

Page 1

Installation Instructions
6L80 Cast Aluminum
Deep Transmission Fluid Pan
SPECIFICALLY DESIGNED FOR 2010-2014 CAMARO SS (V8)
Part Number 70391
(see www.bmracing.com for the latest vehicle fitment applications and model years)
© 2013 by B&M Racing and Performance Products
Congratulations! You have just purchased one of the finest cast aluminum pans available for the GM 6L80
transmissions. This B&M Cast Alu-
minum Deep Transmission Fluid
Pan has been designed to work on
most GM vehicles equipped with 6L80
transmissions (specifically 2010-2014
Camaro SS equipped with an automatic transmission). The B&M Cast
Aluminum Deep Fluid Pan provides
several advantages over stock factory
oil pans. The extra capacity provides
increased oil volume and added cooling, while the finned aluminum construction increases case rigidity and
improved heat transfer. The magnetic
drain plug feature allows regular transmission maintenance and oil changes
without the usual mess associated
with “dropping the pan,” and limits ferrous debris from circulating in the
transmission.
WARNING!: This B&M Cast Aluminum Deep Transmission Fluid Pan
has been designed with added capacity and external cooling fins which
cause the pan to hang as much as
¾” or more, lower than the original
transmission pan. Extra care and
caution should be taken when driving
the vehicle over objects and/or straddling debris. As always, check underneath the vehicle if objects or features come into contact with under ve-
hicle components before continuing
driving.
NOTE: The 6L80 transmissions do
not come with a dip stick. For ease
of fluid measurement and fill, it is
suggested to use a B&M 6L80 Lock-
ing Dipstick P/N 22168 to measure
fluid level and have a convenient
location to fill the transmission.
When installing your B&M Cast Aluminum Deep Fluid Pan you may
wish to consider a B&M Transmission Temperature Gauge. Most
transmission and converter failures
can be traced directly to excessive
heat. This accurate temperature
gauge comes with a light kit, colorcoded dial face, antiglare enclosure,
wires, terminals, special sending unit,
and T -fitting for easy installation. A vailable at your B&M dealer.
INTRODUCTION
This deep fluid pan can be installed in
about an hour by carefully following
the instructions. Check the tool list
at the end of these instructions for the
tools required to install your B&M Cast
Aluminum Deep Fluid Pan. Transmission components are precision fit
and dirt is the number one enemy of
an automatic transmission. Automatic transmissions operate at tem-
peratures between 150°F and 250°F .
It is suggested that the vehicle be allowed to cool off for a few hours to
avoid burns from hot oil and parts. The
vehicle should be off the ground for
ease of installation – jack stands,
wheel ramps or a hoist will work fine.
MAKE SURE VEHICLE IS FIRMLY
SUPPORTED - DO NOT WORK UNDER A VEHICLE IF IT IS SUPPORTED BY ONLY A JACK! Try to
raise the vehicle 1-2 feet so you will
have plenty of room to work. Also, have
a small box to put bolts in and a drain
pan to catch oil.
NOTE: This kit does not come with
a transmission filter or gasket.
INST ALLATION
BEFORE BEGINNING INSTALLATION IT IS RECOMMEND TO INSTALL B&M 6L80 LOCKING DIPSTICK P/N 22168 FIRST TO INSURE
CORRECT FLUID FILL LEVEL!
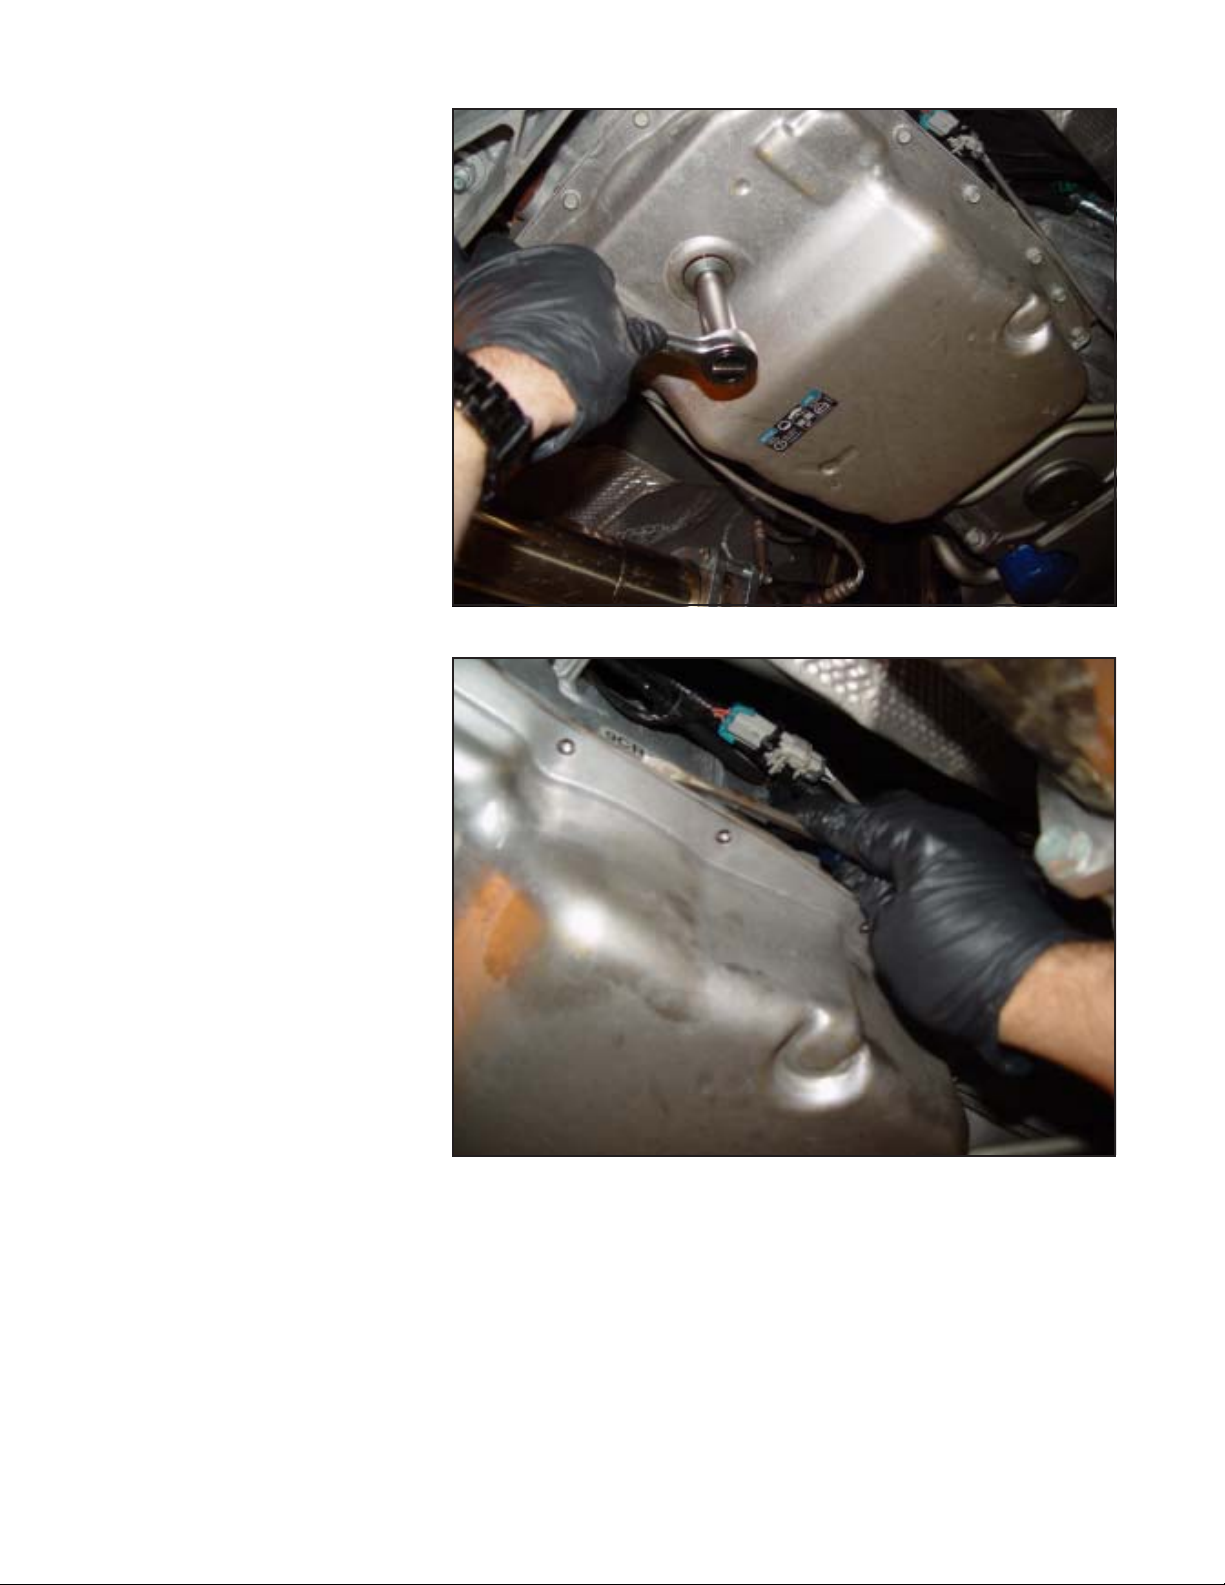
STEP 1. Place a drain pan underneath
transmission. To drain the oil pan, first
unscrew the rear center oil level check
plug, using a 14mm deep socket and
ratchet (see figure 1). Allow the transmission fluid to drain and then re-install the check plug.
NOTE: At this point only a small portion of the fluid in the pan has
Printed in the USA 9500871-00
Page 2
drained (~ 1.5 quarts (1.4L) – cold
transmission).
STEP 2. Loosen two opposing corner
bolts and remove the rest of the pan
bolts using a 10mm socket, extension, and ratchet. If the pan and gasket sticks, pry it down slightly with a
screwdriver to break the seal (see fig-
ure 2).
NOTE: Be careful not to damage
the transmission surface and/or
pan gasket as leaks could develop.
STEP 3. Carefully remove the two re-
maining corner bolts while holding the
pan and lower the pan without spilling
the remaining fluid. The pan will be
about 7/8 or more, full of fluid (~4
quarts (3.8L)), so keep the pan level
and slowly move it out from underneath the vehicle where it can be safely
drained (see figure 3).
STEP 4. Remove the magnet from the
pan, fully clean it and set it aside as
it will be re-used.
STEP 5. The oil filter will now be exposed. If changing the filter (recommended), pull the filter out of the valve
body , being careful not to bend the filter pickup tube as it is plastic and may
crack or break (see figure 4). If the
seal remains in the valve body and
does not come out with the filter, remove it by using a flat head screwdriver. Be careful not to damage the
surface. Then install the new filter
(GM p/n: 24236931).
STEP 6. Place the magnet removed
earlier on the bottom of the B&M Cast
Aluminum Deep Transmission
Fluid Pan directly on top of the star
feature with threaded hole (see figure 5). Using the supplied button head
screw and over-sized washer, af fix the
magnet to the bottom of the pan and
tighten with a 4mm hex wrench.
STEP 7. Place Teflon tape on the
threads of the magnetic drain plug and
temperature sensor plug (or sending
unit if using a temperature gauge) and
tighten them into the pan using a 3/8"
hex wrench and 7/16" box wrench (see
figure 6).
STEP 8. Using a 14mm deep socket,
extension, and ratchet; remove the oil
level check plug from the stock pan
and install it into the oil level check
recess of the B&M Cast Aluminum
Figure 1
Figure 2
Deep Fluid Pan. Tighten to 18 ft-lbf
(25 N-m).
STEP 9. Closely inspect the transmission pan gasket for any signs of problems including, rips, tears, or excessive deformation. Replace with a new
gasket (GM p/n: 24224781) if necessary . Align the gasket onto the mounting flange of the B&M Cast Alumi-
num Deep Fluid Pan and push the
nubs of the gasket into the guide hole
of the pan to hold the gasket in place
(see figure 7).
STEP 10. Clean the transmission
mating surface with a clean rag (see
figure 8).
STEP 11. Install the B&M Cast Aluminum Deep Oil Pan using the sup-
plied bolts and washers (see figure
9). Using a 5mm hex drive, extension,
and torque wrench tighten the bolts
to 80 in-lbf (9N-m) in the sequence
Page 3

Figure 3 Figure 4
Figure 5
shown in diagram A. Do not over
tighten as this can cause leaks or
damage to the transmission case or
gasket.
STEP 14. Add ~7.3 quarts (6.9L)
Dexron VI transmission fluid (only) to
the transmission using one of these
methods:
-Method A (preferred): With the dipstick removed, use a funnel and slowly
add the transmission fluid through the
previously installed B&M 6L80 Lock-
ing Dipstick P/N 22168 tube. Pouring the fluid in too quickly can cause
fluid to back-up in the tube and spill.
Pour slowly and carefully .
-Method B: Locate the fill plug on the
right side of the transmission case
(see figure 10) and remove it by pull-
ing it straight out from the top. Using
a tube and a pump, pump the fluid into
the transmission pan through the fill
plug hole.
-Method C: Remove the oil level
check plug and using a tube and
pump, pump the fluid into the transmission pan through the oil level check
hole. NOTE: Using this method you
will only be able to add ~5.8 quarts
(5.5L) of fluid before the fluid starts to
spill back through the oil level check
hole. At this point, you will need to
proceed to the next steps and then
return to this step to add additional
fluid.
STEP 15. Reinstall any caps or plugs
that were removed during the transmission fluid fill procedure in the previous step and then lower the vehicle.
STEP 16. Check the fluid level of the
transmission. CAUTION!: The trans-
mission fluid level must be checked
Figure 6
when the operating range of the transmission fluid temperature (TFT) is between 86-122°F(30-50°C). If the transmission fluid is outside this range the
level of the transmission fluid cannot
be accurately determined resulting in
either an over filled or under filled transmission.
A. Observe the TFT using the
driver information center (DIC)
or other temperature measuring tool.
B. Start and idle the engine.
C. Depress the brake pedal
and move the shift level
through each gear range.
Pause for at least 3 seconds
in each range. Move the shift
level back to P ARK. Ensure
the engine RPM is low (500800 RPM).
Page 4

Figure 7 Figure 8
Figure 9
D. Allow the engine to idle
for at least 1 minute.
STEP 17. CAUTION!: THE ENGINE
MUST BE RUNNING AND TFT
WITHIN THE RANGE AS STATED
ABOVE when the transmission fluid
level is checked:
- Method A (preffered):Using the previously installed B&M 6L80 Locking
Dipstick P/N 22168 unscrew the dipstick cap and check the transmission
fluid level according to the instructions.
Add (see step 14) or remove fluid (use
drain plug or oil level check plug) accordingly.
-Method B: Carefully raise and support the vehicle (with the engine still
running and TFT in range). Ensure the
vehicle is level. Remove the oil level
check plug from the pan and allow any
fluid to drain until the fluid begins to
drip. If no fluid comes out, add fluid
as described in step 14.
WARNING!: An under-filled transmission will cause premature component wear and damage. An
over-filled transmission will cause
fluid to discharge out the vent tube,
fluid foaming, and/or pump cavitation. DO NOT operate the vehicle
Figure 10
with an incorrect transmission
fluid level.
STEP 18. Inspect the pan gasket and
any of the ports for any signs of leaks
and correct immediately before operating vehicle.
STEP 19. Reset the oil life monitor in
the DIC.
STEP 20. Over the next several
cycles of vehicle operation inspect
the transmission, pan, and ports for
any signs of leaks and periodically
check the transmission fluid level as
described in steps 16 & 17.
Page 5

FRONT OF VEHICLE
PAN BOLT TORQUE SEQUENCE
Diagram A
Parts List
1 B&M Cast Alum. Pan
1 Magnetic Drain Plug
1 1/8” NPT Pipe Plug
1 M6-1.0x10mm Screw
1 Oversized Washer
18 M6-1.0x25 mm Bolts
18 M6 Flat Washers
1 Transmission Filter*
*(not included - but
recommended)
Drain Pan
14mm Deep Socket
Ratchet Extension
Ratchet
10mm Socket
Flat Blade Screwdriver
4mm & 3/8” Hex Wrench
5mm Hex Drive
7/16” Box Wrench
T eflon T ape
T ools List
T orque Wrench(s)
Clean Rags
8 Quarts (7.6L)Dexron VI Trans Fluid
Jack & Jack Stands
Funnel
B&M P/N 22168-Locking Dip Stick
(suggested - otherwise use:)
Fluid Pump
Tubing
Technical Service
A highly trained technical service department is maintained by B&M Racing and Performance Products to answer
your technical questions, provide additional product information and offer various recommendations.
B&M offers a wide variety of transmission related products to improve cooling and ultimately longevity of your
transmission. See your local retailer of B&M products for specific prices.
Technical service calls, correspondence, and warranty questions should be directed to the following address:
B&M Racing and Performance Products
100 Stony Point Rd., S te. 125
Santa Rosa, CA 95401
Phone (707) 544-4761
Monday-Friday 7AM to 5PM PST
Page 6

P/N 22168
LOCKING TRANSMISSION DIPSTICK
FOR 6L80 TRANSMISSIONS
(specifically designed for 2010-2014 Camaro
SS with Automatic Transmission)
www .bmracing.com
P/N 70297
HI-TEK ENGINE OIL & AUT OMATIC
TRANSMISSION COOLER
( for 2010-2014 Camaro SS with Automatic
Transmission)
www .bmracing.com
P/N 70274
SUPERCOOLER - TRANSMISSION OIL
COOLER
( for 2010-2014 Camaro SS with Automatic
Transmission)
www .bmracing.com
 Loading...