

Page 1

Instruction Manual
BPT6021BT
Enjoy it.
2.1CH Sound Tower with Bluetooth
Page 2

Content
SPECIFICATION...............................................................................................................................................1
ACCESSORIES..................................................................................................................................................1
WARNING.........................................................................................................................................................2
INSTALLATION................................................................................................................................................4
PANELS..............................................................................................................................................................5
REMOTE CONTROL.......................................................................................................................................6
BASIC OPERATION........................................................................................................................................7
FM OPERATION..............................................................................................................................................8
BLUETOOTH OPERATION...........................................................................................................................9
AUDIO OPERATION....................................................................................................................................10
USB OPERATION..........................................................................................................................................11
TROUBLE SHOOTING.................................................................................................................................12
IMPORTANT INFORMATION....................................................................................................................13
Page 3
Specification
Power supply
Max. power consumption
Input joint
Frequency
Operating conditions
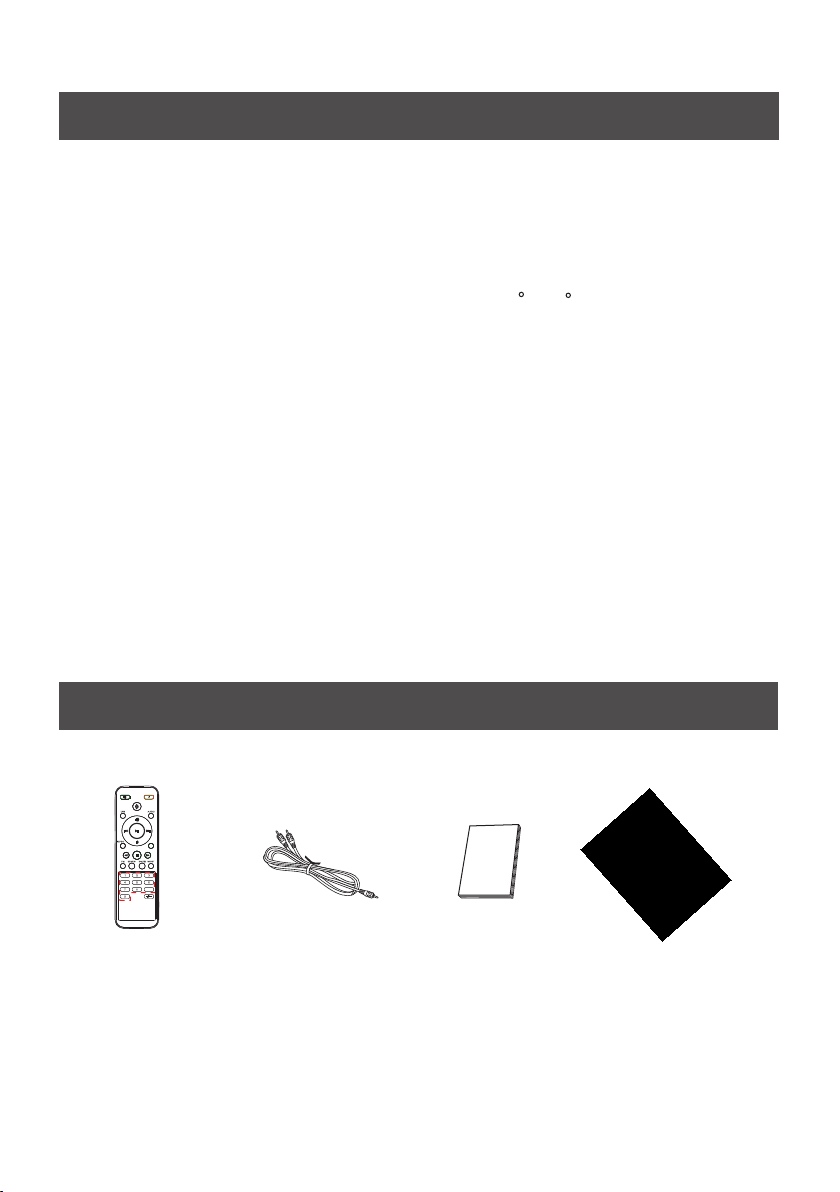
Accessories
AC 220V-240V~50Hz
60W
Audio in, USB
87.5MHz-108.0MHz
Temperature : 5 C~35 C
Installation : on a flat horizontal surface
DISPLAY
9
1* Remote Control
1* Audio cable
USER MANUAL
1* User Manual
1
1* Power Cable
Page 4
Warning
1. Read these Instructions - All the safety and operating instructions should be read before this product is
operated.
2. Keep these Instructions - The safety and operating instructions should be retained for future reference.
3. Heed all Warnings - All warnings on the appliance and in the operating instructions should be adhered to.
4. Follow all instructions - All operating and use instructions should be followed.
5. Do not use this apparatus near water- The appliance should not be used near water or moisture - for
example, in a wet basement or near a swimming pool, and the like.
6. Clean only with a damp cloth.
7. Do not block any of the ventilation openings. Install in accordance with the manufacturer’s instructions.
8. Do not install near any heat sources such as radiators, heat Registers, stoves, or other apparatus
(including amplifiers)that produce heat.
9. Protect the power cord from being walked on or pinched particularly at plugs, convenience receptacles,
and the point where they exit from the apparatus.
10. Only use attachments/accessories specified by the manufacturer.
11. Unplug the apparatus during lightning storms or when unused for long periods of time.
12. Refer all serving to qualified service personnel. Servicing is required when the apparatus has
been damaged in any way, such as power-supply cord or plug is damaged, liquid has been spilled
or objects have fallen into the apparatus, the apparatus has been exposed to rain or moisture.
13. Please keep the unit in a good ventilation environment.
14.These servicing instructions are for use by qualified service personnel only. To reduce the risk of
electric shock, do not perform any servicing other than that contained in the operating instructions
unless you are qualified to do so.
15. The MAINS PLUG is used as disconnect device, the disconnect device shall
16. This equipment is a Class II or double insulated electrical appliance. It has been designed
in such a way that it does not require a safety connection to electrical earth.
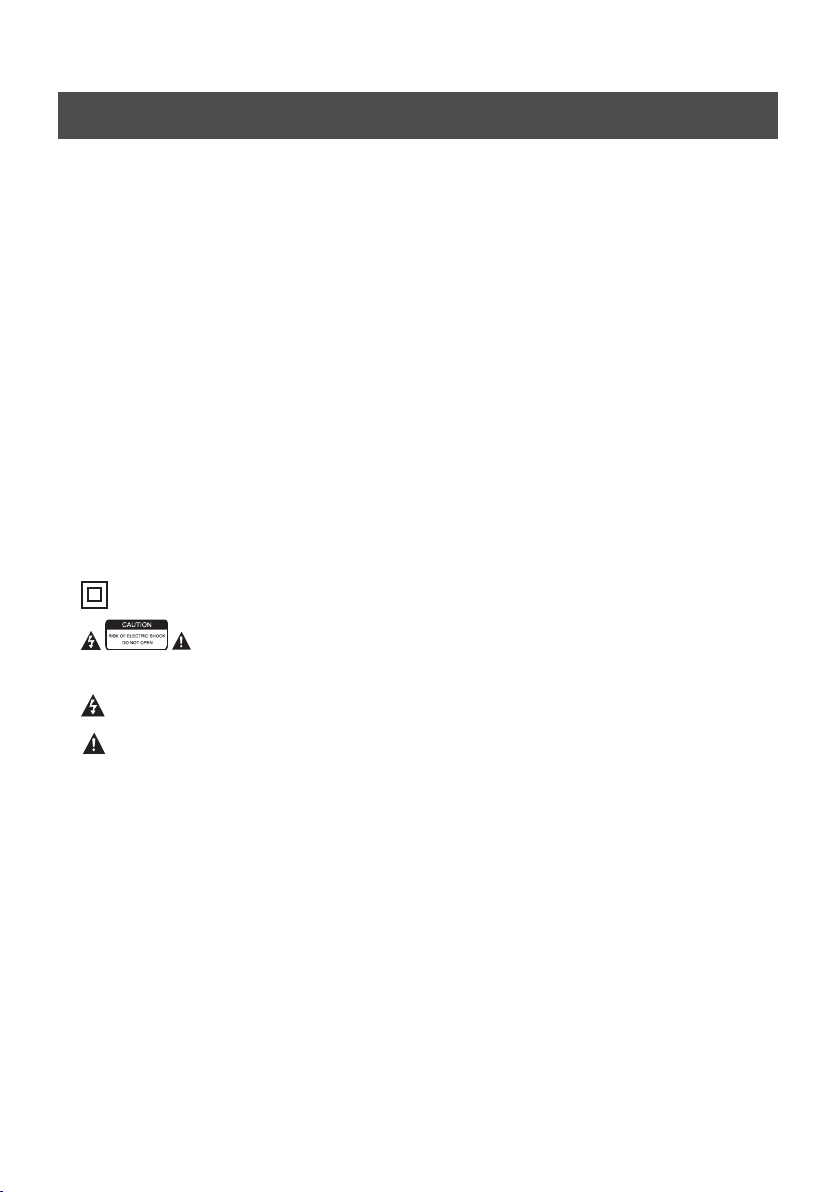
17.
- This lightning flash with arrowhead symbol within an equilateral triangle is
intended to alert the user to the presence of non-insulatd dangerous voltage within the product’s
enclosure that may be of sufficient magnitude to constitute a risk of electric shock.
- Warning: To reduce the risk of electric shock, do not remove cover (or back) as there are no
userserviceable parts inside. Refer servicing to qualified personnel.
- The exclamation point within an equilateral triangle is intended to alert the user to the presence
18. The batteries in remote control shall not be exposed or excessive heat such as sunshine, fire or the like.
19. The apparatus shall not be exposed to dripping or slashing and that no objects filled with liquids,
20. A warning that excessive sound pressure from earphones and headphones can cause hearing loss.
of important operating and maintenance in the literature accompanying the appliance.
such as vases, shall be placed on the apparatus.
21. Keep children supervised at all times near the product. Children MUST NOT use the tower to climb on as
it may become unstable and fall causing injury.
remain readily operable.
2
Page 5
Safety Instructions
Please read and understand all the warnings provided below, as well as and those
marked on the unit. This unit has been designed and manufactured to assure personal
safety.
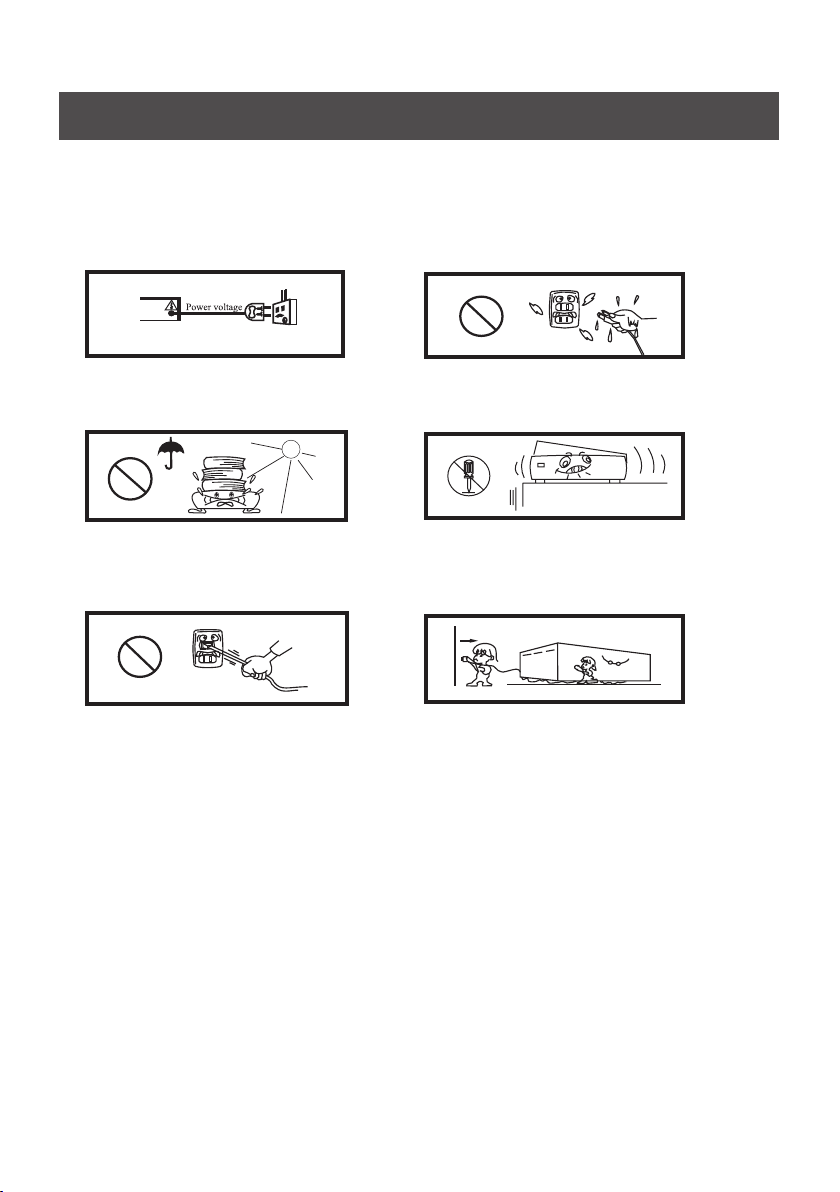
Only use power source that is specified
in the User Manual or on the system.
Avoid placing the unit in direct
or sunshine or near a heat source.
Do not bend or pull the power cable
excessively, and do not apply pressure
to it by standing on it.
ERP II (Energy related products note)
This product complies with the European Commission on the Eco-design Directive and
its implementing Regulations-Energy related products. 15 minutes (approx.) later
without any input ( expect in FM mode), the system will automatically enter standby
mode. Follow up the instruction manual to assume the function operation.
Keep the unit and power plug
away from water.
Never open the cover and avoid dropping
anything into the unit, such as coins,
hairpins and needles for example.
Unplug the unit from the main power
outlet when you do not use it for a long
time.
3
Page 6

Installation diagram
Please install the machine as below (do not connect to power):
Please remove the protective
film before use.
The tower
Base plate
Screw washers
Fix the Screws
4
Page 7

PANELS
Panel Controls
USB PORT
NFC SENSOR
PREVIOUS
STANDBY
FAST FORWARD
FAST REWIND
NEXT
STOP
VOLUME -/+
PLAY/PAUSE
SOURCE
AUDIO IN AUDIO IN
R L
AUDIO INPUT
L/R AUDIO IN SOCKET
FM
FM ANTENNA
POWER SWITCH
POWER INPUT
5
Page 8

Remote control
1. Align the remote control directly at the remote control sensor of the device (beside
display screen).the
2. The range of the remote control is 7 meters.
3. Bright light (sun or artificial light) should not fall directly at the remote control
sensor. Bright light can negative influence the efficacy of the remote control.
4. Make sure that there are no obstacles between the remote control and the
remote sensor on the screen.
Remote sensor
MUTE
BLUETOOTH
USB
VOLUME+
PREVIOUS
VOLUME-
REPEAT
FAST REWIND
FM
SEARCH
NUMBER BUTTONS
STANDBY
AUDIO
NEXT
PLAY/PAUSE
DISPLAY
DISPLAY
STOP
FAST FORWARD
MONO/STEREO
SAVE
9
FREQUENCY
6
Page 9

Basic Operation
PREPARATION
1) Before the unit is turned on, please check if all the connections are right and safe.
Then connect the main power.
2) Press the POWER ON/OFF button on the back panel to turn on the main power.
3) Press the STANDBY button to turn on the unit or to the standby mode.
SOURCE BUTTON
P ress SOURCE button on the front panel Or press the USB, FM, AUDIO or BT button
on remote control to select the mode.
MUTE BUTTON
If you press the MUTE button while playing, sound signal will not be heard. Press the
MUTE button again or the VOL+/- buttons to resume the previous volume level.
VOLUME SETTING
Press the VOL.+/- buttons to turn the volume up or down.
PREVIOUS AND NEXT
Press the 9 or : button to skip to the previous or next track/station/frequency.
FAST FORWARD AND FAST REWIND
Press the 7 or 8 button to rewind or forward the track. Press again to resume normal.
NUMBER BUTTONS
Press the NUMBER buttons to select the track/station/frequency.
PLAY/PAUSE BUTTON
Press the button to pause the music, press again to resume playing.
STOP BUTTON
Press the STOP button to stop playing, press PLAY/PAUSE button to re-start.
REPEAT BUTTON
Press the REPEAT button to select the repeat mode: Repeat One, Repeat All, Repeat off.
DISPLAY
Press the DISPLAY button to turn on or off the display screen.
7
Page 10

FM operation
The range of FM frequency is from 87.50MHz to 108.00MHz.
1.
2. Press SOURCE button or FM button to enter FM mode.
3. Extend the antenna as far as it can to get the best reception.
4. Press MO/ST button on remote control to turn on or off the stereo. If the reception is
not good enough, it can turn on the stereo.
SEARCH
Press SEARCH button to search stations from low to high frequency; press again to
stop searching. After searching all the stations, it starts playing from the first station.
SELECT STATIONS
1) Press button to adjust the frequency up or down the frequency by 0.05MHz. 7 or 8
2) Press NUMBER buttons directly to selection the stations.
E.g. to play the station 24, press 2, then press 4 to skip to station 24.
3) Press -/-- button, then press NUMBER buttons on remote to select frequency.
E.g. to select 104.50MHz, press -/-- button, then press 1, 4, 5, 0 to enter 104.50MHz.
4) Press PREVIOUS or NEXT button to skip to the previous or next station.
SAVE STATIONS
1) Press NUMBER buttons to select the preset number for saving the wanted station.
2) Press -/-- button and number buttons to select the frequency.
3) Press SAVE button to save the wanted station/frequency into the preset number.
E.g. to save the station 88.50MHz into preset 13, press 1, 3 to select preset 13, then
press -/-- and next press 8, 8, 5, 0 to select 88.50MHz, at last press SAVE button.
8
Page 11

Bluetooth operation
BLUETOOTH PAIRING
1. Put the Bluetooth device (e.g. smart phone) within the 10m Bluetooth search range.
Then turn on the Bluetooth function on the phone.
2. Press BLUETOOTH button on remote or press SOURCE button on the panel to
enter Bluetooth mode. The indicator flashes blue quickly in pairing status.
3. Enter the Bluetooth searching interface on the phone and start to search the devices.
4. Select the device name BPT6021BT from the search list. If they’re paired successfully,
there comes a audible signal and the indicator lit steadily in blue.
5. Some device may ask you to select OK/YES/PAIR to pair the phone with the unit.
And some even ask to input the password, just input “0000" (four Zero) to pair.
6. To disconnect the device and connect to a different device:
Turn off the Bluetooth function on your device and un-pair the unit with the BT
device. Then follow the pairing Steps 2-5 to pair with a new device.
NOTE:
1. Some devices connect immediately after pairing so the indicator remains on.
2. If the device is out of Bluetooth range (10m), put the device within the BT search
range and make connection again manually if it is suspended.
NFC operation
NFC function is a fast connection between our tower and a
1. device with NFC function.
2. If your device has NFC function, check if the NFC software is available for use and
turn on the function, please refer to your device’s instructions.
3. Turn on the unit to “bt” mode. Place your NFC device (e.g. smart phone with NFC) on
the NFC sensor for 3 seconds.
4. When they are paired successfully, there will be a audible sound from the unit.
5. To disconnect the device of the NFC connection, place the phone again on the NFC
sensor for 3 seconds, and then will automatically disconnect.
NOTE:
1. Not all devices support NFC function. please check your instructions.
2. Some NFC device make ask you to install the NFC APK to enable the function.
3. Always place the NFC device on the correct pisition of the NFC sensor.
9
Page 12

Audio operation
Before connecting with the music devices, pay attention to the picture below.
1. Each connection must be safe and firm. Disconnect the power cable before you have
finished all the connections.
2. The unit can connect with the Disc player/MP3 player/Smart phone/Computer or
other music device via a audio cable.
Select one of the below connections
1. Connect one end of 3.5mm audio cable to
the Mp3 player’s line output/headphone
and the other end to the AUDIO L/R
sockets on the rear panel of the unit.
2. Connect one end of 3.5mm audio cable to
the unit’s AUDIO IN socket and the other
end to the Disc player’s L/R AUDIO
OUTPUT sockets on the rear panel of the
unit.
Disc Player
MP3 player
Operation
1. Press SOURCE button or AUDIO button
R L
AUDIO IN AUDIO IN
to enter the audio mode.
2. Control the playback only by the Disc/MP3
player.
3. If the AUDIO IN and L/R AUDIO IN sockets are connected at the same time, the
device connected with AUDIO IN socket is prior to play.
10
Page 13

USB connection
USB OPERATION
1. Insert USB stick to the USB port to connect with this unit.
2. Press SOURCE button or USB button to enter USB mode.
3. Once the unit detects the USB stick, it starts playing music automatically.
4. Please refer to BASIC OPERATION for playback control.
Note:
1. Depending on the amount of data and media speed, it may take longer time to read.
In some cases, reading time may be as long as 60s, this is not a malfunction.
2. For some music files, even when they are in a supported format (MP3), the unit may
unable to play because of the format compatibility.be
3. Maximum supported USB capacity is 32GB.
11
Page 14

Trouble shooting
For your convenience, we have listed some methods to solve common problems you
may encounter when you use the system. If the problem occurs repeatedly, contact
the nearest maintenance center.
The product can not be turned on
* Make sure you have turn ON the switch on the back of your product.
* Try using a different power point.
* Make sure the product is NOT in standby.
The remote control does not work
* Replace the batteries in the remote control.
* The front end of the remote control is not aimed at the infrared reception part of the
player.
* The batteries are not inserted correctly.
No sound
* Make sure that the audio cable is connected correctly and securely to the back of
your unit and to the sound system.
* Make sure that the sound system is set to the correct audio input.
* Turn your unit off, then back on.
* In FM mode, you may need to adjust the antenna for better sound.
Bluetooth does not work
* Make sure you have selected Bluetooth mode on the product “bt”.
* Check that your phone product are paired.
* Only one device can connect to Bluetooth at any time, make sure someone else is not
already connected to the product.
NFC does not work
* Make sure the NFC setting is turned on in your device settings.
* Tap NFC device on the NFC logo for 3 seconds.
12
Page 15

Important information
Correct disposal of this product
Old appliances must be collected separately in order to optimize the recovery and
recycling of the materials they contain, and reduce the impact on human health and
the environment. The crossed out “wheeled bin” symbol reminds you of your
obligation, that when you dispose of the appliance, it must be separately collected.
Consumers should contact their local authority or retailer for information concerning
the correct disposal of their old appliance. This marking indicates that this product
should not be disposed with other household wastes throughout the EU.
To prevent possible harm to the environment or human health from
uncontrolled waste disposal, recycle it responsibly to promote the
sustainable reuse of material resources. To return your used device,
please use the return and collection systems or contact the retailer
where the product was purchased. They can take this product for
environmental safe recycling.
13
Page 16

For customer support and to
register your warranty visit:
www.blaupunkt-australia.com.au
Our goods come with guarantees that cannot be excluded under the Australian
Consumer Law. You are entitled to a replacement or refund for a major failure and for
compensation for any other reasonably foreseeable loss or damage.
You are also entitled to have the goods repaired or replaced if the goods fail to be of
acceptable quality and the failure does not amount to a major failure.
SEP14 BPT6021BT
 Loading...