


New Features Guide
DaVinci
Resolve
February 2021
English
Leading the Creative Video Revolution

Welcome
Welcome to DaVinci Resolve for Mac, Linux and Windows!
DaVinci is the world’s most trusted name in color and has been used to grade more
Hollywood films, TV shows, and commercials than anything else. With DaVinci Resolve,
you get a complete set of editing, advanced color correction, professional Fairlight
audio post production tools and Fusion visual effects combined in one application so
you can edit, compose, grade, mix and master deliverables from start to finish, all in a
single tool!
DaVinci Resolve has the features professional editors, colorists, audio engineers and
VFX artists need, and is built on completely modern technology with advanced audio,
color and image processing that goes far beyond what any other system can do.
With this release, we hope to inspire creativity by letting you work in a comfortable,
familiar way, while also giving you an entirely new creative toolset that will help you cut
and finish projects at higher quality than ever before!
We hope you enjoy reading this manual. With its customizable interface and
keyboard shortcuts, DaVinci Resolve is easy to learn, especially if you’re switching from
another editor, and has all of the tools you need to create breathtaking, high end work!
The DaVinci Resolve Engineering Team
Grant Petty
CEO Blackmagic Design
DaVinci Resolve 17 New Features Guide 2
Navigation Guide
Hover over and click
the ContentsHeading
and itopens the Main
Content Page at the
beginning ofthe manual
Hover over and click
each title and it opens
the Page accordingly
Hover over and click
thefooter on each
pageand it opens the
Chapter Content Page
DaVinci Resolve 17 New Features Guide 3

Contents
1 General Improvements 5
2 Cut Page Improvements 31
3 Using the DaVinciResolve Speed Editor 41
4 DaVinci Resolve Editor Keyboard Improvements 61
5 Media and Edit Page Improvements 64
6 Cut and Edit Page Effects 75
7 Fusion Improvements 86
8 Color Page Improvements 107
9 DaVinci Resolve Advanced Panel Update 186
10 Resolve FX Improvements 239
11 Fairlight Page Improvements 282
12 Using The Fairlight Desktop Console 298
13 Deliver Page Improvements 346
DaVinci Resolve 17 New Features Guide 4

Chapter 1
General Improvements
DaVinci Resolve 17 introduces many improvements that extend to all the
different pages in the program. In addition, there have been fundamental
changes and enhancements made to DaVinci Resolve’s basic functionality.
Chapter – 1 General Improvements 5

Contents
Overall Interface Improvements 8
Transitions, Titles, and Eects Thumbnail View 8
Improved Inspector 10
Show Panel in Workspace Submenu 13
Show Page Navigation 14
Improved Editing of Parameter Values Using Arrow Keys 14
Viewer Overlay Submenu 14
Viewer Fast Forward and Rewind Speed Indicators 14
MacOS Title Bar Integration 14
New Preferences and Project Settings 15
Assign Capture and Playback to Separate Devices 15
New Resize Filter Options 15
Ability to Enable and Disable Open FX Plug-ins on Startup 15
Pro Tools Keyboard Customization 16
Timeline Sort Order Setting 16
Thai (ภา ษาไทย) and Vietnamese (Tiếng Việt) Language Localization 16
Performance and Cache Improvements 17
Improved Playback Performance in the Color Page 17
Adjustment Clips Rendered to Cache 17
Sharing Optimized Media Between Projects 17
Collaborative Workflow Improvements 17
New Proxy Media Workflow 18
Creating and Using Proxy Media 18
Generating Proxy Media in Other Applications 19
Managing Proxy Media 19
Using Proxy Files for Delivery 21
Moving Proxies Using a DaVinci Resolve Archive (.dra) 21
Working Remotely Using Proxy Media 21
Proxy Media vs. Other Playback Optimizations in DaVinci Resolve 23
Chapter – 1 General Improvements 6

Improved Media Handling 24
Improved Processing of Interlaced Material 24
DaVinci Neural Engine Deinterlacing (Studio Only) 24
Real-Time 3:2 Pulldown Removal 24
Improved Format Support 25
Media Pool Improvements 26
Support for Viewing and Adjusting Media Pool Clips in Inspector 26
Import and Export Specific DaVinci Resolve Project Bins 26
Import and Export Individual DaVinci Resolve Timelines 27
Media Management of Timelines Creates DRT Files 28
Disable Timelines 28
New Oine Clip Relinking Icon and Dialog 28
Support for Continuing Media Management Jobs on Error 29
Ability to Save Smart Bins and Smart Filters Across Projects 29
Support for Growing Files in the Media Pool 29
Scripting API Improvements 30
Chapter – 1 General Improvements 7

Overall Interface Improvements
This section covers some of the most visible improvements to the DaVinci Resolve
user experience.
Transitions, Titles, and Effects Thumbnail View
In order to make the selection of Transitions, Titles, and Effects more intuitive, DaVinci Resolve
now shows each effect as a thumbnail representation in addition to the text name. This allows
the user to quickly scan through all the numerous options to select the appropriate effect
visually, rather than remembering them based on name alone. You can now preview transitions
and titles before you place them on the Timeline to quickly audition multiple options before
making your final decision.
Transitions Thumbnails
To preview a transition before you place it into the Timeline, ensure that “Hover Scrub Preview”
is checked in the Transitions option menu, then simply hover your pointer over any transition in
the Transitions tab and move it across the thumbnail. The transition will preview in the Viewer
using the two clips nearest the smart indicator in the Cut page, or the two clips nearest the the
playhead in the Edit page.
Scrubbing over a Transition Thumbnail previews the transition in the Viewer.
Once you’ve chosen your transition, it can be applied by dragging it from the Transitions tab to
any edit point on your Timeline in the Edit page. In the Cut page, you can either select the
thumbnail and then select one of the transition alignment tools at the bottom of the Transitions
tab, drag it directly to an edit point in the upper or lower Timelines, or simply double click the
transition to insert it at the smart indicator position.
Titles Thumbnails
To audition titles before you place them into the Timeline, ensure that “Hover Scrub Preview” is
checked in the Titles option menu, then simply hover your pointer over any thumbnail in the
Titles tab. If the title is animated (i.e., Fusion titles), moving the pointer across the thumbnail will
preview the animation. Once you’ve chosen your title, you can drag it from the Titles tab to your
Timeline in the Edit page or in the Cut page to either the upper or lower Timelines, or use the
editing selection modes at the bottom of the tab.
Chapter – 1 General Improvements 8

Scrubbing over a Title Thumbnail previews the title in the Viewer.
Eects Thumbnails
A thumbnail icon now represents each specific effect available in DaVinci Resolve.
Video Eects
To preview a video effect before placing it on a clip, ensure that “Hover Scrub Preview” is
checked in the Effects option menu, then simply hover your pointer over any thumbnail in the
Effects tab and move it across the thumbnail. The effect will preview in the Viewer using its
default parameters, and scrub through the clip that is selected in the Timeline. If no clip is
selected then it will use the clip currently under the playhead.
To activate a specific video effect on a clip, simply drag the thumbnail of the selected effect to a
clip on the Timeline. In the Cut page, you can also double click the thumbnail to apply the effect
to the selected clip. To adjust the effect’s parameters, open the Effects tab in the inspector.
Scrubbing over an Effect Thumbnail previews that effect in the Viewer.
Audio Eects
To activate a specific audio effect on a clip, simply drag the thumbnail of the selected effect to a
clip on the upper or lower Timelines in the Cut page, or onto a clip in an audio track on the Edit
page. Once the effect has been dropped on a clip, its audio plug-in controls will open for you to
adjust the plug-in’s parameters.
Generators
The various video generators included in DaVinci Resolve can be previewed by hovering your
pointer over any thumbnail in the Generators tab. To edit a generator into your timeline, simply
grab the thumbnail of the generator you wish to use, and place it in your Timeline in the Edit
page, or in either the upper or lower Timelines in the Cut page.
Chapter – 1 General Improvements 9

Improved Inspector
The inspector has been redesigned for the Media, Cut, Edit, and Fairlight pages to make it
easier to find specific controls and to adjust common settings for your clips. Instead of a long
vertical list, different aspects of the inspector have now been organized into panels, with each
controlling specific grouped sets of parameters for your clip. Inspector panels that are not
applicable to your clip are grayed out.
Methods of using controls in the inspector:
To activate or deactivate a control: Click the toggle to the left of the control’s name.
The orange dot on the right means the control is activated. A gray dot on the left
means the control is deactivated.
To reveal a control’s parameters: Double-click the control’s name.
To reset controls to their defaults: Click the reset button to the right of the
control’s name.
Video
The Video tab consists of commonly used controls to modify the size, opacity, motion, and
timing of your clip. This tab is composed of the Composite, Transform, Smart Reframe,
Cropping, Dynamic Zoom, Stabilization, Speed Change, Retime and Scaling, and Lens
Correction controls. Smart Reframe is a new feature that’s described later in this document.
All other controls are described in detail in the DaVinci Resolve Reference Manual.
The Video Inspector parameters
Chapter – 1 General Improvements 10

Audio
The Audio tab contains four commonly used audio controls for video editing purposes,
including Clip Volume, Clip Pan, Clip Pitch, and Clip Equalizer. All of these controls are
described in detail in the DaVinci Resolve Reference Manual.
NOTE: There are many more refined plug-ins and effects for audio clips in the Audio
FX library. If you apply any of these, the controls will appear in the inspector’s Effects
tab Audio section, instead of here.
The Audio Inspector parameters
Eects
If a clip has any effects assigned to it, the controls for those effects will show up here. The
effects will be further sub-grouped by type: Fusion, Open FX, or Audio. In the Cut page, you
can now drag an effect directly into the this Inspector panel to apply it to a clip. If a clip does not
have any effects assigned to it, this panel will be dimmed. All effects are described in detail in
the DaVinci Resolve Reference Manual.
The Effects Inspector parameters
for the Binoculars effect
Chapter – 1 General Improvements 11

Transition
This panel lets you adjust the parameters of a selected transition. The transition type can be
changed in the drop-down menu, and each transition exposes a set of parameters unique to
that specific transition. All transitions are described in detail in the DaVinci Resolve
Reference Manual.
The Effects Inspector parameters
for the Cross Dissolve transition
Image
The image panel exposes the Camera Raw parameters. If the video clip is in a Raw format, the
specific camera’s Raw controls will be exposed for user manipulation. Raw still images from
Nikon and Canon cameras can also be adjusted in this panel. Camera Raw controls are
explained in detail in the DaVinci Resolve Reference Manual.
The Image Inspector for a Blackmagic RAW file
File
The File tab provides a consolidated way of to view and edit media file metadata. The tab is
composed of the following parts:
Clip Details: Presents data about the clip’s data format (codec, resolution,
frame rate, etc.).
Metadata: Presents a reduced set of common metadata fields for quick user entry.
–
Timecode: The start timecode of the clip. This field is editable if you want to
manually change the clip’s starting timecode.
Chapter – 1 General Improvements 12

–
Date Created: The date that the clip was created. This field is editable if
you want to manually change the clip’s creation date.
–
Camera: Sets the Camera # metadata.
–
Reel: Sets the Reel/Card ID.
–
Scene: The Scene number of the clip.
–
Shot: The Shot letter/number of the clip.
–
Tak e: The Take number of the clip.
–
Good Ta ke: This checkbox indicates if the clip is a good or circled take.
–
Clip Color: Assign a specific color to a clip that is reflected in the Timeline.
–
Name: The clip name field; this can be entered manually.
–
Comments: Add a text description to the clip.
–
Auto Select Next Unsorted Clip: When this box is checked, the next clip in the
Media Pool is automatically selected when you click the Next Clip button. This allows
rapid metadata entry without having to select each individual clip in the Media Pool.
The File Inspector parameters
Show Panel in Workspace Submenu
You can now assign keyboard shortcuts to show and hide individual panels in your workspace
for instant configuration of the UI. The panels, such as Inspector, Media Pool, Metadata, etc., are
dependent on which page you are working in. Keyboard shortcuts to toggle these panels on or
off can be assigned using the Keyboard Customization window. Alternatively, you can choose
your panels in the Workspace > Show Panel in Workspace drop-down menu.
This function provides the ability to turn on or off a panel by clicking the name of the panel in
the UI toolbar at the top of the DaVinci Resolve interface, if you decide you want to hide it to
make a little more room.
Chapter – 1 General Improvements 13

Show Page Navigation
You can now show and hide the Page Navigation icons at the bottom of the DaVinci Resolve
interface to provide the maximum amount of screen real estate for the GUI on smaller monitors.
To toggle the Show Page Navigation function:
–
Check Workspace > Show Page Navigation.
With this interface element hidden, you can use keyboard shortcuts to access the individual
pages (Shift - 2 through 8), Project manager (Shift - 1) and Project settings (Shift - 9). You can
also access these functions from DaVinci Resolve’s main menu bar.
Improved Editing of Parameter Values Using Arrow Keys
Manually editing numerical parameter values in DaVinci Resolve has been refined. You can now
use the arrow keys to navigate and make adjustments to the decimal level in number fields.
To use the arrow keys to adjust numerical parameters:
1 Double click to select a numeric value in a field, and a highlight appears around
that value.
2 Use the left/right arrows to navigate the cursor to the right of the decimal value you
want to adjust.
3 Use the up/down arrows to change the value of that decimal place.
4 If you select the entire number, the up/down arrows will adjust the minimum value.
This cursor is in place to adjust the tenths
position using the up and down arrows.
Viewer Overlay Submenu
A View > Viewer Overlay submenu provides a dedicated command for turning all overlays on
and off, Toggle On/Off, which can be toggled from the keyboard by pressing Shift-` (accent
grave). This submenu also lists all Viewer Overlay modes that can be selected on whatever
page you happen to be on, enabling you to either choose these from the menu or assign
keyboard shortcuts to activating these modes.
Viewer Fast Forward and Rewind Speed Indicators
An indicator showing the speed at which playback is occurring now appears in the Viewer
just to the right of the Loop arrow in the Media, Cut, and Edit pages. This indicator only appears
during a fast forward or rewind operation and shows numeric multiples of real time
playback (x2 x8, x16, x64, etc.).
MacOS Title Bar Integration
DaVinci Resolve 17 has removed the white title bar previously found at the top of the
DaVinci Resolve window in macOS, and integrated its window management features into the
main GUI. This gives you more space to work with on smaller resolution monitors. The Close,
Minimize, and Zoom options are still found in their accustomed position at the upper-left corner
of the UI, but even these can be removed by selecting Workspace > Full Screen Window, for
the maximum amount of screen real estate possible.
Chapter – 1 General Improvements 14

New Preferences and Project Settings
DaVinci Resolve 17 has added several new settings and preferences to customize your
hardware and the properties of the toolset.
Assign Capture and Playback to Separate Devices
If you have more than one Blackmagic Design video device connected to your computer,
you can now independently configure them for playback and capture. You can change the
setup of your devices in the Video and Audio I/O section of the System tab of the
DaVinci Resolve Preferences.
For playback use: Select your Blackmagic device for video output from
DaVinci Resolve. The default is “None,” and any changes to this setting require a
restart of the program.
For capture use: Select your Blackmagic device for video input to DaVinci Resolve.
The default is “None,” and any changes to this setting require a restart of the program.
This selected device is also used for Resolve Live.
New Resize Filter Options
DaVinci Resolve 17 now lets you take control of the exact algorithm used in all resizing
operations. The new Resize Filter options available are: Bessel, Box, Catmul-Rom, Cubic,
Gaussian, Lanczos, Mitchell, Nearest Neighbor, Quadratic, and Sinc. These options can be set
in the Image Scaling section of the Project Settings, by setting Resize Filter to “Custom”
and choosing the exact filter from the drop-down menu. These new filters are also available in
the “Resize Filter” drop-down menu in the Retime and Scaling section of the Video tab of
the inspector.
In practice, the difference between these methods can be quite subjective. However, if
you need to match a specific resizing method used from another application, you can do it here.
For everyday use, the normal resizing filters in DaVinci Resolve should be sufficient. These
include: Smoother, Bicubic, Bilinear, and Sharper as described in the DaVinci Resolve
Reference Manual.
Ability to Enable and Disable Open FX Plug-ins on Startup
You can now selectively enable and disable specific Open FX plug-ins on startup. You can use
this function to streamline and organize the Open FX list to just the plug-ins you commonly use,
or to exclude a problematic plug-in that causes instability in the system. Additionally,
DaVinci Resolve automatically checks the last plug-in loading result on startup, and skips any
plug-ins that previously caused a crash or hang.
Individual Open FX plug-ins can be manually Enabled and Disabled in the Video Plugins panel
in the System tab of the DaVinci Resolve Preferences.
Chapter – 1 General Improvements 15

The Video Plugins panel allows you to enable or disable
specif ic Open FX plug-ins at startup
Pro Tools Keyboard Customization
If you are coming to DaVinci Resolve as an experienced Pro Tools user, you can set up your
keyboard shortcuts to mimic the Pro Tools layout by selecting “Pro Tools” in DaVinci Resolve >
Keyboard Customization (option-command-K) window.
Timeline Sort Order Setting
A new user setting allows you to determine the default sort order of the Timelines that appear
in the Viewer drop-down menus throughout DaVinci Resolve. To change this, open the UI
Settings panel of the User tab in the DaVinci Resolve Preferences, and choose an option from
the Timeline Sort Order drop-down menu.
Alphabetic: Sorts Timelines alphabetically A-Z.
Creation Date: Sorts Timelines by oldest creation date first.
Recently Used (default): Sorts Timelines by the last actively used Timeline first.
Thai (ภาษาไทย) and Vietnamese (Tiếng Việt) Language Localization
Now the Thai (ภ าษ าไท ย) and Vietnamese (Tiếng Việt) languages are supported in
DaVinci Resolve’s interface. “ย ิน ด ีต ้อ นร ับ ” and “chúc may mắn” to our Thai and Vietnamese users!
To change DaVinci Resolve’s interface language choose from the “Language” drop-down menu
in the UI Settings section of the User tab in the DaVinci Resolve Preferences.
Chapter – 1 General Improvements 16

Performance and Cache Improvements
DaVinci Resolve 17 also boasts some impressive performance and caching improvements.
Improved Playback Performance in the Color Page
Color Page playback performance across the board has been enhanced in DaVinci Resolve 17.
It should be most noticeable in marginal playback situations, for users who were previously only
getting 22-23 fps in a 24 fps timeline.
Adjustment Clips Rendered to Cache
Adjustment clips can now be rendered to the Cache in Smart and User modes in the same
manner as normal video clips. For more information on using the various cache modes, see
Chapter 6 “Improving Performance, Proxies, and the Render Cache” in the DaVinci Resolve
Reference Manual.
Sharing Optimized Media Between Projects
Optimized Media is now shared across projects in the same database (previously optimized
media was confined to a single project). This means that if you create optimized media for a clip
in one project, that same optimized media will be used for that clip in any other project that’s in
the same database. This happens automatically, and requires no user input. This will cut down
the space requirements for working with the same media across different projects dramatically.
This database-wide functionality has changed somewhat how Optimized Media is now
managed. Deleting optimized media from DaVinci Resolve now must take place manually, by
removing the files in the CacheClip/Optimized Media folder in your OS. There is also currently
no way to show which files in your project have been optimized and which have not.
Collaborative Workflow Improvements
DaVinci Resolve 17 has introduced significant performance gains in its Collaborative Workflow.
You should see dramatically increased speeds in navigating bins, as well as the loading and
saving projects and timelines. This increased speed should be particularly noticeable with
larger projects.
Additionally, connecting to a remote database server and using other collaborative workflow
features is no longer exclusive to the Studio version of DaVinci Resolve and is now available to
all DaVinci Resolve users. These features are no longer restricted to the Studio version of
DaVinci Resolve.
Chapter – 1 General Improvements 17

New Proxy Media Workflow
DaVinci Resolve 17 introduces a new Proxy Media workflow to provide a playback optimization
option that makes it easier to exchange projects online, work on projects remotely, and work
with external media asset management systems. It creates a simple and flexible system for
editing collaboration that can be custom configured to your specific requirements.
Creating and Using Proxy Media
Proxy Media is essentially more highly compressed (and potentially lower resolution) versions of
your source media that are linked to your source media in DaVinci Resolve via metadata. This is
done in such a way as to make it easy to switch back and forth between the original and proxy
media as your needs require.
Typically, this lets you use lower bandwidth proxy media for increased real-time effects
performance and full speed playback while editing, while easily reverting back to more
bandwidth and processor-intensive source media for color correction, finishing, and final
output. In addition to enabling better performance, these proxy files are fully portable, which
lets you move your whole project easily from workstation to workstation, and even across the
internet, accompanied by much more compact proxy media.
You set the resolution and format of your proxies in the Optimized Media and Render Cache
section of the Master Settings panel in the Project Settings. There are two settings that control
the actual media files created by the Generate Proxy Media command.
Proxy Media Resolution: Choose “Original” to keep proxies the same resolution as the
source media. If you prefer, reduce the resolution of the proxy media files by choosing
Half, Quarter, Eighth, or Sixteenth to save bandwidth. The “Choose Automatically”
option balances visual quality with efficiency by only reducing the resolution of media
files that are larger than the currently selected Timeline resolution, using whatever
reduction ratio best matches the Timeline resolution.
Proxy Media Format: Lets you choose the specific QuickTime format and codec that
the proxy files will be created with. There are several ProRes and DNxHR varieties
to chose from, as well as H.264 and H.265 options. Which format you chose will be
determined by the bandwidth and quality tradeoffs that you need for a particular
project. For example, if you simply want better playback speed from RAW media while
preserving image quality, you may want to pick a high-quality codec like ProRes 422
HQ, or DNxHR HQX. If your goal is to send your media across the internet to another
editor, you may want to chose a more compressed format, such as ProRes Proxy, or
even H.264 or H.265, to keep file sizes small.
The Proxy Media Resolution and Format set tings
To generate proxy media in DaVinci Resolve:
1 Select all of the clips you wish to generate proxies for in the Media Pool.
2 Right-Click any selected clip and choose “Generate Proxy Media” from the
contextual menu.
Chapter – 1 General Improvements 18

DaVinci Resolve will display a progress bar and give you a time estimate for completion as it
renders out your selected clips to the format and codec determined by the Proxy Media
Resolution and Format settings.
NOTE: If your source clip has a separate audio file synced to it in the Media Pool, any
proxies generated from that clip will include the synced audio, but that audio will be
embedded in the video clip instead of being created as a separate file.
Where is Proxy Media Saved?
Proxy media is created in the “Proxy generation location” destination, found in the Working
Folders section of the Master Settings of the Project Settings. The proxies are further organized
into subfolders by original source clip location. It is important to have enough free space on this
drive to contain the proxies. Once created, these proxy files can then be moved to any other
drive location on the system, if you wish, and then re-linked to their source files.
Generating Proxy Media in Other Applications
Proxy files can also be generated in applications outside of DaVinci Resolve, such as other
NLEs or various media asset management systems. To properly link the proxy to its source
media in DaVinci Resolve, the proxy file must meet the following criteria:
–
Proxy files must have identical timecode to the source file.
–
Proxy files must have the same file name as the source file (excluding extensions).
–
Proxy files must have the same frame rate as the source file.
–
The format and codec used for proxy files must be supported in DaVinci Resolve.
If your proxy file meets these criteria, you’ll be able to manually link proxy media created in
other applications to source clips in the Media Pool as described below.
Managing Proxy Media
You can check the status and location of all your proxy media in the List view of the Media Pool.
Right-click on any column heading and click the checkboxes of “Proxy” and “Proxy Media Path.”
Proxy: This column shows the current proxy status.
–
None: Indicates no proxy media has been created.
–
Offline: Indicates a proxy has been created but can not be found in the
Proxy Media path.
–
(Resolution): A number indicating the resolution of the created proxy
and that it is online.
Proxy Media Path: The location of where DaVinci Resolve is looking for the proxy file.
If this location is incorrect, you can relink the proxy to a new path manually.
The proxy columns in List view, showing Proxy Media status and location
Chapter – 1 General Improvements 19

Linking Clips to Proxy Media
If you’ve created proxy media in another application, or moved the internally created proxy
media out of its default location in “ProxyMedia,“ you’ll need to manually link the proxies to their
source media files in your Media Pool.
To link proxy media to a source clip:
1 Select one or more clips in the Media Pool you wish to link proxy media to.
2 Right-click one of the selected clips, and choose “Link Proxy Media” from the
contextual menu.
3 Use the file browser to find the specific proxy file or directory (in the case of multiple
clips) to set a new Proxy Media path, and click Open. If you select an incorrect file or
directory, a warning dialog box will appear and no linking will occur.
To unlink proxy media from a source clip:
1 Select a clip or clips in the Media Pool you wish to unlink proxy media from.
2 Right-click on any clip and select “Unlink Proxy Media” from the contextual menu. This
will remove the metadata link from proxy to source and will set the status in the Proxy
column to “None.”
NOTE: Unlinking a proxy file does not delete it. The proxy file remains on the hard
drive where it was created. As of this writing, proxy files must be deleted manually
using your OS file system outside of DaVinci Resolve.
Re-generating Proxy Media
You can generate more than one proxy file per clip. This can be useful if you want to set
multiple Camera Raw parameters and choose between them, or to create proxy files of different
resolutions.
To generate a new proxy:
1 Make your desired changes to the current clip’s settings.
2 Right-click on the same clip and select “Generate Proxy Media” from the
contextual menu.
A new proxy file is created in the same directory as the previously linked proxy file, and its file
name is appended with “_s00x” to differentiate it. The latest proxy generated is automatically
linked to the source file, but previous proxy versions are retained on disk, so you can then
manually relink the different versions as needed.
Switching Between Proxy Media and Source Media
You can switch between using your original source media and the proxy media for playback at
any time by checking or unchecking Playback > Use Proxy Media If Available in the Menu bar.
Chapter – 1 General Improvements 20

Using Proxy Files for Delivery
By default, the Deliver page always reverts proxies to the original source media for final output
to ensure the highest quality render. Checking the “Use proxy media” box in the Advanced
Settings of the Video Render settings in the Deliver page overrides this so DaVinci Resolve
uses proxy media for final output instead. This can be useful if you need to save rendering time
while making dailies, or to quickly create outputs of your timeline for producers or audio
engineers where master quality is not necessarily needed. You will also need to check the “Use
proxy media” box if you are editing with proxies and do not have access to the original
source media.
Moving Proxies Using a DaVinci Resolve Archive (.dra)
When moving proxies from one DaVinci Resolve system to another, it can be time consuming
and problematic to manually copy many individual assets (proxies, graphics, source files, etc.)
from different folders and locations. By far the easiest way to move complete projects system to
system is by letting DaVinci Resolve do all that file management for you, by creating a
DaVinci Resolve Archive (.dra). An archive file contains not only your project, but all its media as
well, maintaining the file paths and organization of the original project.
To create a DaVinci Resolve Archive file, right-click on any project in the Project Manager, and
choose “Export Project Archive” from the drop-down menu. Within this mechanism, a new
Archive setting in DaVinci Resolve 17 makes working with proxies simple and elegant.
Creating a Proxy-Only Archive to Share
In the Archive Options dialog, if you check Proxy Media, and uncheck Media Files and Render
Cache, DaVinci Resolve will make an Archive using only the proxy media. This allows you to
create a compact and easily transported version of your project to either move to another
computer, or to give to an editor working remotely. If proxy media is not available for a clip (say
a graphic or a media file you didn’t create a proxy for in the first place), the original media is
automatically exported to ensure that nothing goes offline.
Archive Setting options for exporting only Proxy Media
The resulting .dra is a folder that is a fully self-contained version of your project and proxy
media. This folder can easily be moved from drive to drive, or zipped up and sent across
the internet.
Working Remotely Using Proxy Media
The proxy workflow in DaVinci Resolve opens up many new possibilities for editing
collaboration and media management. For example, one common workflow is to use the RAW
camera master source clips in the editing suite, but to then generate low resolution proxies to
take home to edit on a laptop.
Chapter – 1 General Improvements 21

To create a portable set of proxies for editing on a laptop:
1 Set up the Resolution and Format settings for the proxies in the Project Settings. In
this case, you may want to use “Choose Automatically” and a low- bandwidth, easily
editable codec like ProRes LT or DNxHR LB.
2 Select all source media in the Media Pool and Generate Proxy.
3 Export a DaVinci Resolve Archive (.dra) onto an external drive, with only Proxy
Media checked.
4 Go away. Once at home, connect that drive to your home laptop, and use the Restore
Project Archive command in the Project Manager to import the archive.
5 When you’ve finished working at home, export a timeline, bin, or project from your
laptop when finished, and bring just that file back into the edit suite to continue working
with the original source media.
Another common scenario might involve sending proxies over the internet to an editor in
another city or country.
To send a project to another editor over the internet:
1 Set up the Resolution and Format settings for the proxies in the Project Settings. In this
case, you may want to use a low resolution like “quarter” or “one-eighth,” and a lowbandwidth, highly-compressed codec like H.265 for the smallest file sizes possible.
2 Select all of the source media in the Media Pool and Generate Proxy.
3 Export a DaVinci Resolve Archive (.dra), with only Proxy Media checked.
4 Using the file compression tools in your OS, zip the archive folder so it becomes one
large file.
5 Upload the resulting .zip to the online file sharing service you prefer, and send the
download link to the remote editor.
6 Once the other editor unzips and imports the archive, you and they can then simply
send timelines, bins, and/or project files back and forth to collaborate. These files are
small enough to transfer over email or an instant messaging service.
Additionally, you may have your editing computer connected via ethernet to a Media Asset
Management system that can create its own proxies. In order to edit smoothly via the network,
you need to use low bandwidth proxies instead of the source media.
To create proxy media externally to edit over a local network:
1 Import the original source media files to your Media Pool from the network storage
system you’re using.
2 Set up the proxy generation settings in your Media Asset Management software to
accommodate the amount of network bandwidth you expect to have access to.
3 Make sure the timecode and frame rate of the proxies match the original source media,
and render the proxies to a network location.
4 Select all of your original source media in the Media Pool, and choose
“Link Proxy Media.”
5 Choose the proxy media at the network location where they’ve been rendered.
Chapter – 1 General Improvements 22

Proxy Media vs. Other Playback Optimizations in DaVinci Resolve
There continue to be other methods of optimizing real time performance in DaVinci Resolve, so
it’s natural that one might wonder how this is different from Optimized media, Timeline Proxy
Mode, and other performance optimization techniques available in DaVinci Resolve. The key
aspect of proxy media that differentiates it is that proxy media is independent, portable, and
can be created by applications outside of DaVinci Resolve, if desired.
Proxy Media vs. Timeline Proxy Mode
One of the oldest performance optimization options, originally named “Proxy Mode” in previous
versions of DaVinci Resolve, has been renamed “Timeline Proxy Mode” in DaVinci Resolve 17 to
differentiate it from Proxy Media. While the new Proxy Media feature creates actual media files
on disk, “Timeline Proxy Mode” simply reduces the resolution of the timeline on the fly, allowing
for increased real time playback performance. To be clear, Proxy Media and Timeline Proxy
Mode are two entirely different features, which are wholly independent of one another.
Proxy Media vs. the Render Cache
Proxy Media is designed to create easy-to-edit primary source material on the Timeline, for
improved performance before you start editing. The Render Cache is designed to improve the
real time performance of clips that have enough computationally intensive effects (such as
Resolve FX, color corrections, noise reduction, compound clips, fusion compositions, etc.) to
slow playback, even at the current Timeline resolution. Proxy Media is independent and
portable (you can move clips wherever you want; you just have to relink them afterward), while
the Render Cache media is not designed to be moved or interacted with externally and only
works with the project it was made for.
Proxy Media vs. Optimized Media
On the surface, Proxy Media and Optimized Media appear similar in function. Both options are
designed to create lower bandwidth, easier to edit versions of source media. However,
Optimized Media is managed internally by DaVinci Resolve, cannot be exported, and is not user
accessible. In contrast, Proxy Media creates fully portable and independent media that can be
easily managed by the user.
The chapter in the DaVinci Resolve Reference Manual titled “Improving Performance, Proxies
and the Render Cache” goes into detail on when and how to use DaVinci Resolve’s various
playback optimizations modes, but included below is a quick reference.
Timeline Proxy Mode: My timeline is playing back, just a little bit too slowly.
Cache Clip: I need help playing back a few clips in real time that have
heavy effects applied.
Optimized Media: I need help playing back all my source media in real time,
and I will only be editing on this computer.
Proxy Media: I need help playing back all my source media in real time, and I need to
collaborate and share media with other users, programs, or outside storage locations.
Chapter – 1 General Improvements 23

Improved Media Handling
This release of DaVinci Resolve has greatly improved the media handling of interlaced material.
Improved Processing of Interlaced Material
The processing and output of interlaced media has been significantly improved in
DaVinci Resolve 17, with better support for processing interlaced timelines natively. Video clips
brought into DaVinci Resolve will automatically be tagged as progressive, upper, or lower field
interlaced. This new native interlace processing will allow for much better compositing and title
support for those making interlaced deliverables.
To set up native interlaced processing:
1 Select your Timeline Format in the Master Settings section of the
Project Settings window.
2 Turn on the Enable Interlace processing checkbox.
3 Notice that your Timeline frame rate has changed to an interlaced fields per
second specification (50, 59.94, 60). Select the correct interlaced format from the
drop-down menu.
4 Choose an interlaced Video format in the Video Monitoring section of the
Project Settings, to output a native interlaced signal using a Blackmagic video
monitoring device.
DaVinci Neural Engine Deinterlacing (Studio Only)
There is a new deinterlacing quality option in addition to “normal” and “high,” called
DaVinci Neural Engine. As the name suggests, this option uses the advanced machine learning
algorithms of the DaVinci Neural Engine to analyze motion between the fields of interlaced
material and reconstructs them into a single frame. This option is computationally intensive,
but ideally will deliver an even more aesthetically pleasing result than the “high” setting.
To choose this deinterlacing mode, use the “Deinterlace quality” drop-down menu of the Image
Scaling panel of the Project Preferences, and choose DaVinci Neural Engine. Deinterlacing is
automatically applied to any interlaced video material that is placed in a progressive timeline.
Real-Time 3:2 Pulldown Removal
If you have 29.97fps interlaced material that was encoded with a 3:2 pulldown, DaVinci Resolve
can reconstruct the original footage’s progressive frame rate in real time. For example, if you
have source media from a film camera (24fps progressive) that has been telecined to
NTSC video (29.97fps interlaced), DaVinci Resolve can pull the original 24 discrete film frames
out of the various interlaced fields that make up the NTSC signal.
To remove 3:2 pulldown in real-time:
1 Select one or more 29.97 fps interlaced clips in the Media Pool.
2 Right-click one of the selected clips and select Clip Attributes.
3 In the Video tab, turn on the Remove 3:2 Pulldown checkbox.
4 Set the Frame where the 3:2 cadence started in the “First Frame of Clip” drop-down
(this is usually the “A” frame).
5 Click OK.
Chapter – 1 General Improvements 24

The footage will now behave like a 24fps progressive clip.
Telecine footage with 3:2 pulldown removed; the scrambled
number (mix of the numbers 1 and 2) at the end of the
KeyKode is a field indicator, showing that this A frame was
created properly from fields 1 and 2 of the interlaced signal
Improved Format Support
As the production industry evolves, so too does DaVinci Resolve’s support for new and
improved media formats. Version 17 introduces many new developments.
New Decoding support
–
Support for decoding QuickTime PNG clips
–
Support for decoding uncompressed RGB 8-bit and YUV 10-bit AVI clips
–
Support for decoding spanned Panasonic 8K SHV clips
–
Support for decoding 32-bit PSD format images
–
Support for Canon and Nikon raw formats on the inspector
New Decoding/Encoding and Media Management support
–
Support for 12K Blackmagic RAW clips
–
Dolby Vision functionality is now available on Windows systems
–
Support for reading per frame metadata from Blackmagic RAW, ARRI, RED,
and Sony camera files
–
Improved support for exporting per-frame ARRI metadata for ARI/ARX/MXF formats
–
Support for decoding and rendering per-frame EXR metadata
–
Improved metadata support for Sony MXF clips
–
Support for decoding and encoding GoPro CineForm clips for
non-multiple of 16 resolutions
–
Support for decoding and encoding mp3 audio in Linux
–
Support for decoding and encoding high-throughput JPEG 2000 (HTJ2K)
–
Ability to bypass re-encodes for supported JPEG 2000 profiles on renders
–
Support for encoding IMF MCA audio metadata
–
Support for exporting non-HDR DCP metadata option
–
Support for HDR tags in DCP workflows
–
Support for a 16-bit SDR IMF preset
–
Support for Photon 4.8.0 for IMF validation
–
Support for decoding and encoding H.265 clips with alpha on macOS
–
Native support for 44.1 KHz sample rate audio clips and instruments
–
Support for IMF supplemental packages with Dolby Atmos content
–
Support for importing AES31 timelines
–
Support for Canon IDTs for the EOS C70 Camera
Chapter – 1 General Improvements 25

New GPU support
–
Support for additional NVIDIA encoder parameters for H.264 and H.265
–
Support for NVIDIA Ampere GPUs on Linux and Windows systems
New Internet Account support
–
Support for directly uploading to Twitter from DaVinci Resolve
Media Pool Improvements
DaVinci Resolve 17 has improved its core media pool functionality and increased the options for
sharing assets between workstations.
Support for Viewing and Adjusting Media Pool Clips in Inspector
You can now directly modify Media Pool clips in the Inspector, before you edit those clips into a
timeline. This allows you to change the parameters of source media so that clips that are edited
into a timeline carry those new settings with it. For example, you can prepare your material prior
to editing by changing the clip’s file and RAW settings, adjusting the audio levels and EQ, or
assigning it a specific lens correction, etc. Once modified, any part of that clip would have the
correct Inspector parameters already in place when you edited them into your timeline.
To adjust Media Pool clips in the Inspector:
1 Select one or more clips in the Media Pool Panel of either the Cut, Edit, or
Fairlight pages.
2 Open the Inspector panel, and adjust any parameters in the Video, Sizing,
Audio, and File tabs.
These parameter changes are stored with the Media Pool clip, and will be carried over when
any part of that clip is edited into the Timeline. Of course, each clip’s Inspector parameters can
be further modified once it’s in the Timeline, and those Timeline parameters are independent
from the Media Pool Inspector settings. This means that any further adjustments you make to
the clip in the Timeline do not affect that same clip’s adjustments in the Media Pool.
Import and Export Specific DaVinci Resolve Project Bins
You can now import/export specific bins from one DaVinci Resolve project to another, allowing
you to pass bins quickly between projects and workstations that have access to the same
media. All Metadata, In/Out points, Timelines, etc. are transferred along with the clips in the bin,
but none of the actual media files are included.
To export bins from the Media Pool:
1 Select one or more bins in the Media Pool.
2 Right-click the selection and choose “Export Bin,” or choose File > Export > Export Bin.
3 Choose where to save the DaVinci Resolve Bin file (.drb) in the file system dialog,
and click Save.
Chapter – 1 General Improvements 26

To import bins into the Media Pool:
1 Right-click in the Media Pool and choose “Import Bin,” or choose File > Import >
Import Bin.
2 Do one of the following:
–
Choose a DaVinci Resolve Bin file (.drb) from the file system dialog.
–
Double click the .drb file in your file system.
The bin or bins will appear in the Media Pool. Any bins imported this way will have the word
“import” appended to their name, to avoid duplicate names. If you import a bin that contains
clips that were already in the Media Pool, the potentially duplicate clips are excluded from the
import and instead relinked to the media referenced by your project. This keeps your Media
Pool tidy. However, if the bin or bins have been moved to another computer, you may have to
relink offline media.
Import and Export Individual DaVinci Resolve Timelines
You can now export and import individual timelines from one DaVinci Resolve project into
another previously existing DaVinci Resolve project, allowing you to pass timelines quickly
between projects and workstations, without creating additional imported project files. Just the
timeline and its associated clip information is exported, none of the actual media files
are included.
To export a timeline from the Media Pool:
1 Select a timeline from the Media Pool.
2 Choose File > Export > Export AAF, XML, DRT (Shift-Command-O).
3 Choose “DaVinci Resolve Timeline Files (*.drt)” from the format options popup in the file
system dialog.
4 Choose where to save the DaVinci Resolve Timeline file (.drt) in the file system dialog,
and click Save.
To import a timeline into the Media Pool:
1 Choose a bin in the Media Pool in which you want the imported timeline to be saved.
2 Do one of the following:
–
Choose File > Import Timeline > Import AAF, XML, DRT (Shift-Command-I), then Select
a DaVinci Resolve Timeline file (.drt) from the file system dialog, and click Open.
–
Double click the .drt file in your file system.
The timeline will appear in the Media Pool, along with all of the clips associated with it.
Any timelines imported this way will have the word “import” appended to their name, to avoid
duplicate names. The imported timeline will be automatically conformed to corresponding
media that’s already in the Media Pool. However, if the timeline has been moved to another
computer, you may have to reimport or relink missing or offline media in to bring the imported
timeline fully online.
NOTE: Only a single timeline can be imported and exported at a time using this
method. To import or export multiple timelines, use the Import /Export Bin function
described above.
Chapter – 1 General Improvements 27

Media Management of Timelines Creates DRT Files
When performing Media Management operations to copy or transcode media from a timeline, a
DaVinci Resolve Timeline (.drt) file is automatically created in the same bin as the resulting
media files, linked to the newly created media.
Disable Timelines
You can now disable/enable timelines in the Media Pool for both performance and
organizational purposes. This is particularly useful for editors who like to maintain a history of a
program’s editing via an ongoing series of periodically duplicated timelines. Since having a
large number of timelines within a single project file can affect performance, having the ability
to disable timelines lets you maintain these backup/alternate timelines without any penalty.
Disabled timelines are never loaded into RAM, have no effect on the speed at which a project
opens, saves, exports, or loads, and have no effect on program performance. A disabled
timeline also hides the timeline from the viewer drop-down menus throughout the program.
Disabled timelines are still visible in the Media Pool, but have a crossed out eye icon in the
lower left to show the status. A disabled timeline cannot be opened in any page of
DaVinci Resolve.
To disable a timeline:
–
Select the timeline, right-click on it and choose “Disable Timeline”
from the drop-down menu.
To enable a timeline:
–
Select the timeline, right-click on it and choose “Enable Timeline”
from the drop-down menu.
The crossed-out eye in the lower left of the
thumbnail indicates this timeline is disabled
New Offline Clip Relinking Icon and Dialog
A new offline clip relinking dialog makes it easier to find specific clips that are missing. If
DaVinci Resolve fails to find your media, a Relink icon in the Cut and Edit Media Pools will
highlight orange.
The new Relink Media icon that appears for unlinked media
Clicking this icon opens a new dialog box showing the volumes that the missing files initially
belonged to. You can then use this information to track down the media on your file system, find
that specific hard drive, or ask a client if they provided you the media from this volume. Clicking
the Locate button lets you re-connect the missing clips to a new file location of your choosing.
Chapter – 1 General Improvements 28

If the quick search initiated by the Locate buttons doesn’t find media that you know is there, you
can initialize an exhaustive deep disk search for the media by clicking on the Disk
Search button.
The new Relink Media dialog, showing the volume
names where the missing clips originated
Support for Continuing Media Management Jobs on Error
DaVinci Resolve 17 has more user-friendly behavior when dealing with errors during media
management operations. In previous versions, DaVinci Resolve would stop and wait for user
input immediately upon encountering an error, meaning that if an error happened while you
were out at lunch, nothing would happen until you came back. Now, DaVinci Resolve will skip
error-flagged files and continue to perform any remaining media management to all the
other clips.
Ability to Save Smart Bins and Smart Filters Across Projects
If you have a commonly used Smart Bin or Smart Filter set up, you can now use it across
multiple projects in your database.
To set up Smart Bins or Smart Filters across projects:
–
Create a new Smart Bin or Smart Filter, and turn on the “Show in all projects”
checkbox in the upper right corner of the Create Smart Bin dialog.
These persistent Smart Bins will be found in the User Smart Bins folder in the Smart Bins pane
in every project. Persistent Smart Filters will be found in the User Smart Filters section of the
Clips drop-down menu in the Color page.
Support for Growing Files in the Media Pool
If you’re using a third-party application that records live to a growing video file, you can now
begin to edit that file while it’s still recording. Simply import the growing file into the Media Pool,
and DaVinci Resolve will continuously refresh to check if the file has changed, automatically
updating its attributes in the Media Pool.
To set this option, check the “Automatically refresh growing files in the Media Pool” box in the
Decode Options of the System tab in the DaVinci Resolve Preferences.
Chapter – 1 General Improvements 29

Scripting API Improvements
DaVinci Resolve 17 has added support to its scripting API for the following features:
Querying and setting individual Timeline settings
Importing an AAF to the current Timeline
For more information on scripting for DaVinci Resolve, choose Help > Documentation >
Developer, and open the Scripting folder for the Readme and examples.
Chapter – 1 General Improvements 30

Chapter 2
Cut Page Improvements
The Cut page in Resolve 17 has been reworked to include optimized
design elements and new functionality to create a faster editing
experience.
Chapter – 2 Cut Page Improvements 31

Contents
New Metadata View in Media Pool 33
Audio Trim View 35
Safe Area Framing Guides 35
Ability to Import ATEM Mini Pro ISO Projects 36
Sync Bin View in Cinema Viewer 37
Sync Bin Timeline Audio Only Playback 37
Dedicated Timecode Entry Mode 37
Full Screen Viewer Icon on the Cut Page 38
Quick Export Dialog Options 38
Navigable Clip Paths in Source Tape 38
New Change Clip Duration Dialog 39
Editing the Duration Field in the Cut Viewer 40
Switching Timelines in the Cut Page 40
Navigating Edit Points and Markers 40
Improved Transition and Effect Behaviors 40
Chapter – 2 Cut Page Improvements 32

New Metadata View in Media Pool
Resolve 17 adds a new Metadata view to the Media Pool. Each clip is represented by its own
card with a thumbnail and basic clip metadata information visible. This view is designed to have
more metadata information than a thumbnail but more targeted information than the List view.
This feature, combined with its sort modes, are a powerful way to organize and reorganize your
clips in the Media Pool.
The metadata fields of the Metadata view (from the top down):
Thumbnail: A scrubbable thumbnail image of your clip.
Row 1: A main description field that is variable and determined
by the sort order selection.
Row 2: Start Timecode, Date Created, Camera #.
Row 3: Scene, Shot, Take.
Row 4: Clip Name, Comment.
The Metadata View icon view (highlighted icon in the top bar),
showing the thumbnail being scrubbed next to the clip’s metadata
The strength of the Metadata view is the automatic clustering of your clips based on the sort
order you choose in the Media Pool Sort By menu, at the very upper-right corner of the Media
Pool. It is also possible to use these sort options in the Thumbnail, List, and Filmstrip
views as well.
The Media Sort options of the Cut
page Media Pool
Each different sort mode changes the main description field on the card, as well as re-arranging
the Media Pool to reflect the selected organization method.
Chapter – 2 Cut Page Improvements 33

The sort modes available in the Metadata view are:
TImecode: This mode clusters the clips by creation date, changes the main description
field to creation date and start timecode, and orders the list by timecode.
Camera: This mode clusters the clips by Camera #, changes the main description field
to camera # and start timecode, and orders the list by timecode.
Date Time: This mode clusters the clips by day, changes the main description field to
creation date and file name, and orders the list by timecode.
Clip Name: This mode clusters the clips by the first letter of the clip name in
alphabetical order, changes the main description field to clip name, and orders the list
by timecode.
Scene, Shot: This mode clusters the clips by scene, changes the main description field
to scene-shot-take, and orders the list by scene-shot-take.
Clip Color: This mode clusters the clips by clip color name, changes the main
description field to creation date and start timecode, and orders the list by timecode.
Date Modified: This mode clusters the clips by day, changes the main description field
to creation date and file name, and orders the list by the last time the clip was modified
by the OS filesystem.
Date Imported: This mode clusters the clips by day, changes the main description field
to creation date and file name, and orders the list by the date the clip was added to the
Media Pool.
Ascending: Orders the Media Pool from lowest numerical value to highest, and
alphabetically from A to Z.
Descending: Orders the Media Pool from highest numerical value to lowest, and
alphabetically from Z to A.
(Top) The Metadata view with clips sorted by Scene-Shot-Take;
(Bottom) The Metadata view with the same clips sorted by Camera
Chapter – 2 Cut Page Improvements 34

Audio Trim View
When performing a trim operation in the Cut page, you can now set the option to expand the
audio waveform of a Timeline clip while trimming. This mode gives a much more accurate view
of the audio, making it easier to pick a specific edit point between words, beats, etc.
To toggle Audio Trim view:
Click the Audio Trim icon, between the Snapping and Marker tools.
The Audio Trim View icon activated (circled)
With this option enabled, you’ll see an expanded waveform for audio/video clips that are
being trimmed in the Timeline, while you’re trimming. This shrinks back down after you finish the
trim operation.
The Audio Trim view showing an expanded audio waveform while trimming in the Timeline
Safe Area Framing Guides
This drop-down menu overlays many useful framing guides over the Viewer to let you see what
part of the image will be included and what will part will be cropped out if you change the
Timeline’s aspect ratio. The framing guides can be turned on and off by toggling the Safe Area
Framing Guide icon in the Viewer, and the exact guides can be selected in the
drop-down menu.
The aspect ratios available in the Framing Guide drop-down are:
Social Media: 1:1, 4:5, 9:16, 1.91:1, 16:9.
Broadcast and Film: 1.33, 1.66, 1.77, 1.85, 2.35.
Safe Area Guides: These options add additional guide lines on the Viewer to protect
your composition from possibly being cut off at the extreme edges of a physical
cathode ray tube. While somewhat anachronistic in this age of flat screen digital
televisions, many legacy programs still adhere to these guidelines. Safe Areas still can
be useful guides in ensuring your image is not inadvertently cropped by the variety of
mobile devices and social media sites in use today.
–
Action: Keep all movement and important action within this box.
–
Title: Keep all on screen text within this box.
–
Center: Designates the exact middle of the image.
Chapter – 2 Cut Page Improvements 35

The Safe Area Framing Guide icon
(circled) and the possible framing options
Ability to Import ATEM Mini Pro ISO Projects
It is now possible to import ATEM Mini Pro ISO projects directly into DaVinci Resolve.
ATEM projects include the master program clip, as well as each individual camera “ISO”
(isolated) clip, and each angle’s audio recordings. All transitions, timecode, and camera number
metadata are imported, as well as whatever graphics were stored in the ATEM’s media pool.
Once the project is loaded, the Sync Bin view is enabled in the Cut page, so you can
seamlessly continue your multi-camera edit. For more information on using the Cut Page,
see Chapter 18 “Introducing the Cut page” in the DaVinci Resolve User Manual.
An ATEM Mini Pro project opened in the Cut page Sync bin
It’s also possible to instantly switch your ATEM camera ISOs to the original camera recordings
made in a Blackmagic Camera. This workflow enables the highest visual quality, and the ability
to output in higher resolutions (such as 4K or UHD) than are supported by the ATEM internally.
Chapter – 2 Cut Page Improvements 36

To relink to camera masters from ATEM ISO recordings:
1 (Before you shoot) Check the “Record in All Cameras” setting in the
ATEM software control.
2 (Before you shoot) Check the “ISO record all inputs” setting in the
ATEM software control.
3 At this point, record your show as you normally would.
4 Copy all the resulting camera masters from each camera’s memory card to
the ATEM project’s “Video ISO Files” folder, and then import the project into
DaVinci Resolve.
5 Click the “Show Camera Originals” button in the Cut page Viewer to instantly switch
between ATEM ISOs and Camera Masters.
The Show Camera Originals button
Sync Bin View in Cinema Viewer
The Sync Bin camera selection can now be viewed full screen in the Cinema Viewer by
pressing “P” on your keyboard, allowing you to see a larger, more detailed view of each specific
camera. In this full-screen mode, the Sync Bin view controls operate identically to those in the
normal Viewer.
Sync Bin Timeline Audio Only Playback
When the “Video Only” mode is activated in the Cut page, audio from the sources in the Sync
Bin are now muted, and the audio playback is from the clips in the Timeline only.
Dedicated Timecode Entry Mode
There is now a dedicated timecode entry mode for the Cut page. Previously, you would type
numbers on the numeric keypad to enable timecode entry, but this precluded you from using
these keys as shortcuts for other functions. Now there are three ways of telling DaVinci Resolve
that you want to perform a timecode action, regardless of what the numeric keypad keys are
assigned to in the Keyboard Customization preferences.
To activate Timecode Entry mode on the Cut page:
1 Select Playback > Goto > Timecode (=) and enter your timecode value.
2 Press “+” or “-“ keys, and enter your timecode value to move the current position
forward or backward by that amount.
3 Click on the Timeline Timecode display on the Viewer, and enter your timecode value.
Chapter – 2 Cut Page Improvements 37

Full Screen Viewer Icon on the Cut Page
The Cut page Viewer has a Full Screen Viewer icon in the upper-right, that can be clicked to
enable Full Screen view. Press Escape to return to your normal view mode.
The Full Screen Viewer icon
Quick Export Dialog Options
The Quick Export Dialog in the Cut page has been updated. The interface has been redesigned
to incorporate the Twitter preset, as well as more prominently listing the basic info (fps,
resolution, etc.) for each preset.
The Quick Export dialog
Navigable Clip Paths in Source Tape
The Media Pool in the Cut page has a navigable title bar that shows a clip’s Media Pool
hierarchy. You can now navigate up and down this hierarchy in the Source tape. In
DaVinci Resolve 17, the Source tape has a flattened view, which shows all clips in both the
current bin and any sub-bins it may contain. This is useful when navigating bin structures that
reflect the original camera file system. For example, you may have a camera that records each
memory card as a separate folder, and then each individual clip is saved as a separate folder
inside that folder. When you bring this file system into the Media Pool using the Create Bins
option, these nested levels are mirrored in the Media Pool bin structure. Now when you click on
a card bin in the Source tape, it will directly show you all the clips on that card, rather than show
many individual sub-bins. This view is also viewable in Thumbnail, List, and Filmstrip views.
As you navigate in the Source tape, the current clip is highlighted, and its hierarchy will now
appear in top of the Media Pool title bar. By clicking directly on bins in this bin path, you can
quickly broaden or narrow the scope of the Source tape, say from Shoot Day to Camera to Card
to Clip and vice versa.
The Media Pool title bar showing a clip’s Media Pool hierarchy. Clicking directly on
these bins will narrow or broaden the scope of the clips in the Source tape
Chapter – 2 Cut Page Improvements 38

New Change Clip Duration Dialog
The new Change Clip Duration dialog in DaVinci Resolve 17 allows you to directly change the
duration of a clip by typing in frames, a timecode value, or using time and frame-based presets.
You can activate the Change Clip Duration dialog by selecting one or more clips on the
Timeline and choosing Clip > Change Clip Duration (Command-D), or by right-clicking on a clip
and choosing Change Clip Duration from the contextual menu. The Change Clip Duration dialog
works both on the Cut and Edit pages.
The new Change Clip Duration
box in Timecode mode.
Options for the Change Clip Duration Dialog box:
Format: You can chose between working with TIme (Timecode) or Frame values.
Duration: Type in the timecode value or number of frames you wish to make the new
duration of the selected clip.
Preset: Select a duration by clicking on 1, 5, or 15 seconds (or their equivalent
value in frames). End will extend the duration to the last frame of the selected clip,
regardless of any Out points set.
Extend Beyond Clip Length (Cut page Only): This will append black filler to any clip
whose duration is set longer than the clip itself.
Cancel/Change: Click Cancel to exit without changing the duration of the clip, or
Change to apply the duration change to the selected clip.
TIP: You can change the duration for more than one clip at a time by selecting multiple
clips before opening Change Clip Duration. All clips selected will be the changed to
the same duration set in the Change Clip Duration dialog box.
Chapter – 2 Cut Page Improvements 39

Editing the Duration Field in the Cut Viewer
When editing using Source tape in the Cut page, you set In and Out points to insert a specified
range of video. The duration of that video range appears in the Duration field, which is in the
upper-right corner of the Viewer.
This field is now editable, and updates the Out point to match the value you enter. You can
directly enter a certain number of frames, use the + or - modifiers to change the value by that
exact amount, or make adjustments to the hh:mm:ss:ff field directly.
Switching Timelines in the Cut Page
You can switch from working on one timeline to another by using the drop-down list at the top
of the Cut page Viewer. This change unifies Viewer behavior across the Cut, Edit, Color, and
Deliver pages.
The Timeline Selection drop-down at the top of the Cut page Viewer
Navigating Edit Points and Markers
You can now use the navigation tools Playback > Previous / Next > Clip (Up Arrow / Down
Arrow) or Marker (Shift - Up Arrow / Shift - Down Arrow) in the Cut page Timeline. This new
feature now unifies Clip and Marker navigation shortcuts between the Cut and Edit pages.
Improved Transition and Effect Behaviors
You can now double click a transition in the Cut page’s Transitions panel to apply it directly to
the edit point referenced by the Smart Indicator. Double-clicking an effect in the Effects panel
applies it directly to the topmost clip at the position of the playhead.
Chapter – 2 Cut Page Improvements 40

Chapter 3
Using the
DaVinciResolve
Speed Editor
The DaVinci Resolve Speed Editor is an edit controller designed
specifically to work hand-in-hand with the Cut page.
Chapter – 3 Using the DaVinciResolve Speed Editor 41

Contents
Introducing the DaVinci Resolve Speed Editor 43
Using the Speed Editor Keys 43
Navigation Using the Search Dial 43
Intelligent Keyboard Edit Modes 45
Search Dial Live Trimming Tools 50
Transition Keys 52
Function Keys 53
Sync Bin Multi Camera Selection 56
Live Overwrite Mode 57
Chapter – 3 Using the DaVinciResolve Speed Editor 42

Introducing the DaVinci Resolve Speed Editor
The DaVinci Resolve Speed Editor is specifically designed for custom integration with the Cut
page. It efficiently combines transport control, editing functions, and multi-camera support into
a powerful edit controller with a small footprint.
The DaVinci Resolve Speed Editor
Using the Speed Editor Keys
To maximize the functionality of all the keys on this reduced-sized edit controller, there are four
different finger actions used to modify a key’s commands:
Press: A short tap to the key and release, as if you were typing.
Double Press: Two short taps to the key and release. The double press triggers the
secondary function of the key that is written on the lower side of the keycap.
Press and Hold: Tap the key and hold it down.
Double Press and Hold: One short tap, and then tap again and hold the key down.
Navigation Using the Search Dial
The most prominent feature of the DaVinci Resolve Speed Editor is the large Search Dial on its
right hand side. Primarily used for navigation, in certain circumstances this dial can also be used
for parameter selection and the direct manipulation of the clips, providing an alternative to click
and drag mouse input.
Chapter – 3 Using the DaVinciResolve Speed Editor 43

DAVINCI RESOLVE SPEED EDITOR
APPND
CLIP
PLACE
ON TOP
TRIM
OUT
SLIP
DEST
RIPL
O/WR
SRC
O/WR
CLR
ROLL
SLIDE
TRANS
DUR
SET
SMTH
DISCUT
CUT
SYNC
ESC
BIN
SPLITTRANS
MOVETITLE
CAM
CAM
8
7
CAM
CAM
5
4
CAM
CAM
2
1
STOP/ PLAY
AUDIO
LEVEL
SNAP
FULL
VIEW
RVWMARKUNDO
RIPL
DEL
LIVE
CAM
O/WR
9
RND
VIDEO
CAM
ONLY
6
AUDIO
CAM
ONLY
3
SOURCE TIMELINE
SCRLJOGSHTL
The Search Dial and
Navigation buttons
SMART
INSRT
CLIP
CLOSE
UP
YPOS
IN OUT
CLR
TRIM
IN
SLIP
SRC
Since navigation of the Timeline is where most editors spend the majority of their time, you will
want to decide on how the playhead reacts on the Timeline. In the Cut page you have two
options: Lock or Free Playhead.
When set to Locked, the playhead is fixed in the center of the Timeline, and your
edited clips scroll past it as you play (press the Spacebar), jog, or shuttle with
the Search Dial in either direction. Locked mode is preferred while using the
DaVinci Resolve Speed Editor.
When set to Free, the playhead moves across the clips as you play (press the
Stop/Play bar), jog, or shuttle using the Search Dial in either direction; the clips stay still.
Once the playhead gets to the right or left edge of the Timeline, the Timeline pages
over to reveal the next part of your edit.
Playhead Lock controls
Key Description
SOURCE
Pressing this key instantly brings the Source Tape into focus, allowing
you to navigate through all the source media in your bin.
TIMELINE
Pressing this key instantly brings the Timeline Viewer into focus,
allowing you to navigate through the Timeline.
Chapter – 3 Using the DaVinciResolve Speed Editor 44

Key Description
SHTL (Shuttle)
Puts the Search Dial into Shuttle mode. Used to quickly navigate long
clips or sync bins. Rotating the dial left of center “rewinds” through the
clip or timeline, rotating it right “fast forwards” through them. The greater
the rotation from center, the faster the Shuttle goes. A LED on the
keyboard will illuminate to show you that this mode is selected.
JOG
Puts the search dial into Jog mode. Used to navigate to specif ic frames
with accuracy and precision. Traditionally, you place your finger the the
search dial dimple, and rotate it to the left to go frame-by-frame reverse,
and to the right to go frame-by-frame forward. The faster you rotate
the search dial, the faster the navigation. A LED on the keyboard will
illuminate to show you that this mode is selected.
SCRL (Scroll)
Puts the search dial into Scroll mode. Scroll mode is essentially a
“higher geared” Jog mode. Rotating the wheel left reverses the play
direction, while rotating it right moves forward. Scroll works in terms
of seconds, rather than frames. The speed at which you rotate the
search dial determines how fast the playhead moves through the
footage. A LED on the keyboard will illuminate to show you that this
mode is selected.
TIP: As a rule of thumb, Shuttle is most effective at the scene level, Jog the clip level,
and Scroll at the timeline level.
Intelligent Keyboard Edit Modes
The DaVinci Resolve Speed Editor has dedicated keys to perform common editing functions.
DAVINCI RESOLVE SPEED EDITOR
APPND
CLIP
PLACE
ON TOP
TRIM
OUT
SLIP
DEST
RIPL
O/WR
SRC
O/WR
CLR
ROLL
SLIDE
TRANS
DUR
SET
SMTH
DISCUT
CUT
SYNC
ESC
BIN
SPLITTRANS
MOVETITLE
CAM
CAM
8
7
CAM
CAM
5
4
CAM
CAM
2
1
STOP/ PLAY
AUDIO
LEVEL
SNAP
FULL
VIEW
RVWMARKUNDO
RIPL
DEL
LIVE
CAM
O/WR
9
RND
VIDEO
CAM
ONLY
6
AUDIO
CAM
ONLY
3
SOURCE TIMELINE
SCRLJOGSHTL
The Cut page
Editing tools
SMART
INSRT
CLIP
CLOSE
UP
YPOS
IN OUT
CLR
TRIM
IN
SLIP
SRC
Chapter – 3 Using the DaVinciResolve Speed Editor 45

Key Description
IN / CLR
OUT / CLR
This key selects the In Point of a clip or timeline. Double press this key
(CLR) to clear the In point.
This key selects the Out point of a clip or timeline. Double press this key
(CLR) to clear the Out point.
If you are viewing a bin in the Source tape, you can use the In and Out
buttons to limit the Source tape between the two points. This allows you
to quickly reduce the Source tape to a specific section, regardless of
how many clips are in your bin.
To reduce the Source tape based on In and Out points:
1 In the Source tape, set the newly desired duration using
the In and Out keys on the Speed Editor.
2 Press the “Source” key.
3 The Source tape is now limited to the duration between the
two points.
4 If you wish top return to the original full Source tape,
press the “Esc” key.
SMART INSRT
(SmartInsert) / CLIP
Automatically inserts an incoming clip at the closest edit point to the
playhead (as shown by the Smart Indicator) on the selected track,
pushing all clips to the right of the edit point forward to make room for
the incoming clip you’ve inserted to Track 1. Because this is a smart
operation, you are prevented from inserting a clip at any arbitrary
frame; incoming clips are only inserted at the closest previously existing
edit point.
Double Press this key (CLIP) to Smart Insert the entire source clip,
ignoring any In and Out points previously set on the clip.
(Top) Before doing a Smart Insert, (Bottom) After inserting clip DD
between clips AA and BB
Chapter – 3 Using the DaVinciResolve Speed Editor 46

Key Description
APPND (Append) /
CLIP
RIPL O/WR
(Ripple Overwrite)
The position of the playhead is ignored; incoming clips are always
placed after the last clip in the Timeline.
Double Press this key (CLIP) to append the entire source clip, ignoring
any In and Out points previously set on the clip.
Performing an Append edit of clip DD to the Timeline
At its simplest, Ripple Overwrite substitutes a clip in the Timeline with
an incoming clip. If you use Ripple Overwrite on a clip on Track 1, this will
automatically move all clips that are to the right of the affected clip in the
Timeline either forward to make room, if the incoming clip is longer, or
back to eliminate gaps, if the incoming clip is shorter.
Performing a Ripple Overwrite to substitute an entire clip at the playhead (BB)
with the incoming clip (DD)
TIP: Using Ripple Overwrite is an efficient way to audition
different takes of the same shot without disrupting the narrative
flow of the entire scene.
Chapter – 3 Using the DaVinciResolve Speed Editor 47

Key Description
CLOSE UP / YPOS
Pressing this key reframes a clip as a zoomed-in close up to make up for
a lack of actual close ups that would have been shot with either longer
lenses, or by moving the camera closer to the subject. This function is
particularly useful when you’re working with 4K media in a 1080 timeline,
or 8K media in a 4K timeline, which enables you zoom into existing wide
shots to create medium shots, or medium shots to create close up shots,
with no loss of quality.
Performing this edit adds the incoming clip as an approximate 20% to
40% zoomed close up and also performs a face detection. If a face or
faces are found, it automatically re-positions the face top center in the
frame. You can always reposition the close up manually using the Sizing
controls in the Inspector.
Press and Hold this key (YPOS) to adjust the Y position of the Clip using
the search dial.
How this key works depends on the mode that is active in the Cut page.
Source mode:
The selected clip in the Source Tape view is edited into the Timeline as
a close up, duration based on the In and Out points set in the clip, and
the Smart Indicator on the Timeline.
Timeline mode:
The clip under the playhead has a Close Up applied to it, and is
copied to the track above it, with a 5 second duration starting from the
playhead position.
PLACE ON TOP
Live Overwrite mode:
This will perform a Close Up on the selected camera as it’s overwritten
into the Timeline.
The LED on this key will then illuminate, to show you that this
mode is armed.
This key lets you edit the incoming clip as a superimposition above
whatever other clips are in the Timeline; the incoming clip is always
placed on top, so if there are clips in Tracks 1, 2, and 3, the incoming clip
is automatically placed on Track 4, regardless of which track is selected.
The frame the incoming clip aligns with depends on the following:
The incoming clip aligns with the closest Timeline edit point in
proximity to the playhead (as shown by the Smart Indicator) if no
Timeline In or Out points have been defined. The playhead is ignored.
The incoming clip aligns with a Timeline In point if one has been set.
The incoming clip’s Out point will align with a timeline Out point
if one has been set without an In point. This “backtimes” the clip.
Before placing a clip on top
Chapter – 3 Using the DaVinciResolve Speed Editor 48

Key Description
PLACE ON TOP
(Continued)
After editing clip DD into the Timeline with a Place on Top edit
SRC O/WR
(SourceOverwrite)
This edit requires overlapping timecode in multiple clips and Track 1 of
the Timeline to work properly, such as when recording synced timecode
to multiple cameras during a multi-cam shoot. If there is no overlapping
timecode, this edit does nothing.
If you are working with footage from multiple cameras that have synced
timecode, then the easiest way to use this edit type is to set In and Out
points over a clip in the Timeline where you want to cut away to another
angle. In the following example, a wide shot of a cooking show covers
the moment when the chef starts slicing a chili.
Setting timeline In and Out points to identify a cutaway
You can then select a clip in the Media Pool that corresponds to the
desired angle you want to add as a cutaway, which has synced timecode
that overlaps with the clip on Track 1 in the Timeline. Don’t set In and Out
points; if necessary, you can clear previously set In and Out points by
pressing Option-X.
Choosing a Media Pool clip from another camera that has overlapping timecode
Chapter – 3 Using the DaVinciResolve Speed Editor 49

Key Description
SRC O/WR
(Continued)
When you click the Source Overwrite key, a synced section of the
selected Media Pool clip will be edited into the Timeline between the
In and Out points you placed, superimposed on top. The result is a
perfectly timed cutaway.
Using Source Over write to edit a superimposed and synced section of the
source clip into the Timeline between the In/Out points
Alternatively, you can also use Source Overwrite to automatically place
a source clip with a marked In/Out region on top of a clip in the Timeline
so that its timecode syncs with the timecode of the Timeline clip, when
you don’t know exactly how much of the incoming source clip you want
to edit into the Timeline, and you just want it synced appropriately.
Search Dial Live Trimming Tools
Several of the most powerful features of the DaVinci Resolve Speed Editor involve the intuitive
trimming controls afforded by the search dial.
DAVINCI RESOLVE SPEED EDITOR
SMART
INSRT
CLOSE
The Trimming tools
Key Description
TRIM IN
When this key is pressed and held, it lets the user trim the nearest
In point on the Timeline (as shown by the Smart Indicator), by simply
rotating the search dial back and forth. The trim point is highlighted in
green. Release the key to confirm the edit.
In Source mode, holding this key and rotating the search dial adjusts the
In Point of the clip in the Viewer.
APPND
CLIP
CLIP
PLACE
ON TOP
UP
YPOS
IN OUT
CLR
TRIM
TRIM
OUT
IN
SLIP
SLIP
DEST
SRC
RIPL
O/WR
SRC
O/WR
CLR
ROLL
SLIDE
TRANS
DUR
SET
SMTH
DISCUT
CUT
SYNC
ESC
BIN
SPLITTRANS
MOVETITLE
CAM
CAM
8
7
CAM
CAM
5
4
CAM
CAM
2
1
STOP/ PLAY
AUDIO
LEVEL
SNAP
FULL
VIEW
RVWMARKUNDO
RIPL
DEL
LIVE
CAM
O/WR
9
RND
VIDEO
CAM
ONLY
6
AUDIO
CAM
ONLY
3
SOURCE TIMELINE
SCRLJOGSHTL
Chapter – 3 Using the DaVinciResolve Speed Editor 50

Key Description
TRIM OUT
ROLL / SLIDE
SLIP SRC
(SlipSource)
SLIP DEST
(SlipDestination)
When this key is pressed and held, it lets the user trim the nearest
Out point on the Timeline (as shown by the Smart Indicator), by simply
rotating the search dial back and forth. The trim point is highlighted in
green. Release the key to confirm the edit.
In Source mode, holding this key and rotating the search dial adjusts the
Out Point of the clip in the Viewer.
When this key is pressed and held, it lets the user trim the nearest
transition point (as shown by the Smart Indicator), and roll the edit point
back and forth between the clips by simply rotating the search dial. The
trim point is highlighted in green. Release the key to confirm the edit.
Double Press and Hold this key (SLIDE) to Slide the entire clip back
and forth in the Timeline. A four-way multiview will show the In and Out
points for both source and destination clips as you slide.
When this key is pressed and held, it allows the user to slip in place the
footage of the clip to the left of the Smart Indicator back and forth by
moving the search dial. A four-way multiview will show the In and Out
points for both source and destination clips as you slip. The clip that will
slip will be highlighted in orange. Release the key to confirm the edit.
When this key is pressed and held, it allows the user to slip in place the
footage of the clip to the right of the Smart Indicator back and forth by
moving the search dial. A four-way multiview will show the In and Out
points for both source and destination clips as you slip. The clip that will
slip will be highlighted in orange. Release the key to confirm the edit.
TRANS DUR
(TransitionDuration)
/ SET
Holding down this key when a transition is under the Smart Indicator will
allow you to change the duration of the transition using the search dial.
Turning the dial left will shorten the transition, and right will lengthen it.
Once the duration is correct, release the key.
Double Pressing this key (SET) allows you to set the current transition
length as the default transition duration.
TIP: Multiple transitions can be changed at the same time by holding down Command
and selecting the transitions on the Upper Timeline, then pressing the appropriate
transition key (CUT, DIS, SMTH CUT).
Chapter – 3 Using the DaVinciResolve Speed Editor 51

Transition Keys
This set of keys provide immediate shortcuts to the most commonly used transition commands.
DAVINCI RESOLVE SPEED EDITOR
APPND
CLIP
PLACE
ON TOP
TRIM
OUT
SLIP
DEST
RIPL
O/WR
SRC
O/WR
CLR
ROLL
SLIDE
TRANS
DUR
SET
SMTH
DISCUT
CUT
ESC
CAM
7
CAM
4
CAM
1
SYNC
BIN
SPLITTRANS
MOVETITLE
CAM
CAM
CAM
8
5
2
STOP/ PLAY
AUDIO
LEVEL
SMART
INSRT
CLIP
CLOSE
UP
YPOS
IN OUT
CLR
TRIM
IN
SLIP
SRC
Transition keys for Cut,
Dissolve, and Smooth Cut
Key Description
CUT
This key will set a simple cut at the Timeline edit point, as shown
by the Smart Indicator. If there is another transition already present
there, it will replace it.
The LED on this key will illuminate to show you the Cut Transition is
armed in Live Overwrite mode.
FULL
VIEW
RVWMARKUNDO
RIPL
SNAP
DEL
LIVE
CAM
O/WR
9
RND
VIDEO
CAM
ONLY
6
AUDIO
CAM
ONLY
3
SOURCE TIMELINE
SCRLJOGSHTL
DIS (Dissolve)
SMTH CUT
(SmoothCut)
This key will add a one second dissolve centered between the two
shots at the Timeline edit point, as shown by the Smart Indicator. If
there is another transition already present there, it will replace it.
The LED on this key will illuminate to show you the Cut Transition is
armed in Live Overwrite mode.
This key will add a Smooth Cut transition centered between the two
shots at the Timeline edit point, as shown by the Smart Indicator. If
there is another transition already present there, it will replace it.
The LED on this key will illuminate in Live Overwrite mode to show you
the Cut Transition is armed.
Smooth Cuts are special-purpose transitions designed to make short
jump cuts in the middle of a clip unnoticeable. This is done by using
optical flow processing to match the same features on either side of
a cut in order to automatically morph a subject from one position to
another over the duration of the transition.
Chapter – 3 Using the DaVinciResolve Speed Editor 52

Key Description
SMTH CUT
(Continued)
The Smooth Cut effect works best on clips such as sit-down interviews
and close-up head shots with a minimum of background and subject
motion, and where the subject’s position on either side of the cut is not
significantly different. A good example of when Smooth Cut is effective
is when you’re cutting pauses, partial repeats, filler sounds such as “um”
or “you know,” or other speech disfluencies out of an interview clip to
tighten the dialog, and you want to eliminate the little “jump” that occurs
at the cut without having to cut away to B-roll. Applying a short two- or
four-frame Smooth Cut transition to the edit can make this kind of edit
invisible, as long as the speaker doesn’t change position significantly
during the cut. The more motion there is in the background of the shot,
and the more the speaker changes position, the harder it will be to get
a useful result using Smooth Cut. Although the default duration for any
transition is one second, you’ll f ind that Smooth Cut transitions may work
much better when they’re short; 2- to 6-frame Smooth Cut transitions
often work best to disguise jump cuts.
Function Keys
Function Keys
DAVINCI RESOLVE SPEED EDITOR
APPND
PLACE
ON TOP
TRIM
OUT
SLIP
DEST
RIPL
O/WR
CLIP
SRC
O/WR
CLR
ROLL
SLIDE
TRANS
DUR
SET
SMTH
DISCUT
CUT
ESC
CAM
7
CAM
4
CAM
1
SYNC
SPLITTRANS
MOVETITLE
CAM
CAM
CAM
BIN
8
5
2
AUDIO
STOP/ PLAY
SMART
INSRT
CLIP
CLOSE
UP
YPOS
IN OUT
CLR
TRIM
IN
SLIP
SRC
Key Description
ESC / UNDO
This key functions the same way as the escape key on your keyboard,
but in the Cut page it is also used to clear a selected camera in the
Sync Bin.
Double press this key (UNDO) to undo your last action. Multiple doublepresses take you back through the Undo history.
LEVEL
FULL
VIEW
RVWMARKUNDO
RIPL
SNAP
DEL
LIVE
CAM
O/WR
9
RND
VIDEO
CAM
ONLY
6
AUDIO
CAM
ONLY
3
SOURCE TIMELINE
SCRLJOGSHTL
Chapter – 3 Using the DaVinciResolve Speed Editor 53

Key Description
SYNC BIN
This key will open up the Sync Bin for easy multi-camera editing.
Formore information on using the Sync Bin see Chapter 20,
“FastEditing in the Cut Page” in the DaVinci Resolve Reference Manual.
Distance Indicators to Adjacent Edits
When using the Speed Editor’s search dial while using the Sync Bin, the
Cut page playhead in the lower timeline now has two small windows to
either side showing the distance to the nearest edit. The left window
shows the time to the nearest previous edit, and the right window shows
the time to the next previous edit. Both windows are in seconds:frames
(SS:FF) format. This feature allows you to quickly jump to, or modify an
edit point using the direct timecode entry method.
The Distance Indicators when using the Search Dial in
the Sync Bin. The left window is showing one second
and ten frames to the previous edit, and the right
window is showing thirty three frames to the next edit
as shown by the smar t indicator.
AUDIO LEVEL /
MARK
Press and holding the Audio Level key allows you to adjust the selected
clip’s Volume parameter by rotating the Search dial. If no clip is selected
it will modify the clip on the highest track under the playhead.
Double pressing this key (MARK) adds a marker placed at the playhead’s
current position. Double press again to enter the marker’s editing dialog
box to add comments, durations, etc.
Double press and holding this key allows you to set the color of the
marker before you add it, by rotating the search dial.
Double pressing and holding down the Audio level/Mark
key brings up a rotary marker color selector that you can
navigate with the search dial
Chapter – 3 Using the DaVinciResolve Speed Editor 54

Key Description
FULL VIEW / RVW
TRANS / TITLE
Pressing this key expands the Viewer to Full View mode on the interface
monitor. Pressing this key again returns the Viewer to its normal mode.
Double press this key (RV W) to review your edit. This function plays
back a pre-roll before and post-roll after the last edit in Full View mode.
The pre- and post-roll time durations can be set in the Editing section of
the User tab in the DaVinci Resolve preferences.
Press and hold this key to bring up a drop-down menu of your available
transitions in alphabetical order and an icon describing their shape.
Rotating the search dial left and right will navigate you through the list.
When you find the transition that you want, simply release this key and it
will be placed at the Timeline edit point as shown by the Smart Indicator.
Double press and hold this key (TITLE) to modify the font of an existing
title. If the playhead is over a basic title and this key is held, you can
rotate the search dial to change the font of the title. This only modifies
the first text element in a title. Once you’ve selected your font, release
the key to set it.
The LED on this key will illuminate to show you the Standard Transition is
armed in Live Overwrite mode.
Drop-down Transition menu
SPLIT / MOVE Press this key to create a new cut in a clip at the playhead position.
The cut will affect all clips under the playhead if more than one track is
being used.
If the playhead is over an existing split, pressing this key will remove the
split and join the two parts of the clip back together.
Double press this key (MOVE) to move your selected clip in the Timeline.
Using the search dial, you can move the clip backwards and forwards in
the Timeline from edit to edit. The Timeline will reflow to adapt to your
clip placement. When you find the place you want to move your clip to,
release the key to set it.
Chapter – 3 Using the DaVinciResolve Speed Editor 55

Key Description
SNAP /
(ViewerResize)
Press this key to enable the Snapping mode designed specifically for
the search dial. With snap turned on in Jog mode, and when the search
dial is rotated very slowly, the playhead will briefly pause at each edit
point in the Timeline. This key has an LED to show you when this mode
is active.
Double press and hold this key (Three Lines) to dynamically resize
the Viewer window using the search dial. Rotating the dial to the left
increases the Viewer size, and to the right decreases it.
RIPL DEL
(RippleDelete)
Pressing this key will delete the selected clip or clips, and then close any
gaps that occur by rippling the Timeline to the left. If no clip is selected,
this key will ripple delete the clip under the playhead.
Sync Bin Multi Camera Selection
DAVINCI RESOLVE SPEED EDITOR
APPND
PLACE
ON TOP
RIPL
O/WR
CLIP
SRC
O/WR
SYNC
ESC
BIN
SPLITTRANS
MOVETITLE
AUDIO
LEVEL
SNAP
FULL
VIEW
RVWMARKUNDO
RIPL
DEL
SOURCE TIMELINE
SCRLJOGSHTL
SMART
INSRT
CLOSE
YPOS
CLIP
UP
IN OUT
CLR
TRIM
TRIM
OUT
IN
SLIP
SLIP
DEST
SRC
CLR
ROLL
SLIDE
TRANS
DUR
SET
SMTH
DISCUT
CUT
CAM
8
7
CAM
CAM
5
4
CAM
CAM
2
1
STOP/ PLAY
O/WR
9
RND
VIDEO
CAM
ONLY
6
AUDIO
CAM
ONLY
3
LIVE
CAM
CAM
Key Description
VIDEO ONLY
Press this key to only allow the video from your source clip
into a video track on the Timeline.
This key has an LED to tell you when it is active. Press this
key again to deactivate.
AUDIO ONLY
Press this key to only allow the audio from your source clip
into an audio track the Timeline.
This key has an LED to tell you when it is active. Press this
key again to deactivate.
The Camera and
Live Overwrite keys
along with the play bar
Chapter – 3 Using the DaVinciResolve Speed Editor 56

Key Description
STOP/ PLAY
This key starts and stops playback on your Timeline or
source media. It’s conveniently arranged for using your
thumb, while your fingers are on the search dial.
CAM 1-9
These keys only function in Sync Bin view. Each camera key
allows you to choose its corresponding camera angle as
active in the Sync Bin. Pressing any Camera key will expand
that camera angle into the Source Clip view, making it easy
to set specif ic In and Out points and perform edit functions.
You can change camera angles instantly in the Source Clip
view by simply pressing another Camera key. If you wish to
return to the Sync Bin view, press the Escape key.
These keys illuminate and have a switcher-like function in
Live Overwrite mode, as explained below.
Live Overwrite Mode
DAVINCI RESOLVE SPEED EDITOR
APPND
PLACE
ON TOP
RIPL
O/WR
CLIP
SRC
O/WR
SYNC
ESC
BIN
SPLITTRANS
MOVETITLE
AUDIO
LEVEL
SNAP
FULL
VIEW
RVWMARKUNDO
RIPL
DEL
SMART
INSRT
CLOSE
YPOS
CLIP
UP
SOURCE TIMELINE
SCRLJOGSHTL
IN OUT
CLR
TRIM
TRIM
OUT
IN
SLIP
SLIP
DEST
SRC
CLR
ROLL
SLIDE
TRANS
DUR
SET
SMTH
DISCUT
CUT
CAM
8
7
CAM
CAM
5
4
CAM
CAM
2
1
STOP/ PLAY
O/WR
9
RND
VIDEO
CAM
ONLY
6
AUDIO
CAM
ONLY
3
LIVE
CAM
CAM
Key Description
LIVE O/WR
The Live Overwrite mode in the Speed Editor can be
thought of as switching a live Multicam shoot without all
the annoying constraints of linear time. With all the camera
angles locked together in the Sync Bin, you can perform
and trim all the edits, transitions, and camera switches, you
want and never go out of sync. Every edit you make will be
perfectly synchronized to the Timeline automatically.
Live Overwrite keys
Chapter – 3 Using the DaVinciResolve Speed Editor 57

LIVE O/WR (Live Overwrite Mode) / RND (Random)
Press this key to enter Live Overwrite mode. An LED will illuminate to tell you this mode is
active. It immediately activates the Sync Bin and the Multicam Viewer, and switches the Speed
Editor into a different mode, slightly changing the functionality of several keys to accommodate
the Live Overwrite workflow. A key that is in Live Overwrite mode has an LED light illuminate to
let you know that the key’s function is currently active.
Double Press this key (RND) to edit a Random camera angle with a random duration into the
Timeline from the Sync Bin.
Using Live Overwrite Mode
Editing Multicamera shoots in Live Overwrite mode starts with the base layer on track V1.
The clip you put here has two additional functions other than its video content. First, it provides
a continuous timecode track that is the foundation of all the Sync Bin functionality. Second, it
provides content to measure all of the ripple functions against.
NOTE: Live Overwrite Mode only works with clips in the Sync Bin. If there are no clips
set in the Sync Bin, this mode will not function. For more information on setting up the
Sync Bin, see Chapter 20, “Fast Editing in the Cut Page,” in the DaVinci Resolve
Reference Manual.
A good starting point is to place your master camera angle, uninterrupted from beginning to
end on track V1. You will be able to edit this track, remove whole sections, and re-arrange it as
necessary later in the process, but for now, this master clip on V1 will serve as the backbone
of the edit.
Live Overwrite mode, with the master camera angle (Cam 4) edited in on track V1
Once the master clip of the Sync Bin is on V1, you can start using the Live Overwrite mode in
earnest. The concept to understand about Live Overwrite is that this method of editing
bypasses traditional In and Out points all together, and edits are performed with the Camera
keys working in conjunction with the Search Dial.
Chapter – 3 Using the DaVinciResolve Speed Editor 58

Performing a Live Overwrite edit:
1 Press the Live O/WR button to activate the mode. The LED on the key will illuminate.
2 Use the search dial to navigate the Sync Bin to where you want to make an edit (switch
camera angles). You will notice all cameras and the Timeline will move together in sync.
3 Select a camera angle in the Multicam Viewer you wish to edit in, and press and hold
the corresponding Camera key on the Speed Editor, while rotating the search dial
forward. This will edit in a new clip on top of the V1 track, and you can use the search
dial to immediately set its duration.
4 Release the Camera key to set the edit.
Performing a Live Overwrite by holding down the Camera
5 key and rotating the search dial to the right
From here you can immediately press and hold another Camera key and rotate the
search dial to continue the Multicam edit. You can think of this method as “painting-on”
clips to the Timeline, rather than inserting them. Clips edited in this fashion will never
overwrite other clips on the same track. Live Overwrite will always add the clip to the
next highest track, and create a new track automatically if necessary.
”Painting-on” the next edit by holding down the Camera 7 key
and rotating the search dial to the right
Continuing the edit from here does not require working in a linear fashion. Because the master
track is on V1, you can skip ahead anywhere on the Timeline and start “painting-in” camera
angles wherever you wish, and because the Timeline and Source clips are locked together in
the Sync Bin, whatever edit you add will always be in perfect sync.
Chapter – 3 Using the DaVinciResolve Speed Editor 59

Live Overwrite Mode Key Modifiers:
Selecting Live Overwrite mode subtly changes the functions of many keys on the Speed Editor,
so they work in conjunction with this mode. Each of these keys has an LED that illuminates to
tell you the function is active before you perform a Live Overwrite edit.
Key Modifier Description
LIVE O/WR
CUT Automatically adds a simple cut to the beginning of each
clip edited to the Timeline. This option is also effectively no
transition added.
DIS
SMTH CUT
TRANS
Automatically adds a Cross Dissolve transition to the
beginning of each clip edited to the Timeline. If the edited
clip is immediately adjacent to another clip on the same
track, the dissolve will be centered on the cut. If there is no
clip immediately adjacent, the dissolve will start on the edit
instead, and dissolve from the video on the track underneath
the clip.
Automatically adds a Smooth Cut transition to the beginning
of each clip edited to the Timeline. If the edited clip is
immediately adjacent to another clip on the same track,
the Smooth Cut will be centered on the cut. If there is no
clip immediately adjacent, the Smooth Cut will start on the
edit instead, and Smooth Cut from the video on the track
underneath the clip.
Automatically adds whatever transition is set as the “Standard
Transition” in the Transitions panel to the beginning of each
clip edited to the Timeline. If the edited clip is immediately
adjacent to another clip on the same track, the transition
will be centered on the cut. If there is no clip immediately
adjacent, the transition will start on the edit instead, and
transition from the video on the track underneath the clip.
CLOSE UP
Automatically performs a Close Up action on the camera as
its edited into the Timeline.
Chapter – 3 Using the DaVinciResolve Speed Editor 60

Chapter 4
DaVinci Resolve Editor Keyboard Improvements
The DaVinci Resolve Editor Keyboard has updated its function key
controls to expand its versatility in both DaVinci Resolve and your
computer’s native OS.
Chapter – 4 DaVinci Resolve Editor Keyboard Improvements 61

Contents
Using the Function (Fn) Key on the Editor Keyboard 63
Editor Keyboard Function (Fn) Key Map 63
Chapter – 4 DaVinci Resolve Editor Keyboard Improvements 62

Using the Function (Fn) Key on the Editor Keyboard
There are three types of key actions mapped to the DaVinci Resolve Editor Keyboard. The
Function (Fn) key in the lower left of the keyboard toggles these modes and each type of key
action modifies the resulting commands. These key actions give you access to standard
computer functions in your native OS.
Key Press: Simply pressing the key once.
Fn + Key Press: Holding down the Fn key and then pressing another key.
Tap Fn + Hold: Pressing the Fn Key once, then pressing Fn again and holding it down,
then pressing another key. This is a total of three key presses.
Editor Keyboard Function (Fn) Key Map
Key Press Fn + Key Press Tap Fn + Hold
SYNC BIN F1 DECREASE SCREEN BRIGHTNESS
INSERT BLACK F2 INCREASE SCREEN BRIGHTNESS
FREEZ F3 SHOW ALL WINDOWS
TRANS F4 SHOW ALL APPLICATIONS
PIC IN PIC F5 DECREASE KEYBOARD LED BRIGHTNESS
SWAP F6 INCREASE KEYBOARD LED BRIGHTNESS
VIDEO ONLY F7 PREVIOUS TRACK
AUDIO ONLY F8 PLAY/PAUSE
INSERT F9 NEXT TR ACK
O/WR F10 MUTE
REPL F11 DECREASE VOLUME
FIT TO FILL F12 INCREASE VOLUME
UP ARROW PAGE UP PAGE UP
DOWN ARROW PAGE DOWN PAGE DOWN
LEFT ARROW HOME HOME
RIGHT ARROW END END
HOME END END
KEYPAD ENTER CALCULATOR CALCULATOR
DELETE FORWARD DELETE FORWARD DELETE
CAM PRINT SCREEN PRINT SCREEN
TIMECODE PAUS E PAUSE
DUR ENTER NUM LOCK NUM LOCK
Chapter – 4 DaVinci Resolve Editor Keyboard Improvements 63

Chapter 5
Media and Edit Page Improvements
The Media and Edit pages have numerous improvements spanning the
gamut of editorial workflow. More clip functionality in the Media Pool,
enhanced integration with Fusion, and better Timeline management are all
included in this release.
Chapter – 5 Media and Edit Page Improvements 64

Contents
Media Pool Improvements 66
Converting Compound Clips or Timelines to Multicam Clips 66
Insert Selected Clips to Timeline Using Timecode 66
Insert Selected Clips to Timeline with Handles 67
Ability to Create Timelines with Audio Mixer Presets 67
Support for Importing Boris Continuum FX with AAF Timelines 67
Import XML, EDL, and AAF Timelines with an Empty Media Pool 67
Timeline Improvements 68
Convert Fusion Compositions to Edit Eects 68
Change Transitions to Fusion Compositions 68
Scroll Wheel Controls on Timeline 69
Zoom Around Mouse Pointer 69
Fast Review on the Edit Page 69
Create Timeline Using an IMF or DCP Composition Playlist (CPL) (Studio Only) 69
Track Heights Independent of Thumbnail Settings 70
Support for DCTL Based Transitions 70
Improved Frame.io Marker Navigation (Studio Only) 70
Improved Take Selector and Retime Control Behavior 70
Viewer Improvements 70
Ability to Monitor HDR and SDR From the Edit Page 70
Ability to Monitor Stereoscopic 3D From the Edit Page 70
Ability to Copy and Paste Timecode in Viewers Based on Timecode Mode 70
Additional Viewer Wipe Modes for Oine Reference Clips 71
Editing Improvements 71
Updated Selection Methods on the Timeline 71
Scene Cut Detection on the Timeline 71
Auto Align Clips 72
Delete Gaps Within a Specified Range 74
Chapter – 5 Media and Edit Page Improvements 65

Media Pool Improvements
A variety of new features have been added to the Media Pool, which make it easier to set up
and import clips into a timeline.
Converting Compound Clips or Timelines to Multicam Clips
It’s now possible to convert compound clips and timelines into multicam clips for easier editing
using the Edit page’s Multicam Editing interface. This conversion is a one-way process.
You cannot reconvert a multicam clip back to a timeline or compound clip. If you wish to
preserve the original timeline or compound clip, make sure to duplicate it first, and then convert
the copy. For more information, see Chapter 32 “Multicam Editing” in the DaVinci Resolve
Reference Manual.
To convert a compound clip or timeline to a Multicam clip:
–
Right-click on the clip or timeline in the Media Pool and choose “Convert Compound
Clips (Timelines) to Multicam Clips” from the drop down menu.
Insert Selected Clips to Timeline Using Timecode
Clips can now be edited directly from the Media Pool into a timeline, such that each clip’s
source timecode is aligned with an identical record timecode value in the Timeline. This can be
useful for long form multi-camera events, like weddings or concerts, where all cameras are
linked by the same timecode to ensure all edits are perfectly synced. This function matches the
Source Overwrite edit on the Cut page.
IMPORTANT: The timecode of the Timeline must overlap the timecode of
the clip(s) for this edit to function. This can be set in the Start Timecode field of the
New Timeline settings.
To insert selected clips to timeline using timecode:
1 Select one or more clips to edit into the Timeline in the Media Pool. If there are In and
Out points set on the clip, the edit will respect those boundaries. If no In/Out points are
set, each selected clip’s full duration will be edited in its entirety.
2 Set a destination control to determine which track in the Timeline you want to edit to.
3 Right-click one of the selected clips and choose “Insert Selected Clips to Timeline
Using Timecode” from the drop-down menu.
4 All of the selected clips will be overwritten into the Timeline at their appropriate
timecode locations onto the destination track.
IMPORTANT: If multiple selected clips have overlapping timecode, no edit will occur.
Chapter – 5 Media and Edit Page Improvements 66

Insert Selected Clips to Timeline with Handles
This command inserts multiple clips into the Timeline serially, using the current sort order of
the Media Pool, with handles subtracted from the current In and Out points of each clip (using
the Default Handles Length in the Editing panel of the User Preferences). Combined with the
Add Transition tool (Command-T), this function is useful when quickly creating montages from
multiple clips.
To insert clips with handles to the Timeline:
1 Select the clips to insert into the Timeline with handles in the Media Pool.
2 Right-click any selected clip, then choose “Insert Selected Clips to Timeline
With Handles.” The clips will be inserted starting at the Timeline In point with
the default handles length already calculated.
TIP: To finish creating the montage, select the clips in the Timeline, then choose
“Add Transition” (Command-T) from the Timeline menu. This will apply the default
transition to all of the clips at once.
Ability to Create Timelines with Audio Mixer Presets
For advanced audio workflows and ease of use with Fairlight, you can now create a timeline
with pre-assigned audio tracks using a previously created Fairlight Configuration preset. To use
this function, create a new timeline, and check the “Use Fairlight Configuration Preset” box.
A drop-down menu then appears, allowing you to select the specific preset for the Timeline.
You can create Fairlight Configuration presets using the Fairlight Presets Library, available from
the Fairlight menu. For more information, see Chapter 150 “Setting up Tracks, Buses, and
Patching” in the DaVinci Resolve Manual.
Support for Importing Boris Continuum FX with AAF Timelines
Boris Continuum FX effects and settings will now be imported along with a timeline via
AAF export. You’ll need to have the same Continuum suite of effects installed on both
machines (OFX version for DaVinci Resolve, AVX for Avid). When importing an AAF, Boris
Continuum effects that were used in the original NLE will appear on each affected clip in the
resulting DaVinci Resolve timeline, with all previously applied parameters available in the
inspector. The Sapphire and Mocha suites are not available for AAF import at this time.
Import XML, EDL, and AAF Timelines with an Empty Media Pool
It is now possible to import an XML, EDL, or AAF file into DaVinci Resolve without having any of
that timeline’s corresponding media in the Media Pool.
Chapter – 5 Media and Edit Page Improvements 67

Timeline Improvements
There have been several new features that improve timeline functionality in terms of playback,
organization, and interoperability with other pages in DaVinci Resolve.
Convert Fusion Compositions to Edit Effects
If you have created a Fusion Composition that you would like to use across a number of
projects, you can now save it to the Effects toolbox in the Edit page. This allows easy access to
the effect from the Edit page, and simple application to video clips in the Timeline.
To convert a Fusion composition to an Edit effect:
1 Export the composition as a macro in Fusion, by right clicking on a node and selecting
Create Macro from the contextual menu.
2 Save the macro file (.setting) to the following directory:
–
MacOS: /Library/Application Support/Blackmagic Design/DaVinci Resolve/Fusion/
Templates/Edit/Effects
–
Windows: C:\ProgramData\Blackmagic Design\DaVinci Resolve\Fusion\Templates\
Edit\Effects
–
Linux: /opt/resolve/Fusion/Templates/Edit/Effects
The effect will now be available as a drag and drop effect in the “Fusion Effects”
section of the toolbox in the Effects Library on the Edit page.
Change Transitions to Fusion Compositions
If you need to create a more complex transition than you can get from the Inspector, it is now
possible to change any transition to a Fusion Composition on the Edit Page timeline.
To convert a Resolve transition to a Fusion composition:
1 Add a transition between two clips on your Timeline.
2 Right-click on the transition and select “Convert to Fusion Cross Dissolve.”
3 Right-click on the transition again and select “Open in Fusion Page.”
A new Fusion composition opens with the base Cross Dissolve nodes and tools already set.
You now can use all of the powerful tools in the Fusion page to customize your transition.
The node tree you start with af ter converting a transition to a Fusion Cross Dissolve
Chapter – 5 Media and Edit Page Improvements 68

Scroll Wheel Controls on Timeline
Additional Scroll Wheel Timeline controls have been added to the Edit page Timeline.
To manipulate the Timeline, rotate the scroll wheel while holding down:
Shift: Expands or contracts all the Video or Audio track heights, depending
on what section the pointer is located at when you scroll.
Option: Zooms in and out the view of the Timeline.
Command: Navigates forwards and backwards in the Timeline.
Zoom Around Mouse Pointer
You can set up the Edit Timeline zoom controls to stay centered on the pointer as you zoom in
or out, instead of staying centered on the Timeline playhead as usual, by selecting View >
Zoom Around Mouse Pointer. This can be helpful when navigating longer timelines.
With this option enabled, zooming in and out of the Timeline using the scroll control of your
pointing device while holding the Option key down keeps the Timeline centered on the pointer.
Deselect this option to return to the behavior of only zooming in or out centered on the
playhead position.
Fast Review on the Edit Page
The Fast Review feature of the Cut page is now available in the Edit page. Fast Review plays
back your timeline at variable fast forward speeds where the speed of playback is dependent
on the length of each clip on the Timeline. Longer clips play back at faster speeds than shorter
ones. This feature is designed to allow you to quickly scan through a large amount of material
on a timeline.
To use the Fast Review feature on your Edit Page timeline, select Playback > Fast Review.
Pressing K or the spacebar will return you to the normal JKL playback mode. If you use this
feature often you can bind Fast Review to a specific key in the Keyboard Customization window.
NOTE: Fast Review does not work for clips in the Source Viewer, only for timelines in
the Timeline Viewer.
Create Timeline Using an IMF or DCP Composition Playlist (CPL) (Studio Only)
You can now create a timeline in DaVinci Resolve that exactly replicates the Composition
Playlist (CPL) of a DCP or IMF package.
To create a timeline using a Composition Playlist (CPL):
1 Import an IMF or DCP package into the Media Pool, like any other piece of media.
2 Right-click on the imported clip and choose “Create New Timeline Using Composition
Playlist” from the contextual menu.
3 In the New Timeline dialog box, choose a specific CPL from the package in the
“Composition Playlist” dropdown menu.
4 Make any other normal New Timeline adjustments you may need (such as Resolution,
Aspect Ratio, etc.), then click the “Create” button.
Chapter – 5 Media and Edit Page Improvements 69

Track Heights Independent of Thumbnail Settings
Track heights in the Edit page are now independent of the Thumbnail and Waveform view
settings in the Timeline View options. Previously, specific Timeline viewing options such as
Filmstrip or Thumbnail view had minimum track height settings. Now you can freely change
track height no matter what options you’ve chosen, and resizing one or more tracks below the
minimum height for filmstrips or thumbnails automatically collapses those tracks into Simple
view to avoid clutter.
Support for DCTL Based Transitions
DCTL based transitions are now supported in DaVinci Resolve, and can be found in the
Transitions section of the Open FX category of the Effects Library. See the DaVinci Resolve
Developer Documentation in the help menu for more details.
Improved Frame.io Marker Navigation (Studio Only)
You can now specifically navigate only markers created in Frame.io while in the comment dialog
of a Frame.io marker, using the Previous Marker (Shift-UpArrow) and Next Marker (ShiftDownArrow) commands. This allows you to skip directly from comment to comment in Frame.io
without having to either navigate all markers in-between, or double-click each Frame.io marker
individually to respond. Frame.io interoperability is a Studio Only feature.
Improved Take Selector and Retime Control Behavior
Active Retime and Take Selector controls can now be closed by pressing the Escape key or
toggled on and off by repeatedly pressing the control’s assigned keyboard shortcut.
Viewer Improvements
The Viewers in DaVinci Resolve have been updated with several usability improvements.
Ability to Monitor HDR and SDR From the Edit Page
You can now view HDR and SDR outputs of your timeline simultaneously from the Edit page.
The SDR signal will be mapped to the first output of your video I/O device, and the HDR signal
will be mapped to the second. This functionality was previously only available in the Color page.
Ability to Monitor Stereoscopic 3D From the Edit Page
You can now view a Stereoscopic 3D signal directly from the Edit page. Previously, the Edit
page was restricted to left eye for both outputs. The Edit Page Viewer now displays
Stereoscopic 3D identically to the Color Page Viewer. The 3D palette in the Color page has the
stereoscopic controls to select the stereo viewing options (Side by Side, Anaglyph, Line by
Line, etc.), as well as adjusting the convergence and other stereoscopic parameters.
For more information on setting up 3D output, see Chapter 172 “Stereoscopic Workflows” in the
DaVinci Resolve Reference Manual.
Ability to Copy and Paste Timecode in Viewers Based on Timecode Mode
You can now copy and paste timecode values directly from timecode fields in the viewers
across the Media Pool, and Cut, Edit, and Deliver pages.
Chapter – 5 Media and Edit Page Improvements 70

To copy and paste between timecode fields:
1 Choose the appropriate timecode mode (Source/Record/Frames/KeyKode, etc.) by
right-clicking on the timecode field in the Viewer and choosing the mode you want to
copy from.
2 Right-click again in the timecode field and choose Copy Timecode.
3 Right-click on any other Viewer’s timecode field, and choose Paste Timecode to paste
that value.
Additional Viewer Wipe Modes for Offline Reference Clips
Three new wipe modes have been added to the Offline Viewer, that allow you to check the
sync between your current timeline and its Linked Offline Reference Clip. You can open the
Offline Viewer by choosing Offline in the Source Viewer Mode drop-down menu, and then
right-clicking in the Program Viewer to select the wipe type. These new modes are:
Diagonal: Lets you compare both halves of the wipe via an adjustable diagonal border.
Dragging the pointer repositions the wipe to the left and right. Hold the option key
down and drag while moving the pointer around in a circle to rotate the border of the
wipe to any angle you like.
Venetian Blind: Lets you compare both images being wiped via alternating horizontal
strips. Drag the pointer up or down to change the size of the alternating strips. Good for
quickly comparing vertical color uniformity, focusing on color and contrast changes that
occur from top to bottom.
Checkerboard: Lets you compare both images being wiped via an alternating
checkerboard. Drag the mouse left or right to alternate between images by squeezing
each check horizontally. Good for comparing color uniformity across the width and
height of two images.
Editing Improvements
The following improvements aid everyday editing functionality.
Updated Selection Methods on the Timeline
Clip selection no longer automatically moves along with the playhead. Instead, a new set of
commands lets you create and move a selection by holding down the Command key and
pressing the Up, Down, Left, and Right Arrow keys. This allows you to select clips above and
below the current track and to the left and right, independently of the playhead.
You can return the Clip Selection mode back to its previous behavior of automatically selecting
the clip it’s intersecting by turning on the “Selection Follows Playhead” option in the
Timeline menu.
Scene Cut Detection on the Timeline
If you need to break down a previously edited video into its component clips for re-editing or
color correction, you can now do so directly in the timeline. Using the DaVinci Neural Engine,
DaVinci Resolve can automatically analyze and split up an edited video into individual clips.
Timeline Scene Cut Detection is also available in the Cut page. If you prefer, you can continue
to use the original Scene Cut Detection tool found in the Media Pool.
Chapter – 5 Media and Edit Page Improvements 71

To use Scene Cut Detection on the Timeline:
1 Select one or more clips you want to split on the Timeline. Alternately, you can limit
Scene Cut Detection to just a portion of a clip by setting In and Out points on the
Timeline around the section you want to analyze.
2 Choose Timeline > Detect Scene Cuts.
A dialogue box appears, “Detecting scene cuts in clips x of x.” This process can take
some time, depending on the length, number, and complexity of the clips you’ve
selected. When the Scene Cut Detection has finished, the clip you selected will be
broken up into a number of through edits that now can be used as independent clips.
Checking and Fixing Your Results
If the Neural Engine has made an error, you can fix it manually by navigating to the cut using
the Up and Down Arrow keys to go back and forth in the Timeline, and by then doing one of
the following:
To remove a Cut: Click the through edit to select it, and press the “Delete” key.
To make a New Cut: Place the timeline indicator at the cut point, and choose
Timeline > Split Clips (Command-\).
A single clip of a finished edit, consisting of multiple cuts before the Detect Scene Cuts command
Multiple individual clips extracted from the edited clip via Detect Scene Cut; the operation
has been contained by the In and Out points, and one of the resulting through edits has been
highlighted in green
Auto Align Clips
DaVinci Resolve now includes more advanced syncing features that are accessible directly from
the Timeline. Auto Align Clips slides one or more selected clips to align with the timecode or
audio waveforms of another clip that has matching timecode or audio. This function works for
video clips, which can be aligned using timecode, and for audio clips which can be aligned
using either timecode or waveform matching. Waveform matching can also be used if you’re
working with audio/video clips.
You can only select one clip per video or audio track to align, and they all will align to whichever
clip is on the lowest-numbered video or audio track. Clips selected that have no overlapping
timecode or audio waveform will not be moved and left in their original position on the Timeline.
For example, clip A on track V1 overlaps with clip B on track V2, but not with clip C on track V3,
or clip D on track V4. Selecting all clips and using Auto Align Edits will slide clip B to align with
clip A, but clips C and D won’t be moved because they don’t overlap with clip A.
Chapter – 5 Media and Edit Page Improvements 72

The original Timeline with Clip A (blue) and Clip B (orange) that
have some overlapping audio but are out of sync
The same Timeline after the Auto Align command; Clip B (orange) has been slipped to sync via audio
waveform with Clip A (blue). Clips C (tan) and D (green) were also selected, but because they had no
overlapping timecode or audio, they remained in place.
In another example, clip A on track V1 overlaps with clips B, C, and D on tracks V2, V3, and V4
respectively. Selecting all clips and using Auto Align Edits will slide clips B, C, and D to be
aligned with clip A.
The original Timeline with Clip A (blue), and Clip B (orange), C (tan)
and D (green) all have overlapping audio, but are out of sync.
The same timeline after the Auto Align command. All clips are now in sync
and the audio waveforms now all match. All the other clips moved to Clip A’s
(blue) position because it was the lowest clip on the Timeline.
Chapter – 5 Media and Edit Page Improvements 73

To use Auto Align clips:
1 Arrange the clips you want to align with one another on the Timeline so that there’s one
clip per track. All clips will sync to the clip on the lowest track number. All clips must
have overlapping timecode or audio waveforms.
2 Select every clip that you want to align (only one per track).
3 Right-click one of the selected clips, and choose an option from the Auto Align Clips
submenu, either “Based on Timecode,” or “Based on Waveform.”
If Timecode is selected, the operation will be instant. If Waveform is used, a progress bar will
appear showing you how long it will take DaVinci Resolve to analyze the selected audio
waveforms before your clips are aligned. If you’ve selected clips that can’t be aligned, a warning
box will appear and tell you which clips had errors.
For video, this can be useful for multi-camera editing situations where you want to align an
insert with the action of an alternate angle. For audio, this is useful for situations where you
have multiple recordings of the same audio that you want to align for further editing.
NOTE: Waveform matching won’t work for re-recorded audio, such as dialog that’s
been re-recorded using the ADR tools of the Fairlight page, as the correspondence
between two waveforms must be precise for a match to be found
Delete Gaps Within a Specified Range
The process of deleting gaps in your timeline can now be more targeted. The Edit > Delete
Gaps command now respects both In/Out ranges and clip selections on the Timeline.
Chapter – 5 Media and Edit Page Improvements 74

Chapter 6
Cut and Edit Page
Eects
DaVinci Resolve 17 brings several enhancements to working with effects
in the Cut and Edit pages. A new Burn Away transition, Edit Timeline
compositing tools, and many usability improvements are available in
this release.
Chapter – 6 Cut and Edit Page Effects 75

Contents
Render in Place 77
Smart Reframe (Studio Only) 78
Edit Page Keying and Compositing Tools 79
Resolve FX Keying in the Timeline 79
Support for Resolve FX and Open FX Alpha for Track Compositing 80
Compositing Alpha Channels on the Timeline 81
Improved Track Compositing Behavior for Dierently Sized Clips 81
Burn Away Transition 81
Progression 82
Adjust Timing 82
Edge 82
Appearance 83
Updated Motion-Blurred Transitions 83
ITU-R BT.2111-1 Color Bar Generators 83
Data Burn-In Enhancements 85
Support for Text Opacity in Data Burn-In 85
Support for Source Frame Number in Data Burn-In 85
Chapter – 6 Cut and Edit Page Effects 76
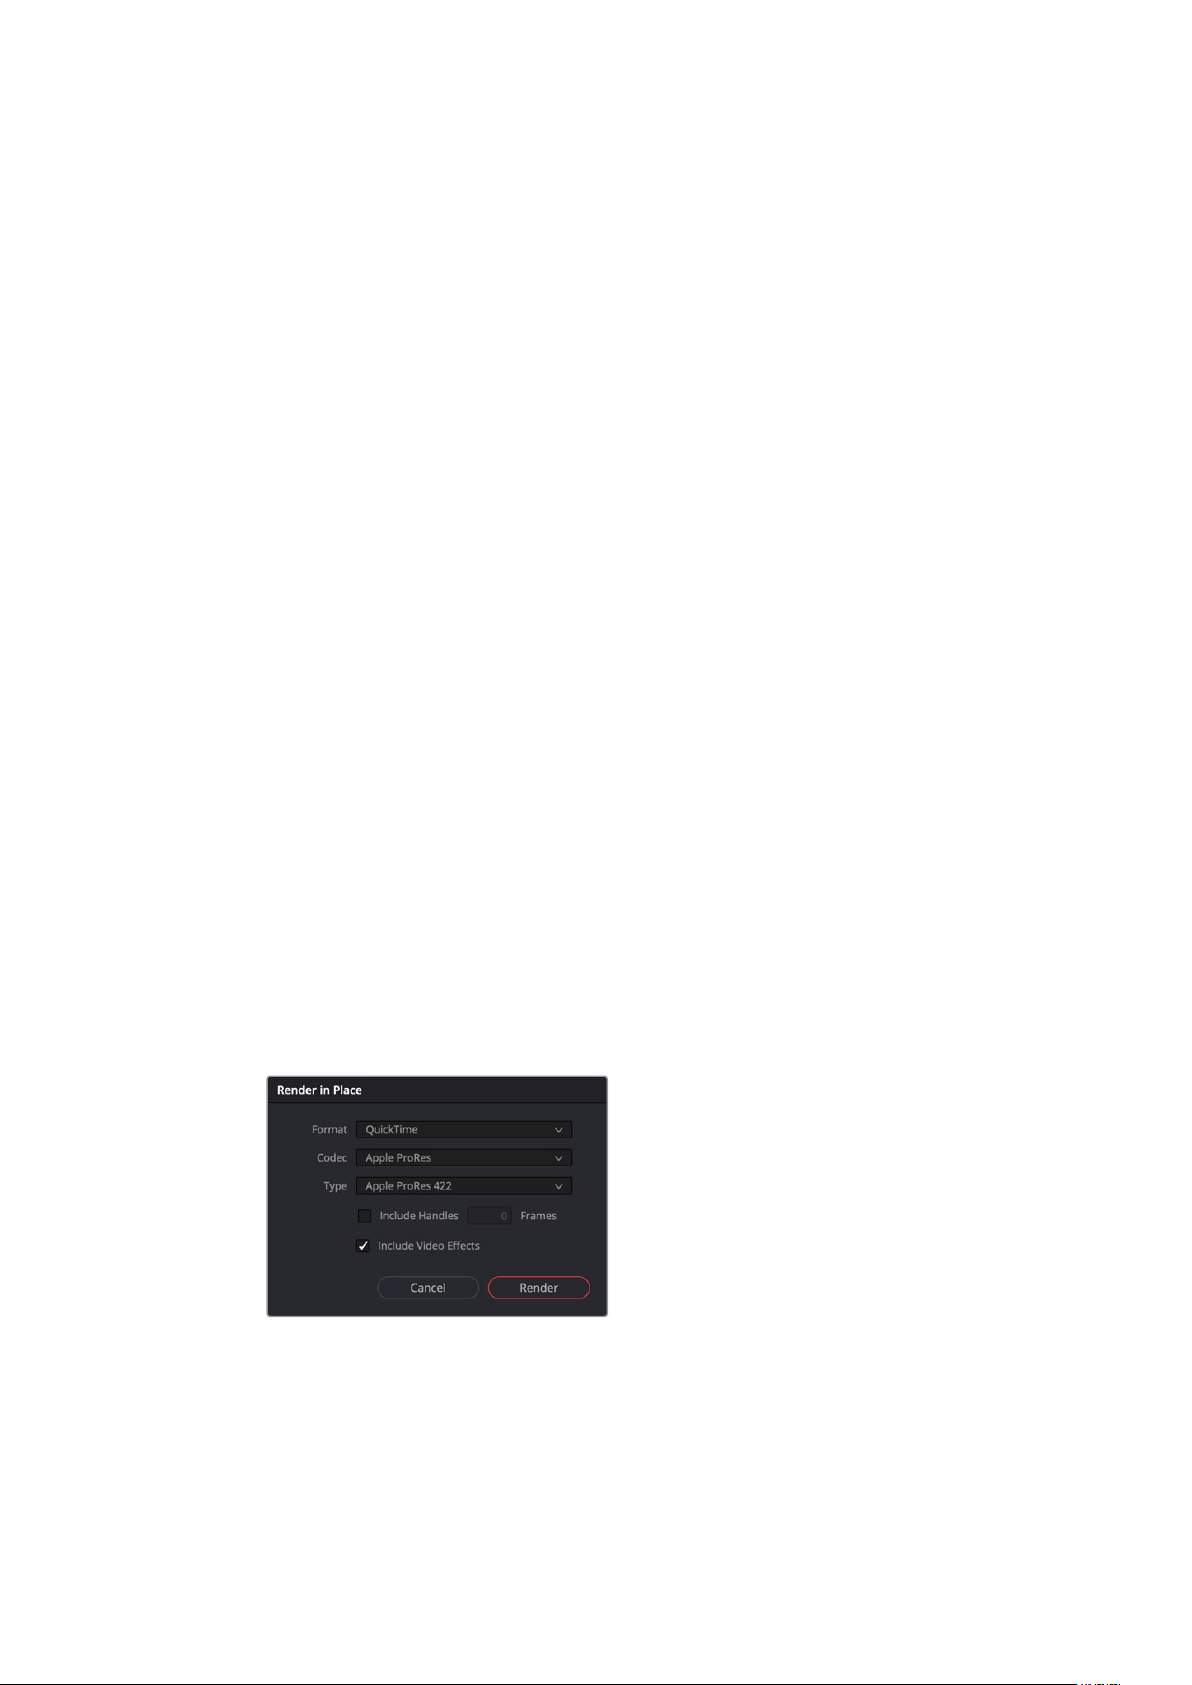
Render in Place
Render in Place allows you to render and bake in all effects that are applied to a single clip on
the Edit page Timeline. This command, which only works in the Edit page, creates an entirely
new media file that replaces the original clip on the Timeline. This new file is created in the
same directory as the original source file and is added to the Media Pool automatically.
You can use Render in Place to improve the playback performance of a computationally
intensive clip, or use it to create a new high-quality master media with effects that have been
finalized baked in. For example, perhaps you have created a clip with a complicated speed
ramp, and you want to pass it to another editor or vfx artist in a round-trip rendering scenario,
but you are worried about how other programs may interpret the speed effects. In this scenario
you could render the clip in place at master quality, and then render and deliver the program.
Render in Place is not a one way operation. Afterwards, you have the option to “Decompose to
Original” to bring back the original clip with the original effects, if you need to make a change
because the clip was not really as finalized as you were hoping.
To Render in Place:
1 Select one or more clips on the Edit Page timeline. Selecting multiple clips results in
each clip being individually rendered in place, but as a batch operation.
2 Right-click the selection, and choose “Render in Place” from the contextual menu.
3 Choose the appropriate Render Clip Options, and then click the “Render” button.
–
Start Timecode: Sets the starting timecode value for the clip.
–
Format: Selects the media file format.
–
Codec: Selects the video codec.
–
Type: Specifies the compression parameters of the selected codec.
–
Include Handles: Gives you the option to specify the number of frames before and
after the clip In/Out points to be rendered.
–
Include Video Effects: Turn on this checkbox to bake in all effects that have been
applied to the clip, including Fusion compositing, sizing, Open FX or Resolve FX,
speed effects, and grading. Turning this checkbox off renders the clip with speed
effects baked in, but no other effects applied.
The Render in Place options
4 Use the File dialog that appears to choose where you want to save the resulting media.
Choose a location and click Open.
A progress bar appears to show you how long this will take. When finished, your new
media is saved in the designated location, added to the Media Pool, and will replace
each corresponding source clip on the Timeline.
Chapter – 6 Cut and Edit Page Effects 77

If you’ve used Render in Place and end up having buyer’s remorse, or a late-breaking change
comes back to you later, you can easily decompose to the original clip with its editable effects
to make the change.
To Decompose to Original:
1 Select one or more clips that have already been Rendered in Place, on the
Edit Page timeline.
2 Right-click the selection, and choose “Decompose to Original” from the
contextual menu.
The original clip, along with all of its editable effects, will be returned to the Timeline.
The new media created in the Render in Place process will not be deleted from the
source folder, nor will it be removed from the Media Pool. It is effectively a new clip.
Smart Reframe (Studio Only)
The new Smart Reframe feature in DaVinci Resolve 17 makes it easier to quickly reframe
material across extreme aspect ratio changes. It’s useful for situations where you’ve shot a 16:9
horizontal video and find yourself needing to create a vertically-oriented 9:16 version for mobile
phones and social media deliverables, or using 4:3 archival footage in a 2.39:1 widescreen
movie. Smart Reframe can be used manually, or automatically executed using the
DaVinci Resolve Neural Engine.
Smart Reframe in action, with the Reference Point bounding box active (right)
The Smart Reframe tool is found in the Sizing tab of the Inspector and is available in both the
Cut and Edit pages.
To use the Smart Reframe tool:
1 Duplicate your timeline, right-click the Timeline and choose Timelines > Timeline
Settings, and click Use Custom Settings to change the Timeline Resolution to the
aspect ratio needed for delivery. Make sure that “Mismatched resolution files” is set to
“Scale full frame with crop,” and click OK.
2 Select one or more clips you want to reframe, and open the Inspector to the Sizing tab.
3 Open the Smart Reframe controls, leave the Object of Interest drop-down menu set to
Auto (if you’ve selected more than one clip, Auto is the only setting available), and click
“Reframe.” DaVinci Resolve will analyze your footage and should automatically adjust
each individual clip’s position to a more aesthetically pleasing framing.
Chapter – 6 Cut and Edit Page Effects 78

4 (Optional) If the “Auto” setting does not give you desirable results for a particular clip,
you can manually select the main subject using the following steps.
a. To manually select the subject area, choose “Reference Point” from the Object of
Interest drop-down menu, and click the target icon just to the right of the menu. This
automatically sets the Viewer mode to Smart Reframe, exposing the onscreen
controls for choosing a reference.
b. Drag the Reference Point bounding box around the main subject of interest in the
frame. You may use the Transform controls directly above in the Inspector to move
the source clip around if your subject is outside the current framing.
c. Click “Reframe.”
The Inspector’s Smart Reframe controls
showing the manual reference point selected
DaVinci Resolve locks onto and, if necessary, tracks your subject using the reference
you’ve selected, automatically panning and scanning the original clip as needed to
keep the reference within the new aspect ratio. While involving a bit of manual
adjustment, this function still dramatically reduces the time involved in pan and
scanning footage by manually adjusting and keyframing the sizing controls.
Edit Page Keying and Compositing Tools
The Edit page received a significant overhaul of its Compositing tools in this release. There
have been many usability improvements and refinements to its compositing features. For more
intricate and fine control, you may still want to look to the Fusion page, but simple compositing
jobs can be now be done right in the Timeline.
Resolve FX Keying in the Timeline
You can now pull keys directly in the Timeline using the Resolve FX Key filters. These are found
in the Resolve FX section of the Open FX category, of the Effects Library. The filter options are
3D Keyer, HSL Keyer, and Luma Keyer, and they are described in detail in the Resolve FX
chapter of this guide.
To set up a green screen composite, place your background video on a track underneath your
foreground video, and drag the 3D Keyer or HSL Keyer onto the foreground clip.
To adjust the key’s parameters, click on the Effects icon in the Inspector to reveal the Keyer’s
controls, and Select “Open FX Overlay” from the Transform Mode drop-down in the lower-left
of the Timeline Viewer, to allow the effect qualifiers to work on the Timeline Viewer.
To pull a Chroma Key in the Timeline using the 3D Keyer.
1 Superimpose your green screened foreground video on a track on top of your
background video.
2 Put the Timeline Viewer in Open FX Overlay mode, using the drop-down menu at the
lower left of the Viewer. This option allows you to use the effect GUI controls directly on
the Viewer.
Chapter – 6 Cut and Edit Page Effects 79

3 Drag the 3D Keyer from the Effects Library onto the foreground video. The 3D Keyer
is a fast and high-quality keyer that’s easy to use, drawing strokes to identify the
background and foreground of the image you’re trying to key.
4 Select the foreground video clip, and open the 3D Keyer from the Effects tab in the
Inspector.
5 Click the Pick eye dropper icon in the Controls section, and click and drag across the
green screen in the Timeline Viewer. A blue line will show you where you’ve selected,
and the green screen should mostly become transparent.
6 (Optional) Use the Add eye dropper (drawing blue lines), to click and drag over
any parts of the green screen that are still not transparent. Use the Subtract eye
dropper (drawing red lines) to add back any foreground elements that may have gone
transparent by mistake.
7 Turn on the Despill checkbox in the 3D Keyer to remove any green light (spill) that may
have reflected onto your foreground subject from the green screen.
Applying the 3D Keyer to the News Anchor clip on the V2 Timeline; note that the “Open
FXOverlay” mode on the Viewer is selected (circled), allowing you to use the Inspector
Effect Controls in the Viewer
Support for Resolve FX and Open FX Alpha for Track Compositing
DaVinci Resolve 17 now allows the direct use of the Alpha Channel from Resolve FX and Open
FX plug-ins for compositing on the Timeline. If an effect creates transparency in the image, a
“Use alpha” checkbox appears at the bottom of the effects parameters in the Effects tab of the
Inspector. Checking this box immediately applies the alpha channel to the selected clip,
compositing it over any background elements that appear in lower tracks. If more than one
alpha-modifying effect is applied to a single clip, the alpha channels are mixed together.
Chapter – 6 Cut and Edit Page Effects 80

The Use Alpha checkbox at the bottom of
the Effects tab in the Inspector
Compositing Alpha Channels on the Timeline
You can now composite tracks directly in the Timeline with clips containing embedded alpha
channels. Clips that contain an embedded alpha channel (and whose Alpha mode is turned on
in Clip Attributes) will show the proper transparency properties when placed in the Timeline.
Improved Track Compositing Behavior for Differently Sized Clips
Previous versions of DaVinci Resolve had an idiosyncrasy when compositing clips of different
sizes. When superimposing a clip that’s smaller than the Timeline resolution on top of a larger
clip in the Timeline, the rest of the larger clip underneath would not show through unless you
cropped or resized the smaller clip on top. In DaVinci Resolve 17, the expected transparency
around the edges of the smaller clip now happens automatically.
Burn Away Transition
DaVinci Resolve 17 adds a new Burn Away transition. This transition replicates the visual of a
film print burning up in the projector. Use this transition to achieve a classically retro effect, or to
strike terror into the hearts of projectionists everywhere. This transition can be found in the
Resolve FX Stylize category of the Transitions section of the Open FX category in the
Effects Library.
Burn Away transition showing two pirates concerned about the state of their release print
The Burn Away effect has the following parameters:
Chapter – 6 Cut and Edit Page Effects 81

Progression
This set of controls affects the type of movement the burn takes as it passes through the frame.
Motion: Allows you to pick a type of burning effect. Each option reveals different
parameters.
–
Directional: The burn moves linearly from one edge of the frame to another. This
setting replicates the film being torn away by the take-up reel as it burns. In this
mode, the OFX overlay in the Viewer lets you choose the direction.
–
Hotspots: The burn erupts from one or more central points. This setting replicates
the film jamming in front of a projector bulb and melting away. In this mode, the OFX
overlay in the Viewer lets you move the burn points directly in the Viewer.
–
Path: Creates a curved path that the burn follows. This setting allows you to specify
the burn direction precisely, to account for elements in the frame that you want to
burn first. In this mode, the OFX overlay in the Viewer lets you add points to a spline
with which to create any curved motion path you want the effect to use.
Angle: (Directional Only) The angle that the burn moves along. You can also change
this in the Viewer directly in Open FX Overlay mode.
Number of Hotspots: (Hotspots Only) The number of points that the burn erupts from.
The possible values are from 1 to 8.
Randomize Hotspots: (Hotspots Only) Will pick a random distribution of the hotspots in
the frame.
Number of Points: (Path Only) The number of points on the onscreen curve control.
The range is from 2 to 5. These points can be manipulated directly in the Viewer in
Open FX Overlay mode.
Adjust Timing
This set of parameters allows you to control the start and end progression of the burn.
Adjust Start: Adjusts how far along in the transition the effect starts. Values are from
-1.000 to 1.000.
Adjust End: Adjusts how far along in the transition the effect ends. Values are from
0.000 to 2.000.
Edge
These controls let you adjust the qualities of the edge of the film as it burns.
Raggedness: How rough the edge of the burn is. Values are from 0.000 (perfectly flat)
to 1.000 (extremely rough).
Scale: The scale of the raggedness. Values are from 1.00 to 10.00.
Chapter – 6 Cut and Edit Page Effects 82

Appearance
These controls adjust the look and color of the burn as it moves through the transition.
Melt: Controls the amount of distortion in the image as it burns away. Values are from
0.000 to 1.000.
Char: Controls the amount of darkened charring along the edge. Values are from
0.000 to 1.000.
Char Color: Lets you select the color of the Char effect.
Burn: Lets you set the thickness of the burn effect. Values are from 0.000 (no burn)
to 1.000 (maximum thickness).
Burn Hue: Lets you select the hue of the Burn effect.
Burn Sat: Lets you select the intensity of the color of the Burn effect.
Burn Brightness: Lets you set the brightness of the Burn effect. At lower values, the
burning edge assumes a motley, irregular effect. Values are from 0.000 to 1.000.
Glow Brightness: Lets you control the intensity of a glow effect emanating from the
Burn effect. Values are from 0.000 to 2.000.
Glow Spread: Lets you control the width of the glow effect. Values are from
0.000 to 2.000.
Ash: Controls how much ash trails behind the burn as it moves through the frame.
Values are from 0.000 to 1.000.
Ash Color: The color of the Ash parameter.
Updated Motion-Blurred Transitions
The Barn Door, Push, Slide, and Split transitions have a new Motion Blur parameter to create
more organic looking transitions, as if the moving video frames were actually shot using a
camera with a shutter. To access this parameter, double click the transition in the Timeline to
open the Inspector. The “Motion Blur” slider has values between 0.000 (No Motion Blur) and
1.000 (Maximum Motion Blur).
ITU-R BT.2111-1 Color Bar Generators
DaVinci Resolve now includes a ITU-R BT.2111-1 specification Color Bar Generator for HDR
video. These are the color bars to use when calibrating, analyzing, or mastering a Rec.2100
(BT.2100) HDR signal.
These new color bars have saturation levels set at 100% at the top, and 75% in the middle
section. They also contain Rec.709 (BT.709) color bars in the lower corners for compatibility with
HD SDR signals. Commonly referenced levels are indicated on the image below. The full color
bar specification can be found on the ITU’s web site: https://www.itu.int/rec/R-REC-BT.2111/en.
Chapter – 6 Cut and Edit Page Effects 83

The BT.2111-1 color bars and some of the more commonly used levels
The BT.2111-1 color bars on the Vectorscope, hitting their targets at 100% levels on the outside,
75% levels in the middle, and with the Rec.709 bars represented in the interior
DaVinci Resolve has three different versions of BT.2111-1 color bars, depending on the
HDR video EOTF you need.
BT.2111 Color Bar HLG Narrow: Use these bars if your HDR timeline is using a
Hybrid Log Gamma curve (HLG). This is most commonly used in broadcast for its simple
backward compatibility with SDR televisions.
BT.2111 Color Bar PQ Narrow: Use these bars if your HDR timeline is using a format
with a PQ gamma curve (i.e., DolbyVision or HDR10). This is most commonly used for
video streaming services and Blu-ray discs..
BT.2111 Color Bar PQ Full: While PQ Full is a part of the Rec.2100 (BT.2100)
specification, it is not commonly in use at this time. Use this setting only if you
know you need it.
Chapter – 6 Cut and Edit Page Effects 84

Data Burn-In Enhancements
Data Burn-In has the following enhancements.
Support for Text Opacity in Data Burn-In
As of DaVinci Resolve 17, the actual text of a Data Burn-In can now have variable transparency.
Using the Text Opacity slider in the Data Burn-In window you can control the degree of the
text’s opacity. 0.00 is fully transparent, and 1.00 is fully opaque.
Support for Source Frame Number in Data Burn-In
A new Source Frame Number metadata Burn-In option is now available. If “Source Frame
Number” is checked in the Data Burn-In window, the resulting text will display the frame count
of the source clip (starting from frame 0), preceded by the “SRC Fm:” prefix render text. For
example, SRC Fm: 110.
The new Source Frame Number burn-in, with fully transparent tex t
Chapter – 6 Cut and Edit Page Effects 85

Chapter 7
Fusion Improvements
Considerable attention has been given to improving the integration of the
Fusion page with the rest of DaVinci Resolve. This includes audio
playback, shared markers, and the addition of more GPU-accelerated
Resolve FX in the Fusion page. The Fusion page and Fusion Studio gain
improvements to the User Interface including a customizable toolbar,
Node Editor bookmarks, and new vertical Node Editor layouts.
Chapter – 7 Fusion Improvements 86

Contents
General Improvements 88
Audio Playback and Waveform Display in the Fusion Page 88
Audio Playback and Waveform Display in Fusion Studio 90
Shared Markers 91
New Fusion Page Resolve FX 92
Fusion Eect Templates 96
Animation Curves Modifier 97
Shape Nodes 100
Advanced Optical Flow Processing 101
Convert Standard Transitions into Fusion Cross Dissolves 102
Improvements to the Interface 102
Node View Bookmarks 102
Customizable Toolbar 104
Vertical Node Editor Layouts 105
Onscreen Controls for Fusion Templates on the Edit Page 105
Improvements to Text and Font Size Management 105
Automatic Fusion Comp Creation in DaVinci Resolve 106
Fusion Studio Floating Frame 106
Chapter – 7 Fusion Improvements 87

General Improvements
The Fusion page in DaVinci Resolve 17 continues to be improved with even tighter integration
to the Edit and Cut pages.
Audio Playback and Waveform Display in the Fusion Page
Playing a composition in DaVinci Resolve’s Fusion page will play the audio from the Edit or
Cut page Timeline. You can choose to hear the sound from all the Timeline audio tracks or the
MediaIn node. The audio waveforms are displayed in the Keyframes Editor to assist in the timing
of your animations.
Audio with Single-Clip Comps
When you bring a single clip into the Fusion page, playing the Comp will play the audio tracks
that are enabled in the Timeline. If the Mute button is enabled on any Timeline tracks, audio
from those tracks will not be heard in Fusion.
While compositing in the Fusion page, you can use the speaker icon in the toolbar to
mute the audio if you don’t need to hear it. The Inspector for the MediaIn node contains a new
Audio Tab, where you can choose to solo the audio from the clip or hear all the audio tracks in
the Timeline.
The Audio tab in the MediaIn node is used
to select the track for playback, slip the
audio timing, and reset the audio cache.
If the audio is out of sync when playing back in Fusion, the Audio tab’s Sound Offset wheel
allows you to slip the audio in subframe frame increments. The slipped audio is only modified in
the Fusion page. All other pages retain the original audio placement.
Audio with Media Pool Clips
Audio from a clip brought in through the Media Pool is muted by default. Hearing the audio from
a Media Pool clip is a two step process.
To hear audio from a clip brought in through the Media Pool, do the following:
1 Select the clip in the Node Editor.
2 In the Inspector, click the Audio tab and select the clip name from the Audio Track
drop-down menu.
If more than one Media In node exists in the comp, the audio last selected in the
Inspector is heard. You can use the Speaker icon in the toolbar to switch between the
MediaIn node audio files.
3 Right-click the speaker icon in the toolbar, then choose the MediaIn for the clip you
want to hear.
Chapter – 7 Fusion Improvements 88

NOTE: Audio tracks from the Timeline are not heard when using a Fusion Composition
effect from the Edit or Cut page.
Purging the Audio Cache
The audio and its settings are cached for faster performance. If you change which audio tracks
you want to play back in Fusion, or you use the Sound Offset wheel to slip the audio tracks, you
need to purge the audio cache. Also, if you return to the Edit, Cut, or Fairlight page and modify
the audio levels, you need to purge the audio cache.
To purge the audio cache after any change to the audio playback:
–
Click the Purge Audio Cache button in the Inspector.
The audio will be updated when you next playback the composition.
Using Audio Waveforms
You can display each MediaIn node’s audio waveform in the Keyframes Editor and use it as a
guide as you add and move keyframes.
Waveforms are displayed in the Keyframes Editor for all MediaIn nodes.
To display the audio waveform in the Keyframes Editor:
1 Open the Keyframes Editor.
2 Click the disclosure arrow next to the MediaIn node to view the
audio waveform for that clip.
To change the size of an audio waveform display:
1 Open the Keyframes Editor.
2 In the Keyframes Editor, select the audio track of the waveform you want to modify.
3 Right-click over the audio waveform and choose
Line Size > Minimum/Small/Medium/Large/Huge.
TIP: Right-clicking over a track in the Keyframes Editor and choosing All Line Size >
Minimum/Small/Medium/Large/Huge changes all the tracks and audio waveforms in
the Keyframes Editor.
Chapter – 7 Fusion Improvements 89

Audio Playback and Waveform Display in Fusion Studio
The audio functionality is included in Fusion Studio for scratch track (aligning effects to audio
and clip timing) purposes. Final renders should almost always be performed without audio.
Audio can be heard if it is brought in through a Loader node.
To hear the audio from a specific Loader node:
–
Right-click over the speaker icon and choose the file name that contains the audio
you want to hear.
Audio Toolbar button
The Audio button in the toolbar is a toggle that can be used to enable or mute audio play back
associated with the clip. Additionally, right clicking this button displays a contextual menu that
can be used to select a WAV file, which can be played along with the composition, and to
assign an offset to the audio playback.
Using Audio WAV Files
You can also load audio-only files into Fusion Studio. Currently Fusion supports playback of
WAV audio files. The entire WAV file is loaded into RAM in order to quickly display the waveform
in the Keyframe Editor. That being the case, it is best to use the shortest possible audio file you
need for the Comp, so as not to use up more memory than necessary.
TIP: AIFF files can be loaded on macOS.
You can either load the audio file independent of any nodes, or load an audio file into the Saver
node. The benefit of using a Saver node to load the audio is that you can view the audio
waveforms in the Keyframes Editor.
To load a WAV audio file, do the following:
1 Right-click over the speaker icon and select Choose from the contextual menu.
2 In the file browser window, select the audio WAV file track to be used.
To load a WAV audio file using a Saver node, do the following:
1 Add a Saver node to the Node Editor.
2 In the Inspector, click the Audio tab and click the Browse button.
3 In the file browser window, select the audio WAV file track to be used.
To view the Audio Waveform in Fusion Studio, do the following:
1 Open the Keyframes Editor.
2 Expand the Saver track to view the audio waveform.
When you want to find the precise location of an audio beat, transient, or cue, you can
slowly drag over the audio waveform to hear the audio.
To change the size of an audio waveform display:
1 Open the Keyframes Editor.
2 Right-click over the audio waveform and choose Line Size > Minimum/Small/Medium/
Large/Huge.
Chapter – 7 Fusion Improvements 90

TIP: Right-clicking a track in the Keyframes Editor and choosing
All Line Size > Minimum/Small/Medium/Large/Huge changes all the tracks
and audio waveforms in the Keyframes Editor.
Sound Oset
If the audio is out of sync when playing back in Fusion, the Saver’s Audio tab includes a Sound
Offset wheel to slip the audio in subframe frame increments.
Shared Markers
In previous releases, Fusion’s guides and the Edit/Cut page markers were two different
functions performing the same fundamental service. In DaVinci Resolve version 17, guides and
markers have been merged.
Markers added to a clip or to the Time Ruler in the Edit page Timeline are displayed in Fusion’s
Keyframes Editor. Timeline Ruler markers are also displayed in the Spline Editor. Marker names,
notes, colors, and durations are also displayed in Fusion.
NOTE: Marker annotations made in the Edit page Timeline Viewer are not
displayed In the Fusion page Viewers.
Markers added to the Time Ruler are editable in Fusion, and the changes appear back in the
other DaVinci Resolve pages. Time Ruler markers can be added, moved, deleted, renamed, and
given descriptive notes from within Fusion’s Keyframes or Spline Editor.
You can open the Marker List to display and modify the Timeline Ruler markers in the Comp.
The Marker List is used to view all markers and hide them from
displaying in the Spline or Keyframes Editor.
To open the Marker List and see all time ruler markers:
1 Right-click over the Keyframes or Spline Editor’s Time Ruler.
2 Choose Show Marker List from the contextual menu, or activate the Keyframes or
Spline Editor and press Shift-G
For more information about using Fusion Markers, see Chapter 60, “Animating in Fusion’s
Keyframes Editor” in the DaVinci Resolve manual and Chapter 9 in the Fusion manual.
Chapter – 7 Fusion Improvements 91

NOTE: Markers attached to clips in the Edit page Timeline are visible on MediaIn nodes
in Fusion’s Keyframes Editor but not editable. They are not visible in the Spline Editor.
New Fusion Page Resolve FX
DaVinci Resolve 17 adds 27 new GPU accelerated Resolve FX to the Fusion page, including the
Color page’s Noise Reduction and Sharpening tools. The Resolve FX appear in the Open FX
category in the Effects Library and can be added to a custom toolbar. These effects work just
like other Open FX plug-ins. For more information on each effect’s controls, see Part 11,
“Resolve FX” in the DaVinci Resolve manual.
Resolve FX Blur
Lens Blur: (Studio Only) Simulates a high-quality optical lens blurring. It offers several
technical and creative adjustments over the native Fusion Defocus node.
Resolve FX Color
Contrast Pop: (Studio Only) Applies a sharp high-contrast look, or soft low-contrast
look to a selected tonal range.
DCTL: (Studio Only) DCTL files are GPU native, color transformation scripts. Anyone
with the mathematical know-how can make and install a DCTL. For more information
about DCTLs, see Chapter 174 “Creating DCTL LUTs” in the DaVinci Resolve manual.
Dehaze: (Studio Only) Used to reduce the visible effects of smog, airlight, and haze in
an image.
False Color: (Studio Only) Generates user selectable color overlays which can
be used to replicate the look of Camera HUDs, thermal/Infrared cameras, and
posterization effects.
Flicker Addition: Adds rapidly animated exposure changes to make the image
appear to flicker.
Resolve FX Key
Alpha Matte Shrink and Grow: Shrinks and grows the edges of an alpha matte,
similar to Fusion’s Erode Dilate node.
Resolve FX Light
Aperture Diffraction: (Studio Only) Models the starburst effect usually seen when
shooting bright lights with small apertures. Similar to the Highlight node in Fusion, but
with much more control.
Lens Reflections: (Studio Only) Simulates intense highlights reflecting off the various
optical elements within a lens to create flaring and scattering effects.
Resolve FX Refine
Beauty: (Studio Only) Allows you to selectively smooth detail that falls above a
particular threshold, while preserving detail falling below a specific threshold.
Resolve FX Revival
Automatic Dirt Removal: (Studio Only) Uses optical flow to target and repair unwanted
artifacts lasting one or two frames, like bits of dust, dirt, and hair.
Chapter – 7 Fusion Improvements 92

Chromatic Aberration Removal: (Studio Only) Lets you manually correct color fringing,
typically found in high contrast areas.
Dead Pixel Fixer: Repairs dead camera sensor pixels. Now includes new patch shapes,
fill methods, and output modes.
Deflicker: (Studio Only) Removes a wide variety of flickering artifacts, including those
caused by variable exposure in timelapse clips, fluorescent lighting, and archival film
sources.
Noise Reduction: (Studio Only) Provides temporal and spatial noise reduction,
previously only available in the Color page.
Patch Replacer: (Studio Only) Offers a quick alternative to the Paint tool when cloning
over an unwanted feature in an image.
Resolve FX Sharpen
Sharpen: (Studio Only) Sharpens an image with an enormous amount of control,
by applying different amounts of sharpening to the fine, medium, and large structures
of the image.
Sharpen Edges: (Studio Only) A variation of the Sharpen filter that’s streamlined to limit
sharpening to the selected edge details of an image.
Soften Sharpen: (Studio Only) A variation of the Sharpen filter that’s streamlined to
smooth some details and add sharpness to other details based on small, medium, and
large structure sizes.
Resolve FX Stylize
Burn Away: A Transition effect that takes two inputs. The transition simulates the
background image burning away to reveal the foreground clip.
Pencil Sketch: (Studio Only) A highly customizable effect used for making an image
look like it was hand-drawn.
Stylize: (Studio Only) Applies one of a variety of painterly styles to an image.
Tilt-Shift Blur: (Studio Only) This effect simulates the depth-of-field of a Tilt-Shift lens.
An adjustable Z-depth map is used to generate the progressive blur that’s applied.
Resolve FX Temporal
Motion Trails: (Studio Only) Like Fusion’s Frame Average node, the Motion Trails effect
is used to create a ghost-like trail when applied to moving images.
Smear: (Studio Only) Blends frames to create artistic motion blur.
Resolve FX Texture
Analog Damage: (Studio Only) This effect simulates different kinds of television signal
degradation resulting from analog transmission and recording.
Detail Recovery: (Studio Only) This effect takes two inputs, typically of the same image.
It uses a relief filter applied to one image to add detail back into the other.
Film Grain: (Studio Only) This effect applies a procedurally generated layer of “film
grain” over the image. Unlike Fusion’s native node, the Resolve FX Film Grain includes
presets based on film formats and speed.
Tex ture Pop: (Studio Only) Texture pop is a frequency-based sharpening/softening
effect that divides the image into tonal regions. You can determine how different details
are softened or sharpened and then configure how much each tonal region is affected.
Chapter – 7 Fusion Improvements 93

Resolve FX Transform
Transform: Almost identical to the native Fusion Transform, however it does
include unique interactive on-screen control modes for corner pinning and
perspective distortions. The Resolve FX Transform does not concatenate with native
Fusion transforms.
Video Collage: Designed to create “video wall” and different split-screen effects,
where each MediaIn node appears within a “tile” that can be styled in different ways.
Although this node is covered in detail in the Resolve FX section of this document,
Fusion-specific setup instructions are covered below.
There are two ways to set up the Video collage node, which are chosen using the
Workflow drop-down menu.
–
Create Background Workflow mode: This is perhaps the simplest way to create
a split-screen using this effect. This mode creates a frame with masks built into it.
These masks can be used to divide a single image or reveal multiple layers of video.
A single image is divided using the masks created from the Video Collage node.
The Video Collage node is added to the foreground input on the Merge node. The clips
is used as a “background” frame in the collage. The clip that fills the mask holes
connects to the Merge node’s background input.
The mask is filled using the background image to the Merge node.
Chapter – 7 Fusion Improvements 94

A Transform node must be added to each MediaIn node that you want to use to fill the
mask holes. The Transform node is used to scale and position each MediaIn correctly
within the mask holes. In the example above, the Video Collage effect is applied to the
foreground MediaIn 2. The MediaIn 1 node uses a transform node for resizing and
connects to the background input.
IMPORTANT: When using Create Background mode, set the Merge node to
Subtractive using the Inspector’s Subtractive/Additive control.
–
Create Tile Workflow mode: This mode needs a bit more setup, as it requires you
to apply the Video Collage node to each MediaIn that you want to use as a tile in
the collage. However, it gives you more options, automatically transforming each
MediaIn in your string of Merge nodes to fit a layout you design.
Using Tile mode, multiple MediaIn nodes are assigned to a layout of your own design.
The best way to work in Create Tile mode is to connect all the clips you want to be
involved in the collage, with a series of Merge nodes, but this time if there’s a clip you
want to use as the background, it should be the initial background input to the first
Merge. Then, apply the Video Collage node to each MediaIn node connected to the
foreground inputs of the remaining Merge nodes. These are the MediaIn nodes that will
fill the tiles of the collage. On each Video Collage node, choose Create Tile from the
Workflow drop-down menu. The MediaIn nodes will fit inside the first rounded tile of
the default layout of four tiles.
Ultimately, you’ll need to choose which clip goes inside each tile; that’s what will create
the arrangement. Before you do that, however, you can customize the layout, if desired.
Each Mediain node is assigned to a tile using the Video Collage node.
Chapter – 7 Fusion Improvements 95

NOTE: Node Instances cannot be used with the Video Collage node.
You can preview the entire layout by enabling the Preview Layout checkbox in the
Inspector. This draws a preview of how all the tiles will be placed. Using this preview
and the Layout controls below, you can make whatever changes you want to set things
up before copying this plug-in to all the other clips in the tree.
When you decide on a layout, you can make tile specific adjustments by clicking the
Tile button and using the Tile controls below.
The Active Tile menu is used to determine which tile you further customize using the
Inspector’s tile-based controls. You should also note the Active Tile drop-down menu
becomes important later on when you apply this effect to multiple MediaIn nodes.
Finally, copy the Video Collage to each MediaIn node and for each copy, select a
different tile number from the Active Tile menu. Each MediaIn will be positioned and
scaled to fit a different tile location.
More information regarding the animation and other controls in the Video Collage node can be
found in the Resolve FX section of this document.
Resolve FX Warp
Lens Distort: (Studio Only) A more straightforward Lens Distort filter than the native
Fusion Lens Distort node. It adds the ability to distort the image based on RGB
channels.
Warper: (Studio Only) The Warper is a free-form image warper that uses points, rather
than a mesh or splines, to push and stretch features in an image as if they were on a
sheet of rubber.
Fusion Effect Templates
The integration of Fusion into DaVinci Resolve has enabled the creation of Fusion Titles,
Transitions, and Generators for use in the Edit page. In DaVinci Resolve v17, you can now create
Fusion Effect templates as well. Like other Fusion templates, you can create Effects on the
Fusion page or within Fusion Studio, save the effects as Macros, and then apply them to clips in
the Edit page. Fusion Effect templates are essentially Comps created in Fusion that create just
about any type of effect on an image (e.g., a rippling water effect, green screen keyer, or a retro
3D video cube). After saving the Macro, you can apply the effect onto any clip in the Edit
page Timeline.
Creating a Fusion Eect Template
You start building a Fusion Effect template by bringing a clip from the Edit page Timeline into
Fusion. This clip is only used for creating the template and will not be saved with the effect.
Once inside Fusion, you use Fusion’s nodes to create the effect you want. You can use a single
node or a hundred, depending on the effect you want to create. For instance, using Fusion’s
Color Correction nodes, you can create a simple color corrector you can use on the Edit page.
To create a simple Color Corrector effect, do the following:
1 Insert the Color Corrector node between the MediaIn and MediaOut nodes.
2 Select the Color Corrector node in the Node Editor, and then press Cmd-A
to select the remaining nodes.
Chapter – 7 Fusion Improvements 96

3 Right-click over any of the selected node and choose Macro > Create Macros from the
contextual menu. Enabling the checkboxes in this window determines the parameters
that appear in the Edit page Inspector.
4 The Macro Editor window opens. Here, you can enable the checkboxes for any
parameters you want to be shown in the Edit page Inspector.
5 Enter the name of your effects at the top of the Macro Editor window.
6 To save the Macro, click Close at the bottom of the window, then click Yes in the dialog
that appears asking you to save the changes.
The Macros must be saved into the correct folder for DaVinci Resolve to recognize the
Macro as an effect.
In the save dialog, save the Macro in the following locations:
On macOS: Macintosh HD/Users/username/Library/Application Support/Blackmagic
Design/DaVinci Resolve/Fusion/Templates/Edit/Effects
On Windows: C:\Users\username\AppData\Roaming\Blackmagic Design\
DaVinci Resolve\Support\Fusion\Templates\Edit\Effects
On Linux: home/username/.local/share/DaVinciResolve/Fusion/Templates/Edit/Effects
To see the effect in the Edit page Effects Library, you’ll need to quit DaVinci Resolve and
relaunch the application.
Creating a Fusion Eect Template for Two or More Layers
If the effect you want to create requires multiple images like a video wall, you start by creating a
Fusion clip on the Edit page Timeline that includes the number of layers you want the effect to
have. The clips are only used to create the number of image inputs for the template and will not
be saved with the effect.
Once inside Fusion, use Fusion’s nodes to create the effect you want.
Save the Macro following the same steps you use for single clip effects. Enable any of the
parameters you want to control in the Edit page. To be able to switch the order of video layers
within the effect, make sure you have the Layer checkbox enabled for all the MediaIn nodes.
Once you’ve saved the Macro and relaunched DaVinci Resolve, to use the effect on multiple
timeline layers, you must create a Fusion clip. The Fusion clip should contain the same number
of layers the effect requires. The order of the Timeline layers, going from the bottom track to
the top, matches the MediaIn numbers. For instance, video track 1 will match the position and
appearance of MediaIn1, video track 2 matches MediaIn2 and so on. If you want to change how
tracks map to MediaIn nodes, you can change the Layer number in the Inspector, assuming you
enabled the MediaIn Layer checkbox when creating the Macro.
Animation Curves Modifier
The Animation Curves Modifier (Anim Curves) is used to dynamically adjust the timing, values,
and acceleration of an animation, even if you decide to change the duration of a Comp. Using
this Modifier, it becomes infinitely easier to stretch or squish animations, create smooth motion,
add bouncing properties, or mirror animations curves without the complexity of manually
adjusting splines.
When creating Fusion templates for the Edit and Cut page in DaVinci Resolve, the Anim Curves
Modifier allows the keyframed animation you’ve created in Fusion to stretch and squish
appropriately as the transition, title, or effect’s duration changes on the Edit & Cut page Timelines.
Chapter – 7 Fusion Improvements 97

Curve Shape Controls
The controls for the Anim Curves Modifier appear in the Modifier’s tab of the inspector.
The Curve Shape controls determine the acceleration or shape of the animation curve.
Source: This drop-down menu has three options based on how the Comp is created
from DaVinci Resolve’s Edit page.
–
Transition: This setting is automatically selected when the Comp is created from an
Edit page transition effect. If the duration of the transition is updated in the Edit page,
the timing of the animation updates as well.
–
Duration: Use this setting when the Comp is created from a clip on the Edit page.
The animation timing will update if the clip’s duration changes by trimming.
–
Custom: Displays an Input dial to manually control the timing.
Input: This dial is only visible when Source is set to Custom. It is used to change the
input keyframe value.
Curve: The Curve drop-down menu selects the interpolation method used between
keyframes. The three choices are linear, easing, or custom.
–
Linear: The default linear interpolation method maintains a fixed, consistent
acceleration between keyframes.
–
Easing: Displays interpolation menus for both the start of the curve (In) and the end
of the curve (Out).
–
Custom: Opens a mini Spline Editor to customize the interpolation from the start of
the animation to the end.
Mirror: Plays the animation forward, and after reaching the end, it returns to the starting
value. This causes the initial animation to be twice as fast since the second half of the
Comp is used for the reverse animation.
Invert: Flips the animation curve upside-down, so that the values start high and end low.
Scaling
The Scale parameters modify the animation values using relative adjustments.
Scale: This number is a multiplier applied to the value of the keyframes. If the Scale
value is 2 and a keyframe has a value of 0, it remains 0. If the Scale value is 2 and a
keyframe has a value of 10, the result is as if the keyframe is set to 20. This can be
thought of as the ending value for the animation. It is best to set this while viewing the
last frame in the comp.
Offset: The offset is added to the keyframe values and can be thought of as the
starting value for the animation. It is best to set this while viewing the first frame
in the comp.
Clip Low: Ensures the output value never dips below 0.0.
Clip High: Ensures the output value never exceeds 1.0.
Timing
The Timing parameters adjust the animation timing using relative values.
Time Scale: Stretches or squishes the animation, causing it to run faster or slower.
A value of 1.0 keeps the animation running for the Comp’s duration (unless you have
customized the animation using other controls in the Modifier).
Time Offset: This value delays the animation, as a fraction of its total duration. A value
of 0.0 applies no delay. A value of 0.5 delays the animation starting point midway into
the Comp’s duration.
Chapter – 7 Fusion Improvements 98

Using the Anim Curves Modifier to Create a Custom Transition
To understand how to use the Anim Curves Modifier for a transition, let’s create a simple
scaling dissolve.
1 Add a standard cross dissolve in the Edit page Timeline.
2 Right-click over the transition and choose Convert to Fusion Cross Dissolve.
3 Right-click over the transition again and choose Open in Fusion page.
4 Add a Transform node to MediaIn1 and to MediaIn 2.
5 Select the Transform node attached to the MediaIn 2.
6 In the Inspector, right-click the Size control, then choose Modify With > Anim Curves
from the contextual menu. Adding this modifier to the Size control will cause the slider
to animate from 0 to 1 for the Cross Dissolve’s duration.
7 Select the Transform node attached to the MediaIn 1.
8 In the Inspector, right-click the Size control, then choose Modify With > Anim Curves
from the contextual menu.
9 At the top of the Inspector, click the Modifier tab and click the Invert button. Inverting
the animation curves causes MediaIn1 to scale opposite of MediaIn 2.
10 In the Modifiers tab, set the Curve drop-down menu to Easing, and experiment with the
different ease-in ease-out curve types from the In/Out drop-down menus.
Once you create a Macro from this Node Tree and save it as a Transition template, you can
apply it in the Edit page Timeline. If you change the transition duration in the Edit page, the
animation timing will update appropriately.
Using the Anim Curves Modifier with Paths
To understand how to use the Anim Curves Modifier’s with a path modifier, let’s use the
premise that you want to create text that falls from the top of the frame and bounces as it
reaches the bottom of the frame.
1 In Fusion, create two keyframes that cause text to start at the top of the frame and drop
to the bottom. This automatically creates a Path Modifier.
2 In the Inspector’s Modifier tab, right-click over the Displacement parameter and choose
Insert > Anim Curves. The animation is normalized to the duration of the Comp.
3 Set the Source menu to Duration since this is not a transition, and we are not
customizing the duration.
4 From the Curve menu, choose Easing, then for the Out menu, choose Bounce.
5 Play the animation to see the Bounce animation.
6 To make the bounce occur halfway down the frame, change the Scale to .05.
7 To make the animation run twice as fast, enter 2.0 in the Time Scale parameter.
Once you create a Macro from this Node Tree and save it as a Title template, you can apply it in
the Edit page Timeline. If you change the Title’s duration in the Edit page, the animation timing
will update appropriately.
TIP: To view the resulting animation curve in the Spline Editor, select the parameter
name in the Spline Editor’s header. The spline is updated as you change the controls.
Chapter – 7 Fusion Improvements 99

Shape Nodes
Fusion includes several vector Shape nodes that can be used to create animated graphical
elements in motion design projects. Shapes are located in the Shape category of the Effects
Library, and all the nodes begin with an s to differentiate them from other similarly named
general-purpose nodes. There are various types of shape nodes, including:
Generators: sEllipse, sNgon, sRectangle, sStar
Multipliers: sDuplicate. sGrid
Modifiers: sExpand, sJitter, sOffset, sOutline, sTransform
Combiners: sBoolean, sMerge
Render node: sRender
To begin using Shape nodes, you start with one of the basic shapes, like sEllipse, sRectangle,
sNGon, or sStar, and then connect it to a sRender node. Technically, the shape nodes are
descriptions of the vector shapes, while the sRender node is responsible for rendering the
shapes in the defined frame size. That being the case, only the sRender node is viewable. You
can connect multiple shape nodes to create intricate designs, but any string of shape nodes
must always end with a sRender node. The sRender node can then be connected to larger
node trees for further compositing. The remaining Shape nodes modify the basic shapes to
create more complex compound shapes.
Shapes are used to create repetitive patterns with offsets.
Below is a list of the shape nodes with a brief description of each:
sBoolean: Combines two shapes based on boolean operators, including Intersection,
Union, Subtract, and Xor. The color of each shape is either used or replaced based on
the Style mode menu.
sDuplicate: Creates a user-defined number of copies of the connected shape.
The copies can be offset in position, size, and rotation.
sEllipse: Creates a circular shape that can be color filled or displayed as an outline.
When the Solid checkbox is disabled, the Border Width modifies the thickness of
the outline.
Chapter – 7 Fusion Improvements 100
 Loading...