

Binatone Speakeasy 600 User Manual
USER GUIDE
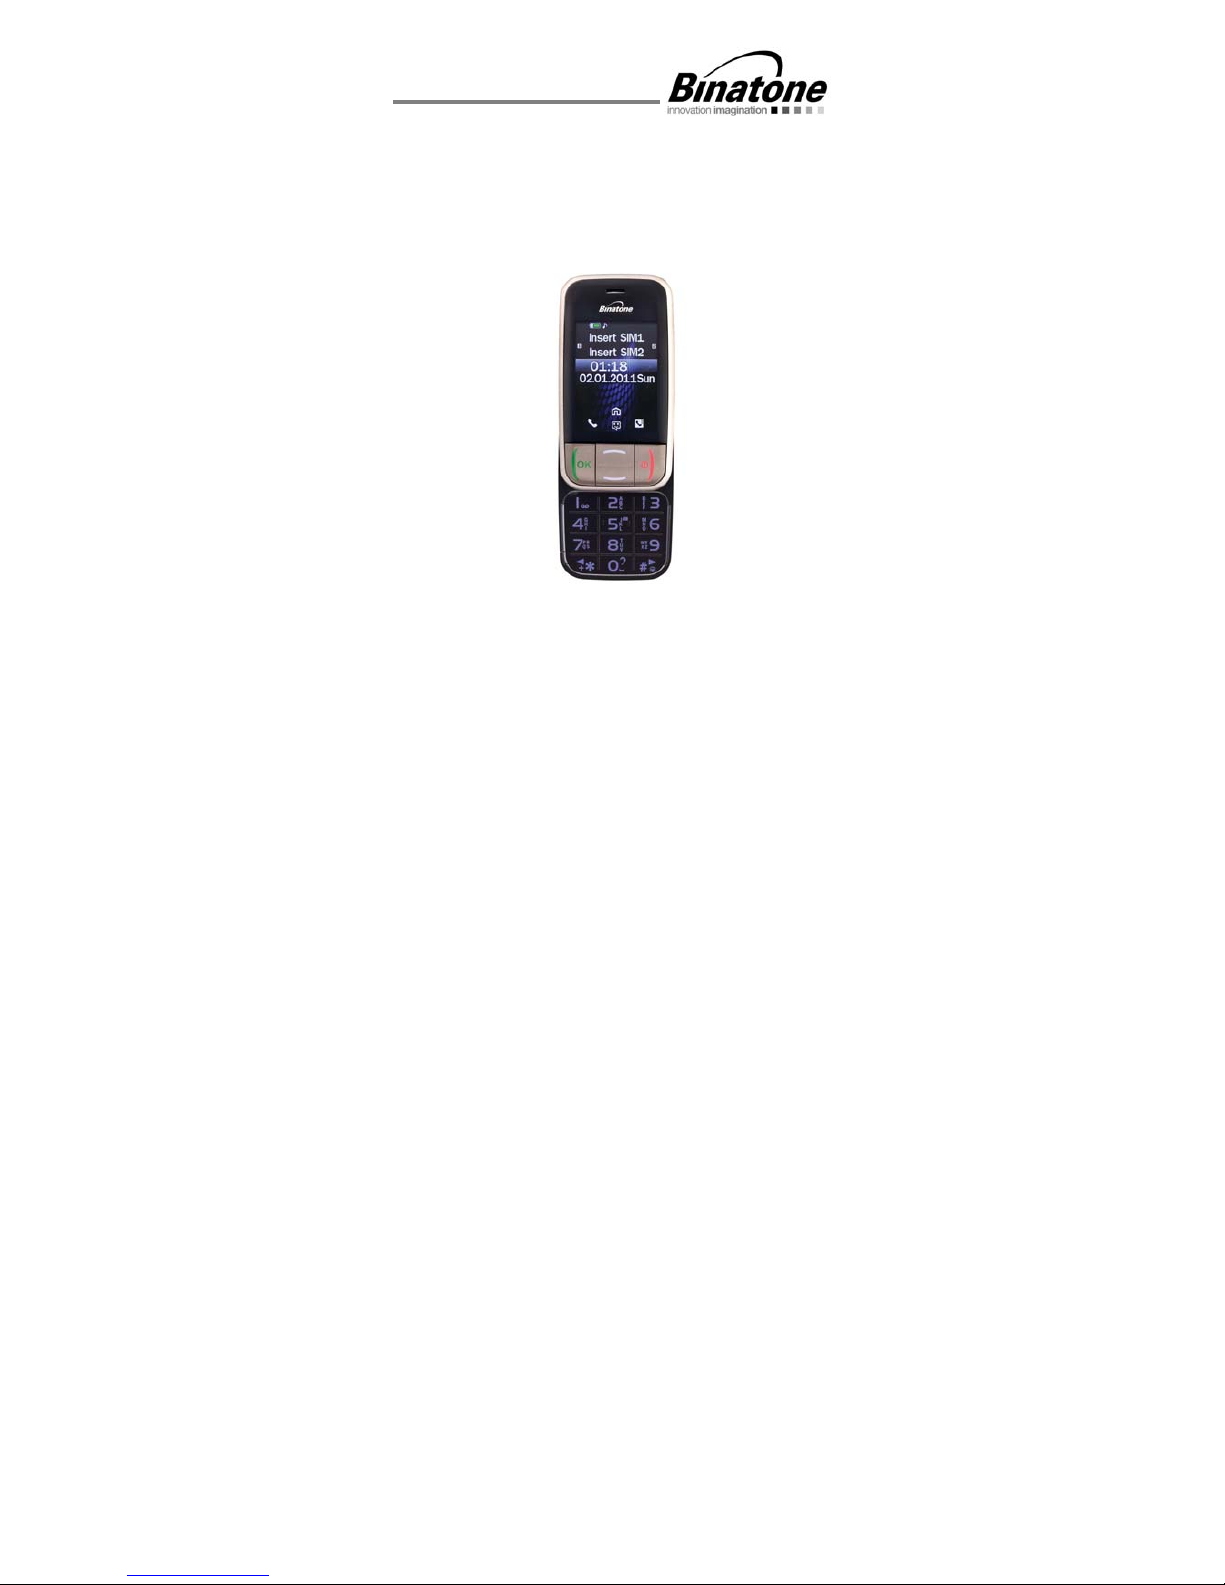
Speakeasy 600
Before operating this set,
please read these instructions carefully.

www.binatonetelecom.com 2
If you need help …
The Binatone Help Line is available from 9.00am-5.00 pm,
Monday to Friday, on 0845 345 9677 (BT Local Call rate)
Or visit our website: www.binatonetelecom.com
IMPORTANT –Your handset is not supplied with a SIM
card. The Speakeasy 600 will work on all UK GSM mobile
networks except “3”, and you will need to insert a SIM
card for the handset to work correctly.
Network Services –The Speakeasy 600 is approved for
use on the GSM900 and DCS1800 networks. Check with
your mobile phone service provider to see if you can use
the Dual-band feature or other Network Services
described in this guide. Some networks may not support
all language dependent characters and/or services.
Unpacking your Speakeasy 600
In the box are:
the mobile handset
a mains power adaptor
a rechargeable battery pack
USB data cable
earphones set
this user guide
Keep the packing materials for future use.
Keep your sales receipt - it is your guarantee.

3
Binatone Help Line : 0845 345 9677
1 WHERE TO FIND IT ............................................... 8
2 SYMBOLS ON THE DISPLAY ............................. 11
3 MENU OPERATION ............................................. 12
3.1 Navigation keys ............................................................ 12
3.2 Selection keys .............................................................. 12
3.3 Main menu ..................................................................... 12
3.4 Writing text and numbers ............................................ 13
4 Read these notes first ......................................... 15
5 INSTALLATION AND SETUP .............................. 16
5.1 Install SIM card ............................................................. 16
5.2 Insert Battery ................................................................ 17
5.3 Charge Battery .............................................................. 18
5.4 Insert a Memory (micro SD) card ................................ 19
6 SWITCHING ON AND OFF .................................. 20
7 MAKING & ANSWERING CALLS ........................ 21
7.1 Make a call .................................................................... 21
7.2 Answer a call ................................................................ 21
7.3 End a call ....................................................................... 21
7.4 Speed dial ..................................................................... 21
7.5 Adjust volume during a call ........................................ 21
7.6 Dial from the phonebook ............................................. 22
7.7 Dial from the call log .................................................... 22
7.8 Reject an incoming call ............................................... 22
8 SOS CALL FUNCTION ........................................ 23
8.1 Using the SOS call button ........................................... 23
8.2 Activate / Deactivate SOS Call function ..................... 24
8.3 Activate / Deactivate SOS Alarm Ring ....................... 24
8.4 Activate / Deactivate SOS SMS ................................... 24
8.5 Add SOS numbers ........................................................ 25
8.6 Edit SOS numbers ........................................................ 25
8.7 Delete SOS numbers .................................................... 26
8.8 Edit SOS SMS Content ................................................. 26
Contents

www.binatonetelecom.com 4
9 QUICK NUMBER FUNCTION .............................. 27
9.1 Add a Quick Number .................................................... 27
9.2 Call a Quick Number .................................................... 27
9.3 Edit a Quick Number .................................................... 28
9.4 Delete a Quick Number ................................................ 28
10 USING THE PHONEBOOK & SETTING SPEED
DIALS ................................................................... 29
10.1 Add a number to the phonebook ................................ 29
10.2 Call a contact from the phonebook ............................ 29
10.3 Edit a phonebook entry ............................................... 30
10.4 Delete a phonebook entry ........................................... 30
10.5 Set speed dial numbers ............................................... 30
10.6 Turn speed dial on or off ............................................. 31
10.7 Set My number .............................................................. 31
10.8 Send My number .......................................................... 31
10.9 Set extra numbers ........................................................ 32
10.10 Check memory status .................................................. 32
10.11 Copy Phonebook contacts .......................................... 32
10.12 Move Phonebook contacts .......................................... 33
10.13 Delete All Phonebook contacts................................... 33
11 SMS TEXT MESSAGING ..................................... 34
11.1 Write and send SMS ..................................................... 34
11.2 Manage your SMS ........................................................ 35
11.2.1 Inbox ................................................................... 35
11.2.2 Drafts .................................................................. 35
11.2.3 Outbox ................................................................ 36
11.2.4 Sent messages ................................................... 36
11.3 SMS settings ................................................................. 37
11.3.1 Save Sent message ............................................ 38
11.4 Message Templates ..................................................... 38
11.4.1 Edit Template ...................................................... 38
11.5 Remove Template......................................................... 39
12. MMS MESSAGING ............................................... 40
12.1 Create and Send MMS.................................................. 40
12.2 MMS Settings ................................................................ 41

5
Binatone Help Line : 0845 345 9677
12.3
Manage your MMS ........................................................ 42
12.3.1 Inbox ................................................................... 43
12.3.2 Drafts .................................................................. 43
12.3.3 Outbox ................................................................ 44
13 BROADCAST MESSAGES .................................. 45
13.1 Broadcast message settings....................................... 45
14 CALL HISTORY ................................................... 46
14.1 Check Call history ........................................................ 46
15 CALL SETTINGS ................................................. 47
15.1 Basic call settings ........................................................ 47
15.2 Advanced Call settings ................................................ 48
16 MULTIMEDIA ....................................................... 49
16.1 FM Radio ....................................................................... 49
16.1.1 Auto tune ............................................................ 49
16.1.2 Manual tune ........................................................ 49
16.1.3 Select from the Channel list ................................ 50
16.1.4 Enable / Disable Background play ...................... 50
16.1.5 Play the radio through the loudspeaker .............. 50
16.1.6 Record a radio broadcast ................................... 51
16.1.7 Set recording format ........................................... 51
17.1.8 Set audio quality ................................................. 51
17.1.9 Record storage ................................................... 52
16.2 Camera .......................................................................... 52
17.2.1 Take photos ........................................................ 52
16.3 Zooming in and out ...................................................... 52
16.3.1 Adjust camera exposure ..................................... 53
16.3.2 View captured photos ......................................... 53
16.4 Adjust camera settings ................................................ 53
16.5 Video recorder .............................................................. 54
16.5.1 Record video ....................................................... 54
16.6 Zooming in and out ...................................................... 55
16.7 Adjust camcorder exposure ........................................ 55
16.8 View recorded videos .................................................. 55
16.9 Adjust camcorder settings .......................................... 56
16.10 Audio player .................................................................. 57

www.binatonetelecom.com 6
16.11
Sound recorder ............................................................. 59
17 USER PROFILES ................................................. 60
17.1 Activate a User profile ................................................. 60
17.1.1 Customise a User profile ..................................... 60
18 SETTINGS ............................................................ 62
18.1 Dual SIM settings ......................................................... 62
18.2 Phone settings .............................................................. 62
18.3 Network settings .......................................................... 63
18.4 Security settings .......................................................... 63
18.5 Restore factory settings .............................................. 64
19 ORGANIZER ........................................................ 64
19.1 Alarm ............................................................................. 64
19.1.1 Set an alarm ....................................................... 64
19.2 Tasks ............................................................................. 65
19.2.1 Set a task ............................................................ 65
19.2.2 Manage the task list ............................................ 67
19.3 Bluetooth ....................................................................... 67
19.3.1 Connecting to a Bluetooth device ....................... 68
19.3.2 Connect to a previously connected device ......... 69
19.3.3 Rename a device in the device list ..................... 69
19.3.4 Delete a device from the device list .................... 69
19.3.5 Getting connected by a Bluetooth device ........... 70
19.3.6 Listen to music or audio files through a Bluetooth
headset ............................................................... 70
19.4 Calculator ...................................................................... 70
19.5 Calendar ........................................................................ 71
19.6 World clock ................................................................... 72
19.7 Unit converter ............................................................... 72
19.8 Currency converter ...................................................... 73
19.9 Stopwatch ..................................................................... 73
19.10 Fun & Games ................................................................ 74
19.11 Ebook reader ................................................................ 75
19.12 File manager ................................................................. 77
20 SERVICES ............................................................ 79
20.1 Access Services ........................................................... 79

7
Binatone Help Line : 0845 345 9677
20.2
Network provider menu ............................................... 79
20.3 Internet service ............................................................. 80
20.3.1 Browsing the Internet .......................................... 80
20.3.2 Settings ............................................................... 80
20.4 Data account ................................................................. 80
21 SMS REMOTE CONTROL ................................... 81
21.1 Set quick number ......................................................... 81
21.2 Set SOS number ........................................................... 81
21.3 Add a new entry ............................................................ 82
21.3 Set alarm ....................................................................... 82
22 TROUBLESHOOTING .......................................... 84
23 GUARANTEE AND SERVICE INFORMATION .... 86
23.1 Servicing Under Warranty ........................................... 86
23.2 Servicing After Warranty Has Expired ....................... 87
24 BATTERY INFORMATION ................................... 88
25 ADDITIONAL SAFETY INFORMATION ............... 89
26 TECHNICAL DATA .............................................. 91
27 DECLARATION OF CONFORMITY ..................... 92
www.binatonetelecom.com 8
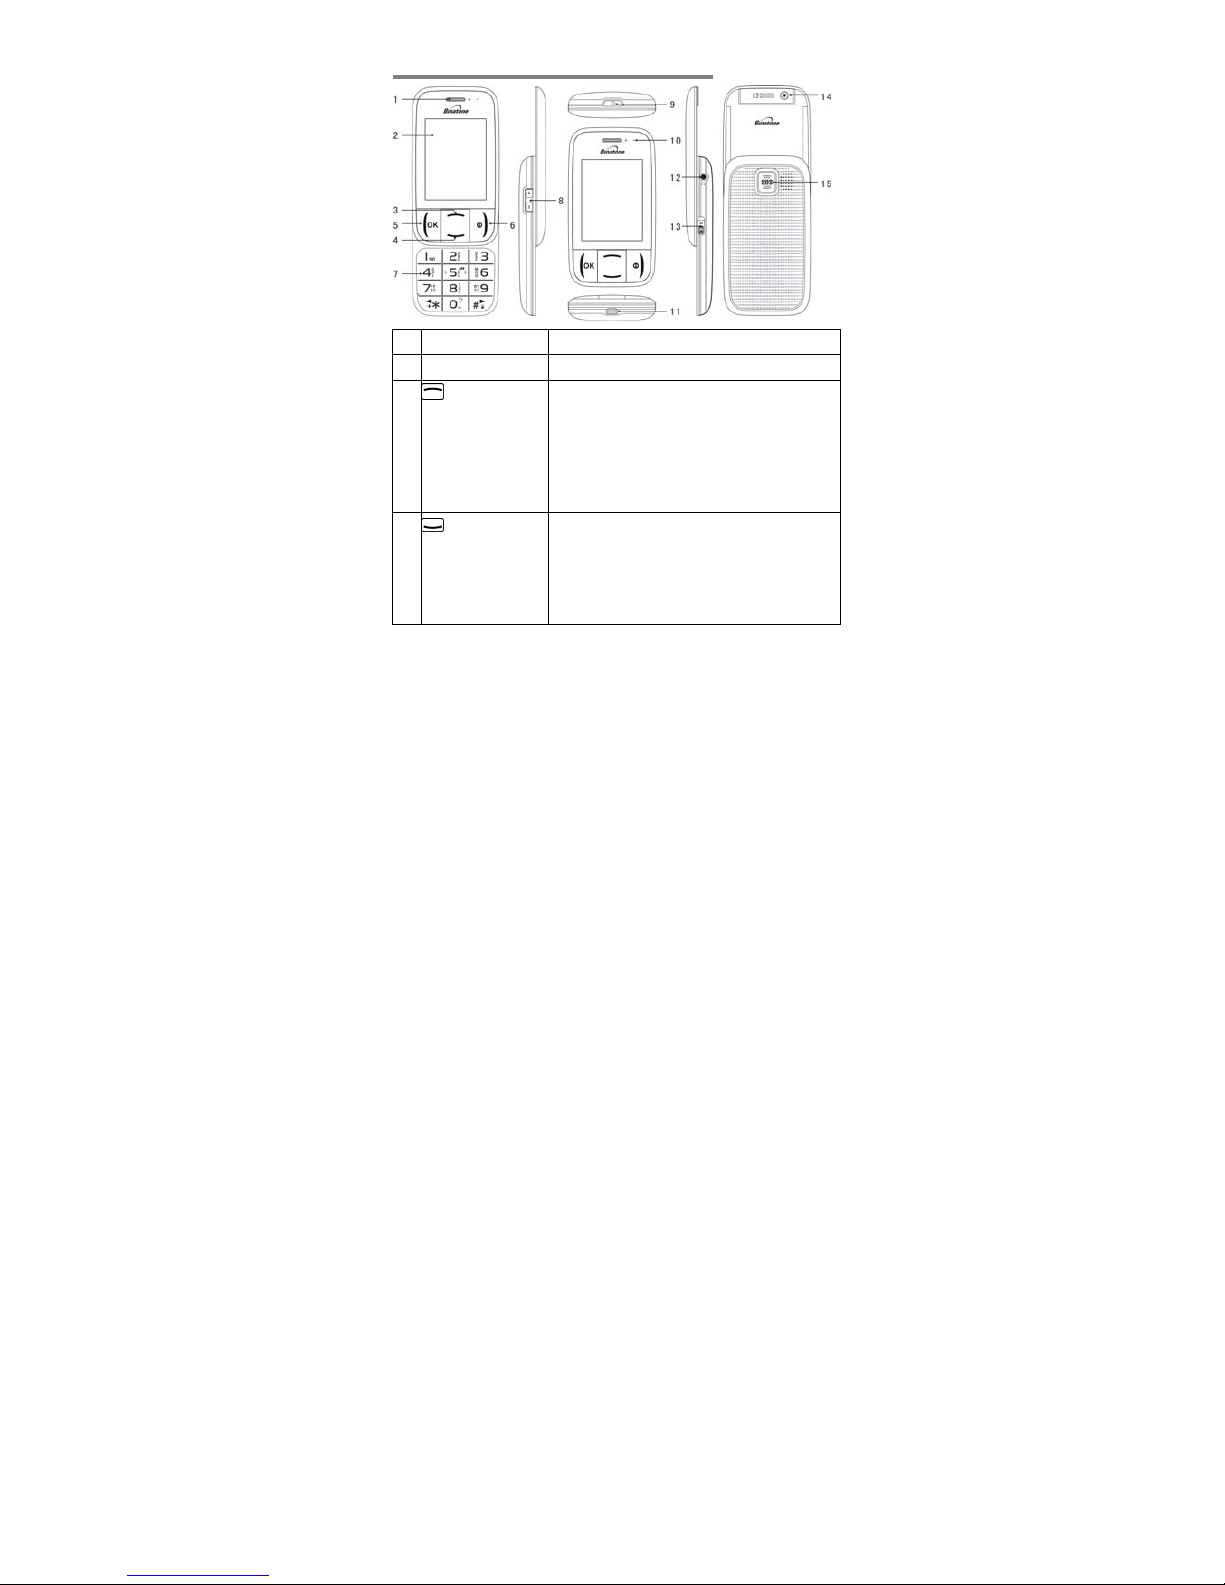
1 WHERE TO FIND IT
1 Earpiece
2 LCD Screen
3 Key Scroll up a menu or options list.
Home screen mode: Press to enter the
main menu.
Editing mode: Move cursor
During a call: Press to switch to
handsfree mode.
4 Key Scroll down a menu or options list.
Home screen mode: Press to enter
the Quick Number list.
Editing mode: Move cursor
9
Binatone Help Line : 0845 345 9677
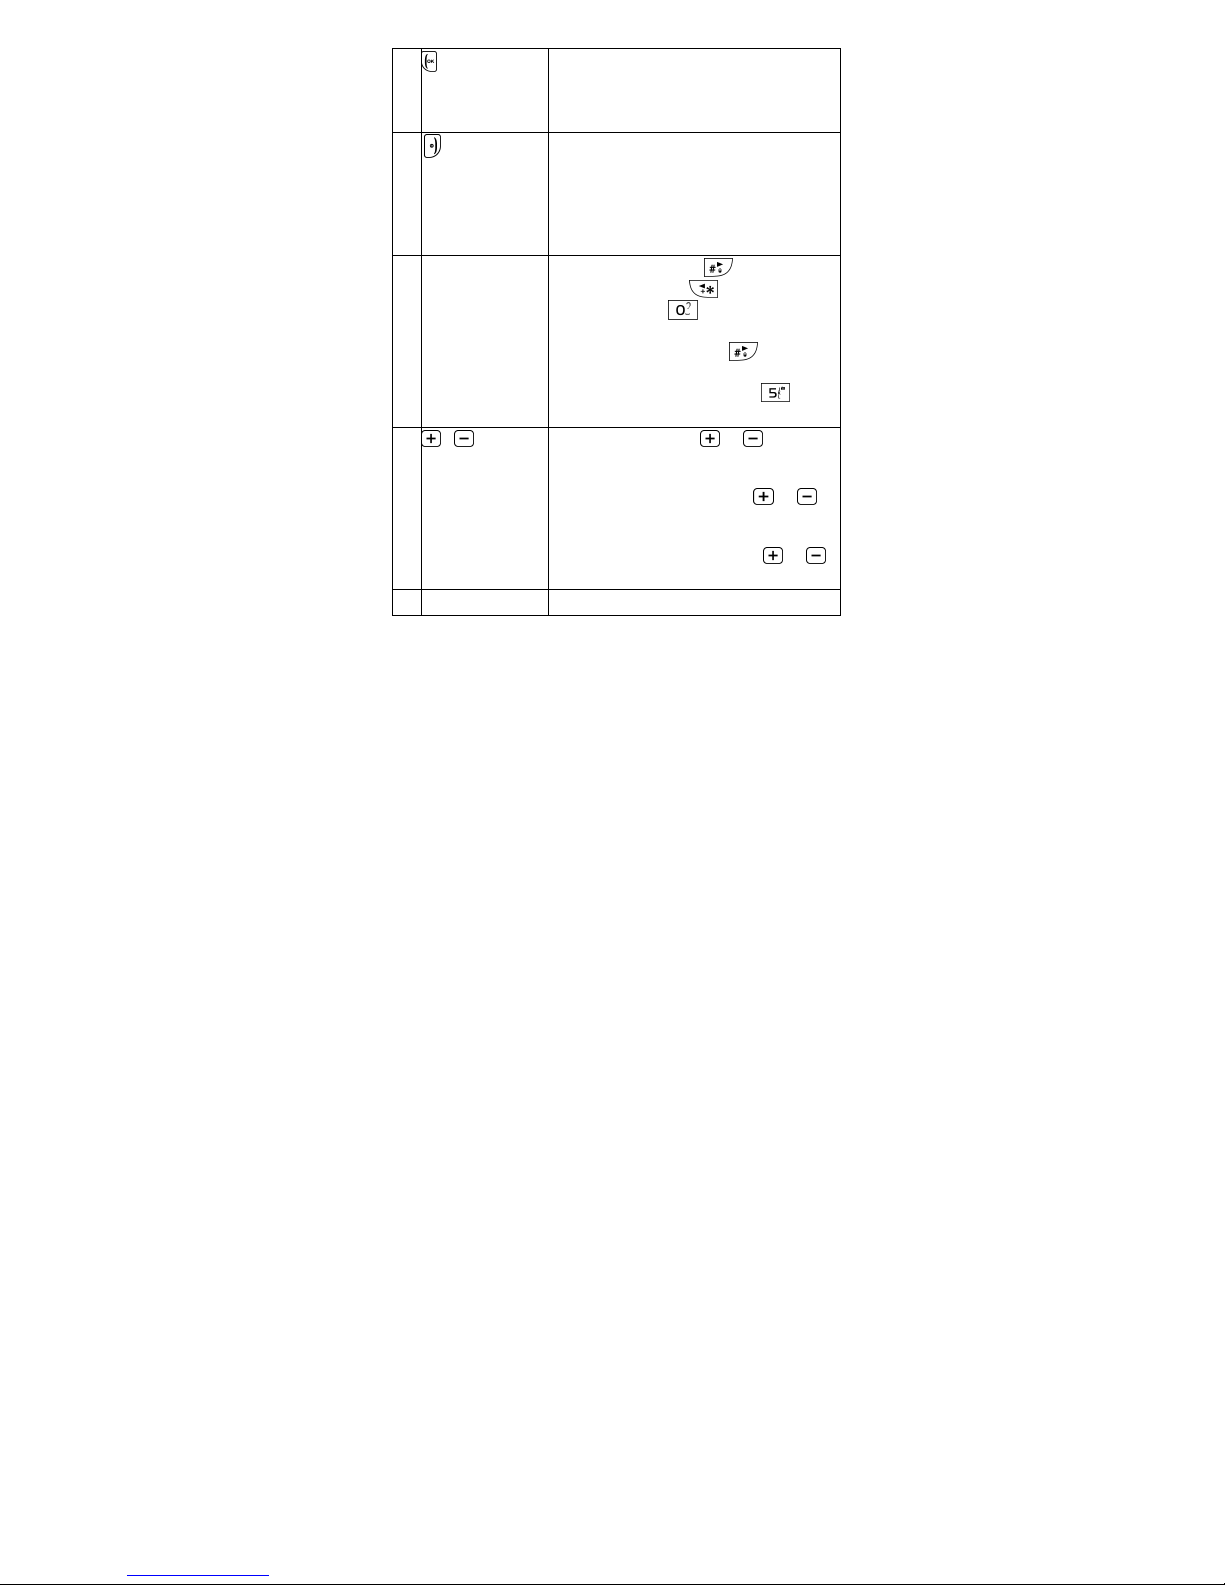
5
Key
Press to answer a call or put the
current call on hold.
Press to select the function shown
above it on the display.
6 Key Press and hold to power up or power
down the phone.
Press to reject a call, end active or
held calls.
Press to select the function shown
above it on the display.
7 Microphone &
A
lphanumeric
Keypad
Editing mode: Press
to switch
input mode; Press to enter
symbols; Press
to insert space
(except 123 mode)
Calculator mode: Press to enter
decimal point
Camera/Video mode: Press
to
take picture/record video
8
/ volume
keys
During a call: Press
or to
increase or decrease the earpiece or
speaker volume.
Home screen mode: Press
or
to increase or decrease ringer
volume.
A
udio listening mode: Press or
to increase or decrease the volume.
9 Torch Light

www.binatonetelecom.com 10
10 Status Lights Red light on when charging.
Red light flashes when there is no
link to a mobile network.
Blue light flashes when linked to the
SIM network.
11 Charger / Data
Transfer
Connector
Connect power cable to charge
phone battery from the mains power
socket.
Connect USB data cable to charge
phone battery or transfer data from a
computer.
12 Earphones
Connector
Connect the supplied earphones for
FM radio listening or for use during a
call.
13 Slide switch for
torch light
Push up to turn on the torch light.
Push down to turn off the torch light.
14 Camera/
camcorder lens
1.3 mega pixels (auto focus)
15 SOS key Press and hold for 3 seconds to send
an SOS message followed by an
SOS call.
11
Binatone Help Line : 0845 345 9677
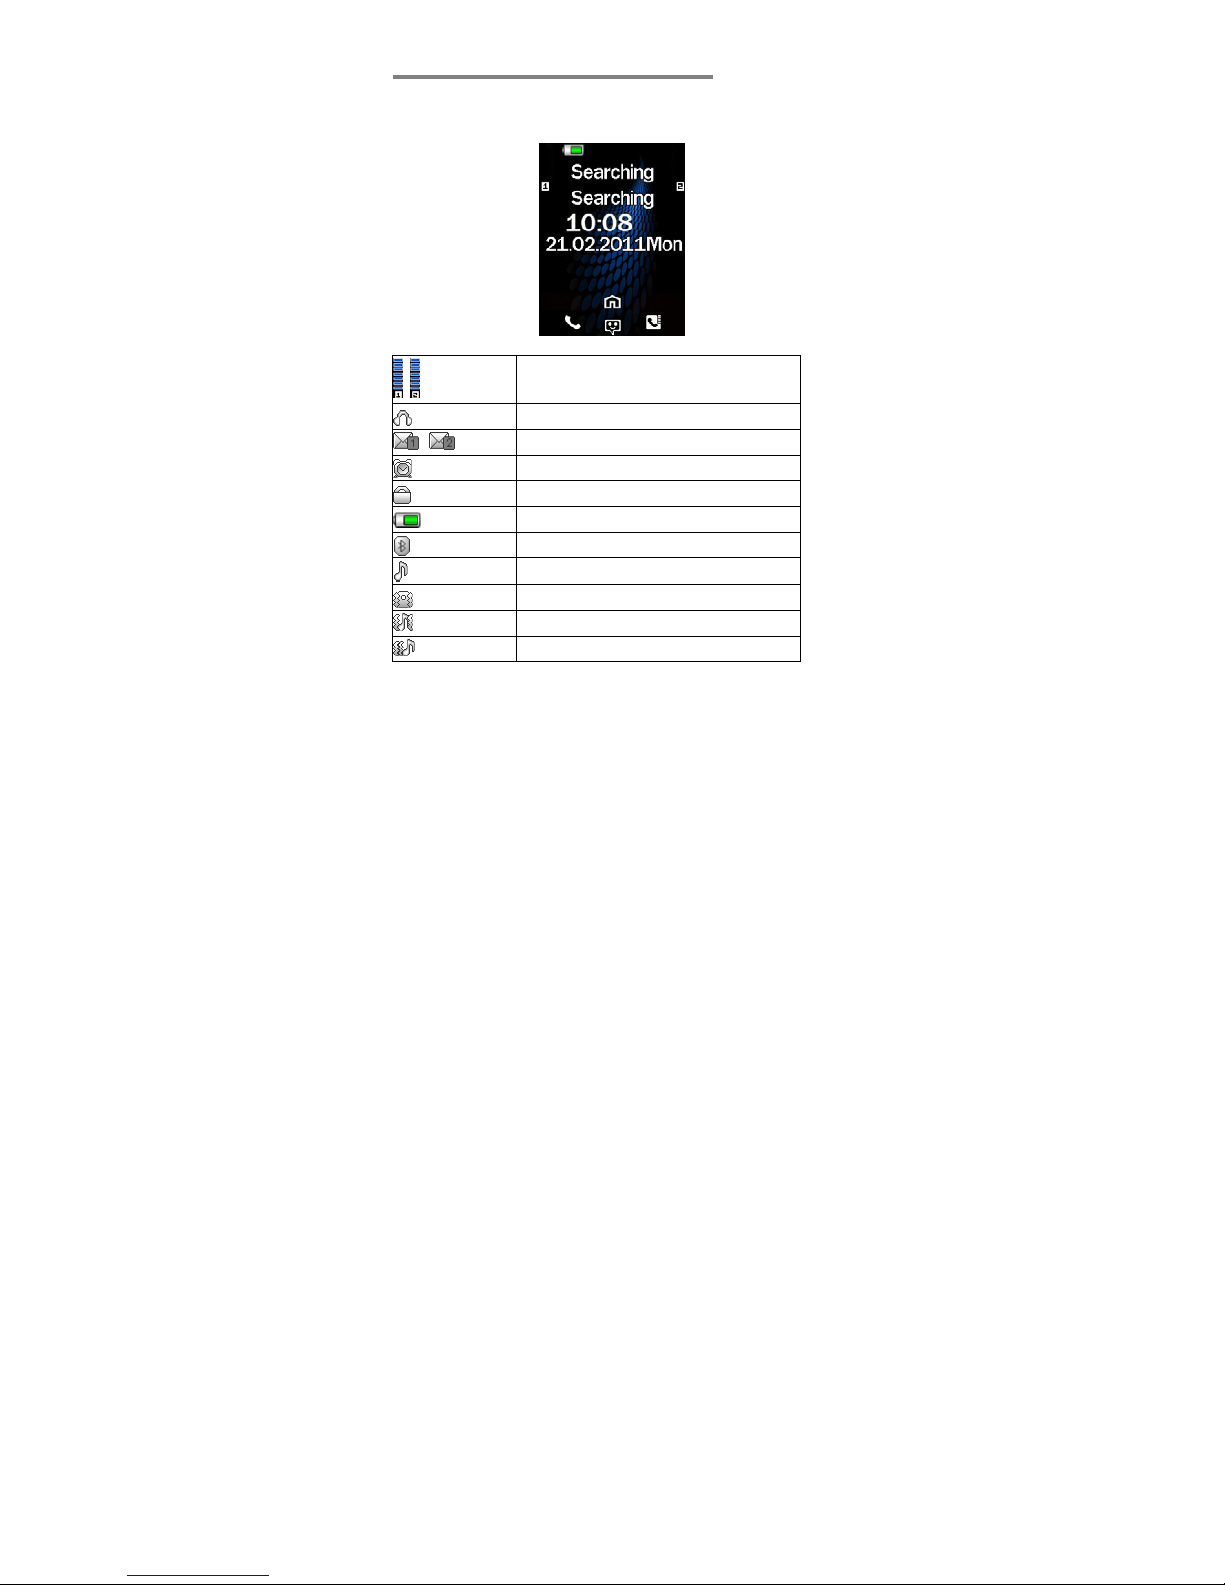
2 SYMBOLS ON THE DISPLAY
The icons in the status bar at the top of the home screen
give you information on the current status of your
Speakeasy 600.
Signal strength
Earphones in use
/ New SMS received
A
larm On
Keypad locked
Battery power level
Bluetooth On
Ringer On
Vibration On
Ring and Vibrate
Vibrate then Ring
www.binatonetelecom.com 12
3 MENU OPERATION
3.1 Navigation keys
Press , , or to move around and highlight
an item on the screen. When an item is highlighted, Press
OK to confirm your selection.
3.2 Selection keys
Apart from making and answering calls, and also
serve as selection keys to select the menus or options
directly above them on the screen of the phone.
The options for include OK, Option, Select, Yes,
Pause, List, Edit, Start.
The options for include Back, Cancel, Reset, No, Stop,
Done, Abort, Split.
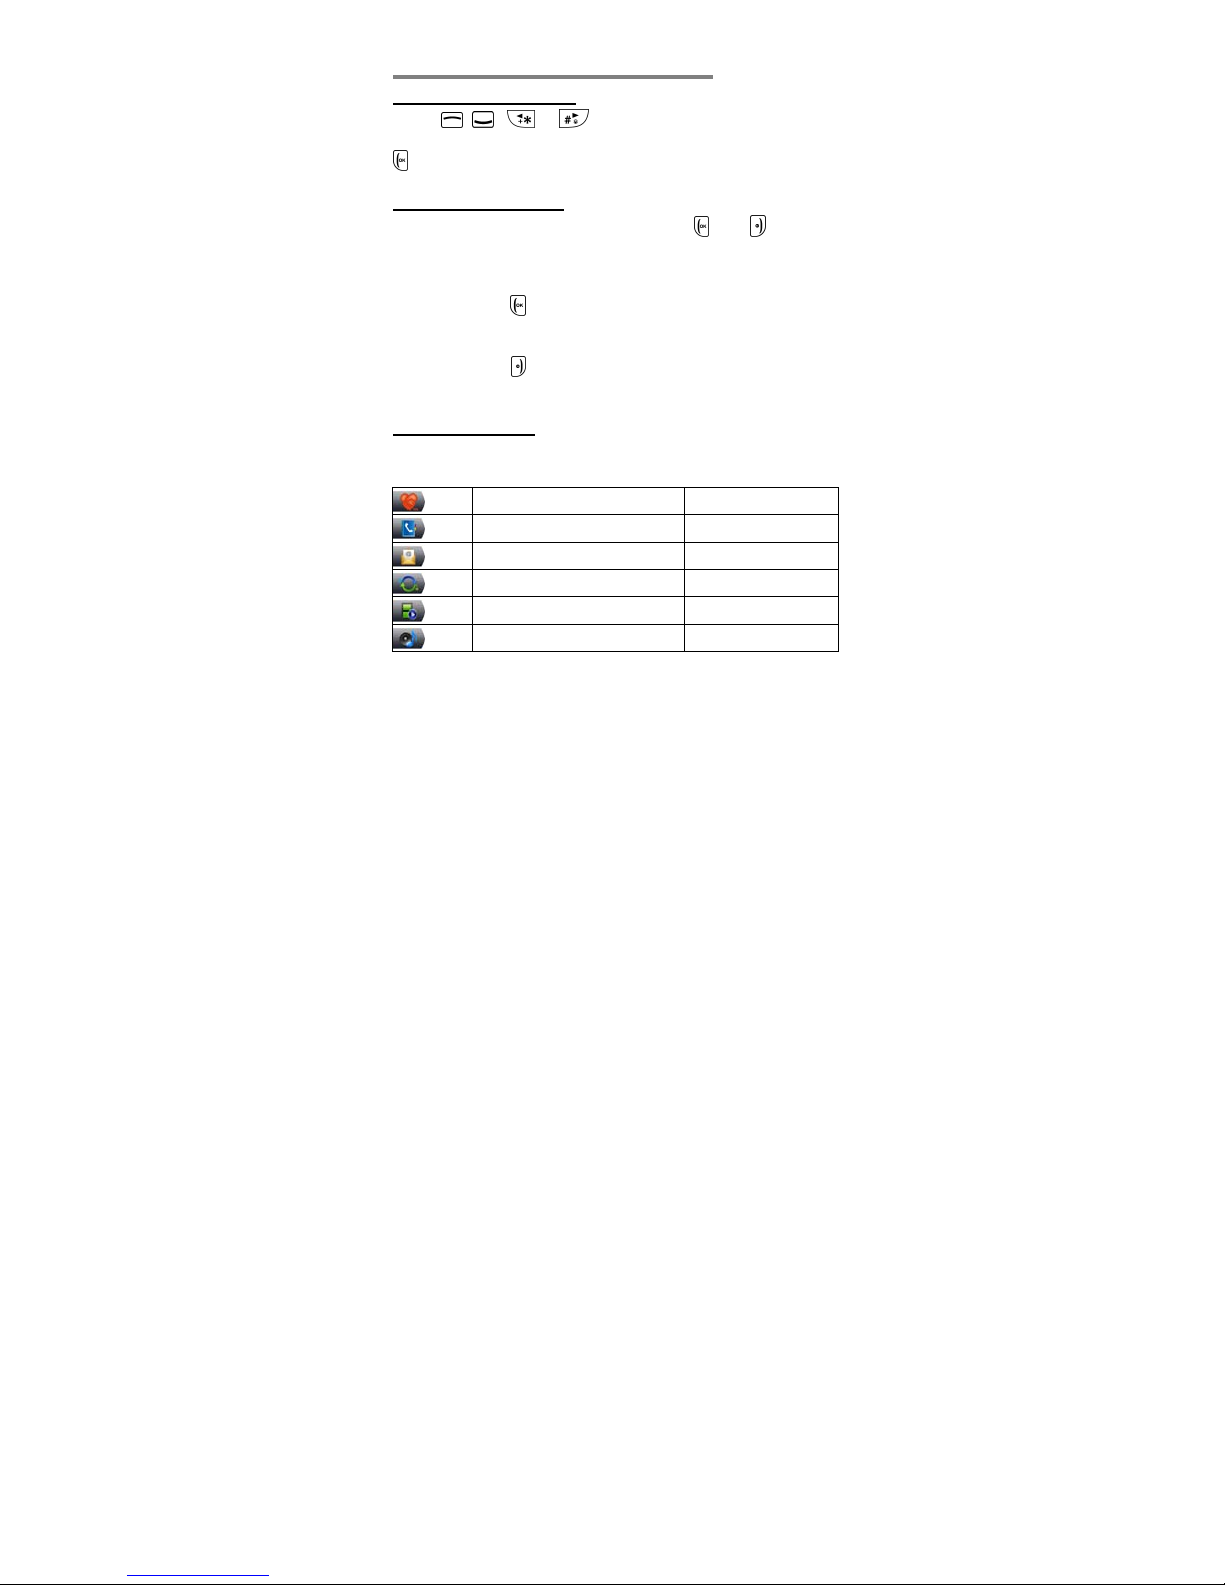
3.3 Main menu
The main menu gives you access to all the different
features of your mobile phone.
Ca
r
e
Page 23
Phonebook
Page 29
Messaging
Page 34
Call history
Page 46
Multimedia
Page 49
User profiles
Page 60
13
Binatone Help Line : 0845 345 9677
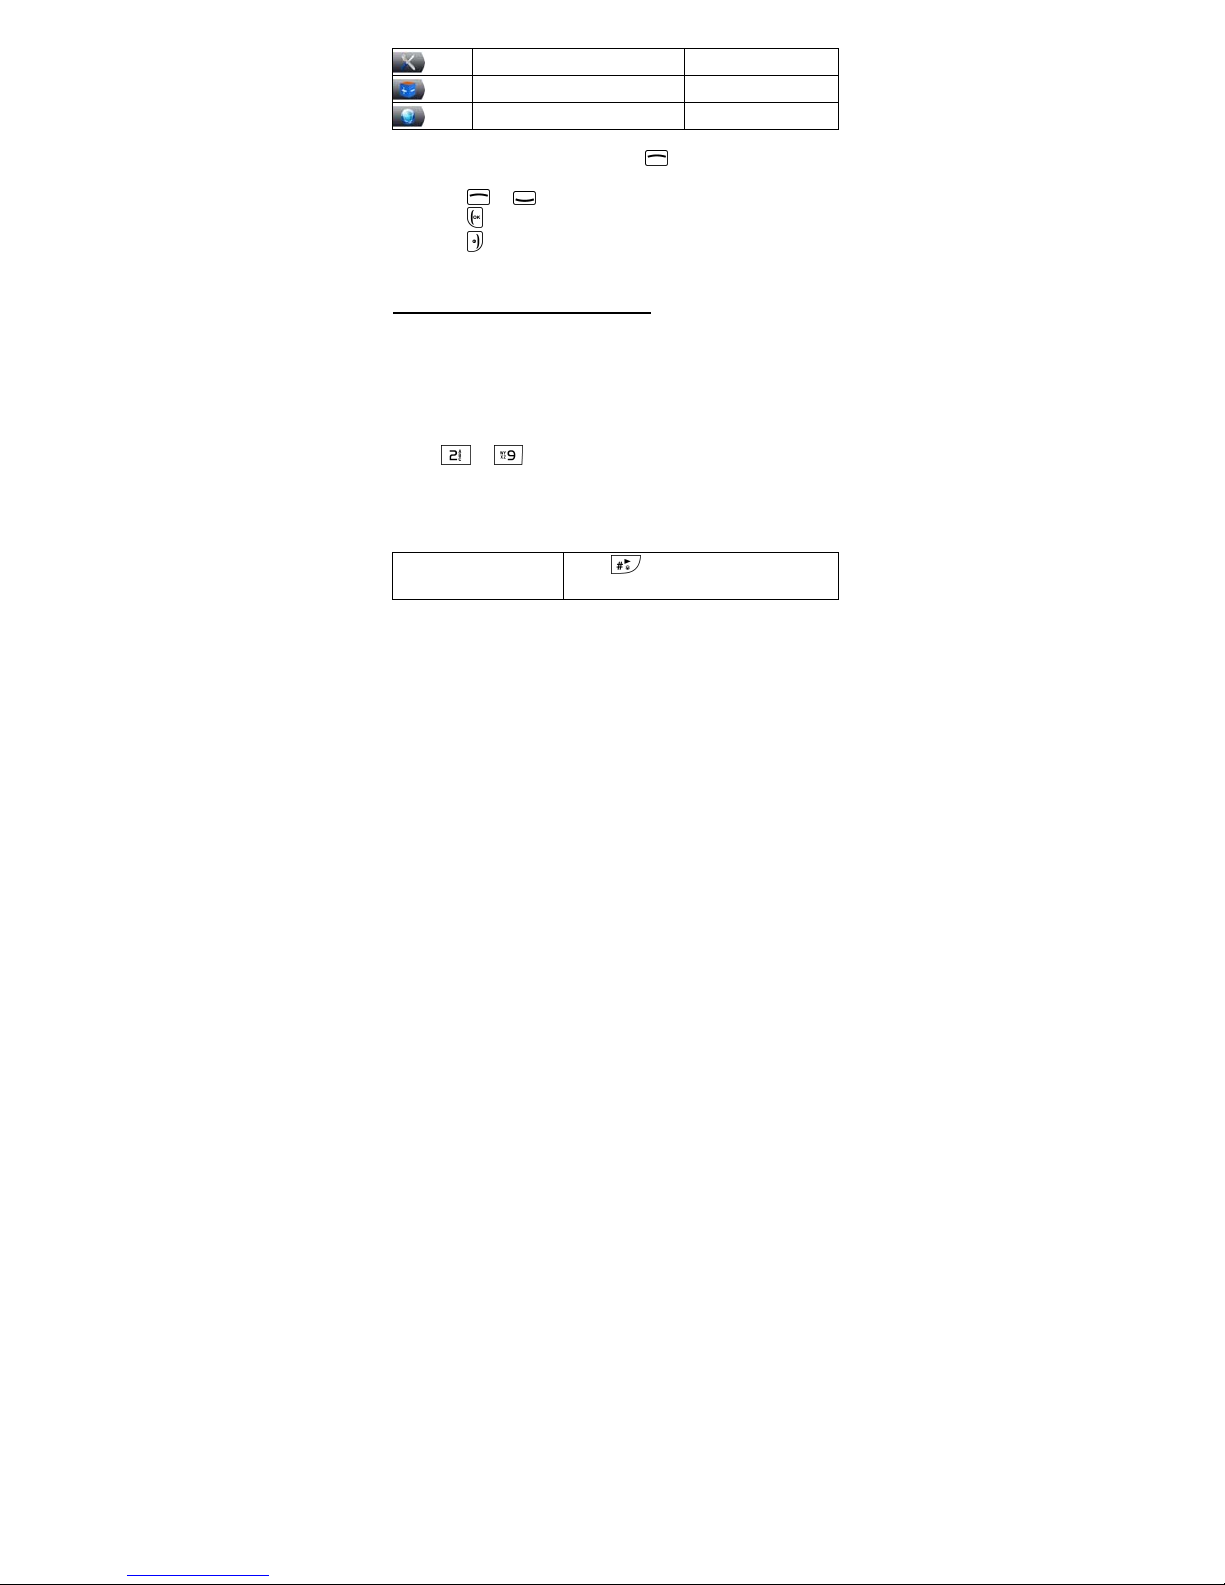
Settings
Page 62
Organize
r
Page 64
Services
Page 79
1. From the home screen, press to access the main
menu.
2. Press or to scroll through the menu list.
3. Press
OK to enter a sub-menu.
4. Press
Back to exit.
5. Slide the phone closed to return to the home screen.
3.4 Writing text and numbers
Speakeasy 600 supports the following input modes:
1. Abc
2. ABC
3. abc
4. 123
Press to keys that are marked with the
corresponding letter you wish to enter. Press once to get
the first letter on the key, press twice quickly to get the
second letter and so on until the letter you want is
displayed on the screen.
Switch input mode
Press
to scroll through the
options.

www.binatonetelecom.com 14
Enter punctuations/
symbols
Press
to show the options.
Press , , or to
select the punctuation or symbol
and press
OK to confirm.
Insert a space
Press (except 123 mode).
Delete text
Press
Clear to delete the
character before the cursor. Press
and hold
Clear to delete all the
characters entered.
Move cursor Press or .

15
Binatone Help Line : 0845 345 9677
4 Read these notes first
Your phone is an electronic product and should be treated
with care to meet any warranty and safety obligations.
• SWITCH ON SAFELY – Do not switch on when
mobile phone use is prohibited or when it may cause
interference or danger.
• HEARING AID FRIENDLY – This phone is hearing aid
friendly. Mobile phone may interfere with some
hearing aids, please contact your hearing aid provider.
• WATER-RESISTANCE – Keep it dry. The phone is
not water-resistant.
• TEMPERATURE RANGE – Operating -10°C to 40°C.
Storage -20°C to 55°C.
• CARE & CLEANING – Do not drop or knock the
phone excessively, and keep it clean using a damp
cloth if necessary - do not use chemicals, cleaning
solvents, or strong detergents.
www.binatonetelecom.com 16
5 INSTALLATION AND SETUP
To use Speakeasy 600, you must first insert a valid SIM
card supplied by your network provider. The SIM card
contains your subscription information, your mobile
telephone number, and a memory in which you can store
phone numbers and messages.
5.1 Install SIM card
Speakeasy 600 supports the use of tw o SIM cards in one
phone. Follow these instructions to insert the SIM cards. If
only one SIM card is to be inserted, you can use either slot.
See Dual SIM settings on page 62 for more information.
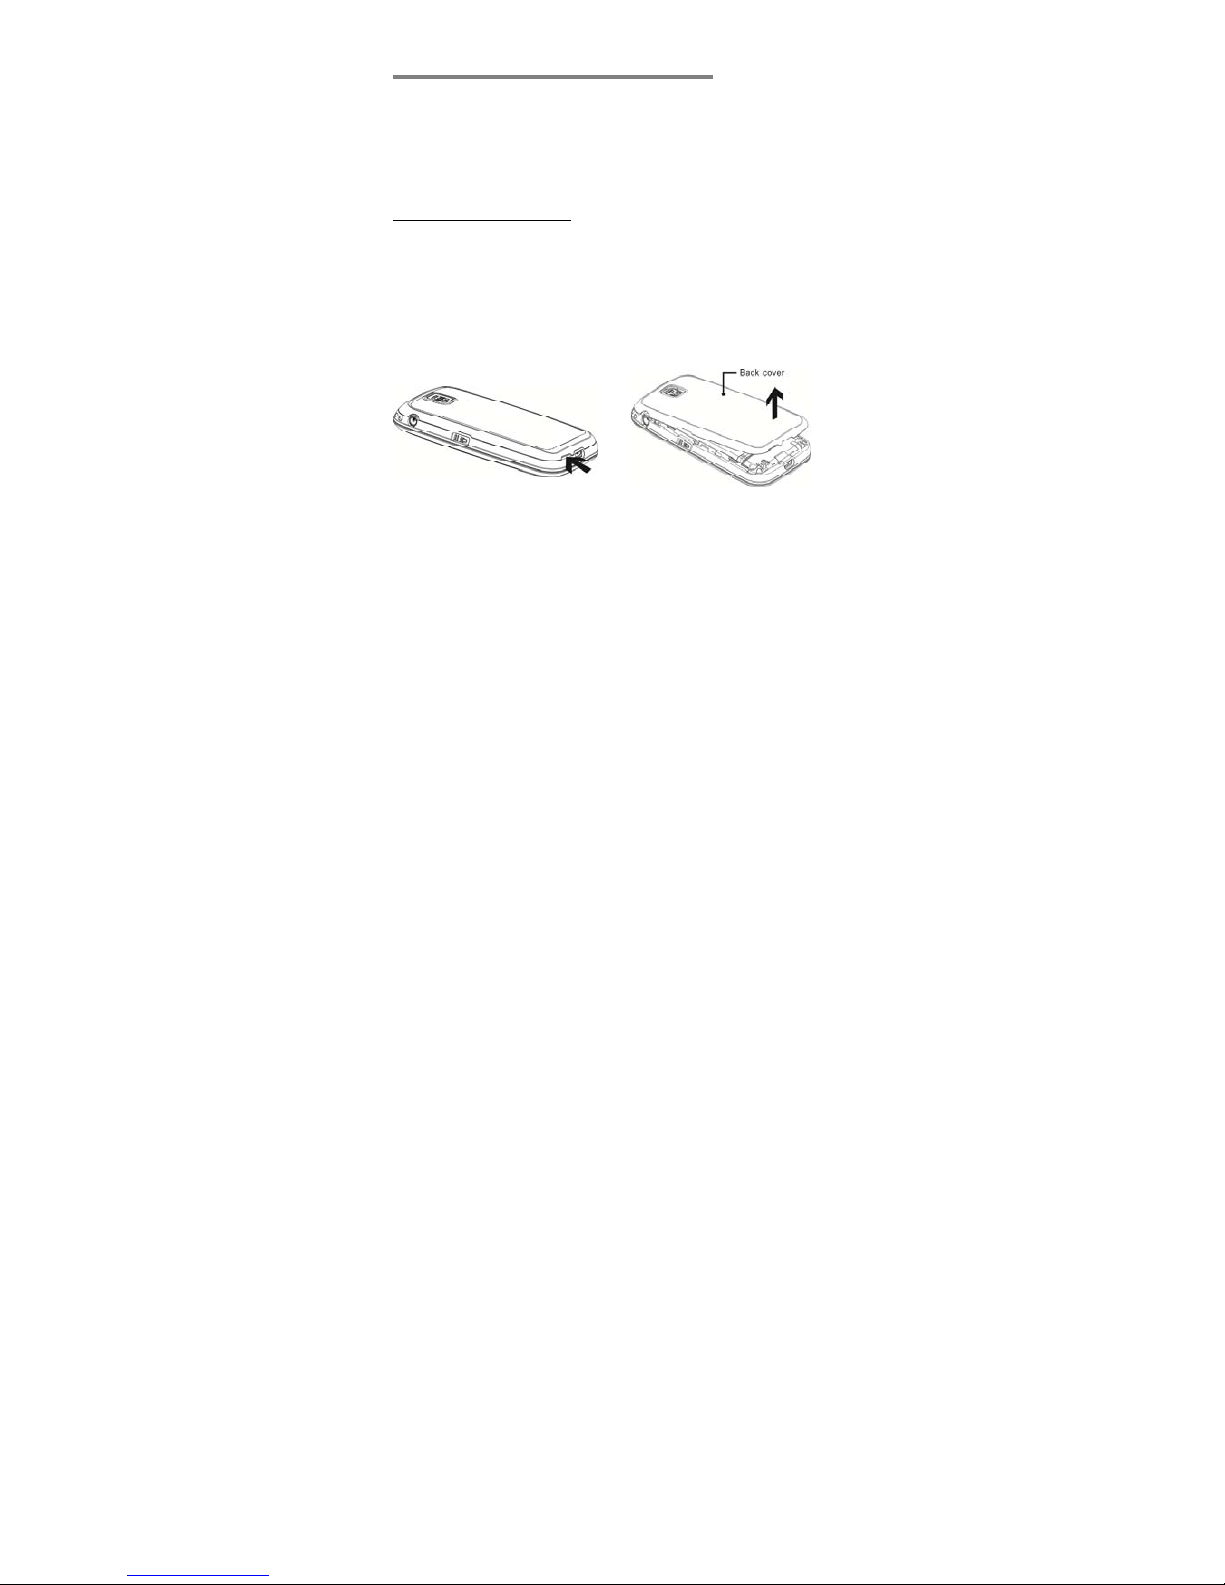
1. Make sure that the phone is switched off.
2. Remove the back cover.

17
Binatone Help Line : 0845 345 9677
3. Slide the SIM card into SIM1 or SIM2. Make sure that
the metal contact of the card is facing down and the
beveled corner is in the direction as shown in the picture.
5.2 Insert Battery
1. Align the gold contacts of the battery with the
corresponding connectors in the battery compartment.
2. Push down the battery until it clicks into place.
3. Replace the back cover by aligning the back cover
tabs with the notches located in the back panel.
4. Close the back cover by pushing it down until it clicks
into place.

www.binatonetelecom.com 18
5.3 Charge Battery
Speakeasy 600 is powered by a rechargeable battery.
New batteries are only partially charged when shipped.
Before you start using your phone, you need to charge the
battery for at least 12 hours.
1. Connect the supplied power adaptor to a wall outlet.
2. Connect the power cord to Speakeasy 600 as shown
in the picture. The battery charging indicator starts
scrolling and the red status light turns on.
1. The charging indicator stops scrolling when the battery
is fully charged.
2. Disconnect the charger.
Tips:
You can also charge Speakeasy 600 by connecting it to a
computer using the supplied USB data cable.
If the battery is totally flat, it may take a while before the
charging indicator starts scrolling.
Battery performance depends on your usage patterns.
19
Binatone Help Line : 0845 345 9677
Caution:
Risk of explosion if the battery is replaced by an incorrect
type.
Dispose of used batteries according to the instructions.
IMPORTANT
Use only the rechargeable battery that is provided with
your Speakeasy 600.
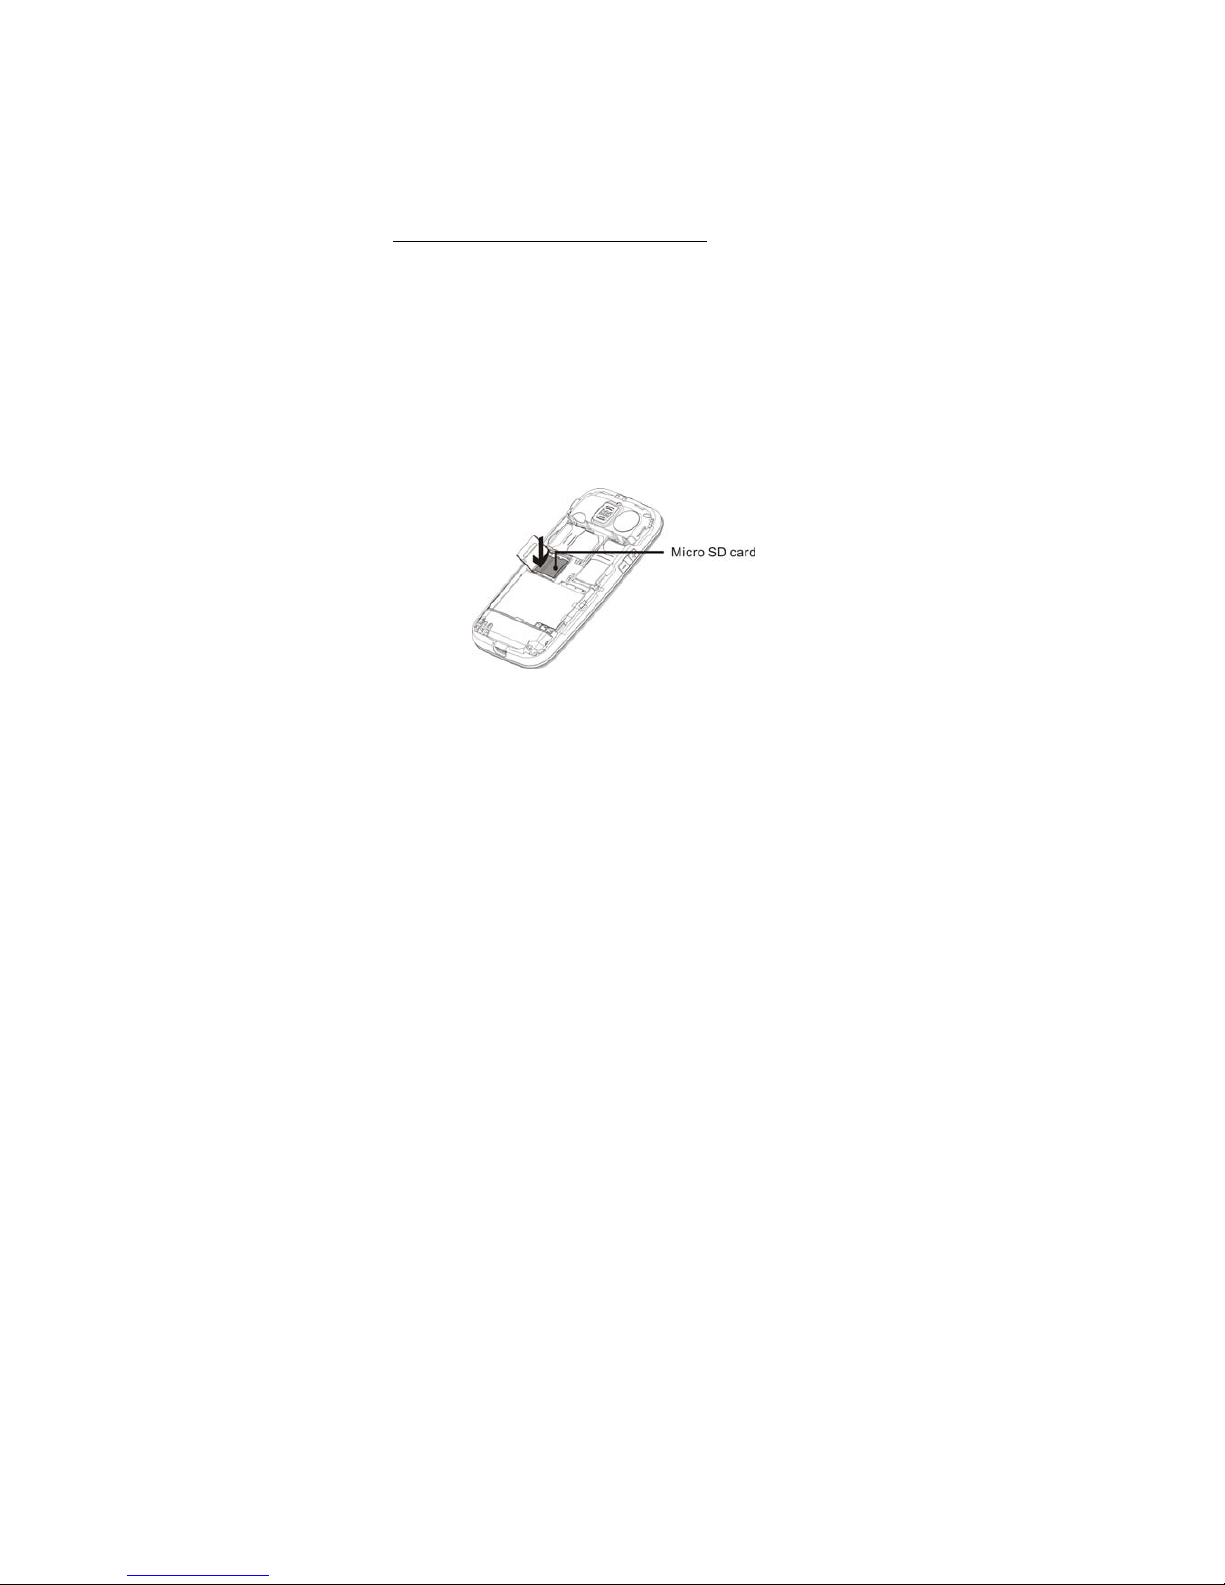
5.4 Insert a Memory (micro SD) card
If you want to download music or pictures using Bluetooth,
record Audio or Video, or store many photos, you will
need to insert a micro SD memory card to store these files.
1. Make sure that the phone is switched off and remove
the back cover, as described in Install SIM card on
page 16.
2. Slide the SD card holder open and insert the micro SD
card into the holder, making sure that the metal contac ts
of the card are facing down.
3. Slide the SD card holder closed, and replace the
battery and back cover.

www.binatonetelecom.com 20
6 SWITCHING ON AND OFF
To switch the phone on and off
To switch off, press and hold
until the display clears.
To switch back on, press and hold
until the display
turns on.
Warning! Do not switch on when mobile phone use is
prohibited or when it may cause interference or
danger.

21
Binatone Help Line : 0845 345 9677
7 MAKING & ANSWERING CALLS
7.1 Make a call
1. Slide the phone open.
2. Enter the phone number using the keypad and press
twice. (When you install two SIM cards, you can
select SIM1/SIM2 voice call)
7.2 Answer a call
1. When the phone rings, slide the phone open or press
to answer the call.
2. If you are using the supplied earphones, press the
earphone button to answer the call.
7.3 End a call
1. Slide the phone closed or press .
2. If you are using the supplied earphones, press the
earphone button to end the call.
7.4 Speed dial
1. Slide the phone open.
2. Press and hold the speed dial number (
to ) to
dial out the number. (see Set speed dial numbers on
page 30)
7.5 Adjust volume during a call
Press / volume keys on the side of the phone.

www.binatonetelecom.com 22
7.6 Dial from the phonebook
1. From the home screen, press to access the
Phonebook.
2. Enter the first letter(s) of the name, and/or scroll to the
name, then press
twice to call the number. (When
you install two SIM cards, you can select SIM1/SIM2
voice call)
7.7 Dial from the call log
1.
From the home screen, press to access the
Call Log.
2. Scroll to the name or number you wish to call and
press twice to call the number. (When you install
two SIM cards, you can select SIM1/SIM2 voice call)
7.8 Reject an incoming call
Press .

23
Binatone Help Line : 0845 345 9677
8 SOS CALL FUNCTION
IMPORTANT: Make sure that the SOS Call Function is
activated (see Activate / Deactivate SOS Call function
on page 24)
The SOS Call button works even when the phone is
locked.
In an emergency situation, you can make an SOS call by
pressing the blue SOS call button located at the back of
the phone. It enables the user to quickly call up to 5
different numbers for help.
8.1 Using the SOS call button
1. Press and hold the blue SOS call button, located at
the back of the phone, for at least 3 seconds.
If SOS Alarm Ring is activated (see Activate /
Deactivate SOS Alarm Ring on page 24), an alert
tone will be issued for 3 seconds, unless the handset
is in silent mode.
2. The phone will then send the SOS message (see
Activate / Deactivate SOS SMS on page 24) to all
the programmed SOS numbers, followed by a call to
the first SOS number.
The phone will switch to handsfree mode if the call is
successfully connected.
3. If the first call cannot be connected, the phone will call
the next SOS number (if available) and will keep calling
the SOS numbers in turn, until finished 3 cycles and
then stop.
4. To cancel the SOS operation at any time, press
.

www.binatonetelecom.com 24
8.2 Activate / Deactivate SOS Call function
If the SOS key setting is deactivated, pressing the blue
SOS call button will not initiate the SOS sequence, and a
warning note will be shown on the display.
1.
From the home screen, press to enter the main menu.
2. Scroll to and select Care > SOS key.
3. Scroll to Settings and select Activate or select
Deactivate.
8.3 Activate / Deactivate SOS Alarm Ring
If the SOS Alarm Ring is deactivated, pressing the blue
SOS call button will initiate the SOS sequence, but the 3second alert tone will not be played.
1.
From the home screen, press to enter the main menu.
2. Scroll to and select Care > SOS key.
3. Scroll to SOS Alarm Ring and select Activate or
select Deactivate.
8.4 Activate / Deactivate SOS SMS
If the SOS SMS is deactivated, pressing the blue SOS call
button will initiate the SOS sequence, but the SMS
message will not be sent.
1.
From the home screen, press to enter the main menu.
2. Scroll to and select Care > SOS key.
3. Scroll to SOS SMS and select Activate or select
Deactivate.

25
Binatone Help Line : 0845 345 9677
8.5 Add SOS numbers
The SOS Call function will not work unless the SOS Num
contains at least one number.
1.
From the home screen, press to enter the main menu.
2. Scroll to and select Care > SOS key.
3. Scroll to SOS Num and press
OK.
The screen will show a list of stored numbers or Empty.
4. Scroll to the entry you wish to add an SOS number
and press
Option.
You can add up to 5 numbers.
5. Enter the user name using the keypad.
6. Press
Option and then OK to confirm it is done.
7. Press
, enter the phone number and then press
OK to confirm.
8. Press
Yes to save the entry.
8.6 Edit SOS numbers
1.
From the home screen, press to enter the main menu.
2. Scroll to and select Care > SOS key.
3. Scroll to SOS Num and press OK.
4. Scroll to the entry you wish to edit and press
Option.
5. Press
OK to edit the entry.
6. Press
Edit to modify the user name.
Press
Clear to delete the character before the
cursor; press
or to move the cursor.
7. When you have modified the name, press
Option
and then
OK to confirm it is done.

www.binatonetelecom.com 26
8. Press and then modify the phone number.
Press to delete the number before the cursor.
9. When you have changed the phone number, Press
OK.
10. Press
Yes to save the changes.
8.7 Delete SOS numbers
1.
From the home screen, press to enter the main menu.
2. Scroll to and select Care > SOS key.
3. Scroll to SOS Num and press OK.
4. Scroll to the entry you wish to delete and press
Option.
5. Scroll to Erase and press
OK.
6. Press
Yes to delete the entry.
8.8 Edit SOS SMS Content
1.
From the home screen, press to enter the main menu.
2. Scroll to and select Care > SOS key.
3. Scroll to SOS Content and press OK.
The default message content is displayed.
4. If you wish to change the content, press Edit.
Press
Clear to delete the character before the
cursor; press and hold
Clear to delete all the
characters.
5. Enter your new message using the keypad.
6. When you have completed the message, press
Option and then OK to confirm it is done.
7. Press
Back to return to the menu list.

27
Binatone Help Line : 0845 345 9677
9 QUICK NUMBER FUNCTION
Speakeasy 600 lets you store up to 5 frequently used
numbers so that you can easily access these numbers
from the home screen.
From the home screen, press
to access the Quick
Number list. Scroll to the number you wish to call and
press
twice to call the number. (When you install two
SIM cards, you can select SIM1/SIM2 voice call)
9.1 Add a Quick Number
1. From the home screen, press to enter the Quick
Number list.
2. Scroll to the entry you wish to add a quick number and
press
Option.
You can add up to 5 numbers.
3. Enter the user name using the keypad.
4. Press
Option then OK to confirm it is done.
5. Press
, enter the phone number and then press
OK to confirm.
6. Press
Yes to save the entry.
9.2 Call a Quick Number
1. From the home screen, press to enter the Quick
Number list.
2. Scroll to the number you wish to call.
3. Press
Option then OK to call the number.

www.binatonetelecom.com 28
9.3 Edit a Quick Number
1. From the home screen, press to enter the Quick
Number list.
2. Scroll to the entry you wish to edit and press Option.
3. Scroll to Edit and press
OK.
4. If you wish to change the name, press
Edit, then
modify the user name using the keypad.
Press Clear to delete character before the cursor.
5. Press
Option then OK to confirm it is done.
6. Press
and then modify the phone number.
Press
Clear to delete the number before the cursor.
7. Press
OK when it is corrected.
8. Press
Yes to save the changes.
9.4 Delete a Quick Number
1. From the home screen, press to enter the Quick
Number list.
2. Scroll to the entry yo u wish to de le te an d press
Option.
3. Scroll to Delete and press
OK.
4. Press
Yes to confirm deletion.
 Loading...