

Page 1
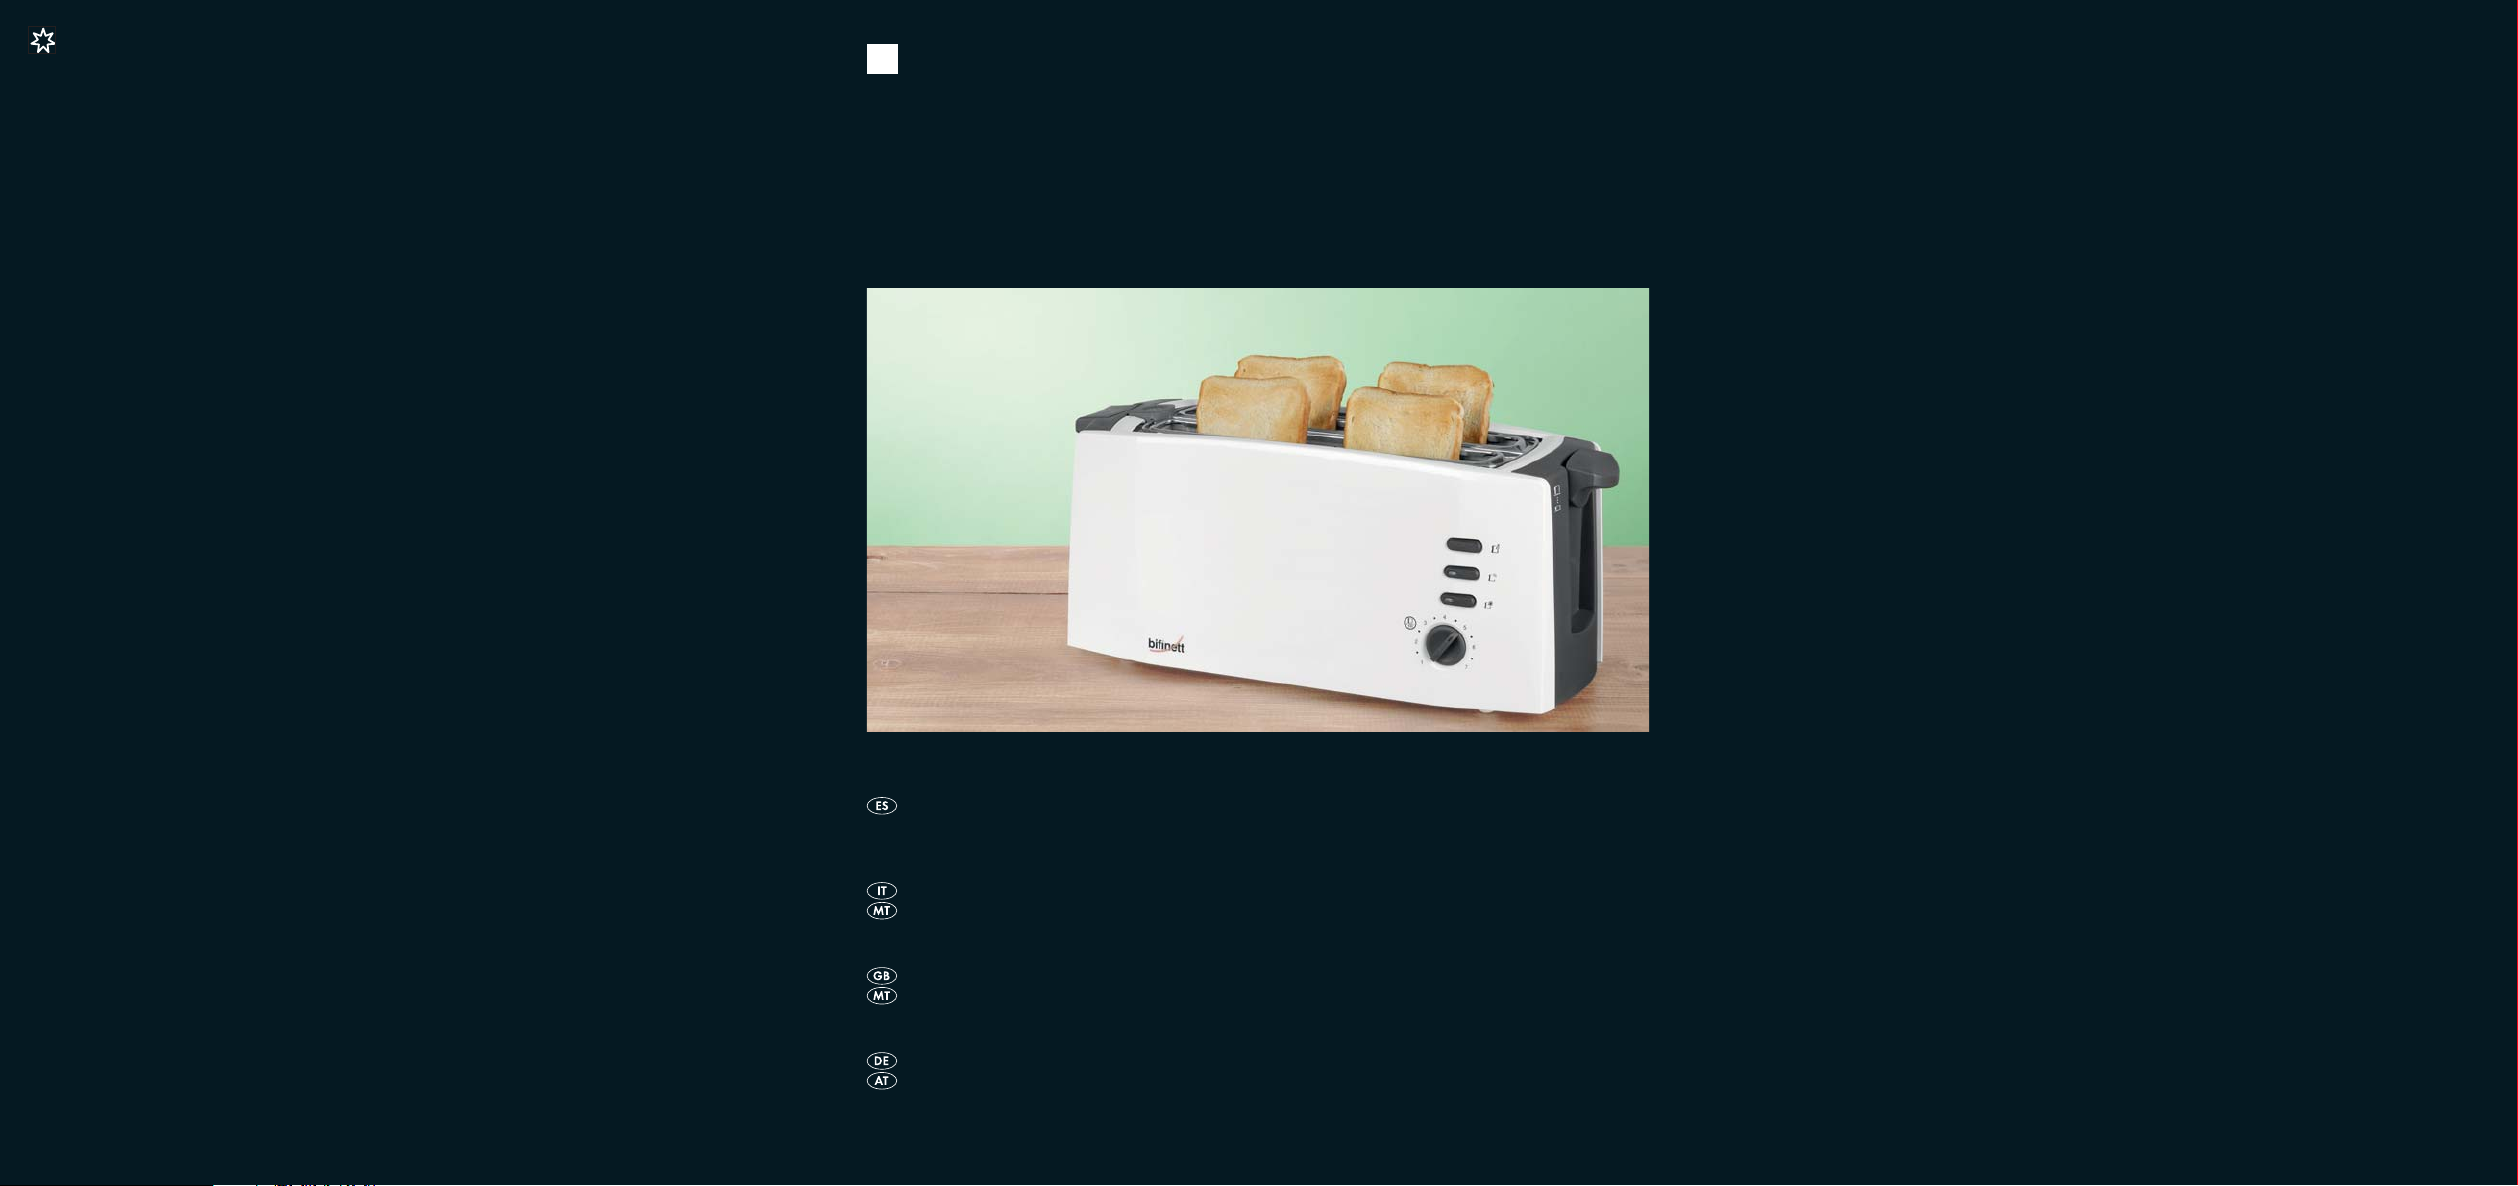
TOSTADORA DOBLE
TOSTAPANE A DUE FESSURE
KOMPERNASS GMBH · BURGSTRASSE 21 · D-44867 BOCHUM
www.kompernass.com
ID-Nr.: KH1552-12/08-V1
KH 1552
TOSTADORA DOBLE
Instrucciones de uso
TOSTAPANE A DUE FESSURE
Istruzioni per l'uso
DUAL LONG-SLIT TOASTER
Operating instructions
DOPPEL-LANGSCHLITZTOASTER
Bedienungsanleitung
Page 2
KH 1552
o
i
u
q
w
e
r
t
y
Page 3

ÍNDICE PÁGINA
Uso conforme al previsto 2
Características técnicas 2
Elementos de mando 2
Indicaciones de seguridad importantes 2
Indicaciones para el manejo 3
Antes de la primera puesta en funcionamiento 3
Ajustar el grado de tueste (tiempo de tueste) 3
Tueste 3
Interrumpir el proceso de tostado 4
Función de calentar 4
Función de descongelar 4
Compartimento para migas 4
Accesorio para panecillos 4
Limpieza y mantenimiento 4
Evacuación 5
Garantía y asistencia técnica 5
Importador 5
¡Guardar estas instrucciones para preguntas posteriores – e, igualmente entregar éstas, en caso de dar el
aparato a terceras personas!
- 1 -
Page 4
TOSTADORA DOBLE
KH 1552
Indicaciones de seguridad
importantes
Uso conforme al previsto
Este aparato está previsto para el tueste de rebanadas
de pan, panecillos y gofres en el uso casero. No
está indicado para ser utilizado con otros productos
alimentarios ni otros materiales, ni tampoco para
el uso en campos comerciales ni industriales. Cualquier uso distinto o modificación no se considera
conforme al previsto y puede entrañar riego de
accidentes considerables.
Características técnicas
Tensión nominal: 220 - 240V ~50 Hz
Potencia nominal: 1300 - 1500 W
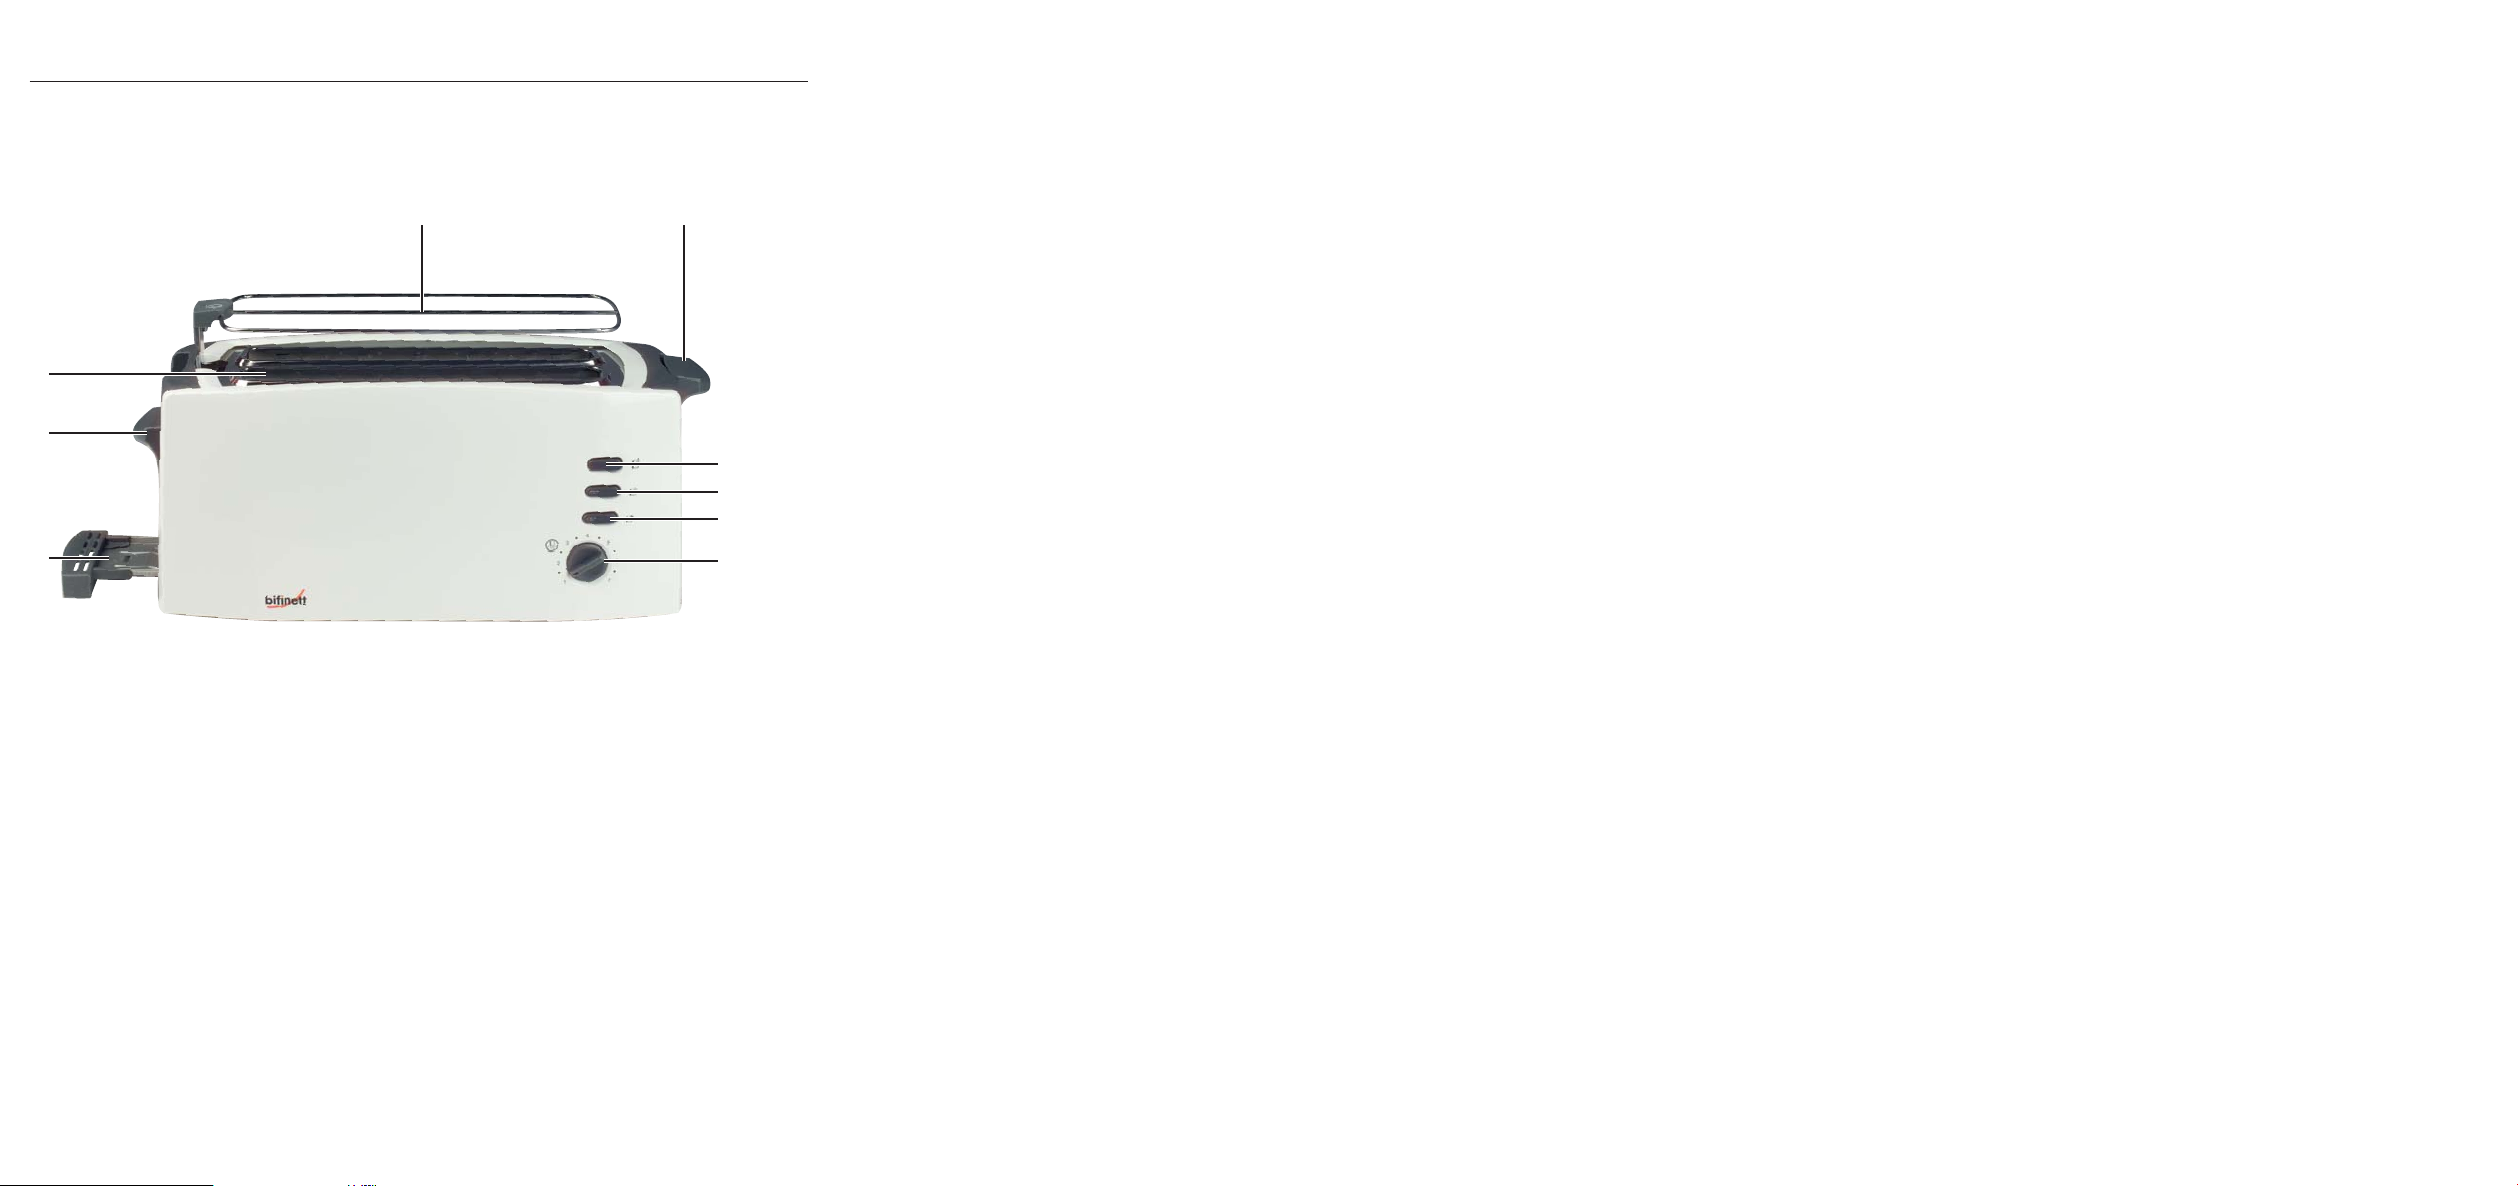
Elementos de mando
Accesorio para panecillos
q
Tecla de mando
w
Tecla de parada para la interrupción del
e
proceso de tostado
Tecla para la función de calentar
r
Tecla para la función de descongelar
t
Regulador de intensidad de tueste (para el
y
sistema temporizador electrónico de tueste
con regulación progresiva)
Compartimento para migas
u
Tecla del accesorio para panecillos
i
Compartimento para tostar
o
Para evitar el peligro de muerte
por descarga eléctrica:
• No introduzca nunca cubiertos u otros objetos
metálicos en los compartimentos para tostar.
• Asegúrese de que el aparato no pueda entrar
nunca en contacto con el agua mientras la clavija
de red se encuentre en la base de enchufe, especialmente si utiliza el aparato en una cocina,
cerca de un fregadero.
• Preste atención de que el cable de red no se
moje o entre en contacto con humedad durante
el servicio. Tiéndalo de modo que no pueda ser
aplastado o dañado de forma alguna.
• En caso de que la clavija de red o el cable de
red estén dañados, encomiende su sustitución a
personal técnico autorizado o al servicio de
posventa, con el fin de evitar riesgos.
• Después del uso extraiga siempre la clavija de
red de la base de enchufe, para evitar una
re-conexión involuntaria.
Para evitar un peligro de incendio
y de lesiones:
• Los componentes del aparato se calientan durante el funcionamiento del mismo. Por lo tanto,
toque sólo los elementos de mando.
• ¡El producto que se va a tostar puede arder!
Por ello, no coloque el aparato nunca cerca ni
bajo objetos inflamables, especialmente no lo
coloque bajo cortinas ni armarios colgantes.
• No cubra la tostadora mientras esté en funcionamiento.
• No permita utilizar el aparato a personas (incluidos
los niños) cuyas facultades físicas, sensoriales
o mentales, así como su falta de conocimientos
o de experiencia, les impida hacer un uso seguro
del mismo si no están bajo vigilancia o no han
sido instruidos correctamente.
- 2 -
Page 5
• Vigile a los niños para asegurarse de que no
juegan con el aparato.
• Utilice el aparato solamente sobre una superficie
estable, antideslizante y plana.
Indicaciones para el manejo
Ajustar el grado de tueste
(tiempo de tueste)
Puede ajustar el grado de tueste deseado, de «claro»
(1) a «oscuro» (7), con el regulador progresivo de
intensidad de tueste
electrónico.
del sistema temporizador
y
• Tueste el pan moreno a un grado de tueste mayor
que el pan blanco. El pan duro y seco se tuesta
más rápido que el fresco.
• No utilice rebanadas demasiado grandes ni
gruesas, pues se atascan fácilmente.
Atención:
En caso de averías o para realizar trabajos de limpieza, saque la clavija de red de la base de enchufe.
¡Riesgo por descarga eléctrica!
• Para sacar las rebanadas de pan atascadas utilice
una varilla de madera sin punta (p. ej. el mango
de un pincel). Al hacerlo no toque las resistencias.
• Las diferencias entre los tipos de pan, así como
la humedad y el espesor de cada rebanada, influyen sobre el tueste del pan. Por este motivo se
debe conservar el pan si es posible en un envase
cerrado.
Antes de la primera puesta en
funcionamiento
Ponga la tostadora en funcionamiento sin pan en la
posición máxima al menos cinco veces. Lea también
«Limpieza y mantenimiento» para informarse sobre
la limpieza de la tostadora.
Por favor tenga en cuenta la siguiente
información:
La tecla de mando
alimentación conectado. En el primer uso es posible que se produzca un ligero olor (también puede
generarse un poco de humo). Esto es normal y cesa al
poco tiempo. Procure que haya suficiente ventilación.
encaja sólo estando el cable de
w
Tenga en cuenta que tras la carga de la tostadora el grado de tueste varia aunque se mantenga el mismo ajuste para el regulador de tueste
. Cuanto menos rebanadas de pan
y
introduzca, mayor será el grado de tueste.
Baje de graduación el regulador de tueste
si introduce menos carga de pan.
y
Tueste
Atención:
¡No cubra el compartimento para tostar odurante
el funcionamiento de la tostadora! ¡Existe riesgo de
incendio! ¡Esto podría estropear el aparato de forma
irreparable!
• Después de ajustar el grado de tueste deseado
coloque el pan en el compartimento para tostar
• Presione hacia abajo la tecla de mando
• El centrado automático del pan de la KH 1552
centra el pan colocado en el compartimento
para tostar
• Una vez alcanzado el grado de tueste deseado,
la tostadora se apaga automáticamente y las
rebanadas de pan salen de nuevo hacia arriba.
• La KH 1552 dispone de una función elevadora
gracias a la que puede retirar de forma sencilla
y segura las rebanadas de pan calientes del
compartimento para tostar
la tecla de mando
o
.
hacia arriba.
w
. Para ello deslice
o
w
o
.
.
- 3 -
Page 6
Interrumpir el
proceso de tostado
Si desea interrumpir el proceso de tostado, pulse la
tecla de parada
. La tostadora se apagará.
e
Función de calentar
La función de calentar rle permite calentar el pan
sin dorarlo. Por ejemplo si se ha enfriado el pan ya
tostado. El pan se calienta sólo brevemente. Esta
función se reconoce por la indicación luminosa del
botón de mando.
• Introduzca el pan y pulse la tecla de mando
hacia abajo.
• Accione la tecla correspondiente a la función de
calentar
• La tostadora se apaga automáticamente y las
rebanadas de pan salen de nuevo hacia arriba.
r
.
w
Función de descongelar
Compartimento para migas
Durante el tueste se acumulan las migas desprendidas
en el compartimento para migas
migas extraiga el compartimento para migas
lateralmente.
. Para retirar las
u
u
Accesorio para panecillos
• No coloque nunca los panecillos directamente
sobre la tostadora, utilice siempre el accesorio
para panecillos
• Pulse la tecla del accesorio para panecillos
hacia abajo hasta que éste haya salido
completamente.
• Coloque los panecillos encima e inicie el proceso
de tostado. Coloque la graduación del regulador
de intensidad de tueste
Coloque los panecillos sobre el accesorio
para panecillos
caerse. Los panecillos están muy calientes al
finalizar el proceso de tostado.
.
q
como máximo al nivel 3.
y
de manera que no puedan
q
i
Accionando la función de descongelar tse puede
también descongelar el pan congelado. Durante este
proceso el tostador calienta el pan lentamente. Esta
función se reconoce por la indicación luminosa del
botón de mando.
• Introduzca el pan y pulse la tecla de mando
hacia abajo.
• Accione la tecla correspondiente a la función de
descongelar
• La tostadora se apaga automáticamente y las
rebanadas de pan salen de nuevo hacia arriba.
Según el grado de tueste ajustado se
descongelará o dorará el pan.
t
.
w
• En cuanto la tostadora se desconecte, dé la
vuelta al panecillo para que se tueste por el
otro lado y vuelva a conectar la tostadora.
• Coloque el accesorio para panecillos
vuelta a su posición inicial deslizando nuevamente hacia arriba la tecla del accesorio para
panecillos
i
.
Limpieza y mantenimiento
¡Advertencia!
Antes de la limpieza retire la clavija de red de la
tostadora y deje que se enfríe. ¡Peligro de lesiones!
¡Nunca sumerja el aparato en agua u otros
líquidos! ¡Esto podría estropear el aparato
de forma irreparable!
- 4 -
q
de
Page 7
• No utilice productos de limpieza agresivos ni
abrasivos. Dichas sustancias corroen la superficie
del aparato.
• Limpie la carcasa con un paño seco o un trapo
ligeramente humedecido.
• Vacíe en intervalos regulares el compartimento
para migas
, para evitar el riesgo de incendio.
u
Evacuación
En ningún caso deberá tirar el aparato
a la basura doméstica. Este producto
está sujeto a la directiva europea
2002/96/EC.
Evacue el aparato en un centro de evacuación autorizado a través de las instalaciones de evacuación
comunitarias.
Preste atención a las normas en vigor.
En caso de dudas póngase en contacto con su
centro de evacuación.
El material de embalaje debe desecharse
de forma respetuosa con el medio ambiente.
Garantía y asistencia técnica
Con este aparato recibe usted 3 años de garantía
desde la fecha de compra. El aparato ha sido fabricado cuidadosamente y ha sido probado antes de
su entrega. Guarde el comprobante de caja como
justificante de compra. Si necesitara hacer uso de
la garantía, póngase en contacto por teléfono con
su punto de servicio habitual. Éste es el único modo
de garantizar un envío gratuito.
La garantía cubre los defectos de fabricación o del
material, pero no las piezas sujetas a desgaste y
los daños sufridos por las piezas frágiles (p. ej. el
interruptor o las pilas). Este producto ha sido diseñado exclusivamente para el uso particular y no
para el uso industrial.
En caso de un tratamiento inadecuado e indebido,
uso de la fuerza bruta e intervenciones por asistencia técnica distinta a la autorizada por nosotros, se
extinguirá la garantía. Esta garantía no reduce en
forma alguna sus derechos legales.
Kompernass Service España
C/Invención 7
Polígono Industrial Los Olivos
28906 Getafe – Madrid
Tel.: 902/884663
Fax: 91/6652551
e-mail: support.es@kompernass.com
Importador
KOMPERNASS GMBH
BURGSTRASSE 21
44867 BOCHUM, GERMANY
www.kompernass.com
- 5 -
Page 8

- 6 -
Page 9

INDICE PAGINA
Uso conforme 8
Dati tecnici 8
Elementi di comando 8
Importanti indicazioni di sicurezza 8
Indicazioni d'uso 9
Prima del primo impiego 9
Impostazione del grado di doratura (tempo di tostatura) 9
Tostatura 9
Interruzione del procedimento di tostatura 10
Funzione di riscaldamento 10
Funzione di scongelamento 10
Cassetto di raccolta delle briciole 10
Accessorio per panini 10
Pulizia e cura 10
Smaltimento 11
Garanzia e assistenza 11
Importatore 11
Conservare le presenti istruzioni per consultarle in futuro; in caso di cessione dell'apparecchio a terzi,
consegnare anche le istruzioni!
- 7 -
Page 10

TOSTAPANE A DUE
FESSURE KH 1552
Importanti indicazioni di
sicurezza
Uso conforme
Il presente apparecchio è previsto per la tostatura
di fette di pane, panini e waffel per uso domestico.
Esso non è previsto per l'impiego con altri alimenti
o altri materiali ovvero per l'impiego in ambienti
commerciali e industriali. Qualunque altro impiego
o modifica dell'apparecchio è da considerarsi non
conforme alla destinazione e comporta gravi rischi
di infortunio.
Dati tecnici
Tensione nominale: 220 - 240V ~50 Hz
Potenza nominale: 1300 - 1500 W
Elementi di comando
Accessorio per panini
q
Tasto di comando
w
Tasto Stop per interrompere il procedimento
e
di tostatura
Tasto per la funzione di riscaldamento
r
Tasto per la funzione di scongelamento
t
Regolatore del grado di doratura (per il coman-
r
do elettronico regolabile in continuo relativo al
tempo di tostatura)
Cassetto di raccolta delle briciole
u
Tasto accessorio per panini
i
Vano di tostatura
o
Per evitare il pericolo di morte per
scossa elettrica:
• Non inserire mai posate o altri oggetti metallici
nel vano di tostatura.
• Impedire che l'apparecchio venga a contatto
con l'acqua, quando la spina di rete è collegata
alla presa di rete, e in particolare se utilizzato in
cucina nelle vicinanze di un lavandino.
• Accertarsi che durante il funzionamento il cavo
di alimentazione non si bagni o inumidisca.
Disporlo in modo che non venga schiacciato o
danneggiato in altro modo.
• Fare sostituire immediatamente il cavo o la spina
di rete danneggiato da personale specializzato
autorizzato del centro di assistenza, per evitare
pericoli.
• Dopo l'uso staccare sempre la spina dalla presa
di rete, per evitare un'accensione involontaria.
Al fine di evitare il pericolo di incendio
e lesioni:
• i componenti dell'apparecchio possono surriscaldarsi durante l'uso. Toccare quindi solo gli elementi di comando.
• Gli alimenti in cottura possono incendiarsi!
Per questa ragione l'apparecchio non deve mai
essere posizionato in prossimità o in presenza
di oggetti infiammabili, in modo particolare sotto
tende o pensili.
• Non coprire mai il tostapane quando è in funzione.
• Questo apparecchio non è indicato per l'uso da
parte di persone (inclusi bambini) con limitate
capacità fisiche, sensoriali o mentali o prive dell'esperienza e/o della conoscenza necessaria, a
meno che tali persone non vengano sorvegliate
da un responsabile per la sicurezza o abbiano
ricevuto indicazioni sull'impiego dell'apparecchio.
• Sorvegliare i bambini per assicurarsi che non
giochino con l'apparecchio.
- 8 -
Page 11

• Azionare l'apparecchio solo su una superficie
stabile, antisdrucciolevole e piana.
Indicazioni d'uso
• Il pane integrale deve essere cotto con un grado
di doratura superiore rispetto al pane bianco. Il
pane vecchio e asciutto viene dorato più rapidamente rispetto a quello fresco.
• Non utilizzare fette troppo grosse o troppo spesse,
poiché potrebbero incastrarsi facilmente.
Attenzione:
in caso di guasti o prima della pulizia, staccare la
spina dalla presa di rete. Pericolo di scossa elettrica!
• Staccare le fette di pane incastrato con un bastoncino di legno non appuntito (ad esempio il
manico di un pennello). Nel farlo non toccare
le resistenze.
• Le differenze nel tipo di pane, umidità e spessore
delle singole fette influiscono sul grado di doratura del pane da tostare. Si consiglia pertanto di
conservare il pane da tostare in una confezione
chiusa.
Prima del primo impiego
Il tostapane deve essere messo in funzione a vuoto
almeno cinque volte alla temperatura massima. Per
indicazioni sulla pulizia del toastapane leggere
anche alla voce »Pulizia e cura«.
Ricordare quanto segue:
il tasto di comando
di rete collegato. Durante il primo impiego può svilupparsi un leggero odore (e anche una leggera
formazione di fumo). Si tratta di un evento normale
che cessa di manifestarsi dopo poco tempo.
Provvedere a una sufficiente aerazione.
si inserisce solo con il cavo
w
Impostazione del grado di
doratura (tempo di tostatura)
Il grado di tostatura desiderato da "chiaro" (1) a
"scuro" (7) può essere impostato con il regolatore
di doratura
regolazione in continuo del tempo di tostatura.
Ricordare che, a seconda della quantità di
pane inserita nel tostapane, il grado di doratura varia anche lasciando inalterata l'impostazione del regolatore del grado di doratura
Meno fette di pane si inseriscono, maggiore
sarà il grado di doratura delle stesse. Pertanto,
in caso di inserimento di una quantità inferiore
di pane, impostare il regolatore del grado di
doratura
del comando elettronico per la
y
a un livello inferiore.
y
y
Tostatura
Attenzione:
durante il funzionamento del tostapane non coprire
il vano di tostatura
recchio potrebbe danneggiarsi irreparabilmente!
• Dopo aver impostato il grado di doratura desiderato, collocare il pane nel vano di tostatura
• Premere il tasto di comando
• La centratura automatica dell'apparecchio
KH 1552 consente di centrare il pane inserito
nel vano di tostatura
• Una volta raggiunto il grado di doratura desiderato, il tostapane si spegne automaticamente e
le fette di pane vengono espulse verso l'alto.
• L'apparecchio KH 1552 dispone di una funzione
di sollevamento che permette di estrarre più facilmente e con maggiore sicurezza le fette di pane
bollenti dal vano di tostatura
il tasto di comando
. Pericolo d'incendio! L'appa-
o
verso il basso.
w
.
o
. A tal fine spingere
o
verso l'alto.
w
o
!
.
- 9 -
Page 12

Interruzione del
procedimento di tostatura
Se si desidera interrompere il procedimento di tostatura,
premere il tasto Stop
. Il tostapane si spegne.
e
Funzione di riscaldamento
La funzione di riscaldamento rpermette di riscaldare il pane senza dorarlo. Essa è utile ad esempio
per riscaldare il pane tostato che si è raffreddato. Il
pane viene riscaldato solo brevemente. Questa funzione è visibile tramite la spia collocata sul pulsante
di comando.
• Inserire il pane e premere il tasto di comando
verso il basso.
• Azionare il tasto per la funzione di riscaldamento
• Il tostapane si spegne automaticamente e le fette
di pane vengono respinte verso l'alto.
r
.
w
Cassetto di raccolta delle briciole
Nel corso della tostatura, le briciole in caduta finiscono nel cassetto di raccolta delle briciole
rimuovere le briciole, estrarre lateralmente il cassetto
di raccolta delle briciole
u
.
u
. Per
Accessorio per panini
• Non collocare mai i panini direttamente sul tostapane, bensì utilizzare sempre l'apposito
accessorio
• Premere il tasto per l'accessorio panini
l'alto, fino a ottenerne la completa estrazione.
• Collocare quindi i panini sull'accessorio e avviare
il procedimento di tostatura. Impostare il regolatore di tostatura
Collocare i panini sull'accessorio
tale che non cadano attraverso di esso. Ricordare che i panini sono bollenti subito dopo il
procedimento di tostatura.
.
q
non oltre il livello 3.
y
i
in modo
q
verso
Funzione di scongelamento
Attivando la funzione di scongelamento tè possibile scongelare anche il pane da tostare surgelato.
Il tostapane in tal caso riscalda il pane lentamente.
Questa funzione è visibile tramite la spia collocata
sul pulsante di comando.
• Inserire il pane e premere il tasto di comando
verso il basso.
• Azionare il tasto per la funzione di scongelamento
• Il tostapane si spegne automaticamente e le fette
di pane vengono respinte verso l'alto.
.
t
A seconda del grado di doratura impostato, il
pane verrà scongelato ovvero dorato.
w
• Non appena il tostapane si spegne, girare i panini
per farli dorare sull'altro lato e riaccendere il
tostapane.
• Riportare l'accessorio per panini
zione di partenza, spingendo nuovamente verso
l'alto il tasto per l'accessorio per panini
nella posi-
q
Pulizia e cura
Avviso!
Prima di ogni pulizia staccare la spina dalla presa
e far raffreddare il tostapane. Pericolo di lesioni!
Non immergere mai l'apparecchio in acqua o
altri liquidi. L'apparecchio può danneggiarsi
irreparabilmente.
- 10 -
i
.
Page 13

• Non utilizzare detergenti abrasivi o corrosivi.
Essi attaccano la superficie dell'apparecchio.
• Pulire l'apparecchio con un panno asciutto o
con uno straccio leggermente inumidito.
• Svuotare regolarmente la cassetta di raccolta
delle briciole
, per evitare incendi.
u
Kompernass Service Italia
Corso Lino Zanussi 11
33080 Porcia (PN)
Tel.: 0434/1851001
Fax: 0434/1851001
e-mail: support.it@kompernass.com
Smaltimento
Non gettare per alcun motivo l'apparecchio insieme ai normali rifiuti domestici. Questo prodotto è conforme alla
direttiva europea 2002/96/EC.
Smaltire l'apparecchio presso un'azienda autorizzata
o presso l'ente comunale di smaltimento.
Rispettate le prescrizioni attualmente in vigore.
In caso di dubbio mettersi in contatto con l'ente di
smaltimento competente.
Smaltire tutti i materiali dell'imballaggio in
modo ecologicamente conforme.
Garanzia e assistenza
Questo apparecchio è garantito per tre anni a partire
dalla data di acquisto. L'apparecchio è stato prodotto con cura e debitamente collaudato prima della
consegna. Conservare lo scontrino come prova d'acquisto. Nei casi contemplati dalla garanzia, mettersi
in comunicazione telefonicamente con il centro di
assistenza più vicino. Solo in tal modo è possibile
garantire una spedizione gratuita della merce.
La garanzia copre solo i difetti del materiale o di
fabbricazione. Il prodotto è destinato esclusivamente
all'uso domestico e non a quello commerciale.
La garanzia decade in caso di impiego improprio
o manomissione, uso della forza e interventi non
eseguiti dalla nostra filiale di assistenza autorizzata.
Questa garanzia non costituisce alcun limite ai diritti
legali del consumatore.
Importatore
KOMPERNASS GMBH
BURGSTRASSE 21
44867 BOCHUM, GERMANY
www.kompernass.com
- 11 -
Page 14

- 12 -
Page 15

CONTENT PAGE
Intended use 14
Technical Data 14
Operating Elements 14
Important safety instructions 14
Tips on usage 15
Before taking into use 15
Adjusting the level of browning (Toasting time) 15
Toasting 15
Interrupting the toasting process 15
Warming function 16
Thaw function 16
Crumb tray 16
Bread roll holder 16
Cleaning and Care 16
Disposal 17
Warranty and Service 17
Importer 17
Read the operating instructions carefully before using the appliance for the first time and preserve this
booklet for later reference. Pass the manual on to whomsoever might acquire the scale at a later date.
- 13 -
Page 16

DUAL LONG-SLIT
TOASTER KH 1552
Intended use
This appliance is intended for the toasting of slices
of bread, rolls and waffles in domestic environments. It is not intended for use with other foodstuffs,
other materials or for use in commercial or industrial
environments. Any other use, or alteration to the
appliance, is regarded as contrary to the intended
use and could increase the risk of accidents.
Technical Data
Power supply: 220 - 240V ~50 Hz
Nominal power: 1300 - 1500 W
Operating Elements
Important safety instructions
To avoid potentially fatal risks
through electric shock:
• NEVER insert cutlery or other metallic objects
into the toaster slots.
• Ensure that the appliance never comes into contact with water when the power plug is inserted
into a wall socket, especially if it is being used in
a kitchen and close to the sink.
• Ensure that the power cable never becomes wet
or moist when the appliance is in use. Lay the
cable such that it does not get clamped or otherwise damaged.
• To reduce risks, arrange for defective power plugs
and/or cables to be replaced as soon as possible
by qualified technicians or by our Customer Service
Department.
• After use, always remove the power plug from
the wall socket, this prevents the unintentional
switching on of the appliance.
Bread roll holder
q
Operator button
w
Stop button for interrupting the toasting
e
process
Button for the warming function
r
Button for the thaw function
t
Browning regulator (electronic, for infinitely
y
adjustable toasting time)
Crumb tray
u
Button for bread roll holder
i
Toast slot
o
To avoid the risks of fire or injury:
• The appliance can become hot when it is in use.
Therefore, only touch the operating elements.
• Bakery products can burn! You should therefore
NEVER locate the appliance close to or underneath inflammable objects, especially not under
curtains or suspended cupboards.
• NEVER cover the toaster when it is in use.
• This appliance is not intended for use by individuals
(including children) with restricted physical, physiological or intellectual abilities or deficiences in
experience and/or knowledge unless they are
supervised by a person responsible for their safety
or receive from this person instruction in how the
appliance is to be used.
• Children should be supervised to ensure that
they do not play with the appliance.
• Operate the appliance only on a stable,
non-slippery and level surface.
- 14 -
Page 17

Tips on usage
• Toast mixed-flour breads at higher browning
levels than white bread. Matured, dry bread
browns faster than fresh bread.
• Avoid using slices that are too big or too thick,
as these can easily become jammed in the
app-liance.
Attention
In the event of a malfunction and when cleaning the
appliance, remove the power plug from the wall
socket. Risk of electrical shock!
• Loosen jammed slices of bread with a blunt wooden
object (e.g. a wooden spatula or spoon). Do NOT
touch the heater elements.
• Differences in bread sorts, moisture and the thickness of individual slices influence the browning of
the toast. Bread for toasting should be kept in
sealed packaging until required.
:
Adjusting the level of browning
(Toasting time)
The desired level of browning, from "light" (1) to "dark"
(7), can be adjusted infinitely with the browning
regulator
of the toasting time electronics.
y
Take note that, dependant on the loading of
the toaster, the browning level varies with an
unchanged setting of the browning regulator
! The fewer the number of slices inserted, the
y
higher their level of browning. Therefore, always turn the browning regulator
little when inserting fewer slices.
y
down a
Toasting
Attention
NEVER cover the toasting slots owhen operating
the toaster! There is a risk of fire! The appliance
could become damaged!
:
Before taking into use
Heat the appliance up at least five times, at the maximum setting, without insertion of bread slices. For
details on cleaning the appliance read the section
»Cleaning and Care«.
Please take note:
The operator button
cable is connected to a power socket. With the first
usage a slight smell may occur (minimal smoke
development is also possible). This is normal and
dissipates after a short time. Please provide for
adequate ventilation.
only engages when the power
w
• After setting the desired browning level, place
the bread into the toasting slots
• Press the operator button
• The automatic bread centering device of the
KH 1552 centres the bread inserted into the
toasting slots
• When the desired level of browning has been
reached the toaster switches itself off automatically
and the slices are ejected.
• The KH 1552 has a lifting function, which makes
it easier and safer for you to take the hot slices
of toast from the toasting slots
the operator button
o
.
upwards.
w
w
.
o
downwards.
. For this, slide
o
Interrupting the
toasting process
If you wish to interrupt the toasting procedure, press
the STOP button
- 15 -
. The toaster switches itself off.
e
Page 18

Warming function
Bread roll holder
The warming function rmakes it possible for you
to warm bread without browning it. For example,
for toast that has gone cold. The bread is only briefly
warmed. This function is visible through the light
indicator placed in the operator button.
• Insert the bread and press the operator button
down.
w
• Activate the button for the warming function
• The toaster switches itself off automatically and
the bread slices are ejected.
r
Thaw function
Through activation of the thaw function tfrozen
bread can also be thawed. Thereby, the toaster slowly
warms the bread. This function is visible through the
light indicator placed in the operator button.
• Insert the bread and press the operator button
down.
w
• Activate the button for the thaw function
• The toaster switches itself off automatically and
the bread slices are ejected.
Dependent on the setting of the browning level,
the bread is either thawed or browned.
t
.
Crumb tray
• NEVER lay bread rolls directly onto the toaster,
ALWAYS use the bread roll holder
• Press the button for the bread roll holder
down until it is completely extended.
• Place the bread rolls onto the holder and start
the toasting procedure. Set the browning
regulator
.
Place the rolls onto the bread roll holder
that they cannot fall through the holder. After
toasting, the rolls will be very hot.
• As soon as the toaster switches itself off, turn the
rolls to toast the other side of them then switch
the toaster back on.
• Return the bread roll holder
ting position by sliding the button for the bread
roll holder
to a maximum of level of 3.
y
back into its star-
q
back to the top.
i
Cleaning and Care
Warning!
Before cleaning, remove the power plug from the
wall socket and allow the toaster to cool down.
Risk of injury!
NEVER submerse the appliance in water or
other liquids! The appliance could be
irreparably damaged!
q
.
i
so
q
When toasting, crumbs that fall from the bread are
collected in the crumb tray
pull the crumb tray
u
. To empty it, please
u
out to the side.
• Do not use aggressive or abrasive cleaning agents.
These can damage the upper surfaces of the
appliance.
• Clean the appliance housing only with a dry
or lightly moistened cloth.
• To avoid the risk of fire, empty the crumb tray
at regular intervals.
- 16 -
u
Page 19

Disposal
Under no circumstances may the appliance be disposed of with normal household waste. This appliance is subject to
the European Guidelines 2002/96/EC.
Dispose of the appliance through an approved disposal centre or at your community waste facility.
Observe the currently applicable regulations.
In case of doubt, please contact your local waste
disposal centre.
Dispose of packaging materials in an
environmentally responsible manner.
Warranty and Service
DES Ltd
Units 14-15
Bilston Industrial Estate
Oxford Street
Bilston
WV14 7EG
Tel.: 0870/787-6177
Fax: 0870/787-6168
e-mail: support.uk@kompernass.com
Irish Connection
Harbour view
Howth
Co. Dublin
Tel: 00353 (0) 87 99 62 077
Fax: 00353 18398056
e-mail: support.ie@kompernass.com
The warranty for this appliance is for 3 years from
the date of purchase. The appliance has been manufactured with care and meticulously examined before delivery. Please retain your receipt as proof of
purchase. In the case of a warranty claim, please
make contact by telephone with our service department. Only in this way can a post-free despatch for
your goods be assured.
The warranty covers only claims for material and
maufacturing defects, not for wearing parts or for
damage to fragile components, e.g. buttons or batteries. The appliance is intended for domestic use
only, NOT for commercial purposes.
If this product has been subjected to improper or inappropriate handling, abuse, or modifications not
carried out by one of our authorised sales and service
outlets, the warranty will be considered void. Your
statutory rights are not restricted in any way by this
warranty.
Importer
KOMPERNASS GMBH
BURGSTRASSE 21
44867 BOCHUM, GERMANY
www.kompernass.com
- 17 -
Page 20

- 18 -
Page 21

INHALTSVERZEICHNIS SEITE
Bestimmungsgemäßer Gebrauch 20
Technische Daten 20
Bedienelemente 20
Wichtige Sicherheitshinweise 20
Hinweise zur Bedienung 21
Vor der ersten Inbetriebnahme 21
Bräunungsgrad (Röstzeit) einstellen 21
Toasten 21
Toastvorgang unterbrechen 21
Aufwärm-Funktion 22
Auftau-Funktion 22
Krümelschublade 22
Brötchenaufsatz 22
Reinigung und Pflege 22
Entsorgen 23
Garantie und Service 23
Importeur 23
Lesen Sie die Bedienungsanleitung vor der ersten Verwendung aufmerksam durch und heben Sie diese für
den späteren Gebrauch auf. Händigen Sie bei Weitergabe des Gerätes an Dritte auch die Anleitung aus.
- 19 -
Page 22

DOPPEL-LANGSCHLITZTOASTER KH 1552
Bestimmungsgemäßer
Gebrauch
Dieses Gerät ist vorgesehen für das Rösten von
Brotscheiben, Brötchen und Toastwaffeln für den
häuslichen Gebrauch. Es ist nicht vorgesehen für die
Verwendung mit anderen Lebensmitteln oder anderen Materialien und auch nicht zur Verwendung in
gewerblichen oder industriellen Bereichen. Jede
andere Verwendung oder Veränderung gilt als nicht
bestimmungsgemäß und birgt erhebliche Unfallgefahren.
Technische Daten
Nennspannung: 220 - 240V ~50 Hz
Nennleistung: 1300 - 1500 W
Wichtige Sicherheitshinweise
Um Lebensgefahr durch elektrischen
Schlag zu vermeiden:
• Führen Sie nie Besteckteile oder andere metallische Gegenstände in die Röstschächte ein.
• Stellen Sie sicher, dass das Gerät niemals mit
Wasser in Berührung kommen kann, solange der
Netzstecker in der Steckdose ist, insbesondere
wenn Sie es in einer Küche in Nähe der Spüle
verwenden.
• Achten Sie darauf, dass im Betrieb das Netzkabel niemals nass oder feucht wird. Führen Sie es
so, dass es nicht eingeklemmt oder anderweitig
beschädigt werden kann.
• Lassen Sie beschädigte Netzstecker oder Netzkabel sofort von autorisiertem Fachpersonal
oder dem Kundenservice austauschen, um
Gefährdungen zu vermeiden.
• Ziehen Sie nach Gebrauch immer den Netzstecker aus der Steckdose, um ein unbeabsichtigtes Einschalten zu vermeiden.
Bedienelemente
Brötchenaufsatz
q
Bedientaste
w
Stoptaste zur Unterbrechung des
e
Toastvorgangs
Taste für Aufwärm-Funktion
r
Taste für Auftau-Funktion
t
Bräunungsregler (für stufenlos regelbare Röstzeit-
y
elektronik)
Krümelschublade
u
Taste Brötchenaufsatz
i
Röstschacht
o
Um Brand- und Verletzungsgefahr
zu vermeiden:
• Die Geräteteile können beim Betrieb heiß werden. Fassen Sie daher nur die Bedienelemente
an.
• Röstgut kann sich entzünden! Stellen Sie das
Gerät deshalb niemals in der Nähe oder unter
brennbaren Gegenständen ab, insbesondere
nicht unter Gardinen oder Hängeschränke.
• Decken Sie nie den Toaster ab, solange er in
Betrieb ist.
• Dieses Gerät ist nicht dafür bestimmt, durch
Personen (einschließlich Kinder) mit eingeschränkten physischen, sensorischen oder
geistigen Fähigkeiten oder mangels Erfahrung
und/oder mangels Wissen benutzt zu werden,
es sei denn, sie werden durch eine für ihre
Sicherheit zuständige Person beaufsichtigt oder
erhielten von ihr Anweisungen, wie das Gerät
zu benutzen ist.
- 20 -
Page 23

• Kinder sollten beaufsichtigt werden, um sicherzustellen, dass sie nicht mit dem Gerät spielen.
• Betreiben Sie das Gerät nur auf einer stabilen,
rutschfesten und ebenen Stellfläche.
Hinweise zur Bedienung
• Toasten Sie Graubrot bei höherem Bräunungsgrad als Weißbrot. Abgelagertes, trockenes Brot
bräunt schneller als frisches.
• Verwenden Sie keine zu großen oder zu dicken
Scheiben, da sich diese leicht verklemmen.
Achtung:
Bei Störungen oder beim Reinigen den Netzstecker
aus der Steckdose ziehen. Gefahr eines
elektrischen Schlages!
• Lösen Sie verklemmte Brotscheiben mit einem
stumpfen Holzstab (z.B. einem Pinselstiel). Dabei
die Heizkörper nicht berühren.
• Unterschiede in der Brotsorte, Feuchte und Dicke
der einzelnen Scheiben beeinflussen die Bräunung des Toastbrotes. Daher sollte das Toastbrot
möglichst in einer geschlossenen Verpackung
aufbewahrt werden.
Vor der ersten Inbetriebnahme
Der Toaster ist ohne Toast mindestens fünfmal bei
maximaler Einstellung zu betreiben. Für Hinweise
zur Reinigung des Toasters lesen Sie bitte auch
»Reinigung und Pflege«.
Bitte beachten Sie:
Die Bedientaste
Netzkabel ein. Beim ersten Gebrauch kann ein
leichter Geruch entstehen (auch geringe Rauchentwicklung möglich). Dieser ist normal und verliert
sich nach kurzer Zeit. Sorgen Sie bitte für ausreichende Entlüftung.
rastet nur bei angeschlossenem
w
Bräunungsgrad (Röstzeit)
einstellen
Der gewünschte Bräunungsgrad von "hell" (1) bis
"dunkel" (7) kann mit dem Bräunungsregler
Röstzeitelektronik stufenlos eingestellt werden.
Beachten Sie, dass je nach Beladung des Toasters, der Bräunungsgrad bei gleichbleibender
Einstellung des Bräunungsreglers
weniger Toastscheiben Sie einlegen, umso höher ist ihr Bräunungsgrad. Stellen Sie daher
den Bräunungsregler
immer etwas herunter.
y
y
bei wenig Beladung
der
y
variiert! Je
Toasten
Achtung:
Bei Betrieb des Toasters den Röstschacht onicht
abdecken. Es besteht die Gefahr eines Brandes!
Das Gerät kann irreparabel beschädigt werden!
• Nach dem Einstellen des gewünschten Bräunungsgrades legen Sie das Brot in den Röstschacht
• Drücken Sie die Bedientaste
• Die automatische Brotzentrierung des KH 1552
zentriert das eingelegte Brot im Röstschacht
• Ist der gewünschte Bräunungsgrad erreicht,
schaltet sich der Toaster automatisch ab und die
Brotscheiben kommen wieder nach oben.
• Der KH 1552 verfügt über eine Hebefunktion,
die es Ihnen ermöglicht einfacher und sicherer
die heißen Brotscheiben aus dem Röstschacht
zu entnehmen. Schieben Sie dafür die Bedientaste
o
nach oben.
w
ein.
nach unten.
w
o
Toastvorgang unterbrechen
Wenn Sie den Toastvorgang unterbrechen wollen,
drücken Sie die Stoptaste
sich aus.
. Der Toaster schaltet
e
.
o
- 21 -
Page 24

Aufwärm-Funktion
Brötchenaufsatz
Die Aufwärm-Funktion rermöglicht Ihnen, das Brot
zu erwärmen ohne es zu bräunen, zum Beispiel
wenn geröstetes Brot wieder erkaltet ist. Das Brot
wird nur kurz erwärmt. Diese Funktion ist durch die
im Bedienknopf platzierte Leuchtanzeige ersichtlich.
• Legen Sie das Brot ein und drücken die
Bedientaste
• Betätigen Sie die Taste für die Aufwärm-Funktion
.
r
• Der Toaster schaltet sich automatisch ab und die
Brotscheiben kommen wieder nach oben.
nach unten.
w
Auftau-Funktion
Durch Betätigung der Auftau-Funktion tkann auch
eingefrorenes Toastbrot aufgetaut werden. Der
Toaster erwärmt das Brot hierbei langsam. Diese
Funktion ist durch die im Bedienknopf platzierte
Leuchtanzeige ersichtlich.
• Legen Sie das Brot ein und drücken die Bedientaste
nach unten.
w
• Betätigen Sie die Taste für die Auftau-Funktion
.
t
• Der Toaster schaltet sich automatisch ab und die
Brotscheiben kommen wieder nach oben.
Je nach eingestelltem Bräunungsgrad wird das
Brot aufgetaut bzw. gebräunt.
Krümelschublade
Beim Toasten sammeln sich die abfallenden Krümel
in der Krümelschublade
mel ziehen Sie die Krümelschublade
Seite heraus.
. Zum Entfernen der Krü-
u
bitte zur
u
• Legen Sie Brötchen niemals direkt auf den
Toaster, sondern verwenden Sie immer den Brötchenaufsatz
• Drücken Sie die Taste für den Brötchenaufsatz
nach unten, bis dieser vollständig ausgefahren ist.
• Legen Sie die Brötchen darauf und starten Sie
den Toastvorgang. Stellen Sie den Bräunungsregler
y
Legen Sie die Brötchen so auf den Brötchenaufsatz
q
durchfallen können. Die Brötchen sind nach
dem Röstvorgang sehr heiß.
• Sobald sich der Toaster ausschaltet, das Brötchen zur Bräunung der anderen Seite umdrehen
und Toaster wieder einschalten.
• Bringen Sie den Brötchenaufsatz
seine Ausgangsposition, indem Sie die Taste für
den Brötchenaufsatz
schieben.
.
q
maximal auf Stufe 3.
, dass sie nicht durch den Aufsatz hin-
wieder in
q
wieder nach oben
i
Reinigung und Pflege
Warnung!
Vor jeder Reinigung den Netzstecker ziehen und
den Toaster abkühlen lassen. Verletzungsgefahr!
Tauchen Sie das Gerät niemals in Wasser
oder andere Flüssigkeiten. Das Gerät kann
irreparabel beschädigt werden.
• Keine scharfen oder scheuernden Reinigungsmittel verwenden. Das greift die Oberfläche des Gerätes an.
• Das Gehäuse reinigen Sie mit einem trockenen
Tuch oder leicht angefeuchteten Lappen.
• Entleeren Sie in regelmäßigen Abständen die
Krümelschublade
den.
, um Brandgefahr zu vermei-
u
i
- 22 -
Page 25

Entsorgen
Werfen Sie das Gerät keinesfalls in den
normalen Hausmüll. Dieses Produkt
unterliegt der europäischen Richtlinie
2002/96/EC.
Entsorgen Sie das Gerät über einen zugelassenen
Entsorgungsbetrieb oder über Ihre kommunale
Entsorgungseinrichtung.
Beachten Sie die aktuell geltenden Vorschriften.
Setzen Sie sich im Zweifelsfall mit Ihrer Entsorgungseinrichtung in Verbindung.
Führen Sie alle Verpackungsmaterialien
einer umweltgerechten Entsorgung zu.
Schraven
Service- und Dienstleistungs GmbH
Gewerbering 14
47623 Kevelaer, Germany
Tel.: +49 (0) 180 5 008107
(14 Ct/Min. aus dem dt. Festnetz ggf. abweichende Preise
aus den Mobilfunknetzen)
Fax: +49 (0) 2832 3532
e-mail: support.de@kompernass.com
Kompernaß Service Österreich
Rittenschober KG
Gmundner Strasse 10
A-4816 Gschwandt
Tel.: +43 (0) 7612 6260516
Fax: +43 (0) 7612 626056
e-mail: support.at@kompernass.com
Garantie und Service
Sie erhalten auf dieses Gerät 3 Jahre Garantie ab
Kaufdatum. Das Gerät wurde sorgfältig produziert
und vor Anlieferung gewissenhaft geprüft. Bitte bewahren Sie den Kassenbon als Nachweis für den
Kauf auf. Bitte setzen Sie sich im Garantiefall mit
Ihrer Servicestelle telefonisch in Verbindung. Nur so
kann eine kostenlose Einsendung Ihrer Ware
gewährleistet werden.
Die Garantieleistung gilt nur für Material- oder
Fabrikationsfehler, nicht aber für Verschleißteile
oder für Beschädigungen an zerbrechlichen Teilen,
z. B. Schalter oder Akkus. Das Produkt ist lediglich
für den privaten und nicht für den gewerblichen
Gebrauch bestimmt.
Bei missbräuchlicher und unsachgemäßer Behandlung, Gewaltanwendung und bei Eingriffen, die
nicht von unserer autorisierten Service-Niederlassung vorgenommen wurden, erlischt die Garantie.
Ihre gesetzlichen Rechte werden durch diese Garantie nicht eingeschränkt.
Kompernaß Service Schweiz
Tel.: +49 (0) 2327 301850
e-mail: support.ch@kompernass.com
Importeur
KOMPERNASS GMBH
BURGSTRASSE 21
44867 BOCHUM, GERMANY
www.kompernass.com
- 23 -
 Loading...