


EZFit
EZFit
™
6 Function Digital Speedometer
6 Funciones Velocímetro Digital
6 Fonctions Compteur Cycliste Numérique
■ INSTRUCTION MANUAL
■ MANUAL DE INSTRUCCIONES
■ MANUEL D’UTILISATION
! WARNING!
■ Improper installation of this or any other bike computer can result in an accident. Read and follow installation
instructions carefully.
■ Call our toll free customer service department at 1-800-456-BELL if you have any questions about installation.
■ Check mounting hardware and transmitter installation before each ride for adjustment and secure fit.
■ This computer will not fit all bikes. If you cannot get a secure installation per the instruction manual, do not use
this computer.
! ADVERTENCIA!
■ La instalación incorrecta de ésta u otra computadora para bicicletas puede provocar un accidente. Lea y siga
cuidadosamente las instrucciones de instalación.
■ Si tiene alguna pregunta acerca de la instalación, llame gratis a nuestro departamento de atención a clientes
1-800-456-BELL.
■ Verifique el ajuste y la seguridad de los accesorios de montaje y la instalación del transmisor antes de cada viaje.
■ Esta computadora no se adapta a todas las bicicletas. Si no puede instalarla con seguridad de acuerdo con el
manual de instrucciones, no use esta computadora.
! AVERTISSEMENT !
■ L’installation incorrecte de ce compteur pour bicyclette, comme de n’importe quel ordinateur pour bicyclette, peut
occasionner un accident. Lisez soigneusement, et observez à la lettre ces instructions d’installation.
■ Si vous vous trouvez en Amérique du Nord, appelez notre service d’assistance à la clientèle au numéro gratuit
1-800-456-BELL, si vous avez des questions à poser au sujet de l’installation.
■ Vérifiez l’installation du matériel de montage et du transmetteur avant chaque utilisation de la bicyclette pour vous
assurer qu’il est correctement réglé et qu’il est bien fixé.
■ Ce compteur ne peut s’adapter à toutes les bicyclettes. Si vous ne parvenez pas à effectuer une installation correcte
en suivant les instructions du mode d’emploi, n’utilisez pas ce compteur.

CONTENTS/CONTENIDO/MATIÈRES PAGE/PÁGINA/PAGE
English Instructions .........................................................................
4
Instrucciones en español ...............................................................
18
Instructions en français .................................................................
32
EZFit
™
6 Function Digital Speedometer
6 Funciones Velocímetro Digital
6 Fonctions Compteur Cycliste Numérique
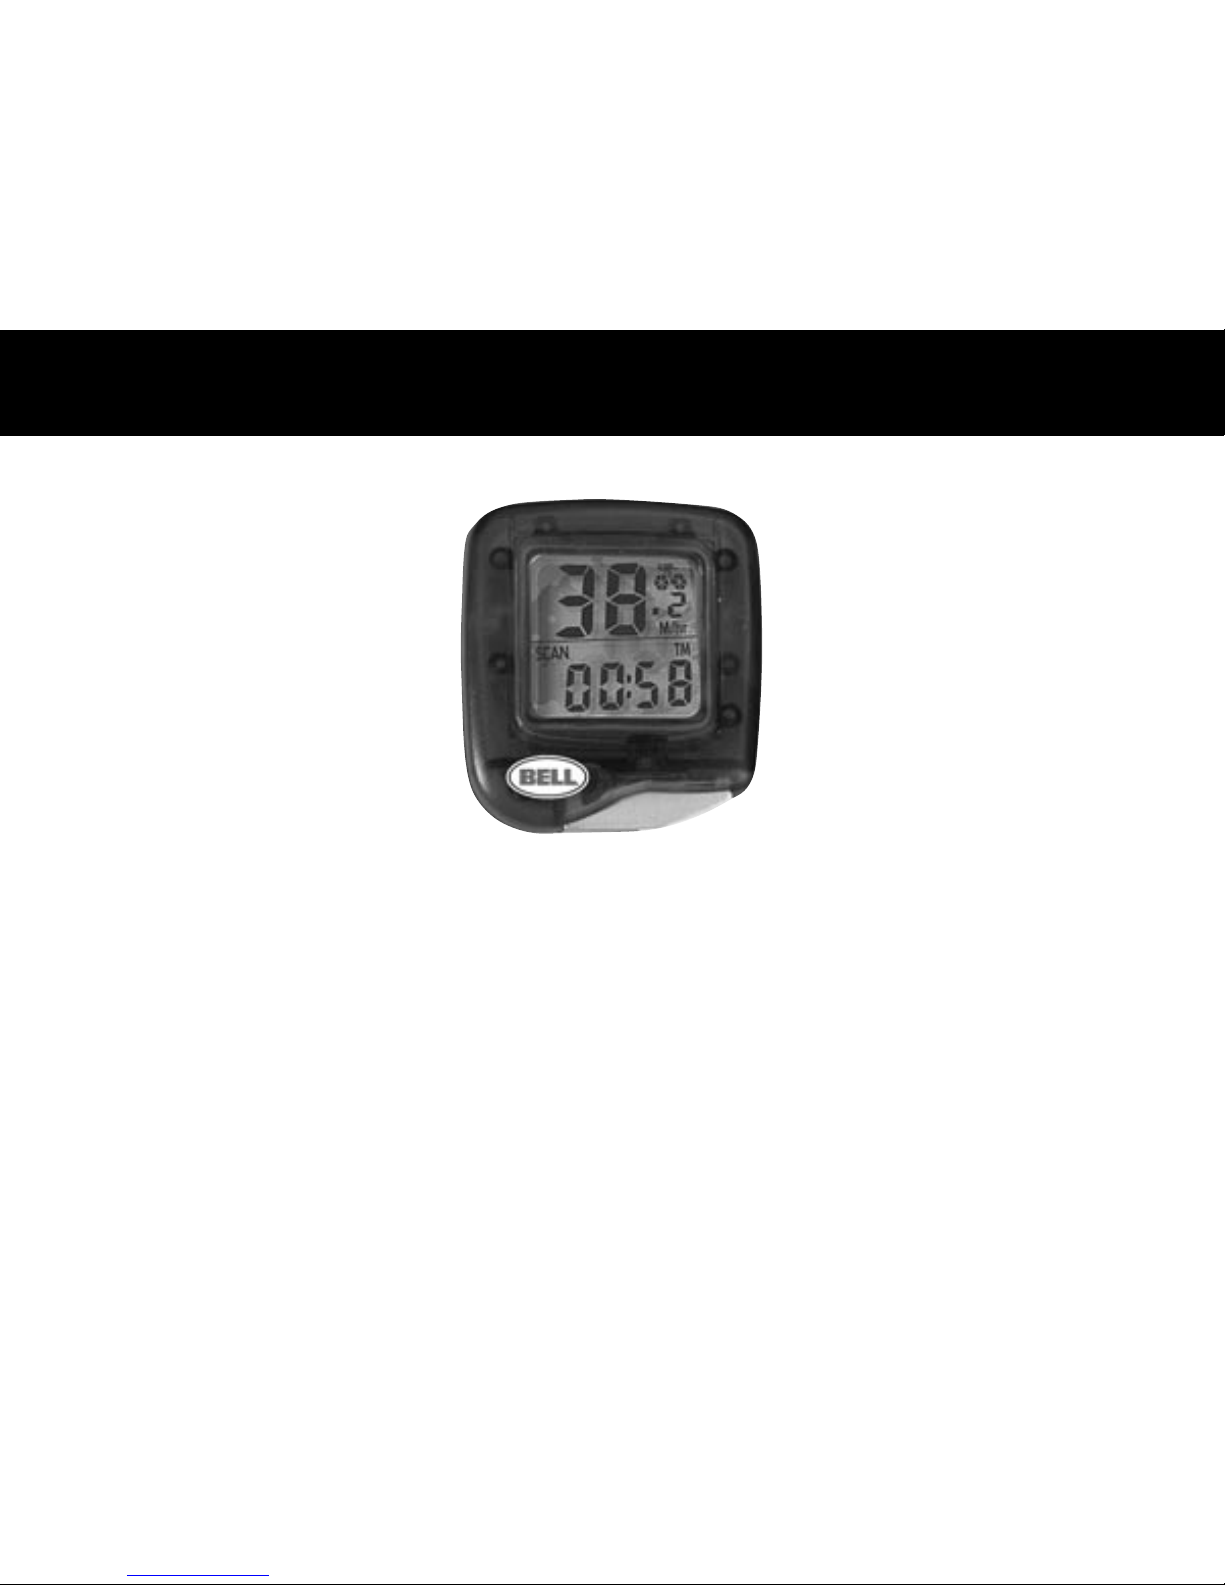
FUNCTIONS
4
■ Speedometer
0–99.9 KM/hr or M/hr
■ Odometer (ODO)
0–9999 KM or M
■ Trip Distance (DST)
0–999.99 KM or M
■ Trip Timer (TM)
59 min 59 sec
■ Auto Start/Stop
■ Distance in Kilometers
or Miles
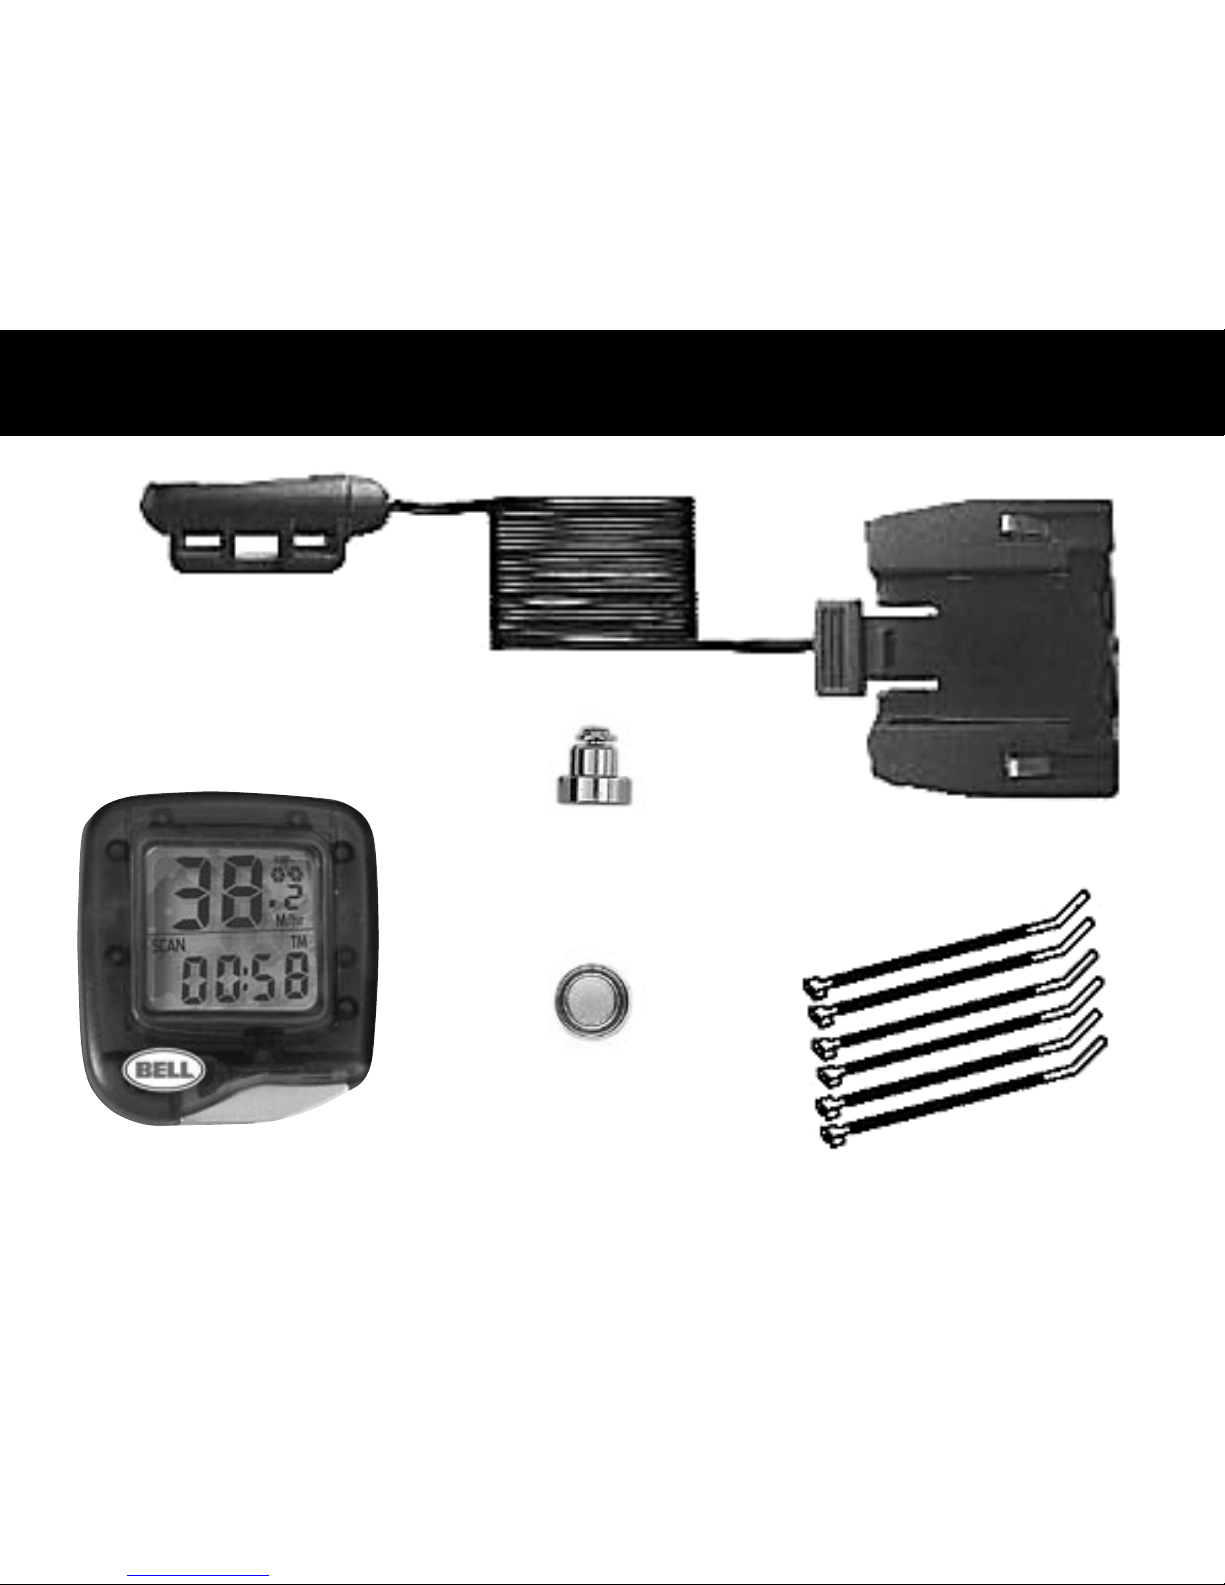
Universal Sensor
Bracket
Mounting Bracket
PARTS
5
Cable TiesComputer Unit
Computer Battery
(1.5V/186/LR43)
Wheel Magnet
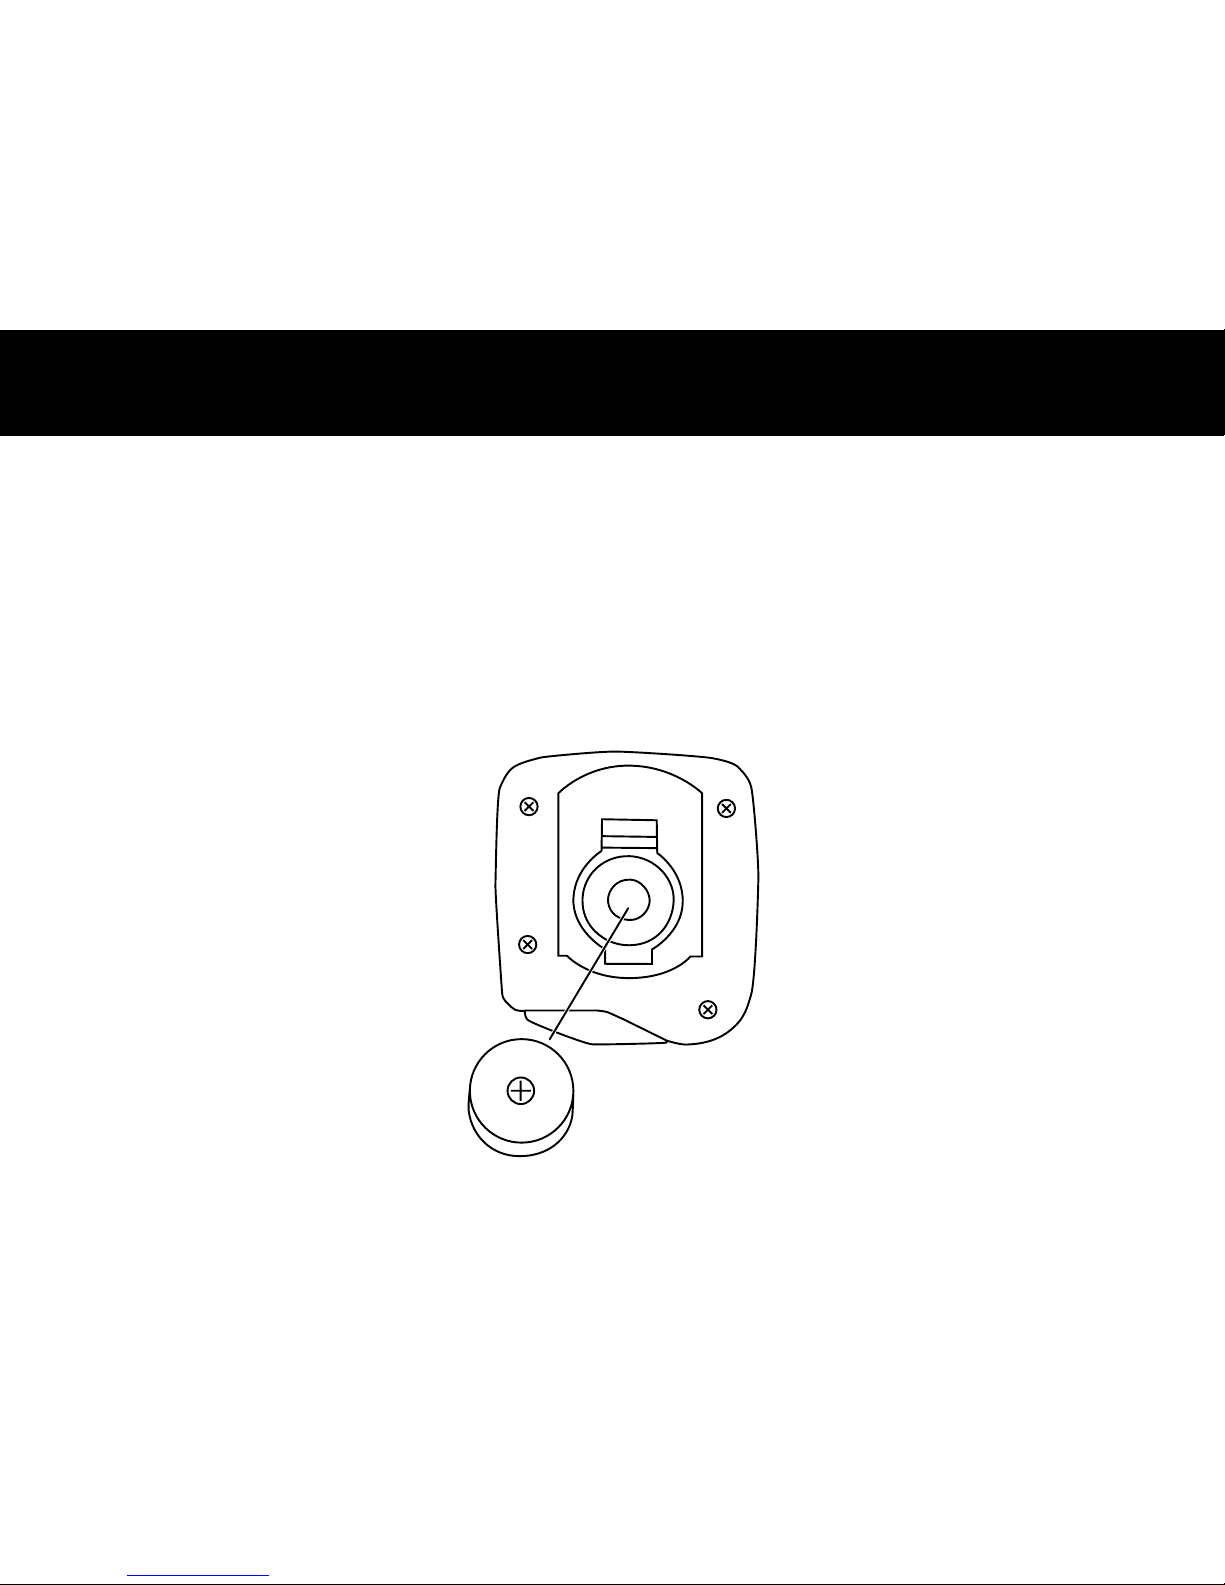
BATTERY INSTALLATION
6
Remove the battery cover from the bottom of the computer using a coin. Install the battery
with the positive (+) pole facing out (Figure 1) and replace the cover. Should the
computer screen show irregular figures, take out the battery and install again. This will
clear and restart the computer.
Figure 1
Battery
(1.5V/186/LR43)
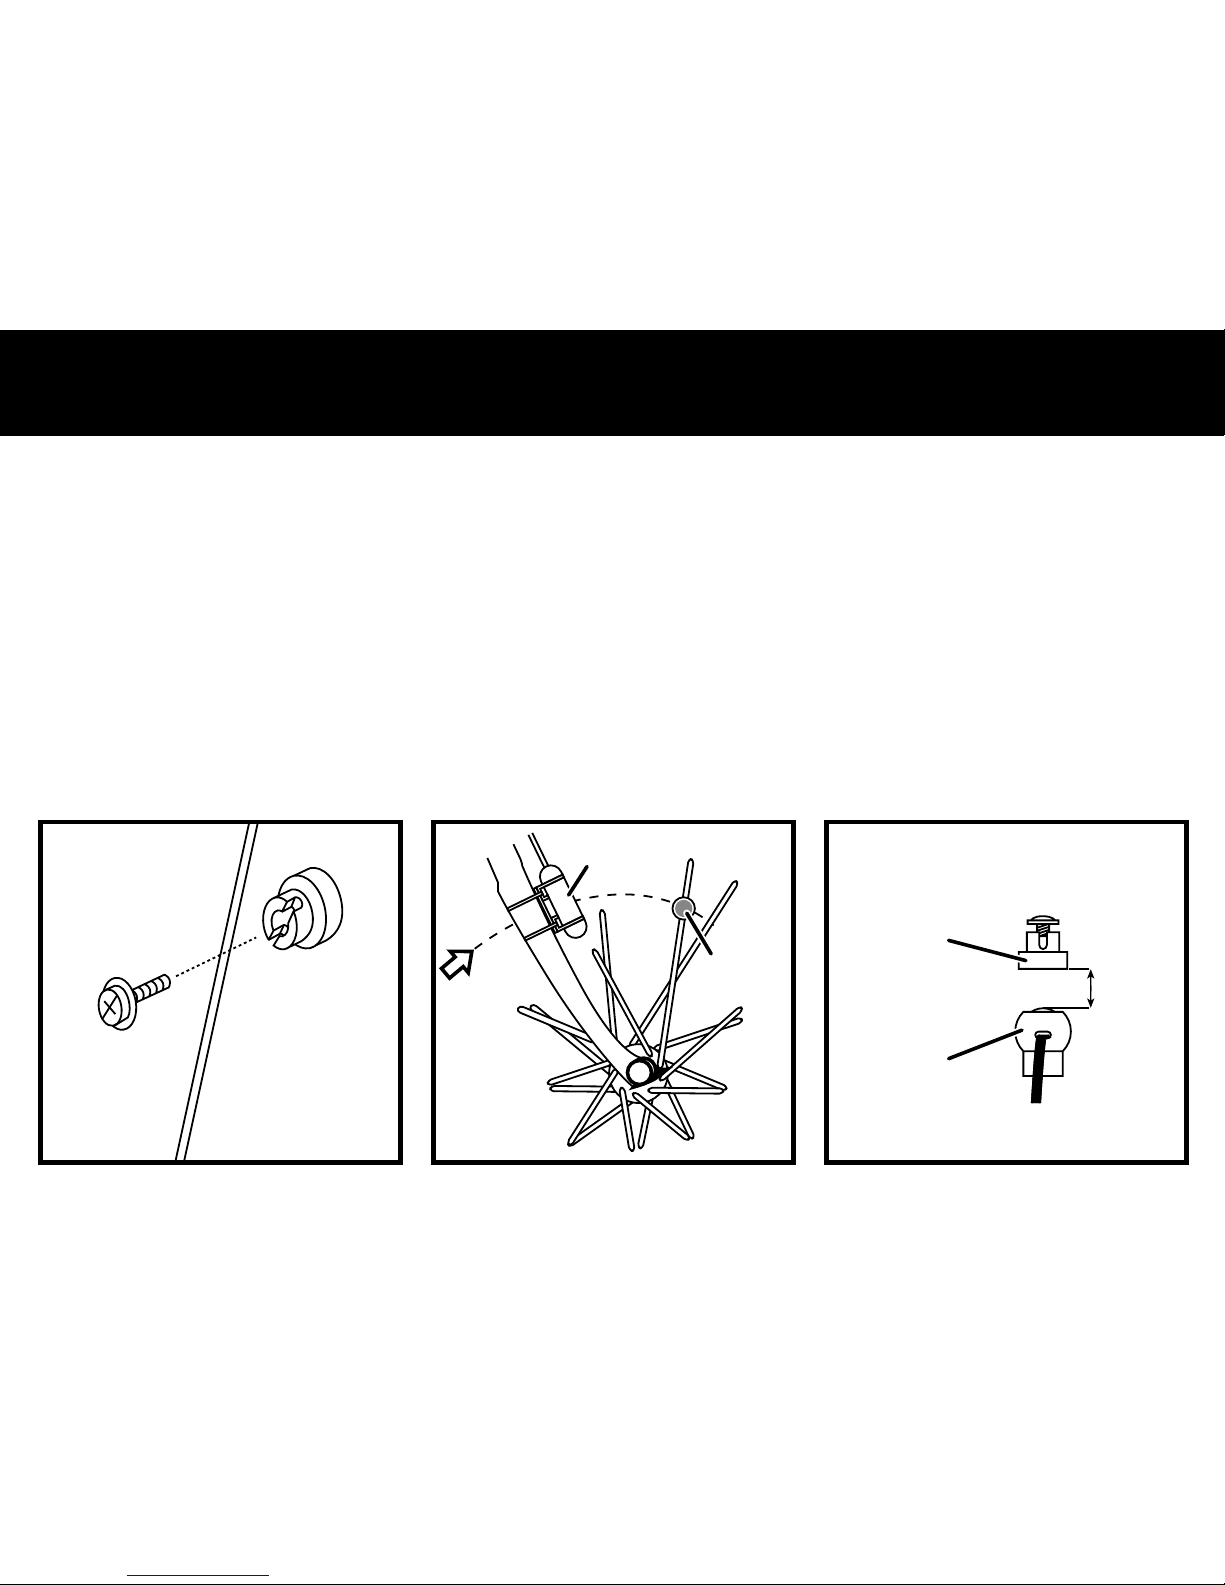
MAGNET AND SENSOR INSTALLATION
7
Attach the speedometer sensor on the right fork of the front wheel using the cable tie.
Clamp the magnet on a spoke on the right side of the front wheel (Figure 2). Adjust the
position of the magnet so that when the wheel spins, the magnet will pass in front of the
lower section of the sensor (Figure 3). Clearance between magnet and sensor should not
be greater than 1/6" (4mm) (Figure 4). Once it is well positioned, tighten the magnet on
the spoke.
Note: Overtightening the screws can strip the threads or crack the assembly, so use caution.
Sensor
Magnet
4mm
(1/6")
Magnet
Sensor
Figure 2 Figure 4Figure 3
Top View

MOUNTING BRACKET
8
Attach the mounting bracket to the handlebar by using two cable ties as shown. Make sure
the mounting bracket is clamped tightly and will not slip on the handlebar.
Bracket can be attached to either the left or right hand side of the handlebar.
Cable ties
Mounting bracket
Mounting
bracket
Computer unit
OFF
Cable ties
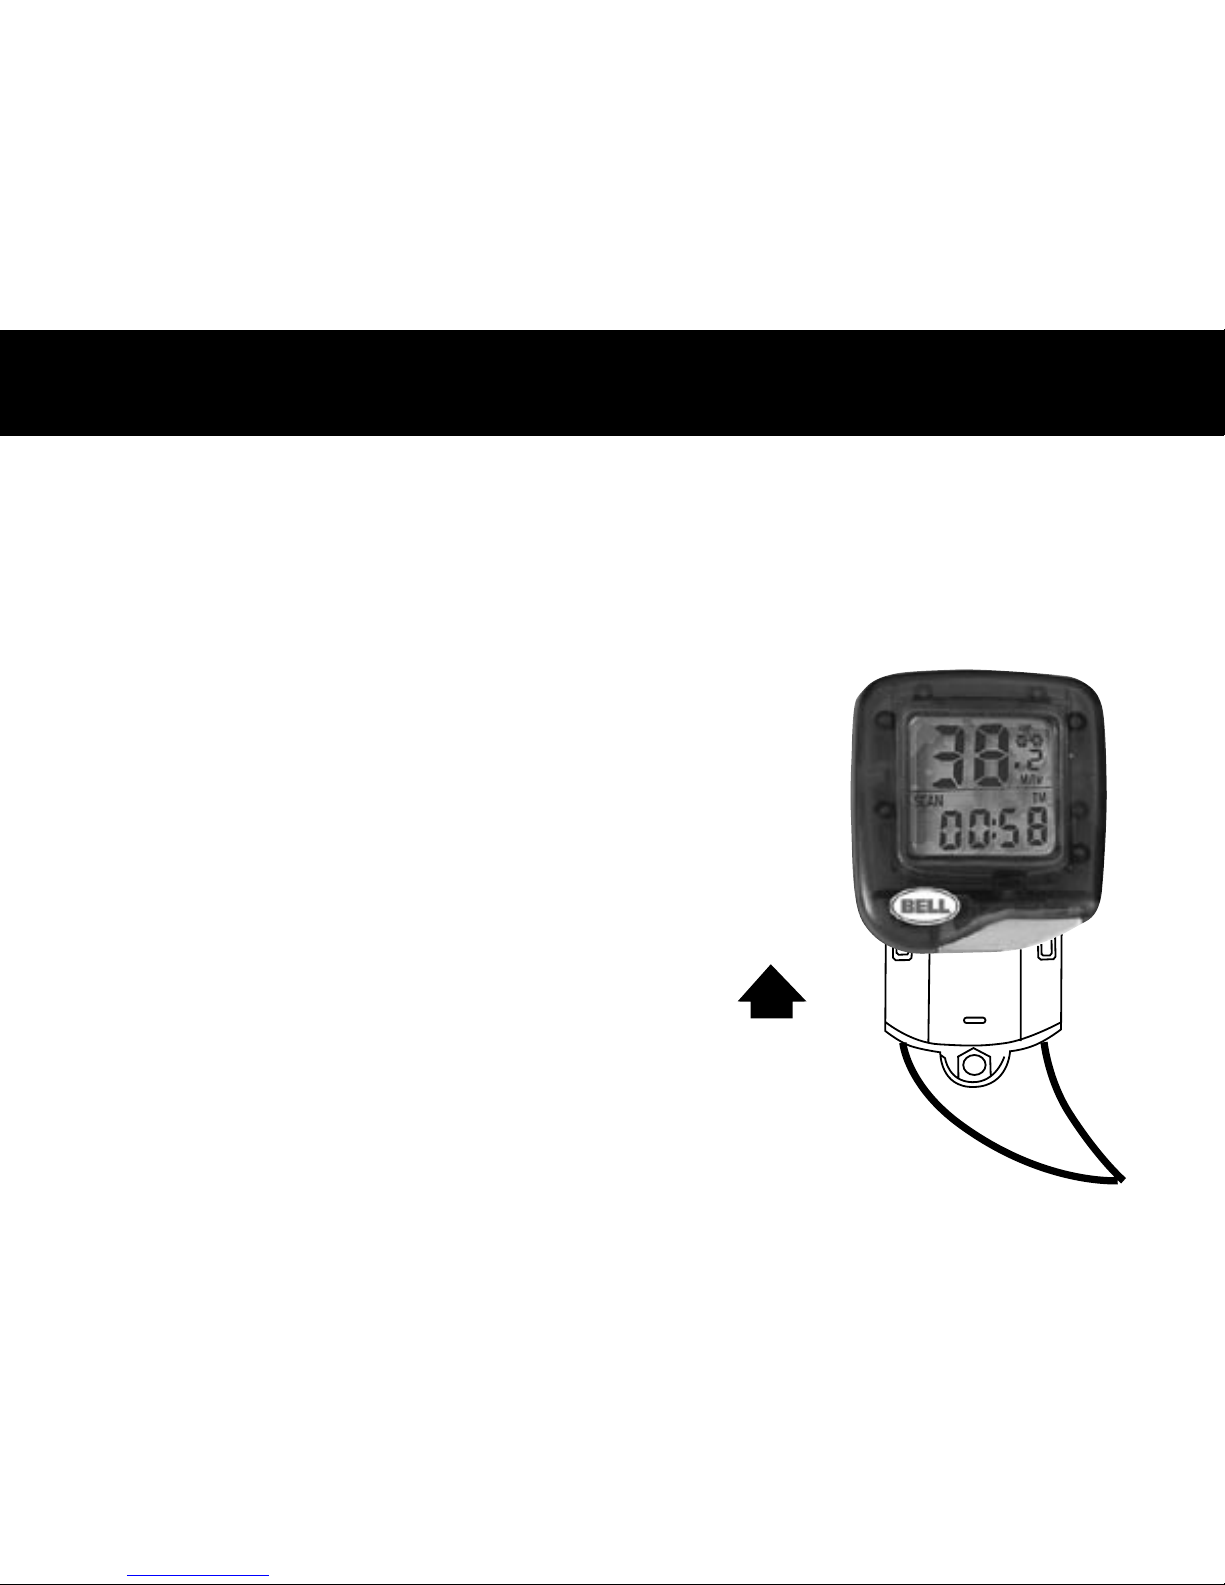
Slide computer into mounting bracket, toward seat until it is inserted all the way into the
bracket. To check for proper installation, spin the front wheel when the computer is in
speedometer mode (see next pages for speedometer mode set-up). The speed should
appear on the screen.
IMPORTANT: To remove computer from mounting
bracket, wrap forefinger around the front of the
mounting bracket and push the computer away
from you with your thumb.
OFF
COMPUTER
9
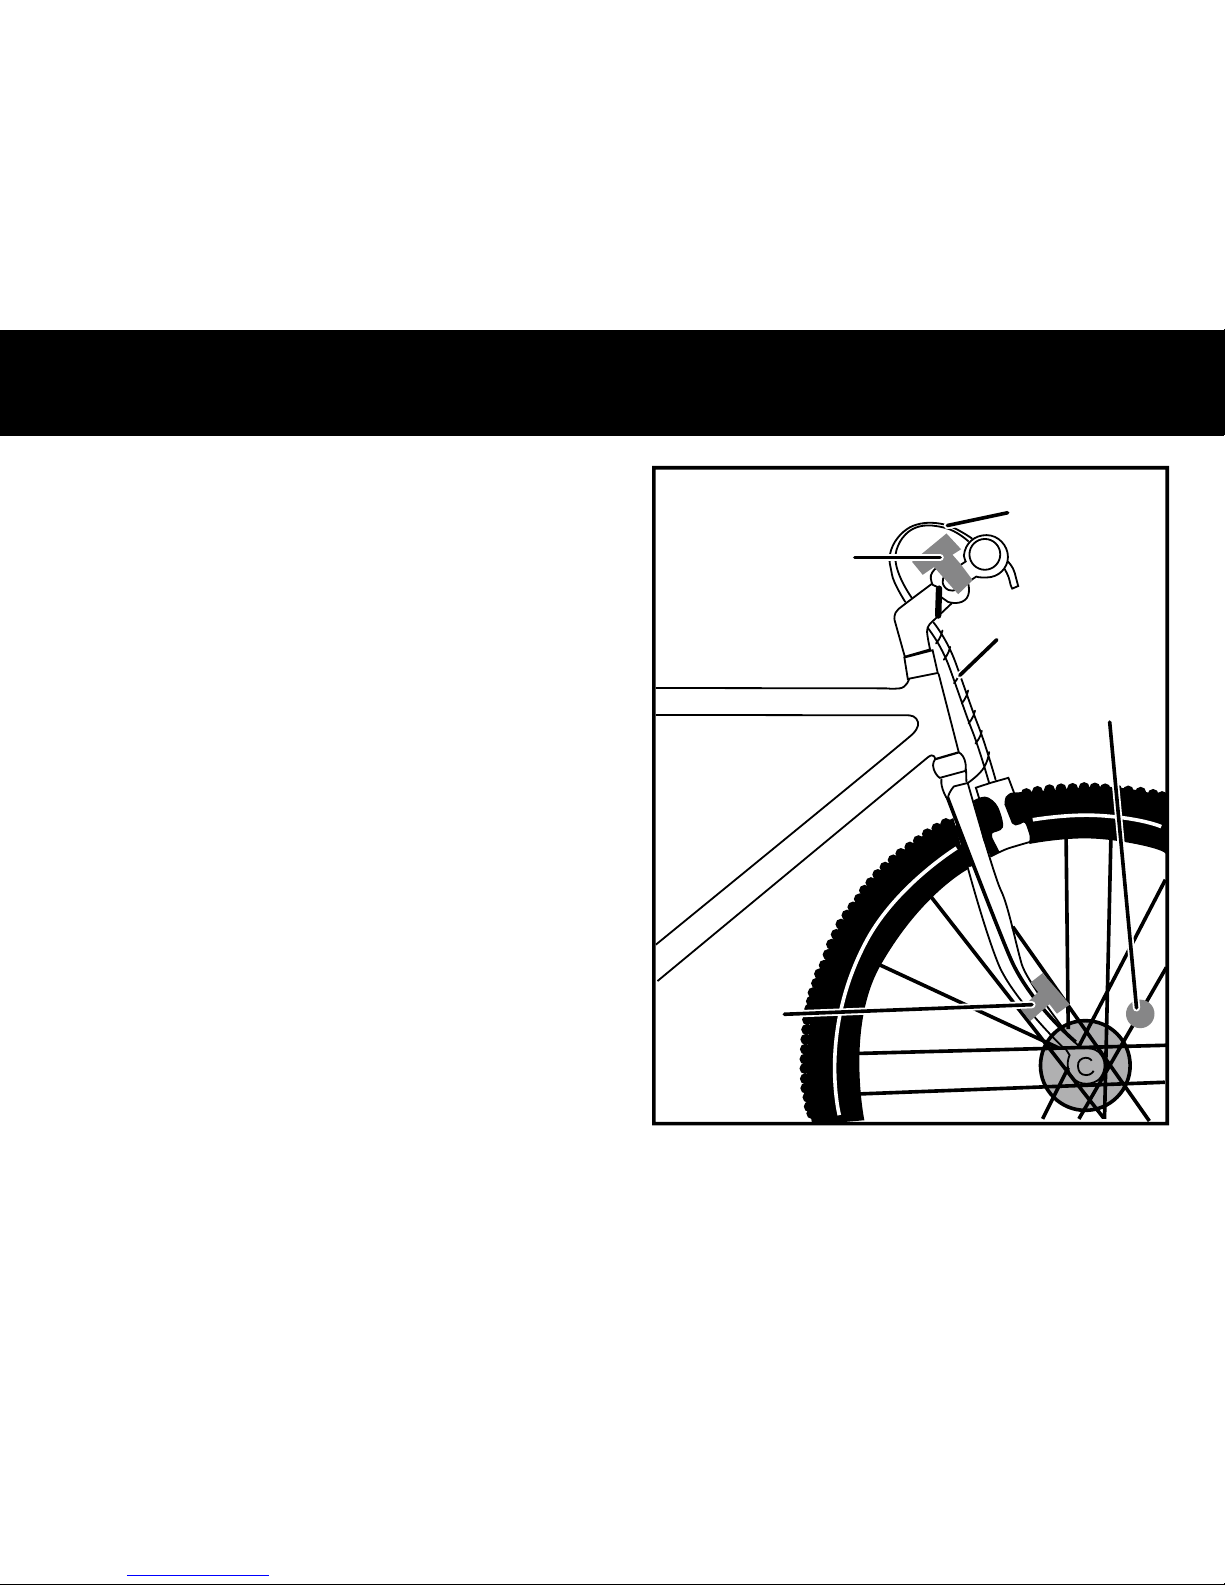
SENSOR WIRING
10
Route the sensor wire up the fork blade,
using the cable ties to secure it at the
bottom and crown. Wire must not hang
loosely. Leave enough slack to allow wheel
to turn right and left freely. Route the
remaining wire around the front brake cable
and to the handlebar. Excess wire should
be carefully looped and secured to the stem
with a cable tie.
Note: Make sure cable tie ends are cut so
as to not interfere with operation of bicycle.
Magnet
Computer
Sensor
Brake cable
Sensor wires

After installing the battery, a default wheel factor will appear with the last digit scrolling.
Use the Wheel Diameter Size Chart on the next page to find the correct wheel factor
(c).
In the event your tire size is not included in this chart, multiply your wheel diameter
(d) in
millimeters by 3.1416 to determine the correct wheel factor
(c).
To enter the correct wheel factor into the computer, each digit will need to be set
individually. Press the button when the correct digit for your wheel factor appears. This
will lock in the correct digit and the next digit to the left will begin to scroll. Repeat until
all four correct digits are entered.
To return to the Wheel Size Input screen, remove the
battery or push and hold the button for two seconds
when in Odometer
(ODO) mode.
Note: All functions will be reset at that time.
d
d is the diameter
of wheel
in millimeters
WHEEL SIZE INPUT
11
WHEEL DIAMETER SIZE CHART
12
Wheel Wheel
Diameter (d) Factor (c)
20" 1596
22" 1759
24" 1916
26" (650A) 2073
26.4" (700 x 20C) 2107
26.5" (Tubular) 2117
26.6" (700 x 25C) 2124
26.8" (700 x 28C) 2136
Wheel Wheel
Diameter (d) Factor (c)
27" (700 x 32C) 2155
27" x 1.25 2155
28" (700B) 2237
ATB 24" x 1.75 1888
ATB 26" x 1.4 1995
ATB 26" x 1.5 2030
ATB 26" x 1.75 2045
ATB 26" x 2 (650B) 2099

The speedometer is now ready to use. Press the button to move between the
available functions.
After wheel size input, the KM/MILE selection screen will appear with KM and Mile flashing
alternately. Press the button while desired mode appears in the screen to lock it in. The unit
is then switched to speedometer mode and is now ready for use.
KM/MILE SELECTION
FUNCTION NAVIGATION
13
To preserve the battery, the cycle computer will automatically switch off if the unit is
stopped or left unused for more than 5 minutes. The display will reappear when the button
is pressed or when the unit detects input from the sensor.
AUTO START/STOP
Total Distance travelled is indicated by ODO and displayed on the bottom
line. To reset the Odometer, press and hold the button for two seconds
when in
ODO mode or remove the battery.
Note: Resetting the Odometer will reset all funtions to zero, and will also
require re-entering the Wheel Size.
Press the button to enter Trip Distance
(DST) mode.
KM/hr
ODO
63
.8
Instantaneous Speed is indicated on the top line. The range of
measurement is from 0 to 99 M/hr (0 to 99 KM/hr) and the accuracy
is +/- 0.5 M/hr (KM/hr).
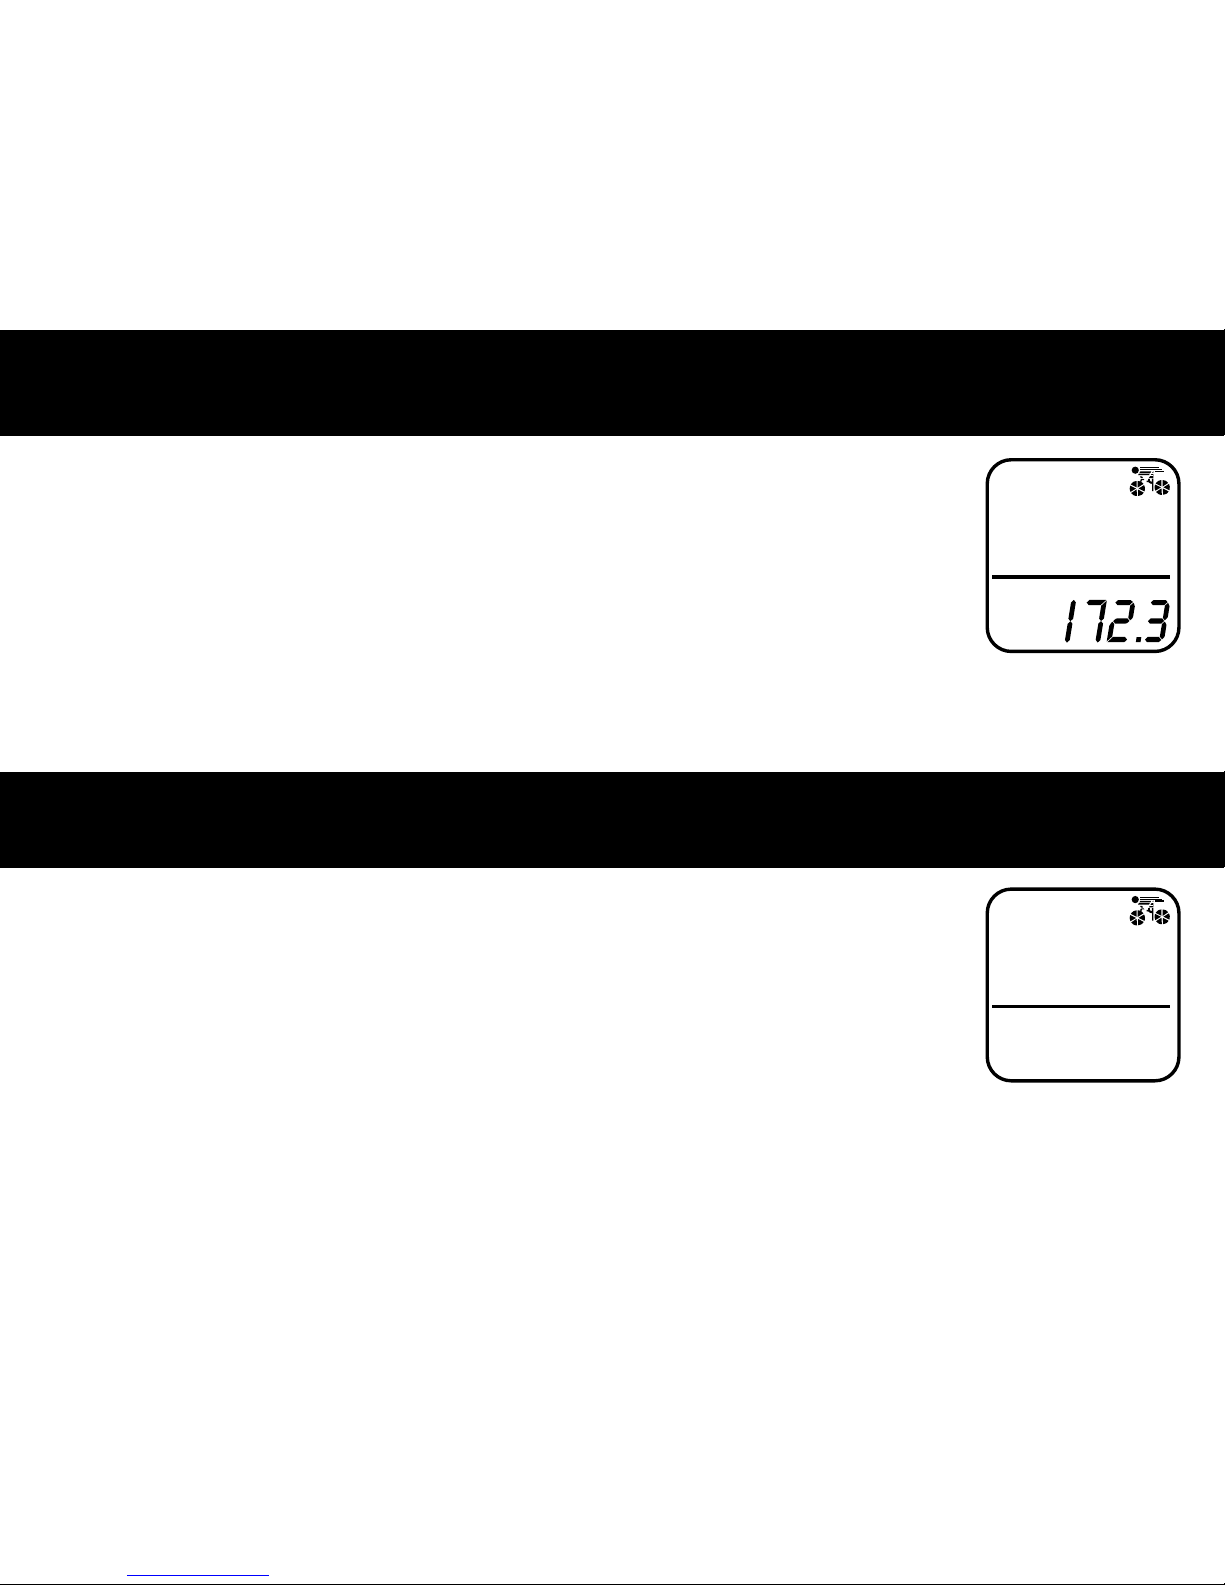
SPEEDOMETER
ODOMETER (ODO)
KM/hr
72.3
ODO
63
.8
14
Trip Timer is indicated by TM and is displayed on the bottom line. Trip
Timer is activated automatically with speedometer input (on when
you ride and off when you stop). It records only the time spent actually
riding. To reset the Trip Timer to zero, press and hold the button for two
seconds when in
DST mode.
Press the button to return to Odometer
(ODO) mode.
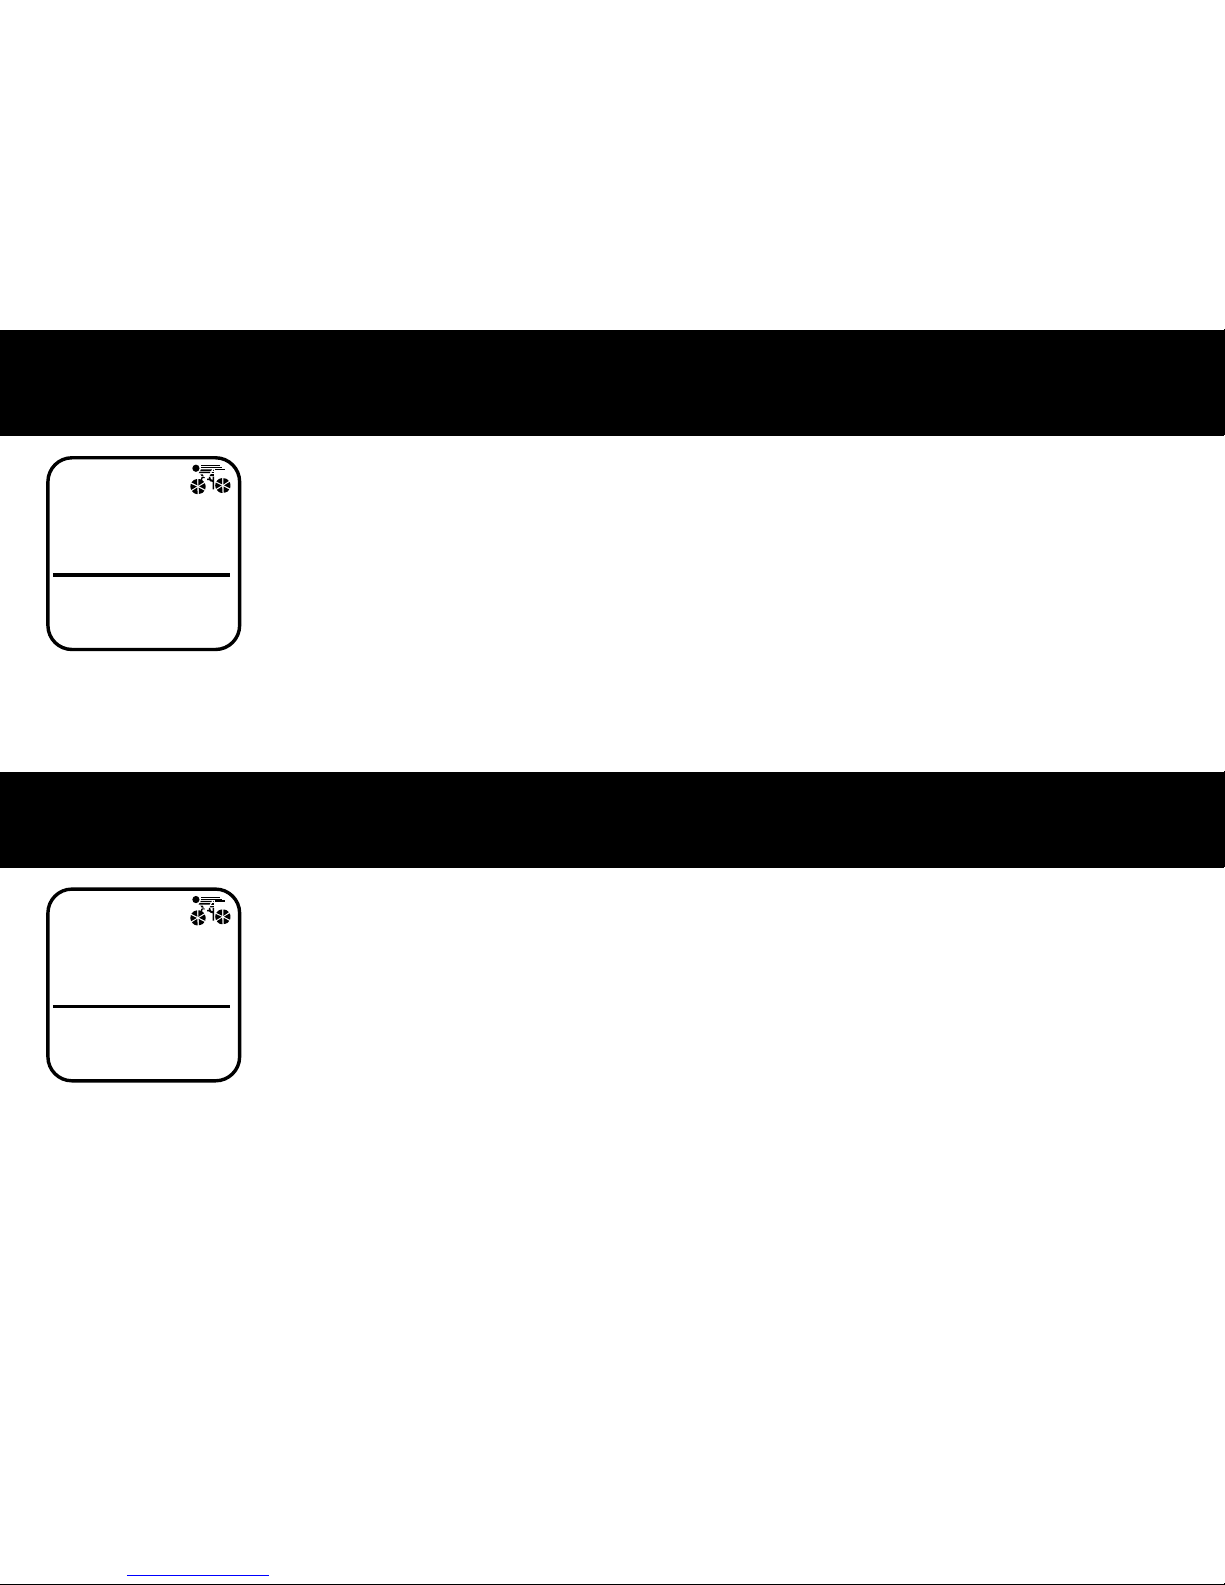
Trip Distance is indicated by
DST and is displayed on the bottom line.
Trip Distance is activated automatically with speedometer input. To reset
the Trip Distance, press and hold the button for two seconds when in
DST mode.
Note: Resetting the Trip Distance will also reset the Trip Timer (TM)
to zero.
Press the button to enter Trip Timer
(TM) mode.
KM/hr
7.23
DST
63
.8
TRIP DISTANCE (DST)
KM/hr
0:59:59
TM
63
.8
TRIP TIMER (TM)
15
 Loading...