

Page 1
No touch medical thermometer
3200 0143
modèle - model : NT3
FR : Notice d’utilisation
IT : I Consigli di utilizzo
NL : Gebruiksaanwijzing
ES : Instrucciones de uso
PT : Conselhos de utilização
EN : Instructions for use
RU : Инструкция по эксплуатации
Page 2
1
6
7
2
4
3
5
8
2
Page 3
10
11
12
13
14
15
16
9
17
3
Page 4
THERMOMÈTRE MÉDICAL SANS CONTACT
FR
Le thermomètre médical sans contact Bébé Confort utilise une technologie de pointe, celle qui consiste à
capter les rayons infrarouges émis par tout corps pour mesurer la température. Cette technologie présente
l’avantage de permettre des prises de température à distance, sans contact direct et d’obtenir un résultat
instantanément. Vous pouvez ainsi suivre l’évolution de la température d’un bébé ou d’un enfant sans le
déranger et même pendant son sommeil.
Toutefois, la simplicité d’utilisation de ce thermomètre, sa rapidité et ses possibilités de mesurer également
la température des objets environnants ne doivent pas vous faire oublier que cet appareil reste avant tout
un dispositif médical de mesure. Utilisez le donc en respectant bien les recommandations générales et
précautions spécifiques détaillées dans ce mode d’emploi.
Merci de prendre connaissance de ce mode d’emploi avant utilisation et de le conserver soigneusement.
Enfin nous vous rappelons qu’en cas de doute sur la santé de l’un des membres de votre famille ou
constatation d’un état fébrile, il faut consulter rapidement un médecin.
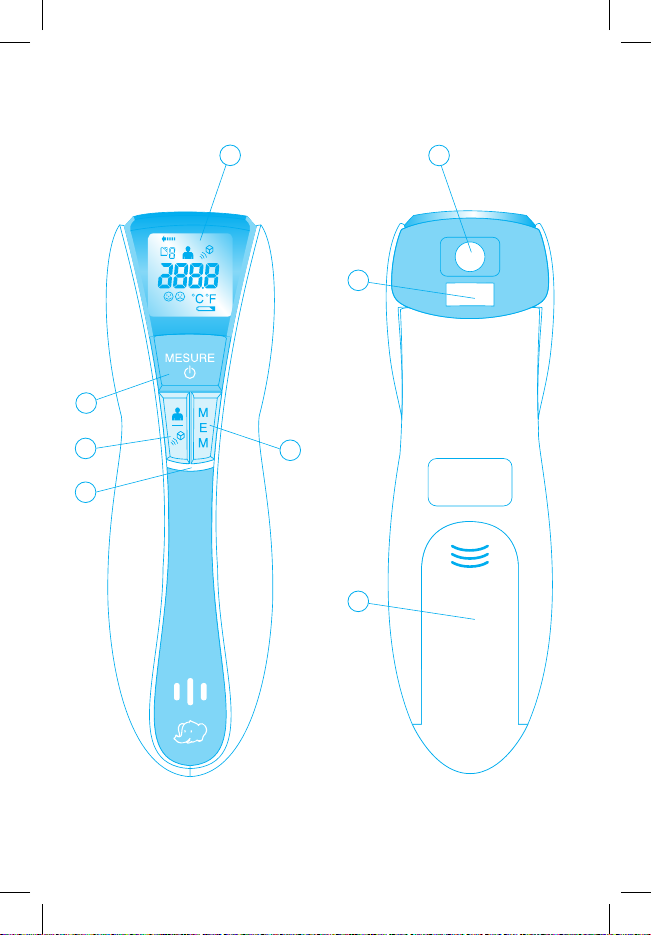
1 - DESCRIPTION DU THERMOMÈTRE ET DE SON ÉCRAN
1/ Ecran à cristaux liquides
2/ Touche mise en marche/mesure
3/ Touche mémoire
4/ Touche sélection du mode de fonctionnement
5/ Signal fièvre
6/ Capteur
7/ Radar
8/ Couvercle du logement des piles
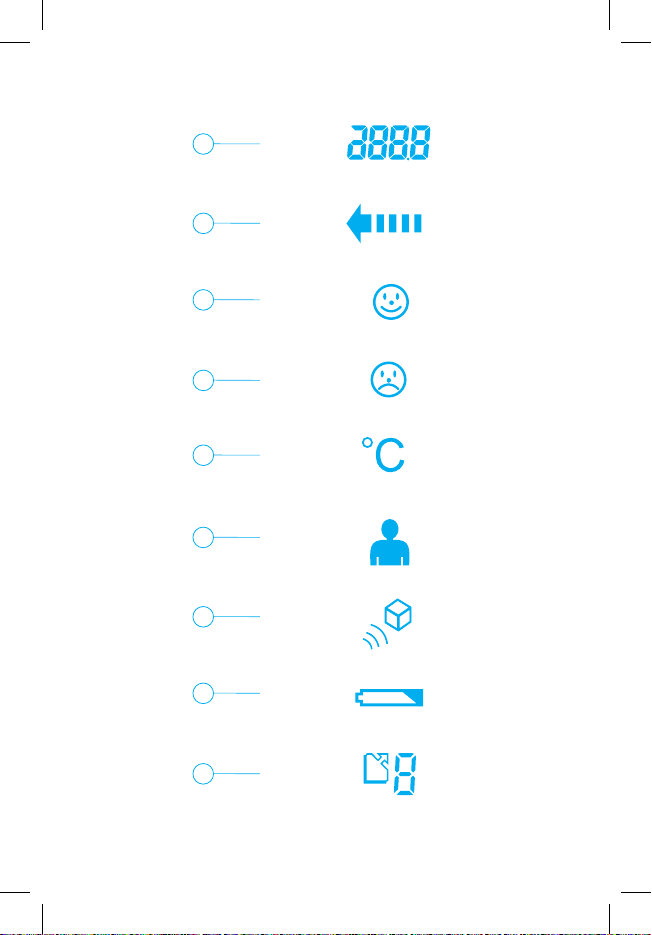
9/ Températures mesurées en degrés
10/ Mesure en cours
11/ Visage souriant indiquant une température inférieure à 38°C
12/ Visage triste indiquant une température égale ou supérieure à 38°C
13/ Unité de mesure
14/ Mesure en mode frontal
15/ Mesure en mode domestique
16/ Signal de piles faibles
17/ Mémoire et numéro d’enregistrement
2 - MISE EN PLACE DES PILES
1. Poussez doucement vers l’extérieur le couvercle du logement des piles pour le dégager (8).
2. Insérez les 2 piles AAA en prenant soin de les placer correctement et en respectant bien la polarité
indiquée au fond du logement.
3. Replacez le couvercle en le faisant glisser dans les fentes latérales jusqu’à son verrouillage.
Les piles et instruments électroniques doivent être éliminés en conformité avec les prescriptions locales,
séparément des ordures ménagères.
3 - SÉLECTION DU MODE DE FONCTIONNEMENT
Ce thermomètre peut fonctionner en 2 modes :
• En mode thermomètre médical, l’appareil mesure à distance la température par une prise frontale. L’écran
affiche en haut et au centre un petit buste
• En mode thermomètre domestique, l’appareil mesure toujours sans contact direct la température des
différents éléments ou objets de la maison.
Pour passer en mode thermomètre domestique, allumez le thermomètre en appuyant sur la touche MESURE .
Dès l’affichage des 2 zéros surmontés du buste, appuyez brièvement sur le bouton de sélection , ce qui
fait apparaître en haut et à droite un petit cube
Note : quel que soit le mode utilisé et après extinction, le thermomètre revient automatiquement en
mode thermomètre médical.
.
confirmant le mode choisi.
4
Page 5

4 - MODE THERMOMÈTRE MÉDICAL FRONTAL
A / Méthode
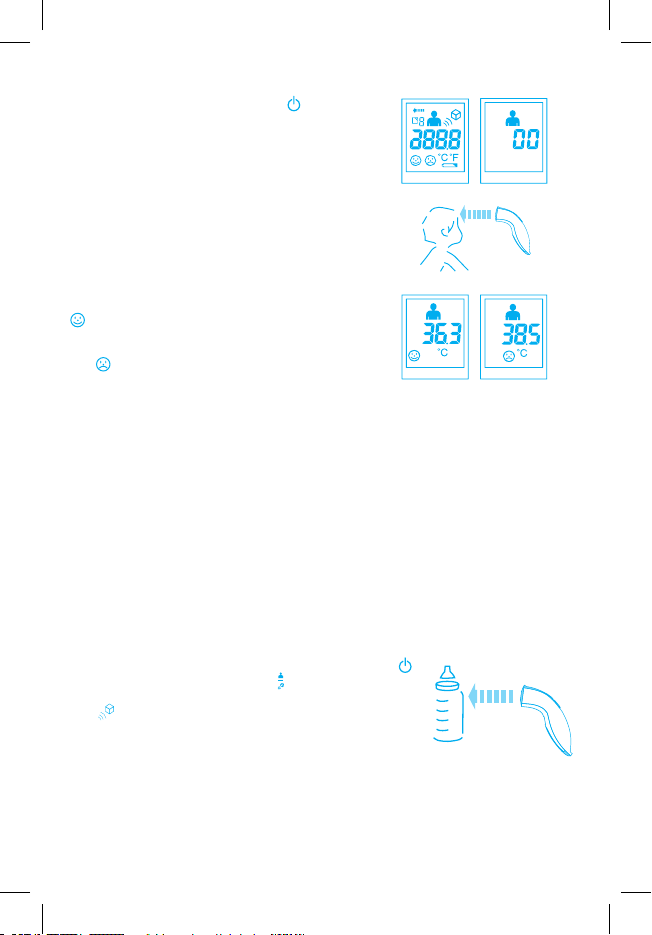
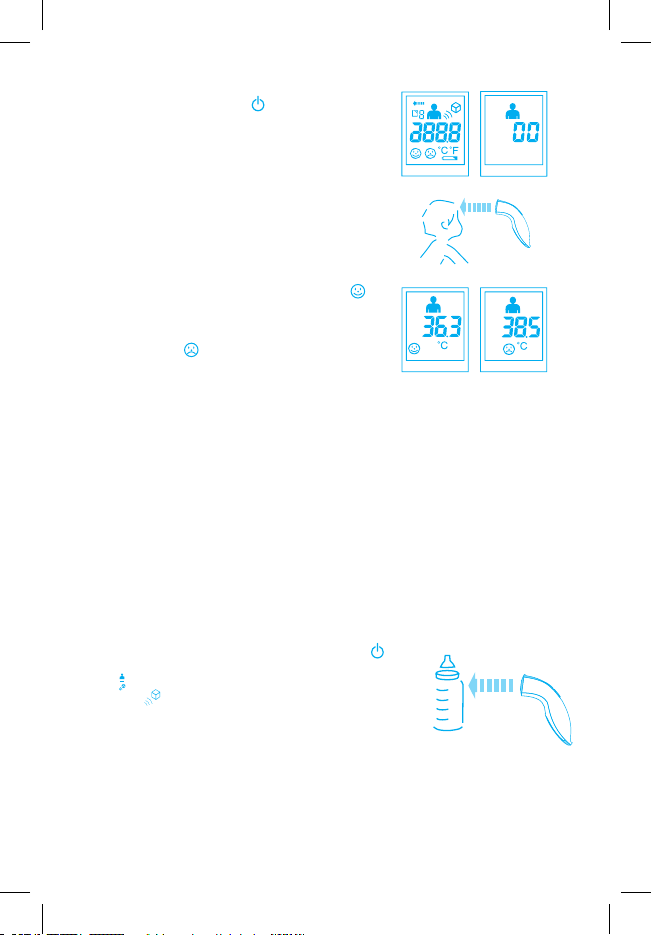
• Appuyez brièvement sur la touche MESURE
L’appareil s’allume, effectue d’abord un autotest en affichant
tous les éléments de l’écran, Figure 1, puis signale qu’il est
prêt par la Figure 2 brièvement rétroéclairée.
• Pressez à nouveau sur la touche MESURE et sans la relâcher,
avancez doucement le thermomètre vers la zone temporale
(de préférence) ou le milieu du front. A la bonne distance (4 à
8 cm environ) le radar déclenche automatiquement la mesure.
• Un bip bref indique la n de la mesure, relâchez alors
la touche MESURE. La température est affichée avec
rétroéclairage durant 3 secondes.
B / Interprétation par le thermomètre
• Température mesurée inférieure à 38°C : un petit visage
souriant
s’affiche en bas de l’écran (figure 3)
• Température égale ou supérieure à 38°C : alarme èvre,
1 bip long/2 bips courts et signal lumineux rouge. C’est alors
un petit visage triste qui apparaît (figure 4).
Toutes les valeurs affichées en mode thermomètre frontal
correspondent sensiblement à une température rectale.
C / Arrêt
L’appareil s’éteint automatiquement au bout de 30 secondes.
D/ Conseils et précautions spécifiques
Pour éviter une mesure inexacte, observez bien les précautions spécifiques qui suivent :
• N’utilisez pas le thermomètre frontal dans un environnement humide, à température excessive, agité par
des courants d’air ou une forte ventilation.
• Veillez à l’état de la peau du front qui doit être parfaitement sèche, propre, bien dégagée et non couverte
de sueur ou par les cheveux.
• Prenez toujours la température au même endroit en respectant les zones préconisées.
• Retenez qu’un phénomène physiologique nommé vasoconstriction peut se produire au début de l’état
fébrile. Il se manifeste extérieurement par une peau relativement froide. Tout thermomètre frontal donne
alors des lectures anormalement basses.
• Enn, si la température frontale afchée ne semble pas correspondre avec l’état du bébé ou de
l’enfant, veuillez utiliser un thermomètre classique électronique. Notez que l’augmentation ou la baisse de
température au niveau du rectum se manifeste souvent avec un léger retard par rapport au front qui est plus
proche de l’hypothalamus, centre de régulation de la température.
5 - MODE THERMOMÈTRE DOMESTIQUE
A / Méthode
• Allumez le thermomètre par une simple pression sur la touche
MESURE
• Appuyez brièvement sur la touche de sélection
2 zéros et assurez-vous que vous êtes bien en mode objet confirmé par
le petit cube en haut et à droite de l’écran.
• Pressez la touche MESURE et sans la relâcher, pointez le thermomètre
vers l’objet en respectant une distance de 4 à 8 cm.
• Relâchez alors la touche MESURE. Un bip bref signale la n de la prise
de température qui s’affiche avec un rétroéclairage de 3 secondes.
B / Conseils et précautions spécifiques
• La température de surface peut être très différente de la température au coeur du biberon, du bain ou de
la soupe. Pour éviter tout incident, il est nécessaire de bien mélanger tous les liquides avant de procéder
à la mesure.
• Dans ces derniers cas, prenez la température le plus rapidement possible pour éviter la formation de
condensation sur le capteur ou le radar. Attendez ensuite 30 minutes environ avant une nouvelle utilisation.
.
et relâchez.
à l’affichage des
Figure 1
Figure 3
Figure 2
4-8 cm
Figure 4
4-8 cm
5
Page 6
6 - DYSFONCTIONNEMENTS, MESSAGES SPÉCIAUX ET SOLUTIONS
9 - REMPLACEMENT DES PILES
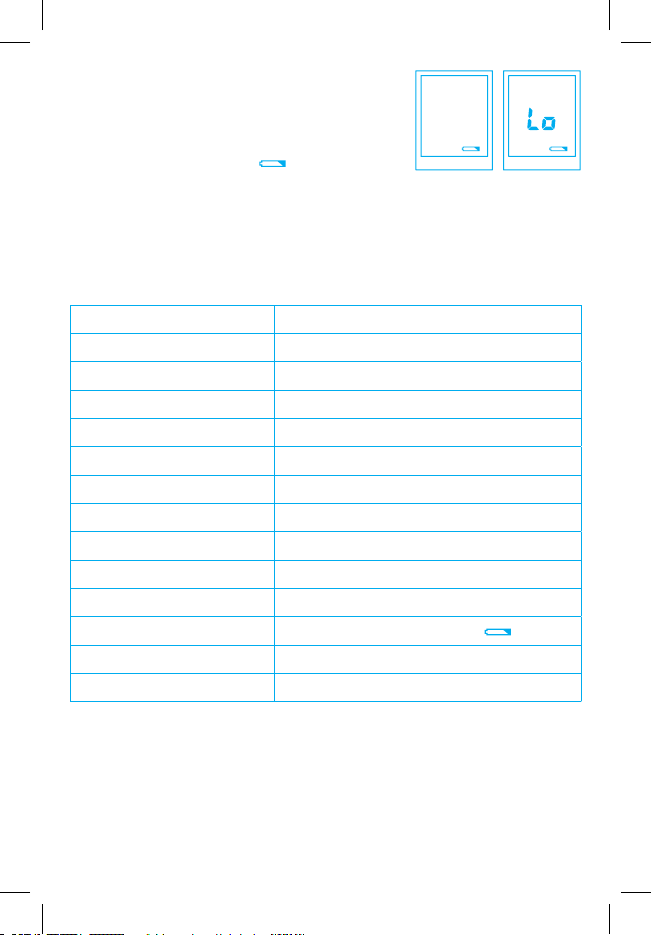
A / Surveillance de la tension des piles
• Lorsque les piles sont faibles, le symbole pile apparaît en bas de
l’écran. Vous devez alors prévoir un jeu de piles neuves AAA - 1,5 v
pour remplacer les anciennes dès que possible (Figure 5).
Toutefois le thermomètre peut continuer à fonctionner normalement
jusqu’à ce que les 2 symboles Lo et s’affichent en même
temps (Figure 6 ).
B / Extraction et remplacement
• Dégagez les vieilles piles de leur logement et placez 2 nouvelles piles AAA de préférence alcalines comme
vous avez procédé lors de la première mise en marche (chapitre 2) en vous conformant bien aux polarités
indiquées.
• Ne laissez pas les piles usées à la portée des enfants et respectez la réglementation en vigueur concernant
l’élimination de celles-ci.
10 - CARACTÉRISTIQUES TECHNIQUES
1 Type Thermomètre à infrarouges sans contact
2 Plages de mesure
3 Précision
4 Echelle de mesure Degrés Celsius
5 Résolution 0,1°C
6 Distance optimale de mesure 4 à 8 cm
7 Mémoire 10
8 Arrêt Automatique après 30 secondes
9 Alimentation 2 piles alcalines AAA – 1,5 v
10 Conditions de fonctionnement
11 Conditions de stockage
12 Signaux de contrôle «Lo» et «Hi» : températures hors plages pile faible
13 Dimensions 141 mm x 42 mm x 55,5 mm
14 Poids 120 grammes avec piles
11 - GARANTIE
Ce produit est garanti pendant une période de deux ans à compter de la date d’achat. Aucun dommage
occasionné par une mauvaise manipulation n’est couvert par la garantie. Les piles et l’emballage sont
également exclus de la garantie. Tout autre sinistre exclu. Toujours joindre la preuve d’achat à toute
déclaration de sinistre et l’adresser à Dorel dont les adresses figurent sur cette notice.
Référence à la norme ASTM (E1965-98), EN 980 : 2003, IEC/EN 60601-1-2, ISO 14971.
Cet appareil est conforme aux exigences de la directive relative aux appareils médicaux 93/42/CEE.
A / Températures affichées régulièrement trop basses
• Le capteur et le radar ont pu être souillés ou voilés par de la poussière.
Vérifiez leur état de surface et nettoyez les à l’aide d’un tampon imbibé d’alcool.
• La prise de température n’est pas effectuée dans les conditions requises.
Relisez les conseils spécifiques (4D). Le patient et le thermomètre doivent être à la même température
ambiante, stable et tempérée. Attendre une trentaine de minutes assure une bonne stabilisation.
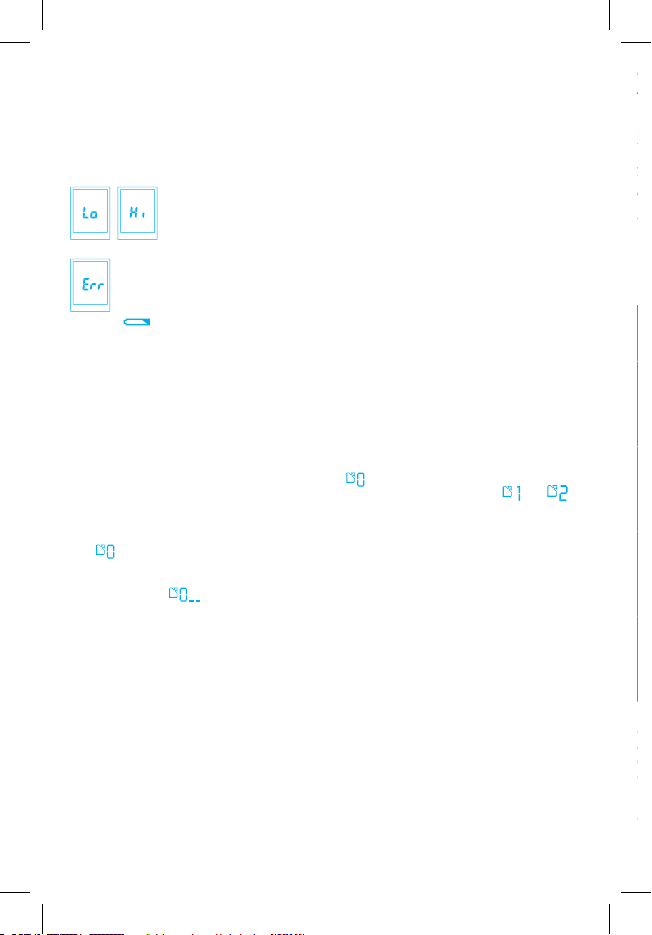
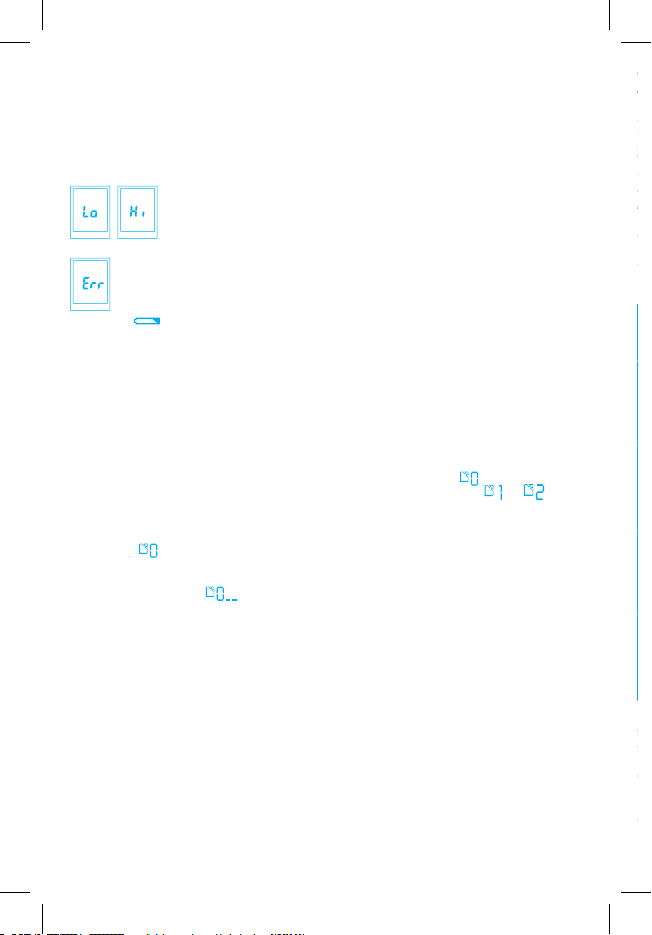
B / Message « Lo » ou Hi »
C / Avertissement « ERR »
D / Signal piles faibles + Lo
Les piles sont trop faibles pour effectuer une mesure. Remplacez les piles en suivant les instructions des
chapitres 2 et 9.
E / L’écran ne s’allume pas
Les piles sont totalement usées ou mal mises en place. Les changer ou les réinsérer correctement en
veillant à la polarité indiquée.
7 - MÉMOIRE - RAPPEL DES PRÉCEDENTES MESURES
La capacité de la mémoire est de 10 mesures.
A / Rappel des mesures précédentes
L’appareil étant allumé, appuyez brièvement une première fois sur la touche MEM puis réappuyez ce qui fait
apparaître la dernière mesure accompagnée du symbole .
Chaque appui sur cette même touche donne accès à une mesure plus ancienne, donc puis et
ainsi de suite jusqu’à 9.
B / Effacement
• Automatique, 11e mesure : lorsque les 10 mémoires sont utilisées, toute nouvelle mesure sera enregistrée
avec et la plus ancienne effacée sans intervention particulière.
• Pour supprimer toutes les mesures en mémoire, allumez le thermomètre puis maintenez la touche MEM
enfoncée pendant 3 secondes.
L’écran affiche alors confirmant l’effacement complet.
8 - NETTOYAGE - ENTRETIEN - RANGEMENT
• Pour conserver toute la précision de cet appareil, vous devez maintenir parfaitement propre la surface du
capteur et du radar. N’utilisez qu’un tampon imbibé d’alcool et surtout ni eau ou autre produit nettoyant.
• Ne touchez pas ces deux éléments précités très sensibles avec les doigts.
• Nettoyez le boîtier du thermomètre avec un chiffon doux et sec. Ne le plongez jamais dans l’eau ou dans
un autre liquide car il n’est pas étanche.
• N’exposez pas le thermomètre à des températures extrêmes (par exemple dans une voiture placée en
plein soleil), à une forte humidité et à la poussière.
• Tenez l’appareil bien en main, évitez de le laisser tomber ou de lui faire subir des chocs.
• Ne tentez pas d’ouvrir ou de démonter l’appareil (sauf le couvercle des piles). Seul un personnel dûment
qualifié peut intervenir.
• Après utilisation replacez le thermomètre dans sa pochette et rangez l’ensemble dans un endroit
accessible… mais éloigné des petites mains enfantines. Si vous pensez ne pas utiliser votre thermomètre
pendant une longue période, retirez les piles.
Ces messages rétroéclairés pendant 3 secondes signifient que la température à prendre
est en dehors de la plage de mesure du thermomètre.
Veuillez vous conformer aux possibilités de l’appareil (chapitre 10 : Caractéristiques
techniques).
La prise de température est effectuée dans des conditions ambiantes ne correspondant pas à
celles permettant un bon fonctionnement du thermomètre.
Prenez toujours la température dans les mêmes conditions à une température ambiante uniforme
et stable entre 16 et 35°C, en dehors de tout courant d’air.
6
Page 7
9 - REMPLACEMENT DES PILES
A / Surveillance de la tension des piles
• Lorsque les piles sont faibles, le symbole pile apparaît en bas de
l’écran. Vous devez alors prévoir un jeu de piles neuves AAA - 1,5 v
pour remplacer les anciennes dès que possible (Figure 5).
Toutefois le thermomètre peut continuer à fonctionner normalement
jusqu’à ce que les 2 symboles Lo et s’affichent en même
temps (Figure 6 ).
B / Extraction et remplacement
• Dégagez les vieilles piles de leur logement et placez 2 nouvelles piles AAA de préférence alcalines comme
vous avez procédé lors de la première mise en marche (chapitre 2) en vous conformant bien aux polarités
indiquées.
• Ne laissez pas les piles usées à la portée des enfants et respectez la réglementation en vigueur concernant
l’élimination de celles-ci.
Figure 6Figure 5
10 - CARACTÉRISTIQUES TECHNIQUES
1 Type Thermomètre à infrarouges sans contact
2 Plages de mesure
3 Précision
4 Echelle de mesure Degrés Celsius
5 Résolution 0,1°C
6 Distance optimale de mesure 4 à 8 cm
7 Mémoire 10
8 Arrêt Automatique après 30 secondes
9 Alimentation 2 piles alcalines AAA – 1,5 v
10 Conditions de fonctionnement
11 Conditions de stockage
12 Signaux de contrôle «Lo» et «Hi» : températures hors plages
13 Dimensions 141 mm x 42 mm x 55,5 mm
14 Poids 120 grammes avec piles
11 - GARANTIE
Ce produit est garanti pendant une période de deux ans à compter de la date d’achat. Aucun dommage
occasionné par une mauvaise manipulation n’est couvert par la garantie. Les piles et l’emballage sont
également exclus de la garantie. Tout autre sinistre exclu. Toujours joindre la preuve d’achat à toute
déclaration de sinistre et l’adresser à Dorel dont les adresses figurent sur cette notice.
Référence à la norme ASTM (E1965-98), EN 980 : 2003, IEC/EN 60601-1-2, ISO 14971.
Cet appareil est conforme aux exigences de la directive relative aux appareils médicaux 93/42/CEE.
Températures corporelles 10°C à 50°C
Températures domestiques 0°C à 100°C
Températures corporelles ± 0,3°C entre 22°C et 40°C
Températures domestiques 20°C ± 1°C / > 20°C ± 5%
Température ambiante 16°C à 35°C avec humidité
relative maximale de 95% (sans condensation)
- 25°C à + 55°C avec humidité maximale de 95%
(sans condensation)
pile faible
7
Page 8

TERMOMETRO MEDICO A DISTANZA
IT
Il termometro medico a distanza Bébé Confort utilizza una tecnologia di punta, che consiste nel captare
i raggi infrarossi emessi dai corpi per misurarne la temperatura. Questa tecnologia presenta il vantaggio
di permettere misure di temperatura a distanza, senza contatto diretto e di ottenere immediatamente il
risultato. Potete così seguire l’evoluzione della temperatura di un neonato o di un bambino senza disturbarlo
e anche mentre dorme.
Tuttavia la semplicità di utilizzo di questo termometro, la sua rapidità e le possibilità di misurare anche la
temperatura degli oggetti circostanti non devono farvi dimenticare che questo apparecchio è prima di tutto
un dispositivo medico di misura. Perciò utilizzatelo rispettando accuratamente le raccomandazioni generali
e le precauzioni specifiche illustrate in questo manuale di utilizzo.
Vogliate consultare le istruzioni prima dell’utilizzo e conservarle con cura.
Vi ricordiamo infine che in caso di dubbi sulla salute di un membro della vostra famiglia o di constatazione
di uno stato febbrile, è necessario consultare al più presto un medico.
1 - DESCRIZIONE DEL TERMOMETRO E DEL SUO SCHERMO
1/ Schermo a cristalli liquidi
2/ Tasto accensione/misura
3/ Tasto memoria
4/ Tasto selezione modo di funzionamento
5/ Segnale febbre
6/ Sensore
7/ Radar
8/ Coperchio del vano batterie
9/ Temperature misurate in gradi
10/ Misura in corso
11/ Faccina sorridente, indica una temperatura inferiore a 38°C
12/ Faccina triste, indica una temperatura superiore o uguale a 38°C
13/ Unità di misura
14/ Misura in modalità frontale
15/ Misura in modalità domestica
16/ Segnale batterie scariche
17/ Memoria e numero di registrazione
2 - POSIZIONAMENTO DELLE BATTERIE
1. Spingete delicatamente verso l’esterno il coperchio del vano batterie per rimuoverlo (8).
2. Inserite le 2 batterie AAA avendo cura di posizionarle correttamente e rispettando la polarità indicata sul
fondo del vano.
3. Riposizionate il coperchio facendolo scorrere lungo le scanalature laterali fino al bloccaggio.
Le batterie e gli strumenti elettronici devono essere smaltiti in conformità con le normative locali,
separatamente dai rifiuti domestici.
3 - SELEZIONE DEL MODO DI FUNZIONAMENTO
Questo termometro può funzionare in 2 modi:
• In modalità termometro medicale, l’apparecchio misura a distanza la temperatura attraverso una presa
frontale. Lo schermo mostra in alto al centro un piccolo busto
• In modalità termometro domestico, l’apparecchio misura sempre senza contatto diretto la temperatura di
diversi elementi o oggetti della casa.
Per passare in modalità termometro domestico, accendete il termometro premendo il tasto MISURA
Quando compaiono i 2 zeri con sopra il busto, premete brevemente il tasto di selezione
comparire in alto a destra un piccolo cubo
Nota : qualunque sia la modalità di utilizzo, dopo lo spegnimento il termometro torna
automaticamente alla modalità termometro medico.
che conferma la modalità selezionata.
.
.
, che farà
8
Page 9
4 - MODALITÀ TERMOMETRO MEDICO FRONTALE
A / Metodo
• Premete brevemente il tasto MISURA
L’apparecchio si accende, effettua prima di tutto
un’autodiagnosi mostrando tutti gli elementi dello schermo,
Figura 1, poi segnala che è pronto con la Figura 2 brevemente
retroilluminata.
• Premete nuovamente il tasto MISURA e, senza rilasciarlo,
avvicinate lentamente il termometro alla zona temporale
(preferibilmente) o al centro della fronte. Alla distanza corretta
(tra i 4 e gli 8 cm circa) il radar inizia automaticamente la
misurazione.
• Un breve bip indica la ne della misurazione, rilasciate
allora il tasto MISURA. La temperatura è indicata con una
retroilluminazione di 3 secondi.
B / Interpretazione del termometro
• Temperatura misurata inferiore a 38°C: una faccina sorridente
compare sulla parte inferiore dello schermo (figura 3).
• Temperatura superiore o uguale a 38°C: allarme febbre, 1 bip
lungo/2 bip brevi e segnale luminoso rosso. Compare una faccina
triste (figura 4). Tutti i valori indicati in modalità termometro
frontale corrispondono sensibilmente alla temperatura rettale.
C / Spegnimento
L’apparecchio si spegne automaticamente dopo 30 secondi.
D / Consigli e precauzioni specifiche
Per evitare una misura scorretta, osservate attentamente le precauzioni specifiche seguenti:
• Non utilizzate il termometro frontale in un ambiente umido, con temperatura eccessiva, in presenza di
correnti d’aria o di una forte ventilazione.
• Assicuratevi dello stato della pelle della fronte, che dovrà essere perfettamente asciutta, pulita, libera e
non coperta da sudore o capelli.
• Prendete la temperatura sempre nello stesso punto, rispettando le zone indicate.
• Tenete presente che un fenomeno siologico denominato vasocostrizione può presentarsi all’inizio dello
stato febbrile. Si manifesta all’esterno con una pelle relativamente fredda. Il termometro frontale rileverà
quindi misure stranamente basse.
• Inne, se la temperatura frontale indicata non sembra corrispondere con lo stato del neonato o del
bambino, vogliate utilizzare un classico termometro elettronico. Tenete presente che l’aumento o la
diminuzione della temperatura a livello del retto si manifesta spesso con un leggero ritardo rispetto alla
fronte, che è più vicina all’ipotalamo, centro di regolazione della temperatura.
5 - MODALITÀ TERMOMETRO DOMESTICO
A / Metodo
• Accendete il termometro con una semplice pressione sul tasto MISURA
• Premete brevemente il tasto di selezione quando compaiono i 2 zeri
e assicuratevi di essere nella modalità in oggetto confermata dal piccolo
cubo in alto a destra dello schermo.
• Premete il tasto MISURA e, senza rilasciarlo, puntate il termometro
verso l’oggetto, mantenendo una distanza tra i 4 e gli 8 cm.
• Rilasciate quindi il tasto MISURA. Un breve bip segnala la ne della
misurazione della temperatura, che viene indicata con una retroilluminazione di 3 secondi.
B / Consigli e precauzioni specifiche
• La temperatura di supercie può essere molto diversa dalla temperatura al centro del biberon, del
bagnetto o della zuppa. Per evitare qualsiasi incidente, è necessario mescolare bene tutti i liquidi prima di
procedere con la misurazione.
• In questi ultimi casi, prendete la temperatura il più rapidamente possibile, in modo da evitare la formazione
di condensa sul sensore o sul radar. Aspettate in seguito 30 minuti circa prima di un nuovo utilizzo.
e rilasciate.
Figura 1
Figura 3
.
Figura 2
4-8 cm
Figura 4
4-8 cm
9
Page 10
6 - MALFUNZIONAMENTI, MESSAGGI SPECIALI E SOLUZIONI
9 - SOSTITUZIONE DELLE BATTERIE
A / Attenzione alla tensione delle batterie
• Quando le batterie sono scariche, il simbolo batteria compare
sulla parte inferiore dello schermo. Dovete allora procurarvi un set di
batterie nuove AAA - 1,5 v per sostituire quelle vecchie non appena
possibile (Figura 5).
Tuttavia il termometro può continuare a funzionare normalmente
fino a quando i 2 simboli Lo e non compaiono
contemporaneamente.
B / Estrazione e sostituzione
• Togliete le vecchie pile dal loro vano e posizionate 2 nuove batterie AAA preferibilmente alcaline, come
avete fatto al momento del primo utilizzo (Capitolo 2) attenendovi alle polarità indicate.
• Non lasciate le batterie usate alla portata dei bambini e rispettate la normativa in vigore per il loro
smaltimento.
10 - CARATTERISTICHE TECNICHE
1 Tipo Termometro a infrarossi senza contatto
2 Portata di misura
3 Precisione
4 Unità di misura Gradi Celsius
5 Risoluzione 0,1°C
6 Distanza ottimale per la misura da 4 a 8 cm
7 Memoria 10
8 Spegnimento Automatico dopo 30 secondi
9 Alimentazione 2 batterie alcaline AAA - 1,5 v
10 Condizioni di funzionamento
11 Condizioni di conservazione
12 Segnali di controllo «Lo» e «Hi» : temperature fuori portata batterie scariche
13 Dimensioni 141 mm x 42 mm x 55,5 mm
14 Peso 120 grammi batterie incluse
11 - GARANZIA
Questo prodotto è garantito per un periodo di due anni a partire dalla data
di acquisto. Nessun danno causato da una cattiva manipolazione è coperto dalla garanzia. Anche le
batterie e l’imballaggio sono esclusi dalla garanzia. Ogni altro incidente è escluso. Allegare sempre la prova
di acquisto ad ogni dichiarazione di sinistro e inviarla a Dorel, agli indirizzi riportati su questo manuale.
Riferimento alla norma ASTM (E1965-98), EN 980 : 2003, IEC/EN 60601-1-2, ISO 14971. Questo
apparecchio è conforme alle esigenze della direttiva relativa alle apparecchiature mediche 93/42/CEE.
A / Temperature indicate regolarmente troppo basse
• Il sensore e il radar potrebbero essere sporchi o velati dalla polvere. Vericate lo stato della loro supercie
e puliteli con un tampone imbevuto di alcool.
• La presa di temperatura non è effettuata nelle condizioni richieste. Rileggete i consigli specici (4D). Il
paziente e il termometro devono essere alla stessa temperatura ambiente, stabile e temperata. Attendere
una trentina di minuti assicura una buona stabilizzazione.
B/ Messaggio « Lo » o Hi »
C / Segnale « ERR »
D / Segnale batterie scariche + Lo
Le batterie sono troppo scariche per effettuare una misurazione. Sostituite le batterie seguendo le istruzioni
dei capitoli 2 e 9.
E / Lo schermo non si illumina
Le batterie sono completamente scariche o mal posizionate. Sostituirle o inserirle correttamente rispettando
la polarità indicata.
7 - MEMORIA - RICHIAMO DELLE MISURAZIONI PRECEDENTI
La capacità di memoria è di 10 misurazioni.
A / Richiamo delle misurazioni precedenti
Quando l’apparecchio è acceso, premete brevemente una prima volta il tasto MEM, poi premete
nuovamente per fare comparire l’ultima misurazione, accompagnata dal simbolo .
Ogni pressione su questo stesso tasto dà accesso a una misura più vecchia, quindi poi e così
di seguito fino a 9.
B / Cancellazione
• Automatico, 11a misurazione: quando le 10 memorie sono state utilizzate, ogni nuova misurazione sarà
registrata con e la più vecchia sarà cancellata senza alcun intervento particolare.
• Per cancellare tutte le misurazioni in memoria, accendete il termometro, poi tenete premuto il tasto MEM
per 3 secondi.
Lo schermo mostrerà allora confermando la cancellazione completa.
8 - PULIZIA - MANUTENZIONE - CONSERVAZIONE
• Per conservare tutta la precisione di questo apparecchio, dovete mantenere perfettamente pulite le
superfici del sensore e del radar. Utilizzate solo un tampone imbevuto di alcool e soprattutto né acqua né
altri prodotti per la pulizia.
• Non toccate tali elementi molto sensibili con le dita.
• Pulite il corpo del termometro con un panno sofce e asciutto. Non immergetelo mai in acqua o in altri
liquidi, poiché non è a tenuta stagna.
• Non esponete il termometro a temperature estreme (per esempio in una macchina posta in pieno sole),
a forti umidità o alla polvere.
• Tenete l’apparecchio saldamente nella mano, evitate di farlo cadere o di fargli subire urti.
• Non tentate di aprire o smontare l’apparecchio (escluso il coperchio delle batterie). Solo personale
adeguatamente qualificato può intervenire.
• Dopo l’utilizzo, rimettete il termometro nella sua custodia e riponete il tutto in un luogo accessibile... ma
lontano dalla portata delle manine dei bambini. Se pensate di non utilizzare il vostro termometro per un
lungo periodo, togliete le batterie.
Questi messaggi retroilluminati per 3 secondi significano che la temperatura da misurare
è fuori dalla portata di misurazione del termometro.
Vogliate attenervi alle possibilità dell’apparecchio (capitolo 10: Caratteristiche
tecniche).
La presa di temperatura è effettuata in condizioni ambientali non corrispondenti a quelle che
permettono un buon funzionamento del termometro.
Prendete sempre la temperatura nelle stesse condizioni, a una temperatura ambiente uniforme e
stabile tra 16 e 35°C, senza correnti d’aria.
10
Page 11

9 - SOSTITUZIONE DELLE BATTERIE
A / Attenzione alla tensione delle batterie
• Quando le batterie sono scariche, il simbolo batteria compare
sulla parte inferiore dello schermo. Dovete allora procurarvi un set di
batterie nuove AAA - 1,5 v per sostituire quelle vecchie non appena
possibile (Figura 5).
Tuttavia il termometro può continuare a funzionare normalmente
fino a quando i 2 simboli Lo e non compaiono
contemporaneamente.
B / Estrazione e sostituzione
• Togliete le vecchie pile dal loro vano e posizionate 2 nuove batterie AAA preferibilmente alcaline, come
avete fatto al momento del primo utilizzo (Capitolo 2) attenendovi alle polarità indicate.
• Non lasciate le batterie usate alla portata dei bambini e rispettate la normativa in vigore per il loro
smaltimento.
Figura 6Figura 5
10 - CARATTERISTICHE TECNICHE
1 Tipo Termometro a infrarossi senza contatto
2 Portata di misura
3 Precisione
4 Unità di misura Gradi Celsius
5 Risoluzione 0,1°C
6 Distanza ottimale per la misura da 4 a 8 cm
7 Memoria 10
8 Spegnimento Automatico dopo 30 secondi
9 Alimentazione 2 batterie alcaline AAA - 1,5 v
10 Condizioni di funzionamento
11 Condizioni di conservazione
12 Segnali di controllo «Lo» e «Hi» : temperature fuori portata
13 Dimensioni 141 mm x 42 mm x 55,5 mm
14 Peso 120 grammi batterie incluse
11 - GARANZIA
Questo prodotto è garantito per un periodo di due anni a partire dalla data
di acquisto. Nessun danno causato da una cattiva manipolazione è coperto dalla garanzia. Anche le
batterie e l’imballaggio sono esclusi dalla garanzia. Ogni altro incidente è escluso. Allegare sempre la prova
di acquisto ad ogni dichiarazione di sinistro e inviarla a Dorel, agli indirizzi riportati su questo manuale.
Riferimento alla norma ASTM (E1965-98), EN 980 : 2003, IEC/EN 60601-1-2, ISO 14971. Questo
apparecchio è conforme alle esigenze della direttiva relativa alle apparecchiature mediche 93/42/CEE.
Temperature corporee da 10°C a 50°C
Temperature domestiche 0°C a 100°C
Temperature corporee ± 0,3°C tra 22°C e 40°C
Temperature domestiche 20°C ± 1°C / > 20°C ± 5%
Temperatura ambiente da 16°C a 35°C con umidità
relativa massima del 95% (senza condensazione)
da - 25°C a + 55°C con umidità massima del 95%
(senza condensazione)
batterie scariche
11
Page 12

CONTACTLOZE KOORTSTHERMOMETER
NL
De contactloze Bébé Confort koortsthermometer maakt gebruik van een geavanceerde technologie die de
infrarood straling van het lichaam opvangt om de temperatuur te meten.
Deze technologie heeft als voordeel dat temperatuur op afstand kan worden opgenomen, zonder direct
contact en met een onmiddellijk resultaat. U kunt het koortsverloop van een baby of kind volgen zonder het
te storen en zelfs wanneer het slaapt.
Ondanks de gebruiksvriendelijkheid, de snelle metingen en zijn mogelijkheden om de temperatuur van
voorwerpen in de omgeving te meten, moet u niet vergeten dat het apparaat in eerste instantie is bedoeld
als een koortsthermometer. Gebruik hem daarom met inachtneming van de algemene aanbevelingen en
de specifieke voorzorgsmaatregelen die in deze handleiding worden vermeld.
Gelieve de gebruiksaanwijzing door te lezen voordat u het apparaat gebruikt en deze vervolgens zorgvuldig
bewaren.
Ten slotte wijzen wij u erop dat u in geval van twijfel over de gezondheid van een gezinslid of bij het
constateren van koorts zo snel mogelijk contact moet opnemen met een arts.
1 - BESCHRIJVING VAN DE THERMOMETER EN HET DISPLAY
1/ Lcd-display
2/ Aan/uit-toets meten
3/ Geheugentoets
4/ Functiekeuzetoets
5/ Koortssignaal
6/ Sensor
7/ Radar
8/ Deksel van het batterijvakje
9/ Gemeten temperaturen in graden
10/ Wordt gemeten
11/ Een glimlachend gezicht geeft een temperatuur aan onder 38°C
12/ Een triest gezicht geeft een temperatuur gelijk aan 38°C of hoger
13/ Meeteenheid
14/ Voorhoofdthermometer
15/ Meting voor huishoudelijk gebruik
16/ Signaal voor batterijen met zwakke lading
17/ Geheugen en opnamenummer
2 - DE BATTERIJEN INSTALLEREN
1. Schuif het dekseltje van het batterijenvakje voorzichtig naar buiten om het open te maken (8).
2. Installeer 2 AAA batterijen en let op dat u de polen in de juiste richting plaatst die wordt vermeld op de
bodem van het vakje.
3. Schuif het dekseltje terug in de zijsleuven totdat het vastklikt.
De batterijen en elektronische apparatuur moeten worden weggedaan in overeenstemming met de
plaatselijke regelgeving, sortering van huisafval.
3 - DE WERKWIJZE KIEZEN
Deze thermometer heeft 2 functies:
• Als koortsthermometer kan het apparaat op afstand de temperatuur opnemen via het voorhoofd. Boven
op het scherm en in het midden verschijnt een kleine buste .
• Als huishoudthermometer kan het apparaat zonder contact de temperatuur direct opnemen van
verschillende elementen of voorwerpen in het huis. Om over te schakelen naar de thermometer voor
huishoudelijk gebruik, zet u de thermometer aan Door de toets METEN
Onmiddellijk na de weergave van de 2 nullen onder een buste, drukt u kort op de keuzeknop
rechtsboven een vierkantje
Opmerking: ongeacht de functie, zal de thermometer na uitschakeling weer automatisch
terugschakelen naar de functie koortsthermometer.
verschijnt, dat de gekozen functie bevestigt.
in te drukken.
, waardoor
12
Page 13

4 - VOORHOOFDTHERMOMETER
A / Methode
• Druk kort op de toets METEN
Het apparaat brandt, en voert eerst een zelftest uit waarbij alle
elementen van het scherm worden weergegeven, Afbeelding
1, vervolgens geeft het aan dat het klaar is voor gebruik
Afbeelding 2 wordt kort verlicht.
• Druk opnieuw op de toets METEN en zonder hem los te
laten, brengt u de thermometer langzaam naar het te meten
gebied (bij voorkeur) of het midden van het voorhoofd. Op
de juiste afstand (ongeveer 4 tot 8 cm) activeert de radar
automatisch de meetcyclus.
• Een korte pieptoon geeft aan dat de meetcylcus is voltooid. U
kunt de toets loslaten. METEN. De gemeten temperatuur wordt
weergegeven met achtergrondverlichting gedurende 3 seconden.
B / Verklaring van thermometersignalen
• Gemeten onder 38°C: een glimlachend gezichtje
verschijnt onderin het scherm (afbeelding 3)
• Temperatuur gelijk aan of hoger dan 38°C: koortsalarm, 1
lange pieptoon/2 korte pieptonen en een rood knipperlicht.
Dit wordt aangegeven door een triest gezichtje (afbeelding
4) Alle waarden gemeten met de voorhoofdfunctie komen
grotendeels overeen met een rectaal opgenomen temperatuur.
C / Uitzetten
Het apparaat gaat automatisch uit na 30 seconden.
D / Adviezen en specifieke voorzorgsmaatregelen
Neem bij een onnauwkeurige meting de volgende specieke voorzorgsmaatregelen in acht:
• De voorhoofdthermometer niet gebruiken in een vochtige omgeving, bij overmatige hitte, sterke tocht of
een sterke ventilatie.
• De huid van het voorhoofd moet goed droog, schoon, vrij en niet bedekt zijn door zweet of haar.
• Neem de temperatuur altijd op dezelfde plaats op en op de de voorgeschreven gebieden.
• Denk eraan dat er een fysiologisch verschijnsel kan optreden dat vasoconstrictie heet aan het begin
van koorts. Dit uit zich uiterlijk door een tamelijk koude huid. Elke voorhoofdthermometer geeft dan een
abnormaal resultaat aan.
• Als de voorhoofdtemperatuur niet lijkt te passen bij de toestand van de baby of het kind, gebruikt u een
klassieke elektronische thermometer. Vergeet niet dat een verhoging of verlaging in de rectale temperatuur
vaak wat later wordt geconstateerd ten opzichte van het voorhoofd, dat zich dichter bij de hypothalamus
bevindt, waar de lichaamstemperatuur wordt geregeld.
5 - THERMOMETER VOOR HUISHOUDELIJK GEBRUIK
A / Methode
• Zet de thermometer aan door een druk op de toets METEN
• Druk kort op de keuzetoets
controleer of de functie Voorwerpen wordt bevestigd door het vierkantje
rechtsboven op het scherm.
• Druk op de toets METEN en zonder deze los te laten, richt u de
thermometer op het voorwerp van een afstand van 4 tot 8 cm.
• De toets METEN vervolgens loslaten. Een korte pieptoon geeft aan
dat de temperatuur is opgenomen. Deze wordt weergegeven met een achtergrondverlichting gedurende
3 seconden.
B / Adviezen en specifieke voorzorgsmaatregelen
• De gemeten temperatuur van het oppervlak kan erg verschillen van de temperatuur in het midden van
de zuigfles, het bad of van de soep. Om ongevallen te voorkomen, moeten alle vloeistoffen goed worden
gemengd voordat u de temperatuur opneemt.
• In het laatste geval, neemt u de temperatuur zo snel mogelijk op om condensvorming te voorkomen op
sensor of op de radar. Wacht vervolgens ongeveer 30 minuten voordat u hem opnieuw gebruikt.
en laat hem weer los.
.
wanneer er 2 nullen verschijnen en
Afbeelding 1
Afbeelding 3
Afbeelding 2
4-8 cm
Afbeelding 4
4-8 cm
13
Page 14

6 - STORING, SPECIALE MELDINGEN EN OPLOSSINGEN
9 - BATTERIJEN VERVANGEN
A / De spanning van de batterijen controleren
• Wanneer de batterijen bijna leeg zijn, verschijnt het symbool
Batterij onderin het scherm. U moet dan nieuwe AAA batterijen
instaleren van 1,5 V om de lege batterijen zo spoedig mogelijk te
vervangen (Afbeelding 5). De thermometer kan echter normaal
worden gebruikt totdat de 2 symbolen Lo en tegelijkertijd
worden weergegeven (Afbeelding 6 ).
B / Batterijen verwijderen en vervangen
• Haal de lege batterijen uit het vakje en installeer 2 nieuwe AAA batterijen, bij voorkeur alkaline, net als
bij de eerste ingebruikneming, (Hoofdstuk 2) en volg hiervoor de instructies voor de richting van de polen.
• Laat de lege batterijen niet binnen bereik van kinderen en volg de geldende regelgeving voor het wegdoen
van de batterijen.
10 - TECHNISCHE EIGENSCHAPPEN
1 Type Contactloze infrarood-thermometer
2 Meetbereik
3 Precisie
4 Meetschaal Graden Celsius
5 Resolutie 0,1°C
6 Optimale meetafstand 4 tot 8 cm
7 Geheugen 10
8 Uitschakeling Automatische na 30 seconden
9 Voeding 2 alkaline batterijen AAA – 1,5 V
10 Bedrijfsvoorwaarden
11 Opslagcondities
12 Controlesignalen
13 Afmetingen 141 mm X 42 mm X 55,5 mm
14 Gewicht 120 gram met batterijen
11 - GARANTIE
Op dit product staat een garantie van twee jaar vanaf de datum van aankoop. Schade veroorzaakt door
verkeerd gebruik valt niet onder de garantie. De batterijen en de verpakking vallen ook buiten de garantie.
Alle andere schade valt buiten de garantie. Voeg altijd de kassabon toe wanneer u een schadeclaim indient
en stuur deze aan Dorel, naar de adressen die in deze handleiding worden vermeld.
Verwijzing naar de norm ASTM (E1965-98), EN 980: 2003, IEC/EN 60601-1-2, ISO 14971.
Dit apparaat is in overeenstemming met de eisen van de Richtlijn voor medische apparatuur 93/42/EEG.
A / Weergegeven temperaturen regelmatig te laag
• de sensor en de radar zijn misschien bedekt met vuil of stof. Controleer hun oppervlak en maak ze schoon
met behulp van een sponsje doordrenkt met alcohol.
• De temperatuur wordt niet opgenomen onder de vereiste voorwaarden.
Volg de specifieke adviezen (4D). De patiënt en de thermometer moeten dezelfde ruimtetemperatuur
hebben, stabiel en gematigd. Wacht ongeveer dertig minuten totdat de temperatuur stabiel is.
B/ Melding «LO of Hi»
C / Waarschuwing «ERR»
D / Signaal Batterijen met zwakke lading + LO
De batterijen zijn te zwak om te meten. Vervang de batterijen met inachtneming van de instructies in
hoofdstukken 2 en 9.
E / Het scherm is niet aan
De batterijen zijn helemaal leeg of verkeerd geïnstalleerd. Zevervangen of installeren met de polen in de
richting die is aangegeven.
7 - GEHEUGEN - EERDERE MEETWAARDEN OPROEPEN
De geheugencapaciteit is 10 meetwaarden.
A / Eerdere meetwaarden oproepen
Wanneer het apparaat aan staat, drukt u een eerste keer kort op de toets MEM en vervolgens een tweede
keer om de laatste meetwaarde op te roepen die wordt weergegeven met het symbool .
Bij elke druk op dezelfde toets verschijnt er een oudere meetwaarde, dus vervolgens en
zo verder tot 9.
B / Wissen
• Automatisch, 11e meting: wanneer er 10 geheugenplaatsen zijn gebruikt, elke nieuwe meting zal worden
opgeslagen met en de oudste meting wordt gewist zonder ingreep van uzelf.
• Als u alle meetwaarden uit het geheugen wilt wissen, zet u de thermometer aan en drukt u vervolgens
de toets MEM 3 seconden lang in. Op het scherm verschijnt dan ter bevestiging van het wissen
van alle waarden.
8 - SCHOONMAAK - ONDERHOUD - OPBERGEN
• Om het apparaat nauwkeurig te houden, moet u het oppervlak van de sensor en de radar goed
schoon houden. Gebruik uitsluitend een sponsje doordrenkt met alcohol en vooral geen water of andere
schoonmaakmiddel.
• De twee voornoemde elementen zijn zeer gevoelig en mogen niet worden aangeraakt met de vingers.
• Maak de buitenkant van de thermometer schoon met een zachte droge doek. Dompel hem nooit in water
of in een andere vloeistof, omdat hij niet waterdicht is.
• Stel de thermometer niet bloot aan extreme temperaturen (bijvoorbeeld in een in de zon geparkeerde
auto), aan hoge vochtigheid en stof.
• Houd het apparaat goed vast en laat het niet vallen en stoot het nergens tegenaan.
• Probeer het apparaat niet te openen of demonteren (met uitzondering van het dekseltje van het
batterijenvakje). Alleen bevoegd personeel mag onderhoud verrichten.
• Na gebruik plaatst u de thermometer terug in zijn etui en bergt u hem op in een gemakkelijk bereikbare
plaats… maar buiten bereik van kinderhandjes. Als denkt dat u uw thermometer gedurende een lange
periode niet gebruikt, verwijdert u de batterijen.
Deze meldingen die 3 seconden worden weergegeven met achtergrondverlichting
betekenen dat de op te nemen temperatuur buiten het meetbereik valt van de
thermometer. Gebruik het apparaat volgens zijn capaciteiten (hoofdstuk 10: Technische
eigenschappen).
De temperatuur wordt opgenomen onder omgevingsvoorwaarden die geen goede werking van de
thermometer mogelijk maken.
Neem de temperatuur altijd op onder dezelfde voorwaarden en een stabiele ruimtetemperatuur
tussen 16 en 35°C en uit de tocht.
14
Page 15

9 - BATTERIJEN VERVANGEN
A / De spanning van de batterijen controleren
• Wanneer de batterijen bijna leeg zijn, verschijnt het symbool
Batterij onderin het scherm. U moet dan nieuwe AAA batterijen
instaleren van 1,5 V om de lege batterijen zo spoedig mogelijk te
vervangen (Afbeelding 5). De thermometer kan echter normaal
worden gebruikt totdat de 2 symbolen Lo en tegelijkertijd
worden weergegeven (Afbeelding 6 ).
B / Batterijen verwijderen en vervangen
• Haal de lege batterijen uit het vakje en installeer 2 nieuwe AAA batterijen, bij voorkeur alkaline, net als
bij de eerste ingebruikneming, (Hoofdstuk 2) en volg hiervoor de instructies voor de richting van de polen.
• Laat de lege batterijen niet binnen bereik van kinderen en volg de geldende regelgeving voor het wegdoen
van de batterijen.
Afbeelding 6Afbeelding 5
10 - TECHNISCHE EIGENSCHAPPEN
1 Type Contactloze infrarood-thermometer
2 Meetbereik
3 Precisie
4 Meetschaal Graden Celsius
5 Resolutie 0,1°C
6 Optimale meetafstand 4 tot 8 cm
7 Geheugen 10
8 Uitschakeling Automatische na 30 seconden
9 Voeding 2 alkaline batterijen AAA – 1,5 V
10 Bedrijfsvoorwaarden
11 Opslagcondities
12 Controlesignalen
13 Afmetingen 141 mm X 42 mm X 55,5 mm
14 Gewicht 120 gram met batterijen
11 - GARANTIE
Op dit product staat een garantie van twee jaar vanaf de datum van aankoop. Schade veroorzaakt door
verkeerd gebruik valt niet onder de garantie. De batterijen en de verpakking vallen ook buiten de garantie.
Alle andere schade valt buiten de garantie. Voeg altijd de kassabon toe wanneer u een schadeclaim indient
en stuur deze aan Dorel, naar de adressen die in deze handleiding worden vermeld.
Verwijzing naar de norm ASTM (E1965-98), EN 980: 2003, IEC/EN 60601-1-2, ISO 14971.
Dit apparaat is in overeenstemming met de eisen van de Richtlijn voor medische apparatuur 93/42/EEG.
Lichaamstemperatuur van 10°C tot 50°C
Temperatuur huishoudelijke voorwerpen van 0°C tot 100°C
Lichaamstemperatuur ± 0,3° tussen + 22° C en 40° C
Temperatuur huishoudelijke voorwerpen 20°C ± 1°C > 20°C ± 5%
Omgevingstemperatuur 16°C tot 35°C met een maximale
relatieve vochtigheid van 95% (zonder condensatie)
- 25°C tot + 55°C met maximale vochtigheid
van 95% (zonder condensatie)
«Lo» et «Hi»: temperaturen buiten bereik
zwakke batterij
15
Page 16

TERMÓMETRO MÉDICO SIN CONTACTO
ES
El termómetro médico sin contacto Bébé Confort utiliza una tecnología puntera que permite captar los
rayos infrarrojos emitidos por todo tipo de cuerpos para medir su temperatura.
La ventaja de esta tecnología es que permite tomar la temperatura a distancia, sin contacto directo y
obtener el resultado al instante. De esta forma puede controlar la evolución de la temperatura del bebé o el
niño sin molestarle e incluso mientras está dormido.
Pese a la rapidez y sencillez de uso de este termómetro y a que permite medir también la temperatura
de los objetos circundantes, no debe olvidar que se trata de un dispositivo médico de medición, por lo
que debe respetar siempre las recomendaciones generales y las precauciones específicas que figuran en
este manual.
Lea este manual antes de utilizar el dispositivo y consérvelo a buen recaudo.
Para terminar, le recordamos que en caso de duda sobre la salud de algún miembro de su familia o si
constata un estado febril, debe consultar rápidamente a un médico.
1 - DESCRIPCIÓN DEL TERMÓMETRO Y DE LA PANTALLA
1/ Pantalla de cristal líquido
2/ Tecla de encendido y medición
3/ Tecla de memoria
4/ Tecla de selección del modo de funcionamiento
5/ Señal de fiebre
6/ Sensor
7/ Radar
8/ Tapa del compartimento de las pilas
9/ Temperaturas medidas en grados
10/ Medición actual
11/ Cara sonriente: indica que la temperatura es inferior a 38°C
12/ Cara triste: indica que la temperatura es igual o superior a 38°C
13/ Unidad de medida
14/ Medición en modo frontal
15/ Medición en modo doméstico
16/ Señal de pilas casi gastadas
17/ Memoria y número de registro
2 - INSERCIÓN DE LAS PILAS
1. Empuje suavemente la tapa del compartimento de las pilas hacia el exterior para extraerla (8).
2. Inserte las dos pilas AAA procurando colocarlas correctamente y respetando la polaridad indicada en
el fondo del compartimento.
3. Vuelva a colocar la tapa deslizándola en las ranuras laterales hasta bloquearla.
Las pilas e instrumentos electrónicos deben desecharse de conformidad con las normas locales y
separados de la basura doméstica.
3 - SELECCIÓN DEL MODO DE FUNCIONAMIENTO
Este termómetro puede funcionar en dos modos:
• En el modo termómetro médico, el aparato mide la temperatura a distancia mediante una toma frontal.
La pantalla muestra en la parte superior y en el centro un pequeño busto
• En el modo termómetro doméstico, el aparato mide, siempre sin contacto directo, la temperatura de
los distintos elementos u objetos de la casa. Para pasar al modo termómetro doméstico, encienda el
termómetro pulsando la tecla MESURE (MEDICIÓN)
Tan pronto como aparezcan dos ceros encima del busto, pulse brevemente el botón de selección para
que aparezca en la parte superior derecha un pequeño cubo
Nota: sea cual sea el modo utilizado, el termómetro recupera automáticamente el modo de
termómetro médico después de apagarlo.
.
.
que confirma el modo elegido.
16
Page 17
4 - MODO TERMÓMETRO MÉDICO FRONTAL
A / Método
• Pulse brevemente la tecla MESURE
se enciende y efectúa primero un autotest mostrando todos
los elementos de la pantalla (Figura 1); después indica
que está preparado mostrando la Figura 2 brevemente
retroiluminada.
• Pulse de nuevo la tecla MESURE y sin soltarla, desplace poco
a poco el termómetro por la zona temporal (preferentemente) o
por el centro de la frente. A una distancia correcta (unos 4 a 8
cm), el radar inicia automáticamente la medición.
• Un corto pitido indica el nal de la medición; ya puede soltar
la tecla MESURE. La temperatura se mostrará retroiluminada
durante tres segundos.
B / Interpretación del termómetro
• Temperatura inferior a 38 °C: aparece una cara sonriente
en la parte inferior de la pantalla (figura 3)
• Temperatura igual o superior a 38°C: alarma de ebre, 1
pitido largo o 2 cortos y señal luminosa en rojo. En este caso
aparece una cara triste (figura 4) Todos los valores que se
muestran en el modo termómetro frontal corresponden en la
práctica a la temperatura rectal.
C / Parada
El aparato se apaga automáticamente después de 30 segundos.
D / Consejos y precauciones específicas
Para evitar errores de medición, respete las siguientes precauciones específicas:
• No utilice el termómetro frontal en entornos húmedos, con temperaturas excesivas, sacudidos por
corrientes de aire o con fuerte ventilación.
• Procure que la piel de la frente esté perfectamente seca, limpia y despejada, sin sudor ni cabellos.
• Tome siempre la temperatura en el mismo lugar respetando las zonas recomendadas.
• Recuerde que al principio del estado febril puede producirse un fenómeno siológico llamado
vasoconstricción. Una de sus manifestaciones exteriores es en la piel, que aparece relativamente fría. En
estos casos, todos los termómetros frontales registrarán lecturas anormalmente bajas.
• Por último, si la temperatura frontal señalada no parece corresponder con el estado del bebé o el niño,
utilice un termómetro clásico electrónico. Tenga presente que el aumento o la bajada de temperatura en
el recto suele manifestarse con un ligero retraso en relación con la frente, que se encuentra más cerca del
hipotálamo, el centro regulador de la temperatura.
5 - MODO TERMÓMETRO DOMÉSTICO
A / Método
• Encienda el termómetro pulsando una vez la tecla MESURE
• Cuando aparezcan los dos ceros, pulse brevemente la tecla de
selección
y asegúrese de estar en el modo objeto (debe aparecer un
pequeño cubo en la parte superior derecha de la pantalla).
• Pulse la tecla MESURE y sin soltarla, apunte con el termómetro hacia
el objeto, respetando una distancia de unos 4 a 8 cm.
• Suelte ahora la tecla MESURE. Un corto pitido indica el nal de la toma
de temperatura, que se mostrará retroiluminada durante tres segundos.
B / Consejos y precauciones específicas
• La temperatura supercial puede ser muy distinta de la temperatura en el centro del biberón, del
baño o de la sopa. Para evitar incidencias, debe mezclar bien todos los líquidos antes de proceder a la
medición.
• En este último caso, tome la temperatura lo más rápidamente posible para evitar que se forme
condensación en el sensor o en el radar. Espere unos 30 minutos antes de volver a utilizarlo.
y suéltela. El aparato
Figura 1
Figura 2
4-8 cm
Figura 3
.
Figura 4
4-8 cm
17
Page 18

6 - ERRORES, MENSAJES ESPECIALES Y SOLUCIONES
9 - CAMBIO DE LAS PILAS
A / Control de la tensión de las pilas
• Cuando las pilas estén casi gastadas, aparecerá el símbolo de la
pila en la parte inferior de la pantalla. Debe entonces preparar un
nuevo juego de pilas AAA, 1,5 V para reemplazar las antiguas lo
antes posible (Figura 5).
No obstante, el termómetro puede seguir funcionando
normalmente hasta que los dos símbolos Lo y aparezcan al
mismo tiempo (Figura 6 ).
B / Extracción y sustitución
• Extraiga las pilas viejas de su compartimento y ponga dos nuevas AAA , preferentemente alcalinas, tal
y como lo hizo al activar por primera vez el aparato (capítulo 2), respetando las polaridades indicadas.
• No deje las pilas gastadas al alcance de los niños y respete la reglamentación vigente relativa a su
eliminación.
10 - CARACTERÍSTICAS TÉCNICAS
1 Tipo Termómetro de infrarrojos sin contacto
2 Intervalos de medición
3 Precisión
4 Escala de medición Grados Celsius
5 Resolución 0,1°C
6 Distancia de medición óptima de 4 a 8 cm
7 Memoria 10
8 Parada Automática después de 30 segundos
9 Alimentación 2 pilas alcalinas AAA – 1,5 V
10 Condiciones de funcionamiento
11 Condiciones de almacenamiento
12 Señales de control «Lo» y «Hi»: temperaturas fuera del intervalo pila débil
13 Dimensiones 141 mm x 42 mm x 55,5 mm
14 Peso 120 gramos con las pilas
11- GARANTÍA
Este producto está cubierto por una garantía de dos años a partir de la fecha de compra. La garantía no
cubre los desperfectos ocasionados por manipulaciones incorrectas. Las pilas y el embalaje también se
excluyen de la garantía. Se excluyen además siniestros de todo tipo. Acompañe siempre la prueba de
compra a cualquier declaración de siniestro y diríjala a Dorel, cuyas direcciones figuran en este manual.
Referencia a las normas ASTM (E1965-98), EN 980: 2003, IEC/EN 60601-1-2, ISO 14971.
Este aparato está conforme con lo establecido en la Directiva 93/42/CEE sobre aparatos médicos.
A / A menudo aparecen temperaturas demasiado bajas
• Es posible que el sensor o el radar estén sucios o cubiertos de polvo.
Compruebe el estado de su superficie y límpielos con ayuda de un tampón impregnado de alcohol.
• La toma de temperatura no se ha efectuado en las condiciones requeridas.
Vuelva a leer los consejos específicos (4D). El paciente y el termómetro deben estar a la misma temperatura
ambiente, estable y templada. Esperando treinta minutos se consigue una buena estabilización.
B/ Mensaje «Lo» o «Hi»
C / Aviso «ERR»
D / Señal pilas casi gastadas + Lo
Las pilas están demasiado gastadas para efectuar la medición. Cámbielas
siguiendo las instrucciones de los capítulos 2 y 9.
E / La pantalla no se enciende
Las pilas están totalmente gastadas o mal colocadas. Cámbielas o vuelva a insertarlas correctamente
respetando la polaridad indicada.
7 - MEMORIA: RECORDATORIO DE LAS MEDIDAS ANTERIORES
La memoria tiene capacidad para guardar hasta 10 mediciones.
A / Recordar las mediciones anteriores
Encienda el aparato, pulse brevemente una primera vez la tecla MEM y vuelva a pulsarla; aparecerá la
última medición acompañada del símbolo .
Cada vez que pulse en esta misma tecla accederá a una medición más antigua. Pulse después
y así hasta 9.
B / Borrado
• Automático, en la medición n.º 11: cuando se hayan utilizado las 10 memorias
las nuevas mediciones se registrarán con y la más antigua se borrará sin necesidad de que intervenga.
• Para eliminar todas las mediciones de la memoria, encienda el termómetro y mantenga pulsada la tecla
MEM durante tres segundos.
En la pantalla aparece ahora
8 - LIMPIEZA, MANTENIMIENTO Y COLOCACIÓN
• Para que el aparato conserve toda su precisión, debe mantener perfectamente limpia la supercie del
sensor y del radar. Utilice únicamente un tampón impregnado de alcohol y sobre todo no utilice agua ni
ningún otro producto de limpieza.
• No toque con los dedos los dos elementos mencionados, pues son muy sensibles.
• Limpie la carcasa del termómetro con un paño suave y seco. No la sumerja jamás en agua ni en ningún
otro líquido, ya que no es estanca.
• No exponga el termómetro a temperaturas extremas (por ejemplo, dentro de un coche a pleno sol), a
fuertes humedades ni o al polvo.
• Sujete bien el aparato con la mano, evitándole caídas o golpes.
• No intente abrir ni desmontar el aparato (salvo la tapa de las pilas). Solo debe intervenir en él personal
debidamente cualificado.
• Después de utilizar el termómetro, introdúzcalo en su funda y guárdelo en un lugar accesible, pero alejado
de los niños. Si cree que no va a utilizar el termómetro durante un largo periodo, extraiga las pilas.
Cuando aparecen estos mensajes retroiluminados durante tres segundos
significa que la temperatura que desea medir está fuera del intervalo de medición del
termómetro.
Adécuese a las posibilidades del aparato (capítulo 10: características técnicas).
La toma de temperatura se ha efectuado en condiciones ambientales que impiden el buen
funcionamiento del termómetro.
Tome siempre la temperatura en las mismas condiciones, a una temperatura ambiente uniforme y
estable entre 16 y 35°C, fuera de las corrientes de aire.
, que confirma el borrado completo.
18
Page 19

9 - CAMBIO DE LAS PILAS
A / Control de la tensión de las pilas
• Cuando las pilas estén casi gastadas, aparecerá el símbolo de la
pila en la parte inferior de la pantalla. Debe entonces preparar un
nuevo juego de pilas AAA, 1,5 V para reemplazar las antiguas lo
antes posible (Figura 5).
No obstante, el termómetro puede seguir funcionando
normalmente hasta que los dos símbolos Lo y
mismo tiempo (Figura 6 ).
B / Extracción y sustitución
• Extraiga las pilas viejas de su compartimento y ponga dos nuevas AAA , preferentemente alcalinas, tal
y como lo hizo al activar por primera vez el aparato (capítulo 2), respetando las polaridades indicadas.
• No deje las pilas gastadas al alcance de los niños y respete la reglamentación vigente relativa a su
eliminación.
aparezcan al
Figura 6Figura 5
10 - CARACTERÍSTICAS TÉCNICAS
1 Tipo Termómetro de infrarrojos sin contacto
2 Intervalos de medición
3 Precisión
4 Escala de medición Grados Celsius
5 Resolución 0,1°C
6 Distancia de medición óptima de 4 a 8 cm
7 Memoria 10
8 Parada Automática después de 30 segundos
9 Alimentación 2 pilas alcalinas AAA – 1,5 V
10 Condiciones de funcionamiento
11 Condiciones de almacenamiento
12 Señales de control «Lo» y «Hi»: temperaturas fuera del intervalo
13 Dimensiones 141 mm x 42 mm x 55,5 mm
14 Peso 120 gramos con las pilas
11- GARANTÍA
Este producto está cubierto por una garantía de dos años a partir de la fecha de compra. La garantía no
cubre los desperfectos ocasionados por manipulaciones incorrectas. Las pilas y el embalaje también se
excluyen de la garantía. Se excluyen además siniestros de todo tipo. Acompañe siempre la prueba de
compra a cualquier declaración de siniestro y diríjala a Dorel, cuyas direcciones figuran en este manual.
Referencia a las normas ASTM (E1965-98), EN 980: 2003, IEC/EN 60601-1-2, ISO 14971.
Este aparato está conforme con lo establecido en la Directiva 93/42/CEE sobre aparatos médicos.
Temperaturas corporales, de 10°C a 50°C
Temperaturas domésticas, de 0°C a 100°C
Temperaturas corporales ± 0,3°C entre 22°C y 40°C
Temperaturas domésticas 20°C ± 1°C / > 20°C ± 5%
Temperatura ambiente, de 16°C a 35°C con una humedad
relativa máxima de 95 % (sin condensación)
de - 25°C a + 55°C con una humedad máxima
de 95 % (sin condensación)
pila débil
19
Page 20

Termómetro médico sem contacto
4 - MODO DE TERMÓMETRO MÉDICO FRONTAL
A / Método
• Premir brevemente o botão MEDIÇÃO
aparelho é ligado, executa um teste automático apresentando
todos os elementos do ecrã, Figura 1, e depois assinala que
está pronto através da visualização da Figura 2 com uma
breve iluminação de fundo.
• Premir novamente o botão MEDIÇÃO e sem o soltar,
avançar devagar o termómetro para a zona temporal (de
preferência) ou para o meio da testa. À distância correcta
(cerca de 4 a 8 cm) o radar inicia automaticamente a medição.
• Um som bip breve indica o m da medição. Soltar o botão
MEDIÇÃO. A temperatura é visualizada com iluminação de
fundo durante 3 segundos.
B / Interpretação pelo termómetro
• Temperatura medida inferior a 38°C: é visualizado um
pequeno rosto sorridente
(Figura 3).
• Temperatura igual ou superior a 38°C: alarme de
febre, 1 som bip longo/2 sons bips curtos e um sinal luminoso
vermelho. Aparece assim um pequeno rosto triste (Figura 4).
Todos os valores visualizados em modo de termómetro frontal
correspondem sensivelmente a uma temperatura rectal.
C / Paragem
O aparelho desliga-se automaticamente ao fim de 30 segundos.
D / Conselhos e precauções específicos
Para evitar uma medição não exacta, cumpra com as seguintes precauções específicas:
• Não utilizar o termómetro frontal num ambiente húmido, com temperaturas excessivas, perturbado por
correntes de ar ou com ventilação forte.
• Verique o estado da pele da testa, que deve estar perfeitamente seca, limpa, não obstruída nem coberta
com suor ou cabelos.
• Medir sempre a temperatura no mesmo local respeitando as zonas recomendadas.
• Tenha em atenção que no início do estado febril pode gerar-se um fenómeno siológico chamado de
vasoconstrição. É manifestado exteriormente por uma pele relativamente fria. Por esta razão, todos os
termómetros frontais fornecerão leituras anormalmente baixas.
• Se a temperatura frontal visualizada parecer não corresponder ao estado do bebé ou da criança, utilizar
um termómetro clássico electrónico. De notar que o aumento ou a redução da temperatura a nível do
recto manifesta-se muitas vezes com um ligeiro atraso em relação à da testa, que está mais próxima do
hipotálamo, o centro de regulação da temperatura.
5 - MODO DE TERMÓMETRO DOMÉSTICO
A / Método
• Ligar o termómetro através de uma simples pressão no botão
MEDIÇÃO
• Premir brevemente o botão de selecção
e certificar-se de que está em modo objecto confirmado pelo pequeno
cubo na parte superior direita do ecrã.
• Premir o botão MEDIÇÃO e sem o soltar apontar o termómetro para o
objecto respeitando uma distância de 4 a 8 cm.
• Soltar depois o botão MEDIÇÃO. Um som bip breve assinala o m da medição da temperatura que é
visualizada com iluminação de fundo durante 3 segundos.
B / Conselhos e precauções específicos
• A temperatura à superfície pode ser muito diferente da temperatura dentro do biberão, do banho ou da
sopa. Para evitar qualquer incidente, é necessário misturar bem os líquidos antes de proceder à medição.
• Nestes últimos casos, medir a temperatura o mais rapidamente possível para evitar a formação de
condensação no sensor ou no radar. Esperar cerca de 30 minutos antes de utilizar novamente.
PT
O termómetro médico sem contacto da Bébé Confort utiliza uma tecnologia de ponta, que consiste em
captar os raios infravermelhos emitidos por qualquer corpo para medir a temperatura. Esta tecnologia tem
a vantagem de permitir medições da temperatura à distância, sem contacto directo, e obter um resultado
instantâneo. Desta forma, pode acompanhar a evolução da temperatura de um bebé ou de uma criança
sem o/a perturbar e mesmo enquanto dorme.
Contudo, a simplicidade de utilização deste termómetro, a sua rapidez e as suas possibilidades de
medição da temperatura dos objectos envolventes, não devem fazer esquecer que este aparelho é,
acima de tudo, um dispositivo médico de medição. Utilizá-lo respeitando as recomendações gerais e as
precauções específicas referidas nestas instruções de utilização.
Ler as instruções de utilização antes da utilização e guardá-las.
Por último, lembramos que em caso de dúvida sobre a saúde de um dos seus familiares ou da confirmação
de um estado febril, deverá consultar imediatamente um médico.
1 - DESCRIÇÃO DO TERMÓMETRO E DO SEU ECRÃ
1/ Ecrã de cristais líquidos
2/ Botão de arranque/medição
3/ Botão da memória
4/ Botão de selecção do modo de funcionamento
5/ Sinal de febre
6/ Sensor
7/ Radar
8/ Tampa do compartimento das pilhas
9/ Temperaturas medidas em graus
10/ Medição em curso
11/ Rosto sorridente a indicar uma temperatura inferior a 38°C
12/ Rosto triste a indicar uma temperatura igual ou superior a 38°C
13/ Unidade de medição
14/ Medição em modo frontal
15/ Medição em modo doméstico
16/ Sinal de pilhas fracas
17/ Memória e número de registo
2 - COLOCAÇÃO DAS PILHAS
1. Empurrar com cuidado para fora a tampa do alojamento das pilhas para a desengatar (8).
2. Inserir as 2 pilhas AAA tendo cuidado para as colocar correctamente e respeitando a polaridade inscrita
no fundo do alojamento.
3. Voltar a colocar a tampa fazendo-a deslizar pelas ranhuras laterais até bloquear.
As pilhas e os instrumentos electrónicos devem ser eliminados em conformidade com os regulamentos
locais e separadas do lixo doméstico.
3 - SELECÇÃO DO MODO DE FUNCIONAMENTO
Este termómetro pode funcionar em 2 modos:
• Em modo de termómetro médico, o aparelho mede a temperatura à distância através de uma medição
frontal. O ecrã apresenta na parte superior ao centro um pequeno busto
• Em modo de termómetro doméstico, o aparelho mede sempre sem contacto directo a temperatura dos
vários elementos ou objectos da casa.
Para passar para o modo termómetro doméstico, ligar o termómetro premindo a tecla MEDIÇÃO
Assim que sejam visualizados os 2 zeros com o busto em cima, premir brevemente o botão de selecção ,
o que faz aparecer na parte superior direita um pequeno cubo
Nota: qualquer que seja o modo utilizado, depois de apagado o termómetro volta automaticamente
ao modo de termómetro médico.
20
.
confirmando o modo seleccionado.
.
Page 21

4 - MODO DE TERMÓMETRO MÉDICO FRONTAL
A / Método
• Premir brevemente o botão MEDIÇÃO
aparelho é ligado, executa um teste automático apresentando
todos os elementos do ecrã, Figura 1, e depois assinala que
está pronto através da visualização da Figura 2 com uma
breve iluminação de fundo.
• Premir novamente o botão MEDIÇÃO e sem o soltar,
avançar devagar o termómetro para a zona temporal (de
preferência) ou para o meio da testa. À distância correcta
(cerca de 4 a 8 cm) o radar inicia automaticamente a medição.
• Um som bip breve indica o m da medição. Soltar o botão
MEDIÇÃO. A temperatura é visualizada com iluminação de
fundo durante 3 segundos.
B / Interpretação pelo termómetro
• Temperatura medida inferior a 38°C: é visualizado um
pequeno rosto sorridente
(Figura 3).
• Temperatura igual ou superior a 38°C: alarme de
febre, 1 som bip longo/2 sons bips curtos e um sinal luminoso
vermelho. Aparece assim um pequeno rosto triste (Figura 4).
Todos os valores visualizados em modo de termómetro frontal
correspondem sensivelmente a uma temperatura rectal.
C / Paragem
O aparelho desliga-se automaticamente ao fim de 30 segundos.
D / Conselhos e precauções específicos
Para evitar uma medição não exacta, cumpra com as seguintes precauções específicas:
• Não utilizar o termómetro frontal num ambiente húmido, com temperaturas excessivas, perturbado por
correntes de ar ou com ventilação forte.
• Verique o estado da pele da testa, que deve estar perfeitamente seca, limpa, não obstruída nem coberta
com suor ou cabelos.
• Medir sempre a temperatura no mesmo local respeitando as zonas recomendadas.
• Tenha em atenção que no início do estado febril pode gerar-se um fenómeno siológico chamado de
vasoconstrição. É manifestado exteriormente por uma pele relativamente fria. Por esta razão, todos os
termómetros frontais fornecerão leituras anormalmente baixas.
• Se a temperatura frontal visualizada parecer não corresponder ao estado do bebé ou da criança, utilizar
um termómetro clássico electrónico. De notar que o aumento ou a redução da temperatura a nível do
recto manifesta-se muitas vezes com um ligeiro atraso em relação à da testa, que está mais próxima do
hipotálamo, o centro de regulação da temperatura.
5 - MODO DE TERMÓMETRO DOMÉSTICO
A / Método
• Ligar o termómetro através de uma simples pressão no botão
MEDIÇÃO
• Premir brevemente o botão de selecção
e certificar-se de que está em modo objecto confirmado pelo pequeno
cubo na parte superior direita do ecrã.
• Premir o botão MEDIÇÃO e sem o soltar apontar o termómetro para o
objecto respeitando uma distância de 4 a 8 cm.
• Soltar depois o botão MEDIÇÃO. Um som bip breve assinala o m da medição da temperatura que é
visualizada com iluminação de fundo durante 3 segundos.
B / Conselhos e precauções específicos
• A temperatura à superfície pode ser muito diferente da temperatura dentro do biberão, do banho ou da
sopa. Para evitar qualquer incidente, é necessário misturar bem os líquidos antes de proceder à medição.
• Nestes últimos casos, medir a temperatura o mais rapidamente possível para evitar a formação de
condensação no sensor ou no radar. Esperar cerca de 30 minutos antes de utilizar novamente.
.
na parte inferior do ecrã
e soltá-lo. O
para visualizar os 2 zeros
Figura 1
Figura 3
Figura 2
4-8 cm
Figura 4
4-8 cm
21
Page 22

6 - FUNCIONAMENTOS INCORRECTOS, MENSAGENS ESPECIAIS E SOLUÇÕES
9 - SUBSTITUIÇÃO DAS PILHAS
A / Monitorização da tensão das pilhas
• Quando as pilhas estão fracas, o símbolo da pilha aparece na
parte inferior do ecrã. Deverá ter disponível um novo conjunto de
pilhas novas AAA -
1,5 v para substituir as antigas assim que possível (Figura 5).
Contudo, o termómetro pode continuar a funcionar normalmente
até que os 2 símbolos Lo e sejam visualizados ao mesmo
tempo (Figura 6 ).
B / Remoção e substituição
• Retirar as pilhas antigas do alojamento e colocar as 2 pilhas novas AAA, de preferência alcalinas, tal como
fez para a primeira utilização (Capítulo 2), respeitando as polaridades indicadas.
• Não deixar as pilhas usadas ao alcance das crianças e respeitar a regulamentação em vigor sobre a
eliminação das mesmas.
10 - CARACTERÍSTICAS TÉCNICAS
1 Tipo Termómetro de infravermelhos sem contacto
2 Intervalos de medição
3 Precisão
4 Escala de medição Graus Celsius
5 Resolução 0,1°C
6 Distância ideal de medição 4 a 8 cm
7 Memória 10
8 Paragem Automática após 30 segundos
9 Alimentação 2 pilhas alcalinas AAA – 1,5 v
10 Condições de funcionamento
11 Condições de armazenagem
12 Sinais de controlo “Lo” e “Hi”: temperaturas fora do intervalo pilhas fracas
13 Dimensões 141 mm x 42 mm x 55,5 mm
14 Peso 120 gramas com pilhas
11 - GARANTIA
Este produto tem garantia para um período de dois anos a partir da data de aquisição. Qualquer dano
ocasionado por uma manipulação errada não é coberto pela garantia. As pilhas e a embalagem estão
igualmente excluídas da garantia. Qualquer outro sinistro excluído. Anexar sempre a prova de compra a
qualquer declaração de sinistro e enviar à Dorel cujo endereço se encontra neste manual.
Referência à norma ASTM (E1965-98), EN 980: 2003, IEC/EN 60601-1-2, ISO 14971.
Este aparelho está em conformidade com os requisitos da directiva relativa aos dispositivos médicos.
A/ Temperaturas muito baixas visualizadas regularmente
• O sensor e o radar podem estar sujos ou tapados com pó.
Verificar o estado da superfície e limpar usando um pouco de gaze embebida em álcool.
• A medição da temperatura não é efectuada nas condições recomendadas.
Voltar a ler os conselhos específicos (4D). O paciente e o termómetro devem estar à mesma temperatura
ambiente estável e moderada. Esperar cerca de trinta minutos para garantir uma estabilização correcta.
B / Mensagem “Lo” ou “Hi”
C / Advertência “ERR”
D / Sinal de pilhas fracas + Lo
As pilhas estão muito fracas para efectuar uma medição. Substituir as pilhas seguindo as instruções dos
capítulos 2 e 9.
E / O ecrã não acende
As pilhas estão totalmente gastas ou mal colocadas. Trocá-las ou voltar a inseri-las correctamente com
a polaridade indicada.
7 - MEMÓRIA – REGISTO DAS MEDIÇÕES ANTERIORES
A capacidade da memória é de 10 medições.
A / Registo das medições anteriores
Com o aparelho ligado, premir brevemente uma primeira vez o botão MEM e depois voltar a premir. Isto faz
aparecer a última medição acompanhada do símbolo .
Cada pressão neste mesmo botão dá acesso a uma medição mais antiga, ou seja, e depois , e
assim sucessivamente até 9.
B / Eliminação
• Automática, 11a medição: quando as 10 memórias são utilizadas, qualquer nova medição será registada
com e a mais antiga é apagada sem qualquer intervenção particular.
• Para eliminar todas as medições na memória, ligar o termómetro e depois manter o botão MEM premido
durante 3 segundos.
O ecrã apresenta confirmando a eliminação completa.
8 - LIMPEZA - MANUTENÇÃO – CONSERVAÇÃO
• Para manter toda a precisão deste aparelho, deve manter perfeitamente limpa a superfície do sensor e
do radar. Utilizar somente um pouco de gaze embebida em álcool e, sobretudo, não utilizar água ou outro
produto de limpeza.
• Não tocar com os dedos nestes dois elementos muito sensíveis.
• Limpar a caixa do termómetro com um pano suave e seco. Não a meter dentro de água ou noutro líquido
porque não é estanque.
• Não expor o termómetro a temperaturas extremas (por exemplo, num automóvel ao sol), a uma
humidade elevada ou ao pó.
• Segurar bem o aparelho, evitar deixá-lo cair ou submetê-lo a choques.
• Não tentar abrir ou desmontar o aparelho (excepto a tampa do compartimento das pilhas). Somente
pessoal devidamente qualificado deve intervir no aparelho.
• Depois da utilização, colocar o termómetro na sua bolsa e guardar o conjunto num local acessível, mas
afastado do alcance das crianças. Se pensa que não vai utilizar o termómetro durante um longo período
de tempo, retirar as pilhas.
Estas mensagens com iluminação de fundo durante 3 segundos significam que a
temperatura a medir está fora do intervalo de medição do termómetro.
Deverá usar o aparelho dentro das suas possibilidades (capítulo 10: Características
técnicas).
A medição da temperatura é efectuada em condições ambientais que não correspondem àquelas
que permitem um correcto funcionamento do termómetro.
Medir sempre a temperatura nas mesmas condições a uma temperatura ambiente uniforme e
estável entre 16 e 35°C, afastado de qualquer corrente de ar.
22
Page 23

9 - SUBSTITUIÇÃO DAS PILHAS
A / Monitorização da tensão das pilhas
• Quando as pilhas estão fracas, o símbolo da pilha aparece na
parte inferior do ecrã. Deverá ter disponível um novo conjunto de
pilhas novas AAA 1,5 v para substituir as antigas assim que possível (Figura 5).
Contudo, o termómetro pode continuar a funcionar normalmente
até que os 2 símbolos Lo e sejam visualizados ao mesmo
tempo (Figura 6 ).
B / Remoção e substituição
• Retirar as pilhas antigas do alojamento e colocar as 2 pilhas novas AAA, de preferência alcalinas, tal como
fez para a primeira utilização (Capítulo 2), respeitando as polaridades indicadas.
• Não deixar as pilhas usadas ao alcance das crianças e respeitar a regulamentação em vigor sobre a
eliminação das mesmas.
Figura 6Figura 5
10 - CARACTERÍSTICAS TÉCNICAS
1 Tipo Termómetro de infravermelhos sem contacto
2 Intervalos de medição
3 Precisão
4 Escala de medição Graus Celsius
5 Resolução 0,1°C
6 Distância ideal de medição 4 a 8 cm
7 Memória 10
8 Paragem Automática após 30 segundos
9 Alimentação 2 pilhas alcalinas AAA – 1,5 v
10 Condições de funcionamento
11 Condições de armazenagem
12 Sinais de controlo “Lo” e “Hi”: temperaturas fora do intervalo
13 Dimensões 141 mm x 42 mm x 55,5 mm
14 Peso 120 gramas com pilhas
11 - GARANTIA
Este produto tem garantia para um período de dois anos a partir da data de aquisição. Qualquer dano
ocasionado por uma manipulação errada não é coberto pela garantia. As pilhas e a embalagem estão
igualmente excluídas da garantia. Qualquer outro sinistro excluído. Anexar sempre a prova de compra a
qualquer declaração de sinistro e enviar à Dorel cujo endereço se encontra neste manual.
Referência à norma ASTM (E1965-98), EN 980: 2003, IEC/EN 60601-1-2, ISO 14971.
Este aparelho está em conformidade com os requisitos da directiva relativa aos dispositivos médicos.
Temperaturas corporais de 10°C a 50°C
Temperaturas domésticas de 0°C a 100°C
Temperaturas corporais ± 0,3°C entre 22°C e 40°C
Temperaturas domésticas 20°C ± 1°C / > 20°C ± 5%
Temperatura ambiente de 16°C a 35°C com humidade
relativa máxima de 95% (sem condensação)
- 25°C a + 55°C com humidade máxima de 95%
(sem condensação)
pilhas fracas
23
Page 24

NO TOUCH MEDICAL THERMOMETER
4 - FOREHEAD MEDICAL THERMOMETER MODE
A/ Method
• Briey press and release the MEASURE
device switches on and initially performs an auto test by
displaying all the screen elements, Figure 1, and then
indicates that is ready by briefly being backlit Figure 2.
• Press the MEASURE button again and hold it down, gently
moving the thermometer towards the temporal area
(preferably) or the centre of the forehead. From the right
distance (around 4 to 8cm) the radar automatically initiates
the measurement.
• When you hear a short beep indicating that the
measurement has been taken, release the MEASURE
button. The temperature is displayed with backlighting for 3
seconds.
B/ Interpretation by the thermometer
• Temperature below 38°C: a little smiling face
at the bottom of the screen (figure 3)
• Temperature equal to or above 38°C: fever signal, 1 long
beep / 2 short beeps and red light signal. Then a sad little face
appears (figure 4)
All the values displayed in forehead thermometer mode are
more or less the same as a rectal temperature.
C/ Switch off
The device automatically switches off after 30 seconds.
D/ Advice and specific precautions
To avoid obtaining an inaccurate measurement, please take the following specific precautions:
• Do not use the forehead thermometer in an environment which is damp, excessively hot or cold, draughty
or overly ventilated.
• Ensure the skin of the forehead is completely dry, clean, bare and not covered in sweat or by hair.
• Always take the temperature in the same place and in the areas recommended.
• Please be aware that a physiological phenomenon called vasoconstriction can happen in the early stages
of a fever. It manifests itself externally by relatively cold skin. This means that any forehead thermometer can
give abnormally low readings.
• Finally if the forehead temperature displayed does not appear to match the baby or child’s state, please
use a classic electronic thermometer. Please note that an increase or reduction in rectal temperature often
lags slightly behind the forehead temperature since the forehead is closer to the hypothalamus which
regulates the body’s temperature.
5 - HOUSEHOLD THERMOMETER MODE
A/ Method
• Switch on the thermometer by pressing the MEASURE
once
.
• Briey press the selection
that you are in object mode confirmed by the little cube at the top
right of the screen.
• Press the MEASURE button and without releasing it, point the
thermometer towards the object from a distance of 4 to 8cm.
• Then release the MEASURE button. A brief beep signals that the temperature has been taken which is
backlit for 3 seconds.
B/ Advice and specific precautions
• The surface temperature can be very different from the temperature in the centre of the bottle, bath or
soup. To avoid any problems, ensure all liquids are stirred thoroughly before being measured.
• For the examples given, take the temperature as quickly as possible to avoid condensation forming on the
sensor or radar. Then wait around 30 minutes before using it again.
EN
Bébé Confort’s no touch medical thermometer uses the latest technology to pick up infrared rays emitted
by a body so that its temperature can be measured. The benefit of this technology is that you can take a
temperature from a distance, without direct contact, and obtain an instant result. It means you can follow
the progress of a baby or child’s temperature without disturbing them - even when they’re asleep.
However the fact that this thermometer is easy to use, quick and also allows you to take the temperature
of surrounding objects does not mean that you should forget that it is primarily a medical measuring device.
When using it, please ensure you follow the general recommendations and specific precautions detailed
in these instructions.
Please familiarise yourself with these instructions before using the device and keep them in a safe place.
Lastly we would like to remind you that if you are in any doubt about the health of a member of your family
or if someone has a fever, you should consult a doctor quickly.
1 - DESCRIPTION OF THE THERMOMETER AND ITS SCREEN
1/ Liquid crystal display
2/ Start/measure button
3/ Memory button
4/ Operating mode selection button
5/ Fever signal
6/ Sensor
7/ Radar
8/ Battery housing lid
9/ Temperatures measured in degrees
10/ Measurement in progress
11/ Smiling face indicating a temperature below 38°C
12/ Sad face indicating a temperature equal to or above 38°C
13/ Unit of measurement
14/ Forehead mode
15/ Household mode
16/ Low battery signal
17/ Memory and number of recording
2 - INSERTING BATTERIES
1. Gently press the lid of the battery housing outwards to remove it (8).
2. Insert two AAA batteries, taking care to position them correctly and observing the polarity indicated on
the base of the housing.
3. Replace the lid by sliding it into the side slots until it clicks into place.
Batteries and electronic instruments must be disposed of in accordance with local regulations, separate
from household rubbish.
3 - OPERATING MODE SELECTION BUTTON
This thermometer can operate in two modes:
• In medical thermometer mode, the device measures the forehead temperature from a distance. The
screen shows a little head and shoulders figure top centre .
• In household thermometer mode, the device measures the temperature of different elements or objects
in the house, again without direct contact. To go to household thermometer mode, switch the thermometer
on by pressing on the MEASURE
When two zeros appear under the head and shoulders, briefly press the selection
a small cube
Please note: whichever mode is used and after switching it off, the thermometer automatically
reverts to medical thermometer mode.
24
appear in the top right confirming the mode selected.
button.
button which makes
Page 25

4 - FOREHEAD MEDICAL THERMOMETER MODE
A/ Method
• Briey press and release the MEASURE
device switches on and initially performs an auto test by
displaying all the screen elements, Figure 1, and then
indicates that is ready by briefly being backlit Figure 2.
• Press the MEASURE button again and hold it down, gently
moving the thermometer towards the temporal area
(preferably) or the centre of the forehead. From the right
distance (around 4 to 8cm) the radar automatically initiates
the measurement.
• When you hear a short beep indicating that the
measurement has been taken, release the MEASURE
button. The temperature is displayed with backlighting for 3
seconds.
B/ Interpretation by the thermometer
• Temperature below 38°C: a little smiling face
at the bottom of the screen (figure 3)
• Temperature equal to or above 38°C: fever signal, 1 long
beep / 2 short beeps and red light signal. Then a sad little face
appears (figure 4)
All the values displayed in forehead thermometer mode are
more or less the same as a rectal temperature.
C/ Switch off
The device automatically switches off after 30 seconds.
D/ Advice and specific precautions
To avoid obtaining an inaccurate measurement, please take the following specific precautions:
• Do not use the forehead thermometer in an environment which is damp, excessively hot or cold, draughty
or overly ventilated.
• Ensure the skin of the forehead is completely dry, clean, bare and not covered in sweat or by hair.
• Always take the temperature in the same place and in the areas recommended.
• Please be aware that a physiological phenomenon called vasoconstriction can happen in the early stages
of a fever. It manifests itself externally by relatively cold skin. This means that any forehead thermometer can
give abnormally low readings.
• Finally if the forehead temperature displayed does not appear to match the baby or child’s state, please
use a classic electronic thermometer. Please note that an increase or reduction in rectal temperature often
lags slightly behind the forehead temperature since the forehead is closer to the hypothalamus which
regulates the body’s temperature.
5 - HOUSEHOLD THERMOMETER MODE
A/ Method
• Switch on the thermometer by pressing the MEASURE
.
once
• Briey press the selection
that you are in object mode confirmed by the little cube at the top
right of the screen.
• Press the MEASURE button and without releasing it, point the
thermometer towards the object from a distance of 4 to 8cm.
• Then release the MEASURE button. A brief beep signals that the temperature has been taken which is
backlit for 3 seconds.
B/ Advice and specific precautions
• The surface temperature can be very different from the temperature in the centre of the bottle, bath or
soup. To avoid any problems, ensure all liquids are stirred thoroughly before being measured.
• For the examples given, take the temperature as quickly as possible to avoid condensation forming on the
sensor or radar. Then wait around 30 minutes before using it again.
button when two zeros appear and ensure
button. The
is displayed
button
Figure 1
Figure 3
Figure 2
4-8 cm
Figure 4
4-8 cm
25
Page 26
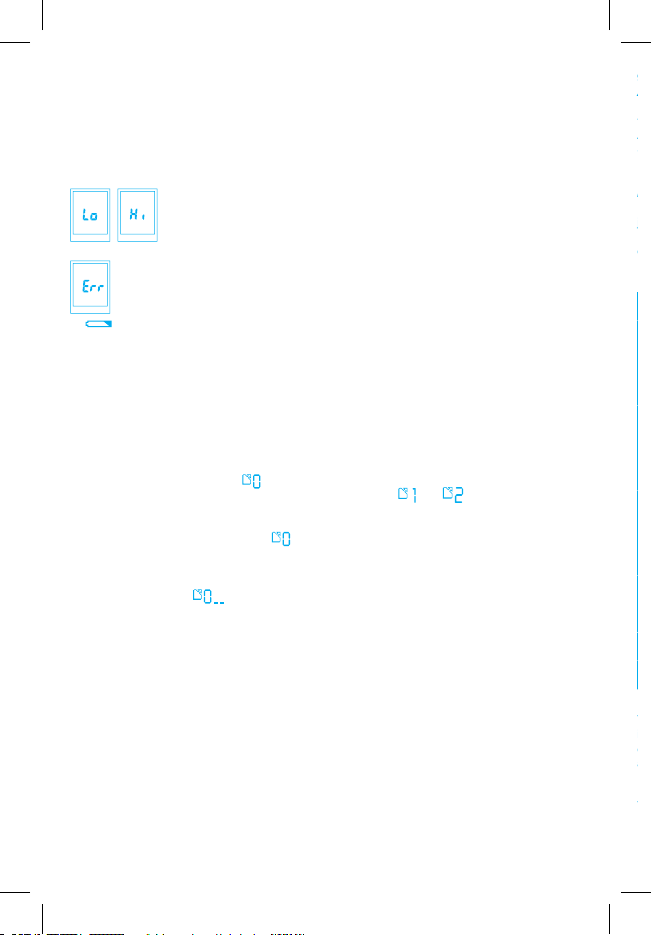
6 - TROUBLESHOOTING
9 - REPLACING BATTERIES
A / Monitoring battery voltage
• • When the batteries are low, the battery symbol appears at
the bottom of the screen. You should therefore keep a set of new
AAA - 1.5 v batteries to replace the old ones as soon as possible
(Figure 5).
However the thermometer can continue to work normally until both
Lo and symbols are displayed at the same time (Figure 6)
B / Taking out and replacing the batteries
• Take the old batteries out of their housing and put in two new AAA batteries, preferably alkaline ones,
just as when first operating the thermometer (Chapter 2), observing the polarities indicated.
• Keep dead batteries out of the reach of children and observe the regulations in force for disposing
of them.
10 - TECHNICAL FEATURES
1 Type Infrared no touch thermometer
2 Measurement ranges
3 Accuracy
4 Measurement scale Degrees Celsius
5 Resolution 0,1°C
6 Optimal measurement distance 4 to 8cm
7 Memory 10
8 Switch off Automatic after 30 seconds
9 Power Two AAA – 1.5 v alkaline batteries
10 Operating conditions
11 Storage conditions
12 Control signals «Lo» and «Hi»: temperatures outside ranges low battery
13 Dimensions 141mm x 42mm x 55.5mm
14 Weight 120 grams with batteries
11 - WARRANTY
This product is guaranteed for two years from the date of purchase. Damage caused by incorrect handling
is not covered by the warranty. The batteries and packaging are also excluded from the warranty. All other
damage is excluded. Always attach the proof of purchase to any claim and send to Dorel at one of the
addresses listed in these instructions.
Reference to ASTM (E1965-98), EN 980: 2003, IEC/EN 60601-1-2, ISO 14971 standard.
This device meets the requirements of Directive 93/42/CEE concerning medical devices.
A/ Displayed temperatures regularly too low
• The sensor and radar may have got dirty or covered in dust.
Check whether the surface is clean and, if not, clean using a pad soaked in alcohol.
• The temperature is not being taken in the right conditions. Read the specic advice again (4D). The patient
and the thermometer must be at the same stable and moderate ambient temperature. If you wait for around
thirty minutes it will stabilise.
B/ «Lo» or «Hi» message
C/ «ERR» notice
D/ Weak battery signal + Lo
The batteries are too weak to take a measurement. Replace the batteries following the instructions in
chapters 2 and 9.
E/ The screen does not light up
The batteries are completely dead or incorrectly inserted. Change them or reinsert them correctly matching
the polarity shown.
7 - MEMORY - REMINDER OF EARLIER MEASUREMENTS
The memory has a capacity of 10 measurements.
A/ Reminder of earlier measurements
When the device is on, press once briefly on the MEM button, then press it again to show the last
measurement accompanied by the symbol.
Each press of the same button recalls a previous measurement , so then all the way to 9.
B/ Deletion
• Automatically on the 11th measurement: when the 10 memories have been used up, any
new measurement will be recorded with and the oldest memory deleted without you having to do
anything.
• To delete all the measurements stored in the memory, switch on the thermometer then hold down the
MEM button for 3 seconds.
The screen then displays confirming it has been deleted.
8 - CLEANING - MAINTENANCE - STORAGE
• To ensure this device stays accurate, you should keep the surface of the sensor and radar completely
clean. Only use a pad soaked in alcohol. Never use water or any other cleaning product.
• Do not touch either of the very sensitive elements above with your ngers.
• Clean the thermometer case using a soft, dry cloth.
Never put it in water or any other liquid because it is not waterproof.
• Do not expose the thermometer to extreme temperatures (for example in a car parked in the sun), great
humidity or dust.
• Hold the device rmly in your hand, do not drop or knock it.
• Do not try and open the device or take it apart (except for the battery lid). Only a properly qualied person
can do this.
• After use, put the thermometer back in its case and keep it in an accessible place… but out of the
reach of children. If you do not think you will be using your thermometer for a long time, take the batteries
out.
These 3-second backlit messages mean that the temperature being taken is outside the
thermometer’s measurement range.
Please use the device within its capabilities
(chapter 10: Technical features).
The temperature is being taken in ambient conditions that prevent the thermometer from operating
correctly.
Always take the temperature in the same conditions at a consistent and stable ambient
temperature between 16 and 35°C, away from draughts
26
Page 27

9 - REPLACING BATTERIES
A / Monitoring battery voltage
• • When the batteries are low, the battery symbol appears at
the bottom of the screen. You should therefore keep a set of new
AAA - 1.5 v batteries to replace the old ones as soon as possible
(Figure 5).
However the thermometer can continue to work normally until both
Lo and symbols are displayed at the same time (Figure 6)
B / Taking out and replacing the batteries
• Take the old batteries out of their housing and put in two new AAA batteries, preferably alkaline ones,
just as when first operating the thermometer (Chapter 2), observing the polarities indicated.
• Keep dead batteries out of the reach of children and observe the regulations in force for disposing
of them.
Figure 6Figure 5
10 - TECHNICAL FEATURES
1 Type Infrared no touch thermometer
2 Measurement ranges
3 Accuracy
4 Measurement scale Degrees Celsius
5 Resolution 0,1°C
6 Optimal measurement distance 4 to 8cm
7 Memory 10
8 Switch off Automatic after 30 seconds
9 Power Two AAA – 1.5 v alkaline batteries
10 Operating conditions
11 Storage conditions
12 Control signals «Lo» and «Hi»: temperatures outside ranges
13 Dimensions 141mm x 42mm x 55.5mm
14 Weight 120 grams with batteries
11 - WARRANTY
This product is guaranteed for two years from the date of purchase. Damage caused by incorrect handling
is not covered by the warranty. The batteries and packaging are also excluded from the warranty. All other
damage is excluded. Always attach the proof of purchase to any claim and send to Dorel at one of the
addresses listed in these instructions.
Reference to ASTM (E1965-98), EN 980: 2003, IEC/EN 60601-1-2, ISO 14971 standard.
This device meets the requirements of Directive 93/42/CEE concerning medical devices.
Body temperatures 10°C to 50°C
Household temperatures 0°C to 100°C
Body temperatures ± 0.3°C between 22°C and 40°C
Household temperatures 20°C ± 1°C / > 20°C ± 5%
Ambient temperature 16°C to 35°C with maximum
relative humidity of 95% (without condensation)
- 25°C to + 55°C with maximum humidity of 95%
(without condensation)
low battery
27
Page 28

4 - Фронтальный режим медицинского термометра
A/ Принцип использования
• Нажмите кратковременно на кнопку MESURE
Прибор включится и проведет автопроверку, выводя на
экран все его элементы (рисунок 1), и сообщит о готовности к
работе кратковременно освещённым изображением на экране
(рисунок 2).
• Снова нажмите на кнопку MESURE и, не отпуская ее, медленно
поднесите термометр к области виска (предпочтительно)
или к середине лба. Оказавшись на необходимом расстоянии
(приблизительно 4 - 8 см), радар автоматически проведет измерение.
• После того, как прозвучит короткий звуковой сигнал, указывающий
конец измерения, отпустите кнопку MESURE. Показатель
температуры будет высвечен на экране в течение 3 секунд.
B/ Условные обозначения термометра
• Температура ниже 38°C: внизу экрана улыбающийся смайл
(рисунок 3).
• Температура равна или выше 38°C: сообщение о повышенной
температуре - 1 длинный/ 2 коротких звуковых сигнала и красный
свет. На экране грустный смайл
полученные во фронтальном режиме термометра, в высокой
степени соответствуют ректальной температуре.
C/ Выключение
Прибор выключается автоматически через 30 секунд.
D/ Советы и специфические предосторожности
Во избежание неточностей в измерении соблюдайте следующие особые предосторожности:
• не используйте фронтальный термометр во влажной среде, при крайних температурах, сквозняках
или мощном проветривании.
• Следите за тем, чтобы лоб был сухим, чистым, не покрыт потом и не закрыт волосами.
• Всегда измеряйте температуру в одном и том же месте, выбирая рекомендованные области.
• Обращаем ваше внимание, что в начале лихорадочного состояния может возникнуть физиологическое
явление, называемое сужением сосудов. Внешне оно проявляется относительно холодной кожей.
Любой фронтальный термометр в этом случае показывает ненормально низкую температуру.
• Если измеренная фронтальная температура кажется несоответствующей состоянию больного,
пожалуйста, воспользуйтесь классическим электронным термометром. Учитывайте, что повышение
или понижение ректальной температуры зачастую происходит с небольшим опозданием по
сравнению с температурой лба, который ближе к гипоталамусу, центру регулирования температуры.
5 - Режим бытового термометра
A/ Принцип использования
• Включите термометр простым нажатием на кнопку MESURE
• Коротко нажмите на клавишу выбора при появлении двух нолей и
убедитесь, что вы действительно в режиме бытового термометра, что
подтвердит изображение маленького куба
• Нажмите кнопку MESURE и, не отпуская ее, поднесите термометр к
предмету на расстояние от 4 до 8 см.
• Затем отпустите кнопку MESURE. Короткий звуковой сигнал сообщит
о завершении измерения температуры, показатель будет высвечен на
экране в течение 3 секунд.
B/ Советы и особые меры предосторожности
• Температура на поверхности может сильно отличаться от температуры внутри детской бутылочки,
ванны или супа. Во избежание несчастного случая необходимо тщательно перемешать жидкости,
прежде чем приступать к измерению.
• В последнем случае измерение надо производить по возможности быстро, чтобы не допустить
образования конденсации на датчике или радаре. Затем нужно подождать примерно 30 минут до
следующего использования.
RU
Термометр медицинский бесконтактный
Медицинский термометр Bébé Confort создан с использованием новейшей технологии, позволяющей
улавливать инфракрасное излучение тела человека с целью измерения его температуры.
Преимуществом этой технологии является возможность измерения температуры на расстоянии, без
прямого контакта, а также получение мгновенного результата. Вы можете следить за изменением
температуры ребенка, не беспокоя его, в том числе во время сна.
Однако, несмотря на скорость и простоту использования этого термометра, а также возможность его
использования для бытовых измерений, вы не должны забывать, что этот аппарат остается прежде
всего медицинским измерительным устройством. Поэтому используйте термометр, строго соблюдая
общие рекомендации и специфические предосторожности, приведенные в инструкции по эксплуатации.
Ознакомьтесь с данной инструкцией до начала эксплуатации и сохраните ее.
Обращаем ваше внимание на то, что если состояние любого члена семьи вызывает у вас сомнение, или
у него отмечается высокая температура, следует немедленно обратиться к врачу.
1 - Описание термометра и его экрана
1/ Экран на жидких кристаллах
2/ Кнопка включения/измерения
3/ Кнопка памяти
4/ Кнопка выбора функции
5/ Сигнал повышенной температуры
6/ Датчик
7/ Радар
8/ Крышка ячейки для батареек
9/ Температура в градусах
10/ Текущие измерения
11/ Улыбающийся смайл, указывающий температуру ниже 38°C
12/ Грустный смайл, указывающий температуру равную или выше 38°C
13/ Единица измерения
14/ Измерение во фронтальном режиме
15/ Измерение в бытовом режиме
16/ Сигнал «слабая батарейка»
17/ Память и номер записи
2 - Установка батареек
1. Осторожно подтолкните к внешней стороне крышку ячейки для батареек, чтобы ее открыть (8).
2. Вставьте 2 батарейки ААА с соблюдением полярности, указанной на дне ячейки.
3. Переместите крышку скользящим движением в боковых щелях до блокировки.
Батарейки и электронные приборы подлежат утилизации отдельно от бытового мусора согласно
норм местного законодательства.
3 - Выбор режима работы
Этот термометр может работать в 2 режимах:
• В режиме медицинского термометра аппарат на расстоянии измеряет температуру на лбу. На
экране наверху и в центре появляется изображение в виде маленького бюста
• В режиме бытового термометра аппарат измеряет также без прямого контакта температуру
различных элементов или домашних предметов. Чтобы перейти в режим бытового термометра,
включите термометр, нажимая на кнопку MESURE
После того, как под изображением бюста высветятся два ноля, нажмите кратковременно на
клавишу выбора
выбранный режим.
Примечание: каким бы ни был выбранный режим, после выключения устройство
автоматически возвращается в режим медицинского термометра.
, после чего справа вверху появится маленький кубик подтверждающий
.
.
28
Page 29

4 - Фронтальный режим медицинского термометра
A/ Принцип использования
• Нажмите кратковременно на кнопку MESURE
Прибор включится и проведет автопроверку, выводя на
экран все его элементы (рисунок 1), и сообщит о готовности к
работе кратковременно освещённым изображением на экране
(рисунок 2).
• Снова нажмите на кнопку MESURE и, не отпуская ее, медленно
поднесите термометр к области виска (предпочтительно)
или к середине лба. Оказавшись на необходимом расстоянии
(приблизительно 4 - 8 см), радар автоматически проведет измерение.
• После того, как прозвучит короткий звуковой сигнал, указывающий
конец измерения, отпустите кнопку MESURE. Показатель
температуры будет высвечен на экране в течение 3 секунд.
B/ Условные обозначения термометра
• Температура ниже 38°C: внизу экрана улыбающийся смайл
(рисунок 3).
• Температура равна или выше 38°C: сообщение о повышенной
температуре - 1 длинный/ 2 коротких звуковых сигнала и красный
свет. На экране грустный смайл
полученные во фронтальном режиме термометра, в высокой
степени соответствуют ректальной температуре.
C/ Выключение
Прибор выключается автоматически через 30 секунд.
D/ Советы и специфические предосторожности
Во избежание неточностей в измерении соблюдайте следующие особые предосторожности:
• не используйте фронтальный термометр во влажной среде, при крайних температурах, сквозняках
или мощном проветривании.
• Следите за тем, чтобы лоб был сухим, чистым, не покрыт потом и не закрыт волосами.
• Всегда измеряйте температуру в одном и том же месте, выбирая рекомендованные области.
• Обращаем ваше внимание, что в начале лихорадочного состояния может возникнуть физиологическое
явление, называемое сужением сосудов. Внешне оно проявляется относительно холодной кожей.
Любой фронтальный термометр в этом случае показывает ненормально низкую температуру.
• Если измеренная фронтальная температура кажется несоответствующей состоянию больного,
пожалуйста, воспользуйтесь классическим электронным термометром. Учитывайте, что повышение
или понижение ректальной температуры зачастую происходит с небольшим опозданием по
сравнению с температурой лба, который ближе к гипоталамусу, центру регулирования температуры.
5 - Режим бытового термометра
A/ Принцип использования
• Включите термометр простым нажатием на кнопку MESURE
• Коротко нажмите на клавишу выбора при появлении двух нолей и
убедитесь, что вы действительно в режиме бытового термометра, что
подтвердит изображение маленького куба
• Нажмите кнопку MESURE и, не отпуская ее, поднесите термометр к
предмету на расстояние от 4 до 8 см.
• Затем отпустите кнопку MESURE. Короткий звуковой сигнал сообщит
о завершении измерения температуры, показатель будет высвечен на
экране в течение 3 секунд.
B/ Советы и особые меры предосторожности
• Температура на поверхности может сильно отличаться от температуры внутри детской бутылочки,
ванны или супа. Во избежание несчастного случая необходимо тщательно перемешать жидкости,
прежде чем приступать к измерению.
• В последнем случае измерение надо производить по возможности быстро, чтобы не допустить
образования конденсации на датчике или радаре. Затем нужно подождать примерно 30 минут до
следующего использования.
, (рисунок 4). Все показатели,
и отпустите.
.
в правой верхней части экрана.
Рисунок 1
Рисунок 3
Рисунок 2
4-8 cm
Рисунок 4
4-8 cm
29
Page 30

6 - Нарушения работы, специальные сообщения и решения
9 - Замена батареек
A / Контроль за напряжением в батарейках
• При слабом заряде батареек внизу экрана появляется
символ батарейки. Вы должны приобрести набор новых
батареек ААА-1,5 вольт, чтобы заменить при необходимости
старые (рисунок 5). Тем не менее термометр может
продолжать работать нормально до тех пор, пока 2 символа
Lо и не покажутся одновременно (рисунок 6).
B / Извлечение и замена
• Достаньте старые батарейки из отсека и поместите 2 новые алкалиновые батарейки таким же
образом, как перед началом эксплуатации (пункт 2), соблюдая указанную полярность.
• Не оставляйте использованные батарейки в пределах досягаемости детей,
соблюдайте действующее законодательство относительно их утилизации.
10 - Технические характеристики
1 Тип Термометр на инфракрасных лучах бесконтактный.
2 Диапазон измерений
3 Точность
4 Шкала измерений градусы Цельсия
5 Разрешающая способность 0,1°C
6 Оптимальное измерительное
расстояние
7 Память 10
8 Автоматическое выключение после 30 секунд
9 Питание 2 алкалиновые батарейки AAA – 1,5 вольт
10 Условия функционирования
11 Условия хранения
12 Сигналы контроля
13 Размеры 141 мм x 42 мм x 55,5 мм
14 Вес 120 граммов с батарейками
11 - Гарантия
Это устройство имеет гарантию на два года, начиная с даты покупки. Гарантия не покрывает ущерб,
вызванный некорректным использованием устройства. Батарейки и упаковка также исключены
из гарантии, также как и покрытие любого другого несчастного случая. Всегда прикладывайте
доказательство покупки к любому заявлению о гарантийном ремонте, отправленному в Dorel по
адресу, указанному в этой инструкции.
Ссылка на стандарт ASTM (E1965-98), EN 980 : 2003, IEC/EN 60601-1-2, ISO 14971.
Это устройство соответствует требованиям постановления относительно медицинских приборов
93/42/CEE.
A/ Показанные температуры регулярно имеют слишком низкий показатель
• Датчик и радар могут быть запачканными или покрытыми пылью.
Проверьте состояние их поверхности и очистите при помощи тампона, пропитанного спиртом.
• Измерение температуры произведено в ненадлежащих условиях.
Перечитайте советы и особые меры предосторожности (4D). Пациент и термометр должны
находиться при одинаковой умеренной температуре окружающей среды. 30-минутный перерыв
между измерениями повысит вероятность стабильных показателей.
B/ Сообщения «Lo» или «Hi»
C/ Предупреждение « ERR »
D/ Сигнал слабые батарейки + Lо
Батарейки слишком разряжены, чтобы провести измерение. Замените батарейки, следуя
инструкциям в пунктах 2 и 9.
E/ Экран не зажигается
Батарейки полностью разряжены или неправильно вставлены. Поменяйте их или вставьте
правильно, соблюдая указанную полярность.
7 - Память – Запоминание предыдущих измерений.
Вместимость памяти – 10 измерений.
A/ Запоминание предыдущих измерений
На включенном устройстве нажмите кратковременно на кнопку МЕМ, затем нажмите еще раз. На
экране появится последнее измерение, сопровождаемое символом
Каждое нажатие на ту же кнопку дает доступ к предыдущему измерению, то есть , затем
и так далее до 9.
B/ Удаление
• Автоматическое при 11-ом измерении: когда объем памяти (10 измерений) использован, любое новое
измерение будет зарегистрировано как
• Для удаления всех измерений в памяти включите термометр, затем нажмите и удерживайте
кнопку MEM в течение 3-х секунд.
47 На экране тогда появляется
8 - Чистка - Техническое обслуживание – Хранение
• Для сохранения точности этого устройства вы должны обеспечить чистоту поверхностей датчика
и радара. Используйте только тампон, пропитанный спиртом, и ни в коем случае - воду или какое-то
другое очищающее средство.
• Не прикасайтесь к двум вышеупомянутым и очень чувствительным элементам пальцами.
• Очищайте корпус термометра мягкой и сухой тканью. Не погружайте его никогда в воду или другую
жидкость, так как он не герметичен.
• Не допускайте воздействия на термометр экстремальных температур (например, в находящейся
на солнце машине), высокой влажности и пыли.
• Держите крепко устройство в руке, остерегайтесь его ронять или ударять.
• Не пытайтесь открывать или разбирать устройство (за исключением крышки ячейки для батареек).
Это может делать только специально обученный персонал.
• После использования поместите термометр в чехол и уберите в доступное, но удаленное от
маленьких детей место. Если вы не собираетесь использовать ваш термометр в течение долгого
периода, выньте батарейки.
Высвеченные на экране в течение 3 секунд сообщения означают, что температура,
которую надо измерить, находится вне диапазона термометра.
Пожалуйста, придерживайтесь возможностей аппарата
(пункт 10: Технические Характеристики).
Измерение температуры осуществлено в условиях окружающей среды, не обеспечивающих
правильную работу термометра.
Всегда измеряйте температуру в однородных и неизменных температурных условиях
окружающей среды в диапазоне от 16 до 35°C, без сквозняков.
.
и наиболее старое стирается без дополнительный усилий.
, подтверждая полное очищение памяти.
30
Page 31

9 - Замена батареек
A / Контроль за напряжением в батарейках
• При слабом заряде батареек внизу экрана появляется
символ батарейки. Вы должны приобрести набор новых
батареек ААА-1,5 вольт, чтобы заменить при необходимости
старые (рисунок 5). Тем не менее термометр может
продолжать работать нормально до тех пор, пока 2 символа
Lо и не покажутся одновременно (рисунок 6).
B / Извлечение и замена
• Достаньте старые батарейки из отсека и поместите 2 новые алкалиновые батарейки таким же
образом, как перед началом эксплуатации (пункт 2), соблюдая указанную полярность.
• Не оставляйте использованные батарейки в пределах досягаемости детей,
соблюдайте действующее законодательство относительно их утилизации.
Рисунок 6Рисунок 5
10 - Технические характеристики
1 Тип Термометр на инфракрасных лучах бесконтактный.
2 Диапазон измерений
3 Точность
4 Шкала измерений градусы Цельсия
5 Разрешающая способность 0,1°C
6 Оптимальное измерительное
расстояние
7 Память 10
8 Автоматическое выключение после 30 секунд
9 Питание 2 алкалиновые батарейки AAA – 1,5 вольт
10 Условия функционирования
11 Условия хранения
12 Сигналы контроля
13 Размеры 141 мм x 42 мм x 55,5 мм
14 Вес 120 граммов с батарейками
11 - Гарантия
Это устройство имеет гарантию на два года, начиная с даты покупки. Гарантия не покрывает ущерб,
вызванный некорректным использованием устройства. Батарейки и упаковка также исключены
из гарантии, также как и покрытие любого другого несчастного случая. Всегда прикладывайте
доказательство покупки к любому заявлению о гарантийном ремонте, отправленному в Dorel по
адресу, указанному в этой инструкции.
Ссылка на стандарт ASTM (E1965-98), EN 980 : 2003, IEC/EN 60601-1-2, ISO 14971.
Это устройство соответствует требованиям постановления относительно медицинских приборов
93/42/CEE.
Температуры тела от 10°C до 50°C
Температуры окружающей среды от 0°C до 100°C
Температура тела ± 0,3°C между 22°C и 40°C
Температура окружающей среды 20°C ± 1°C, > 20°C ± 5 %
4-8 см
температура окружающей среды от 16°C до 35°C с максимальной
относительной влажностью менее 95 % (без конденсации)
от - 25°C до + 55°C с максимальной влажностью
до 95 % (без конденсации)
«Lо» и «Hi»: температуры вне диапазона слабые батарейки
31
Page 32

Made in China / Fait en Chine / Fabricado : China
www.bebeconfort.com
DOREL FRANCE SA - BP 905 - 49309 CHOLET CEDEX
DOREL HISPANIA S.A. C/Pare Rodès n° 26 Torre A 4° Edificio del Llac Center
08208 SABADELL (BARCELONA) se aconseja conservar estos datos
DOREL ITALIA SPA A SOCIO UNICO - 24060 TELGATE (BERGAMO)
DOREL JUVENILE GROUP NETHERLAND - P.O. Box 6071 - 5700 ET HELMOND
DOREL BELGIUM - BITM Brussels International Trade Mart Atomiumsquare
1, BP 177 - 1020 Brussels
DOREL JUVENILE GROUP U.K. - Hertfordshire WD6 1TE
DOREL PORTUGAL Lda - Rua Pedro Dias, 25 - 4480-614 Rio Mau – Vila do Conde
DOREL GERMANY - D-50226 FRECHEN-KÖNIGSDORF
DOREL JUVENILE SWITZERLAND - 1023 CRISSIER
FABRICANT : AVITA CORPORATION – No.858 Jiao Tong Road – Wujiang
Economic Development Zone – Jiangsu Province, P.R.C.
MANDATAIRE : GOLDEN STAR COMPUTER LTD. - Trout Road, West Drayton, Middx.
UB7, 7RN, Royaume-Uni
IMPORTATEUR : MAGNIEN SAS, Z.A les Béthunes,
9 rue du Rapporteur 95310 ST OUEN L’AUMONE
0197
 Loading...