

Page 1

Page 2

Page 3

Congratulations on Choosing Baby Lock Eclipse dx
C
O
N
G
R
A
T
U
L
A
T
I
O
N
S
1
Page 4

T
A
B
L
E
O
F
C
O
N
T
E
Table of Contents
N
T
S
/Rolled Hem
Front Cover Seam Guide ................................................. 19
2
Page 5

Table of Contents (Cont.)
Threading Lightweight Thread
T
A
B
L
E
O
F
C
O
N
T
E
Threading Medium Weight Thread
N
T
S
3
Page 6

O
V
E
R
V
I
E
W
How Your Serger Operates
4
Page 7

Overview of the Eclipse
O
V
E
R
V
I
E
W
5
Page 8

A
C
C
E
S
S
O
R
I
E
S
Accessories
DVD (U.S.A. only)
6
Page 9

Needles
A
C
C
E
S
S
O
R
Thread
I
E
S
Optional Accessories
There are optional snap-on specialty feet available for the Eclipse. The optional accessories are
available at your Baby Lock retailer.
Beading Foot R0-B5002-01A-C-E (BLE-BF)
・
Blindhem Foot R0-B5002S02A-E (BLE-BLHFS)
・
Clear Foot R0-B5002K01A-E (BLE-CLF)
・
Cording / Piping Foot (3mm) R0-B5002-02A-C-E (BLE-CF3)
・
Cording / Piping Foot (5mm) R0-B5002-03A-C-E (BLE-CF5)
・
Elastic Applicator Foot R0-B5002S01A-E (BLE-EF)
・
Flat Sole Foot R0-B5001K02B-C-E (BLE-FSF)
・
Lace Applicator Foot R0-B5002S05A-E (BLE-LF)
・
Ruffling Foot R0-B5002S03A-E (BLE-RF)
・
Bulb Remover Tool R0-B7525-01A (262011)
・
Size 90 Top Stitch Needle (T-90B)
・
7
Page 10

S
E
Setting Up Your Serger
R
G
E
R
S
E
T
U
P
After removing the packing materials from the box, gently lift your Baby Lock serger by gasping
the handle provided on the top of the machine. Place the machine on a serger sewing table or
any level surface that provides ample work area to the left of the machine. Place the foot control
in a pedal stay, if desired, and place if under the sewing table.
Plug the power cord into the machine first, then into a wall outlet. The power switch is located
toward the back on the right side of the machine. Always make sure the power is OFF when the
machine is not in use (fig.A).
Available foot control for U.S.A.: Model YC-482, or YC-420W
This appliance has a polarized plug (one blade wider than the other). To reduce the risk of
electric shock, this plug is intended to fit in a polarized outlet only one way. If the plug does
not fit fully in the outlet, reverse the plug. If it still does not fit, contact a qualified electrician to
install the proper outlet. Do not modify the plug in any way.
The sewing speed of the machine is determined by the amount of pressure applied to the foot
control. When not in use, do not place anything on the foot control, or the machine could start
inadvertently and the foot control or motor could burn out (fig.A).
Raise the telescopic thread guide to its highest position of 14". Rotate the shaft to the left and
right until each section "clicks" into a locked position (fig.B). The front cover may be opened
simply by placing your fingers behind the tab at the right side and pulling toward you (fig.C).
To open the cutting blade cover, place your thumb against the tab, and slide the cover to the
right. A slight pull forward will allow the cover to swing down, providing access to the loopers,
blades, and thread guides (fig.D).
8
Page 11

Threading Preparation
S
E
R
G
E
R
(fig.A).
S
E
T
U
B.
C.
(fig.B).
P
(fig.C).
nylon, rayon or silk threads (fig.D). Once it’s on the spool, fold
(fig.E).
D.
E.
9
Page 12

S
E
R
G
E
R
S
Threading Your Eclipse
E
T
U
P
Locked Position for Threading
(fig.A)
Lower Looper
1. With the presser foot up and machine lock button in the locked position (fig.A), set the looper
threader selector lever to "L" for lower looper threading (fig.B).
2. Place the thread cone or spool on the far right front spool pin. Slip the thread into the
telescopic antenna thread guide "1" directly above the spool, snap into the thread guide "2"
at the top of the machine, through the slot on the front of the machine. (fig.C, page 11)
3. Pull 18 inches (45cm) of thread through guide "3". Insert the end of the thread into the
threading port "L" about 1 inch (2.5cm). Use tweezers if necessary, to insert the thread end
more easily.
4. Depress the looper threading lever (fig.D, page 11). If the thread does not go through the
lower looper eye with one push, depress the threading lever again until it does.
5. Clip the thread 4 inches (10cm) from the lower looper eye and leave it hanging loose.
6. Move the lock button release lever to the right.
10
Page 13

Upper Looper
S
E
1. With the presser foot up and machine lock button in the locked position (fig.A, page 10), set
the looper threader selector lever to "U" for upper looper threading. (fig.B, page 10)
2. Place the thread cone or spool on the second spool pin from the right back. Slip the thread
into the telescopic antenna thread guide "A" directly above the spool, snap into the thread
guide "B" at the top of the front of the machine, through the slot on the front cover. (fig.C,
below)
3. Pull 18 inches (45cm) of thread through guide "C". Insert the end of the thread into the
threading port "U", about 1 inch (2.5cm). Use tweezers, if necessary, to insert the thread end
more easily. (fig.D below)
4. Depress the looper threader lever (fig.D below). If the thread does not go through the upper
looper eye with one push, depress the looper threader lever again until it does, and leave
thread hanging loose.
5. Move the lock button release lever to the right, to unlock the machine.
R
G
E
R
S
E
T
U
P
11
Page 14

S
E
R
Right Needle
G
E
R
S
E
T
U
P
(fig.B page 13).
2. Place the thread on the second from left spindle on the thread stand (fig.A). Thread needle
thread guides
and ⑥. Pull a 6 inch length of thread through guide ⑥.
⑤
4. Hold the thread between your left thumb and middle finger (fig.B page 13). With your
right index finger, hold the thread horizontally in front and just below the needle eye.
With the left index finger, push the needle threader lever down to insert the hook into the
needle eye. Slip the thread into the threader hook guides in front of the needle. Carefully
release the needle threader lever and remover your right index finger, allowing the thread
to be pulled through the needle eye.
and ②, through the groove on the face plate and through guides③, ④,
①
12
Page 15

Left Needle
2. Place the thread on the far-left spindle on the thread stand (fig.A page 12). Thread needle
thread guides Ⓐ and Ⓑ, through the groove the groove on the face plate and through
guides
Ⓒ, Ⓓ, Ⓔ
, and Ⓕ. Pull a 6 " length of thread from guide Ⓕ.
S
E
R
G
E
R
S
E
Unlocked Position for Serging
After threading is complete, move the lock button release lever to the right until it stops. You
will hear the lock release as the lock button pops out automatically (fig.C). Close the front
cover.
T
U
P
13
Page 16

S
E
R
G
I
N
G
W
Serging with Fabric
(fig.A)
I
T
H
F
A
B
R
I
C
ing the fabric toward the needle (fig.B). You need to raise and
Eclipse
(fig.C)
Clearing the Stitch Fingers
(fig.A)
14
A.
B.
release all tensions, and raise the needle (fig.B). Then pull the
(fig.C)
C.
Page 17

Tension Adjustment
Rethreading Loopers
S
E
R
G
I
N
G
W
I
T
H
F
port, leaving an 18 inch thread tail. Thread the looper as usual. Close the front cover and run
a test sample.
Note:When rethreading your Baby Lock Eclipse using the "Jet-Air Threading" feature,
make certain that the previous thread that was in the tubes is completely removed
from the tip of looper. This will eliminate any chance of the previous thread
obstructing the flow of the air when rethreading the machine.rethreading the machine. the machine.
Rethreading Needles
If a needle thread breaks, raise the presser foot and needles to the highest position. Remove
the broken thread and rethread the needle thread guides. Select the "R" or "L" for the needle
being rethreaded. Use the needle threader for exact easier threading. Refer to (pages 12/13)
A
B
R
I
C
for further information.
15
Page 18
E
M
6. 0
3.5
3.0
5.5
M
6. 0
3.5
3.0
5.5
M
6. 0
3.5
3.0
5.5
M
6. 0
3.5
3.0
5.5
M
6. 0
3. 5
3. 0
5. 5
M
6. 0
3. 5
3. 0
5. 5
C
L
I
P
S
E
M
A
C
H
I
N
E
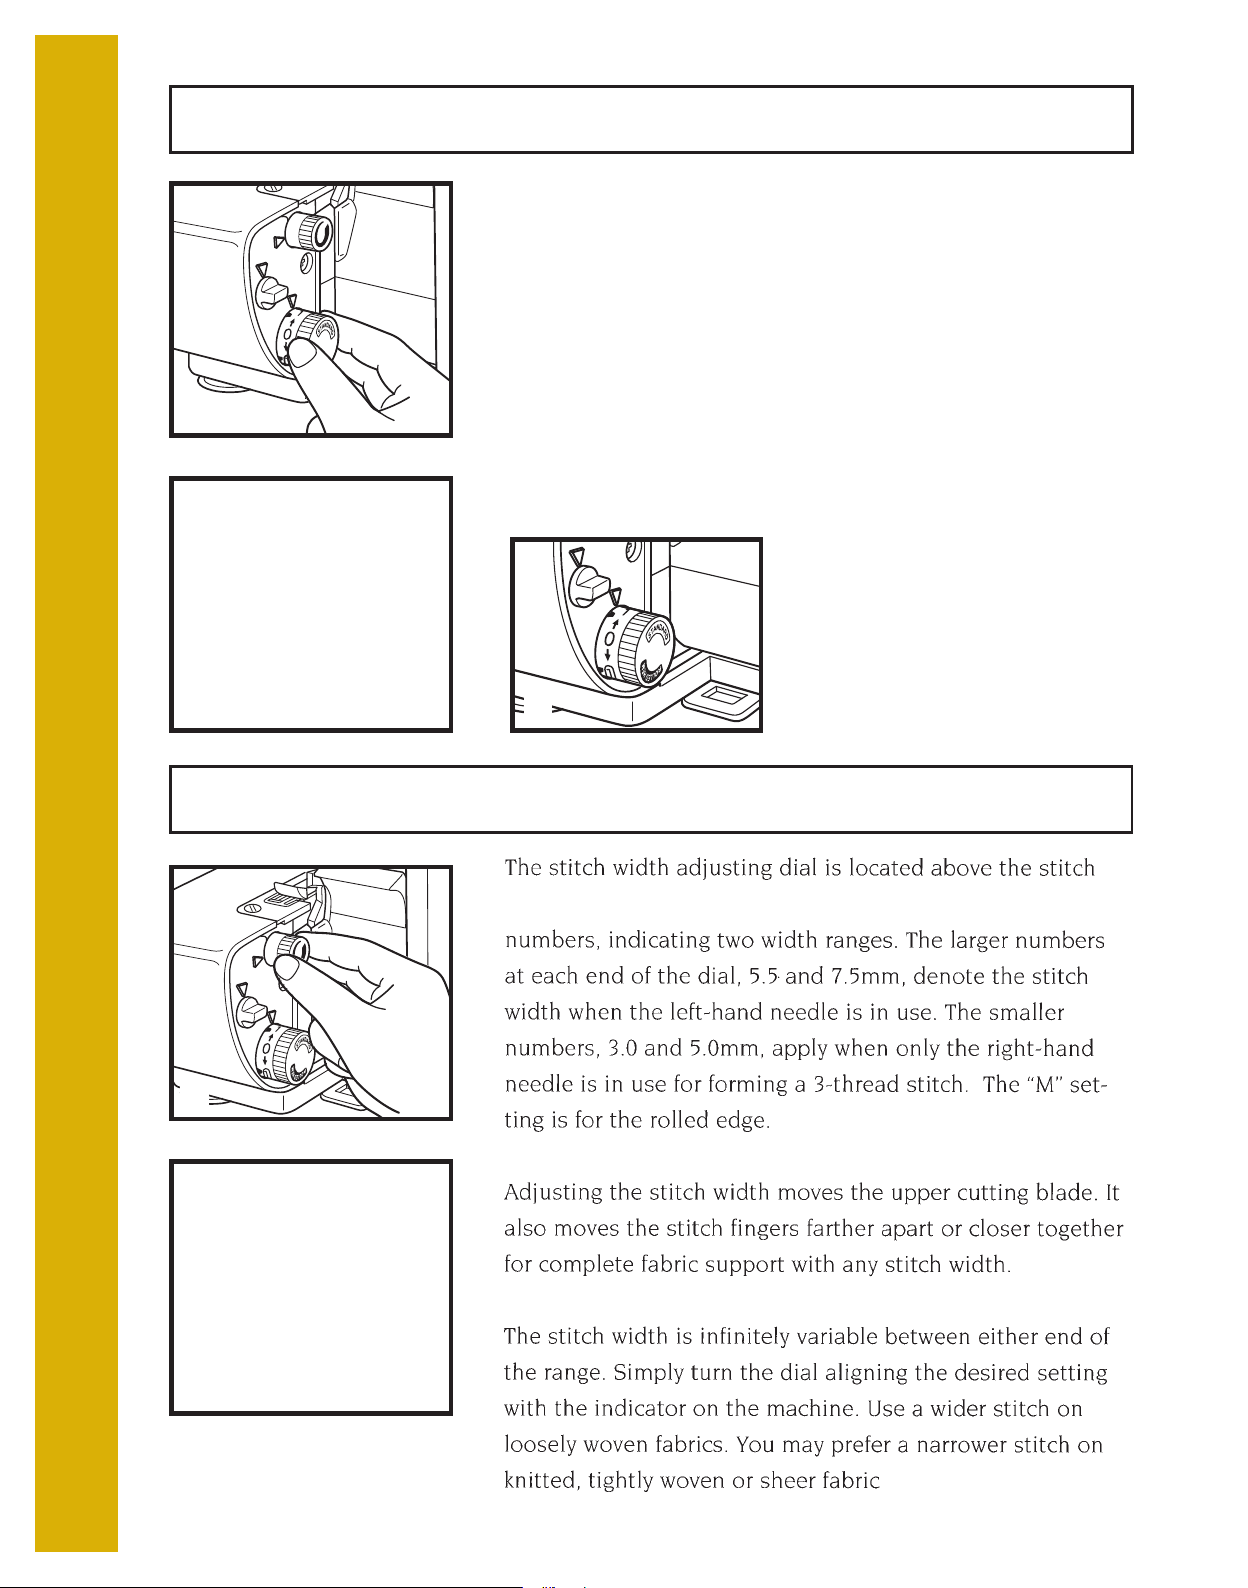
Stitch length/Rolled Hem
A.
B.
The stitch length / rolled hem adjusting dial is conveniently
located just to the left of the front cover, near the base plate (fig.
A). The dial shows two stitch-length ranges, each minimum from
0.75, for the shortest stitch, to 4 for the longest (fig.C). As the
dial indicates, one range is for standard sewing and one is for
rolled edging or narrow seaming. Simply turn the dial aligning
the desired setting with the indicator the machine. A stitch
length of 3mm, or about 10 stitches per inch is ideal for seaming
and overedging most fabrics. For overedging or seaming very
lightweight fabrics, (page 33) or for the rolled edge, you may
prefer a shorter stitch length. When sewing heavier fabrics and
using applications such as gathering,
you may choose to lengt hen the
stitch (fig.B).
Note:0.75mm is located between the
0 and 1 on both standard and rolled
setting.
C.
S
E
T
T
I
N
G
S
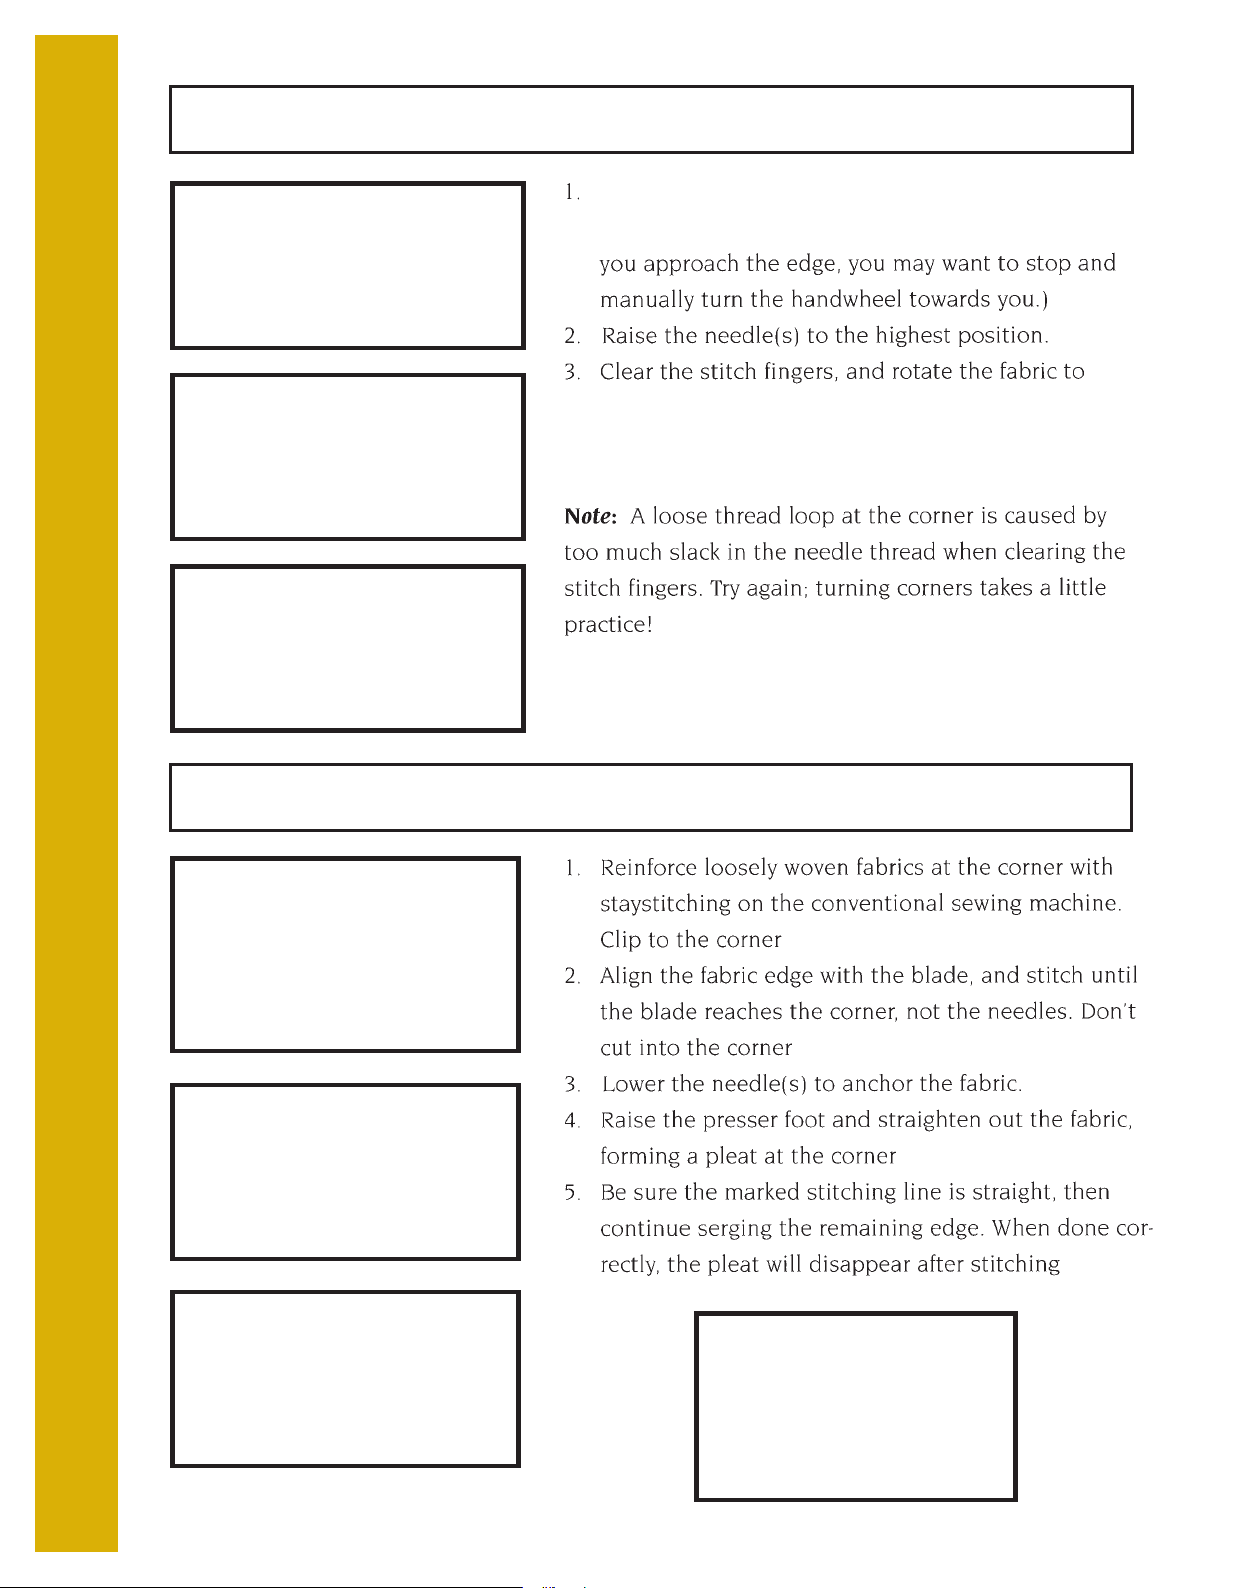
Stitch Width
length dial (fig.A). The stitich width dial display two sets of
A.
B.
16
(fig.B)
Page 19

Differential Feed
E
C
L
I
P
(fig.A)
S
E
B.
A.
M
(fig.B)
the fabric to gather without interference from the foot. At
the maximum setting of 2.00 (fig.C), the differential feed can
gather a lightweight fabric to nearly double fullness (fig.D). The
D.
A
C
H
I
N
E
C.
S
E
T
T
I
N
G
(fig.E)
pulling it taut as it enters the needle (fig.F) These lower
settings prevent puckers on lightweight fabrics, add more
S
E.
F.
17
Page 20

E
C
L
I
P
S
E
M
A
C
H
I
N
Disengaging the Upper Cutting Blade
Presser Foot Pressure
E
S
E
T
T
I
N
G
S
Snap-On Presser Foot
The Eclipse has the convenience of a snap-on presser foot.
To Release:
1. Raise the presser foot lever.
2. Lower the cutting blade.
3. Raise the needles to the hightest position.
4. Push the presser foot release lever located at the back of the
presser foot holder.
5. Carefully turn the presser foot clockwise 90 degrees.
6. Slide the presser foot to the rear to remove.
To Replace:
1. Raise the presser foot lever.
Presser Foot
Release Button
Seam Line
Guides
2. Lower the cutting blade.
3. Raise the needles to the lightest position.
4. Slide the foot from the left to right.
5. Align the bar of the foot with the groove in the holder.
6. Lower the presser foot lever to snap into place.
18
The presser foot that comes with the Eclipse has a tape sewing slot.
Insert the tape or ribbon, into the slot in the front of the foot, then
under the sole of the foot. (see page 23 for more instruction)
The raised markings on the toe of the foot are seam line guides.
They indicate the needle positions to help guide your fabric for
accurate seaming.
Page 21

Overedging
Overedging to finish facings, hems and seams before construction, is one of the most basic uses of
a serger, such as making a garment or project with 5/8 inch (16mm) pressed open seams (fig.A).
To overedge, place the single layer of fabric in front of the presser foot, aligning the cut edge with
upper cutting blade. Begin serging, continuing to guide the fabric along the blade. The edge of
the fabric should be trimmed, but not cut away. Then sew the seams on your conventional sewing
machine and press them open as usual (fig.B).
B
A
S
I
C
Because notches would be cut away in this process, mark them before serging with "V" snips just
inside the seam allowance or with a water-soluble fabric marker (fig.C).
Note: A 2-thread overlock or 3-thread overlock can also be used with this technique.
A. B. C.
Seaming
For garments or projects that do not require conventional pressed
open seams, you can stitch and finish the seam in one operation
and then press the seams to one side (fig.A). A 4 or 3-thread seam is
strong, yet it provides "give" or flexibility according to the needs of
the fabric.
Place two layers of fabric right sides together. Use the marks on your
serger's front cover to align the fabric for the desired seam width.
Keep your eye on the fabric edge to guide it to the appropriate mark
(fig.B).
Do not watch the needle. If you guide the fabric accurately, the
needle will seam in the correct place automatically.
Note: For most seaming, pins are unnecessary because the serger
feeds the fabric evenly. If you need pins, place the pins parallel to
the seam line outside the seam allowance to avoid damaging the
blades.
A.
B.
S
E
R
G
I
N
G
T
E
C
H
N
I
Q
U
E
S
Front Cover Seam Guide
Use the marks on your serger's front cover and set the width dial at
"M" to align the fabric for accurate seam allowances. When using the
left needle, the second mark "L" from the needle indicate 5/8 inch
(16mm) from the cutting edge to the needle.
Use the right needle, the third mark "R" from the needle to indicate
5/8 inch (16mm) from the cutting edge to the needle.
Note: Be sure to set the width dial at the "M" setting for accurate
seam allowances.
19
Page 22

B
A
Securing Ends
S
I
C
S
E
R
G
I
N
G
T
E
C
H
N
A.
B.
The serger stitch will not unravel readily, and in most cases
serged seams are secured by an intersecting seam.
If that's not the case, these are several options for securing
seam (fig.A)
1. Leave a 3 inch (7.5cm) chain, separate the threads and tie a
knot.
2. Apply a dot of seam sealant on the thread chain at the fabric
edge. Allow to dry and cut off the excess thread chain.
3. Leave a 3-4 inch (7.5-10cm) thread chain and use a large-eye
tapestry needle or double-eye needle to weave the chain
back into the stitching.
4. Lock the beginning or end of a seam by serging over the
previous stitches.
To lock the beginning of the seam:
1. Manually turn the handwheel toward you taking 2-3 stitches
into the fabric. Leave the needle(s) in the lowest position to
anchor the fabric.
2. Raise the presser foot.
3. Smooth out the thread chain with your fingers (fig.B). Then
I
Q
U
E
S
20
bring the chain around and under the foot, so that it aligns
with the edge of the fabric (fig.C).
4. Lower the foot and continue sewing, catching the thread
chain in the stitches for about 1 inch (2.5cm). Let the blades
cut off any remaining thread chain (fig.D-E).
E.
Page 23

Securing Ends (Cont.)
B
A
To lock the end of the seam:
1. Take one stitch off the end of the seam (fig.A).
2. Raise the presser foot and bring the needle(s) to the
highest position. Pull back gently on the fabric to clear
the stitch fingers.
3. Turn the fabric over with the wrong side of the stitch
facing up (fig.B), and reposition it under the presser
foot with the needle at the seam edge, aligned with the
previous needle line (fig.C).
4. Lower presser foot and sew 5-6 stitches over the
previous stitches being careful not to cut them. You may
want to flip the cutting blade lock switch clockwise to
the lock position. Pivot the fabric and chain off (fig.D-E).
A.
B.
S
I
C
S
E
R
G
I
N
G
T
E
C.
D.
C
H
N
I
Q
U
E
S
E.
21
Page 24
B
A
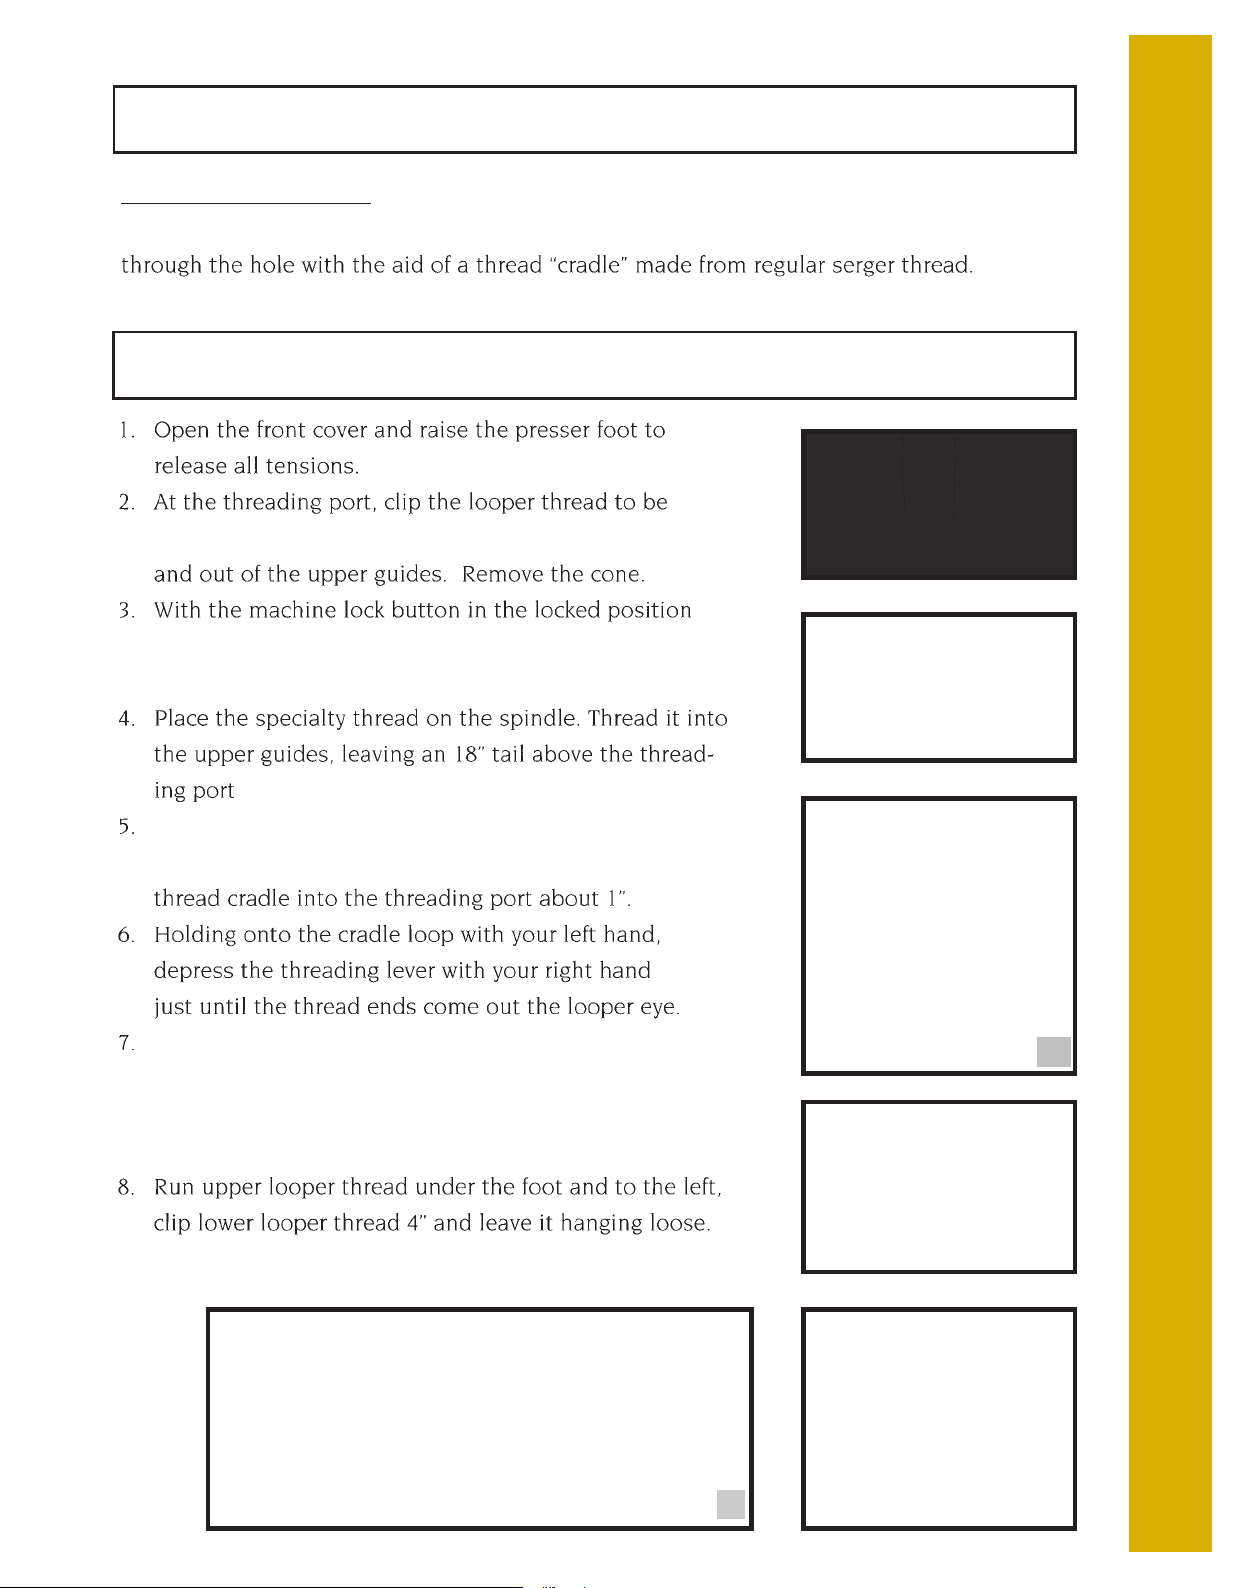
Turning Outside Corners
S
I
C
S
E
R
G
I
N
G
T
E
Stitch along one edge until you reach the corner.
Take one stitch off the edge of the fabric (fig.A). (As
reposition the needle at the previous row o f
stitching (fig.B). Gently pull up on all threads to
remove slack and resume stitching (fig.C).
C.
C
H
N
I
Q
U
E
S
Turning Inside Corners
A.
(fig.A)
(fig.B)
(fig.C)
(fig.D)
22
D.
Page 25

Serging Curves
Inserting Tapes
B
A
S
I
C
S
E
R
G
I
slot and under the back of the foot (fig.A) Adjust the
stitch width to match the tape width. Place the fabric
under the foot and stitch (fig.B).
A.
B.
N
G
T
E
C
H
N
I
Q
U
E
S
23
Page 26

4
T
H
R
E
A
D
S
E
R
G
I
4-Thread Serging
N
G
24
Page 27

3-Thread Serging
3
the needle eye (fig.A). To convert to narrow 3-thread
stitching (3.0-5.0mm), snip the left-hand needle thread.
Remove the needle not being used, completely from the
machine. Retighten the needle clamp screw slightly to
prevent the screw from vibrating out (fig.B).
A.
B.
T
H
R
E
A
D
S
E
R
G
I
N
G
25
Page 28

2
T
H
R
E
A
D
S
E
2-Thread Serging
Converting from 3-Thread to 2-Thread Serging
R
G
I
N
G
just above the threading port (fig.A) Raise the presser
foot and pull out the clipped thread from under the
foot. Remove the upper looper thread from the
A.
Rotate the subsidiary looper up and to the left (fig.B)*
then slip the end into the upper looper eye (fig.C)*.
Close the front cover.
B.
C.
26
Page 29

Flatlock Seams
within the stitch for a non-bulky join (fig.A). Be sure to
sew a test sample first to determine whether the stitch will
A.
B.
2
T
H
R
E
A
D
S
E
R
G
(fig.B)
I
N
G
(fig.C)
(fig.D)
27
Page 30

2
Flatlock “Topstitching”
T
H
R
E
A
D
S
E
R
G
I
N
G
A.
B.
The flatlock stitch need not be limited at seamlines.
When sewn on a fold, flatlocking can create attractive
decorative effects within the body of a garment or
project. Either follow placement lines on your pattern
or design your own special effects by stitching the fabric
before laying out pattern pieces.
1. Set the machine for 2-thread flatlock-wide.
2. Turn the cutting blade lock switch clockwise to
disengage the upper cutting blade.
3. Set the stitch length to desired setting.
4. Fold the fabric (right side or wrong side out, depending
on the loop or ladder stitch you want to show) along
stitch placement lines.
5. Position the fabric under the presser foot, aligning
the fold of the fabric 1/8 inch (3.5cm) to the left of the
upper cutting blade (fig.A).
C.
6. Stitch to the desired ending point.
7. Clear the stitch fingers and chain off the fabric (fig.B).
8. Clip thread, leaving a 3-4 inch (7.5-10cm) chain.
9. Gently pull the fabric to flatten the stitches (fig.C).
10. Separate the chain threads and thread them through
a needle and pull them to the fabric back side. If
necessary, tie a knot to secure the threads (fig.D).
Note: If the fabric does not pull completely flat under the
stitches, guide the fabric fold to the left so that the loops
hang slightly off the fold as they are being stitched.
28
Page 31

Blind Hemming
2
T
H
R
E
A
D
A.
(fig.A)
(fig.B)
(fig.C)
Note: An optional blind hem foot for consistent guiding
is available through your Baby Lock retailer (fig.D).
S
E
R
G
I
N
G
C.
D.
29
Page 32

2
T
H
R
E
A
D
Returning to 3 or 4-Thread Serging
S
E
R
G
I
N
G
place. Rethread the upper looper (page 11). For
30
Page 33

Rolled Edging
3-Thread Rolled Edge
(fig.A)
R
O
L
L
E
D
E
D
G
I
N
(fig.B)
G
(fig.C)
31
Page 34

R
O
L
L
E
D
E
D
G
I
N
G
Seaming Sheers
2-Thread Rolled Edge
32
Page 35

Lettuce Edge
R
O
L
L
E
D
B.
C.
Set differential feed at 0.6 (fig.B). Serge the fabric in the
stitch length and gently stretch the fabric (fig.A), as it is
Belt Loops and Button Loops
E
D
G
I
(fig.C)
N
G
Returning to Standard Serging
33
Page 36

U
S
I
N
G
S
P
E
C
I
A
L
T
Y
Using Specialty Threads
Use the chart on (pages 38 / 39) as a guide in specialty thread use, keeping in mind that the
Threading Lightweight Thread
T
H
R
E
A
D
S
Lightweight thread, including rayon machine-embroidery thread and nylon monofilament
Changing Threads
(fig.A)
A.
(fig.B)
B.
34
Then clip off the knot (fig.C), and rethread the needle
eye manually or with the needle threader.
C.
Page 37
Threading Medium Weight Thread
U
S
Medium weight thread, including topstitching thread, Decor rayon and stretch nylon thread,
are too bulky to form a knot that would fit through the threading port, but they can slip
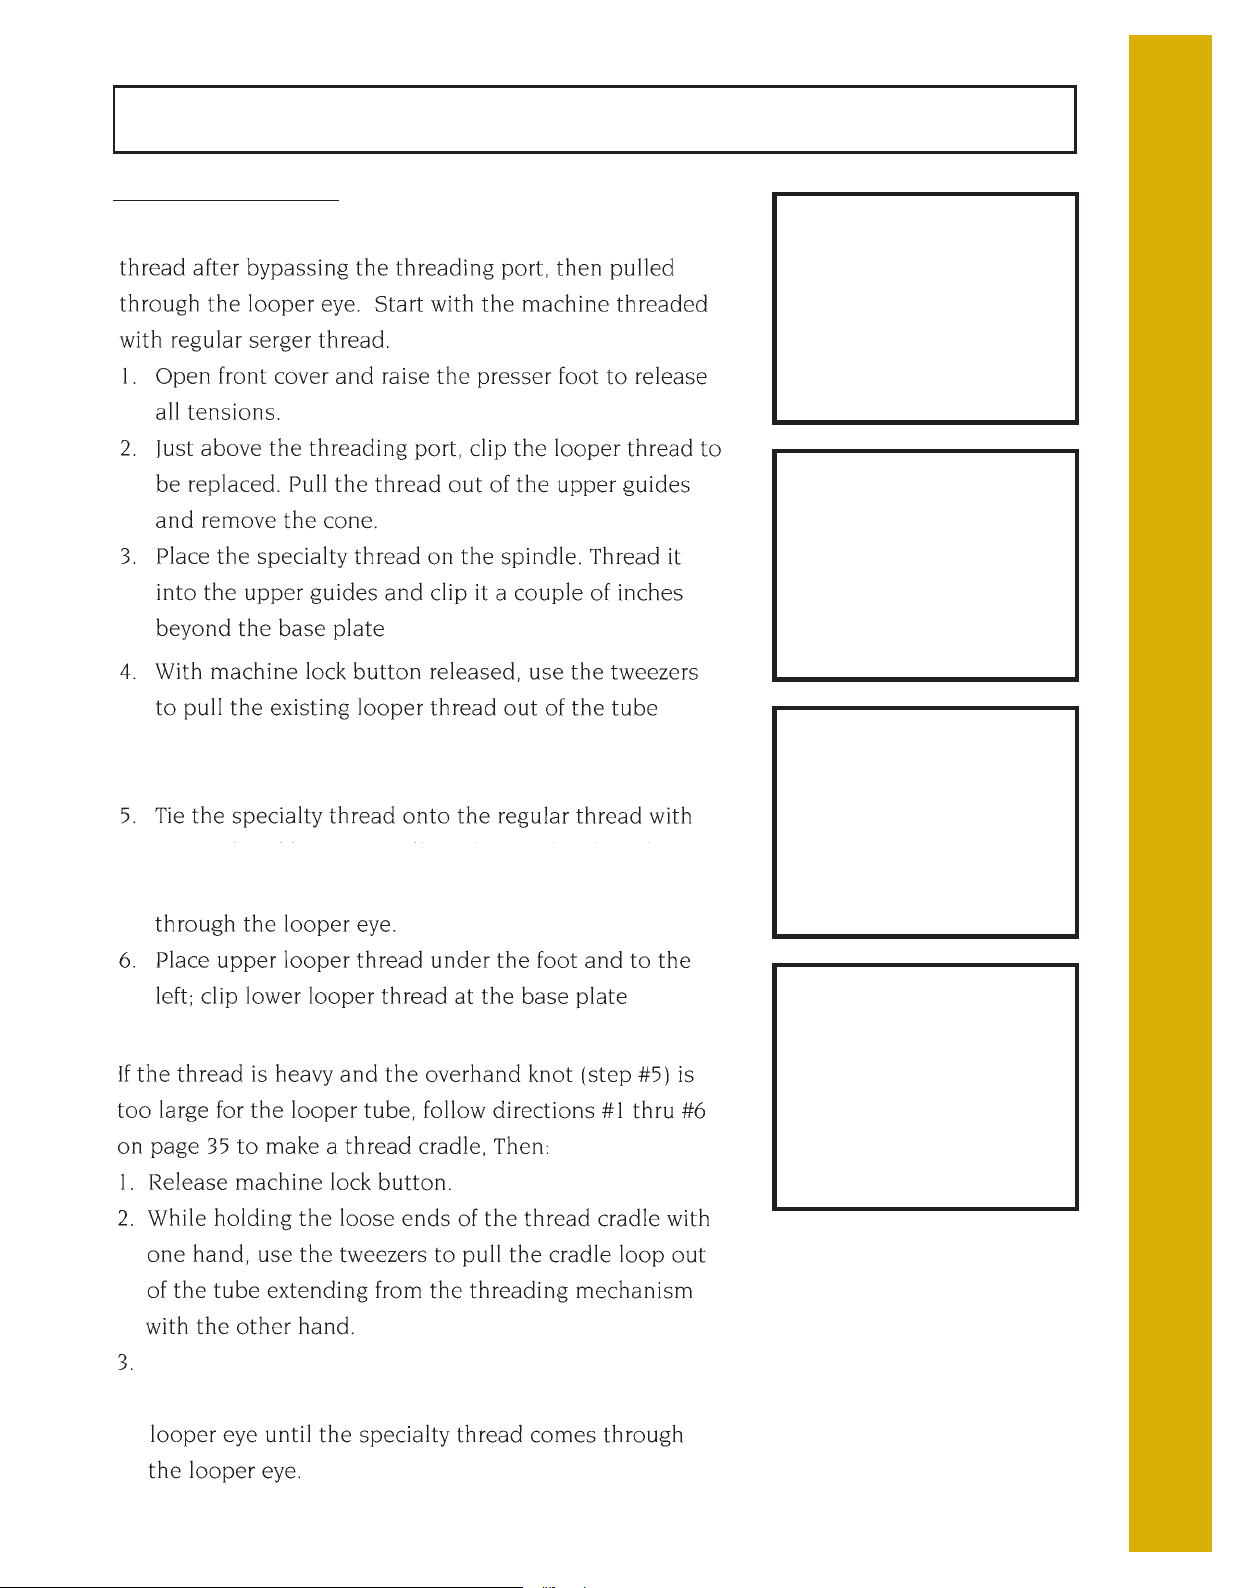
Thread Cradle
A.
replaced (fig.A). Pull the thread out from under the foot
(fig.B), set the looper threading switch to "U" or "L"
according to which looper is to be threaded.
B.
I
N
G
S
P
E
C
I
A
L
T
Y
(fig.C)
Cut a 24 inch strand of serger thread and fold it in half to
make the thread cradle. Insert the loose ends of the
(fig.D)
Insert the specialty thread tail into the cradle loop (E),
and pull the serger thread ends until the specialty thread
comes through the looper eye (fig.F). Discard or set aside
the thread cradle.
C.
D.
F.
T
H
R
E
A
D
S
E.
35
Page 38

U
S
I
Looper Threading Tool
N
G
S
P
E
C
I
A
L
T
Y
T
H
A.
B.
looper threading tool eye (fig.A). Pull the straight end
of the looper threading tool through the looper eye,
the specialty thread will follow (fig.B).
R
E
A
D
S
36
Page 39
Bypassing the Threading Port
U
S
Heavy weight thread, such as pearl cotton, ribbon thread
and fine yarn, must be tied onto the existing looper
(fig.A)
extending from the threading mechanism (fig.B) Leave
A.
B.
C.
I
N
G
S
P
E
C
I
A
L
T
Y
the thread in the looper arm itself.
an overhand knot (fig.C). Pull on the regular thread
from the looper eye until the specialty thread comes
(fig.D)
D.
T
H
R
E
A
D
S
Insert 2 inches of your decorative thread into the cradle
loop. Pull on the loose ends of the thread cradle from the
37
Page 40

U
S
I
N
G
S
Specialty Thread Guide Chart
P
E
C
I
A
L
T
Y
T
H
R
E
A
4-Thread Seaming
3-Thread Seaming
2-Thread Flatlock
4-Thread Edging
3-Thread Edging
2-Thread Edging
3-Thread
Rolled Edge
2-Thread
Rolled Edge
D
S
38
Page 41

Specialty Thread Guide Chart
U
S
I
N
G
S
P
4-Thread Seaming
3-Thread Seaming
2-Thread Flatlock
4-Thread Edging
3-Thread Edging
2-Thread Edging
3-Thread
Rolled Edge
2-Thread
Rolled Edge
E
C
I
A
L
T
Y
T
H
R
E
A
D
S
39
Page 42

M
A
I
N
Replacing Needles
T
E
N
A
N
C
E
Using the small screwdriver, loosen the needle clamp
screw and remove the needle.
Note: To prevent the needle from falling into the needle
plate, hold it with the needle insert tool as you loosen
the screw (fig.A).
(fig.B)
Replacing Cutting Blades
40
To replace the upper blade:
(fig.A)
(fig.B)
Page 43

Cleaning
M
A
I
N
T
E
N
A
N
C
To remove your throat plate:
Replacing the Light Bulb
E
15W/110V
15W/230V
41
Page 44

T
R
O
U
B
L
E
S
H
O
O
T
I
N
Troubleshooting
G
42
Page 45

Troubleshooting (Cont.)
T
R
O
U
B
L
E
S
H
O
O
T
I
N
Dos and Don’ts
G
43
Page 46

T
E
C
H
N
I
C
A
L
D
A
T
A
Technical Data
44
0.75-4mm
Gathering effect: N-2
ORGAN or SCHMETZ HA x 1SP/CR
15W/110V or 15W/230V
(Blue Bulb)
Page 47

Chart for Tension Adjustment
Page 48

JB BLEIDX-2 (USA) EI-26(2)-E
21.5.1000
 Loading...