

Avision FB2100-Green User Manual
En
g
lish
Color Image Scanner
User’s Manual
Regulatory model: BF-0505
Avision Inc.

Copyright 2005 Avision
All rights reserved. No part of this document may be reproduced
in any forms or by any means without prior written permission of
Avision Inc.
Trademark
All brands and product names mentioned in this document are
trademarks of their respective holders.
Warranty
The information contained in this document is subject to change
without notice.
Avision makes no warranty of any kind with regard to this
material, including, but not limited to, the implied warranties of
fitness for a particular purpose.
2

Disposal of Waste Equipment by Users in Private Union
This symbol on the product or on its packaging indicates that the
product can not be disposed of with your other household waste.
Instead it should be sent to appropriate facilities for recovery and
recycling in an effort to protect human health and the
environment. Fore more information about where you can drop
off your waste equipment for recycling, please contact your local
city office, your household waste disposal service or the shop
where you purchased the product.
System Requirements
¾ IBM compatible PC 586, Pentium or higher
¾ Microsoft Windows 98SE/Me/2000/XP
¾ USB port 2.0 (compatible with USB 1.1)
¾ At least 100 MB of free hard disk space
¾ At least 128 MB of system memory
¾ A CD-ROM drive
3

Table of Contents
CHAPTER 1
1.1 PREINSTALLATION INFORMATION ................................6
1.2 CHECKING THE PACKAGE CONTENTS ............................7
1.3 UNLOCKING THE SCANNING UNIT ...............................8
1.4 INSTALLATION .....................................................9
CHAPTER 2 COMPLETING YOUR FIRST SCAN..............12
2.1 PLACING YOUR ORIGINAL.................................. 12
2.2 VERIFYING YOUR SCANNER INSTALLATION ................... 13
2.3 A GLANCE OF THE USER INTERFACE ........................... 17
CHAPTER 3 USING THE SCANNER PROPERTIES DIALOG
3.1 BUTTONS ON THE SCANNER PROPERTIES DIALOG BOX ..... 19
3.2 THE IMAGE TAB.................................................. 21
3.3 THE COMPRESSION TAB ........................................ 34
3.4 THE COLOR DROPOUT TAB ..................................... 36
3.5 THE PAPER TAB.................................................. 39
INSTALLING THE SCANNER .......................6
1.4.1 CONNECTING TO POWER...............................9
1.4.2 INSTALLING THE SCANNER DRIVER....................9
1.4.3 CONNECTING TO COMPUTER......................... 10
BOX ........................................................ 18
3.2.1 THE IMAGE SELECTION BOX......................... 22
3.2.2 OTHER IMAGE OPTIONS ............................. 24
3.2.3 SCANNING COLOR IMAGES........................... 29
3.2.4 SCANNING GRAYSCALE IMAGES ..................... 30
3.2.5 SCANNING B&W IMAGES............................ 30
3.2.6 EDITING PROFILES ................................... 31
3.4.1 COLOR DROPOUT SELECTION ....................... 36
3.4.2 OTHER COLOR DROPOUT OPTIONS................. 37
3.5.1 CROPPING ............................................. 40
4

5
3.5.2
OTHER PAPER SELECTION ........................... 43
3.5.3 RELATIVE TO DOCUMENT ............................ 47
3.6 THE OPTIONS TAB............................................... 50
3.7 THE SETTING TAB ............................................... 55
3.8 THE INFORMATION TAB......................................... 58
CHAPTER 4 USING THE BUTTONS .............................. 60
4.1 INSTALLING BUTTON MANAGER................................ 60
4.2 CHECKING THE BUTTON CONFIGURATIONS BEFORE
SCANNING ....................................................... 60
4.3 THE DEFAULT BUTTON SETTINGS ............................. 62
4.4 USING THE BUTTONS ........................................... 63
CHAPTER 5 MAINTAINING YOUR SCANNER ............... 64
5.1 CLEANING THE GLASS .......................................... 64
5.2 TECHNICAL SUPPORT ............................................ 65
SPECIFICATION ............................................................. 66
INDEX............................................................................ 67

Chapter 1 Installing the Scanner
1.1 PREINSTALLATION INFORMATION
• Keep the scanner out of direct sunlight. Direct exposure to
the sun or excessive heat may cause damage to the unit.
• Do not install the scanner in a humid or dusty place.
• Be sure to use the proper AC power source.
• Only use the AC adapter (HEG42-120130-7L by Hitron, or
PSAA15W-120 by Phihong) included in the machine. Using
other AC adapters may damage the machine and void the
warranty.
• Place the scanner securely on an even, flat surface. Tilted or
uneven surfaces may cause mechanical problems.
6

7
1.2 CHECKING THE PACKAGE CONTENTS
Gently open your box and check the package contents. If there
is anything missing or damaged, please call your dealer.
Accessories:
Quick Guide, Warranty Card.
Note
Please keep all the packing material in case you may have to
return the scanner for repair.
1
1. Scanner main unit
2. USB cable
3. Software CD
4. Power Adapter
5. Scanner Stand
2 3
4
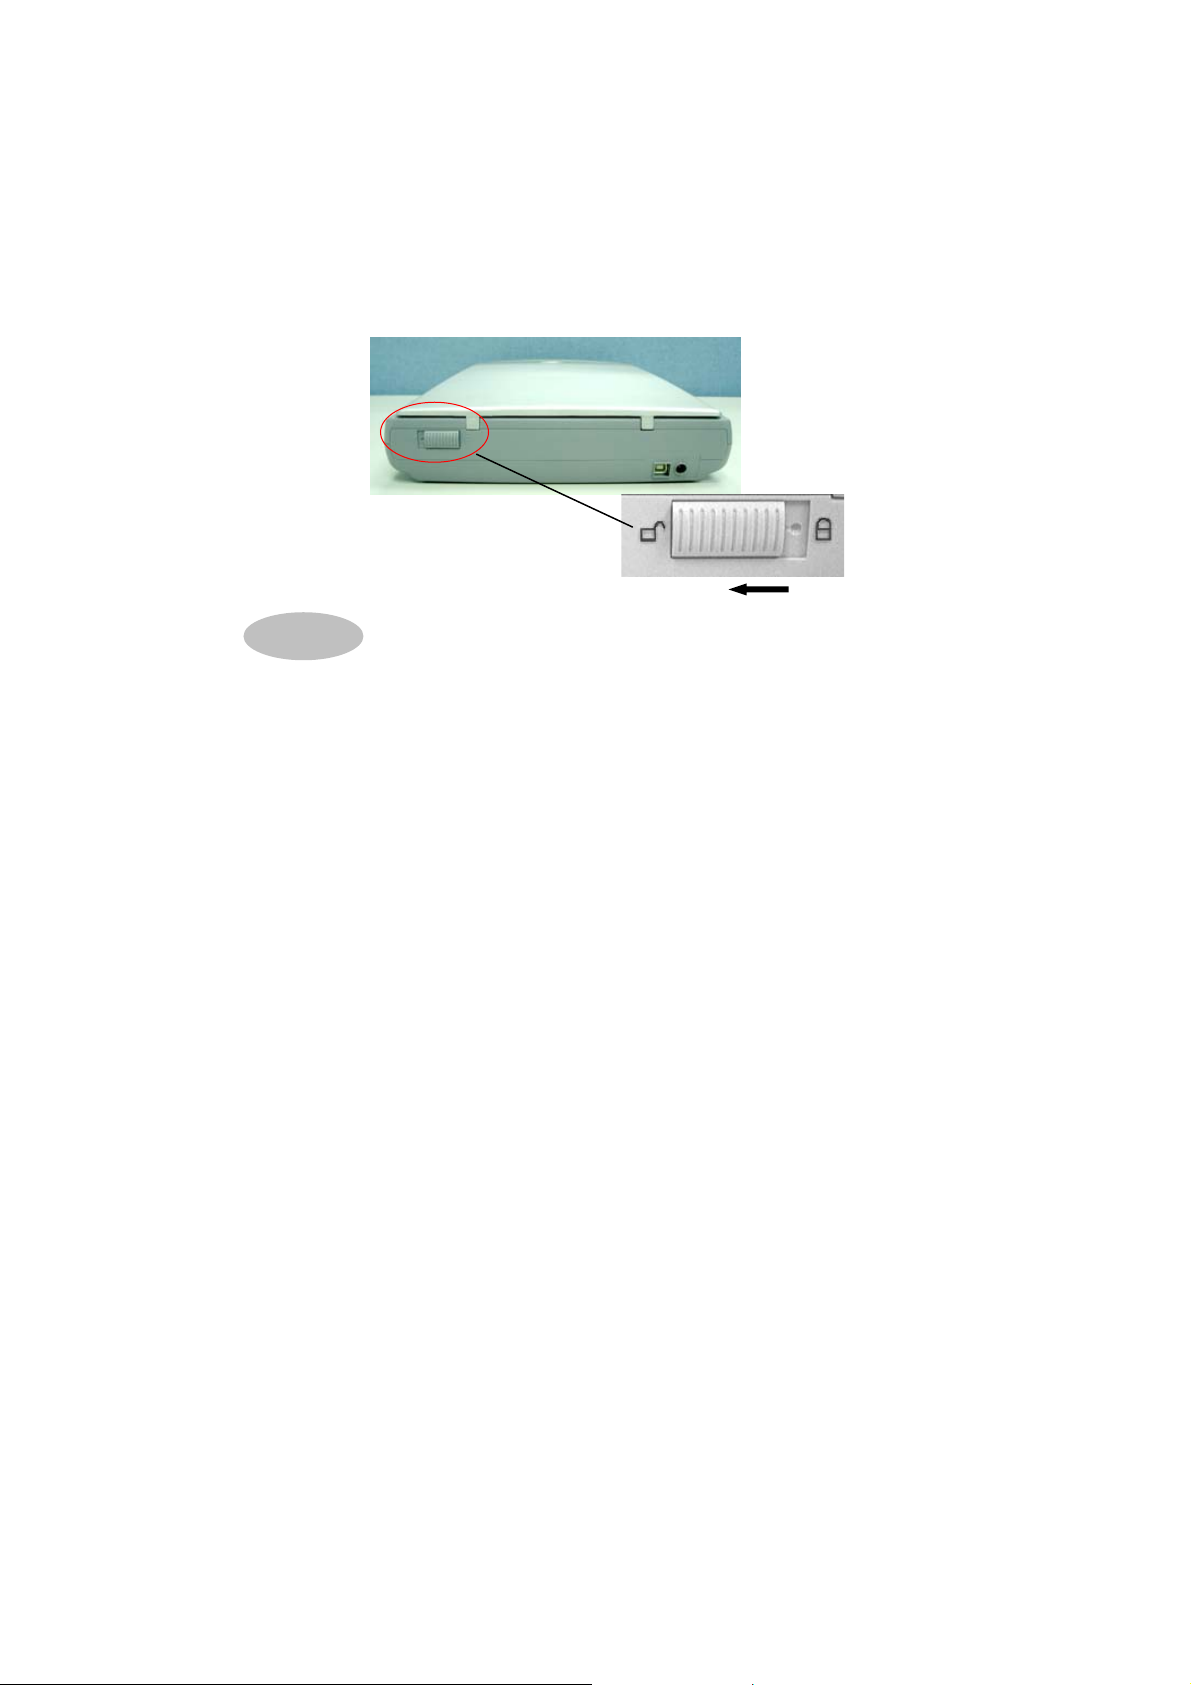
1.3 UNLOCKING THE SCANNING UNIT
The scanner is designed with a lock switch to protect the scanning
unit from damage during shipment. Before using the scanner,
you must unlock the scanning unit. To unlock the scanning unit,
locate the lock switch at the rear of the scanner. Move the lock
switch to the “unlocked position” as shown below.
Warning:
1. Using the scanner without unlocking the scanning unit will
cause damage to the machine and void the warranty.
2. To transport the machine, you must lock the scanning unit
before transporting to other locations.
8
1.4 INSTALLATION
NOTE:
1. The Windows system CD may be required when installing on
some PC’s.
2. To ensure your computer can identify the USB scanner,
please install scanner driver first before connecting the
scanner to your computer.
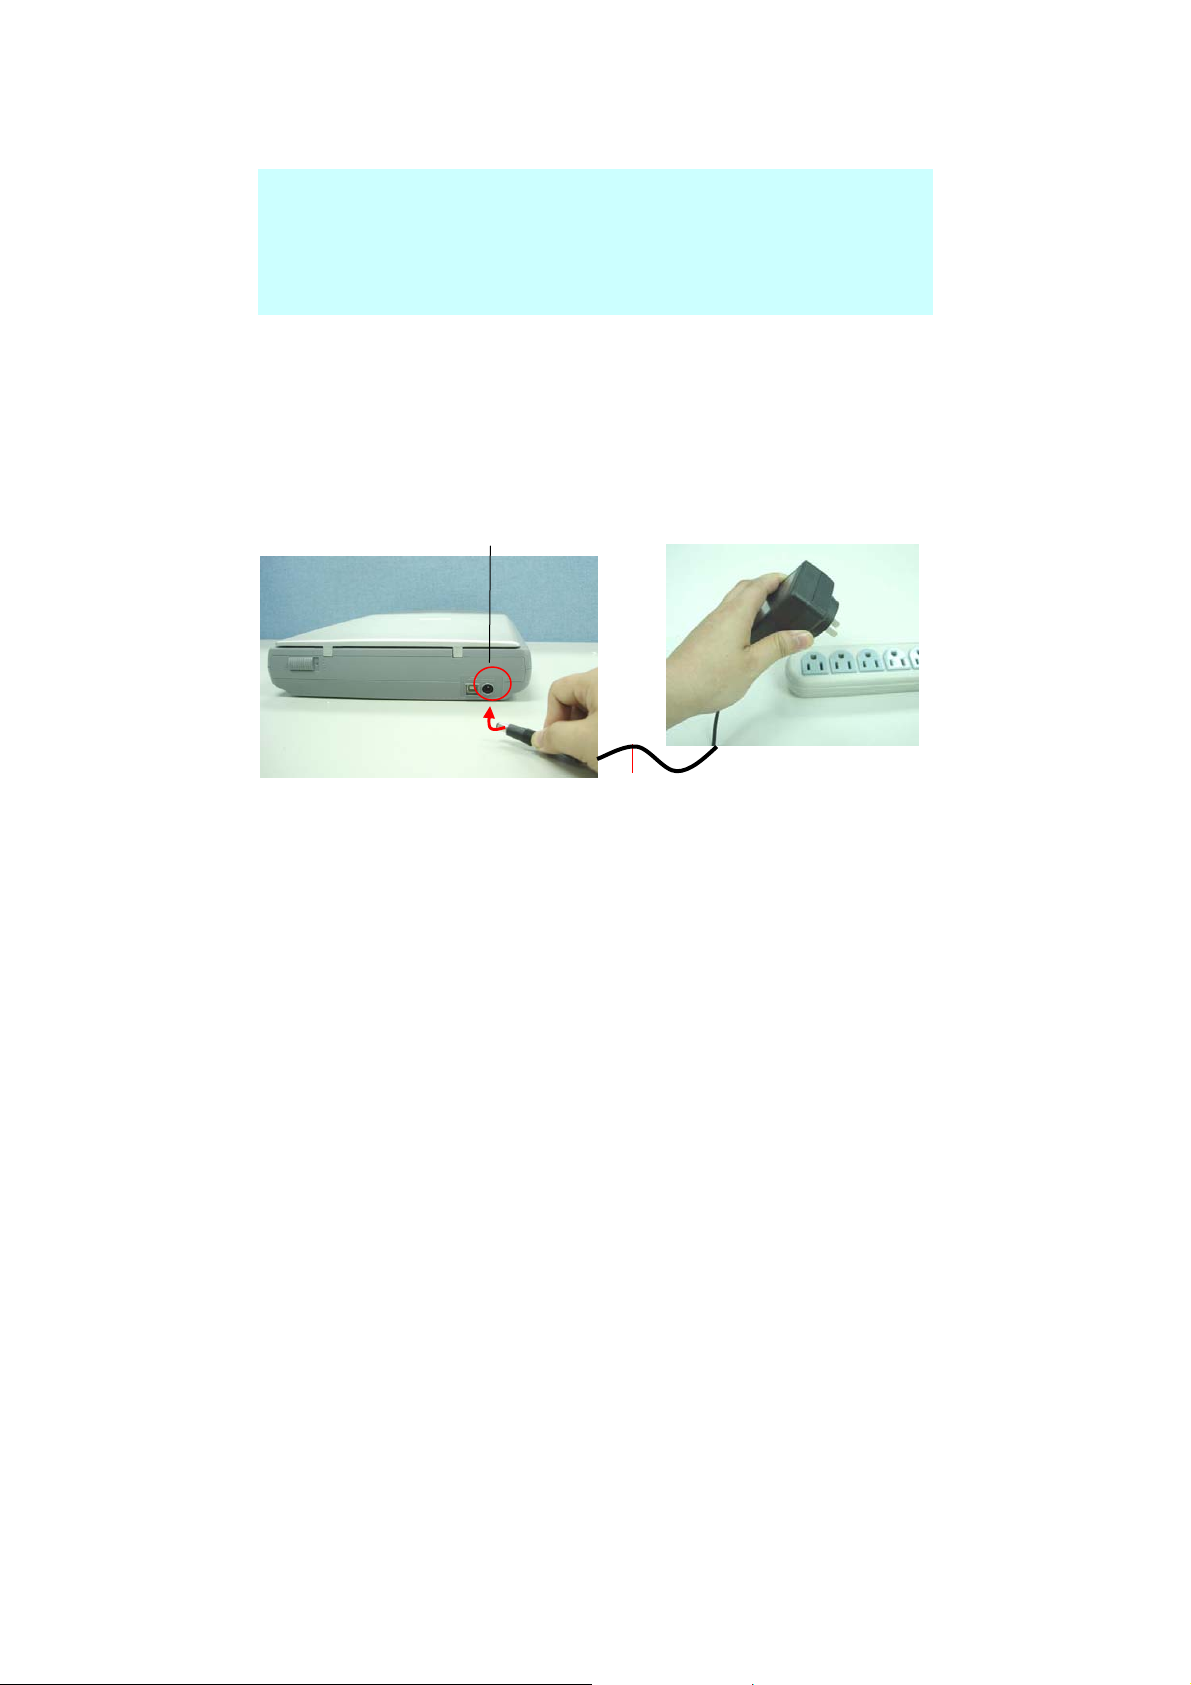
1.4.1 CONNECTING TO POWER
Plug the small end of the power adaptor into the power jack of
your scanner. Insert the other end to an appropriate power
outlet.
Power Jack
Power Cord
1.4.2 INSTALLING THE SCANNER DRIVER
1. Place the supplied CD-ROM onto your CD-ROM drive.
2. The software installation graphic appears. If not, run
“setup.exe”.
9
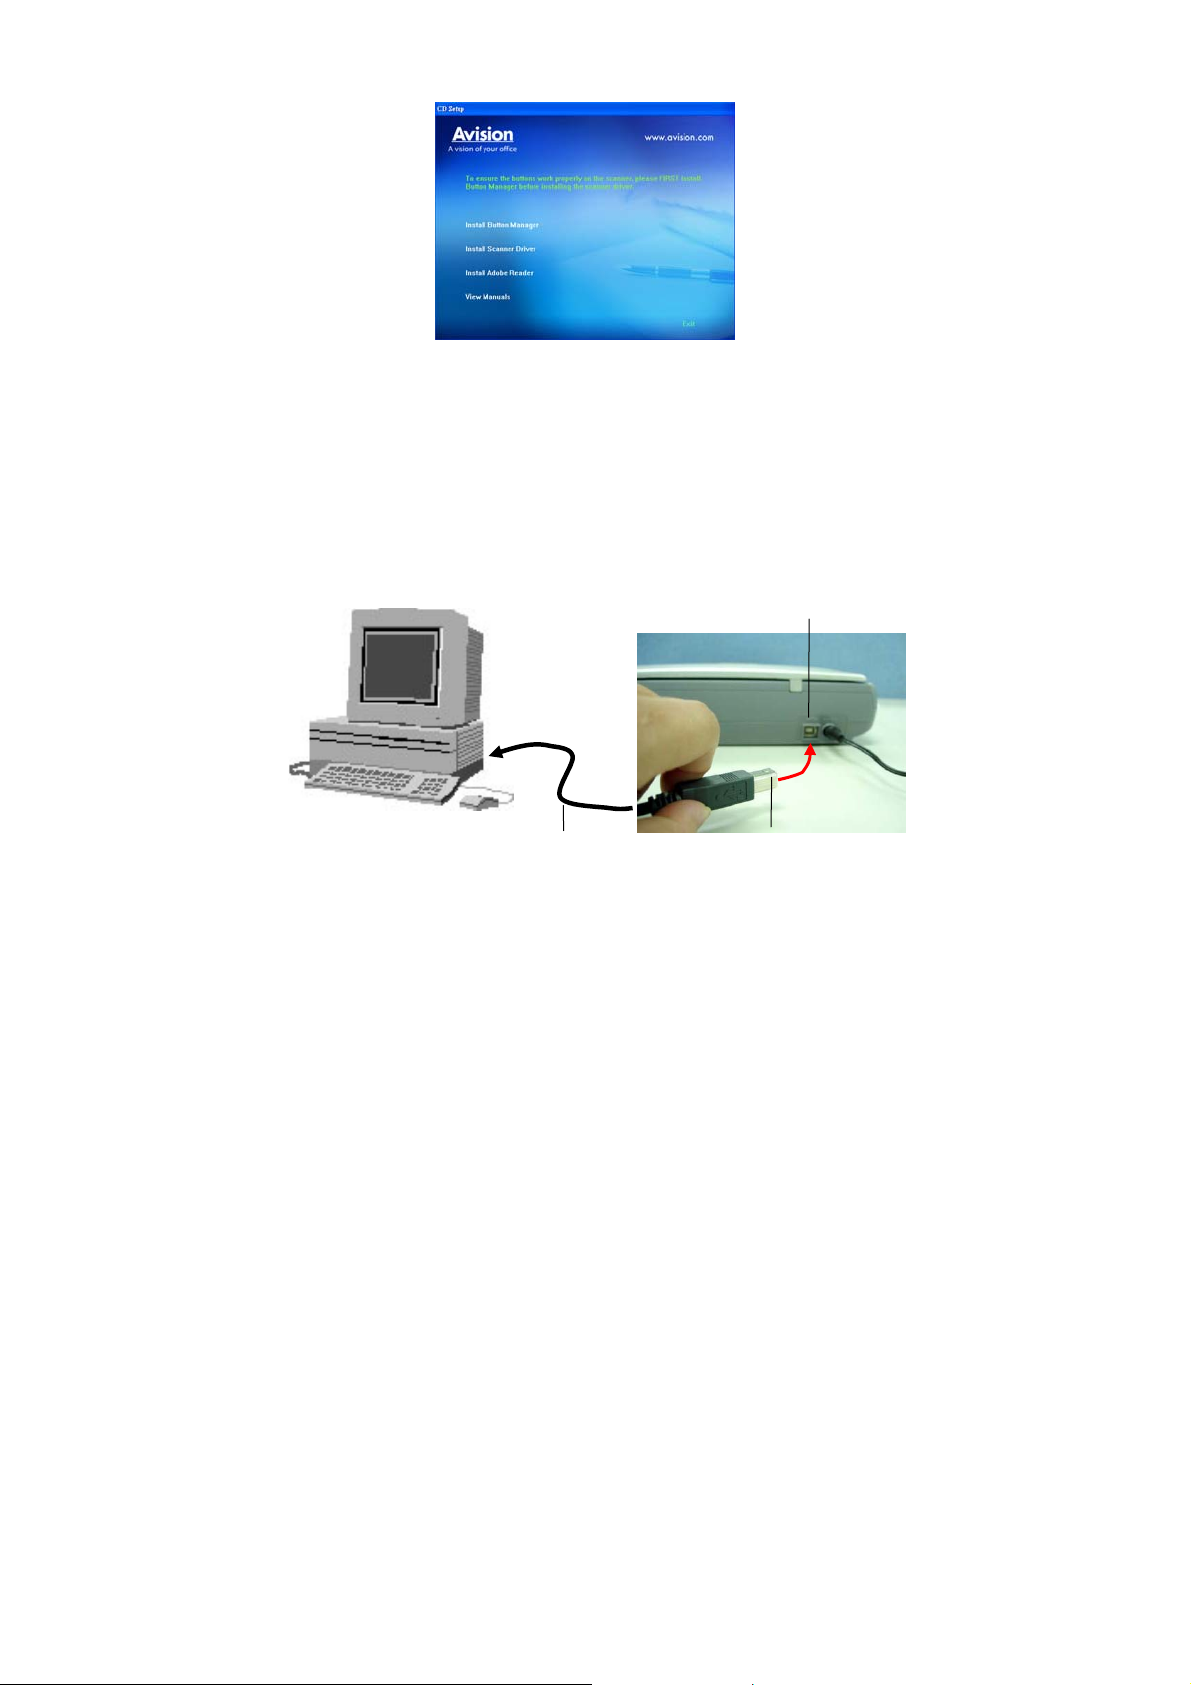
3. Choose Install TWAIN Driver to install the scanner driver.
1.4.3 CONNECTING TO COMPUTER
1. Connect the square end of the USB cable to the USB port of
your scanner. Connect the rectangle end to the USB port
of your computer.
USB port
USB Cable
The Square End
10

2. The computer should detect a new USB device and prompt a
“New Hardware Found” message.
(Windows 9X/Windows ME) (Windows 2000/XP)
3. Follow the instructions on the screen to complete the
installation.
Note:
To uninstall the scanner driver in Windows 2000/XP, be sure
to keep your scanner connecting to your computer.
11
Chapter 2 COMPLETING YOUR
FIRST SCAN
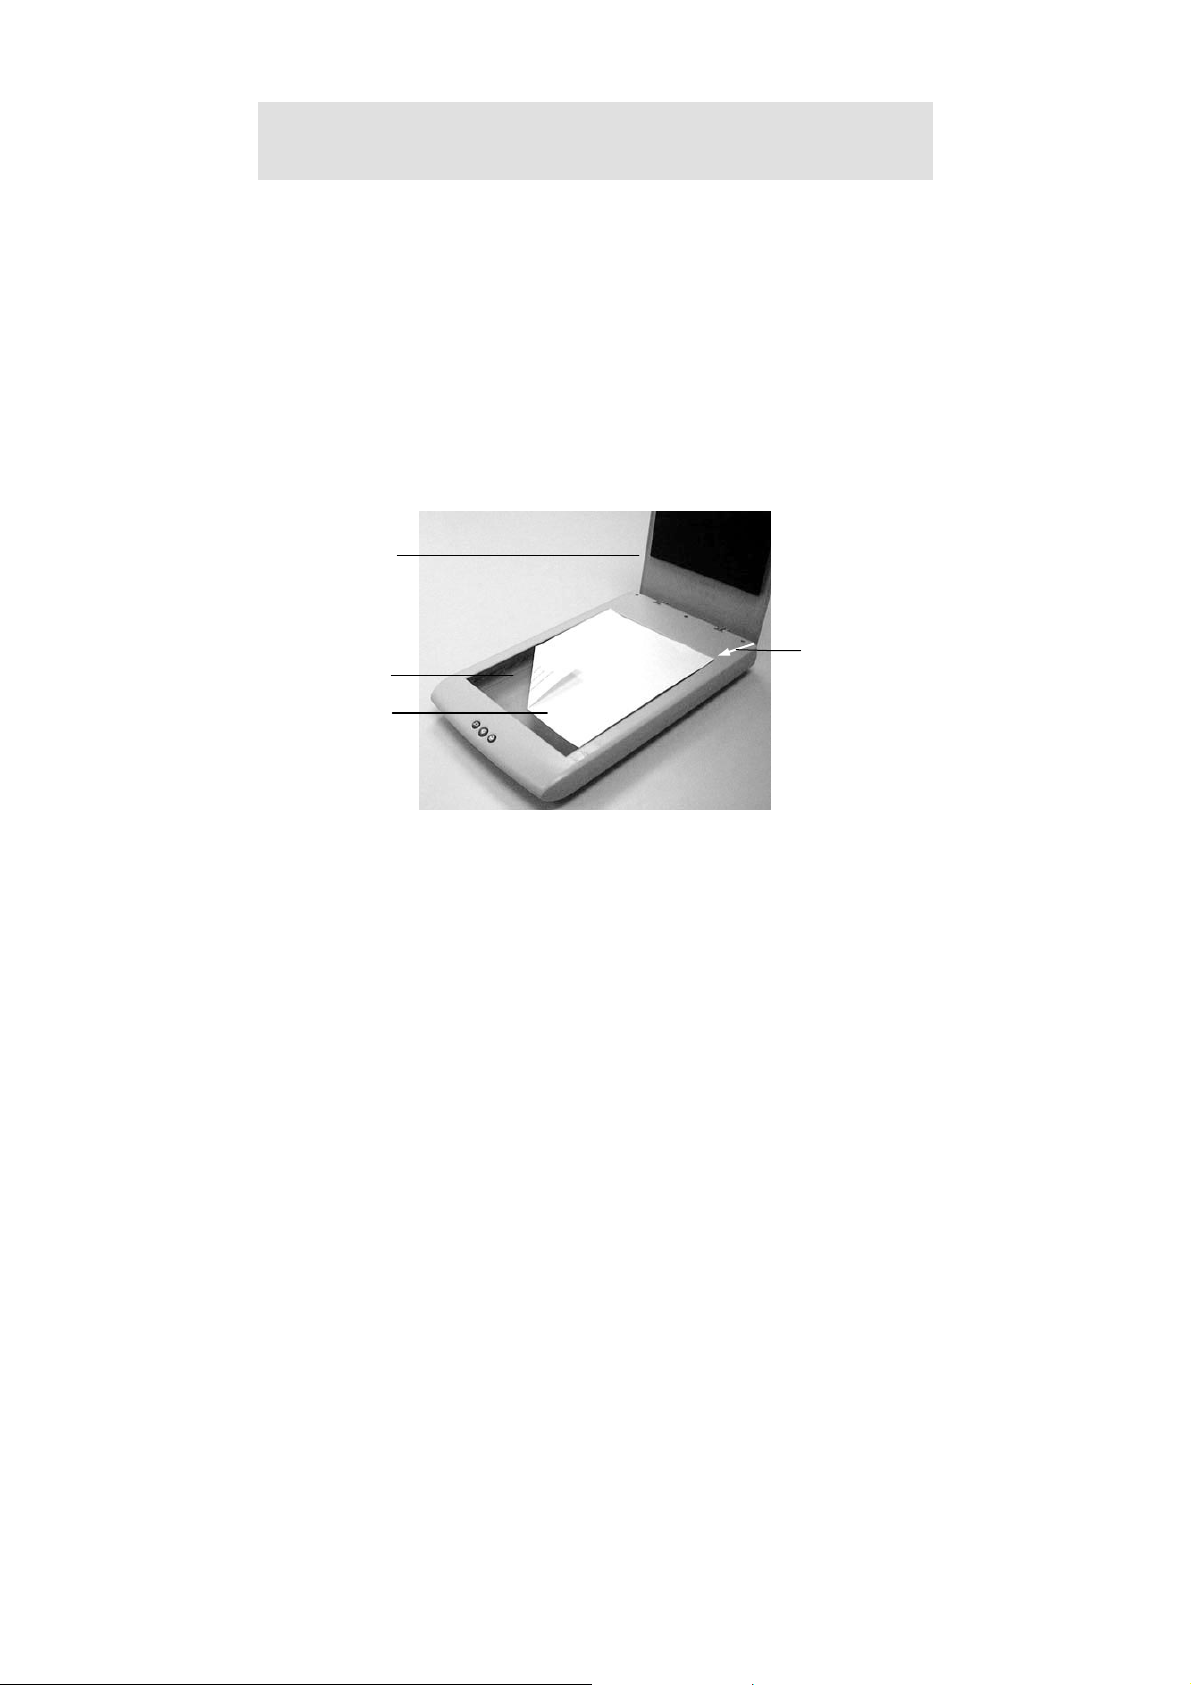
2.1 PLACING YOUR ORIGINAL
1. Open document cover.
2. Place your document with your text FACE DOWN on the
glass.
3. Make sure the upper left corner of your original near the
home position as marked in the scanner.
1
4
2
3
12
1. Document Cover
2. Glass
3. Document
4. Home Position
2.2 VERIFYING YOUR SCANNER INSTALLATION
To verify if your scanner installation is correct, Avision provides
you a useful test program called Avision Capture Tool. With this
tool, you can perform simple scans and view the captured images.
In addition, it helps you complete your scan at a rated speed.
The following procedure describes how to verify your scanner
installation. If the installation is not correct, please review the
preceding section to check if the cable connection and scanner
driver have been successfully installed.
Before you begin, be sure the scanner is on.
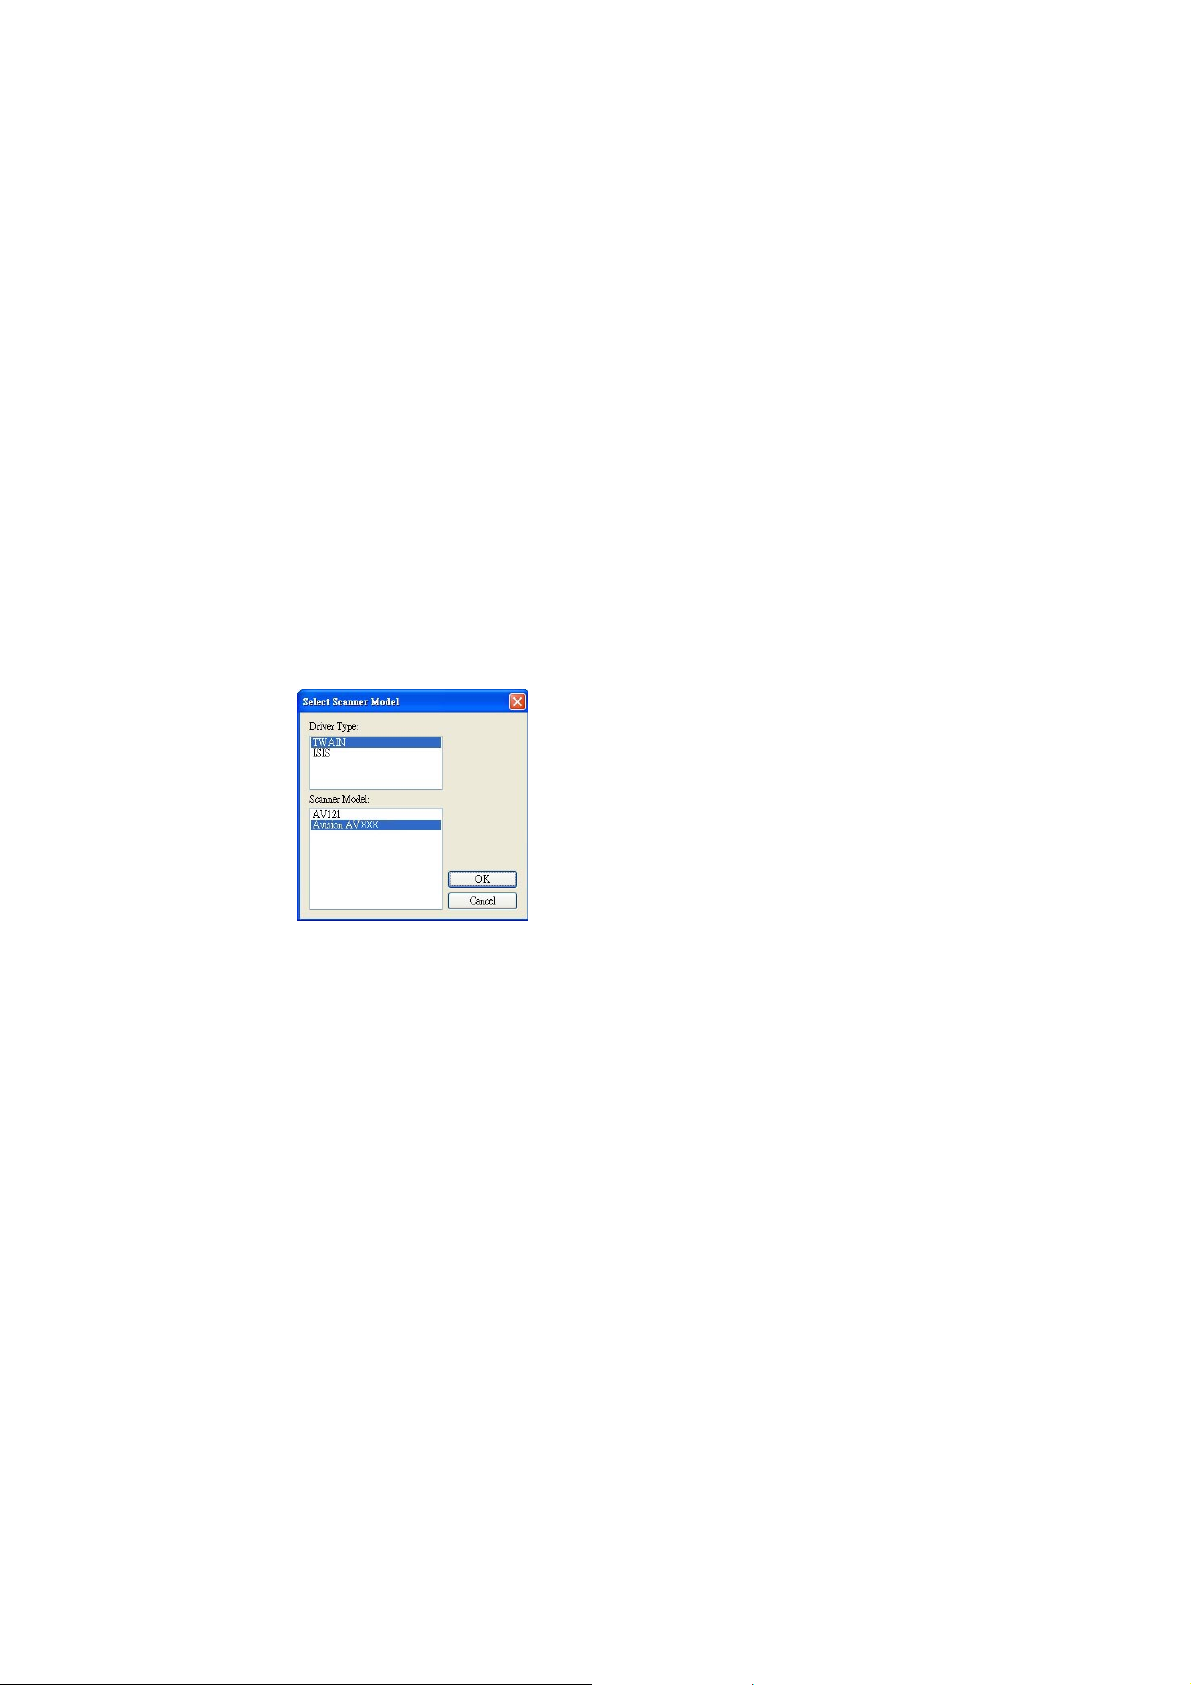
1. Select Start>Programs>Avision AVxxx Scanner>Avision
Capture Tool.
The Select Scanner Model dialog box will be displayed.
2. Select your driver type and scanner model and click OK. The
following Avision Capture Tool dialog box will be displayed.
13

Fit
Page
Actual
Size
Setup
Scan
File Format
Save File Path
3. Choose your desired file format from the File Format drop
down list box. (Default is BMP, other choice includes TIFF,
GIF, and JPEG.)
4. Type your desired folder name and file name in the F ile Path
box. (Default is C:\My Scan\Image.)
Note: If you do not wish to save the scanned image, deselect
the Save button since default is Save Enable. In this case, the
thumbnail view will be disabled. And therefore, after viewing
all the scanned images, only the last one will remain on the
screen.
5. Click the Setup button (
) or choose Setup from the File
menu to prompt the Scanner Properties dialog box.
14

5
Image
Selection
Box
6. From the Image Selection Box, choose your desired image
type for your scanned image. (Default is Front B&W) If
you have a duplex scanner, choose Front and Rear to scan
both sides of your document.
7. Click OK to quit the Scanner Properties dialog box. (To
learn more details about the Scanner Properties dialog box,
please see the subsequent chapter, Using the Scanner
Properties Dialog Box.)
8. Place your document face down on the document glass or
face up in the auto document feeder.
9. In the Scan Validation dialog box, click the Scan button
(
) or choose Scan from the File menu.
10. The document will be scanned and displayed in the Scan
Validation screen. After the scanned images have been
displayed, your scanner installation verification is
completed.
1
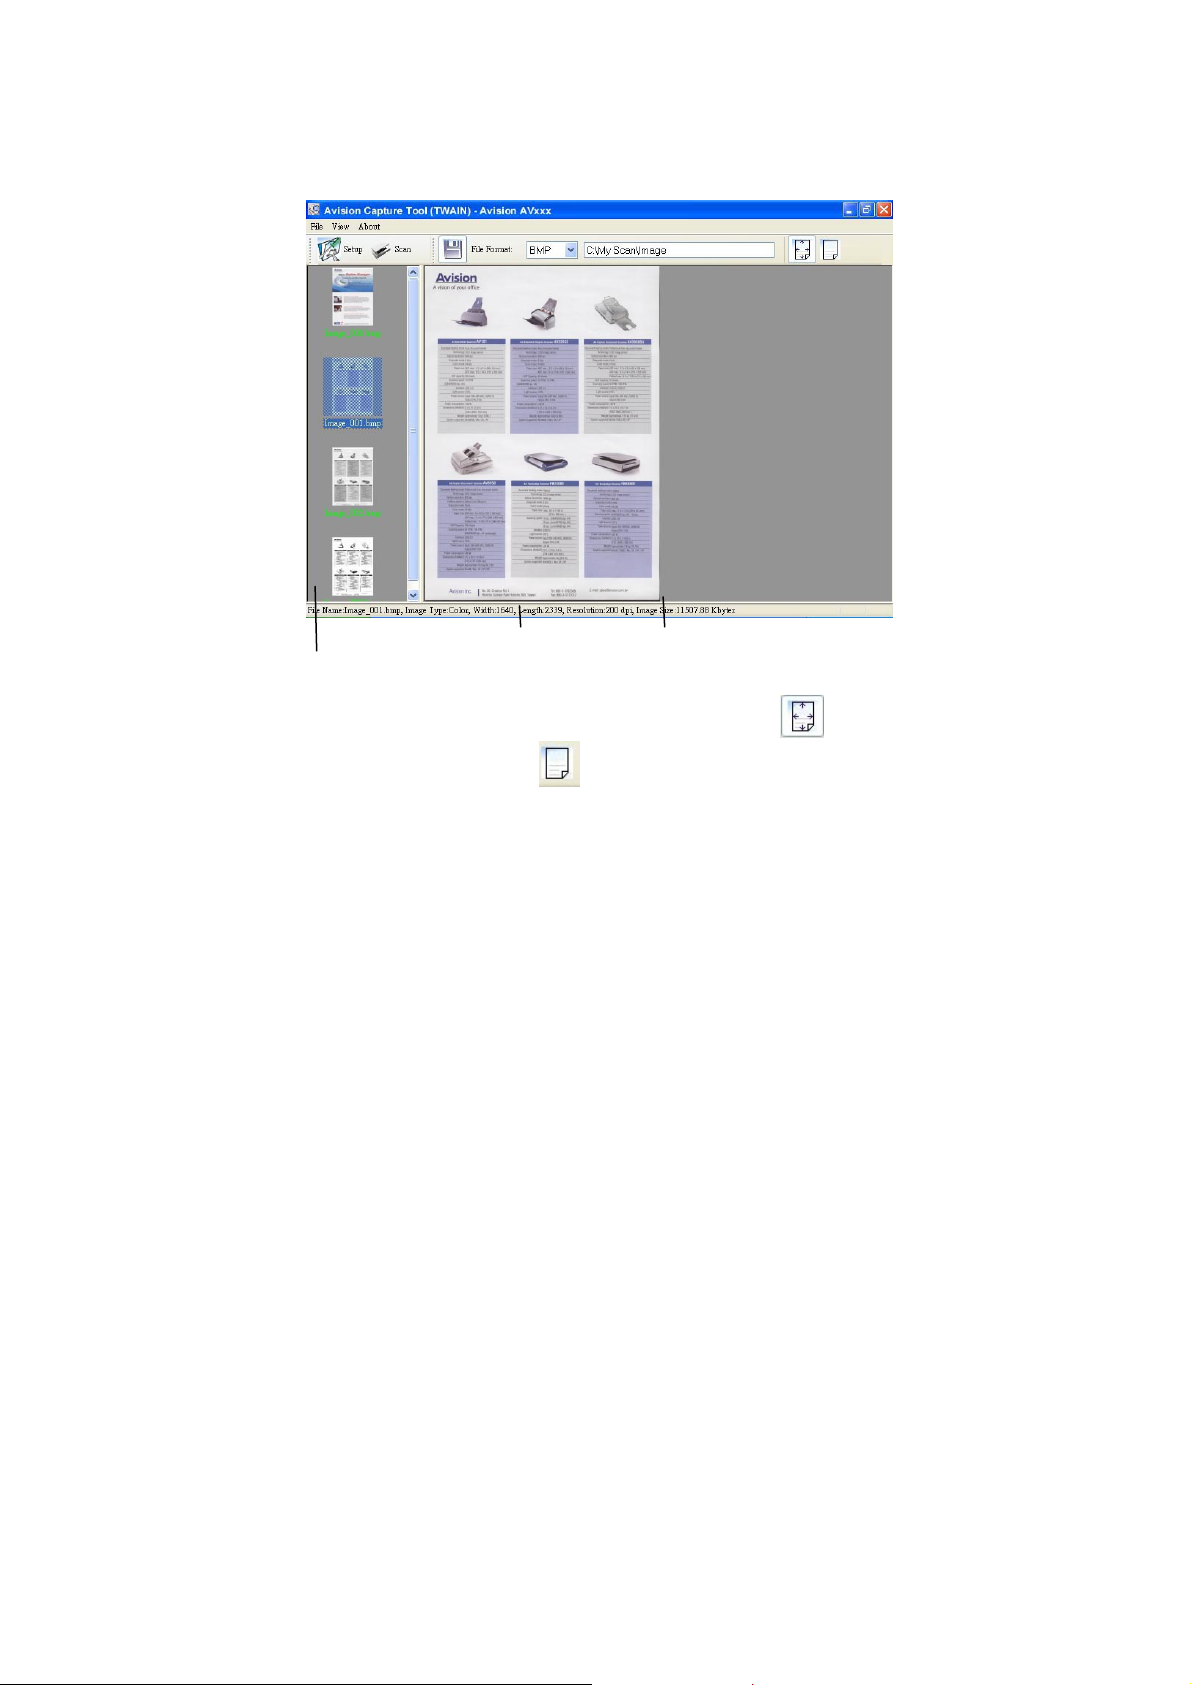
Thumbnail View
Status Bar
Fit Page View
11. You can view the scanned image in Fit Page (
Size (100%) button (
) from the Viewing toolbars at the
) or Actual
right side.
12. Click th e Close box or Quit from the File menu to exit the
Scan Validation Tool.
16
7
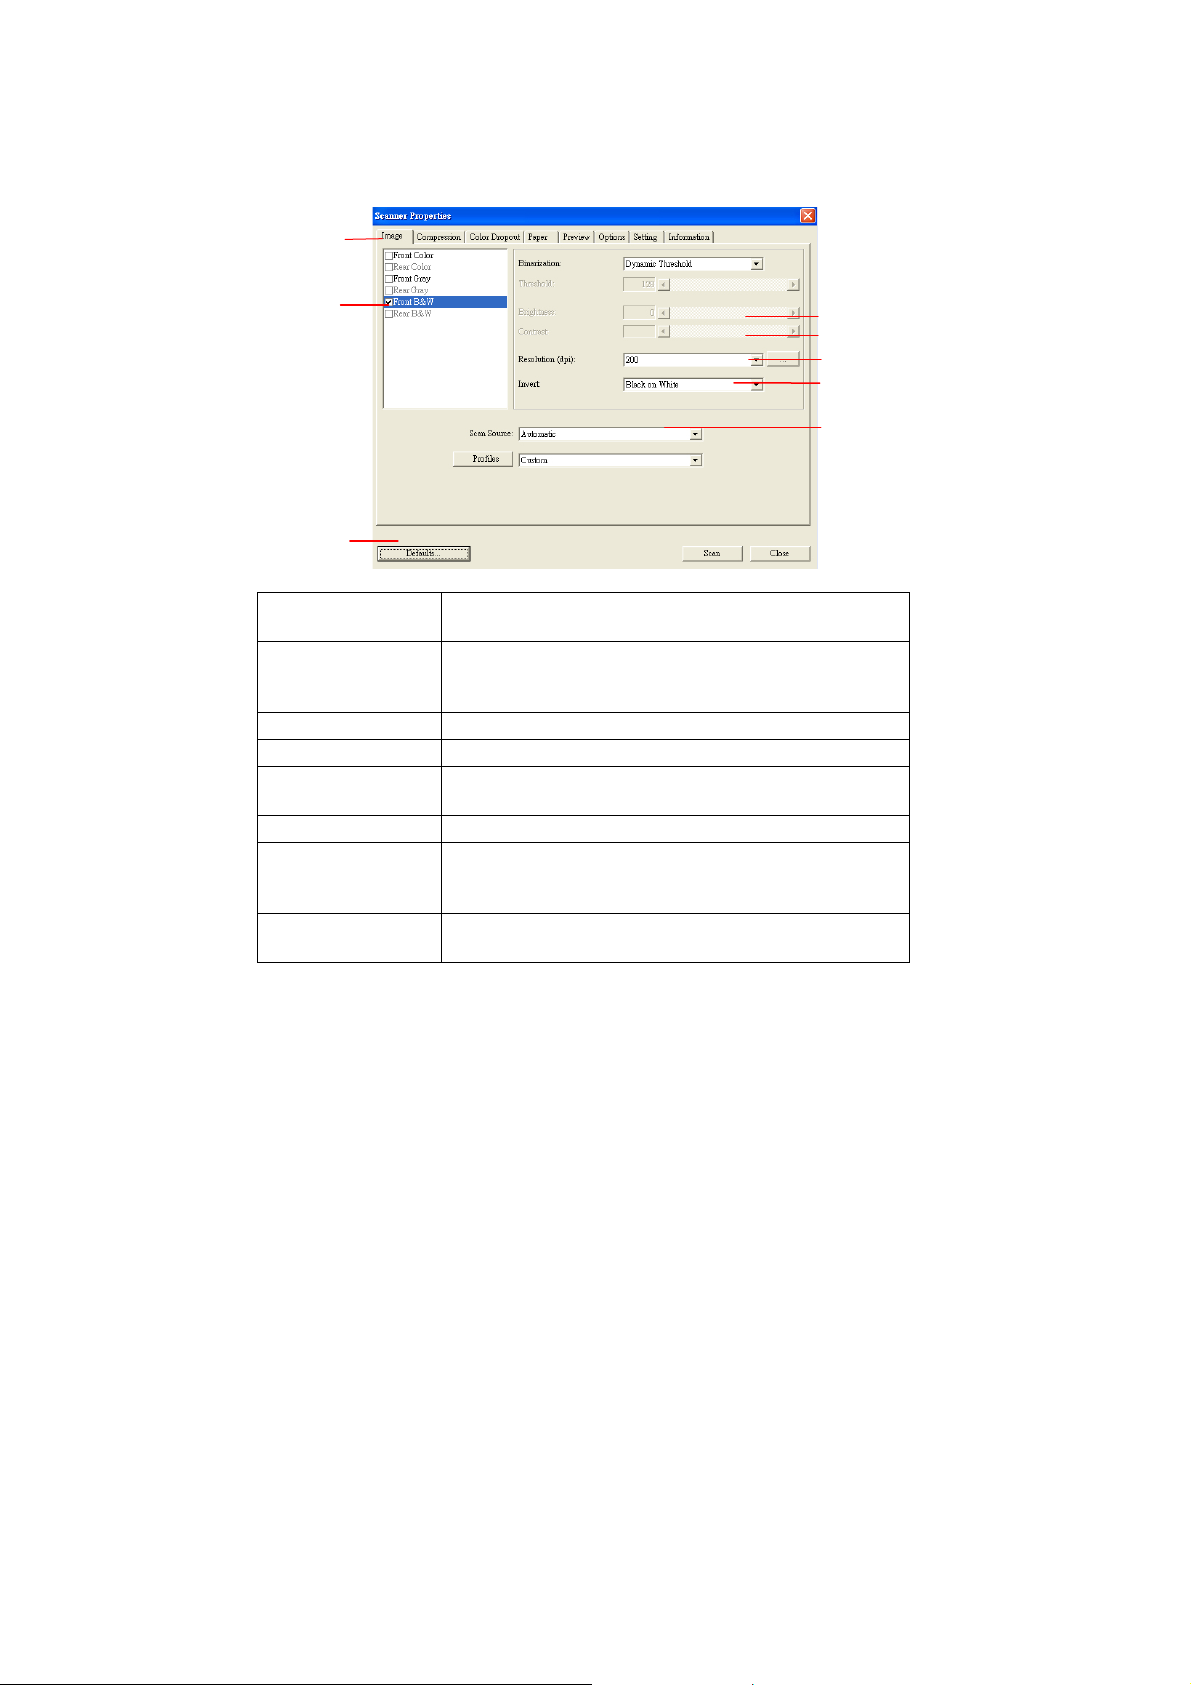
2.3 A GLANCE OF THE USER INTERFACE
1
2
3
4
5
6
7
8
1. Tab Options Choice: Image, Compression, Color Dropout,
Paper, Options, Settings, Information.
2. Image
Selection Box
3. Brightness: Adjust the brightness level from –100 to +100.
4. Contrast Adjust the contrast level from –100 to +100.
5. Resolution
6. Invert Reverse the color of your scanned image.
7. Scan Source Choice: Auto Document Feeder, Flatbed,
8. Defaults Reset all values on the tabs to the factory
Choose your image type and the side of
document you wish to scan. Options vary
based on type of scanner.
Determine the quality of the scanned image.
The industry standard is 200 dpi.
Flatbed (Book), Automatic (varies due to
different scanner model)
default settings.
Note:
For more details on how to use the Scanner Properties dialog box,
please refer to the following chapter.
1
Chapter 3 Using the Scanner
Properties Dialog Box
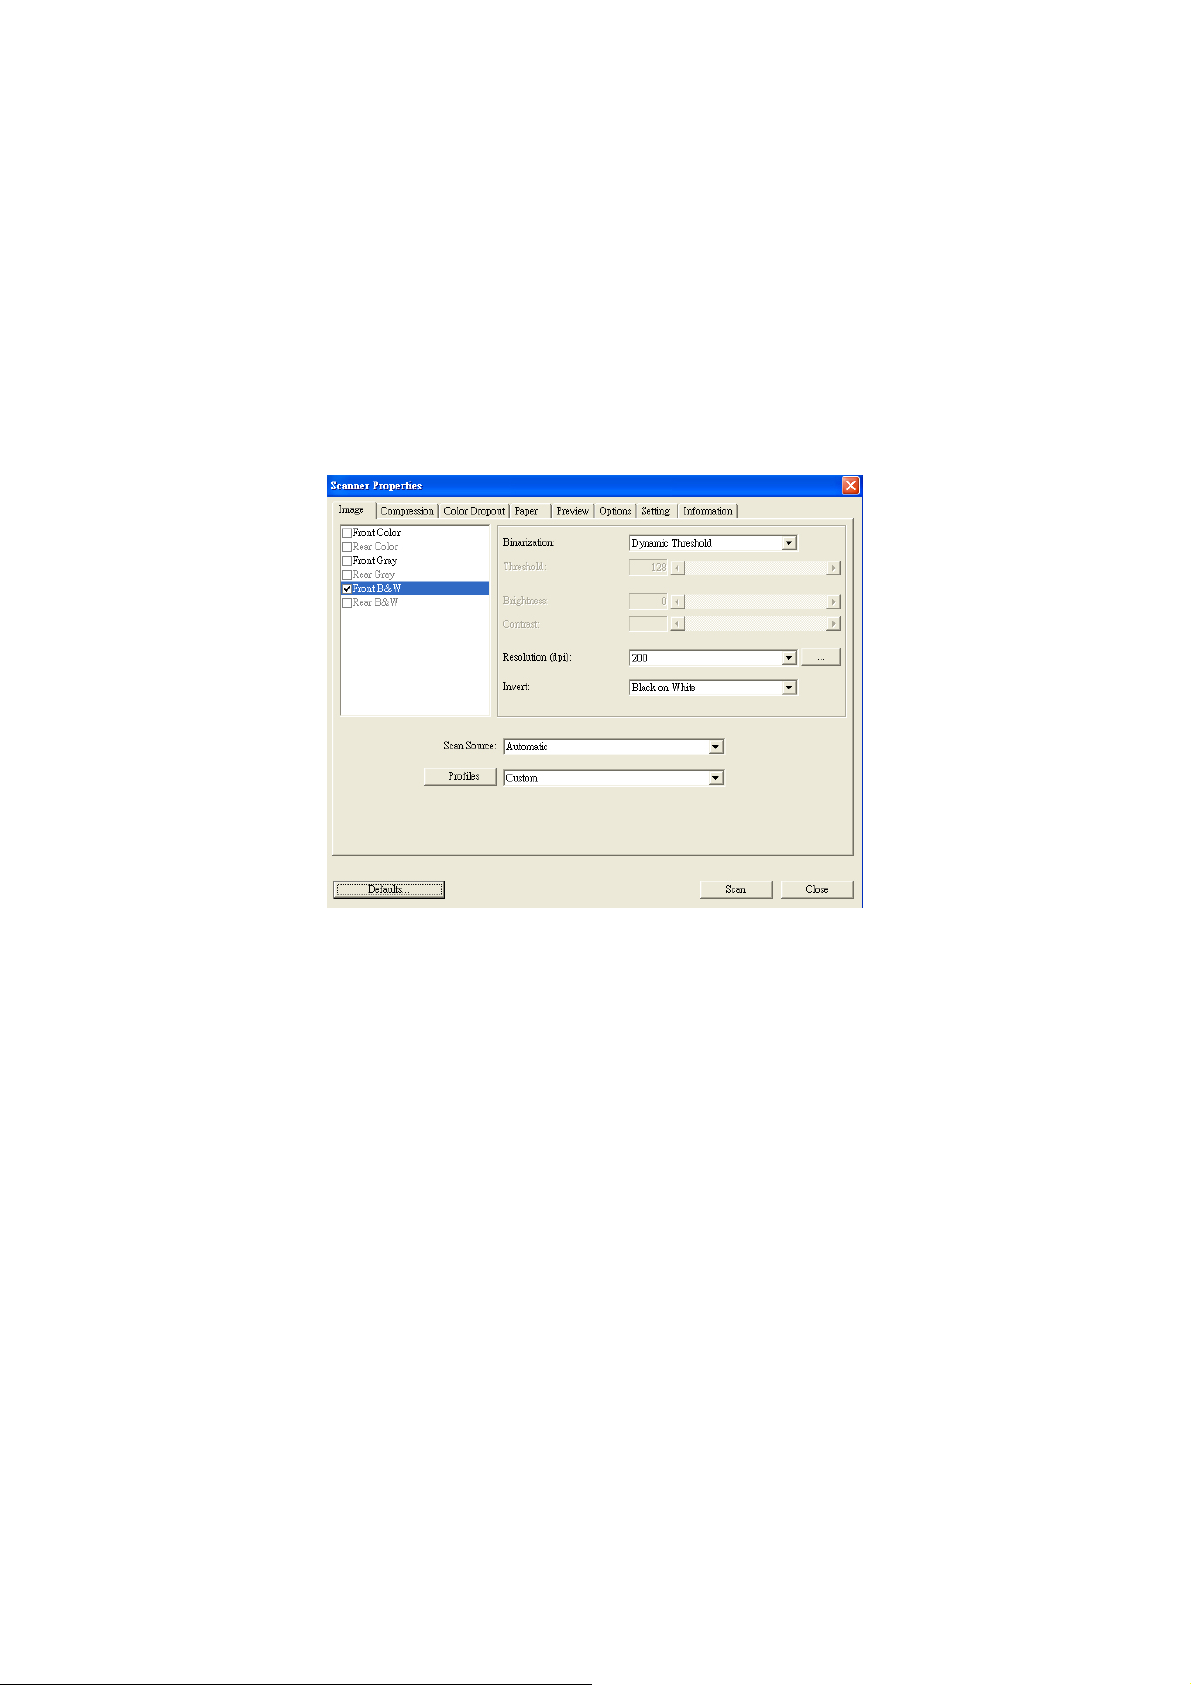
The Scanner Properties dialog box allows you to configure the
scanner’s settings. It consist s of several tabbed windows each of
which will be described in this chapter.
The Scanner Properties dialog box
18
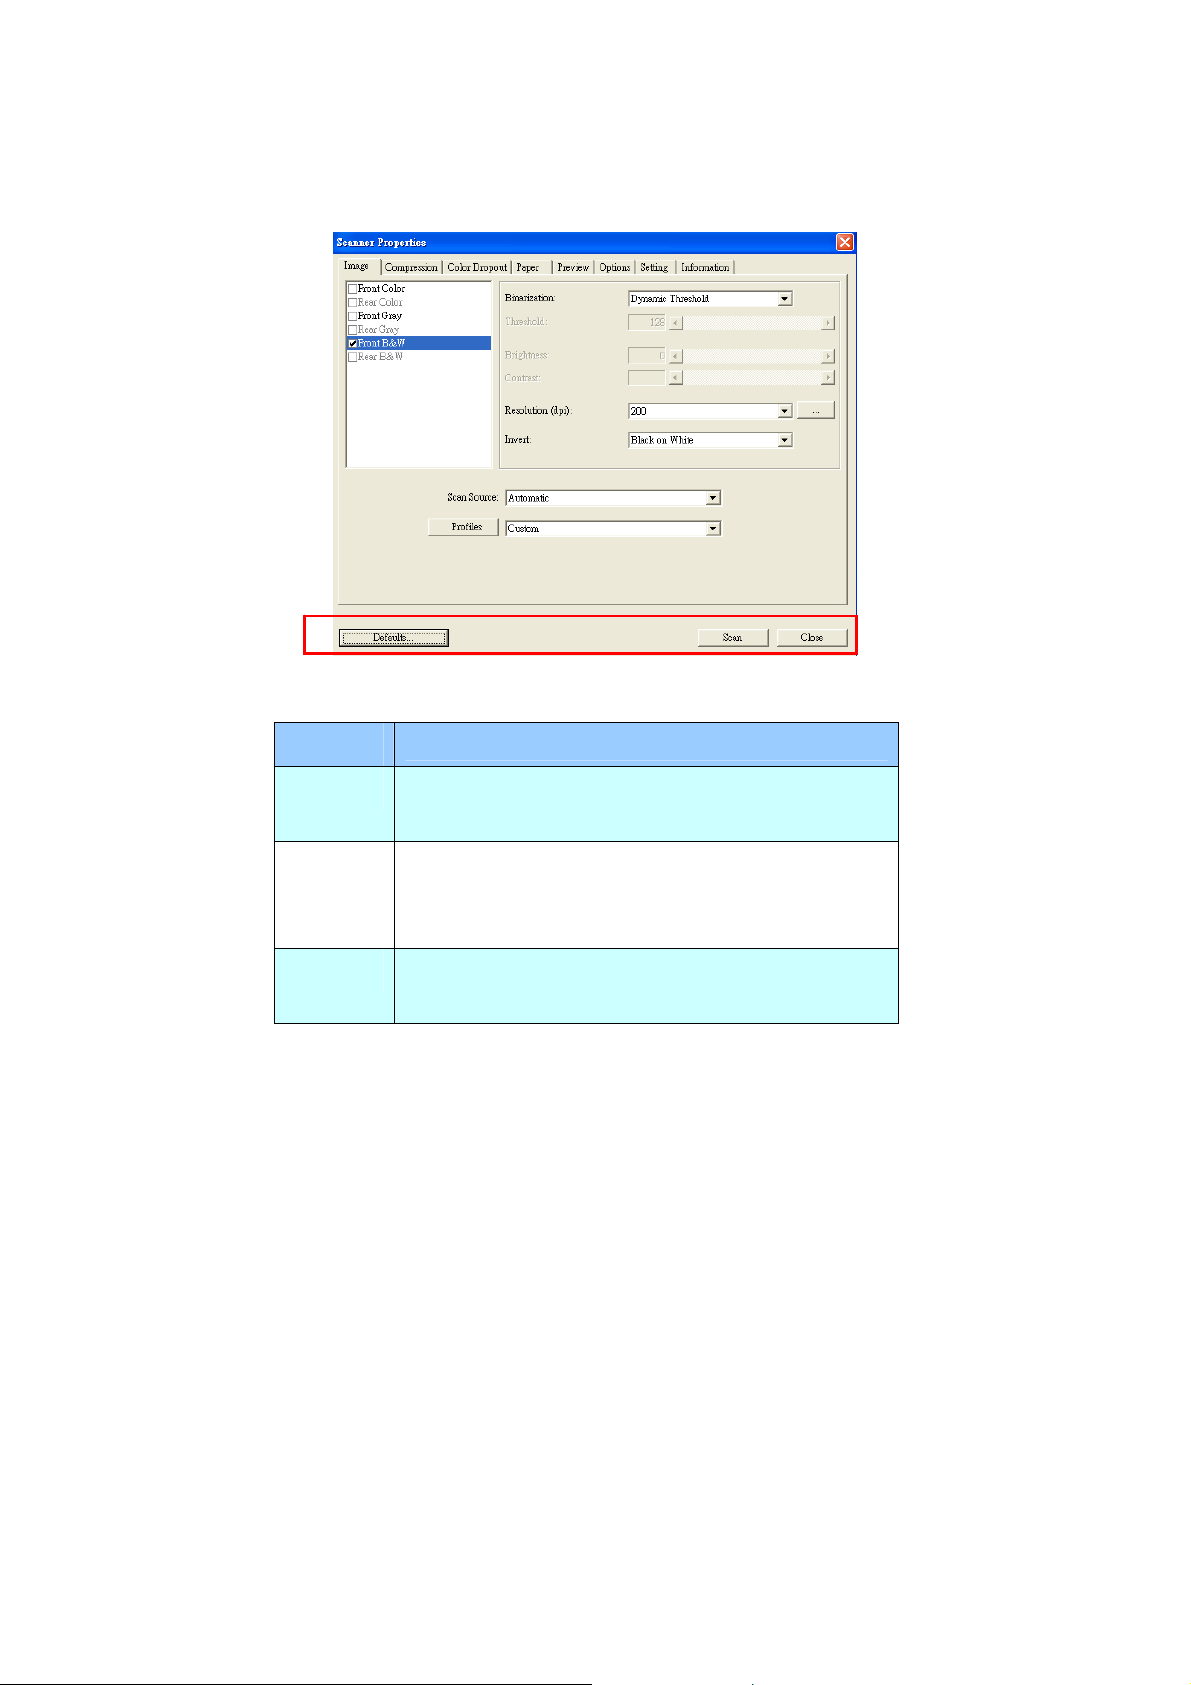
3.1 BUTTONS ON THE SCANNER PROPERTIES
DIALOG BOX
The buttons on the Scanner Properties dialog box
Buttons
Description
Defaults Click the Defaults button, the factory default
settings will be shown on each tab.
Scan After all the scan settings are satisfactory, click
the Scan button to start scanning your
document.
Close Click the Close button to leave the Scanner
Properties dialog box.
19

The following table shows the default settings:
Tab name Default settings
Image Image:Front B&W
Binarization:Dynamic Threshold
Resolution:200 dpi
Invert:Blank on White
Scan Source:Auto Document Feeder
Threshold:None
Brightness:None
Contrast:None
Compression None
Color Dropout None
Paper Cropping:Automatic
Deskew:Yes
Orientation:Portrait
OverScan:0.00
Multifeed Detection:None
Unit:Inch
Options Rotation Degrees:None
Blank Page Removal:None
Edge Fill:White,0 mm
Image Control Option:None
Setting Enable Energy Saver : Enable, 15
minutes after last scan action
Show Scanning Progress:Yes
Show Warning Message:Yes
Save Settings after Closing:Yes
20
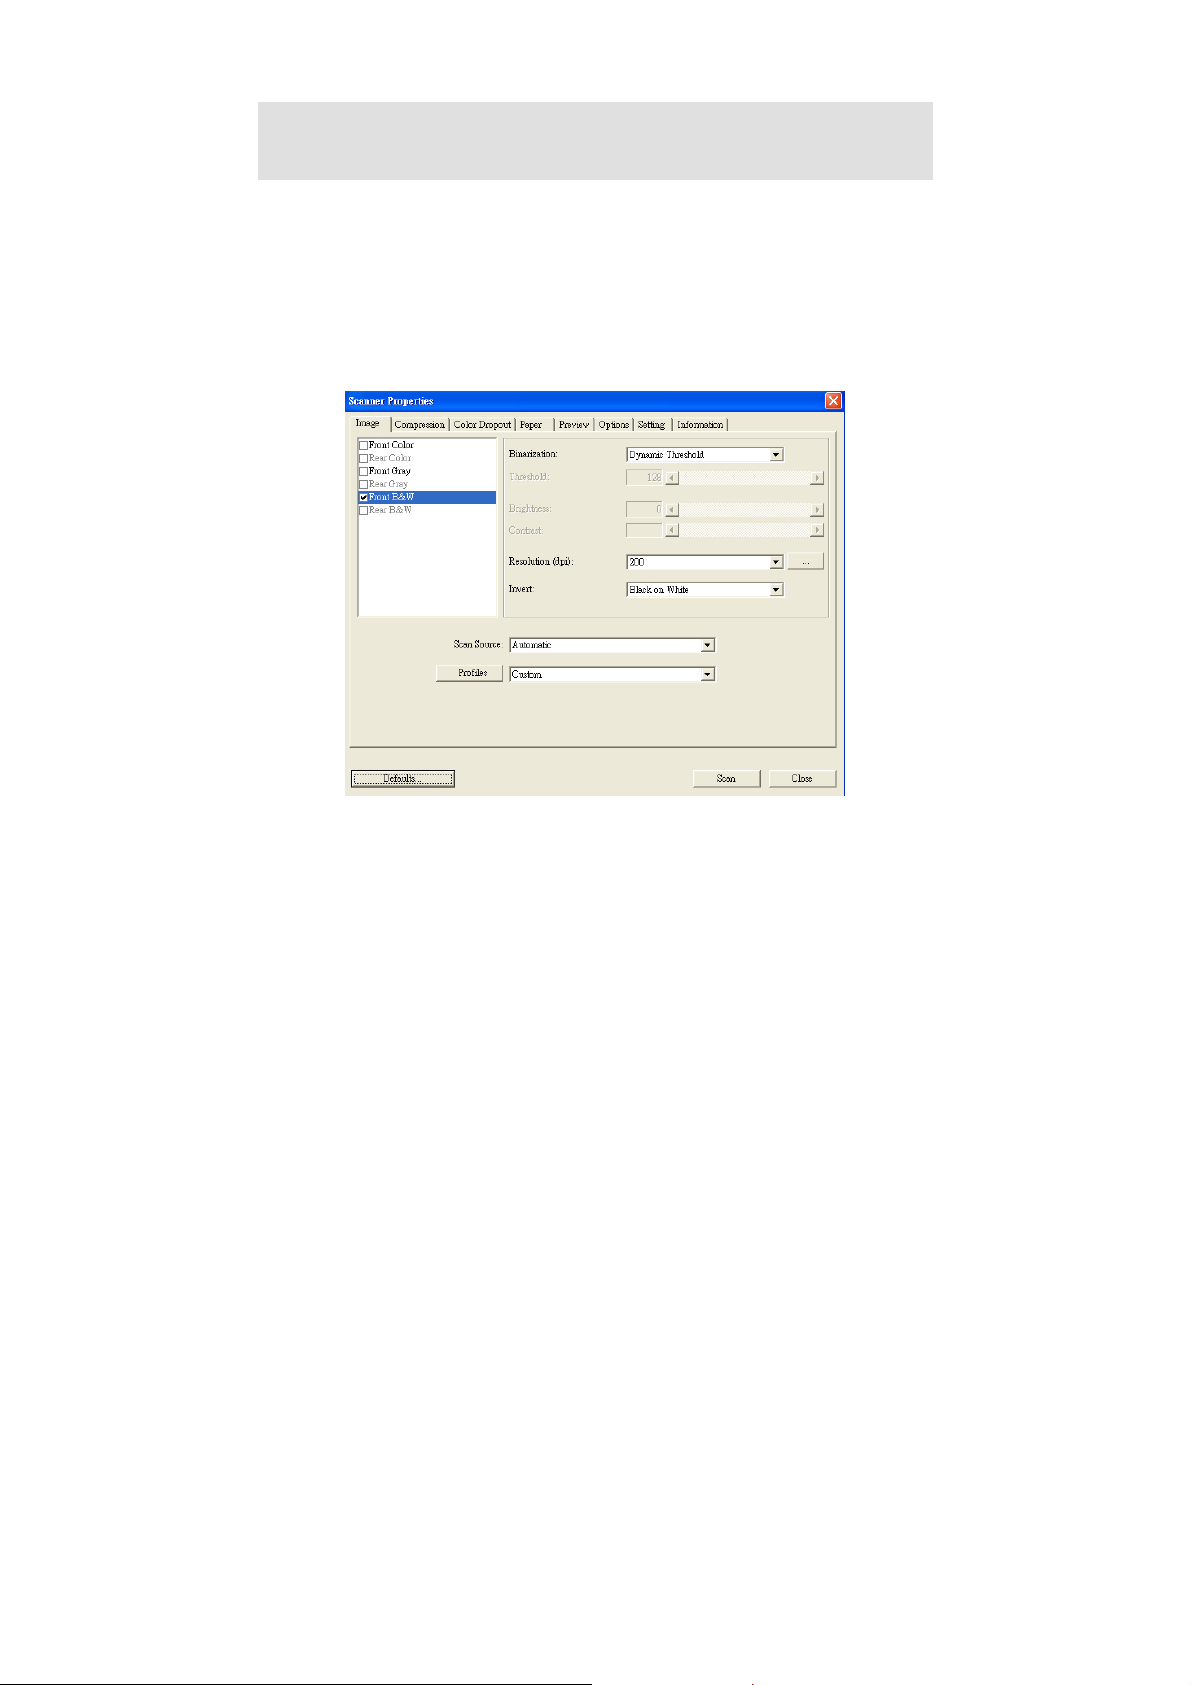
3.2 THE IMAGE TAB
The Image tab allows you to choose the front side and (or) the
rear side of your document, the type of image, and to set several
basic scan settings. Note that except for the resolution, you can
set individual scan settings for the front side and the rear side.
For example, all settings in the Image tab, Compression tab,
Color Dropout tab can be set individually for the front and the
rear side. However, the settings in the Paper tab, the Option tab,
and the Setting tab have to be set the same for the front and rear
side.
The Image tab dialog box
21
 Loading...