

Page 1
AM3000 series User's Manual
AM3200 / AM3100L
AM3230 (only for all other content except fax functions)
(D/N: 250-0477-E V2.0)
Page 2

Documents for the AM3000 series of products
The documents for these series of products are divided as follows. Please refer to
them for detailed information.
Model Documents
AM3200 & AM3100L
(Scanner-Printer-Copier)
AM3230
(Scanner-Printer-Copier-Fax)
included
AM3000 series
user’s manual
AM3000 series
quick guide
AM3000 series
user’s manual
(only for all other
content except
fax functions )
AM3230 Fax
user’s Guide
(only for fax
Format
PDF files included on
the accompanying
CD-ROM
Printed book
PDF files included on
the accompanying
CD-ROM
Printed book
content)
ii
Page 3

Trademarks
The brands and product names herein are trademarks or registered trademarks of their
respective holders.
Copyright
© 2001 Avision Inc. All rights reserved. No part of this publication may be
reproduced, transmitted, transcribed, stored in a retrieval system, or translated into
any language or computer language, in any form or by any means, electronic,
mechanical, magnetic, optical, chemical, manual, or otherwise, without the prior
written permission of the manufacturer.
Warranty
The information contained in this document(s) is subject to change without noti ce.
The manufacturer makes no warranty of any kind with regard to this material,
including, but not limited to, the implied warranties of fitness for a particular purpose.
The manufacturer shall not be liable for errors contained herein or for incidental or
consequential damages in connection with the furnishing, performance, or use of this
material.
AM3000 series User’s Manual
iii
Page 4

The Federal Communications Commission Statement
NOTE: This equipment has been tested and found to comply with the limits for a
Class B digital device, pursuant to part 15 of the FCC Rules. These limits are
designed to provide reasonable protection against harmful interference in a
residential installation. This equipment generate, uses and can radiate radio
frequency energy and, if not installed and used in accordance with the instructions,
may cause harmful interference to radio communications. However, there is no
guarantee that interference will not occur in a particular installation. If this
equipment does cause harmful interference to radio or television reception, which
can be determined by turning the equipment off and on, the user is encouraged to
try to correct the interference by one or more of the following measures:
Reorient or relocate the receiving antenna.
Increase the separation between the equipment and receiver.
Connect the equipment into an outlet on a circuit different from that to which the
receiver is connected.
Consult the dealer or an experienced radio/TV technician for help.
CE Warning!
This is a class B product. In a domestic environment this product may cause radio
interference in which case the user may be required to take adequate measures.
iv
Page 5

EC Declaration of Conformity
Update with final regulations
According to EN55022 and EN55024
Manufacturer’s Name: Avision Inc.
Manufacturer’s Address: No. 20, Creation Road I,
Science Park, Hsinchu
Taiwan, ROC
Declare that the product
Model Name AM/MF3000 series
Conforms to the following Product Specification
Emission: EN 50081-1
Immunity: EN 55024
EN 55022
EN 61000-3-2
EN 61000-3-3
EN 60950
IEC 61000-4-2
IEC 61000-4-3
IEC 61000-4-4
IEC 61000-4-5
IEC 61000-4-6
IEC 61000-4-8
IEC 61000-4-11
AM3000 series User’s Manual
v
Page 6

As an ENNERGY STAR Partner, Avision Inc. has determined that this
product meets the ENNERGY STAR guidelines for energy efficiency.
LASER SAFETY INSTRUCTION
This printer is a page printer which is operated by means of a laser. There is no
possibility of danger from the laser, provided the printer is operated according to the
instructions in this manual. Since radiation emitted by the laser is completely confined
within protective housings and external covers, the laser beams cannot escape from the
machine during any phase of user operation.
• Do not place a coffee cup, vase, or other liquid-filled container on the machine.
Spillage can damage the machine’s electrical parts and insulation.
• Take care not to drop paper clips, staples, or any other metal objects into the
machine.
• Avoid watching the lamp during operation with the Document cover in the open
position. Should you need to copy for a long period with the Document cover open,
it is advisable to arrange a shield for your eyes or to wear sunglasses.
• When clearing paper jams, refer to the instructions in this manual.
• Before disconnecting the plug, turn the machine off. Make sure your hands are dry.
Hold the plug itself, not its cord, when disconnecting it from the receptacle.
• Never attempt to open any fixed cover.
• Do not attempt to alter the machine or its parts.
• Under normal conditions the small quantities of ozone gas produced by the
machine are harmless. However, if the machine is used for an extended period or
within a small room, you should make sure that the area is adequately ventilated.
Also ventilate the room if you notice the machine smalls after a period of frequent or
extended use.
• Do not modify this product, as a fire, electrical shock, or breakdown could result. If
the product employs a laser, the laser beam source could cause blindness.
• Do not attempt to remove the covers and panels which have been fixed to the
product. Some products have a high-voltage part or a laser beam source inside
that could cause an electrical shock or blindness.
vi
Page 7

• If this product becomes inordinately hot or emits smoke, or unusual odor or noise,
immediately turn OFF the power switch, unplug the power cord from the power
outlet, and then call your authorized service representative. If you keep on using it
as is, a fire or electrical shock could result.
• If this product has been dropped or its cover damaged, immediately turn OFF the
power switch, unplug the power cord from the power outlet, and then call your
authorized service representative. If you keep on using it as is, a fire or electrical
shock could result.
• The inside of this product has areas subject to high temperature, which may cause
burns. When checking the inside of the unit for malfunctions such as paper mis-feed,
do not touch the locations (around the fusing unit, etc.) which are indicated by a
“Caution! Hot Surface” caution label.
• Do not store the machine’s consumables in any of these locations:
− Where the temperature or humidity may be excessively high.
− Where flammable items or liquids are stored.
− In direct sunlight.
− In dusty conditions.
CAUTION !
Use of the controls, adjustments, or performance of procedures other than those
specified in this manual may result in hazardous radiation exposure.
This machine is certified as a Class 1 laser product. This means that the machine does
not produce hazardous laser radiation.
AM3000 series User’s Manual
vii
Page 8

Table of Contents
1
GETTING TO KNOW YOUR PRODUCT......................................................................1-1
IDENTIFYING YOUR PRODUCT’S HARDWARE COMPONENTS........................................................1-1
IDENTIFYING PRODUCT PACKAGE CONTENTS .............................................................................1-3
CONTROL PANEL FUNCTIONS ....................................................................................................1-4
2 HARDWARE INSTALLATION.......................................................................................2-1
REMOVE THE PLASTIC BAG AND THE TAPES ...............................................................................2-1
REMOVING THE SHIPPING LOCK .................................................................................................2-3
INSTALLING A TONER CARTRIDGE..............................................................................................2-3
INSTALLING AND LOADING THE MEDIA INPUT TRAYS.................................................................2-5
INSTALLING THE ADF INPUT TRAY............................................................................................2-7
INSTALL PAPER STOPPER ...........................................................................................................2-8
INSTALL PRINTER OUTPUT TRAY ................................................................................................2-8
CONNECTING THE ADF CABLE TO YOUR PRODUCT....................................................................2-9
CONNECTING THE POWER CABLE...............................................................................................2-9
TURNING THE MACHINE ON ....................................................................................................2-10
3 ON-SCREEN PROGRAMMING......................................................................................3-1
MENU TABLE .............................................................................................................................3-1
MEMORY STORAGE....................................................................................................................3-4
NAVIGATION KEYS.....................................................................................................................3-4
SETTING THE PAPER SIZE...........................................................................................................3-6
SLEEP MODE..............................................................................................................................3-7
PRINTING REPORTS....................................................................................................................3-8
RESETTING THE PHOTOCONDUCTOR COUNTER..........................................................................3-9
REMOVING ORIGINAL BACKGROUND ......................................................................................3-10
4 COPYING............................................................................................................................4-1
vi
ii
Page 9

x
ENTER COPY MODE....................................................................................................................4-1
LOADING ORIGINALS TO COPY ...................................................................................................4-1
SETTING COPYING OPTIONS.......................................................................................................4-3
TONER SAVE............................................................................................................................4-13
CHANGING THE DEFAULT SETTINGS........................................................................................4-14
5 SOFTWARE INSTALLATION........................................................................................5-1
INSTALLING SOFTWARE.............................................................................................................5-1
UNINSTALLING SOFTWARE ......................................................................................................5-14
6 PRINTER DRIVER SETTINGS.......................................................................................6-1
HOW TO ACCESS THE PRINTER DRIVER SETTINGS .......................................................................6-1
7 USING QLINK....................................................................................................................7-1
TO START THE QLINK...............................................................................................................7-3
MFP BUTTON SETTING SECTION.................................................................................................7-4
COPY FUNCTION SECTION..........................................................................................................7-8
SCAN FUNCTION SECTION ........................................................................................................7-13
8 SCANNER OPERATION..................................................................................................8-1
USER INTERFACE OPERATION.....................................................................................................8-1
9 MAINTENANCE................................................................................................................9-1
CLEARING THE ADF PAPER JAM................................................................................................9-1
CLEANING THE ADF..................................................................................................................9-2
CLEANING THE GLASS ...............................................................................................................9-3
REPLACING THE SNAP-IN PAD MODULE ....................................................................................9-4
REPLACING TONER CARTRIDGE .................................................................................................9-6
CLEARING THE PRINTER PAPER JAM..........................................................................................9-7
10 TECHNICAL SUPPORT .............................................................................................10-1
SPECIFICATIONS.......................................................................................................................10-2
AM3000 series User’s Manual
i
Page 10
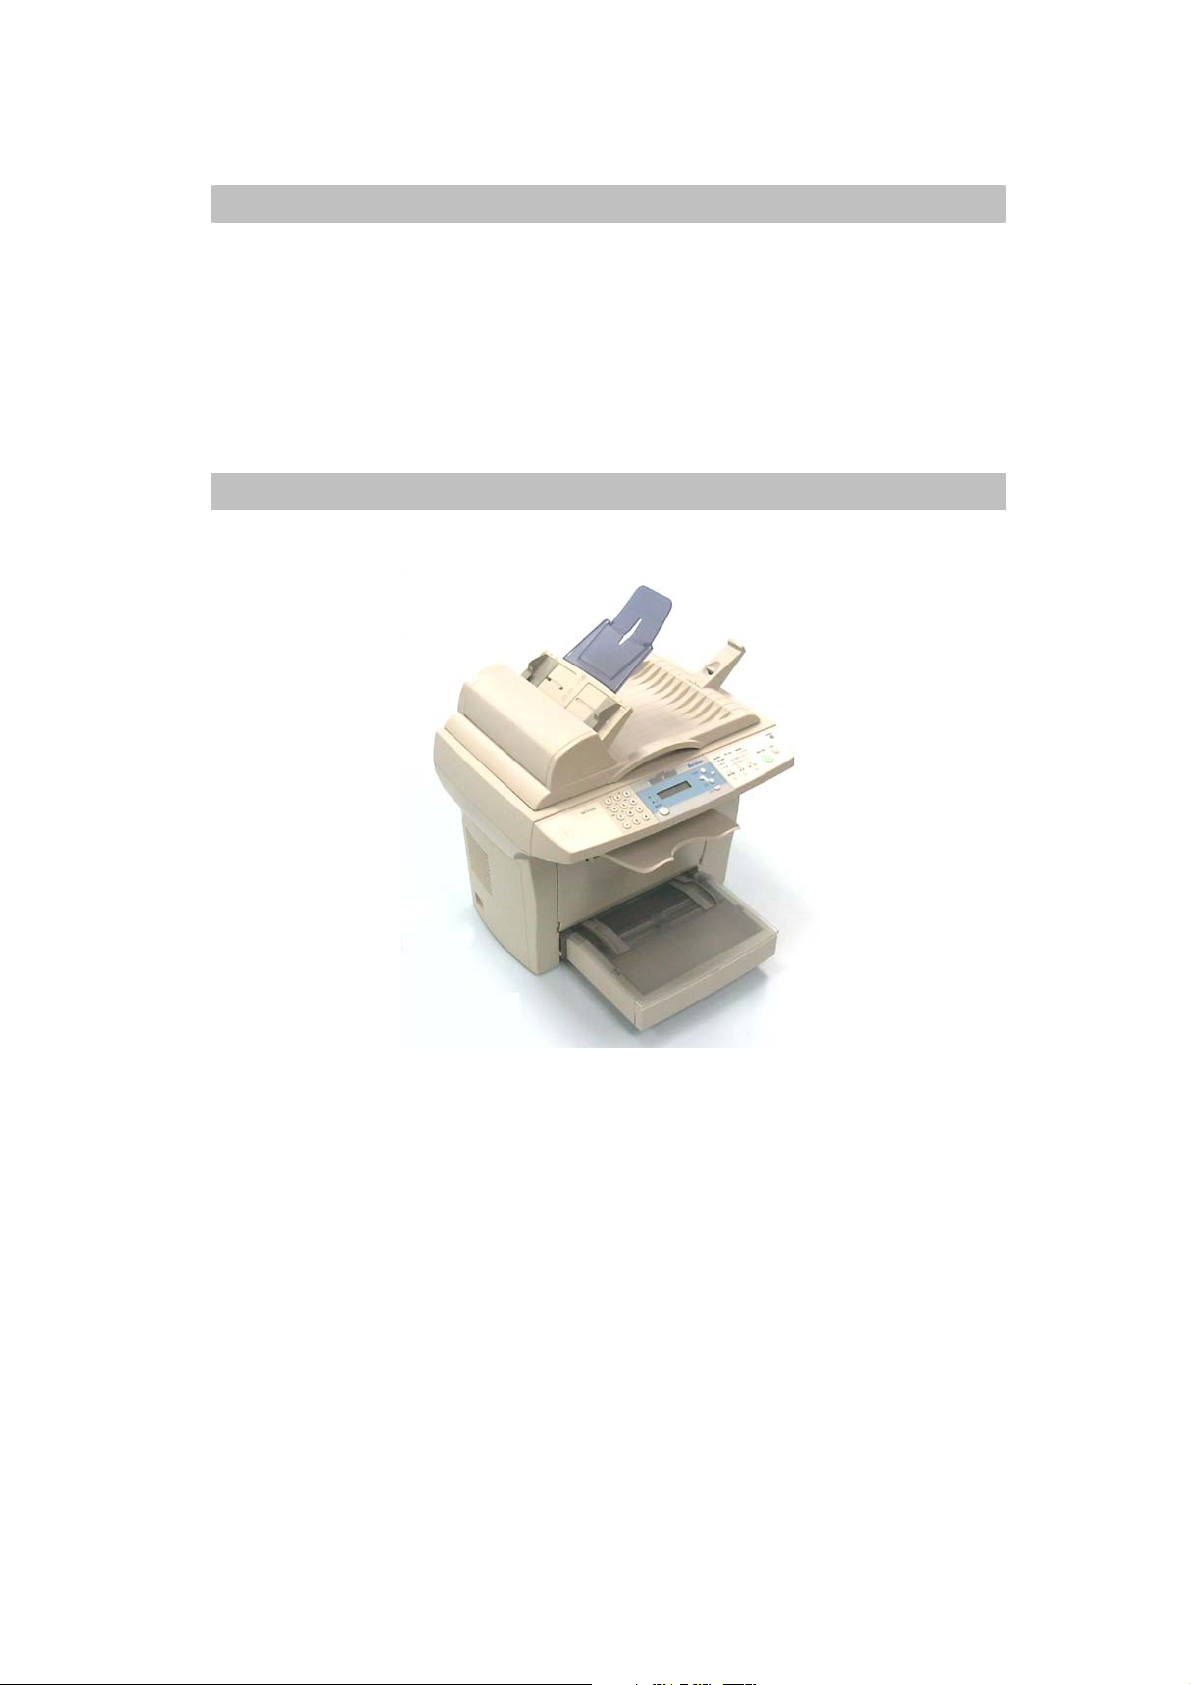
1 Getting to know your product
Identifying your product’s hardware components
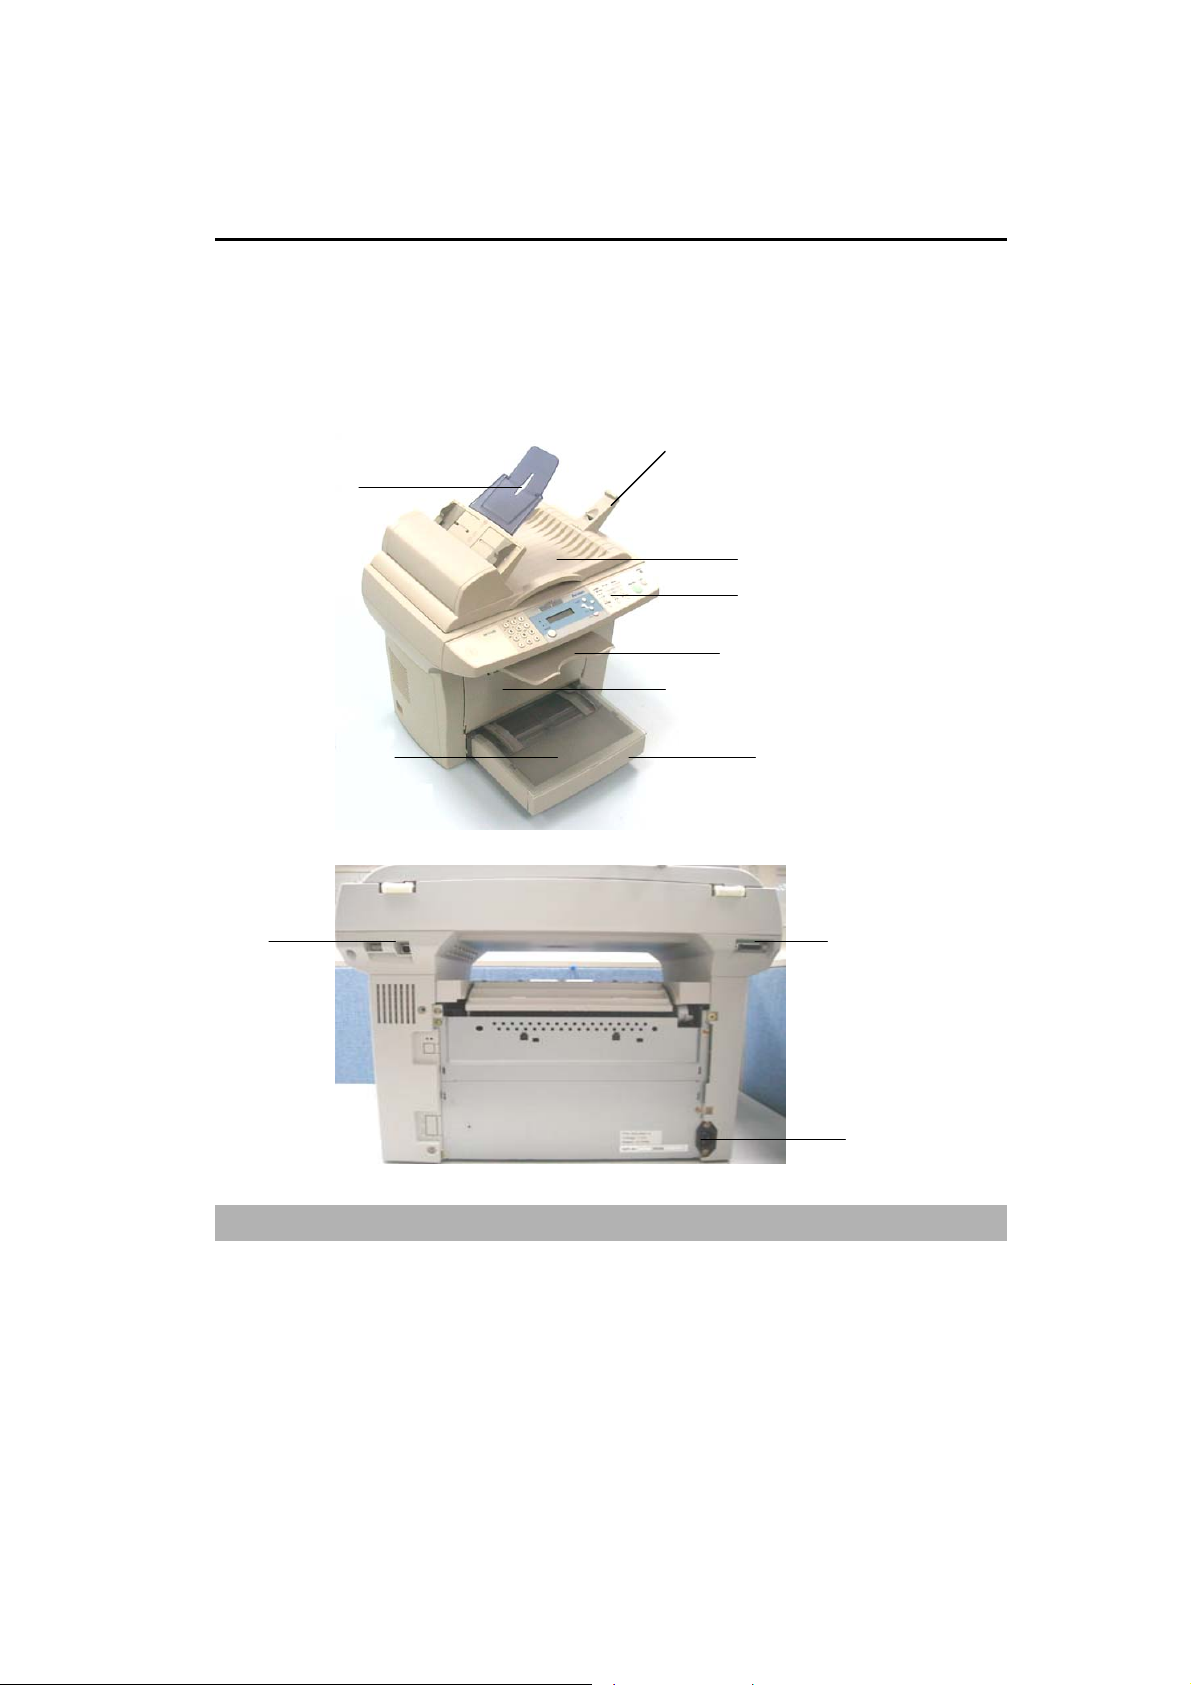
AM3200:
USB port
ADF input tray
(not for AM 3100L)
Priority input tray
Paper stopper
ADF lid
Control panel
Printer output tray
Print cartridge door
Media input tray
ADF port
AM 3000 series User’s Manual
Power jack
1-1
Page 11
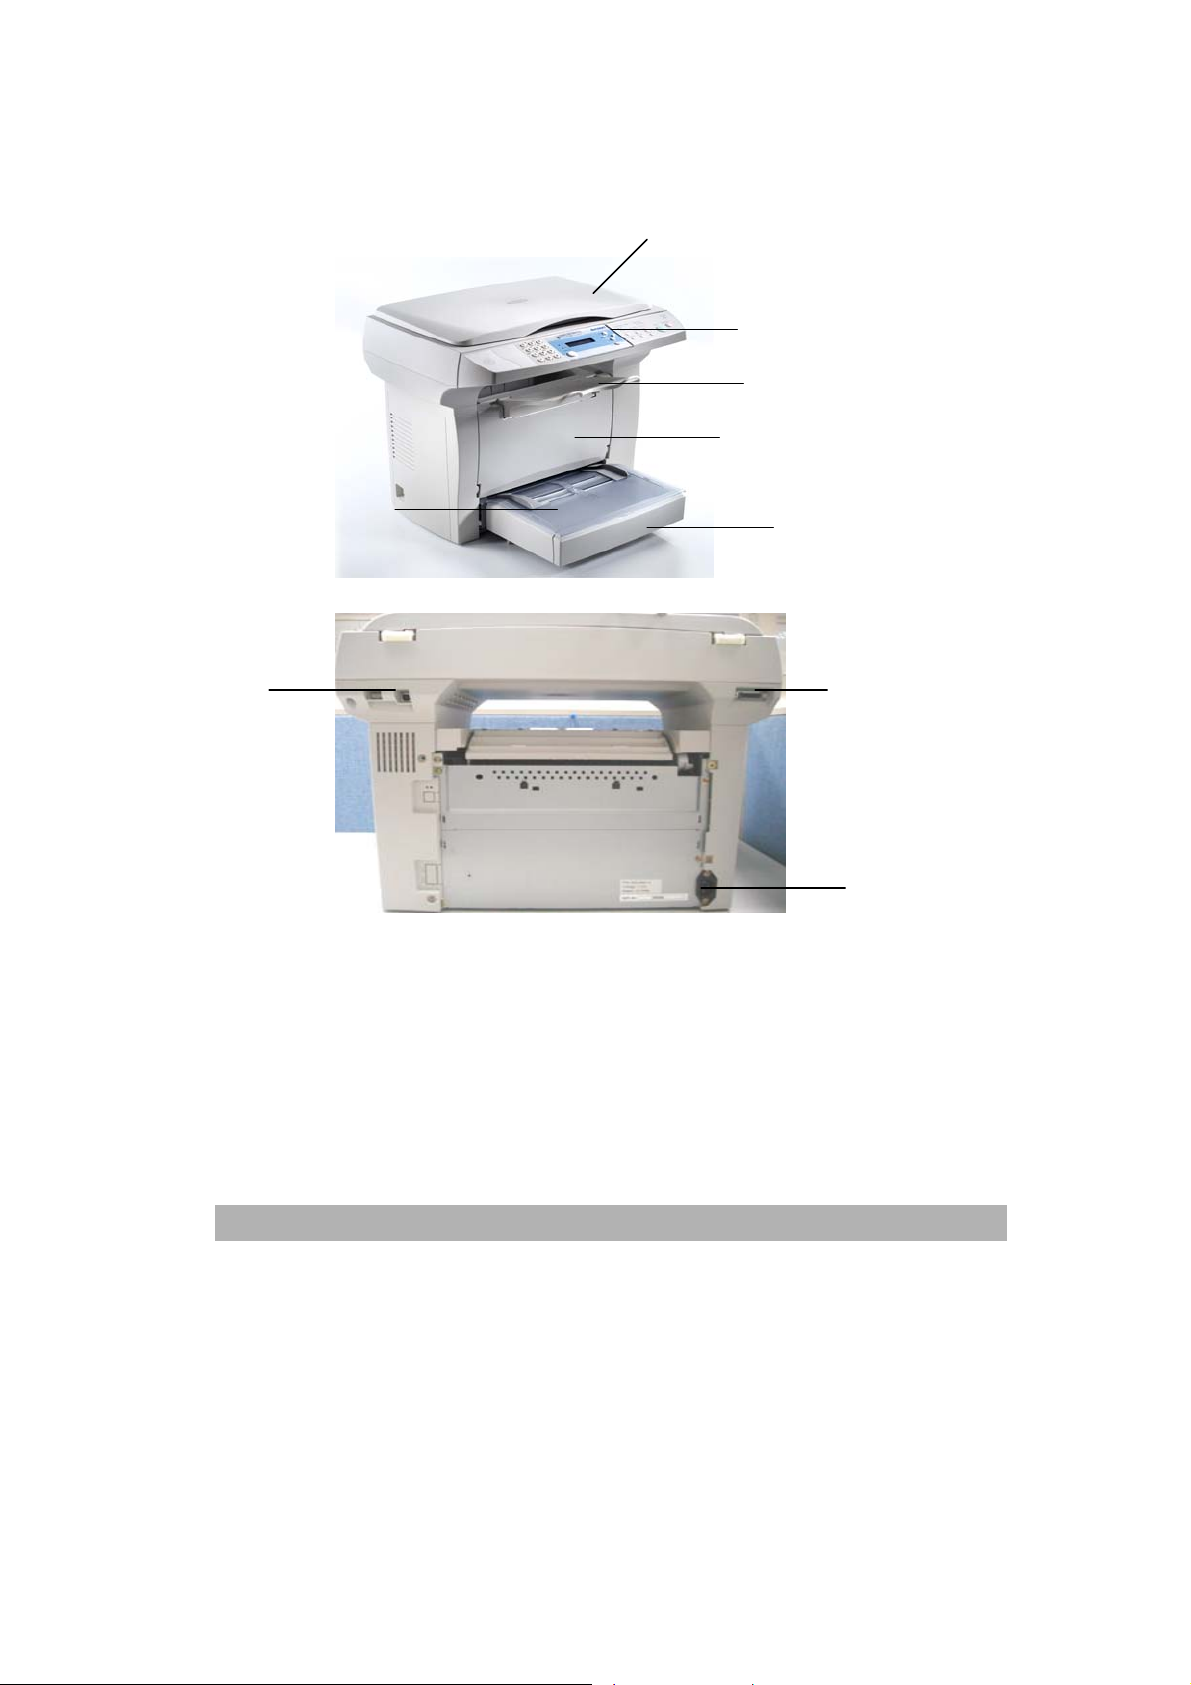
AM3100L/MF3100L:
USB port
Priority input tray
Document cover
Control panel
Printer output tray
Print cartridge
Media input tray
ADF port
1-2
Power jack
Page 12

Identifying product package contents
drum & toner printer paper tray
printer output tray paper stop
(not for AM 3100L)
ADF input tray
(not for AM 3100L)
Quick Guide & CD USB cable Power cable
AM 3000 series User’s Manual
1-3
Page 13
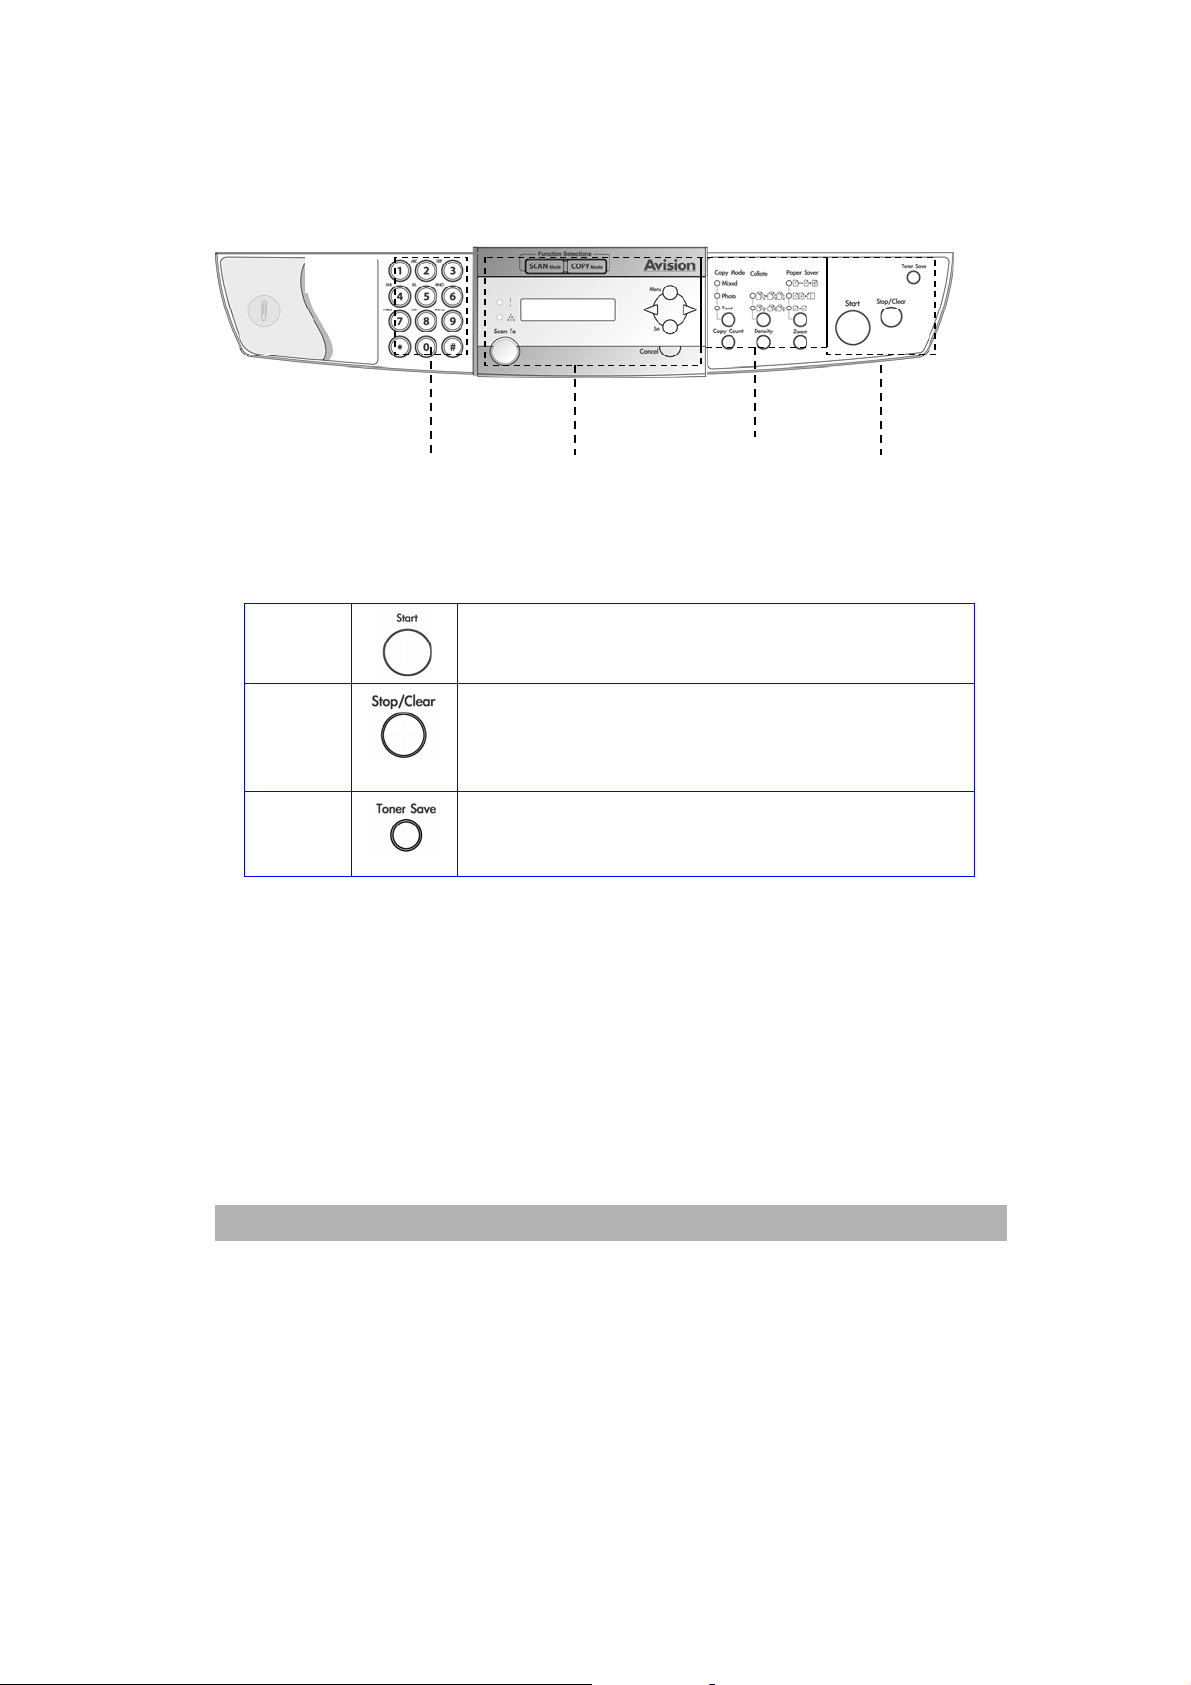
Control Panel Functions
Function Keys
X
Z [
Starts a copying or scanning job.
Stops an operation at any time.
In Standby Mode, clears the copy options
Allows you to save on toner by using less
toner to print a document.
X Y
1-4
Page 14

Y
Selects the document concentration mode for the
current copy job.
Sets the product to automatically collate multiple
copies into sets.
Prints 1,2, or 4 original images reduced to fit onto
one sheet of paper.
Prints 1~4 pages reduced to fit onto one sheet of
paper.
Prints 1~2 pages reduced to fit onto one sheet of
paper.
Selects the number of copies.
(Pressing the button one time incr eases one page.)
Adjusts the brightness of the documents for
the current copy job.
Makes a copy smaller or larger than the
original.
AM 3000 series User’s Manual
1-5
Page 15
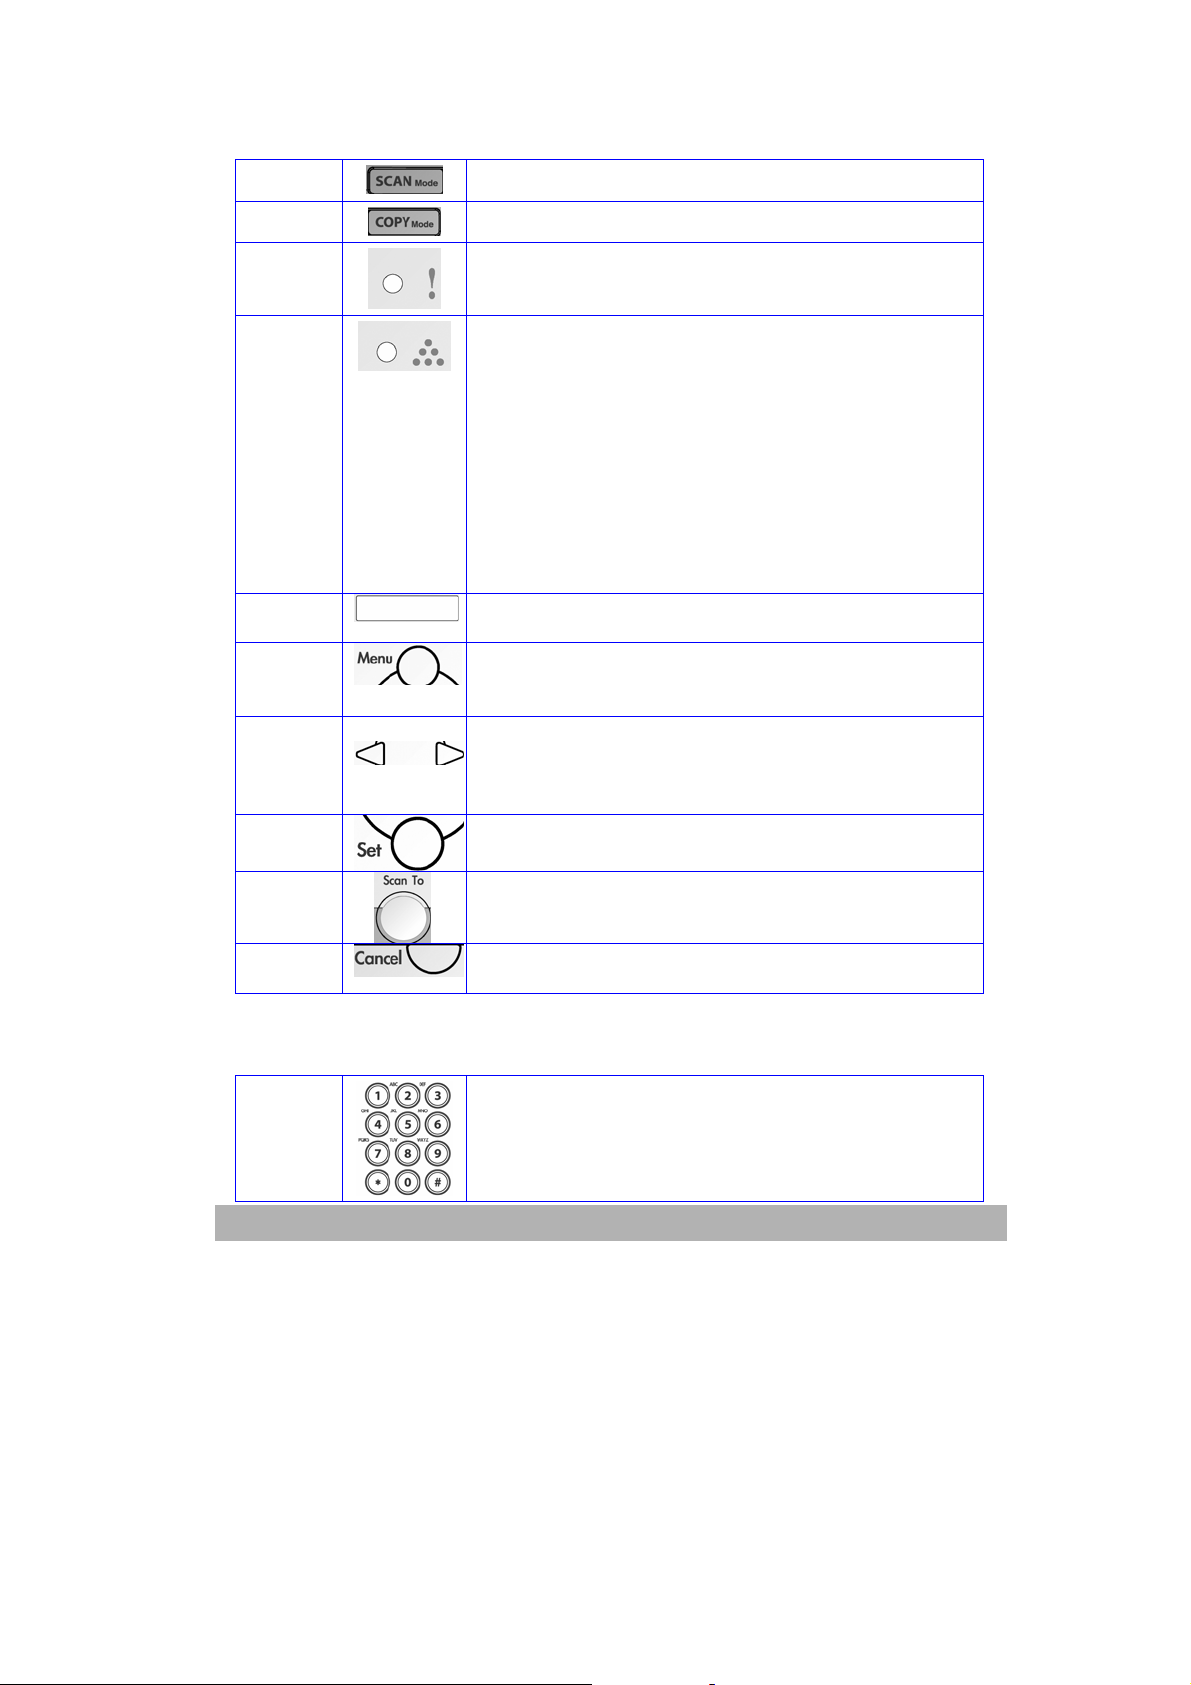
Z
Lets you access Scan mode.
Lets you access Copy mode.
Turns on when paper jam happens.
The toner cartridge warning LED
When flashing, the toner cartridge will be empty
or the drum will be out of use.
When steadily turning on , the toner has been
completely consumed, a wrong toner cartridge is
used, or the drum has been out of use.
Displays messages on the screen to help you set
up and use this product.
Enters Menu Mode and scrolls through the
menus available.
Scrolls through the options available for the
[
1-6
selected menu item.
Confirms the selection on the display.
Scans your original to a designated software.
(Refer to Page 7-7.)
Deletes entered data or lets you exit the menu by
pressing repeatedly.
Enter the number of copies by these number
keys.
Page 16

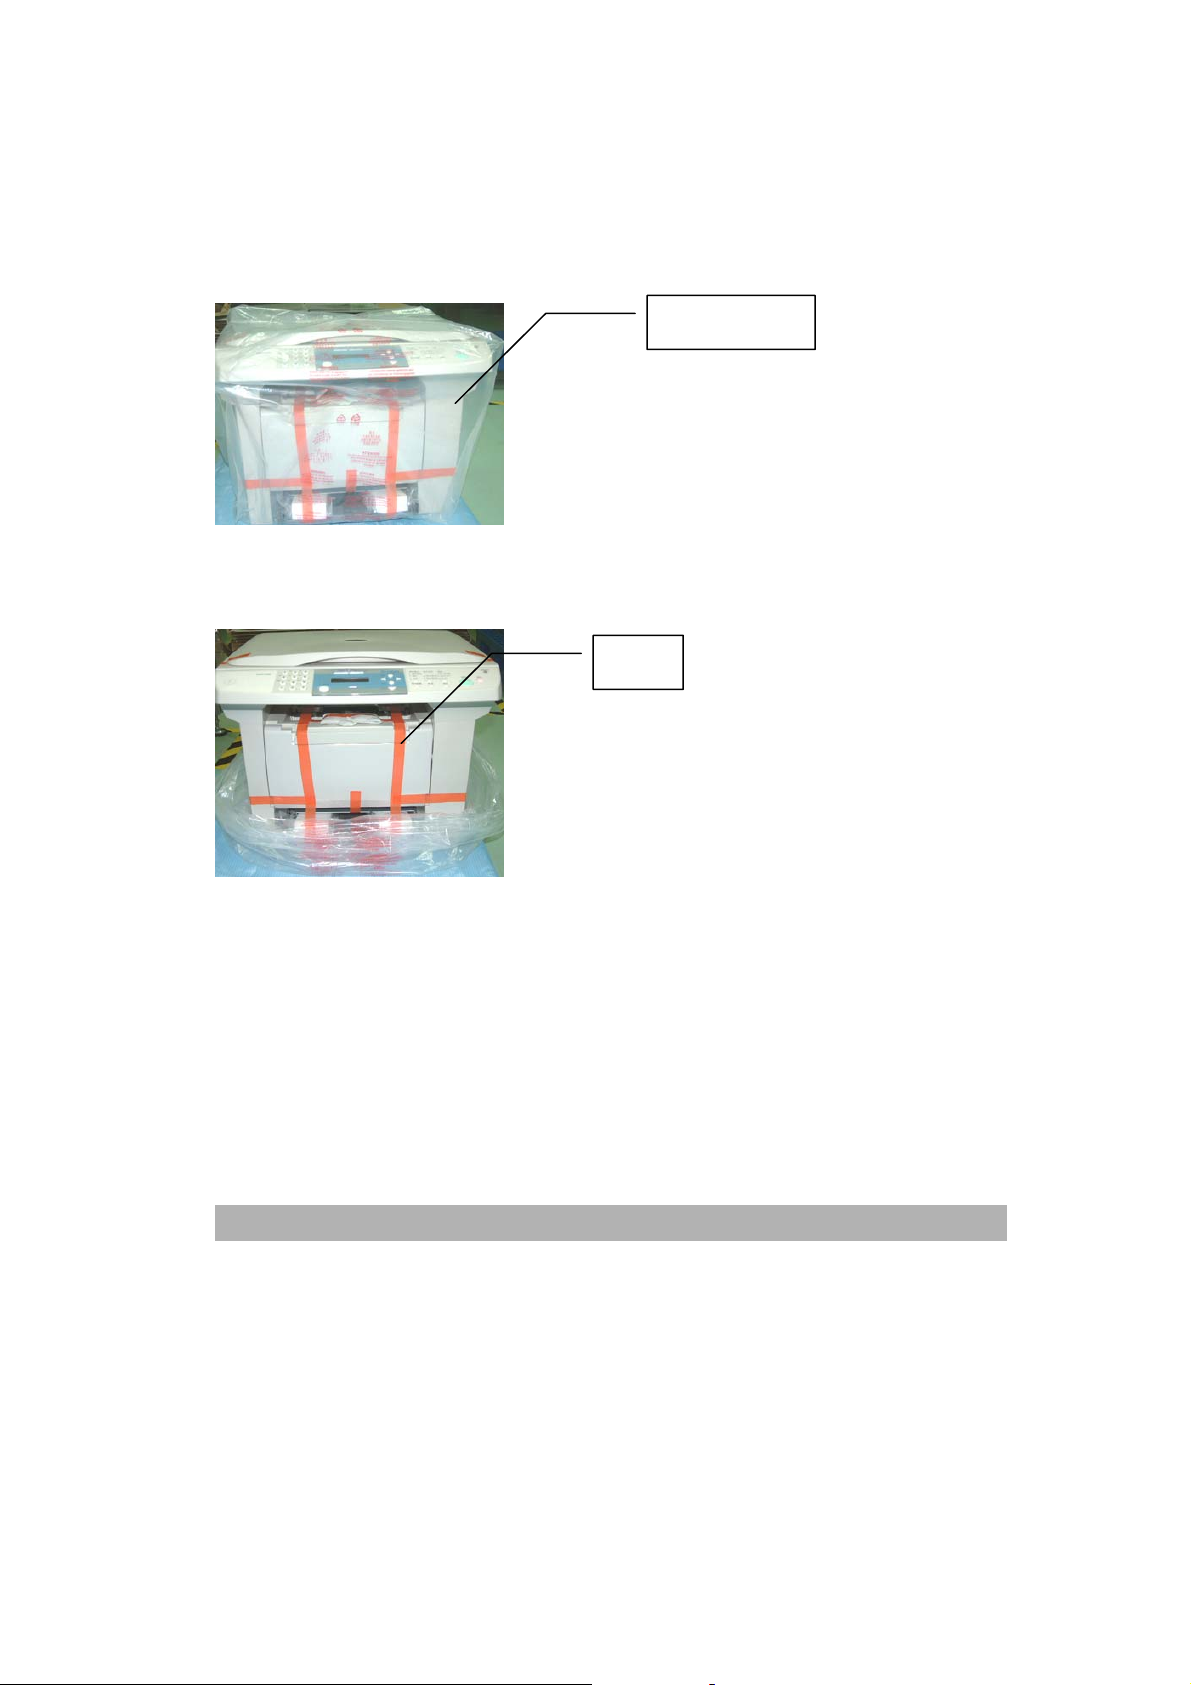
2 Hardware Installation
Remove the plastic bag and the tapes
AM/MF 3200:
Remove the plastic bag, as shown below:
plastic bag
Remove the tapes, as shown below:
tape
AM 3000 series User’s Manual
2-1
Page 17
AM/MF 3100L:
Remove the plastic bag, as shown below:
Remove the tapes, as shown below:
plastic bag
tape
2-2
Page 18
k p
k p
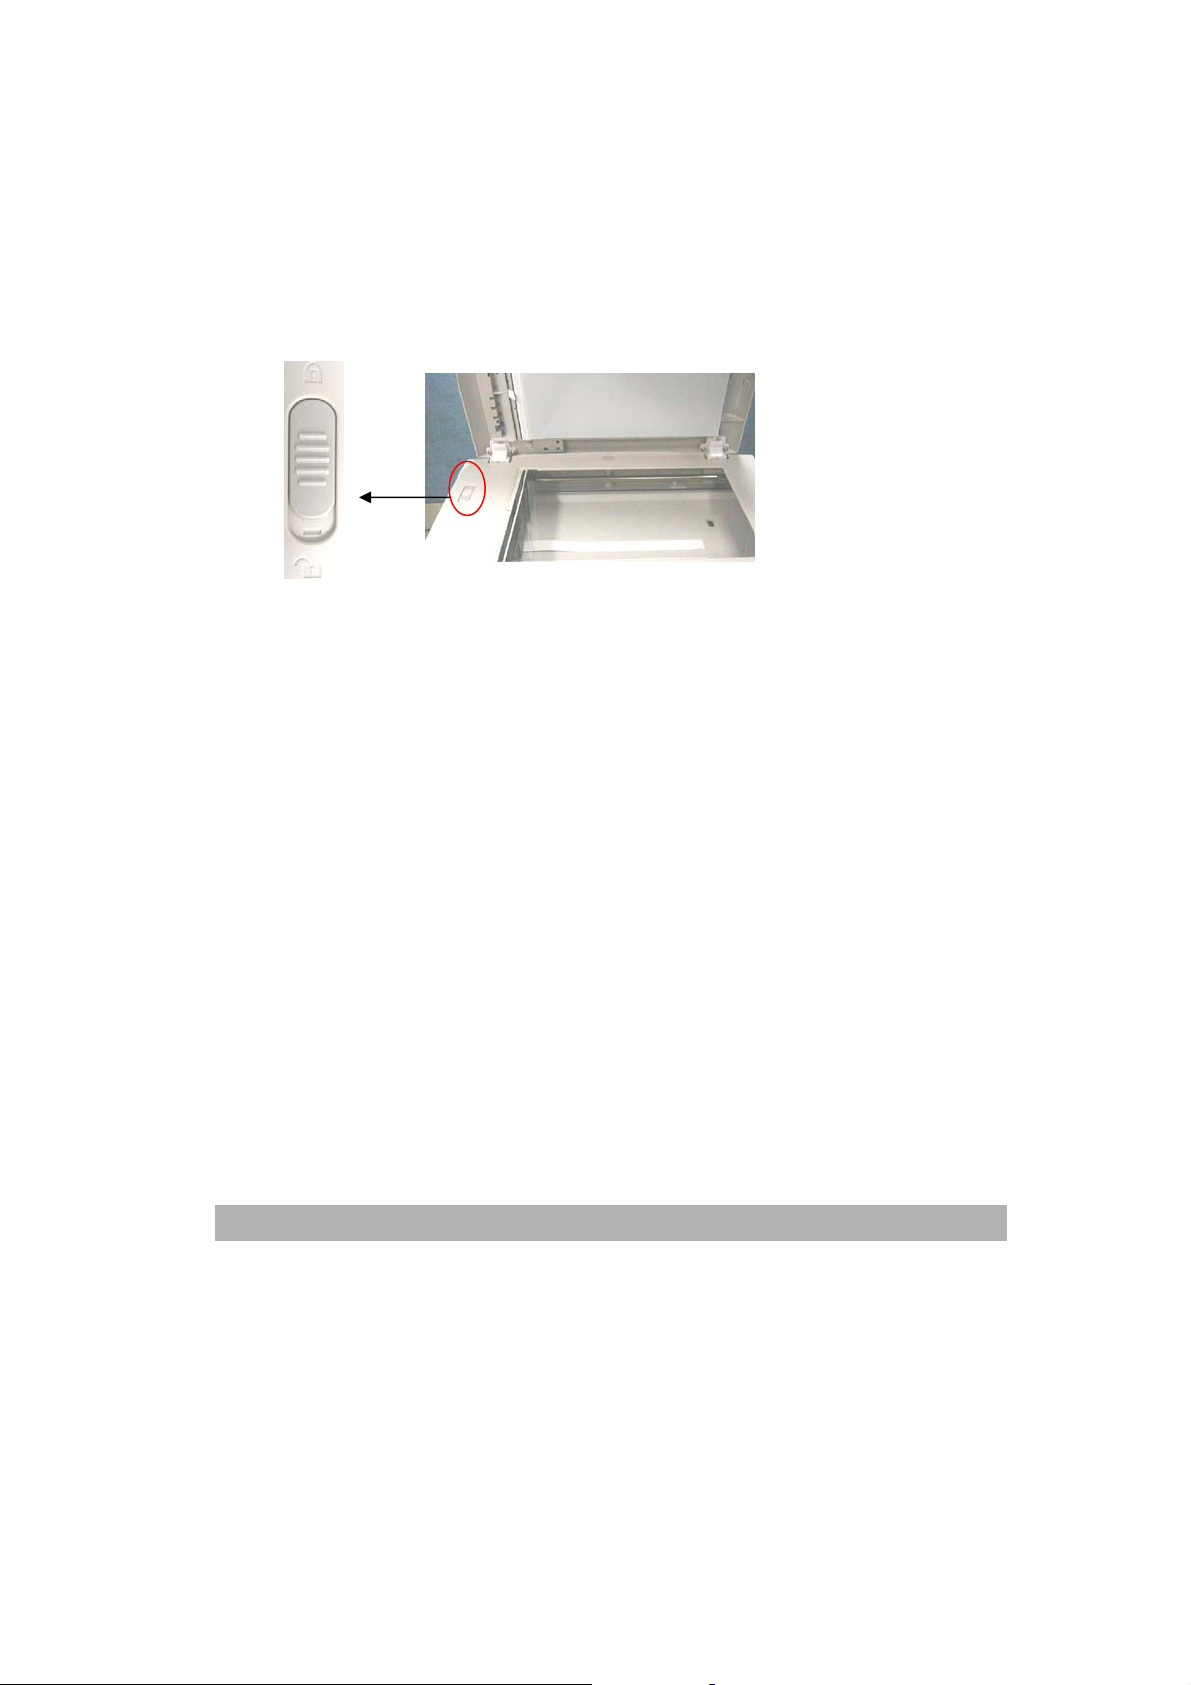
Removing the shipping lock
Unlock the product by moving the lock switch to the “Unlock” position.
Loc
osition
Unloc
Warning: "Always slide shipping lock to 'Lock' position before transporting this product from
one location to another. And slide to 'Unlock' position before using it."
osition
Installing a toner cartridge
To install a toner cartridge, use the following steps:
CAUTION
To prevent damage to the toner cartridge, do not expose it to light for
more than a few minutes.
1 Make sure the toner cartridge door is open.
2 Insert the cartridge as shown.
3 Close the toner cartridge door.
AM 3000 series User’s Manual
2-3
Page 19

Note
If toner gets on your clothing or other fabric, wipe off the toner with a dry
cloth. Wash the items in cold water and air dry.
2-4
Page 20
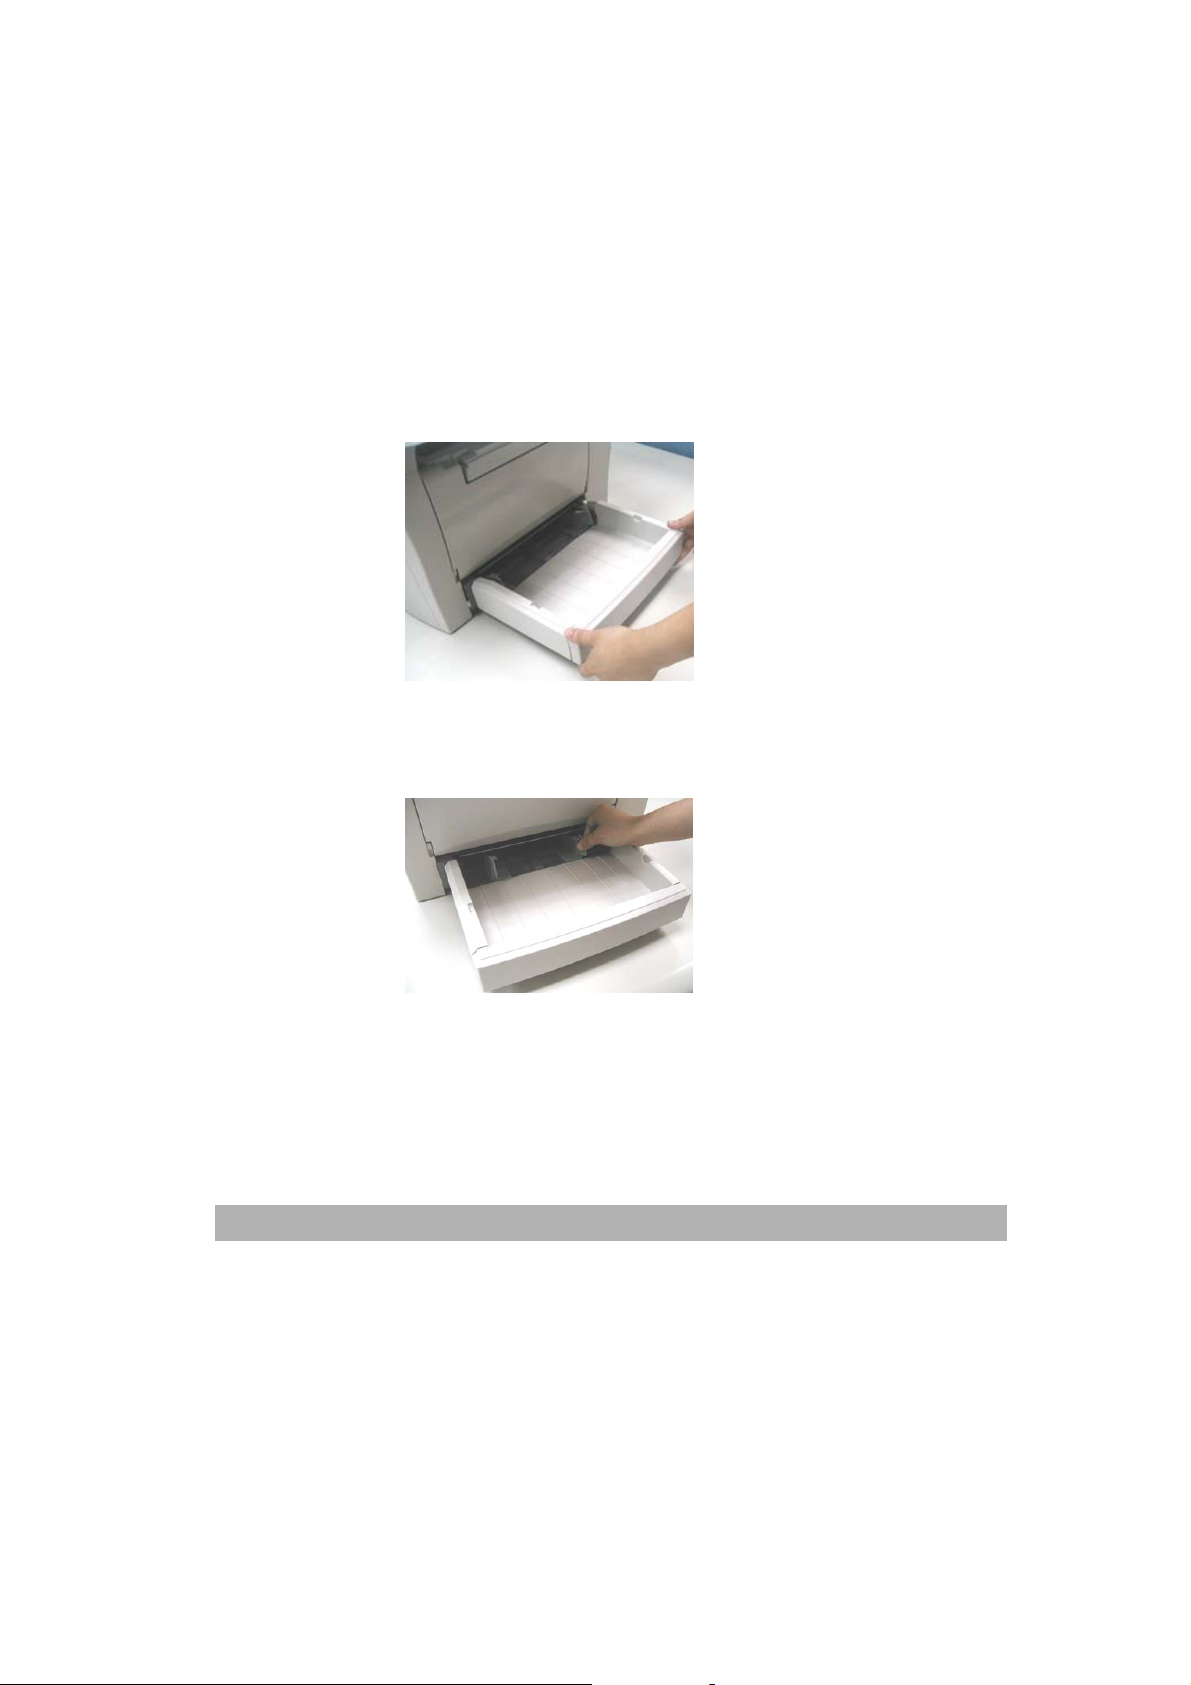
Installing and loading the media input trays
To install and load the media input tray and the priority input tray, use
the following steps:
1. Slide in the media input tray until it fits.
2. While pressing the paper guide release lever, slide the adjusters
to fit the paper size.
AM 3000 series User’s Manual
2-5
Page 21
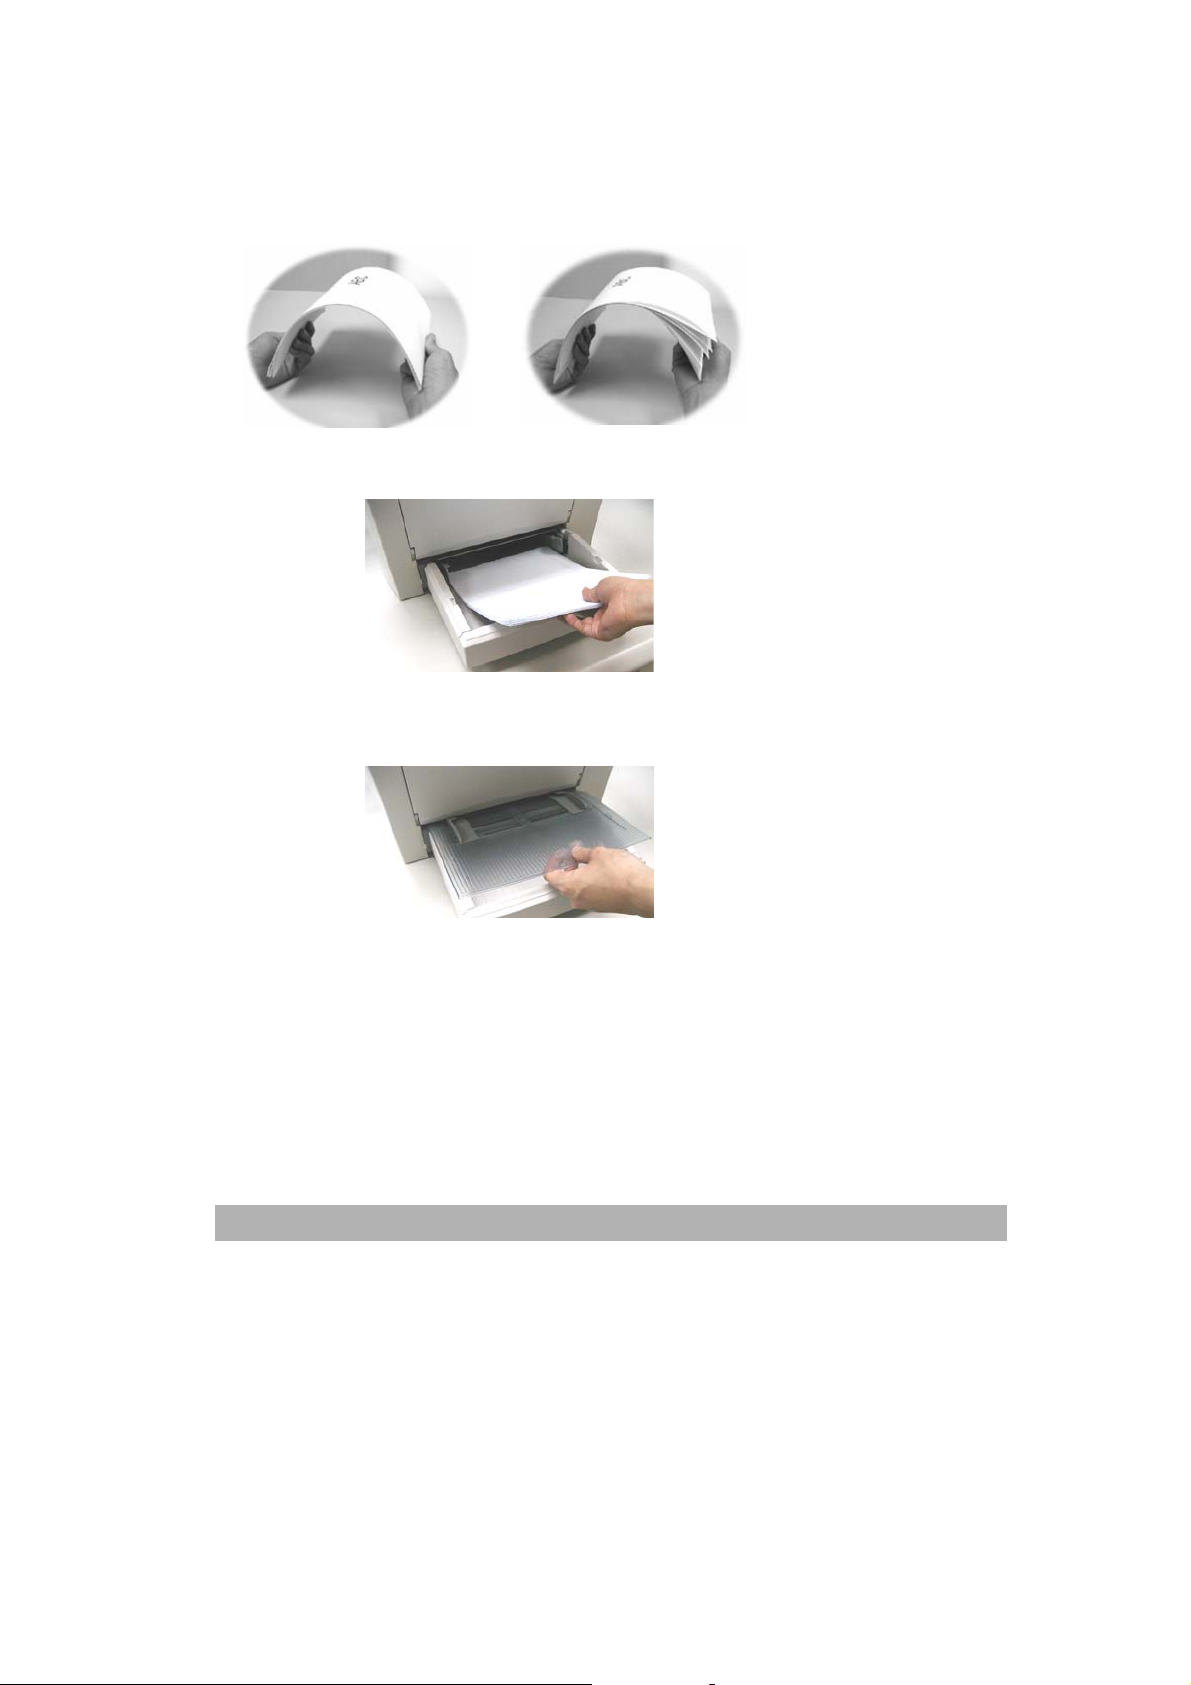
3. Roll the paper and place it in the tray.
4. Install the priority input tray over the media input tray.
2-6
Page 22
7
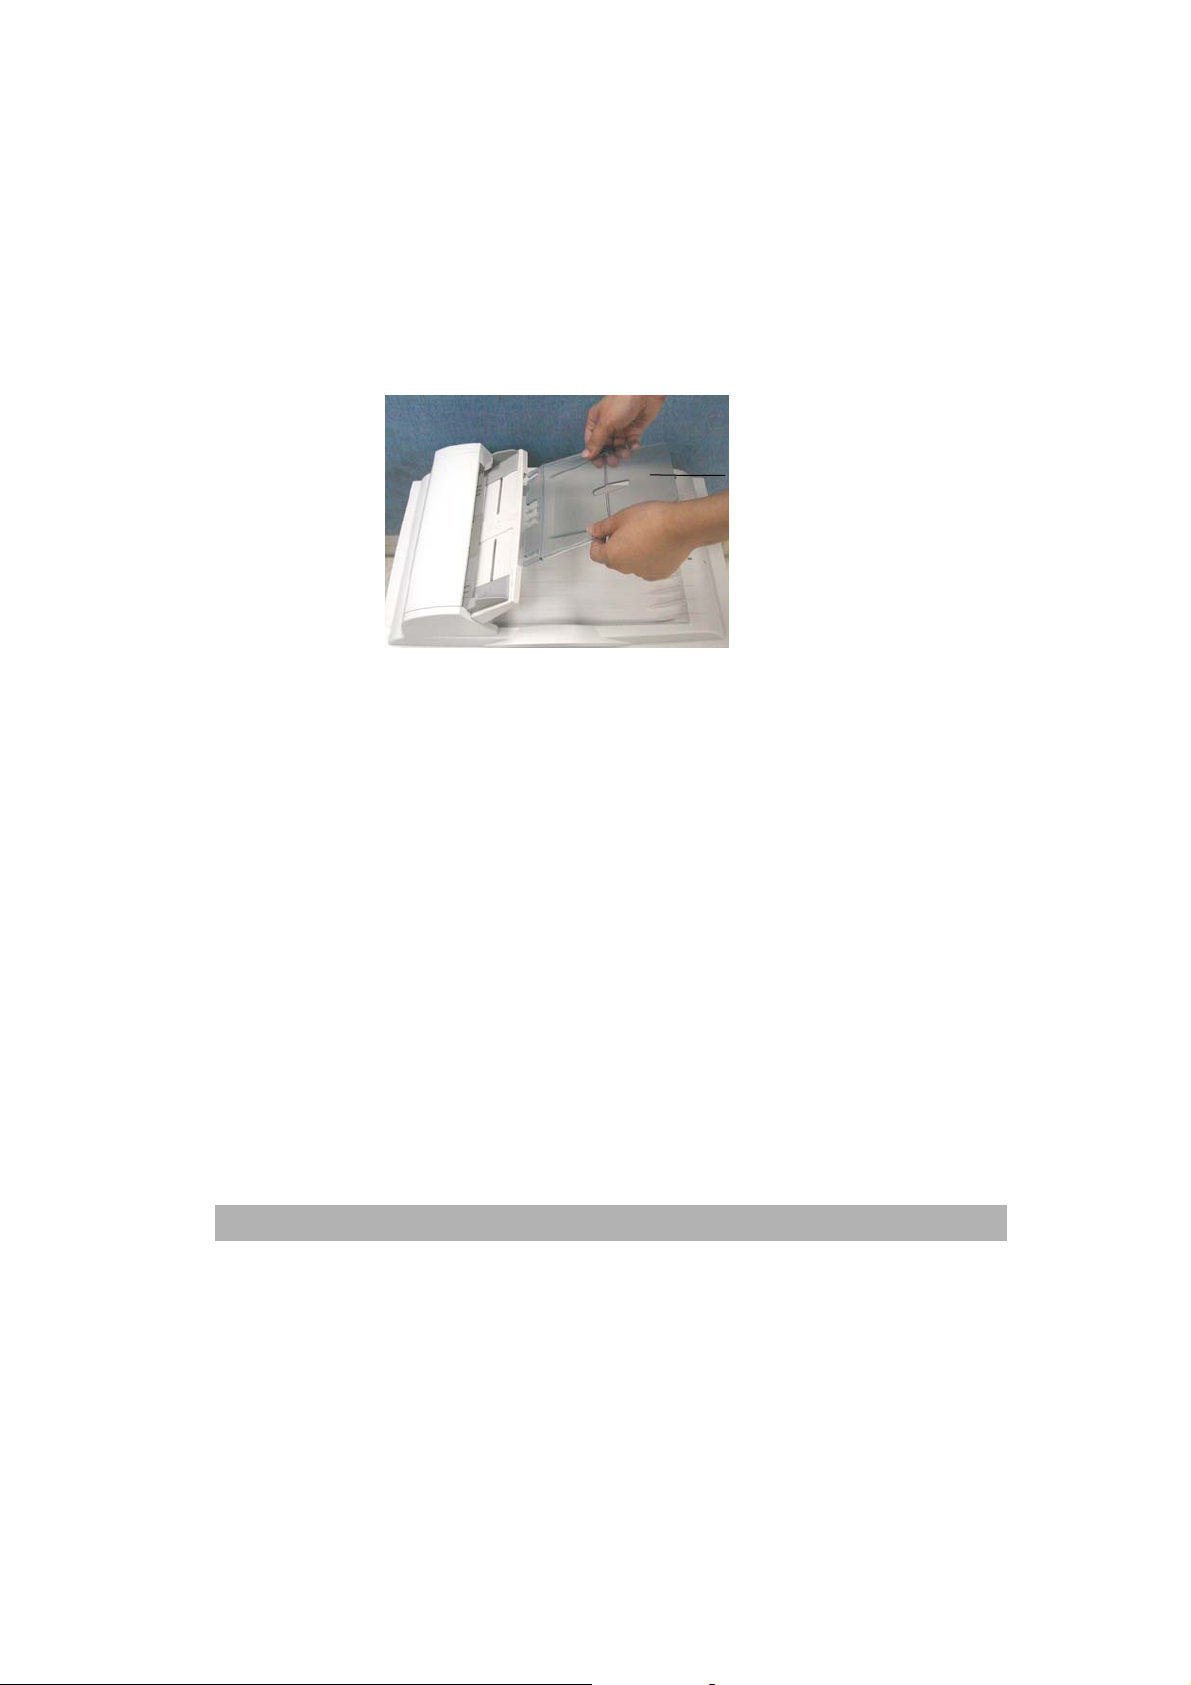
Installing the ADF input tray
Use the following instructions to install the ADF input tray:
Attach the Paper Guide Extension to the Paper Guide.
Paper Guide
Extension
AM 3000 series User’s Manual
2-
Page 23
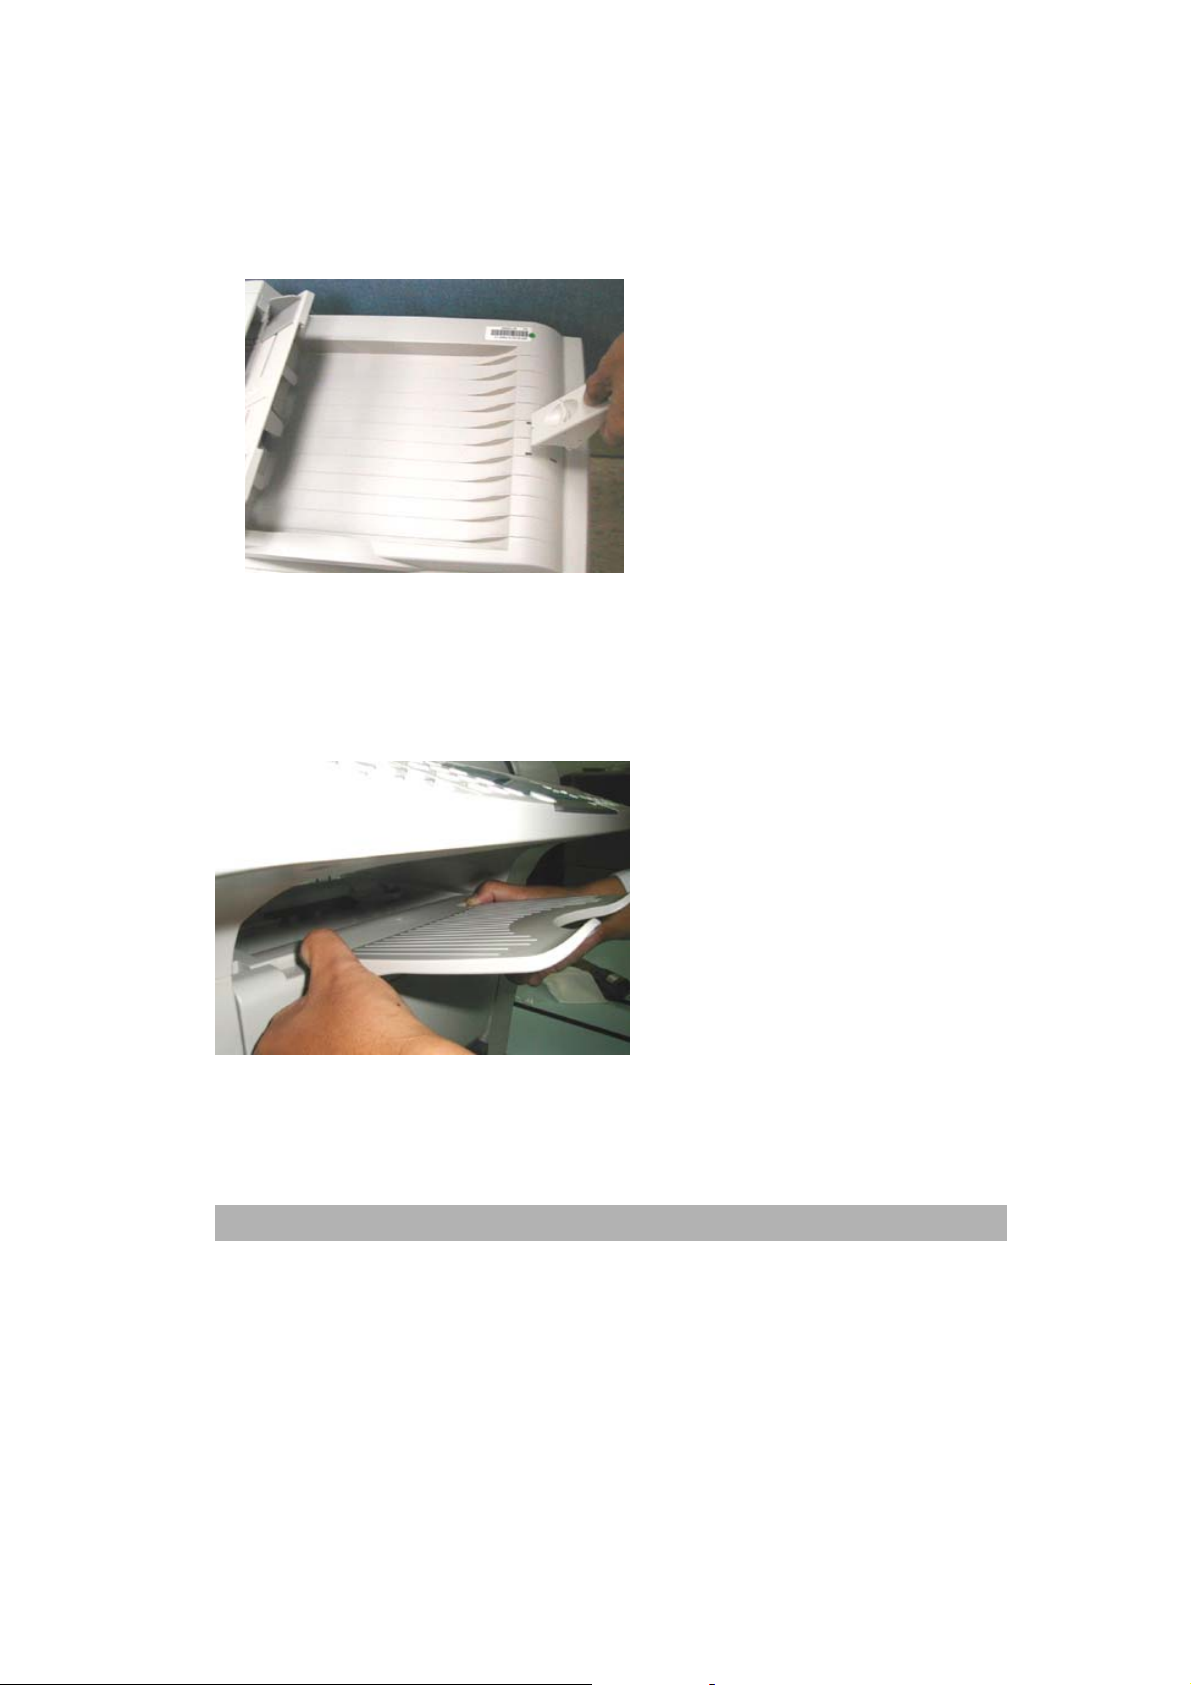
Install Paper stopper
Install the paper stopper, as shown below:
Install printer output tray
Install the printer output tray, as shown below:
2-8
Page 24

Connecting the ADF cable to your product
Connect the ADF cable, which attaches to the ADF document cover, to the ADF port at
the rear of your product.
Connecting the Power cable
1. Make sure the power switch is at the “0” position to turn off the product’s power.
2. Connect the small end of the power cable to the power jack of your product.
3. Connect the other end to an appropriate power outlet.
AM 3000 series User’s Manual
2-9
Page 25
Connecting the telephone line cord (only for AM3230)
If you have AM3230:
Plug the supplied telephone line cord into the LINE jack and the other end into the wall
jack.
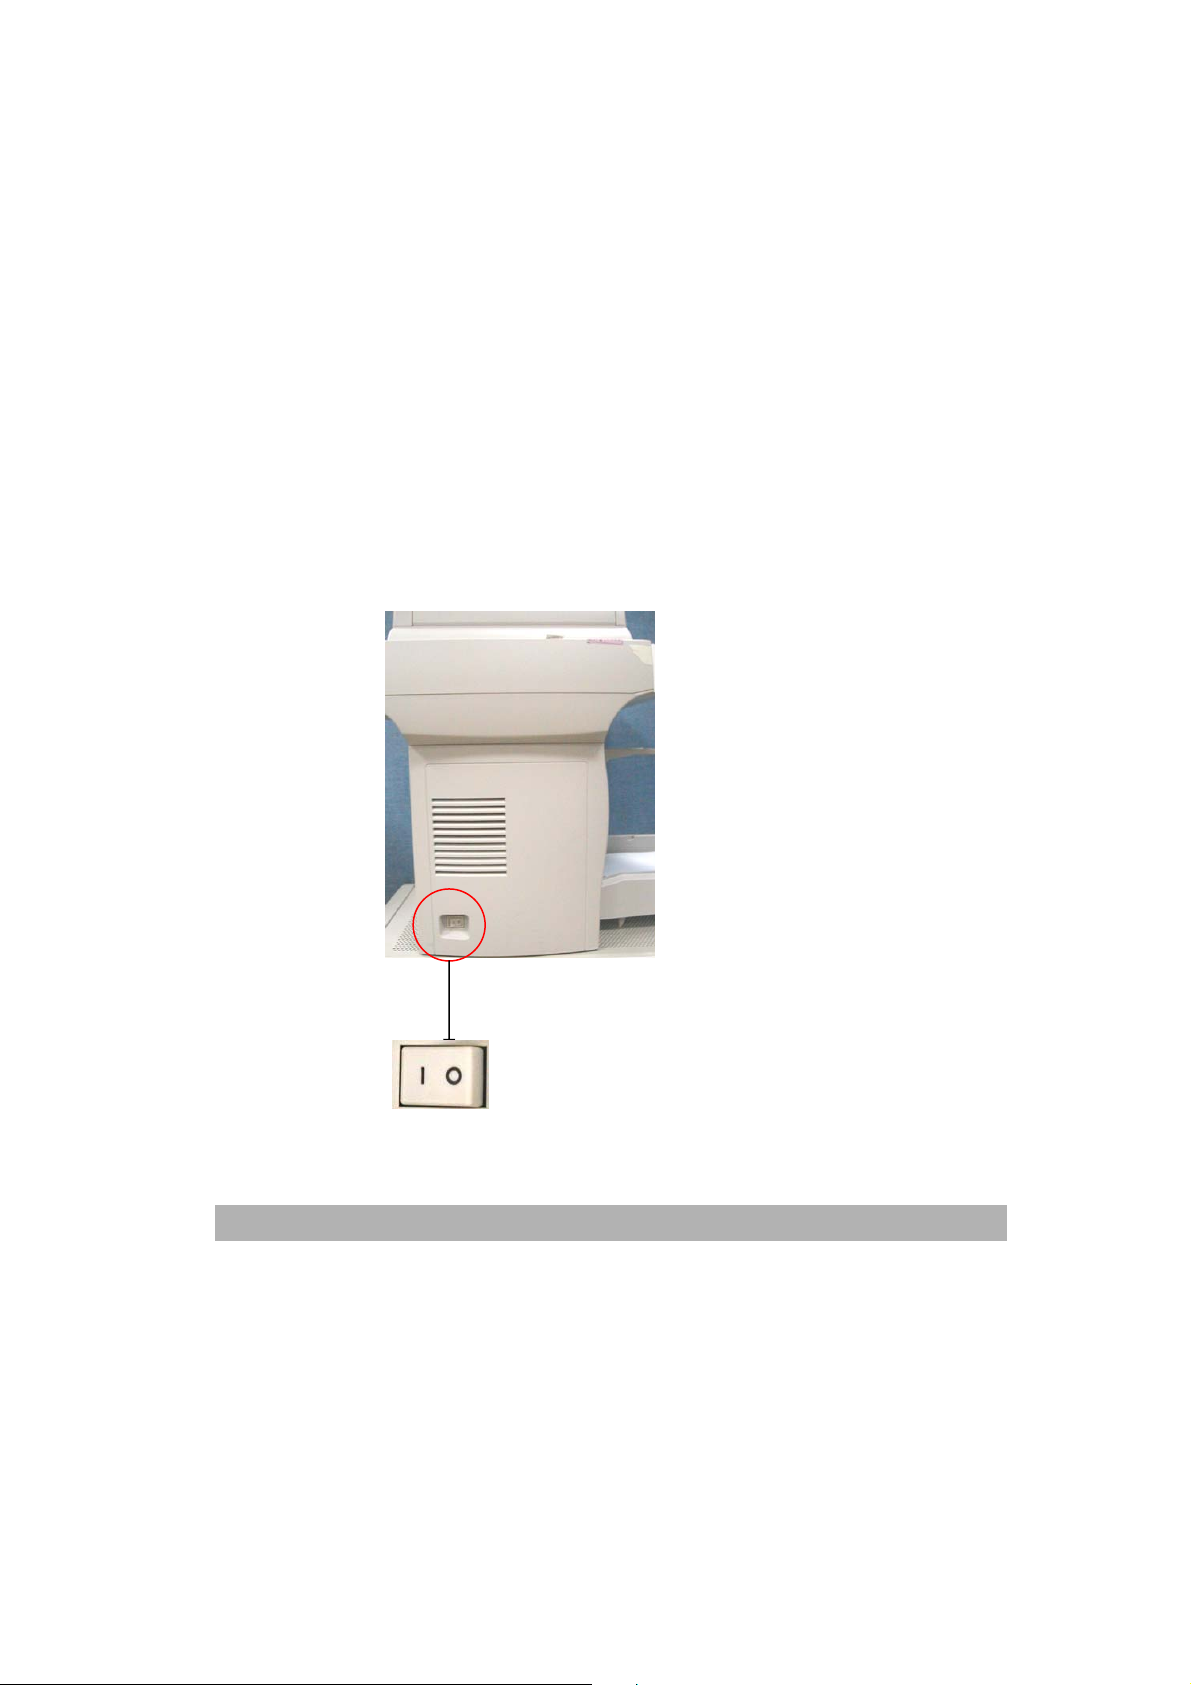
Turning the Machine On
1. The power is controlled by a toggle switch on the side of the
product. To turn on the product, press the switch toward "1".
2-10
Page 26

3 On-screen programming
Your product is designed to be easy to use with LCD on-screen programming using the
navigation keys. User-friendly programming helps you take full advantage of all the menu
selections your product has to offer. Since your programming is done on the LCD, we
have created step-by-step on-screen instructions to help you program your product. All
you need to do is follow the instructions as they guide you through the menu selections
and programming options.
Menu table
You can probably program your product without the User’s Manual. But to help you
understand the menu selections and options that are found in the product programs, use
the Menu table, depicted as below:
AM 3000 series User’s Manual
3-1
Page 27

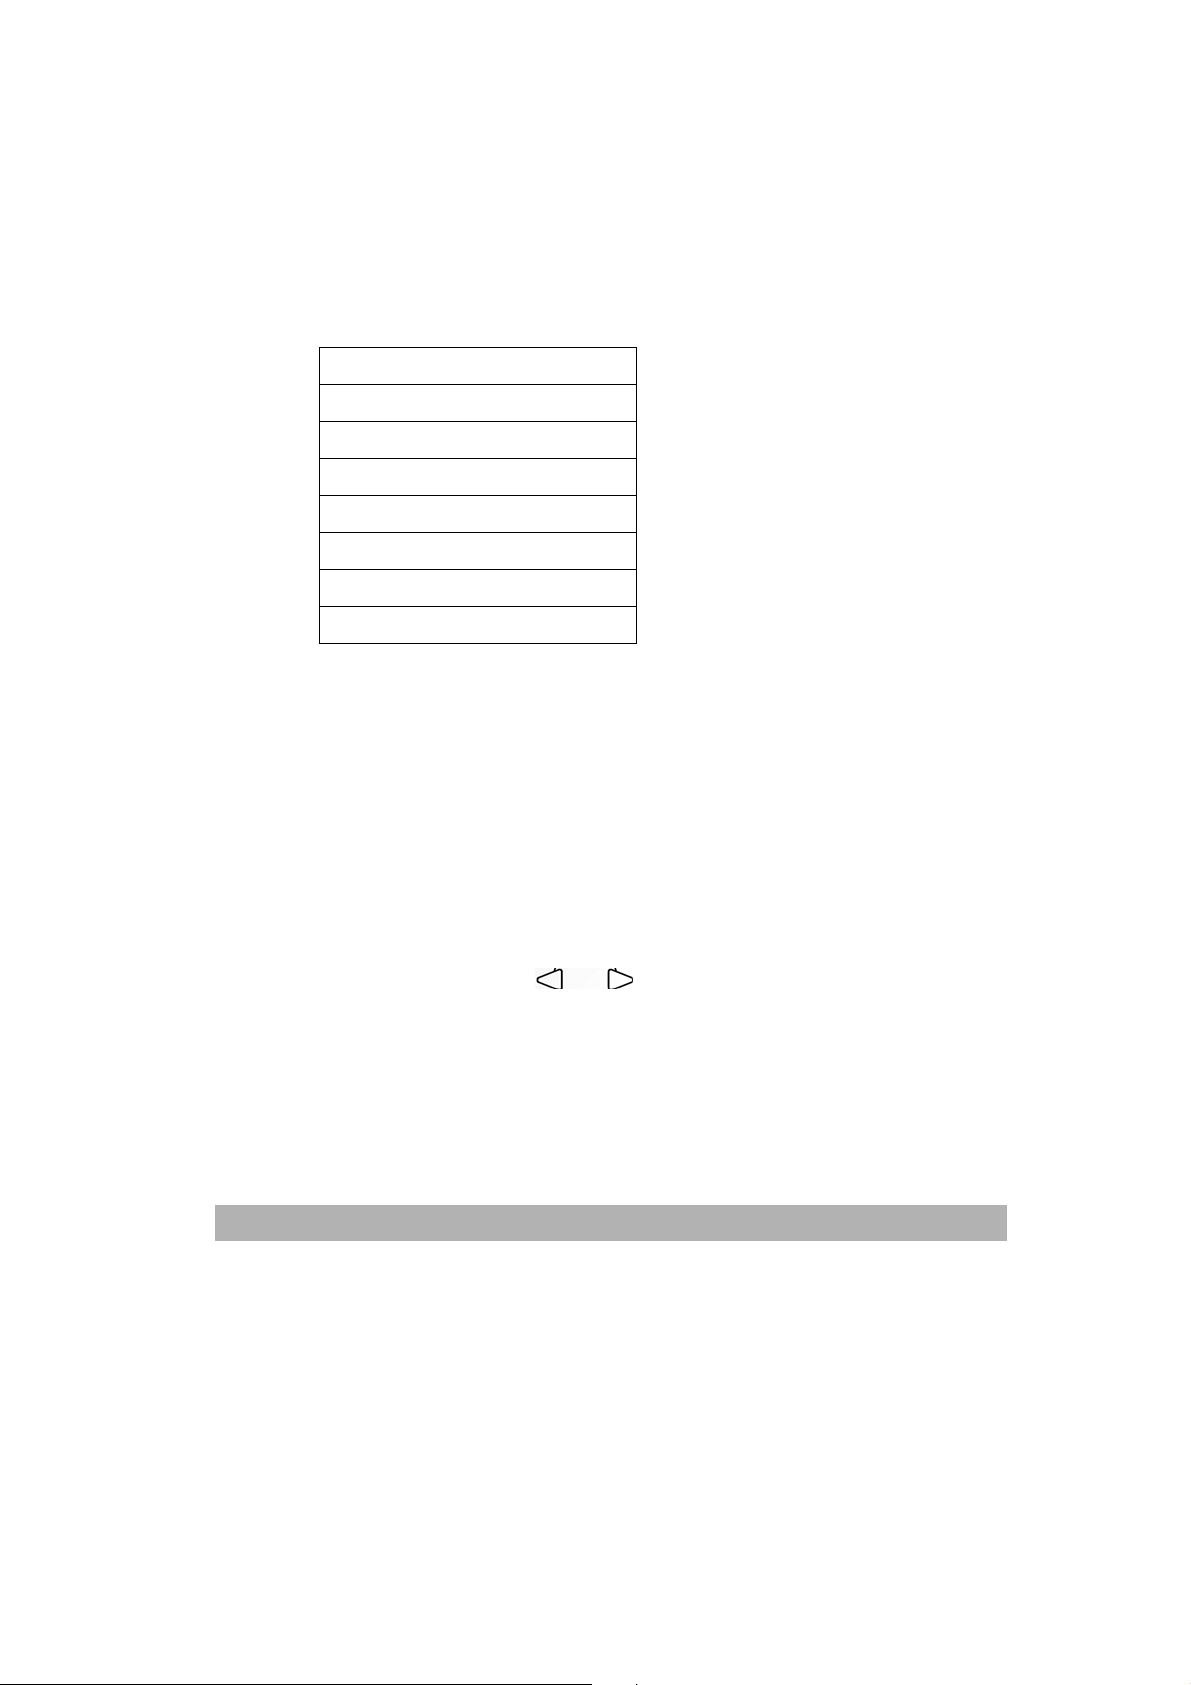
1. Common Setup
11. Language English
12. Paper Size A4
Letter
Legal
A5
B5
13. Sleep Mode Off
5 min
15 min
30 min
1 hr
2 hr
14. Reset OPC.
3-2
Page 28
2. Copy Setup
21. Def Copy Mode Text
Photo
Mixed
22. Def Density 1-7 Levels
23. Def Zoom Original(100%)
Custom(100%)
Fit to Page
A4 to Letter
Letter to A4
Legal to Letter
Legal to A4
24. Def Collation
Collation On
Collation Off
25. Def TonerSave
TonerSave On
TonerSave Off
26. Def Bg Remove Text mode (On, Off)
Photo mode (On, Off)
Mixed mode (On, Off)
3. Report
31. Configuration System information
32. Menu Map
33. Usage report
AM 3000 series User’s Manual
3-3
Page 29
Memory Storage
If there is a power failure, you will not lose your menu settings because they are stored
permanently. Temporary settings (paper saver and copy count) will be lost.
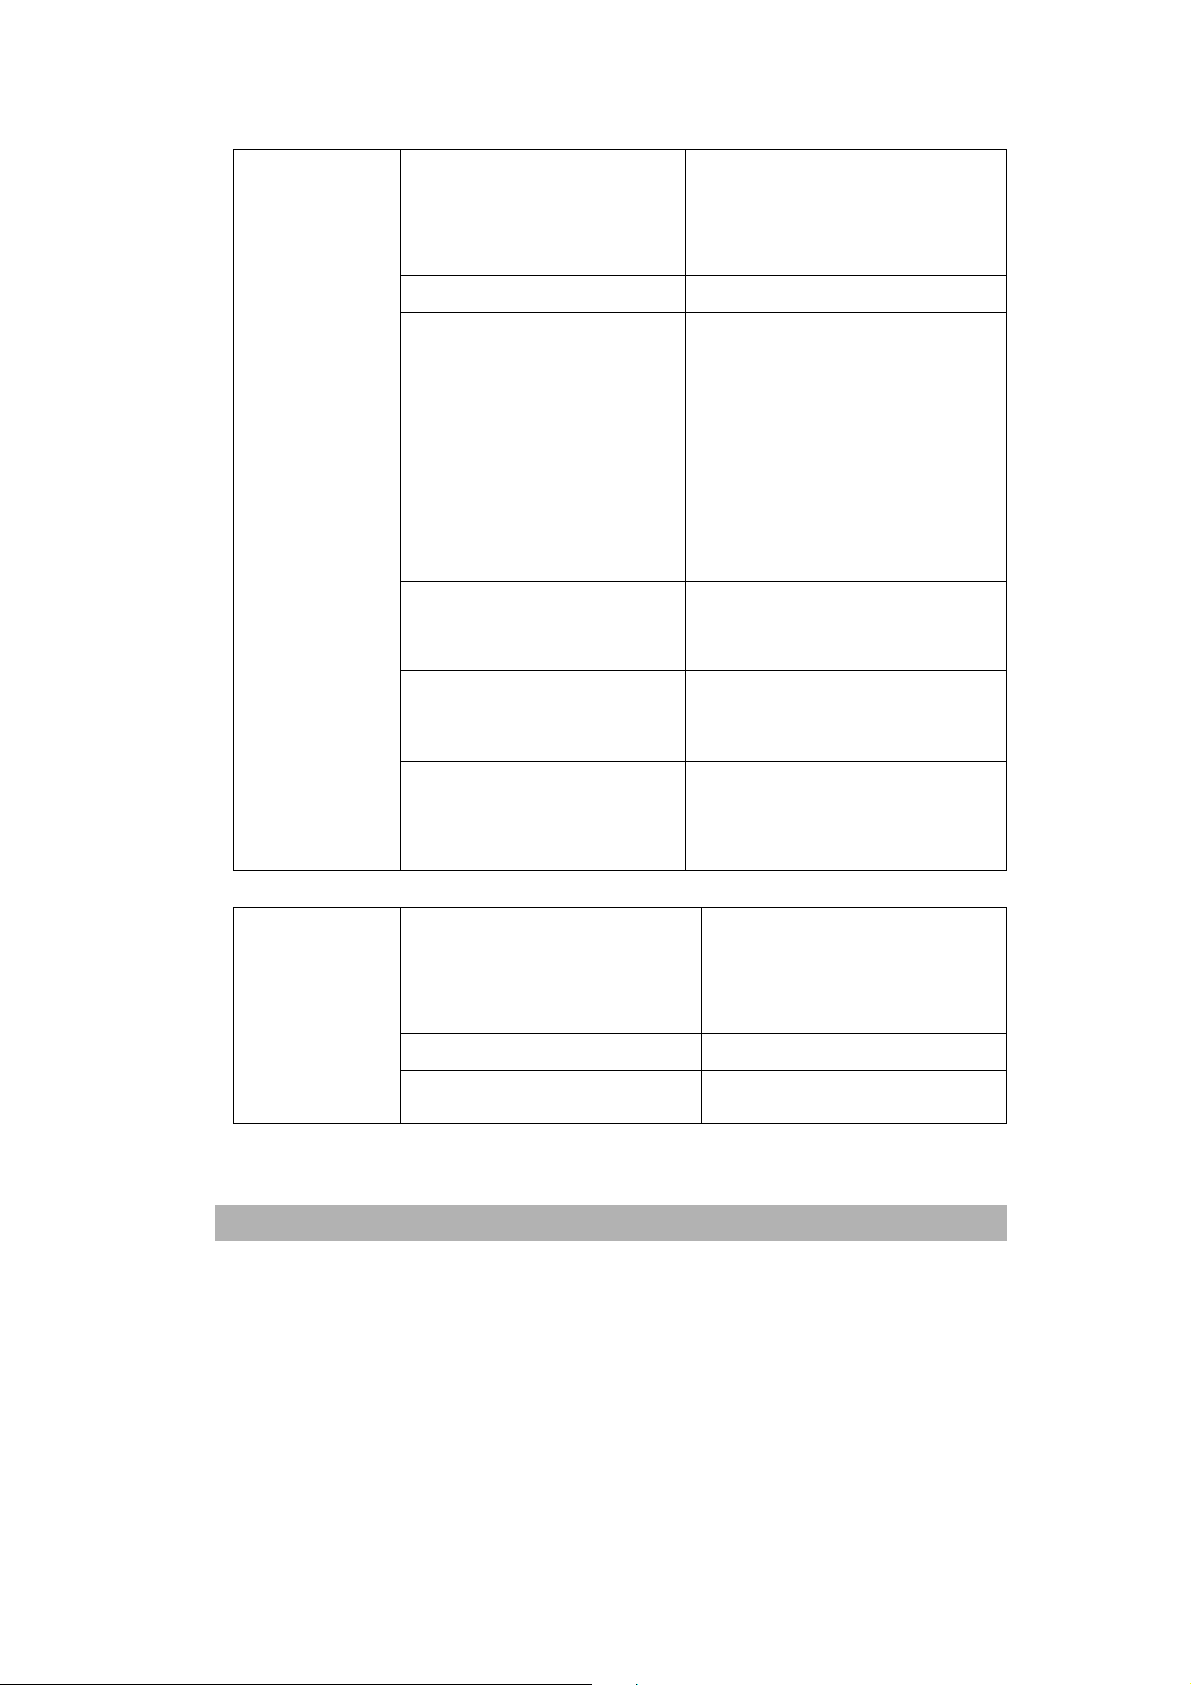
Navigation keys
The navigation keys for the LCD on-screen programming is depicted as below:
cancel the setting or return to previous menu level
Access the menu
Go to the next menu level
Accept an option
3-4
Page 30
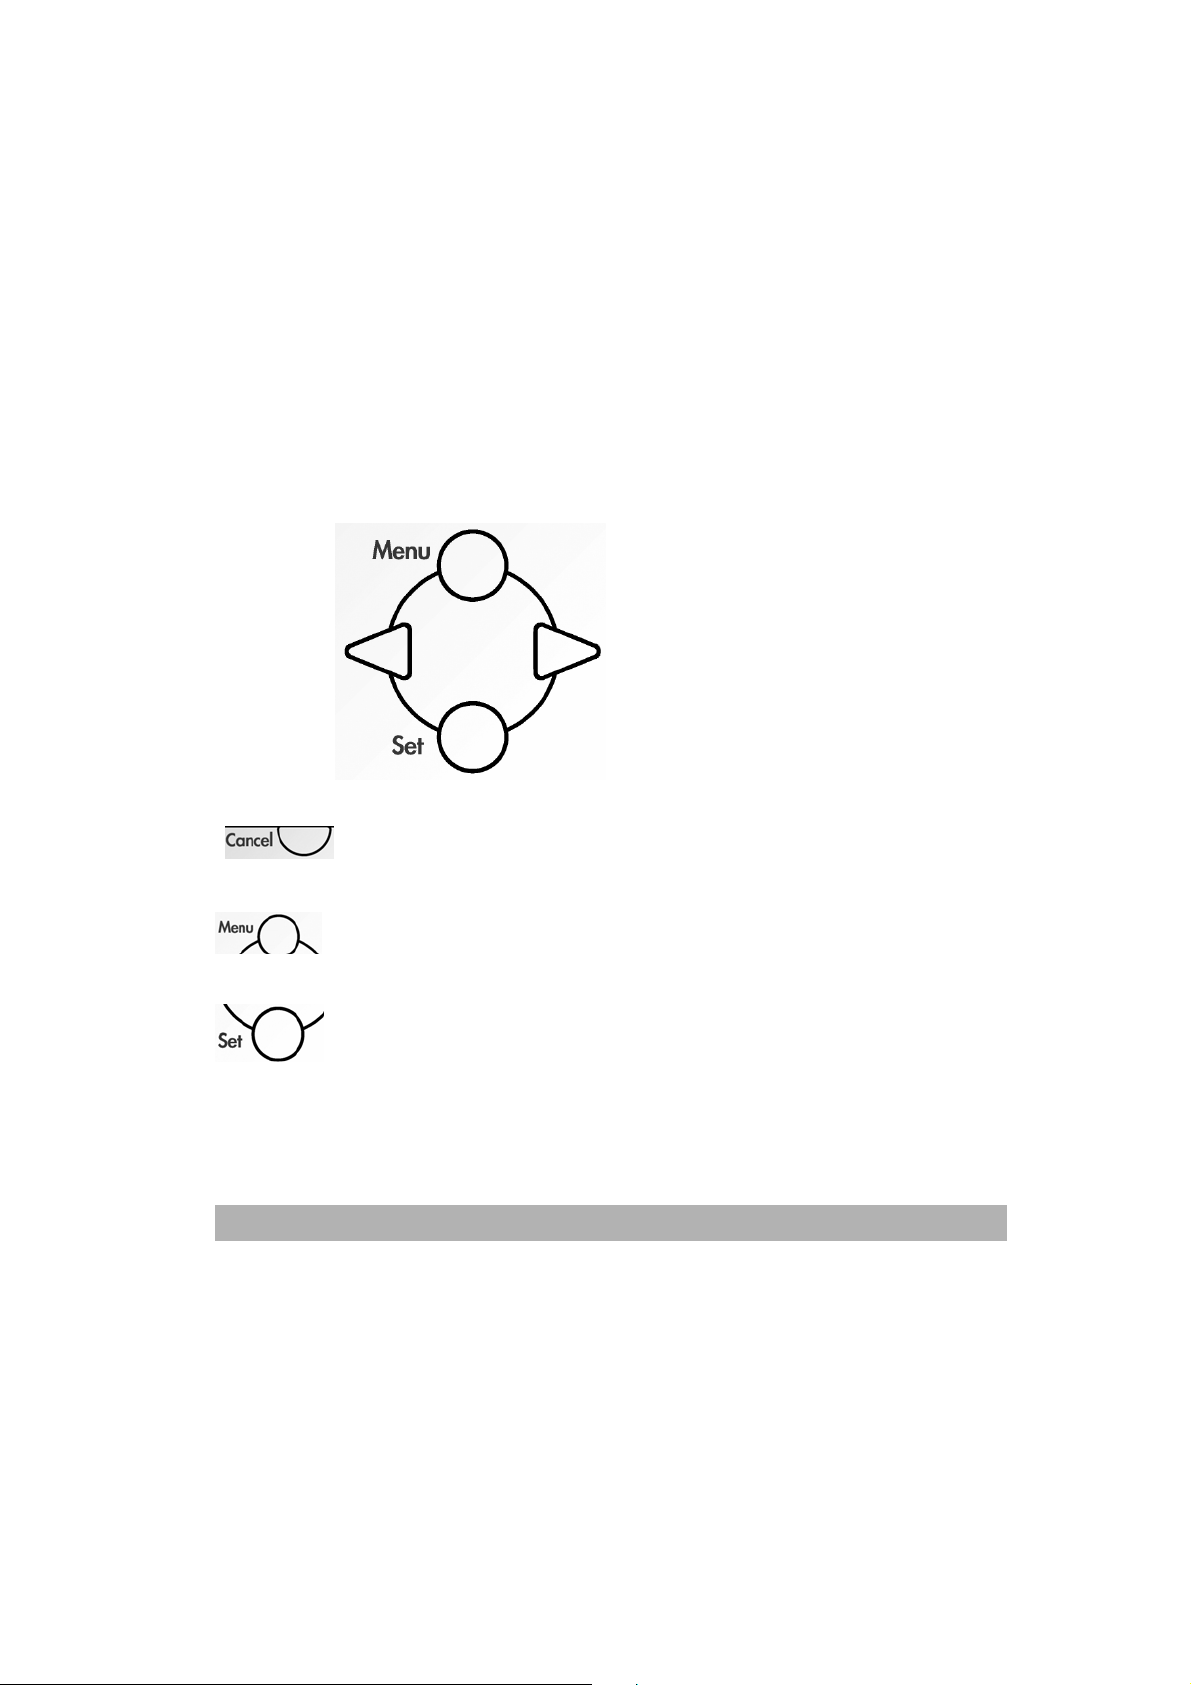
Exit the menu by pressing repeatedly
Go back to the previous menu level
Scroll through the current menu level
Exit the menu
You can access the menu mode by pressing Menu
. When you enter the
menu, the LCD scrolls.
Press the arrow
or a number key(1~3) for Common Setup menu, Copy
Setup menu, or Report menu.
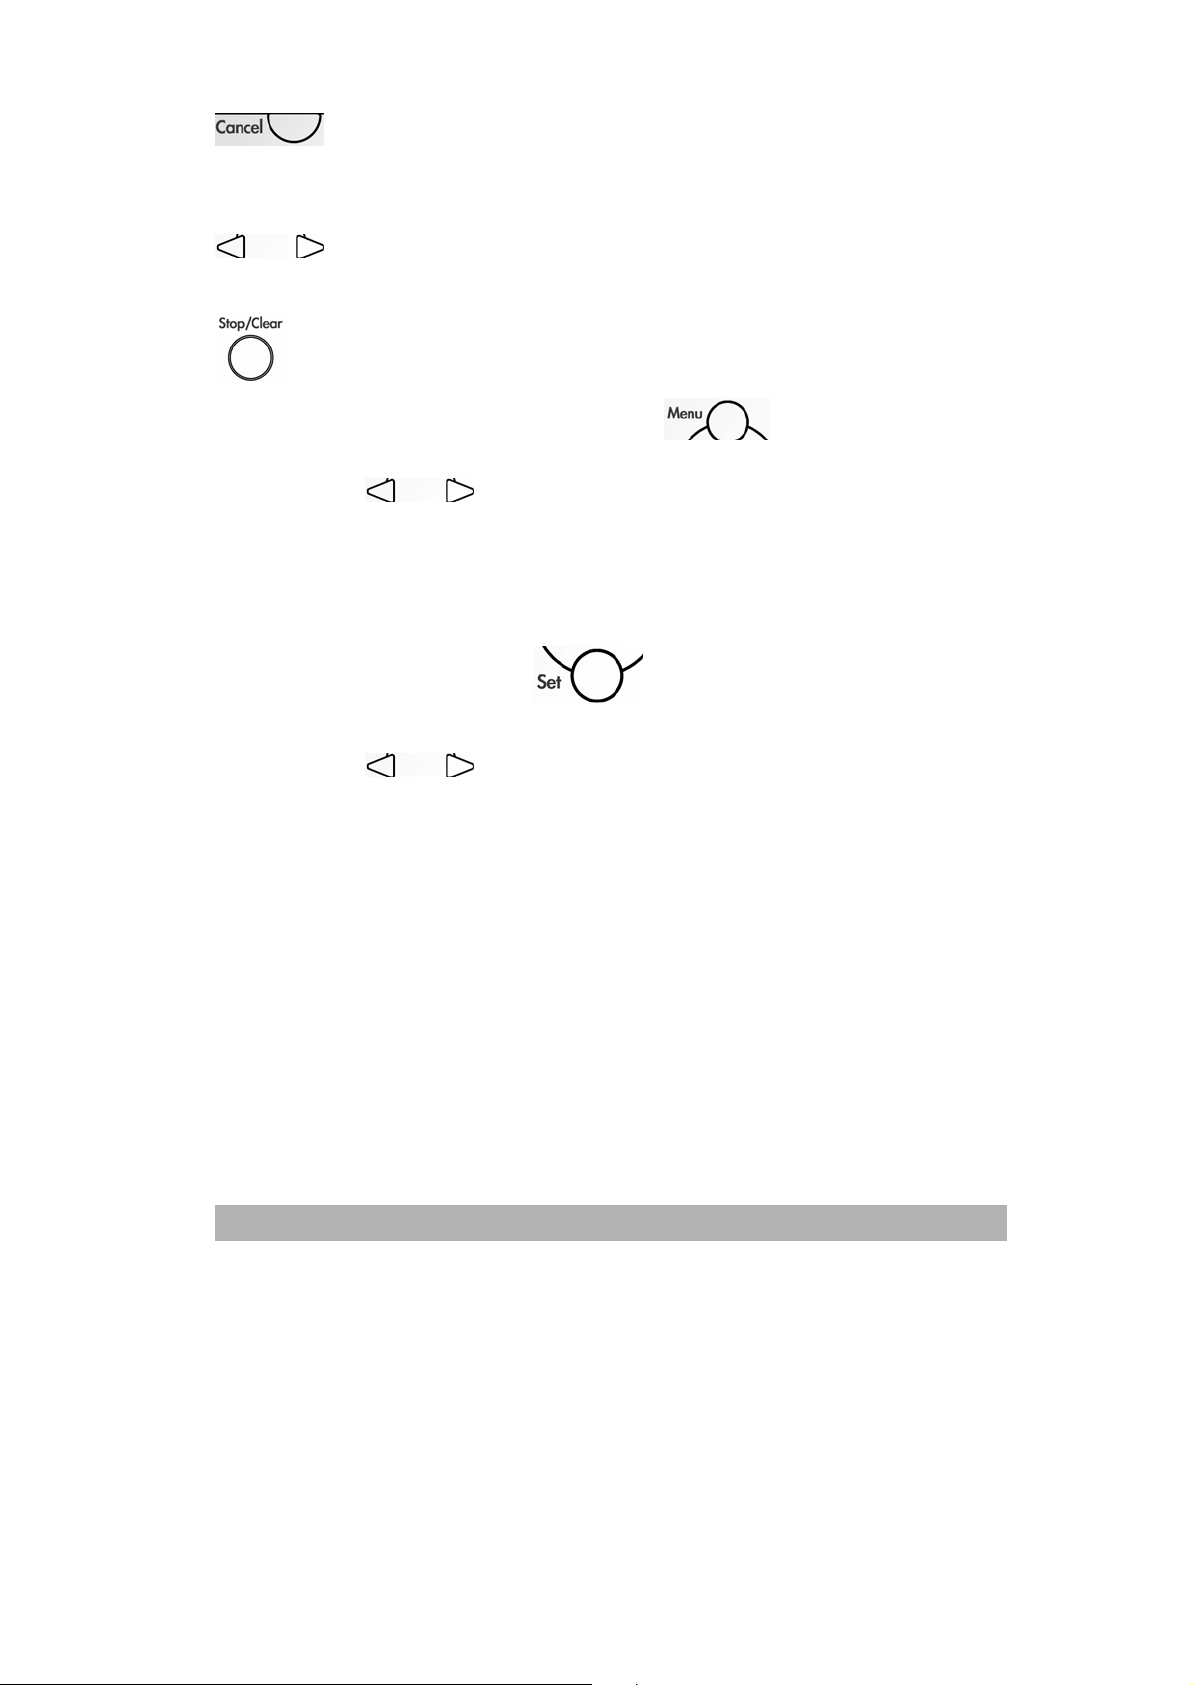
OR
You can scroll more quickly through each menu level by pressing the
arrow for the direction you want.
Then set an option by pressing Set when that option appears on the
LCD. The LCD will then show the next menu level.
Press the arrow
to scroll to your next menu selection.
Press Set.
When you finish setting an option, the LCD shows “Setting OK” on the bottom line.
The current setting is always the option with a check mark, “v”.
AM 3000 series User’s Manual
3-5
Page 31

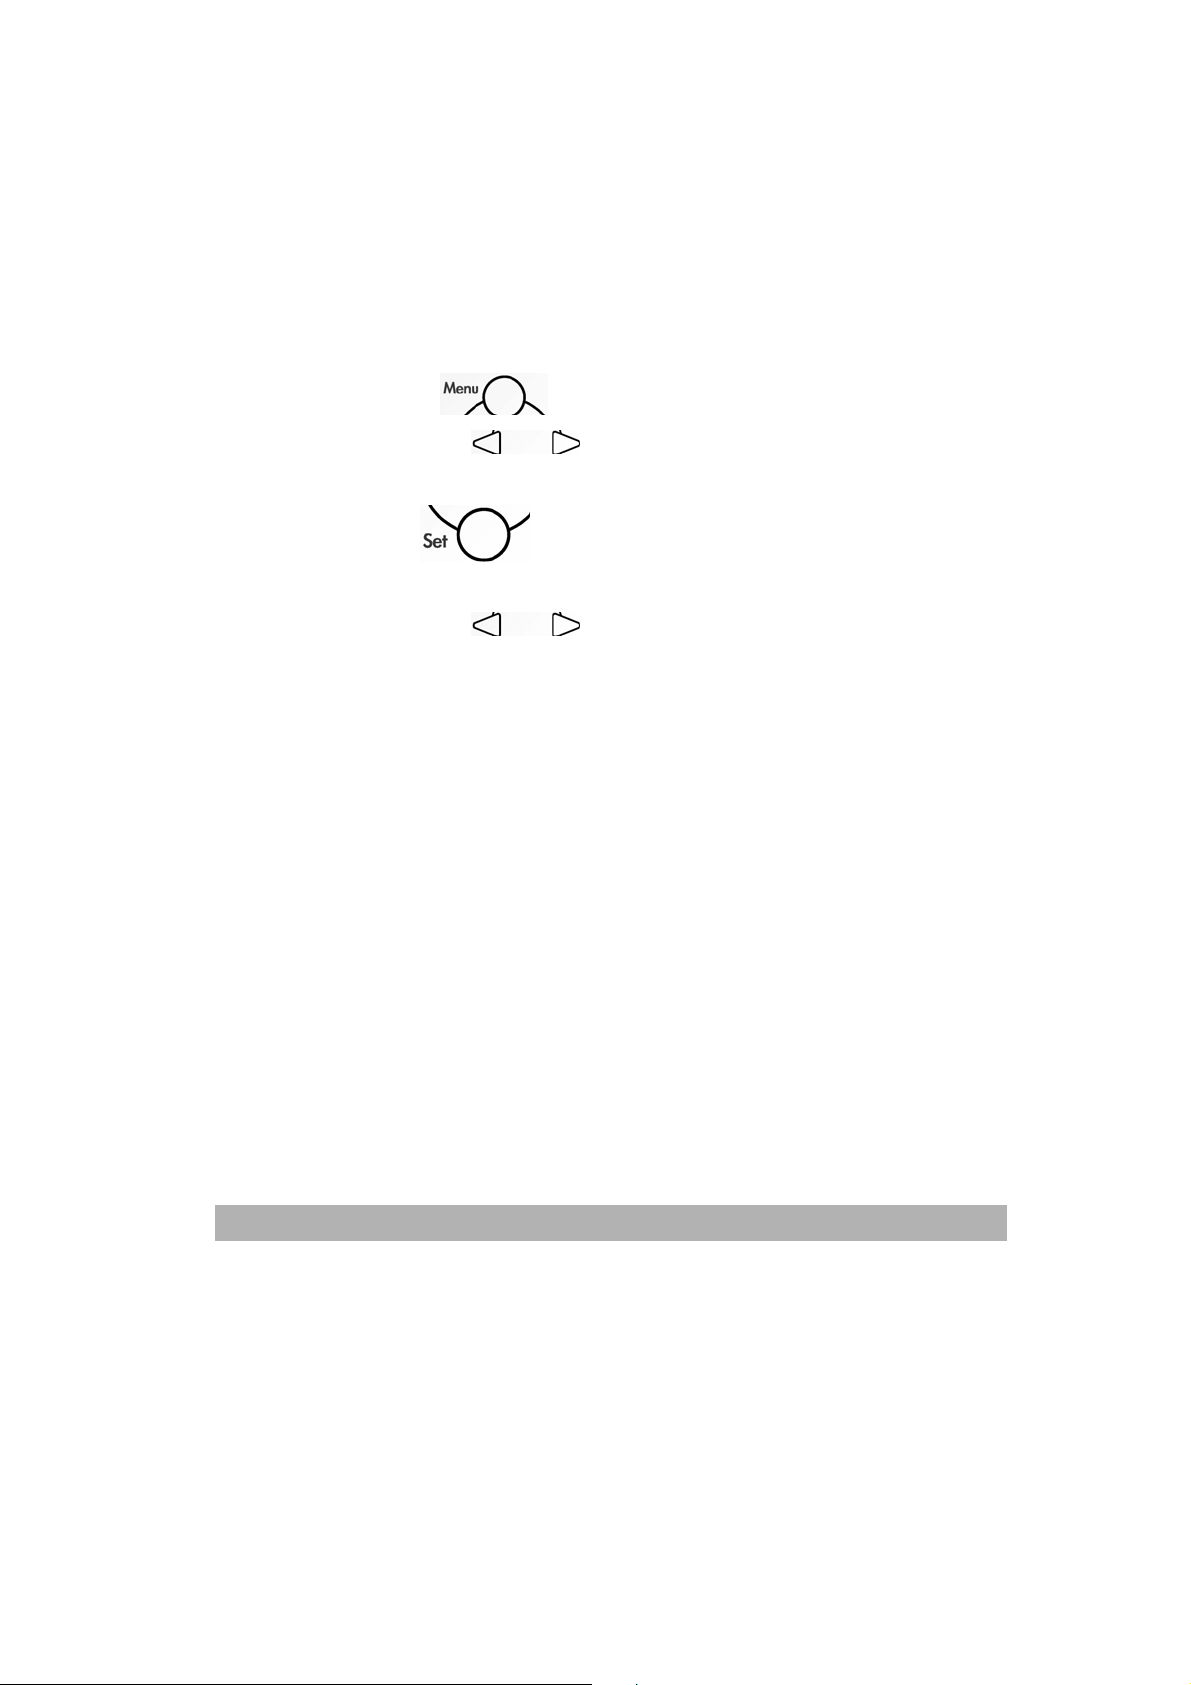
Setting the Paper Size
After loading paper in the paper tray, you need to set the paper size using the control
panel buttons. These settings will apply to copy mode.
1. Press Menu button
2. Press the scroll button
on the display.
3. Press Set button
4. Press the scroll button until “12. Paper Size ” appears
on the display.
5. Press Set button.
5. Press the scroll button to select your desired paper size item.
6. Press Set button to save the selection.
.
until “ 1. Common Setup ” appears
.
3-6
Page 32

7
Sleep Mode
Setting the Sleep Mode reduces power consumption by turning off the fuser inside the
product, while it is idle. You can choose how long the product is idle before it goes into
sleep mode. If you try to copy in sleep mode, there will be a short delay while the fuser
warms up to working temperature.
1. Press Menu button
2. Press the scroll button
on the display.
3. Press Set button
4. Press the scroll button until “13. Sleep Mode” appears
on the display.
5. Press Set button.
5. Press the scroll button to select your desired Sleep Mode item.
6. Press Set button to save the selection.
.
until “ 1. Common Setup ” appears
.
AM 3000 series User’s Manual
3-
Page 33

Printing Reports
To print a report
1. Press Menu button .
2. Press the scroll button
on the display.
3. Press Set button
4. Press the scroll button to select the report item you want.
5. Press Set button to print the report.
until “ 3. Report ” appears
.
3-8
Page 34
Resetting the Photoconductor Counter
After your old drum cartridge is replaced and the whole toner cartridge set is installed
back to the printer, do the following steps to reset the photoconductor counter.
1. Press Menu button .
2. Press the scroll button
on the display.
3. Press Set button
4. Press the scroll button
on the display.
5. Press Set button to reset the photoconductor counter.
.
until “ 1. Common Setup ” appears
.
until “ 14. Reset OPC. ” appears
AM 3000 series User’s Manual
3-9
Page 35

Removing Original Background
If your original comes with color background, you can remove the background to sharpen
your text.
1. Press Menu button
2. Press the scroll button
on the display.
3. Press Set button
4. Press the scroll button until “26. Def Bg Remove ” appears
on the display.
5. Press Set button.
5. Press the scroll button to select your desired copy modes.
6. Press Set button to save the selection.
7. Press Set button again when the message “ Bg Remove on” appears.
.
until “ 2. Copy Setup ” appears
.
3-10
Page 36
4 Copying
Enter Copy mode
Before making copies, make sure that is illuminated in green. If it is not,
press
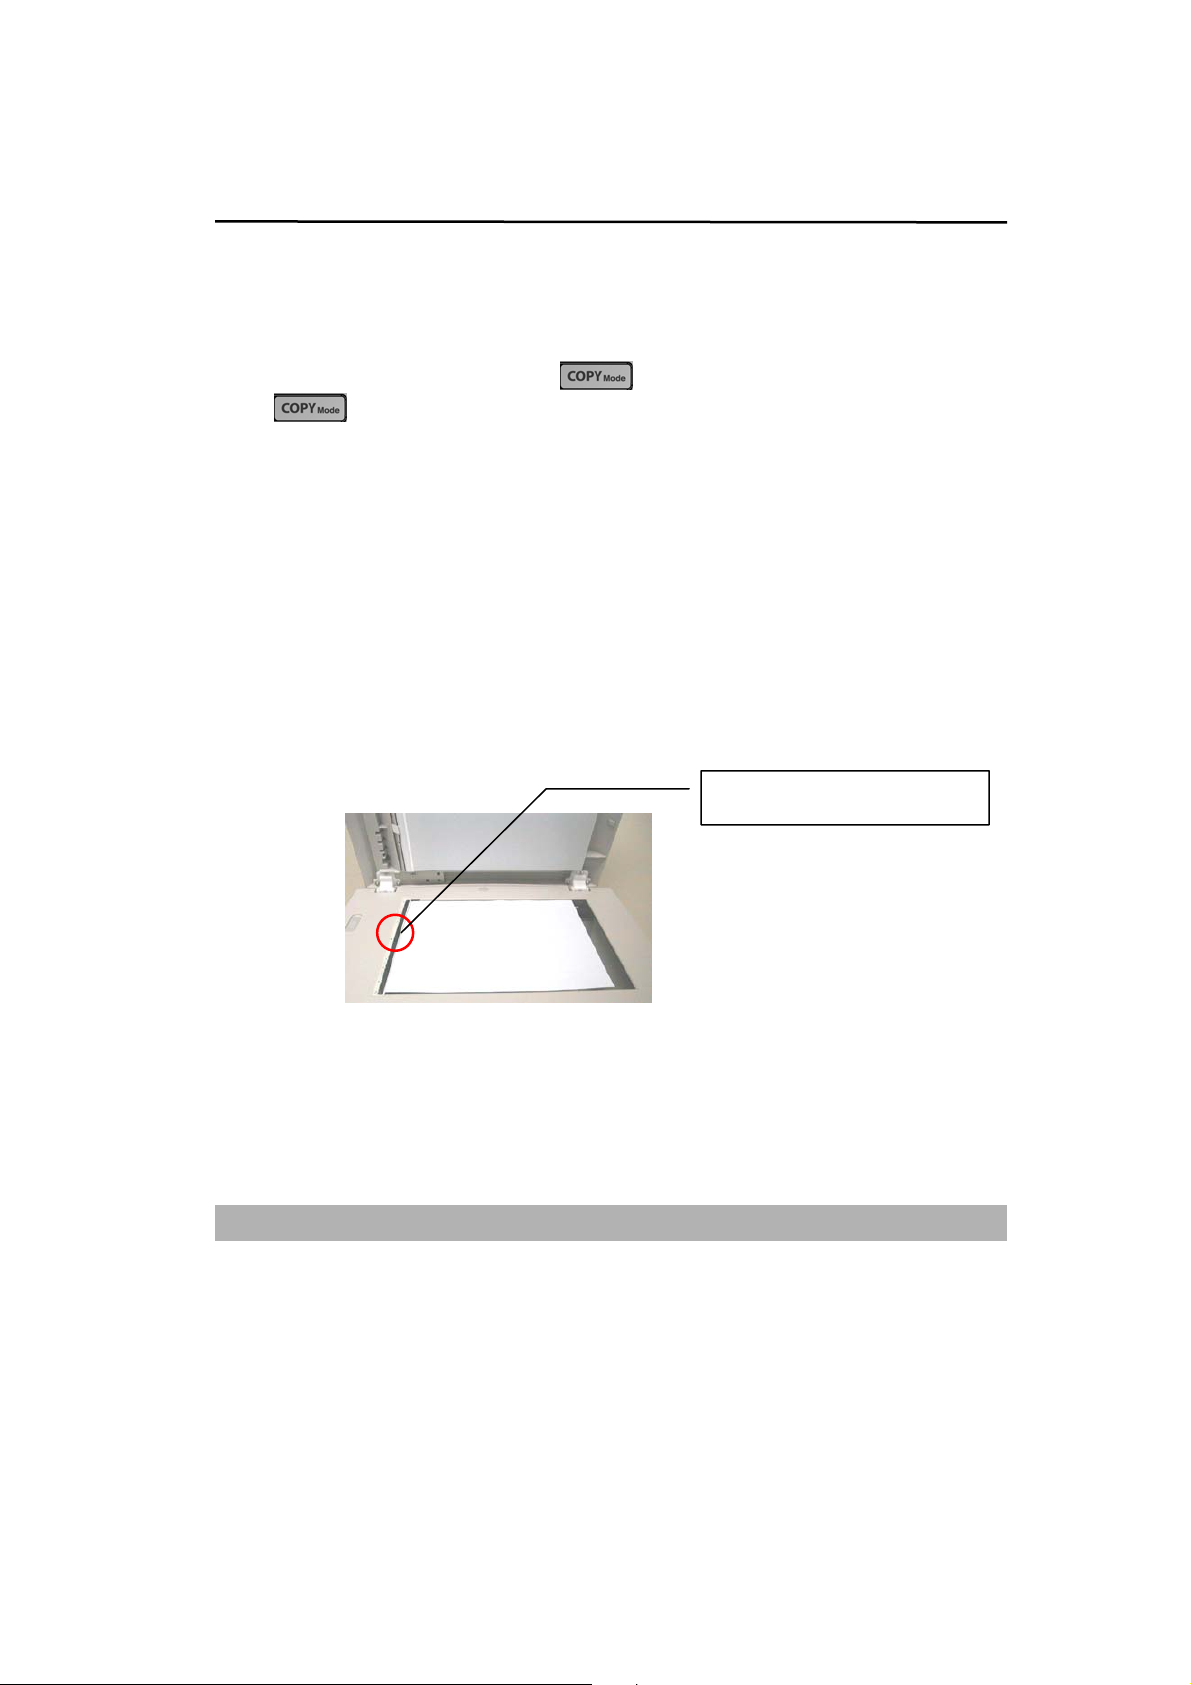
Loading originals to copy
To load originals onto the flatbed glass
1. Lift the ADF cover.
2. Place the original document face down on the flatbed glass and align its center to
the arrow mark on the glass.
to enter copy mode. The default setting is Copy mode.
3. Gently close the ADF cover.
AM 3000 series User’s Manual
the arrow mark on the glass
4-1
Page 37

4. Customize the copy settings by using the control panel buttons.
See “Setting Copy Options” on page 4-3.
To clear settings, use Stop/Clear button.
5. Press Start to begin copying.
Note: If you are using the flatbed to scan, do not put any media on the ADF.
To load originals into the ADF input tray
1. Make sure the flatbed scanner is free of media.
2. Roll the paper and place it in the tray.
3. Put the top end of the original media stack into the ADF input tray, with the media
stack face up and the first page to be copied on top of the stack.
4. Adjust the media guides to the document size.
5. Customize the copy settings by using the control panel buttons.
See “Setting Copy Options” on page 4-3.
To clear settings, use Stop/Clear button.
6. Press Start to begin copying.
Note: If you are using the ADF to scan, do not put any media on the flatbed and open
the ADF lid.
4-2
Page 38

Setting Copying Options
The buttons on the control panel let you make all the basic copy options.
Set the following options for the current copy job before pressing Start to make copies.
Density
If you have an original document containing faint markings and dark images, you can
adjust the brightness to make a copy that is easier to read.
To adjust the density,
1. Press Density.
2. Repeatedly press Density to find the density setting you want.
AM 3000 series User’s Manual
4-3
Page 39

Copy Mode
You can improve the copy quality for your type of original.
To select the copy mode type, press Copy Mode.
Each time you press the button, the LED labeled with the selected mode turns on.
You can choose from the following copy modes:
• Mixed: Use for documents with mixed text and graphics.
• Photo: Use when the originals are photographs.
• Text: Use for documents containing mostly text.
4-4
Page 40
Zoom
You can select the following enlargement or reduction ratios.
Fit To Page sets the product to calculate the ratio that fits the size of your document.
Custom allows you to adjust a ratio from 25% to 400%.
To select from the predefined copy sizes:
1. Press Zoom.
The default setting appears on the bottom line of the display.
Ratio
Original(100%)
Custom(100%)
Fit To Page
A4 to Letter(94%)
Letter to A4(97%)
Legal to Letter(78%)
Legal to A4(83%)
2. Use Zoom or the scroll button
3. Press Set to confirm the selection.
AM 3000 series User’s Manual
to find the size setting you want.
4-5
Page 41

To fine-tune the size of copies:
1. Press Zoom.
2. Press Zoom or the scroll button
bottom line.
3. Use the numerical keys on the number keypad to enter the copy size you want
appears on the display.
4. Press Set to confirm the selection.
until “Custom:xx %” displays on the
4-6
Page 42

7
Copy Count
Using the Copy Count button, you can select the number of copies from 1 to 99.
Repeatedly press Copy Count until the number you want appears on the display.
or
Enter the number of copies by the number keys.
or
Use the scroll button
(Pressing and holding the button allows you to quickly scroll to the number you want.)
to find the setting you want.
AM 3000 series User’s Manual
4-
Page 43

Collate
If you want to sort multiple copies, use the ADF. Document pages will be printed in the
order 12, 12, 12, and so on.
To use the collation function, press Collate.
Each time you press the button, the LED labeled with the selected mode turns on.
You can choose from the following collation modes:
Pages will be printed in the order 12, 12, and so on.
Pages will be printed in the order 11, 22, and so on.
4-8
Page 44

Note: (1)
The number of pages to be collated is related to scan mode and the original paper.
(2)
If you place the original in the ADF, the function automatically starts scanning all the
originals. If you place the original on the scanner glass, do the following steps
manually:
a. Place the original document face down on the flatbed glass and align its
center to the arrow mark on the glass.
b. Press the Collate button.
c. Select the number of copies to collate.
d. Press the Start button, and the LCD shows:
Continue: START
Finish : *
e. Place the next original document on the flatbed glass. Press the Start
button ,and the LCD shows:
Continue: START
Finish : *
f. Repeat the previous step to finish scanning all of your originals.
g. Press the “*” key in the number pad to start collating.
h. The printer will start printing the result , based on your collate option。
AM 3000 series User’s Manual
4-9
Page 45

Paper Saver
The Paper Saver feature is available only when you load documents in the ADF.
To use the Paper Saver function, press Paper Saver.
Each time you press the button, the LED labeled with the selected mode turns on.
You can choose from the following Paper Saver modes:
Prints 4 original images reduced to fit onto one
sheet of paper.
Prints 2 original images reduced to fit onto one
sheet of paper.
4-10
Prints 1 original image reduced to fit onto one
sheet of paper.
Page 46

Note: (1)
The Paper Saver does not support the Collate or the Zoom.
(2)
If you place the original in the ADF, the function automatically starts scanning all the
originals. If you place the original on the scanner glass, do the following steps
manually:
a. Place the original document face down on the flatbed glass and align its
center to the arrow mark on the glass.
b. Press the Paper Saver button to select your option.
c. Press the Start button, and the LCD shows:
Continue: START
Finish : *
d. Place the next original document on the flatbed glass. Press the Start
button ,and the LCD shows:
Continue: START
Finish : *
e. Repeat the previous step to finish scanning all of your originals.
f. The printer will start printing the result.
(If you select “Prints 2 original images reduced to fit onto one sheet of paper”,
the product will scan every two pages and print out one page.
If you select “Prints 4 original images reduced to fit onto one sheet of paper”,
the product will scan every four pages and print out one page.)
AM 3000 series User’s Manual
4-11
Page 47

How to abort the paper saver function:
Suppose you select “Prints 2 original images reduced to fit onto one sheet of paper”, and
want to abort the paper saver function for the second original when finishing scanning
the first original.
a. Place the original document face down on the flatbed glass and align its
center to the arrow mark on the glass.
b. Press the Paper Saver button to select “Prints 2 original images reduced to fit
onto one sheet of paper”.
c. Press the Start button, and the LCD shows:
Continue: START
Finish : *
d. Press the “*” key in the number pad to abort the paper saver function, and the
printer prints the result with the first original.
(If you have not pressed any key on the control panel for about 30 seconds,
the printer automatically prints the result with the first original.)
4-12
Page 48

Toner Save
You can conserve toner using this feature. When you set Toner Save to on, print
appears somewhat lighter. The default setting is off.
Each time you press
the LED labeled with the Toner Save turns on.
If you press
the LED labeled with the Toner Save turns off.
button on the control panel again to set it off,
button on the control panel to set it on,
AM 3000 series User’s Manual
4-13
Page 49

Changing the Default Settings
The copy options, including Density, Copy Mode, Zoom and Collate, can be set to the
most frequently used modes. When you copy a document, the default settings are used
unless they are changed by using the corresponding buttons on the control panel.
To update your default Copy Mode setting:
1. Press Menu button
2. Press the scroll button
on the display.
3. Press Set button
4. Press the scroll button until “21. Def Copy Mode” appears
on the display.
5. Press Set button.
5. Press the scroll button to select your desired Copy Mode item.
6. Press Set button to save the selection.
.
until “2. Copy Setup” appears
.
4-14
Page 50

To update your default Density setting :
1. Press Menu button
2. Press the scroll button
on the display.
3. Press Set button
4. Press the scroll button until “22. Def Density” appears
on the display.
5. Press Set button.
5. Press the scroll button to select your desired Density level.
6. Press Set button to save the selection.
.
until “2. Copy Setup” appears
.
AM 3000 series User’s Manual
4-15
Page 51

To update your default Zoom setting:
1. Press Menu button
2. Press the scroll button
on the display.
3. Press Set button
4. Press the scroll button until “23. Def Zoom” appears
on the display.
5. Press Set button.
5. Press the scroll button to select your desired Zoom item.
6. Press Set button to save the selection.
.
until “2. Copy Setup” appears
.
4-16
Page 52

7
To update your default Collate setting:
1. Press Menu button
2. Press the scroll button
on the display.
3. Press Set button
4. Press the scroll button until “24. Def Collation” appears
on the display.
5. Press Set button.
5. Press the scroll button to enable or disable the Collate function.
6. Press Set button to save the selection.
.
until “2. Copy Setup” appears
.
AM 3000 series User’s Manual
4-1
Page 53

5 Software Installation
Installing Software
1. Insert the supplied CD into your CD-ROM. The installation menu
appears, as shown below.
2. Click “Install TWAIN Driver” to install the product’s driver.
AM 3000 series User’s Manual
5-1
Page 54
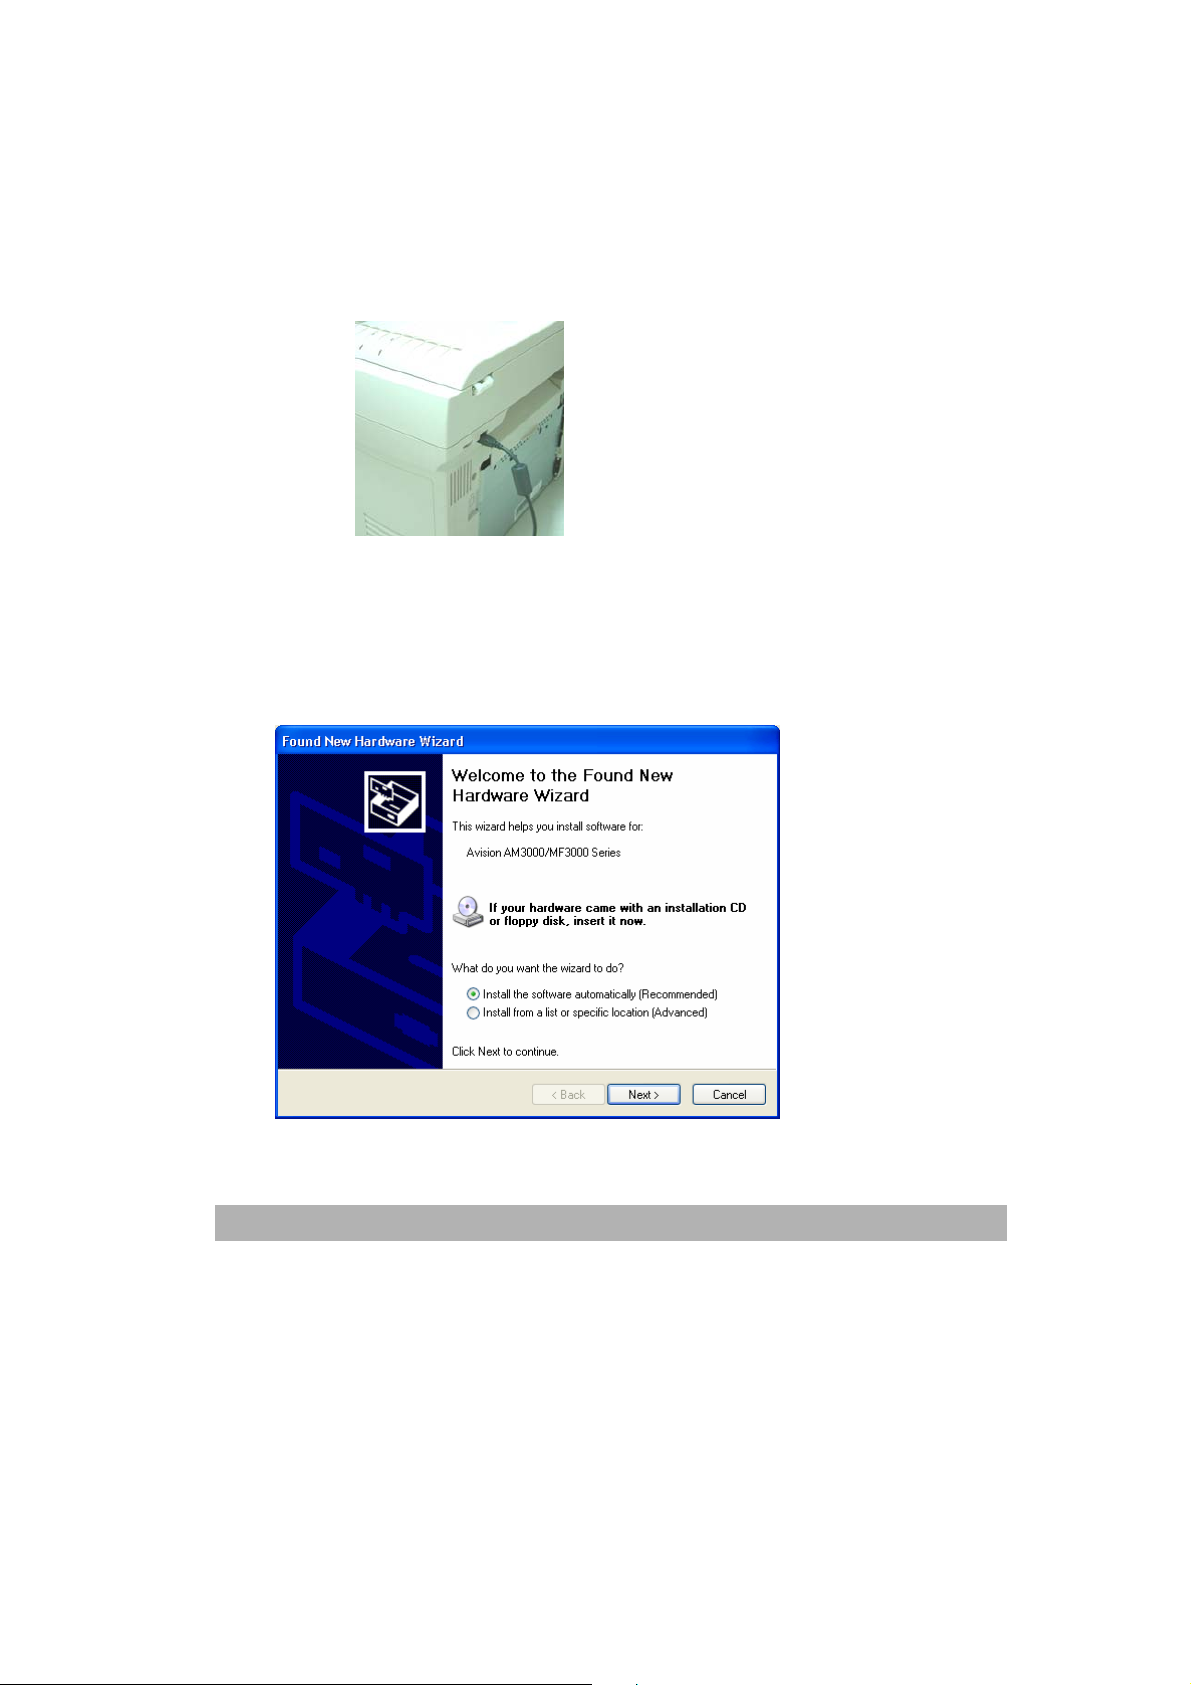
3. When you finish installing the driver, connect a USB cable to your product:
a. Connect one end of the USB cable to your computer.
b. Connect the other end to the USB port of your product.
For Windows XP Users Only:
4. When the following screen appears,click Next.
5-2
Page 55

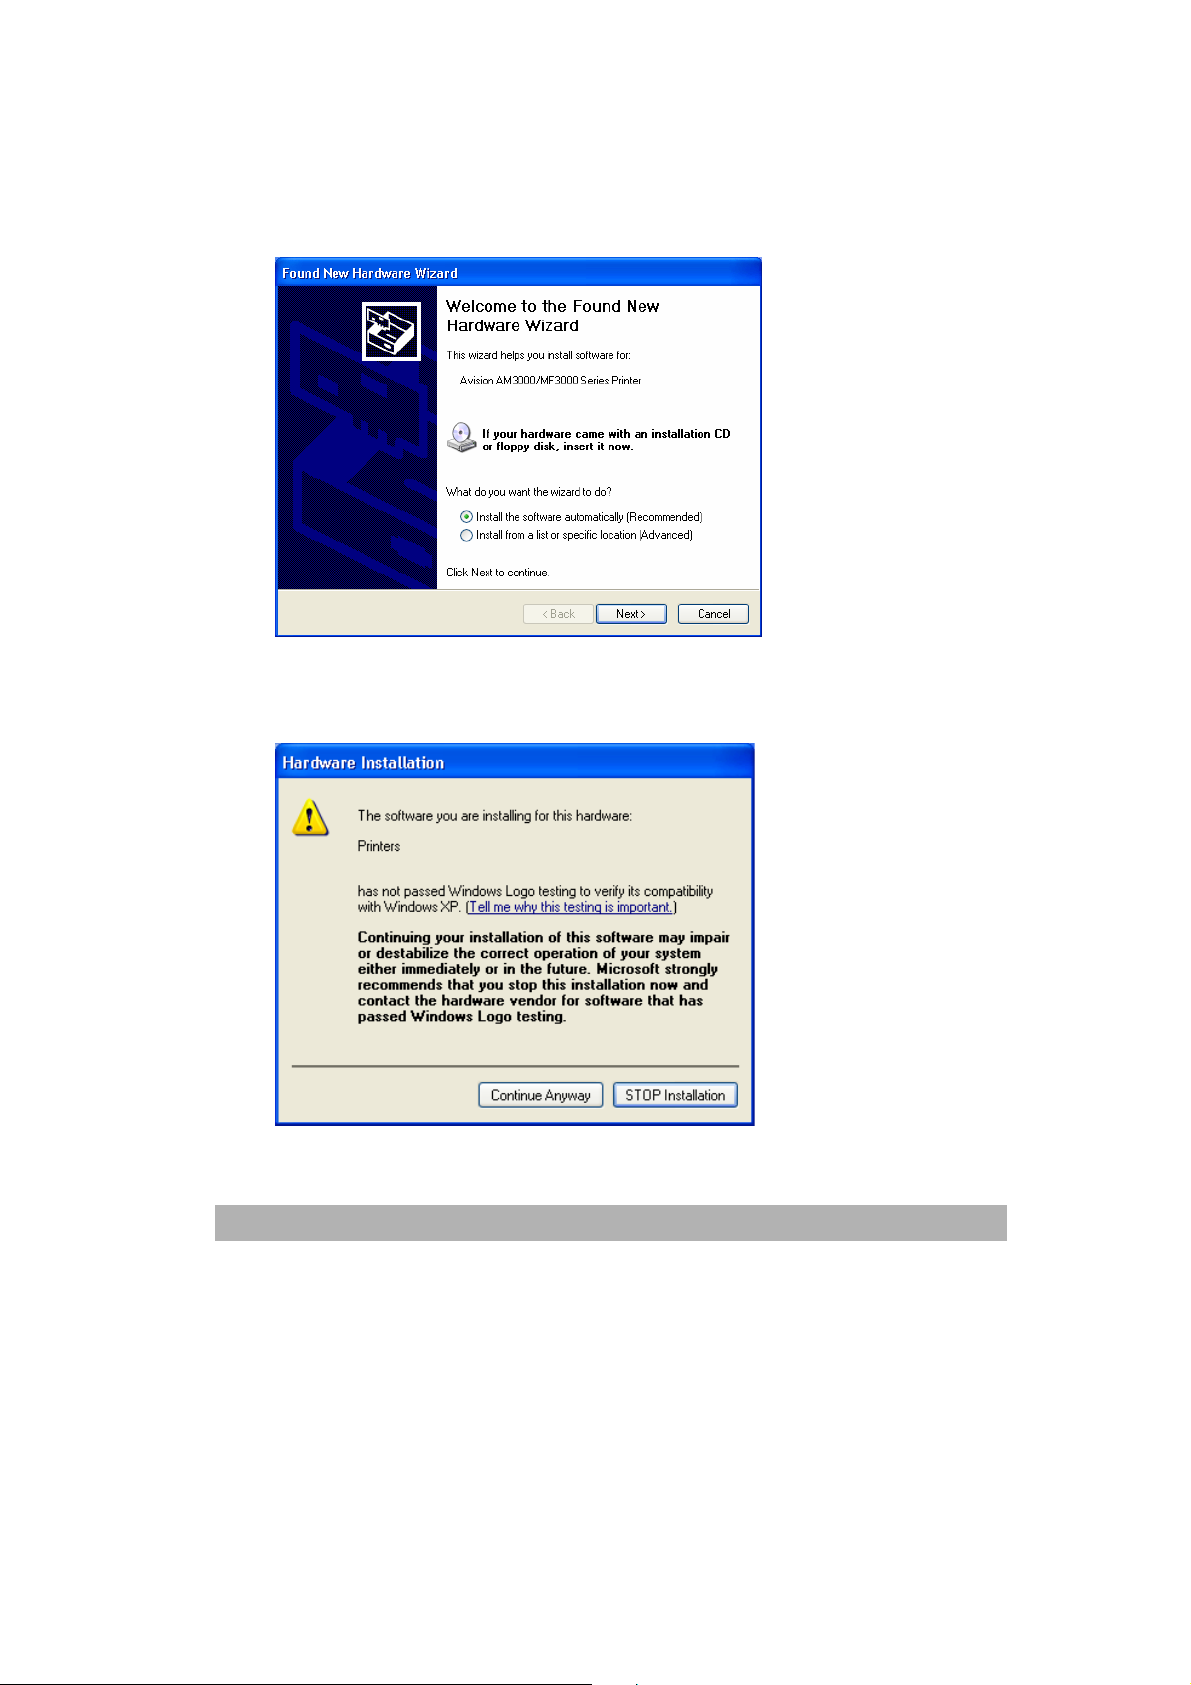
5. When the following screen appears,click Continue Anyway.
6. When the following screen appears,click Finish.
AM 3000 series User’s Manual
5-3
Page 56
7. When the following screen appears,click Next.
8. When the following screen appears,click Continue Anyway.
5-4
Page 57

9. When the following screen appears,click Finish.
AM 3000 series User’s Manual
5-5
Page 58

For Windows 2000 Users Only:
4. When the following screen appears,click Next.
5. When the following screen appears,click Next.
5-6
Page 59

7
6. When the following screen appears,click Next.
7. When the following screen appears,click Next.
AM 3000 series User’s Manual
5-
Page 60

8. When the following screen appears,click Finish.
5-8
Page 61

For Windows 98SE Users Only:
4. When the following screen appears,click Next.
5. When the following screen appears,click Next.
AM 3000 series User’s Manual
5-9
Page 62

6. When the following screen appears,click Next.
7. When the following screen appears,click Next.
5-10
Page 63

8. When the following screen appears,click Next.
9. When the following screen appears,click Next.
AM 3000 series User’s Manual
5-11
Page 64

10. When the following screen appears,click Next.
11. When the following screen appears,click Next.
5-12
Page 65

12. When the following screen appears,click Next.
13. When the following screen appears,click Next.
AM 3000 series User’s Manual
5-13
Page 66

14. When the following screen appears,click Finish.
Once you have completed the above steps, you see the QLINK icon,
desktop window.
, on the
Uninstalling Software
1. Make sure your USB cable is connected to your product.
2. From the “Start” menu, select “All Programs”, “AM(MF)3000 Series”, and then
“uninstall”.
5-14
Page 67
6 Printer driver settings
How to access the printer driver settings
1. Select Print from the File menu in your application software such as Microsoft
Word.
2. Select Avision AM/MF3000 SERIES Series Printer as your printer and click
Preferences.
9. Now you see the Avision AM/MF3000 Series Printer Properties window, which
allows you to access all of information you need when using the product.
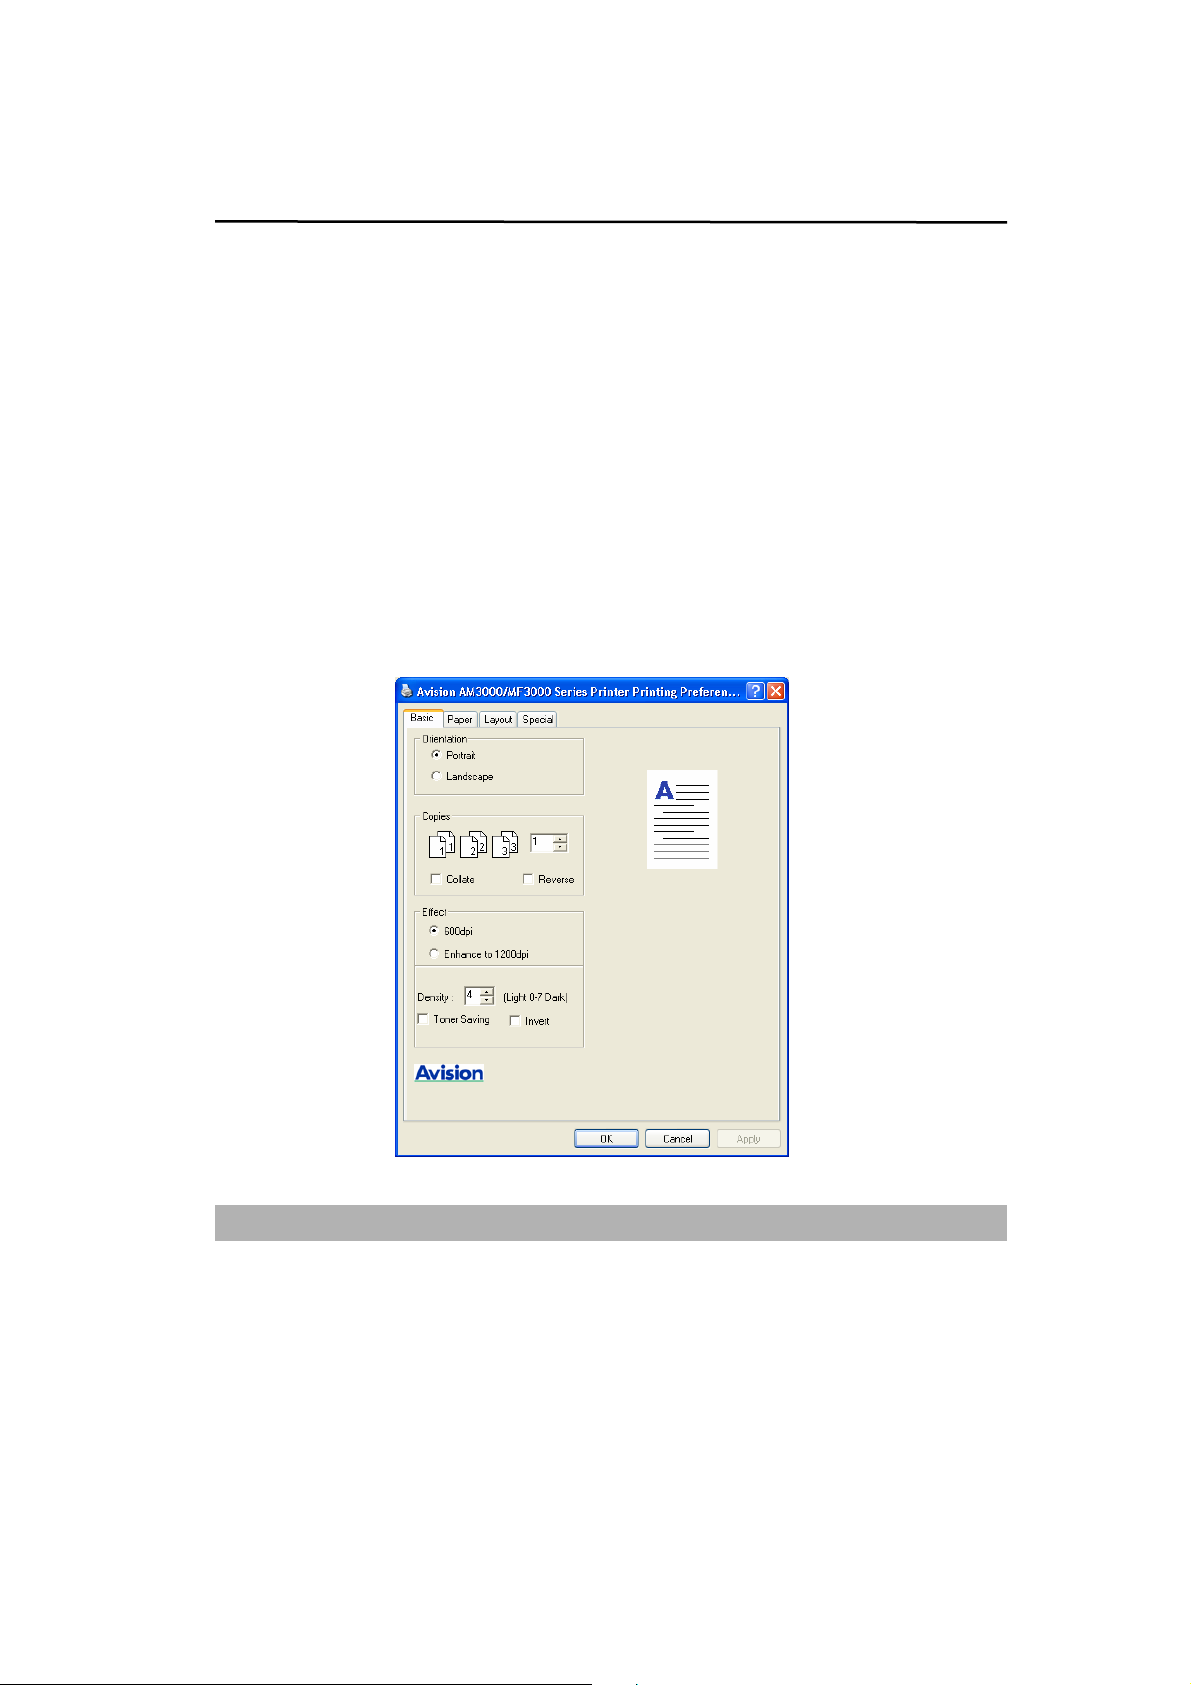
The Basic tab first displays.
AM 3000 series User’s Manual
6-1
Page 68
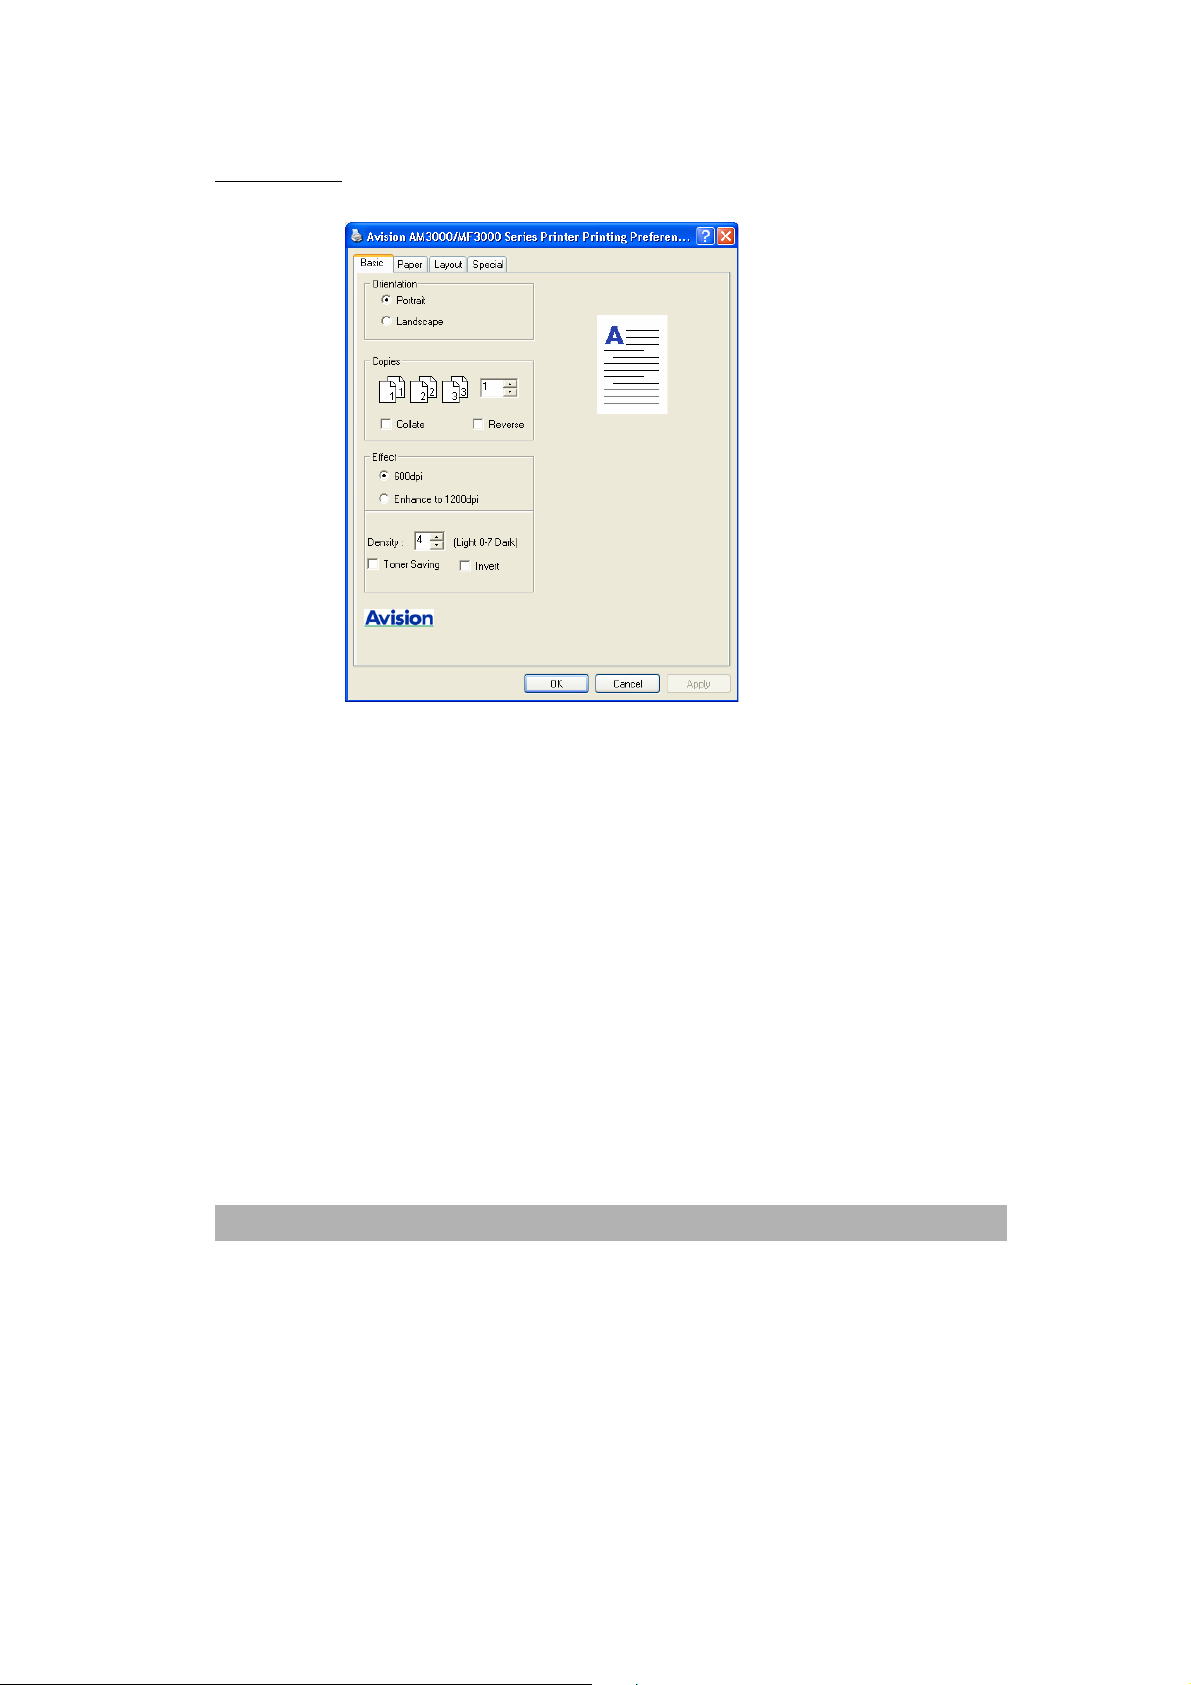
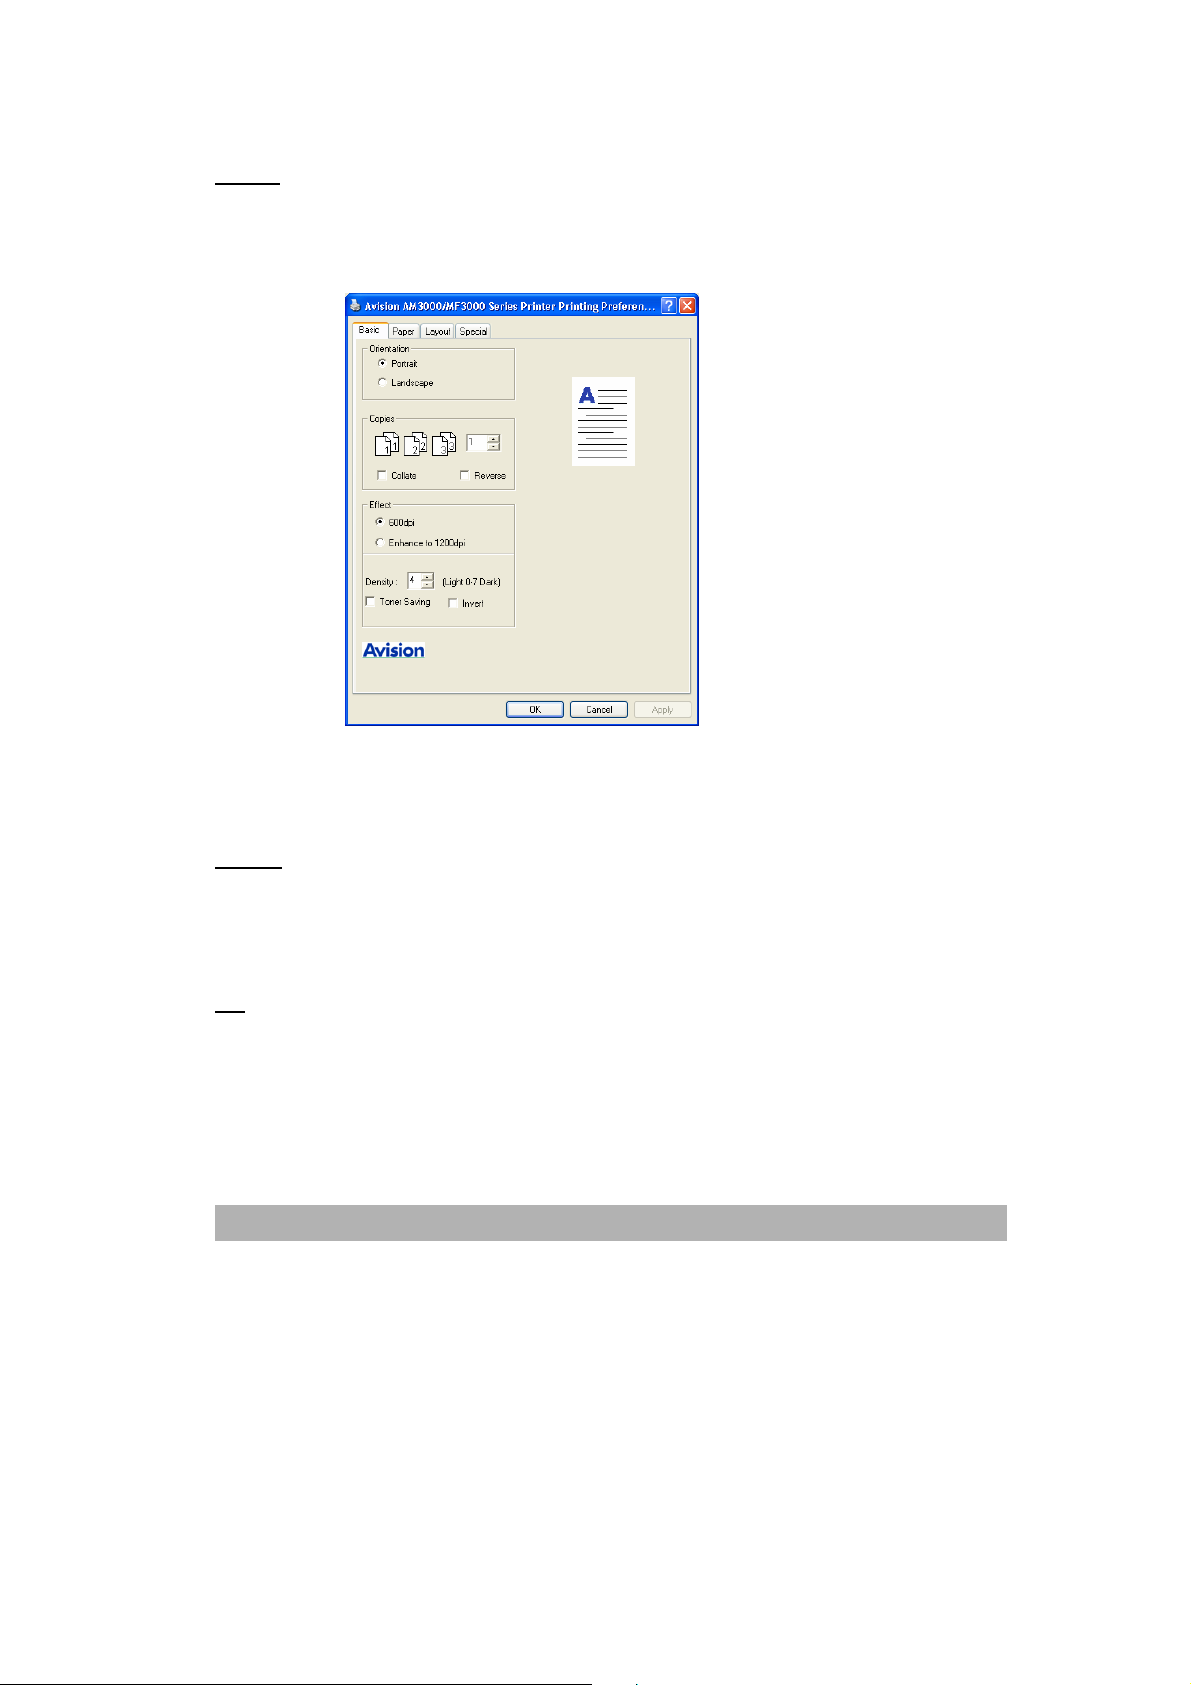
Basic tab
Orientation
• Portrait: prints across the width of the page, letter style.
• Landscape: prints across the length of the page, spreadsheet style.
Copies
Allows you to choose the number of copies to be printed. You can enter up to 99.
Collate
With the Collate check box selected, one complete copy of your document will be printed
and then repeated for the number of copies you selected. If the Collate check box is not
selected, then each page will be printed for all the copies selected before the next page
of the document is printed.
Reverse
Printed in a reversed order.
6-2
Page 69

Effect
You can change the resolution as follows:
600 dpi
Enhance to 1200 dpi
Density: adjusts your density level (0~7).
Toner Save: allows you to save on toner by using less toner to print a document.
Invert:reverses the brightness and the color in the image.
Paper tab
Paper
Size:The Size option allows you to choose the size of paper loaded in the tray. If the
required size is not listed in the Size box, click Custom. When the Custom Page Size
window appears, set the paper size and click Save and Close.
AM 3000 series User’s Manual
6-3
Page 70

Media
Choose your desired paper media type.
Duplex Print
Choose Manual flip to manually let the product print on both sides of the paper.
Layout tab
Multi-page
You can select the number of pages to print on a single sheet of paper. To print more
than one page per sheet, the pages will appear decreased in size and arranged on the
sheet. You can print up to 9 pages on one sheet.
From the Layout tab, choose Pages on the drop-down list. Select the number of pages
you want to print per sheet
6-4
Page 71

Select the page order on the Order drop-down list, if necessary.
Choose a border line from the Border drop-down list to print a border around each page
on the sheet.
If you choose 2X2 Poster, You can print a single-page document onto 4 sheets of paper,
for the purpose of pasting the sheets together to form one poster-size document.
Scaling
You can scale your print job on a page.
AM 3000 series User’s Manual
6-5
Page 72

Special tab
You can place a logo or text into your document as a Watermark. You can use a
bitmap file or text file that you have created.
Text Watermark
Click New/Add button, and then a Watermark dialog window appears.
Set up various settings for your text Watermark.
Bitmap
Click Specify button to select your bitmap file.
First Page only
Checking this box allows you to put the watermark only on the first page.
6-6
Page 73

7 Using QLINK
The QLINK is a software utility that allows you to quite easily, with very few mouse clicks,
access the most frequently used scanning applications. Using the QLINK eliminates the
need to manually launch the specific applications and allows you to scan a document
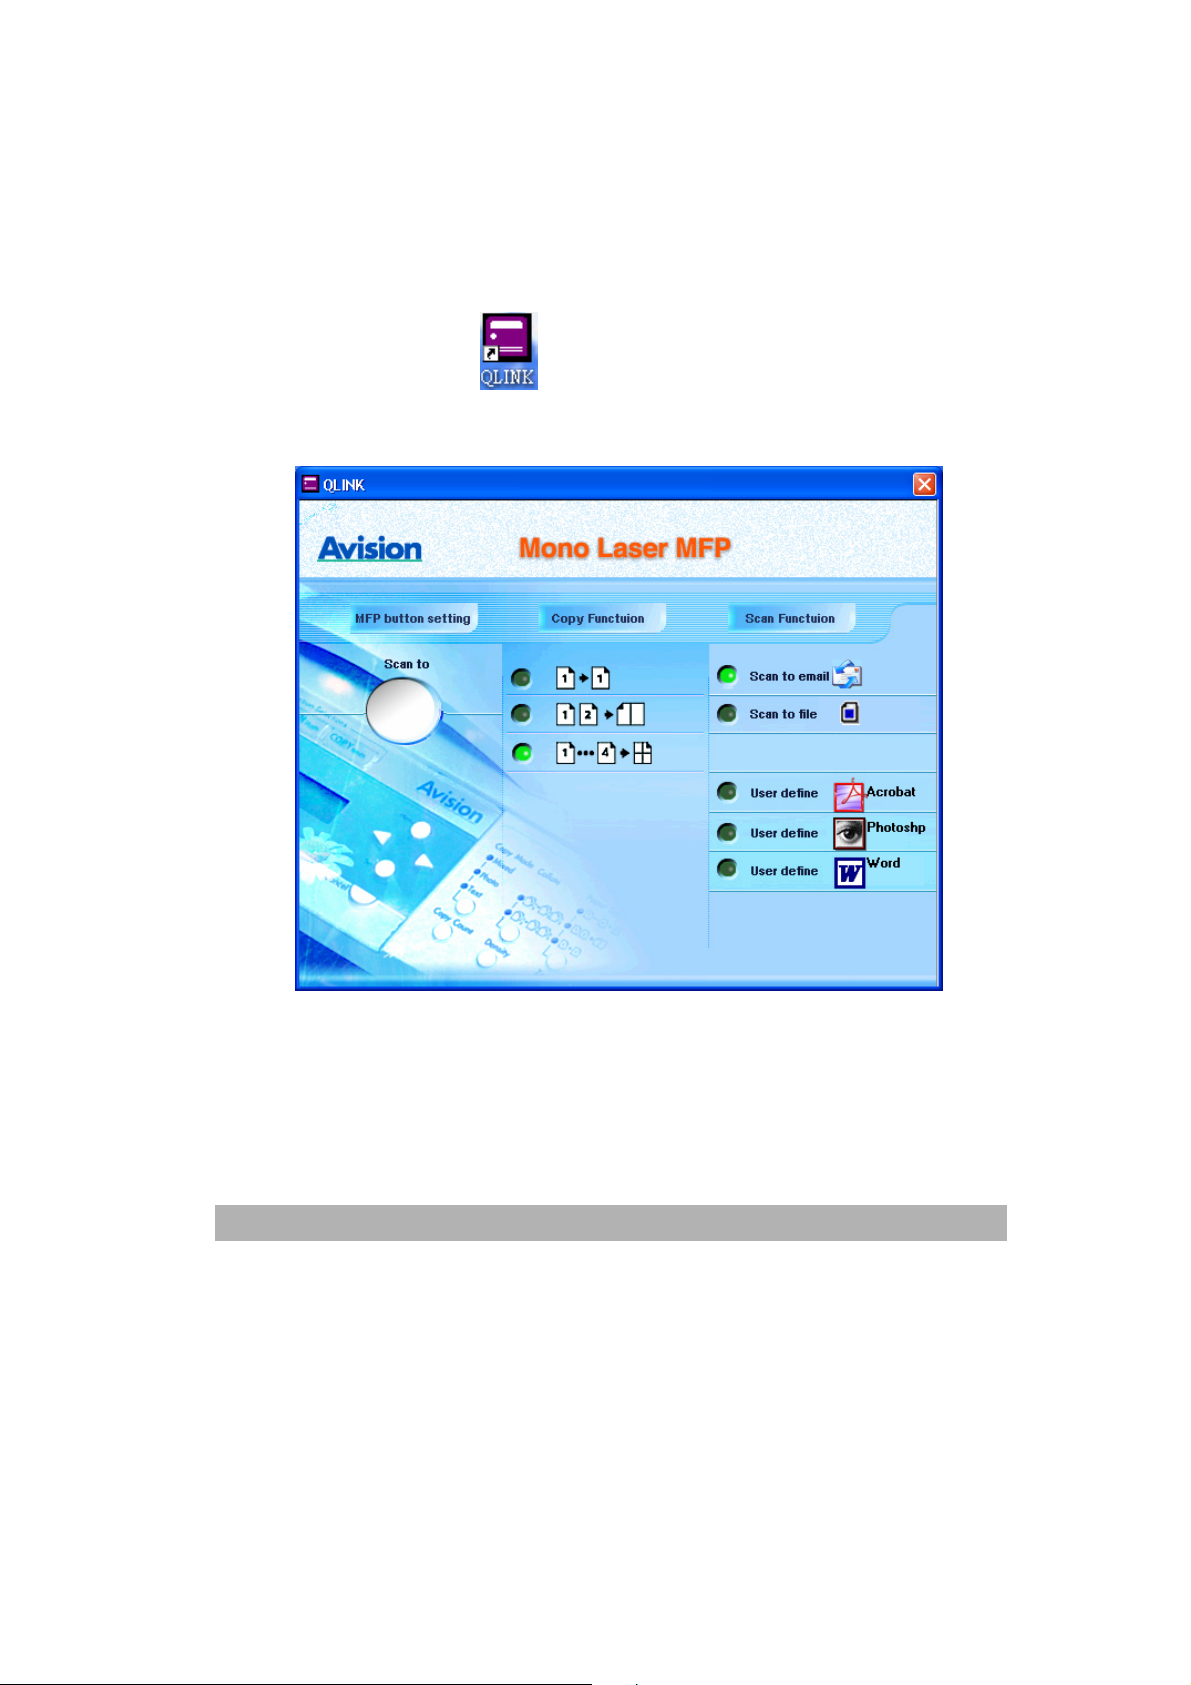
directly to a folder on your computer. The QLINK provides three categories of operations,
as shown below:
A. Configure the Scan To button on the control panel. [MFP button setting section]
B. Enhanced copy functions, such as Four/Two or One-on-One Copying.
[Copy Function section]
C. Scan directly to a file, or email .
User-defined buttons allow you to configure a button to meet your own
application requirements. [Scan Function section]
AM 3000 series User’s Manual
7-1
Page 74

A B C
Two of the three sections in the above QLINK figure have a number of different buttons
which are predefined for the most frequently used applications. The Scan Function
section contains one button for Scan to file, one button for Scan to email, and three
user-defined buttons with which you can assign your desired application. The Copy
Function section contains three buttons for 4 to 1 copying. The MFP button setting
section contains a big button, called Scan to, which allows you to configure the physical
Scan To button on the control panel.
7-2
Page 75
To start the QLINK
Double-click the QLINK icon,
status area and the QLINK appears, as shown below:
, and then click the small QLINK icon located in the
AM 3000 series User’s Manual
7-3
Page 76

MFP button setting section
Configuring the Scan To button
When the QLINK is displayed, click the Scan to button, , on the QLINK, and the
Edit Application list appears , as shown below:
7-4
Page 77

Edit
The Edit button allows you to change your application item or its properties in the list.
Click one of the applications in the list and then the Edit button to launch the Preferences
dialog box, as shown below:
AM 3000 series User’s Manual
7-5
Page 78

Program Path
Select the path where your application’s executable file is located in your computer by
clicking the Browse button.
Program Name
Your application’s original name is shown here.
Program name on MFP LCD
Set a name for your application, which will appear on the product’s LCD.
Scan
Adjust all other preferred scanner settings, including Image Type, Scan Size, Resolution,
Brightness, and Contrast.
File Format
By selecting from the File Format pull down list, you can save your original as PDF, BMP,
and TIFF.
File Path
You can select another folder/directory where the scanned file will be sent by clicking the
Browse button.
New Application
The New Application button allows you to add your extra desired application item.
Delete
The Delete button allows you to delete any application item in the list.
7-6
Page 79
7
OK
This button is to save your updated settings.
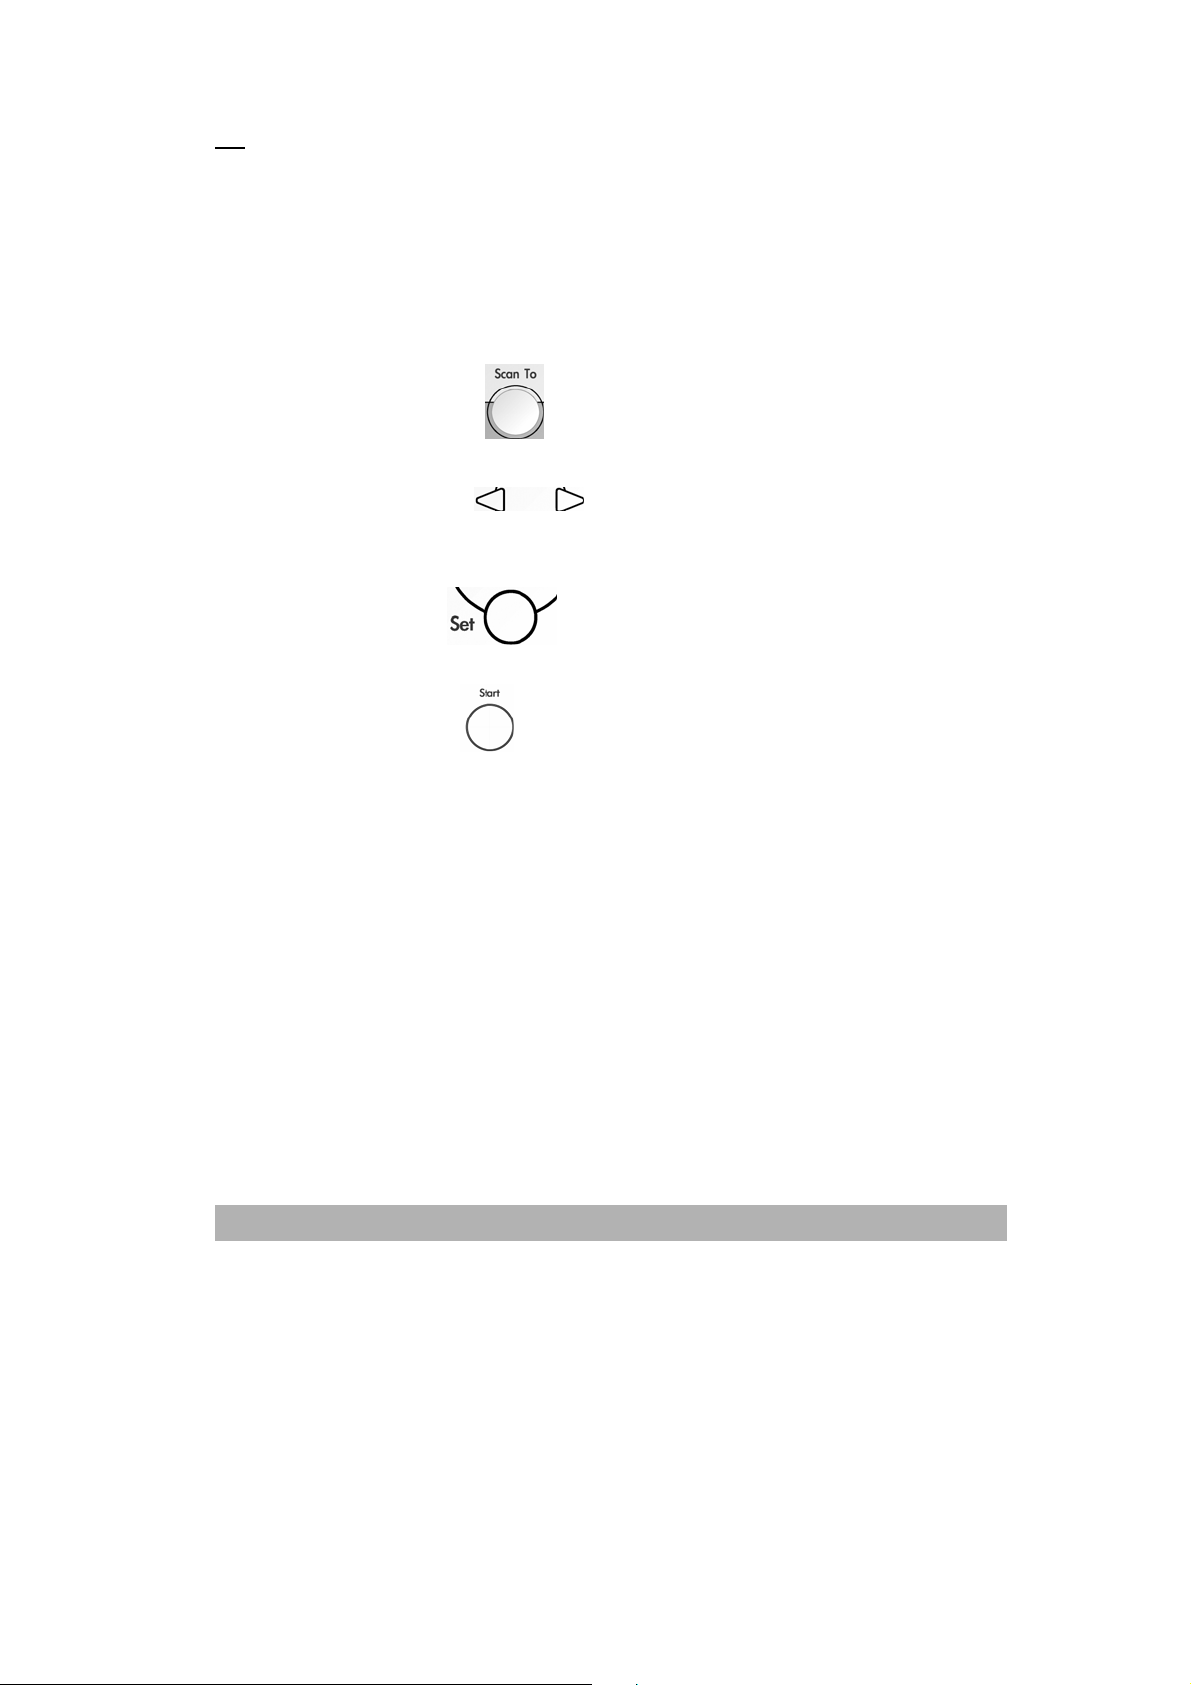
Using the Scan To button on the control panel to scan
1. Place the original face up in the ADF, or face down on the scanner glass.
2. Press the Scan to button,
3. Press the scroll buttons,
screen on the control panel.
4. Press the Set button,
5. Press the Start button,
, on the control panel.
to select an application item in the display
to confirm your selected application item.
to start the scanning process.
AM 3000 series User’s Manual
7-
Page 80

Copy Function section
The three copy buttons in the QLINK can be customized to allow you to take advantage
of the features built into the AM3100 printer driver to do the Paper Saver function if you
load documents in the ADF.
By following the figure directions below, click one of the three copy buttons in the QLINK
to copy.
Prints 1 original image reduced to fit
onto one sheet of paper.
Prints 2 original images reduced to
fit onto one sheet of paper.
Prints 4 original images reduced to fit
onto one sheet of paper.
7-8
Page 81

To configure any of the three copy buttons in the QLINK, right-click on it and click
Configuration. A Copy dialog box for this button appears, as shown below:
AM 3000 series User’s Manual
7-9
Page 82

Scanner Setting
By clicking the arrow sign beside the drop-down list, you can choose from the following
image types:
If the content in the original is occupied by photo images only or by photo images with a
little text on it, select Photo to get a photo-concentrated image copy. On the contrary, the
Text option helps you get a text-concentrated copy. However, if the proportion of the
photo image is almost the same as that of text in the original to be copied, it is
recommended to select the Mixed in order to get the most optimal printout with photo
and text mixed.
7-10
Page 83

Advanced Setting
This button is to show the Scan preference dialog box, as shown below:
You can make good use of this Scan preference dialog box to adjust all other preferred
scan settings, including Scan size, Resolution, Brightness, and Contrast.
Copies
Selects the number of copies.
Scale
Increase or decrease copy scaling.
AM 3000 series User’s Manual
7-11
Page 84
Printer
To update the default printer properties, click Properties button, and an example of
printer driver property window is displayed as shown below:
The printer driver property window will vary, depending upon what printer mod el you
connected to the product.
Collate
Enables the collate function.
OK
This button is to save your updated settings.
7-12
Page 85

Scan Function section
Scan to email
The Scan to E-mail button enables you to scan a page or document directly into the
E-mail application, Outlook Express, as a standard attachment.
To scan your originals to the E-mail application in the QLINK, click the Scan to email
button. (Note: If your Outlook Express application does not work, try to launch it before
clicking the Scan to email button.)
Scan to file
The Scan to file button enables you to scan an image and save it to any directory on
your hard disk. This allows you to easily archive your paper documents.
To scan your originals to a file in the QLINK, click the Scan to file button.
AM 3000 series User’s Manual
7-13
Page 86

User define buttons
There are up to three user-defined buttons on the QLINK. You can set your own
preferences and configuration to fit your required application.
To configure a User define Button, right click on one of the three User define buttons and
then click Configuration. An Application dialog box as an example appears, depending
on the previously selected or default application item.
7-14
Page 87

Target Application
Select Scan To Send
The drop-down list allows you to select one of your preferred applications.
The list contains the 8 default application items, which are frequently used scanning
applications.
OK
This button is to save your updated settings.
To scan your originals to the application for which a User define Button is defined in the
QLINK, click a User define Button.
AM 3000 series User’s Manual
7-15
Page 88

8 Scanner Operation
This product allows you to operate the scanner from within a TWAIN or plug-in software
application. As the scanner driver is not a stand-alone software, it has to be started from
within a TWAIN-compliant software application and then the scanner driver is able to
scan and load the image to your computer. The command to start the scanner driver may
vary due to different software applications. To check the correct command, please refer
to the user manual of your software application.
User interface operation
1. Open your TWAIN scanning application.
2. Pull down the File menu and choose Select Source.
If the Select Source command is not available on the File menu, see your
application’s user’s guide to determine how the TWAIN link is used.
A dialog box with a list of scanning sources appears.
3. Select or import AM/MF3000 Series Scanner.
You need to select the source only once, unless you want to choose another
scanner.
AM 3000 series User’s Manual
8-1
Page 89
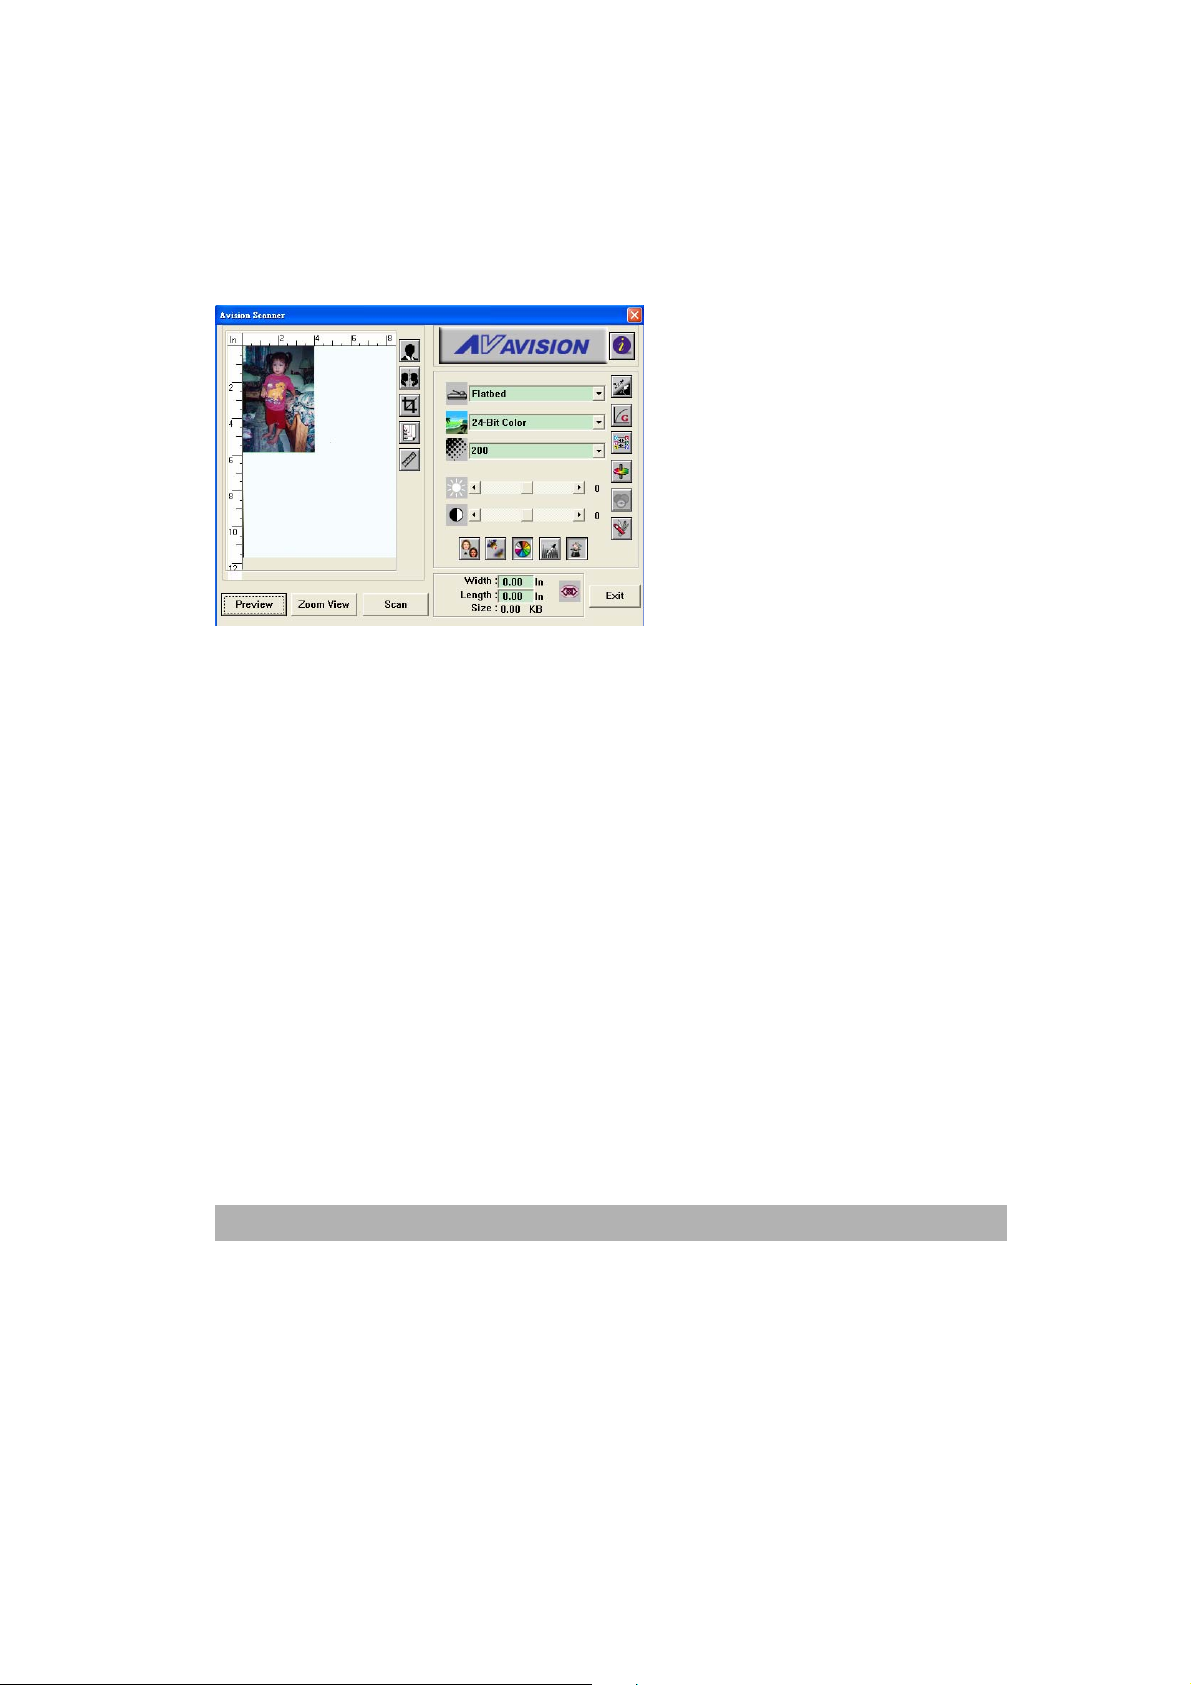
4 A dialog box containing scanning features appears as below:
5 Select the scanning method you want to use on the Scan Method drop-down menu.
6. Select the mode you want to use for your scans on the Image Type drop-down
menu.
7. Select a scanning resolution on the Resolution drop-down menu.
8. Select the settings for the scanning features (e.g., Sharpen, Descreen, etc.) that you
want to use.
9 Click on the Preview or Scan button to preview or scan your document(s).
8-2
Page 90

Scan method
Select how you want to scan on the Scan Method drop-down menu.
Flatbed—use this setting if you are using the flatbed to scan one page at a time.
ADF—use this setting if you are using the automatic document feeder (ADF) to scan
documents at a time.
Determining your resolution
A good control of the resolution results a satisfactory detail of an image that
scans. The resolution is measured by dots per inch(dpi). Normally, the greater the dpi
number, the higher the resolution and the image file size.
Be aware that the greater resolution takes more time, memory and disk space,
therefore, up to a certain degree of dpi, the resolution will not visually be improved, on
the contrary, it makes your files more unmanageable.
Resolution: 50 dpi
Resolution: 100 dpi
AM 3000 series User’s Manual
8-3
Page 91

Tips:
1. For your information, an A4 size color image scanned at 300 dpi at True Color mode
consumes approximately 25 MB of disk space. A higher resolution (usu ally means
over 600 dpi) is recommended only when you need to sca n a small area at True Color
mode.
2. You can also refer to the following table to choose a proper resolution while applying
your image to other application.
Scanner Settings
Application
File, Fax, E-mail Your
Document
View, Copy, Edit Your
Color Picture
OCR* Your Document
Image
Type
LineArt 200
True Color 100
LineArt 300
Resolution
(dpi)
*OCR: Stands for Optical Character Recognition, the process to convert an image to a text
format.
8-4
Page 92

Selecting a proper image type
Select image type through the mode from the scanner user interface for your
own purpose.
Each image type is described as follows:
Line art(Black and White)
LineArt presents the image in black and white only and there are no intermediate
shades of gray in between. That means each pixel of the image is 100% black or
100% white. LineArt is the best choice of image type if you want to scan text, pen or
ink drawing. Since only 1-bit of black or white information is required for each
pixel*, the disk space required for saving lineArt image is only about 1/24 of that
required to save 24-bit true color images.
Lineart Image
*Pixel: A combination of two words: picture and element, a pixel is a single dot on a
computer display or in a digital image.
AM 3000 series User’s Manual
8-5
Page 93

8-Bit Gray
A single-channel image consists of at least 256 shades of gray. An 8-bit scanner
produces a grayscale image with 1024 shades of gray between pure black and pure
white. Choose this option if you are scanning black-and-white photographs.
With 8 bits of color information per pixel, the file size of an image is eight times larger
than a Black and White image and 1/3 the size of a 24-Bit Color image.
8-6
Gray Image
Page 94

7
24-Bit Color
A 24-Bit Color image consists of three 8-bit color channels. The red, green, and blue
channels are mixed together to create a combination of one billi on colors which give a
more true-to-life quality to the image. Choose 24-Bit Color if you are scanning color
photos.
24-Bit Color Image
AM 3000 series User’s Manual
8-
Page 95

Enhancing your image
Brightness: Adjusts the lightness or darkness of an image.
The higher the value, the brighter the image.
Contrast
Adjusts the range between the darkest
and the lightest shades in the image. The
higher the contrast, the bigger the
different gray scales.
Increase your Brightness
8-8
Increase your Contrast
Page 96
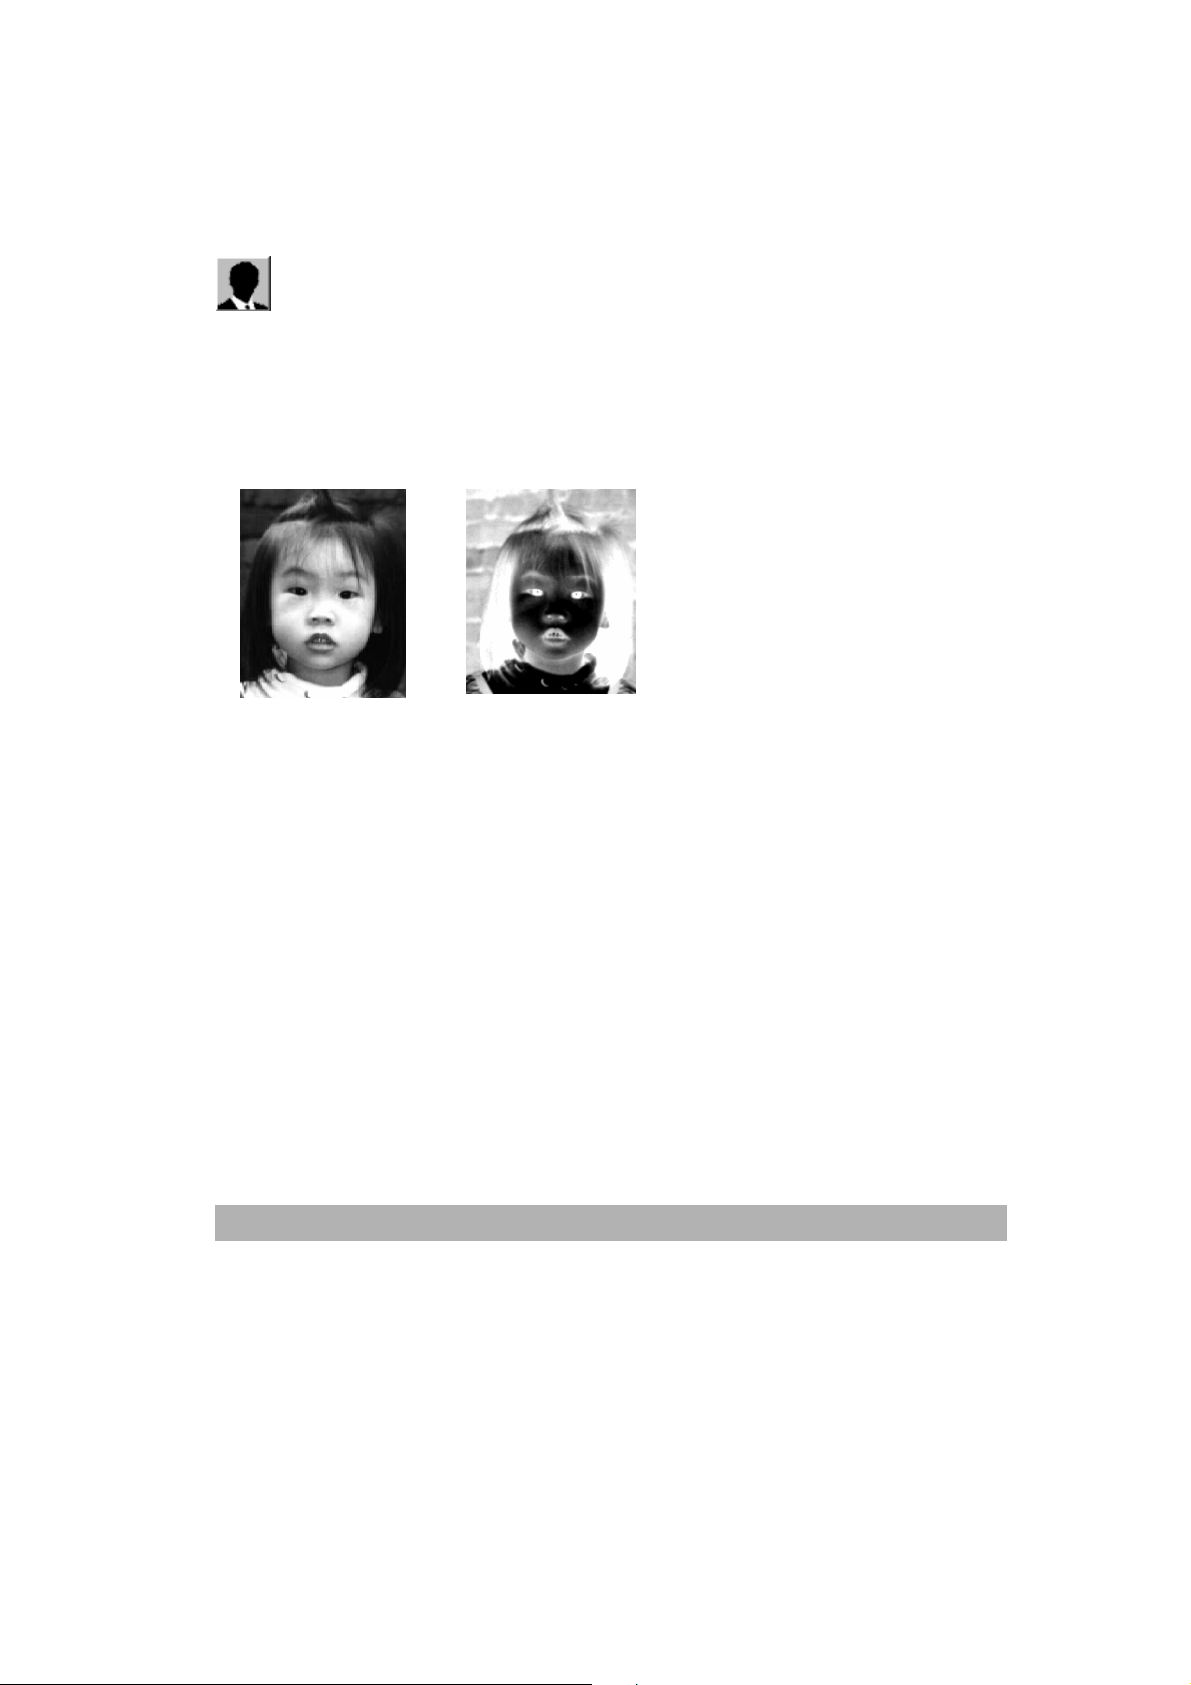
Invert Image
The invert command reverses the brightness and the color in the image. For
color images, each pixel will be changed into its complementary col or at the command of
Invert.
Original
After Invert
AM 3000 series User’s Manual
8-9
Page 97
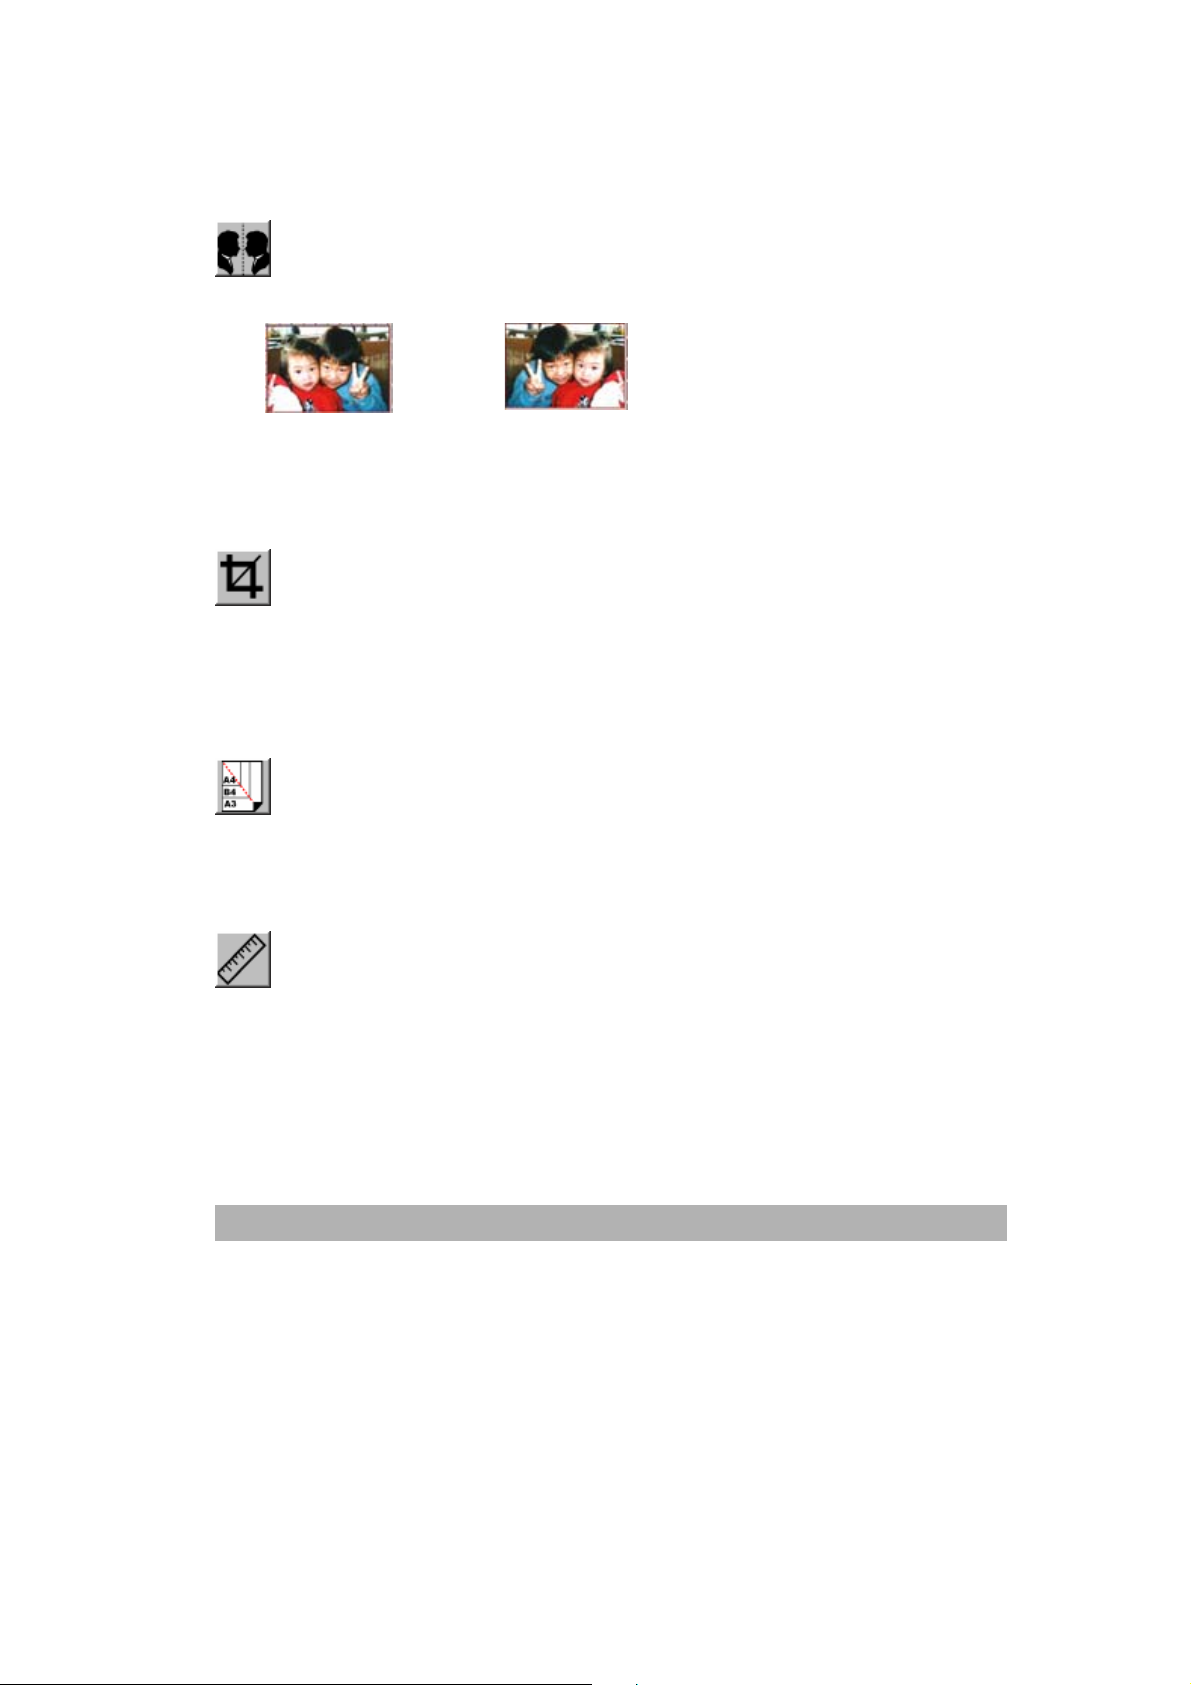
Mirror
Click on the Mirror button to reverse the image (create a mirror image).
Mirror function is off
Mirror function is on
Preview Auto-Area:
Clicking on the Preview Auto-Area button automatically crops the preview scan area to
the previewed document. This will then be the cropping area for all of the scanned documents.
Paper Size:
Select a size on the Paper Size list of frequently used scan sizes, including business card,
5 x 3 in., 6 x 4 in., Letter, Legal, B5, A5, A4, A3, or your current scan area to perform an immediate
selection of your scan size.
Units
The Units button indicates the measuring system that is in use(Inch, Cm, or Pixel).
8-10
Page 98

Descreen
Click on the Descreen button to access a drop-down menu that allows you to specify the
type of document you are scanning in order to eliminate the moiré pattern* commonly found in
printed matter. You can specify Newspaper, Magazine, or Catalog.
Before Descreen
*Moiré pattern—an undesirable pattern resulting from the incorrect screen angle of the overprinting
halftone.
After Descreen
Sharpen
Click on the Sharpen button to access a drop-down menu that allows you to specify a
level to sharpen the scanned image. You can specify a Sharpen setting of Light, More, Heavy, or
Extra Heavy.
Color Adjustment
Click on the Color Adjustment button to enable the button for the Hue, Saturation, and
Lightness feature.
NOTE: The Advanced Settings button must be enabled in order to use the Hue
Saturation, and Lightness feature.
AM 3000 series User’s Manual
8-11
Page 99
Auto Level
Click on the Auto Level button to add shadow to reveal more details in an image.
Advanced Settings
Click on the Advanced Settings button to view the advanced settings buttons for Highlight
/ Shadow, Curves, Color Balance, Hue / Saturation / Lightness, Color
Drop-out, and Custom Settings (six buttons on the right side of the TWAIN dialog box).
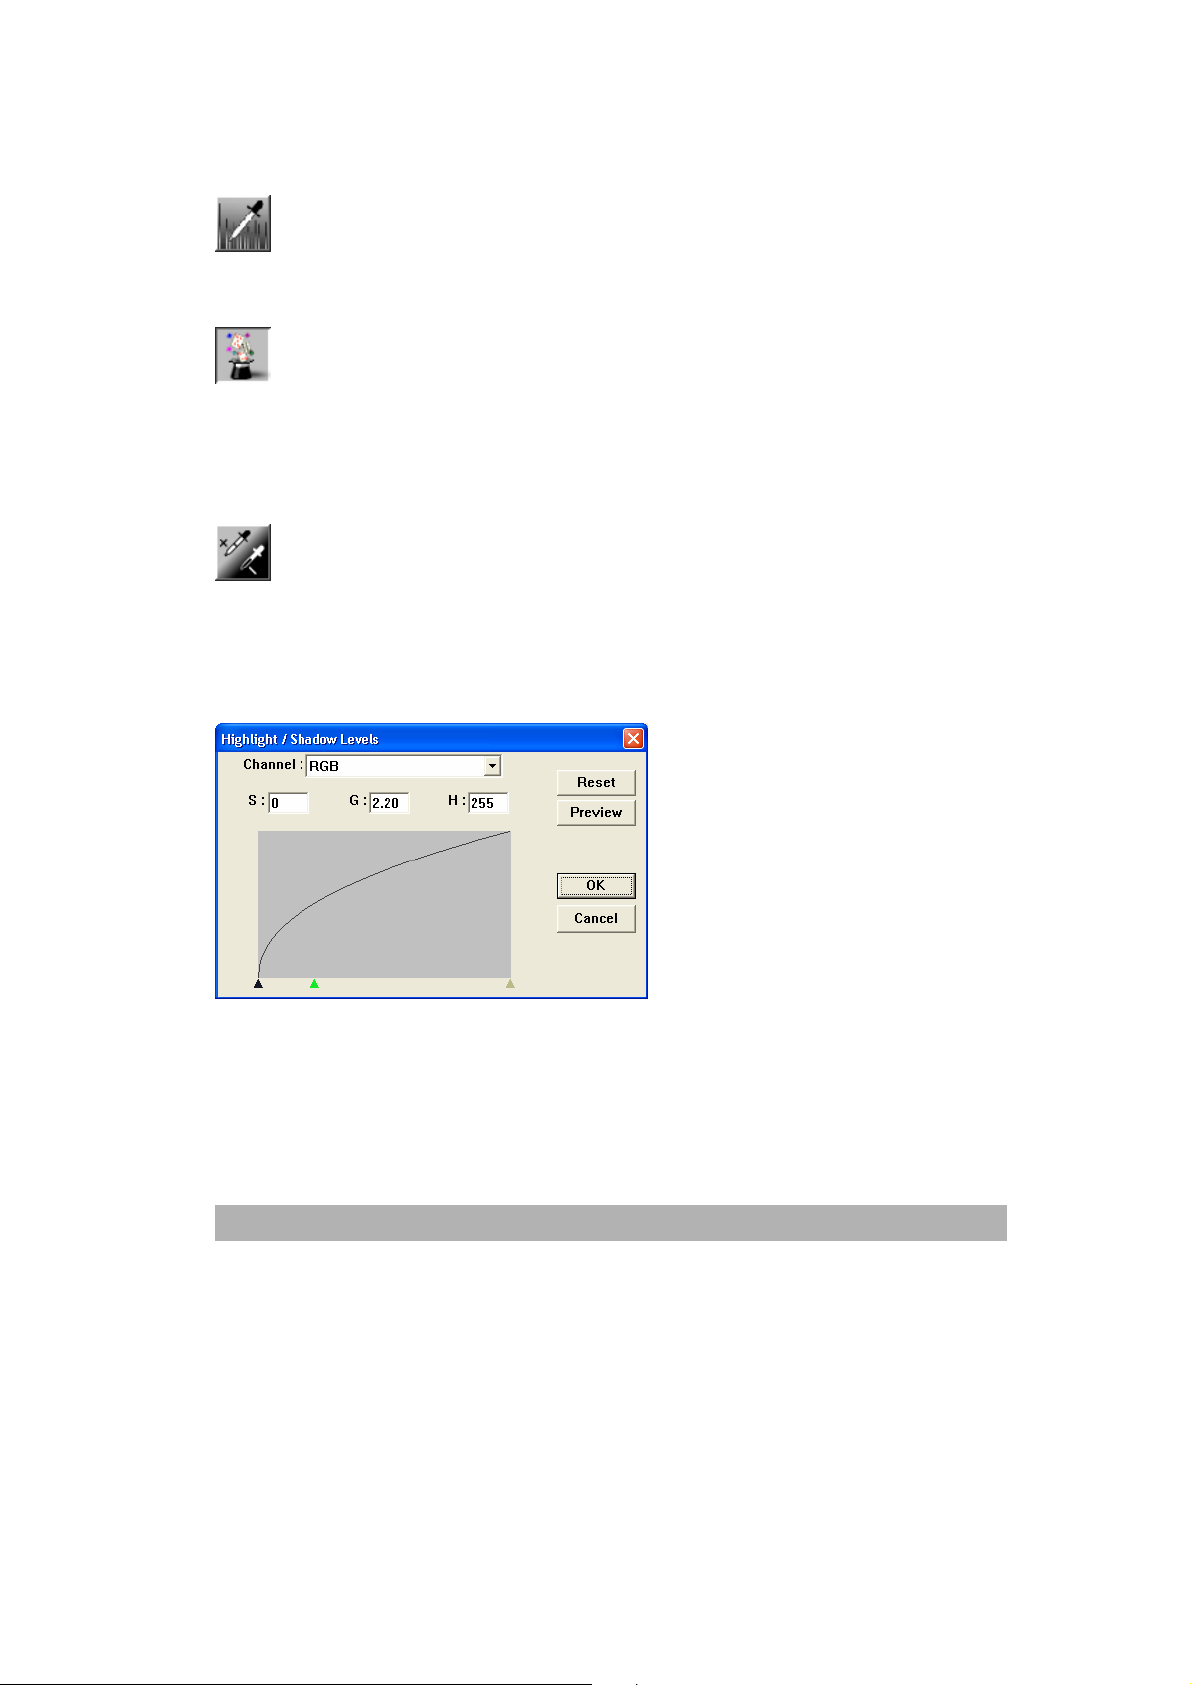
Highlight / Shadow
This feature is available when 8-Bit Gray, 8-Bit Color, or 24-Bit Color is selected on the
Image Type drop-down menu. Highlight refers the lightest point in a scanned image; shadow
refers the darkest point.
Click on the Highlight / Shadow button to access the Highlight / Shadow Levels dialog box. You
can type values in the text boxes or you can place the mouse cursor over the line, click the right
mouse button, and drag the line to specify the values you want.
Use the Highlight and Shadow settings together to extend the range of color and
reveal more details in a color image.
8-12
Page 100

Curves
When you select the Curves button, a dialog box appears that allows you to adjust the
midtone of the image without losing details in the lightest and darkest areas.
Select the Curve or Line button, depending on if you want a curved or an angled setting. Place the
mouse cursor over the line, click the right mouse button, and drag the line to set the curve you
want.
AM 3000 series User’s Manual
8-13
 Loading...