

AVF PM-S-XL User Manual
PM-S-XL
Assembly and mounting Instructions
Thank you for purchasing VFI's large display mounting system.
This product was designed for tabletop mounting of a single TV's sized 50-70+"
and weighing no more than 250lbs.
Some larger TV's will fit, Download TV manufacturers specs online,
Max hole locations are 1100mm w x 650mm h, up to M10 threads.
2 persons are required to attach plasma/lcd TV's to this mount.
Note:
If you cannot understand these instructions or are concerned about the safety of the installation
Contact a qualified contractor or contact VFI at 1-877-834-3876.
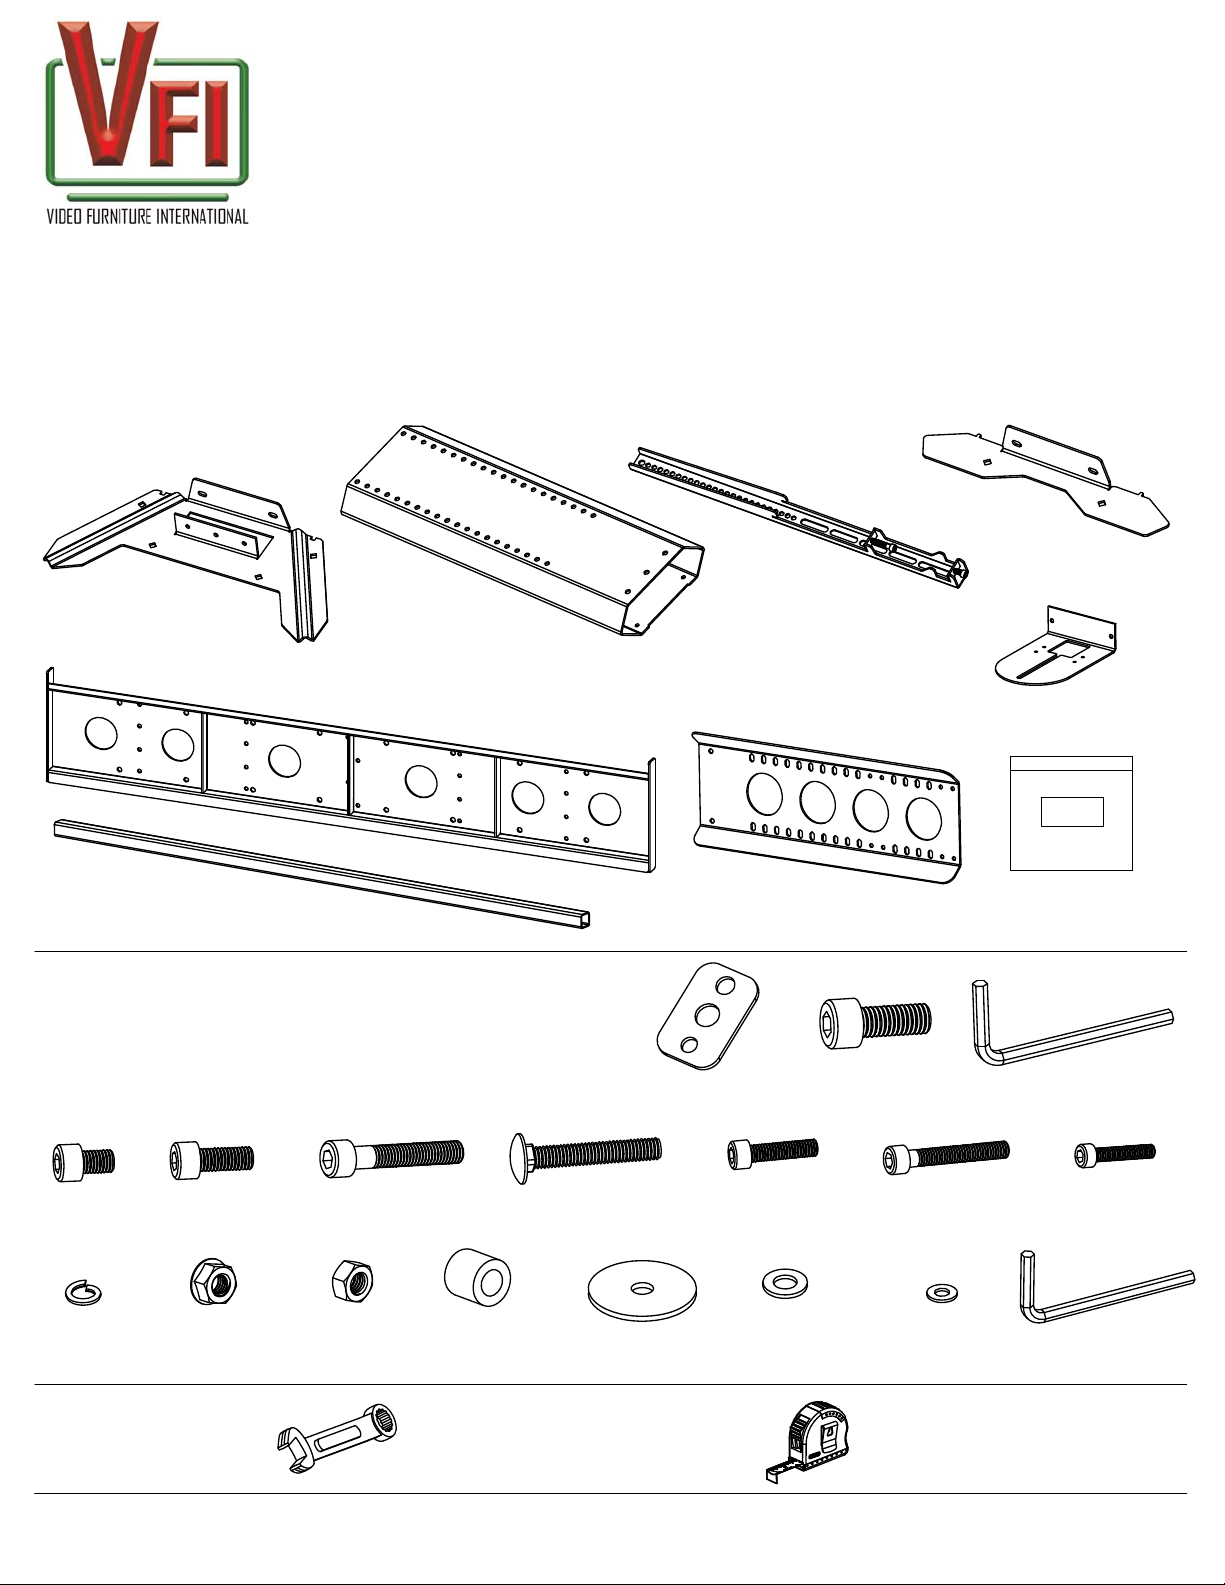
Confirm all parts are included before you begin assembly.
Not all hardware supplied will be used depending on the manufacturer of your display/s.
Read these intructions start to finish before beginning installation.
Supplied Parts:
Mounting Base
(1)
Mounting Spine
(1)
XL TV Bracket
(2)
Page 1
Base Extension
(1)
of 7
XL Brace
(1)
Supplied Hardware:
M8 x 12
(10) PM-S
M8 x 20
(10) PM-S
XL Mounting Bracket
(1)
(1) in PM-S Bag + M10 Hardware
M8 x 40
(6) PM-S
5/16 Carriage Bolt
(6)PM-S
XL Camera mount neck
(1)
Multi Washer
(4)
M6 x 25
(4) PM-S
M10 x 25
(4)
M6 x 40
(4) PM-S
Camera Tongue
(1)
Hardware Bag
(1)
Hex Key
8mm (1)
M5 x 25
(6) PM-S
Spring Washer
(12) PM-S
M8 Lock Nut
(6) PM-S
Tools required:
(not supplied)
5/16 Nut
(6) PM-S
Spacer
(4) PM-S
Large Washer
(6) PM-S
Wrench or Socket (2)
9/16inch
M6-M8 Washer
(8) PM-S
M5 Washer
(6) PM-S
Tape
Measure
13mm
VIDEO FURNITURE INTERNATIONAL
190 Don Hillock Aurora , Ontario L4G 0G9 www.video-furn.com
Toll Free: 1-877-834-3876 Fax: 1-905-751-1488 Local:905-751-1459
Hex Key
6mm
(1) PM-S
1.91

Step 1
9/16 Wrench
or Socket
Securing the Base to a cart or table
5/16 Carriage Bolt
Mounting
Base Part
Table/Cart
Large Washer
Page 2
of 7
Shown Mounting to
VFI cart PL3070
Tighten all 6 nuts securely
Step 2
6mm Hex Key
Adding the Mounting Spine
L
1
Spring Washer
5/16 Nut
If your cart/table does not have pre-drilled holes.
See Page 7 for optimal placement of base.
1. Insert Mounting Spine into Base as shown
2. Add the back bolts first. Do not tighten till front and back
bolts are in place.
3. Use your 6mm hex key to tighten all 5 bolts
Remove grommet if present, surface must be flat.
M8 X 12
: Optional Base cover can be
Note
inserted over-top at the end of Step 2.
see bottom of page 7 for description.
VIDEO FURNITURE INTERNATIONAL
190 Don Hillock Aurora , Ontario L4G 0G9 www.video-furn.com
Toll Free: 1-877-834-3876 Fax: 1-905-751-1488 Local:905-751-1459
2
M8 X 20
3
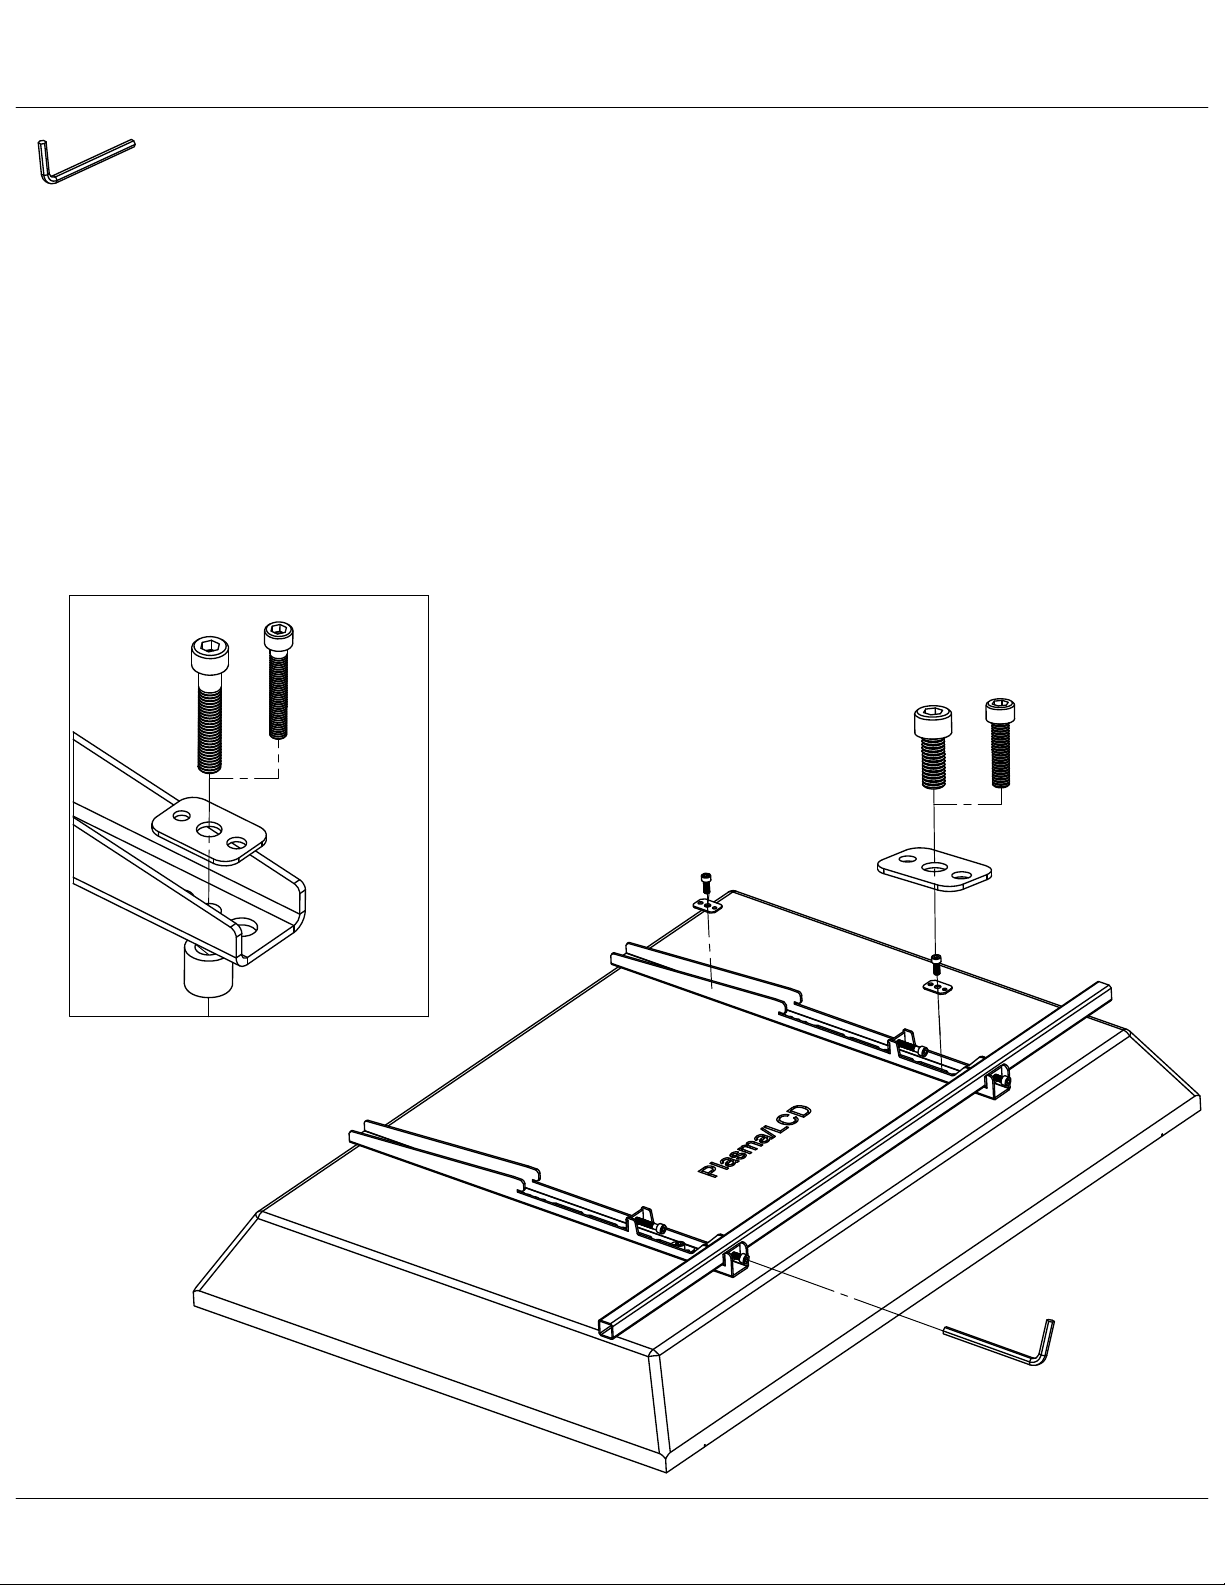
Step 3
Attaching TV brackets
.Have 2 people lift the TV as it can be very heavy and awkward.
Note
Page 3
of 7
Hex Key
1.Place TV face down on blanket or non abrasive surface such as cardboard.
2.Check to see if your TV came with mounting hardware.
If not,we have supplied the most common hardware.
Most TV manuals list the required thread and depth for mounting hardware.
See which bolt length you need by hand tightening only.
3.Place TV brackets so you can see the TV mounting holes through the bracket
and insert bolt through appropriate washer and spring washer for depth adjustment.
4.Use the hex key to tighten until there is resistance, then give a half turn.
DO NOT OVERTIGHTEN AS THIS CAN DAMAGE OR PUNCTURE THE TV
5.Place XL Brace into the locations at the bottom of the TV brackets while ensuring
that it is centred. Use the hex key to tighten until secure.
Optional Spacer mounting
Appropriate
bolt.
Multiwasher
TV Bracket
Spacer
Spacer is used when the back of TV is
not flat or the mount holes are sunk into
the back of the TV. (Rarely used)
3
4
5
VIDEO FURNITURE INTERNATIONAL
190 Don Hillock Aurora , Ontario L4G 0G9 www.video-furn.com
Toll Free: 1-877-834-3876 Fax: 1-905-751-1488 Local:905-751-1459
 Loading...