

Page 1

Avaya Video Telephony Solution Release 4.0 Networking Guide
16-601423
Issue 3
January 2008
Page 2

© 2008 Avaya Inc.
All Rights Reserved.
Notice
While reasonable efforts were made to ensure that the infor mation in this
document was complete and accurate at the time of printing, Avaya Inc. can
assume no liability for any errors. Changes and corrections to the information
in this document may be incorporated in future releases.
For full legal page information, please see the complete document, A vaya
Legal Page for Software Documentation, Document number 03-600758.
To locate this document on the website, simply go to
http://www.avaya.com/support
search box.
Documentation disclaimer
Avaya Inc. is not responsible for any modifications, addition s, or deletions to
the original published version of this documentation unless such modifications,
additions, or deletions were performed by Avaya. Customer and/or End User
agree to indemnify and hold harmless Avaya, Avaya's agents, servants and
employees against all claims, lawsuits, demands and judgments arising out of,
or in connection with, subsequent modifications, additions or deletions to this
documentation to the extent made by the Customer or End User.
Link disclaimer
Avaya Inc. is not responsible for the contents or reliability of any linked Web
sites referenced elsewhere within this documentation, and Avaya does not
necessarily endorse the products, services, or informa tion described or o ff ered
within them. We cannot guarantee that these links will work all of the time and
we have no control over the availability of the linked pages.
Warranty
Avaya Inc. provides a limited warranty on this product. Refer to your sales
agreement to establish the terms of the limited warran ty. In addition, Avaya’s
standard warranty language, as well as information regarding support for this
product, while under warranty, is available through the following Web site:
http://www.avaya.com/support
Copyright
Except where expressly stated otherwise, the Product is protected by copyrigh t
and other laws respecting proprietary rights. Unauthorized reproduction,
transfer, and or use can be a criminal, as well as a civil, offense un der the
applicable law.
Avaya support
Avaya provides a telephone number for you to use to report pro blems or t o ask
questions about your product. The support telephone number
is 1-800-242-2121 in the United States. For additional support telephone
numbers, see the Avaya Web site:
http://www.avaya.com/support
and search for the document number in the
Page 3

Contents
Chapter 1: Introduction . . . . . . . . . . . . . . . . . . . . . . . . . . . 7
Overview of Avaya Video Telephony Solution. . . . . . . . . . . . . . . . . . . . 7
What’s New in this Release . . . . . . . . . . . . . . . . . . . . . . . . . . . . . . 8
Requirements . . . . . . . . . . . . . . . . . . . . . . . . . . . . . . . . . . . . . 8
Managing Video on Your Network . . . . . . . . . . . . . . . . . . . . . . . . . . 9
Classifying Video Users. . . . . . . . . . . . . . . . . . . . . . . . . . . . . . 9
Set Up Your Bandwidth Pools . . . . . . . . . . . . . . . . . . . . . . . . . . 10
Sample Scenarios . . . . . . . . . . . . . . . . . . . . . . . . . . . . . . . . . 10
Chapter 2: Design and Deployment Checklist. . . . . . . . . . . . . . . 17
Overview . . . . . . . . . . . . . . . . . . . . . . . . . . . . . . . . . . . . . . . . 17
Network and PBX-Network Requirements . . . . . . . . . . . . . . . . . . . . . . 18
Feature Interactions and Limitations. . . . . . . . . . . . . . . . . . . . . . . . . 20
Avaya Communication Manager Global Administration . . . . . . . . . . . . . . 21
Avaya Communication Manager Administration for
Ad-hoc Video Conferencing . . . . . . . . . . . . . . . . . . . . . . . . . . . . . 27
Avaya Communication Manager Administration for Polycom
Multipoint Stations (VSX and HDX) . . . . . . . . . . . . . . . . . . . . . . . . . 28
Avaya Communication Manager Administration for Polycom MGC Systems. . . 29
Avaya Communication Manager Administration for Polycom RMX Systems . . . 32
Polycom MGC Configuration . . . . . . . . . . . . . . . . . . . . . . . . . . . . . 33
Polycom RMX Configuration . . . . . . . . . . . . . . . . . . . . . . . . . . . . . 35
Polycom VSX System Configuration . . . . . . . . . . . . . . . . . . . . . . . . . 37
Avaya IP Softphone (IPSP) . . . . . . . . . . . . . . . . . . . . . . . . . . . . . . 38
Avaya IP Softphone Performance Issues . . . . . . . . . . . . . . . . . . . . . . 41
Priority Bandwidth Management . . . . . . . . . . . . . . . . . . . . . . . . . . . 42
SIP Administration (Global). . . . . . . . . . . . . . . . . . . . . . . . . . . . . . 43
SIP Trunk Administration . . . . . . . . . . . . . . . . . . . . . . . . . . . . . . . 44
SIP Station Administration (OPTIM) . . . . . . . . . . . . . . . . . . . . . . . . . 45
SIP Limitations. . . . . . . . . . . . . . . . . . . . . . . . . . . . . . . . . . . . . 46
Issue 3 January 2008 3
Page 4

Contents
Chapter 3: Setting Up Video Endpoints . . . . . . . . . . . . . . . . . . 47
Required Administration . . . . . . . . . . . . . . . . . . . . . . . . . . . . . . . 48
Configure IP Codec Sets . . . . . . . . . . . . . . . . . . . . . . . . . . . . . 48
Configure IP Network Regions . . . . . . . . . . . . . . . . . . . . . . . . . . 50
Configure a Station Endpoint for Avaya IP Softphone Release 6.0
and Video Integrator . . . . . . . . . . . . . . . . . . . . . . . . . . . . . . . . . 53
Checklist . . . . . . . . . . . . . . . . . . . . . . . . . . . . . . . . . . . . . . 53
Configuration Procedures. . . . . . . . . . . . . . . . . . . . . . . . . . . . . 53
Configure Polycom VSX/HDX Series Video Conferencing Systems
and V500/V700 Video Calling Systems . . . . . . . . . . . . . . . . . . . . . . . 57
Checklist . . . . . . . . . . . . . . . . . . . . . . . . . . . . . . . . . . . . . . 57
Configuration Procedures. . . . . . . . . . . . . . . . . . . . . . . . . . . . . 57
Configure a Polycom RMX Series Video Conferencing Bridge Platform . . . . . 65
Checklist . . . . . . . . . . . . . . . . . . . . . . . . . . . . . . . . . . . . . . 65
Configuration Procedures. . . . . . . . . . . . . . . . . . . . . . . . . . . . . 65
Configure Ad-hoc Video Conferencing for a Polycom RMX Series
Video Conferencing Bridge Platform . . . . . . . . . . . . . . . . . . . . . . . . 71
Checklist . . . . . . . . . . . . . . . . . . . . . . . . . . . . . . . . . . . . . . 71
Configuration Procedures. . . . . . . . . . . . . . . . . . . . . . . . . . . . . 71
Display Capacity for Ad-hoc Video Conferencing. . . . . . . . . . . . . . . . 77
View Video Conferencing Bridges . . . . . . . . . . . . . . . . . . . . . . . . 77
Configure a Polycom MGC-25 Video Conferencing Bridge Platform
for an Avaya S8300 Server. . . . . . . . . . . . . . . . . . . . . . . . . . . . . . 78
Checklist . . . . . . . . . . . . . . . . . . . . . . . . . . . . . . . . . . . . . . 78
Configuration Procedures. . . . . . . . . . . . . . . . . . . . . . . . . . . . . 78
Configure Polycom MGC Video Conferencing Bridge Platforms
with Avaya S8500 and S87xx Server . . . . . . . . . . . . . . . . . . . . . . . . 82
Trunk Groups . . . . . . . . . . . . . . . . . . . . . . . . . . . . . . . . . . . 82
Signaling Groups . . . . . . . . . . . . . . . . . . . . . . . . . . . . . . . . . 83
Group Member Assignments . . . . . . . . . . . . . . . . . . . . . . . . . . . 84
Outgoing Rules . . . . . . . . . . . . . . . . . . . . . . . . . . . . . . . . . . 85
Examples . . . . . . . . . . . . . . . . . . . . . . . . . . . . . . . . . . . . . . 86
Configure Ad-hoc Video Conferencing for a Polycom MGC
Video Conferencing Bridge Platform . . . . . . . . . . . . . . . . . . . . . . . . 89
Checklist . . . . . . . . . . . . . . . . . . . . . . . . . . . . . . . . . . . . . . 89
Configuration Procedures. . . . . . . . . . . . . . . . . . . . . . . . . . . . . 89
Display Capacity for Ad-hoc Video Conferencing. . . . . . . . . . . . . . . . 95
View Video Conferencing Bridges . . . . . . . . . . . . . . . . . . . . . . . . 95
4 Avaya Video Telephony Solution Networking Guide
Page 5

Configure an Avaya Meeting Exchange 5.0.1 S6800 Bridge . . . . . . . . . . . . 96
Checklist . . . . . . . . . . . . . . . . . . . . . . . . . . . . . . . . . . . . . . 96
Things to Keep in Mind . . . . . . . . . . . . . . . . . . . . . . . . . . . . . . 96
Configuration Procedures. . . . . . . . . . . . . . . . . . . . . . . . . . . . . 97
Configure a Polycom MGC Video Conferencing Bridge Platform
as an H.320 Gateway . . . . . . . . . . . . . . . . . . . . . . . . . . . . . . . . . 126
Trunk Groups . . . . . . . . . . . . . . . . . . . . . . . . . . . . . . . . . . . 126
Route Pattern . . . . . . . . . . . . . . . . . . . . . . . . . . . . . . . . . . . 127
AAR Tables. . . . . . . . . . . . . . . . . . . . . . . . . . . . . . . . . . . . . 127
MGC Administration . . . . . . . . . . . . . . . . . . . . . . . . . . . . . . . . 127
Configure a Polycom PathNavigator/SE200 Gatekeeper . . . . . . . . . . . . . . 128
Checklist . . . . . . . . . . . . . . . . . . . . . . . . . . . . . . . . . . . . . . 128
Configuration Procedures. . . . . . . . . . . . . . . . . . . . . . . . . . . . . 128
Configure Video Trunks between Two Avaya Communication Manager Systems 131
Checklist . . . . . . . . . . . . . . . . . . . . . . . . . . . . . . . . . . . . . . 131
Configuration Procedures. . . . . . . . . . . . . . . . . . . . . . . . . . . . . 131
Monitor the Status of Video Bandwidth Usage . . . . . . . . . . . . . . . . . . . 134
Contents
Index . . . . . . . . . . . . . . . . . . . . . . . . . . . . . . . . . . 135
Issue 3 January 2008 5
Page 6

Contents
6 Avaya Video Telephony Solution Networking Guide
Page 7

Chapter 1: Introduction
Overview of Avaya Video Telephony Solution
The Avaya Video Telephony Solution enables Avaya Communication Manager to me rge a set of
enterprise features with Polycom’s videoconferencing adjuncts. It unifies voice over IP with
video, web applications, Avaya’s video-enabled IP Softphone, third-party gatekeepers, and
other H.323 endpoints. With the Avaya Video Telephony Solution, you can provide video for
desktop and group communications.
The Avaya Video Telephony Solution supports video calls on the following products:
● Avaya IP Softphone Release 6.0 and Video Integrator
● Polycom HDX series video conferencing system
● Polycom VSX series video conferencing system
● Polycom V500/V700 video calling system
● Polycom RMX series video conferencing bridge platform
● Polycom MGC video conferencing bridge platform
● Avaya Meeting Exchange 5.0.1 S6800 bridge
● third-party gatekeepers, including Polycom PathNavigator/SE200 gatekeepers
● H.320 gateways
Note:
Note: You must perform a network readiness or network assessment to ensure your
network is capable of supporting the high bandwidth demands of video over IP.
You should also consider implementing QoS across your network.
Issue 3 January 2008 7
Page 8

Introduction
What’s New in this Release
Avaya Video Telephony Solutions Release 4.0 introduces the following new features and
enhancements:
● Ability to support Ad-hoc video conferencing with Polycom MGC systems, Polycom RMX
systems, and Avaya Meeting Exchange 5.0.1 systems.
● Ability to support the Polycom RMX series video conferencing bridge platform.
● Ability to support the Polycom HDX series video conferencing system.
● Ability to support SIP video telephony with Avaya DevConnect-approved SIP video
endpoints and Avaya Meeting Exchange 5.0.1 bridges.
Requirements
Video Telephony Solution Release 4.0 requires:
● an S8xx server that is running Avaya Communication Manager software release 5.0.
● Avaya-enabled Polycom MGC Manager software installed and running.
● Avaya licensing keys (for RMX and HDX systems)
8 Avaya Video Telephony Solution Networking Guide
Page 9

Managing Video on Your Network
Before configuring video endpoints, you should determine how you want to manage video on
your network. To control how your bandwidth is used, you must:
1. Determine whether you want to provide some endpoints with video whenever possible.
2. Set up your bandwidth pools.
Classifying Video Users
You can identify two types of video stations: priority video stations and normal video stations.
Priority stations have an increased likelihood of receiving bandwidth and may also be allocated
a larger maximum bandwidth per call. By having a larger maximum bandwidth per call, priority
video stations may receive better quality and more reliable video during calls. Priority video
stations will have an increased likelihood of having video on outgoing calls they make. However,
they might not receive video on incoming calls they receive from “non-priority” stations due to
the following conditions:
Managing Video on Your Network
● No bandwidth is available.
● No “normal” bandwidth is available even though priority bandwidth is available. Since the
call is made by a normal (non-priority) video station, this station would not have access to
the priority bandwidth.
These non-priority stations are referred to as “normal” stations. Normal video stations may or
may not get video, depending on the available bandwidth.
Issue 3 January 2008 9
Page 10

Introduction
Set Up Your Bandwidth Pools
Bandwidth pools enable you to control video usage for normal video users and priority video
users. You can divide the bandwidth into three pools:
● Audio pool
The audio pool contains bandwidth for all audio calls, including the audio-component of
multimedia calls.
● Normal video pool
The normal video pool contains bandwidth for the video portion of a call made by a normal
(non-priority) video user. You can set this pool to be shared. When this pool is shared,
audio-only calls are allowed to borrow bandwidth from this pool.
● Priority video pool
The priority video pool contains bandwidth that is dedicated to priority video users only.
Audio calls and normal video users are not allowed to borrow bandwidth from this pool.
However, if all of the priority video pool bandwidth is currently in use, priority video users
can borrow bandwidth from the normal video pool, if available.
Sample Scenarios
This section provides some examples of how you could specify the bandwidth settings for your
network.
Example 1
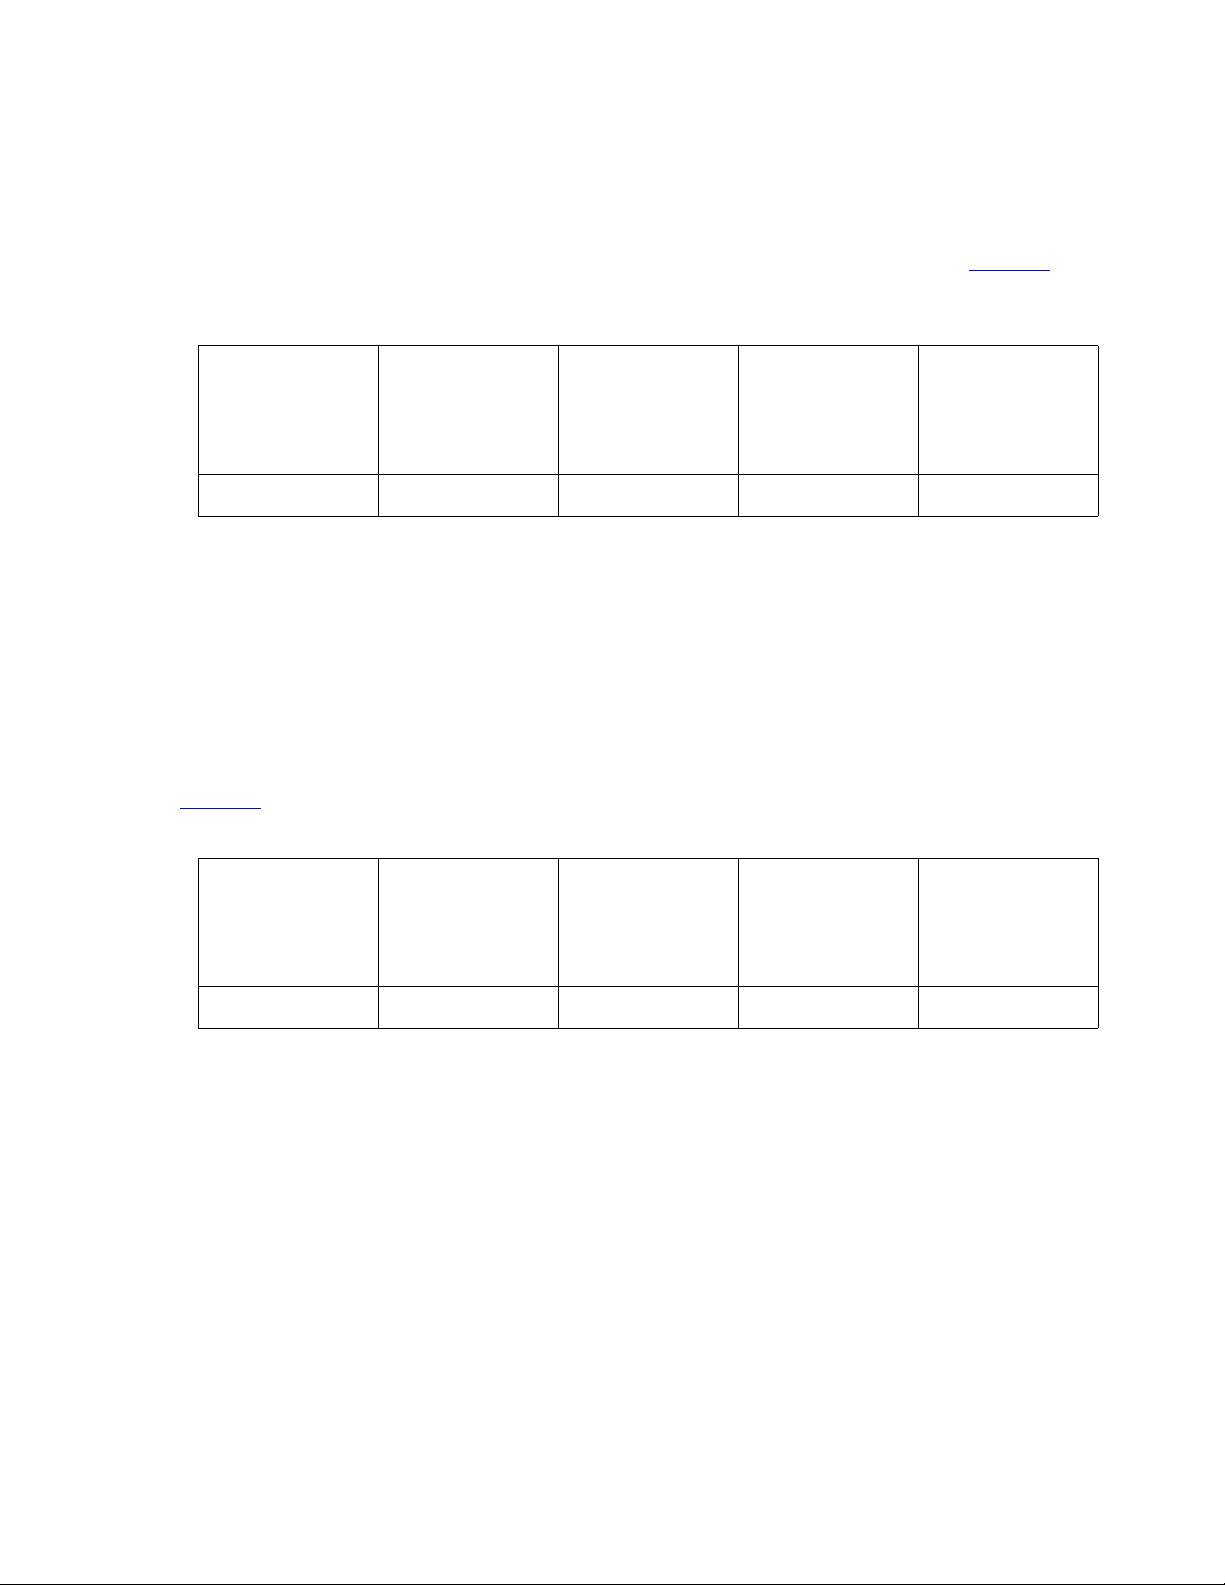
In this example, you do not want to allocate any bandwidth for video. You want to configure the
network to use IP audio. Figure 1
example.
Table 1: Bandwidth Settings for Example 1
Total
Bandwidth
3 Mb 3 Mb 0 Mb 0 Mb No
Audio
Bandwidth
Pool
shows how you would configure the bandwidth pools for this
Priority Video
Bandwidth
Pool
Normal Video
Bandwidth
Pool
Share Normal
Video
Bandwidth
Pool
10 Avaya Video Telephony Solution Networking Guide
Page 11

Example 2
In this example, your network has unlimited bandwidth. Since all of your users can get as much
bandwidth as they need, there is no need to specify priority users. There is only one pool of
bandwidth to be shared by audio and multimedia calls. Audio will come from the normal video
pool. Figure 2
Table 2: Bandwidth Settings for Example 2
Managing Video on Your Network
shows how you would configure the bandwidth for this example.
Total
Bandwidth
3 Mb 0 Mb 0 Mb 3 Mb Yes
Example 3
In this example, you have bandwidth for video only, and you want to reserve some bandwidth
for the CEO. All voice calls will be routed another way. You want to reserve half of your
bandwidth (1.5 Mb) for priority users. If priority users need more than 50% of the bandwidth,
they will be able to use the available bandwidth from the normal video pool. Audio will come
from the normal video pool. Figure 3
example.
Table 3: Bandwidth Settings for Example 3
Total
Bandwidth
Audio
Bandwidth
Pool
Audio
Bandwidth
Pool
Priority
Bandwidth
Pool
shows how you would configure the bandwidth for this
Priority Video
Bandwidth
Pool
Normal Video
Bandwidth
Pool
Normal Video
Bandwidth
Pool
Share Normal
Video
Bandwidth
Pool
Share Normal
Video
Bandwidth
Pool
3 Mb 0 Mb 1.5 Mb 1.5 Mb No
Issue 3 January 2008 11
Page 12

Introduction
Example 4
In this example, you do not want to use too much bandwidth on audio. You want to reserve most
of the bandwidth for video, but you want to allow a few audio calls to keep costs down. You have
a small number priority users. Figure 4
example.
Table 4: Bandwidth Settings for Example 4
shows how you would configure the bandwidth for this
Total
Bandwidth
3 Mb 0.9 Mb 0.6 Mb 1.5 Mb No
The settings in table will allow a few audio calls and one or two priority calls depending on the
bit rate. After the audio pool runs out of bandwidth, the calls will be forced to take another route
since the since the normal video bandwidth pool is not shared. If a priority call occurs when all
of the priority video bandwidth is used, it will use any available bandwidth in the normal video
bandwidth pool before using bandwidth from the audio bandwidth pool.
Example 5
In this example, you do not want to use any IP bandwidth for audio. You want to use IGAR for
audio. All IP bandwidth will be used for video. Figure 5
bandwidth for this example.
Table 5: Bandwidth Settings for Example 5
Total
Bandwidth
Audio
Bandwidth
Pool
Audio
Bandwidth
Pool
Priority Video
Bandwidth
Pool
Priority Video
Bandwidth
Pool
Normal Video
Bandwidth
Pool
shows how you would configure the
Normal Video
Bandwidth
Pool
Share Normal
Video
Bandwidth
Pool
Share Normal
Video
Bandwidth
Pool
3 Mb 0 Mb 0 Mb 3 Mb No
Since you have allocated no audio bandwidth, audio calls will fall over to the public-switched
telephone network. However, multimedia calls will take audio bandwidth and video bandwidth
from the normal video bandwidth pool.
12 Avaya Video Telephony Solution Networking Guide
Page 13
Example 6
In this example, you want video only for the Polycom VSX systems in the boardroom and in the
CEO’s office. Also, this bandwidth must be available always. There are no normal video users.
The extensions for the Polycom VSX systems are administered for priority video. Figure 6
shows how you would configure the bandwidth for this example.
Table 6: Bandwidth Settings for Example 6
Managing Video on Your Network
Total
Bandwidth
3 Mb 2.1 Mb 0.9 Mb 0 Mb No
Example 7
In this example, the following conditions exist:
● You want to guarantee a certain audio bandwidth and video bandwidth.
● You do not want to share the normal video bandwidth pool because you have very strict
limitations on the bandwidth.
● You do not want to exceed any of the provisioned pools.
Figure 7
Table 7: Bandwidth Settings for Example 7
Total
Bandwidth
Audio
Bandwidth
Pool
Priority Video
Bandwidth
Pool
Normal Video
Bandwidth
Pool
shows how you would configure the bandwidth for this example.
Audio
Bandwidth
Pool
Priority Video
Bandwidth
Pool
Normal Video
Bandwidth
Pool
Share Normal
Video
Bandwidth
Pool
Share Normal
Video
Bandwidth
Pool
3 Mb 0.9 Mb 0 Mb 2.1 Mb No
Issue 3 January 2008 13
Page 14

Introduction
Example 8
In this example, the following conditions exist:
● You want to guarantee a certain audio bandwidth and video bandwidth.
● You do not want to share the normal video bandwidth pool because you have very strict
● You do not want to exceed any of the provisioned pools.
● You want to specify a proportion of priority video users.
limitations on the bandwidth. By not sharing the normal video bandwidth pool, you
guarantee:
- a minimum level of video bandwidth
- audio-only calls cannot impact the normal video bandwidth pool
Figure 8
shows how you would configure the bandwidth for this example.
Table 8: Bandwidth Settings for Example 8
Total
Bandwidth
Audio
Bandwidth
Pool
Priority Video
Bandwidth
Pool
Normal Video
Bandwidth
Pool
Share Normal
Video
Bandwidth
Pool
3 Mb 0.9 Mb 0.6 Mb 1.5 Mb No
In this example, 600 Kbit is reserved for priority video. A priority video user will be able to use
the normal video pool if the priority pool is all used and bandwidth exists in the normal video
pool.
14 Avaya Video Telephony Solution Networking Guide
Page 15

Example 9
In this example, the following conditions exist:
● You want to share the normal video bandwidth pool.
● You have no priority video users.
Managing Video on Your Network
Figure 9
Table 9: Bandwidth Settings for Example 7
Total
Bandwidth
3 Mb 0.9 Mb 0 Mb 2.1 Mb Yes
Since there are no priority video users, the normal video bandwidth pool is the entire video
bandwidth pool. With no priority users and the bandwidth being shared, all of the bandwidth
could be used as audio.
Example 10
In this example, the following conditions exist:
● You want to guarantee a certain audio bandwidth and video bandwidth.
● You want to share the normal video bandwidth pool.
● You have priority video users.
shows how you would configure the bandwidth for this example.
Audio
Bandwidth
Pool
Priority Video
Bandwidth
Pool
Normal Video
Bandwidth
Pool
Share Normal
Video
Bandwidth
Pool
Figure 10
shows how you would configure the bandwidth for this example.
Table 10: Bandwidth Settings for Example 7
Total
Bandwidth
Audio
Bandwidth
Pool
Priority Video
Bandwidth
Pool
Normal Video
Bandwidth
Pool
Share Normal
Video
Bandwidth
Pool
3 Mb 0.9 Mb 0.6 Mb 1.5 Mb Yes
In this example, 600 Kbit of bandwidth is reserved for priority video users. Audio cannot use this
bandwidth. The maximum available bandwidth for au dio is 2.4 Mb. (In this case, there wou ld be
no normal video bandwidth available.) The maximum available bandwidth for priority video
users is 2.1 Mb.
Issue 3 January 2008 15
Page 16

Introduction
16 Avaya Video Telephony Solution Networking Guide
Page 17

Chapter 2: Design and Deployment Checklist
Overview
The chapter provides a checklist that will help you design and deploy the Avaya Video
Telephony Solution R4.0.
Note:
Note: For the latest firmware video compatibility matrix, go to
www.avava.com/support. and access Video Telephony Solution.
Issue 3 January 2008 17
Page 18

Design and Deployment Checklist
Network and PBX-Network Requirements
Question 1: Has a multimedia QoS policy been designed and deployed?
Yes.
No. Avoid best effort treatment of video. Avaya IP Softphone (IPSP), Polycom MGC,
Polycom RMX, and Polycom VSX all support QoS for video. See the checklist in section 11.0 of
the white paper from Polycom Global Services titled “Supporting Real-time Traffic: Preparing
Your IP Network for Video Conferencing.”
Question 2: Has a default enterprise Maximum Call Rate been selected?
Note:
Note: Use change ip-codec-set and enable “Allow Direct IP Multimedia” on page 2 of
the form. In Avaya Communication Manager Release 4.0, there are two options:
Normal users and Priority users.
Yes.
No. Recommend initial deployment with Maximum Call Rate of 384 Kbps.
Note:
Note: Keep in mind the following:
- Allow for 20% for IP protocol overheads.
- High definition room systems support call rates of 4 Mbps.
Question 3: Is inter-PBX network connectivity less than 150 ms end-to-end one-way delay and less than 1% packet loss at all times?
Yes.
No. Expect slower call establishment. Compared to audio-only calls, multimedia calls have
a greater number of round-trip signaling messages by a factor of 5.
18 Avaya Video Telephony Solution Networking Guide
Page 19

Network and PBX-Network Requirements
Question 4: Does the VPN connection for Avaya IP Softphone have less than 150 ms one-way delay to Avaya Communication Manager, is packet loss less than 1%, and is jitter less than 20 ms?
Yes.
No. Avaya IP Softphone does not support automatic bit rate downgrades on packet loss
feedback, nor does it perform ping tests for video assessment. The user must reduce call rate
and reattempt the call to achieve the best video experience for the network conditions. In
worst-case conditions, users may experience video disablement by Avaya Communication
Manager for the call duration due to excessive video update requests.
Question 5: Are there video call scenarios that would cross more than three Avaya Communication Manager systems?
Note that a limitation of the solution is that shuffling to direct-ip is blocked for Avaya
Communication Manager systems that are pushing tandem trunk-to-trunk multimedia calls.
Hairpinning is allowed.
Yes. Administer additional trunks to minimize the use of tandem Avaya Communication
Manager systems, thereby reducing video-update latency. Avoid the use of slow CPU servers
(for example, S8700) in tandem scenarios, since video signaling across many Avaya
Communication Manager systems is exponentially more expensive than audio-only calls.
No.
Issue 3 January 2008 19
Page 20

Design and Deployment Checklist
Feature Interactions and Limitations
Question 1: Is Call Recording, Whisper Page, or Service Observing going to occur on video calls?
Yes. Expect audio-only calls. It is working as designed. From Avaya Communication
Manager Release 5.0, the ad-hoc video conferencing feature may resolve some of these
limitations.
No.
Question 2: Is “transfer to MGC/RMX” being used for ad-hoc conferencing?
Yes. Avoid scenarios where a user attempts to transfer to a meeting room where tandem
Avaya Communication Manager systems link the user to the Polycom MGC/RMX. Multiple
Avaya Communication Manager shuffling (if allowed) may legitimately block the transfer. A
reattempted transfer should succeed.
No.
Question 3: Should a customer with a network of PBXs trunked together who will want to deploy ad-hoc video conferencing with Polycom RMXs in the future deploy those RMXs in a distributed manner?
Yes. Ad-hoc conferencing will require at least one Polycom RMX per active Avaya
Communication Manager system to support future ad-hoc video conferencing via the
Conference button.
No.
Question 4: Have additional media resources been allocated for Avaya Communication Manager systems that are used for tandem multimedia calls?
In a typical hub and spoke arrangement of Avaya Communication Manager systems, the
core PABX that is doing the tandem calls between remote PABX systems should have
additional media resources deployed as shuffling to direct-ip is blo cked for multimedia calls.
Yes.
No. Expect higher utilization of media resources on tandem Avaya Communication
Manager systems.
20 Avaya Video Telephony Solution Networking Guide
Page 21

Avaya Communication Manager Global Administration
Avaya Communication Manager Global Administration
Question 1: Are the video capacities on system-parameters customer-options, page 2 configured correctly?
Maximum Video Capable H.323 Stations should be 1 x the number of single point Polycom
VSX systems.
Maximum Video Capable IP Softphones should be equal to the number of video
softphones.
Maximum Administered Ad-hoc Video Conferencing Ports should be based on the number
of RMX systems and the maximum port count capability for the RMX systems.
Yes.
No.
Question 2: Are the fields on system-parameters customer-options, page 4 configured correctly?
“Enhanced Conferencing?” = y
“IP Trunks?” = y
“IP Stations?” = y
“ISDN-BRI Trunks?” = y
“ISDN-PRI?” = y
“Multimedia Call Handling (Basic)?” = n
“Multimedia Call Handling (Enhanced)?” = n
Yes.
No.
Issue 3 January 2008 21
Page 22

Design and Deployment Checklist
Question 3: Are the fields in ip-network-region, page 1 configured properly for all regions used by video endpoints?
“Intra-region IP-IP Direct Audio” = y
“Inter-region IP-IP Direct Audio” = y
Note:
Note: For network regions containing third-party gatekeepers, these values must be set
to No for direct audio because shuffling may not be supported by all third-party
endpoints.
Yes.
No. Note the actual settings in this page and find out the customer’s reasons/requirements
for these options to be disabled. Video endpoints do not need to be shuffled to resume video.
Third-party endpoints will support basic call setup only.
Question 4: Are the fields in ip-network-region, page 2 configured properly for all regions used by video endpoints?
H.323 SECURITY PROFILES must contain any-auth for Polycom VSXs to authenticate.
challenge is used by Avaya IP Softphone. pin-eke is used by Polycom VSX. any-auth
encompasses both challenge and pin-eke.
Yes.
No. Expect registration failures.
Question 5: Is the ip-codec-set form configured properly?
Review all codec-sets used across the enterprise including the codec-sets used by media
processors, trunks, and stations as well as inter-region codec sets. Has the enterprise
selected a single version of G.711 across all Avaya Communication Manager systems
globally?
Yes.
No. Simplify the codec-set administration by selecting one variant of G.711 across the entire
network of Avaya Communication Manager systems. A single variant can be used globally.
Otherwise expect codec mismatch errors and call drops between Avaya Communication
Manager systems. Multimedia signaling uses H.245, which is more sensitive to codec
administration than audio-only repeat-fast start signaling.
22 Avaya Video Telephony Solution Networking Guide
Page 23

Avaya Communication Manager Global Administration
Question 6: Is the intra-region audio administration correct in the ip-codec-set form?
Review all IP codec-sets used across the enterprise including the IP codec-sets used by
media processors, IP trunks, and IP stations.
Wide-band codecs (for example, SIREN series, G.722.1 series, and G.722-64k) should
appear first and are supported for shuffled Polycom VSX calls only across a single Avaya
Communication Manager system.
G.711 should appear next.
Then follow with G.729/G.729A codec, etc.
Yes.
No.
Question 7: Is the inter-region audio administration correct in the ip-codec-set form?
Review all codec-sets used across the enterprise including the codec-sets used by media
processors, IP trunks, and IP stations.
Are there bandwidth issues? If no, then re-use the one codec set also in use for intra-region.
If there are bandwidth issues, specify a low bandwidth codec first followed by one G.711
codec. If there are severe bandwidth issues, customers can choose to leave out G.711 and
also ensure video is disabled.
Yes.
No.
Question 8: Is the audio administration for Polycom VSXs correct in the ip-codec-set form?
Review all codec-sets used across the enterprise including the codec-sets used by media
processors, trunks, and stations.
If codec-sets used for stations include G.729, then a new network-region and codec must be
defined for use by Polycom VSXs. VSX stations do not support G.729 but do support
G.729A.
Note that media encryption is not supported by VSX stations.
Yes.
No. Expect call setup failure. This is a work around for a VSX signaling issue.
Issue 3 January 2008 23
Page 24

Design and Deployment Checklist
Question 9: Is the video administration correct in the ip-codec-set form?
Review page 2 of all the codec-sets to be used by video stations and video trunks.
Is “Allow Direct-IP Multimedia?” set to yes?
Is “Maximum Call Rate for Direct-IP Multimedia” set appropriately considering whether the
codec-set is used for inter-region where there are bandwidth issues.?
Yes.
No. Expect audio only calls.
Question 10: Is ip-network-region inter-region video bandwidth management used across WAN links?
Ensure appropriate video total bandwidth limits on ip-network-region page 3 are set
correctly.
Yes.
No. Expect low-quality video. Avaya recommends replacement of CAC via trunk-member
counting with cumulative bandwidth management. Note that unlike audio, Avaya
Communication Manger’s bandwidth management feature does not take into account the
variable video headers. Allow 20% overheads. Best practice recommends video applications
should consume no more than 35% of the total WAN bandwidth.
Question 11: Is video station administration correct in the station form?
First refer to this guide or the quick setup guide.
Ensure “IP Video?” is yes.
Ensure “IP Video Softphone?” is yes.
On page 2, ensure “Direct IP-IP Audio Connections?” is yes.
Yes.
No. Expect audio only calls.
24 Avaya Video Telephony Solution Networking Guide
Page 25

Avaya Communication Manager Global Administration
Question 12: Is signaling group administration appropriate for video support?
Review the signaling groups used between Avaya Communication Manager systems, to
Polycom MGCs/RMXs, and to PathNavigators. Also refer to this guide or the quick setup
guide.
Ensure “IP Video?” is yes.
Ensure “Direct IP-IP Audio Connections?” is yes.
Ensure “Calls Share IP Signaling Connection?” is No, though this setting may be Yes
between Avaya Communication Manager systems.
Does the network-region value correspond to an ip-codec-set that supports video?
Yes.
No. Expect audio only calls.
Question 13: Does the network-region value in the change signaling-group form correspond to an ip-codec-set that supports video?
Yes.
No. Expect audio only calls.
Question 14: Is DSCP tagging provisioned correctly?
Ensure that DSCP parameters are provisioned for the network region to which endpoints
are registered.
For Avaya Communication Manager Release 4.0: Polycom VSX 8.5.3 onwards and
Polycom MGC 8.0.1 onwards will automatically obtain DSCP parameters as configured in
the network region. All other endpoints should have DSCP parameters set manually to the
same values to which Avaya Communication Manager is set.
Yes.
No. This is not best practice.
Issue 3 January 2008 25
Page 26

Design and Deployment Checklist
Question 15: For shared control of IP sets, is the network region of the Avaya IP Softphone the same as the IP set?
Use the change ip-network-map command to ensure that the Avaya IP Softphone is
mapped to the same network region as the IP set.
Note:
Note: For shared control when using video, the only option supported is via the server .
Do not try using the via the phone (CTI) option.
Yes.
No. Do not do this. This is not supported, so expect undefined results. When using shared
control with video, the network region used for Avaya IP Softphone must match the network
region used by the IP set. For Avaya Communication Manager Release 5.0 and later, this will
not be a limitation.
26 Avaya Video Telephony Solution Networking Guide
Page 27

Avaya Communication Manager Administration for Ad-hoc Video Conferencing
Avaya Communication Manager Administration for
Ad-hoc Video Conferencing
Question 1: Are the Ad-hoc conferencing video capacities on system-parameters customer-options, page 2 configured correctly?
Ensure the “Maximum Administer Ad-hoc Video Conferencing Ports” is set to the number of
ports available for Ad-hoc video conferencing.
Yes.
No.
Question 2: Has a Class of Service (COS) been assigned with “Ad-hoc Conferencing” enabled?
Yes.
No. Use the change COS command to enable Ad-hoc Video Conferencing.
Question 3: Has a video bridge been added using the add video-bridge command?
Yes.
No. Use the add video-bridge command to add Polycom MGC or Polycom RMX details for
Ad-hoc video conferencing.
Issue 3 January 2008 27
Page 28

Design and Deployment Checklist
Avaya Communication Manager Administration for Polycom Multipoint Stations (VSX and HDX)
Question 1: Does each extension for a given multipoint endpoint have the same password configured on the station form?
For a multipoint station, each extension must have the same password. However, this
password does not need to match the password for other multipoint stations.
Yes.
No. Use the change station command to set the “Security Code” entries to match. If these
entries do not match, Avaya Communication Manager may reject registration by the station or
confine it to one extension only.
Question 2: Has “Hunt-to Station” been configured to a circular hunt on the station form?
Configuring “Hunt-to Station” to a circular hunt enables Avaya Communication Manager to
find the unused extension when dialing a multipoint station that is already in a call. This
allows you to always call the main extension for the multipoint station.
Yes.
No. Use the change station command to set “Hunt-to Station” so that each station hunts to
the next one, and the last station hunts to the first one.
Question 3: Has “Coverage” been configured on the station form?
The coverage feature has priority over the hunt-to feature and will interfere with it. The first
call to the main Polycom VSX/HDX extension will succeed, but other calls will be busy
(instead of hunting correctly). Setting "Station Hunt Before Coverage?" to "y" will also work
but has system-wide consequences.
Yes. U se the change station command and set “Coverage” to blank.
No.
28 Avaya Video Telephony Solution Networking Guide
Page 29

Avaya Communication Manager Administration for Polycom MGC Systems
Avaya Communication Manager Administration for
Polycom MGC Systems
Question 1: Polycom MGCs with multiple IP boards in conjunction with S87xx servers with multiple CLAN boards in regions require administration planning. Has this guide or the quick setup guide been used and understood?
Yes.
No. Complex signaling group and trunk group administration is required. Follow the rules in
this guide and the quick setup guide. This solution offers a number of high availability options.
CLAN board failures and IP board failures can be survivable. Incorrect administration can cause
intermittent service.
Question 2: In Avaya Communication Manager Release 4.0, do signaling groups to Polycom MGCs have “Layer 3 Tests?” set to No?
Yes.
No. Expect signaling groups to go out of service (OOS).
Question 3: Is the outgoing trunk group to the Polycom MGC configured correctly in the change trunk-group form?
On Trunk group page 1, “Direction” must be outgoing.
On Trunk group page 1, “Outgoing Display” may be y. This is helpful for diagnostics.
On Trunk group page 2, “Disconnect Supervision – Out?” must be y to allow transfer to the
MGC.
On Trunk group page 3, “Send Calling Number” must be set to allow the MGC to resolve
calling party against the participant list on MGC conferences when pre-administered with
participants.
Yes.
No. Expect trunk transfer failure. Expect wasted resources on the MGC.
Issue 3 January 2008 29
Page 30

Design and Deployment Checklist
Question 4: Is the incoming trunk group for the Polycom MGC configured correctly in the change trunk-group form?
On Trunk group page 1, “Direction” must be incoming.
On Trunk group page 2, “Disconnect Supervision – In?” must be y to allow transfer of
MGC-initiated calls to other trunks.
Yes.
No. Expect trunk transfer failure.
Question 5: Is there only one incoming trunk group per Polycom MGC?
Yes.
No. Read this guide or the quick setup guide.
Question 6: Does the Polycom MGC have additional IP boards?
Yes. For board redundancy, administer a second outgoing trunk group for the second to
“nth” IP boards.
No. Only one outgoing trunk group is required.
Question 7: Is the outgoing signaling group to the MGC configured correctly?
“LRQ Required?” must be y.
“Near end Listen Port” must be 1719.
“Far end Listen Port” must be 1719.
“Trunk Group for Channel Selection” must be clear.
Yes.
No. Expect call failures or intermittent call failures, or shuffling that shuts down video.
30 Avaya Video Telephony Solution Networking Guide
Page 31

Avaya Communication Manager Administration for Polycom MGC Systems
Question 8: Is the incoming signaling group to the Polycom MGC configured correctly?
“RRQ Required?” must be y.
“ARQ Required?” must be y.
“Near end Listen Port” must be 1720.
“Far end Listen Port” must be 1720.
“Trunk Group for Channel Selection” must be set to the trunk that uses the group.
Yes.
No. Expect call failures.
Question 9: If a Polycom MGC is to be used for six-party Ad-hoc video conferencing with Avaya Communication Manager Release 5.0, has the MGC been placed in a dedicated network region?
You must have:
- a dedicated network region for MGC use
- dedicated codec sets to infer the conference bit rates
Map the MGC to the new dedicated network region using the region field on the signaling
groups connected to the MGC.
Ensure that you are using a codec set that reflects the correct conference bit rates for the
MGC’s network region.
Use the change ip-network region command to ensure that all other network regions have
direct connectivity to the MGC’s network region.
Yes.
No. Expect the MCU selection algorithms to make compromised decisions based on
potentially incorrect inferred information from the codec-set conference bit rates.
Issue 3 January 2008 31
Page 32

Design and Deployment Checklist
Avaya Communication Manager Administration for Polycom RMX Systems
Question 1: Is a single, dual-direction trunk-group to the Polycom RMX configured correctly in the change trunk-group form?
On Trunk group page 1, “Direction” must be both.
On Trunk group page 1, “Outgoing Display” may be y. This is helpful for diagnostics.
On Trunk group page 2, “Disconnect Supervision – In?” must be y to allow transfer to the
RMX.
On Trunk group page 2, “Disconnect Supervision – Out?” must be y to allow transfer to the
RMX.
On Trunk group page 3, “Send Calling Number” must be set to allow the RMX to resolve
calling party against the participant list on RMX conferences when pre-administered with
participants.
Yes.
No. Expect trunk transfer failure. Expect wasted resources on the RMX.
Question 2: Is the signaling group to the Polycom RMX configured correctly?
“RRQ Required?” must be y.
“ARQ Required?” must be y.
“Near end Listen Port” must be 1720.
“Far end Listen Port” must be 1720.
“Trunk Group for Channel Selection” must be set to the trunk that uses the group.
Yes.
No. Expect call failures.
Question 3: In Avaya Communication Manager Release 4.x, do signaling groups to Polycom RMX have “Layer 3 Tests?” set to No?
Yes.
No. Expect signaling groups to go out of service (OOS).
32 Avaya Video Telephony Solution Networking Guide
Page 33

Polycom MGC Configuration
Polycom MGC Configuration
Question 1: Does Network Service Properties have AVF?
Check that “Service Mode” is set to Pseudo Gatekeeper – AVF on the “Network Services
Properties” H.323 tab.
Yes.
No. If this option is not available, install the Avaya version of the Polycom MGC Manager.
Question 2: Is H.245 tunneling enabled in the system.cfg file?
Check that IP_BOARD_P ARAMETERS H245_TUNNELING is set to YES in the system.cfg
file.
Yes.
No. Set this parameter to YES.
Question 3: Is G.729 disabled in the system.cfg file?
Check that IP_AUDIO G729 is set to NO in the system.cfg file.
Yes.
No. You must set this parameter to NO to avoid call drops.
Question 4: Is wideband audio enabled in the system.cfg file?
In the system.cfg file, ensure that AUDIO_PLUS_FREQUENCY is set to WB (wideband).
NOTE: The default value for this parameter is MB (medium band).
Yes.
No. Expect no wideband support by the MGC.
Question 5: For Polycom MGC version 8, is the Avaya mode enabled in the option flag in the system.cfg file?
Yes.
No. You must enable this parameter.
Issue 3 January 2008 33
Page 34

Design and Deployment Checklist
Question 6: Is the Polycom MGC registration refresh rate set to less than 60 seconds? (35 seconds is recommended.)
Yes.
No. In the MGC Manager, go to <MGC name>-MCU Configuration-Network
Services-IP-<service name>. Find the H.323 tab, and ensure that “Refresh H.323
Registrations Every” is enabled and set to 35 seconds.
Question 7: Has 1*1 transcoding been set up?
Modify the desired conference room properties, and select the display option 1 on the Video
Sources tab.
Yes.
No. MGC-MGC and MGC-RMX conference cascading may not display as expected.
34 Avaya Video Telephony Solution Networking Guide
Page 35

Polycom RMX Configuration
Polycom RMX Configuration
Question 1: Is the Polycom RMX licensed for Avaya use?
Using the Polycom RMX web interface, go to Administration>License Information, and
verify that Avaya is selected in “Polycom Partners.”
Yes.
No. Expect registration failure.
Question 2: Has the Polycom RMX system configuration been modified for use in the Avaya environment?
Using Setup menu>"System Configuration” tab, modify the following system configuration
parameters:
● MCMS_PARAMETERS:
- ENABLE_AUTO_EXTENSION = YES
- MCU_DISPLAY_NAME = POLYCOM RMX-2000
- CP_REGARD_TO_INCOMING_SETUP_RATE = NO
- H323_FREE_VIDEO_RESOURCES = NO
- NUMERIC_CONF_ID_LEN = 5
- NUMERIC_CONF_ID_MAX_LEN = 8
- NUMERIC_CONF_ID_MIN_LEN = 4
- TERMINATE_CONF_AFTER_CHAIR_DROPPED = NO
● CS_MODULE_PARAMETERS:
- H245_TUNNELING = YES
Yes.
No. Configuration not supported.
Issue 3 January 2008 35
Page 36

Design and Deployment Checklist
Question 3: Has a silence .wav file been installed?
Create a silence .wav file.
From the Polycom RMX web interface, click the note button (the right-most icon located
below ivr services), and replace the music file with the silence .wav file you created.
Yes.
No. The RMX IVR audio for conference entry will be played when the first party joins the
ad-hoc video conference.
Question 4: Has 1*1 transcoding been set up?
Modify the desired conference room properties, and select the display option 1 on the Video
Sources tab.
Yes.
No. MGC-MGC and MGC-RMX conference cascading may not display as expected.
36 Avaya Video Telephony Solution Networking Guide
Page 37

Polycom VSX System Configuration
Polycom VSX System Configuration
Question 1: Are firewalls present between the Polycom VSX/HDX and the Avaya Communication Manager system?
Yes. Ensure H.245 port range 59000-59200 is open.
No.
Question 2: Does the Polycom VSX Options page have “Multipoint” or “Multipoint Trial” enabled?
Yes. On the Avaya Communication Manager system, ensure that x (where x depends on
the VSX type) consecutive stations are administered with the same password in a circular
station hunt group. Refer to this guide or the quick setup guide.
No.
Question 3: Is the “Avaya option” enabled on the Polycom VSX Options page?
Yes.
No. Install the new options key that will enable Avaya options.
Question 4: If H.239 is desired, is the H.239 option field enabled?
On VSX System->Admin Settings->Network->Call Preference, set Enable H_239.
Yes.
No. Dual video (people and content) will not work.
Issue 3 January 2008 37
Page 38

Design and Deployment Checklist
Avaya IP Softphone (IPSP)
Question 1: Did you install the USB camera with the latest drivers and verify that the camera is working?
Verify the camera works using the software that was installed with the camera (for example, use
Logitech QuickCapture for Logitech cameras).
Yes.
No.
Question 2: Did you update the PC with the latest software?
This is required for best performance. This includes video card drivers (VGA drivers) and
Microsoft DirectX.
Yes.
No. Expect flickering video.
Question 3: Did you install the Avaya IP Softphone version that supports video?
Check www.avaya.com/support for the latest video Avaya IP Softphone release. Verify that
the Avaya Communication Manager license supports this version of Avaya IP Softphone.
Yes.
No. Expect audio-only.
38 Avaya Video Telephony Solution Networking Guide
Page 39

Avaya IP Softphone (IPSP)
Question 4: Did you configure the Avaya IP Softphone Login settings for video?
Configuration:
Road Warrior
Control of Avaya Telephone (via the server)
Bandwidth Settings:
Local Area Network
Cable, xDSL or ISDN
Yes.
No. Video is NOT available with the following Settings:
Control of Avaya Telephone (via the telephone)
Telecommuter
Instant Messaging Only
28800bsp or faster modem
Question 5: Did you verify video registration after logging into Avaya IP Softphone?
Verify that the local video window opens properly.
Check the video status icon in the Avaya IP Softphone window:
Indicates that Avaya IP Softphone is not registered with video.
Indicates that Avaya IP Softphone is successfully registered with video.
Yes.
No. Check the Login settings in Avaya IP Softphone. (See Question 4 in this section.)
Check Video Options and manually select the camera.
Issue 3 January 2008 39
Page 40

Design and Deployment Checklist
Question 6: Is the Video Options outgoing call rate set to “Maximum”?
Ensure that the Video Options outgoing call rate is not set lower than the Polycom MGC/RMX
conference requirements. It should only be changed from “Maximum” for specific reasons by
advanced users. Avaya Communication Manager determines the call rates automatically.
Yes.
No. Change the Video Options outgoing call rate to meet the Polycom MGC/RMX
conference requirements.
40 Avaya Video Telephony Solution Networking Guide
Page 41

Avaya IP Softphone Performance Issues
Avaya IP Softphone Performance Issues
Question 1: Are there video issues?
Check the Video Properties dialog box. Check the information on all the tabs in the dialog
box.
Status – The current stats of the video.
Capabilities – The codec sets that Avaya IP Softphone currently supports.
Signaling – The current signaling with the Avaya Communication Manager system.
Yes.
No.
Question 2: Is Avaya IP Softphone non-responsive?
Yes. Set the virus scanner to exclude the Avaya IP Softphone directory. See
www.support.avaya.com for more information.
No.
Question 3: If there are video issues, have you provided log files?
Logs files are located in:
C:\Program Files\Avaya\Avaya IP Softphone\Log Files\*
C:\Program Files\Polycom\video\viaVideo.vg2
Zip up these files and send to support.
Yes.
No.
Issue 3 January 2008 41
Page 42

Design and Deployment Checklist
Priority Bandwidth Management
Question 1: Has a COS been assigned with “Priority IP Video” enabled?
Yes.
No. Use change cos and enable Priority IP Video.
Question 2: Have inter-region video limits been set for normal and priority callers?
Yes.
No. Use change ip-network-region and allocate priority video bandwidth across WANs on
page 3 of the form.
Question 3: Has the Maximum Call Rate for Priority Direct-IP Multimedia been set?
Yes.
No. Use change ip-codec-set and set appropriate the maximum call rates for priority and
normal video users on page 2 of the form.
Question 4: Do Polycom MGC trunks need access to priority bandwidth pools across the Avaya Communication Manager network for MGC dialout scenarios?
Yes. Set the “Priority Video” field to yes on the MGC signaling groups.
No.
42 Avaya Video Telephony Solution Networking Guide
Page 43

SIP Administration (Global)
SIP Administration (Global)
Question 1: Is Avaya Communication Manager licensed for SIP video?
Verify that the fields have been configured correctly on page 4 of the system-parameters
customer-options form. "Multimedia IP SIP Trunking?" must be set to "y."
Yes.
No. SIP video calls are not possible without the correct license. Installa tion of the license will
enable the "IP Video" field on the SIP signaling group form.
Question 2: Are the video capacities configured appropriately on the system-parameters customer-options form, page 2?
“Maximum Video Capable Stations” should be equal to one time the number of single point
VSX and/or three times the number of multipoint VSX and should include SIP video users.
Yes.
No. SIP video users are included in the total. If the limit has been reached, there will be no
video calls.
Question 3: Is the authoritative domain for the IP network region in use set to match the SIP domain configured on the Avaya SIP Enablement Services (SES) server?
“Authoritative Domain” on page 1 of the ip-network-region form should be set to
yoursipdomain.com.
Yes.
No. Expect "403 forbidden" denial messages, preventing call setup.
Issue 3 January 2008 43
Page 44

Design and Deployment Checklist
SIP Trunk Administration
Question 1: Is the SIP signaling group in use configured to allow video calls?
Verify that the fields have been configured correctly on page 1 of the signaling-group form.
"IP Video?" must be set to "y."
Yes.
No. Video calls be audio only if a signaling group is used without IP Video allowed.
Question 2: Is the SIP signaling group configured to allow direct IP connections?
Verify that the fields have been configured correctly on page 1 of the signaling-group form.
"Direct IP-IP Audio Connections?" must be set to "y."
Yes.
No. Video calls will be auto only if a signaling group is used without IP Video allowed.
44 Avaya Video Telephony Solution Networking Guide
Page 45

SIP Station Administration (OPTIM)
SIP Station Administration (OPTIM)
Question 1: Is the IP station configured to use video?
Verify that the fields have been configured correctly on page 1 of the station form. "IP
Video?" must be set to "y."
Yes.
No. Expect no video media if video is disabled for the station.
Question 2: Is the IP station configured to use direct media?
Verify that the fields have been configured correctly on page 2 of the station form. "Direct
IP-IP Audio Connections?" must be set to "y."
Yes.
No. Expect no video media if direct media is disabled for a station.
Question 3: Is the station type correct for the SIP endpoint being administered?
Verify that the fields have been configured correctly on page 1 of the station form. "Type"
must be set to "4620SIP" or "96xx."
For Avaya endpoints, ensure that the set type matches. All OPTIM video endpoints should
use the "4620SIP" station type.
Yes.
No. An incorrect set type can cause registration failure or call setup failure.
Question 4: Is the OPTIM call limit configured to allow the number of simultaneous call appearances required by the endpoint?
Verify that the fields have been configured correctly on page 2 of the off-pbx-telephone
station-mapping form. "Call Limit" should be set to the number of extensions/line
appearances.
Yes.
No. Certain station features may be unavailable, or multipoint capabilities may not work as
expected.
Issue 3 January 2008 45
Page 46

Design and Deployment Checklist
SIP Limitations
Question 1: In a mixed H.323/SIP environment, are all H.323 MCUs the supported RMX platform?
Verify that all H.323 bridges accessible to SIP video users are not MGCs.
Yes.
No. SIP video users will not receive video when dialing into an H.323 MGC. Upgrading to the
Polycom RMX bridge will enable video for SIP users.
Question 2: Is the video routing feature set to prefer only H.323 trunks and not use SIP trunks with a multimedia bearer capability?
Verify that all route patterns containing SIP video trunks do not rely on the multimedia
bearer capability being set.
Yes.
No. Multimedia bearer capability is not set f or SIP video calls. As a result, SIP video calls will
route as audio only.
Question 3: Is priority video enabled on a SIP signaling group, and is the bandwidth allocated from the priority pool as expected?
Verify that the signaling gr oups at either end of the SIP trunk have priorit y video enabled if it
desired to use priority bandwidth. Separate sub-domain names may be used to separate
priority and normal users.
Yes.
No. SIP currently has no means to signal a priority video call over a trunk. A system that
receives a call on a priority trunk will always be allocated bandwidth from the priority pool.
46 Avaya Video Telephony Solution Networking Guide
Page 47

Chapter 3: Setting Up Video Endpoints
This chapter describes how to
● install and configure the following video endpoints
- Avaya IP Softphone Release 6.0 and Video Integrator
- Polycom HDX series video conferencing system
- Polycom VSX series video conferencing system with Release 8.5.3 or later
- Polycom V500/V700 video calling system
- Polycom RMX series video conferencing bridge platform
- Polycom MGC video conferencing bridge platform with Release 8.0.0.27
- Avaya Meeting Exchange 5.0.1 S6800 bridge
- Polycom PathNavigator/SE200 gatekeeper
● configure Ad-hoc video conferencing on a system running Avaya Communication Manager
Release 5.0
● configure a Polycom MGC video conferencing bridge platform as an H.320 gateway
● configure video trunks between two systems running Avaya Communication Manager
Release 4.0 for later
● monitor the status of video bandwidth usage
Issue 3 January 2008 47
Page 48

Setting Up Video Endpoints
Required Administration
Before administering any video endpoints on your system, you must perform the following
procedures:
● configure IP codec sets
● configure IP network regions
Configure IP Codec Sets
To configure the IP codec sets that you want to use for video:
1. Use the change ip-codec-set x command (where x is the chosen IP codec set) to access
the IP Codec Set form.
2. Define the codecs. The following codecs are recommended:
● SIREN14-48K (1 fpp, 20 ms)
SIREN14-48K are wideband codecs. Since most Polycom systems are not configured for
stereo, it is not recommended to use a stereo SIREN codec as a default.
● G.722-64K (2fpp, 20 ms)
G.722-64K are wideband codecs. These codecs allow wideband with video endpoints
that do not support SIREN codecs. G.722-64K codecs are required if you are using VSX
systems in mixed H.320/H.323 environments. Be sure to place this codec above the
other non-Siren audio codecs.
● G.722.1-32K (1 fpp, 20 ms)
G.722.1-32K are wideband codecs. These codecs allow wideband with video endpoints
that do not support SIREN codecs.
● G.729A (no silence suppression, 2 fpp, 20 ms)
Polycom systems do not support all variants of G.729 codecs. If you want to use G.729,
you must specify G.729A. If you specify G.729, no audio problems arise. All variants of
G.729 codecs are narrowband codecs.
Note:
Note: Keep in mind the following information:
- Wideband codecs should appear before narrowband codecs in the codec set. If you
are using VSX systems in mixed H.320/H.323 environments, place the G.722-64K
audio codec above the other non-Siren audio codecs.
- G.711 codecs are recommended for Avaya Meeting Exchange 5.0.1. Avaya
Meeting Exchange 5.0.1 does not support wideband codecs.
3. Go to page 2 of the form.
48 Avaya Video Telephony Solution Networking Guide
Page 49

Figure 1: Example of Page 2 of the IP Codec Set Form
Required Administration
4. Set Allow Direct-IP Multimedia to y.
5. Set Maximum Call Rate for Direct-IP Multimedia. The range is 128 Kbits through 768
Kbits. 384 Kbits is recommended.
This setting is the combined audio and video transmit rate or receive rate for non-priority
(normal) video calls. You can use this setting to limit the amount of bandwidth used for
normal video calls. For example, if you select 384 Kbits, a maximum of 384 Kbits will be
used to transmit and to receive audio/video.
6. Set Maximum Call Rate for Priority Direct-IP Multimedia. The range is 128 Kbit s through
768 Kbits. 384 Kbits is recommended.
This setting is the combined audio and video transmit rate or receive rate for priority video
calls. You can use this setting to limit the amount of bandwidth used for priority video calls.
For example, if you select 384 Kbits, a maximum of 384 Kbits will be used to transmit and to
receive audio/video.
7. Repeat Steps 1 through 6 for each IP codec set that will be used for video.
Issue 3 January 2008 49
Page 50

Setting Up Video Endpoints
Configure IP Network Regions
To configure the IP network regions:
1. Use the change ip-network-region x command (where x is the chosen IP network region)
to access the IP Network Region form for the specified region.
The IP Network Region form appears.
Figure 2: Example of Page 1 of the IP Network Region Form
2. Set Intra-region IP-IP Direct Audio to yes.
3. Set Inter-region IP-IP Direct Audio to yes.
Note:
Note: Shuffling is recommended. However, you can set shuffling to no, and video calls
will work properly.
4. Go to page 2 of the form.
50 Avaya Video Telephony Solution Networking Guide
Page 51

Figure 3: Example of Page 2 of the IP Network Region Form
Required Administration
5. Set Security Procedures 1 to any-auth.
6. Go to page 3 of the form.
Issue 3 January 2008 51
Page 52

Setting Up Video Endpoints
Figure 4: Example of Page 3 of the IP Network Region Form
7. Set codec set to the codec set you defined in Procedure 2.
8. Set Video Norm to the amount of bandwidth that you want to allocate for the normal video
pool to each IP network region.
9. Set Video Prio to the amount of bandwidth that you want to allocate for the priority video
pool to each IP network region.
10. Set Video Shr . Specify whether the normal video pool can be shared with the audio pool for
each link between IP network regions (y or n).
11. Repeat Steps 1 through 10 for each IP network region that will be used for video in this
system.
52 Avaya Video Telephony Solution Networking Guide
Page 53

Configure a Station Endpoint for Avaya IP Softphone Release 6.0 and Video Integrator
Configure a Station Endpoint for Avaya IP Softphone
Release 6.0 and Video Integrator
This section describes how to enable video calls for a desktop user.
Note:
Note: Users must install Avaya IP Softphone Release 6.0 and Video Integrator on their
PCs before they can handle video calls from their desktops.
Checklist
When setting up video calls for a desktop, you will need to know the following information:
● the station number of the desktop user
● the IP codec sets you want to use
● the IP network regions you want use
Configuration Procedures
To configure a station to use Avaya IP Softphone R6.0 and Video Integrator, you must perform
the following steps:
1. Determine the maximum number of video-capable Avaya IP Softphone endpoints your
voice system supports.
2. Configure the Class of Service if you want to use priority video calling.
3. Add a new station or modify an existing station that will use Avaya IP Softphone for video.
Issue 3 January 2008 53
Page 54

Setting Up Video Endpoints
Procedure 1: Determine the Maximum Number of Video-Capable Avaya IP Softphone Endpoints Supported
To determine the maximum number of video-capable Avaya IP Softphone endpoints your voice
system supports:
1. Use the display system-parameters customer-options command to access t he Optional
Features form.
2. On page 2 of the form, verify the Maximum Video Cap able IP Sof tphones . This number is
provided by the RFA license file.
Note:
Note: To provide video softphone capability, you must have at least this number of IP
Softphone licenses. Page 10 of this form displays the number of IP Softphone
licenses you have.
Figure 5: Example of Page 2 of the Optional Features Form
In this example, the system can have a maximum of 40 video-enabled Avaya IP
Softphones. Currently, 14 video-capable Avaya IP Softphones are being used.
54 Avaya Video Telephony Solution Networking Guide
Page 55

Configure a Station Endpoint for Avaya IP Softphone Release 6.0 and Video Integrator
Procedure 2: Configure Class of Service
Perform this procedure if you want to allow priority video calling.
To configure the Class of Service:
1. Use the change cos command to access the Class of Service form.
2. Go to page 2 of the form.
Figure 6: Example of Page 2 of the Class of Service Form
3. Set Priority Video Calling for the appropriate COS levels.
Issue 3 January 2008 55
Page 56

Setting Up Video Endpoints
Procedure 3: Add a Video-Enabled Avaya IP Softphone Station
To add a video-enabled Avaya IP Softphone station:
1. Perform one of the following steps:
● If you want to add a new station that will use Avaya IP Softphone, use the add station
command.
● If you want to modify an existing station that will use Avaya IP Softphone, use the
change station xxxx (where xxxx is the number of the station you want to modify)
command.
The Station form appears.
Figure 7: Example of Page 1 of the Station Form
2. Enter the appropriate information for this station.
3. Set IP Softphone to y.
4. Set IP Video Softphone to y.
5. If you want this station to be able to make priority video calls, make sure you select a COS
level that has Priority Video Calling enabled. (See Procedure 2.)
6. Repeat Steps 1 through 5 for each video-e nabled A vaya IP Sof tphone end point you want to
configure.
56 Avaya Video Telephony Solution Networking Guide
Page 57

Configure Polycom VSX/HDX Series Video Conferencing Systems and V500/V700 Video Calling Systems
Configure Polycom VSX/HDX Series Video Conferencing
Systems and V500/V700 Video Calling Systems
Use this procedure to configure Polycom VSX/HDX series video conferencing systems and
V500 and V700 video calling systems.
Checklist
When setting up these systems, you will need to know the following information:
● maximum number of VSX/HDX, V500, and V700 systems on your network
● PIN for each VSX/V500/V700 system. The PIN can consist of a maximum of eight numeric
characters and is defined by the System Administrator.
● the key code that combines the Avaya option with any other Polycom options.
● whether the VSX/HDX system has the multipoint option or IMCU option. If so, you must
combine the Polycom Software License for this cap ability with the “Avaya Option” Polycom
Software License to create a single Key Code to input into the unit.
● IP address of the voice system
● the IP codec sets you want to use
● the IP network regions you want use
Configuration Procedures
To configure Polycom VSX/HDX series video conferencing systems and V500/V700 video
calling systems, you must perform the following steps:
1. Determine the maximum number of video-capable H.323 stations your voice system
supports.
2. Configure the Class of Service if you want to use priority video calling.
3. Add a new station for the Polycom system.
4. Configure the Polycom system.
Issue 3 January 2008 57
Page 58

Setting Up Video Endpoints
Procedure 1: Determine the Maximum Number of Video-Capable H.323 Stations Supported
To determine the maximum number of video-capable H.323 endpoints your voice system
supports:
1. Use the display system-parameters customer-options command to access t he Optional
Features form.
2. On page 2 of the form, verify the Maximum Video Capable Stations. This number is
provided by the RFA license file. The Maximum Video Capable Stations was determined
using the following criteria:
● Each V500/V700 system is considered to be one station.
● Each single-point VSX system is considered to be one station.
● Each VSX multipoint system can be three to six stations.
● Each HDX system can be three stations for multipoint plus four and seven for multipoint
plus eight multipoint licensed options for the HDX9004. The HDX9002 only has
multipoint plus 4 as an option.
58 Avaya Video Telephony Solution Networking Guide
Page 59

Configure Polycom VSX/HDX Series Video Conferencing Systems and V500/V700 Video Calling Systems
Figure 8: Example of Page 2 of the Optional Features Form
In this example, the system can have a maximum of 40 video-capable stations. Currently,
20 video-capable H.323 stations are being used.
Issue 3 January 2008 59
Page 60

Setting Up Video Endpoints
Procedure 2: Configure Class of Service
Perform this procedure if you want to allow priority video calling.
To configure the Class of Service:
1. Use the change cos command to access the Class of Service form.
2. Go to page 2 of the form.
Figure 9: Example of Page 2 of the Class of Service Form
3. Set Priority Video Calling for the appropriate COS levels.
60 Avaya Video Telephony Solution Networking Guide
Page 61

Configure Polycom VSX/HDX Series Video Conferencing Systems and V500/V700 Video Calling Systems
Procedure 3: Add a Station for the Polycom System
To add a station:
1. Use the add station command.
The Station form appears.
Figure 10: Example of Page 1 of the Station Form
2. Enter the appropriate information for this station.
3. Set Type to H.323.
4. Set Security Code to the “pin” you will administer for the VSXHDX or V500 system.
5. Set IP Video to y.
6. If you want this station to be able to make priority video calls, make sure you select a COS
level that has Priority Video Calling enabled. (See Procedure 2.)
Note:
Note: You can create an alias for VSX/HDX stations.
Issue 3 January 2008 61
Page 62

Setting Up Video Endpoints
7. If the VSX system has the multipoint option or IMCU option, perform the following steps:
a. Use the add station command to add a second station for the Polycom system.
b. Set Type to H.323.
c. Set Security Code to the “pin” you will administer for the VSX/HDX. Make sure the
security code is the same as the previous station. All three stations must have the same
security code.
d. Set IP Video to y.
e. Go to page 2 of the form.
Figure 11: Example of Page 2 of the Station Form
f. Set Direct IP-IP Audio Connections to y.
g. Set IP Audio Hairpinning to y.
h. If you want this station to be able to make priority video calls, make sure you select a
COS level that has Priority Video Calling enabled. (See Procedure 4.)
i. Repeat Steps a through h to create the third consecutive station.
Note:
Note: You can have up to six stations.
62 Avaya Video Telephony Solution Networking Guide
Page 63

Configure Polycom VSX/HDX Series Video Conferencing Systems and V500/V700 Video Calling Systems
j. Use the change station xx command (where xx is the first station you added for the
Polycom system) to set Hunt-to St ation to the second station you added for the Polycom
system.
k. Use the change station xx command (where xx is the second station you added for the
Polycom system) to set Hunt-to Station to the third station you added for the Polycom
system.
l. Use the change station xx command (where xx is the third station you added for the
Polycom system) to set Hunt-to Station to the first station you added for the Polycom
system. All three stations must be in a circular hunt.
Note:
Note: If you added more than three stations for the Polycom system, use the change
station xx command to set Hunt-to Station for each station. All of the stations
you add must be in a circular hunt.
8. Repeat Steps 1 through 7 for each Polycom system.
Procedure 4: Configure the Polycom System
To configure the Polycom system:
1. Install the Polycom system and connect it to your network.
2. Upgrade the Polycom system software (if necessary).
3. Using a web browser, access the Polycom home page for the unit, and select Admin
Settings>Network>IP Network.
4. Select the Enable IP H.323 check box.
5. Select the Display H.323 Extension check box.
6. In the H.323 Extension (E.164) box, enter the station number you specified for this system
on the Avaya Communication Manager system.
7. From the Use Gatekeeper box, select Specify with PIN.
8. In the Gatekeeper IP Address box, enter the IP address of the CLAN or PCLAN followed by
:1719 (to specify the correct port to use).
9. In the Authentication PIN box, enter the security code you entered in Procedure 4.
10. In the Number box in the Gateway area, enter the extension you specified.
11. Select the Enabled PVEC check box.
12. In the Type of Service box in the Quality of Service area, select the appropriate setting. Both
IP Precedence and Diffserve are supported. Contact your Network Administrator for this
information.
13. In the Type of Service Value boxes (Video, Audio, and Far End Camera Control), enter the
QoS values for the IP Network Region settings in which the VSX station belongs.
14. Select the Dynamic Bandwidth check box.
Issue 3 January 2008 63
Page 64

Setting Up Video Endpoints
15. From the Maximum Transmit Bandwidth box, select the setting that matches the Maximum
Call Rate for Direct-IP Multimedia setting you specified for the Avaya Communication
Manager system.
16. From the Maximum Receive Bandwidth box, select the setting that matches the Maximum
Call Rate for Direct-IP Multimedia setting you specified for the Avaya Communication
Manager system.
17. Complete the Firewall and Streaming sections as necessary.
18. When finished, click the Update button.
19. Repeat Steps 1 through 18 for each Polycom system.
64 Avaya Video Telephony Solution Networking Guide
Page 65

Configure a Polycom RMX Series Video Conferencing Bridge Platform
Configure a Polycom RMX Series Video Conferencing
Bridge Platform
This section describes how to configure a Polycom RMX series video conferencing bridge
platform for use with an Avaya server.
Checklist
When setting up these systems, you will need to know the following information:
● the IP codec sets you want to use
● the IP network regions you want use
● the IP address of the IP board for the RMX system
● the IP address of the CLAN
Note:
Note: Make sure you have the RMX Installation and Configuration guide available when
you configure the RMX.
Configuration Procedures
To configure a Polycom RMX video conferencing bridge platform, you must perform the
following steps:
1. Add an entry in the IP Node Names for the RMX system.
2. Add a two-way trunk group for the RMX system.
3. Add a signaling group for the RMX system.
4. Add members to the two-way trunk group for the RMX system.
5. Create a route pattern for the trunk group.
6. Configure the RMX system.
Issue 3 January 2008 65
Page 66

Setting Up Video Endpoints
Procedure 1: Add an Entry in the IP Node Names for the RMX System
To add an entry in the IP Node Names form for the RMX system:
1. Use the change node-names ip command to access the IP Node Names form.
2. In the Name field, enter a name for the RMX system.
3. In the corresponding IP Address field, enter the IP address of the signaling host for the RMX
system.
Procedure 2: Add a Two-Way T runk Group for the RMX System
To add a two-way trunk group for the RMX system:
1. Use the add trunk-group xx command (where xx is the chosen trunk group) to access the
Trunk Group form.
The Trunk Group form appears.
Figure 12: Example of Page 1 of the Trunk Group Form
2. Set Group Type to isdn.
3. Set Direction to two-way.
66 Avaya Video Telephony Solution Networking Guide
Page 67

Configure a Polycom RMX Series Video Conferencing Bridge Platform
4. Set Carrier Medium to H.323.
5. Set Service Type to tie.
Procedure 3: Add a Signaling Group for the RMX System
To add a signaling group for the RMX system:
1. Use the add signaling-group xx command (where xx is the chosen signaling group) to
access the Signaling Group form.
The Signaling Group form appears.
Figure 13: Example of Page 1 of the Signaling Group Form
2. Set Group Type to h.323.
3. Set IP Video to y.
4. Set Priority Video. If you want all incoming calls to receive priority video transmissions,
select y.
5. Set Trunk Group for Channel Selection to the two-way trunk group you added.
6. Set Near-end Node Name. For example, for an S8300 system, you would enter procr. For
an S8500 or S8700 system, you would enter the name of the CLAN board.
Issue 3 January 2008 67
Page 68

Setting Up Video Endpoints
7. Set Near-end Listen Port to 1720.
8. Set LRQ Required to n.
9. Set RRQ Required to y.
10. Set Enable Layer 3 Test to n.
11. Set Far-end Node Name to the name you entered for the RMX system.
12. Set Far-end Listen Port to 1720.
13. Set the Far-end Network Region.
14. Set Calls Share IP Signaling Connection to n.
15. Set Direct IP-IP Audio Connections to y.
16. Set IP Audio Hairpinning to n.
68 Avaya Video Telephony Solution Networking Guide
Page 69

Configure a Polycom RMX Series Video Conferencing Bridge Platform
Procedure 4: Add Members to the Two-Way Trunk Group
To add members to the two-way trunk group:
1. Use the change trunk-group xx command (where xx is the incoming trunk group you
added) to access the Trunk Group form.
The Trunk Group form appears.
2. Go to page 5 of the Trunk Group form.
Page 5 of the Trunk Group form appears.
Figure 14: Example of Page 5 of the Trunk Group Form
3. Add members to the trunk group. The number of members depends on the maximum
simultaneous calls an RMX supports.
Issue 3 January 2008 69
Page 70

Setting Up Video Endpoints
Procedure 5: Create a Route Pattern for the RMX Trunk Group
To create a route pattern that points to the two-way trunk group:
1. Use the change route-pattern xx command (where xx is the route pattern you want to use)
to access the Route Pattern form.
The Route Pattern form appears.
2. In the Grp No field, enter the number of the two-way trunk group you created for the RMX.
Procedure 6: Configure the RMX System
To configure the Polycom RMX system:
1. Install the RMX system and connect it to your network.
2. Upgrade the Polycom system software (if necessary).
3. Access the Polycom home page for the unit.
4. From the Setup menu, select the System Configuration tab.
5. Under MCMS_PARAMETERS_USER, configure the following settings:
● MCU_DISPLAY_NAME = POLYCOM RMX-2000
● ENABLE_AUTO_EXTENSION = YES
● NUMERIC_CONF_ID_LEN = 5
● CP_REGARD_TO_INCOMING_SETUP_RATE = NO
● NUMERIC_CONF_ID_MAX_LEN = 8
● NUMERIC_CONF_ID_MIN_LEN = 4
● TERMINATE_CONF_AFTER_CHAIR_DROP = NO
● H323_FREE_VIDEO_RESOURCES = NO
6. Under CS_MODULE_PARAMETERS, add the following information:
H245_TUNNELING = YES
7. Create an H.323 service, and enter the CLAN IP address of the Avaya Communication
Manager system as the primary gatekeeper. Confirm via a status signaling group that the
RMX has registered.
8. Create a meeting room to use a test direct dial conference ID.
If you want to configure Ad-hoc conferencing for the RMX system, go to Configure Ad-hoc
Video Conferencing for a Polycom RMX Series Video Conferencing Bridge Platform on
page 71.
70 Avaya Video Telephony Solution Networking Guide
Page 71

Configure Ad-hoc Video Conferencing for a Polycom RMX Series Video Conferencing Bridge Platform
Configure Ad-hoc Video Conferencing for a Polycom RMX
Series Video Conferencing Bridge Platform
This section describes how to configure Ad-hoc video conferencing for a Polycom RMX series
video conferencing bridge platform.
Checklist
When setting up Ad-hoc conferencing on a Polycom RMX system, you will need to know the
following information:
● the IP codec sets you want to use
● the IP network regions you want use
● the IP address of the IP board for the RMX system
● the IP address of the CLAN
Note:
Note: Make sure you have the RMX Installation and Configuration guide available when
you configure the RMX.
Configuration Procedures
To configure Ad-hoc conferencing, you must perform the following steps:
1. Configure the RMX for use with an Avaya server.
2. Determine the maximum number of Ad-hoc video conferencing ports your voice system
supports.
3. Configure the Class of Service for Ad-hoc video conferencing.
4. Configure a video bridge.
5. Configure the RMX system for Ad-hoc conferencing.
Issue 3 January 2008 71
Page 72

Setting Up Video Endpoints
Procedure 1: Configure the Polycom RMX for Use with an Avaya Server
Perform the procedures in the section Configure a Polycom RMX Series Video Conferencing
Bridge Platform on page 65 to configure the Polycom RMX system. After performing these
procedures, go to Procedure 2: Determine the Maximum Number of Ad-hoc Video
Conferencing Ports Supported on page 72.
Procedure 2: Determine the Maximum Number of Ad-hoc Video Conferencing Ports Supported
To determine the maximum number of Ad-hoc video conferencing ports your voice system
supports:
1. Use the display system-parameters customer-options command to access t he Optional
Features form.
2. On page 2 of the form, verify Maximum Administered Ad-hoc Video Conferencing
Ports. The maximum number of Ad-hoc video conferencing ports allowed is the sum of the
ports on your RMX systems. For example, if you have an RMX20 system and an RMX80
system, the maximum number of ports is 100.
72 Avaya Video Telephony Solution Networking Guide
Page 73

Configure Ad-hoc Video Conferencing for a Polycom RMX Series Video Conferencing Bridge Platform
Figure 15: Example of Page 2 of the Optional Features Form
In this example, the system can have a maximum of 217 administered Ad-hoc video
conferencing ports. Currently, 100 Ad-hoc video conferencing ports are being used.
Procedure 3: Configure Class of Service
To configure the Class of Service:
1. Use the change cos command to access the Class of Service form.
2. Go to page 2 of the form.
3. Set Ad-hoc Video Conferencing for the appropriate COS levels.
Issue 3 January 2008 73
Page 74

Setting Up Video Endpoints
Procedure 4: Configure a Video Bridge
To configure a video bridge:
1. Use the add video-bridge xx command (where xx is the bridge number between 1 to 40)
to access the Video Bridge form.
Figure 16: Example of the Video Bridge Form
2. In Name, enter the name for this video bridge (for example, Ad Hoc Video Bridge - RMX).
3. Set Max Ports to the maximum number of Ad-hoc conferencing port s you want to assign to
this bridge. (The minimum you can enter is 3.) This is equivalent to the number of ports for
Ad-hoc use on the associated RMX. You can use Max Ports to limit the extent of Ad-hoc
usage of an RMX and thereby reserve ports for scheduled usage.
4. In Trunk Groups, enter the administered two-way ISDN H.323 trunk groups you added in
Procedure 2: Add a Two-Way Trunk Group for the RMX System
must be of the same carrier type (that is, all H.323 trunks).
The Far End Resource Info, ID Range, Priority Factory Number, and Standard Factory
Number fields appear.
74 Avaya Video Telephony Solution Networking Guide
on page 66. All entries
Page 75

Configure Ad-hoc Video Conferencing for a Polycom RMX Series Video Conferencing Bridge Platform
Figure 17: Example of the Video Bridge Form
5. Make sure Far End Resource Info? is set to y.
6. Set ID Range to the range of ports. The IDs you specify on this form must NOT be
configured on the RMX. You must leave these IDs free for the factory to create its own
conferences there. Note that Automatic Alternate Routing (AAR) and Unified Dial Plan
(UDP) are not used to connect to these meeting room numbers. Conference IDs (and
factory numbers) are completely independent of the dial plan. As a result, you can set up
several video bridges with exactly the same conference IDs and numbers. (This will make it
easier for you to maintain configurations and swap hardware.)
7. Set Priority Factory Number. This number represents the Entry Queue created on the
RMX and corresponds to a priority conference service level (for example, 784 Kbps). The
Priority Factory Number must NEVER be in the conference ID range.
If this field is left blank, all conferences can use the bridge. However, priority conferences
will try to find a video bridge that has a priority factory (if there is one).
Issue 3 January 2008 75
Page 76

Setting Up Video Endpoints
8. Set Standard Factory Number. This number represents the Entry Queue created on the
RMX and corresponds to a standard conference service level (for example, 384 Kbp s). The
Standard Factory Number must NEVER be in the conference ID range.
If this field is left blank, non-priority conferences cannot use this video bridge. A conference
started by a priority user with non-priority users may be moved to a priority bridge, and the
non-priority users will connect to it and receive video.
Note:
Note: You must specify either a Priority Factory Number or a St andard Factory number.
You cannot leave both fields blank.
Procedure 5: Configure the RMX System
On the Polycom RMX system, perform the following steps for Ad-hoc conferencing:
1. Create conference profiles for Ad Hoc (and Meeting Room) style conferences.
Note:
Note: Be sure to choose Auto Layout under the video settings.
2. Create the two entry queues (one for Ad-hoc conferences, and one for priority
conferences).
3. For the “Conference IVR Service,” perform the following steps:
a. Under the Welcome tab, disable the Enable Welcome Messages check box.
b. Under the Conference Chairperson tab, disable the Chairperson messages chec k b ox.
c. Under the Conference Password tab, disable the Enable Password Messages check
box.
4. Under the General tab, perform the following steps:
a. Deselect any .wav file for the First to Join announcement.
b. Disable roll call.
c. Disable click and view.
5. Under the IVR Service tab, click the music icon, and set a silence .wav file as the IVR
message. A silence .wav file will disable music from being played to the first party who joins
the conference. To create a silence .wav file:
a. Open the Windows Sound Recorder application.
b. From the File menu, select Save As.
The Save As dialog box appears.
c. Click the Change button.
d. In the Name box, enter silence.wav.
e. From the Format box, select PCM.
76 Avaya Video Telephony Solution Networking Guide
Page 77

Configure Ad-hoc Video Conferencing for a Polycom RMX Series Video Conferencing Bridge Platform
f. From the Attributes box, select 16.00 kHz, 16 Bit, Mono.
g. Click the OK button.
Display Capacity for Ad-hoc Video Conferencing
To display the capacity for Ad-hoc video conferencing:
1. Use the display capacity command to access the System Capacity form.
2. Go to page 7. Ad-hoc Video Conferencing Ports displays the following Ad-hoc video
conferencing information:
- Used - the number of video conferencing ports currently in use.
- Available - the number of video conferencing ports currently available.
- System Limit - the total number of video conference ports in your system. (This is the
sum of Used ports and Available ports.)
View Video Conferencing Bridges
Use the list video-bridge command to view the video conferencing bridges administered on
your system.
Issue 3 January 2008 77
Page 78

Setting Up Video Endpoints
Configure a Polycom MGC-25 Video Conferencing Bridge Platform for an Avaya S8300 Server
This section describes how to configure a Polycom MGC-25 video conferencing bridge platform
for use with an Avaya S8300 server.
Checklist
When setting up these systems, you will need to know the following information:
● the IP codec sets you want to use
● the IP network regions you want use
● the IP address of the IP board for the MGC system
● the IP address of the CLAN
Configuration Procedures
To configure a Polycom MGC-25 video conferencing bridge platform for use with an Avaya
S8300 server, you must perform the following steps:
1. Add an entry in the IP Node Names for the MGC system.
2. Add a two-way trunk group for the MGC system.
3. Add a signaling group for the MGC system.
4. Add members to the two-way trunk group for the MGC system.
5. Create a route pattern for the trunk group.
6. Configure the MGC system.
Procedure 1: Add an Entry in the IP Node Names for the MGC System
To add an entry in the IP Node Names form for the MGC system:
1. Use the change node-names ip command to access the IP Node Names form.
2. In the Name field, enter a name for the MGC system.
3. In the corresponding IP Address field, enter the IP address of the IP board for the MGC
system.
78 Avaya Video Telephony Solution Networking Guide
Page 79

Configure a Polycom MGC-25 Video Conferencing Bridge Platform for an Avaya S8300 Server
Procedure 2: Add a Two-Way T runk Group for the MGC System
To add a two-way trunk group for the MGC system:
1. Use the add trunk-group xx command (where xx is the chosen trunk group) to access the
Trunk Group form.
The Trunk Group form appears.
2. Set Group Type to isdn.
3. Set Direction to two-way.
4. Set Carrier Medium to H.323.
5. Set Service Type to tie.
Procedure 3: Add a Signaling Group for the MGC System
To add a signaling group for the MGC system:
1. Use the add signaling-group xx command (where xx is the chosen signaling group) to
access the Signaling Group form.
The Signaling Group form appears.
2. Set Group Type to h.323.
3. Set IP Video to y.
4. Set Priority Video. If you want all incoming calls to receive priority video transmissions,
select y.
5. Set Trunk Group for Channel Selection to the two-way trunk group you added.
6. Set Near-end Node Name. For example, for an S8300 system, you would enter procr. For
an S8500 or S8700 system, you would enter the name of the CLAN board.
7. Set Near-end Listen Port to 1720.
8. Set LRQ Required to n.
9. Set RRQ Required to y.
10. Set Enable Layer 3 Test to n.
11. Set Far-end Node Name to the name you entered for the MGC system.
12. Set Far-end Listen Port to 1720.
13. Set the Far-end Network Region.
14. Set Calls Share IP Signaling Connection to n.
15. Set Direct IP-IP Audio Connections to y.
16. Set IP Audio Hairpinning to n.
Issue 3 January 2008 79
Page 80

Setting Up Video Endpoints
Procedure 4: Add Members to the Two-Way Trunk Group
To add members to the two-way trunk group:
1. Use the change trunk-group xx command (where xx is the incoming trunk group you
added) to access the Trunk Group form.
The Trunk Group form appears.
2. Go to page 5 of the Trunk Group form.
Page 5 of the Trunk Group form appears.
3. Add members to the trunk group.
Procedure 5: Create a Route Pattern for the MGC Trunk Group
To create a route pattern that points to the two-way trunk group:
1. Use the change route-pattern xx command (where xx is the route pattern you want to use)
to access the Route Pattern form.
The Route Pattern form appears.
2. In the Grp No field, enter the number of the two-way trunk group you created for the MGC.
Procedure 6: Configure the MGC System
To configure the Polycom MGC system:
1. Install the MGC system and connect it to your network.
2. Upgrade the Polycom system software (if necessary).
3. Access the Polycom home page for the unit, and select MCU Configuration>Network
Services>IP>IP Default>Network Service Properties.
4. Create a new H.323 service.
5. On the Settings tab, perform the following steps:
a. Set Protocol to H323.
b. Specify the Subnet Mask.
c. Specify the Default Router.
6. On the DNS Settings tab, specify the appropriate DNS servers in the Use DNS Servers
box.
7. On the H323 tab, perform the following steps:
a. Make sure the Forwarding check box is not enabled.
b. In the Use Gatekeeper box, specify the gatekeeper.
c. In the Preferred Gatekeeper IP Address box, enter the CLAN IP address.
80 Avaya Video Telephony Solution Networking Guide
Page 81

Configure a Polycom MGC-25 Video Conferencing Bridge Platform for an Avaya S8300 Server
d. In the Service Mode box, enter Pseudo Gatekeeper AVF.
Note:
Note: If Pseudo Gatekeeper AVF does not appear, you do not have the latest
software. You must install the Avaya-enabled Polycom MGC Manager software.
e. In the Prefix box, enter the first digit of the extension numbers range in which the MCU
resides.
f. Select the Refresh H.323 Registrations check box, and select 120 seconds.
8. On the Spans tab, add a new IP Span.
a. In the Circuit ID box, enter a unique identifier for this new circuit.
b. In the IP Address box, enter the IP address of the IP card that will use H.323 signaling.
c. In the H323 Alias 1 box, enter an H.323 ID of an alias for the board that Avaya
Communication Manager will route calls to this MGC.
9. Define the IP1 configuration. In the Circuit ID box on the IP-Network Parameters tab, enter
the unique identifier you specified in Step 6.
10. Create a meeting room in Meeting Rooms and Entry Queues. In the Numeric ID box on
the General tab, enter the dialed digits excluding the prefix defined in the Network Service.
If you want to configure Ad-hoc conferencing for the MGC system, go to Configure Ad-hoc
Video Conferencing for a Polycom MGC Video Conferencing Bridge Platform on page 89.
Issue 3 January 2008 81
Page 82

Setting Up Video Endpoints
Configure Polycom MGC Video Conferencing Bridge Platforms with Avaya S8500 and S87xx Server
This section provides a set of guidelines to configure Polycom MGC video conferencing bridge
platforms for use with Avaya S8500 servers and Avaya S87xx servers. You must understand
these guidelines before you administer these systems.
If you want to configure Ad-hoc conferencing for the MGC system (after you administer the
MGC system for use with the Avaya server), go to Configure Ad-hoc Video Conferencing for a
Polycom MGC Video Conferencing Bridge Platform on page 89.
Trunk Groups
For incoming trunk groups, you must:
● Create one incoming trunk group per Polycom MGC system.
● Set the following parameters:
- Direction to incoming.
- Service Type to tie.
- Disconnect Supervision - In? to y to allow Polycom MGC-Avaya Communication
Manager-Polycom MGC calls (that is, trunks calling trunks).
For outgoing trunk groups, you must:
● Create one “primary” outgoing trunk group for the “primary” Polycom MGC board (IP1).
● Set the following parameters:
- Direction to outgoing.
- Service Type to tie.
- You may set Outgoing Display to y.
- Send Calling Number to y. This allows participant matching in the Polycom MGC.
- Format to private.
● If you want board redundancy, create one “secondary” outgoing trunk group for the other
boards (IP2.n) in the Polycom MGC system.
82 Avaya Video Telephony Solution Networking Guide
Page 83

Configure Polycom MGC Video Conferencing Bridge Platforms with Avaya S8500 and S87xx Server
Signaling Groups
For incoming signaling groups, you must:
● Create one incoming signaling group (RRQ signaling group) per MGC board in the
Polycom MGC system for a primary CLAN. This incoming signaling group allows a
Polycom MGC board to register and is used for incoming calls. The “primary” CLAN is the
CLAN you want to use with the MGC. The IP address of this CLAN is administered on the
MGC via the Polycom MGC Manager software.
Keep in mind the following information:
- For Avaya Communication Manager Release 3.0.1, one signaling group can support a
maximum of 31 calls.
- For Avaya Communication Manager Release 3.1 or later, one signaling group can
support a maximum of 255 calls.
● Set the following parameters for the incoming signaling groups:
- IP Video? to y.
- Priority Video. If you want all incoming calls to receive priority video transmissions,
select y.
- Trunk Group for Channel Selection.
- Near-end Listen Port to 1720.
- Far-end Listen Port to 1720.
- ARQ Required? to y.
- RRQ Required? to y.
- Enable Layer 3 Test to n.
- Direct IP-IP Audio Connections to? to y.
- Far-end Network Region. If you set the maximum bandwidth for video calls in an IP
network region, assign the appropriate IP network region.
● Optional: Create one incoming signaling group per MGC board in the Polycom MGC
system for a secondary CLAN. If the primary CLAN fails, the MGC will use the alternate
gatekeeper list as a list of alternate CLANs with which to register.
Issue 3 January 2008 83
Page 84

Setting Up Video Endpoints
For outgoing signaling groups, you must:
● Create one outgoing signaling group (LRQ signaling group) per board in the Polycom
MGC system for the primary CLAN. This outgoing signaling group is used for outgoing
LRQ calls to the co-resident gatekeeper in the Polycom MGC system.
Keep in mind the following information:
- For Avaya Communication Manager Release 3.0.1, one signaling group can support a
maximum of 31 calls.
- For Avaya Communication Manager Release 3.1 or later, one signaling group can
support a maximum of 255 calls.
● Set the following parameters for the outgoing signaling groups:
- IP Video? to y.
- Near-end Listen Port to 1719.
- Far-end Listen Port to 1719.
- LRQ Required? to y.
- Enable Layer 3 Test to n.
- Direct IP-IP Audio Connections to? to y.
- Far-end Network Region. If you set the maximum bandwidth for video calls in an IP
network region, assign the appropriate IP network region.
Note:
Note: Do not set Trunk Group for Channel Selection. If you set this parameter, all
incoming video calls may fail or video may close during audio shuffle.
● Optional: Create one outgoing signaling group per board in the Polycom MGC system for
the secondary CLAN.
● Optional: Create additional outgoing signaling groups per board in the Polycom MGC
system per CLAN for additional CLAN load sharing and additional call capacity.
Group Member Assignments
Keep in mind the following information:
● Group member assignments for the incoming trunk may consist of all incoming signaling
groups for the Polycom MGC system.
● Group member assignments for the primary outgoing trunk may consist of all signaling
groups defined for multiple CLANs to the one primary board in the Polycom MGC system.
Do not mix Polycom MGC boards.
● Group member assignments for the secondary outgoing trunk may consist of all signaling
groups defined for multiple CLANs to the other boards in the Polycom MGC system.
84 Avaya Video Telephony Solution Networking Guide
Page 85

Configure Polycom MGC Video Conferencing Bridge Platforms with Avaya S8500 and S87xx Server
Outgoing Rules
Keep in mind the following information:
● Change dial plan analysis and uniform dial plan as required to support the Polycom
MGC-assigned extension range.
● Add AAR analysis for dial plan extension range for use by the Polycom MGC system. Use
lev0 as the type to force use of the private numbering plan.
● On the route pattern form, add an entry for each outgoing trunk group, and set LAR to
next. Only one route pattern should be required per Polycom MGC system.
● Regarding digit manipulation, present the digits to the Polycom MGC system in the form of
“prefix” plus digits. For example, suppose the Polycom MGC system is administered with
the prefix 7, and there is a five-digit dial plan with 715xx routing to the Polycom MGC
system. You should present the digits 715xx instead of 15xx, where 15xx is the meeting
rooms. The Polycom MGC system allows support of multiple prefixes.
Issue 3 January 2008 85
Page 86

Setting Up Video Endpoints
Examples
Example 1: S87xx with 2 CLANs/MGC-50 with 2 boards, board redundancy, and no CLAN redundancy
In this example, CLAN1 is chosen as the CLAN for use with the Polycom MGC system. CLAN2
is not used. If CLAN1 fails, the Polycom MGC system will not be allowed to register to CLAN2
and will no longer be able to make incoming or outgoing calls. If the Polycom MGC board IP1
fails, IP2 will continue to be able to make incoming and outgoing calls.
Trunk 1: MGC-A Incoming:
SigGroup 1: CLAN1, IP1; 31 trunk members
SigGroup 2: CLAN1, IP2; 31 trunk members
Trunk 2: MGC-A Outgoing Primary:
SigGroup 3: CLAN1, IP1; 31 trunk members
Trunk 3: MGC-A Outgoing Secondary:
SigGroup 4: CLAN1, IP2; 31 trunk members
Example 2: S87xx with 2 CLANs/MGC-50 with 2 boards, board redundancy, and CLAN redundancy
In this example, CLAN1 is chosen as the primary CLAN for the Polycom MGC system to use,
and CLAN2 is a backup. CLAN2 provides backup to CLAN1 for Polycom MGC registration and
incoming and outgoing calls. If Polycom MGC board IP1 fails, IP2 will continue to be able to
make incoming and outgoing calls.
Note that the incoming signaling groups for CLAN2 will be out-of-service unless the Polycom
MGC boards are forced to register with CLAN2 in the event that CLAN1 is unavailable.
Trunk 1: MGC-A Incoming:
SigGroup 1: CLAN1, IP1; 31 trunk members
SigGroup 2: CLAN1, IP2; 31 trunk members
SigGroup 3: CLAN2, IP1; 31 trunk members
SigGroup 4: CLAN2, IP2; 31 trunk members
Trunk 2: MGC-A Outgoing Primary:
SigGroup 5: CLAN1, IP1; 31 trunk members
SigGroup 6: CLAN2, IP1; 31 trunk members
Trunk 3: MGC-A Outgoing Secondary:
SigGroup 7: CLAN1, IP2; 31 trunk members
SigGroup 8: CLAN2, IP2; 31 trunk members
86 Avaya Video Telephony Solution Networking Guide
Page 87

Configure Polycom MGC Video Conferencing Bridge Platforms with Avaya S8500 and S87xx Server
Example 3: S87xx with 2 CLANs/MGC-50 with 3 boards, board redundancy, and CLAN redundancy
In this example, CLAN1 is chosen as the primary CLAN for the Polycom MGC system to use,
and CLAN2 is a backup. CLAN2 provides backup to CLAN1 for Polycom MGC registration and
incoming and outgoing calls. If Polycom MGC board IP1 fails, IP2 and IP3 will continue to be
able to make incoming and outgoing calls.
Note that the incoming signaling groups for CLAN2 will be out-of-service unless the Polycom
MGC boards are forced to register with CLAN2 in the event that CLAN1 is unavailable.
Trunk 1: MGC-A Incoming:
SigGroup 1: CLAN1, IP1; 31 trunk members
SigGroup 2: CLAN1, IP2; 31 trunk members
SigGroup 3: CLAN1, IP3; 31 trunk members
SigGroup 4: CLAN2, IP1; 31 trunk members
SigGroup 5: CLAN2, IP2; 31 trunk members
SigGroup 6: CLAN2, IP3; 31 trunk members
Trunk 2: MGC-A Outgoing Primary:
SigGroup 7: CLAN1, IP1; 31 trunk members
SigGroup 8: CLAN2, IP1; 31 trunk members
Trunk 3: MGC-A Outgoing Secondary:
SigGroup 9: CLAN1, IP2; 31 trunk members
SigGroup 10: CLAN2, IP2; 31 trunk members
SigGroup 11: CLAN1, IP3; 31 trunk members
SigGroup 12: CLAN2, IP3; 31 trunk members
Issue 3 January 2008 87
Page 88

Setting Up Video Endpoints
Example 4: S87xx with 4 CLANs/MGC-50 with 3 boards, board redundancy, and outgoing CLAN redundancy
In this example, CLAN1 is chosen as the primary CLAN for the Polycom MGC system to use,
and CLAN2 is a backup. CLAN2 provides backup to CLAN1 for Polycom MGC registration and
incoming and outgoing calls. If Polycom MGC board IP1 fails, IP2 and IP3 will continue to be
able to make incoming and outgoing calls.
Note that the incoming signaling groups for CLAN2 will be out-of-service unless the Polycom
MGC boards are forced to register with CLAN2 in the event that CLAN1 is unavailable.
Note that CLAN3 and CLAN4 are not used. Additional outgoing call capacity could be added by
defining additional outgoing signaling groups between CLAN3 to IP1, IP2, and IP3, and CLAN4
to IP1, IP2, and IP3. Additional incoming call capacity could be added by defining additional
incoming signaling groups between CLAN3 and CLAN4 to boards IP1, IP2, and IP3.
Trunk 1: MGC-A Incoming:
SigGroup 1: CLAN1, IP1; 31 trunk members
SigGroup 2: CLAN1, IP2; 31 trunk members
SigGroup 3: CLAN1, IP3; 31 trunk members
SigGroup 4: CLAN2, IP1; 31 trunk members
SigGroup 5: CLAN2, IP2; 31 trunk members
SigGroup 6: CLAN2, IP3; 31 trunk members
Trunk 2: MGC-A Outgoing Primary:
SigGroup 7: CLAN1, IP1; 31 trunk members
SigGroup 8: CLAN2, IP1; 31 trunk members
Trunk 3: MGC-A Outgoing Secondary:
SigGroup 9: CLAN1, IP2; 31 trunk members
SigGroup 10: CLAN2, IP2; 31 trunk members
SigGroup 11: CLAN1, IP3; 31 trunk members
SigGroup 12: CLAN2, IP3; 31 trunk members
88 Avaya Video Telephony Solution Networking Guide
Page 89

Configure Ad-hoc Video Conferencing for a Polycom MGC Video Conferencing Bridge Platform
Configure Ad-hoc Video Conferencing for a Polycom MGC
Video Conferencing Bridge Platform
This section describes how to configure Ad-hoc video conferencing for a Polycom MGC video
conferencing bridge platform.
Checklist
When setting up Ad-hoc video conferencing for a Polycom MGC, you will need to know the
following information:
● the IP codec sets you want to use
● the IP network regions you want use
● the IP address of the IP board for the MGC system
● the IP address of the CLAN
Configuration Procedures
To configure Ad-hoc conferencing, you must perform the following steps:
1. Configure the IP network regions for the MGC.
2. Configure the MGC for use with an Avaya server.
3. Determine the maximum number of Ad-hoc video conferencing ports your voice system
supports.
4. Configure the Class of Service for Ad-hoc video conferencing.
5. Configure a video bridge.
6. Configure the MGC system.
Note:
Note: Keep in mind the following information when configuring the Polycom MGC:
- Place the Polycom MGC in a dedicated network region with a dedicated codec set
to infer the conference bit rates.
- Ensure that you specify the correct network region (Far-end Network Region field)
when you add the signaling groups for the MGC (Signaling Group form).
- Ensure that all other network regions have direct connectivity to the MGC’s network
region (change ip-network-region command).
Issue 3 January 2008 89
Page 90

Setting Up Video Endpoints
Procedure 1: Configure IP Network Regions
You must place the Polycom MGC in a dedicated network region and ensure that all other
network regions have direct connectivity to the Polycom MGC’s network region.
To configure the IP network regions:
1. Use the change ip-network-region x command (where x is the chosen IP network region)
to access the IP Network Region form for the specified region.
The IP Network Region form appears.
Figure 18: Example of Page 1 of the IP Network Region Form
2. Set Intra-region IP-IP Direct Audio to yes.
3. Set Inter-region IP-IP Direct Audio to yes.
Note:
Note: Shuffling is recommended. However, you can set shuffling to no, and video calls
will work properly.
4. Go to page 2 of the form.
90 Avaya Video Telephony Solution Networking Guide
Page 91

Configure Ad-hoc Video Conferencing for a Polycom MGC Video Conferencing Bridge Platform
Figure 19: Example of Page 2 of the IP Network Region Form
5. Set Security Procedures 1 to any-auth.
6. Go to page 3 of the form.
7. Set codec set to the appropriate codec set you defined.
8. Set Video Norm to the amount of bandwidth that you want to allocate for the normal video
pool to each IP network region.
9. Set Video Prio to the amount of bandwidth that you want to allocate for the priority video
pool to each IP network region.
10. Set Video Shr . Specify whether the normal video pool can be shared with the audio pool for
each link between IP network regions (y or n).
11. Repeat Steps 1 through 10 for each IP network region that will be used for video in this
system.
Issue 3 January 2008 91
Page 92

Setting Up Video Endpoints
Procedure 2: Configure the Polycom RMX for Use with an Avaya Server
Perform the procedures in the appropriate section to configure the Polycom MGC system:
1. Configure a Polycom MGC-25 Video Conferencing Bridge Platform for an Avaya S8300
Server on page 78.
2. Configure Polycom MGC Video Conferencing Bridge Platforms with Avaya S8500 and
S87xx Server on page 82.
After performing these procedures, go to Procedure 3: Determine the Maximum Number of
Ad-hoc Video Conferencing Ports Supported on page 92.
Procedure 3: Determine the Maximum Number of Ad-hoc Video Conferencing Ports Supported
To determine the maximum number of Ad-hoc video conferencing ports your voice system
supports:
1. Use the display system-parameters customer-options command to access t he Optional
Features form.
2. On page 2 of the form, verify Maximum Administered Ad-hoc Video Conferencing
Ports. The maximum number of Ad-hoc video conferencing ports allowed is the number of
video ports available for Ad-hoc use on the MCU(s). For example, if you have three MCUs,
and each MCU has 16 ports available for Ad-hoc use, the maximum number of Ad-hoc
video conferencing ports allowed is 48. This is a license count that Avaya provides based
on your stated needs. Licensing and administration are two different decisions on port
counts.
92 Avaya Video Telephony Solution Networking Guide
Page 93

Configure Ad-hoc Video Conferencing for a Polycom MGC Video Conferencing Bridge Platform
Figure 20: Example of Page 2 of the Optional Features Form
In this example, the system can have a maximum of 217 administered Ad-hoc video
conferencing ports. Currently, 100 Ad-hoc video conferencing ports are being used.
Procedure 4: Configure Class of Service
To configure the Class of Service for Ad-hoc video conferencing:
1. Use the change cos command to access the Class of Service form.
2. Go to page 2 of the form.
3. Set Ad-hoc Video Conferencing for the appropriate COS levels.
Issue 3 January 2008 93
Page 94

Setting Up Video Endpoints
Procedure 5: Configure a Video Bridge
To configure a video bridge:
1. Use the add video-bridge xx command (where xx is the bridge number between 1 to 40,
and each video bridge belongs to an MCU) to access the Video Bridge form.
Figure 21: Example of the Video Bridge Form
2. In Name, enter the name for this video bridge (for example, Ad Hoc Video Bridge - MGC25).
3. Set Max Ports to the maximum number of Ad-hoc conferencing port s you want to assign to
this bridge. (The minimum you can enter is 3.) This is equivalent to the number of p orts tha t
are available for Ad-hoc use on the associated MGC based on a needed bit rate for video.
4. In Trunk Groups, enter the administered incoming or outgoing ISDN H.323 or SIP trunk
groups you added for the MGC. All entries must be of the same carrier type (that is, all
H.323 trunks or all SIP trunks).
The Far End Resource Info, ID Range, Priority Factory Number, and Standard Factory
Number fields appear.
Note:
Note: MGC Ad-hoc should not be used for SIP video endpoints. Expect no video.
5. Set Far End Resource Info? to n. The Priority Factory Number and Standard Factory
Number fields are removed.
94 Avaya Video Telephony Solution Networking Guide
Page 95

Configure Ad-hoc Video Conferencing for a Polycom MGC Video Conferencing Bridge Platform
6. Set ID Range to the range of ports. These IDs correspond to the actual conference ID
numbers of meeting rooms configured on the MGC. For example, if you enter the range
1000 - 1003, you must configure 1000, 1001, 1002, and 1003 as meeting rooms on the
MGC. These meeting rooms are for Ad-hoc use only and must not be accessible via the
Unified Dial Plan (UDP). Note that Automatic Alternate Routing (AAR) and Unified Dial Plan
are not used to connect to these meeting room numbers. Conference IDs (and factory
numbers) are completely independent of the dial plan. As a result, you can set up several
video bridges with exactly the same conference IDs and numbers. (This will make it easier
for you to maintain configurations and swap hardware.)
Procedure 6: Configure the MGC System
On the MGC system, perform the following steps for Ad-hoc conferencing:
1. Create meeting room IDs that correspond to the ID range on Avaya Communication
Manager Video Bridge form, with each being video switching auto conferences. Determine
the ID length from the MGC system.cfg file.
2. Set 1*1 transcoding so cascaded conferences display properly.
Display Capacity for Ad-hoc Video Conferencing
To display the capacity for Ad-hoc video conferencing:
1. Use the display capacity command to access the System Capacity form.
2. Go to page 7. Ad-hoc Video Conferencing Ports displays the following Ad-hoc video
conferencing information:
- Used - the number of video conferencing ports currently in use.
- Available - the number of video conferencing ports currently available.
- System Limit - the total number of video conference ports in your system. (This is the
sum of Used ports and Available ports.)
View Video Conferencing Bridges
Use the list video-bridge command to view the video conferencing bridges administered on
your system.
Issue 3 January 2008 95
Page 96

Setting Up Video Endpoints
Configure an Av aya Meeting Exchange 5.0.1 S6800 Bridge
This section describes how to configure an Ava ya Meeting Exchange 5.0.1 S68 00 bridge as an
external video bridge.
Checklist
When setting up an Avaya Meeting Exchange 5.0.1 S6800 bridge, you will need to know the
following information:
● the IP codec sets you want to use
● the IP network regions you want use
● the Priority Factory Number and the Standard Factory Number to use in the Avaya
Communication Manager system and the Avaya Meeting Exchange bridge.
Things to Keep in Mind
Before configuring an Avaya Meeting Exchange 5.0.1 S6 800 bridge, kee p in mind the following
information:
● For more information on the Avaya Meeting Exchange bridge, refer to the Avaya Meeting
Exchange 5.0.1 Installation and Administrator guide.
● Ad-hoc supports six audio callers per conference.
● Schedule supports 16 video callers per Meeting Exchange 5.0.1 scheduled conference.
● Each 6800 bridge can support up to 2000 video ports
● Each conference can support up to 16 video participant.
● The video capacity for each Convedia MPC varies depending on bit rate, picture size, and
frame rate. See the following table.
96 Avaya Video Telephony Solution Networking Guide
Page 97

Table 11: Video Capacity
Configure an Avaya Meeting Exchange 5.0.1 S6800 Bridge
Total Bit Rate Picture SIze
(MPI)
768 Kbit/s CIF:1 G.711 45 91
384 Kbit/s CIF:2 G.711 90 75
128 Kbit/s QCIF:4 G.711 250 75
Configuration Procedures
To configure an Avaya Meeting Exchange 5.0.1 S6800 bridge with an Avaya Communication
Manager system, you must perform the following steps:
1. Verify the licensing on the Avaya Communication Manager system.
2. Configure IP network regions for the Meeting Exchange system.
3. Add an entry in the IP node names for the Meeting Exchange system.
4. Add a signaling group for the Meeting Exchange system.
Audio Codec # Ports per
MPC
Resource
Allocation for
Video (%)
5. Add a SIP trunk group for the Meeting Exchange system.
6. Configure the Avaya Meeting Exchange 5.0.1 S6800 bridge.
7. Configure the Radisys CMS 6000 for Avaya Meeting Exchange 5.0.1 S6800 bridge.
8. Configure Avaya Communication Manager Video Bridge (Ad-hoc conferencing only).
9. Configure Avaya Communication Manager to use SES for Avaya Meeting Exchange.
Issue 3 January 2008 97
Page 98

Setting Up Video Endpoints
Procedure 1: Verify Licensing
Y ou must verify that the A vaya Communication Manager system is licensed for video end points,
Ad-hoc video conferencing ports, and multimedia IP SIP trunking.
To verify licensing:
1. Use the display system-parameters customer-options command to access t he Optional
Features form.
2. On page 2 of the form, verify the following settings:
● Maximum Video Capable IP Softphones. This number is provided by the RFA license
file.
Note:
Note: To provide video softphone capability, you must have at least this number of IP
Softphone licenses. Page 10 of this form displays the number of IP Softphone
licenses you have.
● Maximum Administered Ad-hoc Video Conferencing Ports. The maximum number of
Ad-hoc video conferencing ports allowed is the number of video ports available for
Ad-hoc use on the MCU(s). For example, if you have three MCUs, and each MCU has 16
ports available for Ad-hoc use, the maximum number of Ad-hoc video conferencing port s
allowed is 48.
98 Avaya Video Telephony Solution Networking Guide
Page 99

Configure an Avaya Meeting Exchange 5.0.1 S6800 Bridge
Figure 22: Example of Page 2 of the Optional Features Form
In this example, the system can have:
● a maximum of 40 video-enabled Avaya IP Softphones. Currently, 13 video-capable
Avaya IP Softphones are being used.
● a maximum of 217 administered Ad-hoc video conferencing port s. Curre ntly, 100 Ad-hoc
video conferencing ports are being used.
3. Go to page 4.
Issue 3 January 2008 99
Page 100

Setting Up Video Endpoints
Figure 23: Example of Page 4 of the Customer-Options Form
4. Make sure Multimedia IP SIP Trunking? is set to y.
Procedure 2: Configure IP Network Regions
Y ou must place the Meeting Exch ange system in a dedicated network region and ensure that all
other network regions have direct connectivity to the Meeting Exchange system’s network
region.
To configure the IP network regions:
1. Use the change ip-network-region x command (where x is the chosen IP network region)
to access the IP Network Region form for the specified region.
The IP Network Region form appears.
100 Avaya Video Telephony Solution Networking Guide
 Loading...