

Page 1

Avaya 1110 IP Deskphone
User Guide
Avaya Communication Server 1000
Document Status: Standard
Document Version: 07.01
Part Code: NN43110-101
Date: October 2010
Page 2

© 2010 Avaya Inc. All Rights Reserved.
Notices
While reasonable efforts have been made to ensure that the information in this docum ent is complete and accurate at the time of
printing, Avaya assumes no liability for any errors. Avaya reserves the right to make changes and corrections to the
information in this document without the obligation to notify any person or organization of such changes.
Documentation disclaimer
Avaya shall not be responsible for any modifications, additions, or deletions to the original published version of this
documentation unless such modifications, additions, or deletions were performed by Avaya. End User agree to indemnify and
hold harmless Avaya, Avaya’s agents, servants and employees against all claims, lawsuits, demands and judgments arising out
of, or in connection with, subsequent modifications, additions or deletions to this documentation, to the extent made by End
User.
Link disclaimer
Avaya is not responsible for the contents or reliability of any linked Web sites referenced within this site or documentation(s)
provided by Avaya. Avaya is not responsible for the accuracy of any information, statement or content provided on these sites
and does not necessarily endorse the products, services, or information described or offered within them. Avaya does not
guarantee that these links will work all the time and has no control over the availability of the linked pages.
Warranty
Avaya provides a limited warranty on this product. Refer to your sales agreement to establish the terms of the limited warranty.
In addition, Avaya’s standard warranty language, as well as information regarding support for this product, while under
warranty, is available to Avaya customers and other parties through the Avaya Support Web site: http://www.avaya.com/
support
Please note that if you acquired the product from an authorized reseller, the warranty is provided to you by said reseller and not
by Avaya.
Licenses
THE SOFTWARE LICENSE TERMS AVAILABLE ON THE AVAYA WEBSITE, HTTP://SUPPORT.AVAYA.COM/
LICENSEINFO/ ARE APPLICABLE TO ANYONE WHO DOWNLOADS, USES AND/OR INSTALLS AVAYA
SOFTWARE, PURCHASED FROM AVAYA INC., ANY AVAYA AFFILIATE, OR AN AUTHORIZED AVAYA
RESELLER (AS APPLICABLE) UNDER A COMMERCIAL AGREEMENT WITH AVAYA OR AN AUTHORIZED
AVAYA RESELLER. UNLESS OTHERWISE AGREED TO BY AVAYA IN WRITING, AVAYA DOES NOT EXTEND
THIS LICENSE IF THE SOFTWARE WAS OBTAINED FROM ANYONE OTHER THAN AVAYA, AN AVAYA
AFFILIATE OR AN AVAYA AUTHORIZED RESELLER, AND AVAYA RESERVES THE RIGHT TO TAKE LEGAL
ACTION AGAINST YOU AND ANYONE ELSE USING OR SELLING THE SOFTWARE WITHOUT A LICENSE. BY
INSTALLING, DOWNLOADING OR USING THE SOFTWARE, OR AUTHORIZING OTHERS TO DO SO, YOU, ON
BEHALF OF YOURSELF AND THE ENTITY FOR WHOM YOU ARE INSTALLING, DOWNLOADING OR USING
THE SOFTW ARE (HEREINAFTER REFERRED T O INTERCHANGEABLY AS "YOU" AND "END USER"), AGREE TO
THESE TERMS AND CONDITIONS AND CREATE A BINDING CONTRACT BETWEEN YOU AND AVAYA INC. OR
THE APPLICABLE AVAYA AFFILIATE ("AVAYA").
Copyright
Except where expressly stated otherwise, no use should be made of the Documentation(s) and Product(s) provided by Avaya.
All content in this documentation(s) and the product(s) provided by Avaya including the selection, arrangement and design of
the content is owned either by Avaya or its licensors and is protected by copyright and other intellectual property laws
including the sui generis rights relating to the protection of databases. You may not modify, copy, reproduce, republish, upload,
post, transmit or distribute in any way any content, in whole or in part, including any code and software. Unauthorized
reproduction, transmission, dissemination, storage, and or use without the express written consent of Avaya can be a criminal,
as well as a civil offense under the applicable law.
Third Party Components
Certain software programs or portions thereof included in the Product may contain software distributed under third party
agreements ("Third Party Components"), which may contain terms that expand or limit rights to use certain portions of the
Product ("Third Party Terms"). Information regarding distributed Linux OS source code (for those Products that have
distributed the Linux OS source code), and identifying the copyright holders of the Third Party Components and the Third
Party Terms that apply to them is available on the Avaya Support Web site: http://support.avaya.com/Copyright.
Trademarks
The trademarks, logos and service marks ("Marks") displayed in this site, the documentation(s) and product(s) provided by
Avaya are the registered or unregistered Marks of Avaya, its affiliates, or other third parties. Users are not permitted to use
such Marks without prior written consent from Avaya or such third party which may own the Mark. Nothing contained in this
site, the documentation(s) and product(s) should be construed as granting, by implication, estoppel, or otherwise, any license
or right in and to the Marks without the express written permission of Avaya or the applicable third party . Avaya is a registered
trademark of Avaya Inc. All non-Avaya trademarks are the property of their respective owners.
Downloading documents
For the most current versions of documentation, see the Avaya Support. Web site: http://www.avaya.com/support
Contact Avaya Support
Avaya provides a telephone number for you to use to report problems or to ask questions about your product. The support
telephone number is 1-800-242-2121 in the United States. For additional support telephone numbers, see the Avaya Web site:
http://www.avaya.com/support
Page 3

Revision history
October 2010
Standard 07.01. This document is up-issued to support Unistim
5.0 and Avaya Communication Server 1000 Release 7.5.
June 2010
Standard 06.01. This document is up-issued to support
Communication Server 1000 Release 7.0.
October 2009
Standard 05.01. Because of the similarity between
Communication Server 1000 Release 6.0 for UNIStim 4.0
features and Release 5.5 features, UNIStim 4.0 Release 6.0
documentation is also used for Release 5.5.
June 2009
Standard 04.02. This document is up-issued to support Nortel
Communication Server 1000 Release 6.0.
Revision history
May 2009
Standard 04.01. This document is up-issued to support Nortel
Communication Server 1000 Release 6.0.
April 2008
Standard 03.03. This document is up-issued to support Nortel
Communication Server 1000 Release 5.5 for UNIStim 3.0.
May 2007
Standard 02.01. This document is issued to support Nortel
Communication Server 1000 Release 5.0.
3
Page 4

Revision history
March 2007
Standard 01.01. This document is issued to support
Communication Server 1000 Release 4.5. This is the first
publication of this document.
4
Page 5

Contents
About the Avaya 1110 IP Deskphone . . . . . . . . . . . . . . . . . 11
Basic features . . . . . . . . . . . . . . . . . . . . . . . . . . . . . . . . . . . . . 11
Telephone controls . . . . . . . . . . . . . . . . . . . . . . . . . . . . . . . . . 13
Telephone display . . . . . . . . . . . . . . . . . . . . . . . . . . . . . . . . . 17
License Notification . . . . . . . . . . . . . . . . . . . . . . . . . . . . . . . . 17
Call features and Flexible Feature Codes . . . . . . . . . . . . . . . 18
Audio and text message broadcast . . . . . . . . . . . . . . . . . . . . 18
Security features . . . . . . . . . . . . . . . . . . . . . . . . . . . . . . . . . . . 19
Using Encrypted Calling . . . . . . . . . . . . . . . . . . . . . . . . . . 19
Managing your Station Control Password (SCPW) . . . . . 19
Entering and editing text . . . . . . . . . . . . . . . . . . . . . . . . . . . 22
Entering text using the dialpad . . . . . . . . . . . . . . . . . . . . . . . . 22
Editing text using the soft keys . . . . . . . . . . . . . . . . . . . . . . . . 22
Contents
Entering text using the USB keyboard . . . . . . . . . . . . . . . . . . 24
Connect the components . . . . . . . . . . . . . . . . . . . . . . . . . . 25
Before you begin . . . . . . . . . . . . . . . . . . . . . . . . . . . . . . . . . . 25
Telephone features . . . . . . . . . . . . . . . . . . . . . . . . . . . . . . . . 31
Telephone Options . . . . . . . . . . . . . . . . . . . . . . . . . . . . . . . . . 31
Volume adjustment... . . . . . . . . . . . . . . . . . . . . . . . . . . . . . . . 33
Contrast adjustment . . . . . . . . . . . . . . . . . . . . . . . . . . . . . . . . 34
Language... . . . . . . . . . . . . . . . . . . . . . . . . . . . . . . . . . . . . . . . 35
Date/Time... . . . . . . . . . . . . . . . . . . . . . . . . . . . . . . . . . . . . . . 36
Local Dialpad Tone . . . . . . . . . . . . . . . . . . . . . . . . . . . . . . . . . 37
Set Info . . . . . . . . . . . . . . . . . . . . . . . . . . . . . . . . . . . . . . . . . . 37
Diagnostics . . . . . . . . . . . . . . . . . . . . . . . . . . . . . . . . . . . . . . . 38
5
Page 6

Contents
Ring type... . . . . . . . . . . . . . . . . . . . . . . . . . . . . . . . . . . . . . . . 39
Call timer . . . . . . . . . . . . . . . . . . . . . . . . . . . . . . . . . . . . . . . . 40
Live Dial Pad . . . . . . . . . . . . . . . . . . . . . . . . . . . . . . . . . . . . . 41
Caller ID display order . . . . . . . . . . . . . . . . . . . . . . . . . . . . . . 42
Normal mode indication . . . . . . . . . . . . . . . . . . . . . . . . . . . . . 42
Local tools . . . . . . . . . . . . . . . . . . . . . . . . . . . . . . . . . . . . . . . 44
1. Using the Preferences submenu . . . . . . . . . . . . . . . . . . . . 45
1. Contrast . . . . . . . . . . . . . . . . . . . . . . . . . . . . . . . . . . . . 46
2. Languages... . . . . . . . . . . . . . . . . . . . . . . . . . . . . . . . . 46
3. Backlight Timer . . . . . . . . . . . . . . . . . . . . . . . . . . . . . . 47
2. Using the Local Diagnostics submenu . . . . . . . . . . . . . . . . 48
1. IP Set&DHCP Information . . . . . . . . . . . . . . . . . . . . . . 49
2. Network Diagnostic Tools . . . . . . . . . . . . . . . . . . . . . . 49
3. Ethernet Statistics . . . . . . . . . . . . . . . . . . . . . . . . . . . . 49
4. IP Network Statistics . . . . . . . . . . . . . . . . . . . . . . . . . . 49
5. DHCP Information . . . . . . . . . . . . . . . . . . . . . . . . . . . . 50
6. License Information . . . . . . . . . . . . . . . . . . . . . . . . . . . 50
7. Certificate Information . . . . . . . . . . . . . . . . . . . . . . . . . 50
3. Using the Network Configuration submenu . . . . . . . . . . . . 50
4. Using the Lock Menu . . . . . . . . . . . . . . . . . . . . . . . . . . . . . 50
Making a call . . . . . . . . . . . . . . . . . . . . . . . . . . . . . . . . . . . . . 51
Using Off-hook dialing . . . . . . . . . . . . . . . . . . . . . . . . . . . . . . 51
Using On-hook Dialing . . . . . . . . . . . . . . . . . . . . . . . . . . . . . . 52
Using Predial . . . . . . . . . . . . . . . . . . . . . . . . . . . . . . . . . . . . . 52
Using Ring Again . . . . . . . . . . . . . . . . . . . . . . . . . . . . . . . . . . 53
Using Last Number Redial . . . . . . . . . . . . . . . . . . . . . . . . . . . 55
Using Speed Call . . . . . . . . . . . . . . . . . . . . . . . . . . . . . . . . . . 56
Using System Speed Call . . . . . . . . . . . . . . . . . . . . . . . . . . . . 57
6
Page 7

Contents
Answering a call . . . . . . . . . . . . . . . . . . . . . . . . . . . . . . . . . . 58
While on an active call . . . . . . . . . . . . . . . . . . . . . . . . . . . . . 58
Placing a call on hold . . . . . . . . . . . . . . . . . . . . . . . . . . . . . . . 58
Transferring a call . . . . . . . . . . . . . . . . . . . . . . . . . . . . . . . . . . 59
Using Timed Reminder Recall . . . . . . . . . . . . . . . . . . . . . . . . 60
Using Call Park . . . . . . . . . . . . . . . . . . . . . . . . . . . . . . . . . . . . 61
Recording a Calling Party Number . . . . . . . . . . . . . . . . . . . . . 63
Tracing a malicious call . . . . . . . . . . . . . . . . . . . . . . . . . . . . . 64
While away from your desk . . . . . . . . . . . . . . . . . . . . . . . . . 65
Using Call Forward . . . . . . . . . . . . . . . . . . . . . . . . . . . . . . . . . 65
Using Internal Call Forward . . . . . . . . . . . . . . . . . . . . . . . . . . 66
Using Remote Call Forward . . . . . . . . . . . . . . . . . . . . . . . . . . 67
Securing your telephone . . . . . . . . . . . . . . . . . . . . . . . . . . . . . 69
Talking with more than one person . . . . . . . . . . . . . . . . . . 71
Setting up a conference call . . . . . . . . . . . . . . . . . . . . . . . . . . 72
Using Group Call . . . . . . . . . . . . . . . . . . . . . . . . . . . . . . . . . . 73
Working without interruption . . . . . . . . . . . . . . . . . . . . . . . 75
Activating Make Set Busy . . . . . . . . . . . . . . . . . . . . . . . . . . . . 75
Additional call features . . . . . . . . . . . . . . . . . . . . . . . . . . . . 76
Using Call Page Connect to make an announcement . . . . . . 76
Charging a call or charging a forced call . . . . . . . . . . . . . . . . 77
Using Enhanced Override . . . . . . . . . . . . . . . . . . . . . . . . . . . 80
Using Forced Camp-on . . . . . . . . . . . . . . . . . . . . . . . . . . . . . 81
Overriding a busy signal . . . . . . . . . . . . . . . . . . . . . . . . . . . . . 83
Using Privacy Release . . . . . . . . . . . . . . . . . . . . . . . . . . . . . . 83
Using Radio Page . . . . . . . . . . . . . . . . . . . . . . . . . . . . . . . . . . 84
7
Page 8

Contents
Additional phone features . . . . . . . . . . . . . . . . . . . . . . . . . . 87
Secure Communication . . . . . . . . . . . . . . . . . . . . . . . . . . . . . 87
Using Virtual Office . . . . . . . . . . . . . . . . . . . . . . . . . . . . . . . . . 87
Logging in to Virtual Office . . . . . . . . . . . . . . . . . . . . . . . . 89
Using Virtual Office on your Remote telephone . . . . . . . . 90
Using Virtual Office on your Office telephone . . . . . . . . . 93
Logging out of Virtual Office . . . . . . . . . . . . . . . . . . . . . . . 95
Automatic log out from Virtual Office . . . . . . . . . . . . . . . . 95
Emergency calls on your Remote IP Deskphone . . . . . . . 95
Troubleshooting Virtual Office . . . . . . . . . . . . . . . . . . . . . 96
Using Media Gateway 1000B . . . . . . . . . . . . . . . . . . . . . . . . . 98
Using Test Local Mode . . . . . . . . . . . . . . . . . . . . . . . . . . 99
Using Resume Normal Mode . . . . . . . . . . . . . . . . . . . . . 100
Troubleshooting MG 1000B . . . . . . . . . . . . . . . . . . . . . . 100
Using Hospitality features . . . . . . . . . . . . . . . . . . . . . . . . . 102
Configuring Automatic Wake-Up . . . . . . . . . . . . . . . . . . . . . 102
Station Control Password . . . . . . . . . . . . . . . . . . . . . . . . . 104
Accessing External Server Applications . . . . . . . . . . . . . 106
Flexible Feature Codes (FFC) . . . . . . . . . . . . . . . . . . . . . . 107
Quick Reference . . . . . . . . . . . . . . . . . . . . . . . . . . . . . . . . . 109
Feature operation . . . . . . . . . . . . . . . . . . . . . . . . . . . . . . . . . 109
Legend . . . . . . . . . . . . . . . . . . . . . . . . . . . . . . . . . . . . . . . . . 110
Services and Telephone Options menus . . . . . . . . . . . . . . . 110
Regulatory and safety information . . . . . . . . . . . . . . . . . . 113
Other . . . . . . . . . . . . . . . . . . . . . . . . . . . . . . . . . . . . . . . . . . . 115
DenAn regulatory notice for Japan . . . . . . . . . . . . . . . . . . . . 115
8
Page 9

Contents
Third party terms . . . . . . . . . . . . . . . . . . . . . . . . . . . . . . . . 117
Third Party Terms for UNIStim sw releases
4.1 thru 5.0 (Jan 2010 - Nov 2010) . . . . . . . . . . . . . . . . . . . . 117
GNU . . . . . . . . . . . . . . . . . . . . . . . . . . . . . . . . . . . . . . . . 118
OpenSSL . . . . . . . . . . . . . . . . . . . . . . . . . . . . . . . . . . . . 125
Zlib . . . . . . . . . . . . . . . . . . . . . . . . . . . . . . . . . . . . . . . . . 128
Curl . . . . . . . . . . . . . . . . . . . . . . . . . . . . . . . . . . . . . . . . . 129
Libpng . . . . . . . . . . . . . . . . . . . . . . . . . . . . . . . . . . . . . . 130
Kern_random . . . . . . . . . . . . . . . . . . . . . . . . . . . . . . . . . 132
ConvertUTF . . . . . . . . . . . . . . . . . . . . . . . . . . . . . . . . . . 133
Wchar functions . . . . . . . . . . . . . . . . . . . . . . . . . . . . . . . 134
Libjpeg . . . . . . . . . . . . . . . . . . . . . . . . . . . . . . . . . . . . . . 135
Terms you should know . . . . . . . . . . . . . . . . . . . . . . . . . . 137
Index . . . . . . . . . . . . . . . . . . . . . . . . . . . . . . . . . . . . . . . . . . 143
9
Page 10

Contents
10
Page 11

About the Avaya 1110 IP Deskphone
About the
Avaya 1110 IP Deskphone
The Avaya 1110 IP Deskphone brings voice and data to the desktop by
connecting directly to a Local Area Network (LAN) thro ug h an Ethe rne t
connection.
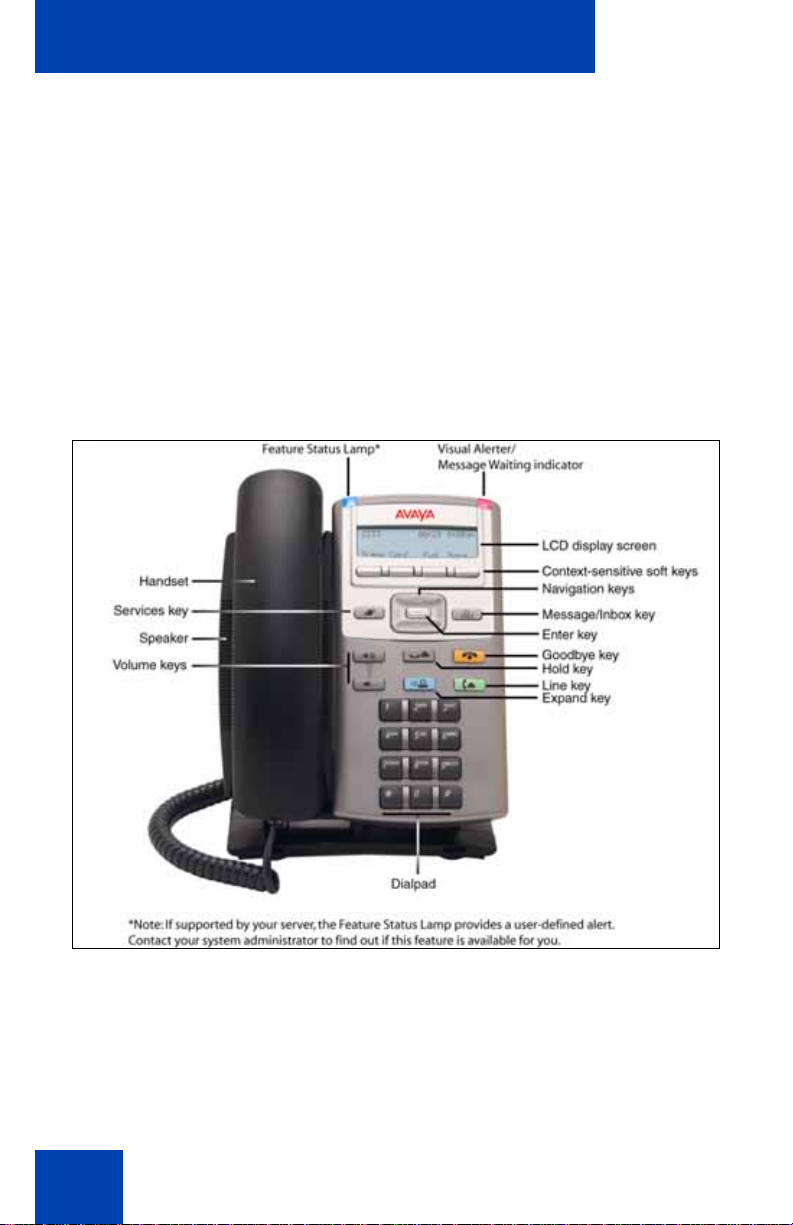
Basic features
Your Avaya 1110 IP Deskphone supports the following:
• four context-sensitive soft keys providing access to a maximum of 10
features
For information about context-sensitive soft keys, see Avaya
Features and Services Fundamentals (NN43001-106).
Context-sensitive soft keys are Avaya Communication Server
dependent. Some Avaya 1110 IP Deskphones may not be
configured to support context-sensitive soft key functionality. Contact
your site administrator for further details.
• pixel-based LCD screen, backlit, with adjustable contrast
• speaker for on-hook listening and on-hook dialing
• volume control keys for adjusting ringer, speaker, and handset
volume
• three call-processing fixed keys:
—Line
—Hold
— Goodbye
• three specialized feature keys:
— Message/Inbox
— Services
— Expand
• integrated 10/100 Ethernet switch for shared PC access
11
Page 12
About the Avaya 1110 IP Deskphone
• automatic network configuration
• hearing aid compatibility
Note: Wideband audio is not supported on the Avaya 1110 IP
Deskphone.
Note: Some features are not available on all telephones. Consult
your system administrator to verify which features are available for
your use.
Figure 1 shows the controls of your Avaya 1110 IP Deskphone.
Figure 1: Avaya 1110 IP Deskphone
12
Page 13
About the Avaya 1110 IP Deskphone
Telephone controls
Table 1: Telephone controls
Note: In some geographic regions, the Avaya 1110 IP Deskphone is
offered with key caps that have English text labels. Text in
parentheses indicates labels appear ing on the key caps, for example,
(Services).
Fwd
Fwd
More...
(Volume +)
(Volume -)
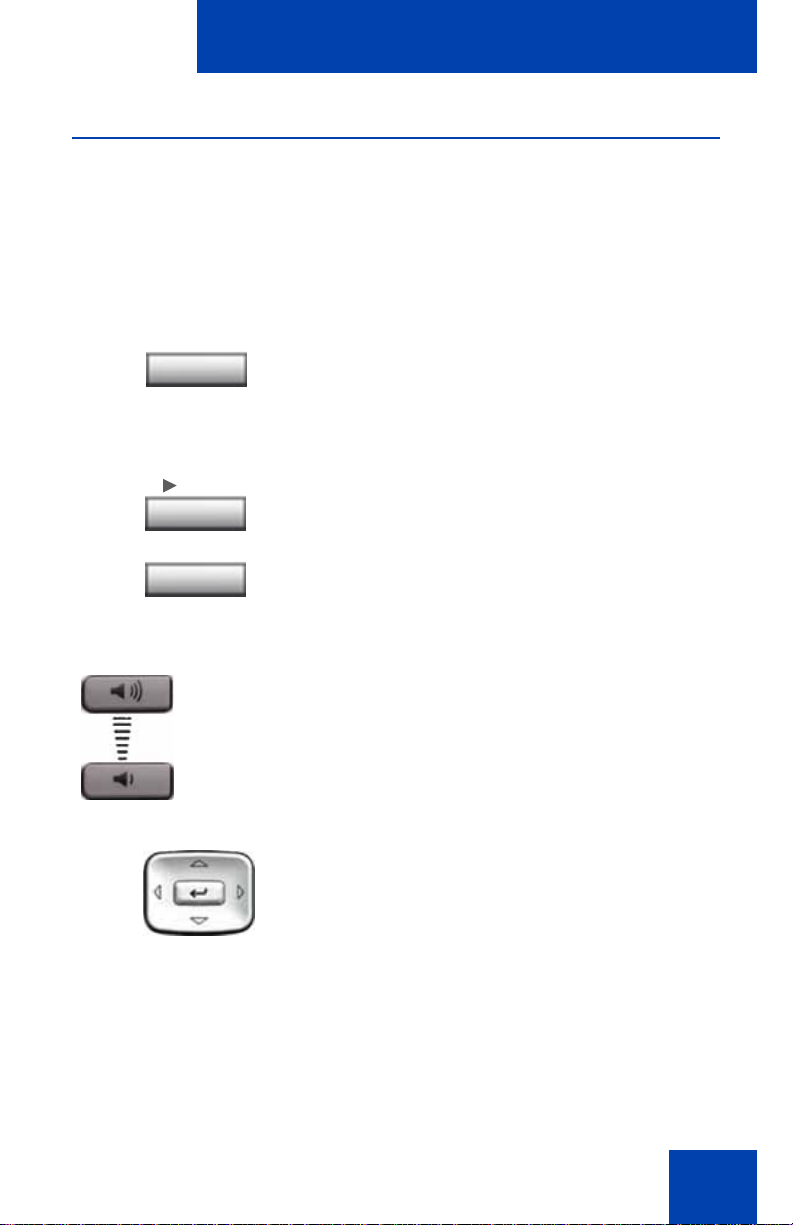
Context-sensitive soft keys are located
below the LCD display area. The LCD label
above each context-sensitive soft key
changes based on the call state or active
feature.
When a triangle appears before a contextsensitive soft key label, the feature
associated with the context-sensitive soft
key is active.
Press the More key to access the next layer
of context-sensitive soft keys.
Use the Volume control buttons to adjust
the volume of the ringer, handset and
speaker. Press the top button to increase the
volume, and press the bottom button to
decrease volume.
Use the Navigation keys to scroll through
menus and lists appearing on the LCD
display screen. The outer part of this key
cluster rocks for up, down, left, and right
movements.
13
Page 14
About the Avaya 1110 IP Deskphone
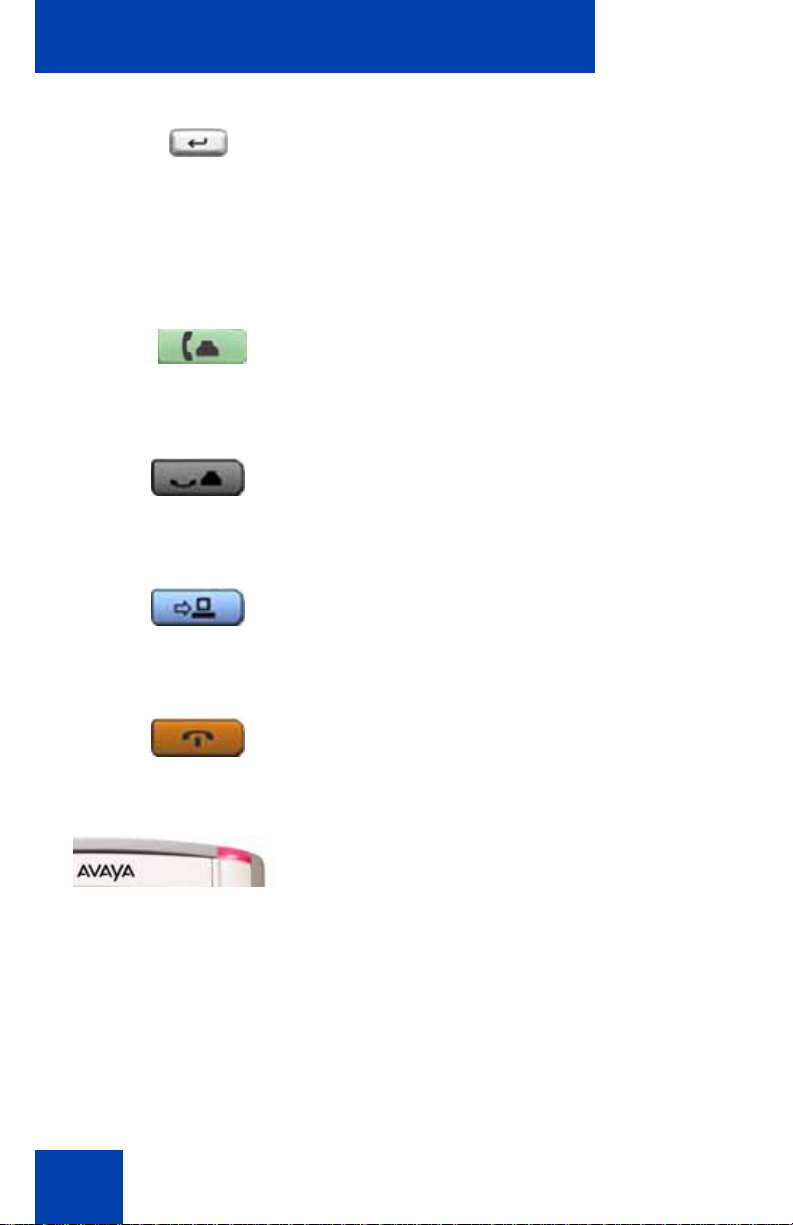
Press the Enter key, at the center of the
Navigation key cluster, to confirm menu
selections.
In many cases, you can use the Enter key
instead of the Select context-sensitive soft
key.
Use the Line (DN) key to access the single
line and activate on-hook dialing. No status
(Line)
icon or LED is provided.
Press the Hold key to put an active call on
hold. Press the Hold key again to return to
(Hold)
the caller on hold.
Use the Expand key to access external
server applications.
(Expand)
14
Use the Goodbye key to terminate an active
call.
(Goodbye)
When a message is waiting, the red Visual
Alerter/Message Waiting indicator flashes.
Also, when the ringer sounds, this indicator
flashes. The flash cadence for each alert is
different.
Note: You may also hear an audio
Message Waiting Indicator (stutter or
beeping dial tone) when you go off-hook.
Page 15

(Services)
About the Avaya 1110 IP Deskphone
When your Avaya 1110 IP Deskphone
firmware is being updated, the blue Feature
Status Lamp flashes.
Note: To find out if additional features
are supported, contact your
administrator.
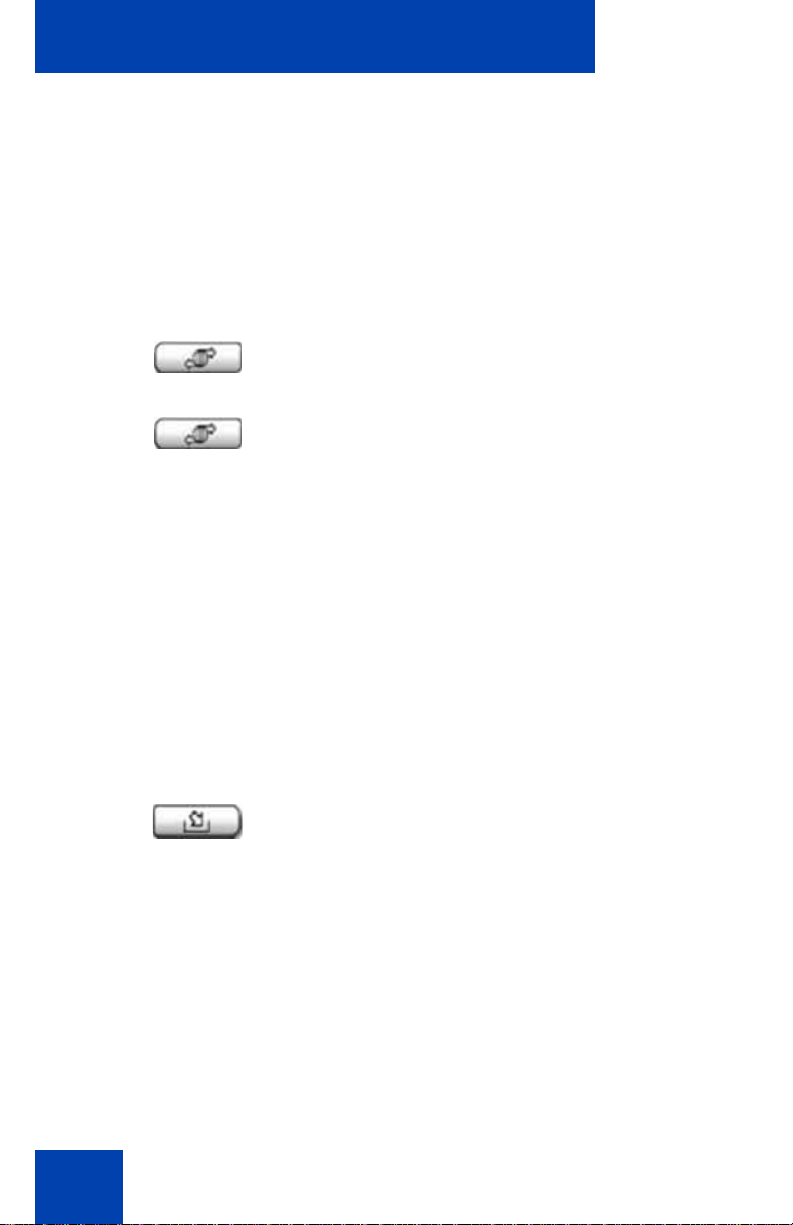
Press the Services key once to access the
following server-based options:
• Telephone Options:
— Volume adjustment...
— Contrast adjustment
— Language...
— Date/Time...
— Local Dialpad Tone
— Set Info
— Diagnostics
— Ring type...
— Call timer
— Live Dial Pad
— Caller ID display order
— Normal mode indication
• Password Admin:
— Station Control Password
Note: The Password Admin menu may
not be available on all Avaya 1110 IP
Deskphones. Consult your system
administrator.
15
Page 16
About the Avaya 1110 IP Deskphone
• Virtual Office Login and Virtual Office
Logout (if Virtual Office is configured)
• Test Local Mode and Resume Local
Mode (if Media Gateway 1000B is
configured)
Note: Press the Services key to exit
from any menu or menu item.
Press the Services key twice to access the
(Services)
following telephone-based (local) options:
• 1. Preferences
(Services)
(Msg/Inbox)
• 2. Local Diagnostics
• 3. Network Configuration
•4. Lock Menu
Note 1: Access to these local options
can be password protected. If you press
the Services key twice and a password
prompt appears, contact your system
administrator.
Note 2: Press the Cancel context-
sensitive soft key to exit from any menu
or menu item.
Press the Message/Inbox key to access
your voice mailbox.
Note: This function may not be available
on all Avaya 1110 IP Deskphones;
consult your system administrator.
16
Page 17
About the Avaya 1110 IP Deskphone
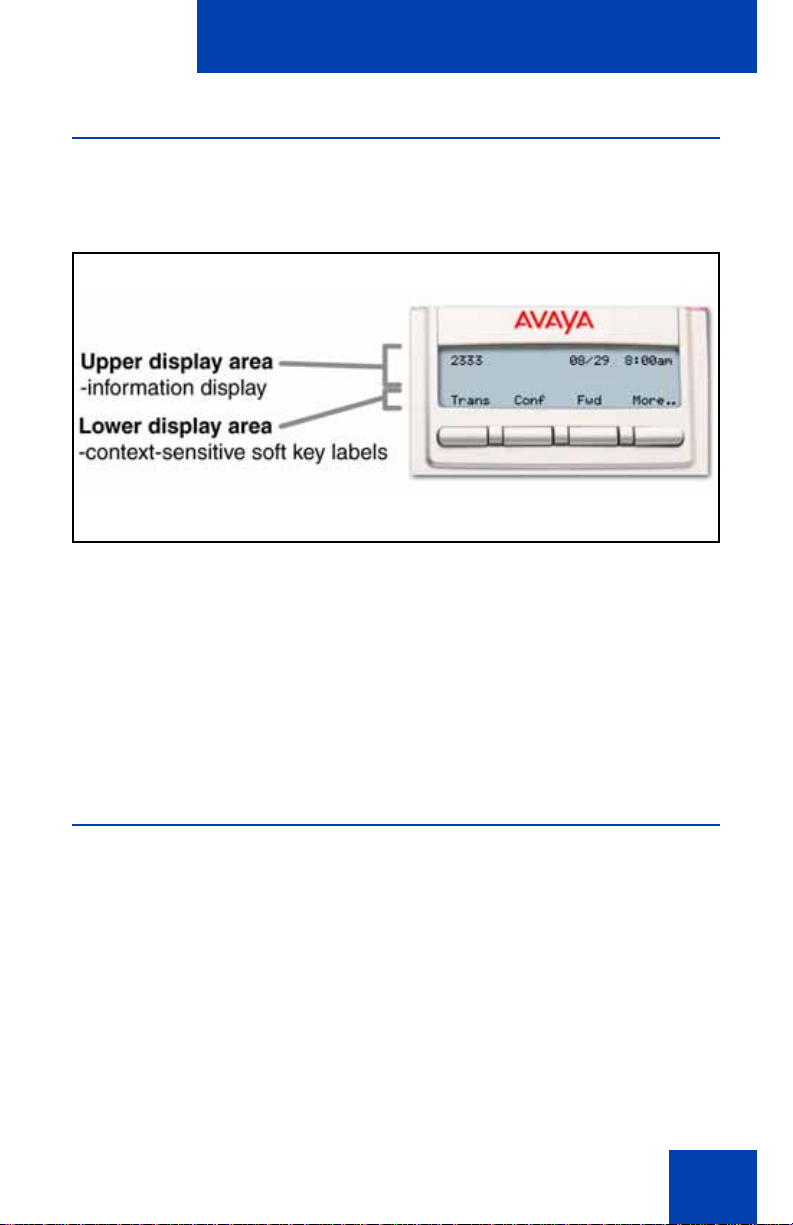
Telephone display
Table 1 shows the LCD screen of your Avaya 1110 IP Deskphone.
Figure 2: Avaya 1110 IP Deskphone LCD screen
The LCD screen on your Avaya 1110 IP Deskphone co nsis ts of two
basic display areas:
• The upper display area is for information such as caller number, caller
name, feature prompt string, user-entered digits, date and time (or
call timer, if provisioned in the Telephone Options menu), and
telephone information.
• The lower display area is for context-sensitive soft key labels.
License Notification
Notify your system administrator if your IP Deskphone displays a
message in a pop-up window about the licensing feature or evaluation
period. License notification provides details to help diagnose why the
features are disabled on the phone. You can press the Stop key or lift the
handset to close the window. The window redisplays every 24 hours at
1:00 AM (default). The time and time frame can be configured when you
provision the phone. For information abou t pr ov isio nin g th e IP
Deskphones, see Avaya Communication Server 1000 IP Deskphones
Fundamentals (NN43001-368).
17
Page 18

About the Avaya 1110 IP Deskphone
Call features and Flexible Feature Codes
Some features are not available on all IP Deskphones. Call features and
Flexible Feature Codes (FFCs) must be assigned to your IP Deskphone
and supported by system software. Contact your system administrator to
configure these features and codes on your IP Deskphone. Use table
“Flexible Feature Codes (FFC)” on page 107 to record the FFCs that your
system administrator assigns to your phon e.
Audio and text message broadcast
The Avaya 1110 IP Deskphone can display special messages in the
display area of your telephone, and can play special audio messages
through the speaker. Your administrator broadcasts these messages,
which can be used to inform you of events like company news and
weather bulletins. The message can be pre c e ded by an aud i o ale rt (a
series of beeps).
The Avaya 1110 IP Deskphone supports the following special messages:
• top line: up to three lines of text. The displays of the first two lines
alternate; the third line displays continuously
• audio: an audio message streams to the telephone
When an audio message starts, the Interrupt Screen displays. While the
audio message plays, you can switch to your handset or headset to liste n
to the message. Depending on the priority of the message, the message
can barge-in during an active telephone cal l, during an incoming call alert,
or when another message is playing.
You can also cancel the audio using the following methods:
• if listening on the speaker, pressing the Handsfree key
• if listening on the handset, placing the handset on hook
• if listening on the headset, pressing the Headset key
• by pressing the Cancel soft key
• by pressing any Line or Feature key
18
Page 19

About the Avaya 1110 IP Deskphone
Security features
The following security features are available on your Avaya 1110 IP
Deskphone:
• Using Encrypted Calling
• Connect the components
Using Encrypted Calling
Your Avaya 1110 IP Deskphone supports secure communication using
SRTP media encryption. If the feature is enabled, a security icon (q) is
displayed on the screen when your call is secured using SRTP media
encryption. Contact your system administrator to find out if this feature is
available for your use.
Managing your Station Control Password (SCPW)
Your Station Control Password (SCPW) enables the following security
features:
• Electronic Lock to prevent others from making calls from your IP
Deskphone
• Password-protected IP Deskphone features (for example, Personal
Directory, Redial List, and Callers List)
Your system administrator defines your initial SCPW. Contact your
system administrator for detailed inform ation.
To change your password (SCPW):
1. Press the Services key.
(Services)
19
Page 20
About the Avaya 1110 IP Deskphone
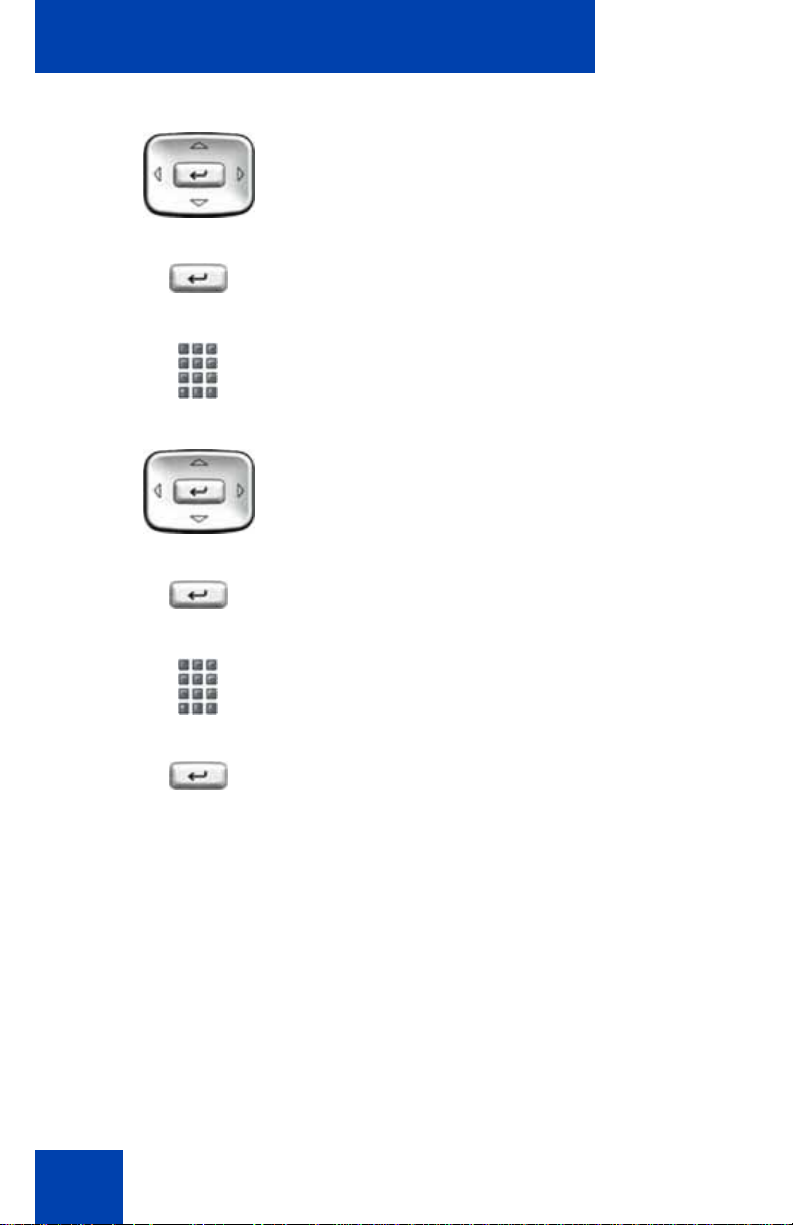
2. Press the Up/Down navigation keys to
scroll up or down, and highlight
Password Admin.
3. Press the Enter key.
4. Use the dialpad to enter your password
at the prompt.
5. Press the Up/Down navigation keys to
scroll up or down, and highlight New
Password.
6. Press the Enter key.
7. Use the dialpad to enter the new
password.
8. Press the Enter key to accept the new
password.
If you are locked out of your Avaya 1110 IP
Deskphone, or if you forget your SCPW,
contact your system administrator.
Note: The default configuration for Password Protection is off.
20
Page 21
About the Avaya 1110 IP Deskphone
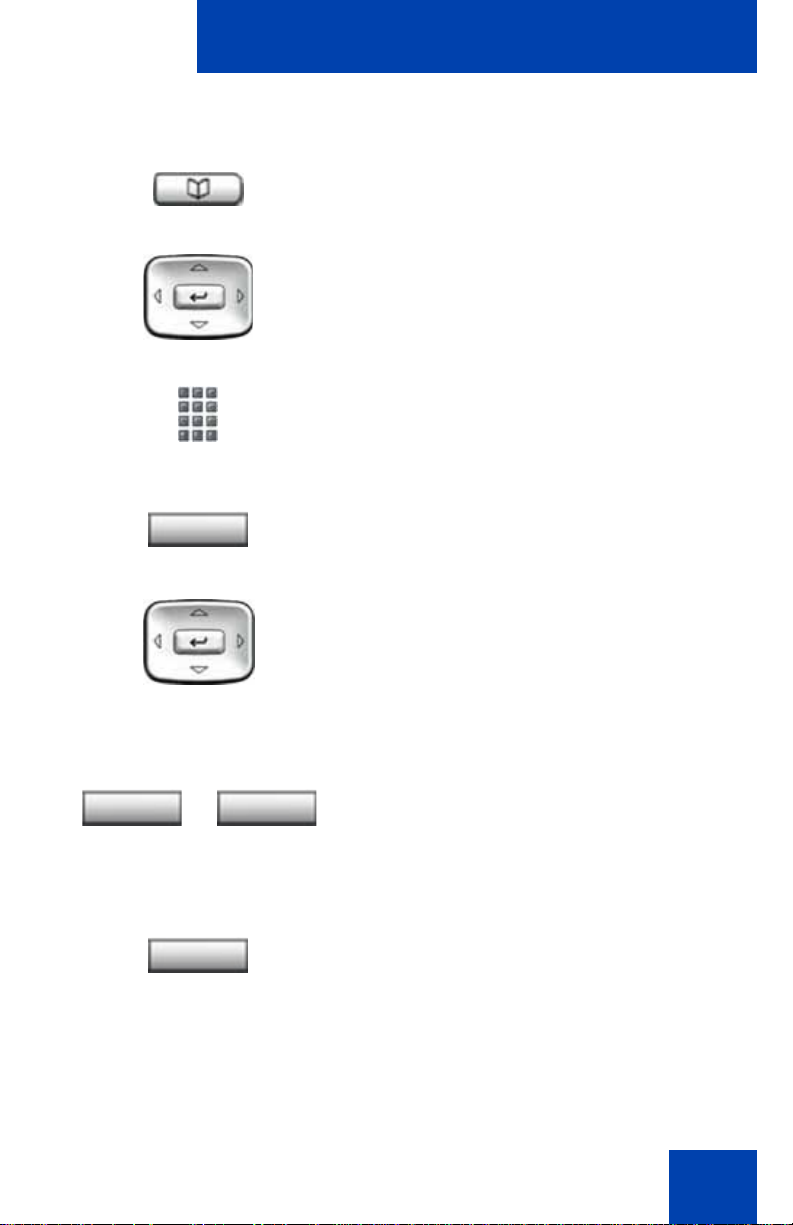
To turn Password Protection on or off:
1. Press the Directory key.
2. Press the Up/Down navigation keys to
scroll up or down, and highlight Change
Protection Mode.
3. Use the dialpad to enter your password
(if Password Protection is enabled).
Enter
Yes No
or
Done
4. Press the Enter soft key.
5. Press the Up/Down navigation keys to
highlight one of the following:
— Enable Password Protection
— Disable Password Protection
6. Choose one of the following soft keys:
— Yes to accept the selection
— No to return to the Directory menu
7. Press the Done soft key.
21
Page 22

Entering and editing text
Entering and editing text
You can enter and edit text on your Avaya 1110 IP Deskphone using the
following methods:
• “Connect the components” on page 25
• “Editing text using the soft keys” on page 22
• “Connect the components” on page 25
The use of any of these methods for text entry depends on the applica-
tion. Table 2 shows the applications and input devices that you can use
for text entry.
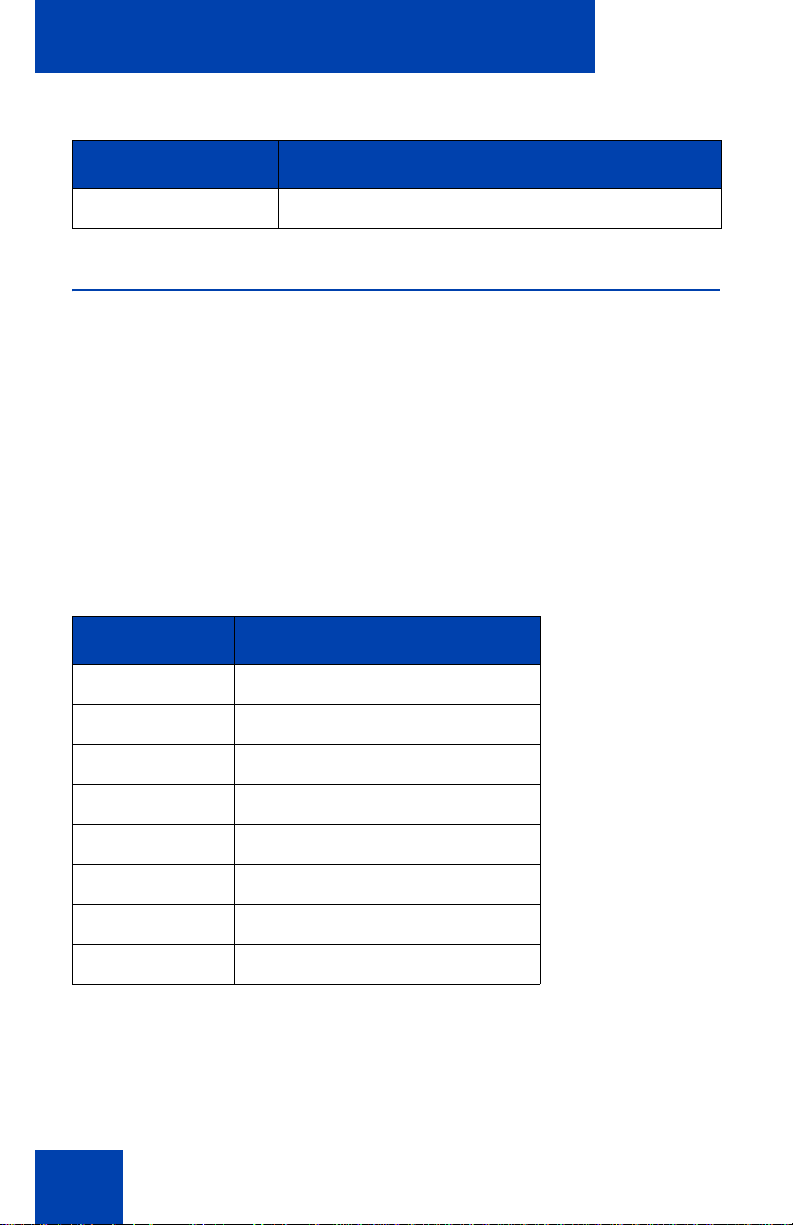
Table 2: Application text entry
For: Use:
Call Server-related applications
(for example, changing feature
key labels, adding personal
directory entries, or dialing)
Graphical applications USB keyboard
Local Tools menu USB keyboard
Dialpad
USB keyboard for numeric
entries only
Dialpad for numeric entries
Entering text using the dialpad
You can use the dialpad to enter text when you use features such as
Personal Directory, Redial List, and Callers List.
For example, if you want to use the letter A, press the number 2 key once.
If you want the letter C, press the number 2 key three times.
Note: No letters are associated with the number 1 or the 0 keys.
Editing text using the soft keys
22
Page 23

Entering and editing text
You can use soft keys to edit text when you use features such as
Personal Directory, Redial List, and Callers List.
To edit an entry in your Personal Directory, press the Directory key, and
select the desired entry from your Personal Directory.
To edit text with the soft keys:
1. Press the Edit soft key.
2. Press the Left/Right navigation keys to move through the text.
3. Select the appropriate editing soft key for the operation you want to
perform.
4. If the character you want is not visible, press the More soft key to
access the next layer of soft keys.
5. To add non-alphanumeric symbols, press the Symbol soft key, and
perform the following:
a. Press the Up navigation key to access the symbols.
b. Press the Left/Right navigation keys to move to a specific
symbol.
c. Press the Choose soft key to select a symbol.
6. Press the Next soft key to submit your changes.
Table 3 describes the soft key editing functions on your Avaya 1110 IP
Deskphone.
Table 3: Editing soft key description (Part 1 of 2)
Key Description
Cancel Action is cancelled.
Choose Select a non-alphanumeric symbol (available
only after the Symbol soft key is selected).
Clear Clear the input field.
Case Switch the next character to either uppercase
or lowercase.
Delete Backspace one character.
23
Page 24
Entering and editing text
Table 3: Editing soft key description (Part 2 of 2)
Key Description
Done/Select/Enter Meaning depends on application.
Entering text using the USB keyboard
You can use the USB keyboard, when connected, to enter text in the tools
and graphical applications.
For number entry in phone applications (for example, when dialing), you
can use the keyboard to enter digits (0–9), as well as * and #. Other
characters are ignored.
When on a call, you can use the function keys (f1, f2, f3, f4, f5, f6, f7, and
f8) to control the phone. Table 4 shows the function keys and their
associated action during phone calls.
Table 4: USB keyboard function keys during phone calls
Function key Action
f1 Go to Handsfree mode
f2 Go to Headset mode
f3 Place the current call on hold
f4 Mute the current call
f5 Volume up
f6 Volume down
f7 Copy
f8 Quit
24
Page 25

Connect the components
Connect the components
Before you begin
CAUTION
Damage to Equipment
Do not plug your Avaya 1110 IP Deskphone into a regular or
ISDN telephone jack. This results in severe damage to the
IP Deskphone. Consult your system administrator to ensure
that you plug your phone into a 10/100BaseT Ethernet jack.
CAUTION
Your Avaya 1110 IP Deskphone is designed for use in an
indoor environment only.
25
Page 26

Connect the components
Figure 3: Release the phone from the stand
WARNING Your Avaya 1110 IP Deskphone is shipped with its
stand locked in position. To release the phone from the stand,
press the Wall-Mount lever (see Figure 3) and gently rotate
the phone away from the stand a little. When you’re sure the
phone is released from the stand, press the Tilt lever and fully
rotate the phone away from the stand.
Wall-mount lever
Use the following steps to connect the components of your phone.
1. Remove the stand cover. Pull upward on the center catch (see
Figure 4) and remove the stand cover from the stand base. The
cable routing tracks are now accessible in the stand base (see
Figure 5).
26
Page 27
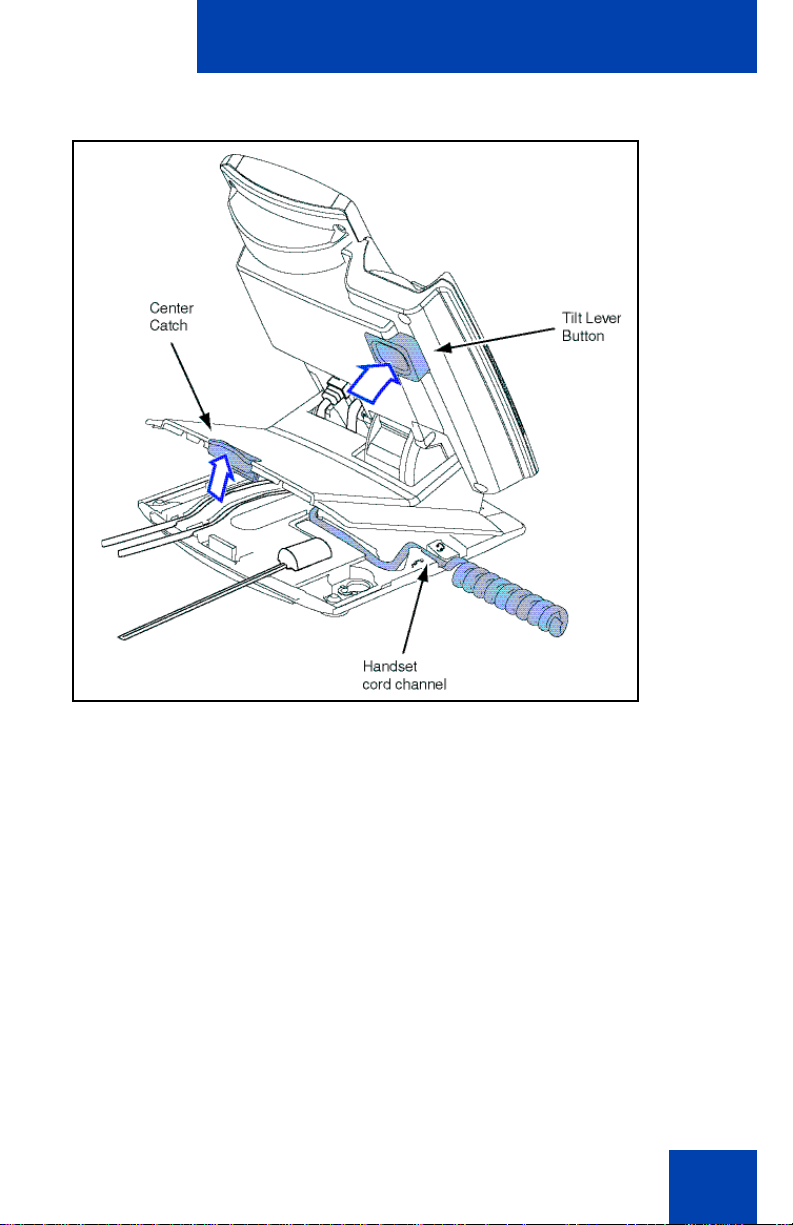
Figure 4: Remove the stand cover
Connect the components
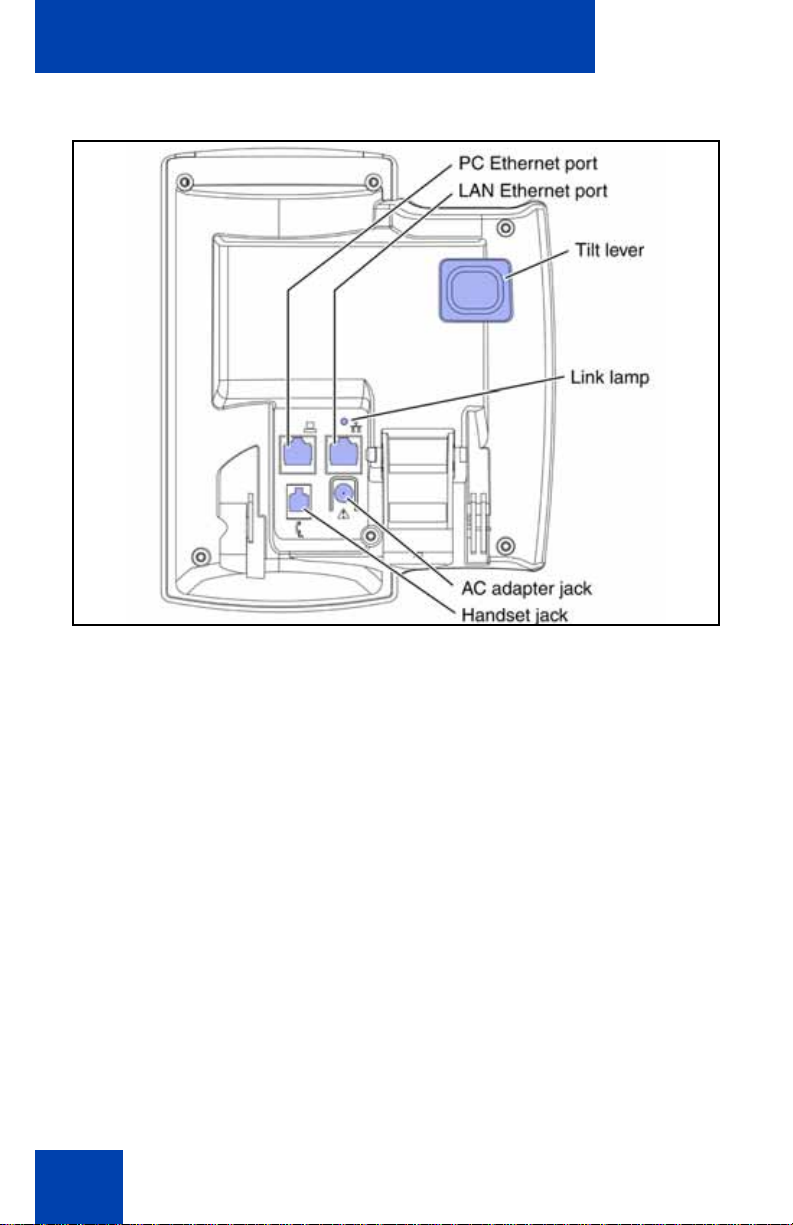
2. Connect the AC power adapter (optional). Connect the AC power
adapter (not supplied) to the AC adapter jack in the bottom of the
phone (see Figure 5). Form a small bend in the cable, and then
thread the adapter cord through the channel in the stand base. Plug
the AC power adapter into the nearest AC power outlet.
Note: Your Avaya 1110 IP Deskphone supports both AC power and
Power over Ethernet (PoE), including IEEE 802.3af standard power.
To use AC power, use only the Avaya-approved AC power adapter
(RoHS Global Power Supply, PEC #: N0089601), which can be
ordered separately. To use Power over Ethernet (PoE) power, your
connected LAN must support PoE; an AC power adapter is not
required.
27
Page 28
Connect the components
Figure 5: Avaya 1110 IP Deskphone connections
3. Install the handset. Plug the end of the handset cord with the short
straight section into the handset. Plug the end of the handset cord
with the long straight section into the handset jack on the back of the
phone (see Figure 5) marked with the symbol
in the cord, and then thread it through the channel in the stand base
marked with the symbol
on the right-hand side of the stand base (see Figure 4).
4. Install the LAN Ethernet cable. Plug one end of the supplied LAN
Ethernet cable into the LAN ethernet port on the back of your phone
(see Figure 5) marked with the symbol % and thread the cable
through the channel in the stand base marked with the symbol %.
Connect the other end of the cable to your LAN Ethernet connection.
5. Install the PC Ethernet cable (optional). If you are connecting your
PC Ethernet through the phone, plug one end of the PC Ethernet
cable (not supplied) into the PC ethernet port on the back of your
phone (see Figure 5) marked with the symbol ( and thread the
cable through the channel in the stand base marked with the symbol
28
+ so that it exits in the handset cord channel
+. Form a small bend
Page 29
Connect the components
(. Plug the other end of the cable into the LAN port on the back of
your PC.
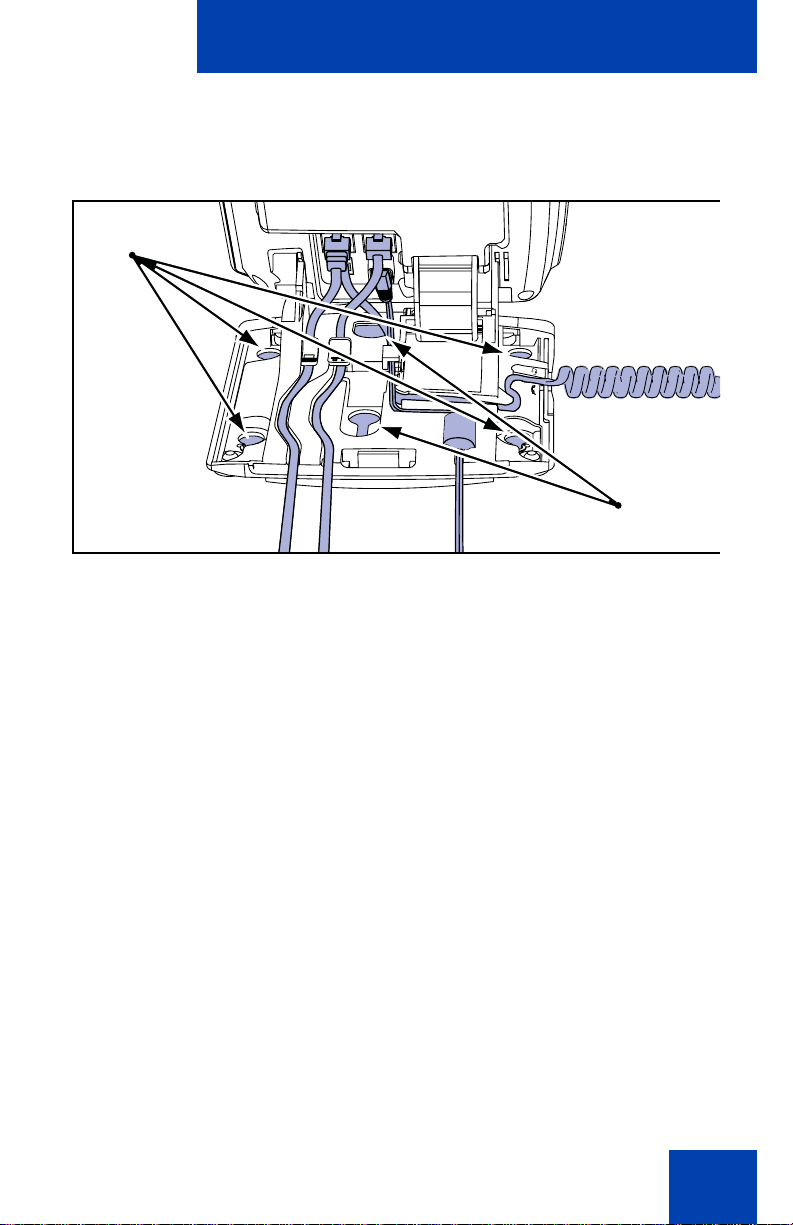
Figure 6: Cable routing tracks and mounting holes
Method A
Method B
6. Wall-mount your phone (optional). Your Avaya 1110 IP
Deskphone can be mounted either by: (Meth od A) using the mounting
holes on the bottom of the phone stand, or (Method B) using a
traditional-style wall-mount box with an RJ-45 connector and a 15-cm
(6-inch) RJ-45 cord (not supplied).
Complete steps 1-5, as needed, before you wall-mount your phone:
Method A: Using the stand cover (part removed in step 1), mark the
wall-mount holes by pressing the bottom of the stand cover firmly
against the wall in the location where you wish to install the phone.
Four small pins on the bottom of the stand cover make marks on the
wall. Use the marks as a guideline for installing the wall-mount
screws (not supplied). Install the screws so that they protrude 3 mm
(1/8 inch) from the wall, and then position the phone stand mounting
holes (as shown in Figure 6, Method A) over the screw heads. You
may need to remove the phone from the wall to adjust the lower
screws. When the lower screws fit snugly, tighten the top screws.
Method B: Attach the 15-cm (6-inch) CAT5e cable (not supplied),
position the phone stand mounting hole s (shown in Figure 6, Method
B) over the mounting rivets, push the phone onto the mounting rivets
and down, to lock the phone into position.
29
Page 30

Connect the components
7. Replace the stand cover. Ensure that all cables are neatly routed
and press the stand cover into place until you hear an audible click.
8. Put the phone in the wall-mount position. If you wall-mounted your
phone, put it in the wall-mount position by pressing the Tilt Lever and
pushing the phone towards the stand until the phone is nearly par allel
with the stand. Release the Tilt Lever and continue to gently push the
phone towards the stand until you hear an audible click (from the
Wall-Mount lever). Ensure the phone is securely locked in position.
30
Page 31

Telephone features
Telephone features
Your Avaya 1110 IP Deskphone has both server-based telephone
features and local (telephone-based) tools. Server-based telephone
features are accessed through the Telepho ne Options menu item on the
Services menu. Press the Services key once to access the Services
menu, which has the following menu items:
• Telephone Options
— enables you or your system administrator to select and con figur e
server-based telephone features. For more information, see
Telephone Options below.
• Password Admin
— enables you or your system administrator to manage the Station
Control Password (SCPW). For more information, see Station
Control Password on page 104.
• Virtual Office Login and Test Local Mode (for Branch Office)
— are present only when your phone’s Class of Service is
configured for Virtual Office and Branch Office. For more
information, see “Using Virtual Office” on page 87.
Note: The Password Admin, Virtual Office Login, and Test Local
Mode menus are not available on all Avaya 1110 IP Deskphone
telephones. Consult your system administrator.
Telephone Options
The Telephone Options menu item provides you with access to the
following features on your Avaya 1110 IP Deskphone:
• “Volume adjustment...” on page 33
• “Contrast adjustment” on page 34
• “Language...” on page 35
• “Date/Time...” on page 36
• “Local Dialpad Tone” on page 37
31
Page 32

Telephone features
• “Set Info” on page 37
• “Diagnostics” on page 38
• “Ring type...” on page 39
• “Call timer” on page 40
• “Live Dial Pad” on page 41
• “Caller ID display order” on page 42
• “Normal mode indication” on page 42
When an option has a submenu, an ellipses (...) appears after the option.
Using the Telephone Options menu:
1. Press the Services key.
2. Press the Up/Down navigation keys to
scroll up or down, and then locate
Telephone Options.
32
3. Press the Enter key.
1. Use Press the Up/Down navigation keys
to scroll up or down, and then locate an
option (for example, Contrast
adjustment).
2. Press the Enter key. The display
provides information required to adjust
your selection.
Page 33

Telephone features
Select Cancel
or
3. Choose one of the following:
— Press the Select context-sensitive
soft key to save any changes and
return to the Telephone Options
menu.
— Press the Cancel context-sensitive
soft key to keep existing setting and
return to the Telephone Options
menu.
Volume adjustment...
To adjust the volume, press the Services key, select Telephone
Options, and then select Volume adjustment…
Adjusting the volume:
1. Press the Up/Down navigation keys to
scroll up or down, and then locate one of
the following items:
— Ringer
— Handset listen
— On-Hook listening/dialing
2. Press the Enter key.
33
Page 34

Telephone features
Down Up
or
or
Select Cancel
or
3. To increase or decrease the volume, do
one of the following:
— Press the Up or Down context-
sensitive soft keys.
— Press the Up or Down navigation
keys.
4. Choose one of the following:
— Press the Select context-sensitive
soft key to save the volume level and
return to the Telephone Options
menu.
— Press the Cancel context-sensitive
soft key to keep existing
configurations.
Contrast adjustment
To adjust the LCD display screen contrast, press the Services key, select
Telephone Options, and then select Contrast adjustment.
Adjusting the display screen contrast:
Lower Higher
or
or
34
1. To increase or decrease the display
contrast level, choose one of the
following:
— Press the Lower or Higher context-
sensitive soft keys.
— Press the Up or Down navigation
keys.
Page 35

Telephone features
Select Cancel
or
2. Choose one of the following:
— Press the Select context-sensitive
soft key to save the contrast level
and return to the Telephone
Options menu.
— Press the Cancel context-sensitive
soft key to keep existing
configurations.
Language...
The LCD display is available in multiple languages. To choose a
language, press the Services key, select Telephone Options, and select
Language…
If the Language setting is password-protected, you must enter a
password (SCPW) to change the language. If you enter an incorrect
password, an error message is displayed. If you enter an incorrect
password more than three times, the passwor d fu nct ion a lity is locke d .
Contact your system administrator to unlock the password.
Selecting a language:
1. Press the Up/Down navigation keys to
scroll up or down, and then highlight the
desired language (for example, German
[Deutsche]).
35
Page 36

Telephone features
Select Cancel
or
2. Choose one of the following:
— Press the Select context-sensitive
soft key to save the language and
return to the Telephone Options
menu.
— Press the Cancel context-sensitive
soft key to keep existing
configurations.
Date/Time...
Several date and time formats are available. Formats are based on the
12-hour and 24-hour clocks. To select the date and time forma t, press the
Services key, select Telephone Options, and then select Date/Time…
Selecting a date and time format:
1. Press the Up/Down navigation keys to
scroll up or down, and then highlight the
desired format. Sample formats appear
on the upper-right side of the display
area.
Select Cancel
or
36
2. Choose one of the following:
— Press the Select context-sensitive
soft key to save the format and
return to the Telephone Options
menu.
— Press the Cancel context-sensitive
soft key to keep existing
configurations.
Page 37

Telephone features
Local Dialpad Tone
The Local DialPad Tone option produces Dual-Tone Multi-Frequency
(DTMF) sounds, a single tone, or no sound when you press a key on the
dialpad. To choose a local dialpad tone, press the Services key, select
Telephone Options, and then select Local DialPad Tone.
Choosing a local dialpad tone:
1. Press the Up/Down navigation keys to
highlight one of the following dialpad
tones:
— None to disable all tones
— Short Click to enable a single tone
for all keys
— DTMF to turn on a separate DTMF
tone for each key
Select Cancel
or
2. Choose one of the following:
— Press the Select context-sensitive
soft key to save the tone selection
and return to the Telephone
Options menu.
— Press the Cancel context-sensitive
soft key to keep existing
configurations.
Set Info
The Set Info option displays the following telephone-specific information:
• General Info
• Set IP Info
• Ethernet Info
37
Page 38

Telephone features
• Server Info
• Location Info
• Encryption Info
To view telephone-specific information, press the Services key, select
Telephone Options, and then select Set Info.
Viewing telephone-specific information:
1. Press the Up/Down navigation keys to
scroll through the list to view the
telephone information.
Cancel
2. Press the Cancel context-sensitive soft
key to return to the Telephone Options
menu.
Diagnostics
The Diagnostics option displays the following telephone-specific
information:
• Diag Tools (Ping, do Route Traces)
• EtherStats (Speed, Auto Neg, CRC Errors, Collision)
• IP Stats (Packet Info)
• RUDP Stats (Msg receive/trans)
•QOS Stats
• DHCP Info
To view diagnostic information, press the Services key, select
Telephone Options, and select Diagnostics.
38
Page 39

Viewing telephone-specific diagnostic information:
1. Press the Up/Down navigation keys to
scroll through the list of diagnostic
information.
Telephone features
Cancel
2. Press the Cancel context-sensitive soft
key to return to the Telephone Options
menu.
Ring type...
The Ring type… option configures the telephone’s r ing tone. To choo se a
ring type, press the Services key, select Telephone Options, and then
select Ring type…
Choosing a ring type:
1. Press the Up/Down navigation keys to
scroll up or down, and then highlight one
of the ring types.
Play
2. Press the Play context-sensitive soft key
to sample the ring tone.
39
Page 40

Telephone features
Select
Stop
Cancel
3. Choose one of the following:
— Press the Select context-sensitive
soft key to save the ring type and
return to the Telephone Options
menu.
— Press the Stop context-sensitive
soft key, and then use the Up/Down
navigation keys to select a different
ring type.
— Press the Cancel context-sensitive
soft key to keep existing
configurations.
Call timer
The call timer measures how long you are on each call. To enable Call
timer, press the Services key, select Telephone Options, and then
select Call timer.
Enabling or disabling Call Timer:
On Off
40
or
1. Choose one of the following:
— To turn on the call timer, press the
On context-sensitive soft key.
— To turn off the call timer, press the
Off context-sensitive soft key.
Page 41

Telephone features
Select Cancel
or
2. Choose one of the following:
— Press the Select context-sensitive
soft key to save the configuration
and return to the Telephone
Options menu.
— Press the Cancel context-sensitive
soft key to keep existing
configurations.
Live Dial Pad
Use Live Dialpad to dial a number using the telephone keypad without
having to pick up the handset, press the Handsfree key, or press the
Line (DN) key.
Note: Live Dialpad activates the primary DN key.
Configuring Live Dialpad
To configure Live Dialpad, press the Services key, select Telephone
Options, and then select Live Dial Pad
Select Cancel
or
1. Press the Up/Down navigation keys to
scroll up or down, and then highlight one
of the following:
— On
— Off
2. Choose one of the following:
—Press the Select soft key to save the
configuration.
— Press the Cancel soft key to keep
existing configurations.
41
Page 42

Telephone features
Caller ID display order
Caller ID display order appears in 2 formats:
• Number, name (default)
• Name, Number
Configuring Caller ID display order
Use the following procedure to configure Caller ID display order.
1. Press the Services key, select Telephone Options, and then select
Caller ID display order.
2. Press the Up/Down navigation keys to scroll up or down, and then
select one of the following:
— Number, name (default)
— Name, number
3. Press the Select soft key to save the configuration, else press the
Cancel key to cancel the modifications.
Normal mode indication
The Normal mode display indication can be On or Off when the IP
Deskphone is in normal mode.
Configuring Normal mode indication
Use the following procedure to configure Normal mode indication.
1. Press the Services key, select Telephone Options, and then select
Normal mode indication.
2. Press the Up/Down navigation keys to scroll up or down, and then
select one of the following:
—On
—Off
3. Press the Select soft key to save the configuration, else press the
Cancel key to cancel the modifications.
42
Page 43

Telephone features
43
Page 44

Local tools
Local tools
Your Avaya 1110 IP Deskphone has both local and server-based
telephone tools and features. This section discusses the various tools and
features available locally on your Avaya 1110 IP Deskphone. Many of
the tools and features discussed in this section are for administrator use
only. Do not make any changes unless instructed by an administrator.
Local tools and features are accessed through the Local tools menu.
Press the Services key twice to access this menu. Your system
administrator can establish a password for the Local tools menu. When
the password is enabled, a password prom p t ap pe ar s whe n you atte mp t
to access this menu. Use the dial pad to type the correct password, and
then press the Enter key. The Local tools menu appears. If the menu
does not appear, contact your system administrator.
The Local tools menu has the following menu options:
• “1. Using the Preferences submenu” on page 45
• “2. Using the Local Diagnostics submenu” on page 48
• “3. Using the Network Configuration submenu” on page 50
• “4. Using the Lock Menu” on page 50
Local tools menu options are preceded by numbers. Pressing th e
associated number key on the dialpad triggers the correspo nding feature
or tool. For example, when you are in the Local tools menu, you can
select the Local Diagnostics menu option by pressing the 2 key on the
dialpad.
The functions of some navigation keys on your Avaya 1110 IP
Deskphone vary depending on the situation. The navigation controls for
menus are described in Table 5
Table 5: Navigation controls for menus (Part 1 of 2)
Key Function
Down arrow keys Dislay next menu item.
Up arrow keys Display previous menu item.
44
Page 45

Table 5: Navigation controls for menus (Part 2 of 2)
Key Function
Left arrow key Close the menu.
Right arrow key Select the current menu item.
Enter key Select the current menu item.
Local tools
Enter digit on the
dialpad
Cancel context-
sensitive soft key
When you are working in Edit mode, the first field of the item is highlighted
and a blinking cursor is to the right of the current edit position. The
navigation controls for Edit mode are described in Table 6.
Table 6: Navigation controls for Edit mode
Key Function
Left arrow key Delete a character in the edit field.
Enter key Ends editing function.
Enter digit on the
dialpad
Asterisk (*) Enters a dot (“.”) at current position.
Select correspondingly numbered menu item.
Exit the Local tools menu option or feature/tool.
Inserts digits at current position
1. Using the Preferences submenu
When you select the Preferences option from the Local tools menu, a
Preferences submenu appears. This submenu provides access to tools
used for controlling various local display preferences for your
Avaya 1110 IP Deskphone.
The Preferences submenu provides access to the following tools:
• “1. Contrast” on page 46
45
Page 46

Local tools
• “2. Languages...” on page 46
• “3. Backlight Timer” on page 47
1. Contrast
Use the Contrast tool to adjust the contrast of the LCD display screen on
your Avaya 1110 IP Deskphone.
To adjust the contrast of the LCD display screen, press the Services key
twice to open the Local tools menu, press the 1 key on the dialpad to
select the Preferences menu option, and then press the 1 key on the
dialpad to select the Contrast tool from the Preferences submenu.
Note: The initial contrast setting for the LCD display screen is
downloaded from the server when your telephone is first configured
by your system administrator. Selecting the Contrast tool from the
Preferences submenu in Local tools automatically sets the LCD
display screen contrast to the telephone’s local contra st setting, even
if the Cancel context-sensitive soft key is pressed.
Adjusting the LCD display screen contrast:
1. Press the Up/Down arrow keys to
increase or decrease the value for the
display screen contrast.
2. Press the Enter key to select the
currently displayed value and exits the
menu.
Cancel
3. Press the Cancel context-sensitive soft
key to exit the menu with no change.
2. Languages...
Use the Languages... tool to select the language used locally on your
Avaya 1110 IP Deskphone.
46
Page 47

Local tools
Note: The Telephone Options menu is synchronized with the
selected language.
To access the local language tool , press the Services key twice to open
the Local tools menu, press the 1 key on the dialpad to select the
Preferences menu option, and then press the 2 key on the dialpad to
select the Languages... tool from the Preferences menu.
Selecting a local tools language:
1. Press the Up/Down navigation keys to
scroll up or down, and then highlight the
desired language (for example, German
[Deutsche]).
1. Press the Enter key to select the
desired language and exit the menu.
Cancel
2. Press the Cancel context-sensitive soft
key to exit the menu with no change.
3. Backlight Timer
Use the Backlight Timer tool to adjust how long the LCD display screen
remains lit when your phone is inactive.
To access the Backlight Timer tool, press the Services key twice to
open the Local tools menu, press the 3 key on the dialpad to select the
Preferences menu option, and then press the 1 key on the dialpad to
select the Backlight Timer tool from the Preferences menu.
Note: The backlight timer is displayed in the format xxx, where xxx is
a time in minutes or hours.
47
Page 48

Local tools
Adjusting the Backlight Timer:
1. Press the Up/Down arrow keys to
2. Press the Enter key to select the
increase or decrease the backlight timer.
— Available values for the backlight
timer are as follows:
5m (5 minutes)
15m (15 minutes)
30m (30 minutes)
1h (1 hour — default)
2h (2 hours)
Never (screen does not go black)
— Choosing a high backlight timer
value or Never, reduces the life span
of the display screen.
desired backlight timer value and exit the
menu.
Cancel
3. Press the Cancel context-sensitive soft
key to exit the menu with no change.
2. Using the Local Diagnostics submenu
When you select the Local Diagnostics option from the Local tools
menu, a Local Diagnostics submenu appears. This submenu provides
access to tools used for monitoring and controlling the operation of your
Avaya 1110 IP Deskphone.
The Local Diagnostics submenu provides access to the following tools:
• “1. IP Set&DHCP Information” on page 49
48
Page 49

Local tools
• “2. Network Diagnostic Tools” on page 49
• “3. Ethernet Statistics” on page 49
• “4. IP Network Statistics” on page 49
• “5. DHCP Information” on page 50
• “6. License Information” on page 50
• “7. Certificate Information” on pag e 50
When in the submenu, press the Cancel context sensitive soft key to exit
the menu. When a Local Diagnostics tool is selected, use the Return
context-sensitive soft key to exit the tool and return to the Local
Diagnostics submenu.
Use the Return context-sensitive soft key to quickly gather information
and run tests. For example, you can check Ethernet Statistics (submenu
option 3), press the Return context-sensitive soft key to return to the
Local Diagnostics submenu, and then select Network Diagnostics
Tools (submenu option 2) to ping an IP address.
1. IP Set&DHCP Information
The system administrator can use the IP Set&DHCP tool to view reports
about IP set and DHCP operation.
2. Network Diagnostic Tools
The system administrator can use the tools of Network Diagnostic
Tools menu to diagnose network problems.
3. Ethernet Statistics
The system administrator can use the Ethernet Statistics tool to view
reports about Ethernet operation.
4. IP Network Statistics
The system administrator can use the IP Networks Statistics tool to view
reports about network operation.
49
Page 50

Local tools
5. DHCP Information
The system administrator can use the DHCP Information menu to view
DHCP related information.
6. License Information
The system administrator can use the License Information menu to view
license related information.
7. Certificate Information
The system administrator can use the Certificate Information to view
certificate related information.
3. Using the Network Configuration submenu
When you select the Network Configuration option from the Local tools
menu, network configuration data appears for your Avaya 1110 IP
Deskphone. This tool is for administrator use only.
4. Using the Lock Menu
When you select the Lock Menu option from the Local tools menu, a
Lock Menu submenu appears. This submenu provides access to tools
used for controlling access to the Local tools menu itself or various
Local tools menu options. This tool is for administrator use only.
50
Page 51

Making a call
Making a call
This section describes features associated with making a call. You can
make a call from your Avaya 1110 IP Deskphone using any of the
following methods:
• “Using Off-hook dialing” on page 51
• “Using On-hook Dialing” on page 52
• “Using Predial” on page 52
• “Using Ring Again” on page 53
• “Using Last Number Redial” on page 55
• “Using Speed Call” on page 56
• “Using System Speed Call” on page 57
Using Off-hook dialing
or
(Goodbye)
1. Lift the handset.
2. Dial the number.
3. To terminate the call, choose one of the
following:
— Replace the handset into the cradle.
— Press the Goodbye key.
51
Page 52

Making a call
Using On-hook Dialing
1. Leave the handset in the cradle.
2. Press the line (DN) key.
3. When the dial tone sounds, dial the
number.
4. When the called party answers, lift the
handset.
5. To terminate the call, choose one of the
following:
or
(Goodbye)
— Replace the handset into the cradle.
— Press the Goodbye key.
Using Predial
Use the Predial feature to enter, preview, and edit numbers before
dialing.
To use Predial:
1. Without selecting the line key, enter the
number to be dialed.
52
Page 53

Making a call
2. Choose one of the following:
or
To edit a Predial number:
Clear Delete
or
— Lift the handset to dial the number.
— Press the line key (DN) to dial the
number.
3. If the Line key is used to dial the number,
lift the handset when the called party
answers.
1. Use the dialpad to enter the number.
2. Choose one of the following:
— To erase all numbers, press the
Clear context-sensitive soft key.
Reenter the numbers to be dialed.
— To change one number at a time,
press the Delete context-sensitive
soft key to backspace. Re-enter the
number.
3. Press the line key to dial the number.
Using Ring Again
Use the Ring Again feature if you receive a busy tone or if there is no
answer. Your IP Deskphone rings when the person you called becomes
available. Ring Again automatically redials the number.
53
Page 54

Making a call
To activate Ring Again:
1. Dial a number and receive a busy tone
or no answer.
RngAgn
2. Choose one of the following:
—Press the Ring Again context-
or
sensitive soft key.
— Enter the Ring Again Activate FF C.
To call a Ring Again party when you receive notification:
1. After receiving the notification ring, lift
the handset.
RngAgn
2. Press the Ring Again context-sensitive
soft key to automatically dial the number.
To deactivate Ring Again before notification:
Choose one of the following:
RngAgn
— Press the Ring Again context-
sensitive soft key a second time.
or
— Enter the Ring Again Deactivate
FFC.
54
Page 55

Making a call
Using Last Number Redial
Use the Last Number Redial feature to automatically redial the last dialed
number.
To use Last Number Redial:
Choose one of the following:
1. To redial using the handset:
or
— Lift the handset.
— Press the line (DN) key.
2. To redial without lifting the handset,
press the line (DN) key twice (the last
number dialed is automatically redialed).
55
Page 56

Making a call
Using Speed Call
Use the Speed Call feature to place internal and external calls by dialing a
one-, two-, or three-digit code to store, edit, and automatically dial
frequently called telephone numbers.
To store a Speed Call number:
SpcCtl
SpcCtl
To make a Speed Call:
1. Press the Speed Call Controller
context-sensitive soft key. The triangular
icon flashes, indicating programming
mode.
2. At the prompt:
— Enter a one-, two-, or three-digit
code (0-999).
— If required, dial the access code.
— Enter the telephone number
(internal, external or long-distance
number).
3. Press the Speed Call Controller
context-sensitive soft key again to save
the code and number. The flashing icon
turns off.
56
1. Lift the handset.
Page 57

Making a call
SpcCtl
2. Press the Speed Call Controller
context-sensitive soft key.
3. Dial the Speed Call code to
automatically dial the number.
Using System Speed Call
Use the System Speed Call feature to dial Speed Call co des that override
dialing restrictions placed on your telephone.
To make a System Speed Call:
1. Lift the handset.
SScUsr SScCtl
or
2. Choose one of the following:
— Press the System Speed Call
context-sensitive soft key.
— Press the System Speed Call
Controller (SScCtl) key.
3. Dial the Speed Call code to
automatically dial the number.
57
Page 58

Answering a call
Answering a call
Each incoming call causes the telephone to ring and the Message
Indicator lamp to flash.
To answer a call:
Lift the handset.
Note: Do not use the Line (DN) key to anwer a call.
While on an active call
This section describes the following features, available during an active
call:
• “Placing a call on hold” on page 58
• “Transferring a call” on page 59
• “Using Timed Reminder Recall” on page 60
• “Using Call Park” on page 61
• “Recording a Calling Party Number” on page 63
• “Tracing a malicious call” on page 64
Placing a call on hold
Use the Hold feature to place an active call on hold.
58
Page 59

While on an active call
To place a call on hold:
Press the Hold key.
(Hold)
To retrieve a call on hold:
Press the line (DN) key.
Transferring a call
Use the Transfer feature to redirect a call to the appropriate person .
To transfer a call to a third party:
Trans
Trans
1. Press the Transfer context-sensitive soft
key. The other party is put on hold and a
dial tone sounds.
2. Dial the DN to which you are transferring
the call.
3. When that number rings or a person
answers, press the Transfer contextsensitive soft key to connect the calling
party.
59
Page 60

While on an active call
To return to the original call, if the transfer is incomplete:
If the person called is not available,
press the Line (DN) key to reconnect to
the original call.
Using Timed Reminder Recall
Use the Timed Reminder Recall feature to receive a reminder tone when
a transferred call is not answered.
To use Timed Reminder Recall:
Trans
Trans
or
1. Press the Transfer context-sensitive soft
key. The call is put on hold.
2. Dial the number to which you are
transferring the call.
3. Choose one of the following to start the
recall timer:
—Press the Transfer context-sensitive
soft key.
— Replace the handset before the
extension answers.
Note: If the transfer is complete, the
recall timer stops.
60
Page 61

While on an active call
If the transferred call is not answered, your telephone rings:
1. Lift the handset to reconnect to the
original caller.
Trans
or
(Goodbye)
2. Choose one of the following:
—Press the Transfer context-sensitive
soft key and repeat the transfer.
— If the transfer is picked up while you
are on the line, press the Goodbye
key to complete the transfer.
Using Call Park
Use the Call Park feature to hold temporarily (park) and retrieve a call
from any telephone. Using Call Park does not tie up a line. When
configured network-wide, Call Park can be used across networks. A
System Park extension can be configured to automatically park most
calls.
To park a call on the System Park DN or your own DN:
Park Park
During an active call, press the Park
context-sensitive soft key twice.
Note: By default, the call is parked on
your DN unless a System Park DN is
enabled to automatically park calls on
the system.
61
Page 62

While on an active call
To park a call on a DN other than the System Park DN or your own
DN:
Park
1. Press the Park context-sensitive soft
key.
2. Dial the DN where you want to park the
call.
Park
3. Press the Park context-sensitive soft
key.
To park a call using the SPRE code or FFC:
Trans Conf
or
1. Choose one of the following:
—Press the Transfer context-sensitive
soft key.
— Press the Conference context-
sensitive soft key.
2. Dial the Call Park FFC.
62
3. To use an alternate DN from the System
Park DN or your own DN, dial the DN
where you want to park the call.
Otherwise, proceed to step 4.
Page 63

While on an active call
Trans Conf
or
To retrieve a parked call:
Park
4. Choose one of the following:
—Press the Transfer context-sensitive
soft key.
— Press the Conference context-
sensitive soft key.
1. Lift the handset.
2. Press the Park context-sensitive soft
key.
3. Dial the DN where you parked the call.
Note: If a parked call is not retrieved
within a specified period of time, it rings
back to your telephone.
Recording a Calling Party Number
Use the Calling Party Number feature to record a caller’s number, or to
charge a call to an account number, during an established call.
To record a caller’s number for accounting purposes:
CParty
1. Press the Call Party context-sensitive
soft key. The caller is placed on hold.
63
Page 64

While on an active call
2. Dial a charge account number or the
caller’s number.
Note: For information on using the
Charge key, see “Charging a call or
charging a forced call” on page 77.
CParty
3. Press the Call Party context-sensitive
soft key to return to the call.
Tracing a malicious call
Use the Call Trace feature to trace nuisance calls within your system.
Note: This is not a default feature. Contact your system administrator
to configure this feature on your telephone.
To activate Call Trace:
Trans Conf
or
1. Choose one of the following:
—Press the Transfer context-sensitive
soft key.
— Press the Conference context-
sensitive soft key.
2. Dial the SPRE code followed by 83 or
dial the Call Trace FFC to automatically
reconnect.
Note: Contact your system administrator for the Call Trace feature
SPRE code.
64
Page 65

While away from your desk
While away from your desk
You can use the following features when you are away from your desk:
• “Using Call Forward” on page 65
• “Using Internal Call Forward” on page 66
• “Using Remote Call Forward” on page 67
• “Securing your telephone” on page 69
Using Call Forward
Use the Call Forward feature to direct incoming calls to ring on another
line (DN). If the telephone is ringing, the call cannot be forwarded.
To forward your calls or change the forward number:
Fwd
Fwd
1. Choose one of the following:
—Press the Forward context-sensitive
soft key.
— Lift the handset and enter the Call
Forward All Calls Activate FFC.
2. Dial the DN where you want to forward
your calls.
3. Press the Forward context-sensitive soft
key.
65
Page 66

While away from your desk
To deactivate Call Forward:
Fwd
Choose one of the following:
or
To reinstate Call Forward to the same number:
Fwd Fwd
• Press the Forward context-sensitive soft
key.
• Lift the handset and enter the Call
Forward All Calls Deactivate FFC.
Press the Forward context-sensitive soft
key twice.
Using Internal Call Forward
Use Internal Call Forward to accept only calls originating at internal DNs
to ring at another DN. Calls originating outside your telephone system still
ring at your telephone. Current incoming calls cannot be forwarded.
To forward internal calls:
66
1. Lift the handset and enter the Internal
Call Forward Activate FFC.
2. Dial the DN to which you are forwarding
your internal calls.
Page 67

While away from your desk
3. Return the handset to the handset
cradle.
To deactivate Internal Call Forward:
Lift the handset and enter the Internal
Call Forward Deactivate FFC.
Using Remote Call Forward
Use the Remote Call Forward feature (from any telephone other than
your own) to forward calls to any telephone.
To activate Remote Call Forward:
1. Lift the handset.
2. If you are calling from a telephone
outside the system, dial your direct
system access number and wait for the
dial tone.
3. Dial the Remote Call Forward Activate
FFC to activate the feature.
4. Dial your Station Control Password. A
dial tone sounds.
67
Page 68

While away from your desk
5. Choose one of the following:
— Dial your DN.
or
— To forward calls to the previous call
6. Dial the number to which you are
forwarding calls. If calls are forwarded to
an invalid number, a fast busy signal
sounds.
7. Press the # key.
To deactivate Remote Call Forward:
1. Lift the handset.
2. If you are calling from a telephone
outside the system, dial the direct
system access number and wait for the
dial tone.
forward telephone number, press
the # key. (Do not perform steps 6
and 7.)
68
3. Dial the Remote Call Forward
Deactivate FFC.
4. Dial your Station Control Password.
Page 69

While away from your desk
5. After you hear the dial tone, dial your
DN.
6. Press the # key.
Securing your telephone
Use the Electronic Lock feature to prevent others from making calls from
your telephone. The Electronic Lock feature is controlled using the
corresponding Flexible Feature Codes (FFC) and your Station Control
Password (SCPW).
To lock your telephone:
1. Lift the handset.
(Goodbye)
or
2. Dial the Electronic Lock Activate
Flexible Feature Code (FFC).
3. Dial your Station Control Password.
4. Choose one of the following:
— If you are dialing locally, press the
Goodbye key.
— If you are dialing the FFC remotely,
dial your DN.
69
Page 70

While away from your desk
To unlock your telephone:
1. Lift the handset.
2. Dial the Electronic Lock Deactivate
FFC.
3. Dial your Station Control Password.
4. Choose one of the following:
(Goodbye)
or
— If you are dialing locally, press the
Goodbye key.
— If you are dialing the FFC remotely,
dial your DN.
70
Page 71

Talking with more than one person
Talking with more than one
person
Use the following features to enable conversations between more than
two people:
• “Setting up a conference call” on page 72
• “Using Group Call” on page 73
71
Page 72

Talking with more than one person
Setting up a conference call
Use the Conference feature to set up a conference call for a maximum of
three or six people including yourself. The maximum number of people
the conference feature supports depends on the configuration of your
telephone.
To set up a conference call:
Conf
Conf
If the person you attempt to add to the conference is una vailable:
(Goodbye)
1. While on a call, press the Conference
context-sensitive soft key to place the
party on hold. You hear a dial tone.
2. Dial the number of the person you want
to add to the conference call. You can
talk privately to the person you are
adding at this time.
3. Press the Conference context-sensitive
soft key a second time to conference all
parties together.
1. Press the Goodbye key.
2. Press the line (DN) key to return to your
original call
.
72
Page 73

Talking with more than one person
Using Group Call
Use the Group Call feature to automatically call members of a predefined
group, one at a time, until all members answer.
To call group members:
1. Lift the handset.
2. Enter the Group Call FFC.
— The feature automatically calls all
group members.
— The telephone numbers of the group
members appear on the display as
they answer.
Note 1: After everyone in the group has
answered, only the person who made
the group call can put the call on hold.
Note 2: When a person in your group is
on a conference call or another group
call, they are not connected to your
group call.
73
Page 74

Talking with more than one person
To answer a group call:
1. Lift the handset. Note the following about
notification tones:
— If you are on a call and receive three
— If you are on a call on another line
— If you are already on a conference
To end a group call:
Press the Goodbye key.
10-second tones, this is the
notification of a group call on your
current extension.
when a group call is made, you
receive a long tone through the
handset or speaker.
call or another group call, you do not
receive notification of a group call.
74
(Goodbye)
Note: When the person who made the
group call disconnects, the call
terminates for all members of the group.
However, the members of the group call
can disconnect from the call and not
affect other members on the call.
Page 75

Working without interruption
Working without interruption
This section describes the Activating Make Set Busy feature, which
provides uninterrupted work time.
Note: Uninterrupted work time can also be obtained by forwarding
your calls to another telephone number (see Using Call Forward on
page 65) or directing your calls to your voice mailbox.
Activating Make Set Busy
Use the Make Set Busy feature to ma ke your telephone appear busy to all
callers.
To activate Make Set Busy:
Lift the handset and enter the Make Set
Busy Activate FFC.
To deactivate Make Set Busy:
Lift the handset and enter the Make Set
Busy Deactivate FFC.
75
Page 76

Additional call features
Additional call features
Contact your system administrator to determine if the following call
features are available on your telephone.
• “Using Call Page Connect to make an announcement” on page 76
• “Charging a call or charging a forced call” on page 77
• “Using Enhanced Override” on page 80
• “Using Forced Camp-on” on page 81
• “Overriding a busy signal” on page 83
• “Using Privacy Release” on page 83
• “Using Radio Page” on page 84
Using Call Page Connect to make an announcement
Use the Call Page Connect feature to make an announcement over a
paging system.
Note: A Page key on an attendant console override s and disconnects
the telephones. The telephones must reaccess the page trunk.
To connect to Call Page:
1. Lift the handset.
2. Dial the Page Trunk Access Code to
complete the connection to the page
system.
3. Make your announcement.
76
Page 77

Additional call features
4. Press the Goodbye key
(Goodbye)
.
Charging a call or charging a forced call
Use the Call Charge feature to charge a call to a specific account.
The Forced Charge feature charges long-distance calls from a telephone
restricted to local calls.
T o cha rge a lo cal or long-distance call to an account before you dial:
1. Lift the handset.
Charge
2. Choose one of the following:
— Press the Charge context-sensitive
soft key.
— Dial the Call Detail Recording FFC.
3. Dial the charge account number.
4. When the dial tone sounds, dial the
number.
77
Page 78

Additional call features
To charge a call in progress:
Trans Conf
or
Charge
or
1. Choose one of the following:
—Press the Transfer context-sensitive
soft key.
— Press the Conference context-
sensitive soft key.
2. Choose one of the following:
— Press the Charge context-sensitive
soft key.
— Dial the Call Detail Recording FFC.
3. Dial the charge account number.
4. Press the line (DN) key to return to the
call.
To charge a call to an account when you transfer a call:
Trans
1. Press the Transfer context-sensitive soft
key. The call is on hold.
78
Page 79

Additional call features
Charge
or
Trans
2. Choose one of the following:
— Press the Charge context-sensitive
soft key.
— Dial the Call Detail Recording FFC.
3. Dial the charge account number.
4. After the dial tone, dial the number to
which you are transferring the call.
5. Press the Transfer context-sensitive soft
key when you hear the telephone ring.
Note: You can talk privately to the
person at the transfer number before you
press the Transfer context-sensitive soft
key.
To charge a call to an account when you add someone to a
conference call:
Conf
1. Press the Conference context-sensitive
soft key. The call is placed on hold.
79
Page 80

Additional call features
Charge
or
Conf
2. Choose one of the following:
— Press the Charge context-sensitive
soft key.
— Dial the Call Detail Recording FFC.
3. Dial the charge account number.
4. Dial the number of the person you want
to add to the conference.
5. Press the Conference context-sensitive
soft key.
Using Enhanced Override
Use the Enhanced Override feature to override an active call after you
attempt a Forced Camp-on. Use Enhance d Override to make a call or a
consultation call, such as placing a call on hold and calling another party.
To use Enhanced Override:
You receive a busy signal after dialing a
telephone number.
80
Page 81

Additional call features
1. Enter the Override FFC to initiate a
Forced Camp-on.
— If either person on the call
disconnects at this time, you receive
an overflow (fast busy or engaged)
signal.
EnhOvr
or
(Goodbye)
2. Enter the Override FFC again.
— The other two people on the call
receive an override tone and a
conference call is established
between the three of you. If anyone
disconnects, the other two people
remain connected.
3. To terminate the call, press the
Goodbye key.
Using Forced Camp-on
Use the Forced Camp-on feature to automatically ring another telephone
(internal or external) immediately after that telephone disconn ects from its
current call.
To use Forced Camp-on:
You receive a busy signal after dialing a
telephone number.
81
Page 82

Additional call features
1. Enter the Override FFC, to initiate a
Forced Camp-on.
Note: The person you called receives a
tone, and you receive a ring signal or a
busy signal, depending on the options
chosen. You are now camped-on to the
number you dialed.
2. Return the handset to the cradle.
— When the person you called finishes
their call, your telephone
automatically dials the number and
both telephones ring.
Answering a call camped-on to your ex te n si on :
When your telephone rings, lift the
handset.
82
Note: You can program your telephone
for either Camp-on or Call Waiting, but
not both.
Page 83

Additional call features
Overriding a busy signal
Use the Override feature to override a busy signal and interrupt another
call.
To override a busy signal:
You receive a busy signal after dialing a
telephone number.
1. Enter the Override FFC.
— The people in the targeted call
receive a tone for approximately 1
second. After Override joins you to
their call, a short tone repeats every
16 seconds.
2. To terminate the call, press the
(Goodbye)
Goodbye key.
Using Privacy Release
Use the Privacy Release feature to enable one or more people who share
your DN to join a call.
83
Page 84

Additional call features
To use Privacy Release in an established state:
PrvRls
Press the Privacy Release context-sensitive
soft key during a call.
— People can join the call by pressing
the shared number (DN) key on their
telephone (Multiple Appearance DN
feature).
Using Radio Page
Use the Radio Page feature to page a person and stay on the line until
they answer. The paged person answers the call after entering a special
Page Meet-me code from any telephone.
To use Automatic Preselection (Meet-me page):
1. Lift the handset.
2. Dial the Radio Paging Access FFC.
— The paging tone sounds (two beeps
followed by a dial tone).
84
3. Dial the number of the party you want to
page.
— After dialing, the ringback tone
sounds.
Note: The paged person can use any
telephone to enter a Radio Paging
Answer FFC, plus their own DN number.
Page 85

Additional call features
4. If your call goes unanswered for a preset
time period and a 15-second high-
(Goodbye)
or
pitched tone sounds followed by silence,
press the Goodbye key or replace the
handset.
To use Automatic Post-selection:
The called party is either busy on the telephone or away from their desk.
To page the called party, you do not need to redial the number of the
called party.
RadPag
(Goodbye)
or
1. Press the Radio Page context-sensitive
soft key.
— A special dial tone sounds.
2. Dial the Radio Paging Access FFC.
— The ringback tone sounds.
Note: The paged person can use any
telephone to enter a Radio Paging
Answer FFC, plus their own DN number.
3. If your call goes unanswered for a preset
time period and a 15-second highpitched tone sounds, followed by
silence, press the Goodbye key or
replace the handset.
85
Page 86

Additional call features
To answer a Radio Page:
If you carry a Radio Pager, a page indicates that someone dialed your
DN. If the Radio Page system is configured to function in M eet-me mod e,
you can answer the page call from any telephone.
1. Lift the handset.
2. Dial the Radio Paging Answer FFC.
— The paging tone sounds.
3. Dial your own DN to connect to the
paging caller. If the caller has
disconnected, a steady high-pitched
(number unavailable) tone sounds.
86
Page 87

Additional phone features
Additional phone features
The following features are described in this section:
• “Secure Communication” on page 87
• “Using Virtual Office” on page 87
• “Using Media Gateway 1000B” on page 98
Secure Communication
Your Avaya 1110 IP Deskphone supports secure communication with
other Avaya IP Deskphones by encrypting your calls using a Pre-Shared
Key (PSK). If the PSK feature is enabled on both Avaya IP Deskphones,
a PSK security icon (:) is displayed on the LCD screen when a secure
communication link is established. Consult your system administrator to
find out if this feature is enabled on your IP Deskphone.
Using Virtual Office
The Virtual Office feature provides a service you can use while you are
away from your desk to transfer calls, and all your office telephone
features, to a remote telephone. Virtual Office makes this possible by
allowing you to use another IP Deskphone (the Remote phone) to log in
to your own home or office IP Deskphone (the Office phone). After you
log in, you can access the DNs, key layout, and voicemail features that
are configured on your own home or office IP Deskphone.
To use Virtual Office, you need your DN and preconfigured Station
Control Password (SCPW). You must activate Virtual Office on your
Office phone before you can connect to it from a Remote phone. See
“Logging in to Virtual Office” on page 89.
Note: Consult your system administrator to verify if the Virtual Office
feature is available for your use.
87
Page 88

Additional phone features
You can use an IP Deskphone as a Remote phone to connect to your
Avaya 1110 IP Deskphone even if it is a different IP Deskphone model.
Table 7 shows the IP Deskphones on which you can use Virtual Office to
connect to your Avaya 1110 IP Deskphone.
Table 7: Virtual Office connection availability
IP Deskphone model Possible to log in to the 1110?
Avaya 1110 IP Deskphone Yes
Avaya 1120E IP
Yes, with restrictions
Deskphone
Avaya 1140E IP
Yes, with restrictions
Deskphone
Avaya 1150E IP
No
Deskphone
Avaya 1165E IP
Yes, with extra key restrictions
Deskphone
Avaya 1210 IP Deskphone Yes, with extra key restrictions
Avaya 1220 IP Deskphone Yes, with extra key restrictions
Avaya 1230 IP Deskphone Yes, with extra key restrictions
IP Phone 2001 Yes
IP Phone 2002 Yes, with restrictions
IP Phone 2004 Yes, with restrictions
Avaya 2007 IP Deskphone Yes, with restrictions
Avaya 2033 IP Conference
Yes, with restrictions
Phone
Avaya 2050 IP Softphone Yes, with restrictions
Note 1: When logged into an Avaya 1110 IP Deskphone from
another IP Deskphone using Virtual Office, your IP Deskphone is
limited to the features available on the Avaya 1110 IP Deskphone.
Note 2: A Virtual Office login to an Avaya 1110 IP Deskphone from
another IP Deskphone is blocked in certain situations. Consult your
system administrator.
88
Page 89

Additional phone features
Logging in to Virtual Office
If the IP Deskphone is configured for Virtual Office, the Virtual soft key is
displayed, as shown in Figures 7.
Figure 7: Virtual Soft key — small phone
89
Page 90

Additional phone features
To activate Virtual Office from this IP Deskphone on your Office IP
1. Press the Virtual Soft key.
2. At the prompt, enter your user ID.
3. Press the Enter key.
4. At the prompt, enter the home Station
Control Password (SCPW).
A successful login transfers all the
features, time, date, and tones to your
Remote telephone from your Office
telephone.
Note 1: If the user ID is not found locally ,
the message “Locating Remote Server”
is displayed.
Note 2: After three failed login attempts,
wait 1 hour before attempting to log in
again, or contact your system
administrator to reset your password.
Note 3: Your Virtual Office session
expires after a fixed period of time,
(determined by your system
administrator).
Deskphone:
Using Virtual Office on your Remote telephone
Because the display characteristics, including size, vary from one IP
Deskphone model to the next, your Office Avaya 1110 IP Deskphone
90
Page 91

Additional phone features
display is different on each Remote phone. Figures 8 to 10 show LCD
displays of various IP Deskphones when they are logged on to an
Avaya 1110 IP Deskphone using Virtual Office.
Figure 8 shows an Avaya 1120E IP Deskphone logged in as a Remote
phone to an Avaya 1110 IP Deskphone Office phone.
Figure 8: Avaya 1120E IP Deskphone logged in to an
Avaya 1110 IP Deskphone
91
Page 92

Additional phone features
Figure 9 shows an Avaya 1140E IP Deskphone logged in as a Remote
phone to an Avaya 1110 IP Deskphone Office phone.
Figure 9: Logged in to an Avaya 1110 IP Deskphone using an
Avaya 1140E IP Deskphone
92
Page 93

Additional phone features
Figure 10 shows an Avaya 2050 IP Softphone logged in as a Remote
phone to an Avaya 1110 IP Deskphone Office phone.
Figure 10: Logged in to an Avaya 1110 IP Deskphone using
an Avaya 2050 IP Softphone
Note 1: On the displays of the IP Phone 2002, IP Phone 2004,
Avaya 1120E IP Deskphone, Avaya 1140E IP Deskphone, and
Avaya 2050 IP Softphone, the feature keys remain empty (except for
the appearance of your DN), because your Avaya 1110 IP
Deskphone does not support feature keys.
Note 2: A User information line appears on all displays listing the
number of your office telephone.
Using Virtual Office on your Office telephone
Figure 11 shows the Avaya 1110 IP Deskphone display when the phone
is logged out due to remote access.
93
Page 94

Additional phone features
Figure 11: Office phone displays the message Logged Out
When activated for Virtual Office by a Remote telephone, your Office
telephone is logged out and no longer operational. If this is the case when
you return to your office, you can disconnect the remote login and regain
control of your Office phone. If you do not disconnect the remote login,
your Virtual Office session expires af ter a fixed per iod of time, determined
by your system administrator.
94
Page 95

Additional phone features
To regain operation of a telephone being used for Virtual Office:
Choose one of the following:
— To completely disconnect your
Home
or
Vrtual
Office telephone from the Remote
telephone:
a. Press the Home context-sensitive
soft key.
b. Enter your User ID and password
(this logs the Office telephone back
on to your office network).
— Press the Virtual context-sensitive
soft key to log in to another IP
Deskphone, and your telephone
becomes a Remote telephone.
Logging out of Virtual Office
To log out of Virtual Office, press the Virtual soft key.
Automatic log out from Virtual Office
Your remote Virtual Office IP Deskphone may be configured to
automatically log out of Virtual Office after a predetermined period of
inactivity. When automatic logout is about to occur, the following message
is displayed on the IP Deskphone: "Logout phone now?"
Press Yes to allow the IP Deskphone to log out of Virtual Office or press
No to remain logged in to Virtual Office and reset the IDLE timer. If no key
is pressed, the IP Deskphone logs out of Virtual Office.
Emergency calls on your Remote IP Deskphone
If you make an emergency call while logged in to Virtual Office on a
Remote IP Deskphone, the call is placed to the local emergency service,
not to your home office emergency service.
Note: Some IP Deskphones are configured as Virtual Office-only
telephones and have no assigned DN. However, these IP
95
Page 96

Additional phone features
Deskphones can still be used to make emergency calls. “Emergency
Calls only“ is displayed on the IP Deskphone display when not logged
in to Virtual Office. When the phone goes off-hook, dial tone is
available for emergency calls only. All other calls are restricted.
Troubleshooting Virtual Office
Virtual Office can display error messages on-screen. Table 8 lists error
messages and describes actions to correct the causes.
Table 8: Troubleshooting Virtual Office (Part 1 of 3)
Displayed Message Probable Cause Actions
Busy, try again Remote IP
Deskphone is active
(not idle).
ACD is logged in. Log out ACD IP
Make Set Busy is
inactive on ACD IP
Deskphone.
Invalid ID (1) Incorrect User ID
entered.
User ID is not in
Gatekeeper
database.
Invalid ID (2) Incorrect User ID
entered.
Wait for remote IP
Deskphone to
become idle and try
again.
Deskphone before
Virtual Office from
another IP
Deskphone.
Configure Make Set
Busy active on ACD
IP Deskphone.
Enter correct User ID.
Notify system
administrator.
Enter correct User ID.
96
Page 97

Additional phone features
Table 8: Troubleshooting Virtual Office (Part 2 of 3)
Displayed Message Probable Cause Actions
Invalid ID (3) Incorrect User ID
entered.
User ID in
Gatekeeper database
points to originating
Call Server.
Locked from Login Three failed attempts
to enter the correct
Station Control
Password.
Permission Denied
(1)
Remote telephone
has no Station
Control Password.
Permission Denied
(3)
Incorrect User ID
entered.
Remote telephone
has no Station
Control Password.
Permission Denied
(4)
Incorrect User ID
entered.
Enter correct User ID.
Notify system
administrator.
Wait one hour for the
lock to clear
automatically, or
notify system
administrator to clear
lock.
Notify system
administrator.
Enter correct User ID.
Notify system
administrator.
Enter correct User ID.
Attempt to log in to a
remote IP Phone
2004 or Avaya 2050
IP Softphone from an
Avaya1110IP
Deskphone (some
restrictions apply).
Go to an IP Phone
2004 or Avaya 2050
IP Softphone and try
again, or consult your
local system
administrator.
97
Page 98

Additional phone features
Table 8: Troubleshooting Virtual Office (Part 3 of 3)
Displayed Message Probable Cause Actions
Permission Denied
(6)
Server Unreachable
(1)
Server Unreachable
(2)
VOUD configured on TNRemote IP
Incorrect User ID
entered.
Incorrect Station
Control Password
entered.
Network problem. Notify system
Network problem. Notify system
Deskphone does not
have VOUA Class of
Service.
Enter correct User ID.
Select Retry, and try
again with the correct
Station Control
Password.
administrator if the
problem persists.
administrator if the
problem persists.
Notify system
administrator.
Using Media Gateway 1000B
The Media Gateway 1000B (MG 1000B) provides a means of extending
CS 1000 Release 4.5 features to one or more remotely located branch
offices using the Branch Office feature. A branch office is a remote
location in the network where IP Deskphones, PSTN access, and TDM
telephones are located. Contact your system administrator to see if these
functions are available for your use.
The Media Gateway 1000B (MG 1000B) telephone can operate in Normal
or Local Mode.
Normal Mode
The telephone registers with the Main Office and receives telephone
services from the Main Office. At any time during Normal Mode, you can
check Local Mode functionality (make and receive calls) by enabling
Local Mode and returning to Normal Mode. After testing, you can return to
98
Page 99

Additional phone features
Normal Mode (see “Using Resume Normal Mode” on page 100) or by
waiting for 10 minutes.
Local Mode
If the WAN connection fails, the IP Deskphone loses communication with
the Main Office Telephone Preference Service (TPS). It then registers
with the MG 1000B and receives telephone services from the MG 1000B.
When in Local Mode, the telephone displays the message LOCAL
MODE.
This section provides more information on the following topics:
• Using Test Local Mode
• Using Resume Normal Mode
• Troubleshooting MG 1000B
Using Test Local Mode
Use Test Local Mode to check Local Mode functionality (make and
receive telephone calls). Test Local Mode is useful when provisioning has
changed for an IP Deskphone on an MG 1000B Controller.
(Services)
1. Press the Services key.
2. Press the Up/Down navigation keys to
scroll up or down, and then highlight
Test Local Mode.
3. Press the Enter key (the telephone
resets and registers back to the Main
Office).
99
Page 100

Additional phone features
Using Resume Normal Mode
Use the Resume Normal Mode command to return to Normal Mode after
testing survival functionality.
Note: If you do not use the Resume Normal Mode command after
testing, the telephone automatically returns to Normal Mode in 10
minutes.
1. Press the Services key.
(Services)
2. Press the Up/Down navigation key to
scroll and highlight Resume Normal
Mode.
3. Press the Enter key (the telephone
registers back to the main office).
Troubleshooting MG 1000B
The MG 1000B can display error messages on-screen. Tabl e 9 lists error
messages and describes actions to correct the causes.
Table 9: Troubleshooting MG 1000B (Part 1 of 2)
Display Message Probable Cause Actions
Local Mode Test Local Mode.
Network problem.
100
Press the Services
key, and then select
Resume Normal
Mode.
Contact system
administrator if
problem persists.
 Loading...