

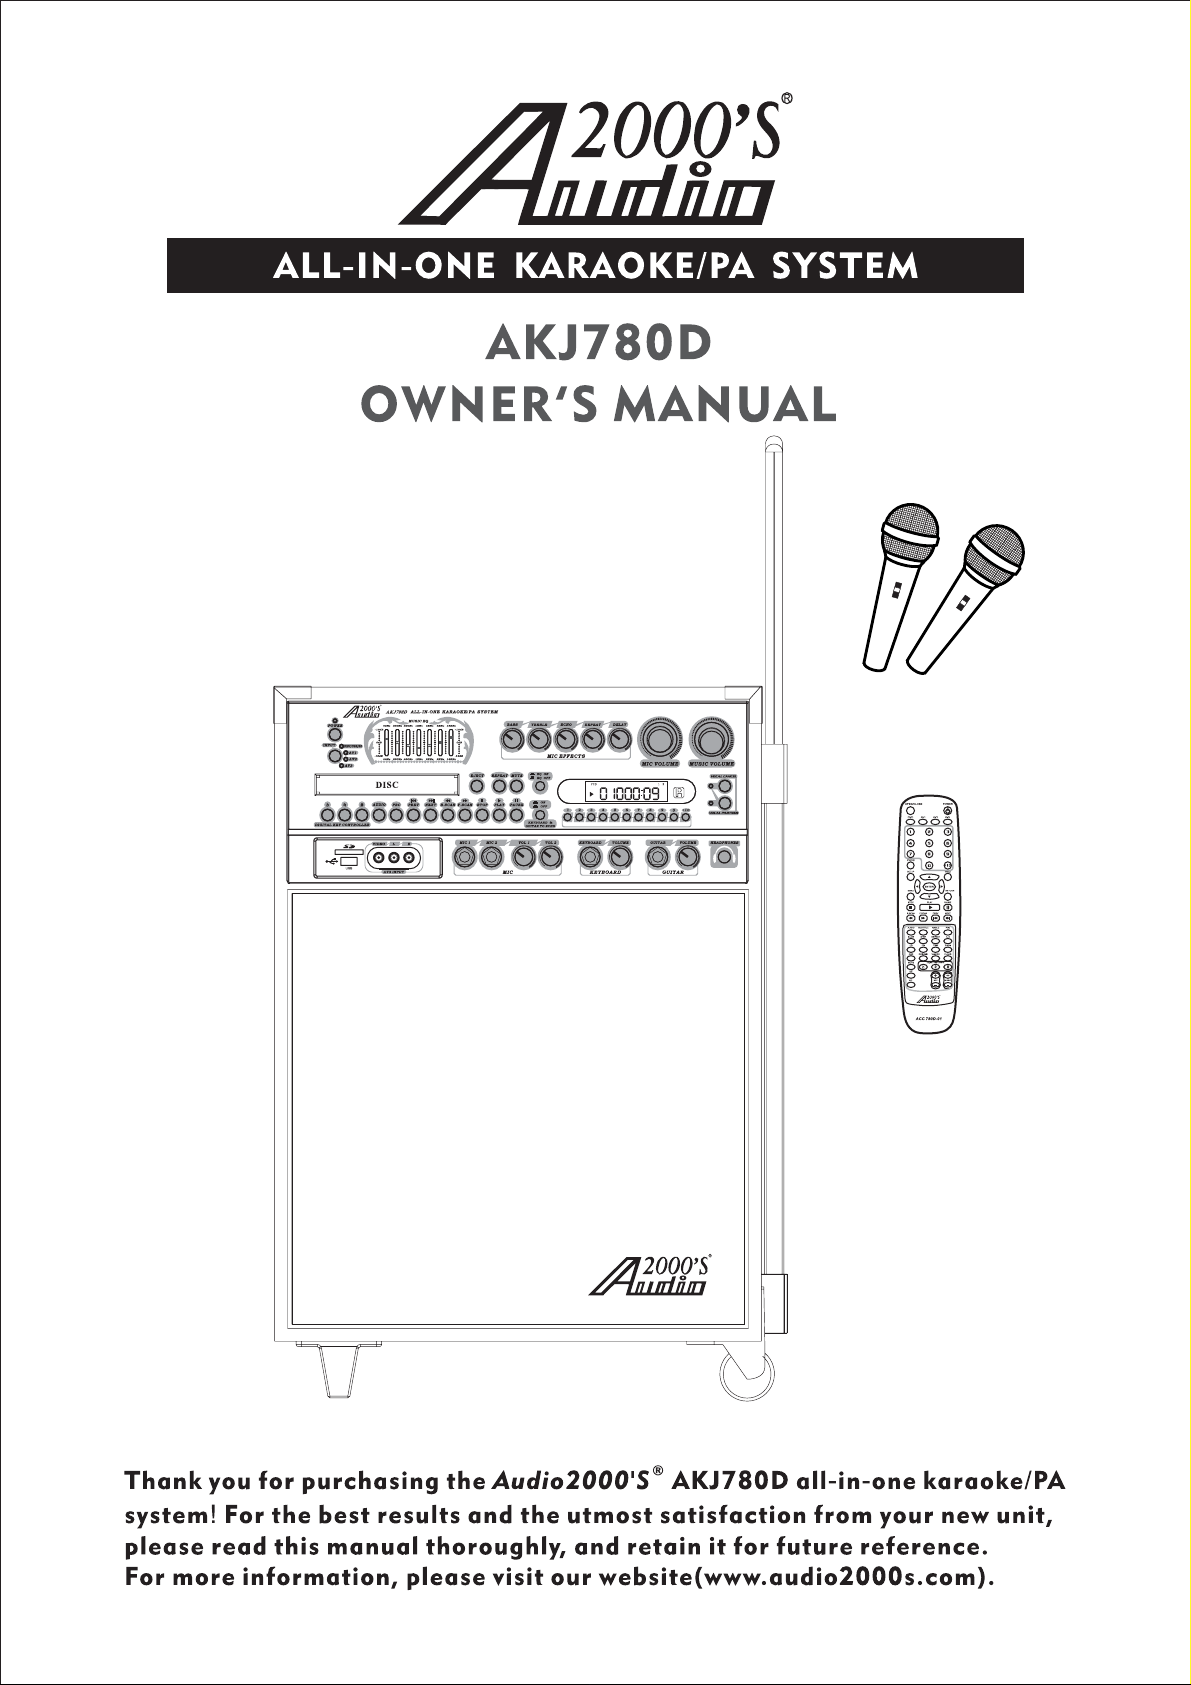
Audio2000's AKJ780D User Manual
Safety Instructions
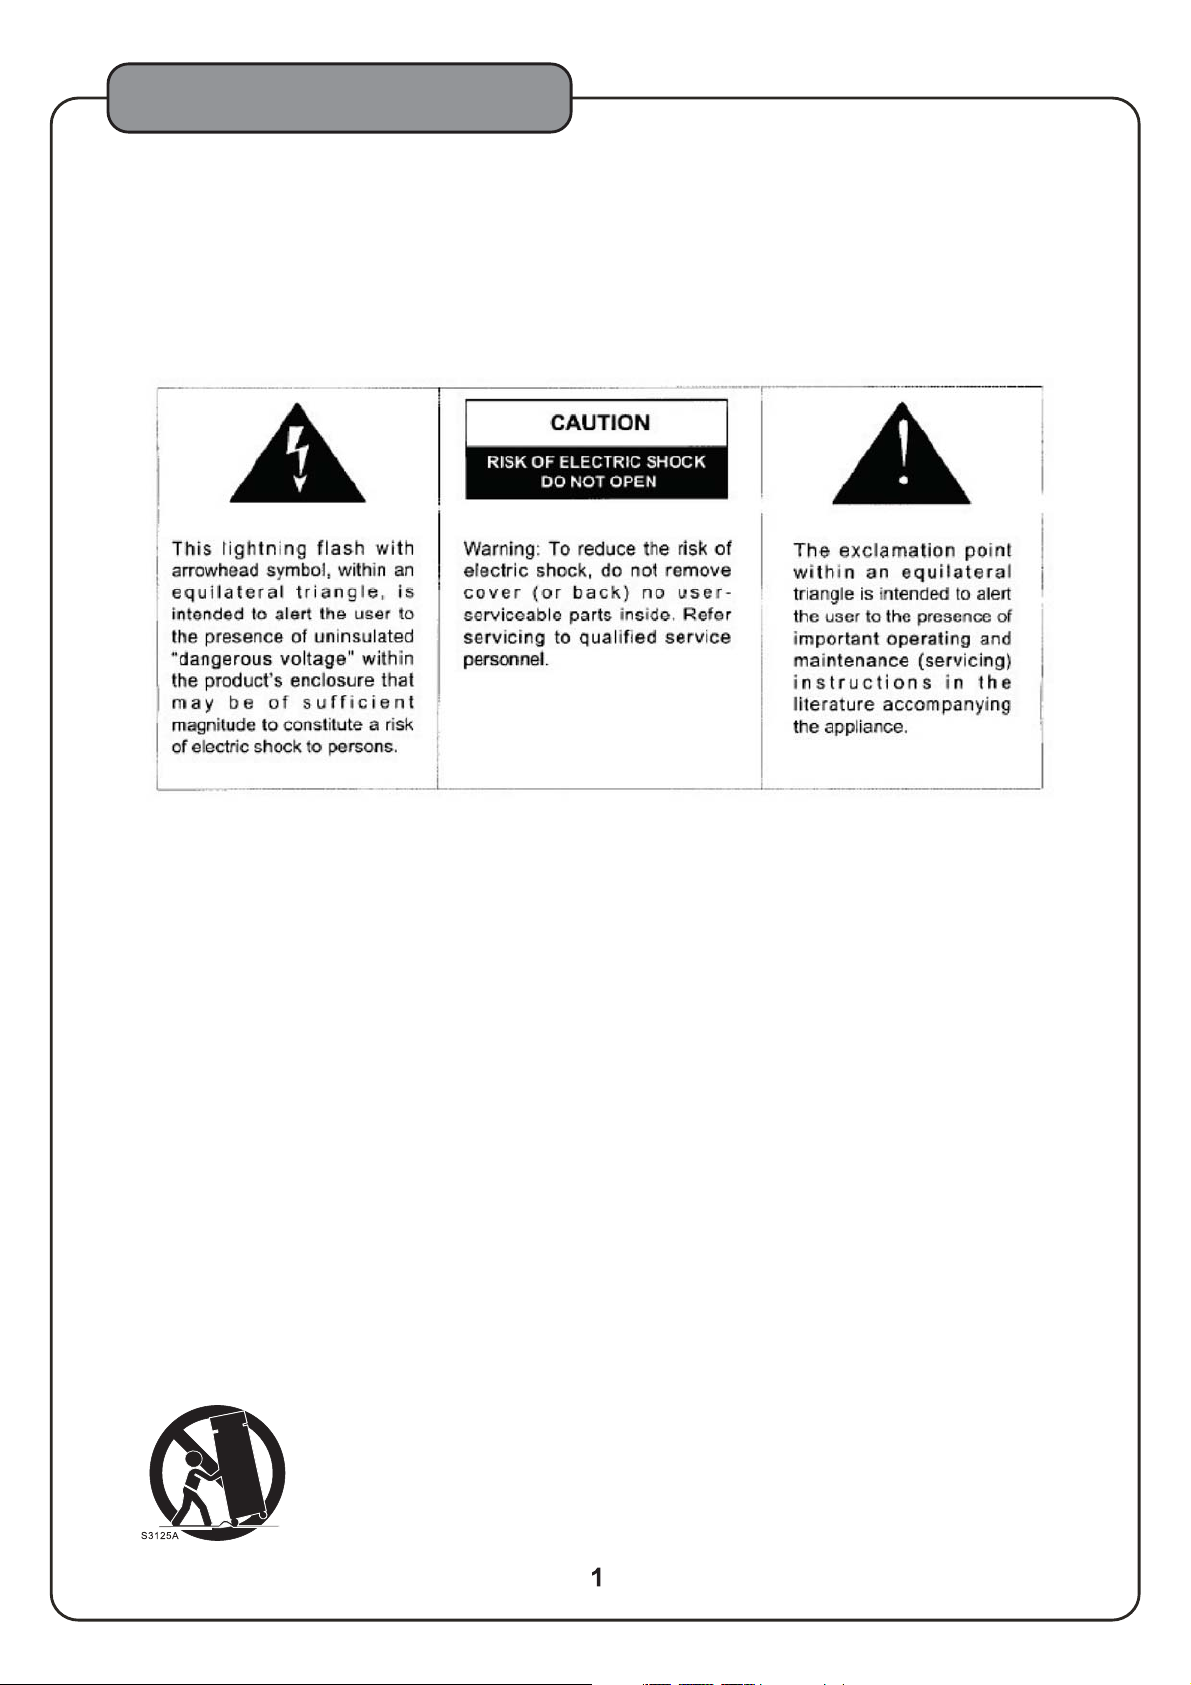
WARNING
* TO PREVENT FIRE OR SHOCK HAZARD, DO NOT EXPOSE THIS APPLIANCE TO RAINOR MOISTURE.
*THIS APPLIANCE SHALL NOT BE EXPOSED TO DRIPPING OR SPLASHING WATER AND THAT NO
OBJECT FILLED WITH LIQUIDS SUCH AS VASES SHALL BE PLACED ON APPARATUS.
IMPORTANT SAFETY INSTRUCTIONS
1) Read these instructions.
2) Keep these instructions.
3) Heed all warnings.
4) Follow all instructions.
5) Do not use this apparatus near water.
6) Clean only with dry cloth.
7) Do not block any ventilation openings. Install in accordance with the manufacturer's instructions.
8) Do not install near any heat sources such as radiators, heat registers, stoves, or other apparatus
(including amplifiers) that produce heat.
9) Do not defeat the safety purpose of the polarized or grounding-type plug. A polarized plug has two
blades with one wider than the other. A grounding type plug has two blades and a third grounding
prong. The wide blade or the third prong are provided for your safety. If the provided plug does not
fit into your outlet, consult an electrician for replacement of the obsolete outlet.
10) Protect the power cord from being walked on or pinched particularly at plugs, convenience
receptacles, and the point where they exit from the apparatus.
11) Only use attachments/accessories specified by the manufacturer.
12) Use only with the cart, stand, tripod, bracket, or table specified by the manufacturer, or sold with the
apparatus. When a cart is used, use caution when moving the cart/apparatus combination to avoid
injury from tip-over.

Features
Features
1
. The built-in USB and SD card readers play VCD, MP3+G, WMA, AVI, MP4, DAT, MPG and JPG files in
the USB and SD card.
2
. A multi-format player with the direct track access supports DVD, CDG, DVD-R, DVD-RW, VCD,
MP4,DIVX,Photo-CD,CD,CD-R,andCD-RWformats.
3
. All-in-one design delivers 180W of power through a 6-speaker cabinet (6.5" X 2; 3.0" X 2; 1.0" X 2).
4
. -inch guitar and keyboard inputs with individual volume controls.
¼
5
. Digital echo with repeat and delay controls for vocal enhancement.
6
. Digital key control (This feature is not applicable to the AUX inputs-AV1, AV2, and Av3).
7
.Vocal cancel and vocal partner modes for canceling vocals from multiplexed media.
8
. 7-band equalizer.
9
. Three RCA audio-video inputs (AV1, AV2, and AV3).
0
1 . Two microphone inputs (MIC1 and MIC2) with individual volume controls (two unbalanced
-inch microphone inputs at the front panel and two balanced microphone inputs at the rear panel).
¼
1
1 . Two RCA audio-video outputs, one stereo -inch audio pre-out, and DVD 5.1 audio-video outputs.
12
. Three effect inserts (GUITAR, KEYBOARD, and MIC).
3
1 . One -inch stereo headphone output.
4
1 . Remote control.
5
1 . 115V / 230V and NTSC-PAL compatible for worldwide use.
¼
¼
Specifications and Package
Contents
Specifications
● AC Input Voltage
Audio Output Power
●
AV1 Audio Input Sensitivity
●
Video Input Sensitivity
●
Microphone Input Sensitivity
●
Keyboard/Guitar Input Sensitivity
●
Video Output Level
●
Audio Output Level
●
S/N Ratio
●
Dimension
●
●
Weight
.......................................
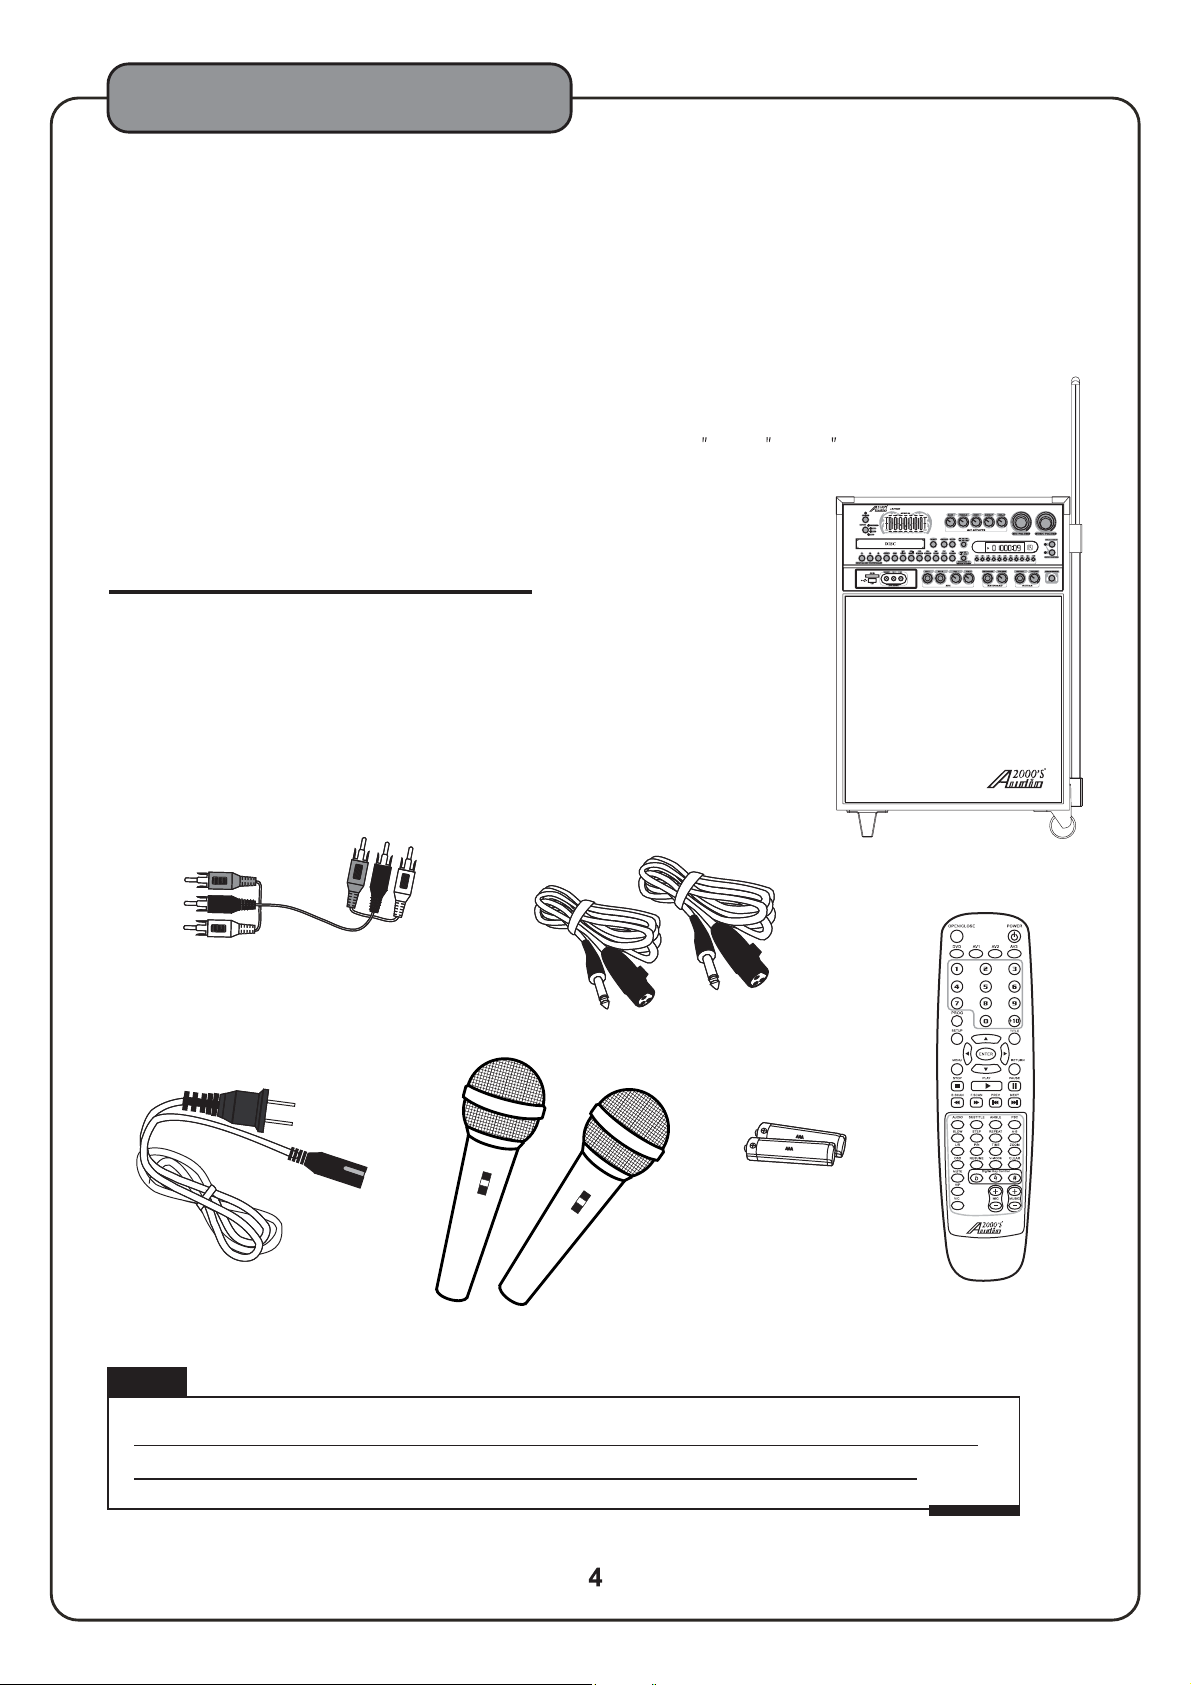
Package Contents
Items Quantities
................................
.............................
........................
............................
.......................
...................
..............................
..............................
.....................................
....................................
AC 115V 60Hz/AC 230V 50Hz
180 W (peak to peak)
500 mV
1 V (peak to peak)
8mV
8mV
1V
(peak to peak)
1000 mV
90 dB
19.3 x 12.8 x 28.0 (LxWxH)
56.6 lbs
ALLIN ONEKARAOKEPA SYSTEM-- /
LR
VCD
AKJ780D Unit
A/V RCA Cable
Microphones
Microphone Cables
Remote Control
AC Power Cord
AAA Batteries
A/V RCA Cable (1)
(1)
(1)
(2)
(2)
(1)
(1)
(2)
ΑΚ U (1)J780D nit
Microphone Cables (2)
AAA Batteries (2)
AC Power Cord (1)
Microphones (2) Remote Control (1)
Note
If you find that any of the items mentioned above are missing from
the box, please contact before proceeding.AUDIO2000’S
®
ACC780D-01

Descriptions and Functions
Front Panel
3
ALL IN ONE KARAOKE PA SYSTEM-- /
4
5
2
1
VCD
1.INPUT
INPUT SOURCES.
2.POWER/STANDBY
Note: When in STANDBY mode, the is not completely powered down and still contains residual
power. This button will not turn the on if the MAIN POWER switch on the rear panel is switched off.
To completely turn the power off, use the MAIN POWER switch on the rear panel of the
3
.MUSIC EQ
MUSIC output. Each slide fader processes a particular frequency range indicated by the number above it.
Frequencies from 30Hz -120Hz constitute the very low to low range. Frequencies from 120Hz to 1KHz
are the mid-range and frequencies from 1KHz to 16KHz make up the high to very high range. To adjust,
slide the fader up to boost the frequency presence or down to cut the frequency.
4.EJECT
KEYBOARD & GUITAR TO ECHO ON/OFF
5.
between the Keyboard / guitar inputs and the digital ECHO circuitry. Depress this button to activate the
digital ECHO. Release this button to the UP position to disconnect the digital ECHO.
6.GRAPHIC DISPLAY
settings and performance.
7.MIC VOLUME
8.MUSIC VOLUME
9.REMOTE SENSOR
Note: Obstacles located between the remote control and remote sensor should be avoided
as they can prevent signal recognition
10.
Note: This feature does not work with a standard or non-multiplex format disc. This feature is designed to
work with multiplex discs only.
11.
Note: Like the VOCAL CANCEL, this feature does not work with a standard or non-multiplex format disc.
This feature is designed to work with multiplex discs only.
12.
Note:
buttons, refer to the Direct track access for Divx operations section of this manual.
- This button toggles through all the INPUT channels (Disc/USB/SD, AV 1/2/3) for available
- This button is used to turn the 'ON'/ 'OFF' or place it in STANDBY mode.
AKJ780D
AKJ780D
- This GRAPHIC EQ is used to BOOST and/or CUT particular frequencies from SOURCE
button-ThisbuttonisusedtoOPEN/CLOSEtheDISCtray.
- This panel displays all graphical information regarding system operations,
control - This control increases/decreases the MIC VOLUME level. Turn clockwise to
increase MIC VOLUME and counter-clockwise to decrease the MIC VOLUME.
control - This control increases/decreases the MUSIC VOLUME level. Turn clockwise
to increase MUSIC VOLUME and counter-clockwise to decrease the MUSIC VOLUME.
- This sensor receives infrared signals transmitted by the REMOTE CONTROL transmitter.
VOCAL CANCEL
format CDG, VCD, or DVD disc. In order for this feature to work, the disc must be multiplex formatted.
Press this button once to remove the lead vocal singer sound track signal. Press this button again and the
lead vocal sound track signal will be added back into the music.
VOCAL PARTNER
microphone signal is present (while you are singing to the microphone). When the microphone signal is
not present (after you stop singing to the microphone), the lead vocal sound track signal will be added back
to the music. In order for this feature to work, the disc must be multiplex formatted. Press this button once to
activate VOCAL PARTNER. Press this button again to deactivate VOCAL PARTNER.
DIRECT TRACK ACCESS
for all the tracks higher than 10. For example, press +10 and 6 to go directly to track 16, and press +10,
+10, and 3 to go directly to track 23.
When playing Divx files, to skip to the desired track directly using the number
button - This feature is used to remove the lead vocal sound track signal on a multiplex
button - This feature is used to remove the lead vocal sound track signal only when the
buttons - These buttons are used for DIRECT TRACK selection. Use the +10 button
AKJ780D
button - This button is used to turn on or turn off the connection
6
7
LR
AKJ780D.
8
9
10
11
12
Descriptions and Functions
Front Panel
ALL IN ONE KARAOKE PA SYSTEM-- /
1813 14 15 16 17
19
20
21
VCD
LR
26
23
13.AUDIO
14. PBC
you can use direct access to tracks/scenes by using the NUMBER PAD on the REMOTE CONTROL. This
feature is used primarily with VCD discs.
Note: Not all discs have PBC support coding. Check to make sure a disc has PBC support before trying
to use the feature. Pressing the PBC button during the playback of a track/scene will cause the playback
to stop and restart.
15.PREV and NEXT
ahead to the next track).
16.B-SCAN and F-SCAN
through the current track and F-Scan scans forwards through the current track.
17.STOP
disc playback when pressed twice.
18.REPEAT
so see the operations section (page 19) of this manual for detailed instructions on using the repeat function
for every kind of disc.
19.MUTE
20.EQ ON/OFF
EQ switch in to activate the equalizer. In the out position, the equalizer is bypassed.
21.PLAY/PAUSE
22.HEADPHONES
23.AV3 INPUT
SOURCE. Connect RCA-style AV cables from these jacks to the AV OUTPUT jacks on your external AV device.
24. SD MEMORY CARD
on a loaded memory card can be played.
25.USB INPUT
thumb drive can be played.
26.DIGITAL KEY CONTROL
lower or reset the musical key of audio from the disc player.
●
●
●
Note: This feature is not applicable to the AUX inputs, AV1/AV2/AV3.
button - Cycles through caption languages on a disc with multiple caption languages available.
button - The PBC (play back control) button toggles the PBC mode ON/OFF. When in PBC mode,
buttons - Skip tracks when in DISC mode (jump to the previous track or skip
buttons - Scan through a track when in DISC mode. B-Scan scans backwards
button - Stops disc playback in standby mode when pressed once and completely stops
button - Cycles through the available repeat options. Repeat options vary from type of disc
button - Mutes the sound from Disc/USB/SD, AV1 ,AV2 and AV3 input channels.
switch - This switch is used to turn the 7-band graphic equalizer ON or OFF. Press the
button - Plays a disc that is stopped or paused .
jack - This jack is used to connect HEADPHONES equipped with a 1/4 inch plug.
jacks - These jacks are for connecting AUDIO/VIDEO OUTPUT from an external AV
Slot - The SD memory card slot accepts SD memory card formats. Media stored
- Use the USB input to connect a USB thumb drive to the unit. Media stored on the USB
buttons - These buttons direct the DIGITAL KEY CONTROLLER to either raise,
# - Raises the musical key a quarter-step each time this button is pressed.
- Resets the musical key to its original key.
b - Lowers the musical key a quarter-step each time this button is pressed.
222425
Descriptions and Functions
Front Panel
ALL IN ONE KARAOKE PA SYSTEM-- /
27 29
28 30 31
LR
373332 35 36
27. MIC BASS
VCD
34
- This control increases/decreases the amount of LOW frequency response applied to the
MASTER VOLUME output.
28.MIC TREBLE
- This control increases/decreases the amount of HI frequency response applied to the
MASTER VOLUME output.
29.MIC ECHO
- This control adjusts the level of ECHO applied to the MIC channels. Turn control clockwise
to INCREASE and counter-clockwise to DECREASE the level of ECHO.
30.MIC REPEAT
- Use this control to adjust the REPEAT setting of the ECHO effect. As REPEAT adjusts
the total number of echo intervals prior to fade-out, the more REPEAT that is applied, the more ECHO
intervals will occur prior to fade-out. Turn control clockwise to INCREASE and counter-clockwise to
DECREASE level.
31.MIC DELAY
- Use this control to adjust the DELAY setting of the ECHO effect. As DELAY adjusts the
total begin-to-end length of each echo interval, the more DELAY that is applied, the longer each ECHO
interval will take to complete. Turn control clockwise to INCREASE and counter-clockwise to
DECREASE level.
32. MIC INPUTS 1, 2
33.MIC1/2VOLUME
- These inputs are for connecting MICROPHONES witha¼inch(6.3mm) plug.
-These controls adjust the VOLUME levels of MIC channels individually. Turn controls
clockwise to INCREASE and counter-clockwise to DECREASE the microphone volumes.
34.KEYBOARD INPUT
35.KEYBOARD VOLUME
-ThisinputisusedtoconnectaKEYBOARDdeviceviaa¼inchinstrumentcable.
- This control is used to set the VOLUME level for a KEYBOARD connected to the
KEYBOARD INPUT JACK.
36.GUITAR INPUT
37.GUITAR VOLUME
- This input is used to connect a GUITAR via a ¼ inch instrument cable.
- This control is used to set the VOLUME level for a GUITAR connected to the
GUITAR INPUT.
 Loading...