

Audi A6 Quattro 2008 User Manual
Accessories and Body, Cab
2008 Audi A6 Quattro
2008 Audi A6 Quattro
Accessories and Body, Cab Body Collision Repair
Accessories and Body, Cab Body Collision Repair
Body Collision Repair
01 - BODY COLLISION REPAIR - GENERAL INFORMATION
SAFETY INSTRUCTIONS
--> Removing Components
--> Battery, Welding Procedures
--> Electronic Control Modules
--> Paint, Glass, Upholstery, Trim
--> Fuel Tank or Fuel Lines
--> Air Conditioning
--> Airbag System
--> Seat Belts, Inspecting
--> Working on Vehicles with Belt Tensioners
--> Separating Work, Straightening Work and/or Dent Removal on Vehicles with Airbags
--> Seats with Side Airbags, Removing
Removing Components
The vehicle must be secured on the hoist before its center of gravity changes due to disassembly.
Battery, Welding Procedures
NOTE:
Before disconnecting battery ensure that radio code is available. Ensure
radio is in an operational condition by inputting radio code before
releasing vehicle to customer.
Before welding, you must disconnect both battery terminals and cover both battery poles.
You must remove the vehicle battery before performing work near the battery that could produce sparks.
CAUTION: Switch off ignition before connecting battery! --> 27
GENERATOR, CRUISE CONTROL
FIXYOURCAR
FIXYOURCAR
1:34:58 AM Page 1
1:35:03 AM Page 1
- STARTER,

No other vehicles may be parked unprotected in areas used for body repairs. (Fire hazard due to flying sparks,
No parts of the charged air conditioner system may be welded, brazed or soldered. This also applies to any part
2008 Audi A6 Quattro
Accessories and Body, Cab Body Collision Repair
On vehicles with electronic ignition lock, ignition must be switched off
before removal
There should not be any people inside the vehicle when connecting the
battery!
Electronic Control Modules
Connect the ground (GND) connection of the electric welding appliance directly to the part to be welded. When
doing this, make sure that no electrically insulated parts are between the ground (GND) connection and the
welding point..
Do not allow the ground (GND) connection or the welding electrode to touch the electronic control units and
electrical wiring.
Procedure for Electronic Control Modules after accident repairs
It is only necessary to install new electronic control units after an accident where at least one of the following
conditions is present:
The function check results in the message "Control module faulty".
If electronic components, e.g. ABS control modules, were removed for servicing and then reused, these are to
be checked for function according to the available documentation after installing. To do this, check all DTC
memories with a tester and correct any possible malfunctions present.
Paint, Glass, Upholstery, Trim
battery, damage to paintwork and glass).
Fuel Tank or Fuel Lines
Use extreme care when performing sanding and welding work near the tank or other components carrying fuel.
Where there are doubts regarding safety, these parts must be removed.
Air Conditioning
of the vehicle if there is a risk that the parts of the air conditioner system could heat up. After paint repairs, the
vehicle must not be heated up to more than 176 F (80 C) in the drying booth or preliminary heating zone,
because heat causes a pressure increase which can burst the system..
NOTE:
The system must be evacuated when it is necessary to weld electrically
near the refrigerant hoses. During the electrical welding process invisible
ultraviolet rays are given off which penetrate the refrigerant hoses and
FIXYOURCAR
1:34:59 AM Page 2
The battery Ground (GND) strap must be disconnected when working on the airbag system or when performing
2008 Audi A6 Quattro
Accessories and Body, Cab Body Collision Repair
decompose the refrigerant.
Solution
Evacuate air conditioning system: --> 87 - AIR CONDITIONING Only extract system if it is required by the
safety precautions.
If it is necessary to evacuate the refrigerant when carrying out repairs to a vehicle, avoid all contact with liquid
refrigerant or refrigerant vapor!
Wear rubber gloves to protect the hands and goggles to protect the eyes! If the refrigerant comes into contact
with unprotected parts of the body it will cause frostbite..
CAUTION: It is advisable to have a rinsing bottle for the eyes handy at all times. If
liquid refrigerant gets into the eyes, they should be rinsed thoroughly with
water for about 15 minutes.
Then use eye drops and obtain medical attention immediately even if no
pain is felt in the eyes. The doctor should be informed that the cause of
the frostbite was R12 or R134a refrigerant.
If the refrigerant comes into contact with other parts of the body despite
compliance with safety measures, the part of the body concerned must be
rinsed immediately with cold water for at least 15 minutes. --> 87
- AIR
CONDITIONING
Although refrigerant does not present a fire hazard, smoking is not permitted in rooms containing refrigerant
vapors. The high temperature of a burning cigarette causes a chemical breakdown of the refrigerant vapor. The
products of this breakdown are poisonous and cause violent coughing and sickness when inhaled.
Airbag System
Repair notes --> 69
- PASSENGER PROTECTION - AIRBAGS, SEAT BELTS
straightening work when repairing the body.
CAUTION: Switch off ignition before connecting battery! --> 27 - STARTER,
GENERATOR, CRUISE CONTROL
On vehicles with electronic ignition lock, ignition must be switched off
before removal
There should not be any people inside the vehicle when connecting the
battery!
FIXYOURCAR
1:34:59 AM Page 3
Airbag components must not even briefly be subjected to temperatures above 100C (212F).
Audi 100 sedan From MY 1982
straightening work or dent removal, the belt tensioners with load detection
2008 Audi A6 Quattro
Accessories and Body, Cab Body Collision Repair
Additional notes --> 69 - PASSENGER PROTECTION - AIRBAGS, SEAT BELTS
Airbag components must not come into contact with grease, cleaning agent, oil or similar.
Mechanically damaged airbag components must be replaced --> Airbag
Wash hands after touching deployed airbag units.
Seat Belts, Inspecting
CAUTION: After every accident, seat belt system must be checked systematically. If
damage is determined when checking the test points, customer must be
informed regarding necessity of changing belts..
Additional notes --> 69 - PASSENGER PROTECTION - AIRBAGS, SEAT
BELTS
Working on Vehicles with Belt Tensioners
CAUTION: Before beginning separation work, straightening work or dent removal,
remove mechanically activating belt tensioners without load detection
(release lock). With electrically activating belt tensioners, the battery
Ground (GND) strap must be disconnected.
Additional notes --> 69
- PASSENGER PROTECTION - AIRBAGS, SEAT
BELTS
NOTE:
If the belt webbing is completely unrolled, the load detection (release lock)
hinders the release of the mechanically activated belt tensioner in an
accident.
CAUTION: With belt tensioners with load detection, the belt webbing must not be
pulled out when performing separation work, straightening work or dent
removal. If strong shaking motions are generated by separating work,
must be removed.
Additional notes --> 69 - PASSENGER PROTECTION - AIRBAGS, SEAT
BELTS
The following vehicles with no load detection on belt tensioners:
FIXYOURCAR
1:34:59 AM Page 4
AIRBAGS,
The battery Ground (GND) strap must be disconnected when working on the airbag system or when performing
--
>
2008 Audi A6 Quattro
Accessories and Body, Cab Body Collision Repair
Audi 200/V8 From MY 1983
Safety belts with belt tensioners, removing and installing --> 69 - PASSENGER PROTECTION SEAT BELTS
Separating Work, Straightening Work and/or Dent Removal on Vehicles with Airbags
straightening work when repairing the body.
CAUTION: Switch off ignition before connecting battery!
There should not be any people inside the vehicle when connecting the
battery!
Repair notes --> 69 - PASSENGER PROTECTION - AIRBAGS, SEAT BELTS
Seats with Side Airbags, Removing
CAUTION: You must always follow safety precautions when removing seats.
You can find the safety precautions in the repair information belonging to each vehicle model --> 69 PASSENGER PROTECTION
- AIRBAGS, SEAT BELTS .
GENERAL INFORMATION
--> Diagnosis of Accident Vehicles
--> General Information
--> Conditions in which Body and/or Parts are Passed for Painting
--> Straightening
--> Separating Cuts
--> Replacement Body Sub-Parts and Part Sections
--> Original Joint
--> Galvanized Body Parts
Removing Remaining Material
FIXYOURCAR
1:34:59 AM Page 5
--
>
New Parts
--> Replacement Parts
reshaping of accident damaged areas should be carried out in the same manner.
Diagnosis of Accident Vehicles
2008 Audi A6 Quattro
Accessories and Body, Cab Body Collision Repair
Damage to the running gear and assembly mountings, which could have very serious effects later
on is
sometimes not discovered when accident vehicles are being repaired. Where the accident damage indicates
over-stressing of the vehicle, special attention must be paid to the following components, completely
independent of the axle geometry check which must be done in all cases:
Check steering and steering linkages using steering wheel angle for problem-free function, visual
inspection for bends or cracks.
Check suspension, all suspension parts such as links, struts, steering knuckle, stabilizer, subframe, axle
body and their securing parts for bends or cracks.
Check rims and tires for damage, true running and imbalance. Check tires for cuts in the profile and the
sides, check tire pressure.
Check mounts for engine, transmission, axles and exhaust system for damage.
Finally, a proper road test after repairs ensures that the vehicle is safe to drive and can be handed over to
the customer.
General Information
When repairing, the original connection should always be restored.
tandard repairs are described in the repair information. Further descriptions are not given because if there are
S
more extensive repairs, the damaged area should be removed at the original connection. Where this is possible,
the joining techniques can be implemented according to the preceding comparison.
All repairs with special separating cuts and joining techniques that do not correspond to the original connection
(production status) checked and approved by the Technical Development by means of calculation, strength
testing and crash.
Conditions in which Body and/or Parts are Passed for Painting
Before a repaired vehicle or part is handed over to the paint shop for painting, the repaired or beaten out, and
where necessary, filled surfaces must be prepared for painting by rubbing-down with abrasive paper having a
grade of P 80 - P 100.
This preparatory work is the job of the sheet metal worker and is included in the time allowed for the repair.
Straightening
Body and floor sections are produced mainly from cold formed deep drawn sheet metal. For this rea
FIXYOURCAR
1:34:59 AM Page 6
son the

If the size of the damage does not allow it to be reshaped against the direction of damage, the damaged part
information, e.g with pressure hammer V.A.G 1577 or body repair saw V.A.G 1523 A , drill out most spot weld
connections with spot weld remover V.A.G 1731.
2008 Audi A6 Quattro
Accessories and Body, Cab Body Collision Repair
must be removed after straightening the connecting surfaces.
Separating Cuts
In areas where cutting and the subsequent joining affect the rigidity of the body and also the operational safety
and serviceability of the vehicle, the parting cuts must be made in accordance with the Repair Information
instructions.
Replacement Body Sub-Parts and Part Sections
"Sub-parts" include sections of individual parts (e.g. front and rear end points) that are del
ivered pre-cut from
the parts depot.
In contrast to this, "partial sections" are to be cut out from replacement parts. In individual cases, work is
to be performed exactly according to the methods described and represented in the body repair
information.
Because the use of "sub-parts" or "partial sections" as well as special resources influence repair times, the
special resources are included separately in the repair description.
Original Joint
"Original joint" refers to welding that is used by the vehicle manufacturer.
These welds should be reconstructed when performing body repairs.
When doing so, ensure that the production number of weld points is not exceeded when making repairs.
Methods and procedures differing from the original connection are described in the applicable body repair
information.
Galvanized Body Parts
Fully galvanized panels provide a high level of bodywork anti-corrosion protection during manufacture. To be
able to maintain the warranty guarantee against perforation rusting when carrying out repairs, the repair
information from --> Galvanized Body Parts
CAUTION: Because toxic galvanized oxide develops in welding emissions when
welding galvanized sheet steel panels, there must be good workplace
ventilation and flue-gas removal through appropriate means, e.g. welding
emission exhaust system V.A.G 1586 A.
Removing Remaining Material
If the damaged body piece is removed roughly according to the separating cuts in the applicable repai
FIXYOURCAR
1:34:59 AM Page 7
r

In addition, we recommend the degree sander V.A.G 1529 as well as an angle sander to remove the weld
New parts which are not accessible from the inside after a repair, e.g. side members, should, to prevent
painted in the color of the vehicle before being welded in. Here it is recommended to mask the
Cut out side part from roof with the body repair saw V.A.G 1523 A , observing prominent contours, e.g. a
After painting vehicle, preserve cavities in repair area.
2008 Audi A6 Quattro
Accessories and Body, Cab Body Collision Repair
connections that cannot be removed with the spot weld remover.
New Parts
corrosion, be prewelding flanges.
Replacement Parts
In many cases, replacement parts are delivered only in the "basic version" for parts reduction.
Examples:
Audi 100 from MY 1991 roof without roof rail holes.
In these cases, we recommend that the workshop creates "patterns" from damaged parts.
Example: from MY Audi 100 1991 roof rail holes:
part of the depression (rain gutter), when doing so. Deburr cut edges and protect with fabric-reinforced
adhesive tape.
Apply patterns before painting and allow for the material strength of the pattern when marking the bore holes.
Check new replacement parts, such as doors, panels or fenders for transport damage before sending to paint
shop. This prevents double painting, if transport or accident damage to the vehicle is noticed during assembly.
EXPANDED FOAM INSERTS
CAUTION: Expanded foam inserts expand only after reaching 180 C. Because of this,
filler foam is used for repairs
Filler foam D 506 000 A2 is required for repairs.
Insert replacement expanded foam inserts.
Foam D 506 000 A2 must be applied before fitting replacement part.
The foam hardens within 25 minutes
Do not do perform welding within 15 mm on either side of molded foam element.
FIXYOURCAR
1:34:59 AM Page 8
SYMBOLS
2008 Audi A6 Quattro
Accessories and Body, Cab Body Collision Repair
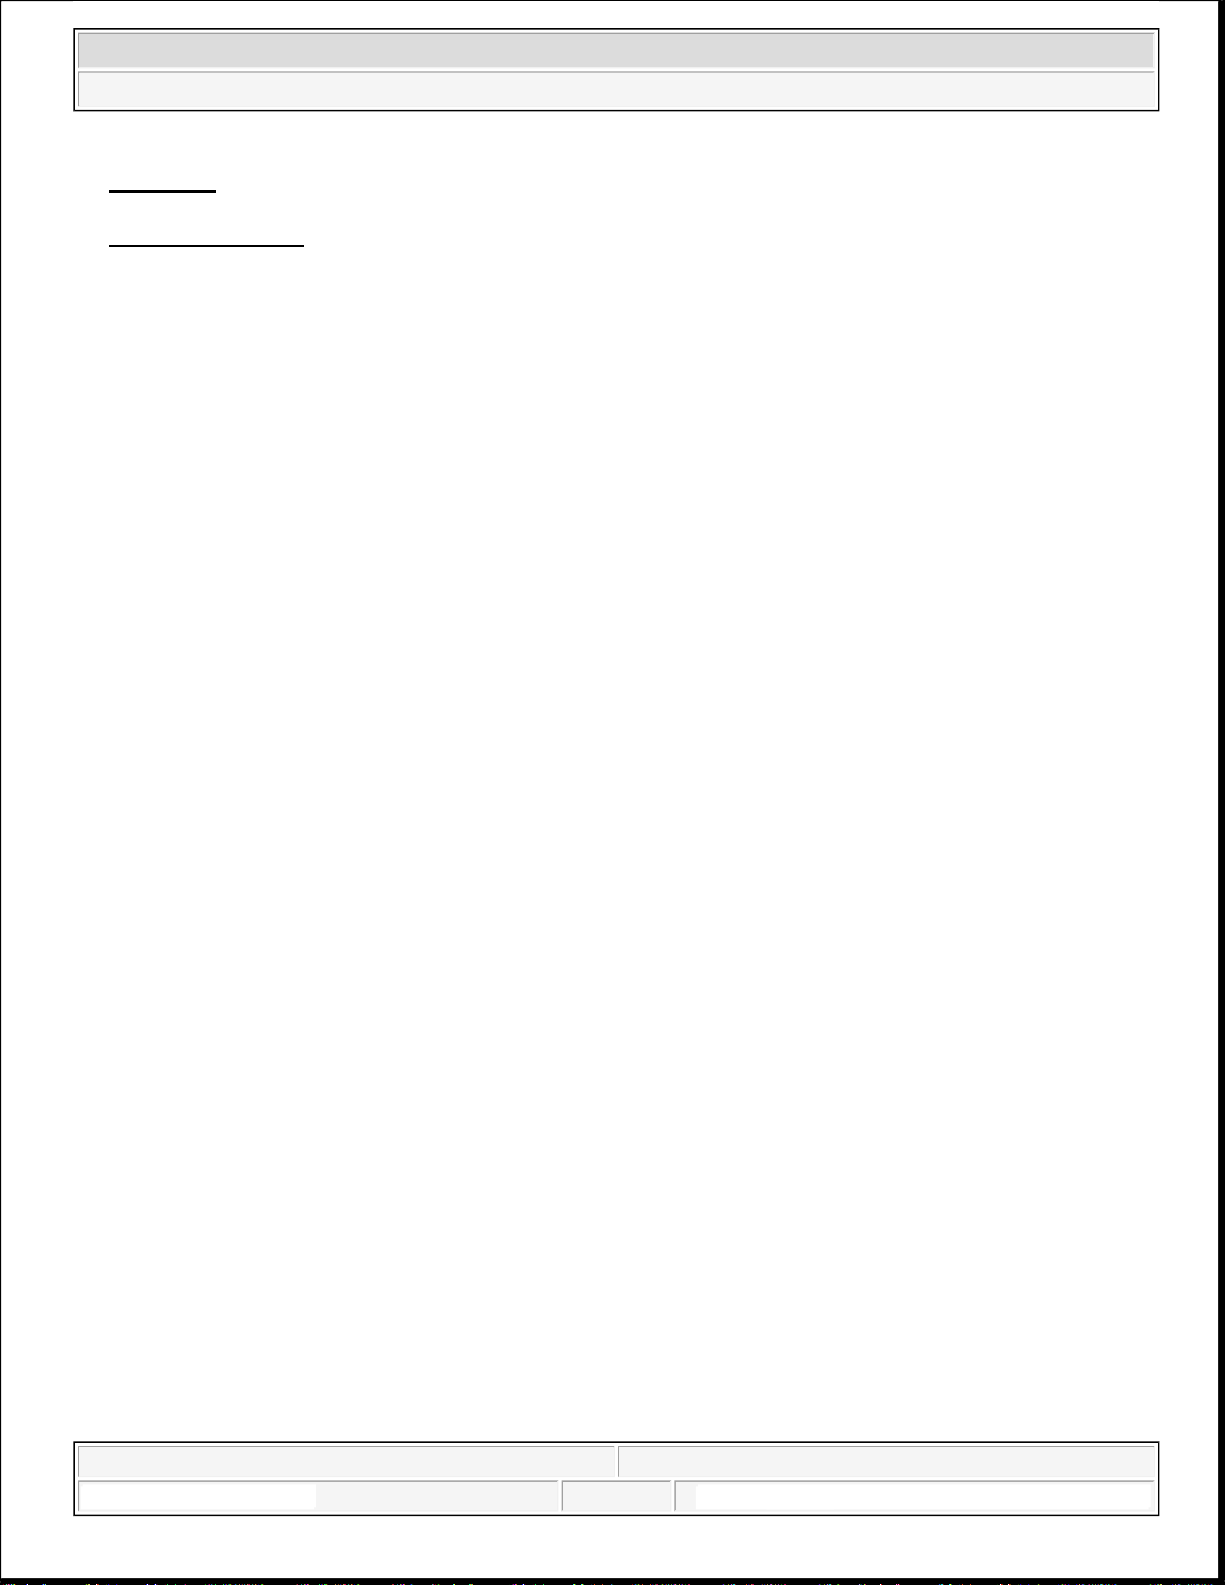
Welding Legend
Straight-line spot weld seam (single row) RP = Spot weld
Straight-line spot weld seam (double row)
Straight-line spot weld seam (double row, staggered)
Fig. 1: Spot Weld Symbols
Courtesy of VOLKSWAGEN UNITED STATES, INC.
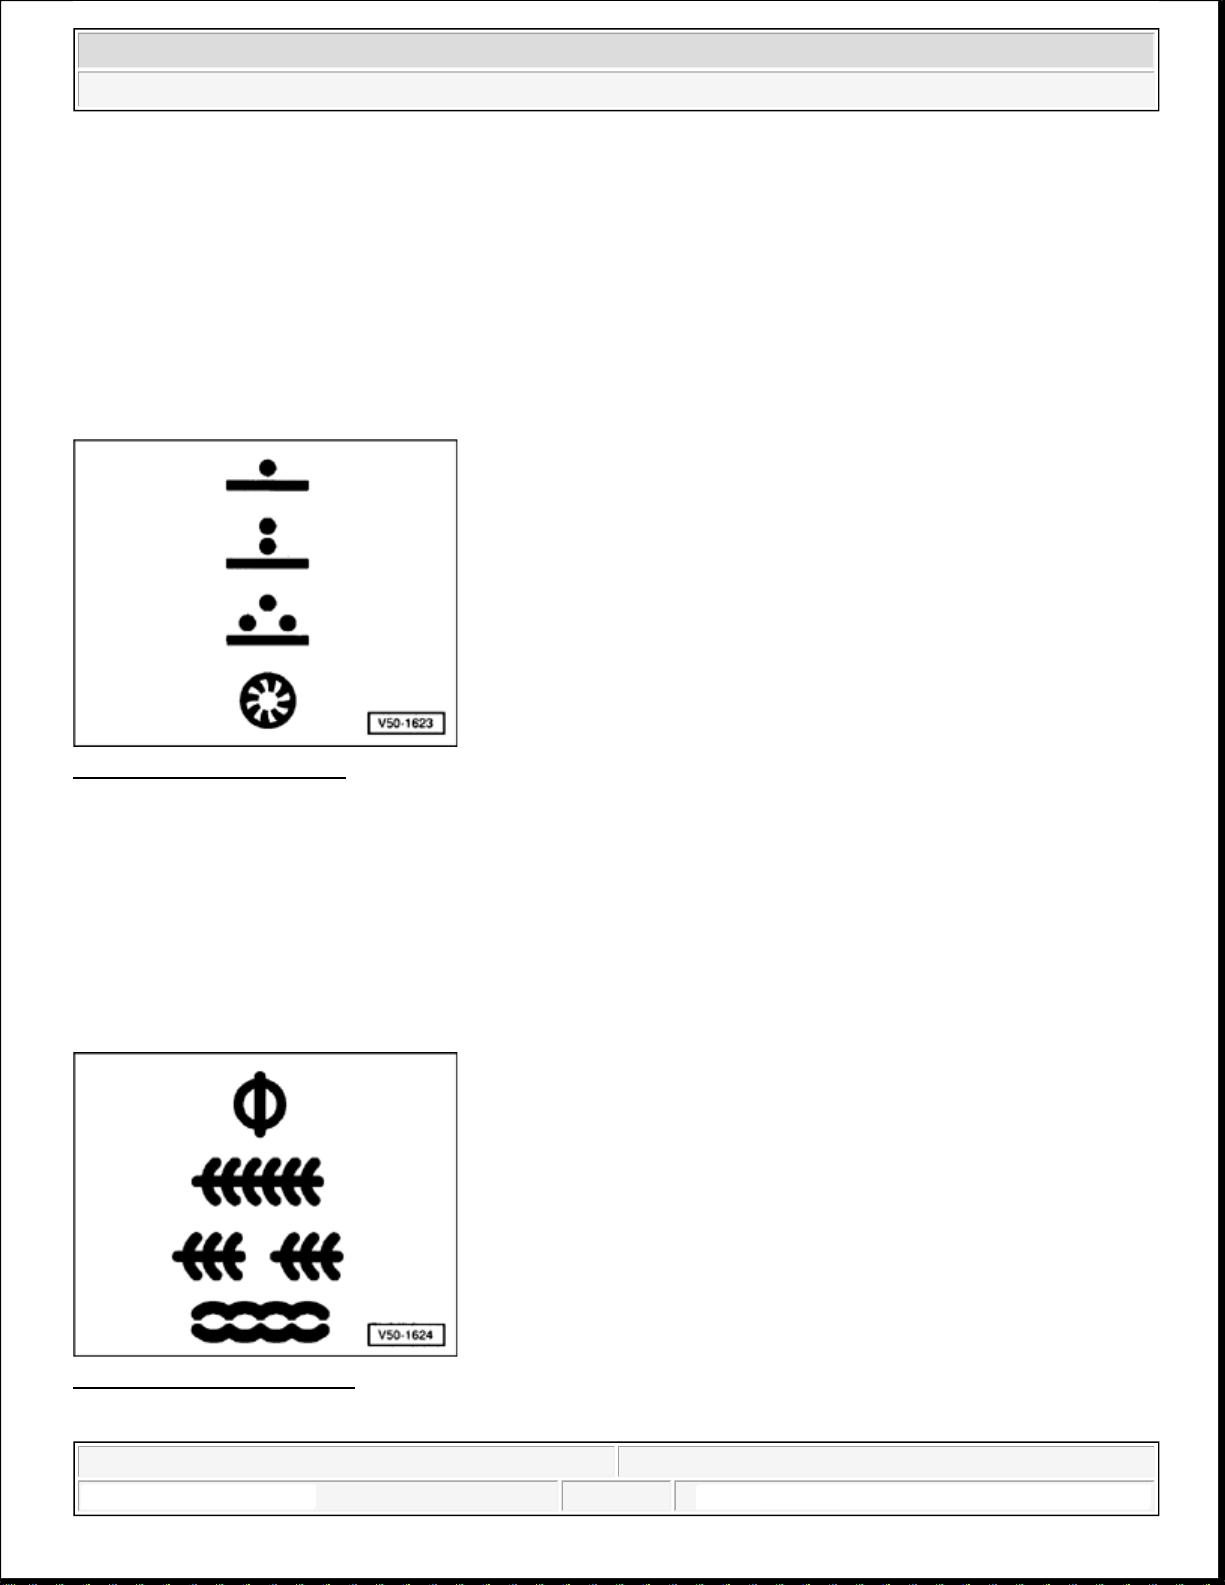
Gas-shielded arc plug weld seam SG = gas-shielded welding
Gas-shielded arc stitch weld seam
Gas-shielded arc continuous weld seam
Gas-shielded arc continuous weld seam (intermittent)
Fig. 2: Seam Weld Symbols
Courtesy of VOLKSWAGEN UNITED STATES, INC.
FIXYOURCAR
1:34:59 AM Page 9
Hard soldering
--> Work Procedures Legend
Work Procedures Legend
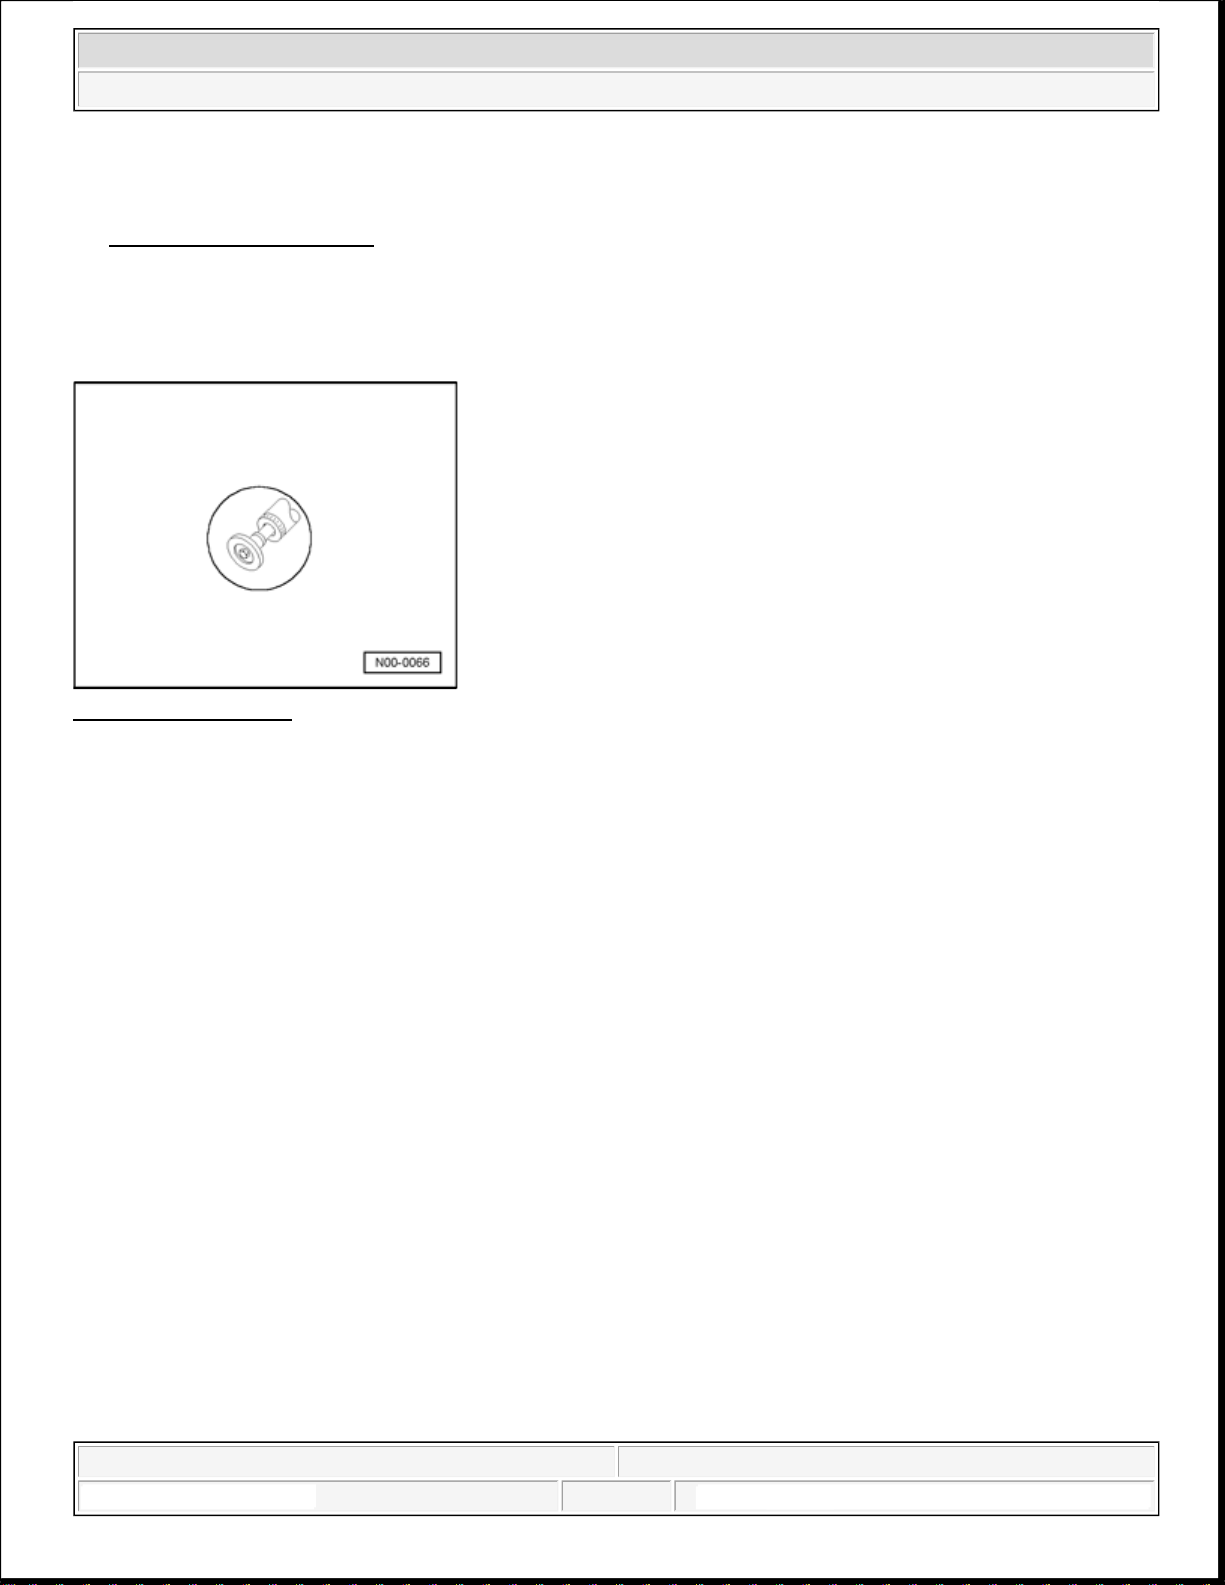
Sanding
2008 Audi A6 Quattro
Accessories and Body, Cab Body Collision Repair
ig. 3: Grind Symbol
F
Courtesy of VOLKSWAGEN UNITED STATES, INC.
Wear away weld seam with a grinder around material application.
NOTE:
The weld seams must be sanded so that the panel strength of the exterior
panels is not or only slightly weakened.
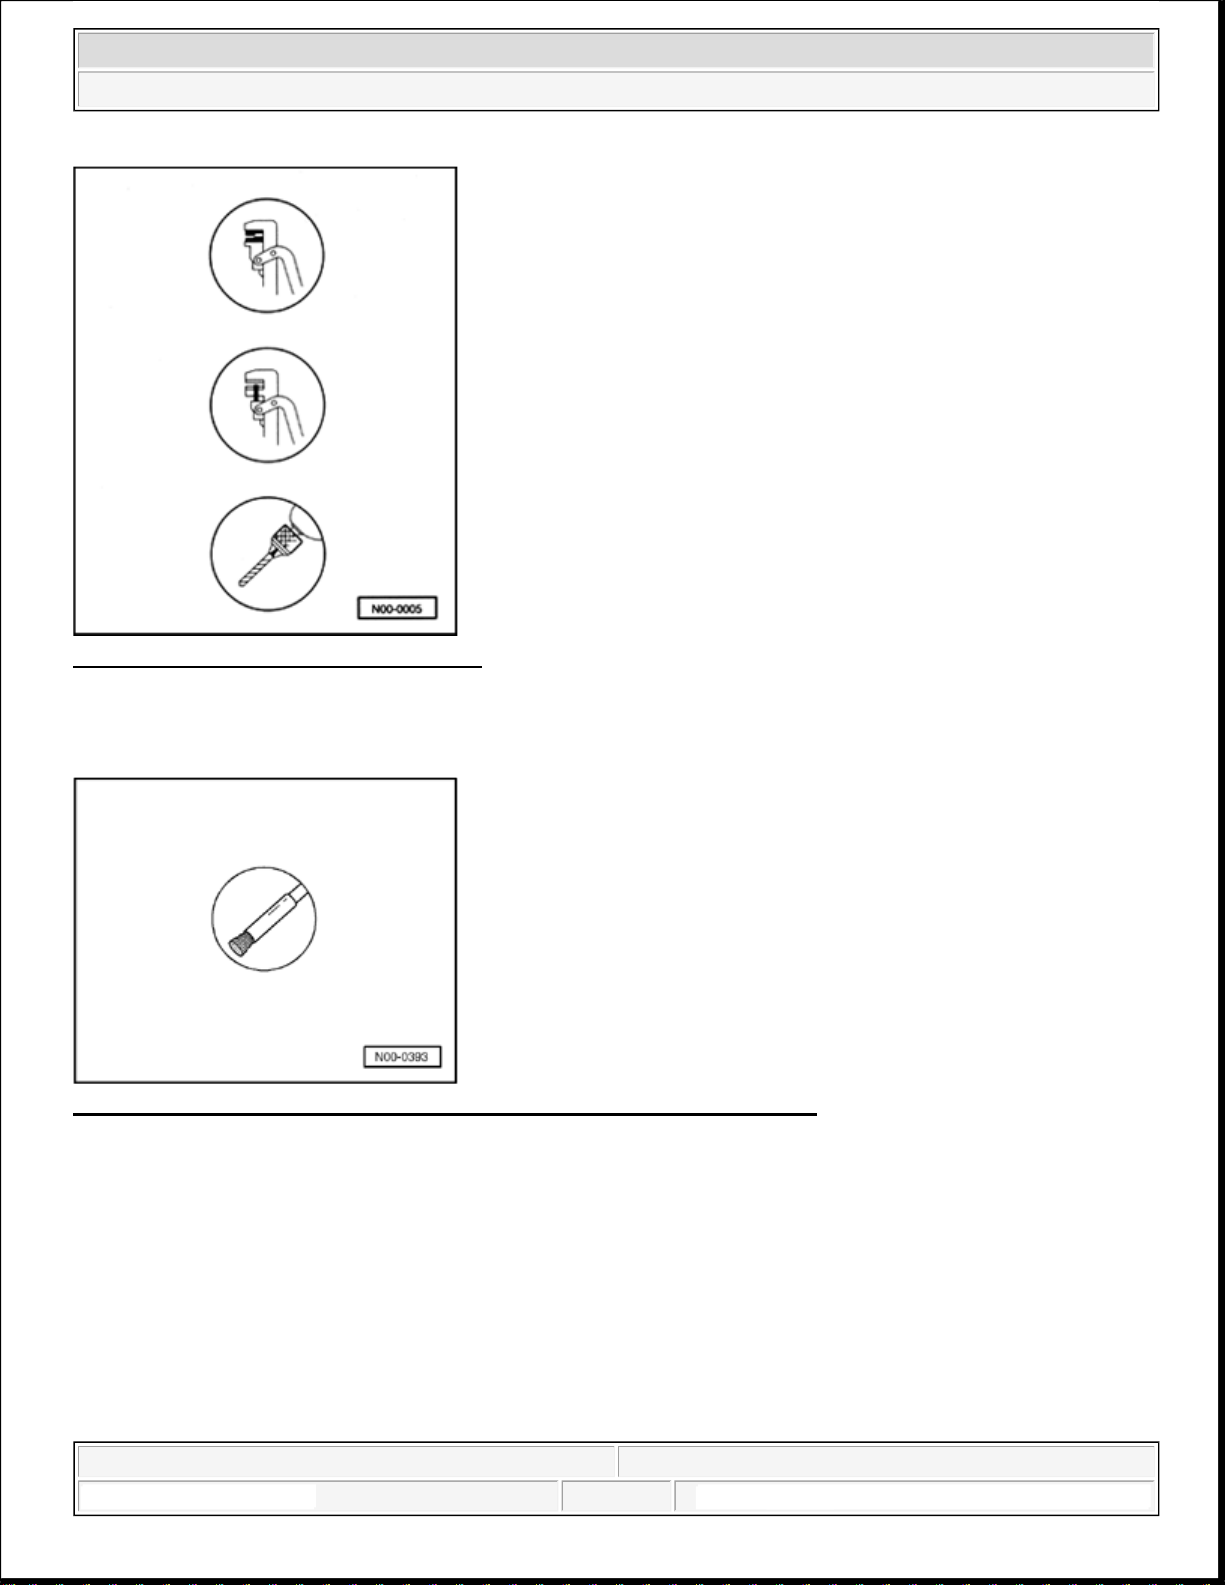
Set an Edge
To perform an overlapping weld.
Perforate
To perform a gas-shielded arc plug weld later.
Drill
FIXYOURCAR
1:34:59 AM Page 10
Removing paint on hard
-to-
reach areas (e.g. interior roof frame) with brush VAS 5182.
2008 Audi A6 Quattro
Accessories and Body, Cab Body Collision Repair
Fig. 4: Offset, Punch And Drill Symbols
Courtesy of VOLKSWAGEN UNITED STATES, INC.
To perform a gas-shielded arc plug weld later or drill out spot welds (original connection).
Fig. 5: Removing Paint On Hard
-To-Reach Areas With Brush VAS 5182
Courtesy of VOLKSWAGEN UNITED STATES, INC.
Sanding
FIXYOURCAR
1:34:59 AM Page 11
Hole pliers V.A.G 1329
The following tools are organized according to V.A.G / VAS numbers.
2008 Audi A6 Quattro
Accessories and Body, Cab Body Collision Repair
Fig. 6: Cavity Conservation Symbol
Courtesy of VOLKSWAGEN UNITED STATES, INC.
Cavity Sealant
Adhesives
Fig. 7: Bond & Seal Symbols
Courtesy of VOLKSWAGEN UNITED STATES, INC.
Fine Seal
BODY REPAIR TOOLS
NOTE:
Special tools, testers and auxiliary items required
FIXYOURCAR
1:34:59 AM Page 12

2008 Audi A6 Quattro
Accessories and Body, Cab Body Collision Repair
Fig. 8: Basic Equipment V.A.G 1366/3
Courtesy of VOLKSWAGEN UNITED STATES, INC.
Basic equipment V.A.G 1366/3
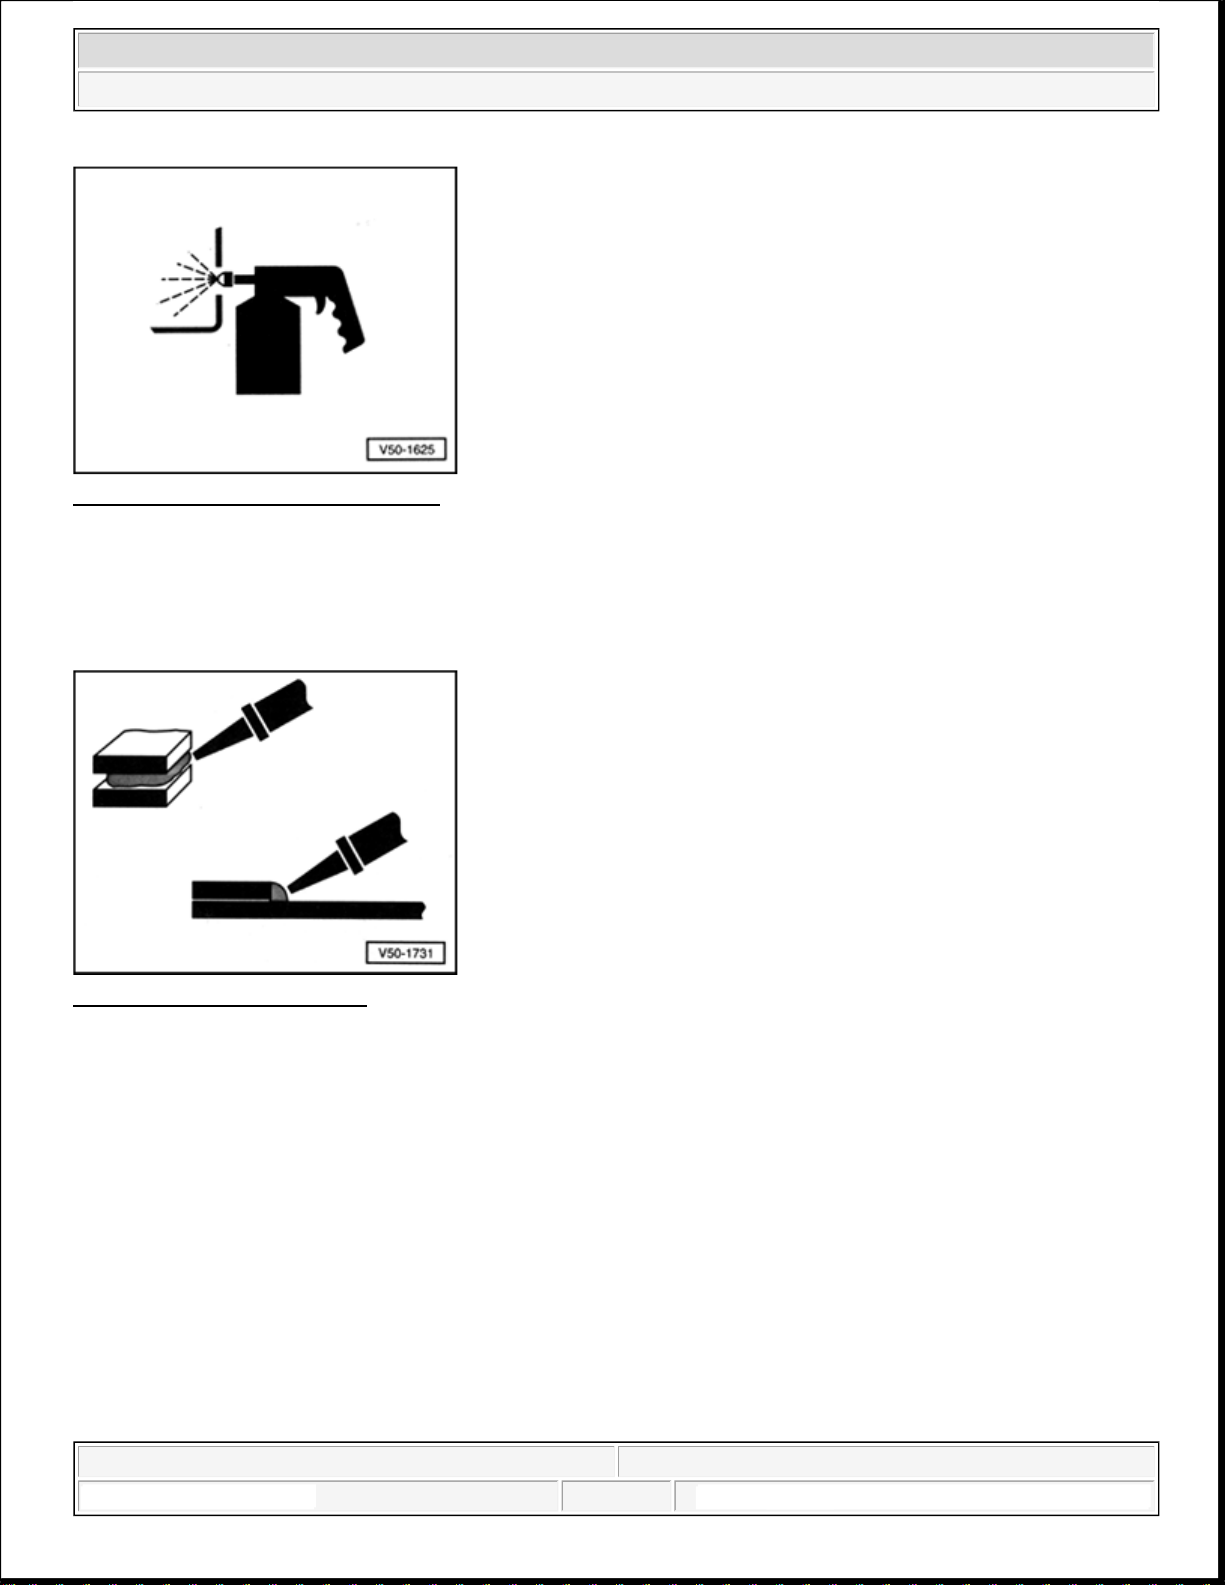
Fig. 9: Undersealant Spray Gun V.A.G 1379
Courtesy of VOLKSWAGEN UNITED STATES, INC.
Undersealant spray gun V.A.G 1379
Fig. 10: Identifying Heat Gun V.A.G 1416
Courtesy of VOLKSWAGEN UNITED STATES, INC.
FIXYOURCAR
1:34:59 AM Page 13
Heat gun V.A.G 1416
Body tool trolley V.A.G 1439
2008 Audi A6 Quattro
Accessories and Body, Cab Body Collision Repair
Fig. 11: Door Tensioner V.A.G 1438
Courtesy of VOLKSWAGEN UNITED STATES, INC.
Door tensioner V.A.G 1438
Fig. 12: Body Tool Trolley V.A.G 1439
Courtesy of VOLKSWAGEN UNITED STATES, INC.
FIXYOURCAR
1:34:59 AM Page 14
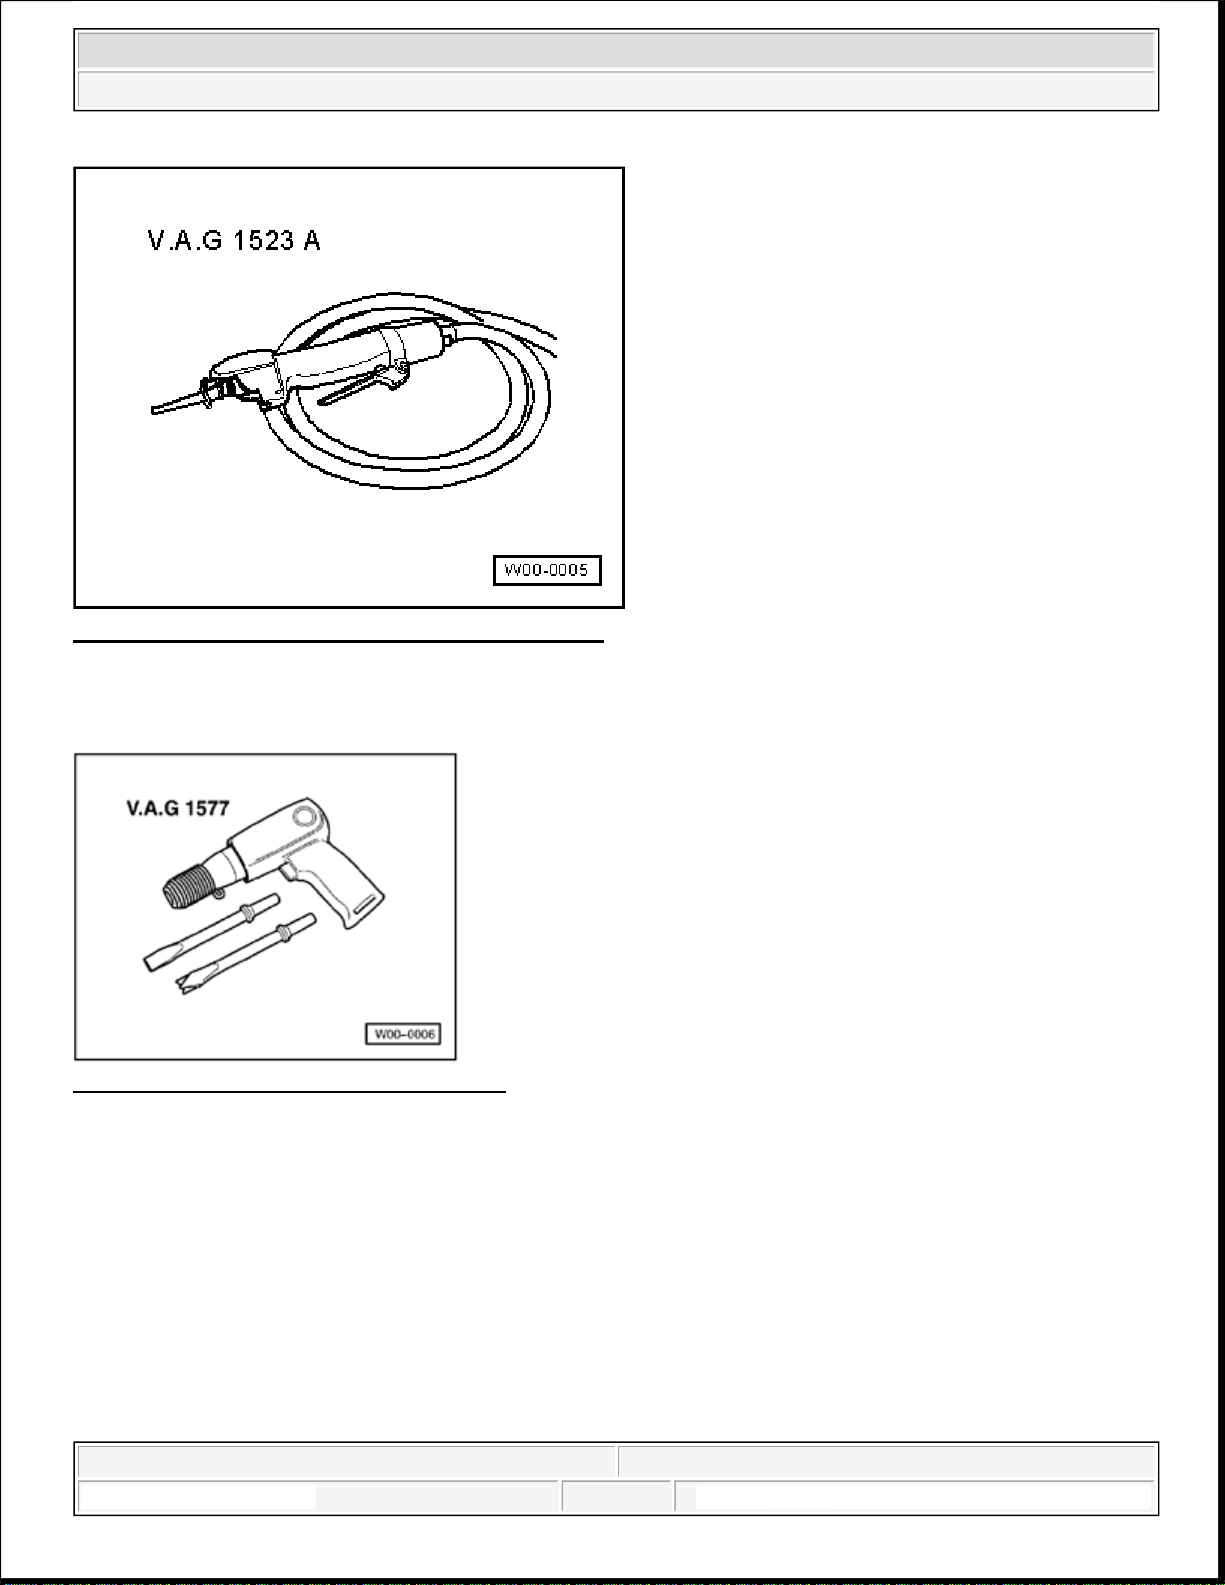
Compressed
-
air chisel V.A.G 1577
2008 Audi A6 Quattro
Accessories and Body, Cab Body Collision Repair
Fig. 13: Identifying Body Repair Saw V.A.G 1523 A
Courtesy of VOLKSWAGEN UNITED STATES, INC.
Body repair saw V.A.G 1523 A
Fig. 14: Pneumatic Hammer (V.A.G 1577)
Courtesy of VOLKSWAGEN UNITED STATES, INC.
FIXYOURCAR
1:34:59 AM Page 15
2008 Audi A6 Quattro
Accessories and Body, Cab Body Collision Repair
Fig. 15: Flange Finishing Iron V.A.G 1585
Courtesy of VOLKSWAGEN UNITED STATES, INC.
Flange finishing iron V.A.G 1585
Fig. 16: Welding Emission Exhaust System V.A.G 1586
Courtesy of VOLKSWAGEN UNITED STATES, INC.
Welding emission exhaust system V.A.G 1586
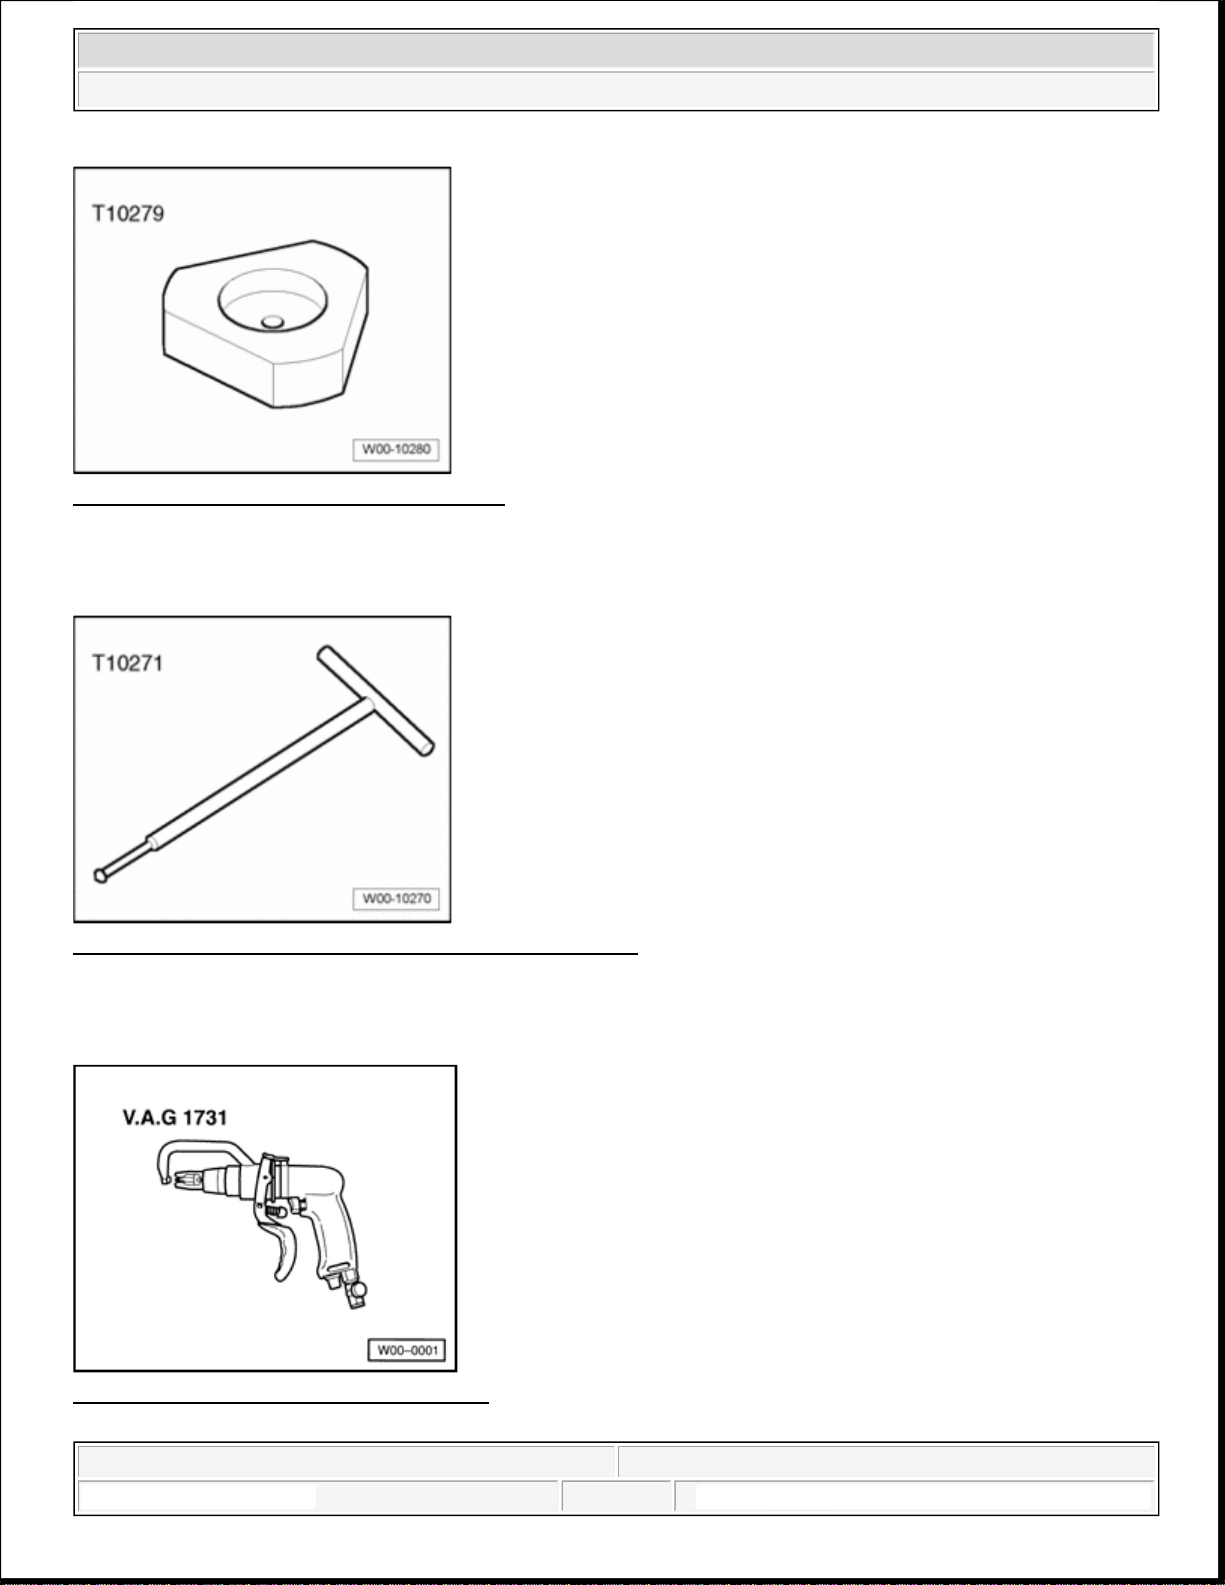
Fig. 17: Spot Weld Remover V.A.G 1731
Courtesy of VOLKSWAGEN UNITED STATES, INC.
FIXYOURCAR
1:34:59 AM Page 16
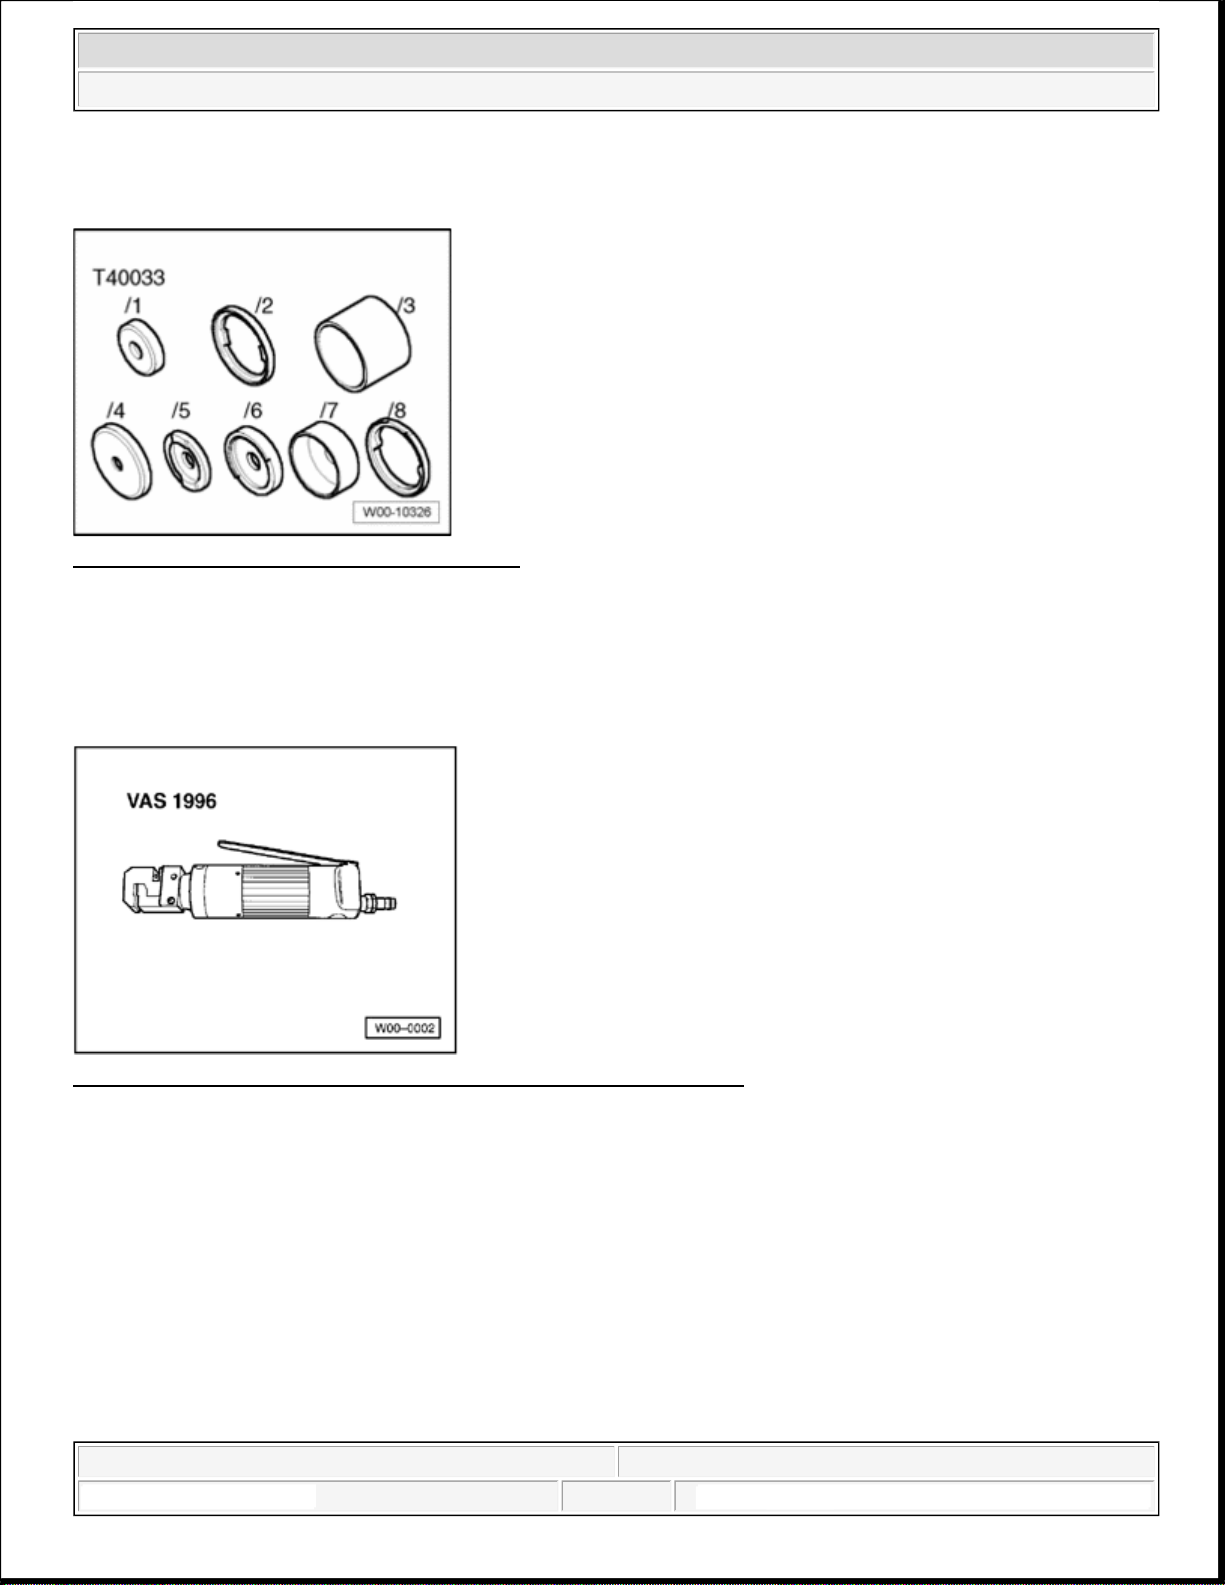
Compressed air punch pliers and edge setter VAS 1996
Accessories and Body, Cab Body Collision Repair
Spot weld remover V.A.G 1731
2008 Audi A6 Quattro
Fig. 18: Compressed Air Gun V.A.G 1761/1
Courtesy of VOLKSWAGEN UNITED STATES, INC.
Compressed air gun V.A.G 1761/1
Compressed air gun for producing seals and undercoating with factory-original optical characteristics.
Also, all 310 ml cartridges can be used with this gun.
Fig. 19: Compressed Air Punch Pliers And Edge Setter VAS 1996
Courtesy of VOLKSWAGEN UNITED STATES, INC.
FIXYOURCAR
1:34:59 AM Page 17
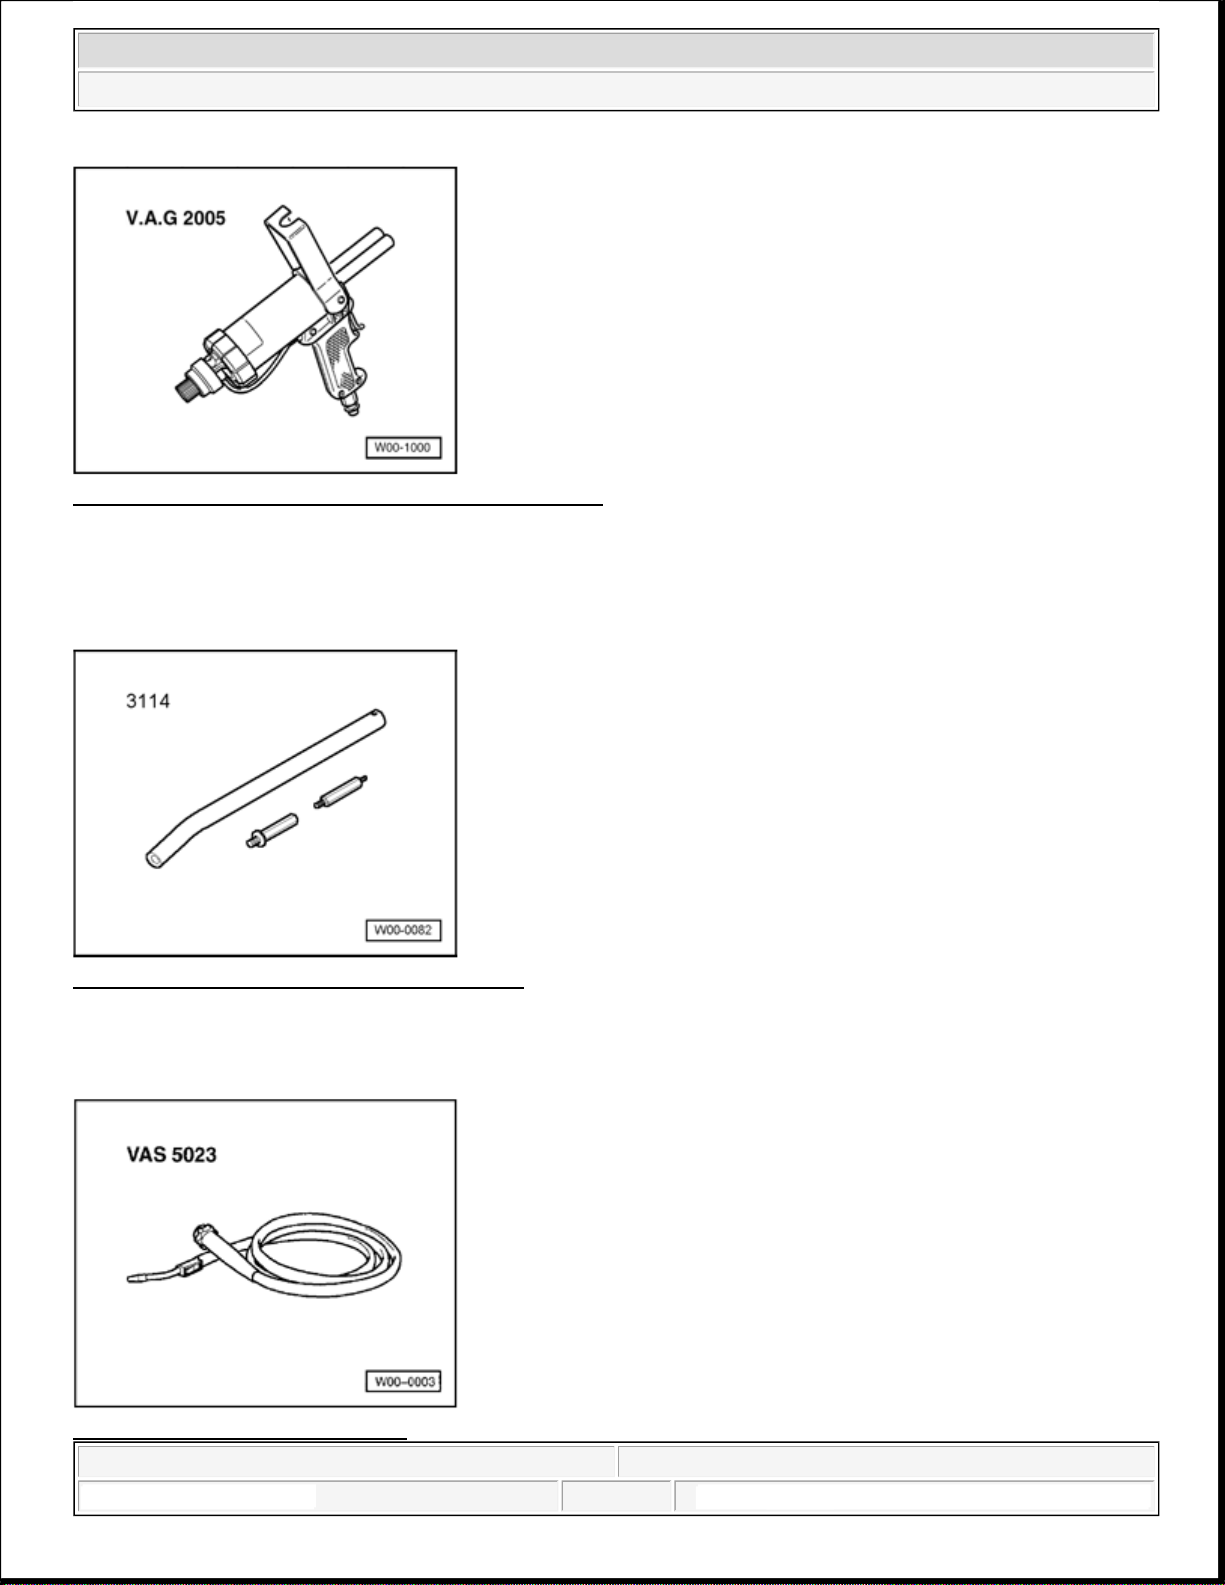
Fig. 22: Hose Packet (VAS 5023)
2008 Audi A6 Quattro
Accessories and Body, Cab Body Collision Repair
Fig. 20: Compressed-Air Adhesive Gun V.A.G 2005
Courtesy of VOLKSWAGEN UNITED STATES, INC.
Compressed-air adhesive gun V.A.G 2005
For body adhesive
Fig. 21: Door Hinge Replacement Stud 3114
Courtesy of VOLKSWAGEN UNITED STATES, INC.
Door hinge replacement stud 3114
FIXYOURCAR
1:34:59 AM Page 18
Courtesy of VOLKSWAGEN UNITED STATES, INC.
Hose package VAS 5023
Nozzle set 5023/1
Angle sander VAS 5174
710 Watt; 115 mm
Angle sander VAS 5175
1500 Watt; 180 mm
2008 Audi A6 Quattro
Accessories and Body, Cab Body Collision Repair
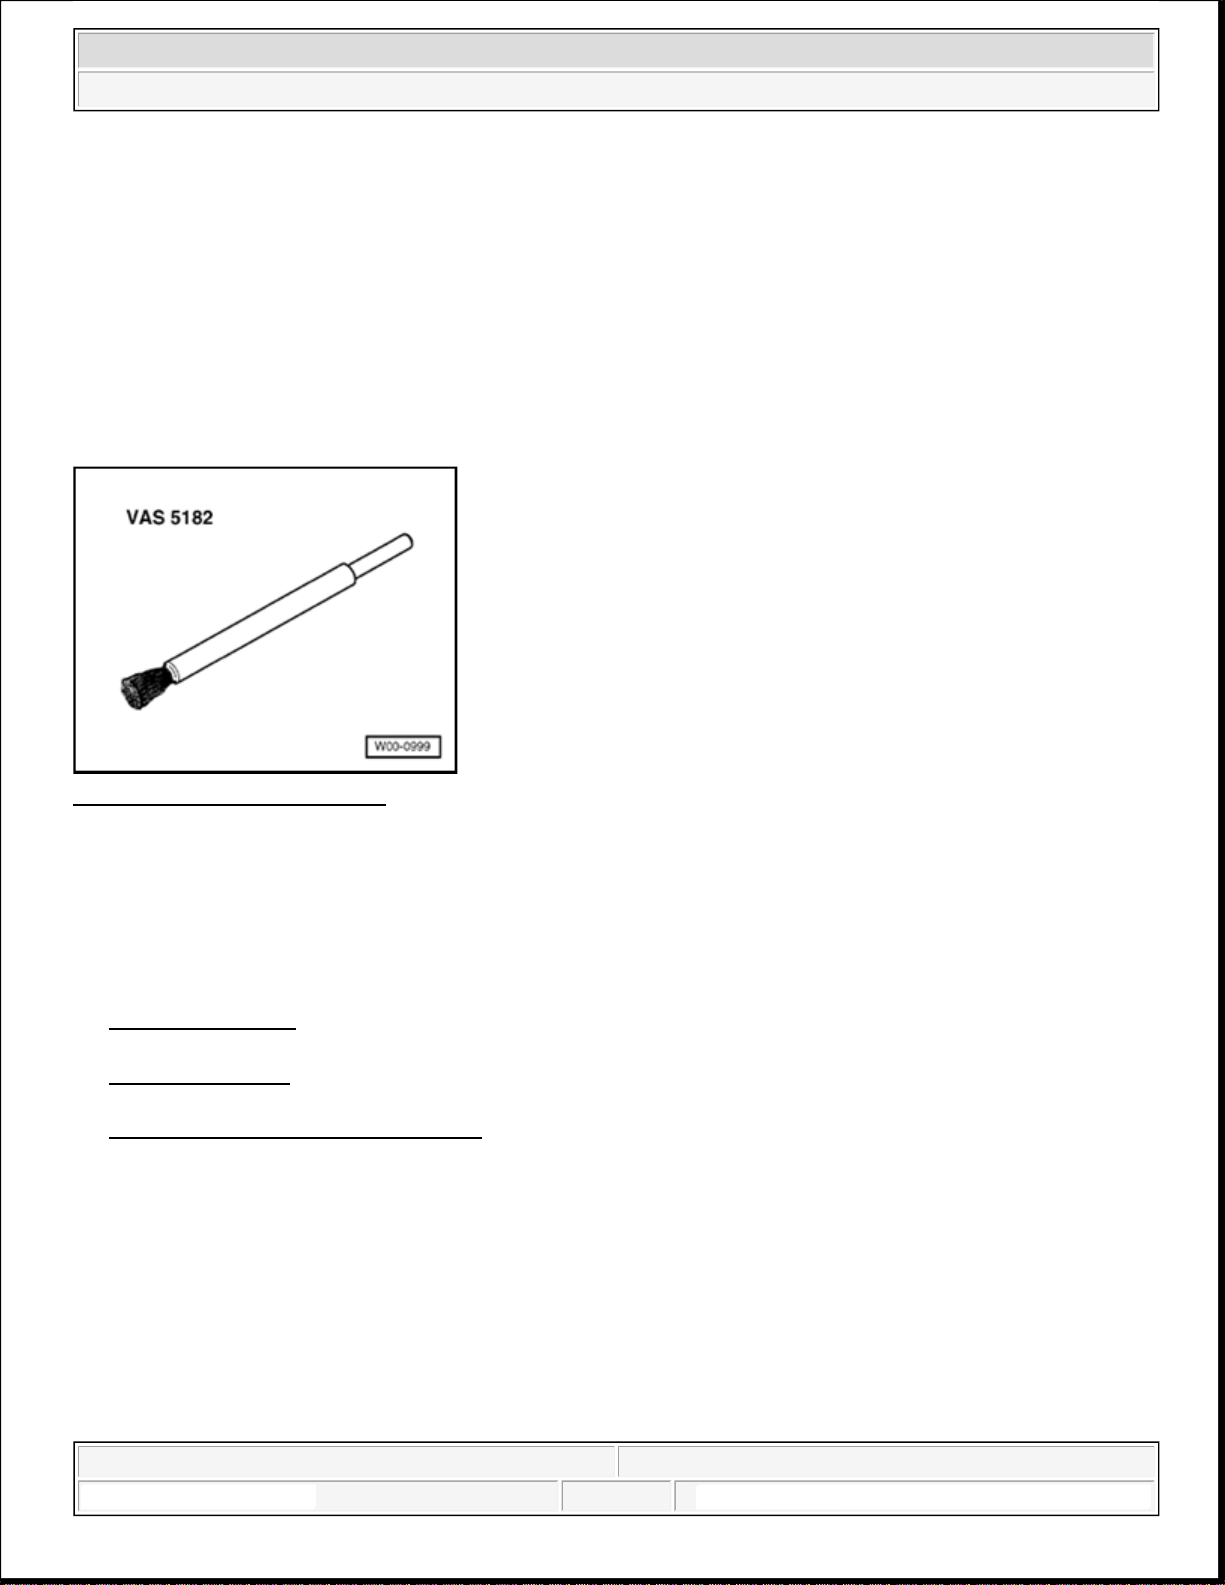
Fig. 23: Wire Brush VAS 5182
Courtesy of VOLKSWAGEN UNITED STATES, INC.
Brush VAS 5182
For removing paint in hard-to-reach places (e.g. interior roof frame)
BONDED BODY JOINTS
--> Supporting Bonds
--> Types of Bonding
--> Repair Methods for Replacing Parts
Supporting Bonds
The following procedure is used when repairing bonded points:
Separating procedure:
FIXYOURCAR
1:34:59 AM Page 19
2008 Audi A6 Quattro
Accessories and Body, Cab Body Collision Repair
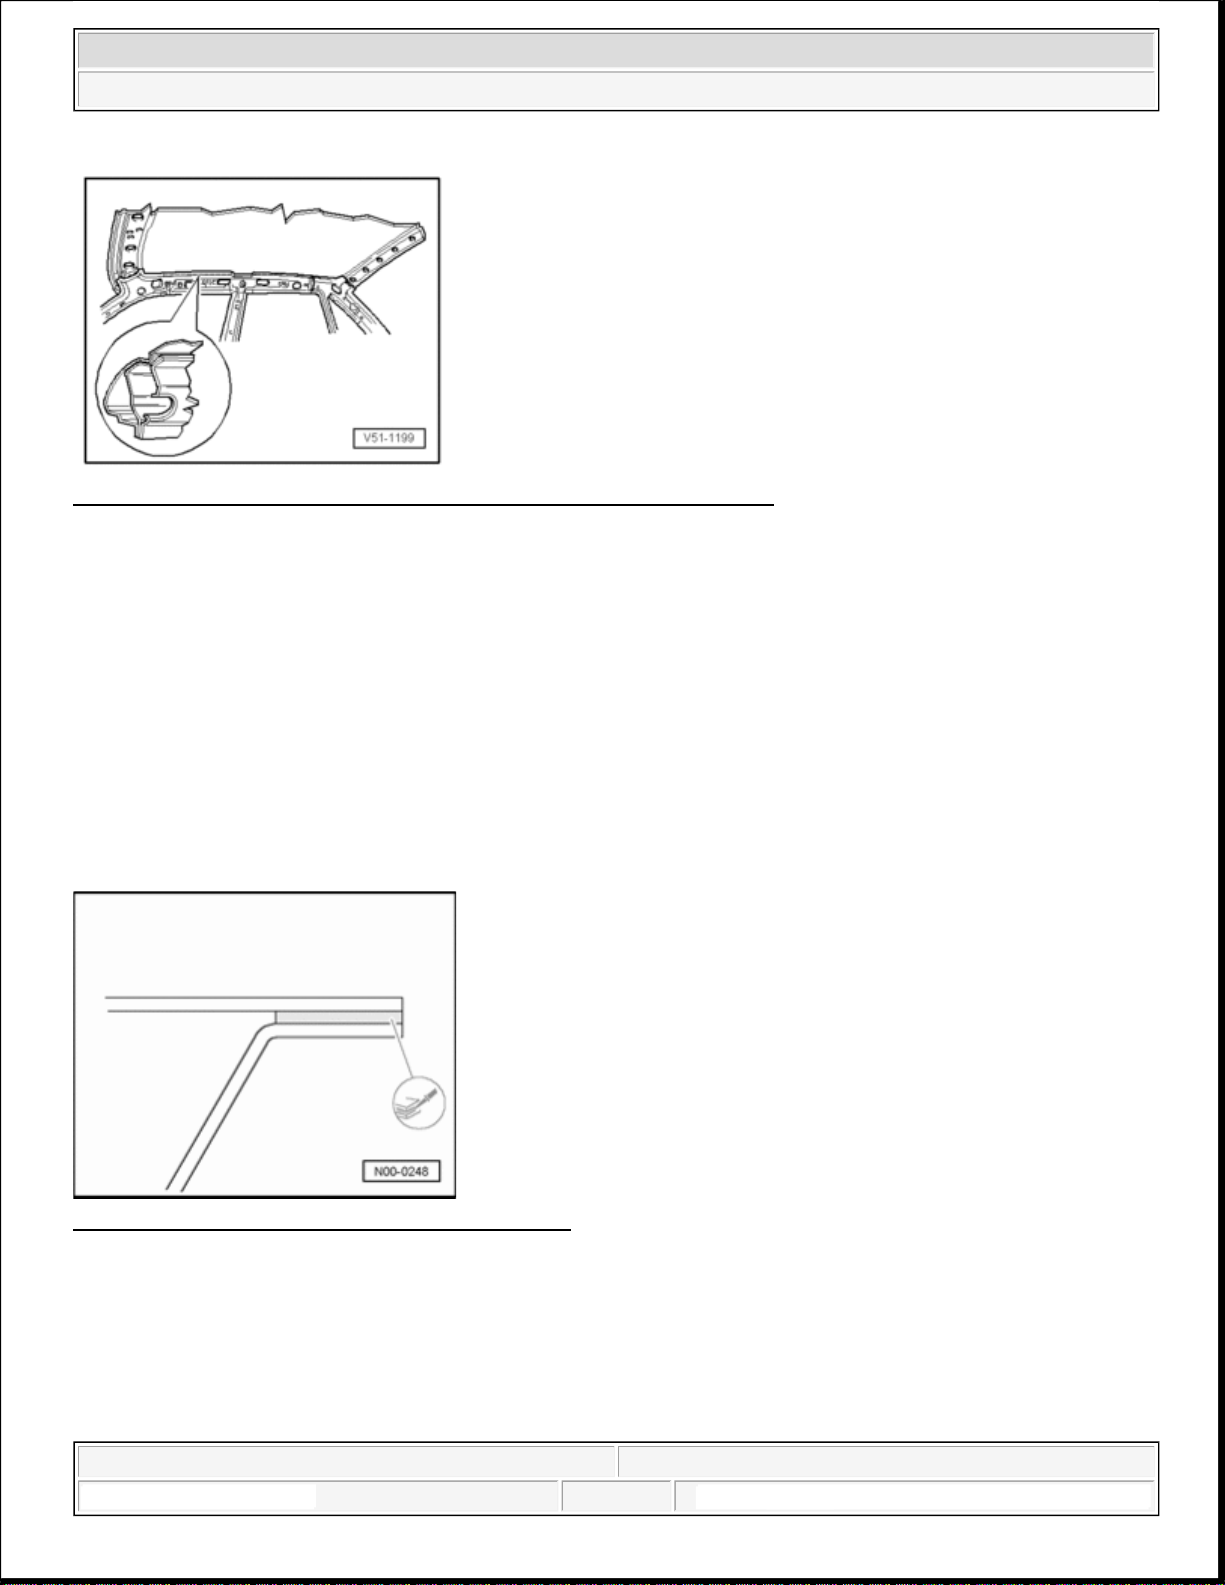
Fig. 24: Roughly Cutting Out Roof To Gain Access To Bonded Point
Courtesy of VOLKSWAGEN UNITED STATES, INC.
Roughly cut out roof to gain access to the bonded point.
Cut through bonded point with oscillating knife.
Types of Bonding
To increase body rigidity and strength, adhesive and spot-weld bonded joints are being increasingly used in
production. They are differentiated as follows:
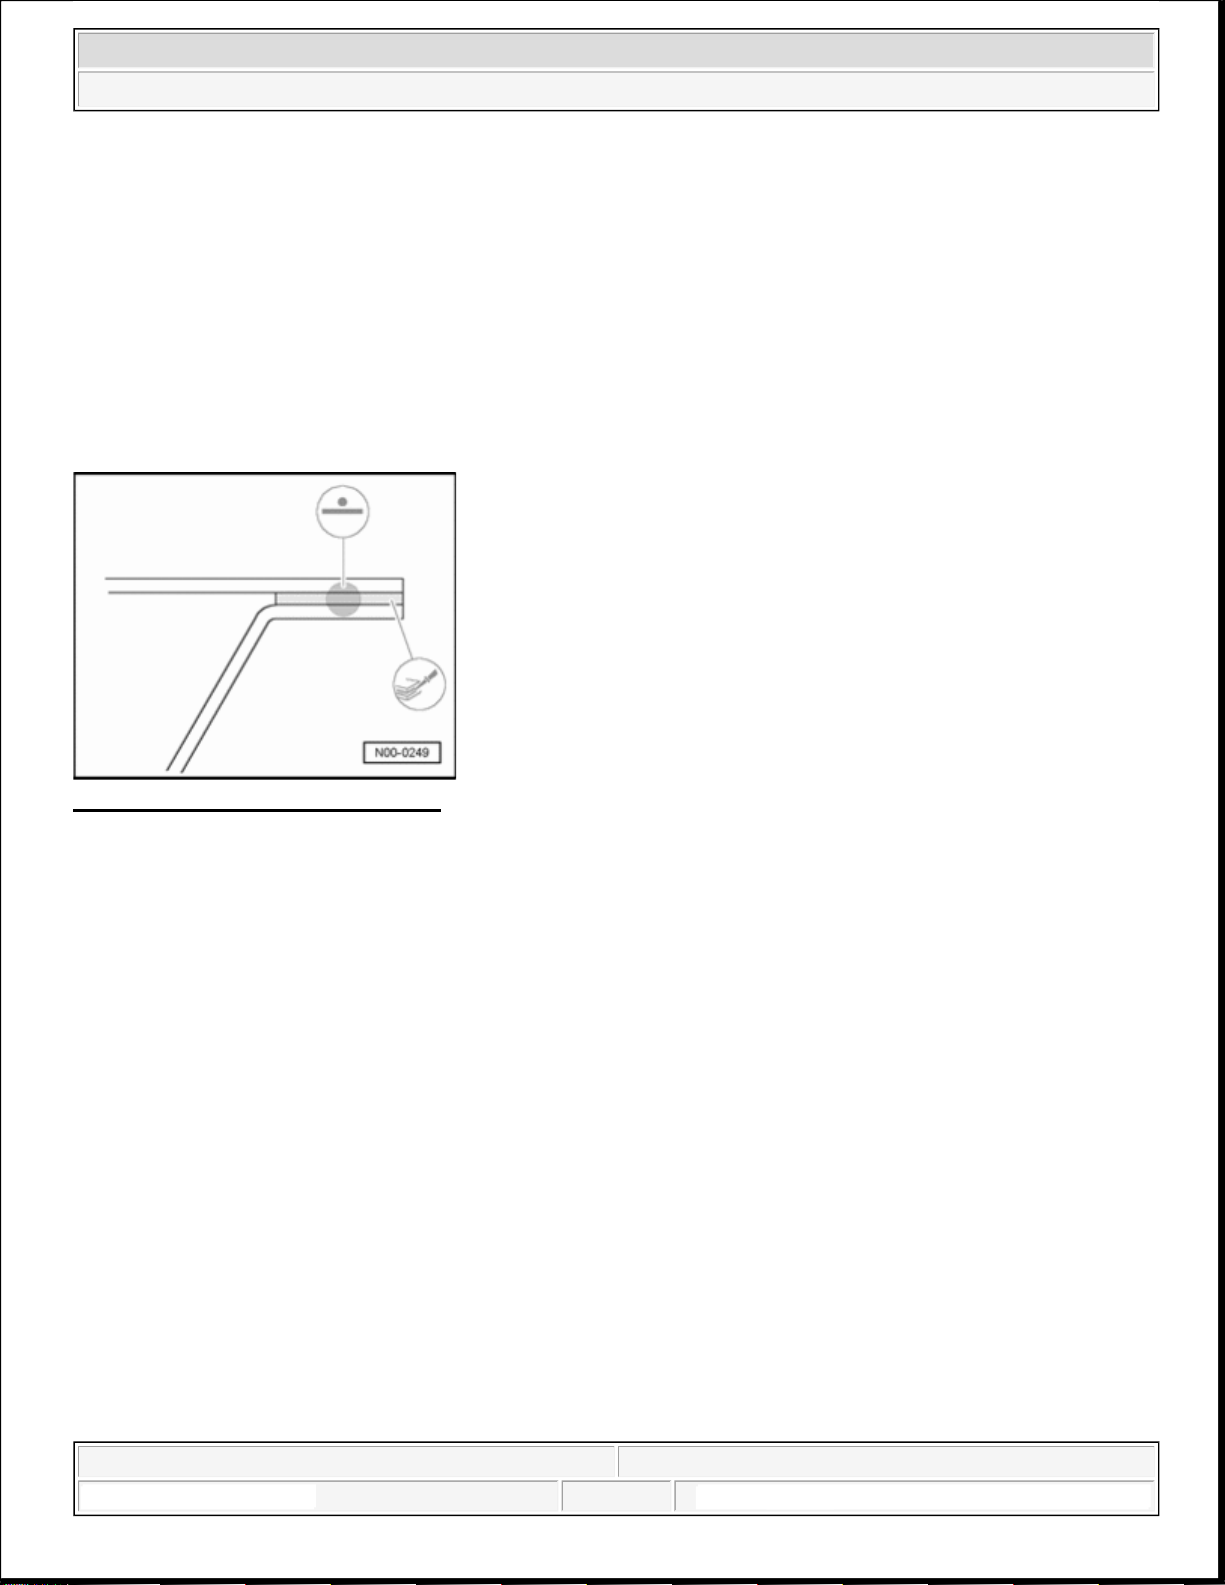
High-Strength bonded joints
In bonded joints, the sheet metal parts are only bonded by adhesive.
Fig. 25: Strength Bonded Joints (Adhesive Only)
Courtesy of VOLKSWAGEN UNITED STATES, INC.
The distance of the high-strength adhesive surfaces to each should not be less than 2 mm or greater than 4 mm.
If necessary, the adhesive surfaces must be prepared.
Repair measures
FIXYOURCAR
1:34:59 AM Page 20
2008 Audi A6 Quattro
Accessories and Body, Cab Body Collision Repair
The bonded joints are restored with the materials specified in the repair information or replacement parts
program.
Spot-weld bonded joints
In spot-welded bonded joints, an electrically conductive adhesive is used between the panels, allowing good
root penetration for spot welding.
The distance of the spot-weld surfaces to each other should not be greater than 1 mm. If necessary, the adhesive
surfaces must be prepared.
Fig. 26: Spot Welded Bonded Joints
Courtesy of VOLKSWAGEN UNITED STATES, INC.
The welding current must not be increased for spot-weld bonding operations. The pre-press period must be
extended to approx. 30 - 50 cycles because of the displacement of the adhesive. The fumes produced must be
exhausted.
Repair Methods for Replacing Parts
Adhesive DA 001 730 A should be used in connection with compressed-air adhesive gun V.A.G 2005 as
eplacement for spot-weld adhesive.
r
For simultaneous bonding and welding, the procedures are differentiated according to the type of weld (spot
weld, gas-shielded weld) as follows:
Straight-line spot weld and bonding
With spot welding and bonding, the entire area of spot welds and bonding is replaced when making repairs, as
in production.
With welding problems, e.g. there is a 3-layer panel connection and only the outer panel is replaced, the repair
spot weld should be placed on the "old" spot weld.
Gas-shielded welding and bonding (if spot welding is not possible)
FIXYOURCAR
1:34:59 AM Page 21

If an adhesion area is not accessible with a straight
-
line spot welding device, the area is welded with a gas
-
On vehicles with highest strength steel, spot welding devices with inverter technology (see workshop equipment
press out a bead about 5 cm. long. Then apply adhesive to adhesive surface.
2008 Audi A6 Quattro
Accessories and Body, Cab Body Collision Repair
shielded arc plug weld seam.
In this case, adhesive is done without in order to maintain the welding bead. The gas-shielded arc plug weld
distance is 15 mm.
Gas-shielded welding
SG 2 welding wire is suitable all steel types.
For variations, see 00
- TECHNICAL DATA .
and special tools catalog) are to be used.
Welding emission exhaust system
For spot welding in conjunction with spot weld adhesive, the same standard exhaust system is used as with
welding galvanized panels.
Preparation
The panels to be welded must be fitted before applying adhesive.
Due to adhesive displacement when spot welding, the bare spot weld flange is coated with adhesive and thus
protected from corrosion.
The adhesive surfaces in the welding area must be free of primer and adhesive residue and well as dust and
grease.
Our vacuum device VAS 6216 is recommended for this.
Reconditioning
Wipe escaping adhesive.
Corrosion protection measure Surface technology / chemical materials binder
Paint structure Surface technology / chemical materials binder
DA 001 730 A1 instructions for use
If the adhesive escapes on both sides along the entire length, too much was applied.
On large parts, such as the roof, it is necessary to perform the work with a helper. Otherwise the adhesive
will dry before work is complete.
Before inserting mixing nozzle, ensure double cartridge openings are clean. Secure mixing nozzle and
FIXYOURCAR
1:34:59 AM Page 22
 Loading...