

Page 1
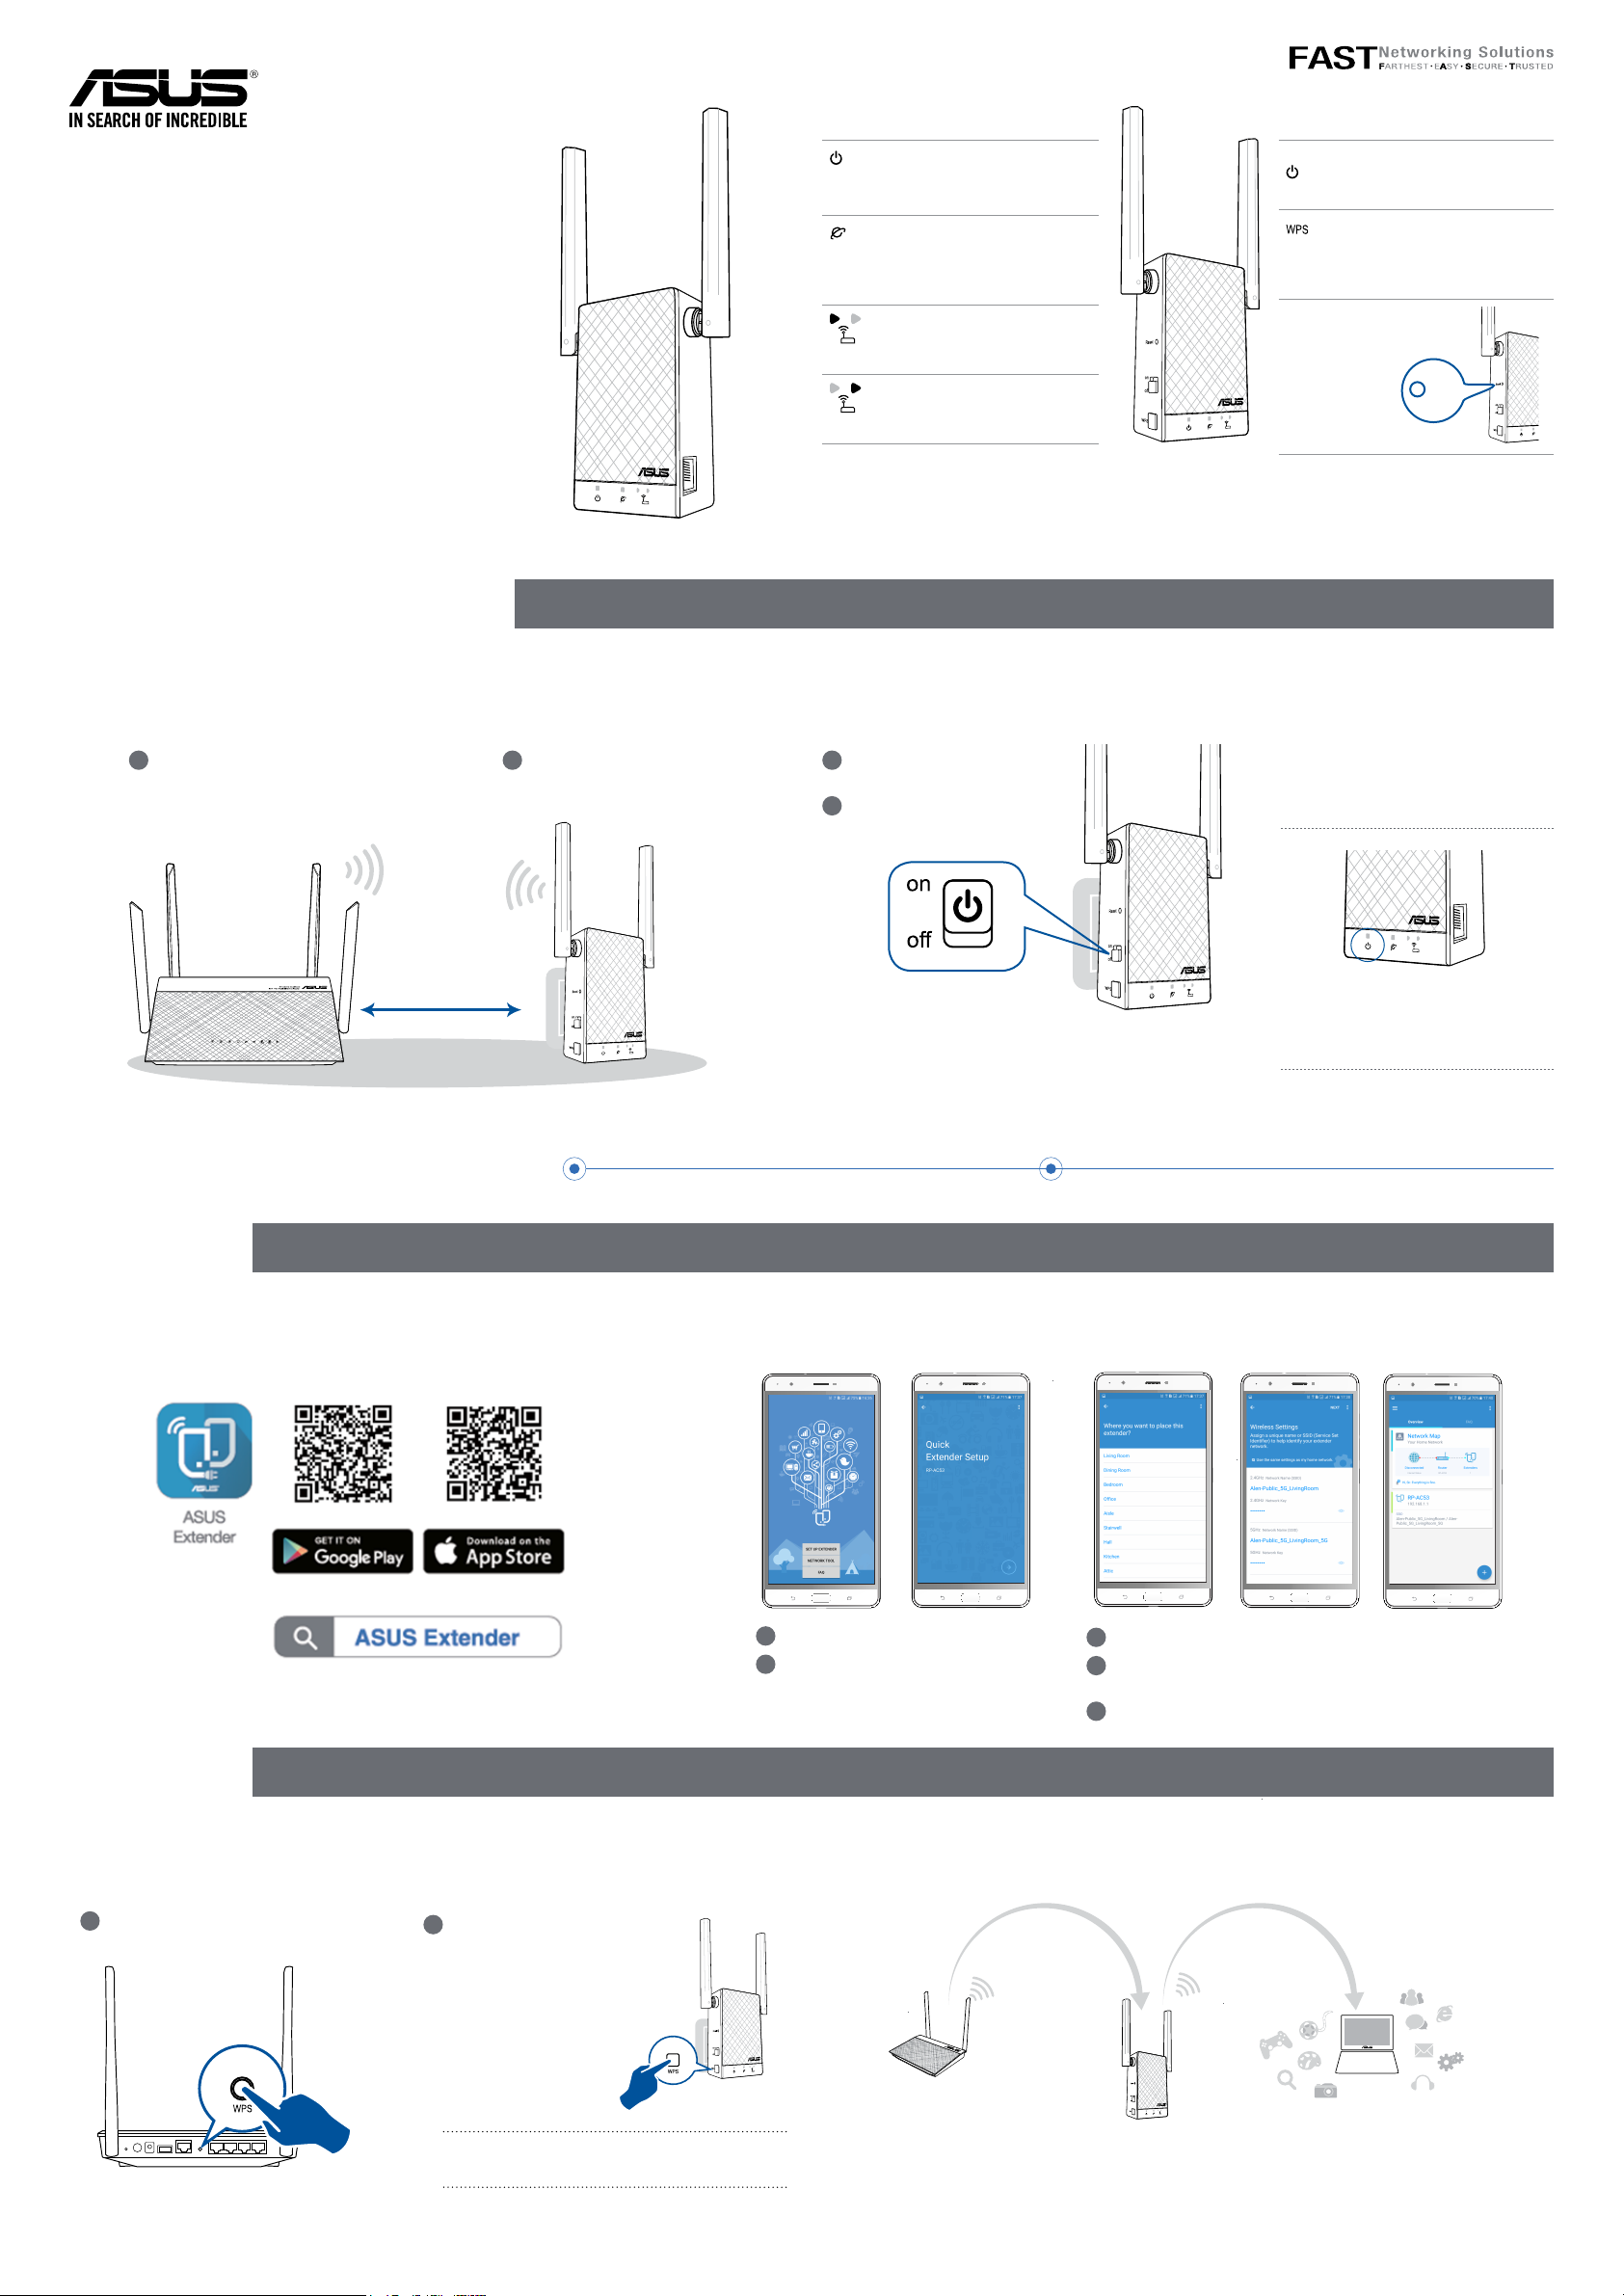
LED explanations
Button explanations
Quick
Start Guide
RP-AC55
Wireless AC1200 Repeater
E12399 / First Edition / March 2017
BEFORE SETUP
01
Placing your RP-AC55
WE SUGGEST...
POWER
On: RP-AC55 is power on.
Off: RP-AC55 is power off.
EXISTING NETWORK
On: Connected to the router/AP.
Off: Not connected to the
router/AP.
MOVE CLOSER
Need to move RP-AC55 closer
to the router/AP.
MOVE AWAY SLIGHTLY
Need to move RP-AC55 slightly
away from the router/AP.
02
Power On
POWER SWITCH
Switch this button on/off to turn
RP-AC55 on/off.
WPS BUTTON
Press this button to quickly
connect to the router/AP via the
WPS method.
RESET
BUTTON
Use a pin
to push this
button to reset
RP-AC55 to
its factory default settings.
Reset
1
Place your RP-AC55 near your
router/AP.
around 2 meters
2
SETUP METHODS
METHOD
APP SUPPORT
1
Check the LEDs and see the
LED explanations.
1 Plug your RP-AC55 to a
power outlet.
2
Turn on the power switch.
Wait until the power LED turns blue,
indicating that your RP-AC55 is ready to
connect to your existing router/AP.
01
Download the app
METHOD
01
Connect via WPS
WPS SUPPORT
2
02
Use the app
1
Tap SET UP EXTENDER.
2
Open your phone Wi-Fi, and connect
to your RP-AC55’s SSID.
02
Enjoy Wi-Fi
3
Follow the Quick Extender Setup instructions.
4
Assign a unique network name (SSID) for your extended
network.
5
Wait until the setup is completed.
1
Press the WPS button on your
router/AP.
2
Press the WPS
button on your
RP-AC55 for
more than two (2)
seconds until the
power LED starts
to blink.
NOTE: Wait until the existing network LED blinks
for about two (2) minutes, then turns solid blue,
indicating the WPS process is completed.
Your RP-AC55’s wireless network name (SSID) changes to your existing Wi-Fi network name,
ending with _RPT or _RPT5G and shares your router/AP’s Wireless Password.
Page 2
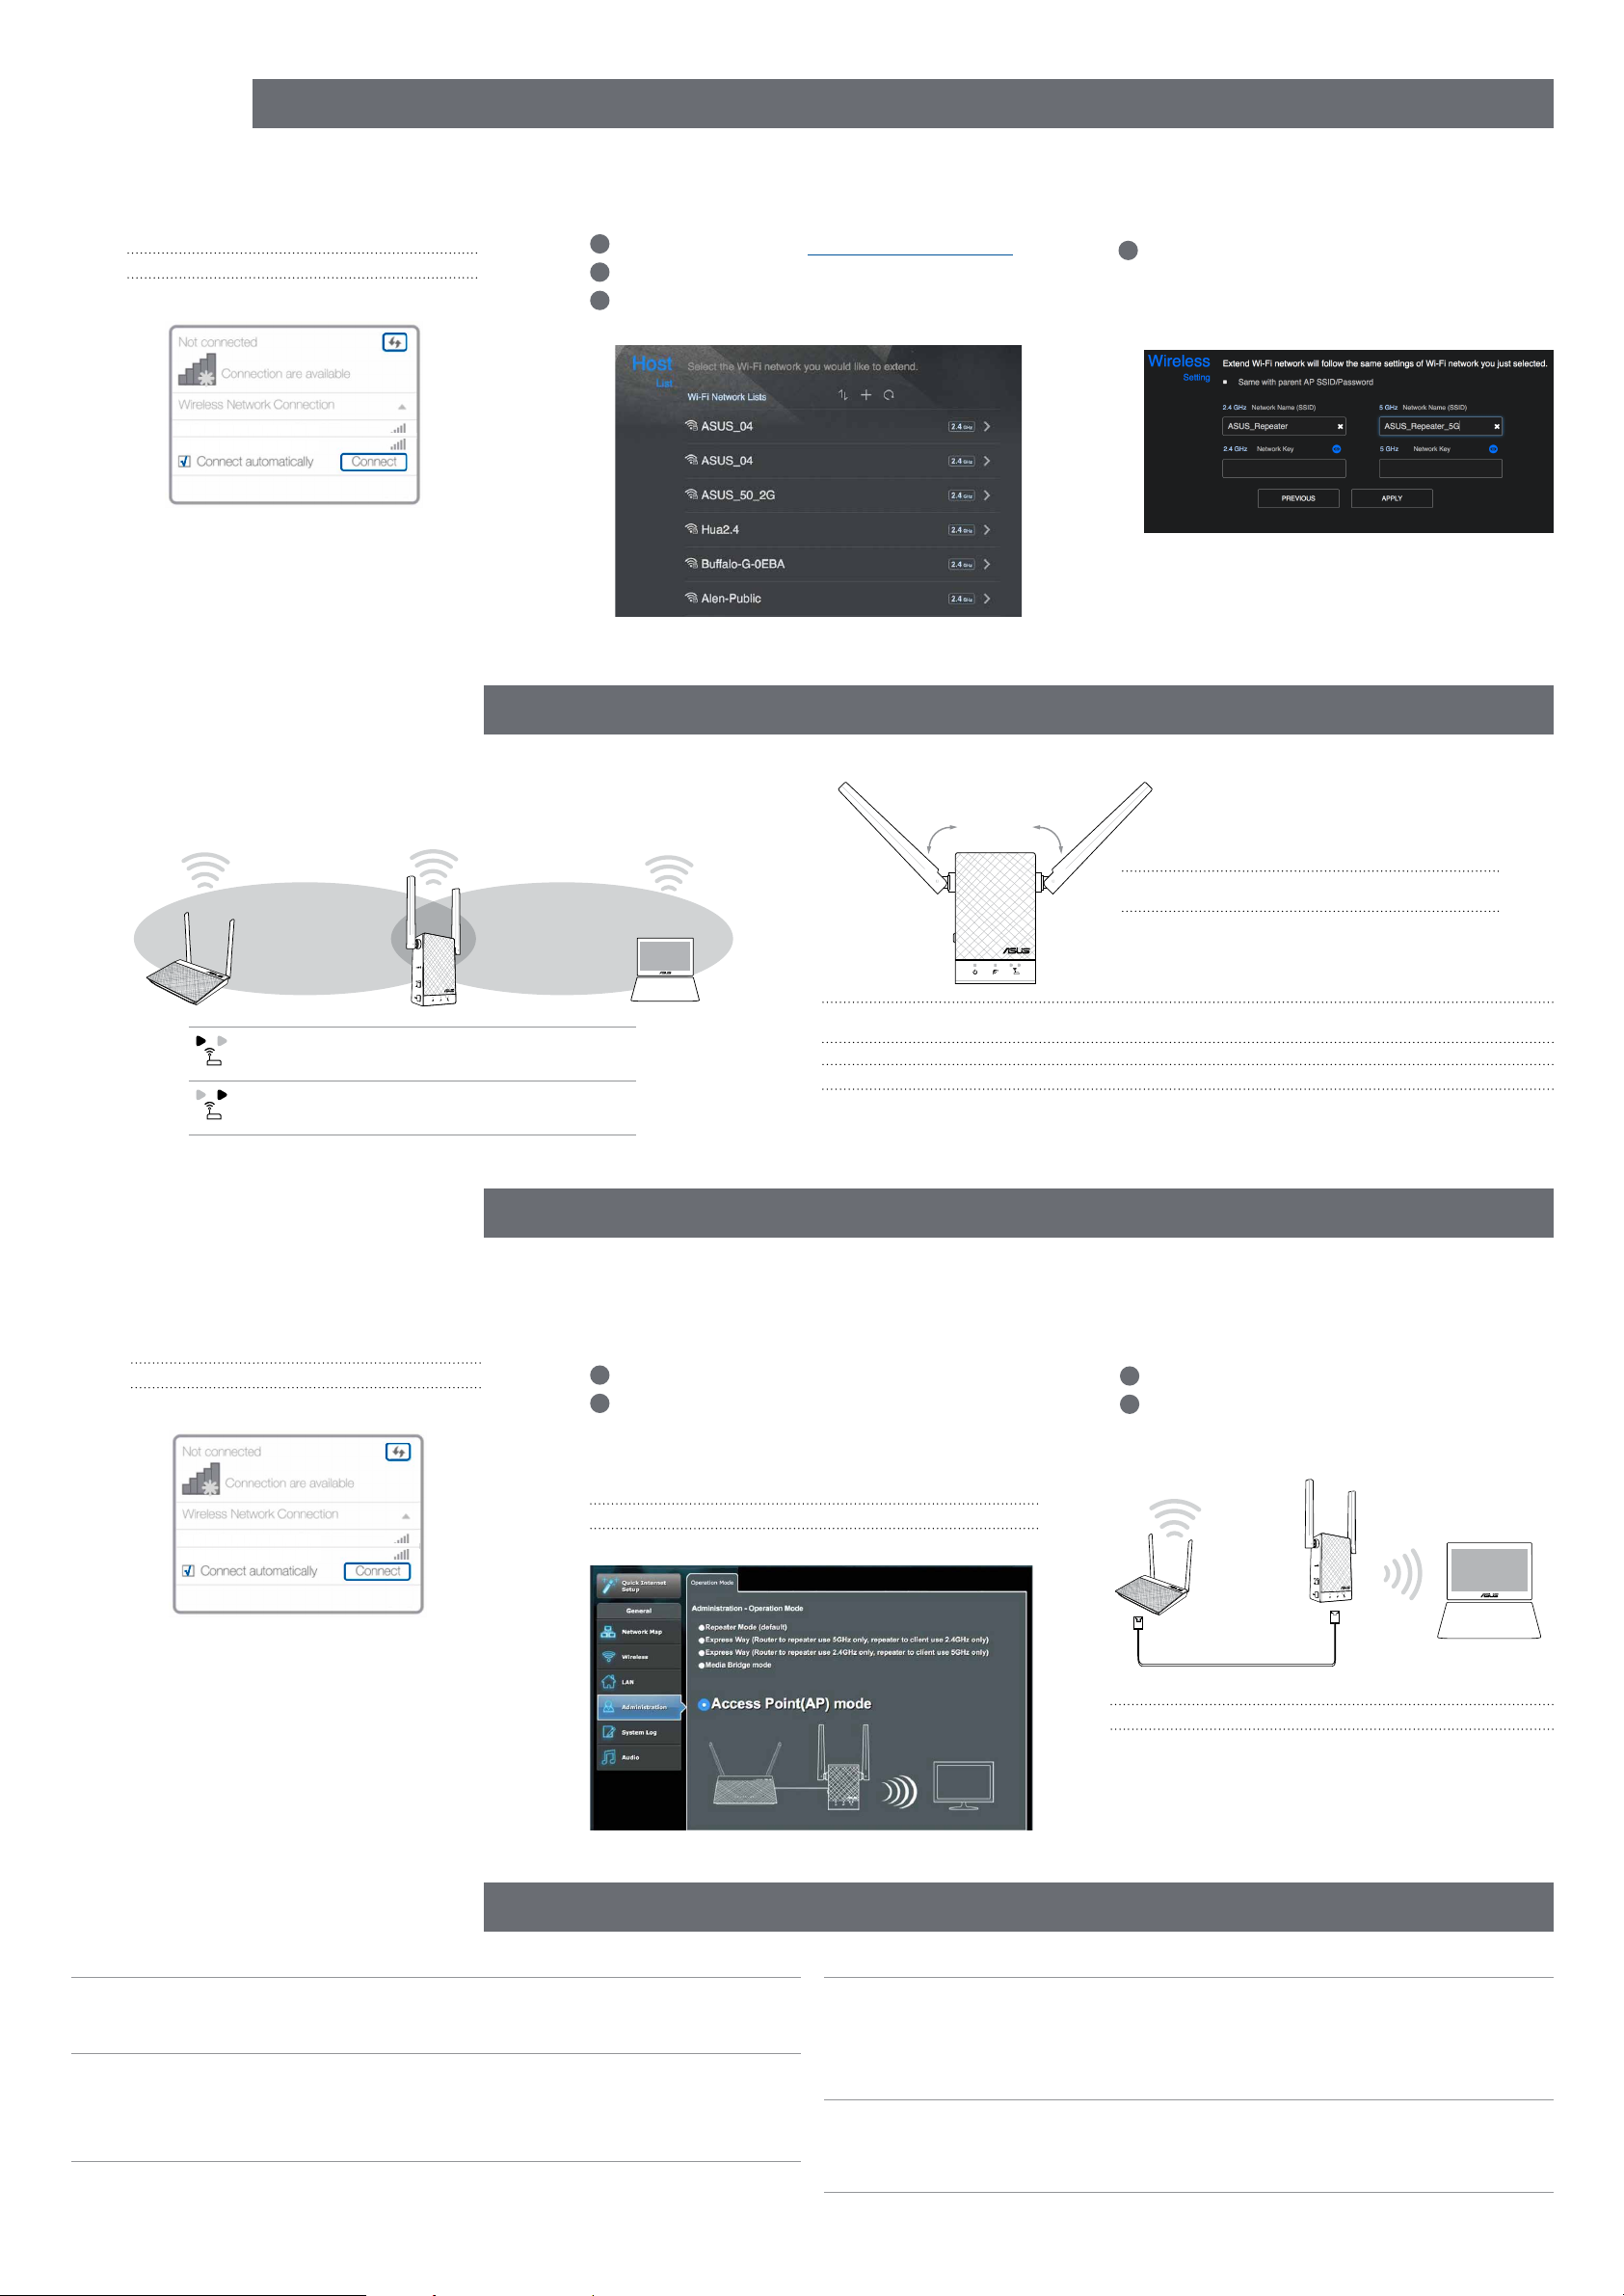
METHOD
WEB SUPPORT
3
01
Connect
NOTE: The screenshot below is from a desktop PC.
ASUS_RPAC55
ASUS_RPAC55_5G
Disconnect your Ethernet (wired) connection from your computer.
Click the Wi-Fi icon on the taskbar and connect to RP-AC55’s
network: ASUS_RPAC55 or ASUS_RPAC55_5G.
RELOCATION
02
Extend
1
On a web browser, enter http://repeater.asus.com.
2
Set a unique repeater login name and password.
3
Select the existing network you want to extend.
FIND THE BEST PLACE
03
Configure
1
Tick Same with Parent AP SSID/Password to copy
the router/AP’s SSID and password for your extended
network. You could also set a unique SSID and password for your extended network by typing in the text
box. When done, click Apply.
After a successful setup
Place your RP-AC55 between your router/AP and wireless device to get the best performance.
MOVE CLOSER
Need to move RP-AC55 closer to the router/AP.
MOVE AWAY SLIGHTLY
Need to move RP-AC55 slightly away from the router/AP.
AP MODE SETUP
AP MODE
01
Connect
02
Log in
°
45
NOTE: To minimize maintenance, keep your RP-AC55 away from devices such as cordless phones, Bluetooth devices, and microwave ovens.
IMPORTANT! We recommend that you place your RP-AC55 in open or spacious location.
45
°
NOTE: Orient the two antennas at 45o angle for the
best performance.
03
Setup
NOTE: The screenshot below is from a desktop PC.
ASUS_RPAC55
ASUS_RPAC55_5G
Disconnect your Ethernet (wired) connection from your computer.
Click the Wi-Fi icon on the taskbar and connect to RP-AC55’s
network: ASUS_RPAC55 or ASUS_RPAC55_5G.
FAQ
1
Enter your login account and password.
2
From your RP-AC55’s web interface, click Adminis-
tration, and select Access Point mode.
NOTE: You can also change to different modes from this page.
FREQUENTLY ASKED QUESTIONS
1
Set up the network name (SSID) and click Apply.
2
After your RP-AC55 has rebooted, connect your RP-
AC55 and router/AP using an Ethernet cable.
Ethernet connection
NOTE: We recommend that you use Cat 5e cable or higher.
Q1
Q2
What should I do if my router does not support WPS?
A: You can use Method One or Method Three to set up your RP-AC55.
Why is it that the LED indicator for the current network does not light up after the
Wi-Fi setup is complete?
A: You may have entered the wrong password for the router/AP. Please restart your RP-
AC55, enter the correct password, and try to set up your RP-AC55 again.
Q3
Q4
Why is it that I cannot see the login page after entering http://repeater.asus.com in
the browser?
A: Ensure that your computer is connected to your RP-AC55 network only, and set your
computer to Obtain an IP address automatically. If you still cannot find the login page, please
download the ASUS Device Discovery utility.
How do I reset RP-AC55?
A: Press the RESET button on the side of RP-AC55 for about two (2) seconds. Wait for
about five (5) seconds until the existing network LED blinks slowly.
 Loading...