

Asrock P45R2000, 4Core1600P35-WiFi+, P43R1600Twins-110dB, P43R1600Twins, P45TurboTwins2000 RAID Utility for Windows Guide
...Page 1

Guide to Intel Matrix Storage Manager
1. Enter Intel Matrix Storage Manager
RAID driver is built in Intel ALL in one driver provided in our support
CD. After you finish the driver installation, you can create, delete, or
rebuild any RAID array. Please enter Intel Matrix Storage Manager by
clicking on Start
Manager
All Programs Intel(R) Matrix Storage
Intel Matrix Storage Console.
Then, the below screen appears.
Intel(R) MatrixStorage Console
1
Page 2

2. Create RAID Volume
Select Action
to create a RAID volume.
Intel(R) MatrixStorage Console
Then, Create RAID Volume from Existing Hard Drive Wizard pops
up. Please click Next to continue.
Create RAID Volume from Existing Hard Drive
2
Page 3
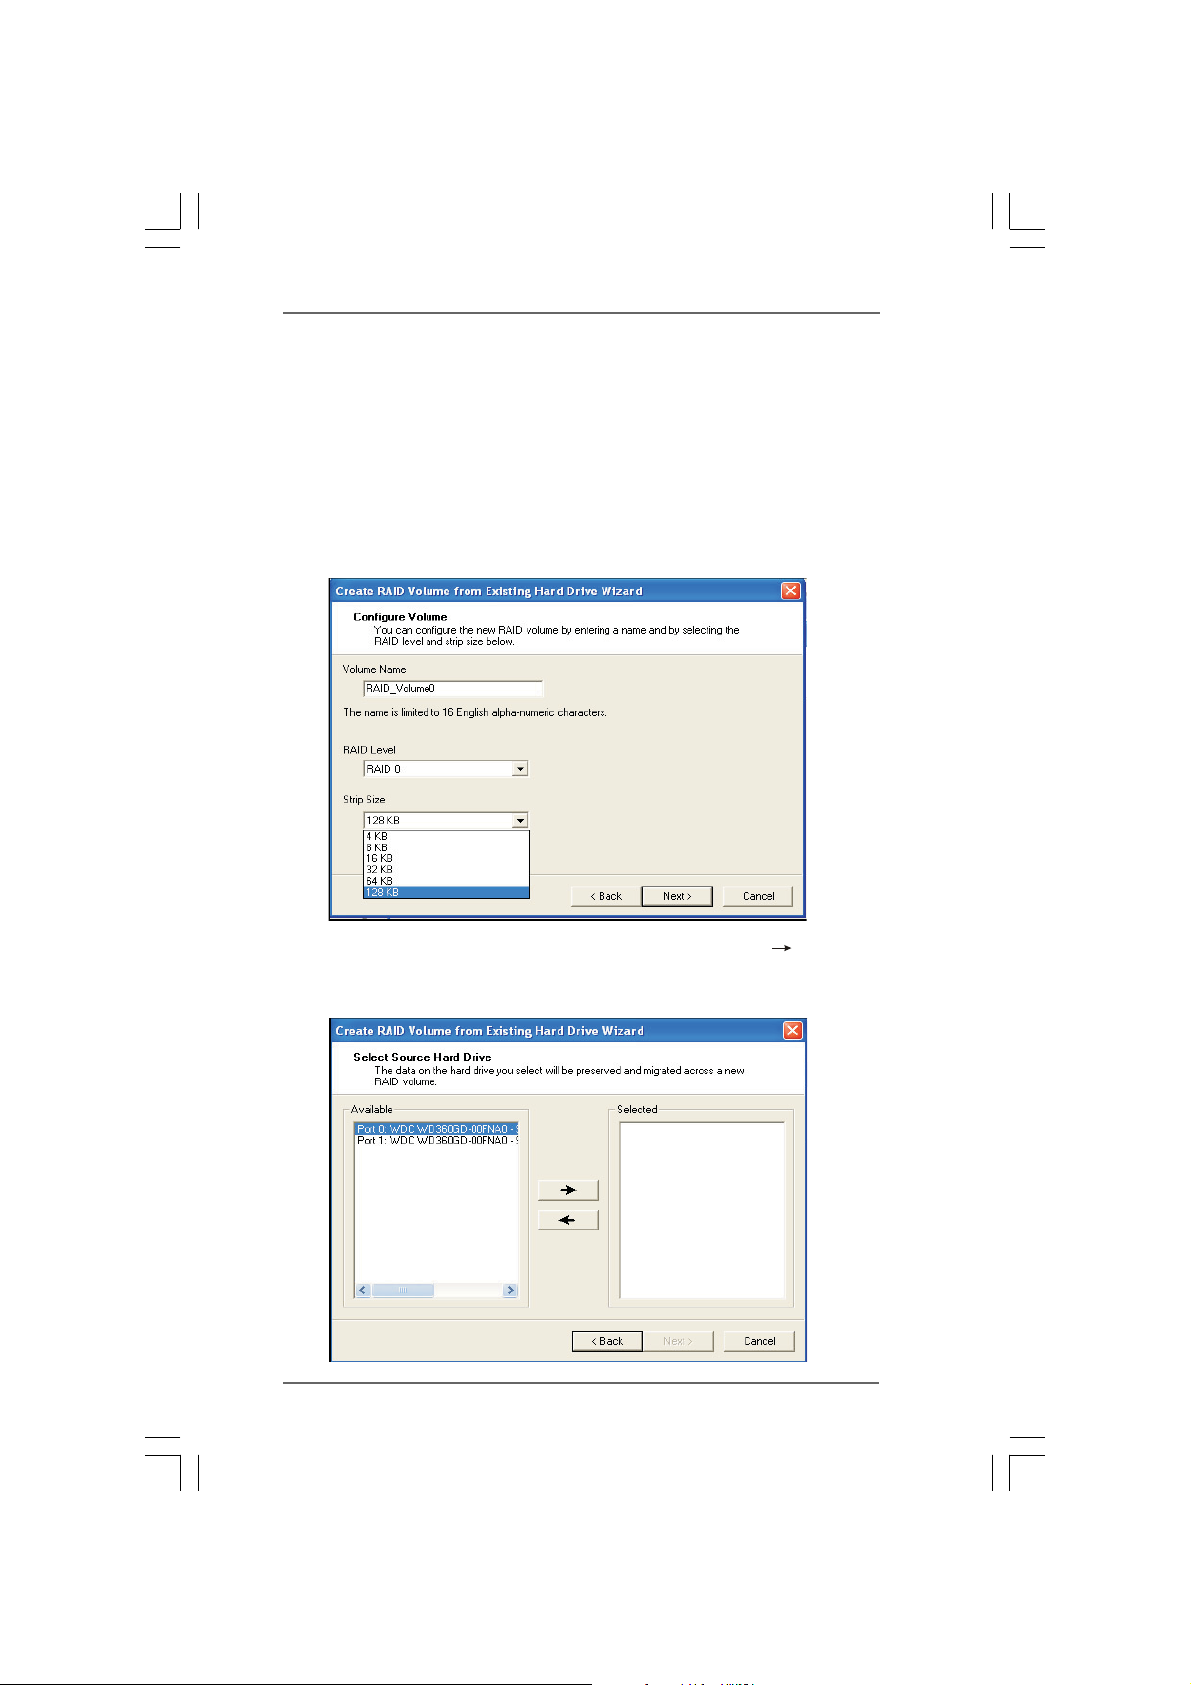
To configure a new RAID volume, you need to key-in the Volume Name
with 1-16 letters, select the RAID Level, and then set the Strip Size
between 4KB and 128KB. The most typical strip size settings are:
4KB: For specialized usage models requiring 4KB strips
8KB: For specialized usage models requiring 8KB strips
16KB: Best for sequential transfers
32KB: Good for sequential transfers
64KB: Good general purpose strip size
128KB: Best performance for most desktops and workstations
Then you have to select the source disk. Please click the “
to move the source disk that you plan to use to the Selected field, and
then click Next to continue.
” arrow
3
Page 4

Then you have to select the member disk. Please click the “
to move the member disk that you plan to use to the Selected field, and
then click Next to continue. Since the existing data on the selected hard
disk drive will be deleted, do not forget to back up your data before
continuing.
” arrow
4
Page 5

Specify the Volume Size. Specify the amount of available array space to
be used by the new RAID volume. You may enter the amount in the space
or use the slider to specify. It is recommended you use 100% of the
available space for the optimized usage. Then click Next to continue.
5
Page 6

Intel(R) MatrixStorage Console andselect Show
Migration Progress.
Start Creating RAID Volume from Existing Hard Drive Wizard. Please note
that as long as you click Finish, the existing data on the selected hard
drive will be deleted and this operation cannot be undone. It is critical that
you backup all important data before this step.
Then, the migration process starts, which may take up to two hours to
complete depending on the size of the disks being used and the strip size
selected.
6
Page 7

After the migration process is completed, the below screen appears. Then
you have to reboot your system to use the full capacity of the new
volume.
7
Page 8

IRRT (Intel Rapid Recover Technology)
Intel Rapid Recover Technology is a feature of Intel Matrix Storage Manager. It uses
RAID 1 (mirroring) functionality to copy data from a designated master drive to a
designated recovery drive. The master drive data can be copied to the recovery drive
either continuously or on request.
When using the continuous update policy, changes made to the data on the master drive
while the system is not docked are automatically copied to the recovery drive when the
system is re-docked. When using the on request update policy, the master drive data can
be restored to a previous state by copying the data on the recovery drive back to the
master drive.
Note:
The recovery volume can be the only volume on a system. Recovery volume capacity will
equal the size of the smaller of the two hard drives.
8
 Loading...