

Page 1

USER MANUAL
Page 2

Special Thanks
DIRECTION
Frédéric BRUN Kevin MOLCARD
DEVELOPMENT
Pierre PFISTER
Theo NIESSINK
Germain MARZIN
Alexandre ADAM
Arnaud BARBIER
Baptiste AUBRY
DESIGN
Pierre PFISTER Shaun ELWOOD Morgan PERRIER Jonas SELLAMI
SOUND DESIGN
Paolo NEGRI
Dave POLICH
MANUAL
Stephan VANKOV (Author)
Vincent LE HEN
Benjamin RENARD
Corentin COMTE
Florian MARIN
Geoffrey GORMOND
Kevin ARCAS
Loris DE MARCO
Nori UBUKATA
Pierre PFISTER
Minoru KOIKE
Charlotte METAIS
Marie PAULI
Mathieu NOCENTI
Matthieu COUROUBLE
Maxime AUDFRAY
Pierre-Lin LANEYRIE
Raynald DANTIGNY
Victor MORELLO
Jose RENDON
Holger STEINBRINK
Samuel LIMIER
Simon CONAN
Timothée BÉHÉTY
Yann BURRER
Jack VAN
SPECIAL THANKS
Adrien BARDET
Clement BASTIAT
Chuck CAPSIS
Thierry CHATELAIN
Marco CORREIA
© ARTURIA SA – 2019 – All rights reserved.
11 Chemin de la Dhuy
38240 Meylan
FRANCE
www.arturia.com
Information contained in this manual is subject to change without notice and does not
represent a commitment on the part of Arturia. The software described in this manual is
provided under the terms of a license agreement or non-disclosure agreement. The software
license agreement specifies the terms and conditions for its lawful use. No part of this
manual may be reproduced or transmitted in any form or by any purpose other than
purchaser’s personal use, without the express written permission of ARTURIA S.A.
All other products, logos or company names quoted in this manual are trademarks or
registered trademarks of their respective owners.
Product version: 2.0.0
Revision date: 25 April 2019
"Koshdukai"
Simon GALLIFET
Florian MARIN
Theo NIESSINK
George WARE
Fernando Manuel
RODRIGUES
Terry MARDSEN
Stephen WEY
Jeffrey CECIL
Peter TOMLINSON
Tony Flying SQUIRREL
Andrew CAPON
Bernd WALDSTÄDT
Chuck ZWICKY
Page 3

Thank you for purchasing Arturia's B-3 V2
This manual covers the features and operation of the Arturia B-3 V2 virtual organ.
Be sure to register your software as soon as possible! When you purchased B-3 V2 you
were sent a serial number and an unlock code by e-mail. These are required during the
online registration process.
Special Messages
Specifications Subject to Change:
The information contained in this manual is believed to be correct at the time of printing.
However, Arturia reserves the right to change or modify any of the specifications or features
without notice or obligation.
IMPORTANT:
The software, when used in combination with an amplifier, headphones or speakers, may
be able to produce sound levels that could cause permanent hearing loss. DO NOT operate
for long periods of time at a high level or at a level that is uncomfortable.
If you encounter any hearing loss or ringing in the ears, you should consult an audiologist.
Page 4

Introduction
Congratulations on your purchase of Arturia's B-3 V2!
We’d like to thank you for purchasing B-3 V2, a physically-modelled recreation of a
tonewheel organ, which captures all the nuances and character of the original instrument
to bring you the most playable and customizable virtual organ to date.
Arturia has a passion for excellence, and B-3 V2 is no exception. Listen to the preset sounds,
tweak a few controls, skim through the features, or dive as deep as you like; it is easy to
understand and use. We are confident that the B-3 V2 will be a valuable addition to your
instrument collection, and that you'll have a lot of fun with it.
Be sure to visit the www.arturia.com website for information about all of our other great
hardware and software instruments. They have become indispensable, inspiring tools for
musicians around the world.
Musically yours,
The Arturia team
Page 5

Table Of Contents
1. WELCOME ......................................................................................................................................................................... 2
1.1. What is B-3 V2?....................................................................................................................................................................... 2
1.2. History of the original instrument .............................................................................................................................. 2
1.3. Notable users............................................................................................................................................................................ 3
1.4. What does B-3 V2 add to the original instrument?........................................................................................ 3
1.5. What's new in V2? ............................................................................................................................................................... 3
2. ACTIVATION AND FIRST START.......................................................................................................................... 4
2.1. Register and Activate.......................................................................................................................................................... 4
2.2. Initial setup............................................................................................................................................................................... 5
2.2.1. Standalone Audio and MIDI settings.............................................................................................................................................................. 5
2.2.2. Using B-3 V2 in plug-in mode............................................................................................................................................................................. 7
3. USER INTERFACE .......................................................................................................................................................... 8
3.1. The virtual keyboard ........................................................................................................................................................... 8
3.2. Toolbar......................................................................................................................................................................................... 8
3.2.1. Save preset....................................................................................................................................................................................................................... 9
3.2.2. Save preset as............................................................................................................................................................................................................... 9
3.2.3. Import preset................................................................................................................................................................................................................. 9
3.2.4. Export preset .................................................................................................................................................................................................................. 9
3.2.5. Export bank ..................................................................................................................................................................................................................... 9
3.2.6. New preset....................................................................................................................................................................................................................... 9
3.2.7. Resize window .............................................................................................................................................................................................................. 9
3.2.8. Audio settings ................................................................................................................................................................................................................ 9
3.2.9. Preset browsing quick look.................................................................................................................................................................................. 9
3.2.10. Modulator and Advanced button................................................................................................................................................................. 10
3.2.11. FX button ....................................................................................................................................................................................................................... 10
3.2.12. MIDI learn assignment ...................................................................................................................................................................................... 10
3.2.13. MIDI controller configuration.......................................................................................................................................................................... 12
3.2.14. The lower toolbar .................................................................................................................................................................................................... 13
3.2.15. The Keyboard Preferences window........................................................................................................................................................... 13
3.3. The Preset Browser........................................................................................................................................................... 15
3.3.1. Searching presets ...................................................................................................................................................................................................... 15
3.3.2. Filtering using tags................................................................................................................................................................................................... 16
3.3.3. The preset Info section ......................................................................................................................................................................................... 16
3.3.4. The second preset view......................................................................................................................................................................................... 17
3.3.5. Playlists............................................................................................................................................................................................................................ 18
3.4. Front panel............................................................................................................................................................................ 20
3.4.1. The vibrato switches.............................................................................................................................................................................................. 20
3.4.2. The Vibrato and Chorus mode knob.......................................................................................................................................................... 20
3.4.3. The Drawbars............................................................................................................................................................................................................ 20
3.4.4. Preamp Drive............................................................................................................................................................................................................... 21
3.4.5. Master Volume............................................................................................................................................................................................................ 21
3.4.6. The Percussion section......................................................................................................................................................................................... 22
3.4.7. The Swell pedal.......................................................................................................................................................................................................... 22
3.5. The Mod Section................................................................................................................................................................. 23
3.5.1. Advanced Settings.................................................................................................................................................................................................... 23
3.5.2. Drawbar Modulators.............................................................................................................................................................................................. 25
3.6. FX, Amp and Room Section........................................................................................................................................ 29
3.6.1. Effects .............................................................................................................................................................................................................................. 30
3.6.2. Amp................................................................................................................................................................................................................................... 44
3.6.3. Room ................................................................................................................................................................................................................................. 47
4. Software License Agreement............................................................................................................................ 48
Page 6

1. WELCOME
Thank you for purchasing our virtual organ, B-3 V2. Unlike sample-based virtual organs
which can be limited in the types of timbres and sound options they provide, B-3 V2 is
based on advanced physical modelling technology, allowing for vast customization of the
instrument so that you can find your perfect tone.
B-3 V2 builds on the features of our original B-3 V with many improvements to provide you
with an even more realistic tonewheel organ sound, better user experience and wider sound
palette. We are confident that B-3 V2 will give you many hours of playing and producing
pleasure.
1.1. What is B-3 V2?
B-3 V2 is a recreation of a classic tonewheel organ, though it adds a number of additional
features that were never available on the original instrument.
The original instrument works by having 91 tonewheels, each rotating near an
electromagnetic pickup. Each key is connected to a fixed set of tonewheel outputs and the
drawbar settings control how these are mixed together before being sent to the preamplifier.
The tube preamp shapes the sound a little bit further (filtering and distortion), also factoring
in the position of the expression pedal which acts not only as a volume control but affects
the frequency response of the preamp as well.
The output of the preamp is then connected into a powerful and customizable set of effects
pedals for achieving a variety of different sounds.
Following the effects pedals is the amplifier with two available speaker models. The first
speaker type is a rotary model. It contains a power amplifier that drives a rotating horn and
a stationary woofer firing into a rotating drum reflector. The speaker actually determines
many interesting spatial and frequency shifting effects in addition to the sound shaping
effects of common loudspeakers. In V2 we have introduced a second type of speaker model
- a popular twin reverb amplifier - to give you even more options for achieving your desired
tone.
At the end of the signal flow is a new convolution reverb processor for placing the organ
sound in a virtual space, ranging from concert halls and studios to vintage plate and spring
reverb hardware.
1.2. History of the original instrument
The tonewheel organ was first released in the 1930s and various models were produced
over the following 40 years. They generate sound by creating an electric current, rotating a
metal tonewheel near an electromagnetic pickup, then amplifying that signal.
Originally aimed at churches as a more compact and affordable alternative to conventional
pipe organs, tonewheel organs found favour first with gospel musicians in churches and
fairly quickly after that, with jazz musicians who loved their unique sound. This was thanks
to features like the organ’s drawbars and various tone controls as well as the rotating
speaker that sounded like nothing else at the time.
It would go on to play a central role in the rock music of the 1970s and even in pop, all
the while remaining a staple instrument of jazz, blues and gospel. The fact that a lot of
clubs would buy one and leave it “in residence” on the stage meant that they got used
more frequently than if musicians had to bring their own keyboards. Smaller than a piano,
the versatility of the organ’s sound meant it could fit in with many different kinds of
performances.
2 Arturia - User Manual B-3V - WELCOME
Page 7

1.3. Notable users
• Jimmy Smith
• John Medeski
• “Brother” Jack McDuff
• Keith Emerson
• Booker T Jones
• Procol Harum
• Steve Winwood
• Gregg Allman
• Joey DeFrancesco
• Rick Wakeman
• Tyrone Downie (with the Wailers)
• James Taylor
• Cory Henry
• Rhoda Scott
• Jon Lord
• George Duke
1.4. What does B-3 V2 add to the original instrument?
A real tonewheel organ and rotary speaker are not only expensive to locate, purchase and
maintain, but also physically very large and difficult to move around. So software is the ideal
way to get the sound without all the hassle. In addition to recreating the original tonewheels
complete with the imperfections that made them sound so unique, B-3 V2 adds a number
of features not available in the original instrument.
• MIDI control of many parameters
• Four insert effect slots
• A reverb unit
• A Drawbar modulator section
• Advanced control over the rotary speaker behaviour and speed
• Attack and release controls for upper and lower manuals
• Control over key click volume and background noise
• Drawbar and tonewheel leakage controls
1.5. What's new in V2?
V2 adds a number of improvements to provide you with even more realistic organ
modelling, as well as UI improvements for better user experience and more tools for
scultping your sound.
• Redesigned effects section with 12 available pedals for powerful sound shaping.
• New Twin amp model for more flexibility in crafting a signature sound.
• New Room convolution reverb for applying characteristics of real acoustic
spaces and vintage reverb hardware to your sound.
• Complete tonewheel redesign captures all the nuances of tonewheel behavior
with unparalled detail.
• Reworked contacts model, including staggered key contact at low velocities
• Organ accurate tuning
• Various improvements to key click, tonewheel leakage, vibrato, Leslie and
preamp models.
Arturia - User Manual B-3V - WELCOME 3
Page 8

2. ACTIVATION AND FIRST START
2.1. Register and Activate
B-3 V2 works on computers equipped with Windows 7 or later and Mac OS X 10.10 or later.
You can use the stand-alone version or use B-3 V2 as an Audio Unit, AAX, VST2 or VST3
instrument.
Once B-3 V2 has been installed, the next step is to register the software.
The registration process will require you to enter the serial number and the unlock code you
received with the product.
In order to proceed, go to this web page and follow the instructions: http://www.arturia.com/
register
Note: If you don’t have an Arturia account yet, you will need to create one. The process is
quick, but it does require that you can access your email address during the registration
process.
Once you have acquired an Arturia account you will be able to register the product.
4 Arturia - User Manual B-3V - ACTIVATION AND FIRST START
Page 9

2.2. Initial setup
2.2.1. Standalone Audio and MIDI settings
If you are running B-3 V2 as a standalone application, you will first need to configure your
MIDI and Audio settings so that you can get sound and MIDI flowing in and out. Once
configured, B-3 V2 will remember and recall these settings next time you launch it.
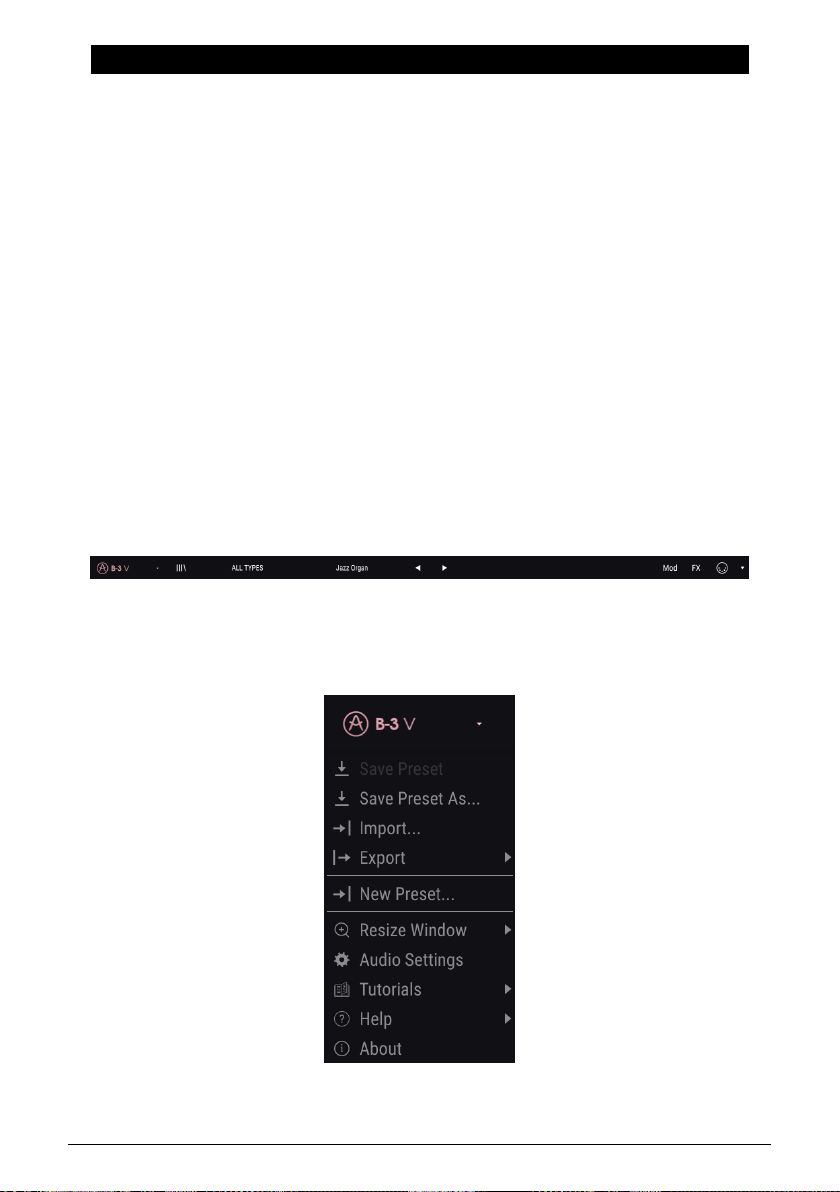
To access these settings, click the Arturia B-3 V logo at the top left corner, then click Audio
Settings.
You will then see the Audio MIDI settings window. This works in the same way on both
Windows and Mac OS X, although the names of the devices available to you will depend on
the hardware that you are using.
Arturia - User Manual B-3V - ACTIVATION AND FIRST START 5
Page 10

2.2.1.1. Audio and MIDI Settings: Windows
Starting from the top you have the following options:
• Device lets you choose which audio driver you want to use for sound payback
from the instrument. This might be your computer’s own driver like Windows
Audio, or an ASIO driver. The name of your hardware interface may appear in
this field.
• Output Channels lets you select which of the available outputs will be used for
audio output. This option will only be visible if your device has more than 1 stereo
output. If it only has 1 stereo output, it will not be visible.
• Buffer Size lets you select the size of the audio buffer your computer uses to
calculate sound. A smaller buffer means lower latency between pressing a key
and hearing the note. A larger buffer means a lower CPU load as the computer
has more time to think, but can result in higher latency. Find the optimum buffer
size for your system. A fast, modern computer should easily be able to operate
at 256 or 128 sample buffer size without creating pops or clicks in the sound. If
you are getting clicks, try raising the buffer a little. The latency in milliseconds is
displayed in parenthesis to the right of your selected buffer size.
• Sample Rate lets you set the sample rate at which audio is sent out of the
instrument. The options here will depend on the capability of your audio interface
hardware. 44.1kHz and 48kHz are the most widely used sample rates. Higher
sample rates can be used, if you audio device supports them, however they will
result in significantly higher CPU load.
• Test Tone helps you to troubleshoot audio issues by checking that sound can
be heard through the correct device. Make sure that your volume is turned up
and click the Play button to hear a brief test tone through your speakers or
headphones. If you cannot hear the tone, check your device settings.
• Show Control Panel button here will jump to the system control panel for
whatever audio device is selected.
• MIDI Devices list will display any currently connected MIDI controller hardware.
Click the check box to accept MIDI from the devices you want to use for playing
B-3 V2. In standalone mode, B-3 V2 listens for all MIDI channels so there’s no
need to specify a channel. Note that you can specify more than one MIDI device
at once if you want to use multiple keyboards and controllers.
• The Tempo control allows you to set the instrument's internal tempo, which is
used for modulation and time-based effects that have a sync option. This setting
is only used when running B-3 V2 as a standalone application. When running it
as a plug-in, the tempo will be determined by your host application.
When done, click the OK button.
6 Arturia - User Manual B-3V - ACTIVATION AND FIRST START
Page 11

2.2.1.2. Audio and MIDI settings: Mac OS
The audio setup process on Mac OS is very similar to Windows and the menu is accessed in
the same way. The difference here is that OS X uses CoreAudio to handle audio routing and
your audio devices will appear in the second dropdown menu. Apart from that, the options
work the same way as described above in the Windows section above.
2.2.2. Using B-3 V2 in plug-in mode
B-3 V2 comes in VST, AU and AAX plug-in formats for use in all major DAW software like
Cubase, Logic, Pro Tools, Ableton Live and so on. You can load it as a plug-in instrument
and its interface and settings work in the same way as in standalone mode, with a few
differences:
• Audio and MIDI settings will be handled by your DAW, instead of B-3 V2.
• The instrument will now use the tempo setting in your DAW for time-based
effects like delay and tremolo, as well as modulation, when their Sync setting
has been activated.
• You can automate parameters using your DAW’s automation system.
• You can use more than one instance of B-3 V2 in a DAW project. In standalone
mode you can only use one at a time.
• You can route B-3 V2’s audio outputs more creatively inside your DAW using the
DAW’s own audio routing system.
• You can use third-party audio effects to process the audio output from B-3 V2.
Arturia - User Manual B-3V - ACTIVATION AND FIRST START 7
Page 12
3. USER INTERFACE
B-3 V2 has many great features, and in this chapter we’ll explain what each one does. We
think you’ll be amazed at how quickly B-3 V2 provides you with sounds that are inspiring
and perfect for all sorts of projects.
It’s also really easy to work with: just a few tweaks here and there and suddenly you’re in a
new world of sound. That will always be the main focus of every Arturia product: unleashing
your creativity while remaining easy to use.
3.1. The virtual keyboard
B-3 V2 has two keyboards, one upper and one lower, just like an original tonewheel organ.
These correspond to the left hand (upper) and right hand (lower) sets of drawbars located
above the keyboard.
The first octave of each keyboard (the notes with their colours reversed) does not actually
generate sound but rather acts as a selector for a fixed set of drawbar configurations, like
in a real organ. Pressing one of these notes will call up a specific drawbar configuration but
will not change any of the other settings on the organ. When you adjust drawbars, these
settings will be automatically remembered in the currently selected drawbar configuration
while you're working with the current preset. If you want these settings to be recalled next
time you load the preset from the browser, you will need to save the preset.
3.2. Toolbar
The toolbar that runs along the top edge of the instrument both in standalone and plug-in
mode provides access to many useful features. Let’s look at them in detail. The first seven of
these options can be found by clicking on the B-3 V section at the very top left hand corner
of the instrument window.
8 Arturia - User Manual B-3V - USER INTERFACE
Page 13

3.2.1. Save preset
The first option lets you save a preset. When you select this you are presented with a
window where you can enter information about the preset, such as name, author, bank
and type. You can also add sound tags. This information can be read by the preset browser
and is useful for searching presets later. You can also enter freeform text comments in the
Comments field which is handy for providing a more detailed description.
3.2.2. Save preset as
This works in the same way as the Save command, but lets you save a copy of the preset
instead of saving over the original. It’s useful for creating variations of presets but still
keeping individual copies of each one.
3.2.3. Import preset
This allows you to import a preset file. Presets are stored in the .b3x format.
3.2.4. Export preset
This allows you to export any preset as a file using this command.
3.2.5. Export bank
This option can be used to export the entire bank of presets from the instrument which is
useful for backing up or sharing.
3.2.6. New preset
This option will create a new preset, initialized with default settings.
3.2.7. Resize window
B-3 V2’s window can be resized from 50% to 200%. On a smaller screen such as a laptop
you might want to reduce the interface size so it doesn’t dominate the display. On a larger
screen or a second monitor you can increase its size to get a better view of the controls.
3.2.8. Audio settings
Here you manage the way the instrument transmits sound and receives MIDI. See Audio
And MIDI Settings [p.6] section of this manual for details.
3.2.9. Preset browsing quick look
The Preset Browser is opened by clicking on the button which contains four vertical lines.
See The Preset Browser [p.15] section of this manual. The All Types, name field and left / right
arrows in the toolbar all deal with preset selection.
Arturia - User Manual B-3V - USER INTERFACE 9
Page 14

3.2.10. Modulator and Advanced button
This button opens the Modulator and Advanced section. See the Mod Section [p.23] part of
this manual for more on this.
3.2.11. FX button
This button opens the FX section, which allows you to add audio effects, amplification and
room reverb to the organ. See the FX, Amplifier and Room Section [p.29] of this manual for
more information.
3.2.12. MIDI learn assignment
The MIDI plug icon at the right hand end of the toolbar places the instrument into MIDI learn
mode. Parameters that can be assigned to MIDI controls will be shown in purple and can
be mapped to physical MIDI knobs, faders or pedals on your hardware controllers. Note
that you can also assign MIDI controls to parameters in the Mod and FX sections, as long
as those windows are visible. To see these windows, click the Mod or FX buttons on the top
toolbar.
For example you can map an expression pedal to the virtual swell pedal, or map controller
buttons to the tone select switches so you can change the sound from the controller.
If you click on a purple control you’ll put that parameter into learning mode. Move a dial or
fader on your MIDI controller and the target goes red to show that a link has been made
between the hardware control and the software parameter. You'll see a pop-up window
which displays which two things are being linked and a button to unassign the two from
each other.
10 Arturia - User Manual B-3V - USER INTERFACE
Page 15

There’s also a Min and Max value slider that you can use to restrict the parameter change
range from the default 0%-100%. For example you might want the amp’s master volume
to be controllable via hardware from 30% to 90%. If you made this setting (Min set to 0.30
and Max set to 0.90), your physical dial would not alter the volume any lower than 30% or
any higher than 90% no matter how far you turned it. This is very useful for making sure
you can’t accidentally make the sound too quiet or too loud when performing.
In the case of switches which only have two positions (up or down) you can still use
minimum and maximum values in the MIDI learn popup window, but in these cases the
behaviour is a little different.
It's about what values the controller sends and whether those are high or low enough to
trigger the state change in a switch - which is always 0.5 or in the case of the three stage
switch, 33.3/33.3/33.3 (or near enough). You can set the minimum and maximum values
of the hardware MIDI control but whether it affects the software parameter depends on
whether it crosses the threshold required to make the change.
Let's take an example. We want to control a 2-position switch with a hardware fader. The
fader value goes from 0.0 to 1.0 and the switch state will always change when 0.5 is
crossed.
The min value in the MIDI learn window corresponds with the value that will be sent (from
the controller to the engine) when the fader is at its min position (same goes for the max
value).
To explain this, you can try these 5 use cases:
• Set min value to 0.0 and max value to 0.49 => the switch cannot be switched on
because the 0.5 value can never be crossed
• Set min value to 0.51 and max value to 1.0 => the switch cannot be switched off
because the 0.5 value can never be crossed
• Set min value to 0.0 and max value to 1.0 => the switch state changes when the
fader crosses its central position
• Set min value to 0.49 and max value to 1.0 => the switch state changes when the
fader is very low
• Set min value to 0.0 and max value to 0.51 => the switch state changes when the
fader is very high
The same goes for the three-stage switches, where instead of 0.5 being the state change
value, it is divided into three thirds.
In the case of drawbars which have nine different positions the same rule applies but
instead of splitting the controller range into two or three it is split into nine.
Arturia - User Manual B-3V - USER INTERFACE 11
Page 16
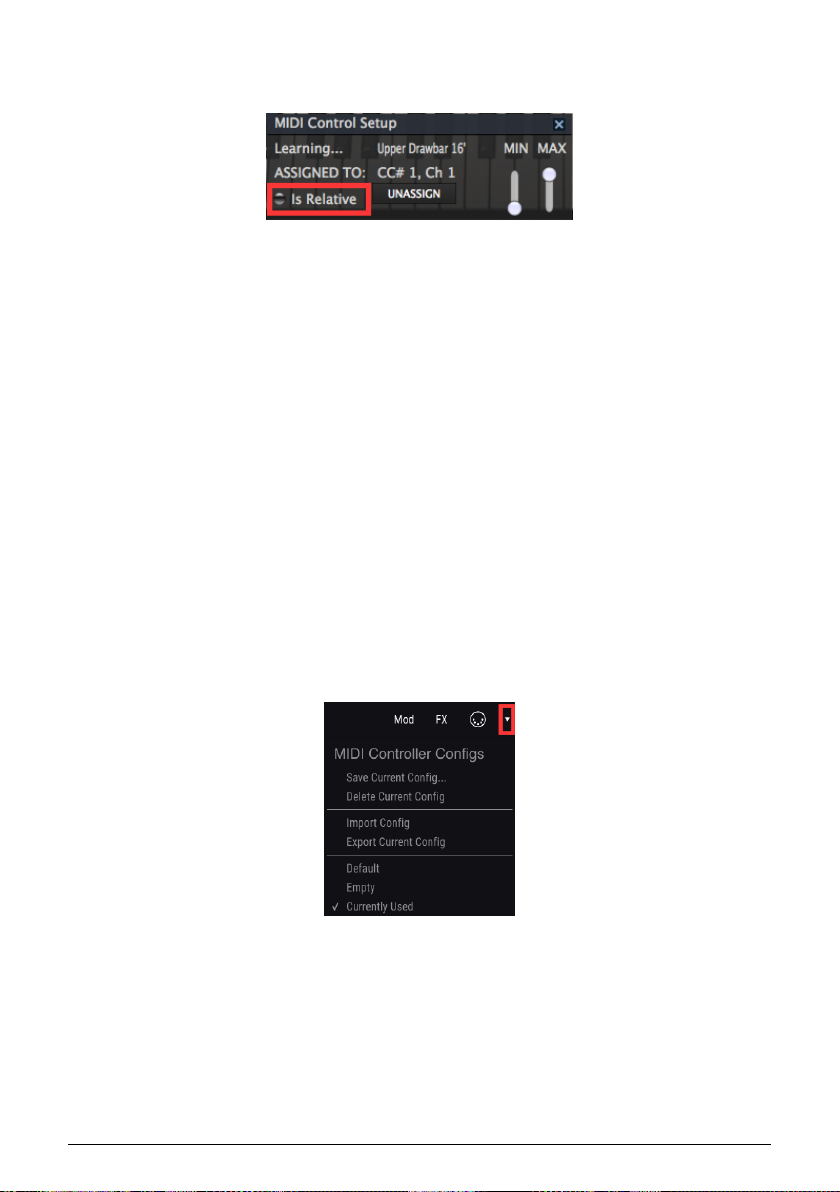
The final option in this window is a button labelled Is relative. This allows you to change how
the parameter is adjusted from your hardware control – absolute (“Is relative” disabled), or
relative (“Is relative” enabled).
This can be useful when switching presets, where a mapped software parameter may
change. For example when using an absolute setting, adjusting the parameter from your
hardware will immediately jump to the position of the hardware control. While with a
relative setting, the hardware control will adjust the parameter from its current value in
the software. Note that to use the “Is relative” option your MIDI controller needs to support
relative mode. Please consult your MIDI device’s user manual for information on how to
change hardware controls to send relative data.
Note that the following MIDI Continuous Controller (MIDI CC) numbers are reserved and
cannot be reassigned to other controls:
• Ctrl All Notes Off (CC #123)
All other MIDI CC numbers may be used to control any assignable parameter in B-3 V2.
3.2.13. MIDI controller configuration
There’s a small arrow at the far right hand side of the toolbar that deals with MIDI controller
configurations. This allows you to manage different sets of MIDI mappings that you may
have set up for controlling the instrument’s parameters from MIDI hardware. You can copy
the current MIDI assignment setup or delete it, import a configuration file or export the
currently active one. This can be used to quickly set up different hardware MIDI keyboards
or controllers with B-3 V without having to build all the assignments from scratch each time
you swap hardware.
12 Arturia - User Manual B-3V - USER INTERFACE
Page 17

3.2.14. The lower toolbar
At the right hand side of the lower toolbar are three small items.
• Keyboard Preferences button opens a new window, where you can configure
how your MIDI controller maps to the virtual keyboards.
• Panic button can be pressed to stop any stuck notes.
• CPU meter displays how much of your computer’s CPU is being used by the
instrument.
3.2.15. The Keyboard Preferences window
Since B-3 V has two keyboards which generate different tones, we have provided a way
to choose how your MIDI keyboard will control the instrument. It provides the flexibility to
play both virtual keyboards with one MIDI keyboard or play each virtual keyboard with a
different MIDI keyboard. Here’s how it works.
In Multi mode, you can assign MIDI channels to each virtual keyboard. A typical example
might be to connect one MIDI keyboard to the upper keyboard on MIDI channel 1, and a
second MIDI keyboard to the lower keyboard on channel 2, giving you the full range of
notes at your fingertips.
If your MIDI keyboard supports it, you could split its range into two zones, assign each one
a MIDI channel and achieve a similar result. This setting is usually performed on the MIDI
keyboard itself.
Arturia - User Manual B-3V - USER INTERFACE 13
Page 18

The Octave Shift settings allow you to transpose the octave of either virtual keyboard up or
down here, which is useful for things like assigning a smaller MIDI keyboard to control a
bass part.
Split mode allows you to split the range of a single MIDI keyboard inside B-3 V2. This is
useful if your MIDI keyboard does not itself support multiple zones and MIDI channels from
the hardware. Adjust the Split Points parameters to define the notes at which the MIDI
keyboard changes from controlling one virtual keyboard to controlling the other.
The Lower and Upper options also allow octave shifting but these modes simply assign your
whole MIDI keyboard to play either the lower or upper manuals.
14 Arturia - User Manual B-3V - USER INTERFACE
Page 19

3.3. The Preset Browser
The preset browser is how you search, load and manage sounds in B-3 V. It has a couple of
different views but they all access the same banks of presets. Click on the browser button
(three lines and a slanted line) to access the search view.
NEED UPDATE SCREENSHOT once final presets are populated
3.3.1. Searching presets
The Search screen has a number of sections. By clicking on the Search field at the top left
you can quickly enter any search term to filter the preset list by patch name. The Results
column is updated to show the results of your search. Press the X button in the search field
to clear the search.
Arturia - User Manual B-3V - USER INTERFACE 15
Page 20

3.3.2. Filtering using tags
NEED UPDATE SCREENSHOT of search tags
You can also search using different tags. For example if you click on the Lead and Organ
options in the Types field you can show only presets that match those tags. The tag fields
can be shown or hidden by using the small +/- buttons in their title fields. Results columns
can be sorted by clicking the arrow button in their own section.
You can use multiple search fields to perform narrower searches. So by entering a text
search and also specifying type, bank and characteristics options you could see only the
presets that match those exact criteria. Deselect any tag in any area to remove that criteria
and widen the search without having to go back and start again.
The second Results column can be switched to show Type, Sound Designer or Bank tags
depending on how you like to search. Click on its options menu button (the three horizontal
libes) to the left of its title.
3.3.3. The preset Info section
The Preset Info section on the right side shows you information about the selected preset.
If you want to make changes to a factory preset such as changing its name, adding
comments or tags, you have to re-save it as a user preset using the Save As command in
the main menu. When you have done this, the Info section will gain Edit and Delete buttons
that you can use to change the information stored inside the preset. Factory presets can’t
be overwritten.
16 Arturia - User Manual B-3V - USER INTERFACE
Page 21

3.3.4. The second preset view
The menu in the middle of the top toolbar shows you a different view. The first option in
this menu is called Filter and will hold a record of whatever search terms or tags you last
searched for in the main Search field. So if you searched for Jazz, those results will appear
here.
Selecting the All Types option will provide a list of all patches. The Categories shown beneath
group sounds based on their Type like keys, pads, bass and so on.
Clicking on the name field in the centre of the toolbar will show you a list of all available
presets and will also change based on what you have entered in the Search field. So again
if you have searched for “jazz”, this shortcut menu will only show you patches that match
that tag. The left and right arrows in the toolbar will load the next or previous preset in the
list: either the full list, or the filtered list if you have entered a search term.
Arturia - User Manual B-3V - USER INTERFACE 17
Page 22

3.3.5. Playlists
In the lower left corner of the Preset Browser window is a feature titled Playlists. This is used
to collect presets into collection groups, such as a set list for a particular performance or a
set of presets related to a particular studio project.
3.3.5.1. Add a playlist
To create a playlist, click the + New Playlist button:
Give the playlist a name and it will appear in the Playlists menu. To rename the playlist at
any time, click the pencil icon at the end of its row.
3.3.5.2. Add a preset to the playlist
You can use the Search window to locate the presets you want to add to your playlist. Once
you have found the right preset, click and drag it onto the playlist name.
You will see a message which tells you that the new preset will be duplicated. B3-V2 will
create a copy of the preset so that you can modify settings in the playlist presets without
impacting the original preset it is based on, and vice versa.
To view the contents of a playlist, click on the playlist name.
18 Arturia - User Manual B-3V - USER INTERFACE
Page 23

3.3.5.3. Re-order the presets in the playlist
Presets may be reorganized within a playlist. For example, to move a preset from slot 3 to
slot 1, drag and drop the preset to the desired location.
This will move the preset into the new location.
3.3.5.4. Remove a preset from the playlist
To remove a preset from a playlist, click the X at the end of the preset row.
3.3.5.5. Delete a playlist
To delete a playlist, click the trashcan icon at the end of the playlist row.
Arturia - User Manual B-3V - USER INTERFACE 19
Page 24

3.4. Front panel
3.4.1. The vibrato switches
These switches let you toggle vibrato on or off independently for the upper and lower virtual
keyboards.
3.4.2. The Vibrato and Chorus mode knob
This knob lets you select between three different chorus and three different vibrato types
that will be applied to the virtual keyboards when their vibrato switches are activated. The
position of this knob represents three different depths for each kind of effect. So C1 is a
light chorus and C3 is more intense. Similarly, V1 is light vibrato and V3 is deeper. The three
settings could be thought of as Small, Wide and Full.
3.4.3. The Drawbars
Every sound or note is made up of a fundamental and harmonics. The fundamental can be
considered as the "root" of the sound and harmonics are higher frequencies you can hear,
which add some shape to the sound.
The drawbars let you shape your organ sound by mixing the fundamental and harmonics.
B-3 V has 9 drawbars for each virtual keyboard (upper and lower), and 2 bass pedal
drawbars for a total of 20. The 9 drawbards for the upper keyboard are located on the
left, and the 9 drawbars for the lower keyboard are located on the right, with the 2 bass
pedal drawbars located in the middle. Pulling a drawbar out will increase the volume of that
tonewheel in steps starting at zero (no sound) all the way to 8 (full volume). Each set of nine
drawbars is organised in asdending fashion, such that the bars on the left control lower
tones and the ones on the right control higher tones.
20 Arturia - User Manual B-3V - USER INTERFACE
Page 25

Think of the leftmost two (brown) drawbars as “sub” tones, the middle four as “foundation”
tones in the midrange, and the three to the furthest right as “brilliance”, controlling higher
frequencies.
Due to the fact that each drawbar has nine positions there are literally millions of possible
combinations of settings and sounds and this is what makes tonewheel organs so flexible,
capable of everything from subtle, minimal tones to very complex, rich and powerful
sounds.
Part of the skill of being an organ player is in mastering the drawbars, manipulating them in
real time to change the sound dynamically during a performance. This is something you will
see a good organ player doing very frequently as they play their instrument. For a software
organ it can be helpful to map MIDI sliders or knobs to the drawbars to give you a similar
kind of control. See the MIDI Learn Assignment [p.10] section of this manual for information
on how to assign MIDI controls.
3.4.4. Preamp Drive
This control can be used to set the amount of drive applied to the preamp. Increasing the
amount will add a slightly overdriven effect to the sound, introducing bite and grit which can
be desirable for certain kinds of music.
3.4.5. Master Volume
This controls the master volume output of the organ.
Arturia - User Manual B-3V - USER INTERFACE 21
Page 26

3.4.6. The Percussion section
This section allow you to add a percussive attack to the sound. Note that this only applies to
notes played on the upper virtual keyboard.
• Perc On/Off - Enables or disables the percussive attack.
• Vol Soft/Norm - Sets the volume of the percussive attack.
• Decay Fast/Slow - When set to Slow, the percussion tone will decay slowly. Set
to Fast, it will decay rapidly.
• Percussion Harmonic Selector - This sets the pitch of the Percussion sound.
Second means the pitch is up one octave above the Fundamental Drawbar. Third
means the pitch is up an octave and a fifth above the Fundamental Drawbar.
3.4.7. The Swell pedal
The swell pedal is situated pre-amplifier and connects directly to the organ. Since an organ
is not velocity-sensitive, meaning that pressing the keys will generate the same volume
regardless of how hard you press them, the Swell pedal is an important way of adding
volume fluctuations for a more expressive performance. Assigning a MIDI hardware pedal
to the Swell pedal is a good way to get more creative control over your performance. See
the MIDI Learn Assignment [p.10] section of this manual for information on how to assign
MIDI controls.
22 Arturia - User Manual B-3V - USER INTERFACE
Page 27

3.5. The Mod Section
The Mod section houses the modulation options and advanced settings for B-3V. Click the
Mod button located on the top toolbar to view these panels.
3.5.1. Advanced Settings
The Advanced section allows you to make further changes to the way sound is generated.
There are four subsections.
In the Organ Model subsection you can adjust how the various components of the
instrument interact, giving you the ability to tweak the components to create an ultrarealistic simulation of the organ condition - from clean and pristine to banged up and worn:
• Tonewheel Profile allows you to select a profile from one of 7 classic organs.
These tonewheel profiles were meticulously modelled from the original
instruments to capture all of their unique sound characteristics.
• Tonewheel Leakage controls the amount of signal that is allowed to leak from
each tonewheel. The more leakage you allow, the more imprecise the sound
because the tonewheels will all start to interfere with each other. However
allowing some leakage can help to give a more authentic sound.
• Drawbar Leakage lets you manually control the amount of each drawbar that
leaks into the ones either side of it. Set to zero, there is no leakage.
• Brilliance controls the amount of boost applied to the middle and upper
frequencies.
In the Mix subsection, you can adjust the relative volumes of each aspect of the sound.
• Upper/Lower adjust the relative volume balance of the two virtual manuals.
• Background Noise can be added for a more deliberately imperfect sound.
• Key Click volume can be turned up or down, altering the organ’s sound to make
it more or less percussive when keys are pressed.
Arturia - User Manual B-3V - USER INTERFACE 23
Page 28

In the Percussion subsection you can further tweak the behavior of the percussive sound.
• Volume specifies loudness for the soft and normal switch on the main panel.
• Decay specifies the decay time (in milliseconds) for the slow and fast decay
switch on the main panel.
• Volume Drop reduces the volume of the instrument when you set percussion to
Normal.
• Disable 1' removes the 1' drawbar tone from the sustained tone when the
percission is on.
• Polyphonic Percussion allows you to trigger the percussion sound
polyphonically.
In the Envelopes subsection you can adjust the shape of the sound for each virtual
keyboard.
• The Attack parameter changes the speed at which a note comes in once a key is
pressed.
• The Release parameter adjusts how long the sound will fade out after a key is
released.
Each virtual keyboard can be adjusted independently. For regular organ sounds these would
all be set very low, but if you raise them you can get more synth-like sounds.
24 Arturia - User Manual B-3V - USER INTERFACE
Page 29

3.5.2. Drawbar Modulators
3.5.2.1. What this section does
The organ sound can be quite static if the player does not interact with it much. A true
tonewheel organ player will move the drawbars a lot while playing, to add evolution to
the sound. We decided to pursue that idea by letting the user automate the movement of
drawbars using envelopes, LFOs and step sequencers. This opens a lot of possibilities for
sound design. It can be used to create sharp attacks with lots of harmonics that turn into
a softer sound. It can also be used to create atmospheric, evolving sounds. The harmonic
relationship between drawbars means that the sound will always feel natural, even when
the drawbars are heavily modulated.
The Drawbar Modulators allow you to modulate the values of the drawbars over time. There
are ten modulator slots at the top of this section, each of which can hold either an LFO,
multi-point enveolope, or step sequencer.
To add a modulator to a slot, click the + button and select from one of the three types. To
swap one type of modulator for another at any time, click the down arrow above the slot
and select a different type from the menu.
Below we will explain the difference between each type of modulator.
Arturia - User Manual B-3V - USER INTERFACE 25
Page 30

3.5.2.2. Envelope modulator
This lets you draw your own modulation shape by adding and manipulating points on a
curve.
Click anywhere in the window to add a point. Right-click on a point to remove it.
You can set up to 16 points in the Envelope window, and you can drag points around after
you've placed them.
To change the curve between points, click and drag the yellow up/down arrows in that
segment.
To zoom in and out for a better view, click the time display above the envelope ares and
drag the mouse up or down.
26 Arturia - User Manual B-3V - USER INTERFACE
Page 31

3.5.2.3. LFO
LFO stands for Low Frequency Oscillator. This is a type of modulation waveform that
oscillates between minimum and maximum value at a given rate and shape.
You can choose between five different Wave shapes - Sine, Triangle, Saw, Ramp and Square.
Rate describes the frequency at which the waveform is "scanned".
Sync switch allows you to sync the Rate to a tempo-locked time interval. When Sync is
turned on, the Rate control will display Note divisions. When Sync is turned off, Rate will
display continuous time values.
Phase functions as a start offset for the waveform, in degrees - between 0 (beginning of the
waveform) and 360 (end of the waveform).
Arturia - User Manual B-3V - USER INTERFACE 27
Page 32

3.5.2.4. Step Sequencer
The Step Sequencer allows you to enter modulation in steps, which can be good for creating
more rhythmic types of modulations.
There are 32 steps available and you can specify the length of the sequence using the Steps
control.
Step Length describes the rate at which the sequence will proceed through each step.
Sync allows you to sync the Step Length to a tempo-locked time interval. When Sync is
turned on, the Step Length control will display Note divisions. When Sync is turned off, Rate
will display continuous time values.
Smooth control specifies whether transitions between steps happen immediately or more
smoothly. At minimum value no smoothing will be applied. At higher values interpolation will
occur from one step value to the next.
3.5.2.5. Assigning modulation amount to drawbars
Each modulation slot can be set to modulate one or several drawbars at a time, allowing
you to create interesting movement and relationship between the partials of the sound over
time. On the bottom of the Voice Modulator section, you will see representations of each
drawbar as a "puck".
To change the modulation amount for a given tonewheel click and drag the tonewheel puck
up or down. When the puck is dragged above the horizontal yellow line, the modulation will
be positive, meaning that when the modulation signal goes up, the drawbar will be extended
out so that you will hear that tonewheel. If the puck is dragged below the yellow line the
modulation will work inversely - when the modulation signal goes up, the drawbar will be
retracted and less sound will come out of it.
To reset the modulation amount for a given tonewheel (i.e. no modulation), double-click its
puck and it will reset to the middle.
Note that the position of the drawbars in the main organ interface has no influence on these
modulations.
28 Arturia - User Manual B-3V - USER INTERFACE
Page 33

3.6. FX, Amp and Room Section
B-3 V2 features a new FX section, which now houses the amplifier, room convolution reverb,
and effects pedals. The FX section can be accessed by clicking the FX button located on the
top toolbar.
There are four slots for creating your own custom configuration of FX modules, followed by
a fixed amplifier and room reverb.
There are three global controls at the top of the FX section:
• In Gain adjusts the volume of the signal sent into the chain. Be careful when
using the In Gain knob after you've created an effects chain containing
compressors and limiters, as this may affect the dynamics of the sound.
• Out Gain adjusts the volume of the processed sound.
• Bypass disables the effects, amp and room so that you are only hearing the
unprocessed sound from the instrument. This can be useful if you intend to
process the sound with other types of amplification or effects in your DAW.
To disable a module in the chain, click the power button at the top of the corresponding
module. When disabled, the module will be bypassed and will have no effect on the sound.
To enable a module, click the power button again.
You can save and recall presets for effects, amplifier, or room reverb by clicking on the three
horizontal lines at the top of the corresponding module.
Arturia - User Manual B-3V - USER INTERFACE 29
Page 34

3.6.1. Effects
Let's first look at the effects pedal section. Here you can add up to four different effects
pedals to shape the sound. You can place as many or as few effects as you need in the four
slots and effects slots can remain empty.
To load an effect, click the + button in the middle of the slot and select from one of the 12
available effects pedals. Alternatively, you can click the pull-down menu at the top of the fx
slot and you will be presented with the same menu of 12 effects.
To change an effect pedal position in the signal chain, hover over the body of the pedal until
the cursor changes to a hand icon then click and drag it to a different slot. If there is an
effect already loaded in the target slot, it will swap positions with the one you drag on top
of it.
Let's now look at the various types of available effects pedals.
30 Arturia - User Manual B-3V - USER INTERFACE
Page 35

3.6.1.1. Chorus pedal
Chorus works by taking an audio signal and mixing it with one or more delayed and pitchmodulated copies of itself, making the sounds harmonically richer and adding a sense of
movement and space.
This effect can be observed in live vocal choirs where multiple singers perform the same
melodic line which, due to small differences in each performer's timing and pitch, creates a
thicker, moving sound.
Control Description
LFO Freq Controls the frequency of the LFO that will modulate the delayed signal to produce the effect.
Depth Sets the depth of the modulation applied by the LFO.
Feedback Adds feedback to the chorus, to achieve a harsher or ringing tone.
Delay
Voices
Stereo Switches the Chorus output between mono and stereo.
Shape Lets you choose the wave shapre of the modulating LFO.
Dry/Wet Controls the balance between processed and unprocessed sound.
Controls the amount of delay applied to the signal. The more delay, the deeper the chorus
effect.
Sets the number of "voices" (delay lines) the effect will use, with a different starting phase for
each voice, to achieve a higher chorus density.
Arturia - User Manual B-3V - USER INTERFACE 31
Page 36

3.6.1.2. Flanger pedal
The Flanger works by mixing identical copies of the input signal, with one signal delayed
by a small and gradually changing amount of time. While the Chorus works with longer
delay times, the Flanger uses much shorter delay times which produces a characteristic
undulating swept comb filter effect.
Control Description
LFO Freq Controls the frequency of the LFO that will modulate the delayed signal to produce the effect.
Depth Sets the depth of the modulation applied by the LFO.
Feedback Adds feedback to the flanger signal, to achieve a harsher or ringing tone.
Stereo Switches the Flanger output between mono and stereo.
Phase Invert Inverts the phase of the flanger signal to create effect variations through phase cancellations.
LP Filter Filters the frequencies above the cutoff point, to achieve a more muted sound.
HP Filter Filters the frequencies below the cutoff point to achieve a brighter, less boomy sound.
Dry/Wet Controls the balance between processed and unprocessed sound.
32 Arturia - User Manual B-3V - USER INTERFACE
Page 37

3.6.1.3. Compressor pedal
A Compressor reduces the volume of the audio signal above a defined threshold which has
the effect of smoothing out volume differences between loud and quiet sections. By making
the louder sections quieter, this allows you to apply additional gain to the signal to make the
quieter sections louder. The Compressor is a very useful tool for creating a more balanced
sound that sits well in a mix.
Control Description
Threshold Sets the level above which volume compression will be applied to the sound.
Ratio
Attack
Release
Out Gain
Make Up Turns automatic gain (make up) compensation on and off.
Dry/Wet Controls the balance between processed and unprocessed sound.
Sets the amount of compression. Higher values mean more compression/gain reduction. For
example, a ratio of 5 means that for every 5db of volume above the Threshold, the signal will
only go up by 1db.
Sets the time it takes for the compressor to reach the maximum compression once Threshold is
reached.
Sets the time it takes for the compression to return to zero once the audio volume falls below the
Threshold.
Manual volume gain (make up) amplification to compensate for the reduction due to
compression.
Arturia - User Manual B-3V - USER INTERFACE 33
Page 38

3.6.1.4. Phaser pedal
Phasing is the psychedelic sweeping effect that was popular in the 1960s and 70s and adds
a sense of movement and swirling to the sound. It works by creating a copy of the input
signal, feeding it through a series of all pass filters which create peaks and valleys in the
frequency spectrum, then mixing it back with the original signal. As the all pass filters are
modulated, frequencies that are out of phase cancel each other, producing the phaser's
characteristis "whoosh" sweeping effect.
Control Description
Freq Sets the harmonic center of the phase modulation effect
Poles
Feedback Controls the amount of phase resonance by adding feedback to the signal.
Stereo Controls the stereo spread of the signal. At the lowest value, the signal will be mono.
Rate Controls the speed of the LFO that will modulate the phasing effect.
Amount Controls the amount of modulation applied by the LFO.
Sync
Dry/Wet Controls the balance between processed and unprocessed sound.
Determines the steepness (number of poles) of the all-pass filters that will process the
modulation signal.
Synchronizes the modulation speed to the internal tempo, or your DAW's tempo when using as
a plug-in.
34 Arturia - User Manual B-3V - USER INTERFACE
Page 39

3.6.1.5. Delay pedal
Delay adds dimension and spaciousness to the signal, by creating echoes that can be
spread over the stereo image. When using longer delay times, this can also add a rhythmic
quality to the sound, especially when working with sounds that have a more pronounced
attack.
Control Description
Time Controls the time the delayed line will sound after the original signal. May be tempo-synced.
Feedback Adjusts how many times the delayed line will repeat (more feedback, more delay lines).
Stereo Controls the stereo spread of the signal. At the lowest value, the signal will be mono.
Sync
Ping
Pong
LP Filter Filters the frequencies above the cutoff point to achieve a more muted sound.
HP Filter Filters the frequencies below the cutoff point to achieve a brighter, less boomy sound.
Dry/Wet Controls the balance between processed and unprocessed sound.
Synchronizes the delay time to the internal tempo, or your DAW's tempo when running as a plugin. When synced, the Time value will then display values in note format.
In ping-pong mode, delay lines will alternate between left and right in the stereo field.
Arturia - User Manual B-3V - USER INTERFACE 35
Page 40

3.6.1.6. Distortion pedal
This pedal offers 4 different types of distortion, ranging from subtle drive, crunch and grit to
extreme distortion, fuzz and bitcrushing.
Use the left and right arrows to select one of the 4 distortion types. Each type will have its
own associated controls below.
Bitcrusher: This effect distorts the sound by reducing the number of bits used to define the
waveform. The less bits used, the more the signal is degraded and distorted. Downsampling
is another way of inducing distortion. As the sample rate is reduced, aliasing is introduced
to the sound, creating "ghost partials" in the spectrum.
Control Description
Bit Depth Reduces the number of bits used to represent the waveform.
Downsampling Reduces the sample-rate of the input signal.
Dry/Wet Controls the balance between processed and unprocessed sound.
Overdrive: The Overdrive effect is well known by guitar players and adds a "fuzziness" to the
sound. This effect is modelled after a solid-state circuit.
Control Descri ption
Drive Controls the distortion intensity.
Out Gain Controls the volume of the processed signal output.
Tone Controls the brightness of the resulting signal.
Dry/Wet Controls the balance between processed and unprocessed sound.
36 Arturia - User Manual B-3V - USER INTERFACE
Page 41

Wavefolder: This is a type of Distotion effect where the signal is amplified until it clips, then
the peaks above the clip point are folded downward. Usually, this type of distortion enriches
the spectrum with high-frequency content and can produce complex frequencies out of
simple waveforms.
Control Description
Drive Controls the distortion intensity.
Out Gain Controls the volume of the processed signal output.
Type Controls the shape of the wavefolding. Hard produces more distortion.
Dry/Wet Controls the balance between processed and unprocessed sound.
Waveshaper: This distortion effect applies a mathematical shaping function to the input
signal to produce a modified output. The result may be anything between subtle overdrive
to pure noise.
Control Descri ption
Drive Controls the distortion intensity.
Out Gain Controls the volume of the processed signal output.
Dry/Wet Controls the balance between processed and unprocessed sound.
Arturia - User Manual B-3V - USER INTERFACE 37
Page 42

3.6.1.7. Equalizer pedal
An equalizer is a bank of filters where each filter works in a specific band of the frequency
spectrum, boosting or cutting those frequencies to change the overall spectrum balance. It
can be used for subtle tone adjustments, or for accentuating certain bands to allow them to
cut through the mix.
The Equalizer has three bands - a shelf in the low region (Low Shelf), a bell in the middle
(Peak), and a shelf in the high region (High Shelf).
Each band features a gain control and a frequency control.
The mid band also features a Q (bandwidth) control, which allows you to specify the width
of the cut or boost to mid frequencies. Small values can be used for a more surgical cut or
boost, while larger values affect more frequencies around the cut-off (center) frequency.
Control Description
Low Shelf Gain Controls the gain/attenuation (between -15 dB and 15 dB) of the Low Shelf band.
Low Shelf Frequency Controls the shelf frequency of the Low Shelf band (between 50 Hz and 500 Hz).
Peak Gain Controls the gain/attenuation (between -15 dB and 15 dB) of the Peak band.
Peak Frequency Controls the peak frequency of the Peak band (between 40 Hz and 20 kHz).
Peak Q Controls the Q (bandwidth) of the Peak band (between 0.001 and 15.0).
High Shelf Gain Controls the gain/attenuation (between -15 dB and 15 dB) of the High Shelf band.
High Shelf Frquency Controls the shelf frequency of the High Shelf band (between 1 kHz and 10 kHz).
Scale Controls the depth of the equalization effect.
38 Arturia - User Manual B-3V - USER INTERFACE
Page 43

3.6.1.8. Reverb pedal
The Reverb pedal allows you to place the sound in a virtual space. This is an algorithmic
Reverb, unlike the Room module at the end of the effects chain which is convolution-based.
However, this Reverb can be placed anywhere in the signal chain, so that other effects can
be applied to the sound after it has been processed by the reverb.
Control Description
Pre
Delay
Size
Decay
Damping
M/S
LP Filter Filters the frequencies above the cutoff point to achieve a more muted sound.
HP Filter Filters the frequencies below the cutoff point to achieve a brighter, less boomy sound.
Dry/Wet Controls the balance between processed and unprocessed sound.
Controls the time between the original signal and the first echoes (early reflections).
Controls the size of the room or space (basically, the reverb "body"). The bigger the size, the more
reverb that's added.
Controls the length of the reverb effect. Should be articulated with the Damping parameter for a
more realistic effect.
In a room, this parameter defines the absorption coefficient of the reflection surfaces. The higher
the damping, the faster high frequencies will decay.
Adjusts the stereo wideness of the effect, from mono to an increasingly wide stereo image. Takes
advantage of Mid/Side processing.
Arturia - User Manual B-3V - USER INTERFACE 39
Page 44

3.6.1.9. Stereo Pan pedal
The Stereo Pan pedal can be used to add stereo motion to the sound. It uses an LFO (low
frequency oscillator) to bounce the sound between the left and right channel to create a
sense of movement.
Control Description
Rate
Shape Defines the shape of the LFO. Available options are Sine, Triangle, Saw, Ramp, and Square.
Sync
LP
Mono
Dry/
Wet
Controls the speed of the LFO. Can be synced to internal tempo, or your DAW's tempo when running
as a plug-in.
Synchronizes the cycle of the LFO to the internal tempo, or your DAW's tempo when running as a
plug-in.
When set to On, the low frequencies are not modulated by the effect.
Controls the balance between processed and unprocessed sound.
40 Arturia - User Manual B-3V - USER INTERFACE
Page 45

3.6.1.10. Analog Delay pedal
Analog Delay is another type of delay pedal with a slightly different sound. The principle
is the same - the input audio is recorded and played back after a small amount of time.
A feedback circuit then introduces more copies of the delayed audio back into the original
signal.
This particular delay pedal is great for more dubby sounds with lots of feedback. Since this
delay is modeled after analog hardware, it will introduce more coloration than the other
Delay pedal options.
Control Description
Time
Feedback Adjusts how many times the delayed line will repeat (more feedback, more delay lines).
Sync
Feedback
Tone
Rate
Depth Controls the amount of modulation.
Dry/Wet Controls the balance between processed and unprocessed sound.
Specifies the time interval between the original and delayed signal. May be synced to internal
tempo, or your DAW's tempo.
Synchronizes the delay times to the internal tempo, or your DAW's tempo when running as a
plug-in.
Controls the tone (brightness) of the resulting feedback delays.
Controls the rate of the LFO modulation source. When Sync is on, the rate is synced to the
internal tempo, or your DAW's tempo when running as a plug-in, and is expressed in note values.
Arturia - User Manual B-3V - USER INTERFACE 41
Page 46

3.6.1.11. Limiter pedal
The Limiter is a type of compressor that serves a very specific purpose. It essentially works
as a volume "ceiling" to prevent the signal from going above a certain volume. This is
especially useful when working with sounds with a wide dynamic range and many effects
that could potentially cause the signal to clip and result in clicks and pops.
Control Description
Input
Gain
Release Controls the time it takes for the audio to recover from limiting.
Output
Level
Dry/Wet Controls the balance between processed and un processed sound.
Controls the amount of gain added to the input signal. The VU Meter gives a visual reference of
the current volume.
Controls the output gain, after limiting.
42 Arturia - User Manual B-3V - USER INTERFACE
Page 47

3.6.1.12. Tape Echo pedal
The Tape Echo pedal is a recreation of a famous tape echo unit from the 70s and 80s, which
worked by recording snippets of the input audio onto magnetic tape, then playing them
back with a delay. Due to the nature of magnetic tape, this imparts a natural tape saturation
effect to the delays.
Control Description
Bass Controls the volume of low frequencies.
Treble Controls the volume of high frequencies.
Time Specifies the time interval between the original and delayed echo signal. May be tempo-synced.
Sync
Intensity Controls the number of echoes that are produced and, therefore, the intensity of the effect.
Input Controls the volume of the in put signal.
Echo Controls the volume of the echo signal.
Dry/Wet Controls the balance between processed and unprocessed sound.
Synchronizes the echo times to the internal tempo, or your DAW's tempo when running as a plugin.
Arturia - User Manual B-3V - USER INTERFACE 43
Page 48

3.6.2. Amp
Following the effects pedal slots is the Amplifier. This is a fixed module and cannot be
reordered in the signal chain. There are two available types of amps - a rotary speaker, as
well as a model of a popular twin amp. Each amplifier type has its own unique sound and
features.
You can select the desired amplifier from the menu at the top.
3.6.2.1. The Rotary Speaker
Rotary speaker cabinets were invented by Donald Leslie in 1940. They became inseparable
add-ons to the Hammond organ, to the point of being almost impossible to see one without
the other, but have also been used with many other types of instruments due to their distinct
swirling sound character.
The Leslie expressiveness was largely due to the independently rotating speaker elements
inside the cabinet - a horn (for higher frequencies) and drum (for lower frequencies) - which
could rotate at variable speeds to produce the characteristic swirling effect that greatly
contributed to the fame of the Hammond organs.
The Leslie 122 cabinet was the most popula and was designed specifically for the
Hammond. Later, Leslie created the Leslie 147 which was intended to be a "universal" cabinet
to be used with any organ.
• The pull-down menu in the upper left corner allows you to switch among
different types of cabinet models - Closed, Open, 122 Closed, 122 Open, 147
Open. Each option gives a subtle variation on the sound.
• Fast switch controls whether the horn and drum rotate at slow or fast speeds. In
the off position, the speaker elements will rotate at their slow rate, specified by
the Horn Slow and Drum Slow settings in the Advanced tab. In the on position,
the speaker elements will rotate at a fast rate, specified by the Horn Fast and
Drum Fast knobs in the Advanced tab. This setting can also be accessed from the
main panel Slow / Fast lever.
44 Arturia - User Manual B-3V - USER INTERFACE
Page 49

• Brake switch controls whether the rotary speaker is moving or not. When toggled
on, speaker rotation will stop. When toggled off, speaker rotation will resume
based on the position of the other rotation settings in this panel. The Brake can
also be accessed from the main panel Stop / Run lever.
• Stereo controls the amount of stereo spacing between the two elements. Turned
hard left, the sound is more mono and to the right it becomes wider.
• Balance lets you set the mixture between the horn and drum sound for a more
muted or brighter effect.
• Dry / Wet adjusts the blend of the direct "dry" sound (post pedal effects) and the
"wet" sound through the rotary speaker. Turn up this knob to hear more of the
rotary speaker effect.
There are a few additional settings in the Advanced tab:
• Horn Slow and Drum Slow knobs specify the rotation speed of each element
when the Fast switch is in the off (slow) position. The slow rotation range is
0.100Hz to 2Hz.
• Horn Fast and Drum Fast knobs specify the rotation speed of each element when
the Fast switch is in the on (fast) position. The fast rotation range is 2Hz to 8Hz.
• Horn Acceleration and Drum Acceleration knobs control how quickly the speed
changes when switching from slow to fast, or when using the Brake. At low
settings, it will take longer for the speed to change. At high settings, the speed
change will happen quicker.
Arturia - User Manual B-3V - USER INTERFACE 45
Page 50

3.6.2.2. Twin Amp
This amplifier is modelled after a famous guitar amp to give you even more options for
achieving your desired tone. Twin Amp models all of the characteristics and features of the
original amp, including Tremolo as well as two microphone placement positions.
• On Axis chooses whether the virtual microphone capturing sound from the
speaker is placed on axis (pointing straight at the speaker) or off axis (pointing
at an angle). This will give a slightly different tone to the sound, with on axis
resulting in a brighter, more present tone.
• Bright switch accentuates the higher frequencies of the sound, adding sheen and
sparkle to the tone.
• Drive knob controls an additional preamp stage that adds overdrive and
saturation to the sound.
• Bass / Mid / Treble knobs adjust the volumes of the corresponding EQ bands.
• Reverb knob lets you dial in reverberation amount. Twin Amp uses a modelled
spring reverb.
• Speed knob controls the speed of the Tremolo effect.
• Intensity knob controls the intensity of the Tremolo effect.
46 Arturia - User Manual B-3V - USER INTERFACE
Page 51

3.6.3. Room
The last processor in the effects signal chain is the Room, a high-quality convolution reverb
processor. This too is a fixed module and cannot be reordered in the chain. Convolution
reverb works differently than algorithmic reverb - instead of simulating a virtual "room"
and how a sound reverberates in it via algorithmic calculations, convolution uses impulse
responses sampled from real spaces and hardware units. These impulse responses capture
reverberation characteristics, such as frequency response and decay, of the given space
into a sonic "signature". The convolution processor then allows you to "convolve" your sound
with this signature to imprint its reverberation characteristics onto your own sound.
The menu at the top allows you to pick from 9 different types of convolution reverb, ranging
from concert halls and studios to vintage plate and spring reverb hardware.
There are four controls which allow you to further shape the character of the reverb:
• Room controls the size and tone of the space. A larger space will usually sound darker.
• Duration controls the duration of the reverb tail.
• Decay Start controls when the reverberated sound starts fading out.
• Dry / Wet controls the mix amount of dry and reverberated signals.
Arturia - User Manual B-3V - USER INTERFACE 47
Page 52

4. SOFTWARE LICENSE AGREEMENT
In consideration of payment of the Licensee fee, which is a portion of the price you paid,
Arturia, as Licensor, grants to you (hereinafter termed “Licensee”) a nonexclusive right to
use this copy of the Analog Lab Lite Software (hereinafter the “SOFTWARE”).
All intellectual property rights in the software belong to Arturia SA (hereinafter: “Arturia”).
Arturia permits you only to copy, download, install and use the software in accordance with
the terms and conditions of this Agreement.
The product contains product activation for protection against unlawful copying. The OEM
software can be used only following registration.
Internet access is required for the activation process. The terms and conditions for use of the
software by you, the end-user, appear below. By installing the software on your computer
you agree to these terms and conditions. Please read the following text carefully in its
entirety. If you do not approve these terms and conditions, you must not install this software.
In this event give the product back to where you have purchased it (including all written
material, the complete undamaged packing as well as the enclosed hardware) immediately
but at the latest within 30 days in return for a refund of the purchase price.
1. Software Ownership Arturia shall retain full and complete title to the SOFTWARE recorded
on the enclosed disks and all subsequent copies of the SOFTWARE, regardless of the media
or form on or in which the original disks or copies may exist. The License is not a sale of the
original SOFTWARE.
2. Grant of License Arturia grants you a non-exclusive license for the use of the software
according to the terms and conditions of this Agreement. You may not lease, loan or sublicense the software.
The use of the software within a network is illegal where there is the possibility of a
contemporaneous multiple use of the program.
You are entitled to prepare a backup copy of the software which will not be used for
purposes other than storage purposes.
You shall have no further right or interest to use the software other than the limited rights as
specified in this Agreement. Arturia reserves all rights not expressly granted.
3. Activation of the Software Arturia may use a compulsory activation of the software and
a compulsory registration of the OEM software for license control to protect the software
against unlawful copying. If you do not accept the terms and conditions of this Agreement,
the software will not work.
In such a case the product including the software may only be returned within 30 days
following acquisition of the product. Upon return a claim according to § 11 shall not apply.
4. Support, Upgrades and Updates after Product Registration You can only receive support,
upgrades and updates following the personal product registration. Support is provided only
for the current version and for the previous version during one year after publication of the
new version. Arturia can modify and partly or completely adjust the nature of the support
(hotline, forum on the website etc.), upgrades and updates at any time.
The product registration is possible during the activation process or at any time later through
the Internet. In such a process you are asked to agree to the storage and use of your
personal data (name, address, contact, email-address, and license data) for the purposes
specified above. Arturia may also forward these data to engaged third parties, in particular
distributors, for support purposes and for the verification of the upgrade or u pdate right.
5. No Unbundling The software usually contains a variety of different files which in its
configuration ensure the complete functionality of the software. The software may be used
as one product only. It is not required that you use or install all components of the software.
You must not arrange components of the software in a new way and develop a modified
version of the software or a new product as a result. The configuration of the software may
not be modified for the purpose of distribution, assignment or resale.
48 Arturia - User Manual B-3V - Software License Agreement
Page 53

6. Assignment of Rights You may assign all your rights to use the software to another
person subject to the conditions that (a) you assign to this other person (i) this Agreement
and (ii) the software or hardware provided with the software, packed or preinstalled
thereon, including all copies, upgrades, updates, backup copies and previous versions,
which granted a right to an update or upgrade on this software, (b) you do not retain
upgrades, updates, backup copies und previous versions of this software and (c) the
recipient accepts the terms and conditions of this Agreement as well as other regulations
pursuant to which you acquired a valid software license.
A return of the product due to a failure to accept the terms and conditions of this Agreement,
e.g. the product activation, shall not be possible following the assignment of rights.
7. Upgrades and Updates You must have a valid license for the previous or more inferior
version of the software in order to be allowed to use an upgrade or update for the software.
Upon transferring this previous or more inferior version of the software to third parties the
right to use the upgrade or update of the software shall expire.
The acquisition of an upgrade or update does not in itself confer any right to use the
software.
The right of support for the previous or inferior version of the software expires upon the
installation of an upgrade or update.
8. Limited Warranty Arturia warrants that the disks on which the software is furnished is
free from defects in materials and workmanship under normal use for a period of thirty (30)
days from the date of purchase. Your receipt shall be evidence of the date of purchase. Any
implied warranties on the software are limited to thirty (30) days from the date of purchase.
Some states do not allow limitations on duration of an implied warranty, so the above
limitation may not apply to you. All programs and accompanying materials are provided “as
is” without warranty of any kind. The complete risk as to the quality and performance of the
programs is with you. Should the program prove defective, you assume the entire cost of all
necessary servicing, repair or correction.
9. Remedies Arturia's entire liability and your exclusive remedy shall be at Arturia's option
either (a) return of the purchase price or (b) replacement of the disk that does not meet the
Limited Warranty and which is returned to Arturia with a copy of your receipt. This limited
Warranty is void if failure of the software has resulted from accident, abuse, modification,
or misapplication. Any replacement software will be warranted for the remainder of the
original warranty period or thirty (30) days, whichever is longer.
10. No other Warranties The above warranties are in lieu of all other warranties, expressed
or implied, including but not limited to, the implied warranties of merchantability and fitness
for a particular purpose. No oral or written information or advice given by Arturia, its dealers,
distributors, agents or employees shall create a warranty or in any way increase the scope
of this limited warranty.
11. No Liability for Consequential Damages Neither Arturia nor anyone else involved in
the creation, production, or delivery of this product shall be liable for any direct, indirect,
consequential, or incidental damages arising out of the use of, or inability to use this product
(including without limitation, damages for loss of business profits, business interruption, loss
of business information and the like) even if Arturia was previously advised of the possibility
of such damages. Some states do not allow limitations on the length of an implied warranty
or the exclusion or limitation of incidental or consequential damages, so the above limitation
or exclusions may not apply to you. This warranty gives you specific legal rights, and you
may also have other rights which vary from state to state.
Arturia - User Manual B-3V - Software License Agreement 49
 Loading...