

Page 1

LV 661 A
LV 661 A
IT
EN
FR
DE
NL
ES
PT
Lavastoviglie
Istruzioni per l’installazione e l’uso
Dishwasher
Instructions for installation and use
Lave-vasseille
Instructions pour l’installation et l’emploi
Geschirrspüler
Informationen f
V aatwasser
Gebruiksaanwijzingen voor de plaatsing en gebruik
Lavavajillas
Instrucciones para la instalaci
Máquina de lavar louça
Instruções para a instalação e a utilização
ü
r Installation und Gebrauch
ó
n y el uso
Page 2

Page 3

Guida rapida per la
lavastoviglie
Questo manuale ti racconta in maniera piacevole tutto quello che
può offrirti il tuo nuovo elettrodomestico. In più, scoprirai curiosità
e piccole astuzie per lavare meglio con la tua lavastoviglie e farla
durare di più.
1. Installazione e trasloco (p. 8)
L'installazione, dopo la consegna o un trasloco, è l'operazione
più importante per il buon funzionamento della tua lavastoviglie.
Verifica sempre:
1. Che l'impianto elettrico sia a norma;
2. Che i tubi di carico e scarico dell'acqua siano collegati correttamente;
3. Che la lavastoviglie sia a livello. Ne vale la pena: per la durata e il
corretto funzionamento della lavastoviglie.
AVASTOVIGLIE
L
2. Quadro comandi ai tuoi ordini (p. 2)
Impara a conoscere le parti da cui è composta la lavastoviglie, la
userai meglio. Qui trovi la descrizione dettagliata dei comandi e
delle parti interne.
3. Come si caricano le stoviglie (p. 3)
In questa pagina trovi consigli utili per caricare correttamente la
lavastoviglie e sfruttare al meglio i suoi spazi.
4. Come avviare la lavastoviglie (p. 4)
Dopo avere caricato la lavastoviglie, devi scegliere il programma
giusto e dosare correttamente detersivo e brillantante. Leggere
queste pagine ti aiuterà in tutte le fasi del lavaggio.
9. Cura e manutenzione particolari (p. 10)
Ogni tanto, una volta al mese, dedica un po' di attenzione al gruppo filtrante e agli irroratori. Qui imparerai come fare.
10. Tenere in forma la lavastoviglie (p. 10)
5. Il sale: un importante alleato (p. 7)
Usare il sale giusto e nella giusta quantità ti aiuta a conservare in
ottimo stato la lavastoviglie, per lavare meglio ed evitare i possibili danni del calcare.
Rispetta le poche regole che leggi qui, il risultato sarà una lavastoviglie sempre in ottima forma.
11. Caratteristiche tecniche (p.2)
6. Consigli e suggerimenti, anche per
risparmiare (p. 7)
Tutti i dati tecnici del tuo elettrodomestico, sempre a norma di
legge.
Qui trovi piccoli consigli per lavare meglio le tue stoviglie e per
risparmiare scegliendo il programma adatto al tipo di carico.
7. Problemi e soluzioni (p. 9)
Prima di chiamare il tecnico, guarda qui: moltissimi problemi
possono avere una soluzione immediata. Se poi non riesci a risolvere chiama il numero dell'assistenza Ariston e in poco tempo,
se possibile, qualsiasi guasto sarà riparato.
12. Ariston ti è vicina anche dopo lacquisto
Ariston sostiene i suoi prodotti con servizi e supporto anche dopo
l'acquisto offrendoti garanzie speciali, assistenza professionale,
ricambi e accessori di qualità. Per informazioni telefona al Numero Verde Ariston.
8. Sicurezza per te e la tua famiglia (p. 9)
Leggi questo capitolo con attenzione, ti darà informazioni utili
sulla sicurezza di installazione l'uso e la manutenzione. Per evitare brutte sorprese.
LAVASTOVIGLIE ARISTON - Istruzioni per l’installazione e l’uso
(p.11)
1
Page 4

AVASTOVIGLIE
G
C
S
T
E
R
D
B
A
L
Apriamo insieme la tua lavastoviglie
Come è fatta?
Imparare a conoscere le parti da cui è composta la lavastoviglie ti
aiuterà ad usarla meglio.
E. Cestello superiore
F. Irroratore superiore
G. Regolazione altezza
cestello
H. Cestello inferiore
I. Irroratore inferiore
J. Tappo contenitore sale
K. Filtro lavaggio
L. Contenitore detersivo e
brillantante
Quadro comandi ai tuoi
ordini
A. Pulsante ON-OFF
Premi questo pulsante
per accendere la
macchina.
B. Spia ON-OFF
Ti segnala che la
macchina è accesa
C. Maniglia apertura porta
Serve ad aprire la porta
della lavastoviglie.
D. Manopola selezione
programmi
Serve a selezionare un
programma.
E. Pulsante "Extra
asciugatura"
Premilo per ottenere
una maggiore
asciugatura.
G. Lampade spia
avanzamento ciclo
prelavaggio,lavaggio,
risciacquo,asciugatura.
R. Pusante Start/Reset
Con Start si avvia il
programma di lavaggio,
con Reset annulli tutte
le impostazioni.
S. Lampada spia
mancanza sale
Ti avvisa che è ora di
aggiungere il sale.
T. Lampada spia
mancanza brillantante
Ti avvisa che è ora di
aggiungere il
brillantante.
Caratteristiche Tecniche
Caratteristiche tecniche
Larghezza cm. 59,5
Profondità cm. 57
Altezza cm. 82
Capacità 12 coperti stand ard
Pressione acqua al imen ta z ione 4,3 psi - 145 psi ( 30 KP a÷ 1MPa ) ( 0, 3 ÷1 0 bar)
Tensione di alimentaz ione Vedi targhetta caratteristi ch e
Potenza totale assorbita Vedi targhetta caratteristiche
Fusibile Vedi targhetta caratteristi ch e
2
LAVASTOVIGLIE ARISTON- Istruzioni per l’installazione e l’uso
Questa lavastoviglie è
conforme alle seguenti
Direttive Comunitarie:
73/23/CEE
(Basse Tensioni)
e successive
modificazioni;
89/336/EEC
(Compatibilità
elettromagnetica)
e successive
modificazioni.
97/17/CE
(Etichettatura)
2002/96/CE
(Residui di
Apparecchiature
Elettriche ed
Elettroniche)
Page 5

AVASTOVIGLIE
L
Come si caricano le stoviglie?
Prima di lavare, piccoli gesti possono aiutarti a lavare meglio e a conservare più a lungo
la tua lavastoviglie. Asporta i residui più grossi di cibo, metti a bagno le pentole e le
padelle più incrostate. Dopo avere caricato le stoviglie controlla che le pale
dellirroratore girino bene. Non sovrapporre bicchieri e tazze, controlla che i piatti non
si tocchino.
Prima di tutto.
Prima di disporre le stoviglie nei
cestelli, asporta i residui più grossi di cibo, eviterai così di intasare
i filtri riducendo lefficacia del lavaggio.
Se le pentole e le padelle sono molto incrostate, mettile a bagno in
attesa del lavaggio. Per facilitare
loperazione di carico delle stoviglie estrai i cesti.
Cosa va nel cestello
inferiore?
Nel cestello inferiore ti consigliamo di mettere le stoviglie più difficili da lavare: pentole, coperchi,
piatti piani e fondi, ma anche: tazze , tazzine e bicchieri (nelle foto
trovi esempi di carico). Questo
cesto è dotato di una ribaltina con
inserti, sollevala per sistemare
agevolmente i piatti.
Piatti da portata e coper-
chi grandi: sistemali ai lati
del cesto.
Pentole, insalatiere: devo-
no essere sempre capovolte.
Stoviglie molto fonde: si-
stemale in posizione obliqua,
così lacqua potrà defluire per
lavarle meglio.
Bicchieri e tazze: sistemali
come indicato nella figura.
Cosa va nel cestello
superiore?
Nel cestello superiore carica le stoviglie delicate e leggere: bicchieri,
tazze da tè e caffè, piattini ma anche piatti, insalatiere basse, padelle, pentole e tegami bassi poco
sporchi (nelle foto puoi trovare
esempi di carico).
Sistema le stoviglie leggere in
modo che non vengano spostate
dai getti dacqua.
In dotazione possono essere fornite una o due ribaltine sulle quali
sistemare tazze e tazzine ma anche coltelli lunghi e acuminati e
posate di servizio.
Dopo avere caricato la lavastoviglie, ricordati di controllare che le
pale dellirroratore ruotino liberamente, senza scontrarsi con le stoviglie.
Regolazione del cestello
superiore.
Puoi regolare il cestello superiore
in posizione alta o bassa per poter
collocare le tue stoviglie senza difficoltà.
1
2
cestello inferiore
Esempi di caricamenti
cestello superiore
Il cestino per le posate è
sdoppiabile in due parti sfilando la
maniglia (vedi le figure A e B).
Quando hai poche posate da lavare puoi utilizzare solo metà cestino.
Questo cestino è dotato di due
griglie asportabili: inserisci le posate ad una ad una nelle feritoie.
I coltelli e gli utensili con punte
taglienti devono essere caricati
con le punte rivolte verso il basso.
Sistema tutte le posate in modo
che non si tocchino fra di loro.
E meglio sistemare le posate particolarmente lunghe in posizione
orizzontale nella parte anteriore del
cestello superiore.
F
Apri le alette di arresto rotaia e sfila il
cestello. Sistemalo in posizione alta o
bassa, quindi fallo scivolare lungo le guide
fino a far entrare anche le rotelle anteriori.
Chiudi le alette. Segui la sequenza delle
operazioni illustrate nella figura “F”.
3
4
B
A
LAVASTOVIGLIE ARISTON - Istruzioni per l’installazione e l’uso
A
3
Page 6
AVASTOVIGLIE
L
Avviare la lavastoviglie
Pronti, via!
Hai caricato la lavastoviglie e ora devi impostare il
programma di lavaggio. Bastano pochi minuti per
imparare
Prima di tutto.
Apri completamente il rubinetto
dellacqua e premi il pulsante di ONOFF A: senti un breve segnale
acustico e la spia B si illumina.
Ora la macchina è accesa e puoi
programmarla.
Scegliere il
programma.
Per selezionare il programma
ruota la manopola D in senso
orario fino a far coincidere la
tacchetta di riferimento sulla
manopola con il simbolo o il numero del programma che desideri impostare (dai una occhiata alla tabella programmi a pag. 6).
Se la porta è chiusa, premendo il
pulsante di Start R sentite un segnale acustico ed entro pochi secondi il programma si avvia, e si
accenderà la spia G relativa alla
fase di inizio del programma stesso.
La lavastoviglie ti
informa.
La tua lavastoviglie è dotata di
lampade spia (G) che si illuminano per segnalarti lo stato di
avanzamento del ciclo di lavaggio.
Ecco i simboli delle fasi :
prelavaggio, lavaggio, risciacqui,
asciugatura.
In ogni momento la tua lavastoviglie ti dice a che punto è arrivata.
Puoi annullare un
programma in corso
solo se è appena
iniziato.
Modifica del programma
in corso.
Ma se hai sbagliato programma,
niente paura! Un programma in
corso può essere modificato solo
se è appena iniziato.
Tenete premuto per circa 3 secondi il pulsante di Reset R
sentirete un segnale acustico prolungato seguito da 3 brevi bip, e
si spegne la spia G: significa che
tutte le impostazioni sono state annullate. Ora puoi re-impostare il
programma giusto. Ruotate la manopola per selezionare un nuovo
programma.
Hai dimenticato fuori
una stoviglia?
Be, capita a tutti. Interrompi il ciclo di lavaggio premendo il pulsante ON-OFF, inserisci la stoviglia
dimenticata e premi di nuovo il pulsante ON-OFF. Il ciclo riprenderà
dal punto in cui lhai interrotto.
Finito?
La fine del ciclo è segnalata da 2
brevi segnali acustici e dal lampeggiare della spia relativa
allasciugatura.
Attenzione:
Spegni la macchina premendo il
pulsante A, stacca la spina dalla presa di corrente per togliere
lalimentazione elettrica; il cavo
di alimentazione deve essere
perciò facilmente accessibile.
Chiudete il rubinetto dellacqua.
Attendete alcuni minuti prima di
togliere le stoviglie:se aspettate un
pochino, con il vapore si asciugano
meglio.
Svuotate per primo il cesto inferiore.
Accertati che il
programma sia
terminato prima di
togliere le stoviglie!
È andata via la luce? Hai
aperto la porta della
macchina?
Il programma si interrompe e poi
riprende quando torna la luce o
quando chiudi la porta. È tutto sotto controllo!
Vuoi una maggiore
asciugatura?
Premi il pulsante E prima di avviare il programma impostato.
Un bip prolungato ti avvisa che hai
selezionato lextra asciugatura, un
breve bip indica la deselezione.
Con lextra asciugatura il programma di lavaggio durerà più a lungo
per darti stoviglie più asciutte.
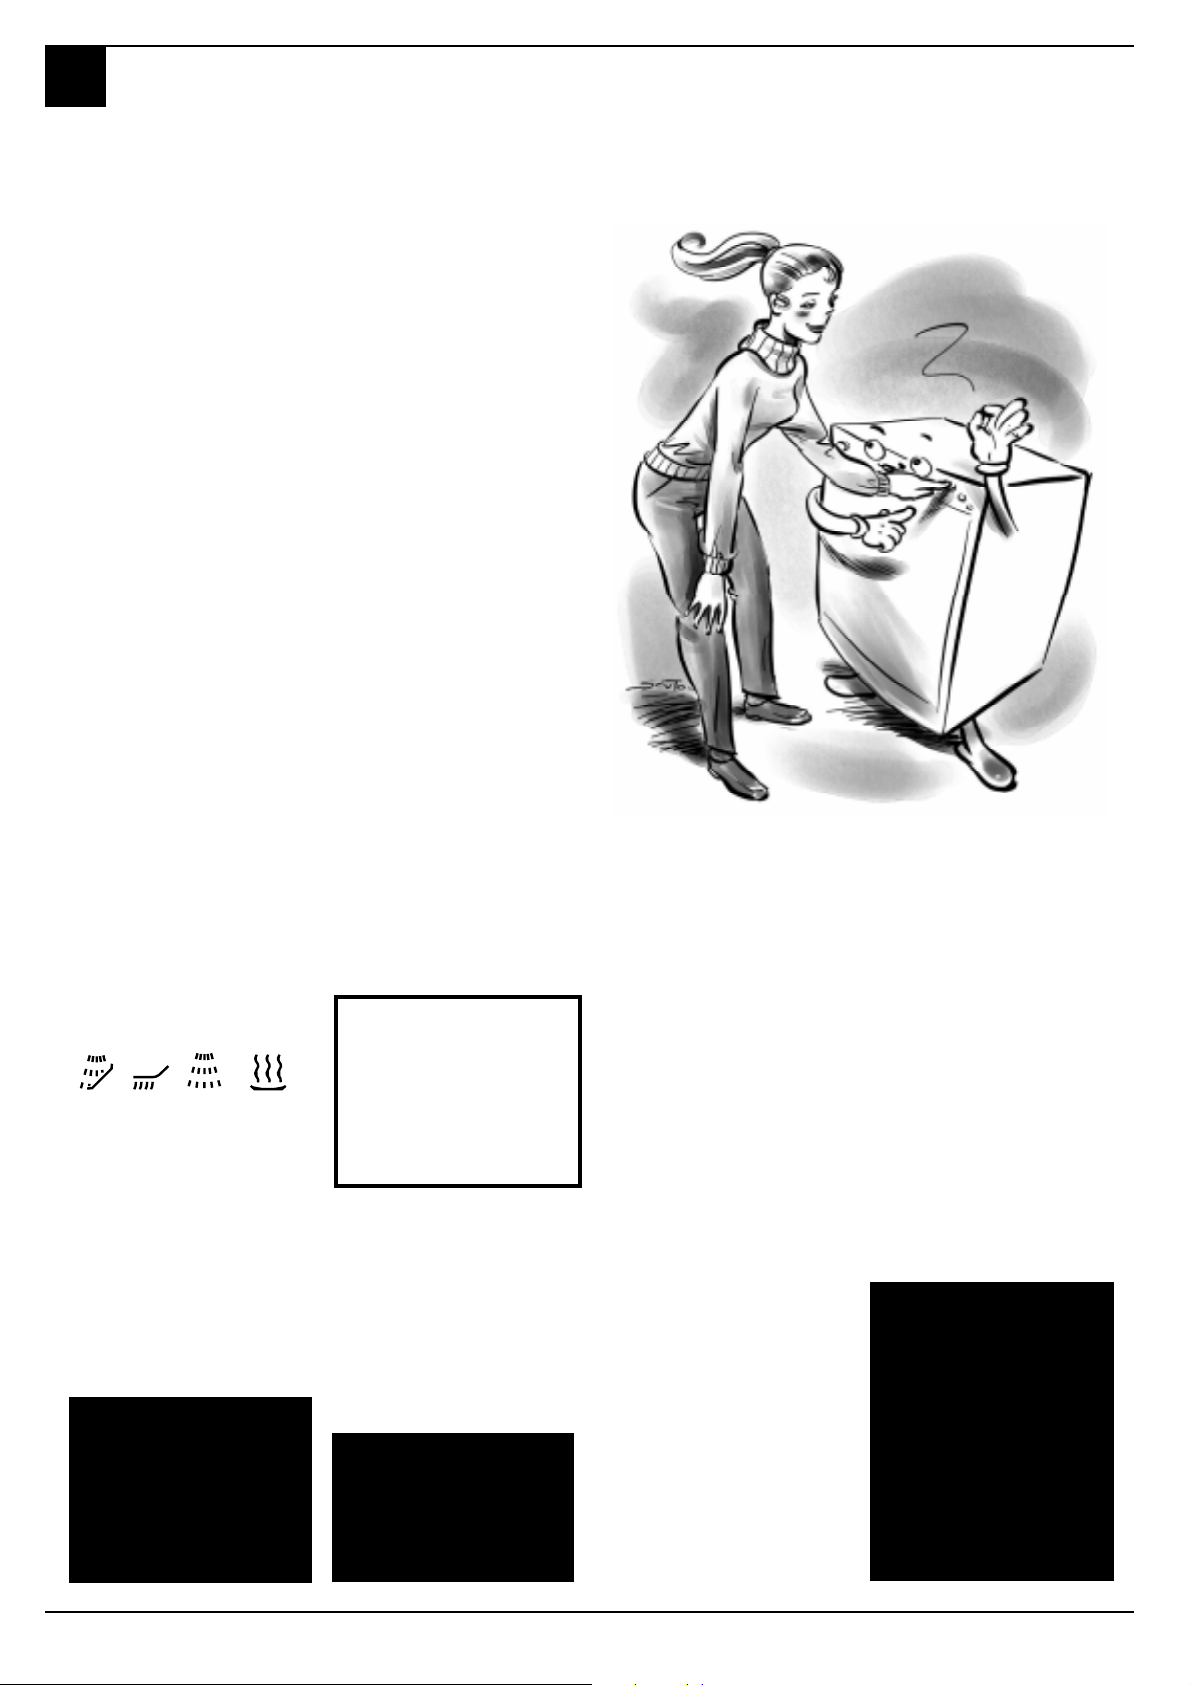
Quando apri la porta
della lavastoviglie se
il ciclo di lavaggio è
in corso o è appena
terminato, fai
attenzione al vapore
caldo che fuoriesce,
potresti scottarti!
4
LAVASTOVIGLIE ARISTON- Istruzioni per l’installazione e l’uso
Page 7

L
Detersivo e brillantante
Usa solamente prodotti specifici per lavastoviglie. Versa il detersivo nel distributore che
trovi allinterno della porta. Prima dellinizio del ciclo di lavaggio!
AVASTOVIGLIE
Consigli utili
Il detersivo
Caricamento del detersivo
Per aprire il coperchio A, premi il pulsante B. Il detersivo va
inserito nelle 2 vaschette fino
al bordo.
Ora puoi chiudere il coperchio:
premi finché senti lo scatto.
Se decidi di utilizzare il detersivo in compresse mettine una
nella vaschetta D e chiudi il
coperchio.
Non si chiude!
Controlla che sui bordi della
vaschetta non ci siano residui
di detersivo. È colpa loro se il
coperchio non riesce a chiudersi. Eliminali e vedrai che si
chiuderà.
Il brillantante.
Il brillantante rende le tue stoviglie
più brillanti perchè ne migliora
lasciugatura.
Il serbatoio del brillantante è posto
allinterno della porta: va riempito
quando lampeggia la spia mancanza brillantante T .
Se ti capita di versare del
brillantante fuori dal serbatoio, pulisci bene con una spugna.
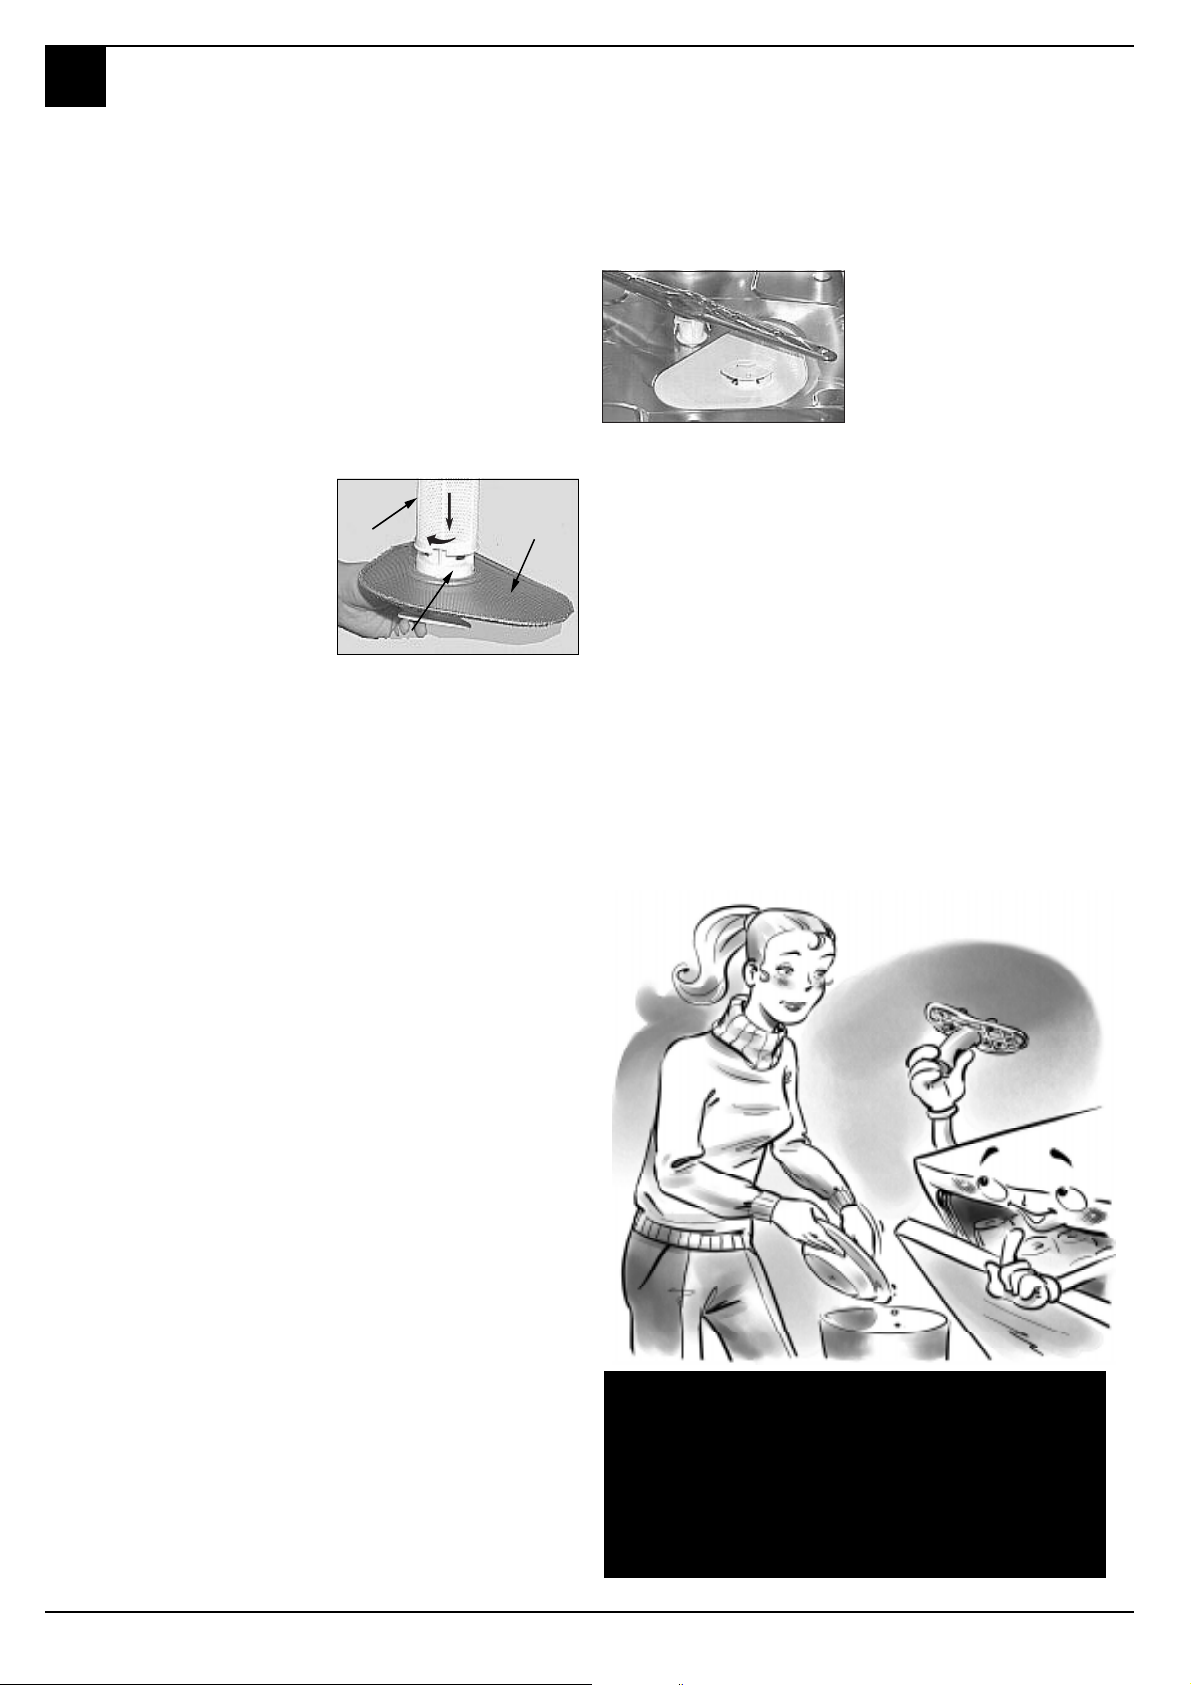
Caricamento
del brillantante.
Per aprire il contenitore ruota
in senso antiorario il tappo C.
Fai attenzione quando versi il
brillantante per evitare che
fuoriesca. Puoi adattare la
quantità di brillantante utilizzato dalla lavastoviglie: regola con
un giravite o con una moneta
agendo sul regolatore F che
vedi sotto il coperchio C.
B
D
C
A
F
Puoi scegliere tra sei posizioni. Normalmente è tarato sul 4.
C
Dosa la giusta
quantità di detersivo:
se eccedi non otterrai
stoviglie più pulite,
solo un maggiore
inquinamento
ambientale.
Tieni detersivo e
brillantante in luoghi
asciutti, lontano
dalla portata dei
bambini
La regolazione
della quantità di
brillantante usato
migliora
lasciugatura.
Se sulle stoviglie
noti gocce
dacqua o
macchie, ruota il
regolatore verso i
numeri più alti.
Se invece le tue
stoviglie
presentano delle
striature bianche,
ruota il
regolatore verso i
numeri più bassi.
Attenzione
In commercio si possono trovare prodotti per il lavaggio delle stoviglie che contengono detersivo, sale e brillantante (3 in 1).
Se l acqua è dura o molto dura consigliamo di aggiungere comunque sale nellapposito dispenser per evitare la formazione di
striature bianche sulle stoviglie o sulla vasca.
Se si utilizzano i prodotti 3 in 1 non è più necessario caricare il brillantante nellapposito serbatoio.
Se si vuole unasciugatura ancora maggiore è possibile caricare il brillantante, avendo cura però di portare il regolatore sul
n° 2.
In ogni caso consultare le istruzioni del produttore sulle confezioni.
Se si usano solo questi prodotti è normale che le spie sale e brillantante, dopo un certo numero di cicli, lampeggino in permanenza.
LAVASTOVIGLIE ARISTON - Istruzioni per l’installazione e l’uso
5
Page 8

AVASTOVIGLIE
L
Scegli il programma giusto
Ogni sporco ha il suo programma
Con il lavaggio in lavastoviglie avrai la garanzia di un
ambiente igienizzante e di un pulito più sicuro.
Sale, brillantante, la giusta dose di detersivo e il giusto
programma: ecco la formula per ottenere i risultati migliori e
conservare bene la tua lavastoviglie
3URJUDPPD
,QWHQVLYR
,QGL FD]L RQL SH UOD
VFHOWDGHL
SURJUDPPL
Stoviglie e pentole
mo lt o s por c h e ( da
non us a r e p e r pezzi
delicati)
'HVFUL]LRQHGHOFLFOR
Prelavaggio con acqua calda a 40°C
Lavaggio a 6 5°C
2 risciacqui con acqua fredda
Risciacquo caldo a 70°C
Asciugatura
'HWHUVLYR
SUHODYDJJLR
ODYDJJLR
JU
Scegli il programma
giusto per le tue
stoviglie.
Scegliere il programma
più adatto per il carico
che hai effettuato ti
assicura stoviglie pulite
e luso più conveniente
di acqua ed energia
elettrica
' XUD WD GH O
SURJUDPPD
%ULOODQWDQWH
WROOH UDQ]D
VHQ]D
H[WUD
DVFLXJDWXUD
1RUPDOH
5DSLGR
$PPR OOR
C iclo p er s to v iglie e
pe nt o le no r malmente
sporche.
Programma standard
giornaliero.
Programma per un
la vagg io e co logico , a
bassi consumi
energetici, adatto a
s t o v iglie e pent ole
nor malmente
sporche.
Ciclo economico e
ve loc e da u t ilizzar e
p e r s t ovig lie poc o
sporche, subito dopo
l'us o. S enza
asciugatura, eccetto
ne l ca so di s ele z io n e
dell'extra asciugatura.
Lavagg io pr eliminar e
in attes a di
c omp let ar e il ca ric o
al pasto successivo.
Prelavaggio con acqua fredda
Lavaggio a 5 0°C
Risciacquo freddo
Risciacquo caldo a 70°C
Asciugatura
2 Prelavaggi con acqua fredda
Lavaggio a 5 0°C
Risciacquo caldo a 67°C
Asciugatura
Bre v e lavagg io a 47 ° C
Risciacquo caldo a 62°C
Breve lavaggio freddo per impedire
l' es s ica z io n e d ei r es id u i di c ibo sulle
s t o v iglie
JU
JU
JU
(con extra
asciugatura.)
C iclo s pe cia le d a
utilizza r e p e r p e zzi
d elic at i, più se n s ibili
alle alte temperature,
&ULVWD OOL
' XR:DV K
6
LAVASTOVIGLIE ARISTON- Istruzioni per l’installazione e l’uso
subito dopo l'uso.
Lava ggio
d iffe re n zia t o s u i due
c es t i: d elic at o s u l
s upe rio re pe r c r ist a lli
e bicchieri, energico
per pentole sul cesto
inferiore.
Lavaggio a 5 2°C
Risc iacquo a 4 5 °C
Risciacquo caldo a 65°C
Asciugatura
Prelavaggio freddo
Lavaggio a 5 2°C
Risciacquo tiepido a 45°C
Risciacquo caldo a 65°C
Asciugatura
JU
JU
Page 9

Mai senza sale
L
La durezza dellacqua varia a seconda delle località. Se lacqua di casa tua è dura, senza decalcificazione
si formerebbero incrostazioni sulle stoviglie. La tua lavastoviglie ha un decalcificatore che utilizza sale
speciale ed elimina il calcare dallacqua.
Caricamento del sale.
Utilizza sempre sale specifico per
lavastoviglie.
Il serbatoio del sale è sotto il
cestello inferiore, riempilo così:
1. Estrai il cesto inferiore, svita
e togli il tappo del serbatoio.
2. È la prima volta che carichi il
sale? Prima riempi dacqua il
serbatoio (la prossima volta
non dovrai più farlo).
3. Metti limbuto della lavastoviglie sul foro e introduci circa
due chili di sale. È normale vedere uscire un po dacqua dal
serbatoio.
4. Riavvita con cura il tappo.
Quando devo caricare il
sale?
Il serbatoio del sale va riempito
quando lampeggia la spia mancanza sale S .Dopo aver caricato il
sale per la prima volta, è normale
che la spia lampeggi per circa 5
cicli consecutivi.
Regolazione sale
La tua lavastoviglie ti consente di
regolare il consumo del sale a seconda della durezza dellacqua di
casa tua. Così potrai ottimizzare
e personalizzare il consumo del
sale (né troppo né troppo poco).
Per regolare il consumo del sale
fai così:
1. Svita il tappo del serbatoio
sale
2. Sul collare del serbatoio vedi
una freccia (figura accanto):
se necessario, ruotala in senso antiorario dal segno - al
segno +.
Scegli la posizione della freccia
facendo riferimento allo schema
con la durezza dellacqua.
10 - 25 18 - 44 1,8 - 4, 4
25 - 50 45 - 89 4,5 - 8,9 MED 40 40
Durezza dell’acqua
°dH °fH mmol/l
0 -10 0 - 17 0 - 1,7 / 0 /
> 50 > 89 > 8,9
Posizione
selettore
formazione di ruggine,
formazione di ruggine,
carica il sale prima di
carica il sale prima di
iniziare un ciclo di
iniziare un ciclo di
Consumo
sale
(grammi/ciclo)
-
+
Non conosci il grado
di durezza dellacqua
di casa tua? Chiedilo
fornisce lacqua nella
AVASTOVIGLIE
Per evitare la
Per evitare la
lavaggio.
lavaggio.
Autonomia
(cicli\2kg)
20 60
60 25
alla società che
tua zona.
Suggerimenti e consigli per te.
Come conservare e riparare
le stoviglie a cui tieni
■ Quasi tutta largenteria si
può lavare in lavastoviglie.
Ci sono due eccezioni: largenteria antica e quella decorata con un agente ossidante. Lacqua calda può allentare i manici di quella antica e far sparire i motivi ornamentali dellaltra.
Non mettere mai l'argenteria
a contatto con altri metalli:
eviterai macchie ed
annerimento.
■ Piatti e vassoi dargento vanno lavati immediatamente
dopo luso, soprattutto se
Oltre a farti
risparmiare tempo e
fatica, la lavastoviglie
disinfetta le stoviglie,
lavandole ad unalta
temperatura.
sono stati a contatto con
sale, uova, olive, senape,
aceto, succhi di frutta e verdure cotte.
■ Per stoviglie particolarmente delicate, utilizza il lavaggio specifico presente nella
tua lavastoviglie.
Risparmiare si può
Un uso intelligente degli elettrodomestici ti fa
risparmiare e fa bene allambiente
Massimo carico.
Per ottimizzare i consumi, attiva la lavastoviglie
possibilmente a pieno carico. Se per riempirla
passa un po di tempo, utilizza il ciclo ammollo,
eviterai la formazioni di cattivi odori e di
incrostazioni.
Il programma giusto.
Scegli il programma adeguato al tipo di carico che
hai fatto. La scelta del programma dipende dal
tipo di stoviglie da lavare e dal loro grado di sporco.
Per fare la scelta giusta consulta la tabella dei
programmi a pagina 6.
LAVASTOVIGLIE ARISTON - Istruzioni per l’installazione e l’uso
7
Page 10

AVASTOVIGLIE
L
Installazione e trasloco
È arrivata la tua lavastoviglie
Appena acquistata o spostata in unaltra casa, linstallazione fatta bene ti assicura il buon
funzionamento della tua lavastoviglie
Scegli il punto dove sistemare
la tua lavastoviglie, puoi farla
aderire con i fianchi o con lo
schienale ai mobili adiacenti o
alla parete. La lavastoviglie è
munita di tubi per lalimentazione e lo scarico dellacqua che
possono essere orientati verso
destra o verso sinistra per consentire la migliore installazione.
Livellamento.
Una volta posizionata la macchina, agisci sui piedini avvitandoli o svitandoli a seconda se
desideri variare la sua altezza e
per livellarla in modo che venga a trovarsi orizzontale. Assicurati che non sia inclinata di
oltre 2 gradi. Un buon
livellamento assicurerà il corretto funzionamento della tua
lavastoviglie.
Regolazione piedini
posteriori.
Incassa la macchina nell'apposito vano quindi regola l'altezza della stessa agendo sulle viti
poste nella parte anteriore inferiore. Con un cacciavite ruota in senso orario le viti per alzare la lavastoviglie e in senso
antiorario per abbassarla.
Collegamento alla
presa dacqua fredda.
Lallacciamento dellelettrodomestico alla rete idrica deve
avvenire esclusivamente con il
tubo di carico fornito con lapparecchio, non utilizzare tubi
diversi. In caso di sostituzione
utilizza solo ricambi originali.
Se la presa di
corrente alla quale
colleghi la macchina
non corrisponde alla
spina, sostituiscila
con una spina adatta;
non impiegare
adattatori o
deviatori, potrebbero
provocare
riscaldamenti o
bruciature.
Allaccia il tubo di carico ad una
presa dacqua fredda con bocca filettata da 3/4 gas, avendo
cura di avvitarlo strettamente al
rubinetto. Se i tubi dellacqua
sono nuovi o sono rimasti per
lungo tempo inattivi, prima di
fare l'allacciamento, assicurati,
facendola scorrere, che lacqua
diventi limpida e sia priva di impurità. Senza questa precauzione, cè il rischio che il punto
dove entra lacqua si intasi, danneggiando la tua lavastoviglie.
Collegamento alla
presa dacqua calda.
La lavastoviglie può essere alimentata con acqua calda di rete
(se hai un impianto centralizzato con termosifoni) che non
superi la temperatura di 60° C.
In questo caso il tempo di lavaggio sarà abbreviato di circa 15
minuti e lefficacia del lavaggio
lievemente ridotta.
Dovrai effettuare il collegamento alla presa dacqua calda, nello stesso modo descritto per il
collegamento alla presa dacqua
fredda.
Sicurezza
antiallagamento.
La tua lavastoviglie è dotata di
un sistema che interrompe lingresso dellacqua nel caso di
perdite all'interno della macchina. E provvista inoltre di un
tubo entrata acqua che sopporta pressioni molto alte e che in
caso di rottura si colora in rosso. La sicurezza in caso di allagamenti è garantita dal secondo tubo trasparente che lo contiene. E molto importante controllarlo periodicamente e se lo
vedi di colore rosso sai che devi
al più presto cambiarlo. Chiama lassistenza tecnica autorizzata per lintervento.
Collegamento al tubo
di scarico.
Inserisci il tubo di scarico in
una conduttura di scarico che
abbia un diametro minimo di
cm. 4 oppure appoggialo al lavandino. Evita strozzature o
curvature eccessive. La parte del
tubo contrassegnata con la lettera
A deve essere ad una altezza compresa tra 40 e 100 cm.
Il tubo non deve essere immerso
nellacqua.
A
Collegamento elettrico.
Prima di tutto verifica che i valori
della tensione e della frequenza di
rete corrispondano a quelli riportati sulla targhetta situata sulla
controporta inox della macchina e
che l'impianto elettrico al quale la
colleghi sia dimensionato per la
corrente massima indicata sulla
targhetta.
Terra: sicurezza
indispensabile.
Solo a questo punto inserisci la
spina in una presa di corrente
munita di un efficiente collegamento a terra (la messa a terra
dellimpianto è una garanzia di
sicurezza prevista dalla legge,
assicurati che il tuo impianto ce
labbia).
Cavo di alimentazione.
Controlla periodicamente il cavo
di alimentazione; se risulta danneggiato ti raccomandiamo di farlo sostituire dal servizio di Assistenza tecnica autorizzata.
La spina
La spina della lavastoviglie deve
rimanere accessibile per poter effettuare operazioni di manutenzione in tutta sicurezza.
Striscia anticondensa.
Su alcuni modelli è prevista in dotazione una striscia
autoadesiva trasparente.
Deve essere incollata sul lato
inferiore del vostro ripiano in
legno per proteggerlo dalla condensa.
Ove non prevista in dotazione,
può essere richiesta come ricambio ai rivenditori autorizzati.
8
LAVASTOVIGLIE ARISTON- Istruzioni per l’installazione e l’uso
Page 11

AVASTOVIGLIE
Problemi e soluzioni
L
Se hai un problema, leggi qui
Può accadere che la lavastoviglie non funzioni o funzioni male. In molti casi si tratta di problemi che puoi risolvere senza dover chiamare il
tecnico. Prima di telefonare allassistenza, leggi sempre questi punti.
La lavastoviglie non parte
■ Il rubinetto dellacqua è aperto
e collegato bene al tubo?
■ Manca lacqua in casa?
■ Lacqua arriva con sufficien-
te pressione?
■ Il tubo è piegato?
■ Il filtro del tubo di alimenta-
zione dellacqua è intasato?
■ La porta della lavastoviglie è
aperta?
■ Le istruzioni per lavvio e la
selezione del programma
sono state correttamente eseguite?
Le stoviglie non sono
pulite.
■ Hai messo la giusta dose di
detersivo?
■ Il programma di lavaggio se-
lezionato è idoneo alle stoviglie che hai caricato?
■ Filtro e microfiltro sono pu-
liti?
■ Gli irroratori sono liberi?
La lavastoviglie non
scarica.
■ Il tubo di scarico è piegato?
Nella lavastoviglie
rimangono depositi calcarei
o una patina bianca.
■ Il tappo del contenitore sale è
chiuso bene?
■ Hai controllato la durezza
dellacqua di casa tua? Se è
molto dura meglio utilizzare
il sale anzichè le pastiglie
3x1.
■ Il dosaggio di brillantante è
regolato bene?
Messaggi di errore
La tua lavastoviglie è dotata di
un sistema di sicurezza in grado di rilevare eventuali anomalie di funzionamento. Tali anomalie sono segnalate da una o
due spie G lampeggianti a frequenza rapida.
Dopo aver preso nota di quali
spie lampeggiano spegni la macchina e chiama lassistenza tecnica.
Allarme rubinetto chiuso
Se hai dimenticato di aprire il rubinetto dellacqua, la tua macchina
te lo segnala per alcuni minuti con
brevi segnali acustici. Apri il rubinetto e vedrai che la macchina,
dopo alcuni minuti, si riavvia. Nel
caso in cui non sei presente quando vengono emessi i segnali acustici, la macchina si blocca e le spie
2 e 3 (lavaggio e risciacqui)
lampeggiano a frequenza rapida.
Spegni con il pulsante di On-Off,apri
il rubinetto dellacqua e dopo aver
atteso circa 20 secondi riaccendi
la macchina.
Riseleziona il programma come
previsto nel paragrafo Scegliere il programma e vedrai che
la macchina si avvia.
Allarme filtri intasati
Se la macchina è bloccata e
lampeggiano a frequenza rapida le spie1(prelavaggio) e 3 (risciacqui)) significa che il filtro è intasato da massicci residui di cibo. Spegni la macchina, pulisci accuratamente il filtro e dopo averlo
risistemato nella sua sede come
indicato a pag. 10, riaccendi e
riavvia il programma.
Allarme per guasto
allelettrovalvola di carico
dellacqua.
Se lampeggia a frequenza rapida
la spia 2 (lavaggio) SPEGNERE E
RIACCENDERE la lavastoviglie
dopo un minuto. Se lallarme permane, per prima cosa chiudere il
rubinetto delllacqua per evitare allagamenti poi togliere corrente e
chiamare lassistenza tecnica.
Hai verificato tutto, ma la
lavastoviglie non funziona e
il problema esiste ancora?
Chiama il centro assistenza autorizzato e ricordati di comunicare:
il tipo di guasto
la sigla del modello (Mod....)
e il numero di serie (S/N ....) che
puoi trovare sulla targhetta applicata nella parte laterale della porta inox.
Non ricorrere mai a
tecnici non autorizzati e
rifiuta sempre
linstallazione di pezzi
di ricambio non originali
La sicurezza in casa tua
La tua lavastoviglie è stata costruita seguendo le più severe norme internazionali di sicurezza. Tutelano te e la tua famiglia. Leggi
attentamente le avvertenze e le informazioni contenute in questo libretto: ti daranno molte notizie utili sulla sicurezza d'installazione,
luso e la manutenzione. Per non avere brutte sorprese.
1. Elimina con cura il materiale dell'imballaggio (segui le istruzioni sulla raccolta differenziata che ti ha
fornito il Comune di residenza).
2. Una volta tolto limballaggio, verifica lintegrità dell'apparecchio. Se hai dei
dubbi, rivolgiti a personale professionalmente qualificato.
3. La tua lavastoviglie verrà
usata solo da adulti e per il
lavaggio di stoviglie ad uso
domestico, secondo le
istruzioni scritte in questo
manuale. Non toccare la
macchina a piedi nudi o
con le mani e i piedi bagnati.
4. Ti sconsigliamo di ricorrere a prolunghe e prese multiple. Se il cavo di alimentazione elettrica non è abbastanza lungo, fallo sostituire con uno della giusta
lunghezza e ricorda che
non deve avere pieghe o
compressioni pericolose.
5. In caso di funzionamento
anomalo o di lavori di manutenzione disinserisci
lapparecchio dalla rete
elettrica (stacca la spina!).
6. Tieni lontano i bambini dai
detersivi e dalla lavastoviglie quando è aperta.
7. La tua lavastoviglie non va
installata allaperto, nemmeno se lo spazio è riparato da una tettoia: è molto
pericoloso lasciarla esposta a pioggia e temporali.
8. Non toccare la resistenza
durante e subito dopo un
ciclo di lavaggio.
9. Non appoggiarti e non sederti sullo sportello aperto,
potresti ribaltare la lavastoviglie.
10. In caso di guasto, chiudi il
rubinetto di entrata acqua
ed estrai la spina dalla presa a
muro. Poi prova a consultare
il capitolo Se hai un problema, leggi qui. Se non trovi
una soluzione, contatta il centro assistenza.
11 . Gli apparecchi fuori uso devo-
no essere resi inutilizzabili:
taglia il cavo di alimentazione
e danneggia il blocco della
porta.
12.
La direttiva Europea 2002/96/
CE sui rifiuti di
apparecchiature elettriche ed
elettroniche (RAEE), prevede che gli elettrodomestici non
debbano essere smaltiti nel
normale flusso dei rifiuti solidi urbani. Gli apparecchi
dismessi devono essere raccolti separatamente per
ottimizzare il tasso di
recupero e riciclaggio dei materiali che li compongono ed
impedire potenziali danni per
la salute e l'ambiente. Il sim-
bolo del cestino barrato è riportato su tutti i prodotti per
ricordare gli obblighi di raccolta separata.
Per ulteriori informazioni, sulla corretta dismissione degli
elettrodomestici, i detentori
potranno rivolgersi al servizio
pubblico preposto o ai rivenditori.
LAVASTOVIGLIE ARISTON - Istruzioni per l’installazione e l’uso
9
Page 12
AVASTOVIGLIE
L
Cura e manutenzione
Pulizia e manutenzione particolari
Il gruppo filtrante
Se vuoi avere sempre buoni risultati di lavaggio, è necessario pulire il
gruppo filtrante.
Lacqua di lavaggio viene pulita dai
residui di cibo e rimessa in circolo
perfettamente filtrata. Per questo,
dopo ogni lavaggio, è meglio rimuovere i residui più grossi che trovi
trattenuti dal bicchiere C e dal
filtro semicircolare A; per estrarli
tira il manico del bicchere verso
lalto. Basterà sciacquarli sotto lacqua corrente.
Una volta al mese è necessario
pulire accuratamente tutto il gruppo filtrante: bicchiere C + filtro
semicircolare A + filtro cilindrico
B. Il filtro B si estrae ruotandolo
in senso antiorario.
Per la pulizia aiutati con uno spazzolino non metallico.
Rimetti insieme i pezzi (come indicato nella figura) e reinserisci il
gruppo nella lavastoviglie. Posizionalo nel suo alloggiamento facendo una pressione verso il basso.
La lavastoviglie non deve essere
usata senza filtri. Se non inserisci
correttamente i filtri si ridurrà lefficacia di lavaggio, e si potrebbe
anche danneggiare la lavastoviglie.
1
B
2
C
A
Ogni tanto, una volta al
mese, dedica un po di
attenzione al gruppo
filtrante e agli
irroratori.
Pulizia degli irroratori.
Può succedere che alcuni residui di cibo si attacchino agli
irroratori ostruendo i fori da cui
deve uscire lacqua. Controllali
e puliscili ogni tanto (lettere F
e I capitolo Come è fatta?).
Tieni in forma la tua lavastoviglie
Rispettare poche regole ti assicura di avere sempre una compagna diRispettare poche regole ti assicura di avere sempre una compagna di
Rispettare poche regole ti assicura di avere sempre una compagna di
Rispettare poche regole ti assicura di avere sempre una compagna diRispettare poche regole ti assicura di avere sempre una compagna di
lavoro affidabile.lavoro affidabile.
lavoro affidabile.
lavoro affidabile.lavoro affidabile.
Dopo ogni lavaggio.
Quando il ciclo di lavaggio è finito ricordati sempre di chiudere il rubinetto dellacqua e lascia socchiusa la porta. Non ristagneranno lumidità e non si
formeranno cattivi odori.
Stacca la spina.
Prima di fare qualsiasi pulizia o
manutenzione della macchina,
stacca sempre la spina elettrica. Ti eviterà qualsiasi pericolo.
Niente solventi!
Niente abrasivi!
Per pulire lesterno e le parti in
gomma della tua lavastoviglie
non occorre usare né solventi
né abrasivi, usa solo un panno
imbevuto di acqua tiepida e di
sapone.
Se vedi delle macchie sulla superficie della vasca, utilizza un
panno imbevuto di acqua e aceto bianco (ne basta poco) oppure usa un prodotto specifico
per la pulizia della lavastoviglie.
Vai in vacanza?
Quando ti assenti per lunghi
periodi, ti consigliamo di eseguire queste operazioni:
fai un lavaggio a vuoto
chiudi il rubinetto di ingres-
so dellacqua
lascia socchiusa la porta
Facendo così le guarnizioni
dureranno più a lungo e allinterno non si formeranno odori
sgradevoli.
Trasloco.
In caso di trasloco è meglio tenere l'apparecchio in posizione
verticale. Se fosse necessario,
puoi inclinarla sul lato posteriore.
Le guarnizioni.
Uno dei responsabili dei cattivi
odori allinterno della lavastoviglie è il ristagno di cibo che
rimane nelle guarnizioni. Basterà che tu le pulisca di tanto in
tanto con una spugnetta inumidita.
La tua lavastoviglie non è un tritarifiuti!
Non preoccuparti di rimuovere ogni minimo
residuo di cibo dalle stoviglie, ma elimina ossa,
bucce e altri eventuali avanzi prima di riporle
nei cestelli. Vuota bicchieri e coppe dei liquidi
rimasti.
10
LAVASTOVIGLIE ARISTON- Istruzioni per l’installazione e l’uso
Page 13

AVASTOVIGLIE
L
Ariston ti è vicina anche
dopo lacquisto
Grazie per averci scelto, ma vogliamo rimanere
sempre vicino a te e al tuo elettrodomestico
Registra il tuo acquisto
Partecipa al concorso Rispondi e vinci inviando il questionario
che troverai in allegato alla documentazione del tuo elettrodomestico,
potrai usufruire di una serie di servizi riservati ai clienti Ariston.
Aderisci subito ai servizi speciali
Da cliente speciale a cliente privilegiato.
Ti puoi garantire anni ed anni di totale tranquillità per i tuoi nuovi elettrodomestici.
Troverai in allegato le modalità per l'adesione, da effettuare entro 30
giorni dalla data di acquisto..
Assistenza
specializzata
Rivolgiti al numero 199 199 199
risponderà il centro di Assistenza Ariston, più vicino a casa tua, 7 giorni su 7.
Quando chiami questo numero per una richiesta di assistenza, ricambi e/o accessori, ricordati di fornire le
seguenti informazioni:
- natura del guasto
- la sigla del modello (Mod..)
e il numero di serie (S/N)
riportati sullapparecchio e nel certificato di garanzia.
Ricambi
originali
**
*
**
Accessori
garantiti
* Al costo di 14,25 centesimi di Euro al minuto(iva inclusa) dal Lun. al Ven. dalle 08:00 alle 18:30, il Sab. dalle 08:00 alle 13:00 e di 5,58
centesimi di Euro al minuto (iva inclusa) dal Lun. al Ven. dalle 18:30 alle 08:00, il Sab. dalle 13:00 alle 08:00 e i giorni festivi, per chi
chiama da telefono fisso.
Per chi chiama da radiomobile le tariffe sono legate al piano tariffario delloperatore telefonico utilizzato.
LAVASTOVIGLIE ARISTON - Istruzioni per l’installazione e l’uso
11
Page 14
ISHWASHER
D
Quick guide to your
dishwasher
This manual explains pleasantly all your new electric household
appliance has to offer. In addition, you will discover a world of useful
hints and handy tips to help you get a better wash from your
dishwasher and to make it last longer.
1. Installation and moving (p. 19)
Installation, after delivery or your moving house, is the most
important procedure for the correct operation of your dishwasher.
Always check:
1. That the electricity system is in accordance with norms;
2. That the water inlet and outlet hoses are connected correctly;
3. That the dishwasher is level on the ground. It is worth it: for the
longer life span and the correct operation of your dishwasher.
2. Control panel at your orders (p.13)
Learn to get to know the parts which make up your dishwasher,
you will use it better for it. This is where you will find the
description of the controls and the internal parts.
3. How to load your dishes (p.14)
This page includes useful tips to help you load your dishwasher
correctly and make the most of all the available space.
4. How to start your dishwasher (p. 15)
8. Safety for you and your family (p.20)
After loading the dishes, you need to select the right wash cycle
and measure out the correct dose of detergent and rinse aid.
Reading these pages will help you through all the wash phases.
Read this chapter carefully, as it will provide you with useful
information on installation, use and maintenance safety. To avoid
nasty surprises.
5. Salt: an important ally (p. 18)
9. Special care and maintenance (p.21)
Using the right salt and in the right quantity will help you maintain
your dishwasher in top condition, to wash better and to avoid
possible damage caused by limescale.
6. Advice and suggestions to help you make
savings as well (p. 18)
This is where you will find small tips on how to wash your dishes
better and to help make savings by selecting a wash cycle which
best suits the type of load.
7. Troubleshooting (p.20)
Once in a while, once a month, spend a little time on the filter
assembly and the sprayer arms. This is where you can learn how.
10. Keeping your dishwasher in shape (p.21)
Respect the few rules you will find here, and the result will be an
enduring top-shape dishwasher.
11. Technical characteristics (p. 13)
All your appliance's technical data, in accordance with norms and
regulations as always.
Before calling the technician, have a look here: a lot of problems
can have an immediate solution. If you can't manage to solve it
yourself, then call the Ariston helpline and any problem will be
solved as quickly as possible.
12
ARISTON DISHWASHER - Instructions for installation and use
12. Ariston is still with you after purchase (p.22)
Ariston supports its products by means of after-sales services and
assistance, offering you special guarantees, professional assistance
as well as quality spare parts and accessories. To find out more,
call the Ariston Freefone Number.
Page 15

Let's open up your dishwasher together
G
C
S
T
E
R
D
B
A
How is it made?
Learn to get to know the parts which make up your
dishwasher, you will use it better for it.
ISHWASHER
D
E. Upper rack
F. Top sprayer arm
G. Rack height adjuster
H. Lower rack
I. Bottom sprayer arm
J. Salt container cap
K. Washing filter
L. Detergent and rinse aid
dispenser
Control panel at your orders
A. ON-OFF Button
Press this button to
turn the appliance on.
B. ON-OFF Indicator light
Indicates that the
appliance is turned on
C. Door opening handle
Use this handle to
open the dishwasher
door.
D. Cycle selection knob
Use this knob to select
a wash cycle.
E. Extra drying button
Press this button for
greater drying
G. Cycle phase indicator
lights
pre-wash, wash,
rinses, drying.
R. Start/Reset Button
With Start, the wash
cycle begins, whereas
all the settings are
cleared with Reset.
S. Low salt indicator light
This light warns you that
it is time to add more salt.
T. Low rinse aid indicator
light
This light warns you that
it is time to add more
rinse aid.
Technical Characteristics
Technical characteristics
Width cm. 59,5
Depth cm. 57
Height cm. 82
Capacity 12 standard place settings
Mains water pressure 4,3 psi - 145 psi (30 KPa÷ 1MPa) (0,3 ÷10 bar)
Power voltage See data plate
Total absorber power See data plate
Fuse See data plate
ARISTON DISHWASHER - Instructions for installation and use
This dishwasher
conforms to the
following European
Community Directives:
73/23/EC
(Low Voltage
Directive) and
subsequent
amendments;
89/336/EC
(Electromagnetic
Compatibility) and
subsequent
amendments.
97/17/EC
(Labelling)
2002/96/EC
(Waste
Electrical and
Electronic
Equipment)
13
Page 16

ISHWASHER
D
How to load your dishes
Before washing, a few small steps can help you get a better wash and keep your dishwasher for longer.
Remove the largest scraps of food left over on your plates, soak saucepans and frying pans with tough
incrustations. After loading your dishes, make sure the blades on the sprayer arm turn well
First of all.
Before placing the dishes in the
racks, remove the largest scraps
of food left over on your plates,
you will thus avoid blocking the
filter, which would reduce the
efficacy of the wash.
If the saucepans and frying pans
are very dirty, allow them to soak
before being washed. To make it
easier to load your dishes, pull the
racks out.
What goes into the
lower rack?
We recommend you place the most
difficult dishes to wash into the
lower rack: saucepans, lids, soup
dishes and plates, but also: mugs,
cups and glasses (see photos for
load examples).
Serving dishes and large
lids: place them on the sides
of the rack.
Saucepans, salad bowls:
must always be placed upside
down
Very deep dishes: place
them obliquely, thus allowing
water to run down them and
cleaning them better
Glasses and cups: position
them as indicated in the figure.
What goes into the
upper rack?
Place delicate and lightweight
dishes in the upper rack: glasses,
tea cups and coffee cups, saucers
- but plates too - shallow salad
bowls, slightly dirty frying pans and
shallow pans.
Position light weight dishes in such
a way as to avoid their being moved
by the spray of water.
The appliance can also be equipped
with one or two tip-up
compartments onto which you can
place mugs and cups, as well as
long sharp knives and serving
cutlery.
After loading the dishes, remember
to check that the blades on the
sprayer arms can turn freely
without hitting against any dishes.
How to adjust the top
rack.
The upper rack can be set in high
or low position to enable you to
organise your dishes effortlessly.
1
2
lower rack
Load examples
upper rack
The cutlery basket can be split up
by pulling out the handle and
removing the clips that keeps the
two parts joined together.
When you only have little cutlery
to wash, you can use just half the
basket; save space for other
crockery or place the other half of
the basket in the upper rack instead
(see figures A and B).
This basket is equipped with two
removable grids: insert the cutlery
one by one into the slots; knives
and utensils with sharp blades or
tips should be positioned with the
sharp parts at the bottom.
Position all cutlery items so that
they don't touch.
Fig.F
Open the rail stop flaps and pull the
rack out completely. Now place it in
high or low position, then slide it along
the guide rails until the front wheels
also go in. Now close the rail stop flaps.
Follow the sequence of actions
illustrated in figure "F".
3
4
B
A
A
14
ARISTON DISHWASHER - Instructions for installation and use
Page 17

Starting the dishwasher
Ready, steady, go!
You have loaded your dishes and you now have to set the
wash cycle. It takes just one minute to learn how
ISHWASHER
D
First of all.
After performing all the operations
described in the previous
paragraphs, turn the water tap on
completely and press ON-OFF
button "A": you will hear a short
beep and indicator light "B" lights
up. Now the appliance is on and
ready to be programmed.
Selecting the wash
cycle.
To select the wash cycle, turn the
cycle selector knob "D" clockwise
until the reference notch on the
knob corresponds with the number
or symbol for the cycle you wish
to set (consult the wash cycle
table on page 17, especially when
first using the appliance).
If the appliance door is shut,
press the Start button "R" and you
will hear a beep; the cycle will
start up within a few seconds.
During this time, you can modify
your choice of wash cycle. A short
beep will indicate the start of the
wash cycle and indicator light "G"
corresponding to the cycle starting
phase will light up.
The dishwasher keeps
you informed.
Your dishwasher is fitted with
indicator lights (G) which light up
to indicate the cycle phase under
way.
Here are the symbols corresponding to each cycle phase:
pre-wash, wash, rinses, drying.
At all times, your dishwasher tells
you which cycle phase is under
way.
You can cancel the
wash cycle in
progress, if it has
only just started.
Modifying a wash cycle
in progress.
But if you have chosen the wrong
cycle, not to worry! You can cancel
the wash cycle in progress, if it has
only just started.
To modify a wash cycle, keep the
RESET button "R" pressed for
about 5 seconds: a prolonged beep
will sound, followed by three short
beeps. Indicator light "G" will turn
off and at this point, all the settings
will have been cancelled.
To select a new wash cycle,
repeat the operations illustrated
in the paragraph entitled "starting
and selecting the cycle".
You are now free to re-set the
correct wash cycle.
You've left out a dish?
Well, it happens to everyone.
Interrupt the wash cycle by
pressing the ON-OFF button,
insert the dish you had forgotten
and press the ON-OFF button
again. The cycle will start up from
where you interrupted it.
Finished?
The end of the wash cycle is
indicated by two short beeps and
the flashing of the drying phase
indicator light.
Warning:
Turn the appliance off by
pressing button A, unplug the
appliance from the electricity
socket to cut off the power
supply; the power supply
cable should consequently be
easily accessible.
Turn off the water tap.
Wait a few minutes before
unloading the dishes: if you wait
a little while, they dry better thanks
to the steam.
Empty the lower rack first.
Make sure the wash
cycle has ended
before removing the
dishes!
There's been a power
failure? Have you
opened the dishwasher
door?
The wash cycle stops and then
restarts when the electricity
comes back on or when you
shut the door. Everything is
under control!
Do you want extra
drying?
Press button "E" before you start
the selected wash cycle.
A prolonged beep will inform you
that you have selected extra drying,
a short beep indicates it has been
disabled.
With extra drying, the wash cycle
will last longer, to provide you with
drier dishes.
If opening the
door soon after
the end of the
programme,or
during it, stand
away from the
Dishwasher, to
avoid possible
injury from hot
steam.
ARISTON DISHWASHER - Instructions for installation and use
15
Page 18

ISHWASHER
D
Detergent and rinse aid
Only use specific dishwasher detergents. Pour the detergent into the dispenser on the inside
of the door. Before the wash cycle starts!
The detergent
Loading the detergent
To open lid A, press button B.
The detergent should be
poured into the two containers
C and D up to the rim.
Now you can close the lid: press
it down until you hear it click.
If you prefer to use the
detergent in tablets, place one
of these in container "D". Now
you can close the lid: press it
down until you hear it click.
It won't close!
Check whether there is any
detergent residue on the edges
of the dispenser. It is due to this
residue that the lid won't close.
Get rid of it and you'll see that
it closes.
B
C
D
A
Useful tips
Use the right
amount of
detergent: if you
use too much,
you will not get
cleaner dishes,
but just more
environmental
pollution.
Keep your
dishwasher
detergent and
rinse aid in a
cool, dry place
and away from
children.
The rinse aid.
F
This product makes dishes sparkle
more as it improves their drying.
The rinse aid container is situated
on the inside of the door: It should
be filled up when the low rinse aid
indicator light "T" flashes.
Loading the rinse aid.
To open the dispenser, turn cap C
anticlockwise. Take care when you
pour in the rinse aid to avoid it
overflowing. You can adapt the
amount of rinse aid used by the
dishwasher: regulate the adjuster
F which you will find under lid C.
Warning
Three-in-one dishwasher tablets are now available on the market, and combine detergent, salt and rinse aid all in one.
If the water in your area is hard or very hard, we still recommend you pour extra salt into the relevant dispenser to prevent the
formation of white streaks on your dishes or on the interior of the appliance.
Using a three-in-one product means it is no longer necessary to put rinse aid into the relevant container.
If you want to achieve perfectly dry dishes, you may add rinse aid as long as the dosage adjuster is set to no.2.
In any case, please read the manufacturer's instructions on the packet.
If you use only these products, it is normal for the salt and rinse aid indicator lights to flash permanently after a certain number
of cycles.
Y ou can choose from six different
positions. It is normally set to 4.
C
Proper dosage of the
rinse aid improves
drying.
If drops of water
remain on the dishes
or spotting occurs,
turn the dosage
adjuster to a higher
setting.
If, on the other hand,
the dishes have white
streaks, then turn the
dosage adjuster down
to a lower setting.
16
ARISTON DISHWASHER - Instructions for installation and use
Page 19

Select the right wash cycle
A wash cycle for every degree of soil
Dishwasher washing guarantees your dishes will be
cleaned in a hygienic setting for safer, cleaner results.
Salt, rinse aid, the right amount of detergent and the
correct wash cycle: this is the formula to get the best
results and to keep your dishwasher in shape
'HWHUJHQW
&\FOH
6XSHU:DV K
&\FOHVHOHFWLRQ
LQVWUXFWLRQV
Very dirty dishes and pans
(not to be used for
delicate items)
&\FOH GH V FULSWLRQ
Pre-wash at 40°C
Wash a t 65 ° C
2 Cold rinses
Hot r inse at 7 0° C
Drying
IRUSUH
ZDVK
ZD V K
J
D
Select the right
wash cycle for your
Selecting the most
suitable wash cycle
for the load ensures
clean dishes and a
more convenient
use of water and
ISHWASHER
dishes.
electricity.
:DVKF\FOH
GXUDWLRQ
5LQVH
$LG
WROHUDQFH
ZLWKRXW
H[WUD
GU\LQJ
1RUPDO
5DSLG
6RDNLQJ
&U\VWDO
Cycle for normally dirty
pans and dishes. Standard
daily cycle.
Environme nt a lly- fr iendly
cycle, with low energy
co ns umpt ion le ve ls,
suitable for normally dirty
pans and dishes.
Economic and fast cycle to
be us e d fo r s lightly dirty
dishes. Without drying
except when the extra
drying option has been
selected.
Preliminary wash cycle for
dishes while awaiting
completion of the load
with the dishes from the
next mea l.
Special cycle to be used
fo r mor e d elic at e it ems
which are sensitive to high
temperatures. Run cycle
imme diately after use.
Cold pre-wash
Wash at 50°
Cold rinse
Hot r inse at 7 0° C
Drying
2 Cold pre-washes
Wash a t 50 ° C
Hot r inse at 6 7° C
Drying
Short wash at 47°C
Hot r inse at 6 2° C J
Short cold wash to prevent food
from drying onto the dishes
Wash a t 52 ° C
Rins e a t 4 5 °C
Hot r inse at 6 5° C
Drying
J
J
J
(with
extra
drying)
'XR:DVK
Wash differentiated on the
two racks delicate for
glassware and glasses on
the upper rack and heavy
duty for the pans on the
lower rack.
Cold pre-wash
Wash a t 52 ° C
Luke warm rinse at 45°C
Hot r inse at 6 5° C
Drying
ARISTON DISHWASHER - Instructions for installation and use
JU
17
Page 20

ISHWASHER
D
Never without salt
Water in your home
Water hardness varies according to where you live. If the water in your home is hard, without water
softening, incrustations would form on your dishes. Your dishwasher is fitted with a water softener
To prevent rust from
forming, load the salt
just before beginning a
which uses special salt to get rid of limescale in the water.
Loading the salt.
Always use salt which is intended
for dishwasher use.
The salt container is situated
underneath the lower rack, fill it
up as follows:
1.Pull out the lower rack
completely, unscrew and
remove the container cap
2. Is it the first time you load the
salt? First fill the container up
with water (you won't have to
do this again next time)
3. Put the dishwasher funnel on
the hole and pour in
approximately two kilos of
salt. It is normal that some
water comes out of the
container.
4. Screw the cap back in place
carefully.
When should I load the salt?
The salt container should be filled
up when the low salt indicator light
"S" flashes. Once you have loaded
the salt
for the first time, it is normal
that the low salt indicator light stays
on or flashes for about 5 consecutive cycles.
Intelligent salt.
Your dishwasher can adjust its
salt consumption according to
the hardness of the water in your
home. This way, you can optimise
and customise your dishwasher's
salt consumption (not too much,
nor too little).
To adjust salt consumption, do as
follows:
1. Unscrew the salt container cap
2. There is an arrow on the neck
of the container (see figure):
if necessary, turn the arrow
anti-clockwise from the "-"
setting to the "+" setting.
Select the arrow position
depending on the water hardness,
referring to the table provided.
Water Hardness
Clarke
degrees
0 ¸ 14 0 ¸ 17 0 ¸ 1,7 / 0 /
14¸ 36 18 ¸ 44 1,8 ¸ 4,4 "-" 20 60
36 ¸ 71 45 ¸ 89 4,5 ¸ 8,9 MED 40 40
>71 > 89 > 8,9 "+" 60 25
°dH mmol/l
Selector
position
You don't know how
hard the water in
your home is? Ask
the company that
supplies water in
wash cycle.
Salt
consumption
(grams/cycle)
your area.
Autonomy
(cycles\2-
kg)
Suggestions and advice for you.
How to look after and protect
the dishes you hold dear
■ Almost all silverware can
be cleaned in a dishwasher.
There are two exceptions:
old silverware and
silverware decorated with
an oxidising agent. Hot
water can loosen the
handles on old silverware
ad wear off the decorations
on the other.
Never let silverware come
into contact with other
metals: you will thus avoid
stains and blackening
Apart from making
you save time and
energy, your
dishwasher disinfects
your dishes, washing
them at a high
temperature.
■ Silver plates and serving
dishes should be washed
immediately after use,
especially if they have
contained salt, eggs, olives,
mustard, vinegar, fruit juices
and cooked vegetables.
■ For particularly delicate
dishes, we recommend you
use the specific wash cycle
offered by your dishwasher.
Savings are easy
Using your electric household appliances
wisely helps you make savings and is good for
the environment.
Maximum load.
To optimise consumption levels, try to use the
dishwasher with a full load only. If it takes quite
some time to fill up your dishwasher, use the soak
cycle to avoid the formation of bad odours and cakedon food.
The right wash cycle.
Select the most suitable wash cycle for the type of
load you have placed in the dishwasher. The choice of
wash cycle depends on the type of dishes to wash
and on how dirty they are. To select the right wash
cycle, please consult the wash cycle table on page 17.
18
ARISTON DISHWASHER - Instructions for installation and use
Page 21

Installation and moving
A
Your dishwasher has arrived
After having bought or moved your dishwasher to another home, a correct installation
ensures that your dishwasher will operate smoothly and efficiently.
ISHWASHER
D
Choose where you want to
install your dishwasher, you
can even place it so that its
sides or back panel are side by
side with furniture or up against
the wall. The dishwasher is
provided with water supply and
drain hoses, which can be
directed towards the left or
right to facilitate appropriate
installation.
Levelling.
Once the appliance is
positioned, adjust the feet by
screwing them in or out
depending on how high you
want it and to level it so that it
is horizontal. Make sure that it
is not inclined more than 2
degrees. If the appliance is
level, it will help ensure its
correct operation.
Adjusting the back Feet
Insert the appliance into the
cutout and then adjust the
height using the screws located
on the front bottom part of the
machine. Use a screwdriver to
turn the screws in the
clockwise or anti-clockwise
direction to increase or
decrease the height
respectively.
Cold water connection.
This electric household
appliance should be connected
to the water mains using the
cold water supply hose
provided with the appliance
only. Do not use a different
hose. In the event of replace-
If the power socket
to which the
appliance is
connected is not
compatible with the
plug, replace it with
a suitable plug rather
than using adapters
or multiple plugs as
these could cause
overheating or
burns.
ments, use original spare parts
only.
Connect the cold water supply
hose to a 3/4 gas threaded
connection, taking care to
screw it tightly onto the tap. If
the water hoses are new or have
been out of use for an extended
period of time, let the water run
to make sure it is clear and free
of impurities before making the
connection. If this precaution is
not taken, the water inlet could
get blocked, causing damage to
your dishwasher.
Hot water connection.
Your dishwasher can be
supplied with hot water from
the mains supply (if you have a
central heating system with
radiators) at a temperature of
no more than 60°C.
In this case, the wash cycle time
will be about 15 minutes
shorter and the wash will be
slightly less effective.
The connection must be made
to hot water supply following
the same procedures as those
indicated for the cold water
connection.
Anti-flooding
protection
Your dishwasher is provided
with a special system which
blocks the water supply in the
event of leaks inside the
appliance. It is further equipped
with a water inlet hose that can
withstand extremely high
pressures and that turns bright
red in the event of breakage.
Safety in the event of flooding
is ensured by the second clear
hose that contains the former
and thus highlights the latter
when it has turned bright red.
It is vital that you check it on a
regular basis: if you see it has
turned bright red, then you
know you have to replace it as
soon as possible. Call for an
authorised technical engineer
to come and replace it.
Drain hose connection.
Fit the drain pipe into a drain line
with a minimum diameter of 4
cm or place it over the sink. Avoid
restricting or bending it. The part
of the pipe marked with the letter
A should be between 40 and 100
cm above the ground.
The pipe should not be immersed
in water.
Electrical connection.
First of all, check that the mains
voltage and frequency values
correspond to those stated on the
rating plate located on the
stainless steel inner door of the
appliance and that the electrical
system to which the dishwasher
is connected is sized for the
maximum current indicated on
said rating plate.
Earth: indispensable
safety.
Only now can you plug the
appliance into a socket provided
with an efficient earth connection
(the system's earthing is a
guarantee of safety provided for by
law, make sure your system has
it).
The plug
The dishwasher plug must be
accessible even when the appliance
is installed as a built-in unit so that
maintenance can be done safely.
Power supply wire.
Check the power supply wire on a
regular basis; if it is damaged, we
recommend you have it replaced
by an authorised technical
Assistance service centre.
Condensation-proof tape.
On some models, a transparent
condensation-proof adhesive
tape has been provided.
It should be stuck onto the
lower side of your wooden
worktop to protect it from the
formation of condensation.
When not provided, this tape
can be requested as a spare part
from authorised retailers.
ARISTON DISHWASHER - Instructions for installation and use
19
Page 22

ISHWASHER
D
Troubleshooting
If you have a problem, read this
Your dishwasher may not work or not function properly. In many cases, these are problems which can be solved without having to call for
a technician. Before calling the service centre, always check the points below.
The dishwasher won't
start
■ Is the water supply tap
turned on?
■ Is the water supply tap
connected to the hose
properly?
■ Has the water in your home
been cut off?
■ Is the pressure of the water
supply sufficient?
■ Is the hose bent?
■ Is the filter on the water
supply hose blocked?
■ Is the dishwasher door
open?
The dishes are not
clean.
■ Have you put the right
amount of detergent into the
dispenser?
■ Is the wash cycle suitable for
the dishes you have placed
inside the appliance?
■ Are the filter and microfilter
clean?
■ Can the sprayer arms turn
freely?
The dishwasher won't
drain.
■ Is the drain hose bent?
Limescale deposits or a
white film form on the
dishes.
■ Is the lid on the salt
container closed properly?
■ Is the rinse aid dosage
correct?
Error messages.
Your dishwasher is equipped
with a safety system which is
able to detect any operating
anomalies. These anomalies
are reported by one or two
wash cycle indicator lights "G"
flashing rapidly.
Take a note of which lights are
flashing, turn the appliance off
and call for technical assistance.
Tap off alarm
If you have forgotten to turn the
water tap on, your appliance
will remind you of this by
sounding a few short beeps for
a few minutes. Turn the tap on and
your appliance will start up again
after a few minutes. Were you to
be absent when these beeps are
sounded, the appliance will be
blocked automatically and
indicator lights 2 and 3 (wash and
rinses) will flash rapidly. Turn the
appliance off at the ON-OFF button, turn on the water tap and wait
approximately 20 seconds before
turning the appliance back on. Reselect a wash cycle as indicated in
the "Selecting the wash cycle"
paragraph and the appliance will
start.
Clogged filter alarm
If the appliance is blocked and
indicator lights 1 (pre-wash)
and 3 (rinses) flash rapidly, this
means the filter is clogged by
large particles of food residue.
Turn the appliance off, clean
the filter thoroughly and reposition it in its seat as illustrated
on page 21. Then turn it back
on. The selected wash cycle will
start up again.
Water load solenoid valve
malfunction alarm.
If indicator light 2 (wash) flashes
rapidly, TURN the dishwasher OFF
AND BACK ON AGAIN after one
minute. If the alarm persists, first
turn off the water tap to avoid any
flooding and then cut off the
electricity supply and call for
technical assistance.
You have checked
everything, but the
dishwasher still doesn't
work and the problem
persists?
Call an authorised service centre
near you and remember to mention:
the type of malfunction
the model mark (Mod.) and the
serial number (S/N.) indicated on
the rating plate located on the inner
door, to one side.
Never call upon
the services of
unauthorised
technicians and
always refuse
spare parts that
are not originals.
Safety within your home
Your dishwasher was built in accordance with the strictest international safety regulations. They protect you and your family.
Read the instructions and information contained in this manual: they will provide you with useful hints as to installation, use and
maintenance safety. To avoid nasty surprises.
1. Dispose of the packaging
material carefully (follow the
instructions on how to divide
your rubbish up provided by
your local Council)
2. After removing the
packaging, check to make
sure your appliance is intact.
If in doubt, contact a qualified
professional.
3. Your dishwasher must only be
used by adults and for washing
household dishes, according to
the instructions included in
this manual. Do not touch the
appliance with wet hands or
feet or barefoot.
4. We discourage the use of
extension leads and multiple
plugs. If the electricity supply
wire is not long enough, then
have it replaced with one of
the correct length and
remember that it should be
free of bends or dangerous
kinks.
5. If the appliance is not operating
properly or if maintenance
operations are necessary,
disconnect the dishwasher
from the mains power supply
(unplug it!).
6. Keep children away from the
dishwasher when it is open and
keep detergents out of their
reach.
7. Your dishwasher is not to be
installed outdoors, not even if
the area is covered by a roof:
it is extremely dangerous to
leave it exposed to rain and
thunderstorms.
8. Do not touch the heating
element during or straight
after a wash cycle.
9. Do not lean or sit on the door
when it is open, as this could
overturn the dishwasher.
10. If the appliance malfunctions,
turn off the water inlet tap and
disconnect the plug from the
wall socket. Then try
consulting the section entitled
"I you have a problem, read
this". If you cannot resolve the
problem, then call the service
centre.
11. Once taken out of use,
appliances must be made
inoperable: cut the power
supply wire and damage the
door lock.
12. Disposal of old electrical
appliances
The European Directive 2002/
96/EC on Waste Electrical and
Electronic Equipment
(WEEE), requires that old
household electrical
appliances must not be
disposed of in the normal
unsorted municipal waste
stream. Old appliances must
be collected separately in
order to optimise the recovery
and recycling of the materials
they contain and reduce the
impact on human health and
the environment. The crossed
out "wheeled bin" symbol on
the product reminds you of
your obligation, that when you
dispose of the appliance it
must be separately collected.
Consumers should contact
their local authority or retailer
for information concerning
the correct disposal of their
old appliance.
20
ARISTON DISHWASHER - Instructions for installation and use
Page 23

Care and maintenance
Cleaning and special maintenance
ISHWASHER
D
The filter assembly
If you want consistent good results
from your dishwasher, you need to
clean the filter assembly.
The food particles are removed
from the wash water, allowing it to
be recirculated during the cycle,
filtered perfectly. For this reason,
it is a good idea to remove the larger
food particles trapped inside the
cup C and the semi-circular filter
A after each wash; pull the cup
handle upwards to remove them.
Just rinse them under running
water.
The entire filter assembly should
be cleaned thoroughly once a
month: cup C + semi-circular filter
A + cylindrical filter B. Rotate filter
B anticlockwise to remove it.
For cleaning, use a non metallic
brush.
Reassemble the filter parts (as
shown in the figure) and reinsert
the whole assembly into the
dishwasher. Position it into its
housing and press downwards.
The dishwasher is not to be used
without filters. Improper
replacement of the filters may reduce the efficiency of the wash and
even damage your dishwasher.
1
B
2
C
A
Once in a while, once a
month, spend a little
time on the filter
assembly and the
sprayer arms.
Cleaning the sprayer
arms.
Food residue may become
encrusted onto the sprayer
arms and block the holes where
water comes out. Check the
sprayer arms regularly and
clean them once in a while
(letters F and I How is it
made?).
Keep your dishwasher in shape
Respecting these few rules ensures you will always have a reliable work
companion by your side.
After every wash.
When the wash cycle has
ended, always remember to
turn off the water supply tap
and to leave the appliance door
ajar. This way, moisture and
bad odours will not be trapped
inside.
Unplug the appliance.
Before carrying out any
cleaning or maintenance on the
dishwasher, always remove the
plug from the electricity socket.
Do not run risks.
No solvents! No
abrasives!
To clean the exterior and
rubber parts of your appliance,
do not use solvents or abrasive
cleaning products. Use a cloth
dampened with lukewarm
soapy water only.
If there are any stains on the
surface of the appliance
interior, use a cloth dampened
with water and a little white
vinegar, or a cleaning product
specifically made for
dishwashers.
Going on holiday?
When you go away for an
extended period of time, we
recommend you do the
following:
run a cycle with the
dishwasher empty
turn off the water inlet tap.
leave the appliance door ajar
This will help the seals last
longer and prevent unpleasant
odours from forming inside the
appliance.
Moving the appliance.
Should the appliance have to be
moved, try to keep it in a
vertical position. If absolutely
necessary, it can be positioned
on its back.
The seals.
One of the factors that cause
unpleasant odours to form
inside the dishwasher is food
that remains trapped in the
seals. Periodic cleaning using a
damp sponge will prevent this
from occurring.
Your dishwasher is not a waste disintegrator!
Do not worry about removing every single bit of
food residue from your dishes, but do get rid of
bones, peel and rind and any other left-overs
before placing them in the racks. Empty out all
glasses and cups.
ARISTON DISHWASHER - Instructions for installation and use
21
Page 24
ISHWASHER
D
Stay in touch
THANK YOU for choosing an Ariston appliance. We are confident
you have made a good choice and that your new appliance will give
many years of excellent service.
And we're there when you need us.
Register your purchase
now
This will confirm your entitlement to free spare parts for five years,
and you could also be lucky enough to recover the cost of your
purchase in our quarterly prize draw.
Simply complete and return the Registration Form supplied with
the appliance documents, using the FREEPOST envelope supplied.
Or call the Registration Hotline on 0870 010 4305.
Enjoy complete peace of mind. By registering now, you
automatically qualify for a full year's guarantee on parts and labour
PLUS free functional parts cover for a further 4 years, provided
they are genuine Ariston spare parts fitted by an Ariston Service
Engineer.
We're as close to you as your telephone
For direct access to Genuine Ariston Spare Parts and Accessories,
call 0870 558 5850 and speak to our skilled staff who can help you to identify and purchase the item you
require.
For a Rapid Response to a problem with your appliance, call 0870 607 0805. We're open from Monday
to Saturday (8am - 5.30pm weekdays, 9am - 5pm Saturday). We have our own department of highly trained
Ariston service staff. For most calls, our Service Engineer can fix the problem on the first visit.
Please have the following details to hand when you ring us:
The nature of the problem, the Model Number and the Serial Number.
These numbers can be found on the appliance and on the portion of the Registration Card which you retain.
22
ARISTON DISHWASHER - Instructions for installation and use
Page 25

AVE-VAISSELLE
L
Un guide rapide pour tout savoir
sur votre lave-vaisselle
Ce manuel a une façon plaisante de vous énumérer tout
ce que votre nouvel électroménager peut vous offrir.
Vous découvrirez, en plus, un tas de curiosités et de
petites astuces pour mieux laver votre vaisselle et
prolonger la durée de votre machine.
1. Installation et déménagement (page 30)
Le bon fonctionnement de votre lave-vaisselle dépend en grande partie
de la façon dont il a été installé, à sa livraison ou après un déménagement. Cette opération est donc de la plus haute importance. Vérifiez
toujours:
1. Que l'installation électrique est conforme;
2. Que les tuyaux d'arrivée et d'évacuation de l'eau sont bien raccordés;
3. Que le lave-vaisselle est bien installé à plat. Sa durée de vie et son bon
fonctionnement en dépendent.
2. Tableau de bord à vos ordres (page 24)
Apprenez à bien connaître les parties composant votre lave-vaisselle,
vous vous en servirez mieux. Vous trouverez ici la description détaillée
des commandes et des parties internes.
3. Rangement de la vaisselle (page 25)
Cette page contient des renseignements utiles qui vous aideront à bien
ranger votre vaisselle à l'intérieur du lave-vaisselle et à exploiter à fond
la place disponible.
4. Démarrage du lave-vaisselle (page 26)
Après avoir rangé votre vaisselle, choisissez le programme approprié et
dosez correctement les produits de lavage et de rinçage. Lisez ces pages
pour tout savoir sur chaque phase de lavage.
5. Le sel: un allié important (page 29)
Utilisez un sel approprié et les quantités conseillées pour conserver votre
lave-vaisselle en bon état, mieux laver et éviter que le calcaire ne l'endommage.
8. La sécurité pour toute la famille (page 31)
Lisez attentivement ce chapitre, vous y trouverez des renseignements
utiles sur la sécurité au moment de l'installation, l'utilisation et l'entretien.
Pour éviter de vilaines surprises.
9. Soin et entretien particuliers (page 32)
De temps en temps, au moins une fois par mois, occupez-vous plus
particulièrement du groupe filtrant et des bras gicleurs. Voyez ici comment
vous y prendre.
6. Faites des économies: nos conseils et nos
suggestions (page 29)
10. Gardez votre lave-vaisselle en forme (page 32)
De petits conseils pour mieux laver votre vaisselle et économiser en
choisissant le programme adapté au type de chargement.
7. Problèmes et solutions (page 31)
Avant d'appeler le technicien, lisez ce qui suit: bon nombre de problèmes
trouveront une solution immédiate. Et si vous n'y arrivez pas, appelez le
service après-vente Ariston. En peu de temps et dans la limite du possible,
toute panne sera réparée.
Prévenez les pannes, les conseils qui vous sont fournis vous aideront à
garder votre lave-vaisselle en pleine forme.
11. Caractéristiques techniques (page 24)
Les données techniques de votre électroménagers sont toutes conformes
à la réglementation en vigueur.
LAVE-VAISSELLE ARISTON - Mode d'installation et d'emploi
23
Page 26

AVE-VAISSELLE
L
Ouvrons ensemble votre
lave-vaisselle
Qu'est-ce qu'il
contient?
Apprenez à bien connaître les parties qui composent
votre lave-vaisselle pour mieux vous en servir
E. Panier supérieur
F. Gicleur supérieur
G. Réglage hauteur
panier
H . Panier inférieur
I. Gicleur inférieur
J. Bouchon réservoir à sel
K. Filtre lavage
L. Distributeur produits de
lavage et de rinçage
Tableau de bord à vos ordres
A. Touche ON-OFF
Appuyez sur cette touche
pour allumer votre
machine.
B. Lampe-témoin ON-OFF
Elle vous signale que
votre lave-vaisselle est
branché.
C. Poignée ouverture porte
Elle sert à ouvrir la porte
du lave-vaisselle.
D.Bouton sélection pro-
grammes
Tournez-le pour choisir un
programme
G. Voyants déroulement
cycle et départ différé
Ils vous renseignent sur
les phases du
programme en cours
(prélavage, lavage,
rinçages, séchage).
E. Touche séchage super
Appuyez sur cette
touche pour obtenir un
meilleur séchage.
R. Touche de Start/Reset
Start sert à faire démarrer
le programme et Reset à
annuler toutes les
sélections effectuées.
G
S
E
S. Voyant manque de sel
Il vous signale qu'il faut
ajouter du sel.
T
C
R
T. Voyant produit de rinçage
Il vous signale qu'il faut
ajouter du produit de
rinçage
D
B
A
Caractéristiques techniques
Caractérist i ques th ecni que s
Largeur cm. 5 9,5
Profondeur cm. 57
Hauteur cm. 82
Capacité 12 couverts standard
Pression eau alimen tati on 4,3 psi-145 psi ( 30 KPa÷ 1MPa ) (0, 3 ÷10 bar)
Te nsi on d' ali ment at ion Voir plaquette caractéri st i ques
Puissance tot ale ab sor bée Voir plaquette caractéri st i ques
Fusible Voir plaquette caractéri st i ques
24
LAVE-V AISSELLE ARISTON - Mode d'installation et d'emploi
Ce lave-vaisselle est conforme
aux Directives
Communautaires suivantes:
73/23/CEE
(Basse Tension) et
modifications
suivantes;
89/336/EEC
(Compatibilité
électromagnétique) et
modifications
suivantes.
97/17/CE
(Etiquetage)
2002/96/CE
(Déchets des
Equipements
Electriques et
Electroniques)
Page 27

AVE-VAISSELLE
L
Comment s'y prendre pour
charger la vaisselle?
Avant de laver, prenez de bonnes habitudes, vous obtiendrez de meilleurs résultats et augmenterez la
longévité de votre lave-vaisselle. Eliminez les déchets les plus gros, mettez tremper vos casseroles et
vos poêles particulièrement sales. Une fois que vous avez chargé votre vaisselle, contrôlez que les bras
du gicleur tournent bien.
Tout d'abord.
Avant de ranger la vaisselle dans
les paniers, éliminez les déchets
de nourriture, ainsi les filtres ne se
boucheront pas et le lavage n'en
sera que plus efficace.
Si les casseroles et les poêles sont
très sales, mettez-les tremper en
attendant de les laver au lavevaisselle. Pour charger votre
vaisselle plus facilement, sortez les
paniers.
Que ranger dans le
panier inférieur ?
Nous vous conseillons de placer
dans le panier inférieur la vaisselle
plus difficile à laver:
casseroles,couvercles, assiettes
plates et creuses, mais aussi :
tasses, tasses à café et verres (les
photos montrent des exemples de
chargement).
Plats et grands couvercles:
rangez-les sur les côtés du panier.
Casseroles, saladiers:
placez-les toujours sens dessus
dessous.
Vaisselle très creuse: mettez
ces pièces en position oblique, l'eau
pourra ainsi s'écouler et mieux les
laver.
Verres et tasses : rangez-les
comme illustré (voir figure).
Le panier à couverts se sépare en
deux quand vous enlevez la
poignée.
Quand vous avez peu de couverts
à laver, n'utilisez que moitié panier,
vous aurez plus de place pour le
reste de votre vaisselle, vous
pouvez d'ailleurs ranger l'autre
moitié dans le panier supérieur (voir
figures A et B).
Ce panier est équipé de deux grilles
amovibles : rangez les couverts un
par un dans les fentes, manches
tournés vers le bas.
Les pointes des couteaux et des
utensiles de cuisine tranchants
doivent être tournées vers le bas.
Rangez les couverts de manière à
ce qu'ils ne se touchent pas entre
eux.
Que ranger dans le
panier supérieur ?
Chargez votre vaisselle fragile et
légère dans le panier supérieur :
verres, tasses à thé et à café,
soucoupes - mais aussi assiettes saladiers bas, poêles et casseroles
basses peu sales (les photos vous
montrent quelques exemples de
chargement).
Placez la vaisselle légère de
manière à ce qu'elle ne risque pas
d'être déplacée par les jets d'eau.
Une ou deux étagères rabattables
peuvent être fournies pour ranger
des tasses, grandes et petites, mais
aussi des couteaux longs et pointus
et des couverts de service.
Après avoir chargé votre lavevaisselle, n'oubliez pas de contrôler
si les bras du gicleur tournent bien,
sans buter contre la vaisselle.
Le réglage du panier supérieur?
Le réglage en hauteur du panier
supérieur vous permet de charger
votre vaisselle plus facilement.
1
3
F
Ouvrez les ailettes d'arrêt des rails et
sortez le panier. Placez-le maintenant
dans la position désirée, plus haute ou
plus basse, faites-le ensuite glisser le
long des glissières jusqu'à ce que les
roulettes avant entrent elles aussi.
Refermez les ailettes pour bloquer le tout.
Suivez le déroulement des opérations
illustré figure "F".
2
4
Quelques examples de chargement
panier inférieur
panier supérieur
A
A
B
LAVE-VAISSELLE ARISTON - Mode d'installation et d'emploi
25
Page 28

AVE-VAISSELLE
L
Démarrage du lave-vaisselle
Allons-y!
Vous avez chargé votre lave-vaisselle, il faut à
présent choisir un programme de lavage. Une
minute suffit pour apprendre
Tout d'abord.
Ouvrez à fond le robinet de l'eau et
appuyez sur la touche ON-OFF "A":
vous entendrez retentir un bref
signal acoustique et le voyant "B"
s'allumera. L'appareil est à présent
branché et attend d'être
programmé.
Choisissez un
programme.
Tournez dans le sens des aiguilles
d'une montre le sélecteur de
programmes "D" pour amener le
repère sur le bouton en face du
chiffre ou du symbole du cycle que
vous désirez sélectionner (au
début, consultez le tableau des
programmes page 28).
Une fois la porte fermée, appuyez
sur la touche de Start "R", un signal
acoustique retentit et au bout de
quelques secondes, un bref signal
sonore vous indiquera que le
programme a démarré et
l'indicateur "G" affichera le
symbole de la phase de démarrage.
Le lave-vaisselle vous
renseigne.
Votre lave-vaisselle est équipé de
voyants (G) qui s'allument pour
vous signaler le déroulement du
cycle de lavage.
Voilà les symboles des différentes
phases:
prélavage, lavage, rinçages,
séchage.
A tout moment, votre lave-vaisselle
vous signale où il en est.
Vous pouvez
modifier le
programme en
cours, sil vient
just de démarrer.
Modification du
programme en cours.
Si vous vous êtes trompé de programme, aucun problème!
pouvez modifier le programme en
cours, à condition qu'il ait démarré
depuis peu.
Pour modifier un programme,
appuyez 5 secondes de suite sur la
touche de RESET "R" : un signal
acoustique prolongé retentira suivi
de 3 bip rapides. Le témoin "G"
s'éteindra et toutes les sélections
seront annulées.
Pour sélectionner un nouveau
programme, refaites les opérations
énumérées dans le paragraphe
"Choisissez un programme." Vous
pouvez alors resélectionner le bon
programme.
Vous avez oublié
d'introduire de la
vaisselle ?
Cela peut arriver à tout le monde.
Appuyez sur la touche ON-OFF
pour interrompre le cycle de lavage, introduisez la vaisselle que
vous aviez oubliée et appuyez de
nouveau sur la touche ON-OFF.
Le cycle redémarrera de l'endroit
où vous l'avez interrompu.
Fini ?
La fin du cycle est signalée par 2
brefs signaux acoustiques et par le
clignotement du voyant
correspondant au séchage.
Attention:
Pour éteindre l'appareil, appuyez
sur la touche A débranchez la
fiche de la prise de courant pour
couper lalimentation électrique;
le câble dalimentation doit être
par conséquent facilement
accessible.
Fermez le robinet de l'eau.
Attendez quelques minutes avant
de sortir votre vaisselle : si vous
attendez un peu, elle séchera
mieux à la vapeur.
Videz d'abord le panier inférieur.
Vous
Contrôlez que le
programme est bien
achevé avant de
sortir votre
vaisselle!
Il y a une coupure de
courant ? Vous avez
ouvert la porte de la
machine ?
Le programme s'interrompt et repart dès que le courant revient ou
que vous refermez la porte. Tout a
été prévu !
Vous désirez davantage
de séchage ?
Appuyez sur la touche "E" avant
de démarrer le programme
sélectionné. Un long signal
acoustique vous signale que vous
avez sélectionné le séchage super
et le programme de lavage durera
plus longtemps pour mieux sécher
votre vaisselle.
Lorsque vous
ouvrez la porte
du lave-vaisselle
alors que le cycle
de lavage est en
cours ou vient
juste de finir,
faites attention
au nuage de
vapeur chaude
qui s'échappe,
vous risquez de
vous brûler!
26
LAVE-V AISSELLE ARISTON - Mode d'installation et d'emploi
Page 29

Produit de lavage et de rinçage
AVE-VAISSELLE
L
N'utilisez que du produit de lavage spécial lave-vaisselle. Versez le produit
Conseils utiles
de lavage dans le distributeur situé à l'intérieur de la porte. Avant de
démarrer le cycle de lavage, bien sûr!
Le produit de lavage
Chargement du produit de
lavage
Pour ouvrir le couvercle A, appuyez
sur la touche B. Remplissez de produit de lavage les deux bacs C et D
jusqu'au bord.
Fermez le couvercle en appuyant
jusqu'au déclic.
Dans le commerce, il existe des
produits de lavage en pastilles, dans
ce cas mettez une pastille dans le
bac "D" et fermez le couvercle.
Le couvercle ne ferme pas!
Contrôlez qu'il n'y a pas de résidus
de produit de lavage sur les bords
du bac. C'est certainement pour
cela que le couvercle n'arrive pas à
fermer. Nettoyez bien et vous verrez qu'il fermera.
B
D
C
A
Ne remplissez la
cuve du produit de
lavage qu'au moment
de démarrer le lavevaisselle.
Si vous le mettez trop
à l'avance, le produit
risque d'absorber de
l'humidité, former
des grumeaux et
perdre de sa
puissance de lavage.
Dosez juste la
quantité de produit
de lavage nécessaire:
exagérer ne rendra
pas votre vaisselle
plus propre mais
polluera davantage.
Le produit de rinçage.
Le produit de rinçage fait briller
votre vaisselle davantage car il
améliore son séchage. Le réservoir
à produit de rinçage est situé à
lintérieur de la porte, remplissezle quand le voyant produit de
rinçage T clignote
Chargement du produit de
rinçage.
Pour ouvrir le réservoir, tournez le
bouchon C dans le sens inverse
des aiguilles d'une montre. Attention à ne pas faire déborder le
produit quand vous le versez. Vous
pouvez régler la quantité de produit
de rinçage utilisé par le lavevaisselle: à l'aide d'un tournevis
agissez sur le dispositif de réglage
F qui se trouve sous le couvercle
C.
Attention
Il existe dans le commerce des produits pour lave-vaisselle qui ont à la fois une fonction lavage, une fonction sel et une fonction rinçage
(3 en 1)
Si votre eau est dure ou très dure, nous vous conseillons d'ajouter quand même du sel dans le réservoir prévu à cet effet pour éviter la
formation de traces blanches sur votre vaisselle ou à la surface de la cuve.
Si vous utilisez des produits 3 en 1, plus besoin de remplir le réservoir à produit de rinçage.
Ne remplissez votre réservoir à produit de rinçage que si vous désirez un séchage encore plus performant, amenez dans ce cas le
sélecteur de dosage sur 2.
Suivez toujours les recommandations du fabricant reportées sur l'emballage.
Si vous n'utilisez que des produits de ce genre, il est normal qu'au bout d'un certain nombre de lavages, les indicateurs lumineux sel et
produit de rinçage se mettent à clignoter.
Vous avez six positions au choix.
Normalement il est réglé sur 4.
F
C
Le réglage de la
quantité de
produit de
rinçage utilisé
améliore le
séchage.
Si vous
remarquez des
gouttes d'eau ou
des traces sur la
vaisselle, tournez
le dispositif de
réglage vers les
numéros plus
élevés.
Si par contre
votre vaisselle
présente des
traces blanches,
tournez le
dispositif de
réglage vers les
numéros plus
bas.
LAVE-VAISSELLE ARISTON - Mode d'installation et d'emploi
27
Page 30

AVE-VAISSELLE
L
Choisissez le bon programme
A chaque besoin son
programme
Le lavage en lave-vaisselle garantit un
environnement hygiénisant et davantage de
propreté.
Sel, produit de rinçage, une juste dose de produit de lavage et le programme
qu'il faut: voilà la formule idéale pour obtenir de meilleurs résultats et bien
entretenir votre lave-vaisselle.
3URGXLWGH
3URJ UDPPH
,QGLFDWLRQVVXUOHFKRL[
GH V SUR JUDPPHV
'HVFULSWLRQ GX F\FOH
ODYDJH
SUpODYDJH
ODYDJH
Prélavage à l'eau chaude 40°C
Vaisse lle e t c as se ro les tr ès
s ales ( dé c ons eillé po ur la
va iss elle fra g ile)
6XSHU:DVK
Lavage à 65 °C
2 rinçages à l'eau froide
Rinçage chaud à 70°C
Séchage.
J
que vous avez effectuée
de l'eau et du courant.
3URGXLW GH
Choisissez le bon
programme pour
votre vaisselle.
Choisir le programme
le plus approprié
à la charge
vous garantit
une vaisselle propre
et une meilleure
utilisation
'XUpHGX
SURJUDPPH
WROpUDQFH
ULQoDJH
VDQV
VpFKDJH
VXSHU
1RUPDO
5DSLGH
7UH PSDJH
9HUUHV
Cycle pour vaisselle et
casseroles normalement sales.
Programme standard
quotidien.
Progr amme de la va ge
é cologique , à faib le
consommation d'électricité,
pour vaisselle et casseroles
normalement sales.
Cycle économique et rapide
c o n se illé en ca s de vais selle
peu sale, tout de suite après
l'usage. Sans séchage, sauf en
cas de sélection du séchage
super.
Lavage préalable dans
l' at ten t e d e c ompléter le
chargeme nt au repas s uiva nt
C ycle sp éc ial cons eillé po u r la
va isselle fra gile ne sup po rtant
pas les hautes températures
tout de suite après l'usage.
Prélavage à l'eau froide
Lavage à 50 °C
Rinça ge fr oid
Rinçage chaud à 70°C
Séchage.
2 Prélavages à l' eau froide
Lavage à 50 °C
Rinçage chaud à 67°C
Séchage
Lavage bref à 47°C
Rinçage chaud à 62°C
Lavage bref froid pour éviter que les
déchets ne sèchent sur la vaisselle
Lavage à 52 °C
Rinçage tiède à 45°C
Rinçage chaud à 65°C
Séchage
J
J
J
J
(Avec
séchage
super)
Lavage différencié dans les
de ux panie r s dé lic a t d ans
celui du haut pour verres et
cristallerie, énergique dans
celui du bas pour les
'XR:DVK
28
LAVE-V AISSELLE ARISTON - Mode d'installation et d'emploi
casseroles
Prélavage froid
Lavage à 52 °C
Rinçage tiède à 45°C
Rinçage chaud à 65°C
Séchage
J
Page 31

Jamais sans sel
AVE-VAISSELLE
L
Votre eau
La dureté de l'eau varie d'un endroit à l'autre. Si votre eau est dure et qu'aucun
Pour éviter la
formation de
rouille, chargez le
adoucisseur n'est installé, des incrustations pourraient se former sur votre vaisselle.
Or, votre lave-vaisselle dispose d'un adoucisseur qui utilise du sel spécial et élimine le
démarrer un cycle
calcaire de l'eau.
Chargement du sel.
Utilisez du sel spécial lave-vaisselle.
Le réservoir à sel est situé sous le
panier inférieur, remplissez-le
comme suit:
1. Sortez le panier inférieur, dévissez et enlevez le bouchon du réservoir
2. Vous chargez le sel pour la première fois? D'abord, remplissez
le réservoir d'eau (vous n'aurez
plus à le faire par la suite)
3. Placez l'entonnoir du lave-vaisselle dans le trou et introduisez
environ deux kilos de sel. Il est
normal que de l'eau déborde du
réservoir.
4. Revissez soigneusement le bouchon.
Quand faut-il ajouter du sel?
Il faut remplir le réservoir à sel
quand le voyant sel "S" clignote.
Après avoir chargé le sel
première fois , il est tout à fait normal que le voyant sel reste allumé
ou clignote pendant 5 cycles de
suite.
Sel: dosage intelligent.
Votre lave-vaisselle peut régler sa
consommation de sel selon la dureté de votre eau. Vous pourrez ainsi
optimiser et personnaliser votre
consommation de sel (ni trop ni trop
peu).
Pour régler la consommation de sel,
procédez comme suit:
1. Dévissez le bouchon du réservoir à sel
2. Vous verrez sur la collerette du
réservoir une flèche (figure): si
nécessaire, tournez-la dans le
sens inverse des aiguilles d'une
montre en allant du signe "-" au
signe "+".
Choisissez la position de la flèche
après avoir consulté le schéma sur
la dureté de l'eau.
pour la
Durété de l'eau
°dH °fH mmol/l
0 ¸ 10 0 ¸ 17 0 ¸ 1,7 / 0 /
10¸ 25 18 ¸ 44 1,8 ¸ 4,4
25 ¸ 50 45 ¸ 89 4,5 ¸ 8,9 MED 40 40
> 50 > 89 > 8,9
Position
sélécteur
-
+
connaissez pas le
degré de dureté
de votre eau?
Renseignez-vous
société qui est
chargée de la
distribution de
l'eau dans votre
sel avant de
de lavage.
Consommation sel
(grammes-
/cycle)
20 60
60 25
Vous ne
auprès de la
ville.
Autono-
mie
(cycles/
2kg.)
Des astuces et des conseils à votre service.
Comment entretenir et réparer la vaisselle à laquelle vous
tenez
■ Vous pouvez laver presque toute
votre argenterie au lave-vaisselle. A deux exceptions près:
l'argenterie ancienne et celle qui
est décorée avec un agent oxydant. L'eau chaude peut desserrer les manches de l'argenterie
ancienne et faire disparaître les
motifs ornementaux de l'autre.
Ne placez jamais l'argenterie
Le lave-vaisselle
non seulement
vous permet
d'économiser du
temps et du
travail, mais il
désinfecte la
vaisselle, en la
lavant à une
température
élevée.
au contact d'autres métaux:
vous éviterez taches et noircissement.
■ Les plats et plateaux en argent
doivent être lavés
immédiatement après l'usage,
surtout s'ils contenaient du sel,
des ufs, des olives, de la
moutarde, du vinaigre, des jus
de fruit et des légumes cuits.
■ Pour votre vaisselle
particulièrement fragile, faites
un lavage spécial prévu sur
votre lave-vaisselle.
Economiser: c'est
possible
Utilisez les électroménagers de façon
intelligente, vous ferez des économies et
chouchouterez l'environnement.
Charge maximum
Pour optimiser vos consommations, faites
fonctionner votre lave-vaisselle à sa charge
maximum. Si vous n'arrivez pas à le remplir
tout de suite, utilisez le cycle trempage, vous
éviterez la formation de mauvaises odeurs et
d'incrustations.
Le bon programme.
Choisissez le programme approprié au type de
chargement que vous avez effectué. Le choix
du programme dépend du type de vaisselle
que vous devez laver et de son degré de
salissure. Pour effectuer le bon choix, consultez
le tableau des programmes page 28.
LAVE-VAISSELLE ARISTON - Mode d'installation et d'emploi
29
Page 32

AVE-VAISSELLE
L
Installation et déménagement
Votre lave-vaisselle est arrivé
A son achat ou après un déménagement, le bon fonctionnement de
votre lave-vaisselle dépend en grande partie de son installation.
Choisissez l'endroit où installer votre lave-vaisselle, vous pouvez le
placer côte à côte avec des meubles ou contre le mur. Le lave-vaisselle est équipé de tuyaux pour l'arrivée et l'évacuation de l'eau, ils
peuvent être orientés vers la droite
ou vers la gauche en vue d'une
meilleure installation.
Mise à niveau
Après avoir installé la machine, vissez ou dévissez ses pieds de réglage
pour l'amener à la hauteur voulue
et la mettre à niveau afin qu'elle
soit parfaitement à plat. Veillez à
ce qu'elle ne soit pas inclinée de
plus de 2 degrés. Une bonne mise à
niveau garantira le bon fonctionnement de votre lave-vaisselle.
Réglage des pieds
arriére
Glissez la machine dans la niche et
réglez sa hauteur en vous servant
des vis situées à l'avant de
l'appareil, dans le bas. A l'aide d'un
tournevis tournez les vis dans le
sens des aiguilles d'une montre pour
soulever le lave-vaisselle et dans
le sens inverse pour l'abaisser.
pièces de rechange originales.
Raccordez le tuyau d'arrivée à une
prise d'eau froide avec embouchure filetée ¾ gaz; vissez-le soigneusement au robinet . Si les
tuyaux de l'eau sont neufs ou s'ils
sont restés longtemps inutilisés,
avant d'effectuer le raccordement,
faites couler l'eau jusqu'à ce qu'elle
devienne limpide et dépourvue
d'impuretés. Faute de quoi, vous
risquez d'endommager votre lavevaisselle à cause du risque d'engorgement au point d'arrivée de
l'eau.
Raccordement à la prise
d'eau chaude.
Le lave-vaisselle peut être alimenté
avec de l'eau chaude de réseau (si
vous disposez d'une installation
centralisée avec radiateurs) ne
dépassant pas 60°C.
Dans ce cas, la durée du lavage
sera plus courte de 15 minutes et
l'efficacité du lavage légèrement
réduite.
Pour le raccordement à la prise
d'eau chaude, procédez comme
décrit pour le raccordement à la
prise d'eau froide.
La portion de tuyau repérée par la
lettre A doit se trouver à une hauteur comprise entre 40 et 100 cm
Le tuyau ne doit pas être plongé
dans l'eau.
A
La fiche
La fiche du lave-vasseille
encastrable doit être accessible
pour pouvoir effectuer les
opérations d'entretien en toute
sécurité.
Câble d'alimentation.
Procédez à un contrôle périodique
du câble d'alimentation; s'il est
abîmé nous vous conseillons vivement de le faire remplacer par un
service après-vente agréé.
Raccordement à la prise
d'eau froide.
Pour raccorder l'électroménager
au réseau de distributionde l'eau,
utilisez le tuyau d'arrivée fourni
avec l'appareil, n'utilisez aucun
autre type de tuyau. En cas de
remplacement, n'utilisez que des
Si la prise de
courant à
laquelle vous
raccordez la
machine ne
correspond pas à
la fiche,
remplacez-la par
une prise
appropriée;
n'utilisez ni
adaptateurs ni
déviateurs, ils
pourraient
provoquer des
surchauffes ou
des brûlures.
Sécurité anti-fuite
Votre lave-vaisselle est équipé d'un
dispositif qui coupe l'arrivée de l'eau
en cas de fuites à l'intérieur de la
machine. Il est également équipé
d'un tuyau d'arrivée de l'eau qui
supporte des pressions très élevées
et qui, en cas de rupture, devient
rouge vif. La sécurité en cas de
fuites est garantie par un deuxième
tuyau qui l'englobe et qui,
transparent, prend une couleur
rouge vif.
Très important: contrôlez-le
périodiquement, s'il devient rouge
vif c'est qu'il faut le changer au
plus tôt. Appelez un service
d'assistance technique agréé pour
l'intervention.
Raccordement au tuyau
d'évacuation.
Introduisez le tuyau d'évacuation
dans une conduite ayant au moins
4 cm de diamètre ou bien accrochez-le à l'évier. Evitez tous étranglements ou courbes excessifs.
Branchement
électrique.
Vérifiez avant tout si les valeurs de
tension et de fréquence du réseau
correspondent bien à celles qui sont
indiquées sur l'étiquette placée sur
la contre-porte inox de la machine
et si l'installation électrique à laquelle vous la raccordez est bien
dimensionnée pour le courant maximum indiqué sur l'étiquette.
Terre: sécurité
indispensable.
Vous pouvez alors insérer la fiche
dans une prise de courant munie
d'une liaison à la terre efficace (la
mise à la terre de l'installation est
une garantie de sécurité prévue par
la loi, vérifiez si votre installation
est bien en règle).
Bande de protection
contre la formation de
buée.
Une bande transparente
autocollante est fournie avec
certains modèles.
Collez-la au-dessous de votre plan
de travail en bois pour le protéger
contre la buée.
Si cette bande nest pas fournie
avec votre appareil, vous pouvez
la commander comme pièce
détachée à nos revendeurs agréés.
30
LAVE-V AISSELLE ARISTON - Mode d'installation et d'emploi
Page 33

AVE-VAISSELLE
Problèmes et solutions
L
Au moindre problème, lisez ce qui suit
Il peut arriver que le lave-vaisselle fonctionne mal ou pas du tout. La plupart du temps, vous pouvez résoudre
ces problèmes vous-même. Avant de téléphoner au service après-vente, lisez ces quelques lignes.
Le lave-vaisselle ne
démarre pas
■ Le robinet de l'eau est-il bien
ouvert?
■ Le robinet de l'eau est-il bien rac-
cordé au tuyau?
■ Y a-t-il une coupure d'eau à la
maison?
■ La pression de l'eau est-elle suf-
fisante?
■ Le tuyau est-il plié?
■ Le filtre du tuyau d'arrivée de
l'eau est-il bouché?
■ La porte du lave-vaisselle est-
elle ouverte?
La vaisselle n'est pas
propre.
■ Avez-vous utilisé une dose de
produit de lavage idoine?
■ Le programme de lavage sélec-
tionné est-il approprié à la vaisselle que vous avez chargée?
■ Le filtre et le micro-filtre sont-
ils propres?
■ Les gicleurs sont-ils libres?
Le lave-vaisselle ne
vidange pas
■ Le tuyau d'évacuation est-il
plié?
Le lave-vaisselle
présente des dépôts de
calcaire ou une couche
blanche.
■ Le bouchon du réservoir à sel
est-il bien fermé?
■ La quantité de produit de rin-
çage est-elle bien dosée?
Messages d'erreur.
Votre lave-vaisselle monte un
dispositif de sécurité à même de
détecter des anomalies de
fonctionnement. Ces anomalies
sont signalées par un ou deux
voyants "G" qui clignotent très
rapidement. Après avoir pris note
des voyants qui clignotent,
éteignez votre appareil et appelez
l'assistance technique.
Alarme robinet fermé
Si vous avez oublié d'ouvrir le robinet de l'eau, votre machine vous le
signale pendant quelques minutes
en émettant de brefs signaux
acoustiques. Ouvrez le robinet et,
au bout de quelques minutes, votre
machine redémarrera. Si vous
n'êtes pas là quand les signaux
acoustiques retentissent,votre
appareil s'arrête et les voyants des
programmes 2 et 3 (lavage et
rinçages) clignotent très
rapidement.
Eteignez l'appareil, ouvrez le robinet de l'eau et au bout de 20 secondes rallumez l'appareil:
recommencez les opérations de
programmation, le programme
redémarrera.
Alarme filtres bouchés
Si la machine est bloquée et les
voyants phases programme 1 et 3
(prélavage et rinçages) clignotent
rapidement, c'est que le filtre est
bouché par de gros résidus d'aliments. Eteignez l'appareil, nettoyez soigneusement le filtre et
après l'avoir remonté à son emplacement comme indiqué page 32,
rallumez. Recommencez les
opérations de programmation, le
programme redémarrera.
Alarme pour panne de
l'électrovanne d'entrée
de l'eau.
Si le voyant 2 (lavage) clignote
rapidement, il faut ETEINDRE
votre lave-vaisselle et le
REMETTRE EN MARCHE au
bout d'une minute. Si l'alarme persiste, fermez avant tout le robinet
de l'eau pour éviter tout risque
d'inondation puis coupez le courant
et appelez le service de dépannage.
Vous avez tout vérifié
mais votre lavevaisselle ne fonctionne
toujours pas et le
problème persiste?
Appelez le service après-vente le
plus proche de chez vous et
n'oubliez pas de leur signaler:
ile type de panne
le sigle du modèle (Mod....) et le
numéro de série (S/N ....) que vous
trouverez sur l'étiquette signalétique appliquée sur le côté de la contre-porte
Ne faites jamais appel à
des techniciens non
agréés et exigez
toujours l'installation
de pièces détachées
originales.
La sécurité chez vous
Votre lave-vaisselle a été fabriqué selon les réglementations internationales de sécurité les plus sévères
en la matière. Elles vous protègent ainsi que votre famille. Lisez attentivement les avertissements et les
renseignements de cette notice: ils vous fourniront des nouvelles utiles quant à la sécurité d'installation,
d'utilisation et d'entretien de votre appareil. Pour ne pas avoir de mauvaises surprises.
1. Eliminez avec soin l'emballage (suivez les instructions
concernant le dépôt sélectif
des déchets de votre Commune)
2. Après avoir déballé l'appareil,
contrôlez s'il est en bon état.
Si vous avez le moindre doute,
adressez-vous à un professionnel du secteur.
3. Votre lave-vaisselle ne doit
être utilisé que par des adultes. N'y lavez que la vaisselle
de tous les jours en suivant les
instructions de ce manuel. Ne
touchez pas la machine quand
vous êtes pieds nus ou si vous
avez les mains et les pieds
mouillés.
4. L'usage de rallonges et de prises multiples est déconseillé.
Si le câble d'alimentation électrique n'est pas assez long, faites-le remplacer sans oublier
qu'il ne doit pas être écrasé
ou dangereusement plié.
5. En cas de mauvais fonctionnement ou de travaux d'entretien, déconnectez l'appareil de
la ligne (débranchez la fiche!).
6. Gardez les enfants à bonne
distance des produits de lavage et du lave-vaisselle
ouvert.
7. N'installez pas votre lave-vaisselle à l'extérieur, même s'il
est abrité par un auvent: il est
extrêmement dangereux de le
laisser sous la pluie et les orages.
8. Ne touchez pas à la résistance
pendant et dès la fin du cycle
de lavage.
9. Ne vous appuyez pas et ne
vous asseyez pas sur la porte
ouverte, vous risqueriez de
faire basculer le lave-vaisselle.
10. En cas de panne, fermez le
robinet d'arrivée de l'eau et
débranchez la fiche de la prise
murale. Consultez le chapitre
"Si vous avez des problèmes,
lisez ce qui suit". S'il n'y a pas
de solution possible, appelez
le service après-vente.
11 . Rendez inutilisables vos appa-
reils hors d'usage comme suit:
coupez le câble d'alimentation
et rendez le verrouillage de la
porte inopérant.
12. Enlèvement des appareils
ménagers usagés
La Directive Européenne
2002/96/EC sur les Déchets
des Equipements Electriques
et Electroniques (DEEE),
exige que les appareils
ménagers usagés ne soient
pas jetés dans le flux normal
des déchets municipaux. Les
appareils usagés doivent être
collectés séparément afin
d'optimiser le taux de
récupération et le recyclage
des matériaux qui les
composent et réduire l'impact
sur la santé humaine et
l'environnement. Le symbole
de la ''poubelle barrée'' est
apposée sur tous les produits
pour rappeler les obligations de
collecte séparée.
Les consommateurs devront
contacter les autorités locales
ou leur revendeur concernant
la démarche à suivre pour
l'enlèvement de leur vieil
appareil.
LAVE-VAISSELLE ARISTON - Mode d'installation et d'emploi
31
Page 34

AVE-VAISSELLE
L
Soin et entretien
Nettoyage et entretien particuliers
Le groupe filtrant
Si vous voulez toujours avoir
dexcellents résultats de lavage,
nettoyez le groupe filtrant.
Leau de lavage est débarrassée des
déchets daliments et remise en
circulation parfaitement filtrée.
Voilà pourquoi, il vaut mieux
enlever, après chaque lavage, les
déchets les plus gros arrêtés par le
gobelet «C» et par le filtre semicirculaire A; pour les sortir, tirez la
poignée du gobelet vers le haut Il
vous suffira alors de les rincer à
leau courante.
Nettoyez soigneusement, une fois
par mois, tout le groupe filtrant:
gobelet C + filtre semi-circulaire A
+ filtre cylindrique B. Pour sortir le
filtre B tournez-le dans le sens
inverse des aiguilles dune montre.
Pour les nettoyer servez-vous dune
petite brosse non métallique.
Assemblez les pièces (comme
illustré) et remontez le groupe dans
le lave-vaisselle. Faites-le entrer
dans son logement en poussant vers
le bas.
Nutilisez pas votre lave-vaisselle
sans filtres. Si les filtres ne sont pas
montés correctement, lefficacité
du lavage en souffrira et vous
risquez dendommager lappareil.
1
B
2
C
A
De temps en
temps, au moins
une fois par mois,
occupez-vous plus
particulièrement
du groupe filtrant
et des bras
gicleurs.
Nettoyage des bras
gicleurs
Il peut arriver que des déchets
restent collés aux bras gicleurs et
bouchent les trous de sortie de
l'eau. Contrôlez-les et nettoyez-les
de temps en temps.
Gardez votre lave-vaisselle en pleine forme
Chouchoutez votre lave-vaisselle, il vous servira
fidèlement.
Après chaque lavage.
Quand le cycle est terminé,
n'oubliez pas de toujours fermer le
robinet de l'eau et de laisser la porte entrebâillée. Vous éviterez que
l'humidité stagne à l'intérieur et que
de mauvaises odeurs se forment.
Débranchez la fiche.
Avant d'effectuer toute opération
de nettoyage ou d'entretien de la
machine, débranchez la fiche
électrique. Vous éviterez tout
danger.
Pas de solvants! Pas de
produits abrasifs!
Pour nettoyer l'extérieur et les
parties en caoutchouc de votre lavevaisselle, pas besoin d'utiliser de
solvants ou de produits abrasifs, un
chiffon mouillé d'eau tiède et un
peu de savon suffisent.
Si vous remarquez des taches à la
surface de la cuve, enlevez-les à
l'aide d'un chiffon mouillé d'eau et
de vinaigre blanc (il en faut peu),
ou bien utilisez un produit de
nettoyage spécial lave-vaisselle.
Vous partez en
vacances?
Quand vous vous absentez pour
longtemps, nous vous conseillons
d'effectuer les opérations
suivantes:
effectuez un lavage à vide
fermez le robinet d'arrivée de
l'eau
laissez la porte entrouverte
Vos joints dureront plus longtemps
et vous éviterez la formation de
mauvaises odeurs à l'intérieur du
lave-vaisselle.
Déménagement.
En cas de déménagement, mieux
vaut laisser l'appareil à la verticale. En cas de besoin, vous pouvez
l'incliner sur le dos.
Les joints.
La formation de mauvaises odeurs
à l'intérieur du lave-vaisselle est
principalement due aux déchets
alimentaires qui restent coincés
dans les joints. Il vous suffira de les
nettoyer de temps en temps avec
une éponge humide.
Votre lave-vaisselle n'est pas un
broyeur à ordures!
Ne vous mettez pas martel en tête, pas
besoin de débarrasser votre vaisselle de
tous les menus déchets, mais
débarrassez-la des os, pelures et autres
restes avant de la ranger dans les
paniers. Videz les verres et les coupes.
32
LAVE-V AISSELLE ARISTON - Mode d'installation et d'emploi
Page 35

ESCHIRRSPÜLER
G
Express-Nachschlagebuch für
Ihren Geschirrspüler
Dieses Handbuch erklärt Ihnen auf angenehme Weise, was Ihnen
Ihr neues Haushaltsgerät alles bieten kann. Außerdem werden Sie
so manche interessante Kuriositäten erfahren und zum Abschluss
bieten wir Ihnen noch einige kleine Tips und Tricks, damit Ihnen
Ihr Gerät die bestmöglichen Spülergebnisse liefert und Sie möglichst
lange Ihre Freude daran haben.
1. Installation und Umzug (Seite 40)
Nach der Lieferung Ihres neuen Geschirrspülers oder nach einem
Umzug ist es von grundlegender Bedeutung, dass das Gerät
korrekt angeschlossen wird, damit Ihr Geschirrspüler einwandfrei
funktioniert. Kontrollieren Sie daher stets folgende Punkte:
1. dass die Elektroanlage den einschlägigen Vorschriften
entspricht;
2. dass Versorgungs- und Ablaufschläuche vorschriftsmäßig
angeschlossen wurden;
3. dass der Geschirrspüler vollkommen eben steht. Das lohnt sich:
Ihr Gerät wird es Ihnen mit einer perfekten Funktion und einem
langen Leben danken.
2. Die Schalttafel (Seite 34)
Lernen Sie die Bestandteile kennen, aus denen sich Ihr
Geschirrspüler zusammensetzt, das hilft Ihnen, besser damit
umzugehen. Hier finden Sie die detaillierte Beschreibung der
Schalttafel und der Innenbestandteile.
jedoch keine geeignete Lösung finden, dann fordern Sie den Ariston-
3. So füllen Sie Ihren Geschirrspüler richtig (Seite 35 )
Auf dieser Seite finden Sie einige nützliche Hinweise, um den
Geschirrspüler richtig zu füllen und den Platz bestmöglich
auszunützen.
4. So starten Sie Ihren Geschirrspüler (Seite 36)
Nachdem Sie das Gerät gefüllt haben, wählen Sie das passende
Programm aus und dosieren Sie das Geschirrspülmittel und den
Klarspüler richtig. Lesen Sie diese Seiten aufmerksam durch, denn
sie sind Ihnen für alle Reinigungsphasen dienlich.
5. Das Regeneriersalz: ein wichtiger
Verbündeter (Seite 39)
Wenn Sie das richtige Salz verwenden und es korrekt dosieren,
wird Ihnen das sehr nützlich sein, um Ihr Geschirr besser zu
reinigen, Ihren Geschirrspüler zu schonen und Schäden durch
Kalkablagerungen zu vermeiden.
Kundendienst an, der für eine sofortige Behebung einer jeden
Betriebsstörung sorgen wird.
8. Sicherheit für Sie und Ihre Familie (Seite 41)
Lesen Sie dieses Kapitel aufmerksam durch, denn es enthält
wichtige Informationen zur Sicherheit bei der Installation, im
Einsatz und bei der Wartung. Damit Ihnen böse Überraschungen
erspart bleiben!
9. Pflege und Wartung (Seite 42)
Einmal im Monat sollten Sie der Siebkomposition und dem
Sprüharm etwas Aufmerksamkeit schenken. Hier erfahren Sie wie.
10.Halten Sie Ihren Geschirrspüler fit (Seite 42)
Beachten Sie die paar Regeln, die Sie hier lesen und Ihr
Geschirrspüler wird stets in Form sein.
6. Tips und Tricks für eine bessere und
sparsamere Reinigung (Seite 39)
Hier finden Sie einige kleine Ratschläge, um Ihr Geschirr besser
zu reinigen und um Energie zu sparen, indem Sie das passende
Programm für das jeweilige Geschirr auswählen.
7. Probleme und Lösungen (Seite 41)
Bevor Sie den Techniker rufen, schauen Sie sich doch diese Seite
an: sehr viele Probleme können im Nu gelöst werden. Sollten Sie
11. Technische Eigenschaften (Seite 34)
Alle technischen Daten zu Ihrem Haushaltsgerät - natürlich stets
normgerecht.
12. Ariston steht Ihnen auch nach dem Kauf
Ariston bietet Ihnen auch nach dem Kauf seiner Produkte
Beratung und Unterstützung und liefert Ihnen besondere
Garantien, einen professionellen Kundendienst, hochwertige
Ersatzteile und Zubehör. Weitere Infos erhalten Sie kostenlos unter
der Ariston-Hotline.
jederzeit zur Seite (Seite 43)
GESCHIRRSPÜLER ARISTON - Bedienungsanleitungen
33
Page 36

ESCHIRRSPÜLER
G
Öffnen wir doch gemeinsam Ihren
Geschirrspüler
Wie ist er gebaut?
Lernen Sie die Bestandteile kennen, aus denen Ihr Geschirrspüler
gebaut ist: dies wird Ihnen helfen, besser damit umzugehen.
E. Oberer Korb
F. Oberer Sprüharm
G. Vorrichtung zur
Höhenverstellung des
Korbes
H. Unterer Korb
I. Unterer Sprüharm
J. Salzbehälterdeckel
K. Filtersieb
L. Dosierkammer für
Geschirrspülmittel und
Klarspüler
Schalttafel und Bestandteile
A. EIN/AUS-Taste
Drücken Sie diese
Taste, um das Gerät
einzuschalten.
B. EIN/AUS-
Kontrollleuchte
Diese Taste zeigt an,
dass das Gerät
eingeschaltet ist.
C. Türgriff
Hiermit können Sie
die Tür Ihres
Geschirrspülers
öffnen.
D. Programmwähler-
knopf
Mit diesem Knopf können
Sie Ihr Programm
auswählen.
E.Taste"ExtraTrocken"
Drücken Sie diesen,
wird Ihr Geschirr
ganz besonders gut
getrocknet.
G . Programmphasen-
Anzeigeleuchten
Vorspülen, Reinigen,
Klarspülen, Trocknen.
R. Start/Reset-Taste
Mit Start setzen Sie
das Spülprogramm in
Gang, mit Reset
löschen Sie sämtliche
Einstellungen.
S. Salz-Kontrollleuchte
Diese Lampe zeigt an,
dass es Zeit ist, Salz
nachzufüllen.
T. Klarspüler Kontrollleuchte
Wenn diese Lampe
aufleuchtet, heißt das,
dass es Zeit ist,
Klarspülmittel
nachzufüllen.
G
S
E
T
C
R
D
B
A
Technische Eigenschaften
Technische daten
Breite cm. 59,5
Tiefe cm. 57
Höhe cm. 82
Fassungsvermögen 12 maßgedecke
Anschluß-Wasserdruck 4,3 psi -145 psi
Betriebsspannung Siehe Typenschild
Leistung Siehe Typenschild
Sicherung Siehe Typenschild
34
GESCHIRRSPÜLER ARISTON - Bedienungsanleitungen
(30 KPa÷ 1MPa) (0,3 ÷10 bar)
Dieser Geschirrspüler
entspricht folgenden EGRichtlinien:
73/23/EWG
(Niederspannung) und
nachfolgenden
Änderungen;
89/336/EWG
(elektromagnetische
Verträglichkeit) und
nachfolgenden
Änderungen.
97/17/EG
(Etikettierung)
2002/96/EC
(WEEE)
Page 37

ESCHIRRSPÜLER
G
So füllen Sie Ihren Geschirrspüler richtig
Mit einigen kleinen Handgriffen können Sie Ihr Geschirr besser reinigen und die Lebensdauer Ihres
Geschirrspülers verlängern. Befreien Sie das Geschirr von größeren Essensresten, bevor Sie es in den
Geschirrspüler geben, und weichen Sie angebrannte Töpfe und Pfannen ein. Nachdem Sie das Gerät
gefüllt haben, vergewissern Sie sich, dass der Sprüharm sich gut drehen kann. Setzen Sie Gläser
und Tassen bitte nicht übereinander ein und achten Sie darauf, dass die Teller sich nicht berühren.
Erster Schritt
Bevor Sie das Geschirr in die Körbe geben, entfernen Sie gröbere
Essensreste; auf diese Weise vermeiden Sie, dass die Siebe verstopft werden, wodurch die Reinigung weniger effizient wird.
Wenn Ihre Töpfe oder Pfannen
stark angebrannt sind, weichen Sie
sie vor dem Spülen ein. Ziehen Sie
die Körbe heraus, um das Geschirr
besser anordnen zu können.
Was gehört in den
Unterkorb?
Wir raten Ihnen, in den unteren
Geschirrkorb das größere, häufig
stark verschmutzte Geschirr zu geben: Töpfe, Deckel, flache und tiefe Teller, aber auch: Kaffee- und
Teetassen, Mokkatassen und Gläser (auf dem Foto sind
Beschickungsbeispiele ersichtlich).
Servierteller und große Deckel:
ordnen Sie diese am Korbrand an.
Töpfe und Salatschüsseln: müs-
sen immer umgestülpt werden.
Sehr hohes Geschirr: stets verti-
kal und umgestülpt anordnen, das
Wasser kann so besser abfließen
und es erfolgt eine bessere Reini-
gung.
Gläser und Tassen: sortieren
Sie die se so wie auf der
Abbildung veranschaulicht ein.
Dessertteller aber auch große
Teller flache Salatschüsseln, flache, nur leicht verschmutzte Pfannen und Töpfe (auf den Fotos sind
einige Beschickungsbeispiele ersichtlich).
Ordnen Sie vor allem das leichte
Geschirr so an, dass es fest steht
und nicht vom Wasserstrahl umgeworfen werden kann.
Zu dem Gerät können auch 1 oder
2 hochklappbare Ablagen, auf die
Tassen und Mokkatassen, lange
und spitze Messer und Servierbesteck eingeordnet werden
können, geliefert werden.
Nachdem Sie den Geschirrspüler
gefüllt haben, vergessen Sie nicht
zu kontrollieren,ob sich der Sprüharm problemlos drehen kann, ohne
vom Geschirr behindert zu werden.
Einstellung des oberen
Geschirrkorbes.
Sie können den oberen Korb höher
oder niedriger einstellen, so dass
Sie Ihr Geschirr problemlos
einräumen können.
1
2
Beschickungsbeispiele
unterer Geschirrkorb oberer Geschirrkorb
IDer Besteckkorb kann durch Abziehen des Griffes in zwei Teile geteilt werden (siehe Abb. A und B);
haben Sie wenig Besteck zu spülen, dann können Sie den halben
Korb einsetzen.
Sortieren Sie das Besteck mit
nach unten gerichteten Griffen in
den Besteckkorb
Ordnen Sie das Besteck so ein,
dass sich die einzelnen Teile nicht
berühren.
Der Besteckkorb verfügt über
zwei abnehmbare Gitterteile:
Ordnen Sie das Besteck Stück für
Stück in die Öffnungen ein; Messer
mit scharfen Schneiden und
andere spitze Küchenutensilien
sind mit nach unten gerichteten
Schneiden bzw. Spitzen
einzuordnen. Ordnen Sie das
gesamte Besteck so ein, dass sich
die einzelnen Teile nicht berühren..
Was gehört in den
Oberkorb?
In den oberen Geschirrkorb geben
Sie empfindliches und leichtes
Geschirr:Gläser, Tee-,Kaffee-und
Mokkatassen, Untertassen und
Abb.F
Ziehen Sie dazu die Griffe, die den Korb
an den Schienen blockieren, nach außen
und ziehen Sie den Korb aus. Nun können
Sie ihn in der Höhe verstellen. Daraufhin
lassen Sie ihn so weit an den Schienen
entlang gleiten, bis auch die vorderen
Räder einrasten. Nun schließen Sie die
Griffe wieder, wodurch der Korb blockiert
wird. Beachten Sie die Abfolge, die Sie in
der Abb. "F" finden.
3
4
B
A
A
GESCHIRRSPÜLER ARISTON - Bedienungsanleitungen
35
Page 38

ESCHIRRSPÜLER
G
So starten Sie Ihren Geschirrspüler
Auf die Plätze, fertig, los!
Nachdem Sie den Geschirrspüler gefüllt haben, stellen Sie
das passende Spülprogramm ein. Wie das geschieht, lernen
Sie in einer Minute.
Erster Schritt
Öffnen Sie den Wasserhahn
vollständig und drücken Sie die
Ein-/Aus-Taste (ON-OFF) "A". Sie
vernehmen einen kurzen Signalton
und die Anzeigeleuchte "B"
schaltet sich ein. Das Gerät ist nun
eingeschaltet und kann
programmiert werden.
Programmauswahl
Drehen Sie den
Programmwählerknopf "D" im
Uhrzeigersinn, bis die auf dem
Knopf befindliche Bezugskerbe
mit der Nummer oder dem
Symbol des gewünschten
Programms übereinstimmt.
(Ziehen Sie zur Programmwahl,
besonders bei erstmaligem
Gebrauch des Gerätes, die
Programmtabelle auf Seite 38
dieses Handbuchs zu Rate) .
Sobald die Gerätetür geschlossen
und die Start-Taste "R" gedrückt
wird, vernehmen Sie ein
akustisches Signal, Die
Anzeigeleuchte "G" erlischt;
sämtliche Einstellungen wurden
gelöscht. worauf sich innerhalb
weniger Sekunden das Programm
in Gang setzt. .
Ihr Geschirrspüler hält
Sie auf dem Laufenden
Ihr Geschirrspüler ist mit Anzeigeleuchten (G) versehen, die
nacheinander aufleuchten, und
den jeweiligen Stand des
Spülprogramms anzeigen.
Folgende Symbole entsprechen
den einzelnen Programmphasaen:
Vorspülen, Spülen, Klarspülen,
Trocknen.
Ihr Geschirrspüler zeigt Ihnen stets
an, wie weit er gekommen ist.
Änderung des laufenden
Spülprogramms.
Sollten Sie jedoch ein falsches
Programm gewählt haben, dann
keine Angst!
Programm kann nur dann gelöscht
werden, wenn es gerade erst in
Gang gesetzt wurde.
Um ein Programm zu ändern,
halten Sie für ca. 5 Sekunden die
Taste RESET "R" gedrückt: Sie
vernehmen ein längeres
akustisches Signal gefolgt von 3
kurzen Bip'-Tönen. Die
Anzeigeleuchte "G" erlischt;
sämtliche Einstellungen wurden
gelöscht.
Stellen Sie nun gemäß der
Hinweise des Abschnitts "Wahl und
Start des Spülprogramms" das neue
Programm ein. Nun können Sie das
richtige Programm einstellen.
Ein schon laufendes
Programm kann nur
gerade erst in Gang
Haben Sie Geschirr
vergessen
einzuräumen?
Nun, das kann jedem passieren.
Unterbrechen Sie den Spülvorgang,
indem Sie die Taste Ein/Aus
drücken, geben Sie das Geschirr
hinein und drücken Sie erneut die
Taste Ein/Aus. Der Spülgang läuft
genau dort weiter, wo er
unterbrochen wurde.
Stellen Sie sicher,
Programm auch
Ein schon laufendes
dann gelöscht
werden, wenn es
gesetzt wurde.
dass das
abgelaufen ist,
bevor Sie das
Geschirr
ausräumen!
Fertig?
Das Ende des Spülgangs wird durch
2 kurze Signaltöne und durch
Blinken der TrockengangAnzeigeleuchte angezeigt.
Achtung!
Schalten Sie den
Geschirrspüler durch Druck auf
die Taste "A" aus und ziehen
Sie den Netzstecker aus der
Steckdose, um auch die
Stromversorgung
abzuschalten; das Netzkabel
muss demnach jederzeit leicht
zugänglich sein.
Drehen Sie den Wasserhahn zu.
Warten Sie einige Minuten, bevor
Sie das Geschirr herausnehmen:
auf diese Weise trocknet das
Geschirr durch den heißen Dampf
teilweise von selbst.
Entleeren Sie zuerst den
Unterkorb.
Möchten Sie ganz
besonders trockenes
Geschirr?
Drücken Sie den Knopf "E", bevor
Sie das eingestellte Spülprogramm
starten.
Ein verlängerter Signalton meldet
Ihnen, dass die Funktion 'Extra
Trocken' gewählt wurde, ein kurzer
Signalton dagegen meldet, dass
diese Funktion ausgeschaltet
wurde.
Durch die Funktion 'Extra Trocken"
wird zwar das Spülprogramm
verlängert, das Geschirr wird
jedoch besonders trocken.
Ist der Strom
ausgefallen? Haben Sie
die Tür des Gerätes
geöffnet?
Das Programm unterbricht den
Reinigungsvorgang und nimmt
ihn wieder an derselben Stelle
auf, sobald die Stromzufuhr
wieder hergestellt ist bzw.
sobald die Tür wieder
geschlossen wird. Es ist also
alles unter Kontrolle!
Vorsicht:
Beim Öffnen der Türe
während des
Spülvorgangs oder
unmittelbar nach
Beendigung des
Spülprogramms tritt
heißer Wasserdampf
aus. Verbrennen Sie
sich nicht daran!
36
GESCHIRRSPÜLER ARISTON - Bedienungsanleitungen
Page 39

ESCHIRRSPÜLER
G
Geschirrspülmittel und Klarspüler
Verwenden Sie nur Klarspüler für Geschirrspüler. Geben Sie das Geschirrspülmittel - vor Beginn des Spülganges! in die Dosierkammer, die sich auf der Innenseite der Gerätetür befindet.
Geschirrspülmittel
So wird das Geschirrspülmittel eingefüllt
Öffnen Sie den Deckel A"
durch Drücken des Knopfes
B". Füllen Sie die beiden
Dosierkammern bis zum Rand
mit dem Reiniger.
Jetzt können Sie den Deckel
schließen: Drücken Sie
solange, bis der Deckel hörbar
einrastet.
Falls Sie lieber
Geschirrspülmittel in
Tablettenform verwenden,
geben Sie eine Tablette in die
größere Dosierkammer und
schließen Sie den Deckel.
Der Deckel läßt sich nicht
schließen!
Kontrollieren Sie, ob der Rand
der Dosierkammer keine Reste
von Reinigungsmitteln
aufweist. Diese können eine
einwandfreie Schließung des
Deckels behindern. Entfernen
Sie sie und Sie werden sehen,
der Deckel lässt sich schließen.
Klarspülmittel
Der Klarspüler verleiht Ihrem
Geschirr einen strahlenden Glanz,
denn er verbessert den
Trockenprozess. Die
Dosierkammer für den Klarspüler
befindet sich auf der Innenseite der
Gerätetür: Der Salzbehälter muss
neu aufgefüllt werden, wenn auf
dem die
Klarspülernachfüllanzeige "T"
blinkt.
B
Achtung
Der Handel stellt Ihnen Geschirrspülreiniger zur Verfügung, die Reiniger, Salz und Klarspüler
beinhalten (3 in 1).
Sollte das Wasser Ihrer Wasserleitung jedoch kalkhaltig, oder sogar stark kalkhaltig sein, kann
zuzüglich weiteres Salz in den entsprechenden Behälter eingefüllt werden, um weiße Streifen auf
Gläsern und Gerätebottich zu verhindern.
Bei Verwendung der Produkte 3 in 1 ist es nicht mehr erforderlich, Klarspüler in die entsprechende
Dosierkammer einzufüllen.
Wird ein besonders effektives Trocknen gewünscht, kann Klarspüler eingefüllt werden, in diesem
Falle ist der Dosierer jedoch auf Nr. 2 einzustellen.
Auf jeden Fall sollten die Hinweise auf der Verpackung beachtet werden.
Werden nur solche Geschirrspülreiniger verwendet, dann ist es ganz normal, dass die
Nachfüllanzeigen für Salz und Klarspüler nach einer gewissen Anzahl von Spülgängen dauernd
blinken.
C
D
A
Nützliche Hinweise
Verwenden Sie
die richtige
Menge an
Spülmittel: eine
zu große Dosis
sorgt nicht für
saubereres
Geschirr,
sondern für eine
stärkere
Umweltbelastung.
Bewahren Sie das
Spülmittel und den
Klarspüler an einem
trockenen Raum und
außerhalb der
Reichweite von
Kindern auf.
Nachfüllen des Klarspülers
Öffnen Sie den
Klarspülerbehälter, indem Sie
den Schraubdeckel C gegen den
Uhrzeigersinn drehen. Achten
Sie beim Einfüllen darauf, dass
der Klarspüler nicht überläuft.
Sie können die Menge an Klarspüler, die der Geschirrspüler
über die Dosiervorrichtung
erhält, regeln: stellen sie anhand
eines Schraubenziehers die Reguliervorrichtung F ein, die sich
unter dem Deckel C befindet. Es
stehen Ihnen 6 Positionen zur
Auswahl.
F
Normalerweise ist die Dosiervorrichtung auf 4
voreingestellt.
GESCHIRRSPÜLER ARISTON - Bedienungsanleitungen
C
Wenn Sie die richtige
Menge an Klarspüler
verwenden, erzielen
Sie ein besseres
Trockenergebnis.
Wenn Ihr Geschirr
Wassertropfen oder
Flecken aufweist,
stellen Sie den
Regulierpfeil höher
ein. Wenn Ihr
Geschirr hingegen
weiße Streifen
aufweist, dann stellen
Sie den Wert niedriger
ein.
37
Page 40

ESCHIRRSPÜLER
G
Wählen Sie das passende Reinigungsprogramm aus
Für jeden Verschmutzungsgrad
gibt es ein ideales Programm
Spülen im Geschirrspüler garantiert höchste
Hygienesicherheit und Sauberkeit.
Regeneriersalz, Klarspüler, die richtige Menge an
Reinigungsmittel: das ist die Geheimformel, um die bestmöglichen
Ergebnisse zu erzielen und Ihren Geschirrspüler zu schonen.
6SOPLWWHO
9RUVSOJDQJ
+DXSWV SOJDQJ
JU
JU
6SOSURJUDPP
6XSHU:DVK
7lJOLFKHU
$EZDV FK
+LQZHLVH]XU
3URJUDPPZDKO
Stark verschmutztes
Geschirr, Töp fe und
Pfa nnen ( nicht gee ignet für
empfindliches Geschirr)
Normal verschmutztes
Ge s c hir r und T ö p fe .
N o r ma le r tägliche r
Abwasch
%HVFKUHLEXQJGHV
6SOJD QJV
Warmes Vorsp ülen 40°C
S p ülga ng b ei 65°C
2x Kaltes Klarspülen
Heißes Klarspülen bei 70°C
Trocknen
kaltes Vorspülen
S p ülga ng b ei 50°C
Kaltes Klarspülen
Heißes Klarspülen bei 70°C
Trocknen
Wählen Sie das richtige
Programm für Ihr Geschirr aus.
Wenn Sie das passende Programm
für das Geschirr auswählen, mit
dem Sie Ihren Geschirrspüler
gefüllt haben, sind Ihnen ein
sauberes Geschirr und ein
wirtschaftlicher Wasser- und
Stromverbrauch gewährleistet.
.ODUV SOHU
3URJUDPP
GDXH U
7ROHUDQ]
R KQH
([WUD
WURFN QH Q
.XU]
(LQZHL FKHQ
.ULVWD OOJOlV H U
'XR:DVK
Öko- Sparprogramm mit
niedrigem
Energieverbrauch, geeignet
für normal verschmutztes
Geschirr.
Kurzes Sparprogramm für
nur le ich t v e rs chmu t z t es ,
sofort nach dem Gebrauch
ges p ülte s G e s chirr Ohne
Trocknen, ausgenommen
bei Wahl des
Trock e nga n gs "Extr a
Tr ocken"
Abspülen des Geschirrs,
das erst später, zusammen
mit weiterem Geschirr
ges p ült wer d en s o ll.
Kurzes Sparprogramm für
temperaturempfindliches,
sofort nach dem Gebrauch
zu reinigendes Geschirr
Unterschiedliches
Programm für die beiden
K ö r be : sc hone nd für
Kr is ta llg läs er u nd G läs er
im obe r en Kor b ; in t e n s iv
für Töp fe und P fa nne n im
unter e n Kor b .
2x kaltes Vorspülen,
S p ülga ng b ei 50°C
Heißes Klarspülen bei 67°C
Trocknen
Kurzer Spülgang bei 47°C
Heißes Klarspülen bei 62°C
K a lter Kur zs p ülga ng, um ein
Antrocknen der Speisereste zu
vermeiden
Hauptspülgang bei 52°C
Lauwarmes Klarspülen 45°C
Heißes Klarspülen bei 65°C
Trocknen
Kaltes Vorspülen
S p ülga ng b ei 52°C
Lauwarmes Klarspülen bei 45°C
Heißes Klarspülen bei 65°C
Trocknen
JU
JU
JU
JU
(Extra
Trocken)
38
GESCHIRRSPÜLER ARISTON - Bedienungsanleitungen
Page 41

Nie ohne Salz
ESCHIRRSPÜLER
G
Ihr Wasser
Der Härtegrad des Wassers ändert sich von einem Ort zum anderen. Wenn das Wasser Ihres
Haushaltes hart ist, würde es ohne Regenerierungsmittel zu Kalkablagerungen im Geschirrspüler
kommen. Ihr Gerät verfügt über eine Entkalkungsanlage, die mit einem Spezialsalz das Wasser
entkalkt.
So wird das Salz eingefüllt
Verwenden Sie ausschließlich
Spezialsalz für Geschirrspülmaschinen.
Der Salzbehälter befindet sich unter dem unteren Geschirrkorb und
er wird folgendermaßen aufgefüllt:
1. Nehmen Sie den unteren
Geschirrkorb heraus, schrauben Sie den Deckel des Salzbehälters ab.
2. Füllen Sie das erste Mal Salz
ein? In dem Fall müssen Sie
den Behälter zuerst mit Wasser
füllen (das nächste Mal ist das
nicht mehr nötig).
3. Geben Sie den Trichter, der dem
Geschirrspüler beiliegt, in die
Öffnung und füllen Sie ca. 2 kg
Salz ein. Es ist normal, dass etwas Wasser aus dem Behälter
überläuft.
4. Schrauben Sie den Deckel wieder sorgfältig zu.
Wann muss Salz
nachgefüllt werden?
Der Salzbehälter muss dann
nachgefüllt werden, wenn die
Salzanzeige "S" blinkt. Nachdem
Sie
zum ersten Mal Salz eingefüllt
haben könnte die Nachfüllanzeige
für weitere 5 Spülgänge
eingeschaltet bleiben bzw. blinken.
Salzentnahme-Einstellung
Ihr Geschirrspüler ermöglicht es
Ihnen, die Salzentnahme je nach
dem Härtegrad Ihres Wassers zu
regulieren. So ist die ideale Salzzugabe gewährleistet: nie zuviel
und nie zu wenig.
Um die Salzentnahme zu regeln,
befolgen Sie folgende Schritte:
1. Schrauben Sie den Deckel des
Salzbehälters ab
2. am oberen Rand des Behälters
sehen Sie einen Pfeil (siehe Abbildung): wenn es nötig ist, drehen Sie ihn vom Minuszeichen
(-) weg weiter in Richtung +
hin.
Um die richtige Pfeilposition auszuwählen, beachten Sie die Tabelle mit den Wasserhärtegraden.
Wasserhärte
°dH °fH mmol/l
0 ¸ 10 0 ¸ 17 0 ¸ 1,7 / 0 /
10¸ 25 18 ¸ 44 1,8 ¸ 4,4
25 ¸ 50 45 ¸ 89 4,5 ¸ 8,9 MED 40 40
> 50 > 8 9 > 8 ,9
Füllen Sie das Salz
immer direkt vor dem
Spülen nach; dadurch
vermeiden Sie jegliche
Positions-
wähler
-
+
kennen, fragen Sie
bei Ihrem Wasseramt
Rostbildung.
Salzverbrauch(gramm/spülgan-
g)
20 60
60 25
Wenn Sie den
Härtegrad Ihres
Wassers nicht
nach.
Reichweite
(Spulgange-
/2kg)
Nützliche Hinweise
Wie können Sie Ihr kostbares Geschirr schonen?
■ Fast jede Art von Silbergut
darf in den Geschirrspüler.
Mit zwei Ausnahmen:
antikes Silber und Silber, das
mit einem Oxidierungsmittel
verziert wurde. Das heiße
Wasser kann nämlich die
Henkel von antiken Silberwaren loslösen und die Dekoration bei verziertem
Silber wegspülen.
Bringen Sie nie Silber in
Kontakt mit anderen
Metallen: auf diese Weise
vermeiden Sie Flecken und
Schwarzfärbung.
Der Geschirrspüler hilft
Ihnen nicht nur, Zeit
und Mühe zu sparen,
sondern er desinfiziert
Ihr Geschirr zusätzlich
durch die Reinigung bei
hohen Temperaturen
.
■ Silberteller und -tabletts
müssen unmittelbar nach
dem Gebrauch gereinigt
werden, insbesondere wenn
sie mit Salz, Eiern, Oliven,
Senf, Essig, Obstsäften und
gekochtem Gemüse in
Berührung gekommen sind.
■ Für besonders
empfindliches Geschirr
verwenden Sie den
Schongang Ihres Geschirrspülers.
Sparen kann man
Durch einen intelligenten Einsatz Ihrer
Hausgeräte können Sie sparen und die Umwelt
schonen
Maximale Füllmenge
Um den Energieverbrauch zu optimieren, empfiehlt
es sich, den Geschirrspüler möglichst ganz gefüllt
einzuschalten. Falls es sehr lange dauert, bis die
Maschine voll wird, benützen Sie das Einweichprogramm; auf diese Weise vermeiden Sie Geruchsbildung und ein Antrocknen der Speisereste.
Das richtige Reinigungsprogramm
Wählen Sie je nach dem einsortierten Geschirr das
richtige Programm aus. Die Programmwahl hängt
sowohl vom Geschirrtyp als auch vom
Verschmutzungsgrad ab. Um die richtige Wahl
vorzunehmen, beachten Sie die Programmübersicht
auf Seite 38.
GESCHIRRSPÜLER ARISTON - Bedienungsanleitungen
39
Page 42

ESCHIRRSPÜLER
G
Installation und Umzug
Ihr Geschirrspüler ist da
Egal ob Sie ihn neu gekauft haben oder damit umgezogen sind, eine korrekt durchgeführte Installation
gewährleistet Ihnen in jedem Fall eine einwandfreie Funktion Ihres Geschirrspülers.
Bestimmen Sie, wo Sie den Geschirrspüler anschließen
wollen; das Gerät kann sowohl
mit der Seitenwand als auch mit
der Rückwand an die
anliegenden Möbel oder an die
Wand gestellt werden. Der
Geschirrspüler verfügt über
Versorgungs- und Ablaufschläuche, die sowohl nach
rechts als auch nach links
ausgerichtet werden können,
wodurch eine optimale Installation gesichert ist.
Nivellierung
Nachdem Sie das Gerät aufgestellt haben, stellen Sie die
Höhe richtig ein, indem Sie die
Stützfüße so lange hoch oder
herunterschrauben, bis das
Gerät vollkommen eben steht.
Vergewissern Sie sich dabei,
dass es um nicht mehr als 2
Grad geneigt steht. Eine gute
Nivellierung gewährleistet eine
korrekte Funktion Ihres
Geschirrspülers.
Regulieren der
hinteren Verstellfüße
Schieben Sie das Gerät in den
Umbau, bzw. in die
entsprechende Nische.
Regulieren Sie nun durch
Drehen (mittels eines
Schraubenziehers) der vorne
unter dem Gerät befindlichen
Füße die Höhe des
Geschirrspülers. Durch eine
Rechtsdrehung wird der
Geschirrspüler angehoben,
durch eine Linksdrehung tiefer
gestellt.
Anschluss an den
Kaltwasserhahn
Der Anschluss an die Wasser-
Falls die Steckdose, an
die Sie das Gerät
anschließen, über ein
anderes
Anschlussmodell
verfügt, tauschen Sie
den Stecker aus;
verwenden Sie keine
Adapter oder
Zwischenstecker, denn
diese können sich
überhitzen oder
durchschmelzen.
leitung ist ausschließlich
mittels des mit dem Gerät
gelieferten Versorgungsschlauches vorzunehmen.
Verwenden Sie bitte keine
anderen Schläuche. Verwenden
Sie bitte nur Originalersatzteile,
wenn Teile ausgewechselt
werden müssen.
Schließen Sie den Versorgungsschlauch an einen Kaltwasserhahn mit einem
Gewindeanschluss von ¾-Zoll
Gas" an, und achten Sie dabei
darauf, dass er gut festgezogen
wird. Falls die Wasserschläuche neu sind oder lange Zeit
unbenützt waren, vergewissern
Sie sich vor dem Anschluss, ob
das Wasser auch klar und frei
von Verunreinigungen herauskommt; lassen Sie es hierzu einige Zeit lang fließen. Es kann
nämlich ansonsten passieren,
dass die Anschlußstelle verstopft wird und Ihr Geschirrspüler dadurch Schaden erleidet.
Anschluss an den
Warmwasserhahn
Der Geschirrspüler kann auch
mit Warmwasser vom
Wassernetz versorgt werden
(falls Sie über eine zentrale
Heizanlage verfügen), welches
jedoch nicht 60° C überschreiten darf.
In dem Fall wird die Spülzeit
um ca. 15 Minuten verkürzt und
die Reinigungswirkung leicht
herabgesetzt.
Der Anschluss an den
Warmwasserhahn erfolgt auf
die gleiche Weise wie im vorhergehenden Absatz für
Kaltwasser beschrieben.
Schutz vor
Überschwemmungen
Ihr Geschirrspüler verfügt über
ein System, das die
Wasserzufuhr unterbricht, falls
es einen Wasserverlust im
Gerät ermittelt. Außerdem ist
er mit einem Zulaufschlauch
ausgerüstet, der einem äußerst
hohen Wasserdruck standhält,
und der sich im Falle einer
Beschädigung leuchtend rot
verfärbt. Der Schutz gegen
Überschwemmungen ist durch
den zweiten, äußeren Schlauch,
in dem er untergebracht ist, gewährleistet. Da dieser
transparent ist, wird auch er
leuchtend rot. Eine regelmäßige Kontrolle des Schlauchs ist
von größter Wichtigkeit, sobald
Sie bemerken, dass er sich rot
verfärbt, wissen Sie, dass er
schnellstmöglich ausgetauscht
werden muss. Fordern Sie
hierfür den zuständigen Kundendienst an.
Anschluss des
Ablaufschlauches
Führen Sie den Ablaufschlauch
in eine Ablauföffnung mit
einem Durchmesser von
mindestens 4 cm ein oder legen
Sie ihn über einen
Spülbeckenrand. Vermeiden
Sie hierbei, dass er geknickt
oder allzu stark gebogen wird. Der
mit dem Buchstaben A versehene
Schlauchteil muss auf einer Höhe
von 40 - 100 cm liegen.
Der Schlauch darf nicht im Wasser
eingetaucht sein.
A
Stromanschluss
Vergewissern Sie sich in erster Linie, dass die Spannungs- und
Frequenzwerte Ihres Stromnetzes
den Angaben auf dem Typenschild
entsprechen, das sich auf dem Innenteil der Gerätetür aus Edelstahl
befindet und dass die Stromanlage,
an die Sie den Geschirrspüler anschließen, die auf dem Typenschild
angegebene Leistung aufweist.
Die Erdung: eine
unerlässliche Sicherheitsvorrichtung
Nun schließen Sie den Stecker
an eine Steckdose an, die über
eine effiziente Erdung verfügt
(die Erdung der Stromanlage ist
eine gesetzlich vorgeschriebene Sicherheitsvorrichtung: vergewissern Sie sich, dass Ihre Anlage damit
ausgestattet ist).
Stromkabel
Kontrollieren Sie regelmäßig
das Stromkabel; wenn es defekt
sein sollte, lassen Sie es bitte
unbedingt vom zuständigen
Kundendienst austauschen.
ACHTUNG!
Der Netzstecker des
Geschirrspülers muss zugänglich
sein, um eventuelle
Wartungsmaßnahmen in vollster
Sicherheit durchführen zu können
Klebestreifen zur
Verhütung von
Kondenswasserbildung
Einigen Modellen wird ein
durchsichtiger Klebestreifen
beigelegt.
Dieser ist auf die Unterseite Ihres
Arbeitsflächen-Holzpaneels zu
kleben, um dieses vor
Kondenswasser zu schützen.
Wo es nicht mitgeliefert wird, kann
es bei den anerkannten Händlern
als Ersatzteil angefordert werden.
40
GESCHIRRSPÜLER ARISTON - Bedienungsanleitungen
Page 43

ESCHIRRSPÜLER
Probleme und Lösungen
G
Wenn Sie irgendein Problem haben,
lesen Sie sich diese Seite durch
Es kann passieren, dass der Geschirrspüler nicht oder nicht richtig funktioniert. In vielen Fällen handelt es sich dabei um Probleme, die Sie
ohne weiteres selbst lösen können, ohne den Techniker anzufordern. Überprüfen Sie demnach zuerst die folgenden Punkte.
Der Geschirrspüler startet
nicht
■ Ist der Wasserhahn auf?
■ Ist der Schlauch richtig an den
Wasserhahn angeschlossen?
■ Ist die Wasserversorgung in
Ihrem Haus unterbrochen?
■ Ist der Wasserdruck ausrei-
chend?
■ Ist der Schlauch geknickt?
■ Ist das Sieb des Versorgungs-
schlauches verstopft?
■ Ist die Gerätetür richtig ge-
schlossen?
Das Geschirr ist nicht
sauber geworden
■ Haben Sie die richtige Menge
Geschirrspülmittel
verwendet?
■ Haben Sie das passende Rei-
nigungsprogramm für Ihr Geschirr ausgewählt?
■ Sind Sieb und Mikrosieb sau-
ber?
■ Bewegen sich die Sprüharme
ohne Behinderung?
Der Geschirrspüler pumpt
das Wasser nicht ab
■ Ist der Ablaufschlauch ge-
knickt?
Im Geschirrspüler befinden
sich Kalkablagerungen oder
ein weißer Belag.
■ Ist der Deckel des Salz-
behälters gut geschlossen?
■ Ist der Klarspüler richtig do-
siert?
Fehlermeldungen
Ihr Geschirrspüler verfügt über ein
Sicherheitssystem, das imstande
ist, etwaige
Funktionsunregelmäßigkeiten zu
ermitteln. Solche Anomalien
werden durch kurz aufeinander
folgendes Blinken einer oder
zweier Anzeigeleuchten "G"
angezeigt.
Merken Sie sich die Leuchten, die
blinken, schalten Sie das Gerät aus
und fordern Sie den Kundendienst
an.
Alarmanzeige "Wasserhahn
abgedreht"
Sollten Sie vergessen haben, den
Wasserhahn aufzudrehen, dann
meldet Ihnen Ihre Maschine dies
für einige Minuten durch kurze
Signaltöne. Drehen Sie den
Wasserhahn auf, Sie werden sehen,
dass sich Ihr Geschirrspüler nach
einigen Minuten wieder in Betrieb
setzt. Sollten Sie während dieser
Signaltöne nicht anwesend sein,
bleibt der Geschirrspüler stehen
und die Anzeigeleuchten 2 und 3
(Spülen und Klarspülen) blinken
in kurzen Abständen. Schalten Sie
das Gerät über die ON/OFF-Taste
aus, drehen Sie den Wasserhahn
auf, warten Sie ca. 20 Sekunden,
schalten Sie dann den
Geschirrspüler wieder ein.
Stellen
Sie gemäß der Anleitungen
"Programmauswahl"das
Programm neu ein, und Sie
werden sehen, dass sich der
Geschirrspüler in Betrieb setzt.
Alarmanzeige "Filter verstopft"
Tritt ein Stillstand (Sperre) des
Gerätes auf und leuchten (in
Kurzabständen) die
Kontrollleuchten 1 (Vorspülen)
und 3 (Klarspülen), dann ist dies
ein Zeichen dafür, dass das Sieb
durch grobe Speisereste verstopft
ist. Schalten Sie das Gerät aus,
sorgen Sie für eine gründliche
Reinigung der Filter, setzen Sie
diese wieder ein (siehe
Anleitungen auf Seite 42); schalten
Sie das Gerät daraufhin wieder ein.
Stellen Sie gemäß der Anleitungen
"Programmauswahl"das
Programm neu ein, und Sie werden
sehen,dass sich der Geschirrspüler
in Betrieb setzt.
Sicherheit in Ihrem Haushalt
Alarmanzeige aufgrund einer
Störung des Magnetventils
der Wasserversorgung.
Blinkt die Kontrollleuchte 2
(Spülen) schnell, SCHALTEN Sie
den Geschirrspüler AUS und nach
einer Minute wieder EIN. Besteht
der Alarm weiterhin, schließen Sie
zuerst den Wasserhahn,um
Überschwemmungen zu
verhindern. Stellen Sie dann den
Strom ab und fordern Sie den
Kundendienst an.
Haben Sie alles genau
kontrolliert, aber der
Geschirrspüler funktioniert
immer noch nicht oder das
Problem besteht weiterhin?
In dem Fall rufen Sie den
Kundendienst an, der Ihrem
Wohnsitz am nächsten gelegen
ist; erinnern Sie sich dabei immer,
folgende Details anzugeben:
Art der Störung
das Modell-Kennzeichen
(Mod....) und die Seriennummer (S/
N ....), die Sie auf dem Typenschild
ablesen können, das sich auf dem
Seitenrand der Innentür befindet.
Wenden Sie sich
ausschließlich an
autorisierte Fachkräfte
und verlangen Sie den
Einsatz von Original-
Ersatzteilen.
Ihr Geschirrspüler wurde gemäß den strengsten internationalen Sicherheitsnormen gebaut. Damit schützen wir Sie und Ihre
Familie. Lesen Sie aufmerksam die Warnhinweise und Informationen durch, die Sie in diesem Handbuch finden: es werden Ihnen
hier viele nützliche Hinweise zur Sicherheit bei der Installation, im Einsatz und bei der Wartung geboten. Damit es keine bösen
Überraschungen gibt!
1. Nehmen Sie vorsichtig das
Verpackungsmaterial ab (beachten Sie dabei die Hinweise zur Mülltrennung Ihrer Gemeinde)
2. Nachdem Sie die Verpackung
abgenommen haben, kontrollieren Sie, ob sich das Gerät in
einem einwandfreien Zustand
befindet. Falls Sie irgendwelche Zweifel haben, wenden
Sie sich an ausgebildetes
Fachpersonal.
3. Ihr Geschirrspüler darf nur von
Erwachsenen bedient werden
und er dient ausschließlich der
Reinigung von Haushaltsgeschirr (siehe Bedienungsanleitungen). Berühren Sie das
Gerät nicht barfuß oder mit
nassen Händen oder Füßen.
4. Wir empfehlen Ihnen, keine
Verlängerungskabel oder Zwischenstecker zu verwenden.
Falls das Stromkabel nicht
lang genug ist, lassen Sie es
durch ein längeres ersetzen;
denken Sie stets daran, dass
die Kabel nicht geknickt und
nicht gequetscht sein dürfen.
5. Wenn Ihr Geschirrspüler nicht
ordnungsgemäß funktioniert
oder falls Sie irgendwelche
Wartungsarbeiten vornehmen
müssen, unterbrechen Sie die
Verbindung des Gerätes zum
Stromnetz (ziehen Sie den
Stecker aus der Steckdose!).
6. Halten Sie Kinder von den Reinigungsmitteln und vom Geschirrspüler fern, wenn dieser
offen ist.
7. Ihr Geschirrspüler darf nicht
im Freien installiert werden,
auch dann nicht, wenn die Fläche überdacht ist: es ist sehr
gefährlich, ein Haushaltsgerät
Regen oder Gewittern auszusetzen.
8. Berühren Sie die Heizstäbe nie
während oder gleich nach ei-
nem Spülvorgang.
9. Setzen oder stützen Sie sich
nie auf die offene Gerätetür,
Sie könnten den Geschirrspüler umkippen.
10 . Im Falle von Störungen schlie-
ßen Sie den Wasserzulauf und
ziehen Sie den Stecker aus der
Steckdose. Daraufhin lesen Sie
das Kapitel Probleme und
Lösungen" durch. Wenn Sie
keine Lösung finden, kontaktieren Sie den Kundendienst.
11. Altgeräte müssen unbrauchbar gemacht werden: schneiden Sie das Stromkabel durch
und zerstören Sie die
Türverriegelung.
12. Entsorgung von
Elektroaltgeräten
Gemäß der Europäischen
Richtlinie 2002/96/EC über
Elektro- und ElektronikAltgeräte (WEEE) dürfen
Elektrohaushalts-Altgeräte
nicht über den
herkömmlichen
Haushaltsmüllkreislauf
entsorgt werden. Altgeräte
müssen separat gesammelt
werden, um die
Wiederverwertung und das
Recycling der beinhalteten
Materialien zu optimieren und
die Einflüsse auf die Umwelt
und die Gesundheit zu
reduzieren. Das Symbol
durchgestrichene Mülltonne"
auf jedem Produkt erinnert Sie
an Ihre Verpflichtung, dass
Elektrohaushaltsgeräte
gesondert entsorgt werden
müssen.
Endverbraucher können sich
an Abfallämter der
Gemeinden wenden, um mehr
Informationen über die
korrekte Entsorgung ihrer
Elektrohaushaltsgeräte zu
erhalten.
GESCHIRRSPÜLER ARISTON - Bedienungsanleitungen
41
Page 44

ESCHIRRSPÜLER
G
Pflege und Wartung
Reinigung und Instandhaltung
Die Siebkomposition
Wenn Sie jederzeit ein gutes
Reinigungsergebnis wünschen,
müssen Sie die Siebkomposition
sauber halten.
Anhand des Siebes wird das
Spülwasser von Speiseresten
gereinigt und perfekt gefiltert in
Umlauf gebracht. Es ist daher
empfehlenswert, nach jedem
Spülgang die gröberen Essensreste,
die Sie im Grobsieb C und im
halbrunden Sieb A finden, zu
entfernen. Zum Herausnehmen
brauchen Sie nur den Griff des
Filtereinsatzes nach oben zu
ziehen. Waschen Sie nun die beiden
Siebe unter fließendem Wasser
aus.
Einmal im Monat muss die
Siebkomposition sorgfältig
gereinigt werden: d.h. Grobsieb C
+ halbrundes FeinsiebA+
MikrosiebB.
Zum Herausnehmen des FiltersB
drehen Sie diesen gegen den
Uhrzeigersinn.Verwenden Sie zum
Reinigen eine kleine Bürste (die
nicht aus Metall sein sollte).
Fügen Sie die Einzelteile (wie in
der Abbildung angegeben) wieder
zusammen und bauen Sie die
Siebkomposition wieder in die
Spülmaschine ein. Stecken Sie sie
in die vorgesehene Halterung und
drücken Sie sie nach unten.
Der Geschirrspüler darf nie ohne
Siebe arbeiten. Wenn Sie die
Siebkombination nicht richtig
montieren, wird das
Reinigungsergebnis beeinträchtigt
und Ihr Geschirr kann Schaden
erleiden.
1
B
C
Etwa einmal im Monat
sollten Sie der
Siebkomposition und
den Sprüharmen etwas
2
A
Aufmerksamkeit
schenken.
Reinigung der
Sprüharme
Es kann passieren, dass einige
Speiserückstände an den Sprüharmen festkleben und die Düsen,
aus denen das Wasser austreten
sollte, verstopfen. Kontrollieren
und reinigen Sie sie regelmäßig
(siehe Punkt F und I des Kapitels
Wie ist er gebaut?).
Halten Sie Ihren Geschirrspüler in Form
Wenn Sie einige Grundregeln einhalten, ist Ihnen stets eine verlässliche Haushaltshilfe sicher.
Nach jedem Spülgang
Wenn der Spülgang beendet ist,
denken Sie stets daran, den
Wasserhahn zuzudrehen und
die Tür leicht auf zu lassen. Auf
diese Weise kann sich keine
Feuchtigkeit ansammeln und es
kann zu keiner Geruchsbildung
kommen.
Ziehen Sie den Stecker
heraus
Bevor Sie irgendwelche
Reinigungs- oder Wartungsarbeiten am Gerät vornehmen,
ziehen Sie immer den Stecker
aus der Steckdose. Auf diese
Weise sind Sie keinerlei Gefahr
ausgesetzt.
Keine Lösungsmittel!
Um Ihren Geschirrspüler
außen und die
Gummidichtungen innen zu
reinigen, ist kein Einsatz von
Lösungs- oder Scheuermitteln
nötig; benützen Sie nur ein
feuchtes, in lauwarmer
Seifenlauge getränktes Tuch.
Falls Sie im Innenraum Flecken
sehen, verwenden Sie ein
feuchtes Tuch, auf das Sie ewas
weißen Essig träufeln (es reicht
ganz wenig davon aus) oder
benützen Sie ein
Spezialprodukt für
Geschirrspüler.
Fahren Sie in Urlaub?
Wenn Sie länger wegfahren,
empfehlen wir Ihnen, zuvor
folgende Schritte zu beachten:
führen Sie einen Reinigungs-
gang ohne Geschirr durch
schließen Sie den
Wasserhahn
lassen Sie die Gerätetür
leicht auf
Auf diese Weise verlängern Sie
die Lebensdauer der
Dichtungen und es kommt zu
keiner Geruchsbildung in Ihrer
Maschine.
Umzug
Im Falle eines Umzuges sollten
Sie das Gerät in vertikaler Lage
transportieren. Falls es nötig
sein sollte, können Sie es auf
die Rückseite neigen.
Dichtungen
Ein Grund für Geruchsbildung
im Geschirrspüler ist das
Anstauen von Essensresten in
den Dichtungen. Es reicht,
diese von Zeit zu Zeit mit einem
feuchten Lappen zu säubern.
Ihr Geschirrspüler ist kein Müllschredder!
Es ist nicht nötig, jede Kleinigkeit von Ihrem
Geschirr zu entfernen, doch müssen Sie es von
Knochen, Obstschalen und anderen Essensresten
befreien, bevor Sie es in den Korb geben.
Entleeren Sie auch Gläser und Becher von
Getränkerückständen.
42
GESCHIRRSPÜLER ARISTON - Bedienungsanleitungen
Page 45

ESCHIRRSPÜLER
G
Ariston steht Ihnen auch nach
dem Kauf jederzeit zur Seite
Wir danken Ihnen für den Kauf unseres Produkts. Unser
Wunsch ist es, Ihnen auch weiterhin zur Seite zu stehen.
Nutzen Sie alle Sonderleistungen, die nur den Ariston-Kunden
vorbehalten sind.
Machen Sie sich unseren Sonderservice
unverzüglich zu Nutze
Vom Sonderkunden zum Vorzugskunden.
Jahr für Jahr eine Garantie absoluter Sicherheit und Ruhe für Ihre neuen
Hausgeräte.
Die Beitritts-Modalitäten finden Sie anbei.
Kundendienst
Spezialisierter
Rufen Sie die unten genannten Service Nummern an:
Kundendienst 0180 5 250 350
Ersatzteile und Zubehör 0180 5 250 351
Bei Anforderung eines Kundendienstes, eines Ersatzteils und/oder eines Zubehörteils vergessen Sie nicht,
auch folgende Daten durchzugeben:
- Art der Störung
- Modell-Kennzeichen (Mod..)
und Seriennummer (S/N)
diese Angaben finden Sie auf dem Etikett auf der Rückseite des Waschvollautomaten.
Ersatzteile
Original
Zubehör
Garantiertes
GESCHIRRSPÜLER ARISTON - Bedienungsanleitungen
43
Page 46

AATWASSER
V
Snelle gids voor de
vaatwasser
Deze gebruiksaanwijzing legt uit wat uw nieuwe vaatwasser te
bieden heeft. U zult ook kleine tips vinden voor het beste gebruik
van uw vaatwasser en voor het bevorderen van de duurzaamheid
hiervan.
1. Installeren en verhuizen (blz.51)
Nadat de vaatwasser is bezorgd of na een verhuis is het installeren
het allerbelangrijkste element voor het goed functioneren.
Controleer altijd:
1. of de elektrische installatie voldoet aan de normen;
2. of de aan- en afvoerbuizen van het water op de juiste wijze zijn
aangesloten;
3. of de vaatwasser horizontaal staat. Dit is de moeite waard: voor
de duurzaamheid en het goed functioneren van de vaatwasser.
2. Het bedieningspaneel (blz.45)
Leer de onderdelen van de vaatwasser kennen, zo zult u er het
meeste profijt van hebben. Hier vindt u een gedetailleerde
beschrijving van de bedieningsknoppen en de interne onderdelen.
3. Het inladen van het vaatwerk (blz.46)
Op deze bladzijde vindt u nuttige raadgevingen voor het op de
juiste wijze vol laden van de vaatwasser en het zo veel mogelijk
uitbuiten van de beschikbare ruimte.
4. Het starten van de vaatwasser (blz.47)
Na het inladen van het vaatwerk moet u het juiste programma
kiezen en de juiste hoeveelheid afwasmiddel en naspoelmiddel
doseren. Lees deze bladzijde, het zal u in alle fasen van de afwas
helpen.
8. Veiligheid voor u en uw familie (blz.52)
Lees deze bladzijde aandachtig, hij bevat nuttige informatie voor
de veiligheid van de installatie, het gebruik en het onderhoud. Zo
vermijdt u nare verrassingen.
9. Speciale zorg en onderhoud (blz.53)
Wijd eens per maand een beetje aandacht aan de filtergroep en
de sproeiarmen. Hier wordt uitgelegd hoe.
5. Het zout: een belangrijke medewerker (blz.50)
10. Het in goede staat bewaren van de
Gebruik het juiste soort zout en in de juiste hoeveelheid, zo
bewaart u de vaatwasser in optimale staat, wordt het vaatwerk
schoner en wordt kalkaanzetting vermeden.
Houdt u zich aan de paar regels die u hier leest en uw vaatwasser
zal altijd in goede staat verkeren.
6. Raadgevingen en tips, ook voor
energiebesparing (blz.50)
Hier vindt u kleine tips voor beter wassen en energiebesparing
door het kiezen van het juiste programma voor het soort lading.
11. Technische gegevens (blz. 45)
Alle technische gegevens van uw vaatwasser, altijd volgens de
normen van de wet.
vaatwasser blz.53)
7. Problemen en oplossingen (blz.52)
Voordat u er de installateur bijhaalt, kijkt u eerst hier: vele
problemen kunnen onmiddelijk worden opgelost. Lukt dit niet,
bel dan de Ariston installateur die zo mogelijk het probleem in
korte tijd zal oplossen.
44
ARISTON VAATWASSER
- Instructies voor installeren en gebruik
12. Ariston laat u niet in de steek, ook niet na
de aankoop (blz. 54)
Ariston staat haar producten nabij met technische dienst en
hulpverlening ook na de aankoop, met speciale garanties,
professionele assistentie, onderdelen en accessoires van kwaliteit.
Voor informatie belt u het gratis Ariston nummer.
Page 47

Laen we samen de vaatwasser
openen
Hoe zit hij in elkaar?
Kennis van de onderdelen waaruit hij bestaat helpt u bij het
gebruik.
AATWASSER
V
E. Bovenkorf
F. Bovenste sproeiarmen
G. Regelen hoogte korf
H. Onderkorf
I. Onderste sproeiarmen
J. Deksel zoutbak
K. Filter
L. Bakje afwasmiddel en
glansmiddel
Bedieningspaneel tot uw
beschikking
A. ON-OFF knop
Druk op deze knop voor
het inschakelen van de
machine
B. ON-OFF controlelampje
geeft aan dat de machine
is ingeschakeld.
C. Handvat voor openen van
deur
Hiermee wordt de
vaatwasser geopend.
D. Knop programmakeuze
Deze dient voor het
kiezen van een
programma.
G. Controlelampje
programma-fasen
voorwassen, wassen,
spoelen, drogen.
E. Extra droog-knop
Gebruik deze knop voor
een drogere vaat.
R. Start/Reset knop
Met Start begint het
programma, met Reset
worden alle instellingen
geannuleerd.
S. Controlelampje
zoutgebrek
Als dit aan gaat moet u
zout bijvullen.
G
T. Controlelampje gebrek
glansmiddel
Als dit aan gaat moet u
glansmiddel bijvullen.
S
T
R
D
B
E
C
Technische gegevens
Technische eigenschappen
Breedte cm. 59,5
Diepte cm. 57
Hoogte cm. 82
Capaciteit 12 standaard couverts
W aterdruk 4,3 psi - 145 psi (30 KPa÷ 1MPa) (0,3 ÷10 bar)
Spanning Zie label
Energieverbruik Zie label
Zekering Zie label
ARISTON VAATWASSER -
Instructies voor installeren en gebruik
A
Deze vaatwasser voldoet
aan de volgende EEG
richtlijnen:
73/23/CEE
(Laagspanningen) en
verdere modificaties;
89/336/EEC
(Elektromagnetische
compatibiliteit) en
verdere modificaties.
97/17/CE
(Etiketteren)
2002/96/EC
(Vernietiging van
Electrische en
Electronische
Apparatuur)
45
Page 48

AATWASSER
V
Het laden van de vaatwasser
Kleine dingen kunnen u helpen beter te wassen en de vaatwasser langer goed te houden.
Spoel het vaatwerk af voordat u het inlaadt, zet aangekoekte pannen en bakpannen in de week. Controleer
na het inladen of de sproeiarmen zich vrijelijk kunnen bewegen. Zet niet glazen en kopjes op elkaar en
controleer dat de borden elkaar niet aanraken.
Allereerst
Voordat u het vaatwerk in de
korven plaatst moeten
voedselresten eraf gespoeld
worden zodat de filter niet verstopt
raakt.
Als de pannen en bakpannen erg
zijn aangekoekt zet u ze in de week
voordat u ze in de vaatwasser doet.
Trek de korven naar voren om het
inladen van het vaatwerk te
vergemakkelijken.
Wat gaat er in de onderkorf?
In de onderkorf gaat het vaatwerk
dat moeilijk te wassen is: pannen,
deksels, platte borden, soepborden
maar ook bekers, kopjes en glazen
(op de foto's ziet u verschillende
voorbeelden).
Schalen en grote deksels: zet ze
aan de zijkant van de korf.
Pannen, slabakken: altijd
ondersteboven.
Diepe schalen: zet ze schuin zodat
het water er beter afdruipt en beter
wast.
Glazen en kopjes: plaats zoals
aangegeven in de afbeelding.
Wat gaat er in de bovenkorf?
De bovenkorf is bestemd voor het
fijnere en lichtere vaatwerk zoals
glazen, theekopjes en koffiekopjes,
schoteltjes, maar ook weinig vuile
borden, lage slabakken,
koekenpannen, hoge pannen en
platte pannen (op de foto's ziet u
verschillende voorbeelden).
Plaats de lichte stukken zodanig
dat ze niet verplaatst worden door
de waterstralen.
Eventueel kunnen er één of twee
opklaprekjes worden bijgeleverd
waarop u bekers en kopjes maar
ook lange scherpe messen en
opscheplepels kunt plaatsen.
Vergeet niet na het inladen van het
vaatwerk te controleren of de
sproeiarmen zich vrij kunnen
bewegen zonder tegen vaatwerk
aan te botsen.
Het regelen van de
bovenkorf.
U kunt de hoogte van de bovenkorf
regelen voor het gemakkelijker
plaatsen van uw vaatwerk.
onderkorf
Voorbeelden van ladingen
bovenkorf
De bestekkorf is in twee stukken
verdeeld (zie afb. A-B): als er maar
weinig bestek te wassen is kunt u
alleen de helft van de korf
gebruiken. U kunt zo meer pannen
kwijt of u kunt de andere helft op
de bovenkorf plaatsen. Deze
bestekkorf is voorzien van twee
uitneembare roosters:steek het
bestek één voor één in de vakjes;
de messen en andere
gebruiksvoorwerpen met scherpe
punten moeten met de punten naar
beneden worden geplaatst. Plaats
al het bestek zodanig dat ze elkaar
niet aanraken.
Plaats ze zodanig dat ze elkaar niet
aanraken.
A
1
3
F
U kunt de hoogte van de bovenkorf
regelen voor het gemakkelijker plaatsen
van uw vaatwerk. Draai de
vleugelschroefjes die de gleuf vastzetten
los en schuif de korf naar voren. Plaats
hem nu hoger of lager, schuif hem naar
achteren in de gleuven totdat ook de
voorste wieltjes erin zitten. Draai de
vleugelschroefjes vast. Volg de
handelingen in afbeelding "F".
2
4
A
46
ARISTON VAATWASSER
B
- Instructies voor installeren en gebruik
Page 49

Het staren van de machine
Bent u klaar?
De machine is ingeladen en nu moet het afwasprogramma
gekozen worden. Dit is in één minuut geleerd.
AATWASSER
V
Allereerst
Open de waterkraan en druk op de
ON-OFF knop "A": u hoort een kort
geluidssignaal en het
controlelampje "B" gaat aan. De
machine is nu ingeschakeld en u
kunt programmeren.
Het kiezen van het
programma
Draai de keuzeknop "D" met de
klok mee totdat het kerfje op de
knop samenvalt met het nummer
of het symbool van het programma dat u wilt instellen (raadpleeg
vooral in het begin de programmatabel op bladzijde 49).
Als de deur dicht is en u drukt op
de startknop "R" dan hoort u een
geluidssignaal en gaat, en de
indicatie "G" geeft het symbool aan
van de eerste fase. Het programma binnen een paar seconden
beginnen.
De vaatwasser houdt u
op de hoogte
Uw vaatwasser is voorzien van
controlelampjes (G) die de fasen
van de wascycle aangeven.
Ziehier de symbolen van de fasen:
voorwassen, wassen, spoelen,
drogen.
Uw vaatwasser laat u weten op
welk punt hij is gearriveerd.
Veranderen van een
reeds begonnen
programma
Als u zich heeft vergist met het
programma is dat niet erg. U kunt
het reeds begonnen programma
nog veranderen, maar alleen als het
net is begonnen. Houd de ResetTaste "R" ongeveer 3 seconden
ingedrukt: ,na enkele seconden
hoort u 4 pieptonen en het
controlelampje "G" gaat uit: dit
betekent dat alle instellingen
geannuleerd zijn. U kunt vervolgens
het juiste programma instellen.
Heeft u vergeten een
stuk vaatwerk in te
laden?
Dat kan iedereen gebeuren. Druk
op de ON-OFF knop om de
wascycle te onderbreken, laad het
vergeten stuk vaatwerk in en druk
nogmaals op de ON-OFF knop. De
wascycle neemt het programma
weer op waar het onderbroken was.
Einde programma?
Het einde van de cycle wordt
aangegeven door 2 korte geluidssignalen en het knipperen van het
controlelampje van het drogen.
Draai de knop tegen de klok in
totaan de positie Reset voor het
annuleren van alle instellingen.
Doe de waterkraan dicht.
Belangrijk!
Schakel de vaatwasser uit door
op de knop "A" te drukken en trek
de stekker uit het stopcontact om
de stroom uit te schakelen; de
voedingskabel moet voor deze
reden gemakkelijk bereikbaar
zijn.
Wees er zeker
van dat het
programma is
afgelopen
voordat u het
vaatwerk
verwijdert!
Is de stroom
onderbroken? Is de
deur geopend?
Het programma wordt onderbroken en neemt weer op als
de stroom terug is of als de deur
dicht gaat. Alles is onder
controle!
Wilt u een extra droge
vaat?
Druk dan knop "E" in voordat u het
programma van uw keuze aanzet.
Een kort geluidssignaal
waarschuwt u dat u de extra droogoptie heeft ingesteld en dat het programma langer duurt opdat u een
drogere vaat heeft.
Een reeds begonnen
programma kan
alleen veranderd
worden als het zojuist
begonnen is.
Wacht een paar minuten voordat u
het vaatwerk eruit haalt: Wacht dus
even, met de stoom droogt het
beter.
Ontlaad eerst de onderste korf.
ARISTON VAATWASSER -
Waarschuwing:
Als u de deur van de
vaatwasser open
doet terwijl het
programma bezig is
of net geëindigd
moet u oppassen
voor de hete stoom
die eruit komt!
Instructies voor installeren en gebruik
47
Page 50

AATWASSER
V
Afwasmiddel en glansmiddel
Gebruik alleen speciaal afwasmiddel voor vaatwassers. Giet het in het bakje in de deur. Voor
het begin van de afwascycle
Het afwasmiddel
Het opvullen van
afwasmiddel
Druk op knop B voor het
openen van het dekseltje A . Het
afwasmiddel wordt in de twee
bakjes gegoten, tot aan de rand.
Nu kunt u het dekseltje sluiten:
druk tot het vastklikt.
Als u blokjes afwasmiddel wilt
gebruiken plaatst u er een in het
bakje "D" en sluit u de deksel.
Het sluit niet!
Controleer dat er geen afwasmiddel op het randje zit. Dit verhindert het sluiten van het dekseltje. Veeg de rand schoon en
u zult zien dat het nu sluit.
B
C
D
A
Nuttige wenken
Doseer de
juiste
hoeveelheid
afwasmiddel:
als u teveel
gebruikt wordt
het vaatwerk
niet schoner,
maar het milieu
lijdt eronder.
Bewaar afwas- en
glansmiddel op een
droge plaats en uit het
bereik van kinderen.
Belangrijk:
Er zijn producten voor de afwasmachine in de handel die zowel wasmiddel als zout en glansmiddel bevatten (3 in 1).
Wij raden aan om, als het water hard of zeer hard is, toch zout in het hiervoor bedoelde reservoir te doen om het
vormen van witte strepen op uw vaatwerk of op de trommel te voorkomen.
Als u deze producten (3 in 1) gebruikt hoeft er geen glansmiddel in het bakje te worden toegevoegd.
Mocht u toch een nog beter drogen verlangen, dan kunt u glansmiddel toevoegen, maar zet de niveau-regelaar in dit
geval op 2.
Volg in ieder geval de instructies op de verpakking.
Als u alleen deze producten gebruikt is het normaal dat de controlelampjes voor het zout en voor het glansmiddel na
een aantal afwasbeurten blijvend gaan knipperen.
Het glansmiddel
Het glansmiddel maakt uw
vaatwerk glanzender omdat het
drogen bevorderd wordt. Het
bakje van het glansmiddel in de
binnenkant van de deur moet
worden bijgevuld als het
controlelampje "T" dat gebrek aan
glansmiddel aangeeft op
knippert.
Opvullen glansmiddel
Draai de deksel C tegen de klok in.
Let op dat het glansmiddel niet
overloopt bij het opvullen. U kunt
de hoeveelheid glansmiddel die uw
machine gebruikt regelen: draai
met een schroevendraaier aan de
afstelschroef F onder de deksel C.
F
Er zijn 6 posities, normaal gesproken
staat hij op 4.
C
Het regelen van de
hoeveelheid
glansmiddel verbetert
het drogen.
Als er druppels of
vlekken op het
vaatwerk zitten, stel
de afstelschroef dan
op een hoger nummer.
Als daarentegen het
vaatwerk witte
strepen vertoont, zet
de afstelschroef dan
op een lager nummer.
48
ARISTON VAATWASSER
- Instructies voor installeren en gebruik
Page 51

Kies het juise programma
AATWASSER
V
Ieder soort vuil heeft zijn eigen
programma
Met het wassen in een vaatwasser is hygiëne en
veilig schoonwassen gegarandeerd.
Zout, glansmiddel, de juiste dosis afwasmiddel en het juiste programma:
dit is de formule voor het beste resultaat en behoud van uw vaatwasser.
:DVPLGGHO
YRRUZDVVHQ
HQZDVVHQ
JU
3URJUDPPD
,QWHQVLHI
$DQZLM]LQJHQYRRU
SURJUDPPDNHX]H
Erg vuil vaatw e r k e n
pa nnen (nie t vo o r
breekbaar vaatwerk)
%HVFKULMYLQJYDQGHF\FOH
Vo o rwa ss e n met water 40 °C
Was 65°C.
2 koude spoelingen.
Warme spoeling 70°C.
Drogen.
Kies het juiste
Kies het juiste
programma voor
programma voor
uw vaatwerk
uw vaatwerk
Het kiezen van het
Het kiezen van het
juiste programma
juiste programma
voor uw lading
voor uw lading
garandeert schoon
garandeert schoon
energiebesparing.
energiebesparing.
*ODQVPLGGHO
vaatwerk en
vaatwerk en
'XXUYDQ
KHW
SURJUDPPD
WROHUDQWLH
]RQGHU
H[WUD
GURJHQ
'DJH OLMNV
6QHO
:H NHQ
*ODV ZHUN
Normaal vuil vaatwerk en
pa nnen. Da ge lijk se norma le
cycle.
Programma voor
ecologische was met laag
energie verb ruik, ge schik t
voor no r ma a l vuil vaatw e rk
en pa nne n.
Zuinige snelle cycle voor
weinig vuil vaatwerk , direct
na ge bruik . Z o nd e r d r o ge n,
behalve als extra
droogbeurt is gekozen.
Voorwassen in afwachting
van d e lad ing va n d e
volgende maaltijd.
Spe-ciale cycle voor fijn
vaatwerk dat gevoeliger is
voor hoge t e mp e r a t ur e n,
dir e ct na gebruik .
K o ud e voo rw a s s e n
Was 50°.
Koude spoeling
Warme spoeling 70°C.
Drogen.
2 koude voorwassen
Was 50°C.
Warme spoeling 67°C.
Drogen.
Korte was met 47°C.
Warme spoeling 62°C.
Korte koude was om aankoeken
van et e ns r e s t e n t e ve r mijd e n
Was 52°C.
Lauw spoelen 45°C
Warme spoeling 65°C.
Drogen.
JU
JU
JU
JU
(extra drogen
'XR:DVK
Gedifferenciëer-de afwas
op twee korven: voorzichtig
op bovenkorf voor
glas w e r k, intensie f vo or
pannen op onderkorf.
K o ud e voo rw a s .
Was 52°C.
Lauw spoelen 45°C
Warme spoeling 65°C.
Drogen.
ARISTON VAATWASSER -
JU
Instructies voor installeren en gebruik
49
Page 52

AATWASSER
V
Nooit zonder zout
Uw waterleiding
De hardheid van het water variëert van plaats tot plaats. Als uw water hard is kan zich kalkafzetting
Vul het zout bij voordat
u een afwascycle begint
om roestvorming te
op het vaatwerk voorkomen. Uw vaatwasser is voorzien van een ontkalker die speciaal zout gebruikt
en de kalk uit het water verwijdert.
Het opvullen met zout
Gebruik altijd speciaal zout voor
vaatwassers.
Het zoutreservoir bevindt zich
onder de onderkorf en wordt als
volgt gevuld:
1. Trek de onderkorf eruit,
schroef de deksel van het
zoutreservoir los.
2. Is het de eerste keer dat u zout
opvult? Vul het reservoir eerst
met water (de volgende keer
hoeft dat niet meer).
3. Plaats de trechter op het gat
en giet er ongeveer 2 kilo zout
in. Een beetje water kan uit
het reservoir lopen.
4. Schroef de deksel weer stevig
vast.
Wanneer bijvullen?
Het zoutreservoir moet worden
bijgevuld als het controlelampje
zoutgebrek "S" knippert. Nadat u
voor de eerste keer zout heeft
toegevoegd is het normaal dat het
controlelampje 'zoutgebrek' aan
blijft of knippert voor de volgende
5 afwasbeurten.
Intelligent zout
Uw vaatwasser kan het
zoutverbruik regelen naarmate
de hardheid van het water van uw
waterleiding. Zo kunt u het
zoutverbruik optimaal en naar uw
wens regelen (niet te veel, niet te
weinig).
Voor het regelen van het
zoutverbruik gaat u als volgt te
werk:
1.Schroef de deksel van het
zoutreservoir los.
2. Op de hals van het reservoir
ziet u een pijl (zie afbeelding):
draai hem naar behoefte tegen
de klok in van het teken "-"
naar het teken "+".
Kies de positie van de pijl volgens
het schema van de hardheid van
het water.
Hardheid van het water.
°dH °f H mmol/l
0 ¸ 10 0 ¸ 17 0 ¸ 1,7 / 0 /
10¸ 25 18 ¸ 44 1,8 ¸ 4,4
25 ¸ 50 45 ¸ 89 4,5 ¸ 8, 9 MED 40 40
> 50 > 89 > 8,9
Keuze
positie.
-
+
hardheidsgraad van
het water van uw
waterleiding niet?
informatie aan het
waterleidingsbedrijf
van uw woonplaats.
vermijden.
Zout-gebruik.
(gram./ciclo)
20 60
60 25
Weet u de
Vraag deze
Autono-
(cycles\2-
mie
kg)
Suggesties en raadgevingen
Het behoud van uw vaatwerk
■ Bijna al het zilver kan in de
vaatwasser gewassen
worden. Met twee
uitzonderingen: antiek
zilver en zilver dat versierd
is met een oxiderende
agens. Het warme water
kan de handvaten van
antieke messen en vorken
los maken en in het tweede
geval kunnen de
versieringen verdwijnen.
Breng zilver nooit in
contact met andere
metalen: zo vermijdt u
vlekken en zwarte punten.
Niet alleen bespaart
de vaatwasser u
moeite en tijd, maar
ook sterilizeren de
hoge temperaturen
het vaatwerk.
■ Zilveren schalen moeten
onmiddelijk na gebruik
worden gewassen, vooral
als ze met zout in contact
zijn geweest, of met ei,
olijven, azijn, vruchtensap of
gekookte groenten.
■ Voor speciaal delicate
stukken gebruikt u de speciale wascycle.
Besparen is mogelijk
Intelligent gebruik van uw
huishoudapparatuur kan energie besparen en
ten goede komen voor het milieu.
Maximum lading
U kunt de vaatwasser het beste gebruiken met volle
lading. Als het tijd neemt voordat hij vol is kunt u een
weekcycle gebruiken zodat zich geen onaangename
geuren en/of aankoeken voordoen.
Het juiste programma
Kies het programma dat geschikt is voor het soort
lading. De keuze van het programma hangt af van
het soor vaatwerk dat gewassen moet worden en hoe
vuil het is. Raadpleeg de programmatabel op blz. 49
voor de juiste keuze.
50
ARISTON VAATWASSER
- Instructies voor installeren en gebruik
Page 53

Installeren en verhuizen
Uw vaatwasser is gearriveerd
Het installeren, na aankomst of verhuis, moet op de juiste wijze worden uitgevoerd voor
het goed functioneren van uw vaatwasser.
AATWASSER
V
Kies de plek waar uw
vaatwasser moet komen te
staan; hij kan met de zijkanten
of met de achterkant tegen
andere keukenmeubelen of de
muur staan. De aan- en
afvoerbuizen van het water
kunnen naar rechts of naar
links worden gericht.
Het horizontaal zetten
Als de machine eenmaal staat,
draait u aan de stelvoetjes voor
het regelen van de hoogte en
voor het horizontaal zetten. De
machine mag niet meer dan 2
graden hellen. Een goede
waterpas positie garandeert het
perfect functioneren van de
vaatwasser.
Het regelen van de
stelschroeven
Plaats de machine in zijn
behuizing en regel vervolgens
de hoogte door aan de
stelschroeven te draaien die
zich onder aan de voorkant
bevinden. Met een
schroevendraaier draait u met
de klok mee om de vaatwasser
hoger te zetten en tegen de klok
in om hem lager te zetten.
Aansluiting aan de
koudwaterkraan
De aansluiting aan de waterleiding mag uitsluitend worden
uitgevoerd met de aanvoerbuis
die bij het apparaat is
bijgeleverd; gebruik geen ander
soort buis. Als onderdelen
moeten worden vervangen
mogen alleen originele
Als de stekker niet in
het stopcontact past
moet deze vervangen
worden met een die
wel past; gebruik
geen adaptors of
dubbelstekkers
aangezien die
verhitting of
schroeien kunnen
veroorzaken.
onderdelen worden gebruikt.
Sluit de aanvoerbuis aan een
koudwaterkraan aan met een
schroefdraad van ¾ gas en
schroef hem goed vast aan de
kraan. Als de waterleiding
nieuw is of lange tijd niet
gebruikt, laat dan eerst water
lopen voordat u de aansluiting
tot stand brengt, totdat het
water helder is en zonder
vuiltjes. Als u dit niet doet loopt
u het risico dat het punt waar
het water binnenkomt verstopt
raakt tot schade van uw
vaatwasser.
Aansluiting aan de
warmwaterkraan
De vaatwasser kan worden
voorzien van warm water uit de
kraan (als u centrale
verwarming heeft) dat niet
warmer mag zijn dan 60°C.
In dit geval wordt de tijdsduur
van de afwas verkort met
ongeveer 15 minuten en de
doeltreffendheid enigszins
verminderd.
De aansluiting aan de
warmwaterkraan wordt
uitgevoerd zoals voor de
koudwaterkraan.
Beveiliging tegen
overlopen
Uw vaatwasser is voorzien van
een systeem dat de watertoevoer
stopt als er lekkage optreedt in
de machine. De machine is
bovendien voorzien van een
watertoevoerslang die bestendig
is tegen zeer hoge druk en die een
intense rode kleur aanneemt in
het geval dat hij zou scheuren.
De beveiliging tegen overlopen
wordt gegarandeerd door de
tweede doorzichtige slang die
zich om de toevoerslang heen
bevindt en die, aangezien hij
doorzichtig is, een intense rode
kleur aanneemt. Het is erg
belangrijk dat u de slang
regelmatig controleert. Als u ziet
dat hij rood is, weet u dat u hem
zo snel mogelijk moet vervangen.
Bel een bevoegde installateur
voor deze ingreep.
Aansluiting aan de
afvoerbuis
Steek de buis in een afvoerleiding met een minimum
doorsnee van 4cm. of hang hem
in de gootsteen. Vermijd
knellingen of scherpe bochten.
Het deel van de buis dat is aangegeven met de letter A moet zich
op een hoogte tussen 40 en 100 cm
bevinden.
De buis mag niet onder water
liggen.
A
Elektrische aansluiting
Controleer om te beginnen of de
spanning en frequentie kloppen met
de waarden op het typeplaatje dat
zich aan de binnenkant van de deur
bevindt, en of het elektrische net
waaraan de machine wordt
aangesloten, gedimensioneerd
is voor de maximum stroom die op
het typeplaatje wordt aangegeven.
Aarde: onmisbar e
beveiliging
Nu kunt u de stekker van de
machine in een stopcontact steken
dat voorzien is van een efficiënte
aarding (het aarden van uw
elektrische net is een
veiligheidsgarantie die door de wet
is voorgeschreven, verzekert u zich
ervan dat uw net is geaard).
Voedingskabel
Controleer de voedingskabel
regelmatig; indien hij
beschadigd of versleten is laat
u hem vervangen door een
bevoegde installateur.
Anticondens-strip
Enkele modellen zijn voorzien
van een bijgeleverde
doorzichtige zelfklevende strip.
Deze moet aan de onderkant
van uw houten aanrecht
worden vastgeplakt om hem
tegen condenswater te
beschermen.
Indien deze strip niet is
bijgeleverd moet u hem bij uw
handelaar als los onderdeel
bestellen.
Belangrijk:
De stekker van de vaatwasser moet
na het inbouwen goed bereikbaar
blijven zodat onderhoud in alle
veiligheid kan worden uitgevoerd.
ARISTON VAATWASSER -
Instructies voor installeren en gebruik
51
Page 54

AATWASSER
V
Problemen en oplossingen
Als u een probleem heeft, lees dan hier
Als de vaatwasser niet of slecht functioneert kan de storing in vele gevallen worden opgelost zonder dat u er de installateur bij hoeft te
roepen. Voordat u de installateur telefoneert, lees eerst deze punten.
De vaatwasser start
niet
■ Is de waterkraan open?
■ Is de waterkraan goed
aangesloten aan de buis?
■ Komt er geen water uit de
waterleiding?
■ Is er genoeg druk op het
water?
■ Ligt de buis gebogen?
■ Is de filter van de
watertoevoer verstopt?
■ Is de deur van de vaatwasser
niet goed dicht?
Het vaatwerk is niet
schoon
■ Heeft u de juiste dosis
afwasmiddel toegevoegd?
■ Is het programma dat u koos
geschikt voor het soort
vaatwerk dat is ingeladen?
■ Zijn de filter en de microfilter
schoon?
■ Zijn de sproeiarmen vrij?
De vaatwasser loopt
niet leeg
■ Ligt de buis gekneld?
Er blijven in de
vaatwasser
kalkafzettingen achter
of een witte aanslag
■ Is de deksel van het
zoutreservoir goed dicht?
■ Is de dosis glansmiddel goed
afgesteld?
Storingssignalen
Uw vaatwasser is voorzien van een
veiligheidssysteem dat eventuele
storingen kan opsporen. Dergelijke
storingen worden gesignaleerd
door één of twee snel knipperende
controlelampjes "G".
Nadat u genoteerd heeft welke
controlelampjes er knipperen, zet
u de machine uit en belt u de
installateur.
Alarm kraan dicht
Als u vergeten bent de waterkraan
open te draaien, wordt dit
gedurende enkele minuten met
kortegeluidssignalen aangegeven.
Zet de waterkraan open en u zult
zien dat de machine na enkele
minuten in werking treedt. Als u er
niet bij bent als de pieptonen worden
gegeven, dan wordt de machine
geblokkeerd en de controlelampjes
2 en 3 (wassen en spoelen) gaan
snel knipperen. Zet de machine uit
met de ON-OFF knop, draai de
waterkraan open, wacht ongeveer
20 seconden en zet vervolgens de
machine weer aan. Kies opnieuw
het programma zoals dat
beschreven wordt in paragraaf
"Programma kiezen" en u zult zien
dat de machine weer begint te
draaien.
Alarm filters verstopt
Als de machine is geblokkeerd en
de controlelampjes 1 (voorwassen)
en 3 knipperen snel (spoelen)
betekent dit dat de filter is verstopt
met voedselresten. Schakel de
machine uit, maak de filter goed
schoon en nadat u hem weer op
zijn plaats heeft aangebracht zoals
aangegeven op blz. 53, schakelt u
hem weer in. Kies opnieuw het programma zoals dat beschreven
wordt in paragraaf "Programma
kiezen" en u zult zien dat de
machine weer begint te draaien.
Alarm storing aan de
elektroklep van de
watertoevoer.
Als controlelampje 2 (wassen) snel
knippert moet u de vaatwasser na
een minuut UIT DOEN EN WEER
AAN DOEN. Als het alarm aan
blijft moet u eerst de waterkraan
dicht doen om overstroming te
vermijden, vervolgens de stroom
afsluiten en dan de installateur
erbij roepen.
Heeft u alles goed
gecontroleerd, maar werkt
de machine nog niet en de
storing blijft bestaan?
Roep er de installateur bij en
vermeld:
het soort storing
het codenummer van het model
(Model ) en het serienummer
(S/N ) die u op het typeplaatje
aan de zijkant in de deur vindt.
Wendt u zich altijd
tot een erkende
installateur en eis
altijd alleen originele
onderdelen.
Veiligheid in uw huis
De vaatwasser is volgens de meest strenge internationale veiligheidsnormen gemaakt teneinde de veiligheid van u en uw familie te
garanderen. Lees de aanwijzingen en informatie in deze gebruiksaanwijzing met aandacht: zij geven u veel nuttige aanwijzingen
voor de veiligheid van de installatie, het gebruik en het onderhoud. Zo vermijdt u nare verrassingen.
1. Verwijder het
verpakkingsmateriaal
zorgvuldig (houdt u zich aan
de voorschriften voor
gescheiden vuilnis zoals
voorgeschreven in uw
gemeente).
2. Als de machine is uitgepakt
onderzoekt u of hij
onbeschadigd is. Als u twijfels
heeft wendt u zich tot een
erkende installateur.
3. De vaatwasser mag alleen
worden gebruikt door
volwassen personen en voor
het wassen van vaatwerk
voor huishoudelijk gebruik
volgens de instructies in deze
gebruiksaanwijzing. Raak de
machine niet aan als u
blootsvoets bent of met natte
handen of voeten.
4. Gebruik liefst geen
verlengsnoeren en/of
dubbelstekkers. Als de
voedingskabel niet lang
genoeg is, laat hem dan
vervangen met een kabel die
lang genoeg is, en denk eraan
dat hij niet gekneld of
omgebogen mag liggen.
5. Schakel altijd de stroom uit als
de machine niet goed werkt
en bij
onderhoudswerkzaamheden.
6. Houd kleine kinderen op een
afstand als de machine open
is.
7. De vaatwasser mag niet
buiten worden geïnstalleerd,
ook niet onder een afdakje:
het is gevaarlijk hem bloot te
stellen aan regen en onweer.
8. Raak de weerstand niet aan
gedurende en onmiddelijk na
een afwascycle.
9. Leun niet en ga niet zitten op
de open deur.
10. Als er een storing is moet u de
waterkraan dicht doen en de
stroom afsluiten. Kijk
vervolgens in de paragraaf
"Als u een probleem heeft, lees
dan hier". Als u de oplossing
niet heeft gevonden roept u
er de installateur bij.
11. Een machine die niet meer
gebruikt wordt moet onklaar
gemaakt worden:snijd de
voedingskabel door en
beschadig de sluiting van de
deur.
12. Vernietiging van oude
electrische apparaten.
De Europese Richtlijn 2002/
96/EC over Vernietiging van
Electrische en Electronische
Apparatuur (WEEE), vereist
dat oude huishoudelijke
electrische apparaten niet
mogen vernietigd via de normale ongesorteerde
afvalstroom. Oude apparaten
moeten apart worden
ingezameld om zo het
hergebruik van de gebruikte
materialen te optimaliseren en
de negatieve invloed op de
gezondheid en het milieu te
reduceren. Het symbool op het
product van de "afvalcontainer
met een kruis erdoor"
herinnert u aan uw
verplichting, dat wanneer u het
apparaat vernietigt, het
apparaat apart moet worden
ingezameld.
Consumenten moeten contact
opnemen met de locale
autoriteiten voor informatie
over de juiste wijze van
vernietiging van hun oude
apparaat.
52
ARISTON VAATWASSER
- Instructies voor installeren en gebruik
Page 55

Zorg en onderhoud
AATWASSER
V
Schoonmaken en speciaal onderhoud
De filter-unit
Voor goede resultaten van de afwas
moet de filter-unit worden schoon
gemaakt. Het afwaswater wordt
gereinigd van etensresten en
perfect gefilterd weer in circulatie
gebracht. Het is daarom
noodzakelijk de grootste stukjes die
in de beker C en in de filter A
zijn achtergebleven te verwijderen:
trek de beker aan zijn handvat naar
boven. Spoel onder stromend
water.
Eens per maand moet de hele filterunit worden gereinigd: de beker C
+ de halfcirkelvormige filter A +
de cilindrische filter B. De filter
B wordt verwijderd door hem
tegen de klok in te draaien. Gebruik
bij het reinigen een niet-metalen
borstel.
Zet de onderdelen weer in elkaar
(zoals aangegeven in de
afbeelding)en plaats de unit in de
vaatwasser. Druk hem op zijn
plaats.
De vaatwasser mag niet zonder
filters worden gebruikt. De afwas
wordt minder efficiënt uitgevoerd
als de filters niet op de juiste wijze
in hun behuizing zijn geplaatst en
de vaatwasser kan eventuele
schade oplopen.
1
B
2
C
A
Besteed regelmatig, eens
per maand, wat aandacht
aan de filters en
sproeiarmen.
Het schoonmaken van
de sproeiarmen
Het kan gebeuren dat er
etensrestjes aan de
sproeiarmen blijven kleven en
de gaatjes verstoppen.
Controleer ze en reinig ze af en
toe (letters F en I Hoe zit hij in
elkaar?).
Houd uw vaatwasser in goede staat
Door u aan enkele vaste regels te houden garandeert u dat de machine
betrouwbaar functioneert.
Na iedere afwasbeurt
Denk eraan als de afwascycle
is afgelopen de waterkraan
dicht te doen en de deur op een
kier open te laten. Zo ontstaat
er geen vochtigheid en vormen
zich geen onaangename
geuren.
Schakel de stroom uit
Voordat u de machine gaat
schoonmaken of ander
onderhoud gaat verrichten,
schakel altijd de stroom uit om
gevaar te vermijden.
Geen oplosmiddelen!
Geen schuurmiddelen!
Voor het schoonmaken van de
buitenkant en de rubber
onderdelen van de machine
mag u geen oplosmiddelen of
schuurmiddelen gebruiken.
Een doek en een sopje zijn
genoeg.
Als u vlekken ziet op de
oppervlake van de trommel
kunt u een doek met water en
een beetje witte azijn gebruiken
oftewel een speciaal product
voor vaatwassers.
Gaat u op vakantie?
Als u voor lange tijd weggaat
raden wij het volgende aan:
laat een afwascycle leeg
lopen
doe de kraan dicht
laat de deur op een kier staan
Zo duren de afdichtingen langer
en vormen zich geen
onaangename geuren binnenin.
Verhuis
Houd de machine bij een
verhuis in vertikale positie.
Indien noodzakelijk kunt u hem
op zijn achterkant kantelen.
De afdichtingen
Een van de redenen van
onaangename geuren in de
vaatwasser is het aankleven van
etensresten aan de
afdichtingen. Maak ze af en toe
schoon met een natte spons.
Uw vaatwasser is geen vuilnisbak
Het is niet strikt nodig ieder kleinste restje
voedsel af te spoelen, maar verwijder wel botten,
schillen en andere eventuele resten. Giet glazen,
kopjes, bekers leeg voordat u ze inlaadt.
ARISTON VAATWASSER -
Instructies voor installeren en gebruik
53
Page 56

AATWASSER
V
Ariston: ook de service
staat voor kwaliteit
In deze handleiding staan een aantal tips om eenvoudige storingen zelf te
verhelpen. Mocht u niet in staat zijn de storing te verhelpen, dan kunt u
gebruik maken van de fabrieksservice van Indesit Company Nederland.
Indesit Company Nederland heeft Nederland opgedeeld in verschillende
serviceregio's. Elke regio is postcodegebonden. Binnen elke regio is een
Indesit Service Partner verantwoordelijk voor de fabrieksservice. Elke Indesit
Service Partner voldoet aan strenge kwaliteitseisen, waardoor storingen snel,
vakkundig en goedkoop opgelost worden.
VOOR SERVICE IN NEDERLAND BEL 0900-2025254
Bij opgave van de storing verzoeken wij u onderstaande gegevens te willen
verschaffen:
Aard van de storing
Model
Serienummer
Aankoopdatum
Naam van de leverancier
INDESIT COMPANY - EEN ORGANISATIE DIE OPTIMALE
SERVICE GARANDEERT
54
ARISTON VAATWASSER
- Instructies voor installeren en gebruik
Page 57

Guía rápida para el
lavavajilla
Este manual le cuenta, de manera agradable, todo lo que puede
ofrecerle su nuevo electrodoméstico. Además, descubrirá
curiosidades y pequeños detalles para lavar mejor con su lavavajilla
y hacerlo durar más tiempo.
1. Instalación y traslado (p. 62)
La instalación, después de la entrega o de un traslado, es la
operación más importante para el buen funcionamiento de su
lavavajilla. Verifique siempre:
1. Que la instalación eléctrica esté dentro de las normas;
2. Que los tubos de carga y descarga de agua hayan sido
conectados correctamente;
3. Que el lavavajilla esté nivelado. Vale la pena: por la duración y
el correcto funcionamiento del lavavajilla.
AVAVAJILLA
AVAVAJILLA
L
L
2. Cuadro de mandos a tus órdenes (p. 56)
Aprenda a conocer las partes que componen el lavavajilla, lo usará
mejor. Aquí encontrará la descripción detallada de los mandos y
de las partes internas.
3. Carga de la vajilla (p. 57)
En esta página encontrará consejos útiles para cargar
correctamente el lavavajilla y aprovechar al máximo su espacio.
4. Puesta en marcha del lavavajilla (p.58)
Después de haber cargado el lavavajilla, debe seleccionar el
programa adecuado y dosificar correctamente el detergente y el
abrillantador. Leer estas páginas le ayudará en todas las fases del
lavado.
5. La sal: un importante aliado (p. 61)
Usar la sal adecuada y en la cantidad justa le ayudará a conservar
en óptimo estado el lavavajilla, para lavar mejor y evitar los daños
que pudiera causar la caliza.
6. Consejos y sugerencias también para ahorrar
(p. 61)
8. Seguridad para Ud. y su familia (p. 63)
Lea este capítulo con atención, le brindará información útil sobre
la seguridad de instalación, el uso y el mantenimiento. Evite
sorpresas desagradables.
9. Mantenimiento y cuidados especiales (p. 64)
Aproximadamente una vez por mes, dedique un poco de atención
al grupo filtrante y a los brazos rociadores. Aquí aprenderá cómo
hacer.
10. Mantenga en buenas condiciones el
lavavajilla (p. 64)
Respete las pocas reglas que leerá aquí, el resultado será un
lavavajilla siempre en óptimo estado.
Aquí encontrará pequeños consejos para lavar mejor su vajilla y
para ahorrar eligiendo el programa adecuado para el tipo de carga.
11. Características técnicas (p.56)
Todos los datos técnicos de su electrodoméstico, siempre de
acuerdo con la ley.
7. Problemas y soluciones (p. 63)
12. Ariston está cerca suyo aún después de la
Antes de llamar al técnico, consulte este párrafo: muchos
problemas pueden tener una solución inmediata. Si, aún así, no
logra resolver el problema, llame al número de la asistencia
Ariston y, en poco tiempo, si es posible, se reparará cualquier
avería.
Ariston sostiene sus productos con servicios y soporte técnico
incluso después de la compra, ofreciéndole garantías especiales,
asistencia profesional, repuestos y accesorios de calidad. Para
más información, llame al número gratuito de Ariston.
LAVAVAJILLA ARISTON - Instrucciones para la instalación y el uso
compra (p.65)
55
Page 58

AVAVAJILLA
G
C
S
T
E
R
D
B
A
L
Abramos juntos su lavavajilla
¿Cómo está
compuesto?
Aprender a conocer las partes que componen el
lavavajilla le ayudará a usarlo mejor
E. Cesto superior
F. Rociador superior
G. Regulación de la altura
del cesto
H. Cesto inferior
I. Rociador inferior
J. Tapón recipiente de sal
K. Filtro de lavado
L. Recipiente para
detergente y
abrillantador
Cuadro de mandos a tus
órdenes
A. Botón ON-OFF
Presione este botón para
encender la máquina
B. Luz testigo ON-OFF
Le indica que la máquina
está encendida
C. Manija de apertura de la
puerta
Sirve para abrir la
puerta del lavavajilla.
D. Perilla de selección de
programas
Sirve para seleccionar
un programa.
E. Botón de secado extra
Presiónelo para obtener
un mayor secado
G. Lámparas indicadoras
de avance del ciclo
prelavado, lavado,
aclarado, secado.
R. Botón Start/Reset
Con Start se pone en
marcha el programa,
con Reset se anulan
todas las selecciones.
S. Lámpara indicadora de
falta de sal
Le avisa que debe
agregar la sal.
T. Lámpara indicadora de
falta de abrillantador
Le avisa que debe
agregar el abrillantador.
Características técnicas
Cara cterísticas técnicas
Largo cm. 59,5
Profundidad cm. 57
Altura cm. 82
Capacidad 12 cubiertos normales
Presión agua alimentación
4,3 psi -145 ps i 30 KPa÷ 1MPa) (0,3 ÷10 bar)
Tensión de alimentación Véase placa de características
Potencia total absorvida Véase placa de características
Fusible Véase placa de características
56
LAVA VAJILLA ARISTON - Instrucciones para la instalación y el uso
Este lavavajilla es
conforme a las siguientes
Directivas de la
Comunidad:
73/23/CE
(Bajos Voltajes) y
sucesivas
modificaciones;
89/336/EEC
(Compatibilidad
Electromagnética) y
sucesivas
modificaciones.
97/17/CE
(Etiquetado)
2002/96/CE
(Residuos de
Aparatos
Eléctricos y
Electrónicos)
Page 59

AVAVAJILLA
L
¿Cómo se carga la vajilla?
Antes de lavar, estos pequeños detalles pueden ayudarle a lavar mejor y a conservar durante más tiempo
su lavavajilla. Quite los residuos más grandes de comida, ponga en remojo las ollas y las sartenes con
residuos muy pegados. Después de haber cargado la vajilla controle que giren bien las palas del rociador.
No superponga vasos y tazas, controle que los platos no se toquen.
Antes que nada.
Antes de disponer la vajilla en los
cestos, elimine los residuos más
grandes de comida, de este modo,
evitará tapar los filtros reduciendo
la eficacia del lavado.
Si las ollas y los sartenes tienen
residuos muy pegados, colóquelos
en remojo a la espera del lavado.
Para facilitar la operación de carga
de la vajilla, extraiga los cestos.
¿Qué coloco en el cesto
inferior?
En el cesto inferior le aconsejamos
colocar la vajilla más difícil de lavar: ollas, tapas, platos llanos y
hondos, pero también: tazas, tacitas y vasos (en las fotos se puede
observar un ejemplo de carga).
Fuentes y tapas grandes:
colóquelos a los costados del
cesto.
Ollas, ensaladeras: deben
estar siempre volcadas
Vajilla muy honda:
colóquela en posición oblicua,
así el agua podrá fluir para
lavarlas mejor
Vasos y tazas:
colóquelos como se indica en la
figura.
El cesto para los cubiertos se puede
desdoblar extrayendo la manija.
Cuando tiene pocos cubiertos que
lavar, puede utilizar sólo la mitad
del cesto, así ahorrará espacio para
otras vajillas y además puede
colocar la otra mitad en el cesto
superior (ver las figuras A y B).
Este cesto está dotado de dos
rejillas que se pueden extraer:
introduzca los cubiertos de a uno
en las ranuras,
utensilios con puntas cortantes se
deben colocar con las puntas hacia
abajo. Colóquelos de modo que no
se toquen entre sí.
los cuchillos y los
¿¿Qué coloco en el
cesto superior?
En el cesto superior cargue la vajilla
delicada y liviana: vasos, tazas de
té y café, platitos -también platos ensaladeras bajas, sartenes y
cazuelas bajas que no estén muy
sucias.
Coloque la vajilla liviana de modo
tal que no sea desplazada por los
chorros de agua.
Con el aparato, se pueden
suministrar uno o dos cestos
volcables en los cuales se pueden
colocar tazas y tacitas, así como
también cuchillos largos y afilados
y cubiertos para servir.
Regulación del cesto
superior.
Puede regular el cesto superior en
posición alta o baja para poder colocar su vajilla sin dificultad.
1
F
Abra las aletas de bloqueo del carril y
extraiga el cesto. Colóquelo ahora en
posición alta o baja, luego hágalo deslizar
a lo largo de las guías hasta hacer entrar
también las ruedas delanteras. Ahora
cierre las aletas para el bloqueo. Siga la
secuencia de las operaciones ilustradas
en la figura "F".
3
2
4
cesto inferior
Ejemplos de carga
cesto superior
A
LAVAVAJILLA ARISTON - Instrucciones para la instalación y el uso
A
A
B
57
Page 60

AVAVAJILLA
L
Poner en marcha el lavavajilla
¿Listos?, ¡ya!
Ha cargado el lavavajilla y ahora debe seleccionar el
programa de lavado. Basta un minuto para aprender
Antes que nada.
Abra completamente el grifo de
agua y pulse el botón ON-OFF "A":
escuchará una breve señal sonora
y la luz testigo "B" se iluminará.
Ahora la máquina está encendida,
y puede programarla.
Elija el programa.
Para seleccionar un programa, gire
la perilla "D" en sentido horario
hasta hacer coincidir la muesca de
referencia ubicada en la perilla, con
el símbolo o el número del programa que desee seleccionar (consulte
la tabla de programas en la pág.
60). Pulse el botón de Start "R",
después de algunos segundos se
escuchará una breve señal
acústica,
visualizará el símbolo de la fase
con la cual ha comenzado, y no es
aconsejable modificarlo.
El lavavajilla le informa.
Su lavavajilla está dotado de
lámparas testigo (G) que se
iluminan para indicarle el estado
de avance del ciclo de lavado.
He aquí los símbolos de las fases :
prelavado, lavado, aclarados,
secado.
En todo momento su lavavajilla le
informa a que punto ha llegado.
Puede anular un
mismo ha apenas
y el indicador "G"
programa en
curso sólo si el
comenzado
Modificación del
programa en curso.
¿Qué pasa si se equivoca de
programa? ¡No tenga miedo! Puede
modificar el programa en curso, si
recién ha comenzado. Mantenga
presionado el botón Reset "R"
durante aproximadamente 3
segundos: escuchará una señal
sonora prolongada seguida por 3
breves sonidos y se apagará la luz
testigo "G". significa que todas las
selecciones realizadas fueron
anuladas. Ahora puede volver a seleccionar el programa adecuado.
¿Ha dejado afuera una
vajilla?
Bueno, le puede suceder a
cualquiera. Interrumpa el ciclo de
lavado pulsando el botón ON-OFF,
introduzca la vajilla olvidada y pulse
de nuevo el botón ON-OFF. El ciclo
se reanudará desde el punto en el
cual lo ha interrumpido.
¿Terminó?
El final del ciclo está indicado por
2 breves señales sonoras y por el
centelleo de la luz testigo
correspondiente al secado.
Gire la perilla en sentido antihorario
hasta la posición de Reset para
anular todas las selecciones.
Atencion:
Apague la lavavajilla pulsando
el botón A, desenchufe la
máquina para interrumpir la
alimentación eléctrica; para ello,
el cable de alimentación debe
ser fácilmente accesible.
Cierre el grifo de agua.
Espere algunos minutos antes de
extraer la vajilla: ¡quema! Si espera
un poquito, con el vapor se seca
mejor.
Vacíe primero el cesto inferior.
¡Antes de extraer la
vajilla, verifique que
el programa haya
terminado!
¿Desea obtener un
mayor secado?
Presione el botón "E" antes de que
comience el programa seleccionado.
Un sonido prolongado le avisa que
ha seleccionado el secado extra,
un breve sonido indica la
deselección.
Con el secado extra, el programa
de lavado durará más tiempo para
brindarle una vajilla más seca.
¿Se cortó la luz? ¿Abrió
la puerta de la máquina?
El programa se interrumpe y luego
se reanuda cuando vuelve la luz o
cuando se cierra la puerta. ¡Está
todo bajo control!
Advertencia:
Cuando abra la
puerta del lavavajilla,
si el ciclo de lavado
recién ha terminado
o aún no lo ha hecho,
tenga cuidado con el
vapor caliente que
sale, ¡se podría
quemar!
58
LAVA VAJILLA ARISTON - Instrucciones para la instalación y el uso
Page 61

Detergente y abrillantador
AVAVAJILLA
L
Use solamente detergente específico para lavavajilla. Vierta el detergente en el distribuidor
que se encuentra en la parte interna de la puerta. ¡Hágalo antes de que comience el ciclo de
Consejos útiles
lavado!
El detergente
Carga del detergente
Para abrir la tapa A, pulse el botón B. El detergente se
introduce en las 2 cubetas hasta
el borde.
Ahora puede cerrar la tapa: presione hasta que sienta el
disparo del cierre.
Si decide utilizar el detergente
en comprimidos, coloque uno
en la cubeta "D" y cierre la tapa.
¡No se cierra!
Controle que en los bordes de
la cubeta no hayan quedado residuos de detergente. Ese es el
motivo por el cual la tapa no se
puede cerrar. Elimínelos y verá
que se cerrará.
B
C
D
A
Dosifique la
cantidad justa de
detergente: si se
excede no
obtendrá vajilla
más limpia, sólo
una mayor
contaminación
ambiental.
Mantenga el
detergente y el
abrillantador en
lugares secos, lejos del
alcance de los niños.
El abrillantador.
El abrillantador vuelve su vajilla
más brillante porque mejora su
secado. El depósito del
abrillantador está ubicado en la
parte interna de la puerta: se debe
llenar cuando centellea la luz
indicadora de falta de abrillantador
"T"
.
Carga del abrillantador.
Para abrir el recipiente gire en
sentido antihorario la tapa C.
Tenga cuidado cuando vierta el
abrillantador para evitar que
caiga fuera del recipiente. Ud.
puede adaptar la cantidad de
abrillantador utilizado por el
lavavajilla: regule con un
destornillador el regulador F
que se ve debajo de la tapa C.
Atención
En los negocios Ud. puede encontrar productos para el lavado de la vajilla que contienen detergente, sal y abrillantador (3 en 1).
Si el agua con la que Ud. trabaja es dura o muy dura, le aconsejamos agregar sal en el correspondiente distribuidor para evitar
la formación de estrías blancas en la vajilla o en la cuba.
Si se utilizan los productos 3 en 1 no es necesario cargar el abrillantador en el depósito correspondiente.
Si desea obtener un secado todavía mayor, se puede cargar el abrillantador, pero recordando llevar el regulador al nº 2.
De todos modos, consulte las instrucciones del fabricante que se encuentran en los envases.
Si usa sólo estos productos, es normal que los pilotos de sal y abrillantador, después de un cierto número de ciclos, centelleen
permanentemente.
Puede elegir entre seis posiciones.
Normalmente está fijado en la 4.
F
C
La regulación de la
cantidad de
abrillantador usado
mejora el secado.
Si en la vajilla nota
gotas de agua o
manchas, gire el
regulador hacia los
números más altos.
Si en cambio, su
vajilla presenta
estrías blancas, gire
el regulador hacia los
números más bajos.
LAVAVAJILLA ARISTON - Instrucciones para la instalación y el uso
59
Page 62

AVAVAJILLA
L
Elija el programa adecuado
Cada tipo de suciedad
tiene su programa
Lavando en lavavajilla tendrá la garantía de un
ambiente higiénico y de una limpieza más segura.
Sal, abrillantador, la justa dosis de detergente y el programa adecuado: he aquí
la fórmula para obtener los mejores resultados y conservar bien su lavavajilla
3URJUDPD
(QpUJLFR
,QGLFDFLRQHVSDUDOD
VHOHFFLyQGH
SUR JUDPD V
Va j illa y o llas muy suc ias
(no usar para piezas
delicadas)
' HV FULSFLy Q GH O FL FOR
Prelavado con agua caliente a 40°C
Lava d o a 6 5 °C
2 aclarados con agua fría
Acla ra do ca li e n t e a 7 0° C
Secado
'H WHUJHQWH
SUHODYDGR
ODYDGR
JU
Elija el programa
adecuado para su
vajilla.
Elegir el programa
más adecuado para la
carga que ha
efectuado, le asegura
obtener una vajilla
limpia y un uso más
conveniente de agua
y energía eléctrica.
'XUDFLyQ
GH O
SUR JUDPD
$EULOODQWDGRU
WROH UDQFLD
VLQ
VHFDGR
H[WUD
1RUPDO
5 iSLGR
5HPRMR
&ULVWDOH V
Ciclo para vajilla y ollas
norma lme nte sucias.
Programa estándar diario.
Programa para un lavado
ecológico, de bajo
consumo energético,
adecuado para vajilla y
ollas normalmente sucias.
Ciclo económico y velo z
que se utiliza para vajilla
poco sucia,
inmediatamente después
del uso. Sin secado.
Lavad o p re limin a r a la
espera de completar la
carga en la comida
sucesiva.
Ciclo especial que se
utiliza para piezas más
sens ible s a la s a lt as
temp eraturas,
inmediatamente después
del uso.
Prelavado con agua fría,
Lava d o a 5 0 °C
Acla ra do frío
Acla ra do ca li e n t e a 7 0° C
Secado
2 prelavados con agua fría,
Lava d o a 5 0 º C
Acla ra do ca li e n t e a 6 7° C
Secado
Breve lavado a 47°C
Acla ra do ca li e n t e a 6 2° C
Breve lavado frío para impedir que
los residuos de comida se sequen
sobre la vajilla
Lava d o a 5 2 °C.
Aclarado tibio a 45ºC
Acla ra do ca li e n t e a 6 5° C
Secado
JU
JU
JU
JU
(Con secado
extra)
La va do d ife r e nciado e n
los dos cestos: delicado
en el superior para
cr ist a le s y va s o s ,
enérgico para ollas en el
'XR:DVK
60
LAVA VAJILLA ARISTON - Instrucciones para la instalación y el uso
cesto inferior.
Prelavado frío
Lava d o a 5 2 °C.
Aclarado tibio a 45ºC
Acla ra do ca li e n t e a 6 5° C
Secado
JU
Page 63

Nunca sin sal
AVAVAJILLA
L
Agua de su casa
La dureza del agua varía según las localidades. Si el agua de su casa es dura, sin decalcificación se
formarían incrustaciones en la vajilla. Su lavavajilla posee un decalcificador que utiliza sal especial y
elimina la caliza del agua.
Carga de la sal.
Utilice siempre sal específica
para lavavajilla.
El depósito de sal está debajo del
cesto inferior, llénelo de la
siguiente manera:
1. Extraiga el cesto inferior,
desenrosque y quite la tapa del
depósito
2. ¿Es la primera vez que carga la
sal? Si es así, antes llene de
agua el depósito (la próxima
vez ya no deberá hacerlo)
3. Meta el embudo del lavavajilla
en el orificio e introduzca
aproximadamente dos kilos
de sal. Es normal ver salir un
poco de agua del depósito.
4. Vuelva a enroscar con cuidado
la tapa.
¿Cuándo debo cargar la
sal?
El depósito de sal se debe llenar
cuando centellea la luz indicadora
de falta de sal "S".Después de
cargar la sal
normal que la luz piloto de falta de
sal permanezca encendida o
relampaguee durante 5 ciclos
consecutivos.
Sal inteligente.
Su lavavajilla puede regular el
consumo de sal de acuerdo a la
dureza del agua de su casa. De
este modo, podrá optimizar y
personalizar el consumo de sal (ni
poco, ni demasiado).
Per regular el consumo de sal proceda del siguiente modo:
1. Desenrosque la tapa del
depósito de sal
2. En el collar del depósito se ve
una flecha (figura): si es
necesario, gírela en sentido
antihorario, del signo "-" al
signo "+".
Elija la posición de la flecha consultando el esquema con la
dureza del agua.
por primera vez es
Dureza del agua
°dH °fH mmol/l
0 ¸ 10 0 ¸ 17 0 ¸ 1,7 / 0 /
10¸ 25 18 ¸ 44 1,8 ¸ 4,4
25 ¸ 50 45 ¸ 89 4,5 ¸ 8,9 MED 40 4 0
> 50 > 89 > 8,9
herrumbre, cargue la
sal antes de comenzar
un ciclo de lavado.
Posición
selector
-
+
¿No conoce el grado
de dureza del agua de
su casa? Pregunte al
suministra el agua en
Para evitar la
formación de
Consumo
sal
(gramas/ciclo)
20 60
60 25
personal de la
empresa que
su zona.
Autono-
(ciclos\-
2kg)
mia
Sugerencias y consejos para Ud.
Cómo conservar y cuidar la
vajilla más valiosa para Ud.
■ Casi toda la vajilla de plata
se puede lavar en el
lavavajilla. Hay dos
excepciones: la vajilla de
plata antigua y la decorada
con un agente oxidante. El
agua caliente puede aflojar
los mangos de la antigua y
hacer desaparecer los
motivos ornamentales de la
otra.
No ponga nunca la vajilla de
plata en contacto con otros
metales: evitará manchas y
ennegrecimiento.
Además de hacerle
ahorrar tiempo y
trabajo, el lavavajilla
desinfecta la vajilla,
lavándola a una alta
temperatura.
■ Los platos y bandejas de
plata se deben lavar
inmediatamente después
del uso, sobre todo si han
estado en contacto con sal,
huevos, aceitunas, mostaza,
vinagre, zumos de fruta y
verduras cocidas.
■ Para una vajilla
particularmente delicada,
utilice el lavado específico
presente en su lavavajilla.
¿Ahorrar? ¡Claro que
se puede!
Un uso inteligente de los electrodomésticos te
hace ahorrar y cuida el ambiente
Carga máxima.
Para optimizar el consumo, use el lavavajilla lleno. Si
para llenarlo demora un poco de tiempo, utilice el
ciclo remojo, evitará la formación de malos olores e
incrustaciones.
El programa adecuado.
Elija el programa adecuado para el tipo de carga que
ha hecho. La elección del programa depende del tipo
de vajilla que debe lavar y de su grado de suciedad.
Para hacer la elección adecuada, consulte la tabla de
programas en la página 60.
LAVAVAJILLA ARISTON - Instrucciones para la instalación y el uso
61
Page 64

AVAVAJILLA
L
Instalación y traslado
Llegó su lavavajilla
Apenas adquirido o trasladado a otra casa, una instalación bien hecha, le asegura el buen
funcionamiento de su lavavajilla
Elija el lugar donde va a colocar
su lavavajilla, puede hacerlo adherir, con los costados o con la
parte posterior, a los muebles
adyacentes o a la pared. El
lavavajilla posee tubos para la
alimentación y la descarga del
agua que se pueden orientar
hacia la derecha o hacia la izquierda para permitir una
buena instalación.
Nivelación.
Una vez instalada la máquina,
enrosque o desenrosque las
patitas para regular su altura y
para nivelarla de modo que se
encuentre de forma horizontal.
Verifique que no esté inclinada
más de 2 grados. Una buena
nivelación asegurará un correcto funcionamiento de su
lavavajilla.
Regulación pies
posteriores.
Colocar la máquina en el lugar
correspondiente, luego regular
la altura de la misma
accionando los tornillos
ubicados en la parte anterior
inferior. Con un destornillador
girar en sentido horario los
tornillos para alzar el lavavajilla
y en sentido antihorario para
bajarlo.
Conexión a una toma de
agua fría.
La conexión del
electrodoméstico a la red de
agua se debe realizar
exclusivamente con el tubo de
carga suministrado con el
aparato, no utilice tubos
diferentes. En caso de
sustitución utilice sólo repues-
Si la toma de
corriente a la cual
conecta la máquina
no es la adecuada
para el enchufe,
sustitúyalo con uno
adecuado; no utilice
adaptadores o
desviaciones, podrían
provocar
calentamientos o
quemaduras.
tos originales.
Conecte el tubo de carga a una
toma de agua fría con boca
roscada de 3/4 gas, teniendo
cuidado de enroscarlo
estrechamente al grifo. Si los
tubos de agua son nuevos o permanecieron inactivos durante
mucho tiempo, antes de
realizar la conexión, verifique,
haciéndola correr, que el agua
se vuelva límpida y no contenga
impurezas. Sin esta precaución,
existe el riesgo de que el lugar
por donde entra el agua se tape,
dañando su lavavajilla.
Conexión a una toma de
agua caliente.
El lavavajilla se puede
alimentar con agua caliente de
la red (si dispone de una
instalación central con
termosifones) que no supere la
temperatura de 60° C.
En ese caso, el tiempo de
lavado disminuirá
aproximadamente 15 minutos
y la eficacia del lavado se
reducirá levemente.
Deberá efectuar la conexión a
la toma de agua caliente del
mismo modo descripto para la
conexión a una toma de agua
fría.
Dispositivo de
seguridad contra
inundación.
Si se producen pérdidas en el
interior de la máquina, su
lavavajilla está dotado de un sistema que interrumpe el
ingreso del agua. Además está
provisto de un tubo de entrada
de agua que soporta presiones
muy altas y que cuando se rompe se colorea de rojo intenso.
La seguridad, en caso de
inundaciones, está garantizada
por el segundo tubo externo
que lo contiene y que siendo
transparente se colorea de rojo
intenso. Es muy importante
controlarlo periódicamente y
cuando lo vea de color rojo,
debe cambiarlo lo antes
posible. Llame al servicio de
asistencia técnica autorizado
para ello.
Conexión al tubo de
descarga.
Introduzca el tubo de descarga en
una tubería de descarga que tenga
un diámetro mínimo de 4 cm. o
apóyelo en el lavamanos.Evite
estrangulaciones o curvas excesivas. La parte del tubo marcada
con la letra A debe estar a una
altura comprendida entre 40 y 100
cm.
El tubo no debe estar sumergido
en agua.
A
Conexión eléctrica.
Antes que nada verifique que los
valores de tensión y de frecuencia
de la red se correspondan con los
indicados en la placa situada en la
contrapuerta de acero inox. de la
máquina y que la instalación eléctrica a la cual la conecta, esté preparada para la corriente máxima
indicada en la placa.
Atencion
para poder realizar las operaciones
de mantenimiento con total
seguridad, el enchufe del mismo
debe permanecer accesible.
Conexión a tierra:
seguridad indispensable.
Sólo a partir de este momento, enchufe la máquina en una toma de
corriente que posea una eficiente
conexión a tierra (la conexión a tierra de la instalación es una garantía de seguridad prevista por la ley,
verifique que su instalación la tenga).
Cable de alimentación.
Controle periódicamente el cable
de alimentación; si resulta dañado
le recomendamos hacerlo sustituir
por el servicio de Asistencia técnica autorizado.
Cinta anticondensación.
En algunos modelos se
suministra con el equipo una
cinta autoadhesiva
transparente.
La misma se debe pegar en la
parte inferior de su ménsula de
madera para protegerla de la
condensación.
Cuando no se suministre con el
equipo, se puede solicitar como
repuesto a los revendedores
autorizados.
62
LAVA VAJILLA ARISTON - Instrucciones para la instalación y el uso
Page 65

AVAVAJILLA
Problemas y soluciones
L
Si tiene un problema, lea aquí
Puede suceder que el lavavajilla no funcione o funcione mal. En muchos casos, se trata de problemas que Ud. puede resolver sin tener que
llamar al técnico. Antes de llamar a la asistencia, lea siempre estos puntos.
El lavavajilla no arranca
■ El grifo de agua está abierto?
■ El grifo de agua está bien
conectado al tubo?
■ No hay agua en la casa?
■ El agua llega con la
suficiente presión?
■ El tubo está plegado?
■ El filtro del tubo de
alimentación de agua está
tapado?
■ La puerta del lavavajilla está
abierta?
La vajilla no queda
limpia.
■ Ha colocado la dosis justa de
detergente?
■ El programa de lavado
seleccionado es el adecuado
para la vajilla que ha cargado?
■ El filtro y el microfiltro están
limpios?
■ Los rociadores están libres?
El lavavajilla no descarga.
■ El tubo de descarga está
plegado?
En el lavavajilla quedan
depósitos calcáreos o una
pátina blanca.
■ La tapa del recipiente de la sal
está bien cerrado?
■ La dosis de abrillantador está
bien regulada?
Mensajes de error.
Su lavavajilla está dotado de un
sistema de seguridad capaz de
detectar eventuales anomalías
de funcionamiento. Dichas
anomalías están indicadas por
una o dos luces testigo "G"
centelleantes con frecuencia
rápida.
Después de haber anotado
cuáles luces testigo centellean,
apague la máquina y llame a la
asistencia técnica.
Alarma por grifo cerrado
Si se ha olvidado de abrir el grifo
de agua, su máquina se lo indica
durante algunos minutos con
breves señales sonoras. Abra el
grifo y verá que la máquina,
después de algunos minutos,
vuelve a funcionar. Si Ud. no está
presente cuando se emiten los sonidos, la máquina se bloquea y las
luces testigo 2 y 3 (lavado y
aclarados) centellean con
frecuencia rápida. Apáguela con
el botón On-Off, abra el grifo de
agua y después de haber
esperado aproximadamente 20
segundos,vuelva a encender la
máquina.
Vuelva a seleccionar el
programa, y verá que la
máquina volverá a funcionar.
Alarma por filtros
atascados
Si la máquina está bloqueada y
centellean con frecuencia rápida
las luces testigo 1 (prelavado) y
3 (aclarados) significa que el
filtro está atascado por residuos
de comidas. Apague la máquina,
limpie cuidadosamente el filtro
y después de haberlo colocado
en su lugar, como se indica en la
pág. 64, vuelva a encender la
máquina. Vuelva a seleccionar el
programa, y verá que la máquina
volverá a funcionar.
¿Alarma por avería en la
electroválvula de carga de
agua?
Si centellea con frecuencia rápida
la luz testigo 2 (lavado) APAGUE
Y VUELVA A ENCENDER el
lavavajilla después de un minuto.
Si la alarma permanece, primero
cierre el grifo de agua para evitar
inundaciones, luego desconecte el
aparato y llame a la asistencia
técnica.
¿Ha verificado todo pero
el lavavajilla no funciona
y el problema todavía
existe?
Llame al centro de asistencia
autorizado más cercano a su
casa y recuerde comunicarles:
el tipo de avería
la sigla del modelo (Mod....) y
el número de serie (S/N ....) que
podrá encontrar en la placa
aplicada en la parte lateral de
la contrapuerta.
No recurra nunca a
técnicos no
autorizados y
rechace siempre la
instalación de
repuestos que no
sean originales
La seguridad en su casa
Su lavavajilla ha sido fabricado siguiendo las normas internacionales más severas de seguridad que lo tutelan a Ud. y a su familia.
Lea atentamente las advertencias y la información contenida en este manual: le darán muchas noticias útiles sobre la seguridad en
la instalación, el uso y el mantenimiento. Evite sorpresas desagradables.
1. Elimine con cuidado el
material del embalaje (siga las
instrucciones sobre la
recolección de basura que
suministra el Municipio en el
que reside)
2. Una vez quitado el embalaje,
verifique la integridad del
aparato. Si tiene dudas, diríjase
a personal profesionalmente
calificado.
3. Su lavavajilla será utilizado
sólo por adultos y para el
lavado de la vajilla de uso
doméstico, según las
instrucciones contenidas en
este manual. No toque la
máquina descalzo o con las
manos o pies mojados
4. No es aconsejable recurrir a
prolongaciones o tomas
múltiples. Si el cable de
alimentación eléctrica no es
lo suficientemente largo,
hágalo sustituir con uno de
longitud adecuada y recuerde
que no debe estar plegado ni
sufrir compresiones
peligrosas.
5. En caso de funcionamiento
anómalo o de trabajos de
mantenimiento, desconecte
el aparato de la red eléctrica
(¡desenchúfelo!).
6. Mantenga a los niños alejados
de los detergentes y del
lavavajilla cuando está
abierto.
7. Su lavavajilla no se debe
instalar afuera, tampoco en un
lugar reparado por un
cobertizo: es muy peligroso
dejarlo expuesto a la lluvia o
a las tormentas.
8. No toque la resistencia durante o inmediatamente después
de un ciclo de lavado.
9. No se apoye ni se siente en la
puerta abierta, podría hacer
volcar el lavavajilla.
10. En caso de avería, cierre el
grifo de entrada de agua y
desenchufe el aparato. Luego
consulte el capítulo "Si tiene
un problema, lea aquí". Si no
encuentra una solución, llame
al centro de asistencia.
11. Los aparatos fuera de uso se
deben inutilizar: corte el cable
de alimentación y dañe el
bloqueo de la puerta.
12. Eliminación del
electrodoméstico viejo
En base a la Norma europea
2002/96/CE de Residuos de
aparatos Eléctricos y
Electrónicos (RAEE), los
electrodomésticos viejos no
pueden ser arrojados en los
contenedores municipales
habituales; tienen que ser
recogidos selectivamente
para optimizar la recuperación
y reciclado de los
componentes y materiales
que los constituyen, y reducir
el impacto en la salud humana
y el medioambiente. El
símbolo del cubo de basura
tachado se marca sobre todos
los productos para recordar al
consumidor la obligación de
separarlos para la recogida
selectiva.
El consumidor debe contactar
con la autoridad local o con el
vendedor para informarse en
relación a la correcta
eleminación de su
electrodoméstico viejo.
LAVAVAJILLA ARISTON - Instrucciones para la instalación y el uso
63
Page 66

AVAVAJILLA
L
Cuidados y manteimiento
Limpieza y cuidados especiales
El grupo filtrante
Si desea obtener siempre buenos
resultados de lavado, es necesario
limpiar el grupo filtrante.
Se eliminan los residuos de comida
del agua de lavado y se vuelve a
poner en circulación
perfectamente filtrada. Por ello,
después de cada lavado, es mejor
eliminar los residuos más grandes
que encuentre retenidos en el
cartucho C y en el filtro
semicircular A; para extraerlos tire
del mango del cartucho hacia
arriba. Bastará enjuagarlos bajo el
agua corriente.
Una vez por mes es necesario
limpiar cuidadosamente todo el
grupo filtrante: cartucho C + filtro
semicircular A + filtro cilíndrico B.
El filtro B se extrae girándolo en
sentido antihorario.
Para la limpieza puede utilizar un
cepillo no metálico.
Vuelva a colocar juntas las piezas
(como se indica en la figura) y
vuelva a introducir el grupo en el
lavavajilla. Colóquelo en su
alojamiento ejerciendo una presión
hacia abajo.
El lavavajilla no se debe utilizar
sin filtros. Si no introduce
correctamente los filtros se
reducirá la eficacia del lavado, e
incluso se podría dañar el
lavavajilla.
1
B
2
C
A
Aproximadamente una
vez al mes, dedique un
poco de atención al
grupo filtrante y a los
brazos rociadores
Limpieza de los brazos
rociadores.
Puede suceder que algunos
residuos de comida se adhieran
a los brazos rociadores
obstruyendo los orificios por
los que debe salir el agua.
Contrólelos y límpielos cada
tanto (letras F e I ¿Cómo está
compuesto?)
Mantenga en buenas condiciones su lavavajilla
Si Ud. respeta algunas reglas, tendrá la certeza de disponer siempre de una compañera de
trabajo confiable.
Después de cada
lavado.
Cuando el ciclo de lavado ha
terminado, recuerde siempre
que debe cerrar el grifo de agua
y dejar semicerrada la puerta.
No tendrá problemas de
humedad y no se formarán
malos olores.
Desenchúfela.
Desenchufe siempre la
máquina antes de realizar
cualquier tipo de limpieza o
mantenimiento. Evitará todo
peligro.
¡Nada de solventes!
¡Nada de productos
abrasivos!
Para limpiar la parte externa y
las partes de goma de su
lavavajilla no es necesario usar
solventes ni productos
abrasivos, use sólo un paño
embebido en agua tibia y jabón.
Si observa manchas en la superficie de la cuba, utilice un paño
embebido en agua y vinagre
blanco (un poco es suficiente)
o use un producto específico
para la limpieza del lavavajilla.
¿Se va de vacaciones?
Cuando esté ausente largos
períodos, le aconsejamos
realizar las siguientes
operaciones:
haga un lavado en vacío
cierre el grifo de ingreso del
agua
deje la porta semicerrada
De este modo, las juntas
durarán más tiempo y en su
interior no se formarán olores
desagradables.
Traslado.
En caso de traslado es mejor
tener el aparato en posición
vertical. Si fuera necesario,
puede inclinarlo hacia la parte
posterior.
Las juntas.
Una de las causas del mal olor
en el interior del lavavajilla es
el depósito de comida que se
produce en las juntas. Será
suficiente limpiarlas, cada tanto, con una esponja húmeda.
Su lavavajilla no es un triturador de basuras!
No se preocupe por eliminar residuos de comida
de la vajilla, pero sí elimine huesos, cáscaras y
otros eventuales sobrantes antes de volver a
colocarlos en los cestos. Vacíe los vasos y copas.
64
LAVA VAJILLA ARISTON - Instrucciones para la instalación y el uso
Page 67

AVAVAJILLA
L
Ariston sigue a su lado
después de la compra
Gracias por habernos elegido. Déjenos seguir cercanos a usted y
a su electrodoméstico.
Regístrese ahora mismo
Envíe por correo la hoja de garantía que encontrará
en la documentación de su electrodoméstico.
Adhiérase rápido a nuestros servicios
De cliente especial a cliente privilegiado.
Benefíciese de todas las ofertas e informaciones que en los años
venideros vamos a crear para usted.
Permanezcamos en contacto.
Asistencia
especializada
Llame al 902.133.133
le responderá el centro de Asistencia Ariston, más cercano a su domicilio.
Cuando llame para requerir asistencia, recambios o accesorios, por favor
indíquenos:
- naturaleza del problema
- el modelo (Mod )
y el número de serie (S/N)
que aparece en la etiqueta situada en la parte posterior de la lavadora.
Recambios
originales
Accesorios
garantizados
LAVAVAJILLA ARISTON - Instrucciones para la instalación y el uso
65
Page 68

ÁQUINA DE LAVAR LOUÇA
M
Guia rápida para a máquina
de lavar louça
Este manual explica de maneira agradável tudo que lhe pode ser
proporcionado por este novo electrodoméstico. Além disso,
descobrirá nele curiosidades e pequenos truques para lavar melhor
com esta máquina de lavar louça e fazê-la durar mais.
1. Instalação e mudança (p. 73)
A instalação, depois da entrega ou depois de uma mudança, é a
operação mais importante para o bom funcionamento da máquina
de lavar louça. Verifique sempre:
1.Que a instalação eléctrica seja em conformidade com as normas;
2. Que os tubos de carregamento e descarga de água estejam ligados
correctamente;
3. Que a máquina de lavar louça esteja nivelada. Vale a pena: a
máquina de lavar louça durará e funcionará correctamente.
2. Quadro de comandos às suas ordens (p.67)
Conheça as partes que constituem a máquina de lavar louça para
usá-la melhor. Encontre aqui a descrição pormenorizada dos
comandos e das peças internas.
3. Como se carrega a louça e as panelas (p.68)
Nesta página encontrará conselhos úteis para carregar
correctamente a máquina de lavar louça e aproveitar melhor os
seus espaços.
4. Como ligar a máquina de lavar louça (p.69)
Depois de ter carregado a máquina de lavar louça, é necessário
escolher o programa apropriado e dosar correctamente
detergente e aditivo para brilho. A leitura destas páginas ajudarlhe-á em todas as fases da lavagem.
5. O sal: um importante aliado (p.72)
A utilização do sal apropriado na quantidade certa ajudar-lhe-á a
preservar em óptimo estado a máquina de lavar louça, para lavar
melhor e evitar possíveis danos causados pelo calcário.
8. Segurança para si e sua família (p. 74)
Leia este capítulo com atenção, porque fornece informações úteis
para a segurança da instalação, na utilização e na manutenção.
Para evitar surpresas desagradáveis.
9. Cuidados e manutenção especiais (p. 75)
De vez em quando, uma vez por mês, dedique um pouco de atenção
ao conjunto de filtros e aos braços distribuidores. Aqui aprendese como fazê-lo.
10. Mantenha em forma a máquina de lavar
Obedeça às poucas regras que aqui lerá, o resultado será uma
máquina de lavar louça sempre em óptima forma. .
11. Características técnicas (p.67)
6. Conselhos e sugestões, também para
economizar (p. 72)
São todos os dados técnicos deste electrodoméstico, sempre em
conformidade com a legislação.
louça (p. 75)
Aqui encontrará pequenos conselhos para lavar melhor a louça e
para economizar mediante a escolha do programa adequado ao
tipo de carga.
7. Problemas e soluções (p. 74)
Antes de chamar um técnico, consulte aqui: muitíssimos
problemas podem ter solução imediata. Entretanto, se não
conseguir resolvê-los, chame o número da assistência técnica da
Ariston e, em pouco tempo, se for possível, quaisquer defeitos
serão reparados.
66
MÁQUINA DE LAVAR LOUÇA ARISTON - Instruções para a instalação e a utilização
12. Ariston está perto de si mesmo depois da
aquisição (p. 76)
A Ariston proporciona aos próprios produtos: serviços e apoio
mesmo depois da aquisição, mediante a oferta de garantias
especiais, assistência profissional, peças de reposição e acessórios
de qualidade. Para informações, telefone ao Número Verde da
Ariston.
Page 69

Vamos juntos abrir a máquina
de lavar louça
Como é feita?
Conheça as partes que constituem a máquina de lavar louça para
usá-la melhor.
ÁQUINA DE LAVAR LOUÇA
M
E. Cesto superior
F. Distribuidor superior
G. Regulação da altura do
cesto
H. Cesto inferior
I. Distribuidor inferior
J. Tampinha do recipiente
de sal
K. Filtro de lavagem
L. Recipiente para
detergente e para aditivo
para brilho
Quadro de comandos às suas
ordens
A. Botão ON-OFF
Carregue neste botão
para ligar a
máquina.
B. Luz indicadora ON-
OFF
A avisar que a
máquina está ligada
C. Alça de abertura da
porta
Serve para abrir a
porta da máquina de
lavar louça.
D. Botão selector de
programas
Serve para
seleccionar um
programa.
E. Botão extra
enxugada
Carregue nele para
obter uma maior
enxugada.
G. Luzes indicadoras do
avanço do ciclo
pré lavagem, lavagem,
enxaguada, enxugada.
G
S
E
R. Reset (Reinício)
Mediante Start inicia o
programa de lavagem ,
com Reset cancelam-se
todas as definições.
S. Luz indicadora de falta
de sal
Avisa que é hora de
acrescentar sal.
T
C
R
T. Luz indicadora de falta
de aditivo para brilho
Avisa que é hora de
acrescentar mais aditivo
para brilho.
D
B
A
Características técnicas
Característica s té cnicas
Largura cm. 59,5
Profundidade cm. 57
Altura cm. 82
Capacidade 12 talheres standard
Pressão de água alim entaçáo
Tensão de alimentaçáo Ver etiqueta características
Potência total absorvida Ver etiqueta características
Fusível Ver etiqueta características
4,3 psi -145 psi (30 KPa÷ 1MPa) (0,3 ÷10 bar)
MÁQUINA DE LAVAR LOUÇA ARISTON - Instruções para a instalação e a utilização
Esta aparelhagem é em
conformidade com as
seguintes Directivas
Comunitárias:
73/23/CEE
(Baixas Tensões) e
sucessivas modificações;
89/336/EEC
(Compatibilidade
electromagnética) e
sucessivas modificações.
97/17/CE
(Rotulagem)
2002/96/CE
(Resíduos de
Aparelhos
Eléctricos e
Electrónicos)
67
Page 70

ÁQUINA DE LAVAR LOUÇA
M
Como se carrega a louça e as panelas?
Antes da lavagem, pequenas acções podem ajudar a lavar melhor e a preservar mais tempo a máquina de
lavar louça. Tire os restos maiores de comida, coloque em banho as panelas e frigideiras que tiverem
restos grudados. Depois de ter carregado a máquina, controle se as pás do distribuidor rodam bem. Não
coloque copos nem chávenas umas sobre as outras, verifique se os pratos não estão encostados.
Antes de mais nada.
Antes de dispor a louça nos cestos,
tire os maiores restos de comida,
desta maneira evitará que um filtro entupa-se e reduza a eficiência
da lavagem.
Se as panelas e frigideiras tiverem
muitos restos grudados, deixe-as
de banho enquanto aguarda a
lavagem. Para facilitar a
operação de carregar a máquina,
puxe os cestos para fora.
O que coloca-se no
cesto inferior?
No cesto inferior é aconselhável
colocar o que for mais difícil lavar: panelas, tampas, pratos rasos
e fundos, mas também: chávenas,
xícaras e copos (nas fotografias
há exemplos de carregamento).
Travessas e tampas
grandes: arrume-os dos lados
do cesto.
Panelas, tigelas: é
necessário virá-las sempre com
o fundo para cima.
Peças muito fundas:
arrume-as em posição oblíqua,
desta maneira a água poderá
defluir para lavá-las melhor.
Copos e chávenas: colo-
que-as da maneira indicada na
figura.
O cestinho para talheres pode ser
divido em dois.
Quando houver poucos talheres
para lavar, é possível utilizar
apenas metade do cestinho e
economizar espaço para outros
utensílios, além disso, é possível
colocar a outra metade no cesto
superior (veja as figuras A e B).
Este cestinho é equipado com
duas grades extraíveis: coloque os
talheres um de cada vez nas
fendas, as facas e os utensílios
com cabos cortantes devem ser
carregados com os cabos para
baixo. Disponha-os de maneira
que não encostem uns nos outros.
O que coloca-se no
cesto superior?
No cesto superior carregue as
peças delicadas e leves: copos,
chávenas de chá e de café,
pratinhos - mas também pratos tigelas baixas, frigideiras,
caçarolas e panelas baixas e pouco
sujas.
Arrume as peças leves de maneira
que não se desloquem com os
jactos de água.
Podem ser fornecidas juntas uma
ou duas peças basculantes para
arrumar chávenas e xícaras, mas
também facas compridas e
pontiagudas e talheres de cozinha.
Regulação do cesto
superior.
É possível regular o cesto superior
em posição alta ou baixa, para
poder colocar as panelas dentro
sem dificuldades.
1
Fig.F
Abra as linguetas que prendem o cesto
no carril. Regule na posição alta ou baixa
e, em seguida, deslize-a nos carris até
entrarem também as rodinhas dianteiras.
Em seguida feche novamente as
linguetas para prendê-la. Siga a
sequência das operações ilustradas na
figura "F".
3
2
4
cesto inferior
Exemplos de carregamentos
cesto superior
A
68
MÁQUINA DE LAVAR LOUÇA ARISTON - Instruções para a instalação e a utilização
A
A
B
Page 71

Ligar a máquina de lavar louça
Pronto, vamos!
A máquina de lavar louça foi carregada e agora é necessário
escolher o programa de lavagem. Basta um minuto para
aprender
ÁQUINA DE LAVAR LOUÇA
M
Antes de mais nada.
Abra inteiramente a torneira d'água
e carregue no botão ON-OFF "A":
ouvirá um breve sinal acústico e o
indicador luminoso "B" acende-se.
Agora a máquina estará ligada e
será possível programá-la.
Selecção do programa.
Para seleccionar o programa, rode
o selector "D" na direcção horária
até a marca de referência do
selector coincidir com o número
ou com o símbolo do programa que
desejar definir (dê uma olhada na
tabela dos programas na pág. 71).
Carregue no botão de Start "R",
depois de alguns segundos, um
'bip' avisa que o programa iniciará
e o indicador "G" visualizará o
símbolo da fase com que
começar.
A máquina de lavar
louça informa.
Esta máquina de lavar louça é
equipada com indicadores
luminosos (G) que se acendem
para avisar o estado de progressão
do ciclo de lavagem.
São estes os símbolos das fases :
pré-lavagem, lavagem, enxaguada, enxugada.
A todos os momentos a máquina
de lavar louça informa a que ponto
já chegou.
Modificação do
programa em curso.
Mas se tiver errado o programa,
não tenha medo! É possível
modificar o programa em curso
somente se tiver começado a
pouco. Mantenha 3 segundos
pressionado o botão de
restabelecimento "R", depois de
poucos segundos, ouvirá 4 bipes e
apaga-se o indicador luminoso "G":
significa que todas as definições
serão anuladas. Será então possível
regular novamente o programa
como desejar.
Esqueceu-se de colocar
algo na máquina?
Bem, acontece com toda a gente.
Interrompa o ciclo de lavagem
carregando no botão ON-OFF,
coloque dentro o que tiver esquecido
e carregue de novo no botão ONOFF. O ciclo reiniciará do ponto em
que tiver sido interrompido.
É possível
modificar o
programa em
curso somente se
tiver começado a
pouco.
Acabou?
Para avisar o fim do ciclo tocam 2
breves sinais acústicas e acende-se
intermitente o indicador luminoso
correspondente à enxugada.
Rode o selector na direcção
antiorária até a posição de Reset
para colocar no zero todas as
definições.
Atenção:
Para apagar a máquina carregue
no botão "A", desligue a ficha eléctrica para interromper a alimentação; por isto deve haver fácil
acesso ao cabo de alimentação.
Feche a torneira da água.
Aguarde alguns minutos antes de
tirar a louça da máquina: está
quente! Se aguardar um bocado, com
o vapor enxugar-se-ão melhor.
Esvazie primeiro o cesto inferior.
Assegure-se que o
programa tenha
terminado antes de
tirar a louça de
dentro!
Houve interrupção da
corrente eléctrica?
Abriu a porta da
máquina?
O programa interrompe-se e
pode reiniciar quando a
electricidade voltar ou quando
a porta for fechada. Tudo está
sob controlo!
Deseja enxugar mais?
Carregue no botão "E" antes do
programa seleccionado começar.
Um bipe prolongado avisa que foi
seleccionada extra enxugada, um
breve bipe indica o cancelamento
da selecção.
Com a extra enxugada o programa
de lavagem durará mais tempo,
para assim enxugar melhor a louça.
Advertências:
Quando abrir a porta
da máquina de lavar
louça, se houver um
ciclo de lavagem em
curso ou recém
terminado, tome
cuidado com o vapor
quente que sairá,
pode causar
queimaduras!
MÁQUINA DE LAVAR LOUÇA ARISTON - Instruções para a instalação e a utilização
69
Page 72

ÁQUINA DE LAVAR LOUÇA
M
Detergente e aditivo para brilho
Use somente detergente específico para máquina de lavar louça. Deite o detergente no recipiente
que se encontra no interior da porta. Antes de começar o ciclo de lavagem!
O detergente
Carregamento de detergente
Para abrir a tampa A, carregue
no botão B. Deite o detergente
nas 2 gavetas até a beira.
Em seguida pode fechar a
tampa: aperte até sentir que se
encaixou.
Se decidir utilizar detergente
em pastilhas, coloque uma na
gaveta "D" e feche a tampa.
Não consigo fechar!
Controle se nas beiradas do recipiente há resíduos de
detergente. É por causa deles
que a tampa não se fecha. Tireos e verá que se fecha.
B
C
D
A
Conselhos úteis
Doseie a
quantidade certa
de detergente: se
ultrapassá-la
não obterá louça
mais limpa, mas
somente maior
poluição
ambiental.
Guarde o
detergente e o
aditivo para
brilho em um
lugar enxuto,
fora do alcance
das crianças.
O aditivo para brilho.
Este aditivo torna a louça mais
brilhante porque enxuga-se
melhor.
brilho encontra-se no interior da
porta: é necessário enchê-lo quando no visor, piscar a luz indicadora
"T" de falta de aditivo para brilho.
Carregamento do aditivo
para brilho.
Para abrir o recipiente, rode a
tampinha C na direcção
antiorária. Tome cuidado quando deitar aditivo para brilho,
para evitar que vaze. É possível
adaptar a quantidade de aditivo
para brilho utilizado pela
máquina de lavar louça: regule,
mediante uma chave de fenda,
o regulador F que há embaixo
da tampa C. É possível escolher
entre seis posições.
Atenção
No comércio há a venda produtos para lavar louça que já contêm detergentes, sal e aditivo para brilho (3 em 1).
Se a sua água for dura ou muito dura, é aconselhável acrescentar , em todo o caso, mais sal na respectiva gaveta, para evitar
a formação de manchas brancas na louça ou no tambor da máquina.
Se for utilizar os produtos 3 em 1, não será mais necessário adicionar o aditivo para brilho no específico tanque.
Se desejar uma secagem ainda mais forte, é possível adicionar o aditivo para brilho, prestando atenção de colocar o
regulador no n.º 2.
Em todo o caso, consulte com atenção nas embalagens as instruções do produtor .
Se usar somente estes produtos é normal que os indicadores luminosos do sal e do aditivo para brilho, depois de um
determinado número de ciclos, pisquem permanentemente.
O tanque do aditivo para
Normalmente fica regulado na posição 4.
F
C
Regule a quantidade
de aditivo para brilho
empregada, e
enxugar-se-á melhor.
Se notar gotas de
água ou manchas nas
peças lavadas,
coloque o regulador
em números mais
altos.
Por outro lado, se as
peças lavadas
possuírem listras
brancas, coloque o
regulador em
números mais baixos.
70
MÁQUINA DE LAVAR LOUÇA ARISTON - Instruções para a instalação e a utilização
Page 73

Escolha o programa adequado
ÁQUINA DE LAVAR LOUÇA
M
Cada grau de sujidade tem um próprio
Escolha o programa
programa
Com a lavagem na máquina de lavar louça, terá a garantia
de um ambiente higiénico e de uma limpeza mais segura.
lavagem, obterá com
Sal, aditivo para brilho, a dose adequada de detergente e o
adequado programa: é esta a fórmula para obter resultados
melhores e preservar bem a máquina de lavar louça.
3URJ UDPD
,QWHQVLYR
,QGLFDo}HVSDUD
HVFROKDGHSURJUDPDV
Louça e panelas muito sujas
(não use com peças
delicad as)
'HVFULomRGRFLFOR
Pré-lavagem com água quente 40°C
La va ge m a 6 5 ° C
2 enxaguadas com água fria
Enxa gua da que nt e a 7 0°C
Enxuga r
'HWHUJHQWH
SUpODYDJHP
ODYDJHP
JU
conveniente de água
apropriado para
cada lavagem.
Se escolher o
programa mais
adequado para a
certeza peças
lavadas melhor e
uma utilização mais
e energia eléctrica.
'XUDomRGR
$GLWLYR
SDUD
EULOKR
SURJUDPD
WROHUkQFLD
VHP
HQ[XJDGD
H[WUD
1RUPDO
5 iSL GD
0ROKR
&ULVWD LV
Ciclo para louça e panelas
normalment e s uj a s .
Programa normal diário.
Programa para lavagem
ecológica, com baixos
consumos de energia,
adequado para louça e
panelas normalmente sujas.
Ciclo económico e veloz a
s e r ut iliza do p a ra louç a
pouco suja, logo depois de
usad a . S em enxugad a ,
excepto no caso de
selecção de enxugada extra.
Lavagem preliminar a
aguardar completar a carga
na próxima refeição.
C iclo es pe cia l a s er u t iliza do
para peças mais sensíveis às
altas temperaturas, logo
depois de usadas.
Pré-lavagem com água fria
La va ge m a 5 0 °
Enxa gua da fr ia
Enxa gua da que nt e a 7 0°C
Enxuga r
2 Pré-lavagens com água fria
La va ge m a 5 0 ° C
Enxa gua da que nt e a 6 7°C
Enxuga r
Lavagem breve a 47°C.
Enxa gua da que nt e a 6 2°C
Br eve la vagem fria p ar a imp e dir que
os restos de comida sequem-se na
louça
La va ge m a 5 2 ° C
Enxaguada com água morna a 45°C
Enxa gua da que nt e a 6 5°C
Enxuga r
J U
JU
J U
J U
(com
enxuga da
extra)
'XR:DVK
Delicado no superior para
cristais e copos, enérgico
para panelas no cesto
inferior.
P r é -lavage m fria
La va ge m a 5 2 ° C
Enxa gua da mo r na a 4 5 ° C
Enxa gua da que nt e a 6 5°C
Enxuga r
MÁQUINA DE LAVAR LOUÇA ARISTON - Instruções para a instalação e a utilização
JU
71
Page 74

ÁQUINA DE LAVAR LOUÇA
M
Nunca sem sal
A água de sua casa
A dureza da água varia segundo os locais. Se a água de sua casa for dura, se não a descalcificar, formarse-ão crostas nas peças lavadas. Esta máquina de lavar louça tem um dispositivo para descalcificar,
Para evitar a formação
de ferrugem, deite sal
imediatamente antes de
iniciar um ciclo de
que utiliza sal especial e elimina o calcário da água.
Carregamento do sal.
Utilize sempre sal específico para
máquina de lavar louça.
O recipiente do sal encontra-se
embaixo do cesto inferior, enchao da seguinte maneira:
1. Tire o cesto inferior, desatarraxe
e tire a tampinha do recipiente.
2. É a primeira vez que está a deitar
sal? Primeiramente encha de
água o recipiente (a próxima vez
já não será necessário).
3. Coloque o funil da máquina de
lavar louça na abertura e deite
aproximadamente dois quilos de
sal. É normal sair um pouco de
água do recipiente.
4. Atarraxe novamente a tampinha
com cuidado.
Quando é necessário deitar
mais sal?
É necessário encher de sal o recipiente quando acender-se o
indicador luminoso de falta de sal
"S" .
Depois de ter carregado de sal pela
primeira vez , é normal que o
indicador luminoso de aviso de falta
de sal permaneça aceso ou a piscar
os 5 ciclos seguintes.
Sal inteligente.
Esta máquina de lavar louça
poderá regular o consumo de sal
em função da dureza da água de
sua casa. Desta maneira poderá
optimizar e personalizar o
consumo do sal (nem demais, nem
excessivamente pouco).
Para regular o consumo de sal
realize as seguintes operações:
1.Desatarraxe a tampinha do
recipiente de sal.
2. No gargalo do recipiente há uma
seta (figura): se for necessário,
rode na direcção antiorária
desde a marca "-" até a marca
"+".
Escolha a posição da sete em
relação ao esquema da dureza da
água.
Dureza da água
°dH °fH mmol/l
0 ¸ 10 0 ¸ 17 0 ¸ 1,7 / 0 /
10¸ 25 18 ¸ 44 1,8 ¸ 4,4
25 ¸ 50 45 ¸ 89 4,5 ¸ 8,9 MED 40 40
> 50 > 89 > 8,9
Posição
selector
-
+
Não sabe qual é o
grau de dureza da
água abastecida à sua
moradia? Pergunte à
abastecimento de
lavagem.
Consumo
sal
(gramas/ciclo)
20 60
60 25
empresa de
água da zona.
Auto-
nomia
(ciclos-
\2kg)
Sugestões e conselhos.
Como preservar e proteger
as peças de estimação
■ Quase toda prataria pode ser
lavada na máquina de lavar
louça. Há duas excepções:
prataria antiga e a decorada
com um agente oxidante. A
água quente poderá soltar os
cabos da antiga e apagar os
padrões ornamentais da
segunda.
Nunca coloque prataria em
contacto com outros metais,
para evitar manchar e
escurecer.
Além de ganhar tempo
e evitar canseira, a
máquina de lavar
louça desinfecta as
peças ao lavá-las em
altas temperaturas.
■ Pratos e tabuleiros de prata
devem ser lavados
imediatamente após o uso,
principalmente se tiverem
entrado em contacto com
sal, ovos, azeitonas,
mostarda, vinagre, sumos de
frutas e verduras cozidas.
■ Para peças especialmente
delicadas, utilize a lavagem
específica de que dispõe esta
máquina de lavar louça.
Economizar mais
Uma utilização inteligente dos
electrodomésticos economiza e faz bem ao
ambiente
Carga máxima.
Para optimizar os consumos, use a máquina de lavar
louça possivelmente com plena carga. Se para enchêla, for aguarda um determinado tempo, utilize o ciclo
de molho, evitará a formação de cheiros desagradáveis
e de crostas.
O programa adequado.
Escolha o programa adequado ao tipo de carregamento
realizado. A escolha do programa depende do tipo de
peças a serem lavadas e do grau de sujidade das
mesmas. Para escolher bem, consulte a tabela dos
programas na página 71.
72
MÁQUINA DE LAVAR LOUÇA ARISTON - Instruções para a instalação e a utilização
Page 75

ÁQUINA DE LAVAR LOUÇA
Instalação e mudança
M
Chegou a sua nova máquina de lavar louça
Assim que comprá-la ou para mudá-la para outra moradia, uma instalação bem feita
assegura um bom funcionamento da máquina de lavar louça.
Escolha onde deseja colocar a
máquina de lavar louça, é
possível prende-la dos lados ou
atrás nos móveis vizinhos ou na
parede. Esta máquina de lavar
louça é dotada de tubos para
alimentação e escoamento de
água que podem ser virados
para a direita ou para a
esquerda, para consentir uma
melhor instalação.
Nivelamento.
Depois de posicionar a
máquina, aja nos pés da mesma
e atarraxe-os ou desatarraxeos, em função da altura que
desejar variar, para nivelá-la de
maneira que esteja horizontal.
Assegure-se que não esteja
inclinada mais de 2 graus. Um
bom nivelamento assegurará
um funcionamento correcto da
máquina de lavar louça.
Regulação dos pezinhos
traseiros.
Encaixar a máquina no
apropriado vão, regular em
seguida a altura da mesma,
mediante os parafusos situados
na parte dianteira inferior. Com
uma chave de fenda, girá-los no
sentido dos ponteiros do
relógio para elevar a máquina
de lavar louça e no outro
sentido para abaixá-la.
Ligação da entrada de
água fria.
A ligação do electrodoméstico
à rede d'água deve ser
efectuada exclusivamente
mediante a mangueira de
carregamento fornecido junto
com o aparelho, não utilize
Se a tomada de
corrente eléctrica à
qual for ligar a
máquina não
corresponder à ficha,
troque-a por outra
ficha adequada; não
empregue
adaptadores nem
desviadores, poderão
causar
superaquecimento ou
arder.
tubos diferentes. No caso de
trocas, utilize somente peças
originais.
Ligue o tubo de carregamento
numa entrada de água fria com
boca de rosca de 3/4 gás, tome
cuidado para atarraxá-la
apertada na torneira. Se os
tubos de água forem novos, ou
se tiverem permanecido muito
tempo não utilizados, antes de
realizar a ligação, deixe
escorrer água para certificar-se
que seja límpida e isenta de
impurezas. Sem esta
precaução, há riscos que a
entrada de água entupa-se e
cause danos à máquina de lavar louça.
Ligação da entrada de
água quente.
É possível fornecer à esta
máquina de lavar louça água
quente da rede (se possuir um
sistema centralizado de
esquentador), desde que não
ultrapasse a temperatura de 60°
C.
Neste caso o tempo de lavagem
será aproximadamente 15
minutos mais curto e a eficácia
da lavagem levemente
reduzida.
A ligação da entrada de água
quente deve ser realizada da
mesma maneira que a descrita
para a ligação da água fria.
Segurança contra
alagamento.
Esta máquina de lavar louça é
equipada com um sistema que
pára a entrada d'água no caso
de vazamento no interior da
máquina. Também é equipada
com uma mangueira para
entrada de água que aguenta
pressões muito altas e que no
caso de quebra colorae-se de
vermelho. Para garantir a
segurança no caso de
alagamentos esta mangueira
fica dentro de uma segunda
mangueira externa que por ser
transparente colora-se de
vermelho escuro. É muito importante controlá-la
regularmente e se o a vir de cor
vermelha, já sabe que será
necessário assim que possível
trocá-la. Chame a assistência
técnica autorizada para a
intervenção.
Ligação da mangueira de
escoamento.
Coloque a mangueira de
escoamento num tubo de água
servidas de pelo menos 4 cm.
de diâmetro, ou dentro do lavabo. Evite apertos e curvas
excessivas.
A parte da mangueira por onde sai
a água (a parte solta), deve estar a
uma altura entre 40 e 100 cm. e
não deve estar imersa na água.
A
Ligação eléctrica.
Antes de mais nada, verifique se
os valores da tensão e da frequência
de rede correspondem aos
apresentados na placa de
identificação situada na contra
porta inoxidável da máquina, e
se o sistema eléctrico ao qual
for ligar-se tem capacidade para
a corrente máxima indicada na
placa.
Ligação à terra: segurança
indispensável.
Somente neste ponto coloque
a ficha numa tomada eléctrica
dotada de uma eficiente ligação à
terra (a realização da ligação à terra da instalação é uma garantia de
segurança prevista pela legislação,
certifique-se que a sua instalação
possua uma).
Cabo de alimentação.
Controle periodicamente o cabo de
alimentação; se tiver sofrido danos,
é recomendável mandar trocá-lo
pelo serviço de Assistência técnica
autorizado.
Fita contra condensação.
Para alguns modelos é
fornecida uma fita auto adesiva transparente.
Deve ser grudada do lado
inferior da prateleira de
madeira para protegê-lo contra
a condensação.
Quando não for fornecida,
poderá ser solicitada como
peça acessória aos
revendedores autorizados.
A ficha
a ficha da lava-loiça deve
permanecer acessivel para poder
efectuar operações de manutenção
com segurança.
MÁQUINA DE LAVAR LOUÇA ARISTON - Instruções para a instalação e a utilização
73
Page 76

ÁQUINA DE LAVAR LOUÇA
M
Problemas e soluções
Se houver um problema, leia aqui
Pode acontecer que a máquina de lavar louça non funcione ou funcione mal. Em muitos casos tratam-se de problemas fáceis de resolver sem
precisar chamar um técnico. Antes de telefonar para a assistência técnica, controle sempre estes pontos.
A máquina de lavar louça
não começa a funcionar
■ A torneira da água esteja
aberta?
■ A torneira da água está bem
presa ao tubo?
■ Está a faltar água em casa?
■ A água está a chegar com
suficiente pressão?
■ O tubo está dobrado?
■ O filtro do tubo de
alimentação da água está
entupido?
■ A porta da máquina de lavar
louça está aberta?
A louça e as panelas são
mal lavadas.
■ Colocou a dose certa de de-
tergente?
■ O programa de lavagem
seleccionado é idóneo às
peças colocadas na
máquina?
■ O filtro e micro filtro estão
limpos?
■ Os braços distribuidores
estão presos?
A água da máquina de lavar
louça não se escoa.
■ A mangueira de escoamento
está dobrada?
Na máquina de lavar louça
permanecem depósitos de
calcário ou uma camada
branca.
■ A tampinha do recipiente de sal
está bem fechada?
■ A dose de aditivo para brilho
está bem regulada?
Mensagens de erro
Esta máquina de lavar louça é
equipada com um sistema de
segurança capaz de detectar
eventuais anomalias de
funcionamento. Estas anomalias
são comunicadas por um ou dois
indicadores luminosos "G" a
piscar com frequência rápida.
Depois de ter tomado nota de
quais indicadores luminosos
piscarem, desligue a máquina e
chame a assistência técnica.
Alarme de torneira
fechada
Se tiver se esquecido de abrir a
torneira d'água, a máquina avisará,
durante alguns minutos, com breves
sinais sonoros. Abra a torneira e verá
como a máquina, depois de alguns
minutos, reinicia. Se não estiver presente quando tocarem os avisos
sonoros, a máquina bloqueia-se e os
dois indicadores luminosos 2 e 3
(lavagem e enxaguada) piscarão com
frequência rápida. Desligue mediante o botão On-Off, abra a torneira
d'água e, depois de aguardar
aproximadamente 20 segundos,
ligue a máquina novamente.
Seleccione novamente o programa
e verá que a máquina reinicia.
Alarme dos filtros
entupidos
Se a máquina estiver bloqueada
e estiverem acesos intermitentes
os indicadores luminosos 1 (prélavagem) e 3 (enxaguadas)
significa que o filtro está
entupido por grandes resíduos
de comida. Desligue a máquina,
limpe o filtro com cuidado e, depois
de tê-lo recolocado no lugar, na maneira indicada na pág. 75, ligue-a
de novo. Seleccione novamente o
programa e verá que a máquina
reinicia.
A segurança em sua casa
Alarme por causa de
defeito da válvula eléctrica
de carregamento d'água.
Se lampejar a frequência rápida o
led 2 (lavagem) DESLIGAR E
LIGAR DE NOVO a máquina de
lavar louça depois de um minuto.
Se o alarme permanecer, como
primeira coisa fechar a torneira da
água para evitar alagamentos
depois tirar a corrente e chamar a
assistência técnica.
Verificou tudo, mas a
máquina de lavar louça ainda
não funciona e o problema
persiste sempre?
Chame o centro de assistência
técnica autorizado mais próximo
de sua moradia e lembre-se de indicar-lhe:
o tipo de defeito
a sigla do modelo (Mod. ....) e o
número de série (S/N ....) que
podem ser encontrados na placa
de identificação colocada na parte
lateral da contra porta.
Nunca recorra a
técnicos não
autorizados e recuse
sempre a instalação de
peças de reposição não
originais.
Esta máquina de lavar louça foi fabricada em conformidade às mais severas normas internacionais de segurança. Tutela-se assim
a si e à sua família. Leia com atenção as advertências e as informações contidas neste livrete: fornecem-lhe muitas notícias úteis
sobre a segurança da instalação, na utilização e na manutenção. Para não ter surpresas desagradáveis.
1. Elimine com cuidado o
material da embalagem (siga
as instruções sobre a colecta
separada de lixo do município
de residência)
2. Depois de tirar a embalagem,
verifique se o aparelho está
em boas condições. Se tiver
dúvidas, entre em contacto
com pessoal
profissionalmente qualificado.
3. Esta máquina de lavar louça
deve ser utilizada somente por
adultos e para a lavagem de
louças e panelas de utilização
doméstica, segundo a
instruções escritas neste
manual. Não toque a máquina
com os pés descalços, nem
se estiver com as mãos ou os
pés molhados
4. É desaconselhado recorrer a
extensões e fichas múltiplas.
Se o cabo de alimentação
eléctrica não for do
comprimento adequado,
mande trocá-lo por outro do
comprimento certo e lembrese que não deve estar dobrado
nem sofrer pressões
perigosas.
5. No caso de funcionamento
anormal ou de operações de
manutenção, desligue o
aparelho da rede eléctrica
(tire a ficha da tomada!).
6. Mantenha as crianças
afastadas dos detergentes e
da máquina de lavar louça
quando estiver aberta.
7. Esta máquina de lavar louça
não pode ser instalada ao
aberto, nem mesmo num
lugar protegido por uma
telhado: é muito perigoso
deixá-la exposta à chuva e aos
temporais.
8. Não toque a resistência durante nem logo depois do ciclo de lavagem.
9. Não se apoie nem se sente na
porta aberta, a máquina de
lavar louça poderá tombar.
10. No caso de defeitos, feche a
torneira de entrada de água e
tire a ficha da tomada da
parede. Em seguida tente consultar o capítulo "Se houver um
problema, leia aqui. Se não
conseguir resolver, entre em
contacto com o centro de
assistência técnica.
11. Os aparelhos não mais
utilizados devem ser
inutilizados: corte o cabo de
alimentação e quebre o
bloqueio da porta.
12. Recolha dos
electrodomésticos
A directiva Europeia 2002/96/
CE referente à gestão de
resíduos de aparelhos
eléctricos e electrónicos
(RAEE), prevê que os
electrodomésticos não devem
ser escoados no fluxo normal
dos resíduos sólidos urbanos.
Os aparelhos desactualizados
devem ser recolhidos
separadamente para
optimizar a taxa de
recuperação e reciclagem dos
materiais que os compõem e
impedir potenciais danos para
a saúde humana e para o ambiente. O símbolo constituído
por um contentor de lixo
barrado com uma cruz deve
ser colocado em todos os
produtos por forma a recordar
a obrigatoriedade de recolha
separada.
Os consumidores devem
contactar as autoridades
locais ou os pontos de venda
para solicitar informação
referente ao local apropriado
onde devem depositar os
electrodomésticos velhos.
74
MÁQUINA DE LAVAR LOUÇA ARISTON - Instruções para a instalação e a utilização
Page 77

Cuidados e manuenção
ÁQUINA DE LAVAR LOUÇA
M
Limpeza e manutenção das peças
O conjunto de filtros
Se desejar sempre bons resultados
na lavagem, precisa limpar o grupo
de filtração.
A água de lavagem é limpa tirando
os resíduos de comida e colocada
novamente em circulação
perfeitamente filtrada. Por isto,
depois de cada lavagem, é melhor
tirar os resíduos mais grandes que
ficarem no copo C e do filtro semi
circular A; para tirá-los, puxe a
pega do copo para cima. É
suficiente enxaguá-lo em água corrente.
Uma vez por mês precisa limpar
cuidadosamente o inteiro grupo de
filtração: copo C + filtro semi
circular A + filtro cilíndrico B. Para
tirar o filtro B rode-o na direcção
antiorária.
Para a limpeza empregue uma
escovinha não de metal.
Monte novamente as peças (da
maneira indicada na figura) e
coloque novamente o grupo na
máquina de lavar louça. Coloque-o
no seu lugar a aperte-o para baixo.
A máquina de lavar louça não deve
ser utilizada sem filtros. Se os filtros
não forem colocados direito, a
eficiência de lavagem reduz-se e
pode até causar danos à máquina
de lavar louça.
1
B
2
C
A
De vez em quando, uma
vez por mês, dedique um
pouco de atenção ao
conjunto de filtros e aos
braços distribuidores.
Limpeza dos braços
distribuidores.
Pode acontecer que restos de
comida grudem-se nos braços
distribuidores e tampem os
furos através dos quais a água
deve passar. Controle-os e
limpe-os de vez em quando
(letras F e I Como é feita?).
Mantenha a máquina de lavar louça em forma
Respeite umas poucas regras para assegurar-se ter sempre uma
companheira de trabalho em que pode confiar.
Depois de cada lavagem.
Quando o ciclo de lavagem
terminar, lembre-se sempre de
fechar a torneira da entrada de
água e deixar a porta semi
aberta. A humidade não se
estagnará nem se formarão
cheiros desagradáveis.
Tire a ficha da tomada.
Antes de realizar quaisquer
operações de limpeza ou de
manutenção da máquina,
sempre tire a ficha da tomada.
Assim evitará quaisquer
perigos.
Nada de solventes!
Nada de abrasivos!
Para limpar a parte exterior e
as peças de borracha desta
máquina de lavar louça não é
necessário empregar solventes
nem abrasivos, use somente
um pano molhado de água
morna com sabão.
Se vir manchas na superfície
interior, utilize um pano
molhado com água e vinagre
branca (basta pouca), ou use
um produto específico para a
limpeza de máquinas de lavar
louça.
Vai viajar de férias?
Quando for ausentar-se muito
tempo, é aconselhável realizar
as seguintes operações:
realize uma lavagem com a
máquina vazia;
feche a torneira de entrada
de água;
deixe a porta semi aberta.
Se fizer isto, as guarnições
durarão mais e no interior não
se formarão cheiros
desagradáveis.
Mudança.
No caso de mudança, é melhor
manter o aparelho em posição
vertical. Se for necessário, pode
incliná-lo para a parte traseira.
As guarnições.
Um dos responsáveis pelos
cheiros desagradáveis no
interior da máquina de lavar
louça é a comida estagnada que
permanece nas guarnições.
Bastará limpar de vez em
quando com uma esponjinha
molhada.
Esta máquina de lavar louça não é um moedor
de lixo!
Não se preocupe de tirar até o mínimo resto de
comida da louça e panelas, mas tire os ossos, as
cascas e outros restos que houver, antes de
colocá-las nos cestos. Esvazie dos copos e
chávenas os restos de líquidos.
MÁQUINA DE LAVAR LOUÇA ARISTON - Instruções para a instalação e a utilização
75
Page 78

ÁQUINA DE LAVAR LOUÇA
M
Ariston está sempre
próxima de si
Estamos gratos por nos ter escolhido . Queremos
permanecer sempre próximo de si e do seu
electrodoméstico.
Adira à Garantia Total Ariston
Por 5900$oo, garanta o seu Electrodoméstico por 5 anos.
Esta garantia inclui:
- Mão de Obra
- Peças
- Deslocação dos Seviços técnicos
completamente gratuitos, e nas condições da garantia do 1º
ano,descritas no Certificado incluído no seu electrodoméstico
Para mais informações contactar a nossa
Linha Verde 800 21 22 23.
Assistencia
Li gue para o numero 707 202 707
para saber qual o centro de Assistencia Ariston, mais próximo de si.
Quando pedir uma assistencia, peças ou acessórios, recorde-se de fornecer as seguintes informações:
- natureza da avaria
- A Referência do modelo (Mod..)
e o número de série (S/N)
referidos na etiqueta aplicada na parte posterior da sua máquina.
Peças
Acessorios
76
MÁQUINA DE LAVAR LOUÇA ARISTON - Instruções para a instalação e a utilização
Page 79

Page 80

Viale Aristide Merloni 47
60044 Fabriano (AN) Italy
Tel +39 0732 6611
www.aristonchannel.com
pb-03/2006 - 195046398.03 - Xerox Business Services - DocuTech
 Loading...