How it Works
Log In / Sign Up
Buy Points
How it Works
FAQ
Contact Us
Questions and Suggestions
Users
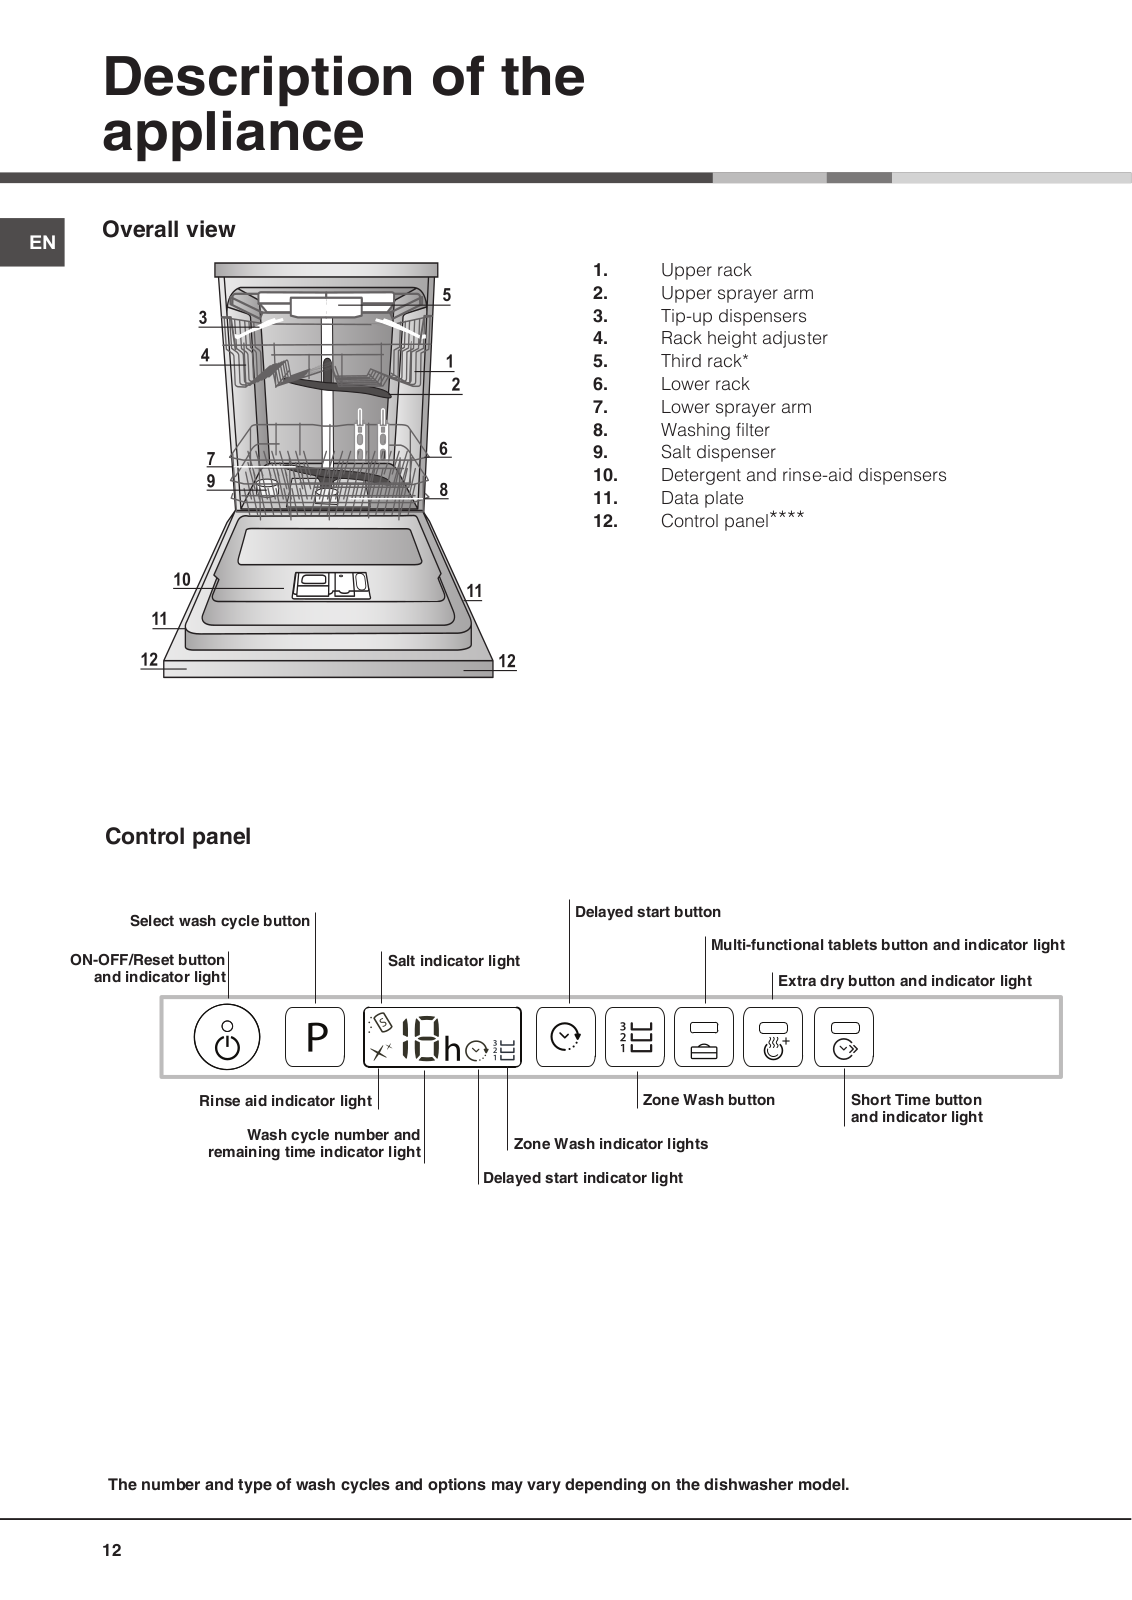
ARISTON
Loading...
L
LS2010
LS-245
2
LS 4510
LS630EX50-60
LSA 2060 ST
LSE 620
2
LSE620 T
LSE622
LSE 720
LSE 730
LSF 6127
LSF 712
LSF 712 AG
LSF 723
LSF7237
LSF 835
LSF 8357
2
LSF 935
2
LSF9357X
LSFC 3M19 X
3
LSFE 1B19 S
3
LSFO 3T223 W X
3
LSI 41
LSI 48 A
LSI 61UK
LSI 68 A
LSI 68 DUO
LSP720
LSP720AX
LSP 733A X
LST 1147
2
LST 11477
2
LST 11677
2
LST 328
LST 329
LST 4167
LST 41677
LST 5337
LST 5397
LST 53977
LST 53977 X
LST 675
LST 680
LSV 46 A
LSV 61
LSV 62
LSV 67 A
LSV 68 DUO
LTB6M019 AUS
LTB 6M116 C TW 60HZ
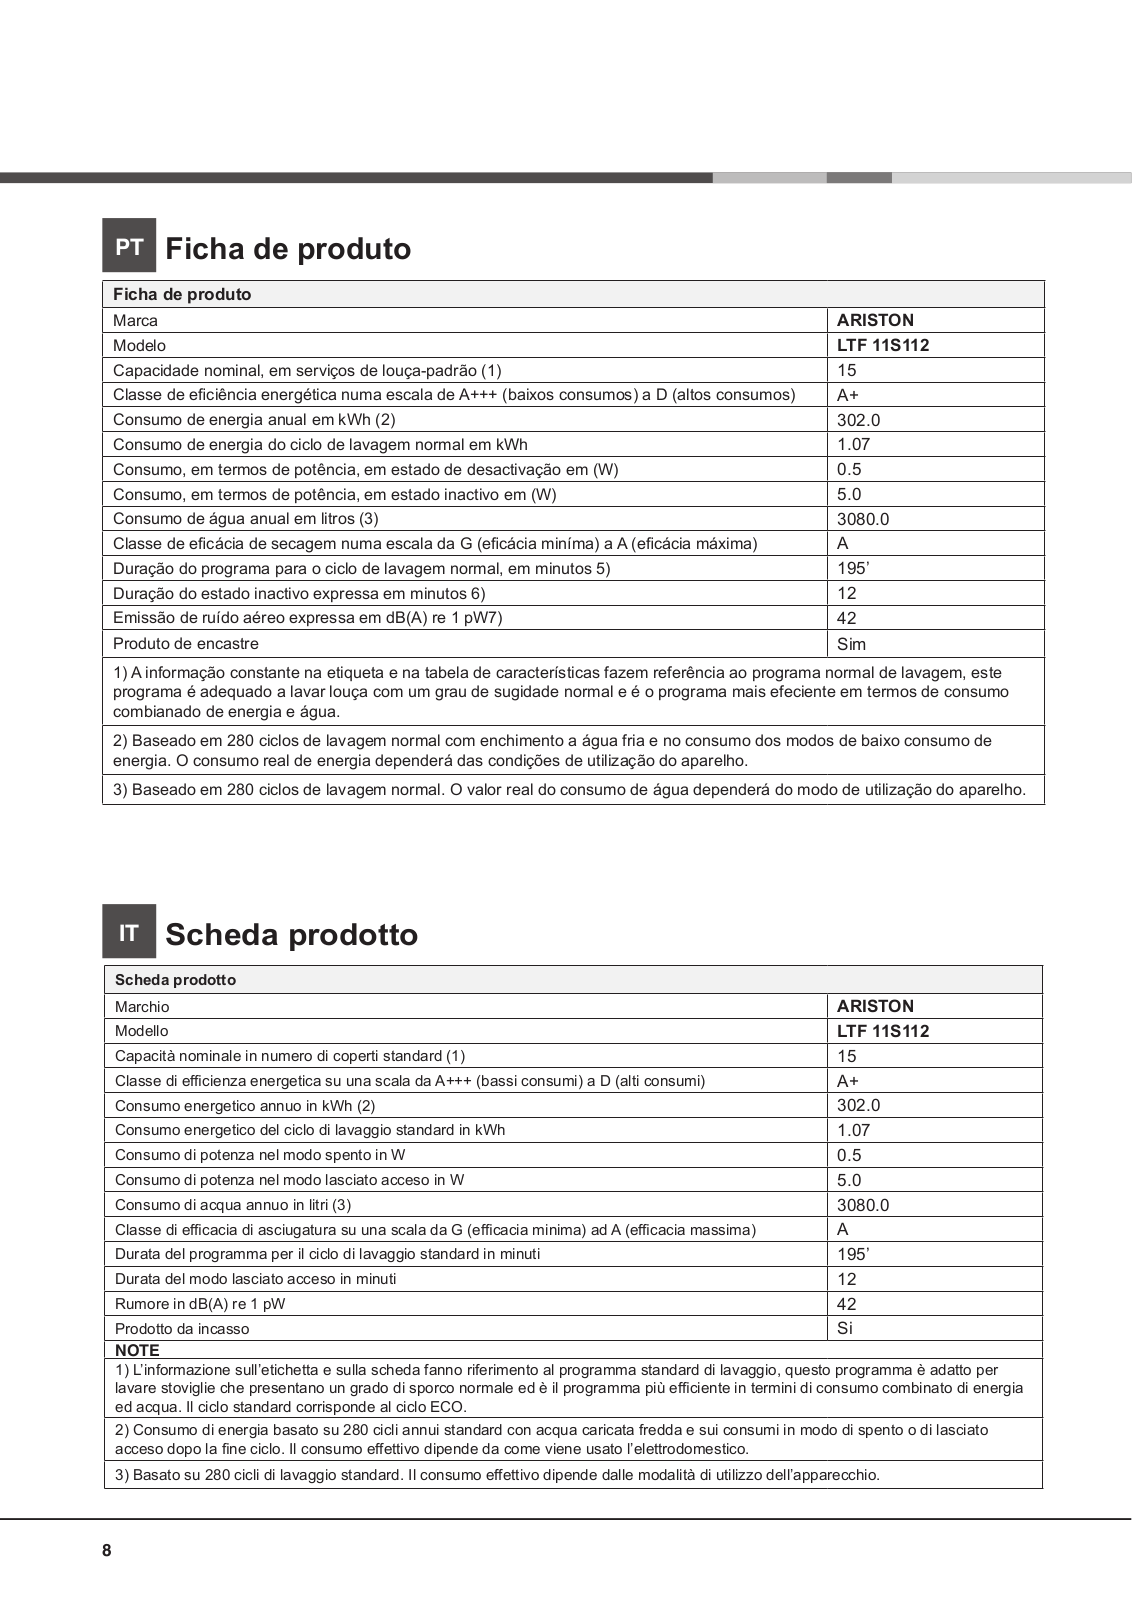
LTF 11S112 AG
LV 460
2
LV 460 A
LV 46 A
LV 62
LV620
2
LV 625
3
LV64
LV640AIX
LV 645 A
3
LV650
LV 650 A
LV66
LV660A
LV661A
LV670
LV 670 DUO
LV 67 DUO
LV 680 DUO
2
LV680DuoIX
LV 68 DUO
LVO 670 DUO
LVO 67 DUO
2
LVO 680 DUO
LVO 680 DUO IX
2
LVO 68 DUO
LVR 645 A
3
LVZ 670 DUO
LVZ 675 DUO
LVZ675 Duo IX
LVZ680Duo
LVZ 680 PLUS
2
LVZ 685 PLUS
2
Lydos Dune R-100V 1.5 kW
Lydos Dune R-50V 1.5 kW
Lydos Dune R-80V 1.5 kW
Lydos Eco 50 3201885 1.8 kW
Lydos Eco 80 3201887 1.8 kW
LYDOS HYBRID
Lydos Hybrid 100 1.2 kW Wi-Fi
Lydos Hybrid 80 1.2 kW Wi-Fi
LYDOS R ABS 100 V
LYDOS R ABS 50 V
LYDOS R ABS 80 V
LZ 700 DUO
LZ 700 PLUS
2
LZ 705 EXTRA
2
LZ 705 IX EXTRA
M
M 3323U-PV1
M 4523U-PV1
Loading...
Loading...
Nothing found
LTF 11S112 AG
User Manual [it]
56 pgs
14.17 Mb
0
Table of contents
Loading...
ARISTON LTF 11S112 AG User Manual [it]
...
ARISTON User Manual [it]
Download
Specifications and Main Features
Frequently Asked Questions
User Manual
Download
Loading...
+
39
hidden pages
Unhide
You need points to download manuals.
1 point = 1 manual.
You can buy points or you can get point for every manual you upload.
Buy points
Upload your manuals
 Loading...