


SHOWBIZ DVD 2.1
ARCSOFT® PRODUCT FAMILY
ArcSoft PhotoStudio
®
Awesome photo editing for the home or
office. Work with layers and enhance your
photos in a number of ways.
Windows (V. 5.5) • Macintosh (V. 4)
ArcSoft PhotoImpression
TM
This all-in-one solution blends powerful
photo editing with project templates and
a slick, easy-to-use interface.
Windows • Macintosh
ArcSoft Panorama Maker
TM
Stitch together photos to create awesome
panoramic images. Make horizontal,
vertical, tiled or 360° masterpieces.
Windows • Macintosh
ArcSoft ShowBiz DVD
®
Take your home videos and turn them into
incredible DVD movies complete with
customized menus and text.
Windows
ArcSoft VideoImpression
TM
Create multimedia presentations by
combining photos and video clips with
audio, text and scene transitions.
Windows
ArcSoft PhotoBase
TM
Your complete multimedia manager.
Sort, share and archive your multimedia
collections in the easiest way possible.
Windows
ArcSoft PhotoPrinter
®
Print multiple photos on a single page
and multiple pages at one time. Edit
and enhance your photos, too.
Windows • Macintosh
ArcSoft PhotoBase - Mobile Edition
TM
Manage, edit and share your photos
wherever you go. Currently available for
Palm OS, Pocket PC and Nokia phone users.
ArcSoft DVD SlideShow
TM
Combine custom slide shows with
video and burn to DVD disc.
Windows
ArcSoft DVD & CD Suite
TM
Organize, store, and share movies, audio
tracks, and other files on DVD or CD.
Super easy to use with tons of options.
Windows
ArcSoft QuickDVD
TM
By far, the coolest, easiest way to make
DVD movies from home videos and prerecorded TV shows. A few clicks and
you're ready to go.
Windows XP MCE
ArcSoft DVD Player
TM
Experience outstanding playback of your
DVD movies, music, and video files through
this incredible multimedia player.
Windows
ArcSoft PhotoMontage Video Edition
®
It's the coolest way to present and share your
pictures. Use thousands of photos to create a
larger, single image.
Windows
ArcSoft Funhouse
®
Put your face on a magazine cover, other
picture or scene. Take your imagination to
the next level.
Windows • Macintosh
ArcSoft Greeting Card Creator
TM
Make your own custom greeting cards
year-round for any occasion using
photos from your own image collections.
Windows • Macintosh
ArcSoft Collage Creator
TM
Piece together awesome collages that
just can't be made by hand. Tons of
tools give you boundless freedom.
Windows
To order, log on to www.arcsoft.com
46601 Fremont Blvd., Fremont, CA 94538, USA • Tel: 1.510.440.9901 • Fax: 1.510.440.1270

- LICENSING AGREEMENT -
The following is a legal software license agreement between you, the software end user, and ArcSoft, Inc.
Carefully read this license agreement before using the product. Using the product indicates that you have read
this license agreement and agree to its terms. If you do not agree to the terms, promptly return the package to the
place it was purchased within 10 days of the date you acquired it for a full refund. Grant of License. This license
permits you to use one copy of the software included in this package on any single computer. For each software
licensee, the program can be in use on only one computer at any given time. The software is in use when it is
either loaded into RAM or installed into the hard disk or other permanent memory.
A multi-seat license permit from ArcSoft is required if the program is going to be installed on a network server for
the sole purpose of distribution by other computers, or if the program is going to be installed on and used by more
than one computer. Copyright. The software contained in this package is owned by ArcSoft and is protected by
United States copyright laws, international treaty provisions, and all other applicable national laws. The software
must be treated like all other copyrighted materials (e.g. books and musical recordings). This license does not
allow the software to be rented or leased, and the written materials accompanying the software (if any) may not be
copied. Limited Warranty. ArcSoft, Inc., warrants that the software contained herein will perform substantially in
accordance with the accompanying documentation. No Other Warranties. ArcSoft disclaims all other warranties,
either express or implied, including but not limited to implied warranties of merchantability and fitness for a
particular purpose, with respect to the software, the accompanying written materials, and any accompanying
hardware (if any).
No Liability for Consequential Damages. In no event shall ArcSoft or its suppliers be liable for any damages
whatsoever (including but not limited to damages for loss of business profits, business interruption, loss of
business information, or any other pecuniary loss) which result from an inability to use this software, even if
ArcSoft, Inc. has been advised of the possibility of such damages. Because some states and jurisdictions do not
allow the exclusion or limitation of consequential or incidental damages, the above limitations may not apply to
you. U.S. Government Restricted Rights. The software and documentation are provided with Restricted Rights.
Use, duplication, or disclosure by the U.S. Government is subject to restrictions as set forth in subparagraph
(c)(1)(ii) of the Rights in Technical Data and Computer Software clause at DFARS 252.227-7013 or
subparagraphs (c)(1),(2), and (3) of the Commercial Computer Software - Restricted Rights at 48 CFR 52.227-19,
as applicable, and any amendments thereto. The manufacturer is ArcSoft, Inc., 46601 Fremont Blvd., Fremont,
CA 94538.
If this product was purchased in the United States, this Agreement is governed by the laws of the State of
California; otherwise, local laws may apply.

ARCSOFT SHOWBIZ DVD 2.1
- TABLE OF CONTENTS -
SYSTEM REQUIREMENTS 2
INTRODUCTION 3
CAPTURING VIDEO 4
EDITING / ASSEMBLING VIDEO CLIPS 5
CREATING A DVD 15
- 1 -

- SYSTEM REQUIREMENTS -
• Windows 98SE/ME/2000/XP (Windows 2000/XP recommended)
• Pentium III 800 MHz or higher (P4 1.6 GHz or higher recommended)
• 400 MB free hard drive space for program installation
• 4 GB+ free hard drive space for video capture and editing
• 128 MB RAM (512 MB DDR RAM recommended)
• 16-bit color display at 1024 x 768
• DirectX 9
• Windows Media Player 9 recommended
• 7200 RPM hard drive recommended
Note: 1 hour of DV video requires 13 GB of hard drive space.
ARCSOFT SHOWBIZ DVD 2.1
- 2 -

ARCSOFT SHOWBIZ DVD 2.1
- INTRODUCTION -
Welcome! Are you ready to learn how to capture, edit, and create DVDs on your computer? Great! We'll walk you
through these three main processes to help you put together and share your own home movies.
Don't forget to consult the built-in Help file--it goes over every button and command found in the program. Here,
we'll go step-by-step through the video capture, edit, and authoring procedures. They may not require the
description of every command, so just be sure to have that handy Help file open whenever you're working on a
project.
Choose where you want to go! (You can also navigate using the links at the top of every page.)
Capture video
•
Edit/assemble video clips
•
Create a DVD movie
•
- 3 -
ARCSOFT SHOWBIZ DVD 2.1
- CAPTURING VIDEO -
The first thing you'll probably want to do before you make your movie is transfer some video from your camera (or
another video device) to your computer. We've made it easy. We'll start from square one. In this walkthrough, we'll
capture from a digital video (DV) camera.
1. Connect your camera to the computer and turn the power on.
2. Launch the program. From the welcome wizard, select "Capture or Edit Video."
3. From the next screen, select "Capture" in the top left corner of the screen.
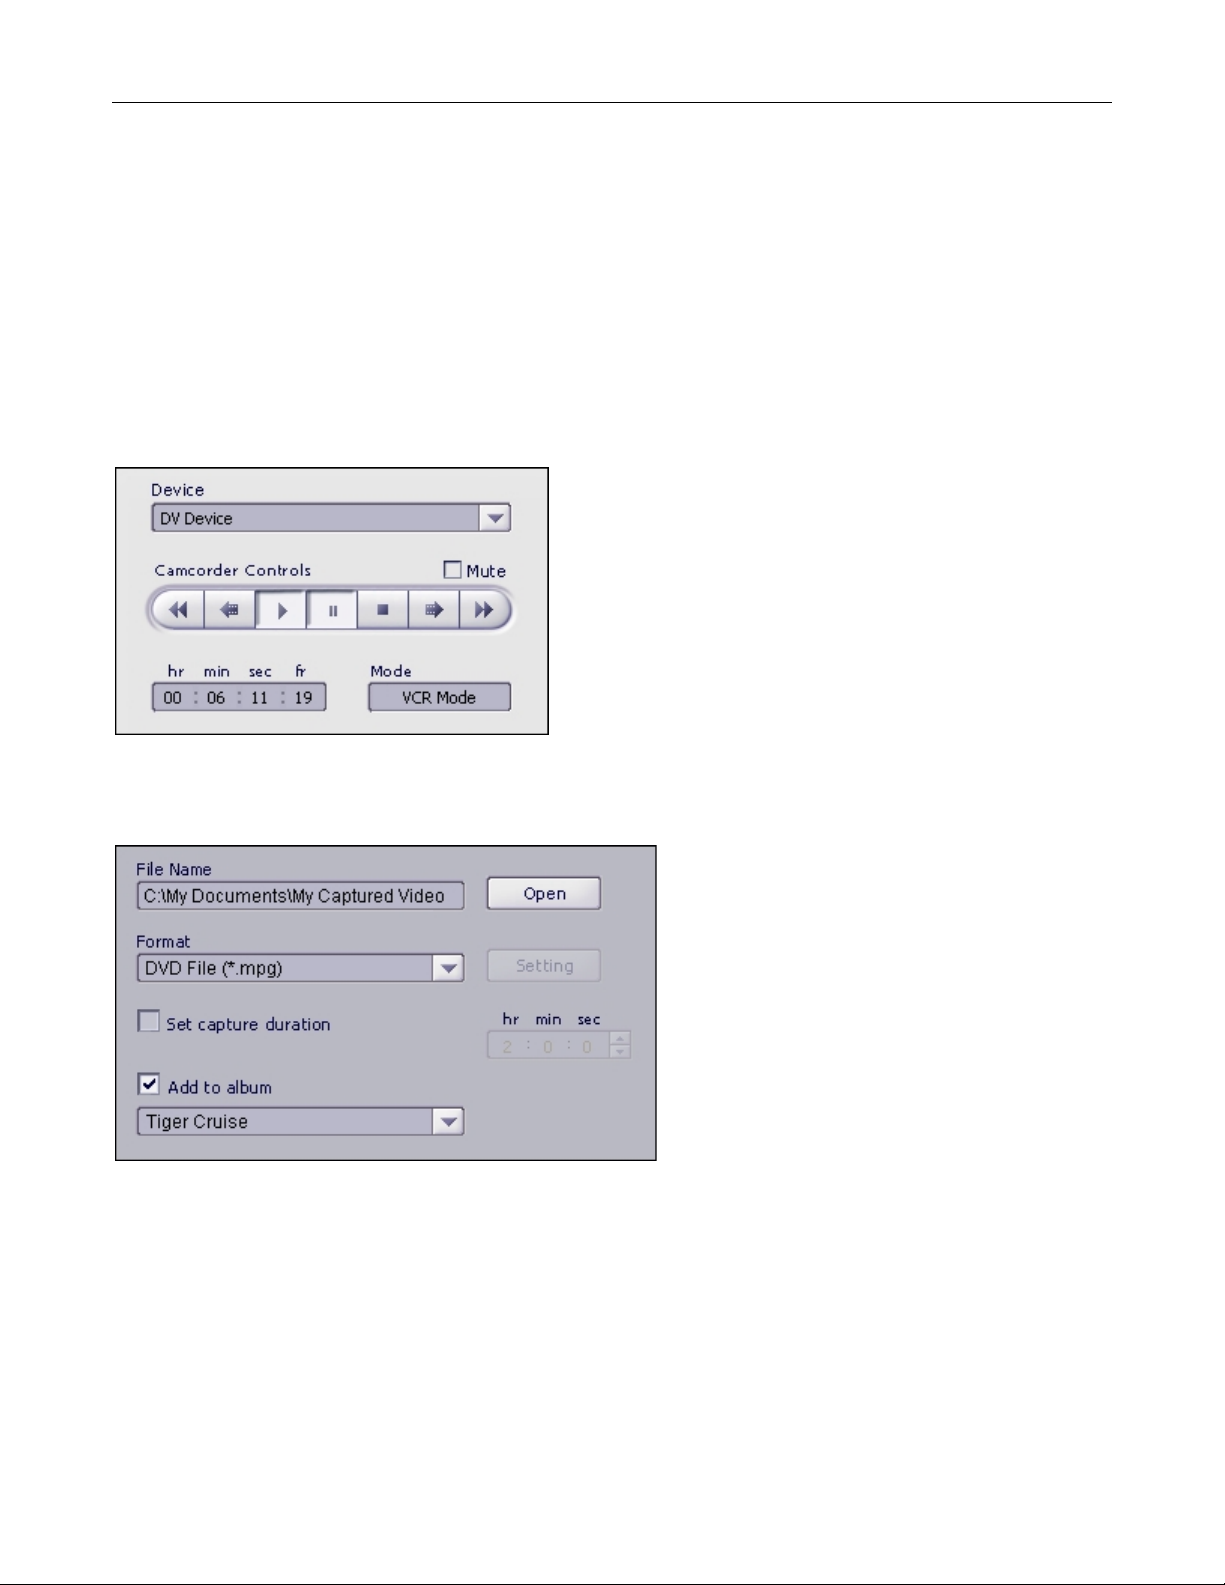
Once within the Capture module, you'll see controls for navigating through the video on your camera:
Use the playback controls to jump to the spot where you would like to begin recording. When you're all set, click
the big red Record button beneath the preview window. You can now define the specifics of your captured file:
Choose the file name and save location
•
Set the file type. If you plan on using the video when you create a DVD, choose the DVD (MPEG-2) file
•
type.
You can optionally enter in the capture time. If you have a really long video and only want to capture a
•
small part, use this option.
You'll almost definitely want to save your captured file to an album. If you plan on doing any type of
•
editing, it's going to need to be in an album. You'll learn more about albums in the Edit section.
- 4 -
ARCSOFT SHOWBIZ DVD 2.1
- EDITING / ASSEMBLING VIDEO CLIPS -
Because the creative possibilities here are limitless, it's a bit difficult to do a step-based walkthough. Instead, we'll
talk about the fundamentals of creating a custom video clip. The heart of the program lies in this section; here's
where you can get really creative by making truly unique and professional-looking videos. Don't forget to use this
tutorial along with the built-in Help file. The Help file details the functions of each button and option.
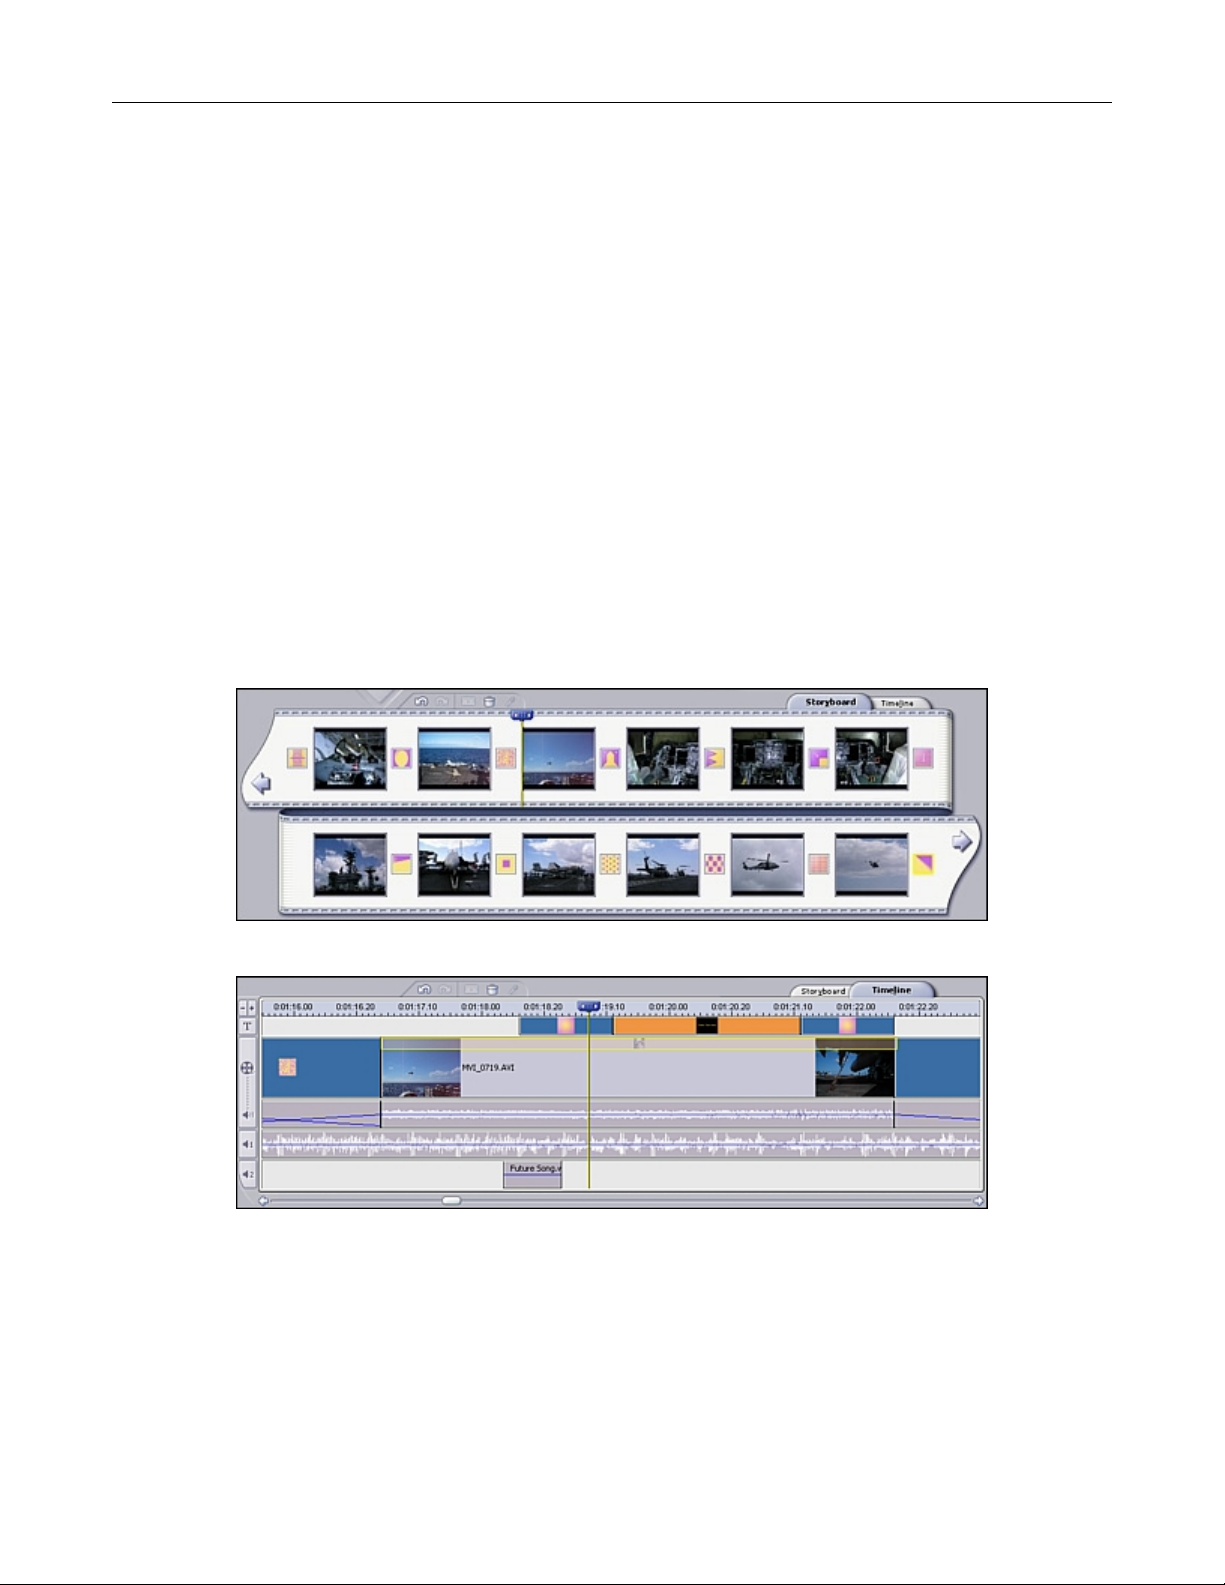
OVERVIEW
Video clips are created by adding content (existing videos, photos, and audio tracks) to a template called the
STORYBOARD. The Storyboard can also referred to as the TIMELINE. The Storyboard/Timeline is basically a
template for the creation of your movie. They represent different views of the same thing. You add still images,
videos, and scene transitions when in Storyboard view. In addition to these, you can add audio, text, and special
effects using the Timeline.
So as you can see, you aren't limited to pictures, video clips, and music. You can also add transitions between
each component that you add (for example, you can have one video clip fade out as the next one fades in), as
well as other special effects. You can add scrolling text for beginning titles or end credits. When you're done, you
video can then be included as a chapter in your final DVD.
The Storyboard displays still images, video clips, and transitions.
The Timeline displays still images, videos, transitions, text, audio, and special effects.
If you want to create a basic video that consists of smaller video clips and still images, stick to the Storyboard. If
you'd like to include additional audio tracks, special effects, and text, you'll need to use the Timeline. Practice
makes perfect! Use the included sample content to play around with the Timeline and all of its options.
When your final video is compiled, all the content is processed into a single video. The video will progress through
each clip and image that you've added.
- 5 -
 Loading...