

Page 1

BDP100
HANDBOOK Blu-ray Disc player
MANUEL Lecteur disque Blu-ray
HANDBUCH Blu-ray Disk-Player
HANDLEIDING Blu-ray DVD-speler
ULTRA HIGH PERFORMANCE 24-BIT DAC
Page 2

Page 3

BDP100
HANDBOOK Blu-ray Disc player
English
ULTRA HIGH PERFORMANCE 24-BIT DAC
Page 4

safety
guidelines
CAUTION: To reduce the risk of electric shock, do not remove cover (or back). No user serviceable parts inside. Refer
servicing to qualied service personnel.
WARNING: To reduce the risk of re or electric shock, do not expose this apparatus to rain or moisture.
e lightning ash with an arrowhead symbol within an equilateral triangle is intended to alert the user to the
presence of uninsulated ‘dangerous voltage’ within the product’s enclosure that may be of sucient magnitude to
constitute a risk of electric shock to persons.
e exclamation point within an equilateral triangle is intended to alert the user to the presence of important
operating and maintenance (servicing) instructions in the literature accompanying the product.
CAUTION: In Canada and the USA, to prevent electric shock, match the wide blade of the plug to the wide slot in the
socket and insert the plug fully into the socket.
CAUTION: Use of any controls, adjustments or procedures other than those specied herein may result in hazardous
radiation exposure.
Important safety instructions
1) Read these instructions.
2) Keep these instructions.
3) Heed all warnings.
4) Follow all instructions.
5) Do not use this apparatus near water.
6) Clean only with dry cloth.
7) Do not block any ventilation openings. Install in
accordance with the manufacturer’s
instructions.
8) Do not install near any heat sources such as
radiators, heat registers, stoves, or other apparatus
(including ampliers) that produce heat.
9) Do not defeat the safety purpose of the polarized or
grounding-type plug.
A polarized plug has two blades with one wider than the
other. A grounding type plug has two blades and a third
grounding prong. e wide blade or the third prong are
provided for your safety. If the provided plug does not t
into your outlet, consult an electrician for replacement
of the obsolete outlet.
10) Protect the power cord from being walked
on or pinched particularly at plugs, convenience
receptacles, and the point where they exit from the
apparatus.
11) Only use attachments/accessories specied by the
manufacturer.
12) Use only with the cart, stand, tripod, bracket, or
table specied by the manufacturer, or sold with the
apparatus.
When a cart is used, use caution
when moving the cart/apparatus
combination to avoid injury from
tip-over.
13) Unplug this apparatus during lightning storms or
when unused for long periods of time.
14) Refer all servicing to qualied service personnel.
Servicing is required when the apparatus has been
damaged in any way, such as power-supply cord or plug
is damaged, liquid has been spilled or objects have fallen
into the apparatus, the apparatus has been exposed to
rain or moisture, does not operate normally, or has been
dropped.
15) Object or liquid entry
WARNING – Take care that objects do not fall and
liquids are not spilled into the enclosure through any
openings. e equipment shall not be exposed to
dripping or splashing. Liquid-lled objects such as vases
should not be placed on the equipment.
16) Climate
e equipment has been designed for use in moderate
climates and in domestic situations.
17) Cleaning
Unplug the unit from the mains supply before cleaning.
e case should normally only require a wipe with a
so, lint-free cloth. Do not use chemical solvents for
cleaning.
We do not advise the use of furniture cleaning sprays or
polishes as they can cause permanent white marks.
18) Power sources
Only connect the equipment to a power supply of
the type described in the operating instructions or as
marked on the equipment.
e primary method of isolating the equipment from
the mains supply is to remove the mains plug. e
equipment must be installed in a manner that makes
disconnection possible.
19) Abnormal smell
If an abnormal smell or smoke is detected from the
equipment, turn the power o immediately and unplug
the equipment from the wall outlet. Contact your dealer
and do not reconnect the equipment.
20) Damage requiring service
e equipment should be serviced by qualied service
personnel when:
A. the power-supply cord or the plug has been
damaged, or
B. objects have fallen, or liquid has spilled into the
equipment, or
C. the equipment has been exposed to rain, or
D. the equipment does not appear to operate
normally or exhibits a marked change in
performance, or
E. the equipment has been dropped or the enclosure
damaged.
Safety compliance
is equipment has been designed to meet the IEC/EN
60065 international electrical safety standard.
is device complies with Part 15 of the FCC Rules.
Operation is subject to the following two conditions:
(1) is device may not cause harmful interference, and
(2) this device must accept any interference received,
including interference that may cause undesired
operation.
E-2
Page 5

Contents
safety ...........................................................E-2
welcome ......................................................E-3
installation .................................................E-4
Placing the unit .....................................................E-4
Power ......................................................................... E-4
The remote control and trigger inputs .........E-4
Interconnect cables..............................................E-4
Making video connections ................................E-6
Making audio connections ............................... E-6
The HDMI interface ..............................................E-7
About HDMI ...........................................................E-7
Connecting using HDMI .....................................E-7
Troubleshooting HDMI .......................................E-7
disc & file formats .....................................E-8
Playable discs ......................................................... E-8
Playable les ...........................................................E-8
Region coding ........................................................ E-8
Network connection ............................................E-9
USB connection .....................................................E-9
basic operation .......................................E-10
remote control ........................................E-11
Controlling the BDP100 ....................................E-12
Advanced controls..............................................E-13
Useful information ..............................................E-14
Device Mode / Source keys .............................E-14
Controlling other devices ...............................E-15
Code blink-back ...................................................E-15
advanced operation .............................. E-16
Disc Information ..................................................E-16
Menus ......................................................................E-16
Soundtrack Selection ........................................E-16
Subtitles ..................................................................E-16
Bonusview & BD-Live.........................................E-17
Playing les ...........................................................E-18
Advanced playback controls ..........................E-19
settings menus ....................................... E-20
troubleshooting ..................................... E-23
audio & video output formats ............. E-24
Audio output format .........................................E-24
Video Output Resolution .................................E-25
ank you and congratulations for purchasing your Arcam FMJ Blu-ray Disc player.
Arcam has been producing specialist hi- and home cinema products of remarkable quality
for over three decades and the BDP100 – which plays Blu-ray Discs, DVD-Video discs and
Audio CDs – is the latest in a long line of award winning home cinema equipment. e design
of the FMJ range draws upon all of Arcam’s experience as one of the UK’s most respected audio
companies and is built to give you years of trouble-free listening enjoyment.
is handbook has been designed to give you all the information you need to install, connect
and use the Arcam BDP100 Blu-ray Disc player. e CR104 remote control handset supplied
with this equipment is also described. Use the contents list shown on this page to guide you to
the section of interest.
We hope that your FMJ Blu-ray Disc player will give you years of trouble-free operation. In the
unlikely event of any fault, or if you simply require further information about Arcam products,
our network of dealers will be happy to help you. Further information can also be found on the
Arcam website at www.arcam.co.uk.
e FMJ development team
customising the CR104 ......................... E-26
Code Learning ......................................................E-26
Creating Macros ..................................................E-27
Volume punch-through ...................................E-27
Key Mover ..............................................................E-27
Mode Mover ..........................................................E-28
Locking/Unlocking .............................................E-28
Mode key IR punch-through ..........................E-29
Resetting the CR104 ..........................................E-29
Command summary ..........................................E-29
Device codes .........................................................E-29
IR commands ..........................................E-30
specications ..........................................E-31
Radio interference ..............................................E-31
Laser radiation......................................................E-31
software licencing ................................. E-32
product guarantee ................................ E-33
device code tables .....................................34
welcome
English
E-3
Page 6

installation
Arcam’s BDP100 provides class-leading sound quality from
Blu-ray Discs, DVD-Video discs and compact discs.
e BDP100 has a state-of-the-art Delta-Sigma DAC
(Digital-to-Analogue Converter) which provides audiophile
sound quality for video and audio discs.
e BDP100 is supplied with the CR104 ‘universal’ remote
control, which is simple to use and can control up to eight
audio devices – such as an amplifer, television or Personal
Video Recorder.
e high performance BDP100 Blu-ray Disc player is
designed to truly bring your movies and music to life.
Placing the unit
< Place the BD player on a level, rm surface,
avoiding direct sunlight and sources of heat or
damp.
< Do not place the BD player on top of an amplier
or other source of heat.
< Do not place the BD player in an enclosed space
such as a bookcase or closed cabinet unless there
is good provision for ventilation. e BD player is
designed to run warm during normal operation.
< Do not place any other component or item on
top of the BD player as this may obstruct airow
around the unit, causing the BD player to run hot.
< Make sure the remote-control receiver (next to
the display on the front panel) is unobstructed, or
remote control will be impaired.
< Do not place your record deck on top of this
unit. Record decks are very sensitive to the noise
generated by mains power supplies which will be
heard as a background ‘hum’ if the record deck is
too close.
Power
e BD player is supplied with a moulded mains plug
already tted to the lead. Check that the plug supplied
ts your supply – should you require a new mains lead,
please contact your Arcam dealer.
If your mains supply voltage or mains plug is dierent,
please contact your Arcam dealer immediately
Push the IEC plug end of the power cable into the
socket on the back of the BD player, making sure that it
is pushed in rmly. Plug the other end of the cable into
your mains socket and, if necessary, switch the socket
on.
The remote control and trigger
inputs
e REMOTE IN input can be used to pass RC5 codes
(listed on page E-30) to the BDP100 if it is installed in a
position, or a system, where infrared cannot be used. If
this is required, please contact your dealer for further
information.
e
TRIGGE R IN input can be used to switch the BDP100
in and out of stand-by. Connecting the trigger output of
your Arcam amplier (or other compatible device), will
cause the BDP100 to come out of stand-by automatically
when the amplier is switched on, returning to stand-by
when the amplier is switched o. Please see your
amplier handbook for further information.
In normal use there is no need to make any connections
to these inputs.
e remote control input requires a mono 3.5mm
jack, with the tip active and the sleeve grounded.
e remote control signals must be in modulated
RC5 format (at 36kHz), with a voltage level of
between 5V and 12V.
RS232 input is for optional connection to a home
e
automation system or a computer. Various third-party
sytems are available providing sophisticated control
over all your entertainment devices using touch screens
etc. Contact your dealer or installer for further details.
e technical details of the remote control protocol
are available from Arcam on request (email support@
arcam.co.uk).
Interconnect cables
We recommend the use of high-quality screened cables
that are designed for the particular application. Other
cables will have dierent impedance characteristics
that will degrade the performance of your system (for
example, do not use cabling intended for video use to
carry audio signals). All cables should be kept as short as
is practically possible.
It is good practice when connecting your equipment to
make sure that the mains power-supply cabling is kept
as far away as possible from your audio cables. Failure to
do so may result in unwanted noise in the audio signals.
E-4
Page 7

Power inlet
Connect the correct
mains cable here.
Analogue audio output
Connect these to your amplier’s CD (or other
line-level) input using suitable high quality
interconnect cables. Ensure that the le and
right audio outputs from the BD player are
connected to the same le and right inputs on
your amplier.
12V trigger input
is socket allows the BDP100 to be switched
in and out of stand-by mode by an amplier
(or another item of AV equipment) with a
12V TRIG OU T function. See page E-4.
Coaxial digital output
Use this socket if you are using an
AV receiver with a coaxial digital
input. Connect to the digital input
using a suitable 75Ω screened cable.
CAUTION: Never connect
the digital output socket to a
conventional audio input.
Composite video output
Connect this output to your
display if the display does not
support any other connection
types.
USB connection
Insert USB ash memory
devices here. USB memory can
be used to save downloaded
content. e BDP100 can also
play certain digital les stored
on USB memory drives (see
page E-8).
English
RS232
is connection allows for remote
control from a third-party home
automation system or computer.
See page E-4 for more information.
is allows remote-control signals
to be received by the BDP100
if the remote sensor is covered
(or otherwise not ‘visible’ to the
remote-control).
See page E-4 for more information.
Remote in
Optical digital output
Use this socket if you are
using an AV receiver with an
optical digital audio input.
Zone 2 audio output
Use this analogue output to
provide audio for use in your
AV receiver’s Zone 2. It can also
be used to connect a recording
device or headphone amplier.
Component video output
If your display does not support
HDMI but has a component input,
connect it to this video output.
E-5
Network connection
Connect this socket to a port on your
network router using an Ethernet
patch cable (see page E-9). An internet
connection enables interactive
content for BD-Live discs (for setup
details see “Network” on page E-22).
HDMI digital video output
Connect this output to your display
or AV receiver if available for the best
digital video and audio connection
(see. page E-7 for details).
Page 8

Making video connections
To view the pictures from the BD player you need to connect one of its video outputs to your display device (TV,
monitor, projector, etc.) or AV receiver (such as the Arcam AVR600).
e BDP100 has three video output options, described below. You need only use one type of video from the list;
choose a type that your display device or AV receiver supports. If your equipment does not support any of the above
connection types then you will be unable to use it directly with the BDP100 and a video converter device may be
required. In this case, please contact your dealer for further assistance.
AV receivers and other video processing devices may be connected between the BDP100 and your display. Ensure
that all the equipment supports the type of video signal you intend to use. For instructions on how to connect AV
equipment, consult the manual for that equipment.
HDMI DIGITAL VIDEO
e HDMI connector oers uncompressed digital video and audio transmission between
the BDP100 and the display device, and provides the highest quality output. Generally, it
is also the easiest connection type to congure.
To use this video connection, you will require a HDMI or HDMI/DVI cable between the
BDP100 and your display device or receiver. See page E-7 for further details.
COMPONENT VIDEO
Use three 75 phono cables to connect the Component Y, Pb, Pr outputs of the BD
player to the Y, Pb, Pr inputs of the display device. Ensure that the cables are suitable for
video use and that they are approximately the same length.
If your television is capable of accepting a progressively scanned (de-interlaced) video
signal, you may wish to use the progressive video output from the BDP100. If you are
unsure whether your display device can accept progressive video, please refer to its
instruction manual or consult your dealer.
Making audio connections
e BDP100 oers a number of alternatives for connecting audio. e connection type to use depends on the rest of
your system; chose the type most appropriate to your amplier.
If you want to listen to audio through... ...we recommend the following:
Your television
<
How you listen to audio through your TV depends on the inputs it has and your
video connection:
HDMI: If you are using an HDMI connection (not DVI), this will carry both
<
audio and video. No further connection is required.
Digital Audio (Coaxial or Optical): If your TV has Digital Audio inputs on
<
Coaxial or Optical connectors, connect the appropriate digital audio lead
between the TV input and the appropriate BDP100 digital output. Do not
make a connection between the BDP100 and a TV’s Digital Audio output.
Stereo phono: If your TV has stereo phono inputs, follow the instructions
<
below for a stereo amplier.
Your stereo amplier
<
If you wish to listen to audio from your player through a stereo amplier, then use the
stereo analogue outputs. ese outputs provide a stereo down-mix of the source material.
Using a stereo phono cable of a suitable length, connect the outputs labeled
the le and right inputs (respectively) for DVD or CD on your amplier.
Your surround-sound receiver
<
Connect the HDMI output to your receiver (for audio and video) if the receiver supports
audio over HDMI. e HDMI connection supports all possible audio formats including
Dolby TrueHD, DTS Master Audio and multichannel PCM.
If your receiver does not support HDMI audio, connect one of the Digital Audio outputs
(Optical or Coaxial) to the ‘Blu-ray’, ‘BD’ or ‘DVD’ input of your receiver. ese digital
outputs provide PCM, Dolby Digital, DTS or MPEG multi-channel audio, depending on
the source material. e BDP100 can also be set to re-encode all audio to DTS (“Bitstream
Mixed”) (see “Audio” on page E-21). is option provides the best surround sound quality for
Digital Audio connections.
You may also wish to connect the stereo analogue audio outputs to the CD input on your
receiver, for listening to CDs. is will allow the BDP100’s audiophile digital-to-analogue
circuitry to be utilised, for the best stereo sound quality.
ZONE 1 AUDI O to
COMPOSITE VIDEO
If your display device oers only a composite input (sometimes labelled CVBS or just
‘video’), connect this to the
cable suitable for video use. Note that a composite video connection gives the lowestquality output; if your display device supports other video connection types, we advise
that those are used instead.
COMPOSI TE video output of the BD player using a 75 phono
E-6
Using two video connections simultaneously
It is possible to use two video connections simultaneously (routing one connection to a
second room or display, for example). If you wish to do this, please read these notes:
e Composite video output is always active.
<
It carries interlaced output at all times.
e Component video output is always active.
<
It can be set to carry either interlaced or progressive-scan output.
e HDMI output is active only if a compatible display is detected by the BDP100.
<
It can be set to carry either interlaced, progressive-scan or high-denition output.
Page 9

The HDMI interface
If you have a HDMI- or DVI-equipped monitor or
display, you can connect it to the BDP100 using a HDMI
cable. e HDMI connector carries uncompressed
digital video, as well as digital audio.
About HDMI
HDMI (High Denition Multimedia Interface) supports
both video and audio on a single digital connection
for use with Blu-ray Disc players, digital TV, set-top
boxes, and other AV devices. HDMI was developed to
combine the technologies of High-bandwidth Digital
Content Protection (HDCP) and the Digital Visual
Interface (DVI) in one specication, with the addition
of transmission of digital audio information; HDCP is
used to protect digital content transmitted to DVIcompliant displays.
HDMI has the capability to support standard or
high-denition video, together with stereo or multichannel surround-sound audio. HDMI features include
uncompressed digital video, one connector (instead of
several cables and connectors), and communication
between the AV source and AV devices.
Connecting using HDMI
Use a HDMI cable to connect the HDMI socket on
this player to a HDMI socket on a compatible display
device or receiver. e arrow on the cable connector
body should be face up for correct alignment with
the connector on the BDP100. If the BDP100 video
resolution has been congured to ‘HDMI Auto’, then the
BDP100 will congure its video output automatically to
match the capabilities of the attached HDMI device.
NOTE: A HDMI connection can be made only with
HDMI or DVI-equipped components compatible
with both DVI and HDCP. Note that if you choose
to connect to a DVI device, you will need an adaptor
(HDMI to DVI) to do so; a DVI/HDCP connection,
however, does not support audio signals.
If you require further information on the
possibilities for connecting your BDP100 to your
DVI/HDMI equipped display device, please contact
your Arcam dealer.
Troubleshooting HDMI
Problems with video
No video (blank screen)
Check that the HDMI cable is connected correctly at
<
both ends. If an HDMI-equipped A/V receiver is in
use, try connecting the BDP100 directly to the display
device, in order to isolate where the fault may lie.
Check that the display device is set to display the
<
HDMI input (i.e., has not been set to some other
video input, instead).
Check that the HDMI input of the receiver and/or
<
display device is enabled. See the user handbook of
the connected device for details on doing this.
Using an alternative video display device (e.g.,
<
connected via the composite video out), check that
video is output.
Consult the user handbook of the display device to
<
ensure that it can handle the output formats provided
by the BDP100. e BDP100 can provide the
following:
720 x 480p (NTSC progressive scan) 1280 x 720p
720(1440) x 480i (NTSC interlaced) 1920 x 1080i
720 x 576p (PAL progressive scan) 1920 x 1080p
720(1440) x 576i (PAL interlaced)
At least one of these standards must be supported by
the connected device in order for it to work with the
BDP100.
No video (random noise)
Random noise will be displayed if the content-protection
algorithm fails to authenticate the attached device. is will
occur, for example, if a DVI device that does not support
HDCP (such as a computer monitor) is connected to the
BDP100.
To attempt to isolate this problem, remove all discs from the
BDP100, then power-o both the BDP100 and the connected
display device. Switch the display device on, then the BDP100
– at this point, the idle logo of the BDP100 should be shown on
the display device. If this is not the case, please check the items
listed above for a blank screen.
If the noise appears when a copy-protected disc (Blu-ray/DVD)
is played, then it is the authentication that is failing. Please
contact your dealer for further information.
Problems with audio
e type of audio provided by the HDMI connector
depends on the conguration of the BDP100 (see
‘Audio Setup’ on page E-21). Choose a setting according
to the capabilities of your audio system. Note that
pure DVI devices (connections requiring a HDMI to
DVI converter cable) do not support audio via this
connection.
English
E-7
Page 10

disc & file
formats
Playable discs
e player supports the following disc types:
Blu-ray Disc
DVD-Video
DVD-R
DVD-RW
NOTE
< Only BD-RE/-R, DVD-R/-RW and
CD-R/-RW discs recorded with UDF or
ISO9660 format can be played back.
< is unit supports Ver 2.0 BD-ROM, Ver 3.0
BD-RE and Ver 2.0 BD-R.
< Unnalized BD-RE/-R, DVD-R/-RW and
CD-R/-RW discs cannot be played back.
< Some 8 cm BD-REs/8 cm BD-Rs cannot be
played on this unit.
< When a BD-Java title is played, loading may
take longer than a normal title, and some
functions may perform slowly.
< When an Audio CD recorded in DTS-ES
or Dolby Digital EX is played, noise may be
heard.
Unplayable discs
Any disc type not listed is not supported by the
BDP100. Do not attempt to play an unsupported
disc.
Some BD-RE/BD-R, DVD-RWs/DVD-Rs or
CD-Rs/CDRWs cannot be played due to incomplete
disc nalization, poor recording quality or physical
condition of the disc, incompatible characteristics of
the recording device or authoring soware, etc. Try
recording the disc at a lower speed, or try a dierent
brand of media.
See the operating instructions supplied with your
recording device or soware for more information.
Playable files
e player supports the following le types:
< MP3 (“.mp3”)
Sample rate: 44.1kHz, 48kHz
Bit rate: Up to 320kbps.
ID3 tags are not supported.
MP3i and MP3 Pro are not supported.
< WMA (“.wma”)
Sample rate: 44.1kHz, 48kHz
Bit rate: Up to 192kbps.
WMA tags are not supported.
< JPEG (“.jpg, .jpeg”)
Maximum resolution : 4,272x2,848 pixels.
JPEG format images stored in progressive format
cannot be played back.
< AVI (“.avi”)
Playable codec : Xvid
Maximum size of image : 1920 x 1080@30 fps
< WMV (“.wmv”)
Playable codec : WMV9
Maximum size of image : 1920 x 1080@30 fps
Region coding
Blu-ray Disc players and Blu-ray or DVD Video discs
are assigned region codes according to the region in
which they are sold. If the region codes do not match,
the disc will not play.
Blu-ray Disc
region code
A + B + C All areas
DVD region
code
All All areas
Area
A North America, Central America,
South America, Korea, Japan, Taiwan,
Hong Kong and South East Asia
B Europe, Greenland, French territories,
Middle East, Africa, Australia and
New Zealand
C India, China, Russia, Central and
South Asia
Area
1 North America
2 Europe, Japan, Middle East, Egypt,
South Africa, Greenland
3 Taiwan, Korea, the Philippines,
Indonesia, Hong Kong
4 Mexico, South America, Central
America, Australia, New Zealand,
Pacic Islands, Caribbean
5 Russia, Eastern Europe, India,
most of Africa, North Korea, Mongolia
6 China
CD-Audio
CD-R
CD-RW
NOTE
< Characters except “A~Z”, “a~z”, “0~9”, “ - “
may be not be displayed.
< is unit supports multi-session discs. Some
multisession discs may take a long time to
load and some may not be loaded at all.
< For some les, it may not be possible to use
certain functions during playback.
< It may not be possible to play some les, even
if they have the extension of a le playable on
this player.
< Files protected by DRM (Digital Rights
Management) cannot be played.
Symbols indicating disc will play in North America:
Blu-ray Discs: DVDs:
Symbols indicating disc will play in Europe:
Blu-ray Discs: DVDs:
E-8
Page 11

Network connection
BD-Live discs can enable the downloading of extra
content from the Internet. To enjoy on-line content,
connect the Network socket of the BDP100 to a LAN
port on your network router using an Ethernet patch
cable (available from a computer supplies retailer).
A local network with Internet connection is required. If
you do not connect to the Internet through a router (e.g.
you connect a single computer directly), please contact
your Internet Service Provider or an IT professional
regarding setting up a home network.
NOTE
< When the player is powered on with no
network congured, a pop-up is shown
on-screen with an option to press the
function key on the remote control to access
network settings. Pressing RED will navigate
directly to the Network Settings menu. Please
refer to page E-22 for details.
< Remember to press the
in order to access the red button.
u
key followed by
S
RED
USB connection
USB memory devices (ash drives) can be used for
media playback and are necessary for storage of
downloaded BD-Live content. To enjoy BD-Live
content, the following specication is recommended:
• Capacity 2GB
• Formatted FAT32
• USB2.0 high speed (480Mbps)
Connect the USB device to the USB socket on the rear
of the unit.
Arcam BDP100
English
LAN
Internet
Router
USB ash drive
E-9
Page 12

basic
operation
Introduction
‘Basic use’ explains how to play a Blu-ray Disc (BD),
DVD, CD or other type of disc. Note that it may be
necessary to congure your player correctly for your
system before optimum – or any – playback can be
achieved. Player conguration is described beginning
on page E-20.
More sophisticated features – such as special playback
modes and programming jumps and playback sequences
– are described in the “advanced operation” section,
later in this handbook.
Switching on
Switch the unit on by pressing the
status LED glows green when the unit is powered up and
red when in stand-by mode. e remote control is used
to enter and exit standby mode. If the POWER button is
pressed (or power is removed) whilst in standby, the
unit will enter standby mode when power is re-applied.
Note that the remote control sensor is located on the
right-hand side of the display window. Do not obstruct
this or the remote control will not work.
POWER button. e
Loading a disc
Press
and place the disc on the tray, with the playback side
facing down (some discs are double sided, in which case
the side labelled ‘side A’ should face up to play side A).
Press
loads aer a pause of a few seconds.
Playing a disc
A disc may take some time to load once the tray is
closed. When the ‘Optical Disc Autoplay’ setting is set
to On (default setting), playback will automatically start.
(For details, refer to “Optical Disc AutoPlay” on page
page E-22).
If Autoplay is not set, the player’s Main Menu will
appear on your TV. Use the cursor keys
disc, then press O to start playback.
Some titles begin by displaying a menu. Select the menu
item ‘Play movie’ (or similar) using the cursor pad, then
press
For discs that do not play automatically, press
the front panel or press 4 on the remote control.
on the front panel (or 1 on the handset)
</1
on the front panel to close the tray. e disc
</1
to select the
OK to start playback.
4/ ;
on
ULTRA HGH PERFORMANCE 24-BIT DAC
Fast play
Press
or 7 on the front-panel or remote control to
8
play fast forwards or backwards. e following speeds
for fast playback are available: x2, x4, x8, x16, x32, x64
and x128 (depending on disc type). Press the button
repeatedly to cycle through the dierent speeds. To
resume normal playback speed, press PLAY.
Skipping chapters/tracks
To skip chapters (or tracks on a CD), press
When skipping back, the rst button press takes you to
the beginning of the current chapter. Pressing the button
again takes you to the start of the previous chapter.
Pausing playback
Press
control to pause playback. To resume playback, press 4/
;
Stopping playback
Press the
remote control to stop playback.
When playing a BD/DVD, pressing
a ‘resume stop’. If you now press 4, playback resumes
from the point it was stopped.
If you press
control twice, this is a ‘complete stop’, and playback
resumes from the beginning of the disc.
on the front panel or
4/ ;
on the front panel or
button on the front panel or
</1
on the front panel or
</1
;
on the handset.
4
on the remote
or 0.
/
on the
<
once performs
<
on the remote
<
NOTE
When you press a button, if the unit does not accept
its operation, appears on the TV screen.
Operations are occasionally unacceptable even if
is not displayed.
Invalid operation may occur as expected if :
< e region codes of the unit is dierent from
that of the disc and playback will not be
allowed.
< e parental control is set to prevent
operation.
(For details, refer to "Parental Control" on
page E-21.)
< BD/DVD Video operations and functions
may be dierent from the explanations in
this manual and some operations may be
prohibited due to disc manufacturer’s settings.
E-10
Page 13

remote
control
e BDP100 is supplied with the CR104 universal
remote control.
Using the remote control
Please keep in mind the following when using the
remote control:
< Ensure there are no obstacles between the
remote control and the remote sensor on the
front panel. e remote has a range of about 7
metres. (If the remote sensor is obscured, the
IR in remote control input jack on the rear
panel is available. Please consult your dealer
for further information.)
< Remote operation may become unreliable if
strong sunlight or uorescent light is shining
on the remote sensor of the unit.
< Replace the batteries when you notice a
reduction in the operating range of the
remote control.
Inserting batteries into the
remote control
1. Open the battery compartment by pressing
the button on the back of the handset.
Notes on batteries:
Incorrect use of batteries can result in hazards
<
such as leakage and bursting.
Do not mix old and new batteries together.
<
Do not use non-identical batteries together –
<
although they may look similar, dierent batteries
may have dierent voltages.
Ensure the plus (+) and minus (-) ends of each
<
battery match the indications in the battery
compartment.
Remove batteries from equipment that is not
<
going to be used for a month or more.
When disposing of used batteries, please comply
<
with governmental or local regulations that apply
in your country or area.
English
2. Insert four ‘AAA’ batteries into the battery
compartment – two facing the top of the unit,
and two facing the end, as in the diagram.
3. Lower the end cap onto the plastic locating
plate in the handset. is acts as a hinge, and
you can now push the end cap rmly into its
locked position with a click.
E-11
Page 14

Controlling the BDP100
e CR104 is a sophisticated ‘universal’ remote control
that can control up to eight devices – including the
BDP100. As it’s a ‘learning’ remote, it can copy almost
any function from an existing single-device remote.
You can also program the CR104 to issue a sequence of
commands (‘macros’) from a single button press.
Select the source key rst
Remember to select a source key before pressing
command buttons – commands vary depending on the
source selected.
To operate the BDP100 from the remote, rst press the
BD source button.
AMP
AVSAT
PVR VCR
TUN
CD
DISP (display)
Press to cycle through the front panel display’s
brightness options (dim to bright, o).
Source selection and handset conguration
BD
BD input/BD controls
SAT
Satellite decoder input/SAT controls
AV
Television (sound) input/AV controls
TUN
Radio tuner input/TUN controls
AMP
Arcam amplier
PVR
Personal Video Recorder input/controls
VCR
Video Cassette Recorder input/controls
CD
CD player input/CD controls
Press the relevant button once to select input and
recongure the handset.
Press and hold the button until the power LED blinks
once if you wish to recongure the handset without
changing the input.
Navigation buttons
Arrow buttons allow navigation around the settings
menus on the BDP100 and disc menus.
Conrm a selection by pressing
OK.
On/Stand-by
is allows the BDP100 to be put into and taken out of
stand-by remotely.
Numeric keys
Used for data entry. Also gives direct access to
individual tracks on audio CDs.
RND
DISP
SHIFT
BD
AMP
T
RND
STATUS
SAT
PVR
iPOD
AV
TUN
VCR
CD
Toggles random (‘shue’) play of chapters/tracks on
and o.
Press
SHIFT followed by RND to cycle through repeat play
options (chapter, title, disc, etc.).
STATUS
Toggles the disc information display.
Press
SHIFT followed by STATUS to activate or deactivate
24p mode (supported discs and TVs only).
MENU
Activates the BD ‘popup’ menu or the DVD disc menu.
MODE
is button activates the Picture-in-Picture Secondary
Video function, where available.
MUTE
Press once to mute an Arcam amplier. Press again (or
use
+/ volume) to un-mute.
VOLUME +/–
Adjusts the volume of a compatible amplier.
OPEN
Opens and closes the disc tray
SETUP
Press
SETUP to access the system settings menu.
E-12
MODE
SETUP TITLE AUDIO SUBT
23425
CR104
MENU
RTN
U
SRCH
RTN
Navigates to the previous menu.
0 /
Press to skip backwards to the previous track(0) or
forwards to the next track (/).
Playback control
Pause (
), Play (4) and Stop (<). SHIFT+Pause
;
activates slow playback.
Advanced controls
ese buttons are described on the next page.
Page 15
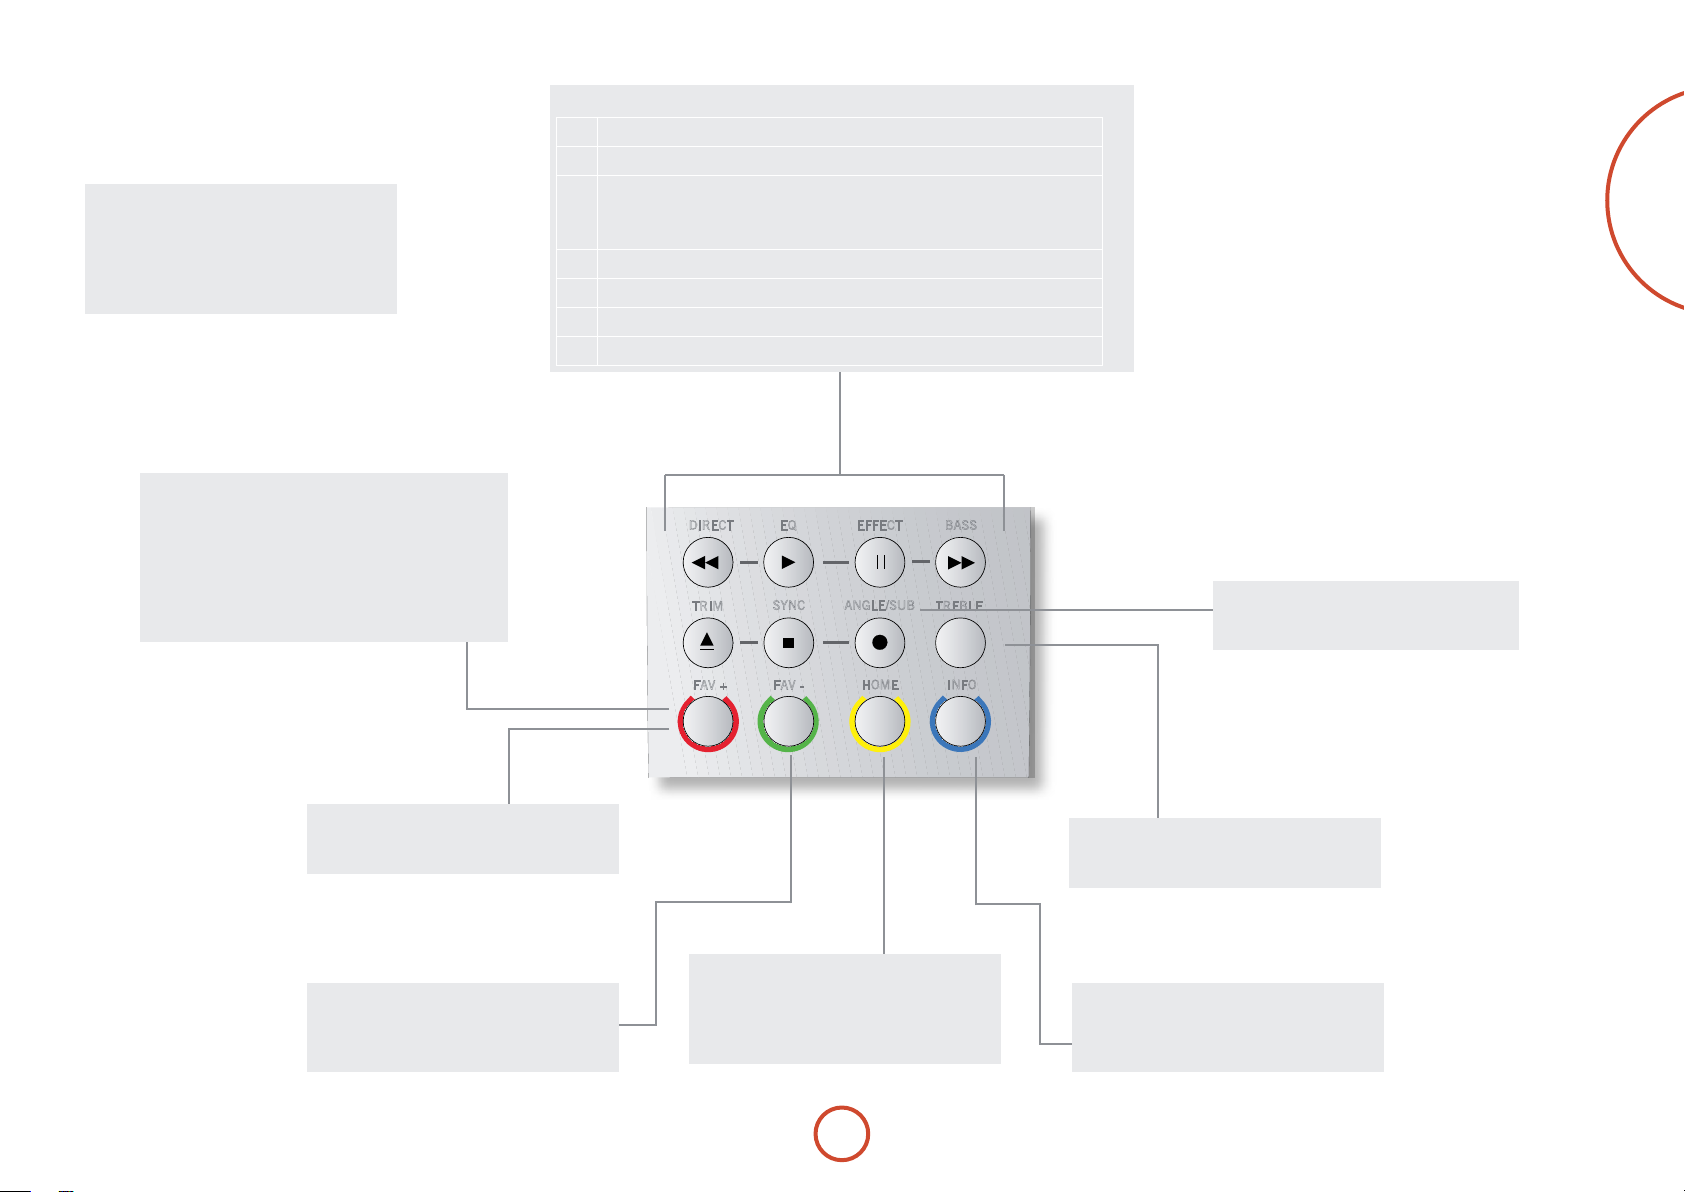
Advanced controls
NOTE
Many of these controls are labelled according
to the functions assigned to other device
modes. For example, the
the bass control of an A/V receiver when the
remote is in AMP mode.
RED/GREEN/YELLOW/BLUE
e colour-coded buttons
provide interactive controls for Blu-ray Discs and some
player functions and will be displayed on-screen. ey
are accessed by rst pressing SHIFT followed immediately
by the button required. eir function depends on the
disc and the part of the disc being viewed.
key will activate
8
RED, GRE EN, YELLOW and BLUE
Transport control buttons
Fast rewind.
7
Starts playback.
4
Pause playback. Press 4to resume playback.
;
When paused, pressing ; advances one frame.
SHIFT +
Fast forward.
8
Open / Close the disc tray.
1
<
Stop playback
Cycles through dierent camera angles, if present on the disc.
=
activates slow motion playback.
;
English
U
SRCH
ANGLE
Displays Angle menu, to allow selection of
dierent camera angles, if present on the disc.
SETUP
Ensure no disc is playing and press
access the ‘Settings’ menu.
TITLE
Press
TITLE to access the DVD’s ‘Title’ menu (a
feature that only applies to multi-title discs) or
to access the main menu if a Blu-ray Disc.
SETUP to
V F V
SETUP TITLE AUDIO SUBT
AUDIO
Some discs oer the facility to select dierent
audio tracks. Press
that allows selection of the available tracks. See
“Soundtrack Selection” on page E-16.
AUDIO to access a menu
E-13
SRCH
Displays Search menu with Time, Title and
Track options.
SUBT
Cycles through the available subtitle languages,
including ‘O ’. Some discs force subtitles on,
overriding any set up preferences.
Page 16

Useful information
Backlight
A blue backlight comes on for ve seconds whenever
a key is pressed. is helps you use the handset in
subdued lighting conditions. It may be possible to hear a
quiet tone being emitted from the remote control when
the backlight is on. is is perfectly normal.
Power LED blinks
Short blinks indicate a valid key press.
Multiple short blinks convey information (such as a
device code) or signal the beginning and successful
completion of a programming sequence.
Long blinks indicate an invalid key press or entry.
e symbol ‘*’ is used in the manual to indicate a
power LED blink.
Timeouts and unassigned keys
Time out – Aer 10 seconds the CR104 exits the
programming state and returns to normal operation.
Stuck key timeout – Aer any key is pressed
continuously for 30 seconds, the CR104 stops sending
IR transmission to conserve battery life. e CR104
remains o until all keys are released.
Unassigned keys – the CR104 ignores any unassigned
key presses for a particular Device Mode and does not
transmit IR.
Low voltage indicator
When the batteries are running down, the IR transmit
indicator on the CR104 (the LED under the Power
button) ashes ve times whenever you press a button:
* * * * *
If this happens, please t four new AAA alkaline
batteries as soon as possible.
Device Mode / Source keys
As the CR104 can control your BDP100, AVR500,
AVR600 or AV888 as well as a range of other equipment,
many of the buttons have more than one function
depending on the ‘device mode’ selected on the remote
control.
e Device Mode keys (shown below) select the source
on the AVR500/AVR600/AV888. If one of these keys is
pressed briey, a command is transmitted to change the
source on the unit. Also the functionality of the remote
control changes to operate the selected source device. It’s
like having eight dierent remotes in your hand!
AVSAT
D
PVR VCR
AMP
BD
SAT
AV
TUN
AMP
BDP100 Blu-ray player
Satellite set-top box
Audio-visual sound input (use with TV)
DAB, Sirius, FM or AM tuner
Controls the amplier and setup features
of the AVR500/AVR600 and AV888
PVR
Personal Video Recorder (or Digital
Video Recorder)
VCR
CD
Video Cassette Recorder
Compact Disc player
If you press and hold a Device Mode key for about four
seconds, you change the Device Mode of the CR104
without changing the signal source on the AVR500/
AVR600/AV888. is can also be done by pressing S
followed by a Device Mode key (within two seconds).
ese two methods allow you to change which device
the CR104 controls without also changing the AVR500/
AVR600/AV888 source, allowing uninterrupted
listening.
Each Device Mode changes the behaviour of many
of the CR104 keys to control the source device
appropriately. For example:
In
CD mode
plays the previous CD track.
0
TUN
CD
In AV mode 0 issues the TV ‘channel down’ command.
e CR104 remains in the last selected Device Mode
so it is not necessary to press a Device Mode key before
every command key if all you are doing is playing or
skipping tracks on a CD, for example.
Navigation keys
e Navigation keys steer the cursor in Setup menus or
on-screen menus. ey also replicate the
navigation functions of original remotes
supplied with other home entertainment
devices in your system.
conrms a setting.
O
Volume control
By default, the CR104 is set up so that the volume
control buttons always control the volume of an Arcam
amplier or receiver, regardless of which Device Mode
the remote is currently set for. is is known as volume
‘punch through’.
For example, if you are listening to a CD, you will
probably have the CR104 in
the CD player. You can use the volume controls on
the remote directly to adjust the volume of an Arcam
amplier without rst having to press A to put the
remote into AMP Device Mode. e volume buttons
‘punch through’ the CD Device Mode on the remote to
the AMP Device Mode. Volume ‘punch through’ can be
disabled individually for any Device Mode if desired.
CD Device Mode to control
The CR104 complies with Part 15 of the
FCC rules
is equipment has been tested and found to
comply with the limits for a class B digital device,
pursuant to part 15 of the FCC Rules. ese limits
are designed to provide a reasonable protection
against harmful interference in a residential
installation. is equipment generates, uses, and can
radiated radio frequency energy and if not installed
and used in accordance with the instructions,
may cause harmful interference to radio
communications. However, there is no guarantee
that interference will not occur in a particular
installation. If this equipment does cause harmful
interference to radio or television reception, which
can be determined by turning the equipment o
and on, the user is encouraged to try to correct
the interference by one or more of the following
measures:
Reorient or relocate the receiving antenna.
Increase the separation between the equipment and
receiver.
Connect the equipment into an outlet or a circuit
dierent from that to which the receiver is
connected.
Consult the dealer or an experienced radio/TV
technician for help.
E-14
Page 17

Controlling other devices
Code blink-back
Method 1 (Direct code setup)
is section describes the simplest (preferred) way to
program the CR104’s Device Mode keys to control the
non-Arcam devices in your system.
AVSAT
D
PVR VCR
AMP
Some of the modes are locked to Arcam operation
<
but can be unlocked if required (see “Locking/
Unlocking a specic Device Mode” on page E-28).
A mode only controls Arcam equipment.
<
BD mode Locked
SAT mode Unlocked
AV mode Unlocked
TUN mode Locked
AUX mode Locked
VCR mode Unlocked
CD mode Locked
Here is a specic example of how to program the a
key to control an Addison television. e principles for
controlling other devices are exactly the same.
1. Make sure your device is switched on (not just on
standby).
2. Find the correct Device Code table (e.g. TV) for
the type of device you want to control from the
CR104.
3. Find the row containing the codes for the
manufacturer of your device (e.g. Addison) (page
34). e most popular code is listed rst.
4. Press the appropriate Device Mode key (e.g. a)
on the CR104.
5. Press and hold S until the red Power LED
blinks twice:
you press the key, then twice aer about three
seconds).
6. Enter the rst four-digit device code using the
number keys. e power key blinks twice:
7. Aim the CR104 at the device and press P. If the
device switches o, the setup is complete.
8. Turn your device back on and test all the CR104’s
functions to ensure they are working properly.
(It actually blinks once when
* *
TUN
CD
* *
9. Important! Write your device code down on the
right hand side of the page so you can remember
it if you ever reset the CR104.
What if I still can’t control my device?
If your device doesn’t respond, repeat the above
<
steps until one of the device codes listed for your
brand works.
If none of the codes listed for your brand operates
<
your device, or if your brand is not listed at all, try
the Library Search Method described in the next
section.
Notes:
Some codes are quite similar. If your device does
<
not respond or is not functioning properly with
one of the codes, try another code listed under
your brand.
If your device’s original remote control does not
<
have a P (POWER) key, press $ instead of P
when setting up your device.
Remember to press the corresponding device key
<
before operating your device.
Many TVs do not switch on pressing P. Please
<
try pressing a number key (‘channel select’) to
switch your TV back on.
To search for the code for another device follow
<
the instructions above, but press the appropriate
device key instead of a during step 2.
.
Method 2 (Library search)
is section describes another way to program the
CR104 to control third-party equipment.
Library Search allows you to scan through all the
codes contained in the CR104’s memory. It can take a
lot longer than the previous method, so only use this
method if:
Your device does not respond to the CR104 aer
<
you have tried all the codes listed for your brand.
Your brand is not listed at all in the Device Code
<
tables.
Example: To search for a TV code
1. Switch your TV on (not standby) and aim the
CR104 at it.
2. Press a on your CR104.
3. Press and hold S until the power LED blinks
twice.
4. Press 9 9 1. e power LED key blinks
twice: * *.
5. Press P.
6. Aim the CR104 at your Television and press [
repeatedly until your Television turns o.
Every time you press [ the CR104 sends out a
POWER signal from the next code contained in its
memory. In the worst case, you may have to press this
key up to 150 times, so patience is required! If you
skip past a code, step back by pressing ]. Remember
to keep pointing the CR104 at your Television while
pressing this key.
7. As soon as your television turns o, press S to
store the code.
Notes:
Many TVs do not switch on by pressing P. Try
<
pressing a number key (‘channel select’) to switch
your TV back on.
If you cannot control your Television properly,
<
please continue the Search Method: you may be
using the wrong code.
To search for the code for another device follow
<
the instructions above, but press the appropriate
Device Mode key instead of a during step 2.
If your device’s original remote control does not
<
have a P (STANDBY) key, press $ instead during
step 5.
Once you have set up your CR104, you can blink back
your device set-up codes for future reference.
Example: To blink back your Television code
1. Press the appropriate Device Mode key (e.g. a)
once.
2. Press and hold S until the red Power LED
blinks twice *
you press the key, then twice aer about three
seconds).
3. Press 9 9 0. e P key blinks twice.
4. For the rst digit of your four-digit code, press
and count all the red blinks. If there are no blinks,
the digit is ‘0’.
5. For the second, third and fourth digits, repeat the
previous step, pressing 2, 3, or 4 in order.
Now you have the four-digit code.
(It actually blinks once when
*
Make a note of the codes
Write down the codes for your devices in the boxes
below for future reference.
Device Code
1
2
3
4
5
6
7
8
English
1
E-15
Page 18

advanced
operation
Disc Information
Press STAT US to display disc information on your TV
screen. e information shown depends on the disc
type.
For Audio CD:
Disc type
Elapsed time
(current track)
Press
Current track/Total track number
Track : 1 / 11
0 : 00 : 23
CD DA
Progress bar Total
STATUS again to turn o this display.
0 : 06 : 46
track
time
Off O ff P lay
Random
playback
mode
Search
e h button allows you to search for a specic title,
chapter or track on the medium. Press h to display
the search box. Press h repeatedly to select the search
type:
Video Discs Audio Discs Media Files
Go to Title Go to Track Go to File No.
Go to Chapter Go to Time
Go to Time
Use the remote control numeric buttons to enter the
search data. Press
location.
to start playback from the selected
O
Menus
Many of BD Video and DVD Video disc contains disc
menu, top menu or pop-up menu which guides you
through the available functions in the disc.
e contents of menus and corresponding menu
operations depend on the disc.
Repeat playback
mode
Playback
mode
NOTE
If the secondary audio is not heard, set the Digital
Output to PCM Stereo, Bitstream Mixed, PCM 5.1
or PCM 7.1. (For details, refer to “Digital Output”
on page E-21.)
When the primary and the secondary Audio
streams are all switched, they will be mixed and
heard together. Set the PIP Audio to O to switch
o the secondary audio stream.
< Disc Menu: Press
the disc menu (‘Top Menu’) on
the TV.
< Popup Menu: Press
display the ‘Popup’ menu on the
TV.
Use the remote control cursor keys to
navigate the menus. Highlight an item
and press
press the relevant menu key to exit the
menu.
to select it, otherwise,
O
to display
t
U
to
Soundtrack Selection
Some discs contain multiple audio streams, such as
a standard Dolby Digital 5.1 soundtrack and a high
denition Dolby TrueHD 7.1 surround soundtrack.
e audio stream can be changed during playback. e
secondary audio (e.g. director’s commentary) of Blu-Ray
Discs (if present) can also be changed (if alternatives are
available).
Note: Audio language is changed using the settings
menu. Refer to page E-21.
Press
to display the current audio stream
o
information:
Current audio stream/total number of streams
Primary Audio
Au dio
PI P Aud io
Secondary Audio
Highlight either the Primary (Audio) or the Secondary
(PIP) audio stream selection using the '/,
buttons.
Press
to show alternate audio streams. Press
>
to highlight the desired audio stream then
'/,
press O to select it.
01 / 04 E NG D olby Dig ital
Off
Subtitles
Some discs contain multiple subtitles. e subtitles can
be changed during playback. Subtitles for the secondary
video (e.g. director’s commentary) of Blu-Ray Discs
(if present) can also be changed (if alternatives are
available).
Note: Subtitle language is changed using the settings
menu. Refer to page E-21.
Press
to display the current subtitle information:
b
Current subtitle/total number of subtitles
Primary Subtitle
S ubtitl e
PI P Su btitle
Secondary Subtitle
Highlight either the Primary (Subtitle) or the Secondary
(PIP Subtitle) subtitle selection using the
buttons.
Press
to show alternate subtitles. Press '/, to
>
highlight the desired subtitle then press O to select it.
01 / 08 E NG
Off
'/,
E-16
Page 19

Bonusview & BD-Live
Bonusview and BD-Live are features of the Blu-ray Disc
format.
Bonusview provides Picture in Picture and Virtual
Package functions for compatible discs. BD-Live discs
additionally provide a variety of features via the Internet.
Virtual Package/BD-LIVE data must be saved to a
USB memory device connected to the BDP100. To
enjoy these functions, connect a USB memory device
(minimum 1 GB capacity, 2 GB or more recommended)
supporting FAT 32 and USB 2.0 High Speed (480
Mbit/s) to the USB connector. (For details, refer to “USB
Connection” on page E-9.)
< If there is insucient storage space, the data will
not be copied/downloaded. Delete unneeded
contents or use a new USB memory device.
< If a USB memory device containing other
contents (previously recorded) is used, the video
and audio may not play back properly.
< If the USB memory device is disconnected from
this unit during playback of Virtual Package/
BD-LIVE contents, playback of the disc will stop.
< Some time may be required for the contents to
load (read/write).
NOTE
< It may not be possible to use the BD-LIVE
functions if there is insucient space on
the USB memory device. In this case, refer
to “Erase Blu-ray Storage?” on page E-22 for
erasing the Virtual Package contents and
the BD-LIVE contents in the USB memory
device.
< Operation of USB memory devices is not
guaranteed.
< Do not use a USB extension cable when
connecting a USB memory device to the USB
connector.
Picture in Picture (secondary video)
Some Blu-ray discs include secondary video screens
that can be played back as a small video overlaid in the
corner of the screen. Press the M button on the remote
control to display the PiP menu:
PI P Off
Press > to enter the PiP menu. Select a secondary video
stream using the remote control cursor keys '/,.
Press O to view the secondary video in PiP mode.
NOTE
< To listen to secondary audio or to display
secondary subtitles, refer to “Soundtrack
selection” or “Subtitles” on page E-16.
< Secondary video may not be present for every
scene of a disc. The feature is disc-dependant,
please consult the disc manual for further
details.
Virtual Package
Blu-ray discs supporting Virtual Package allow for extra
content to be automatically transferred from the disc or
from the Internet to USB storage for interactive viewing.
Features available include secondary video and audio,
subtitles and movie trailers.
NOTE
< Playback methods are disc-dependant — refer
to the disc manual.
< Playback operations may require use of the
colour-coded keys on the remote control. To
access the colour key functions on the CR104
remote control, press
S
first.
BD-Live
e BDP100 is compatible with BD-Live, allowing for a
variety of functions when used with BD-Live compatible
discs. BD-Live allows content such as the latest movie
trailers and BD-J interactive games to be downloaded
from the Internet to USB storage.
Available BD-Live functions are entirely dependant on
the Blu-ray disc being played. Consult the disc manual
for operational information.
NOTE
< e BDP100 must have an active Internet
connection to use BD-Live functions. Refer
to “Network connection” on page E-9 and
“Network” on page E-22
< BD-Live Internet access can be disabled using
the BD-Live Internet access setting in the
System menu. See “System” on page E-22
< Playback operations may require use of the
colour-coded keys on the remote control. To
access the colour key functions on the CR104
remote control, press
S
first.
English
E-17
Page 20

Playing files
Please select Play mode
Play All
Play Selection
Play Current Folder
Cancel
Video and audio les can be played from USB media or
CD-R/RW discs. e following formats are supported:
< Video: AVI, WMV
< Image: JPG
< Audio: MP3, WMA
To play media les, insert the USB device or optical disc
into the player. e main menu is displayed with music,
video and/or picture le symbols:
Video le
System settings
Music le
JPEG le
Use the '/, cursor keys on the remote control to
highlight the media file type to play/view. Press > to
select the file type. The 'Play' menu is displayed:
Mus ic
2 ite m(s )
Main Men u
Pl ay Fil es
B rows e Pi ctur es
Now Pl ayi ng
Play menu Media menu
To play all available files without making any selection,
press < to go to the Play menu, described below.
To select particular les, use the
on the remote control to highlight the media device
to navigate in the Media menu. Press > to select the
media device and display the file and folder contents.
Pl ayli st
US B 1
'/,
cursor keys
NOTE
< You will only be able to browse the selected
type of les (music, picture or video), even
if a CD-R/CD-RW or a USB memory device
contains a mix of music, picture and video
les. To play a dierent le type, return to the
main menu using the
SETUP button.
< When there are playble files or folders within
the selected media or folder, “Empty” will be
displayed.
A single le can be played or les can be added to a
playlist in order to play a selection of les.
Highlight a le using the remote control cursor keys
'/,/</>
. Press O to select the file.
If the file has not been added to the playlist, the
following menu is displayed:
A dd T o P la ylis t
P lay (F ile)
If the file has already been added to the playlist, the
following menu is displayed:
R emo ve from P lay lis t
P lay (F ile)
NOTE
< “Play (File)” cannot be selected for JPEG
images. Add the images to be viewed to the
playlist in order to play a slideshow of images.
< e playlist is cleared whenever the USB
device is removed or the optical disc is
ejected.
Use the '/, cursor keys on the remote control to
highlight a menu item and press O to select it.
Select “Play (file)” to play a single file, or select “Add to
Playlist” to add the file to the playlist. When the desired
files have been added to the playlist, press
<
remote control to go back to the Play menu.
The Play menu
Mus ic
2 ite m(s )
Main Men u
Pl ay Fil es
B rows e Pi ctur es
Now Pl ayi ng
Play menu
e items listed on the play menu vary according to the
selected media and current status. When media is
playing, press the STOP button to display the Play menu.
Select an option using the
'/,
cursor keys and
press O to select it.
< Main Menu: Returns to the main menu.
< Play Files: Navigates to the Play Mode menu.
< Browse Pictures / Browse Music: Changes
the le type to be played and navigates to the
media device showing the le type selected.
< Add all to playlist: Adds all les to the playlist.
< Remove all from playlist: Clears all les from
the playlist.
< Previous folder: Navigates to the previous folder
or menu.
< Now Playing: Displays the playback status for
music les.
E-18
on the
The Play Mode menu
Use the '/, cursor keys on the remote control to
highlight “Play Files” and press O to show the Play
Mode menu:
Select an option using the
press O to select it.
< Play All: Plays all the les of the selected type on
the disc or device.
< Play Selection: Plays all items added to the
playlist.
< Play Current Folder: Plays all the les of the
selected type in the current folder.
< Cancel: Return to Play menu.
When a play option is selected, the media will play and
the “Now Playing” information panel will be shown:
File : 1 / 1 Anima ls - When I drea m. mp3
Title :
Artis t :
Album
0 : 00 : 28 0 : 04 : 36
NOTE
< When playing JPEG les, each le is displayed
for a time interval. is can be adjusted by
pressing
SHIFT followed by
control, or by entering the Slideshow Effects
menu, described opposite.
< e selectable play mode varies according to
the operation status and the selected media,
etc.
'/,
cursor keys and
Off Off P lay
on the remote
&
Page 21

Advanced playback controls
e following advanced controls are available during
disc or le playback (depending on media type):
Slow playback
Press SHIFT followed by & to activate slow motion
playback. Press this button combination again to
change the playback speed. Speeds of /, / and / are
available.
Time interval
When viewing JPEG picture slideshows, the time
interval between pictures can be changed between 5, 10,
15 and 30 seconds. Press SHIFT followed by & to switch
between dierent time intervals
Rapid Playback
Press ) or ( during playback to activate rapid
reverse or forward playback. Further button presses
change the playback speed. Speeds of 2x, 4x, 8x, 16x,
32x, 64x and 128x normal speed are available. Press $
to resume normal playback.
Displaying File Information
Press the STATUS button to display the le information
panel. e le information panel shows the following
information:
Current le/total le number
File type
Elapsed time
Title
File : 2 / 3 .. L ove.Actua lly.DVD Div...
0 : 01 : 59 1 : 04 : 56
Progress bar
Repeat playback mode
Random
playback mode
Total playing time
of current le
S lide S how E ffec ts
S lide S how Del ay
Use the '/, cursor keys on the remote control to
highlight a menu item and press > to select it.
< Slide Show Eects: Use the
to select one of the following eects:
<Horizontal Scroll
<Fade
<Shutter
<None
Press
< Slide Show Delay: Use the
to select the delay time between pictures:
<5 seconds
<2 seconds
<1 second
Off O ff P lay
to conrm the selection.
O
<None
<10 seconds
<15 seconds
<30 seconds
Press
O
No ne
5 s ec (s )
'/,
'/,
to conrm the selection.
Playing music whilst viewing
pictures
Playback
mode
During the playback of music les,
press the O button to display the
cursor keys
cursor keys
Play menu. Use the
control to highlight “Browse Pictures” and press O.
Select pictures and play them as described in “The Play
menu” on page E-18. The JPEG pictures will be displayed
whilst the music continues to play.
NOTE
< When playing JPEG les and music
simultaneously, the playback controls aect
the JPEG le playback only.
< To control the music les:
1. Press the stop button
JPEG slideshow and display the Play
menu.
2. Use the
remote control to highlight “Now
Playing” and press O. The playback
controls nowaffect music playback.
cursor keys on the remote
'/,
'/,
cursor keys on the
to stop the
#
English
Press status again to hide the le information panel.
Note that the le information panel is always shown
when playing music les.
Slideshow Eects
When viewing a JPEG picture slideshow, press the U
button to display the Slideshow Menu:
E-19
Page 22

settings
menus
e Settings menus allow you to congure all aspects
of your BDP100. e next few pages will go through
the menu items and explain their function. e Settings
menus may look daunting if you are new to setting up
home cinema, but the majority of them need only be
congured once when you rst install the system.
e only way to view the Settings menus is on your
display device (TV or projector) using the on-screen
display (OSD) capability of the BDP100. To view the
OSD for the initial setting up, connect any of the video
outputs to your display device (or AV receiver connected
to your display).
Entering the settings menu
To enter the settings menu, use the ' and , cursor
keys to highlight the ‘Settings’ option on the main menu.
If the main menu is not currently displayed, press SETUP
on the remote control to display it. Note that during the
playback of music, video or JPEG les further button
presses may be required to exit the folder structure.
Press > to enter the Settings menu.
Unstable OSD menu or picture display?
e default BDP100 output video resolution when rst
powered up out of the box has been chosen according
to the national standard in the country wheso that most
display devices can synchronise to the video signal
automatically. is can be changed in the Video Outputs
section of the Setup Menus.
If the output resolution and frame rate is set to a setting
your display device does not support, the picture
may become unstable or may not display at all. If this
happens, connect the BDP100 directly to your display
using the composite video connection in order to see
the menus. Once the correct video settings have been
entered, a higher-quality connection can be used.
Navigating the menus
e BDP100 menus can be navigated by using the
cursor (arrow) keys on the remote control.
1. To display the main menu, press the
2. Use the
and C keys to navigate up and
B
down the main section headings in the le-hand
panel.
3. Once you have the main section that you require
highlighted, use the
4. Use the
B
and C keys to navigate up and
key to enter the section.
E
down the section settings in the right-hand panel.
Some settings may be greyed out. ese are either
for information only (e.g. incoming sampling
frequency) or are not currently selectable (e.g.
network IP address when DHCP is used).
5. Pressing
6. Use the
7. Press
> selects a setting to change it,
and C keys to change the setting.
B
OK to conrm the setting. Go back to step 4
to adjust the other settings in the current section.
6. Press
or RETURN to go back to the previous
<
screen, to select another section to adjust.
SETUP button.
S ys tem
Ne twork
Info
Dis play
Audio
L angua ge
P arenta l
Dis play
HD MI S tatu s
HD MI P ref erre d F orm at
TV T ype
R es olu tion
TV A s pec t
F ilm M ode
C olor De pth
C onne cted
720 p
NT S C
HD MI A uto
16: 9 P ill arb ox
Of f
24 Bi t
E-20
Page 23

Display
TV Type – Set the video signal format. If the colour or
picture quality of analogue video appears incorrect,
change this setting. It should not need to be adjusted in
normal use.
< NTSC: USA and Canada video standard.
< PAL: Europe, Australia and China video standard.
Resolution – Set the video resolution of the
COMPONE NT VIDEO outputs.
< HDMI Auto: Sets the TV’s preferred resolution.
< 1080p: Full HD progressive video.
< 1080i: interlaced HD video.
< 720p: progressive HD video.
< 480p/576p: 480 lines (NTSC) or 576 lines (PAL)
progressive video
< 480i/576i: 480 lines (NTSC) or 576 lines (PAL)
Standard Denition interlaced video.
NOTE
< e HDMI Auto setting may not set the best
possible resolution. If you have a 1080p Full
HD display, set the resolution to 1080p.
< For full details of output resolutions available
at dierent outputs, refer to the table on page
E-25.
TV Aspect – Set the aspect ratio (shape) of your display.
< 16:9 Wide: Use with widescreen TVs. 4:3 material
will be zoomed to t the screen.
< 16:9 Pillarbox: Use with widescreen TVs. 4:3
material will be displayed in full, with vertical
black bars at the sides.
< 4:3 Pan and Scan: Use with 4:3 non-widescreen
TVs. 16:9 widescreen content will be displayed
with the le- and right-hand sides of the image
cropped to t the screen (no black bars). e
aspect ratio will be maintained (the image will not
be stretched).
< 4:3 Letterbox: Use with 4:3 non-widescreen TVs.
16:9 widescreen content will be displayed with
black bars at the top and bottom.
24p Mode – Enable or disable 24 frames-per-second
video output (1080/24p).
< On: Select to output 24p signals from the
output.
< O: Disable 24p video output.
HDMI and
HDMI
NOTE
< 1080/24p video signals can only be output
using the HDMI connection.
< e connected equipment (AV receiver, TV/
projector) must be 1080/24p compatible.
< e output resolution must be set to 1080p or
HDMI Auto.
Color Depth – Set the level of Deep Color processing
applied to the HDMI video output.
< 36-bit: Select to output 36-bit Deep Color signals
from the
HDMI output.
< 30-bit: Select to output 30-bit Deep Color signals
from the
HDMI output.
< 24-bit: Select to output 24-bit standard color
signals from the
NOTE
< e connected equipment (AV receiver, TV/
projector) must be Deep Color compatible
in order to use 30/36-bit Deep Color signals.
Refer to your TV & AV receiver user manual.
< All system HDMI interconnect cables must
be Deep Color compatible in order to use
30/36-bit Deep Color signals.
< If you experience a ickering or abnormal
picture aer changing the Deep Color
setting, connect the unit using a Composite
video cable and change the setting to a value
supported by the display.
HDMI output (Deep Color o).
Audio
PCM Downsampling – Set the maximum sample
rate of audio output from the OPTICAL or COAXIAL
DIGITAL OU T.
< 96kHz: Output digital audio with a 96kHz sample
rate (best quality).
< 48kHz: Output digital audio with a 48kHz sample
rate (most compatible).
NOTE
< If the connected equipment (e.g. AV receiver)
does not support 96kHz, silence or loud noise
may result from this setting. If this happens,
set PCM Downsampling to 48kHz.
Digital Output – Sets the audio format output from the
HDMI, OP TICAL or COAXIAL DIGI TA L OUT.
< Bitstream HD: Output the HD bitstream Blu-ray
Disc soundtrack for decoding in your AV receiver
(HDMI output only, requires compatible AV
receiver).
< Bitstream Legacy: Output the relevant legacy
format for the soundtrack. is option is suitab;e
for older AV receivers that are not HD, HDMI
Audio or DTS compatible.
< Bitstream Mixed: Convert all surround audio to
DTS 5.1 surround format. is option gives the
best quality for DTS-compatible AV receivers that
are not HD or HDMI Audio compatible.
< PCM 7.1: Decodes all formats within the player
and outputs PCM audio. Use this option for HD
receivers that cannot decode all HD formats. e
OPTIC AL and COAXIAL digital outputs will output
stereo PCM audio.
< PCM 5.1: As PCM 7.1 but any HD 7.1-format
surround soudtracks will be converted to 5.1format surround (
< PCM Stereo: Decodes all formats within the
player and outputs PCM audio. All surroundsound formats are converted to stereo on all audio
output connections.
NOTE
< e signal at the HDMI output is also
determined by the formats supported by the
connected equipment.
< For full details of output formats, refer to the
table on page E-25.
Dynamic Range Control – Set whether to compress the
dynamic range between the loudest and soest sounds
when a Dolby Digital, Dolby Digital Plus or
DolbyTrueHD audio is played back.
< On: Turns on Dynamic Range Control so that
quiet sounds can be heard more easily.
< O: Turns Dynamic Range Control o.
< Auto: Allows coding embedded within a Dolby
TrueHD soundtrack to set the dynamic range. For
other soundtracks, responds the same as ‘On’.
HDMI output only).
Language
OSD – Set the language used for the On Screen Display
(OSD).
Menu – Set the language used for the Disc Menu and
Pop-up Menu.
< Auto: Sets the priority language of the disc.
Audio – Set the language for the soundtrack.
< Auto: Sets the priority language of the disc.
Subtitle – Set the language used for the subtitles.
< O: Displays no subtitles.
NOTE
< e ability to select a particular language may
depend on the disc played.
Parental Control
Parental control settings can be engaged to prevent
viewing of discs or scenes with material inappropriate
for children. A 4-digit code is required to enable or
disable Parental Control. Parental Control has various
levels; according to the level set, a disc may be stopped
or have certain scenes cut or substituted with alternative
scenes, depending on the disc.
To activate Parental Control:
1. Select the Parental Control menu:
Settings > Parental Control
u
2. If Parental Control is set to On, you must enter your
PIN using the remote control numeric buttons.
The default PIN is 3308.
P lea s e Input 4 -Digit P are nta l P as sword :
P arental Pa s s word
OK Ca ncel
3. Once the Parental Control menu is accessed, press
the '/, cursor buttons on the remote to
select from the following items. Press > to select
an item.
>
English
E-21
Page 24

Parental Control – Set whether Parental Control is On
or O.
< O: All discs are played back.
< On: Disc palyback is restricted according to the
Parental Level set in the following menu item.
Parental Level – Set the degree of disc restriction. e
lower the value, the stricter the limitation.
< 1 [Kid Safe]: Suitable for children.
< 2 [G]: General audience.
< 3 [PG]: Parental Guidance suggested.
< 4 [PG-13]: Unsuitable for children under 13.
< 5 [PG-R]: Parental Guidance Recommended.
< 6 [R]: Restricted; cinemas require children under
the age of 17 to have an accompanying adult
parent or guardian.
< 7 [NC-17]: Cinemas do not admit anyone
younger than 17 years old.
< 8 [Adult]: Discs of any rating (Adult/General/
Children) can be played back.
Parental Password – Press
highlighted to enter a new password. Enter a new 4-digit
code using the numeric buttons on the remote control,
then navigate to the on-screen OK button using the
remote control cursor keys, then press OK on the remote
control. You will be prompted to re-enter the code for
conrmation, repeating the process above.
with this option
>
Please enter a new Parental Control Password:
P arental Pa s sword
OK Cancel
System
Optical Disc Autoplay – controls whether an optical disc
(e.g. Blu-ray Disc, DVD, CD) will play automatically
aer it has loaded.
< On: Optical discs will play automatically.
< O:
PLAY must be pressed to play a disc.
BD-Live Internet access – sets restrictions on Internet
access.
< Limit Access: Only allows Blu-ray discs with
owner certication to access the Internet.
< Always Allow Access: All BD-Live discs are
allowed access to BD-Live websites.
< Prohibit Access: Prohibit all BD-Live discs from
accessing BD-Live websites.
NOTE
< e available on-line functions are disc-
dependent.
< Refer to the BD-Live disc instructions for
information about accessing on-line content.
< e BDP100 must be connected to the
Internet and set up correctly to allow access
to on-line content. See page E-9 for network
connections and page E-22 for network settings.
BD-Live Storage – BD-Live content is stored in the
attached USB memory device. is menu item displays
the amount of USB memory remaining.
Erase Blu-Ray Storage – Press
highlighted to erase the BD-Live content stored on the
USB storage device.
Screensaver duration –sets the duration of static image
display before the screensaver is shown. e screensaver
prevents screen damage due to burn-in of a static image.
< O: Deactivates the screensaver function.
< 5/10/20/30 minutes: sets the period of time
that a static image can be displayed before the
screensaver activates.
NOTE
< e screensaver can be deactivated by
pressing any button on the unit or remote.
Reset Settings – Press OK with this item highlighted to
reset all settings to factory defaults (except parental
controls).
OK with this item
Network
An active, congured Internet connection is required
if you wish to use BD-Live websites and downloaded
content. See page E-9 for physical connections.
Most home networks will automatically congure
the connection using DHCP. If your network is not
congured automatically, you will need to know the
following settings:
IP Address
<
Subnet Mask
<
Gateway
<
Primary DNS
<
Secondary DNS
<
Wired Network
Select and press OK to set the network connection
parameters:
Link Status – Information only
MAC Address – Information only
IP Mode – Set whether the network settings are
automatic or set manually.
O: Disables network functions.
<
Manual: Enter settings manually, for expert users.
<
Dynamic: Allows the connected router or modem
<
to congure the network settings automatically,
using the network’s DHCP server. is setting
should be used for the majority of home networks.
e following settings are only available when IP Mode
is set to Manual:
IP Address – Press OK to set the IP address assigned
to your player by your network administrator. Use
the cursors to navigate between segments and use the
numeric keys on the remote control to enter the address.
Navigate to the on-screen OK button and press OK on
the remote to save the setting.
Subnet Mask – Press OK to set the subnet mask of your
network. Use the cursors to navigate between segments
and use the numeric keys on the remote control to enter
the subnet mask. Navigate to the on-screen OK button
and press OK on the remote to save the setting.
Gateway – Press OK to set the IP address of your
Internet gateway. Use the cursors to navigate between
segments and use the numeric keys on the remote
control to enter the address. Navigate to the on-screen
OK button and press OK on the remote to save the
setting.
Primary DNS – Press OK to set the IP address of your
Primary DNS server. Use the cursors to navigate
between segments and use the numeric keys on the
remote control to enter the address. Navigate to the
on-screen OK button and press OK on the remote to
save the setting.
Secondary DNS – Press OK to set the IP address of
your Secondary DNS server. Use the cursors to navigate
between segments and use the numeric keys on the
remote control to enter the address. Navigate to the
on-screen OK button and press OK on the remote to
save the setting.
Network Test
Press OK to run a network test. is will also congure
the network settings automatically if they have not been
congured and if automatic conguration (DHCP) is
supported by the network.
E-22
Page 25

trouble-
shooting
If a fault occurs, run through the table below before taking your unit for repair.
If the fault persists, attempt to solve it by switching the unit o and on again. If this fails to resolve the situation, consult your
dealer. Under no circumstances should you repair the unit yourself as this will invalidate the guarantee!
Problem Possible cause Remedy
No power • e AC input cord is disconnected.
• Poor connection at AC wall outlet or the outlet is inactive.
No playback • e disc is loaded upside down.
• e disc is not playable.
• e disc is dirty.
• e recorded disc is not correctly nalized.
• e parental level is not set correctly.
• e symbol about invalid operation is displayed.
Malfunction • e disc is scratched, dirty, poorly recorded or unplayable. • Press the POWER switch to switch the power o, press the
No picture • e video cords are disconnected.
• e incorrect selection of input source on the TV.
• e disc is not playable.
Noisy or distorted picture • e unit is connected to a recording device directly and the
copyguard function is activated.
• e disc is dirty.
• It is in rapid advance or reverse playback, or in frame
advance playback.
Abnormal picture or no picture • e resolution is not set correctly for video signals to be output form the
COMPONENT and the HDMI OUTs.
• e TV does not support HDCP.
• e TV type of this unit is dierent from that of your TV or the disc.
Slight pause of picture • e layer transition occurs during playback of DVD Videos, etc. recoded in
dual-layer format.
No sound • e audio cords are disconnected.
• e speakers are disconnected to the amplier.
• e incorrect selection of input source on the amplier.
Noisy or distorted sound • e disc is dirty.
• Poor connections.
BD-LIVE contents cannot be loaded • Poor connections between this unit and broadband router and/or modem.
• e USB memory device is disconnected.
• e BD-Live Internet Access is set to “Prohibit Access”.
• e BD disc does not support BD-LIVE.
• e network settings are not set correctly.
Remote control unit does not operate. • Batteries are not loaded or exhausted.
• e remote sensor is obstructed.
• Connect cord securely.
• Check the outlet using a lamp or another appliance.
• Reload the disc with the printed side up.
• Use a playable disc.
• Clean the disc.
• Load a disc that is correctly nalized.
• Set the parental level setting correctly. (Refer to page E-21.)
• Adjust the setting correctly.
POWER switch again and then unload the disc.
• Connect the cords correctly.
• Select the input source correctly.
• Use a playable disc.
• Connect the unit so that the picture signal is
transferred directly to the TV.
• Clean the disc.
• Sometimes a small amount of picture distortion may
appear. is is not a malfunction.
• Set the resolution correctly. (Refer to page E-21.)
• is unit will not transfer the video signals via the HDMI
connector to TV that does not support HDCP. is is not a
malfunction.
• Set the TV type correctly. (Refer to page E-21.)
• Sometimes a slight pause may occur. is is not a malfunction.
• Connect the cords correctly.
• Connect the speakers correctly.
• Select the input source correctly.
• Clean the disc.
• Check the connections and connect all cords securely.
• Check the connections and connect all cords securely.
• Connect the USB memory device to this unit.
• Set it to “Always Allow Access” (Refer to page E-22.)
• Load a disc that supports BD-LIVE.
• Set the network settings correctly. (Refer to page E-22.)
• Replace the batteries.
• Remove the obstacle.
English
E-23
Page 26

audio
& video
output
START
formats
Audio output format
e audio output format available from the digital audio
outputs depends on the soundtrack format being played,
the audio output in use and the Digital Output setting
in the Audio settings menu (“Audio” on page E-21).e
table opposite shows all possible combinations.
Use the owchart on this page to guide you to the
correct setting for your home cinema setup.
Do you use an AV receiver?
YES
Do you connect audio using
HDMI?
YES
Is your receiver HDMI1.3
compatible (Dolby TrueHD/
DTS HD)?
YES
NO
NO
NO
Use “PCM Stereo”
NO
Do you connect audio using
Optical or Coaxial Digital?
YES
Does your receiver support
the DTS audio format?
YES
Use “Bitstream Mixed”
NO
Use “Bitstream Legacy”
Do you want to play back
Secondary Audio from
Blu-ray Discs?
NO
Use “Bitstream HD”
YES
Do you have a 7.1-format
surround sound
speaker system?
YES
Use “PCM 7.1”
E-24
NO
Do you have a
surround sound
speaker system?
YES
Use “PCM 5.1”
NO
Use “PCM Stereo”
Page 27

Audio Format Digital Output setting HDMI out Optical/Coax out
Bitstream HD Dolby Digital 5.1 Dolby Digital 5.1
Bitstream Legacy Dolby Digital 5.1 Dolby Digital 5.1
Dolby Digital
Dolby Digital Plus /
Dolby TrueHD
DTS-HD High
Resolution Audio /
DTS-HD Master Audio
DTS
LPCM 7.1 (48kHz /
96kHz)
LPCM 5.1 192kHz
LPCM 2.0
(44.1kHz / 48kH)
Bitstream Mixed DTS 5.1 DTS 5.1
PCM 7.1 PCM 5.1 PCM Stereo
PCM 5.1 PCM 5.1 PCM Stereo
PCM Stereo PCM Stereo PCM Stereo
Bitstream HD Dolby Digital Plus /
Dolby TrueHD
Bitstream Legacy Dolby Digital 5.1 Dolby Digital 5.1
Bitstream Mixed DTS 5.1 DTS 5.1
PCM 7.1 PCM 7.1 PCM Stereo
PCM 5.1 PCM 5.1 PCM Stereo
PCM Stereo PCM Stereo PCM Stereo
Bitstream HD DTS-HD High
Resolution Audio /
DTS-HD Master Audio
Bitstream Legacy DTS 5.1 DTS 5.1
Bitstream Mixed DTS 5.1 DTS 5.1
PCM 7.1 PCM 7.1 PCM Stereo
PCM 5.1 PCM 5.1 PCM Stereo
PCM Stereo PCM Stereo PCM Stereo
Bitstream HD DTS 5.1 DTS 5.1
Bitstream Legacy DTS 5.1 DTS 5.1
Bitstream Mixed DTS 5.1 DTS 5.1
PCM 7.1 PCM 5.1 PCM Stereo
PCM 5.1 PCM 5.1 PCM Stereo
PCM Stereo PCM Stereo PCM Stereo
Bitstream HD PCM 7.1 PCM Stereo
Bitstream Legacy PCM 7.1 PCM Stereo
Bitstream Mixed DTS 5.1 DTS 5.1
PCM 7.1 PCM 7.1 PCM Stereo
PCM 5.1 PCM 5.1 PCM Stereo
PCM Stereo PCM Stereo PCM Stereo
Bitstream HD PCM Stereo PCM Stereo
Bitstream Legacy PCM Stereo PCM Stereo
Bitstream Mixed DTS 5.1 PCM Stereo
PCM 7.1 PCM Stereo PCM Stereo
PCM 5.1 PCM Stereo PCM Stereo
PCM Stereo PCM Stereo PCM Stereo
Bitstream HD PCM Stereo PCM Stereo
Bitstream Legacy PCM Stereo PCM Stereo
Bitstream Mixed DTS 2.0 DTS 2.0
PCM 7.1 PCM Stereo PCM Stereo
PCM 5.1 PCM Stereo PCM Stereo
PCM Stereo PCM Stereo PCM Stereo
Dolby Digital 5.1
PCM Stereo
English
Video Output Resolution
e following table shows the video output resolution
at each video output for the dierent resolution settings
(see “Display” on page E-21).
Resolution setting Video Outputs
Composite video out Component video out HDMI out
NTSC PAL NTSC PAL NTSC PAL
HDMI Auto 480i 576i 1080i 1080i Preferred Preferred
1080p 480i 576i 1080i 1080i 1080p 1080p
1080i 480i 576i 1080i 1080i 1080i 1080i
720p 480i 576i 720p 720p 720p 720p
480p/576p 480i 576i 480p 576p 480p 576p
480i/576i 480i 576i 480i 576i 480i 576i
NOTES:
< If the HDMI and Component video outputs are used simultaneously, the Component video
will be output at standard denition (480i/576i resolution).
< Copy protected DVDs can only be output at standard denition over analogue video
connections (component or composite).
< If the BDP100 is set to a resolution that your TV does not support, there may be no picture.
If this happens, connect the Composite Video output to your TV. Select the appropriate
video input on your TV to display the settings menu. Change the resolution to a value
supported by your TV then change the connections back to the desired conguration.
< e ‘HDMI Auto’ setting uses the resolution value that the TV requests. is may not be
the best resolution. It is recommended to consult your TV documentation to discover the
best resolution setting and to set this resolution manually.
E-25
Page 28

customising
the CR104
Code Learning
e CR104 comes with a complete library of
preprogrammed codes. Aer you have set up the CR104
for your device, you may nd that there are one or more
functions on your original remote which do not have a
place on the CR104 keypad. For convenience, the CR104
oers a Code Learning feature that allows you to copy
up to 16 functions from an original remote control onto
the CR104 keypad.
Before you start, make sure that:
e original remote control is working correctly.
<
e remotes are not pointing at your device.
<
e remotes have new batteries.
<
e remotes are not in direct sunlight or under
<
strong uorescent lights.
Learned functions are mode-dependent: You could
theoretically assign up to eight dierent functions
to a single key (the CR104 can handle a total of 16
learned functions).
Example: To copy the ‘text hold’ function
from a TV remote onto the ( key of your
CR104
1. Place both remotes on a at surface, 2 to 5cm
apart, with the IR ports facing each other.
2. On the CR104, press and hold S until the power
LED blinks twice:
3. Press 9 7 5. e power LED blinks twice:
.
* *
4. On the CR104, press the device key that matches
the ‘source’ device (e.g. if you’re learning a TV
function, press a).
5. On the CR104, press the key to which you want to
assign the learned function (e.g. (). e device
key blinks rapidly.
6. On the original remote, press and hold the
function key that you want to learn (e.g.
TEXT H OLD) until the CR104 device key blinks
twice:
7. If you want to learn other functions from the
same source device, simply repeat steps 5 and 6
pressing the next key you want to learn.
8. To exit Code Learning mode, press and hold S
* *
.
* *
.
until the device key blinks twice: * *.
9. To use the learned function on the CR104, press
the Device Mode key, followed by the function
key.
In this example, you’d press
followed by
a
(
Shifted Learning
You can assign a learned function to a CR104 key
without sacricing its original function.
You can assign Shied Learning functions to any key
except for: Device Mode keys (e.g. a), S, or number
keys (0 to 9).
1. To assign a Shied Learning function, simply
follow Code Learning steps in the previous
section. During step 5, press S once before you
press the key to which you want to assign the
learned function.
2. To access the shied function, press S and then
the target key.
Important notes
Once you start a Code Learning session, you have
<
approximately 10 seconds to conduct each step.
Any longer, and a timeout means that you’ll have
to start the process again.
e Learning feature is mode-specic – you can
<
copy one feature per mode onto a key.
e CR104 can learn approximately 16 functions
<
in total.
To replace a learned function, simply assign a new
<
one to the same key.
Learned functions are retained when you change
<
batteries.
If Code Learning fails, try altering the distance
<
between the two remotes; make sure that the light
in the area is not too bright.
To delete a learned function
1. Press and hold S until the power LED blinks
twice: * *.
2. Press 9 7 6. e power LED blinks twice: .
3. Press a Device Mode key once. For example, if you
want to delete one of your learned TV functions,
press a.
4. Press twice on the key you want to deassign. e
handset blinks twice: * * to conrm.
e original function of the CR104 is restored.
To delete a Shifted Learned function:
To delete a Shied Learned function, press S before
you press the key to be deassigned (during step 4 above).
To delete ALL learned functions within a
given Device Mode
1. Press and hold S until the power LED blinks
twice:
2. Press 9 7 6 – the power LED blinks twice:
* *
3. Press the appropriate Device Mode key twice.
* *
.
.
E-26
Page 29

Creating Macros
You can program your CR104 to issue a sequence of
commands when you press a single key. Any sequence of
commands you regularly use can be reduced to a single
key press for your convenience.
For example, you might want to turn o your TV, VCR
and Satellite at the same time.
A key programmed with a Macro is available in all
<
modes; it will replace that key’s dierent functions
for all modes.
A Macro can consist of up to eight key presses.
<
Example: To assign a Macro to the h key
1. Press and hold S until the power LED blinks
twice: * *.
2. Press
3. Press h (the Macro will be assigned to this key).
4. Press a, P, w, P, z, P. (ese are the
5. To store the Macro, press and hold S until the
Now, whenever you press h, the CR104 will toggle the
power to your TV, VCR and Satellite.
<
<
<
<
9 9 5
Macro steps you wish to record.)
power LED blinks twice: * *.
e important word here is ‘toggle’. For example,
if the TV and Satellite devices are currently on,
but the VCR is o, pressing h will switch o the
TV and Satellite and switch on the VCR (rather
than switching all three devices on or o).
When using Macros, remember that you may
need to change mode or use S, and that each
key press (including changing modes and pressing
) counts as one of the Macro steps. You cannot
S
use a Macro key within another Macro.
If the amount of memory storage for a particular
Macro is exceeded, the power LED comes on for
ve seconds. You can, however, save the macro
steps up to that point by pressing S, or you can
cancel the Macro recording by pressing any other
key.
e delay between key presses is recorded as
part of the Macro. A delay of up to 30 seconds is
permitted.
.
Example: To deassign the Macro associated
with the h key
1. Press and hold S until the power LED blinks
twice: * *.
2. Press 9 9 5.
3. Press h.
4. Press and hold S until the power LED blinks
twice: * *.
Volume punch-through
Volume punch-through means that, no matter which
Device Mode is selected, the CR104 controls the
AVR500, AVR600 or AV888 volume. You don’t need to
press A on your CR104; this feature is switched on by
default.
ere are times, however, when you might want to
control a device’s volume directly when in a specic
Device Mode.
Example: To cancel volume punch-through
for a TV (AV mode)
1. Press a once.
2. Press and hold S until the power LED blinks
twice: * *.
3. Press 9 9 3.
4. Press -. e power LED blinks four times.
Now, while in TV (AV) mode, you will be able to control
the volume or mute functions of your TV directly.
To completely cancel all volume punchthrough settings
1. Press and hold S until the power LED blinks
twice: * *.
2. Press 9 9 3.
3. Press +. e power LED blinks four times *
* *
9 9 3
.
.
.
.
* * *
Now, whichever mode you’re in, you will have direct
access to that device’s volume or mute functions,
assuming they are available. You would need to switch to
AMP mode to alter the AVR500/AVR600/AV888 volume.
Example: To restore default volume punchthrough settings to all Device Modes
1. Press and hold S until the power LED blinks
twice:
2. Press
3. Press A. e power key LED blinks twice: *
*
Key Mover
Sometimes you might nd that a key you use a lot for
your system is in the ‘wrong’ place on the CR104 keypad
for your comfort. It’s quite easy to reassign a favourite
function to a more accessible key. It is even possible
to move a function from one Device Mode to another
Device Mode.
Example: To assign the D function to the U
key in SAT mode
1. Press z.
2. Press and hold S until the power LED blinks
twice: * *.
3. Press 9 9 4.
4. Press the key you want to move (e.g. D)
5. Press the key you want to move the key to (e.g.
).
U
Now, pressing either D or U while in SAT Device
Mode makes the CR104 transmit the D function.
To completely swap over the functionality of the two
keys to put the U functionality on the D key, repeat
the above process again, but swap over the D and U
key presses in the example.
Note that the function that is copied over to the new key
is always the original function of the old key.
Restore a moved key
To restore a key to its previous function, repeat the
example above, pressing the key to be restored twice
(copy it back to itself).
Restore all moved keys for a Device Mode
To restore all keys in a Device Mode to their original
functional positions, repeat the example above, but press
the relevant Device Mode key (e.g. A) at points 1,4 and
5 in the example.
English
E-27
Page 30

Copy a key between Device Modes
It is possible to copy functions between Device Modes.
However, remember that button functions are Device
Mode specic and therefore eectively ‘punch-through’
to the original Device Mode when copied over.
e following example copies the AVR500/AVR600/
AV888
DIREC T function from the CR104 AMP device
mode to the shied function of the # button on AV
Device Mode.
1. Press and hold S until the power LED blinks
twice: * *.
2. Press 9 9 4.
3. Press the Device Mode key of the function you
want to move (e.g. A).
4. Press the function key you want to move (e.g.)/
DIREC T)
5. Press the key of the Device Mode you want to
copy the function to (e.g. a)
6. Press the S button graphic
7. Press the key you want to copy the function to
(e.g. #)
If you prefer to copy the key to the main function of the
button instead of the ‘shied’ function, omit point 6
#
in the above example.
Mode Mover
If your home entertainment setup contains devices of
the same type (e.g. two TVs, perhaps from dierent
manufacturers) you can still control both those devices
with the CR104. You simply need to reassign an unused
Device Mode key.
NOTE
Before using Mode Mover, make sure both the
source and destination Device Mode keys are
unlocked (see next section).
Example: To use the z key to control a
second TV
1. Press and hold S until the power LED blinks
twice: * *.
3. Press 9 9 2.
3. Press the Device Mode key for the type of device
you want to control (e.g. for a TV, press a).
4. Press the Device Mode key you want to use (e.g.
).
z
5. Don’t forget to set up the CR104 to control the
second device, using one of the methods from
“Controlling other devices” on page E-15.
Note that volume punch-through is not applied to a
Device Mode that has been copied using Mode Mover.
However, volume punch-through functionality can be
restored when you have used Mode Mover, by copying
and @ from the AMP Device Mode to the
-, +
same physical buttons on the new moved Device Mode
using the last example shown in Key Mover.
To restore a moved Device Mode key to its
original state
1. Press and hold S until the power LED blinks
twice: * *.
2. Press 9 9 2.
3. Press the Device Mode key you want to restore
twice.
Locking/Unlocking a specific
Device Mode
When you rst unpack your CR104 and insert the
batteries, for your convenience it is able to control
certain Arcam components automatically (e.g. DVD
players, Ampliers, Tuners and CD Players). We achieve
this by preprogramming specic Arcam device codes
onto the relevant Device Mode keys, then locking
the Device Modes so you don’t reprogram them
inadvertently.
If you want to override these locked default settings – to
control a third-party CD player, for example – you will
rst need to unlock CD Mode before setting up the
CR104 using one of the methods described at the start
of this guide.
Here are the factory default settings:
Device Mode Default status Default Arcam
codes
BD
SAT
AV
TUN
AMP
PVR
VCR
CD
Alternative codes are available for multi-room solutions,
or in the case of code clashes with other manufacturer’s
products.
For example:
AMP (system code 19) 1954
You will need to change the system code on the product
you wish to control, as well as the CR104.
NOTE
e
AMP Device Mode can only be used to control
Arcam ampliers like the AVR500, AVR600 and
AV888, either on its default or alternative IR system
codes.
Locked 0762
Unlocked 1205
Unlocked 0586
Locked 2009
Locked 1242
Unlocked 1930
Unlocked 0111
Locked 2010
To toggle a Device Mode lock setting:
1. Press the Device Mode key you want to unlock
(e.g.
)
c
2. Press and hold S until the power LED blinks
twice: * *.
3. Press 9 8 2.
e power LED blinks twice when being locked,
<
and blinks four times when being unlocked.
If you enter an invalid key sequence, the power
<
LED gives one long blink and returns to normal
operation.
While the Device Mode key is locked, the Direct Code
Setup and Move Mode functions are not available.
E-28
Page 31

Mode key IR punch-through
e Mode key IR punch-through default is ‘on’.
Example: To set the Mode key IR punchthrough to AMP
1. Press and hold S until the power LED blinks
twice: * *.
2. Press 9 7 1. e power LED blinks twice:
.
* *
3. Press A to punch through IR from it.
Now, whenever you press and release a Mode key, the
IR data assigned to
the current mode is (i.e. it ‘punches through’ any other
device).
AMP is transmitted, no matter what
To cancel Mode key IR punch-through
1. Press and hold S until the power LED blinks
twice: * *.
2. Press 9 7 1. e power LED blinks twice:
.
* *
3. Press S until the power LED blinks twice: *
.
*
Resetting the CR104
Resetting the CR104 will erase all learned functions
across all modes, as well as some other programmed
functions like Macros. It will not reset the Device Mode
keys; these will remain programmed to your choice of
component.
1. Press and hold S until the power LED blinks
twice: * *.
2. Press 9 8 0. e power LED blinks four
times: * * * *.
3. Press and hold S until the power LED blinks
twice: * *.
4. Press 9 9 3.
5. Press A. e power key LED blinks twice: *
.
*
6. Press and hold S until the power LED blinks
twice: * *.
7. Press 9 7 1. e power LED blinks twice:
.
* *
8. Press A. e power key LED blinks twice: *
.
*
Command summary
Direct code setup
(e.g. AV mode, NNNN=code number)
a S * *
Library search
(e.g. AV mode)
a S 9 9 1 * * P [
to save
S
Code blink back
a S 9 9 0 **
1 count blinks for rst N
2 count blinks for second N
3 count blinks for third N
4 count blinks for fourth N
Code learning
(e.g. AV mode fast forward key)
S * * 9 7 5 * * a ( *
rapid blinks)
(Press key on original remote that you wish to copy)
* * S * *
Delete a learned function
(e.g. AV mode fast forward key)
S * * 9 7 5 * * a ( ( * *
Delete all learned functions with a device
(e.g. AV mode)
S * * 9 7 5 a a
Creating macros
(e.g. SRCH key)
S * * 9 9 5 h a P w P z P S
* *
Deassign macro
S * * 9 9 5 h S * *
NNNN * *
P
until unit turns o
(many
Key mover
(e.g. SAT mode, DISP key to MENU key)
z S * * 9 9 4 D U
Mode mover
(e.g. change SAT to TV(AV))
S * * 9 9 2 a z
Restore device mode
(e.g. restore SAT)
S * * 9 9 2 z z
Locking/unlocking a mode
(e.g. CD mode)
c S * * 9 8 2 * *
(i.e. two blinks for lock)
c S * * 9 8 2 * * * *
(i.e. four blinks for unlock)
Cancel all volume punch-through
S * * 9 9 3 + * * * *
Restore volume punch-through
S * * 9 9 3 A * *
Mode key IR punch-through
S * * 9 7 1 * * A
Cancel mode key IR punch-through
S * * 9 7 1 * * S * *
NOTE
As elsewhere in this Handbook, a single ‘blink’ of
the red LED behind the power button is indicated
by the symbol
*
.
Device codes
e tables that begin on page 34 (in the nal section of
this Handbook) list the four-gure codes for dierent
manufacturers’ devices.
Use these when setting your CR104 up to control your
devices, as described in Method 1 (see page E-15).
If more than one code number is listed, try the rst
number. If the results are unsatisfactory, continue trying
the numbers for that manufacturer to get the best ‘t’
with the functionality required.
If the manufacturer of your equipment is not listed, you
can try Method 2, the Library Search (see page E-15). is
allows you to scan through every set of codes contained
in the CR104’s memory.
English
E-29
Page 32

IR
commands
ese are the IR commands generated from the BD player
remote control, and accepted by the BDP100. e codes are
useful if you wish to programme another remote handset
to control the BDP100. e codes are given in the format
SystemCode–CommandCode. 25 (0x19) is the Arcam
System Code for a Blu-ray Disc player.
Key name Decimal Hexadecimal
0
1
2
3
4
5
6
7
8
9
DISP
RND
RPT
SRCH
/
0
7
8
MENU P OPUP MENU
CANCE L
RETUR N
TITLE TOP MENU
25–0 0x19–0x00
25–1 0x19–0x01
25–2 0x19–0x02
25–3 0x19–0x03
25–4 0x19–0x04
25–5 0x19–0x05
25–6 0x19–0x06
25–7 0x19–0x07
25–8 0x19–0x08
25–9 0x19–0x09
25–18 0x19–0x12
25–64 0x19–0x40
25–29 0x19–0x1D
25–76 0x19–0x4C
25–32 0x19–0x20
25–33 0x19–0x21
25–50 0x19–0x32
25–52 0x19–0x34
25–67 0x19–0x43
25–58 0x19–0x3A
25–72 0x19–0x48
25–66 0x19–0x42
Key name Decimal Hexadecimal
NAVIGATE UP
NAVIGATE LEFT
OK
NAVIGATE RIGHT
NAVIGATE DOWN
LOAD
PAUSE
PLAY
STOP
STATUS
MUTE
VOL+
VOL
24P
ANGLE
AUDIO
SUBT
SETUP
RED / A
GREEN / B
YELLOW / C
BLUE / D
25–86 0x19–0x13
25–81 0x19–0x51
25–87 0x19–0x57
25–80 0x19–0x50
25–85 0x19–0x55
25–45 0x19–0x2D
25–48 0x19–0x30
25–53 0x19–0x35
25–54 0x19–0x36
25–75 0x19–0x4B
16–13 0x10–0x0D
16–16 0x10–0x10
16–17 0x10–0x11
25–88 0x19–0x58
25–73 0x19–0x49
25–69 0x19–0x45
25–65 0x19–0x41
25–74 0x19–0x4A
25–107 0x19–0x6B
25–108 0x19–0x6C
25–109 0x19–0x6D
25–110 0x19–0x6E
E-30
Page 33

specications
Analogue Audio Output
Digital to Analogue conversion 24-bit 192kHz Delta-Sigma DAC
Signal to noise ratio 110dB CCIR
Harmonic distortion (1kHz) 0.002%
Frequency response (±0.5dB) 10Hz–20kHz
Output level (0dB) 2.2Vrms
Output impedance 47
Minimum recommended load 5kΩ
Video Outputs
Composite video 1 x phono. 1V pk-pk in 75
Component video Interlaced or Progressive
HDMI 19-pin HDMI connector
Digital interfaces
USB USB 2.0 High Speed (480 Mbit/s)
Network 10 BASE-T / 100 BASE-TX
Physical
Dimensions W430 x D400 x H100mm
Weight 6.2kg nett/10.0kg packed
Power consumption 30W maximum
Digital output connection 75
Supplied accessories
E&OE
NOTE: All specication values are typical unless otherwise stated
Ω
3 phono sockets.
Y 1V pk-pk in 75, Pb 0.7V pk-pk in 75, Pr 0.7V pk-pk in 75
Supported video formats are:
720 x 576p, 720(1440) x 576i, 720 x 480p, 720(1440) x 480i,
1280 x 720p, 1920 x 1080i, 1920 x 1080p
Audio to 6-channel/96kHz or 2-channel/192kHz (24-bit).
Ω co-axial
optical TOSLINK
Mains lead
CR104 remote control
4 x AAA batteries
Radio interference
e BDP100 Blu-ray Disc player is a digital device
which has been designed to very high standards of
electromagnetic compatibility.
All Blu-ray players generate, and can radiate RF
(radio frequency) energy. In some cases this can cause
interference with FM and AM radio reception. If this is
the case, keep the player and its connecting cables as far
from the tuner and its aerials as possible. Connecting
the player and the tuner to dierent mains sockets can
also help to reduce interference.
EC COUNTRIES – is products have been designed to
comply with EMC Directive 2004/108/EC.
USA – ese products comply with FCC Part 15
Class B.
Laser radiation
If the BDP100 Blu-ray Disc
player is operated whilst
the outer casing is removed,
invisible laser radiation could
cause eye damage.
English
E-31
Continual improvement policy
Arcam has a policy of continual improvement for its
products. is means that designs and specications
are subject to change without notice.
Page 34

software
licencing
is item incorporates copy protection technology that is
protected by U.S. patents and other intellectual property rights
of Rovi Corporation. Reverse engineering and disassembly are
prohibited.
“AVCHD” and the “AVCHD” logo are trademarks of Panasonic
Corporation and Sony Corporation.
Java and all Java-based trademarks and logos are trademarks or
registered trademarks of Sun Microsystems, Inc. in the U.S. and
other countries.
e “BD-LIVE” logo is a trademark of Blu-ray Disc
Association.
“Blu-ray Disc”, “Blu-ray” and the “Blu-ray Disc” logo are
trademarks of Blu-ray Disc Association.
“BONUSVIEW” is a trademark of Blu-ray Disc Association.
Manufactured under license from Dolby Laboratories.
Dolby and the double-D symbol are trademarks of Dolby
Laboratories.
Manufactured under license under U.S. Patent #’s: 5,451,942;
5,956,674; 5,974,380; 5,978,762; 6,226,616; 6,487,535; 7,392,195;
7,272,567; 7,333,929; 7,212,872 & other U.S. and worldwide
patents issued & pending. DTS and the Symbol are registered
trademarks, & DTS-HD, DTS-HD Master Audio | Essential and
the DTS logos are trademarks of DTS, Inc. Product includes
soware. © DTS, Inc. All Rights Reserved.
is a trademark of DVD format/Logo licensing
Corporation.
HDMI, the HDMI logo and High-Denition Multimedia
Interface are trademarks or registered trademarks of HDMI
Licensing LLC.
MPEG Layer-3 audio coding technology licensed from
Fraunhofer IIS and omson.
Windows Media and the Windows logo are trademarks or
registered trademarks of Microso Corporation in the United
States and/or other countries.
is product uses some soware programs which are listributed
under the GPL license. Accordingly, the following GPL soware
source codes that have been used in this product can be
provided aer asking at http://www.sherwoodamerica.com.
GNU GENERAL PUBLIC LICENSE
Version 2, June 1991
Copyright (C) 1989, 1991 Free Soware Foundation, Inc.
51 Franklin Street, Fih Floor, Boston, MA 02110-1301, USA
Everyone is permitted to copy and distribute verbatim copies of
this license document, but changing it is not allowed.
Preamble
e licenses for most soware are designed to take away your
freedom to share and change it. By contrast, the GNU General
Public License is intended to guarantee your freedom to share
and change free soware--to make sure the soware is free for
all its users. is General Public License applies to most of the
Free Soware Foundation’s soware and to any other program
whose authors commit to using it. (Some other Free Soware
Foundation soware is covered by the GNU Lesser General
Public License instead.) You can apply it to your programs, too.
When we speak of free soware, we are referring to freedom,
not price. Our General Public Licenses are designed to make
sure that you have the freedom to distribute copies of free
soware (and charge for this service if you wish), that you
receive source code or can get it if you want it, that you can
change the soware or use pieces of it in new free programs;
and that you know you can do these things.
To protect your rights, we need to make restrictions that forbid
anyone to deny you these rights or to ask you to surrender the
rights. ese restrictions translate to certain responsibilities for
you if you distribute copies of the soware, or if you modify
it. For example, if you distribute copies of such a program,
whether gratis or for a fee, you must give the recipients all the
rights that you have. You must make sure that they, too, receive
or can get the source code. And you must show them these
terms so they know their rights.
We protect your rights with two steps: (1) copyright the
soware, and (2) oer you this license which gives you legal
permission to copy, distribute and/or modify the soware.
Also, for each author’s protection and ours, we want to make
certain that everyone understands that there is no warranty for
this free soware. If the soware is modied by someone else
and passed on, we want its recipients to know that what they
have is not the original, so that any problems introduced by
others will not reect on the original authors’ reputations.
Finally, any free program is threatened constantly by soware
patents. We wish to avoid the danger that redistributors of a
free program will individually obtain patent licenses, in eect
making the program proprietary. To prevent this, we have made
it clear that any patent must be licensed for everyone’s free use
or not licensed at all.
e precise terms and conditions for copying, distribution and
modication follow.
TERMS AND CONDITIONS FOR COPYING,
DISTRIBUTION AND MODIFICATION
is License applies to any program or other work which
contains a notice placed by the copyright holder saying it may
be distributed under the terms of this General Public License.
e “Program”, below, refers to any such program or work, and
a “work based on the Program” means either the Program or
any derivative work under copyright law: that is to say, a work
containing the Program or a portion of it, either verbatim or
with modications and/or translated into another language.
(Hereinaer, translation is included without limitation in the
term “modication”.) Each licensee is addressed as “you”.
Activities other than copying, distribution and modication are
not covered by this License; they are outside its scope. e act
of running the Program is not restricted, and the output from
the Program is covered only if its contents constitute a work
based on the Program (independent of having been made by
running the Program). Whether that is true depends on what
the Program does.
ENGLISH
1.You may copy and distribute verbatim copies of the Program’s
source code as you receive it, in any medium, provided that
you conspicuously and appropriately publish on each copy an
appropriate copyright notice and disclaimer of warranty; keep
intact all the notices that refer to this License and to the absence
of any warranty; and give any other recipients of the Program a
copy of this License along with the Program.
You may charge a fee for the physical act of transferring a
copy, and you may at your option oer warranty protection in
exchange for a fee.
2. You may modify your copy or copies of the Program or any
portion of it, thus forming a work based on the Program, and
copy and distribute such modications or work under the terms
of Section 1 above, provided that you also meet all of these
conditions:
a) You must cause the modied les to carry prominent notices
stating that you changed the les and the date of any change.
b) You must cause any work that you distribute or publish, that
in whole or in part contains or is derived from the Program or
any part thereof, to be licensed as a whole at no charge to all
third parties under the terms of this License.
c) If the modied program normally reads commands
interactively when run, you must cause it, when started running
for such interactive use in the most ordinary way, to print or
display an announcement including an appropriate copyright
notice and a notice that there is no warranty (or else, saying
that you provide a warranty) and that users may redistribute
the program under these conditions, and telling the user how to
view a copy of this License. (Exception: if the Program itself is
interactive but does not normally print such an announcement,
your work based on the Program is not required to print an
announcement.)
ese requirements apply to the modied work as a whole.
If identiable sections of that work are not derived from the
Program, and can be reasonably considered independent and
separate works in themselves, then this License, and its terms,
do not apply to those sections when you distribute them as
separate works. But when you distribute the same sections
as part of a whole which is a work based on the Program, the
distribution of the whole must be on the terms of this License,
whose permissions for other licensees extend to the entire
whole, and thus to each and every part regardless of who wrote
it.
us, it is not the intent of this section to claim rights or contest
your rights to work written entirely by you; rather, the intent is
to exercise the right to control the distribution of derivative or
collective works based on the Program.
In addition, mere aggregation of another work not based on
the Program with the Program (or with a work based on the
Program) on a volume of a storage or distribution medium does
not bring the other work under the scope of this License.
3. You may copy and distribute the Program (or a work based
on it, under Section 2) in object code or executable form under
the terms of Sections 1 and 2 above provided that you also do
one of the following:
a) Accompany it with the complete corresponding machinereadable source code, which must be distributed under the
terms of Sections 1 and 2 above on a medium customarily used
for soware interchange; or,
b) Accompany it with a written oer, valid for at least three
years, to give any third party, for a charge no more than your
cost of physically performing source distribution, a complete
machine-readable copy of the corresponding source code, to
be distributed under the terms of Sections 1 and 2 above on a
medium customarily used for soware interchange; or,
c) Accompany it with the information you received as to the
oer to distribute corresponding source code. (is alternative
is allowed only for noncommercial distribution and only if you
received the program in object code or executable form with
such an oer, in accord with Subsection b above.)
e source code for a work means the preferred form of the
work for making modications to it. For an executable work,
complete source code means all the source code for all modules
it contains, plus any associated interface denition les, plus
the scripts used to control compilation and installation of
the executable. However, as a special exception, the source
code distributed need not include anything that is normally
distributed (in either source or binary form) with the major
components (compiler, kernel, and so on) of the operating
system on which the executable runs, unless that component
itself accompanies the executable.
If distribution of executable or object code is made by oering
access to copy from a designated place, then oering equivalent
access to copy the source code from the same place counts as
distribution of the source code, even though third parties are
not compelled to copy the source along with the object code.
4. You may not copy, modify, sublicense, or distribute the
Program except as expressly provided under this License.
Anyattempt otherwise to copy, modify, sublicense or distribute
the Program is void, and will automatically terminate your
rights under this License. However, parties who have received
copies, or rights, from you under this License will not have
their licenses terminated so long as such parties remain in full
compliance.
5. You are not required to accept this License, since you have
not signed it. However, nothing else grants you permission to
modify or distribute the Program or its derivative works. ese
actions are prohibited by law if you do not accept this License.
erefore, by modifying or distributing the Program (or any
work based on the Program), you indicate your acceptance
of this License to do so, and all its terms and conditions for
copying, distributing or modifying the Program or works based
on it.
6. Each time you redistribute the Program (or any work based
on the Program), the recipient automatically receives a license
from the original licensor to copy, distribute or modify the
Program subject to these terms and conditions. You may not
E-32
Page 35

impose any further restrictions on the recipients’ exercise of
the rights granted herein. You are not responsible for enforcing
compliance by third parties to this License.
7. If, as a consequence of a court judgment or allegation of
patent infringement or for any other reason (not limited to
patent issues), conditions are imposed on you (whether by
court order, agreement or otherwise) that contradict the
conditions of this License, they do not excuse you from the
conditions of this License. If you cannot distribute so as to
satisfy simultaneously your obligations under this License and
any other pertinent obligations, then as a consequence you
may not distribute the Program at all. For example, if a patent
license would not permit royalty-free redistribution of the
Program by all those who receive copies directly or indirectly
through you, then the only way you could satisfy both it and
this License would be to refrain entirely from distribution of
the Program. If any portion of this section is held invalid or
unenforceable under any particular circumstance, the balance
of the section is intended to apply and the section as a whole is
intended to apply in other circumstances. It is not the purpose
of this section to induce you to infringe any patents or other
property right claims or to contest validity of any such claims;
this section has the sole purpose of protecting the integrity of
the free soware distribution system, which is implemented
by public license practices. Many people have made generous
contributions to the wide range of soware distributed through
that system in reliance on consistent application of that system;
it is up to the author/donor to decide if he or she is willing to
distribute soware through any other system and a licensee
cannot impose that choice. is section is intended to make
thoroughly clear what is believed to be a consequence of the
rest of this License.
8. If the distribution and/or use of the Program is restricted in
certain countries either by patents or by copyrighted interfaces,
the original copyright holder who places the Program under
this License may add an explicit geographical distribution
limitation excluding those countries, so that distribution is
permitted only in or among countries not thus excluded. In
such case, this License incorporates the limitation as if written
in the body of this License.
9. e Free Soware Foundation may publish revised and/
or new versions of the General Public License from time to
time. Such new versions will be similar in spirit to the present
version, but may dier in detail to address new problems
or concerns. Each version is given a distinguishing version
number. If the Program species a version number of this
License which applies to it and “any later version”, you have
the option of following the terms and conditions either of that
version or of any later version published by the Free Soware
Foundation. If the Program does not specify a version number
of this License, you may choose any version ever published by
the Free Soware Foundation.
10. If you wish to incorporate parts of the Program into other
free programs whose distribution conditions are dierent,
write to the author to ask for permission. For soware which
is copyrighted by the Free Soware Foundation, write to the
Free Soware Foundation; we sometimes make exceptions for
this. Our decision will be guided by the two goals of preserving
the free status of all derivatives of our free soware and of
promoting the sharing and reuse of soware generally.
NO WARRANTY
11. BECAUSE THE PROGRAM IS LICENSED FREE
OF CHARGE, THERE IS NO WARRANTY FOR THE
PROGRAM, TO THE EXTENT PERMITTED BY
APPLICABLE LAW. EXCEPT WHEN OTHERWISE
STATED IN WRITING THE COPYRIGHT HOLDERS
AND/OR OTHER PARTIES PROVIDE THE PROGRAM
“AS IS” WITHOUT WARRANTY OF ANY KIND,
EITHER EXPRESSED OR IMPLIED, INCLUDING, BUT
NOT LIMITED TO, THE IMPLIED WARRANTIES OF
MERCHANTABILITY AND FITNESS FOR A PARTICULAR
PURPOSE. THE ENTIRE RISK AS TO THE QUALITY AND
PERFORMANCE OF THE PROGRAM IS WITH YOU.
SHOULD THE PROGRAM PROVE DEFECTIVE, YOU
ASSUME THE COST OF ALL NECESSARY SERVICING,
REPAIR OR CORRECTION.
12. IN NO EVENT UNLESS REQUIRED BY APPLICABLE
LAW OR AGREED TO IN WRITING WILL ANY
COPYRIGHT HOLDER, OR ANY OTHER PARTY WHO
MAY MODIFY AND/OR REDISTRIBUTE THE PROGRAM
AS PERMITTED ABOVE, BE LIABLE TO YOU FOR
DAMAGES, INCLUDING ANY GENERAL, SPECIAL,
INCIDENTAL OR CONSEQUENTIAL DAMAGES ARISING
OUT OF THE USE OR INABILITY TO USE THE PROGRAM
(INCLUDING BUT NOT LIMITED TO LOSS OF DATA
OR DATA BEING RENDERED INACCURATE OR LOSSES
SUSTAINED BY YOU OR THIRD PARTIES OR A FAILURE
OF THE PROGRAM TO OPERATE WITH ANY OTHER
PROGRAMS), EVEN IF SUCH HOLDER OR OTHER PARTY
HAS BEEN ADVISED OF THE POSSIBILITY OF SUCH
DAMAGES.
END OF TERMS AND CONDITIONS
How to Apply ese Terms to Your New Programs
If you develop a new program, and you want it to be of the
greatest possible use to the public, the best way to achieve this
is to make it free soware which everyone can redistribute and
change under these terms.
To do so, attach the following notices to the program. It is safest
to attach them to the start of each source le to most eectively
convey the exclusion of warranty; and each le should have at
least the “copyright” line and a pointer to where the full notice
is found.
One line to give the program’s name and a brief idea of what
it does.
Copyright (C) <year><name of author>
is program is free soware; you can redistribute it and/or
modify it under the terms of the GNU General Public License
as published by the Free Soware Foundation; either version 2
of the License, or (at your option) any later version.
is program is distributed in the hope that it will be useful,
but WITHOUT ANY WARRANTY; without even the implied
warranty of MERCHANTABILITY or FITNESS FOR A
PARTICULAR PURPOSE. See the GNU General Public
License for more details.
You should have received a copy of the GNU General Public
License along with this program; if not, write to the Free
Soware Foundation, Inc., 59 Temple Place, Suite 330, Boston,
MA 02111-1307 USA
Also add information on how to contact you by electronic and
paper mail.
If the program is interactive, make it output a short notice like
this when it starts in an interactive mode:
Gnomovision version 69, Copyright (C) year name of author
Gnomovision comes with ABSOLUTELY NO WARRANTY; for
details type ‘show w’. is is free soware, and you are welcome
to redistribute it under certain conditions; type ‘show c’ for
details.
e hypothetical commands ‘show w’ and ‘show c’ should show
the appropriate parts of the General Public License. Of course,
the commands you use may be called something other than
‘show w’ and ‘show c’; they could even be mouse-clicks or menu
items--whatever suits your program.
You should also get your employer (if you work as a
programmer) or your school, if any, to sign a “copyright
disclaimer” for the program, if necessary. Here is a sample; alter
the names:
Yoyodyne, Inc., hereby disclaims all copyright interest in the
program ‘Gnomovision’ (which makes passes at compilers)
written by James Hacker.
signature of Ty Coon, 1 April 1989
Ty Coon, President of Vice
is General Public License does not permit incorporating
you program into proprietary programs. If your program is
subroutine library, you may consider it more useful to permit
linking proprietary applications with the library. If this is what
you want to do,
use the GNU Library General Public License instead of this
License.
English
E-33
Page 36

E-34
Page 37

product
guarantee
Worldwide Guarantee
is entitles you to have the unit repaired free of charge, during the rst two years aer
purchase, provided that it was originally purchased from an authorised Arcam dealer.
e Arcam dealer is responsible for all aer-sales service. e manufacturer can take no
responsibility for defects arising from accident, misuse, abuse, wear and tear, neglect or
through unauthorised adjustment and/or repair, neither can they accept responsibility
for damage or loss occurring during transit to or from the person claiming under the
guarantee.
The warranty covers:
Parts and labour costs for two years from the purchase date. Aer two years you must pay
for both parts and labour costs. e warranty does not cover transportation costs at any
time.
Claims under guarantee
is equipment should be packed in the original packing and returned to the dealer from
whom it was purchased. It should be sent carriage prepaid by a reputable carrier – not
by post. No responsibility can be accepted for the unit whilst in transit to the dealer or
distributor and customers are therefore advised to insure the unit against loss or damage
whilst in transit.
For further details contact Arcam at:
Arcam Customer Support Department,
Pembroke Avenue, Waterbeach, CAMBRIDGE, CB25 9QR, England
or via www.arcam.co.uk.
Problems?
If your Arcam dealer is unable to answer any query regarding this or any other Arcam
product please contact Arcam Customer Support at the above address and we will do our
best to help you.
English
On-line registration
You can register your product on-line at www.arcam.co.uk.
E-35
Correct disposal of this product
is marking indicates that this
product should not be disposed with
other household waste throughout
the EU.
To prevent possible harm to the
environment or human health from
uncontrolled waste disposal and to
conserve material resources, this
product should be recycled responsibly.
To dispose of your product, please use your local
return and collection systems or contact the retailer
where the product was purchased.
Page 38

Page 39
BDP100
MANUEL Lecteur disque Blu-ray
Français
ULTRA HIGH PERFORMANCE 24-BIT DAC
Page 40
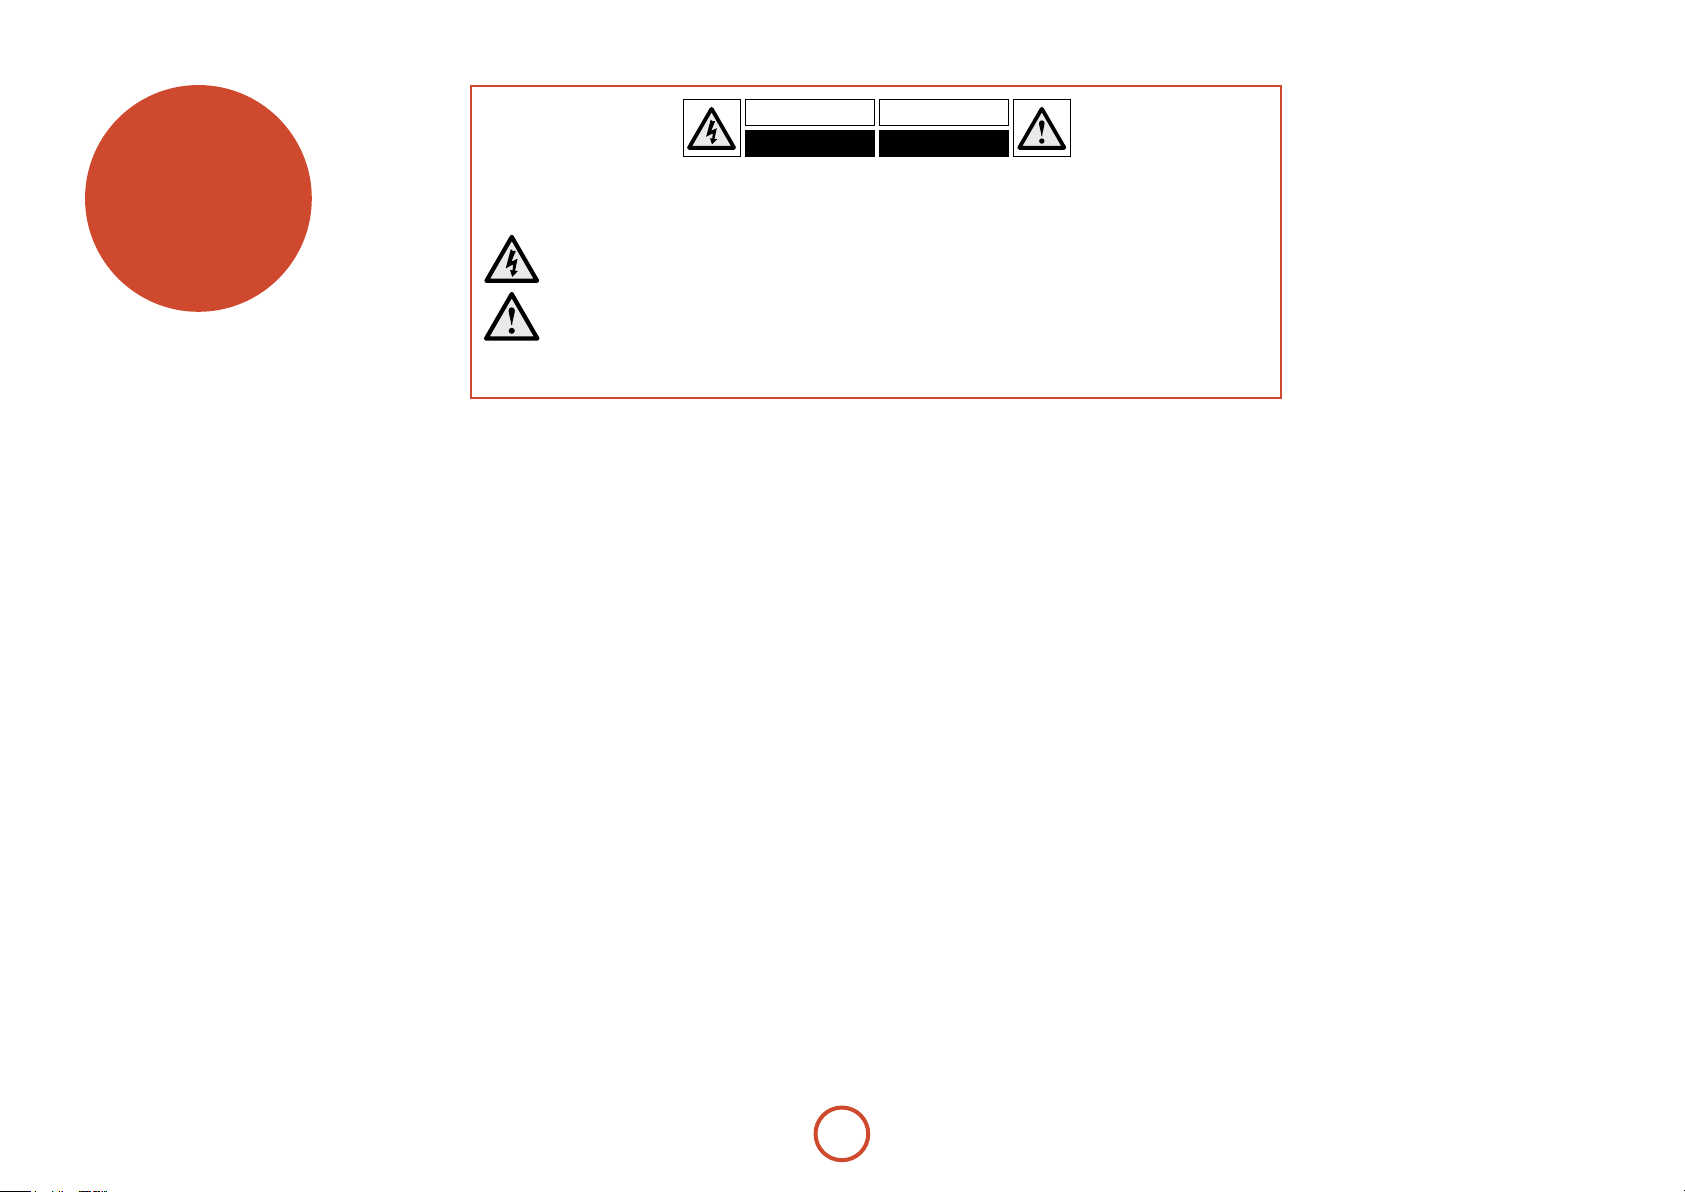
consignes de
sécurité
Bon nombre des consignes ci-dessous sont de simples précautions de bon sens. Nous vous recommandons toutefois de les lire pour votre propre sécurité et pour ne pas endommager l’appareil.
ATTENTION : an de réduire les risques d’électrocution, n’ouvrez pas le boîtier de l’appareil. Les pièces internes ne sont pas réparables
par l’utilisateur. Conez toute réparation à du personnel qualié.
ATTENTION : an de réduire les risques d’électrocution et d’incendie, veillez à ne pas exposer cet appareil à la pluie ou à l’humidité.
Le triangle dans lequel gure le symbole d’un éclair alerte l’utilisateur de la présence, dans le boîtier de l’appareil, d’une tension
dangereuse, non isolée et susamment importante pour représenter un risque d’électrocution.
Le triangle dans lequel gure un point d’exclamation alerte l’utilisateur de la présence d’instructions de fonctionnement et de
maintenance (réparation) importantes dans la documentation accompagnant le produit.
ATTENTION : au Canada et aux Etats-Unis, an d’empêcher tout risque d’électrocution, alignez la plus grosse broche de la prise à la
fente la plus large de la che et insérez entièrement la prise dans la che.
Instructions de sécurité
importantes
Cet appareil a été conçu et fabriqué conformément aux
normes de qualité et de sécurité les plus strictes. Vous
devez cependant observer les précautions qui suivent
lors de son installation et de son utilisation.
1. Respect des avertissements et consignes
Il est impératif de lirel’ensemble des consignes de
sécurité et d’utilisation avant de mettre cet appareil en
marche. Conservez ce manuel pour vous y référer par
la suite et respectez scrupuleusement les avertissements
gurant dans ce manuel ou sur l’appareil lui-même.
2. Eau et humidité
L’installation d’un appareil électrique à proximité d’une
source d’eau présente de sérieux risques. Il ne faut donc
pas installer l’appareil près d’une baignoire, d’un lavabo,
d’un évier, dans un sous-sol humide, près d’une piscine,
etc.
3. Chute d’objets ou inltration de liquides
Veillez à ne pas laisser tomber d’objets ni couler de
liquides à travers les ouvertures de l’appareil et ne placez
pas sur l’appareil d’objet contenant du liquide, tel qu’un
vase par exemple.
4. Ventilation
Évitez de placer l’appareil sur un lit, un canapé, un
tapis ou une surface similaire instable ou dans une
bibliothèque ou un meuble fermé. Ceci risquerait de
nuire à la ventilation du système.
5. Exposition à la chaleur
Ne posez pas l’appareil sur un lit, un canapé, un tapis
ou une autre surface non rigide. Ne l’installez pas non
plus dans un endroit fermé tel qu’un placard ou une
bibliothèque fermée, cela entraverait en eet la bonne
ventilation de l’appareil.
Laissez un espace minimum de 5 cm autour de l’appareil
an de garantir une circulation susante de l’air.
6. Chaleur
Maintenez l’appareil éloigné de toute amme nue
ou d’appareils produisant de la chaleur, comme des
radiateurs, des fours ou autres.
7. Conditions climatiques
L’appareil est conçu pour fonctionner sous climat
tempéré.
8. Nettoyage
Mettez l’appareil hors-tension avant de le nettoyer.
Pour l’entretien du boîtier, utilisez uniquement un
chion doux, humide et non pelucheux. N’utilisez pas
de diluant pour peinture ni de solvant chimique.
L’emploi d’aérosols ou de produits de nettoyage pour
meubles est déconseillé, car le passage d’un chion
humide risquerait de laisser des traces blanches et
indélébiles.
9. Alimentation secteur
Branchez l’appareil uniquement sur une alimentation
secteur du type mentionné dans le manuel d’utilisation
ou indiqué sur l’appareil lui-même.
Le principal moyen d’isoler l’appareil du circuit
électrique est de débrancher l’appareil. L’appareil
doit être installé de façon à pouvoir le débrancer si
nécessaire.
10. Protection des câbles d’alimentation secteur
Veillez à ce que les câbles d’alimentation ne se trouvent
pas dans un lieu de passage ou bloqués par d’autres
objets. Cette règle s’applique plus particulièrement aux
prises et câbles d’alimentation et à leurs points de sortie
de l’appareil.
11. Périodes de non-utilisation
Si l’appareil possède une fonction de mise en veille, un
courant faible continuera de circuler lorsqu’il sera réglé
sur ce mode. Débranchez le cordon secteur de la prise
murale si l’appareil doit rester inutilisé pendant une
période prolongée.
12. Odeur suspecte
Arrêtez et débranchez immédiatement l’appareil en cas
d’émission de fumée ou d’odeur anormale. Contactez
immédiatement votre revendeur et ne rebranchez pas
l’appareil.
13. Service
N’essayez jamais d’eectuer d’autres opérations que celles
mentionnées dans ce manuel. Toute autre intervention
doit être eectuée par un personnel qualié.
14. Les piles
N’exposez pas les piles à une chaleur excessive
(chauage, soleil, etc.) et ne les jetez pas au feu.
Nous vous incitons à éliminer les piles usagées de façon
responsable, et à vous informer sur les possibilités locales
en matière de recyclage. Le recyclage des piles contribue
à éviter la contamination des décharges, des eaux
souterraines et de surface et de l’air par les métaux lourds.
15. Entretien par des techniciens qualiés
L’appareil doit être entretenu par du personnel qualié
lorsque :
A. la prise ou le câble d’alimentation a été
endommagé,
B. des objets sont tombés ou du liquide a coulé dans
l’appareil,
C. l’appareil a été exposé à la pluie,
D. l’appareil présente des dysfonctionnements,
E. l’appareil est tombé ou le boîtier a été endommagé.
Respect des consignes de sécurité
Cet appareil a été conçu pour répondre à la norme
internationale de sécurité électrique EN60065.
Cet appareil est conforme à la Section 15 des règles
de la FCC. Son fonctionnement est soumis aux deux
conditions suivantes :
(1) ce produit ne risque pas de causer d’interférences
nuisibles et
(2) ce produit doit accepter toutes les interférences
reçues, y compris celles qui risquent d’entraîner un
fonctionnement indésirable.
F-2
Page 41

Table des matières
consignes de sécurité ...............................F-2
bienvenue...................................................F-3
installation .................................................F-4
Mise en place de l’appareil ...............................F-4
Alimentation électrique .....................................F-4
Entrées télécommande et déclenchement F-4
Câbles de branchement ..................................... F-4
Eectuer des branchements vidéo ................F-6
Branchements audio ...........................................F-6
L’interface HDMI ....................................................F-7
Présentation de l’HDMI ...................................... F-7
Connexion par HDMI ...........................................F-7
Dépannage en cas de problème HDMI ........ F-7
formats de disque et de fichier ..............F-8
Disques compatibles ........................................... F-8
Fichiers compatibles ............................................ F-8
Codage région ....................................................... F-8
Connexion réseau ................................................. F-9
Connexion USB ......................................................F-9
fonctionnement de base ......................F-10
télécommande .......................................F-11
Commande du BDP100 ....................................F-12
Commandes avancées ......................................F-13
Informations utiles .............................................F-14
Mode périphérique / Touches source .........F-14
Commande d’autres appareils ......................F-15
Rappel du code ....................................................F-15
fonctionnement avancé ....................... F-16
Informations du disque ....................................F-16
Menus ......................................................................F-16
Sélection de la piste audio ..............................F-16
Sous-titres ..............................................................F-16
Bonusview et BD-Live .......................................F-17
Lecture de chiers ..............................................F-18
Commandes de lecture avancées ................F-19
menus de conguration ....................... F-20
dépannage .............................................. F-23
formats de sortie audio et vidéo ........ F-24
Format de sortie audio .....................................F-24
Résolution de sortie Vidéo ..............................F-25
Nous vous remercions et vous félicitons d’avoir acheté ce lecteur disque Blu-ray FMJ Arcam.
Cela fait aujourd’hui plus de trois décennies qu’Arcam conçoit des produits hi et home cinéma
spécialisés d’une qualité remarquable. Le BDP100, qui permet de faire passer des disques Bluray, des disques DVD-Vidéo et des CD audio, est le dernier-né d’une longue lignée d’appareils
home cinéma maintes fois primés. La gamme FMJ capitalise sur l’expérience considérable
d’Arcam, l’un des plus grands spécialistes britanniques de produits audio, conçus pour vous
assurer des années de plaisir audiophile sans le moindre problème.
Ce manuel vise à vous fournir toutes les informations dont vous aurez besoin pour installer,
brancher et utiliser votre lecteur disque Blu-ray Arcam BDP100. La télécommande CR104,
livrée avec l’appareil, y est également décrite. Reportez-vous à la table des matières ci-contre
pour rechercher les rubriques qui vous intéressent.
Nous espérons que votre lecteur Blu-ray FMJ vous assurera des années de fonctionnement
sans le moindre problème. Dans l’éventualité, peu probable, où une panne surviendrait, ou
si vous recherchez simplement des informations supplémentaires sur les produits Arcam, les
représentants de notre réseau de revendeurs se feront un plaisir de vous aider. Ces informations
sont également disponibles sur le site internet d’Arcam à l’adresse www.arcam.co.uk.
L’équipe de développement FMJ
personnalisation de la CR104 ..............F-26
Apprentissage de code .....................................F-26
Création de macros ............................................F-27
Punch-through du volume ............................F-27
Déplacement de touche ..................................F-27
Déplacement de mode .....................................F-28
Verrouillage/Déverrouillage d’un mode
périphérique particulier ..................................F-28
Punch-through infrarouge de
la touche Mode ....................................................F-29
Réinitialisation de la CR104 .............................F-29
résumé des commandes ..................................F-29
Codes périphérique ...........................................F-29
Commandes infrarouge ....................... F-30
spécications ..........................................F-31
Interférences radio .............................................F-31
Radiation laser ......................................................F-31
garantie du produit ............................... F-33
tableaux de code périphérique ..............34
bienvenue
Français
F-3
Page 42

installation
Le BDP100 d’Arcam ore une qualité audio exceptionnelle à partir de disques Blu-ray, de
disques DVD-Vidéo et de disques compacts.
Le BDP100 est équipé d’un DAC (convertisseur numérique-analogique) Delta Sigma ultra
perfectionné an de garantir une qualité de son optimale pour les disques vidéo et audio.
Le BDP100 est livrée avec la télécommande universelle CR104, facile à utiliser et permettant
de commander jusqu’à huit périphériques audio tels qu’un amplicateur, un téléviseur ou un
magnétoscope.
Le lecteur Blu-ray BDP100 haute performance est conçu pour que vos lms et votre musique
prennent véritablement vie.
Mise en place de l’appareil
< Posez le lecteur BD sur une surface plane et
ferme, en évitant de l’exposer directement aux
rayons du soleil ou à une source de chaleur ou
d’humidité.
< Ne posez pas le lecteur BD au-dessus d’un
amplicateur de puissance ou de toute autre
source de chaleur.
< N’installez pas le lecteur BD dans un endroit
conné, tel qu’une bibliothèque ou un placard
fermé, sauf si la ventilation est susante. Lorsque
le lecteur BD est en marche, sa température
augmente, ce qui est normal.
< Ne posez pas un autre appareil ou objet
au-dessus du lecteur BD car cela pourrait bloquer
le ux de ventilation autour de l’appareil, ce qui
entraînerait une surchaue de l’appareil.
< Veillez à ce que le capteur de la télécommande
(situé près de l’écran sur la façace de
l’appareil) ne soit pas bloqué, ce qui gênerait le
fonctionnement de la télécommande.
< Ne posez pas votre platine-disque sur cet
appareil. Les platines sont des appareils très
sensibles aux bruits générés par l’alimentation
secteur. Ces derniers peuvent s’entendre en bruit
de fond si la platine est trop près de l’appareil.
Alimentation électrique
Le lecteur BD est livré avec une prise de courant moulée
intégrée au câble. Vériez que la prise livrée correspond
bien à votre circuit électrique. S’il vous faut un autre
câble d’alimentation, veuillez vous adresser à votre
revendeur Arcam.
Si la tension ou les prises de votre circuit électrique sont
diérentes, contactez immédiatement votre revendeur
Arcam.
Insérez la prise IEC du câble d’alimentation dans
la che située au dos du lecteur BD, en poussant
fermement pour assurer un branchement correct.
Branchez l’autre extrémité du câble sur votre prise
secteur, et, si nécessaire, allumez celle-ci.
Entrées télécommande et
déclenchement
L’entrée REMOTE IN peut être utilisée pour la
transmission de codes RC5 (indiqués sur la page F-30) vers
le BDP100 si ce dernier est installé dans une position ou
sur un système empêchant l’utilisation de l’infrarouge.
Si cela est nécessaire, veuillez contacter votre revendeur
pour obtenir de plus amples informations.
L’entrée par déclenchement peut être utilisée pour
sortir le BDP100 de l’état de veille ou le mettre sur
veille. Si vous branchez le BDP100 sur la sortie de
déclenchement de votre amplicateur Arcam (ou
tout autre appareil compatible), le BDP100 sortira
automatiquement de l’état de veille à la mise en marche
de l’amplicateur, et se remettra sur veille à la mise hors
tension de l’amplicateur. Pour en savoir plus, veuillez
consulter le mode d’emploi de votre amplicateur.
Dans le cadre d’une utilisation normale, il n’est pas
L’entrée télécommande nécessite une prise jack
mono 3,5 mm, avec pointe active et manchon mis
à la masse.
Les signaux de la télécommande doivent être émis
au format RC5 modulé (à 36 kHz), avec un niveau
de tension compris entre 5 et 12 V.
nécessaire d’eectuer de branchement sur ces entrées.
L’entrée
RS232 est destinée à la connexion facultative
sur un système d’automatisation domestique ou sur un
ordinateur. Vous pouvez trouver divers systèmes tiers
permettant de commander l’ensemble de vos dispositifs
de divertissement à l’aide d’écrans tactiles, etc. Pour
en savoir plus, veuillez contacter votre revendeur ou
installateur. Les détails techniques du protocole de
télécommande sont disponibles sur demande auprès
d’Arcam (envoyez un email à support@arcam.co.uk).
Câbles de branchement
Il est recommandé d’utiliser des câbles blindés de haute
qualité, conçus pour ce genre d’application. L’utilisation
d’autres câbles, dont les caractéristiques d’impédance
dièrent, risque d’aecter les performances de votre
système. (Par exemple, n’utilisez pas de câble conçu
pour un usage vidéo pour le transport des signaux
audio). Les câbles doivent être aussi courts que possible.
Lors de la connexion du matériel, il convient de vérier
que les câbles d’alimentation secteur sont positionnés
le plus loin possible de vos câbles audio. Vous éviterez
ainsi les bruits indésirables dans les signaux audio.
F-4
Page 43

Entrée
d’alimentation
Branchez le câble
d’alimentation secteur
qui convient ici.
Sorties audio analogiques
Branchez ces sorties sur l’entrée CD de votre
ampli (ou toute autre entrée à niveau de ligne)
en utilisant des câbles d’interconnexion haute
qualité adéquats. Veillez à ce que les sorties
audio gauche et droite du lecteur BD soient
branchées sur les entrées gauche et droite
correspondantes sur votre ampli.
Entrée déclenchement 12 V
Cette prise permet de mettre le BDP100
en marche ou sur veille à partir d’un ampli
(ou de tout autre appareil AV) grâce à la
fonction 12V TRIG OUT. Voir page F-4.
Sortie numérique coaxiale
Utilisez cette prise si vous disposez d’un
récepteur AV avec entrée numérique coaxiale.
Utilisez un câble blindé 75Ω adéquat pour
eectuer le branchement sur l’entrée numérique.
ATTENTION : ne reliez jamais une prise
de sortie numérique sur une entrée audio
classique.
Sortie vidéo composite
Branchez cette sortie sur votre
écran si l’écran ne prend en
charge aucun autre type de
connexion.
Connexion USB
Insérez vos supports mémoire USB
ici. La mémoire USB permet de
sauvegarder le contenu téléchargé.
Le BDP100 peut également faire
passer certains chiers numériques
enregistrés sur des lecteurs mémoire
USB (voir page F-8).
Français
RS232
Cette prise permet l’utilisation
d’une télécommande d’un système
d’automatisation domestique ou
d’un ordinateur.
Pour en savoir plus, veuillez
consulter la page F-4.
Entrée télécommande
Cette entrée permet d’acheminer les signaux de
la télécommande vers le BDP100 si le capteur de
la télécommande est couvert (ou obstrué d’une
manière ou d’une autre).
Pour en savoir plus, veuillez consulter la page F-4.
Sortie numérique
optique
Utilisez cette prise si
vous disposez d’un
récepteur AV avec entrée
audionumérique optique.
Sortie audio zone 2
Utilisez cette sortie analogique
pour garantir l’audio en zone 2.
Elle permet également
de brancher un appareil
d’enregistrement ou d’un ampli
écouteurs.
Sortie vidéo composante
Si votre écran ne prend pas en
charge le HDMI mais dispose
d’une entrée composante, branchez
celle-ci sur cette sortie vidéo.
F-5
Connexion réseau
Branchez cette prise sur un port de votre
routeur réseau à l’aide d’un câble patch
Ethernet (voir page F-9). Une connexion
internet permet d’activer le contenu
interactif des disques BD-Live (pour plus
d’informations sur la conguration, voir
«Réseau» sur la page F-22).
Sortie vidéo numérique HDMI
Branchez cette sortie sur votre écran ou
récepteur AV si disponible, pour une
connexion audio et vidéo numérique optimale
(pour en savoir plus, voir page F-7).
Page 44

Effectuer des branchements vidéo
Pour faire passer des images de votre lecteur BD, vous devez brancher l’une des sorties vidéo de votre écran
(téléviseur, moniteur, projecteur, etc.) ou d’un récepteur AV (l’AVR600 d’Arcam, par exemple).
Le BDP100 dispose de trois options de sortie vidéo, décrites ci-dessous. Un seul type de vidéo est nécessaire, à choisir
à partir de la liste. Sélectionnez un type pris en charge par votre écran ou récepteur AV. Si votre équipement ne
permet aucun des types de connexion ci-dessus, vous ne pourrez pas utiliser cet appareil directement sur le BDP100
et il vous faudra peut-être utiliser un dispositif de conversion vidéo. Dans ce cas, veuillez vous adresser à votre
revendeur qui pourra vous aider.
Il est possible de brancher des récepteurs AV ou tout autre appareil de traitement vidéo entre le BDP100 et votre
écran. Veillez à ce que l’ensemble des appareils accepte le type de signal vidéo que vous souhaitez utiliser. Pour savoir
comment brancher un équipement AV, veuillez consulter le mode d’emploi de celui-ci.
HDMI VIDÉO NUMÉRIQUE
Le connecteur HDMI permet la transmission de signaux vidéo et audio numériques non
compressés entre le BDP100 et l’écran, et représente la meilleure option au niveau qualité.
C’est également, en général, le type de connexion le plus facile à congurer.
Pour utiliser cette connexion vidéo, il vous faut un câble HDMI ou HDMI/DVI entre le
lecteur BDP100 et votre écran ou récepteur. Pour en savoir plus, voir page F-7.
VIDÉO COMPOSANTE
Utilisez trois câbles phono 75 pour brancher les sorties composante Y, Pb, Pr du lecteur
BD sur les entrées Y, Pb, Pr de l’écran. Vérifez que les câbles conviennent à la vidéo et
qu’ils sont à peu près tous de la même taille.
Si votre téléviseur est capable d’accepter un signal vidéo scanné progressivement
(dé-entrelacé), vous pouvez utiliser la sortie vidéo progressive du BDP100. Si vous ne
savez pas si votre écran accepte la vidéo progressive, veuillez consulter le mode d’emploi
ou demander conseil à votre revendeur.
Branchements audio
Le BDP100 propose plusieurs possibilités de branchement audio. Le type de connexion est à choisir en fonction du
reste de votre système: choisissez le type le mieux adapté à votre ampli.
Si vous voulez écouter de l’audio sur ... ... nous vous conseillons le branchement suivant :
Votre téléviseur
<
La façon dont vous faites passer l’audio sur votre téléviseur dépend de ses entrées et de votre connexion
vidéo :
HDMI : Si vous utilisez une connexion HDMI (pas DVI), celle-ci permet le transport des signaux
<
audio et vidéo. Aucune connexion supplémentaire n’est nécessaire.
Audionumérique (coaxiale ou optique) : Si votre téléviseur dispose d’entrée audionumériques
<
ou de connecteurs coaxiaux ou optiques, branchez le câble audionumérique qui convient entre
l’entrée téléviseur et la sortie numérique du BDP100 qui correspond. Ne reliez pas le BDP100 à la
sortie audio numérique d’un téléviseur.
Stéréo phono : Si votre téléviseur est doté d’entrées phono stéréo, suivez les instructions ci-dessous
<
concernant l’ampli stéréo.
Votre ampli stéréo
<
Si vous souhaitez écouter de l’audio à partir de votre lecteur sur un ampli stéréo, veuillez utiliser les
sorties analogiques stéréo. Ces sorties permettent un sous-mixage stéréo de la source.
A l’aide d’un câble phono stéréo de taille adéquate, branchez les sorties indiquées
entrées gauche et droite (dans cet ordre) pour DVD ou CD sur votre ampli.
Votre récepteur de Son Surround
<
Branchez la sortie HDMI sur votre récepteur (audio et vidéo) si le récepteur prend en charge l’audio
sur HDMI. La connexion HDMI accepte tous les formats audio possibles, y compris les formats Dolby
TrueHD, DTS Master Audio et PCM multicanaux.
Si votre récepteur ne prend pas en charge l’audio HDMI, branchez l’une des sorties audionumériques
(optique ou coaxiale) sur l’entrée «Blu-ray», «BD» ou «DVD» de votre récepteur. Ces sorties
numériques permettent une audio PCM, Dolby Digital, DTS ou MPEG multicanaux, selon la source.
Le BDP100 peut également être réglé pour recoder l’audio en DTS («Bitstream Mixed») (voir
«Audio» sur la page F-21). Avec cette option, vous obtenez une qualité de Son Surround optimale pour les
connexions audionumériques.
Si vous le souhaitez, vous pouvez également brancher les sorties audio analogiques stéréo sur l’entrée
CD de votre récepteur, pour pouvoir écouter des CD. Ceci permet d’utiliser le circuit audiophile
numérique-analogique du BDP100, pour une qualité de son optimale.
AUDIO ZON E 1 sur les
VIDÉO COMPOSITE
Si votre écran ne propose qu’une entrée (parfois appelée CVBS ou simplement «vidéo»),
branchez la sortie vidéo
la vidéo. A noter : la qualité d’une connexion vidéo composite n’est pas excellente. Si votre
écran accepte un autre type de connexion vidéo, nous vous conseillons de privilégier
celle-ci.
COMPOSI TE du lecteur BD à l’aide d’un câble phono 75 adapté à
F-6
Utilisation de deux connections vidéo simultanées.
Il est possible d’utiliser deux connexions vidéo simultanément (pour acheminer une connexion vers une
autre pièce ou un autre écran, par exemple). Si vous souhaitez procéder de cette manière, veuillez lire les
remarques suivantes :
La sortie vidéo composite reste toujours active.
<
Elle transporte une sortie entrelacée en permanence.
La sortie vidéo composante reste toujours active.
<
Elle peut être réglée pour transporter une sortie entrelacée ou à balayage progressif.
La sortie HDMI est active uniquement lorsque le BDP100 détecte un écran compatible. Elle peut
<
être réglée pour acheminer une sortie entrelacée, à balayage progressif ou haute dénition.
Page 45

L’interface HDMI
Si votre moniteur ou écran est équipé HDMI ou DVI,
vous pouvez le brancher sur le BDP100 à l’aide d’un
câble HDMI. Le connecteur HDMI transporte un signal
vidéo numérique non-compressé ainsi qu’un signal
audionumérique.
Présentation de l’HDMI
L’HDMI (High Denition Multimedia Interface en
anglais) prend en charge à la fois la vidéo et l’audio
sur une seule connexion numérique pour les lecteur
Blu-ray, les décodeurs ou autres appareils audiovisuels.
L’HDMI fut élaborée pour associer les technologies de
Protection des contenus numériques haute-dénition
(HDCP) et d’Interface visuelle numérique (DVI) sous
une seule caractéristique, en ajoutant la transmission
d’informations audionumériques. Le procédé HDCP
permet de protéger les contenus numériques transmis
sur des écrans compatibles DVI.
La norme HDMI permet d’exploiter la vidéo standard
ou haute-dénition, ainsi que des formats audio de son
surround stéréo ou multicanaux. Le protocole HDMI
inclut une vidéo numérique non-compressée, un seul
connecteur (au lieu de plusieurs câbles et connecteurs)
et une communication entre la source AV et les
périphériques AV.
Connexion par HDMI
Utilisez un câble HDMI pour relier la prise HDMI de ce
lecteur sur une prise HDMI d’un écran ou récepteur
compatible. La èche sur le connecteur du câble doit être
orientée vers le haut pour obtenir un alignement correct
sur le connecteur du BDP100. Si la résolution vidéo du
BDP100 a été réglée sur «HDMI Auto», le BDP100
congurera automatiquement sa sortie vidéo pour qu’elle
corresponde aux capacités du périphérique HDMI relié.
REMARQUE: Une connexion HDMI n’est possible
que sur des composantes HDMI ou DVI compatibles
à la fois avec le DVI et l’HDCP. Si vous décidez de
brancher un périphérique DVI, il vous faudra pour
cela utiliser un adaptateur (HDMI vers DVI). Une
connexion DVI/HDCP ne prend toutefois pas en
charge les signaux audio.
Si vous souhaitez obtenir de plus amples informations
sur les possibilités de connexion de votre BDP100 sur
un écran DVI/HDMI, veuillez vous adresser à votre
revendeur Arcam.
Dépannage en cas de problème HDMI
Problèmes de vidéo
Pas de vidéo (écran vide)
Vériez que le câble HDMI est correctement branché aux
<
deux extrémités. Si vous utilisez un récepteur AV doté de
l’HDMI, essayez de brancher directement le BDP100 sur
l’écran, pour pouvoir isoler la source du problème.
Vériez que l’écran est réglé sur l’entrée HDMI (en d’autres
<
termes, qu’il n’est pas réglé sur une autre entrée vidéo).
Vériez que l’entrée HDMI du récepteur et/ou de l’écran
<
est activée. Pour cela, reportez-vous au mode d’emploi de
l’appareil connecté.
A l’aide d’un autre appareil d’achage vidéo (branché sur la
<
sortie vidéo composite, par exemple), vériez que la vidéo
est retransmise.
Consultez le mode d’emploi de l’écran pour vérier qu’il
<
accepte les formats de sortie proposés par le BDP100. Le
BDP100 propose les formats suivants :
720 x 480p (balayage progressif NTSC) 1280 x 720p
720(1440) x 480i (NTSC entrelacé) 1920 x 1080i
720 x 576p (balayage progressif PAL) 1920 x 1080p
720(1440) x 576i (PAL entrelacé)
Le périphérique connecté doit être compatible avec au moins l’un
de ces standards pour qu’il puisse fonctionner avec le BDP100.
Pas de vidéo (bruit aléatoire)
Un bruit aléatoire sera aché si l’algorythme de protection du contenu
ne parvient pas à authentier le périphérique connecté. Cela peut se
produire, par exemple, si un appareil DVI ne prenant pas en charge le
protocole HDCP (un écran d’ordinateur, par exemple) est branché sur
le BDP100.
Pour essayer d’isoler la source du problème, enlevez tous les disques du
BDP100, puis éteignez le BDP100 et le périphérique connecté. Mettez
l’écran en marche, puis le BDP100. A ce moment, le logo de veille
du BDP100 devrait s’acher sur l’écran. Si ce n’est pas le cas, veuillez
étudier les options indiquées ci-dessus en cas d’écran vide.
Si du bruit apparaît lors de la lecture d’un disque interdit de copie
(Blu-ray/DVD), cela signie un échec du processus d’authentication.
Veuillez vous adresser à votre revendeur pour obtenir de plus amples
informations.
Problèmes audio
Le type d’audio fournit par le connecteur HDMI
dépend de la conguration du BDP100 (voir
«Conguration audio» sur la page F-21).
Sélectionnez une conguration adaptée aux capacités
de système audio. A noter: les périphériques
purement DVI (connexions nécessitant un câble de
conversion HDMI-DVI) ne prenne pas l’audio en
charge par cette connexion.
Français
F-7
Page 46

formats de disque
et de fichier
Disques compatibles
Ce lecteur accepte les types de disque suivants :
Disque Blu-ray
DVD-Vidéo
DVD-R
DVD-RW
CD-Audio
CD-R
CD-RW
REMARQUE
< Seuls les disques BD-RE/-R, DVD-R/-RW et
CD-R/-RW enregistrés au format UDF ou
ISO9660 peuvent être lus.
< Cet appareil prend en charge les versions 2.0
BD-ROM, 3.0 BD-RE et 2.0 BD-R.
< Les disques BD-RE/-R, DVD-R/-RW et
CD-R/-RW non nalisés ne peuvent pas être lus.
< Certains BD-RE 8 cm/BD-R 8 cm ne passent
pas sur ce lecteur.
< Le chargement d’un titre BD-Java peut prendre
un peu plus de temps qu’un titre normal, et il
est possible que certaines fonctions soient un
plus lentes.
< Lors de la lecture d’un CD audio enregistré en
DTS-ES ou Dolby Digital EX, il est possible que
du bruit se fasse entendre.
Disques non compatibles
Tout type de disque non mentionné sur la liste n’est
pas pris en charge par le BDP100. N’essayez pas de
faire passer un disque non compatible.
La lecture de certains BD-RE/BD-R, DVD-RWs/
DVD-Rs ou CD-Rs/CDRWs est impossible en
raison d’une nalisation de disque incomplète, d’une
mauvaise qualité d’enregistrement ou d’une mauvaise
condition physique du disque, d’une incompatibilité
des caractéristiques du périphérique d’enregistrement
ou du logiciel d’édition, etc. Essayez d’enregistrer le
disque à une vitesse inférieure, ou essayez un support
de marque diérente.
Pour en savoir plus, consultez le mode d’emploi livré
avec votre appareil ou logiciel d’enregistrement.
REMARQUE
< Les caractères autres que «A-Z», «0-9», et
«-» ne pourront peut-être pas s’acher.
< Cet appareil ne prend pas en charge les disques
multissessions. Il est possible que le chargement
de certains disques multissessions prenne
beaucoup de temps ou ne se fasse pas du tout.
< Certaines fonctions ne sont pas disponibles
durant la lecture de certains chiers.
< Il se peut que la lecture de certains chiers
soit impossible, même si leur extension est
compatible sur ce lecteur.
< Les chiers protégés par DRM (Gestion des
droits numériques) ne peuvent pas passer.
Fichiers compatibles
Ce lecteur accepte les types de chier suivants :
< MP3 (“.mp3”)
Fréquence d’échantillonage : 44.1kHz, 48kHz
Débit binaire : jusqu’à 320 Ko/s
Tags ID3 non pris en charge.
Les chiers MP3i et MP3 Pro ne sont pas pris en
charge.
< WMA (“.wma”)
Fréquence d’échantillonage : 44.1kHz, 48kHz
Débit binaire : jusqu’à 192 Ko/s
Tags WMA non pris en charge.
< AAC (“.m4a”)
Fréquence d’échantillonage : 44.1kHz, 48kHz
Débit binaire : jusqu’à 320 Ko/s
Tags AAC non pris en charge.
< JPEG (“.jpg, .jpeg”)
Résolution maximum : 4 272x2 848 pixels.
Les images au format JPEG enregistrées en format
progressif ne peuvent pas passer.
< AVI (“.avi”)
Codec compatible : Xvid
Taille d’image maximum : 1920 x 1080@30 fps
< WMV (“.wmv”)
Codec compatible : WMV9
Taille d’image maximum : 1920 x 1080@30 fps
Codage région
Des codes région sont attribués aux lecteurs Blu-ray et
aux disques Blu-ray ou DVD Vidéo selon leur région
de vente. Si les codes région ne correspondent pas, le
disque ne pourra pas passer.
Code région de
disque Blu-ray
A Amérique du Nord, Amérique Centrale,
B Europe, Groenland, les territoires
C Inde, Chine, Russie, Asie Centrale et
A + B + C Toutes les régions
Code région
DVD
1 Amérique du nord
2 Europe, Japon, Moyen Orient, Egypte,
3 Taïwan, Corée, Philippines, Indonésie,
4 Mexique, Amérique du Sud, Amérique
5 Russie, Europe de l’Est, Inde, la plupart
6 Chine
Tous Toutes les régions
Symboles indiquant qu’un disque peut passer en
Amérique du Nord :
Disques Blu-ray : DVD :
Symboles indiquant qu’un disque peut passer en Europe :
Disques Blu-ray : DVD :
Région
Amérique du Sud, Corée, Japon,
Taïwan, Hong Kong et Asie du Sud-Est
d’outre-mer français, Moyen Orient,
Afrique, Australie et Nouvelle Zélande
Asie du Sud
Région
Afrique du Sud, Groenland
Hong Kong
Centrale, Australie, Nouvelle Zélande,
les Iles du Pacique, Caraïbes
de l’Afrique, Corée du Nord, Mongolie
F-8
Page 47
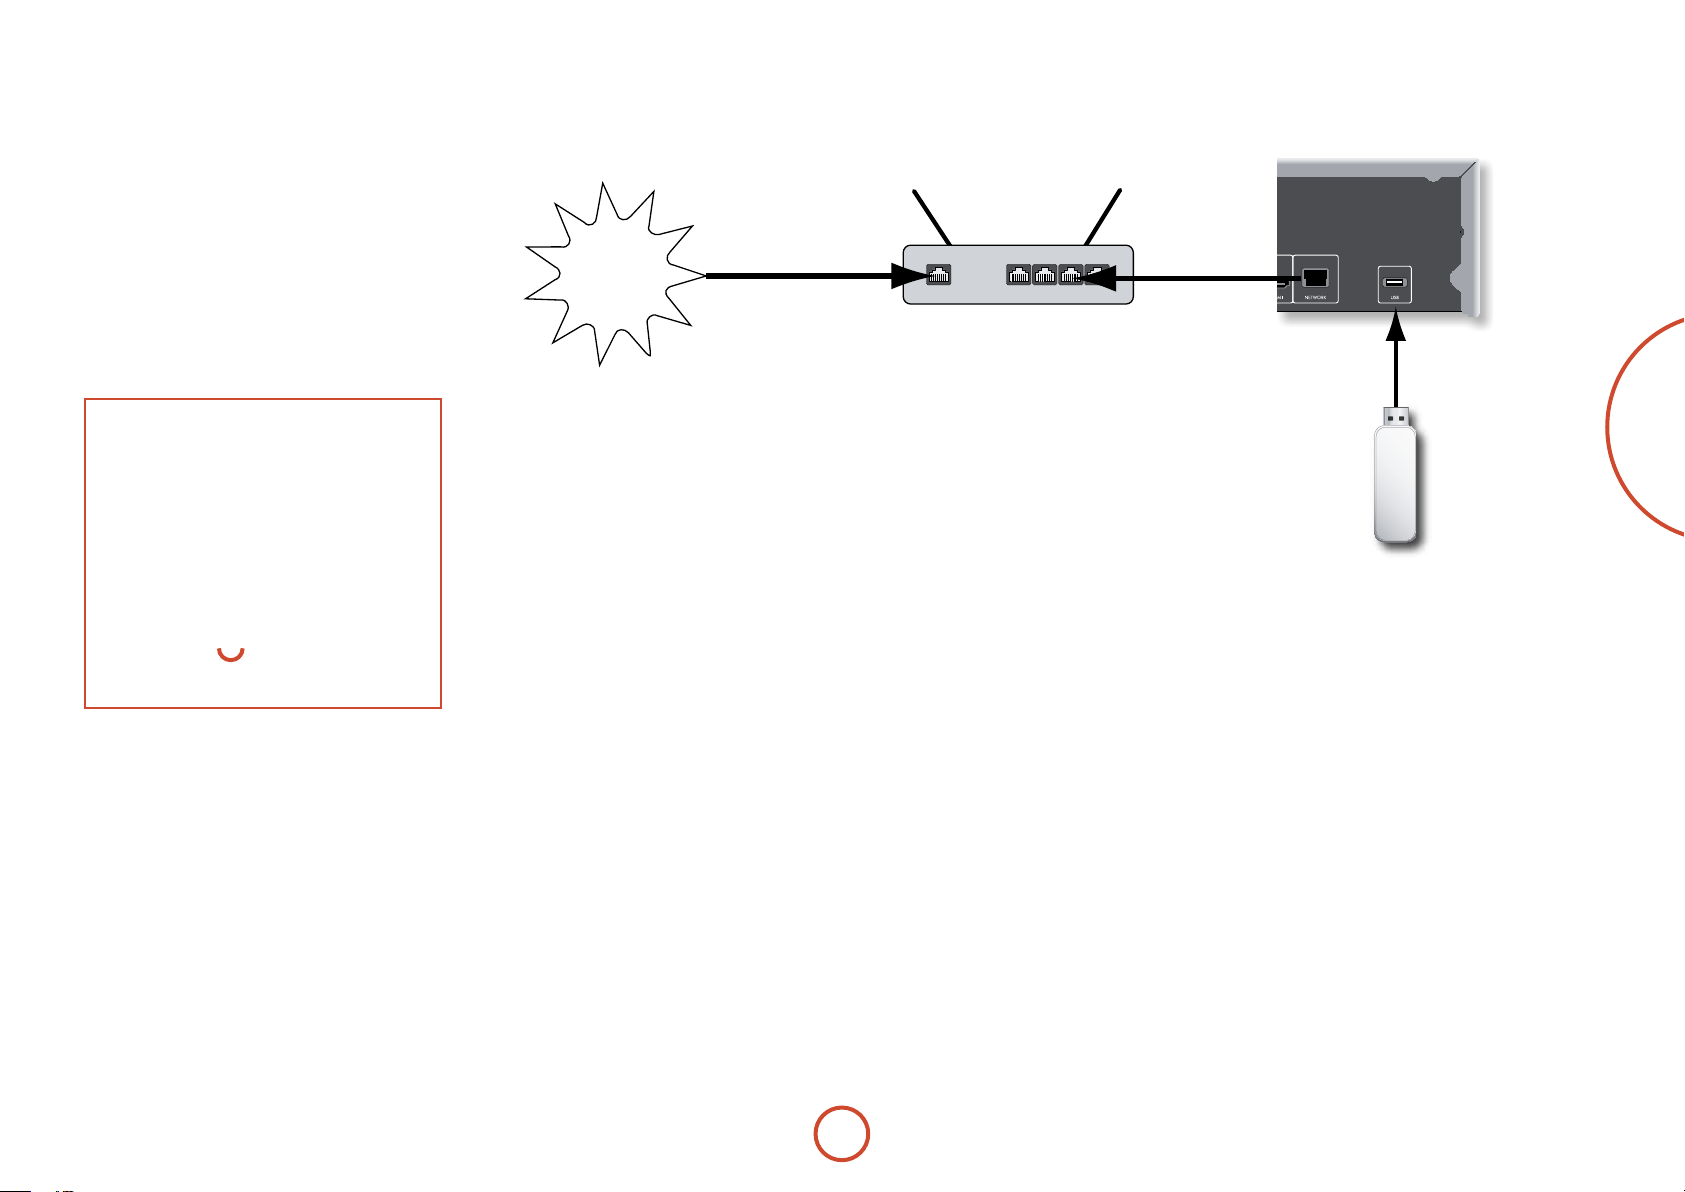
Connexion réseau
Les disques BD-Live permettent d’activer le
téléchargement de contenu supplémentaire sur internet.
Pour proter de ce contenu, branchez la prise réseau
du BDP100 sur un port LAN de votre routeur réseau
à l’aide d’un câble patch Ethernet (en vente dans les
magasins d’accessoires informatiques).
Pour cela, un réseau local avec connexion internet est
nécessaire. Si vous ne vous connectez pas sur internet
par un routeur (par exemple, si vous branchez un
ordinateur unique), veuillez contacter votre opérateur
internet ou un informaticien professionnel pour
l’installation d’un réseau domestique.
REMARQUE
< Lorsque le lecteur est sous tension, sans
réseau conguré, un message apparaît sur
l’écran proposant d’appuyer sur la touche
de fonction ROUGE de la télécommande
pour accéder aux paramètres réseau. Il sut
d’appuyer sur la touche ROUGE pour passer
directement au menu des paramètres réseau.
Pour plus de détails, veuillez consulter la
page F-22.
< N’oubliez pas d’appuyer sur la touche
puis sur
S
rouge.
pour accéder à la touche
u
Internet
Routeur
LAN
BDP100 Arcam
Lecteur USB
Français
Connexion USB
Les périphériques mémoire USB (mémoires ash)
permettent la lecture multimédia et sont nécessaire pour
stocker du contenu BD-Live téléchargé. Pour proter
du contenu BD-Live, les caractéristiques suivantes sont
conseillées:
• 2 Go de capacité
• FAT32 formaté
• USB2.0 haut débit (480 Mo/s)
Branchez le périphérique USB sur la prise USB au dos
de l’appareil.
F-9
Page 48
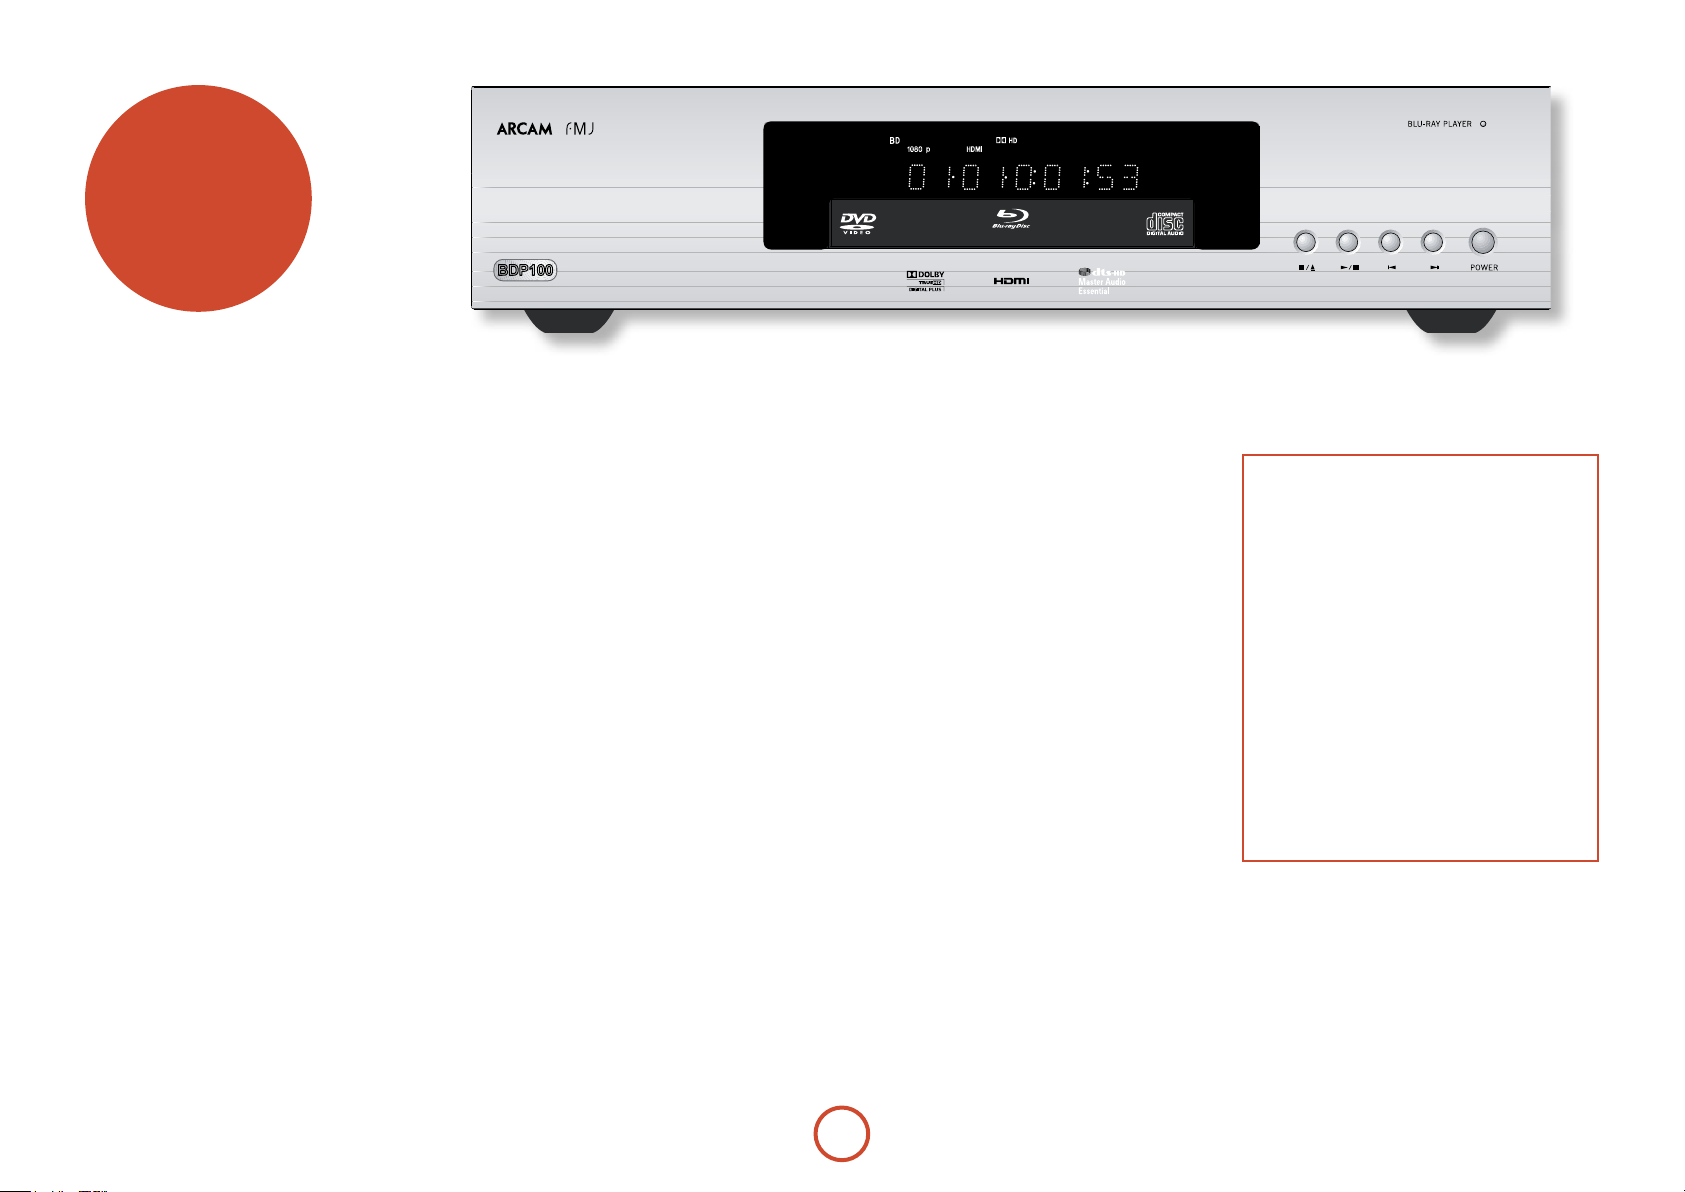
fonctionnement
de base
Introduction
La rubrique «fonctionnement de base» explique
comment faire passer un disque Blu-ray (BD), DVD,
CD, ou tout autre type de disque. Il peut s’avérer
nécessaire de congurer votre lecteur en fonction de
votre système avant de pouvoir obtenir un résultat de
lecture optimal. La conguration du lecteur est décrite à
partir de la page F-20.
Les fonctionnalités plus perfectionnées (modes
de lecture spéciales, sauts de programmation et
séquences de lecture) sont décrites sous la rubrique
«fonctionnement avancé» un peu plus loin dans ce
manuel.
Mise en marche
Appuyez sur la touche
en marche. Le voyant devient vert lorsque l’appareil est
sous tension et rouge lorsqu’il est en mode veille. La
télécommande permet d’accéder au mode veille et de le
quitter. Si vous appuyez sur la touche POWER (ou si vous
débranchez l’appareil) lorsque l’appareil est sur veille, ce
dernier se remettra en mode veille à la prochaine mise
sous tension.
A noter : le capteur de la télécommande est situé sur
le côté droit de l’écran. Ne l’obstruez pas pour que la
télécommande puisse fonctionner.
POWER pour mettre l’appareil
Chargement d’un disque
Appuyez sur
télécommande) et posez le disque sur le plateau, face de
lecture vers le bas (certains disques sont à double face.
Dans ce cas, la face A doit être vers le haut pour une
lecture de cette face).
Appuyez sur
plateau. Au bout de quelques secondes, le chargement
du disque est lancé.
Lecture d’un disque
Le chargement d’un disque peut prendre un certain
temps à partir du moment ou le plateau se referme.
Lorsque l’option «Lecture automatique de disque
optique» est activée (réglage par défaut), la lecture
démarre automatiquement. (Pour en savoir plus, voir la
rubrique «Lecture automatique de disque optique» sur
la page F-22).
Si la lecture automatique n’est pas sélectionnée, le menu
principal du lecteur s’ache sur votre téléviseur. Utilisez
les touches de navigation
puis appuyez sur O pour lancer la lecture.
Certains titres démarrent par l’achage d’un menu.
Utilisez le pavé de navigation pour sélectionner l’option
‘Lecture du lm’ (ou équivalent) sur le menu, puis
appuyez sur
Pour les disques dont la lecture ne démarre pas
automatiquement, appuyez sur
sur 4 sur la télécommande.
sur la façade (ou sur 1 sur la
</1
sur la façade pour refermer le
</1
pour sélectionner le disque,
OK pour lancer la lecture.
4/ ;
sur la façade ou
ULTRA HIGH PERFORMANCE 24-BIT DAC
Lecture accélérée
Appuyez sur
télécommande pour une avance rapide ou un retour
rapide. Les vitesses de lecture suivantes sont proposées :
x2, x4, x8, x16, x32, x64 et x128 (selon le type de disque).
Appuyez plusieurs sur la touche pour faire déler les
diérentes vitesses. Pour reprendre la vitesse de lecture
normale, appuyez sur PLAY.
Saut de chapitres/pistes
Pour passer des chapitres (ou des pistes sur un CD),
appuyez sur
Lorsque vous revenez en arrière, la première pression
sur la touche vous renvoie au début du chapitre en cours.
Une nouvelle pression sur cette touche vous renvoie au
début du chapitre précédent.
Pause de la lecture
Appuyez sur la touche
la télécommande pour mettre la lecture sur pause. Pour
reprendre la lecture, appuyez sur 4/
sur 4 sur la télécommande.
Arrêt de la lecture
Appuyez sur la touche
la télécommande pour arrêter la lecture.
Lorsque vous faites passer un BD/DVD, une seule
pression sur
appuyez maintenant sur 4, la lecture reprend au point
d’arrêt.
ou sur 7 sur la façade ou sur la
8
ou sur 0.
/
sur la façade ou sur
4/ ;
sur la façade ou
;
sur la façade ou sur
</1
eectue un «arrêt reprise». Si vous
<
sur
;
sur
<
REMARQUE
Lorsque vous appuyez sur une touche, si l’appareil
n’accepte pas cette opération, s’ache sur l’écran
du téléviseur.
Certaines opérations ne sont parfois pas acceptées,
même si ne s’ache pas.
Une opération non valide est prévisible si :
< Les codes région de l’appareil dièrent
de celui du disque: la lecture ne sera pas
autorisée.
< Le contrôle parental bloque l’utilisation de
l’appareil.
(Pour en savoir plus, veuillez consulter la
rubrique «Contrôle parental» page F-21.)
< Les opérations et fonctions BD/DVD peuvent
varier par rapport aux explications de ce
manuel. Certaines opérations sont interdites
par les paramètres du fabricant du disque.
Si vous appuyez deux fois sur </
sur la télécommande, c’est un «arrêt complet», et la
<
lecture reprend à partir du début du disque.
sur la façade ou sur
1
F-10
Page 49

télécommande
Le BDP100 est livré avec la télécommande universelle
CR104.
Utilisation de la télécommande
Veuillez garder à l’esprit les règles suivantes lorsque
vous utilisez la télécommande.
< Veillez à ce qu’aucun obstacle ne se trouve
entre la télécommande et le capteur de la
télécommande sur la façade. La portée de la
télécommande est d’environ 7 mètres. (Si
le capteur de la télécommande est obstrué,
vous pouvez utiliser la prise d’entrée de la
télécommande IF in au dos de l’appareil.
Veuillez vous adresser à votre revendeur pour
obtenir de plus amples informations.)
< La télécommande peut devenir capricieuse si
le capteur de la télécommande sur l’appareil
est exposé à une puissante luminosité solaire
ou articielle.
< Remplacez les piles si vous remarquez une
réduction de la portée de la télécommande.
Insertion des piles dans la
télécommande
1. Ouvrez le compartiment des piles en appuyant
sur le bouton au dos de la télécommande.
2. Insérez quatre piles AAA dans le logement: deux
piles dont les bornes + sont dirigées vers le haut,
et deux dirigées vers le bas, comme illustré.
3. Rabattez le couvercle sur la plaque de
positionnement en plastique du boîtier. Cela fait
oce de charnière et vous pouvez maintenant
pousser le couvercle de façon ferme jusqu’à ce
que vous entendiez un clic indiquant que le
couvercle est verrouillé.
Remarques sur les piles :
Une mauvaise utilisation des piles peut entrainer
<
un risque de fuite ou d’explosion.
Ne mélangez pas piles usagées et piles neuves.
<
Ne mélangez pas des piles de types diérents –
<
elles peuvent paraître identiques, mais des piles
diérentes peuvent avoir une tension diérente.
Veillez à ce que les bornes positive (+) et négative
<
(-) de chaque pile correspondent aux indications
du compartiment des piles.
Sortez les piles de l’appareil si vous n’avez pas
<
l’intention de l’utiliser pendant plus d’un mois.
Lorsque vous devez jeter des piles usagées,
<
veuillez respecter les consignes gouvernementales
ou locales en vigueur dans votre pays ou votre
région.
Français
F-11
Page 50

Commande du BDP100
La CR104 est une télécommande «universelle»
particulièrement sophistiquée capable de contrôler
jusqu’à huit appareils (y compris le BDP100). En
tant que télécommande «intelligente», elle peut
copier pratiquement n’importe quelle fonction d’une
télécommande classique à usage unique. Vous pouvez
également programmer la CR104 pour lui faire émettre
une série de commandes («macros») à partir d’un seul
bouton.
Commencez par sélectionner la touche
source
N’oubliez pas de sélectionner une touche source
avant d’appuyer sur les boutons de commande: les
commandes varient selon la source sélectionnée.
Pour utiliser la télécommande an de faire fonctionner
le BDP100, commencez par appuyer sur la touche
BD.
source
AVSAT
TUN
CD
AMP
D
PVR VCR
DISP (achage)
Appuyez sur cette touche pour faire déler les options
de luminosité sur l’écran de la façade (de faible à intense,
désactivé).
Sélection de la source et conguration de la
télécommande
Entrée BD/Commandes BD
BD
Entrée décodeur satellite/Commandes SAT
SAT
Entrée télévision (son)/Commandes AV
AV
Entrée tuner radio/Commandes TUN
TUN
Ampli Arcam
AMP
Entrée magnétoscope numérique/Commandes
PVR
Entrée magnétoscope/Commandes
VCR
Entrée lecteur CD/Commandes CD
CD
Appuyez une fois sur la touche qui convient pour
sélectionner l’entrée et recongurer la télécommande.
Maintenez cette touche enfoncée jusqu’à ce que le
voyant clignote une fois si vous souhaitez recongurer la
télécommande sans changer l’entrée.
Touches de navigation
Les touches échées permettent de naviguer parmi les
menus de conguration du BDP100 et sur les menus des
disques.
Appuyez sur
OK pour conrmer une sélection.
On/Stand-by
Cette touche permet de mettre le BDP100 en veille et de
le rallumer à distance.
Pavé numérique
Ces touches permettent de saisir des données. Elles
orent également un accès direct à une piste sur les CD
audio.
DISP
SHIFT
STATUS
SAT
BD
PVR
AMP
T
RND
T
iPOD
AV
TUN
VCR
CD
RND
Pour activer ou désactiver la lecture aléatoire des
chapitres/pistes.
Appuyez sur
SHIFT suivi de RND pour faire déler les
options de lecture répétée (chapitre, titre, disque, etc.).
STATUS
Active ou désactive l’achage des informations du
disque.
Appuyez sur
SHIFT puis sur STATUS pour activer ou
désactiver le mode 24p (pour les disques et téléviseurs
compatibles uniquement).
MENU
Pour activer le menu contextuel BD ou le menu du DVD.
MODE
Ce bouton active la fonction de vidéo secondaire avec
image dans l’image, si disponible.
MUTE
Appuyez une fois sur cette touche pour couper le son d’un
ampli Arcam. Appuyez de nouveau sur cette touche (ou
utilisez volume
+/ ) pour rétablir le son.
VOLUME +/–
Permet de régler le volume sur un ampli compatible.
OPEN
Ouverture et fermeture du plateau disque
SETUP
Appuyez sur la touche
SETUP pour accéder au menu de
conguration du système.
F-12
MODE
SETUP TITLE AUDIO SUBT
23425
CR104
MENU
RTN
SRCH
RTN
Pour revenir au menu précédent.
0 /
Appuyez sur cette touche pour revenir à la piste
précédente (0) ou passer à la piste suivante (/).
Commande de lecture
Pause (
), Lecture (4) et Stop (<). SHIFT+Pause
;
permet d’activer le ralenti.
Commandes avancées
Ces boutons sont décrits sur la page suivante.
Page 51

Commandes avancées
REMARQUE
La plupart de ces commandes sont indiquées
selon les fonctions attribuées à d’autres modes
de périphériques. Par exemple, la touche
permet d’activer le contrôle des basses d’un
récepteur A/V lorsque la télécommande est sur
mode AMP.
8
Boutons de commande du transport
Retour rapide.
7
Démarrage de la lecture.
4
Pause de la lecture. Appuyez sur 4pour reprendre la lecture.
;
Sur pause, appuyez sur ; pour passer à l’image suivante.
SHIFT +
Avance rapide.
8
Ouverture / Fermeture du plateau disque
1
<
Arrêt de la lecture
Pour faire déler les divers angles de caméra, si disponibles sur le disque.
=
permet d’activer la lecture au ralenti.
;
ROUGE/VERT/JAUNE/BLEU
Les boutons de couleur
permettent de contrôler de manière interactive les
disques Blu-ray et certaines fonctions du lecteur, et
seront achés à l’écran. Pour y accéder, il faut tout
d’abord appuyer sur SHIFT et aussitôt après sur le bouton
requis. Leur fonction dépend du disque et de la partie
du disque en cours de lecture.
ROUGE, V ERT, JAUNE et BLEU
SETUP
Veillez à ce qu’aucun disque ne soit en cours de
lecture et appuyez sur
menu de «conguration».
TITLE
Appuyez sur
«Titre» du DVD (cette fonction ne s’applique
qu’aux disques multi-titres) ou pour accéder au
menu principal d’un disque Blu-ray.
SETUP pour accéder au
TITRE pour accéder au menu
D
EB
SRCH
F V
SETUP TITLE AUDIO SUBT
AUDIO
Certains disques proposent l’option de
sélectionner des pistes audio diérentes. Appuyez
sur
AUDIO pour accéder à un menu qui permet la
sélection des pistes disponibles. Voir «Sélection
de la piste audio» sur la page F-16.
Français
ANGLE
Pour acher le menu Angle et choisir un
angle de caméra, si plusieurs options sont
disponibles sur le disque.
SRCH
Ache le menu de recherche par durée, titre
ou piste.
SUBT
Permet de faire déler les options de langues
de sous-titrage disponibles, y compris «O»
(désactivé). Certains disques forcent l’activation
des sous-titres et ignorent les préférences
choisies dans la conguration.
F-13
Page 52

Informations utiles
Rétro-éclairage
Un rétroéclairage bleu éclaire la télécommande pendant
cinq secondes à chaque pression sur une touche. Ceci
est utile si vous utilisez la télécommande dans une pièce
sombre. Il est possible que la télécommande émette une
faible tonalité lorsque le rétroéclairage est activé. Ceci est
tout à fait normal.
Si le voyant marche/arrêt clignote
Une lumière intermitente rapide indique la pression
d’une touche valide.
Si le voyant voyant clignote rapidement plusieurs fois,
cela indique l’acheminement d’informations (un code
d’appareil, par exemple), ou le démarrage et la n d’une
séquence de programmation.
Un voyant clignotant lentement indique une pression
sur une touche ou une saisie.
Sur ce manuel, le symbole ‘*’ indique un clignotement
de voyant.
Délais expirés et touches non attribuées
Temps d’expiration: au bout de 10 secondes, la CR104
quitte le mode de programmation et revient au mode de
fonctionnement normal.
Temps d’expiration pour touche coincée: si une touche
reste enfoncée pendant 30 secondes, la CR104 cesse
de transmettre des informations par infrarouge pour
préserver les piles. La CR104 reste désactivée jusqu’à ce
que l’ensemble des touches soient relâchées.
Touches non attribuées: la CR104 ignorent toute touche
non attribuée pour un mode périphérique précis et ne
transmet pas d’infrarouge.
Indicateur de piles faibles
Lorsque les piles faiblissent, l’indicateur de transmission
infrarouge sur la CR104 (voyant situé sous la touche
Marche) clignote cinq fois à chaque pression sur un
bouton:
* * * * *
Dans ce cas, veuillez installez dès que possible quatre
piles alcalines AAA neuves.
Mode périphérique / Touches
source
La CR104 étant capable de commander votre BDP100,
AVR500, AVR600 ou AV888, ainsi que d’autres
appareils, une bonne partie des touches auront plus
d’une fonction, selon le mode périphérique sélectionné
sur la télécommande.
Les touches de mode périphérique (illustrées ci-dessous)
permettent de sélectionner la source sur l’AVR500/
AVR600/AV888. Si vous appuyez brièvement sur l’une
de ces touches, une commande transmise demande le
changement de source sur l’appareil. La fonction de la
télécommande change également pour commander
l’appareil source sélectionné. C’est un peu comme si vous
aviez huit télécommandes diérentes entre vos mains !
AVSAT
D
PVR VCR
AMP
BD
SAT
AV
Lecteur Blu-ray BDP100
Décodeur satellite
Entrée son audiovisuelle (à utiliser sur
un téléviseur)
TUN
AMP
DAB, Sirius, tuner FM ou AM
Commande l’ampli et les fonctionnalités
de conguration des AVR500/AVR600
et AV888
PVR
Magnétoscope numérique (Personal
Video Recorder en anglais)
VCR
CD
Magnétoscope
Lecteur compact disque
En maintenant une touche de mode périphérique
enfoncée pendant environ quatre secondes, vous
changez le mode périphérique de la CR104 sans changer
la source de signal sur l’AVR500/AVR600/AV888. Cette
opération peut également se faire en appuyant sur S
puis sur une touche de mode périphérique (en moins de
deux secondes). Ces deux méthodes vous permettent de
changer le périphérique que la CR104 commande sans
avoir à changer la source de l’AVR500/AVR600/AV888,
pour une écoute interrompue.
Chaque mode périphérique change le comportement
TUN
CD
d’un bon nombre de touches de la CR104 pour
commander l’appareil source correctement. Par
exemple:
En mode
CD,
permet de lancer la lecture de la piste
0
CD précédente.
En mode
AV,
lance la recherche de chaîne TV vers le
0
bas.
La CR104 reste sur le dernier mode périphérique
sélectionné. Vous n’avez donc pas à appuyer sur la
touche de mode périphérique avant chaque pression sur
une touche si vous vous contentez, par exemple, de lire
ou de faire des sauts de piste sur un CD.
Touches de navigation
Les touches de navigation permettent de déplacer
le curseur sur les menus de conguration ou sur
les menus à l’écran. Elles reproduisent
également les fonctions de navigation
des télécommandes d’origine livrées avec
d’autres appareils de divertissement sur
votre système.
O conrme un réglage.
Réglage du volume
Par défaut, la CR104 est réglée pour que les boutons de
réglage du volume puissent toujours régler le volume
d’un ampli ou récepteur Arcam, quel que soit le mode
périphérique sélectionné sur la télécommande. C’est ce
que l’on appelle un «punch through» (percement) du
volume.
Ainsi, si vous écoutez un CD, la CR104 sera
probablement en mode périphérique
commander le lecteur CD. Vous pouvez utiliser les
touches de volume de la télécommande directement
pour régler le volume d’un ampli Arcam sans avoir au
préalable à appuyer sur la touche A pour mettre la
télécommande en mode périphérique AMP. Les touches
de volume «perforent» le mode périphérique CD de
la télécommande pour forcer le mode périphérique
AMP. Si vous le souhaitez, il est possible de désactiver ce
«punch through» du volume sur un mode périphérique
particulier.
CD pour pouvoir
La CR104 est conforme à la Section 15 des
règles de la FCC.
Cet équipement a fait l’objet de tests et a été jugé
conforme aux limitations d’un appareil numérique
de classe B, conformément à la Section 15 des règles
de la FCC. Ces limites sont imposées pour assurer
une protection susante contre les interférences
produites dans une installation résidentielle. Cet
appareil génère, utilise et peut émettre de l’énergie
de fréquence radio et, s’il n’est pas installé et utilisé
conformément aux instructions, peut produire des
interférences nuisibles aux communications radio.
Il n’est cependant pas garanti qu’aucune interférence
ne se produira dans une installation particulière.
Si cet appareil provoque des interférences nuisibles
aectant la réception de programmes radio ou
télévisés, ce qui peut être déterminé en éteignant
puis rallumant l’appareil, l’utilisateur peut tenter
de remédier à ces interférences en adoptant une ou
plusieurs des mesures suivantes:
Réorientez ou déplacez l’antenne de réception.
Augmentez la distance entre l’appareil et le
récepteur.
Branchez l’appareil sur une prise située sur un
circuit diérent de celui sur lequel est branché le
récepteur.
Consultez votre revendeur ou un technicien radio/
télévision expérimenté.
F-14
Page 53

Commande d’autres appareils
Rappel du code
Méthode 1 (conguration de code directe)
Cette section décrit la manière la plus simple (privilégiée)
de programmer les touches de mode périphérique de
la CR104 pour commander des appareils autres que les
appareils Arcam sur votre système.
AVSAT
TUN
PVR VCR
AMP
Certains modes sont réservés au fonctionnement
<
des appareils Arcam, mais ils peuvent être
déverrouillés si nécessaire
(voir «Verrouillage/Déverrouillage d’un mode
périphérique particulier» sur la page F-28).
Le mode A ne commande que les appareils
<
Arcam.
Mode BD Verrouillé
mode SAT Déverrouillé
mode AV Déverrouillé
mode TUN Verrouillé
mode AUX Verrouillé
mode VCR Déverrouillé
mode CD Verrouillé
Voici un exemple précis de la façon de programmer la
touche a pour commander un téléviseur Addison.
Les principes de commande d’autres appareils sont
absolument identiques.
1. Vériez que votre appareil est en marche (et non
pas sur veille).
2. Recherchez le tableau de code périphérique (TV,
par exemple) correspondant au type d’appareil que
vous souhaitez commander à partir de la CR104.
3. Trouvez la ligne comprenant les codes du fabricant
de votre appareil (Addison, par exemple)
(page 36). Le code le plus utilisé est donné en
premier.
4. Appuyez sur la touche de mode périphérique (par
exemple a) sur la CR104.
5. Maintenez la touche S enfoncée jusqu’à ce que
le voyant rouge clignote deux fois :
clignote en fait une fois lorsque vous appuyez sur
la touche, et une nouvelle fois au bout d’à peu près
trois secondes).
6. Tapez le code à quatre chires de l’appareil, à
l’aide des touches chirées. Le voyant marche/arrêt
clignote deux fois :
* *
CD
(Il
* *
.
7. Dirigez la CR104 vers l’appareil et appuyez sur P.
Si l’appareil s’éteint, la conguration est terminée.
8. Rallumez votre appareil et testez toutes les
fonctions de la CR104 pour vérier qu’elles
marchent bien.
9. Important ! Inscrivez votre code d’appareil sur le
côté droit de la page pour pouvoir vous en rappeler
si jamais vous avez à réinitialiser la CR104.
Que faire si je ne parviens toujours pas à
commander l’appareil ?
Si votre appareil ne répond pas, procédez de
<
nouveau aux étapes ci-dessus jusqu’à ce que
l’un des codes indiqués pour la marque de votre
appareil fonctionne.
Si aucun code indiqué pour la marque de votre
<
appareil ne marche, ou si la marque de votre
appareil n’apparaît pas, essayez la méthode de
recherche sur bibliothèque indiquée à la prochaine
rubrique.
Remarques:
Certains codes se ressemblent. Si votre appareil ne
<
répond pas ou ne fonctionne pas normalement sur
l’un des codes, essayez un autre code indiqué sous
la marque de votre appareil.
Si la télécommande d’origine de votre appareil
<
ne comprend pas de touche P (marche/arrêt),
appuyez sur $ plutôt que sur P lorsque vous
congurez votre appareil.
N’oubliez pas d’appuyer sur la touche
<
correspondant à votre appareil avant de faire
marcher votre appareil.
De nombreux téléviseurs ne s’allument pas en
<
appuyant sur P. Essayez plutôt d’appuyer sur
une touche chirée («sélection de chaîne») pour
remettre votre téléviseur en marche.
Pour trouver le code d’un autre appareil, procédez
<
de la même manière, en appuyant sur la touche
correspondant à cet appareil plutôt que sur a à
l’étape 2.
Méthode 2 (recherche sur bibliothèque)
Cette rubrique décrit une autre manière de programmer
la CR104 pour commander des appareils tiers.
La recherche sur bibliothèque vous permet de passer en
revue l’ensemble des codes contenus dans la mémoire de
la CR104. Cette méthode peut être beaucoup plus longue
que la méthode précédente. Utilisez-la uniquement si:
votre appareil ne répond pas à la CR104 après que
<
vous ayez essayé tous les codes indiqués pour la
marque de votre appareil.
La marque de votre appareil n’apparaît pas sur les
<
tableaux des codes d’appareil.
Exemple: Pour rechercher le code d’un
téléviseur
1. Mettez votre téléviseur en marche (et non pas sur
veille) et dirigez la CR104 vers celui-ci.
2. Appuyez sur a sur votre CR104.
3. Maintenez la touche S enfoncée jusqu’à ce que le
voyant rouge clignote deux fois.
4. Appuyez sur 9 9 1. Le voyant marche/arrêt
clignote deux fois: * *.
5. Appuyez sur P.
6. Dirigez la CR104 vers votre téléviseur et appuyez
plusieurs fois sur [ jusqu’à ce que votre téléviseur
s’éteigne.
A chaque pression sur [ la CR104 envoie un signal
MARCHE à partir du code suivant contenu dans sa
mémoire. Dans le pire des cas, il vous faudra appuyer sur
cette touche 150 fois, il faut donc garder patience ! Si vous
sautez un code, vous pouvez revenir en arrière en appuyant
sur ]. N’oubliez de pointer en permanence la CR104 vers
votre téléviseur tout en appuyant sur cette touche.
7. Dès que votre téléviseur s’éteint, appuyez sur S
pour mettre le code en mémoire.
Remarques:
De nombreux téléviseurs ne s’allument pas en
<
appuyant sur P. Essayez plutôt d’appuyer sur
une touche chirée («sélection de chaîne») pour
remettre votre téléviseur en marche.
Si vous ne parvenez pas à commander correctement
<
votre téléviseur, reprenez la méthode de recherche :
il est possible que vous ayez sélectionné le mauvais
code.
Pour trouver le code d’un autre appareil, procédez
<
de la même manière, en appuyant sur la touche
correspondant à cet appareil plutôt que sur a à
l’étape 2.
Si la télécommande d’origine de votre appareil ne
<
comprend pas de touche P (STANDBY), appuyez
plutôt sur $ lors de l’étape 5.
Une fois que vous avez conguré votre CR104, vous
pouvez faire un rappel des codes de conguration.
Exemple: Rappel du code de votre téléviseur
1. Appuyez une fois sur la touche de mode
périphérique correspondante (par exemple a).
2. Maintenez la touche S enfoncée jusqu’à ce que le
voyant marche/arrêt clignote deux fois *
*
(Il
clignote en fait une fois lorsque vous appuyez sur
la touche, et une deuxième fois au bout de trois
secondes).
3. Appuyez sur 9 9 0. La touche P clignote
deux fois.
4. Pour le premier chire de votre code à quatre
chires, appuyez sur
1 et comptez le nombre de
fois où le voyant rouge clignote. S’il ne clignote
pas, le chire est «0».
5. Pour les deuxième, troisième et quatrième
chires, recommencez l’opération précédente, en
appuyant, dans l’ordre, sur 2, 3, ou 4.
Vous avez maintenant le code à quatre chires.
Notez ces codes.
Inscrivez les codes de vos appareils dans les cadres
ci-dessous pour pouvoir vous y référer ultérieurement.
Appareil Code
1
2
3
4
5
6
7
8
Français
F-15
Page 54
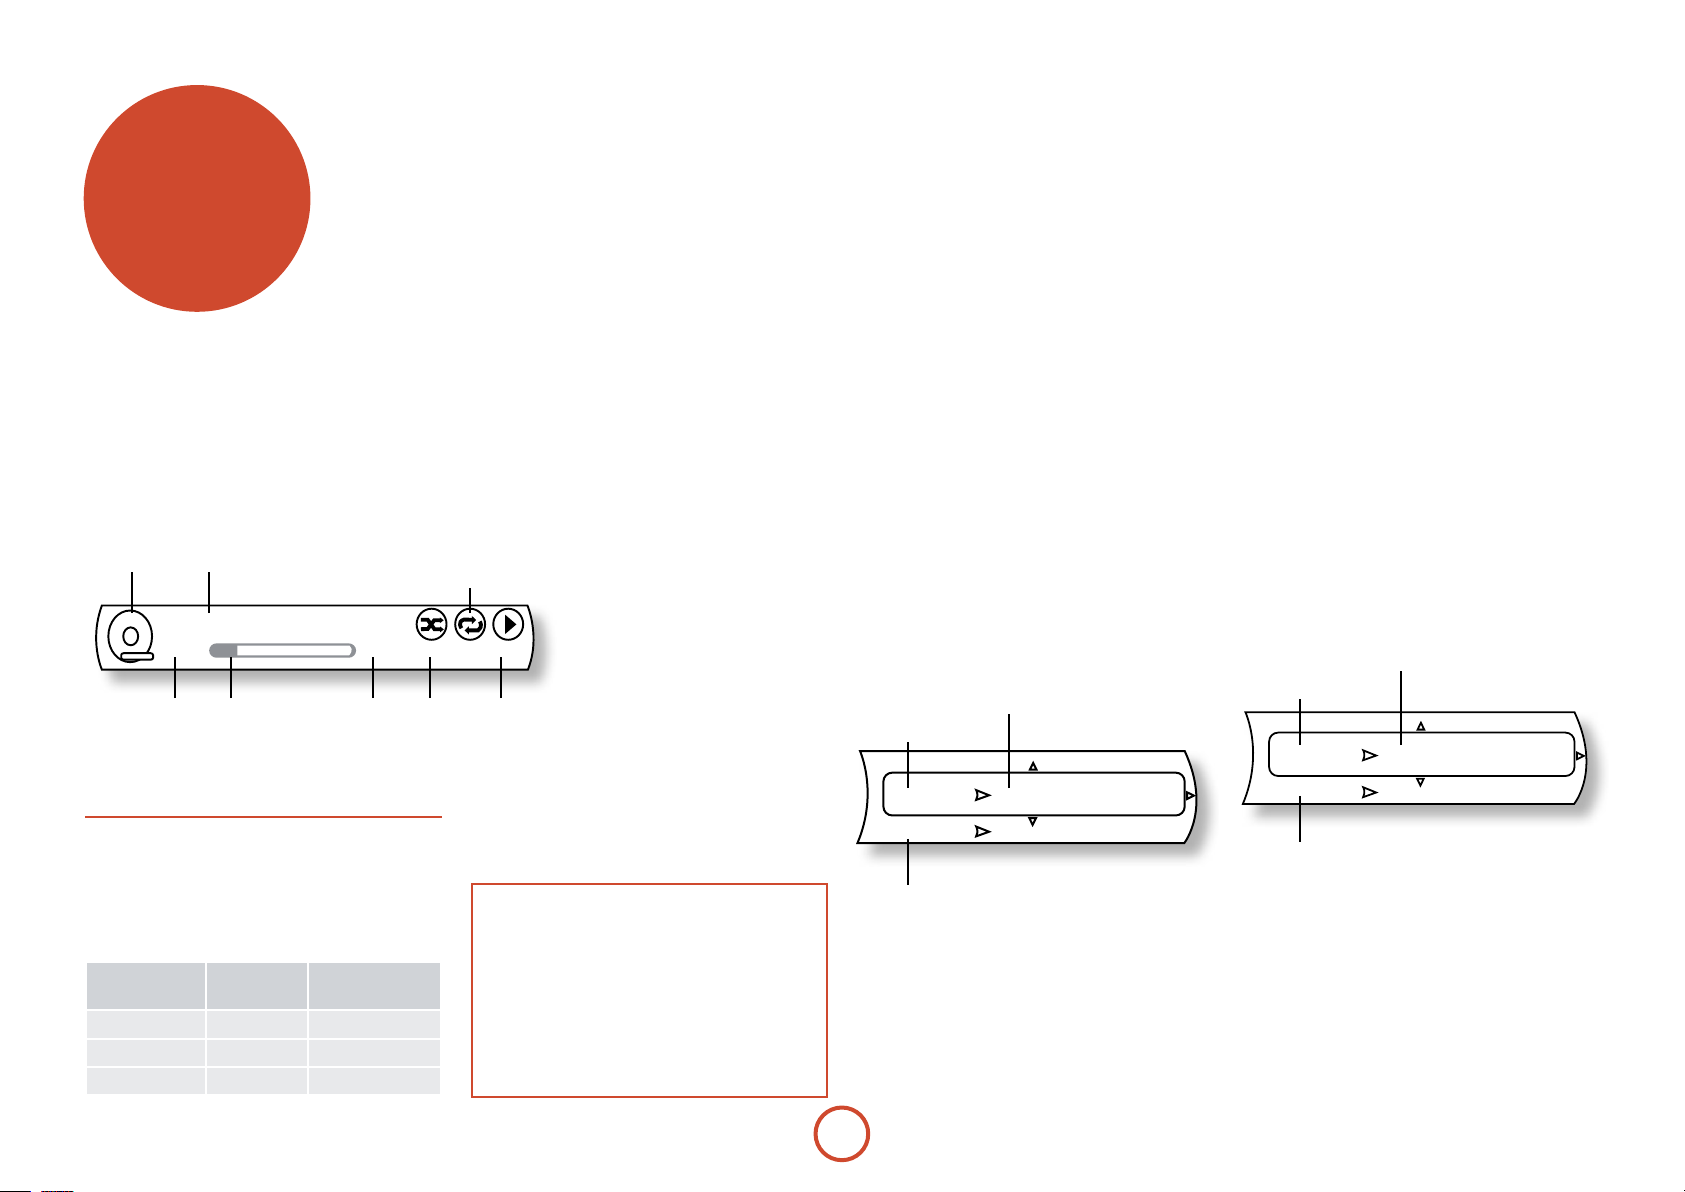
fonctionnement
avancé
Informations du disque
Appuyez sur STATUS pour acher les informations du
disque sur l’écran de votre téléviseur. Les informations
achées dépendent du type de disque.
Pour un CD audio :
Type de
disque
Piste en cours/Nombre
total de pistes
Mode répétition de lecture
Track : 1 / 11
0 : 00 : 23
CD DA
Durée écoulée
(piste en cours)
Barre de
progression
0 : 06 : 46
Durée
totale de
la piste
Mode
lecture
aléatoire
Appuyez de nouveau sur STATUS pour ne plus acher
ces informations.
Recherche
La touche h vous permet de rechercher un titre, un
chapitre ou une piste précis(e) sur le support. Appuyez
sur h pour acher le cadre de recherche. Appuyez
plusieurs fois sur h pour sélectionner le type de
recherche:
Disques vidéo Disques audio Fichiers
Aller au titre Aller à la piste Aller au chier n°
Aller au chapitre Aller à la durée
Aller à la durée
multimédia
Utilisez les touches chirées de la télécommande pour
saisir les données de la recherche. Appuyez sur O
pour démarrer la lecture à partir de l’emplacement
sélectionné.
Menus
De nombreux disque vidéo BD et DVD contiennent
un menu de disque, un menu principal ou un menu
contextuel qui vous indiquera les fonctions du disque.
Le contenu des menus et les opérations
correspondantes dépendent du disque.
< Menu disque : Appuyez sur
Off O ff P lay
Mode
lecture
REMARQUE
Si vous n’entendez pas l’audio secondaire, réglez la
sortie numérique sur Stéréo PCM, Bistream Mixed,
PCM 5.1 ou PCM 7.1. (Pour plus de détails, veuillez
consulter la rubrique «Sortie numérique» page F-21.)
Lorsque les pistes audio primaire et secondaire sont
activées, elles seront mélées et vous entendrez les
deux ensemble. Réglez le PIP Audio sur O pour
désactiver la piste audio secondaire.
pour acher le menu du disque
(‘Menu principal’) sur le téléviseur.
< Menu contextuel: Appuyez sur
pour que le menu «contextuel»
s’ache sur le téléviseur.
Utilisez les touches de navigation de la
télécommande pour parcourir les menus.
Surlignez une option et appuyez sur
pour la sélectionner, ou appuyez sur la
touche de menu adéquate pour quitter ce
menu.
t
O
Sélection de la piste audio
Certains disques comprennent plusieurs pistes audio,
par exemple une piste audio classique Dolby Digital
5.1 et une piste audio surround haute dénition Dolby
TrueHD 7.1. Vous pouvez changer de piste audio
durant la lecture. Vous pouvez également choisir une
piste audio secondaire (commentaire du réalisateur,
par exemple) sur un disque Blu-ray (le cas échéant, si
d’autres pistes sont proposées).
Remarque : Pour modier la langue audio, utilisez le
menu de conguration. Voir page F-21.
Appuyez sur
piste audio en cours :
U
Piste audio actuelle/nombre total de pistes
Audio primaire
Au dio
PI P Aud io
Audio secondaire
Surlignez la sélection de piste audio primaire (Audio) ou
secondaire (PIP) à l’aide des boutons '/,.
Appuyez sur
Appuyez sur '/, pour surligner la piste audio de
votre choix, puis sur O pour la sélectionner.
pour acher les informations sur la
o
01 / 04 E NG D olby Dig ital
Off
pour acher d’autres pistes audio.
>
Sous-titres
Certains disques comportent plusieurs options de soustitrage. Vous pouvez changer les sous-titres durant la
lecture. Vous pouvez également changer une piste vidéo
secondaire (commentaire du réalisateur, par exemple)
sur un disque Blu-ray (le cas échéant, si d’autres pistes
sont proposées).
Remarque : Pour modier la langue des sous-titres,
utilisez le menu de conguration. Voir page F-21.
Appuyez sur
sous-titrage en cours :
Sous-titrage
primaire
S ubtitl e
PI P Su btitle
Sous-titrage
secondaire
Surlignez la sélection de sous-titrage primaire (Soustitres) ou secondaire (sous-titrage PIP) à l’aide des
boutons '/,.
Appuyez sur
titrage. Appuyez sur '/, pour surligner le sous-
titrage de votre choix, puis sur O pour le sélectionner.
pour acher les informations sur le
b
Sous-titrage en cours/Nombre
total d’options de sous-titrage
01 / 08 E NG
Off
pour acher d’autres options de sous-
>
F-16
Page 55
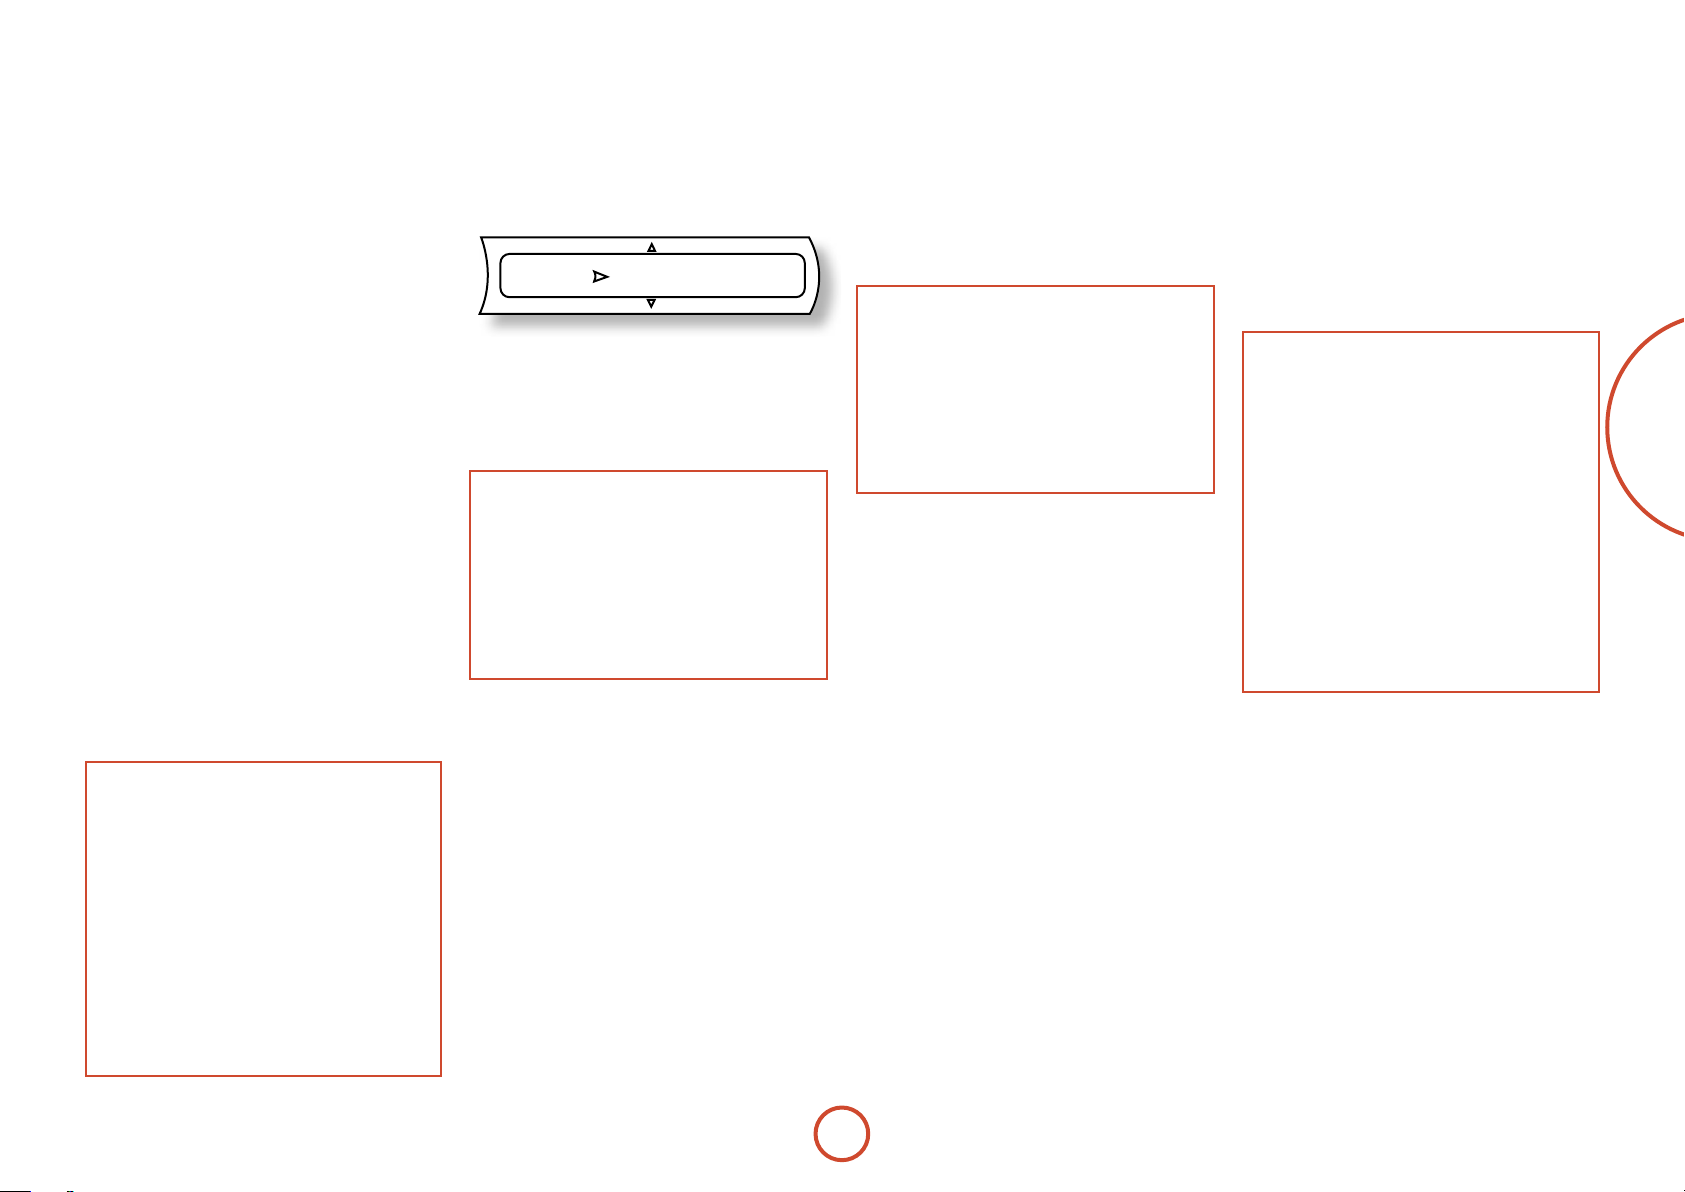
Bonusview et BD-Live
Les fonctions Bonusview et BD-Live sont typiques du
format Blu-ray.
Bonusview propose les fonctions d’Image dans l’image
et de Virtual Package pour les disques compatibles.
Les disques BD-Live proposent en outre un éventail de
fonctionnalités via internet.
Les données de Virtual Package/BD-LIVE doivent être
sauvegardées sur un périphérique de mémoire USB
branché sur le BDP100. Pour pouvoir proter de ces
fonctions, branchez un support mémoire USB (d’une
capacité minimum de 1 Go, et de préférence de 2 Go
ou plus) prenant en charge le FAT 32 et l’USB 2.0 High
Speed (480 Mbit/s) sur le connecteur USB. (Pour plus de
détails, veuillez consulter la rubrique
«Connexion USB» sur la page F-9.)
< Si l’espace de stockage est insusant, les données
ne pourront pas être copiées/téléchargées.
Supprimez tout contenu inutile ou utilisez un
nouveau périphérique mémoire USB.
< Si le support mémoire USB que vous utilisez
comprend déjà d’autres contenus (enregistrés
auparavant), il est possible que cela gêne la lecture
vidéo et audio.
< Si jamais le support mémoire USB est débranché
de l’appareil en cours de lecture de contenu
Virtual Package/BD-LIVE, la lecture du disque
s’arrêtera.
< Le chargement (lecture/écriture) de contenu peut
prendre un certain temps.
Image dans l’image (vidéo secondaire)
Certains disques Blu-ray comprennent des écrans vidéo
secondaires que l’on peut faire passer dans un petit cadre
vidéo surperposé sur l’image principale dans un coin de
l’écran. Appuyez sur le bouton M de la télécommande
pour acher le menu PiP:
PI P Off
Appuyez sur > pour accéder au menu PiP. Sélectionnez
un flux vidéo secondaire à l’aide des touches de
navigation '/, sur la télécommande. Appuyez sur
pour acher la vidéo secondaire en mode PiP.
O
REMARQUE
< Pour obtenir une piste audio secondaire
ou pour acher le sous-titrage secondaire,
veuillez consulter la rubrique «Sélection de
piste audio» ou «Sous-titrage» page F-16.
< Certaines scènes d’un disque peuvent ne pas
contenir de vidéo secondaire. Cette fonction
varie selon les disques: pour en savoir plus,
veuillez vous reporter au manuel du disque.
Virtual Package
Sur les disques Blu-ray disposant de la fonction Virtual
Package, il est possible de transférer automatiquement
des contenus supplémentaires à partir du disque ou
d’internet sur un support USB pour un visionnage
interactif. Les fonctions disponibles incluent la vidéo
et l’audio secondaires, les sous-titres et les bandesannonces.
REMARQUE
< Les méthodes de lecture varient en fonction
du disque — consultez le manuel du disque.
< Vous aurez peut-être à utiliser les touches de
couleur sur la télécommande pour effectuer
les opérations de lecture. Pour accéder
aux fonctions des touches de couleur sur
la télécommande CR104, commencez par
appuyer sur
S
.
BD-Live
Le BDP100 est compatible avec le BD-Live, ce qui
permet l’accès à des fonctions diverses avec des disques
compatibles BD-Live. Le BD-Live permet de télécharger,
à partir d’internet vers une mémoire USB, des contenus
tels que les dernières bandes-annonces de lm et des
interactifs BD-J
Les fonctions BD-Live disponibles dépendent du disque
Blu-ray. Reportez-vous au mode d’emploi du disque
pour en savoir plus.
REMARQUE
< Pour pouvoir utiliser les fonctions BD-Live,
une connexion internet sur le BDP100 est
nécessaire. Veuillez consulter la rubrique
«Connexion réseau» sur la page F-9 et
«Réseau» sur la page F-22.
< Vous pouvez désactiver l’accès internet
BD-Live à l’aide du paramètre d’accès internet
BD-Live sur le menu Système.
Voir la rubrique «Réseau» sur la page F-22
< Vous aurez peut-être à utiliser les touches de
couleur sur la télécommande pour effectuer
les opérations de lecture. Pour accéder
aux fonctions des touches de couleur sur
la télécommande CR104, commencez par
appuyer sur
S
.
Français
REMARQUE
< Si l’espace mémoire sur le périphérique USB
est insusant, il se peut qu’il soit impossible
d’utiliser les fonctions BD-LIVE. Dans ce cas,
veuillez consulter la rubrique «Supprimer
l’enregistrement Blu-Ray» sur la page F-22
pour eacer les contenus de Virtual Package
et les contenus BD-Live sur le support
mémoire USB.
< Le fonctionnement des supports mémoire
USB n’est pas garanti.
< N’utilisez pas de rallonge USB lorsque vous
branchez un support mémoire USB sur la
prise USB.
F-17
Page 56

Lecture de fichiers
Please select Play mode
Play All
Play Selection
Play Current Folder
Cancel
Les chiers vidéo et audio peuvent être lus à partir de
supports USB ou de disques CD-R/RW. Les formats
suivants sont pris en charge:
< Vidéo: AVI, WMV
< Image: JPG
< Audio: MP3, WMA
Pour pouvoir lire des chiers multimédia, insérez le
périphérique USB ou le disque optique dans le lecteur.
Le menu principal s’ache et indique les symboles de
chiers musicaux, vidéo et/ou photo:
Ficher vidéo
Conguration
Fichier musical
Fichier JPEG
Utilisez les touches de navigation '/, de la
télécommande pour surligner le type de fichier
multimédia que vous souhaitez faire passer/regarder.
Appuyez sur > pour sélectionner le type de fichier. Le
menu «Lecture» s’affiche:
Pour faire passer tous les fichiers disponibles sans faire
de sélection, appuyez sur < pour aller au menu de
Lecture, comme décrit ci-dessus.
Pour sélectionner des chiers précis, utilisez les touches
de navigation
surligner le périphérique multimédia à parcourir dans
le menu Multimédia. Appuyez sur > pour sélectionner
le périphérique multimédia et afficher les fichiers et
répertoires.
du système
Mus ic
2 ite m(s )
Main Men u
Pl ay Fil es
B rows e Pi ctur es
Now Pl ayi ng
Menu Lecture Menu Support
'/,
de la télécommande pour
Pl ayli st
US B 1
REMARQUE
< Vous ne pourrez parcourir que le type de
chiers sélectionné (musique, image ou
vidéo), même si le CD-R/CD-RW ou le
support mémoire USB comprend un mélange
de chiers musicaux, photo et vidéo. Pour
faire passer un type de chiers diérent,
utilisez le bouton
SETUP pour revenir au menu
principal.
< Lorsque le support ou le répertoire
sélectionné ne contient pas de fichiers ou
répertoires pouvant être lus, le message
«Vide» s’affiche.
Il est possible de faire passer un seul chier ou d’ajouter
des chiers sur une liste d’écoute pour faire passer une
sélection de chiers.
Surlignez un chier à l’aide des touches de navigation
de la télécommande
'/,/</>
. Appuyez sur O
pour sélectionner le fichier.
Si le fichier n’a pas été ajouté à la liste d’écoute, le menu
suivant apparaît:
A dd T o P la ylis t
P lay (F ile)
Si le fichier figure déjà sur la liste d’écoute, le menu
suivant apparaît:
R emo ve from P lay lis t
P lay (F ile)
REMARQUE
< Il est impossible de sélectionner «Lecture
(Fichier)» pour des images JPEG. Ajoutez
les images à acher sur la liste pour pouvoir
acher un diaporama d’images.
< Cette liste est eacée à chaque fois que le
périphérique USB est retiré ou que le disque
optique est éjecté.
Utilisez les touches de navigation '/, de la
télécommande pour surligner un élément du menu et
appuyez sur O pour le sélectionner.
Sélectionnez «Lecture (fichier)» pour faire passer un
seul fichier, ou sélectionnez «Ajouter à la liste d’écoute»
pour ajouter le fichier à la liste d’écoute. Lorsque tous les
fichiers désirés ont été ajoutés à la liste d’écoute, appuyez
sur
sur la télécommande pour revenir au menu
<
Lecture.
Le menu Lecture
Mus ic
2 ite m(s )
Main Men u
Pl ay Fil es
B rows e Pi ctur es
Now Pl ayi ng
Menu Lecture
Les options indiquées dans le menu Lecture peuvent
varier selon le support sélectionné et le statut actuel.
Lorsqu’un support est en cours de lecture, appuyez sur la
touche STOP pour acher le menu Lecture.
Sélectionnez une option à l’aide des touches de
navigation
'/,
et appuyez sur O pour le
sélectionner.
< Menu principal: Retour au menu principal.
< Lecture de chiers: Navigation vers le menu
Mode de lecture.
< Parcourir les images / Parcourir les chiers
musicaux: Changement du type de chier à lire
et navigation vers le périphérique multimédia
achant le type de chiers sélectionné.
< Ajouter tous les chiers sur la liste d’écoute:
Ajout de l’ensemble des chiers sur la liste
d’écoute.
< Supprimer tous les chiers sur la liste d’écoute:
Suppression de l’ensemble des chiers sur la liste
d’écoute.
< Répertoire précédent: Retour au répertoire ou
menu précédent.
< Lecture en cours: Achage du statut de lecture
des chiers musicaux.
F-18
Le menu Mode de lecture
Utilisez les touches de navigation '/, de la
télécommande pour surligner «Lecture de fichiers» et
appuyez sur O pour le sélectionner.
Sélectionnez une option à l’aide des touches de
navigation '/, et appuyez sur O pour la
sélectionner.
< Lire tout: Lecture de l’ensemble des chiers du
disque ou du périphérique correspondant au type
sélectionné.
< Lire la sélection: Lecture de l’ensemble des
éléments ajoutés à la liste d’écoute.
< Lire le répertoire actuel: Lecture de l’ensemble
des chiers du répertoire actuel correspondant au
type sélectionné.
< Annuler: Retour au menu Lecture.
Lorsqu’une option de lecture est sélectionnée, le support
lancera la lecture et le panneau d’informations «Lecture
en cours» sera affiché:
File : 1 / 1 Anima ls - When I drea m. mp3
Title :
Artis t :
Album
0 : 00 : 28 0 : 04 : 36
REMARQUE
< Lors de la lecture de chiers JPEG, chaque
chier reste aché pendant un certain temps.
Cette durée peut être réglée en appuyant sur
SHIFT puis sur
sur la télécommande, ou
&
en accédant au menu Effets de diaporama,
décrit ci-contre.
< Le mode de lecture disponible varie selon le
statut d’opération, le support sélectionné, etc.
Off Off P lay
Page 57

Commandes de lecture avancées
Les commandes avancées suivantes sont disponibles
durant la lecture d’un disque ou d’un chier (selon le
type de support):
Lecture ralentie
Appuyez sur SHIFT, puis sur & pour activer la lecture
ralentie. Appuyez de nouveau sur ces mêmes touches
pour changer la vitesse de lecture. Les vitesses proposées
sont /, / et /.
Intervalle
Durant un diaporama d’images JPEG, il est possible de
changer l’intervalle entre chaque images. Le choix est
de 5, 10, 15 ou 30 secondes. Appuyez sur SHIFT, puis sur
pour changer d’intervalle.
&
Lecture accélérée
Appuyez sur ) ou sur ( en cours de lecture pour
activer la fonction de lecture accélérée vers l’avant
ou vers l’arrière. Si vous continuez à appuyer sur ces
touches, la vitesse de lecture change. Des vitesses de
2x, 4x, 8x, 16x, 32x, 64x et 128x la vitesse normale sont
proposées. Appuyez sur $ pour reprendre la lecture
normale.
Achage des informations du chier
Appuyez sur la touche STATUS pour acher le cadre
d’informations du chier. Le cadre d’informations
chier ache les informations suivantes:
Fichier en cours/nombre
total de chiers
Type de chier
Durée écoulée
Titre
File : 2 / 3 .. L ove.Actua lly.DVD Div...
0 : 01 : 59 1 : 04 : 56
Barre de progression
Mode répétition de lecture
Durée totale de lecture
du chier en cours
Mode lecture
aléatoire
Eets de diaporama
Lorsque vous regardez un diaporama d’images JPEG,
appuyez sur U pour afficher le menu Diaporama:
S lide S how E ffec ts
S lide S how Del ay
Utilisez les touches de navigation '/, de la
télécommande pour surligner une option du menu et
appuyez sur
< Eets de diaporama: Utilisez les touches de
<Scroll horizontal
<Fondu
<Volet
<Aucun
Appuyez sur
< Délai du diaporama: Utilisez les touches de
<5 secondes
<2 secondes
<1 seconde
<Aucun
<10 secondes
<15 secondes
<30 secondes
Off O ff P lay
Mode
lecture
pour la sélectionner.
>
navigation
eets suivants:
navigation
du délai entre chaque image:
'/,
O
'/,
Appuyez sur
sélection.
pour conrmer la sélection.
No ne
5 s ec (s )
pour sélectionner l’un des
pour sélectionner la durée
pour conrmer la
O
Lecture musicale durant le visionnage
d’images
Durant la lecture de chiers musicaux, appuyez sur la
touche O pour acher le menu Lecture. Utilisez les
touches de navigation
pour surligner «Parcourir les images» et appuyez sur
. Sélectionnez les images et faites-les passer comme
O
décrit dans la rubrique «Le menu Lecture» sur la page
F-18. Les images JPEG défileront tandis que la musique
continue de passer.
REMARQUE
< Lorsque vous faites passer des chiers
JPEG et de la musique en même temps, les
commandes de lecture ne s’appliquent qu’à la
lecture des chiers JPEG.
< Pour commander les chiers musicaux :
1. Appuyez sur la touche stop
arrêter le diaporama JPEG et acher le
menu Lecture.
2. Utilisez les touches de navigation
'/,
surligner «Lecture en cours» et appuyez
sur O. Les commandes de lecture
s’appliquent désormais à la musique.
de la télécommande
'/,
pour
#
de la télécommande pour
Français
Appuyez de nouveau sur status pour masquer le cadre
d’informations. A noter: le cadre d’informations chier
s’ache toujours durant la lecture de chiers musicaux.
F-19
Page 58

menus de
conguration
Les menus de conguration vous permettent de
congurer l’ensemble de votre BDP100. Les quelques
pages suivantes vous indiqueront les options des menus
et leur fonction. Les menus de conguration peuvent
paraître impressionnants si vous découvrez le home
cinéma, mais la majorité des réglages ne sont nécessaires
qu’à l’installation initiale du système.
La seule manière d’acher les menus de conguration
est sur votre écran (téléviseur ou projecteur) en utilisant
la capacité d’achage à l’écran (OSD) de votre BDP100.
Pour acher l’OSD correspondant à la conguration
initiale, branchez l’une des sorties vidéo sur votre écran
(ou récepteur AV branché sur votre écran).
Accès au menu de conguration
Pour accéder au menu de conguration, utilisez les
touches de navigation
B
et
C
pour surligner
l’option «Paramètres» sur le menu principal. Si le
menu principal n’est pas affiché, appuyez sur SETUP sur
la télécommande pour le faire apparaître. A noter: il
faudra peut-être encore d’autres pressions sur les touches
durant la lecture de chiers musicaux, vidéo ou JPEG
pour quitter la structure de répertoire. Appuyez sur
>
pour accéder au menu de conguration.
L’achage du menu OSD ou de l’image est
instable ?
La résolution de sortie vidéo par défaut du BDP100 à
la première mise en marche a été choisie en fonction
du standard national du pays sur lequel la plupart
des écrans peuvent eectuer une synchronisation
automatique du signal vidéo. Vous pouvez modier
ceci à partir de la section Sorties vidéo des menus de
conguration.
Si la résolution de sortie et la vitesse de délement ne
correspondent pas à votre écran, l’image peut devenir
instable ou peut ne pas s’acher du tout. Dans ce cas,
branchez le BDP100 directement sur votre écran à
l’aide de la connexion vidéo composite pour acher les
menus. Dès que les bons réglages vidéo ont été eectués,
vous pouvez utiliser une connexion de meilleure qualité.
Parcourir les menus
Les touches de navigation (èches) de la télécommande
permettent de parcourir les menus du BDP100.
1. Pour acher le menu principal, appuyez sur la
touche
SETUP .
2. Utilisez les touches
vers le haut et vers le bas les en-têtes de la section
principale sur le côté gauche.
3. Lorsque vous avez mis la section principale
requise en surbrillance, utilisez la touche
accéder à cette section.
4. Utilisez les touches
vers le haut et vers le bas les réglages de la section
sur le côté droit. Certains réglages sont achés en
gris. Ce sont soit des informations uniquement
(fréquence d’échantillonnage, par exemple), soit
des options qui ne peuvent pas être sélectionnées
(une adresse IP de réseau lorsque le DHCP est
utilisé, par exemple).
5. Appuyez sur
> pour sélectionner un réglage an
de le modier,
6. Utilisez les touches
réglage.
7. Appuyez sur
OK pour conrmer le réglage.
Retournez à l’étape 4 pour eectuer d’autres
réglages sur la section sélectionnée.
8. Appuyez sur
<
l’écran précédent et sélectionner une autre section
à régler.
et C pour parcourir
B
pour
E
et C pour parcourir
B
et C pour modier le
B
ou sur RETURN pour revenir à
S ys tem
Ne twork
Info
Dis play
Audio
L angua ge
P arenta l
Dis play
HD MI S tatu s
HD MI P ref erre d F orm at
TV T ype
R es olu tion
TV A s pec t
F ilm M ode
C olor De pth
C onne cted
720 p
NT S C
HD MI A uto
16: 9 P ill arb ox
Of f
24 Bi t
F-20
Page 59

Ecran
Type TV – Réglage du format du signal vidéo. Si les
couleurs ou la qualité de l’image sur une vidéo analogique
ne sont pas bonnes, modiez ce réglage. Vous ne devriez
pas avoir à le changer pour une utilisation normale.
< NTSC: norme vidéo des Etats-Unis et du Canada.
< PAL: norme vidéo de l’Europe, de l’Australie et de
la Chine.
Résolution – Réglage de la résolution vidéo des sorties
HDMI et VIDÉO COMPOSANTE.
< HDMI Auto: règle la résolution de préférence du
téléviseur.
< 1080p: vidéo progressive Full HD.
< 1080i: vidéo HD entrelacée.
< 720p: vidéo HD progressive.
< 480p/576p: vidéo progressive à 480 lignes (NTSC)
ou 576 lignes (PAL)
< 480p/576i: vidéo entrelacée à dénition standard
480 lignes (NTSC) ou 576 lignes (PAL).
REMARQUE
< L’option HDMI Auto peut ne pas rendre une
résolution optimale. Si vous disposez d’un
écran 1080p Full HD, réglez la résolution sur
1080p.
< Pour en savoir plus sur les résolutions de
sortie, reportez-vous au tableau de la page F-25.
TV Aspect – Régle le rapport d’aspect (la forme) de votre
écran.
< 16:9 Wide: à utiliser sur des téléviseurs grand
écran. Les sources 4:3 seront grossies pour
correspondre à la taille de l’écran.
< 16:9 Pillarbox: à utiliser sur des téléviseurs grand
écran. Les sources 4:3 seront achées entièrement,
avec des barres noires verticales sur les côtés.
< 4:3 Letterbox: A utiliser avec des téléviseurs 4:3.
Les contenus grand écran 16:9 seront achés avec
des barres verticales au-dessus et en-dessous.
REMARQUE
< Les signaux vidéo 1080/24p ne peuvent être
transmis que sur une connexion HDMI.
< Les appareils connectés (récepteur AV,
téléviseur/projecteur) doivent être compatible
1080/24p.
< La résolution de sortie doit être réglée sur
1080p ou HDMI Auto.
Mode 24p – pour activer ou désactiver la sortie vidéo 24
images par seconde (1080/24p).
< On: A sélectionner pour transmettre les signaux
24p de la sortie HDMI.
< O: pour désactiver la sortie vidéo 24p.
Color Depth – Réglage du niveau de traitement Deep
Color appliqué à la sortie vidéo HDMI.
< 36-bit: A sélectionner pour transmettre les signaux
36-bit Deep Color de la sortie HDMI.
< 30-bit: A sélectionner pour transmettre les signaux
30-bit Deep Color de la sortie HDMI.
< 24-bit: A sélectionner pour transmettre les signaux
24-bit Deep Color de la sortie HDMI (fonction
Deep Color désactivée).
REMARQUE
< Les appareils branchés (récepteur AV,
téléviseur/projecteur) doivent être
compatibles «Deep Color» pour pouvoir
utiliser les signaux 30/36-bit Deep Color.
Veuillez consulter le mode d’emploi de votre
téléviseur et récepteur A/V.
< L’ensemble des câbles d’interconnexion HDMI
système doivent être compatible «Deep
Color» pour pouvoir utiliser les signaux
30/36-bit Deep Color.
< Si vous constatez une image vacillante ou
anormale après avoir modié le paramètre
Deep Color, branchez l’appareil à l’aide d’un
câble vidéo composite et modier le réglage
sur une valeur prise en charge par l’écran.
Audio
PCM Downsampling – Pour régler le taux
d’échantillonage maximum de la sortie audio à
partir de la sortie OPTIQUE ou COAXIALE .
< 96kHz: Sortie audionumérique avec un taux
d’échantillonage de 96 kHz (qualité optimale).
< 48kHz: Sortie audionumérique avec un taux
d’échantillonage de 48 kHz (qualité optimale).
REMARQUE
< Si les appareils connectés (un récepteur AV
par exemple) n’acceptent pas 96kHz, cela peut
entrainer un silence ou des interférences.
Dans ce cas, réglez le PCM Downsampling
sur 48 kHz.
Sortie numérique – Sélection de la sortie du format
audio à partir des sorties HDMI, OPTIQUE ou COAXIALE.
< Bitstream HD: Sortie de la piste audio de disques
Blu-ray HD bitstream pour le décodage sur
votre récepteur AV (sortie HDMI uniquement,
compatibilité du récepteur AV essentielle).
< Bitstream Legacy: Transmission du format Legacy
pour la piste audio. Cette option est adaptée aux
anciens récepteurs AV qui ne sont pas HD, HDMI
Audio ou DTS.
< Bitstream Mixed: Conversion de tout audio
surround audio en format surround DTS 5.1.
Cette option garantit une qualité optimale pour
les récepteurs AV compatibles DTS mais non
compatibles HD ou HDMI Audio.
< PCM 7.1: Décodage de tous les formats sur le
lecture et sortie audio PCM. Utilisez cette option
pour les récepteurs HD qui ne peuvent pas décoder
l’ensemble des formats HD. Les sorties numériques
OPTIQUES et COAXIALES transmettront une
audio stéréo PCM.
< PCM 5.1: Similaire au PCM 7.1 mais toute piste
audio au format HD 7.1 sera convertie en format
surround 5.1 (sortie HDMI uniquement).
< PCM Stereo: Décodage de tous les formats sur le
lecteur et sortie audio PCM. Tout format audio
surround sera converti en stéréo sur l’ensemble des
connexions de sortie audio.
REMARQUE
< Le signal sur la sortie
déterminé par les formats pris en charge sur
les appareils connectés.
< Pour en savoir plus sur les formats de sortie,
reportez-vous au tableau de la page F-25.
Dynamic Range Control – Choisissez ou non de
compresser la plage dynamique entre les sons les plus
intenses et les plus faibles lors de la lecture d’un support
audio Dolby Digital, Dolby Digital Plus ou DolbyTrueHD.
< On: Active le contrôle de la plage dynamique pour
pouvoir entendre plus facilement les sons faibles.
< O: pour désactiver le contrôle de la plage
dynamique.
< Auto: permet au codage enfoui sur une piste audio
Dolby TrueHD de régler la plage dynamique. Pour
les autres pistes audio, la réponse sera la même que
sur ‘On’.
HDMI est également
Langue
OSD – choix de la langue d’achage sur écran (OSD).
Menu – choix de la langue du menu disque et du menu
contextuel.
< Auto: sélection de la langue prioritaire sur le
disque.
Audio – choix de la langue de la piste audio.
< Auto: sélection de la langue prioritaire sur le
disque.
Sous-titrage– choix de la langue des sous-titres.
< O: aucun sous-titrage.
REMARQUE
< Le choix des langues varie selon les disques.
Contrôle parental
Les paramètres du contrôle parental peuvent être activés
pour empêcher l’achage de disques ou de scènes ne
convenant pas à des enfants. Pour pouvoir activer ou
désactiver le contrôle parental, il faut utiliser un code à
quatre chires. Le contrôle parental propose plusieurs
niveaux. Selon le niveau déni, un disque pourra être
bloqué, ou certaines scènes du disque pourront être
coupées ou remplacées par d’autres scènes, selon le
disque.
Pour activer le contrôle parental:
1. Sélectionnez le menu Contrôle parental:
Paramètres > Contrôle parental
u
2. Si le contrôle parental est activé (On), vous devez
saisir le code PIN à l’aide des touches chiffrées
de la télécommande. Le code PIN par défaut est
3308.
P lea s e Input 4 -Digit P are nta l P as sword :
P arental Pa s s word
OK Ca ncel
3. Lorsque vous avez pu accéder au menu Contrôle
parental, appuyez sur les touches de navigation
'/,
les options suivantes. Appuyez sur > pour
sélectionner une option.
de la télécommande pour sélectionner
>
Français
F-21
Page 60

Contrôle parental – pour activer (On) ou désactiver
(O) le contrôle parental.
< O: Tous les disques seront lus.
< On: La lecture des disques est limitée en fonction
du niveau de contrôle parental déni sur l’option
de menu suivante.
Niveau parental – Dénition du niveau de restriction
des disques. Plus la valeur est faible, plus les limites
seront strictes.
< 1 [Kid Safe]: convient aux enfants.
< 2 [G]: tout public.
< 3 [PG]: Accord parental conseillé.
< 4 [PG-13]: Ne convient pas aux enfants de moins
de 13 ans.
< 5 [PG-R]: Accord parental recommandé.
< 6 [R]: Limité, les cinémas exigent que les enfants
de moins de 17 ans soient accompagnés par un
adulte (parent ou responsable).
< 7 [NC-17]: Les cinémas refusent l’entrée à toute
personne de moins de 17 ans.
< 8 [Adult]: Les disques de tout classement
(Adulte/Général/Enfants) peuvent passer.
Mot de passe parental – Appuyez sur
option est en surbrillance pour saisir un nouveau mot
de passe. Tapez un nouveau code à 4 chires à l’aide
des touches chirées de la télécommande, puis allez
sur la touche OK à l’écran à l’aide de ces mêmes touches,
et appuyez sur la touche OK de la télécommande. Il
vous faudra demander de conrmer le code. Pour cela,
recommencez l’opération ci-dessus.
lorsque cette
>
Please enter a new Parental Control Password:
P arental Pa s sword
OK Cancel
Système
Lecture automotique des disques optiques – pour
activer ou désactiver la lecture automatique d’un disque
optique (par exemple un disque Blu-ray, un DVD ou un
CD) après son chargement.
< On: La lecture des disques optiques démarre
automatiquement.
< O: il faut appuyer sur
lecture d’un disque.
Accès internet BD-Live – dénition de restrictions
d’accès internet.
< Accès limité : Seuls les disques Blu-ray disposant
d’un certicat de propriété auront accès à
internet.
< Accès toujours autorisé: Tous les disques
BD-Live pourront accéder aux sites internet
BD-Live.
< Accès interdit: aucun disque BD-Live n’est
autorisé à accès aux sites internet BD-Live.
REMARQUE
< Les fonctions en ligne disponibles dépendent
du disque.
< Reportez-vous aux instructions du disque
BD-Live pour en savoir plus sur l’accès au
contenu en ligne.
< Pour pouvoir accéder au contenu en ligne, il
faut que le BDP100 soit connecté sur internet
et correctement conguré. Voir page F-9 pour
les connexions réseau et page F-22 pour les
paramètres réseau.
Enregistrement de BD-Live – Le contenu BD-Live est
mis en mémoire sur le support mémoire USB connecté.
Cette option du menu ache l’espace mémoire USB
disponible.
Supprimer l’enregistrement Blu-Ray – Appuyez sur
lorsque cette option est en surbrillance pour eacer le
contenu BD-Live enregistré sur le support de stockage
USB.
Durée de l’écran de veille –dénit la durée d’achage
d’une image statique avant que l’écran de veille ne
se mette en marche. L’écran de veille permet d’éviter
que l’écran ne s’abime en raison d’une image statique
rémanente.
PLAY pour démarrer la
OK
< O: pour désactiver la fonction d’écran de veille.
< 5/10/20/30 minutes: dénition de la durée
d’achage d’une image statique avant que l’écran
de veille ne se mette en marche.
REMARQUE
< Vous pouvez désactiver l’écran de veille en
appuyant sur n’importe quelle touche de
l’appareil ou de la télécommande.
Réinitialisation des paramètres – Appuyez sur OK
lorsque cette option est en surbrillance pour rétablir
l’ensemble des paramètres d’usine (à l’exception des
contrôles parentaux).
Réseau
Si vous souhaitez utiliser les sites internet BD-Live et le
contenu téléchargé, il vous faut une connexion internet
congurée et active. Voir la rubrique sur les connexions
physiques page F-9.
La plupart des réseaux domestiques vont
automatiquement congurer la connexion par DHCP.
Si votre réseau n’est pas conguré automatiquement, il
vous faut connaître les paramètres suivants:
Adresse IP
<
Masque Subnet
<
Gateway
<
DNS primaire
<
DNS secondaire
<
Réseau câblé
Sélectionnez et appuyez sur OK pour dénir les
paramètres de connexion du réseau:
Link Status – Informations uniquement
Adresse MAC – Informations uniquement
Mode IP – Pour dénir un réglage des paramètres du
réseau automatique ou manuel.
O: pour désactiver les fonctions de réseau.
<
Manuel: Saisie manuelle des paramètres, pour les
<
utilisateurs avertis.
Dynamique: autorise le routeur ou modem
<
connecté à congurer automatiquement les
paramètres du réseau, à partir du serveur réseau
DHCP. Ce réglage s’applique à la plupart des
réseaux domestiques.
Les réglages suivants ne sont disponibles que si le Mode
IP est réglé sur Manuel:
Adresse IP – Appuyez sur OK pour dénir l’adresse
IP attribuée à votre lecteur par votre administrateur
réseau. Utilisez les touches de navigation pour passer
d’un segment à l’autre et les touches chirées de
la télécommande pour saisir l’adresse. Allez sur la
touche OK à l’écran et appuyez sur la touche OK de la
télécommande pour enregistrer le réglage.
Masque Subnet – Appuyez sur OK pour dénir le
masque subnet de votre réseau. Utilisez les touches
de navigation pour passer d’un segment à l’autre et
les touches chirées de la télécommande pour saisir
le masque subnet. Allez sur la touche OK à l’écran et
appuyez sur la touche OK de la télécommande pour
enregistrer le réglage.
Gateway – Appuyez sur OK pour saisir l’adresse IP
de votre passerelle internet. Utilisez les touches de
navigation pour passer d’un segment à l’autre et les
touches chirées de la télécommande pour saisir
l’adresse. Allez sur la touche OK à l’écran et appuyez sur
la touche OK de la télécommande pour enregistrer le
réglage.
DNS primaire – Appuyez sur OK pour saisir l’adresse
IP de votre serveur DNS primaire. Utilisez les touches
de navigation pour passer d’un segment à l’autre et
les touches chirées de la télécommande pour saisir
l’adresse. Allez sur la touche OK à l’écran et appuyez sur
la touche OK de la télécommande pour enregistrer le
réglage.
DNS secondaire – Appuyez sur OK pour saisir l’adresse
IP de votre serveur DNS secondaire. Utilisez les touches
de navigation pour passer d’un segment à l’autre et
les touches chirées de la télécommande pour saisir
l’adresse. Allez sur la touche OK à l’écran et appuyez sur
la touche OK de la télécommande pour enregistrer le
réglage.
Test réseau
Appuyez sur OK pour eectuer un test du réseau. Ceci
permet également de congurer automatiquement les
paramètres de réseau s’ils n’étaient pas déjà congurés et
si la conguration automatique (DHCP) n’est pas prise
en charge par le réseau.
F-22
Page 61

dépannage
En cas de problème, consultez le tableau ci-dessous avant d’emmener votre appareil à réparer.
Si le problème persiste, essayez de le résoudre en éteignant et en rallumant l’appareil. Si cela ne résout toujours pas la situation, veuillez vous adresser à votre revendeur.
N’essayez jamais de réparer l’appareil par vous-même car cela annulerait la garantie !
Problème Cause possible Solution
Pas d’alimentation • Le câble d’alimentation électrique est débranché.
• Mauvais branchement sur la prise murale ou prise murale hors d’état de marche.
Pas de lecture • Le disque a peut-être été inséré dans le mauvais sens.
• Le disque ne peut pas être lu.
• Le disque est sale.
• Le disque enregistré n’a pas été correctement nalisé.
• Le niveau de contrôle parental n’a pas été bien réglé.
• Le symbole indiquant une mauvaise opération s’ache.
Dysfonctionnement • Le disque est rayé, sale, mal enregistré ou incompatible. • Appuyez sur la touche POWER pour éteindre l’appareil. Appuyez
Pas d’image • Les câbles vidéo sont débranchés.
• La source d’entrée sélectionnée sur le téléviseur n’est pas la bonne.
• Le disque ne peut pas être lu.
Interférences sur l’image ou image
déformée
Image anormale ou pas d’image • La résolution ne permet pas la transmission de signaux vidéo à partir des
Bref arrêt sur image • Une transition de couche peut arriver durant la lecture de DVD Vidéo, etc.
Aucun son • Les câbles audio sont débranchés.
Interférences ou son déformé • Le disque est sale.
Le téléchargement des contenus
BD-LIVE est impossible
La télécommande ne marche pas • Les piles n’ont pas été installées ou sont usagées.
• L’appareil est branché directement sur un appareil d’enregistrement et la fonction
de protection du copyright est activée.
• Le disque est sale.
• La fonction de lecture accélérée ou de lecture image par image a peut-être été
activée.
SORTIES COMPOSANTE et HDMI.
• Le HDCP n’est pas pris en charge par le téléviseur.
• Le standard TV de l’appareil ne correspond pas à celui du téléviseur ou du
disque.
enregistrés en format bicouche.
• Les haut-parleurs ne sont pas branchés sur l’ampli.
• La source d’entrée sélectionnée sur l’ampli n’est pas la bonne.
• Les branchements sont mal eectués.
• Les branchements entre cet appareil et le routeur broadband et/ou le modem
sont mauvais.
• Le support mémoire USB est débranché.
• L’accès BD-Live est réglé sur «Accès interdit».
• Le disque BD ne prend pas en charge la fonction BD-LIVE.
• Les paramètres réseau ne sont pas bien réglés.
• Le capteur de la télécommande est masqué.
• Enfoncez fermement le câble d’alimentation.
• Vériez si la prise fonctionne en utilisant une lampe ou un autre
appareil.
• Réinsérez le disque, face imprimée vers le haut.
• Utilisez un disque compatible.
• Nettoyez le disque.
• Insérez un disque bien nalisé.
• Réglez le niveau parental correctement. (Voir page F-21.)
• Eectuez le bon réglage.
de nouveau sur cette touche et retirez le disque.
• Branchez les câbles comme il convient.
• Sélectionnez la source d’entrée qui convient.
• Utilisez un disque compatible.
• Débranchez l’appareil pour que le signal de l’image soit
directement transmis sur le téléviseur.
• Nettoyez le disque.
• Il est possible que l’image apparaisse légèrement déformée. Ceci
n’est pas un dysfonctionnement.
• Eectuez un bon réglage de la résolution. (Voir page F-21.)
• Cet appareil ne peut pas transférer les signaux vidéo à partir du
connecteur HDMI sur un téléviseur ne prenant pas en charge le
HDCP. Ceci n’est pas un dysfonctionnement.
• Eectuez un bon réglage du standard TV. (Voir page F-21.)
• Il se peut que le délement s’arrête brièvement. Ceci n’est pas un
dysfonctionnement.
• Branchez les câbles comme il convient.
• Branchez les haut-parleurs comme il convient.
• Sélectionnez la source d’entrée qui convient.
• Nettoyez le disque.
• Vériez les branchements et insérez fermement l’ensemble des
câbles sur les prises.
• Vériez les branchements et insérez fermement l’ensemble des
câbles sur les prises.
• Branchez le support mémoire USB sur l’appareil.
• Réglez-le sur «Accès toujours autorisé» (voir page F-22.)
• Insérez un disque avec fonction BD-LIVE.
• Congurez correctement les paramères réseau. (Voir page F-22.)
• Remplacez les piles.
• Enlevez l’obstacle.
Français
F-23
Page 62

formats de sortie
audio et vidéo
DEMARRAGE
Format de sortie audio
Le format de sortie audio disponible à partir des sorties
audionumériques dépend du format de piste audio qui
passe, de la sortie audio en cours et du réglage de Sortie
numérique du menu Audio (voir «Audio» sur la page
F-21). Le tableau ci-contre indique les associations possibles.
Utilisez le tableau de cheminement sur cette page pour
étudier le réglage correspondant à la conguration de
votre home cinéma.
Utilisez-vous un récepteur AV ?
OUI
Faites-vous un branchement
audio par HDMI ?
OUI
Votre récepteur est-il
compatible HDMI 1.3
(Dolby TrueHD/DTS HD) ?
OUI
NON
NON
NON
Utilisez « stéréo PCM »
NON
Faites-vous un branchement
audio par câble numérique
optique ou coaxial ?
OUI
Votre récepteur est-il
compatible avec le
format audio DTS ?
OUI
Utilisez « Bitstream Mixed »
NON
Utilisez « Bitstream Legacy »
Voulez-vous faire passer
une audio secondaire à partir
des disques Blu-ray ?
NON
Utilisez « Bitstream HD »
OUI
Avez-vous un système
d’enceintes son surround
au format 7.1 ?
OUI
Utilisez « PCM 7.1 »
F-24
NON
Avez-vous un système
d’enceintes son surround ?
OUI
Utilisez « PCM 5.1 »
NON
Utilisez « Stéréo PCM »
Page 63
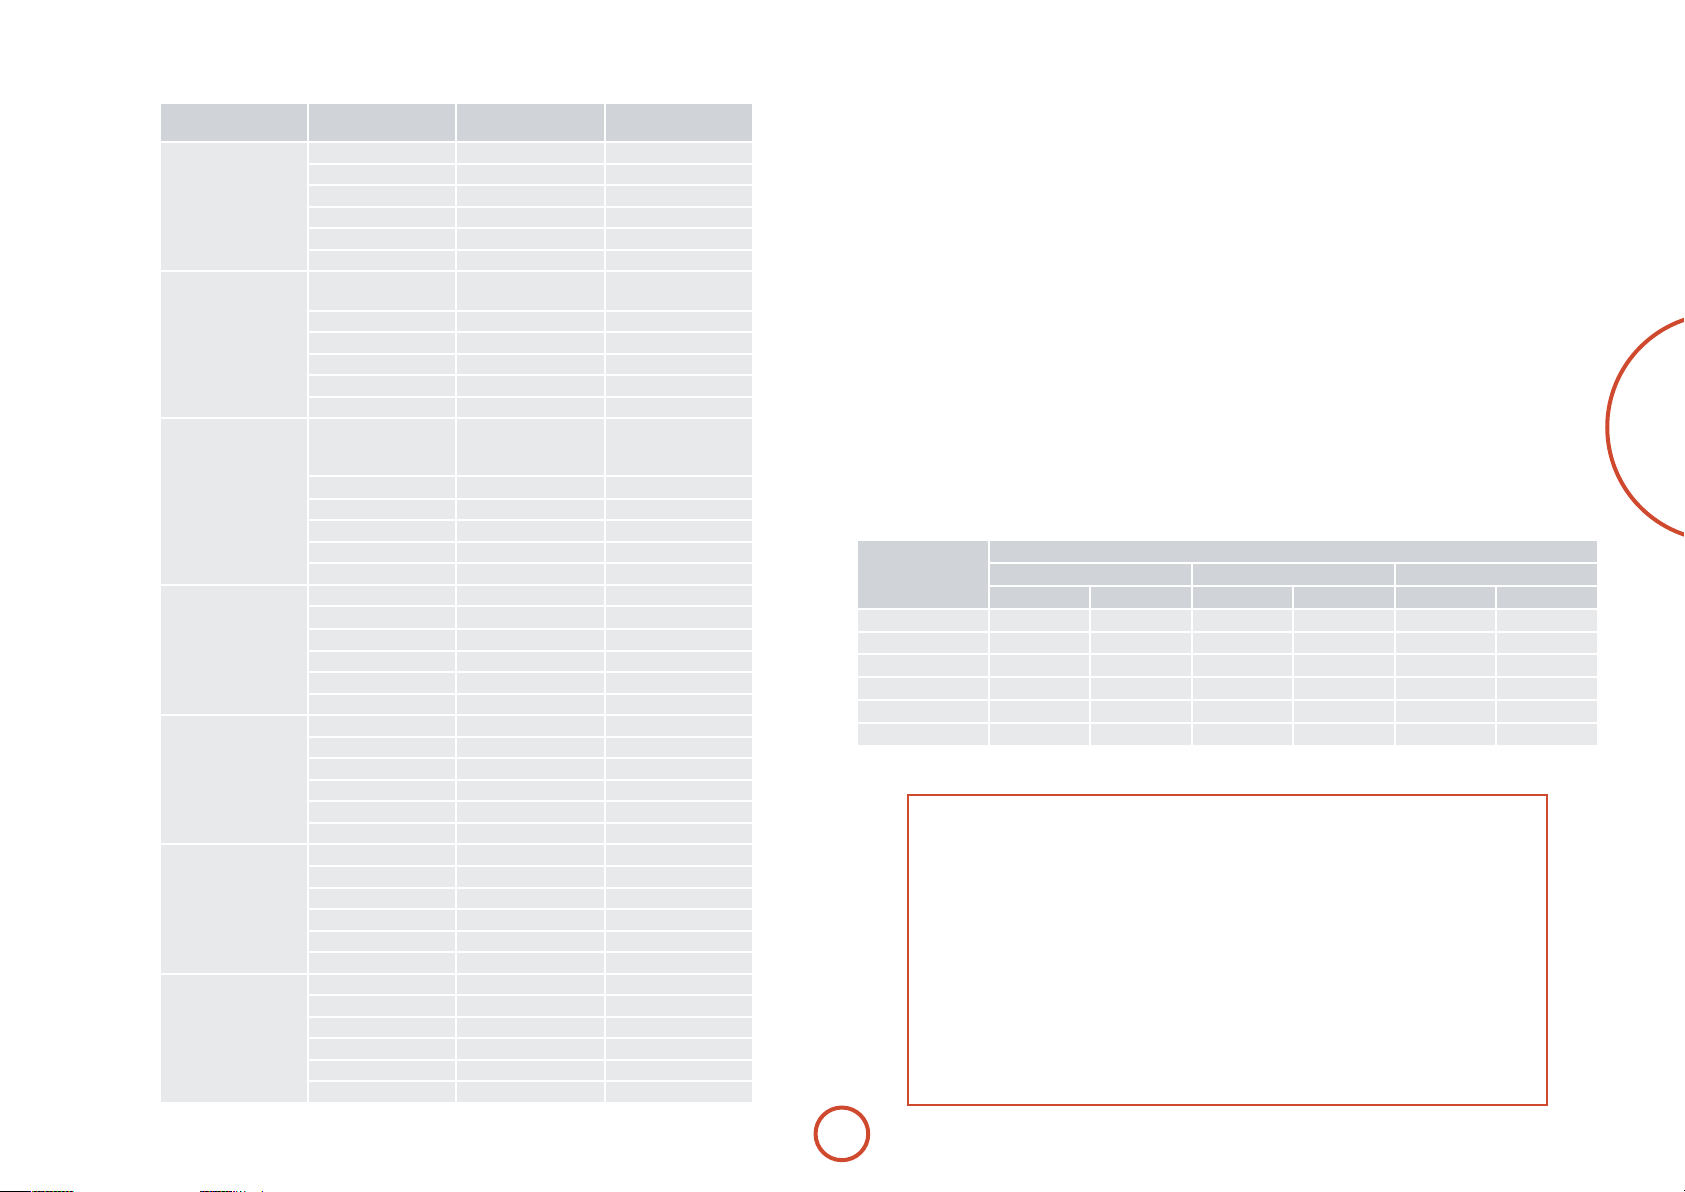
Format audio Réglage de sortie
Dolby Digital
Dolby Digital Plus /
Dolby TrueHD
Audio DTS-HD Haute
résolution / Audio
master DTS-HD
DTS
LPCM 7.1
(48 kHz / 96 kHz)
LPCM 5.1 192 kHz
LPCM 2.0
(44,1 H / 48 H)
numérique
Bitstream HD Dolby Digital 5.1 Dolby Digital 5.1
Bitstream Legacy Dolby Digital 5.1 Dolby Digital 5.1
Bitstream Mixed DTS 5.1 DTS 5.1
PCM 7.1 PCM 5.1 PCM Stereo
PCM 5.1 PCM 5.1 PCM Stereo
PCM Stereo PCM Stereo PCM Stereo
Bitstream HD Dolby Digital Plus /
Bitstream Legacy Dolby Digital 5.1 Dolby Digital 5.1
Bitstream Mixed DTS 5.1 DTS 5.1
PCM 7.1 PCM 7.1 PCM Stereo
PCM 5.1 PCM 5.1 PCM Stereo
PCM Stereo PCM Stereo PCM Stereo
Bitstream HD Audio DTS-HD Haute
Bitstream Legacy DTS 5.1 DTS 5.1
Bitstream Mixed DTS 5.1 DTS 5.1
PCM 7.1 PCM 7.1 PCM Stereo
PCM 5.1 PCM 5.1 PCM Stereo
PCM Stereo PCM Stereo PCM Stereo
Bitstream HD DTS 5.1 DTS 5.1
Bitstream Legacy DTS 5.1 DTS 5.1
Bitstream Mixed DTS 5.1 DTS 5.1
PCM 7.1 PCM 5.1 PCM Stereo
PCM 5.1 PCM 5.1 PCM Stereo
PCM Stereo PCM Stereo PCM Stereo
Bitstream HD PCM 7.1 PCM Stereo
Bitstream Legacy PCM 7.1 PCM Stereo
Bitstream Mixed DTS 5.1 DTS 5.1
PCM 7.1 PCM 7.1 PCM Stereo
PCM 5.1 PCM 5.1 PCM Stereo
PCM Stereo PCM Stereo PCM Stereo
Bitstream HD PCM Stereo PCM Stereo
Bitstream Legacy PCM Stereo PCM Stereo
Bitstream Mixed DTS 5.1 PCM Stereo
PCM 7.1 PCM Stereo PCM Stereo
PCM 5.1 PCM Stereo PCM Stereo
PCM Stereo PCM Stereo PCM Stereo
Bitstream HD PCM Stereo PCM Stereo
Bitstream Legacy PCM Stereo PCM Stereo
Bitstream Mixed DTS 2.0 DTS 2.0
PCM 7.1 PCM Stereo PCM Stereo
PCM 5.1 PCM Stereo PCM Stereo
Sortie HDMI Sortie optique/coaxiale
Dolby Digital 5.1
Dolby TrueHD
PCM Stereo
résolution / Audio
master DTS-HD
PCM Stereo PCM Stereo
Résolution de sortie Vidéo
Le tableau ci-dessous indique la résolution de sortie
vidéo sur chaque sortie vidéo pour les diérents réglages
de résolution (voir «Ecran» sur la page F-21).
Réglage de
résolution
Sortie vidéo composite Sortie vidéo composante Sortie HDMI
NTSC PAL NTSC PAL NTSC PAL
HDMI Auto 480i 576i 1080i 1080i Preferred Preferred
1080p 480i 576i 1080i 1080i 1080p 1080p
1080i 480i 576i 1080i 1080i 1080i 1080i
720p 480i 576i 720p 720p 720p 720p
480p/576p 480i 576i 480p 576p 480p 576p
480i/576i 480i 576i 480i 576i 480i 576i
REMARQUES:
< Si les sorties HDMI et vidéo composante sont utilisées en même temps, la vidéo composite
sera transmise sur une dénition standard (résolution de 480i/576i).
< La dénition des DVD protégés contre la copie ne peut être que standard sur des
connexions vidéo analogique (composante ou composite).
< Si le BDP100 est réglé sur une résolution que votre téléviseur ne peut pas accepter, il se peut
qu’il n’y ait pas d’image. Dans ce cas, reliez la sortie vidéo composante à votre téléviseur.
Sélectionnez l’entrée vidéo qui convient sur votre téléviseur pour acher le menu de
conguration. Sélectionnez une résolution que votre téléviseur accepte, puis modiez les
branchements pour rétablir la conguration requise.
< Le réglage «HDMI Auto» utilise la valeur de résolution que votre téléviseur exige. Cela
peut ne pas correspondre à une résolution optimale. Nous vous conseillons de consulter
la documentation livrée avec votre téléviseur pour connaitre la résolution optimale et
eectuez un réglage manuel de cette résolution.
Sorties vidéo
Français
F-25
Page 64

personnalisation
de la CR104
Apprentissage de code
La CR104 comprend une bibliothèque exhausive de
codes préprogrammés. Après avoir conguré la CR104
pour votre appareil, il se peut qu’une ou plusieurs
fonctions de la télécommande d’origine de votre appareil
ne se retrouve(nt) pas sur les touches de la CR104.
Pour palier à cela, la CR104 propose une fonctionnalité
d’Apprentissage de code qui vous permet de copier
jusqu’à 16 fonctions de la télécommande d’origine sur le
clavier de la CR104.
Avant de commencer, veillez à ce que:
La télécommande d’origine fonctionne
<
correctement.
Les télécommandes ne soient pas dirigées vers
<
l’appareil.
Les télécommandes disposent de piles neuves.
<
Les télécommandes ne sont pas en plein soleil ou
<
sous un éclairage au néon trop puissant.
Les fonctions apprises dépendent du mode: vous
pouvez en théorie attribuer jusqu’à huit fonctions
diérentes sur une seule touche (la CR104 peut gérer
un total de 16 fonctions apprises).
Exemple: Pour copier la fonction de «Gel de
texte» de la télécommande d’un téléviseur
sur la touche ( de votre CR104
1. Posez les deux télécommandes sur une surface
plane, en laissant un espace de 2 à 5 cm entre elles,
ports infrarouge face à face.
2. Sur la CR104, maintenez la touche S enfoncée
jusqu’à ce que le voyant marche/arrêt clignote
deux fois:
3. Appuyez sur 9 7 5. Le voyant marche/arrêt
clignote deux fois:
4. Sur la CR104, appuyez sur la touche périphérique
correspond à l’appareil «source» (par exemple, si
vous apprenez une fonction TV, appuyez sur a).
5. Sur la CR104, appuyez sur la touche que vous
souhaitez attribuer à la fonction apprise (par
exemple, (). La touche de l’appareil clignote
rapidement.
6. Sur la télécommande d’origine, maintenez la
touche de la fonction que vous souhaitez copier
enfoncée (par exemple,
la touche périphérique de la CR104 clignote deux
fois:
* *
* *
.
.
.
* *
TEXT HO LD) jusqu’à ce que
7. Si vous souhaitez copier d’autres fonctions à partir
du même périphérique source, recommencez les
étapes 5 et 6 en appuyant sur la touche suivante
que vous souhaitez copier.
8. Pour quitter le mode d’apprentissage de code,
maintenez la touche S enfoncée jusqu’à ce que la
touche périphérique clignote deux fois: * *.
9. Pour utiliser la fonction copiée sur la CR104,
appuyez sur la touche de mode périphérique, puis
sur la touche de la fonction.
Sur l’exemple donné, il faut appuyer sur
puis sur
a
(
Apprentissage décalé
Vous pouvez attribuer une fonction copiée sur une
touche de la CR104 sans eacer sa fonction d’origine.
Vous pouvez attribuer des fonctions d’apprentissage
décalé à n’importe quelle touche à l’exception de:
Touches de mode périphérique (par exemple a), S,
ou des touches chirées (de 0 à 9).
1. Pour attribuer une fonction d’apprentissage
décalé, procédez de la même manière que pour
l’apprentissage de code. A l’étape 5, appuyez
une fois sur S avant d’appuyez sur la touche
à laquelle vous souhaitez attribuer la fonction
copiée.
2. Pour accéder à cette fonction, appuyez sur S
puis sur la touche cible.
Remarques importantes
Après avoir commencé une session
<
d’apprentissage de code, vous avez environ 10
secondes pour eectuer chaque étape. Au bout
de 10 secondes, le délai est expiré et vous devez
recommencer le processus.
La fonctionnalité d’apprentissage dépend du
<
mode: vous pouvez copier une fonction par mode
sur une touche.
La CR104 peut apprendre un total d’environ 16
<
fonctions.
Pour remplacer une fonction apprise, il sut
<
d’attribuer une nouvelle fonction sur la même
touche.
Les fonctions apprises restent en mémoire lorsque
<
vous changez les piles.
Si l’apprentissage de code ne se fait pas,
<
essayez de modier la distance entre les deux
télécommandes. Vériez que l’éclairage de la pièce
n’est pas trop puissant.
Pour supprimer une fonction apprise
1. Maintenez la touche S enfoncée jusqu’à ce que le
voyant rouge clignote deux fois : * *.
2. Appuyez sur 9 7 6. Le voyant marche/arrêt
clignote deux fois: .
3. Appuyez une fois sur une touche de mode
périphérique. Par exemple, si vous souhaitez
supprimer l’une des fonctions TV apprises,
appuyez sur a.
4. Appuyez deux fois sur la touche correspondant
à la fonction que vous souhaitez supprimer. La
télécommande clignote deux fois: * * pour
conrmer.
La fonction d’origine de la CR104 est rétablie.
Pour supprimer une fonction décalée
apprise:
Pour supprimer une fonction apprise en décalé, appuyez
sur S avant d’appuyer sur la touche correspondant à la
fonction que vous souhaitez supprimer (au moment de
l’étape 4 ci-dessus).
Pour supprimer TOUTES les fonctions
apprises sur un mode périphérique précis
1. Maintenez la touche S enfoncée jusqu’à ce que le
voyant rouge clignote deux fois:
2. Appuyez sur 9 7 6: le voyant marche/arrêt
clignote deux fois:
3. Appuyez deux fois sur la touche de mode
périphérique qui convient.
* *
.
* *
.
F-26
Page 65

Création de macros
Vous pouvez programmer votre CR104 pour qu’elle
transmette une série de commandes sur pression d’une
seule touche. Toute série de commandes que vous
eectuez régulièrement peut être réduite à une seule
touche.
Par exemple, cela peut vous être utile d’éteindre à la fois
votre téléviseur, votre magnétoscope et votre récepteur
satellite.
Une touche programmée par une macro est
<
disponible pour chaque mode ; elle remplace les
diverses fonctions de cette touche pour tous les
modes.
Une macro peut comprendre jusqu’à huit
<
pressions de touche.
Exemple: Pour attribuer une macro sur la
touche h
1. Maintenez la touche S enfoncée jusqu’à ce que le
voyant rouge clignote deux fois : * *.
2. Appuyez sur
3. Appuyez sur h (la macro sera attribuée à cette
touche).
4. Appuyez sur a, P, w, P, z, P. (Ce qui
correspond aux étapes de macro que vous
souhaitez enregistrer.)
5. Pour mettre la macro en mémoire, maintenez
la touche S enfoncée jusqu’à ce que le voyant
marche/arrêt clignote deux fois: * *.
Désormais, à chaque pression sur la touche h, la
CR104 changera le statut de marche/arrêt sur votre
téléviseur, magnétoscope et satellite.
Le mot «changera» est important ici. C’est à dire
<
que si votre téléviseur et votre récepteur satellite
sont en marche, mais que le magnétoscope est
éteint, une pression sur la touche h permettra
d’éteindre le téléviseur et le satellite, et d’allumer le
magnétoscope (plutôt qu’allumer ou éteindre les
trois périphériques).
Si vous utilisez les macros, n’oubliez pas qu’il vous
<
faudra peut-être changer de mode ou utiliser S,
et que chaque pression sur une touche (y compris
le changement de mode et la pression sur la
touche S) compte comme une étape de macro.
Vous ne pouvez pas utiliser une touche macro sur
une autre macro.
9 9 5
.
Si l’espace mémoire disponible pour une macro
<
est épuisé, le voyant marche/arrêt s’allume
pendant cinq secondes. Vous pouvez, toutefois,
sauvegarder les étapes de la macro jusqu’à ce
point en appuyant sur la touche S. Vous pouvez
également annuler l’enregistrement de cette macro
en appuyant sur toute autre touche.
L’intervalle entre chaque pression de touche est
<
enregistré comme faisant partie de la macro. Un
intervalle de 30 secondes maximum est autorisé.
Exemple: Pour supprimer la macro associée
à la touche
1. Maintenez la touche S enfoncée jusqu’à ce que le
2. Appuyez sur 9 9 5.
3. Appuyez sur h.
4. Maintenez la touche S enfoncée jusqu’à ce que le
h
voyant rouge clignote deux fois: * *.
voyant rouge clignote deux fois: * *.
Punch-through du volume
Le punch-through du volume signie que, quel que soit
le mode périphérique sélectionné, la CR104 commande
le volume de l’AVR500, AVR600 ou AV888. Vous n’avez
pas à appuyer sur A sur votre CR104 ; cette fonction
est activée par défaut.
Cependant, il peut parfois arriver que vous ayez à
commander directement le volume d’un appareil sur un
mode périphérique particulier.
Exemple: Pour annuler la fonction de punchthrough du volume pour un téléviseur (mode
AV)
1. Appuyez sur a once.
2. Maintenez la touche S enfoncée jusqu’à ce que le
voyant rouge clignote deux fois : * *.
3. Appuyez sur 9 9 3.
4. Appuyez sur -. Le voyant marche/arrêt clignote
quatre fois.
Désormais, en mode téléviseur (AV), vous pouvez
commander directement le volume ou couper/rétablir le
son sur votre téléviseur.
Pour supprimer complètement la
conguration de punch-through du volume
1. Maintenez la touche S enfoncée jusqu’à ce que le
voyant rouge clignote deux fois : * *.
2. Appuyez sur 9 9 3.
3. Appuyez sur +. Le voyant marche/arrêt clignote
quatre fois *
Désormais, quel que soit le mode sélectionné, vous
aurez un accès direct au fonctions de volume, si ces
fonctions sont disponibles. Il vous faudra alors passer
en mode
AMP pour pouvoir modier le volume du
AVR500/AVR600/AV888.
* * *
Exemple: Pour rétablir la conguration de
punch-through du volume par défaut sur
tous les modes périphériques
1. Maintenez la touche S enfoncée jusqu’) ce le
voyant marche/arrêt clignote deux fois:
2. Appuyez sur
3. Appuyez sur A. Le voyant marche/arrêt clignote
deux fois: * *.
9 9 3
.
.
.
* *
Déplacement de touche
Il se peut que l’emplacement d’une touche que vous
utilisez souvent ne soit pas idéal sur le clavier de
votre CR104. Il est très facile d’attribuer une fonction
privilégiée à une autre touche, plus accessible. Il est
même possible de déplacer une fonction d’un mode
périphérique à un autre.
Exemple: Pour attribuer la fonction D à la
touche U en mode SAT
1. Appuyez sur z.
2. Maintenez la touche S enfoncée jusqu’à ce le
voyant marche/arrêt clignote deux fois: * *.
3. Appuyez sur 9 9 4.
4. Appuyez sur la touche que vous souhaitez
déplacer (par exemple, D)
5. Appuyez sur la touche sur laquelle vous souhaitez
déplacer la fonction (par exemple, U).
Désormais, si vous appuyez sur D ou sur Uen mode
SAT, la CR104 transmet la fonction D.
Pour interchanger complètement la fonctionalité de
deux touches et placer la fonctionnalité de U sur la
touche D, procédez comme ci-dessus, mais changez les
pressions sur les touches D et U de l’exemple.
A noter: la fonction copiée sur la nouvelle touche
correspond toujours à la fonction d’origine de l’ancienne
touche.
Rétablir une touche déplacée
Pour rétablir la fonction précédente d’une touche,
répétez l’opération ci-dessus, en appuyant deux fois sur
la touche à rétablir.
Rétablir l’ensemble des touches déplacées
pour un mode périphérique particulier
Pour rétablir l’ensemple des touches d’un mode
périphérique et leur attribuer de nouveau leur
emplacement d’origine, répétez l’opération donnée en
exemple ci-dessus, mais appuyez sur la touche de mode
périphérique qui convient (par exemple A) aux étapes
1,4 et 5 de l’exemple.
Français
F-27
Page 66
Copier une touche d’un mode périphérique
à l’autre
Il est possible de copier les fonctions entre modes
périphérique. Cependant, n’oubliez pas que les fonctions
des boutons sont particulières au mode périphérique et
qu’elles reviennent donc au mode périphérique d’origine
lorsqu’elles sont copiées.
Dans l’exemple suivant, la fonction directe de l’AVR500/
AVR600/AV888 du mode périphérique
CR104 sur la fonction décalée de la touche # sur le
mode périphérique AV.
1. Maintenez la touche S enfoncée jusqu’à ce le
voyant marche/arrêt clignote deux fois: * *.
2. Appuyez sur 9 9 4.
3. Appuyez sur la touche mode périphérique de
la fonction que vous souhaitez déplacer (par
exemple A).
4. Appuyez sur la touche fonction que vous
souhaitez déplacer (par exemple, )/
5. Appuyez sur la touche mode périphérique vers
lequel vous souhaitez copier la fonction (par
exemple a).
6. Appuyez sur la touche
7. Appuyez sur la touche sur laquelle vous souhaitez
copier la fonction (par exemple, #)
Si vous préférez copier la touche sur la fonction
principale du bouton # plutôt que sur la fonction
décalée, ignorez l’étape 6 dans l’exemple ci-dessus.
S
AMP de la
DIREC T)
Déplacement de mode
Si votre système de divertissement comprend des
appareils de même type (deux téléviseurs, peut-être de
marques diérentes, par exemple), vous pouvez toujours
utiliser la CR104 pour commander ces deux appareils. Il
vous sut d’attribuer une touche de mode périphérique
qui n’est pas utilisée.
REMARQUE
Avant d’utiliser le déplacement de mode, veillez
à ce que les touches de mode périphérique de la
source et de la destination soient toutes les deux
déverrouillées (voir prochaine rubrique).
Exemple: Pour utiliser la touche z pour
commander un second téléviseur
1. Maintenez la touche S enfoncée jusqu’à ce que le
voyant rouge clignote deux fois : * *.
3. Appuyez sur 9 9 2.
3. Appuyez sur la touche de mode périphérique
correspondant à l’appareil que vous souhaitez
commander (par exemple, pour un téléviseur,
appuyez sur a).
4. Appuyez sur la touche de mode périphérique que
vous souhaitez utiliser (par exemple z).
5. N’oubliez pas de congurer la CR104 pour
qu’elle puisse commander le deuxième appareil,
en utilisant l’une des méthodes décrite sous
«Commande d’autres appareils» sur la page F-15.
A noter: la fonction punch-through du volume ne
peut pas s’appliquer à un mode périphérique copié par
déplacement de mode. Cependant, la fonctionnalité de
punch-through du volume peut être rétablie si vous avez
utilisé le déplacement de mode, en copiant -, + et
du mode périphérique AMP sur les mêmes touches
@
physiques du mode périphérique déplacé, selon le
dernier exemple indiqué sous Déplacement de touche.
Pour rétablir la fonction d’origine d’une
touche de mode périphérique
1. Maintenez la touche S enfoncée jusqu’à ce que le
voyant rouge clignote deux fois. * *.
2. Appuyez sur 9 9 2.
3. Appuyez deux fois sur la touche de mode
périphérique que vous souhaitez rétablir.
Verrouillage/Déverrouillage d’un
mode périphérique particulier
Lorsque vous ouvrez l’emballage de votre CR104
et insérez les piles pour la première fois, elle est en
mesure de commander certains éléments Arcam
automatiquement (par exemple des lecteurs DVD,
des amplis, des tuners ou des lecteurs CD). Pour cela,
nous préprogrammons les codes correspondant aux
appareils Arcam sur les touches de mode périphérique
qui conviennent, et verrouillons ensuite ces modes
périphérique pour que vous ne puissiez pas les
reprogrammer par inadvertence.
Si vous souhaitez neutraliser ces réglages par défaut,
pour commander un autre lecteur CD, par exemple, il
vous faut tout d’abord déverrouiller le mode CD avant
de pouvoir utiliser l’une des méthodes décrites au début
de ce guide pour congurer la CR104.
Voici les réglages d’usine :
Mode
périphérique
BD
SAT
AV
TUN
AMP
PVR
VCR
CD
D’autres codes sont disponibles pour des congurations
multi-pièces, ou si un code correspond à celui d’un
fabricant d’autres produits.
Par exemple :
AMP (code système 19) 1954
Vous devrez changer le code système de l’appareil que
vous souhaitez commander, ainsi que celui de la CR104.
REMARQUE
Le mode périphérique
que pour commander des amplicateurs Arcam
comme l’AVR500, AVR600 et AV888, soit sur les
codes système par défaut, soit sur d’autres codes
infrarouge.
Statut par défaut Codes Arcam
par défaut
Verrouillé 0762
Déverrouillé 1205
Déverrouillé 0586
Verrouillé 2009
Verrouillé 1242
Déverrouillé 1930
Déverrouillé 0111
Verrouillé 2010
AMP ne peut être utilisé
Pour changer le réglage de verrouillage d’un mode
périphérique:
1. Appuyez sur la touche de mode périphérique que
vous souhaitez déverrouiller (par exemple
2. Maintenez la touche S enfoncée jusqu’à ce que le
voyant rouge clignote deux fois : * *.
3. Appuyez sur 9 8 2.
Le voyant marche/arrêt clignote deux fois pour
<
indiquer un verrouillage, et quatre fois pour
indiquer un déverrouillage.
Si la séquence de touches saisie n’est pas valide, le
<
voyant marche/arrêt reste allumé un moment et
revient en fonctionnement normal.
Lorsque la touche de mode périphérique est verrouillée,
les fonctions de conguration de code directe et de
mode de déplacement ne sont pas disponibles.
c
).
F-28
Page 67

Punch-through infrarouge de
la touche Mode
Par défaut, le punch-through infrarouge de la touche
Mode est activé.
Exemple: Pour régler le punch-through
infrarouge de la touche mode sur AMP
1. Maintenez la touche S enfoncée jusqu’à ce que le
voyant rouge clignote deux fois : * *.
2. Appuyez sur 9 7 1. Le voyant marche/arrêt
clignote deux fois:
3. Appuyez sur A pour activer la fonction de punch
through infrarouge à partir ce mode.
Désormis, à chaque fois que vous appuyez sur une
touche Mode et que vous la relâchez, les données
infrarouge attribuées à
soit le mode actuel (il «traverse» tout autre appareil).
AMP sont transmises, quel que
* *
.
Pour annuler la fonction de Punch-through
infrarouge de la touche Mode
1. Maintenez la touche S enfoncée jusqu’à ce que le
voyant rouge clignote deux fois: * *.
2. Appuyez sur 9 7 1. Le voyant marche/arrêt
clignote deux fois: * *.
3. Appuyez sur S jusqu’à ce que le voyant marche/
arrêt clignote deux fois: * *.
Réinitialisation de la CR104
Le fait de réinitialiser la CR104 eacera toutes les
fonctions apprises sur l’ensemble des modes, ainsi que
d’autres fonctions programmées, telles que les macros.
Les touches de mode périphérique ne seront pas
réinitialisées: elles resterons programmées sur votre
sélection d’appareils.
1. Maintenez la touche S enfoncée jusqu’à ce que le
voyant rouge clignote deux fois : * *.
2. Appuyez sur 9 8 0. Le voyant marche/arrêt
clignote quatre fois: * * * *.
3. Maintenez la touche S enfoncée jusqu’à ce que le
voyant rouge clignote deux fois : * *.
4. Appuyez sur 9 9 3.
5. Appuyez sur A. Le voyant marche/arrêt clignote
deux foix: * *.
6. Maintenez la touche S enfoncée jusqu’à ce que le
voyant rouge clignote deux fois : * *.
7. Appuyez sur 9 7 1. Le voyant marche/arrêt
clignote deux fois: * *.
8. Appuyez sur A. Le voyant marche/arrêt clignote
deux foix: * *.
résumé des commandes
Conguration de code directe
(par ex. mode AV, NNNN=numéro du code)
a S * *
Recherche sur bibliothèque
(mode AV, par ex.)
a S 9 9 1 * * P [
s’éteigne
pour enregistrer
S
Rappel du code
a S 9 9 0 **
1 compter les clignotements pour le 1er N
2 compter les clignotements pour le 2ème N
3 compter les clignotements pour le 3ème N
4 compter les clignotements pour le 4ème N
Apprentissage de code
(touche d’avance rapide, mode AV, par ex.)
S * * 9 7 5 * * a ( *
clignotements rapides)
(Appuyez sur la touche de la télécommande d’origine
que vous souhaitez copier)
* * S * *
Supprimer une fonction apprise
(touche d’avance rapide, mode AV, par ex.)
S * * 9 7 5 * * a ( ( * *
Supprimer toutes les fonctions apprises
pour un appareil
(mode AV, par ex.)
S * * 9 7 5 a a
Création de macros
(par ex. touche SRCH key)
S * * 9 9 5 h a P w P z P S
* *
Supprimer la macro
S * * 9 9 5 h S * *
NNNN * *
P
jusqu’à ce l’appareil
(plusieurs
Déplacement de touche
(par exemple mode SAT, touche DISP sur la touche
MENU)
z S * * 9 9 4 D U
Déplacement de mode
(pour faire passer SAT sur TV(AV), par ex.)
S * * 9 9 2 a z
Rétablir le mode périphérique
(pour rétablir SAT, par ex.)
S * * 9 9 2 z z
Verrouillage/déverrouillage d’un mode
(le mode CD, par ex.)
c S * * 9 8 2 * *
(soit deux clignotements pour verrouillage)
c S * * 9 8 2 * * * *
(soit quatre clignotements pour déverrouillage)
Pour annuler l’ensemble des punch-through
du volume
S * * 9 9 3 + * * * *
Pour rétablir la fonction de punch-through
du volume
S * * 9 9 3 A * *
Punch-through infrarouge de la touche Mode
S * * 9 7 1 * * A
Annulation du Punch-through infrarouge de
la touche Mode
S * * 9 7 1 * * S * *
REMARQUE
Comme dans le reste du manuel, un seul
«clignotement» du voyant rouge sour la touche
marche/arrêt est représenté par le symbole
*
.
Codes périphérique
Les tableaux indiqués à partir de la page 36 (sur la
dernière section de ce manuel) donnent les codes à
quatre chires des diérents appareils par fabricant.
Servez-vous de ces codes lorsque vous congurez
votre CR104 an de commander ces appareils, selon
la méthode 1 (voir page F-15).
Si plus d’un code est indiqué, essayez le premier
numéro. Si les résultats ne sont pas bons, essayez les
autres codes pour ce fabricant jusqu’à ce que vous
obteniez le meilleur réglage pour la fonctionnalité
requise.
Si le fabricant de votre appareil n’est pas indiqué,
vous pouvez la méthode 2, c’est-à-dire la recherche
par bibliothèque (voir page F-15).
Celle-ci vous permet de passer en revue l’ensemble
des codes contenus dans la mémoire de la CR104.
Français
F-29
Page 68

Commandes
infrarouge
Ce sont-là les commandes infrarouge générées par la
télécommande du lecteur BD, et acceptées par le BDP100.
Ces codes sont utiles si vous souhaitez programmer une
autre télécommande pour commander le BDP100. Ces codes
sont donnés au format CodeSystème-CodeCommande. 25
(0x19) est le code système Arcam pour un lecteur Blu-ray.
Nom de la touche Décimal Hexadécimal
0
1
2
3
4
5
6
7
8
9
DISP
RND
RPT
SRCH
/
0
7
8
MENU MENU CONTEXTUEL
ANNULER
RETOUR
TITRE MENU PRINCIPAL
25–0 0x19–0x00
25–1 0x19–0x01
25–2 0x19–0x02
25–3 0x19–0x03
25–4 0x19–0x04
25–5 0x19–0x05
25–6 0x19–0x06
25–7 0x19–0x07
25–8 0x19–0x08
25–9 0x19–0x09
25–18 0x19–0x12
25–64 0x19–0x40
25–29 0x19–0x1D
25–76 0x19–0x4C
25–32 0x19–0x20
25–33 0x19–0x21
25–50 0x19–0x32
25–52 0x19–0x34
25–67 0x19–0x43
25–58 0x19–0x3A
25–72 0x19–0x48
25–66 0x19–0x42
Nom de la touche Décimal Hexadécimal
PARCOURIR VERS LE HAUT
PARCOURIR VERS LA GAUCHE
OK
PARCOURIR VERS LA DROITE
PARCOURIR VERS LE BAS
CHARGER
PAUSE
LECTURE
STOP
STATUT
SILENCE
VOL+
VOL
24P
ANGLE
AUDIO
SUBT
SETUP
ROUGE / A
VERT / B
JAUNE / C
BLEU / D
25–86 0x19–0x13
25–81 0x19–0x51
25–87 0x19–0x57
25–80 0x19–0x50
25–85 0x19–0x55
25–45 0x19–0x2D
25–48 0x19–0x30
25–53 0x19–0x35
25–54 0x19–0x36
25–75 0x19–0x4B
16–13 0x10–0x0D
16–16 0x10–0x10
16–17 0x10–0x11
25–88 0x19–0x58
25–73 0x19–0x49
25–69 0x19–0x45
25–65 0x19–0x41
25–74 0x19–0x4A
25–107 0x19–0x6B
25–108 0x19–0x6C
25–109 0x19–0x6D
25–110 0x19–0x6E
F-30
Page 69

spécications
Sortie audio analogique
Conversion numérique-analogique DAC Delta-Sigma 24-bit 192 kHz
Rapport signal/bruit 110dB CCIR
Distorsion harmonique (1 kHz) 0.002%
Fréquence en réponse (±0.5 dB) 10 Hz -20 kHz
Niveau de sortie (0 dB) 2,2 Vrms
Impédance de sortie 47
Charge minimum conseillée 5 kΩ
Sorties vidéo
Vidéo composite 1 x phono plaqué or. 1 V pk-pk en 75
Vidéo composante Entrelacée ou Progressive
HDMI Connecteur HDMI à 19 broches
Interfaces numériques
USB USB 2.0 High Speed (480 Mbit/s)
Réseau 10 BASE-T / 100 BASE-TX
Caractéristiques physiques
Dimensions L430 x P400 x H100 mm
Poids 6,2 kg net/10,0 kg avec emballage
Consommation électrique 30 W maximum
Connexion de sortie numérique 75
Accessoires fournis
E&OE
REMARQUE: toutes les valeurs techniques sont typiques sauf mention contraire
Ω
3 prises phono plaquées or.
Y 1 V pk-pk enn 75 , Pb 0,7 V pk-pk in 75 , Pr 0,7 V pk-pk en 75
Formats vidéo compatibles:
720 x 576p, 720(1440) x 576i, 720 x 480p, 720(1440) x 480i,
1280 x 720p, 1920 x 1080i, 1920 x 1080p
Audio sur 6-canaux/96 kHz ou 2-canaux /192 kHz (24-bit).
Ω coaxial
TOSLINK optique
Câble d’alimentation secteur
Télécommande CR104
4 piles AAA
Interférences radio
Le lecteur Blu-ray BDP100 est un appareil numérique
conçu d’après des normes de compatibilité
électromagnétique très strictes.
Tout lecteur Blu-ray génère et peut irradier de l’énergie
RF (radio fréquence). Cela peut parfois entrainer des
interférences sur la réception radio FM et AM. Dans
ce cas, éloignez le plus possible le lecteur et ses câbles
de connexion du tuner et de ses antennes. Brancher le
lecteur et le tuner sur des prises de courant diérentes
peut également contribuer à réduire les interférences.
PAYS DE LA CE – La conception de ces appareils est
conforme à la directive EMC 2004/108/EC.
ETATS-UNIS – Ces appareils sont conformes à la
Class B, section 15 de la FCC.
Radiation laser
Si le lecteur Blu-ray BDP100
fonctionne alors que le boîtier
externe n’est pas en place, une
radiation laser invisible peut
blesser les yeux.
Français
F-31
Politique d’amélioration continue
Arcam améliore continuellement ses produits. Les
conceptions et les spécications peuvent donc faire
l’objet de modications sans préavis.
Page 70

F-32
Page 71

garantie du
produit
Garantie mondiale
Cette garantie vous autorise à faire réparer gratuitement votre appareil chez un
distributeur Arcam agréé durant les deux premières années suivant l’achat, à condition
que l’appareil ait à l’origine été acheté chez un revendeur ou un distributeur Arcam. Le
fabricant ne peut engager sa responsabilité en cas de défauts découlant d’un accident,
d’une mauvaise utilisation, d’une utilisation intensive, d’une usure normale, d’une
négligence ou d’un réglage ou d’une réparation non autorisée. Il ne peut en outre engager
sa responsabilité pour tout dommage ou toute perte survenant pendant le transport du
matériel sous garantie.
La garantie couvre :
Le coût des pièces et de la main d’oeuvre pendant deux ans à compter de la date d’achat.
Après deux ans, ces frais incombent au client. La garantie ne couvre jamais les frais de
transport.
Réclamations au titre de la garantie
Cet équipement doit être emballé dans son emballage original et retourné à votre
revendeur, vous pouvez également le retourner au distributeur Arcam du pays d’achat. Il
doit être envoyé en port prépayé par l’intermédiaire d’un transporteur able – jamais par
la poste. Aucune responsabilité n’est acceptée pendant le transport de l’appareil au titre
de la garantie ; aussi, est-il conseillé aux clients d’assurer l’appareil contre les pertes et les
dommages subis en transit. Pour tout renseignement complémentaire, veuillez contacter
le Service client Arcam à l’adresse suivante :
Arcam Customer Support Department,
Pembroke Avenue, Waterbeach, CAMBRIDGE CB25 9QR, Grande Bretagne
ou sur www.arcam.co.uk.
Des problèmes ?
Si votre revendeur ne peut répondre à votre demande pour ce produit Arcam ou tout
autre produit Arcam, veuillez contacter le Service client d’Arcam, à l’adresse ci-dessus, où
nous ferons de notre mieux pour vous aider.
Enregistrement en ligne
Vous pouvez enregistrer votre produit en ligne sur le site www.arcam.co.uk.
Français
Traitement responsable des déchets
Ce symbole indique que ce produit ne doit pas
être éliminé avec d’autres déchets
ménagers, ceci dans aucun des pays
de l’Union européenne.
En recyclant ce produit de façon
responsable, vous contribuez
à prévenir tout eet nocif sur
l’environnement ou la santé humaine
consécutif à une élimination de
déchets non contrôlée, ainsi qu’à préserver les
resources naturelles.
Si vous souhaitez mettre ce produit au rebut, veuillez
utiliser l’un de vos centres locaux de récuperation
et de recyclage ou contacter le revendeur auprès
duquel vous avez acheté le produit.
F-33
Page 72

Page 73
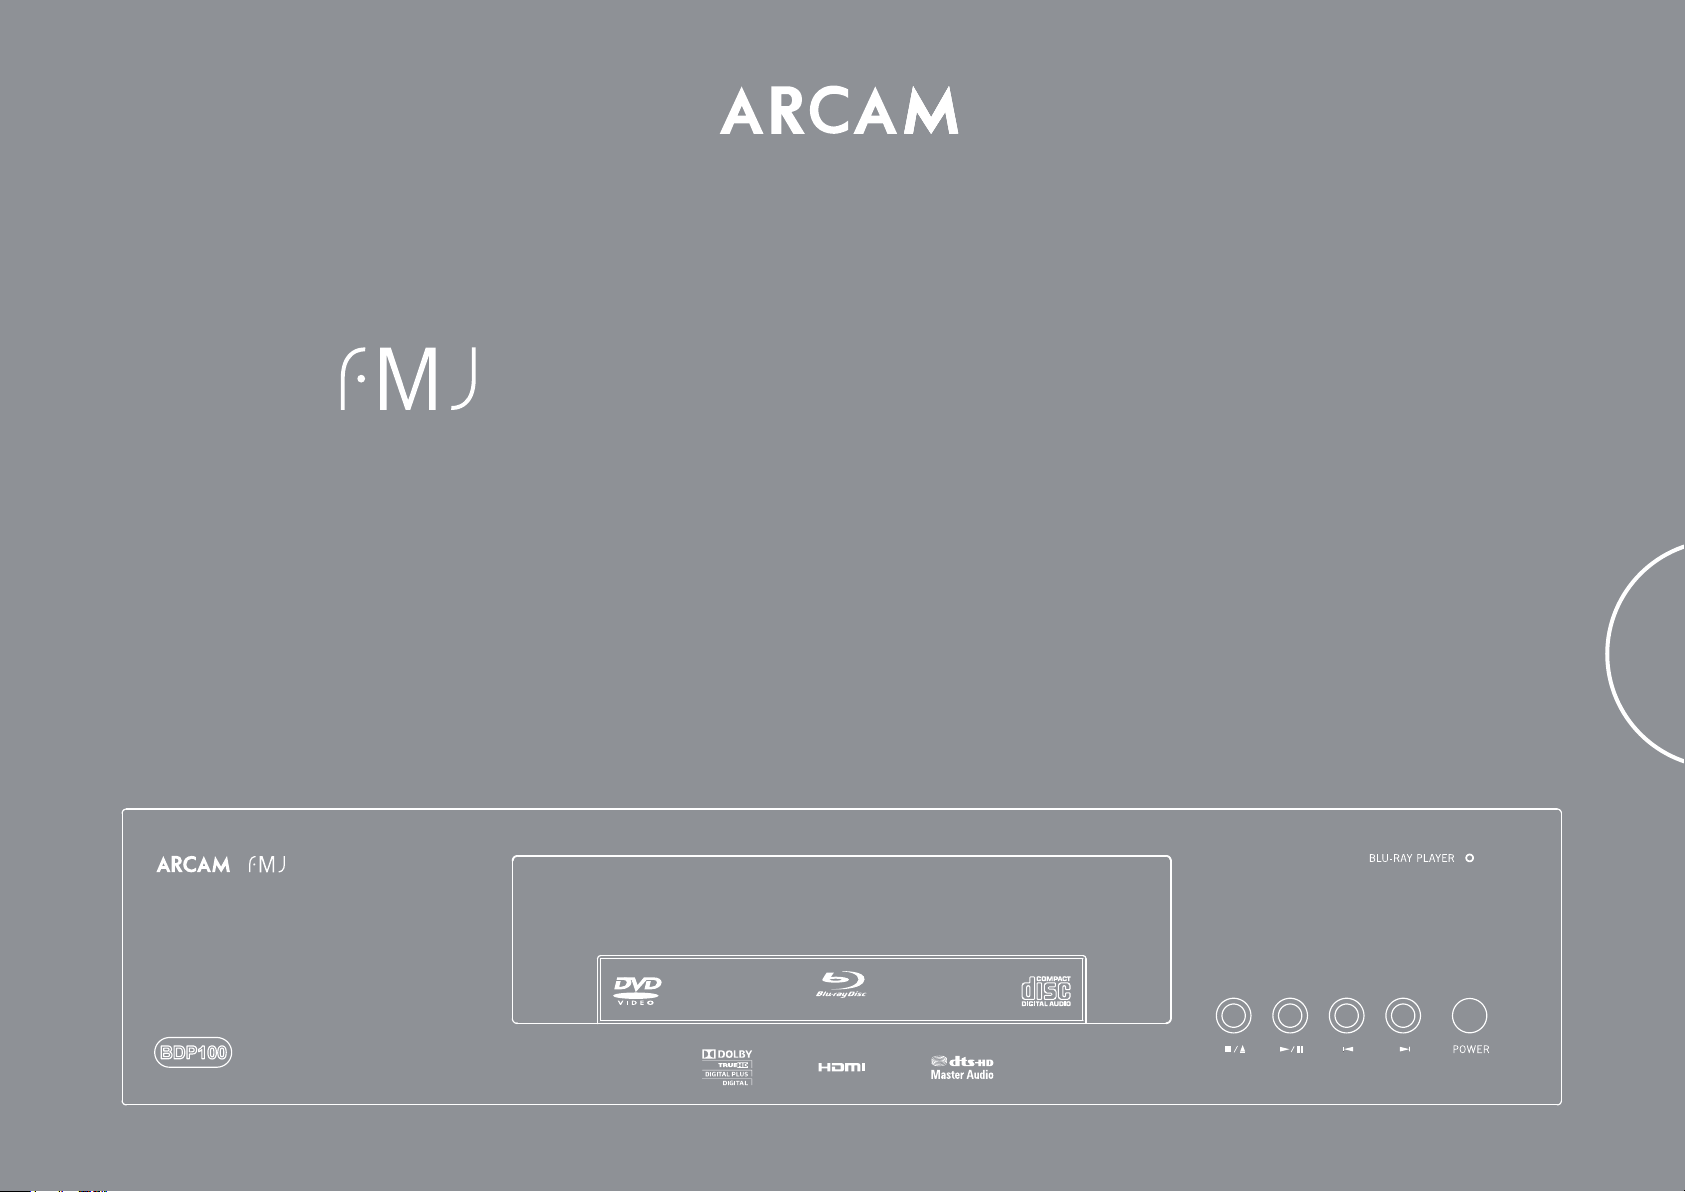
BDP100
HANDBUCH BLURAY DISKPLAYER
Deutsch
D utsch
ULTRA HIGH PERFORMANCE 24BIT DAC
Page 74

Sicherheitshinweis
VORSICHT: Um das Risiko eines Stromschlags zu vermeiden, Abdeckung (Rückseite) nicht entfernen. Die Bauteile im
Gerät können vom Benutzer nicht gewartet werden. Überlassen Sie die Wartung des Geräts einem Fachmann.
WARNUNG: Um das Risiko von Feuer oder Stromschlag zu vermeiden, Gerät weder Regen noch Feuchtigkeit aussetzen.
Das Blitzsymbol im gleichseitigen Dreieck weist den Benutzer auf eine nicht isolierte „gefährliche Spannung“ im
Gehäuse des Geräts hin, die stark genug sein kann, um einen Stromschlag auszulösen.
Das Ausrufezeichen im gleichseitigen Dreieck weist den Benutzer auf wichtige Anweisungen zum Betrieb und zur Instandhaltung
(Wartung) in der Dokumentation hin.
VORSICHT: In Kanada und den USA muss zur Vermeidung von Stromschlag der breite Teil des Steckers in die breite
Önung der Steckdose vorsichtig eingesteckt werden.
Viele der folgenden Sicherheitshinweise sind Ihnen bestimmt bekannt, lesen Sie sie bitte dennoch im Interesse Ihrer Sicherheit und zur Vermeidung von Sachschäden.
Wichtige Sicherheitshinweise
Dieses Gerät wurde unter Berücksichtigung strikter
Qualitäts- und Sicherheitsbestimmungen entworfen und
gefertigt. Sie sollten jedoch bei der Installation und dem
Betrieb folgende Sicherheitshinweise beachten.
1. Beachten Sie die Warnungen und Anweisungen
Vor der Inbetriebnahme dieses Geräts sollten Sie die
entsprechenden Sicherheits- und Betriebsanleitungen
lesen. Heben Sie dieses Handbuch gut auf, und
beachten Sie die enthaltenen Warnungen sowie die
Hinweise auf dem Gerät.
2. Wasser und Feuchtigkeit
Das Betreiben von elektrischen Geräten in der Nähe
von Wasser kann gefährlich sein. Verwenden Sie das
Gerät nicht in einer feuchten Umgebung (z. B. in der
Nähe von Badewannen, Waschbecken, Swimming
Pools oder in einem feuchten Keller).
3. Eindringen von Flüssigkeiten oder Fremdkörpern
Achten Sie darauf, dass keine Flüssigkeiten oder
Fremdkörper in das Geräteinnere gelangen. Sie
sollten keine mit Flüssigkeit gefüllten Behälter (z. B.
Blumenvasen) auf dem Gerät abstellen.
4. Aufstellung
Stellen Sie das Gerät nur in einem Regal auf, das stark
genug ist, das Gewicht dieses Geräts aufzunehmen.
5. Wärme
Stellen Sie das Gerät nicht auf ein Bett, ein Sofa, einen
Teppich oder eine ähnliche weiche Oberäche, in ein
geschlossenes Bücherregal bzw. einen Schrank, da
hierdurch die Belüung beeinträchtigt werden kann.
Achten Sie zur ausreichenden Belüung auf einen
Mindestabstand von 5 cm rund um das Gerät.
6. Wärme
Schützen Sie das Gerät vor oenen Flammen oder
Wärme erzeugenden Geräten wie Heizungen oder
Herde.
7. Klima
Das Gerät wurde für den Betrieb in gemäßigten
Klimazonen ausgelegt.
8. Reinigung
Ziehen Sie vor dem Reinigen des Geräts den
Netzstecker.
In den meisten Fällen reicht es aus, wenn Sie das
Gehäuse mit einem weichen, usenfreien und
angefeuchteten Tuch abwischen. Verwenden Sie keine
Verdünner oder andere chemische Lösungsmittel.
Von der Verwendung von Polituren oder Möbelsprays
wird abgeraten, da diese Substanzen weiße Spuren
hinterlassen können, wenn das Gerät danach mit
einem feuchten Tuch abgewischt wird.
9. Stromversorgung
Verwenden Sie nur eine Stromquelle, die den
Hinweisen im Handbuch oder auf dem Gerät
entspricht.
Zum Trennen des Geräts von der
Netzstromversorgung muss der Netzstecker gezogen
werden. Das Gerät muss so aufgestellt werden, dass
eine Trennung des Geräts von der Stromversorgung
möglich ist.
10. Schutz des Netzkabels
Netzkabel müssen so verlegt werden, dass sie nicht
geknickt oder gedehnt werden, dass nicht auf sie
getreten wird und dass keine Gegenstände darauf
abgestellt werden. Gehen Sie besonders sorgfältig mit
Kabelenden an Steckern und Gerätebuchsen um.
11. Nichtbenutzung
Ziehen Sie zum Strom sparen den Netzstecker, wenn
Sie das Gerät für längere Zeit nicht nutzen.
12. Seltsamer Geruch
Sollten Sie einen ungewöhnlichen Geruch bemerken
oder Rauch am Gerät entdecken, schalten Sie es aus
und ziehen Sie den Netzstecker. Wenden Sie sich
unverzüglich an Ihren Fachhändler.
13. Wartung
Versuchen Sie nicht, das Gerät selbst zu reparieren.
Überlassen Sie die Wartung des Geräts einem
Fachmann.
14. Batterien
Batterien dürfen keinen hohen Temperaturen
(Heizungen, direkte Sonneneinstrahlung usw.)
ausgesetzt bzw. verbrannt werden.
Entsorgen Sie die Batterien auf verantwortungsvolle
Weise. Erkundigen Sie sich über
Recyclingmöglichkeiten in Ihrer Nähe. Durch das
Recycling von Batterien gelangen Schwermetalle nicht
in Deponien, Grundwasser, Oberächenwasser oder
in die Lu.
15. Zu behebende Schäden
Das Gerät muss von einem Fachmann gewartet
werden, wenn:
A. das Netzkabel oder der Netzstecker beschädigt
wurde, oder
B. Gegenstände in das Gerät gefallen oder
Flüssigkeiten eingedrungen sind, oder
C. das Gerät Regen ausgesetzt war, oder
D. das Gerät nicht ordnungsgemäß funktioniert oder
einen erheblichen Leistungsabfall aufweist, oder
E. das Gerät zu Boden gefallen oder das Gehäuse
beschädigt ist.
Einhaltung von
Sicherheitsbestimmungen
Dieses Gerät entspricht der internationalen
Sicherheitsnorm für Elektrogeräte IEC 60065.
Dieses Gerät entspricht Teil 15 der FCC-Regeln. Der
Betrieb unterliegt den folgenden zwei Bedingungen:
(1) Dieses Gerät darf keine schädlichen Störungen
erzeugen, und
(2) dieses Gerät muss Störungen von außen
akzeptieren, dazu gehören solche Störungen, die einen
unerwünschten Betrieb verursachen.
D-2
Page 75

Inhalt
Willkommen ..............................................D-3
Installation ................................................D-4
Aufstellen des Geräts ......................................... D-4
Netzanschluss .......................................................D-4
Die Fernbedienungs
und Triggereingänge .......................................... D-4
Verbindungskabel ............................................... D-4
Video-Anschlüsse herstellen ...........................D-6
Audioanschlüsse herstellen ............................. D-6
Die HDMI-Schnittstelle ......................................D-7
Über HDMI ............................................................. D-7
Anschluss mittels HDMI ..................................... D-7
Fehlerbehebung HDMI ......................................D-7
Disk- u. Dateiformate ..............................D-8
Abspielbare Disks.................................................D-8
Abspielbare Dateien ........................................... D-8
Regionalcode .........................................................D-8
Netzwerkanschluss ............................................. D-9
USB-Anschluss.......................................................D-9
Allgemeine Bedienungshinweise .......D-10
Fernbedienung .......................................D-11
Steuern des BDP100 .........................................D-12
Erweiterte Steuerungen ..................................D-13
Nützliche Informationen .................................D-14
Gerätemodus / Quelltasten ...........................D-14
Andere Gerät steuern ......................................D-15
Code durch Blinken anzeigen .......................D-15
Erweiterter Betrieb ................................D-16
Diskinformationen.............................................D-16
Menüs .....................................................................D-16
Auswahl einer Tonspur ....................................D-16
Untertitel ...............................................................D-16
Bonusview u. BD-Live .......................................D-17
Dateien wiedergeben ......................................D-18
Erweiterte Wiedergabesteuerung ...............D-19
Einstellungsmenüs ................................D-20
Fehlerbehebung ....................................D-23
Audio- u. Video-Ausgabeformate .......D-24
Audio-Ausgabeformat .....................................D-24
Video-Ausgangsauösung .............................D-25
Vielen Dank und herzlichen Glückwunsch, dass Sie sich für den Kauf des FMJ Blu-ray DiskPlayers entschieden haben.
Arcam stellt seit mehr als 30 Jahren hochwertige Audio- und Heinkinokomponenten her. Der
BDP100, der Blu-ray Disks, DVD-VideoCDs abspielen kann, ist die jüngste Komponente in
einer langen Tradition von ausgezeichneten HiFi-Geräten. Arcam ist einer der geachtetsten
britischen Hersteller von Audiokomponenten. Das Design der FMJ-Reihe basiert auf der
Fülle von Erfahrungswerten des Unternehmens und wurde konzipiert, um Ihnen jahrelang
störungsfreien Hörgenuss zu bieten.
Dieses Handbuch bietet eine detaillierte Anleitung zur Installation, Verbindung und Bedienung
des Arcam BDP100 Blu-ray Disk-Players. Die mit diesem Gerät mitgelieferte CR104
Fernbedienung wird ebenfalls detailliert beschrieben. Das Inhaltsverzeichnis auf dieser Seite
zeigt Ihnen welche Abschnitte von besonderem Interesse für Sie sind.
Wir hoen, dass Ihnen Ihr FMJ Blu-ray Disk-Player viele Jahre lang Freude bereiten wird. Im
unwahrscheinlichen Fall eines Produktfehlers oder wenn Sie einfach weitere Informationen zu
den Produkten von Arcam wünschen, wenden Sie sich bitte an unsere Händler, welche Ihnen
gerne weiterhelfen werden. Weitere Informationen nden Sie auf der Arcam-Website unter
www.arcam.co.uk.
Das FMJ-Entwicklungsteam
Einrichten der CR104 ............................D-26
Code anlernen .....................................................D-26
Makros erstellen .................................................D-27
Durchreichen der Lautstärke .........................D-27
Tasten-Mover .......................................................D-27
Modus-Mover ......................................................D-28
Sperren/Freigeben eines Gerätemodus ... D-28
IR Modustaste durchreichen..........................D-29
Rücksetzen der CD104 .....................................D-29
Befehlszusammenfassung .............................D-29
Gerätecodes .........................................................D-29
IR-Befehle ................................................D-30
Technische Daten ...................................D-31
Störungen (Funkinterferenzen) ....................D-31
Laserstrahlung ....................................................D-31
Garantie ...................................................D-33
Gerätecodetabellen...................................34
Willkommen
Deutsch
D-3
Page 76

Installation
Der BDP100 von Arcam bietet eine führende Klangqualität von Blu-ray Disks, DVD-Videodisks
und CDs.
Der BDP100 besitzt den modernsten Delta-Sigma DAC (Digital-Analog-Converter), der
audiophile Klangqualität bei Video- und Audiodiscs liefert.
Die mitgelieferte CR104 Fernbedienung ist eine programmierbare Universalfernbedienung, die
einfach zu bedienen und nach der Programmierung in der Lage ist, max. acht Audiogeräte, wie
Verstärker, Fernseher oder persönlicher Videorecorder zu steuern.
Die hohe Performance des BDP100 Blu-ray Discplayers lässt Musik und Filme lebendig
werden.
Aufstellen des Geräts
< Stellen Sie den BD-Player auf einem ebenen
festen Untergrund und vermeiden Sie direkte
Sonneneinstrahlung, sowie Hitze- und
Feuchtigkeitsquellen.
< Stellen Sie den BD-Player nicht auf einen
Leistungsverstärker oder eine andere
Wärmequelle.
< Stellen Sie BD-Player nicht in ein geschlossenes
Bücherregal oder einen Schrank, es sei denn,
es ist für ausreichende Belüung gesorgt. Der
BD-Player wird bei Normalbetrieb warm.
< Stellen Sie kein anderes Gerät oder Objekt auf
den BD-Player, da dadurch die Lüungsschlitze
verdeckt werden können, was zu einer
Überhitzung des BD-Players sowie eventuell zur
Überhitzung des anderen Geräts führen kann.
< Stellen Sie sicher, dass der
Fernbedienungsempfänger (in der Nähe des
Displays auf der Frontplatte) frei zugänglich ist, da
die Fernbedienungsfunktion sonst gestört werden
kann.
< Stellen Sie keinen Plattenspieler auf dieses Gerät.
Plattenspieler reagieren sehr empndlich auf
das von Netzteilen erzeugte Rauschen, das als
Hintergrundbrummen zu hören ist, wenn sich der
Plattenspieler zu dicht am Gerät bendet.
Netzanschluss
Der BD-Player wird mit einem bereits an das Kabe
verbundenen Netzstecker geliefert. Bitte prüfen Sie ob
dieser zu Ihrer Spannungsversorgung passt - falls Sie
ein neues Netzkabel benötigen, wenden Sie sich bitte an
Ihren Arcam-Händler.
Falls Ihre Netzanschlussspannung oder das Netzkabel
nicht übereinstimmen, wenden Sie sich bitte sofort an
Ihren Arcam-Händler.
Verbinden Sie den IEC-Stecker des Netzkabels mit
dem Anschluss auf der Hinterseite des BD-Players
und stellenSie dabei sicher, dass er fest eingesteckt ist.
Stecken Sie den Stecker des anderen Kabelendes in eine
Steckdose, und schalten Sie diese wenn nötig ein.
Die Fernbedienungs
und Triggereingänge
Der REMOTE I N Eingang (Fernbedienungseingang
seite D-30) kann zum Weiterleiten von RC5-Code an den
BDP100 verwendet werden, wenn er an einer Stelle
bzw. als Teileines Systems installiert ist, wo Infrarot
nicht möglich ist. Sollten Sie diese Option benötigen,
wenden Sie sich bitte an Ihren Händler für weitere
Informationen.
Der
TRIGGE R IN-Eingang kann schalten des BDP100
in oder aus dem Standby-Modus verwendet werden.
Durch den Anschluss Trigger-Ausgangs Ihres ArcamVerstärkers (oder ein anderen kompatiblen Geräts)
wird der BDP100 automatisch aus dem Standby-Modes
eingeschaltet, der Verstärker eingeschaltet wird und
er wird wieder in den Standby-Modus geschaltet,
wenn der Verstärker ausgeschaltet wurde. Für weitere
Informationen schlagen Sie im Handbuch Ihres
Verstärkers nach.
Der Fernbedienungseingang benötigt eine 3,5 mm
Mono-Miniklinke mit einer phasenrichtigen Spitze
und einem geerdeten Scha.
Die Fernbedienungsbefehle müssen in einem
modulierten RC-Format (bei 36 kHz) mit einer
Spannung von zwischen 5 V und 12 V erfolgen.
Beim herkömmlichen Gebrauch muss zu diesem
Eingang keine Verbindung hergestellt werden.
Der
RS232-Eingang ist für eine optionale Verbindung
zu einem Home-Automationssystem oder zu einem
Computer gedacht. Verschiedene DrittanbieterSysteme bieten ein ranierte Steuerung all Ihrer
Unterhaltungsgeräte mittels Touch-Screens usw.
Wenden Sie sich an Ihren Händler oder Installateur für
weitere Informationen. Die technischen Einzelheiten des
Fernbedienungsprotokolls sind auf Anfrage von Arcam
unter support@arcam.co.uk) erhältlich.
Verbindungskabel
Wir empfehlen die Nutzung von qualitativ
hochwertigen, abgeschirmten Kabeln für die
entsprechenden Verbindungen. Andere Kabel können
unterschiedliche Impedanz-Charakteristiken haben,
die die Performance beeinträchtigen (nutzen Sie zum
Beispiel keine „Video-Kabel“ als Audioverbindung). Alle
Kabel sollten so kurz wie möglich gehalten werden.
Es ist ratsam, dass die Netzkabel Ihrer Geräte möglichst
weit von den Audiokabeln Ihrer Geräte verlegt werden.
Sollten Sie dies nicht beachten, können Störgeräusche in
den Audio-Signalen enthalten sein.
D-4
Page 77
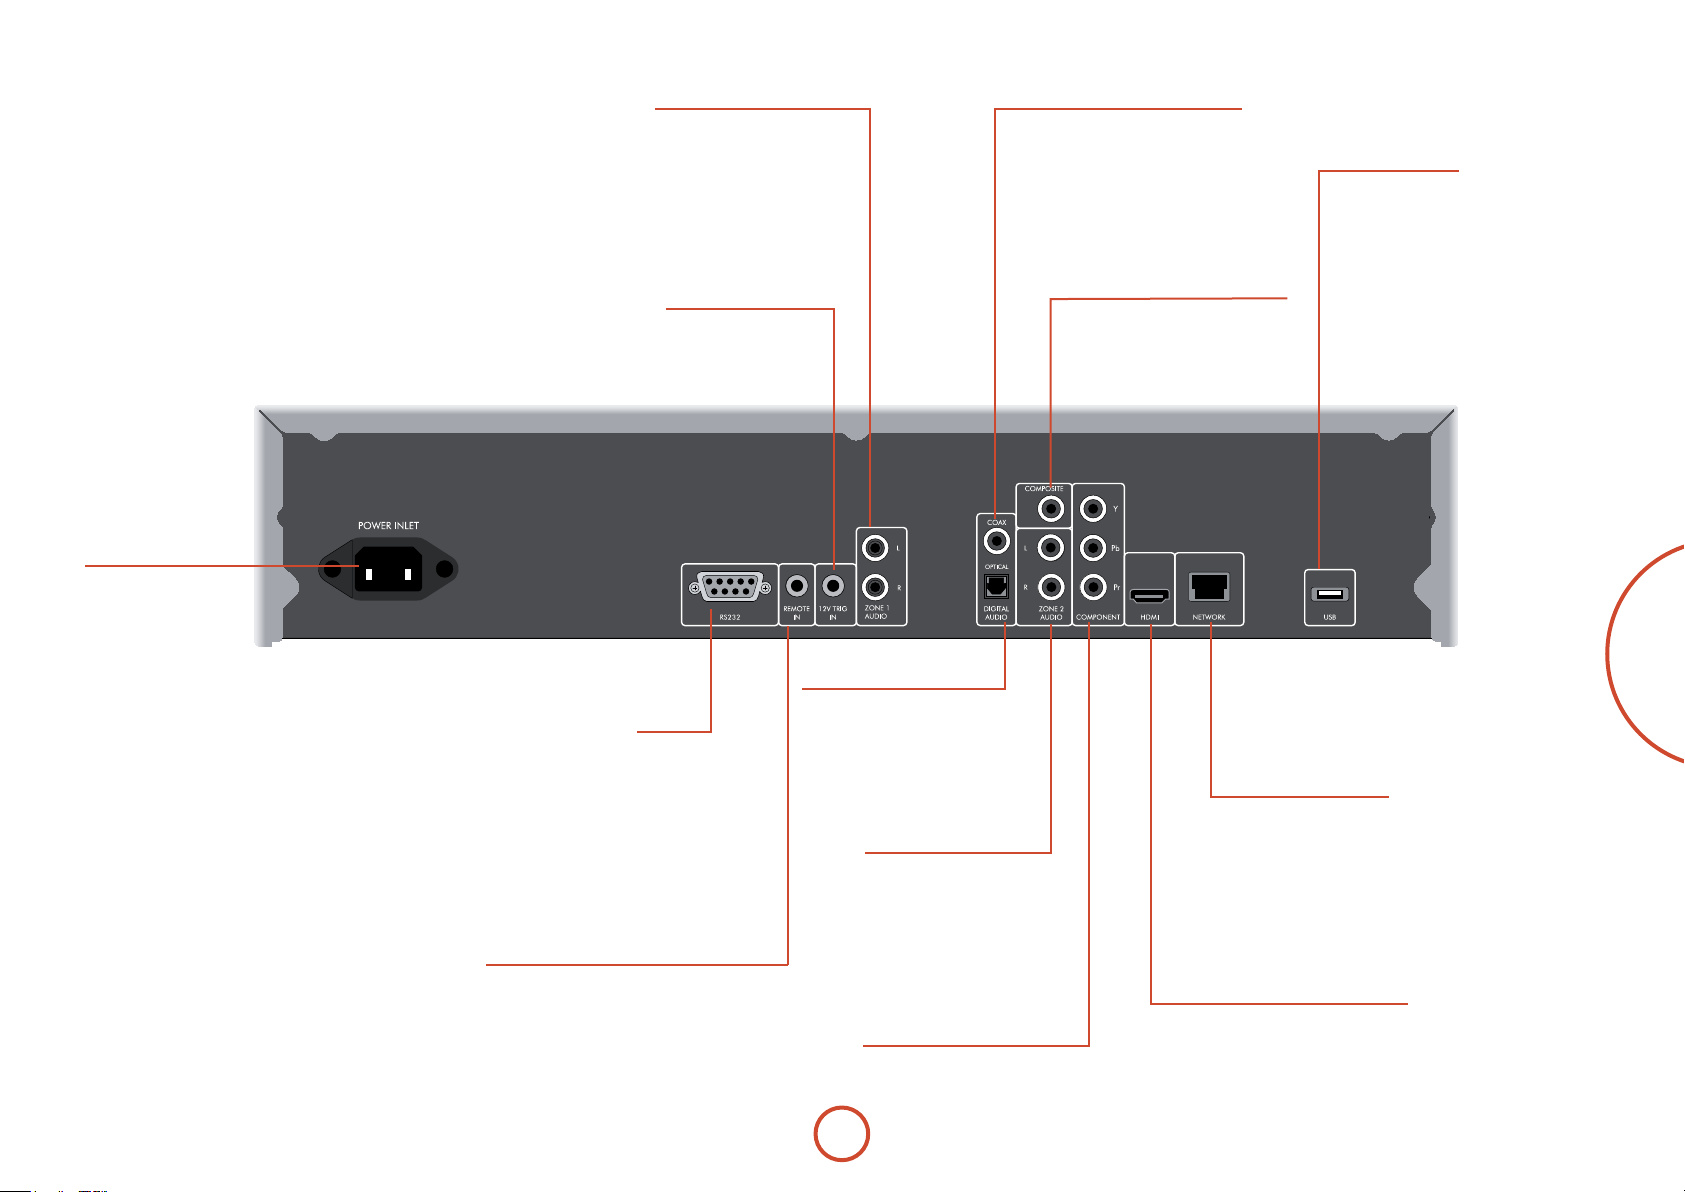
Netzbuchse
Schließen Sie hier
das entsprechende
Netzkabel an.
Analoge Audioausgänge
Schließen Sie diese mit geeigneten,
hochqualitativen Verbindungskabeln an den
CD-Eingang Ihres Verstärkers (oder andere Line-
Signale) an. Stellen Sie sicher, dass die linken und
rechten Audioausgänge des BD-Players mit den
entsprechenden linken und rechten Eingängen am
Verstärker verbunden sind.
12V Triggereingang
Mit dieser Buchse kann der BDP100 vom einem
Verstärker (oder einem anderen AV-Gerät) in oder aus
dem Standby-Modus mit einer 12V TRIG OUT Funktion
geschaltet werden. Siehen seite D-4.
Koaxialer, digitaler Ausgang
Verwenden Sie diese Buchse, wenn Sie
einen AV-Receiver mit einem koaxialen
Digitaleingang anschließen möchten.
Schließen Sie den digitalen Eingang mit einem
passenden, abgeschirmten 75Ω Kabel an.
VORSICHT: Verbinden Sie die digitale
Ausgangbuchse niemals mit einem
herkömmlichen Audioeingang.
Composite-Videoausgang:
Verbinden Sie diesen Ausgang mit
Ihrem Display, wenn das Display keine
anderen Verbindungsarten unterstützt.
USB-Anschluss
Stecken Sie die USBFlashspeichergeräte hier ein. Der
USB-Speicher kann verwendet
werden, um heruntergeladene
Inhalte zu speichern. Der BDP100
kann auch auch bestimmte digitale
Dateien wiedergeben, die auf USBSpeicherlaufwerken gespeichert
wurden (siehe seite D-8).
RS232
Mit dieser Anschluss ermöglicht
die Fernsteuerung von einem
Drittanbieter-Hausautomationsystem
oder Computer.
Weitert Informationen siehe seite D-4.
Remote in (Fernbedienungseingang)
Damit kann der BDP100 Fernbedienungssignale
empfangen, wenn der Fernbedienungssensor
verdeckt (oder anderweitig für die Fernbedienung
„nicht sichtbar“ ist).
Weitert Informationen siehe seite D-4.
Optischer, digitaler Ausgang
Verwenden Sie diese Buchse,
wenn Sie einen AV-Receiver mit
einem optischen Digitaleingang
anschließen möchten.
Zone 2 Audioausgang
Verwenden Sie diesn
Analogausgang um Audio
in Zone 2 zur Verfügung zu
stellen. Er kann auch verwendet
werden, um ein Aufnahmegerät
oder Kopörer-Verstärker
anzuschließen.
Component-Videoausgang:
Wenn Ihr Fernseher keinen HDMI-Video-,
aber einen Componenteingang besitzt,
verbinden Sie ihn mit diesem Videoeingang.
D-5
Deutsch
Netzwerkanschluss
Verbinden Sie diese Buchse mittels eines
Ethernet-Patchkabels mit einem Port Ihres
Netzwerk-Routers (siehe seite D-9). Mit einer
Internetverbindung können interaktiver
Inhalt für BD-Livediscs aktiviert werden (für
Setupdetails siehe „Netzwerk“ auf seite D-22 ).
Digitaler HDMI-Videoausgang
Verbinden Sie diesen Ausgang für die beste
digitale Video- und Audioverbindung
mit Ihrem Display oder AV-Receiver,
falls verfügbar (siehe seite D-7 für weiter
Informationen).
Page 78
Video-Anschlüsse herstellen
Zum Betrachten der Bilder vom dem BD-Player müssen Sie einen seiner Videoausgänge an Ihr Anzeigegerät (TV,
Monitor, Projektor usw.) oder AV-Receiver (wie den Arcam AVR600) anschließen.
Der BDP100 besitzt drei Videoausgangsoptionen, siehe unten. Sie müssen nur einen Videotyp aus der Liste
verwenden. Wählen Sie einen Typ, den Ihre Anzeigegerät oder AV-Receiver unterstützt. Wenn Ihr Gerät keine der
oben genannten Anschlussarten unterstützt, dann können Sie es nicht direkt mit dem BDP100 verwenden und es ist
ein Videokonverter erforderlich. In diesem Fall wenden Sie sich bitte für weitere Unterstützung an Ihren Händler.
AV-Receiver und andere Video-Bearbeitungsgeräte können zwischen BDP100 und Anzeigegerät angeschlossen
werden. Achten Sie darauf, dass alle Geräte den Videosignaltyp unterstützten, den Sie verwenden möchten. Für
Anleitungen zum Anschluss von AV-Geräten schlagen Sie im Handbuch des jeweiligen Geräts nach.
DIGITALES HDMIVIDEO
Der HDMI-Anschluss liefert eine unkomprimierte digitale Video- und AudioÜbertragung zwischen BDP100 und Anzeigegerät und bietet die höchste
Ausgabequalität. Im Allgemeinen ist es auch die am einfachsten zu kongurierende
Anschlussart.
Zur Nutzung dieses Video-Anschluss benötigen Sie zwischen dem BDP100 und Ihrem
Anzeigegerät oder Receiver ein HDMI- oder ein HDMI/DVI-Kabel. Siehe seite F-7 für
weitere Informationen.
COMPONENT VIDEO
Verwenden Sie drei 75 Cinch-Kabel zum Anschluss der Component-Ausgänge Y, Pb,
Pr des BD-Player an die Y, Pb, Pr-Eingänge des Displaysgeräts. Achten Sie darauf, dass
die Kabel für Videoeinsatz geeignet und dass sie etwa gleich lang sind.
Wenn Ihr Fernseher ein progressiv gescanntes (de-interlaced) Videosignal akzeptiert,
können Sie den progressiven Videoausgang des BDP100 verwenden. Wenn Sie sich nicht
sicher sind, ob Ihr Anzeigegerät progressives Video akzeptiert, schlagen Sie bitte der
entsprechenden Bedienungsanleitung nach oder fragen Sie Ihren Händler.
Audioanschlüsse herstellen
Der BDP100 bietet eine Reihe von Alternativen für den Audioanschluss. Die verwendete Anschlussart hängt von
Ihrem restlichen System ab. Wählen Sie die am besten geeignete Art für Ihren Verstärker.
Wenn Sie Audio über... hören möchten, empfehlen wir folgendes:
Ihren Fernseher
<
Wie man Audio über den Fernseher hört, hängt von den Eingängen, die er besitzt und Ihrem Videoanschluss ab:
HDMI: Wenn Sie einen HDMI-Anschluss (nicht DVI) verwenden, überträgt dieser sowohl Audio als auch
<
Video. Es ist keine weiterer Anschluss erforderlich.
Digital Audio (koaxial oder optisch): Wenn Ihr Fernseher Digital Audio-Eingänge mit koaxialen oder
<
optischen Anschlüssen besitzt, verbinden Sie den TV-Eingang und den entsprechenden Digitalausgang
des BDP100 mit dem entsprechenden digitalen Audiokabel. Stellen Sie keine Verbindung zwischen dem
BDP100 und einem TV-Digital Audioausgang her.
Stereo Cinch: Wenn Ihr Fernseher Stereo-Cincheingänge besitzt, befolgen Sie für einen Stereo-Verstärker
<
die Anweisungen unten.
Ihr Stereoverstärker
<
Wenn möchten Audio von Ihrem Player über einen Stereoverstärker wiedergeben möchten, dann verwenden Sie
die analogen Stereoausgänge. Diese Ausgänge liefern einen Stereo-Downmix des Ausgangsmaterials.
Verbinden Sie mit einem Stereo-Cinch-Kabel mit geeigneter Länge die Ausgänge, die mit
beschriet sind, mit den linken und rechten Eingängen (passend) für DVD oder CD an Ihrem Verstärker.
Ihr Surroundklang-Receiver
<
Verbinden Sie den HDMI-Ausgang mit dem Receiver (für Audio und Video), wenn der Receiver Audio über
HDMI unterstützt. Der HDMI-Anschluss unterstützt alle Audioformate, einschließlich Dolby TrueHD, DTS
Master Audio und Mehrkanal-PCM.
Wenn Ihr Receiver HDMI-Audio nicht unterstützt, schließen einen der digitalen Audioausgänge (optisch oder
koaxial) an den ‘Blu-ray’-, ‘BD’- oder ‘DVD’-Eingang des Receivers an. Diese digitalen Ausgänge unterstützen
PCM, Dolby Digital, DTS oder MPEG Mehrkanal-Audio, je nach Quellmaterial. Der BDP100 kann auch
eingestellt werden, um alles Audio nach DTS erneut zu verschlüsseln („Bitstream Mixed“) (siehe “Audio” auf
seite D-21 ). Diese Option bietet für digitale Audioanschlüsse beste Surroundklang-Qualität.
Sie können auch die analogen Stereo-Audioausgänge mit dem CD-Eingang an Ihrem Receiver verbinden,
um CDs anzuhören. Damit kann die audiophile Digital-Analog-Schaltung des BDP100 für die beste StereoKlangqualität verwendet werden,.
ZONE 1 AUDI O
COMPOSITE VIDEO
Wenn Ihr Anzeigegerät nur einen Composite-Eingang besitzt (manchmal mit FBAS
oder einfach nur „video“ beschriet), schließen Sie den
des BD-Players mittels eines 75 Cinch-Kabels an, das für Videoeinsatz geeignet ist.
Beachten Sie, dass ein Composite Videoanschluss die niedrigstes Ausgabequalität liefert.
Wenn Ihr Anzeigegerät weitere Video-Anschlussarten unterstützt, raten wir, diese
stattdessen einzusetzten.
COMPOSI TE Videoausgang
D-6
Zwei gleichzeitige Videoanschlüsse verwenden
Es ist möglich, zwei Videoanschlüsse gleichzeitig zu verwenden (beispielsweise einen Anschluss in einen
zweiten Raum oder zu einem zweiten Anzeigegerät umleiten). Wenn Sie dies tun möchten, bitte lesen Sie
diese Hinweise:
Der Composite Videoausgang ist stets aktiv. Er überträgt immer verschachtelte Ausgangssignale.
<
Die Component Videoausgang ist immer aktiv. Er kann zur Übertragung von entweder
<
verschachtelten oder progressive-scan Ausgangssignalen eingestellt werden.
Der HDMI-Ausgang ist nur aktiv, wenn ein kompatibles Anzeigegerät vom BDP100 erkannt wird.
<
Er kann zur Übertragung von entweder verschachtelten oder progressive-scan oder High-Denition
Ausgangssignalen eingestellt werden.
Page 79
Die HDMI-Schnittstelle
Wenn Sie einen Monitor besitzen, der HDMI- oder DVIfähig ist, können Sie ihn mit einem HDMI-Kabel an den
BDP100 anschließen. Der HDMI-Anschluss überträgt
unkomprimiertes dig tales Video als auch dig tales Audio.
Über HDMI
HDMI (High Denition Multimedia Interface) unterstützt
auf einem einzigen digitalen Anschluss sowohl Video und
Audio zum Einsatz mit Blu-ray Diskplayern, digitalen
Fernsehern, Settop-Boxen und anderen AV-Geräten.
HDMI wurde entwickelt, um die Technologien des HDCP
(High-bandwidth Digital Content Protection) und des
DVI (Digital Visual Interface) zu einer Spezikation zu
verknüpfen, mit zusätzlicher Übertragung von digitalen
Audioinformationen. HDCP wird dazu verwendet,
um digitale Inhalte zu schützen, die an DVI-konforme
Anzeigegeräte übertragen werden.
HDMI unterstützt Standard- oder High-Denition-Video,
zusammen mit Stereo- oder Mehrkanal-Surroundklang.
HDMI unterstützt unkomprimiertes digitales Video, einen
Anschluss (anstatt mehrere Kabel und Anschlüsse) und
die Kommunikation zwischen der AV-Quelle und den
AV-Geräten.
Anschluss mittels HDMI
Verbinden Sie mit einem HDMI-Kabel die HDMI-Buchse
dieses Players mit einer HDMI-Buchse an einem kompatiblen
Anzeigegerät oder Receiver. Der Pfeil auf dem Stecker des
Kabels muss für eine korrekte Ausrichtung mit dem Anschluss
am BDP100 nach oben zeigen. Wenn die Videoauösung des
BDP100 auf ‘DMI Auto’ konguriert wurde, dann stellt der
BDP100 seinen Videoausgang automatisch ein, um sich an die
Funktionen des angeschlossenen HDMI-Gerät anzupassen.
HINWEIS: Ein HDMI-Anschluss kann nur mit
Komponenten hergestellt werden, die m t HDMI oder
DVI ausgestattet und kompatibel zu DVI und HDCP
sind. Beachten Sie, dass Sie einen Adapter (HDMI zu
DVI) benötigen, wenn Sie ein DVI-Gerät anschließen
möchten. Jedoch unterstützt ein DVI/HDCP-Anschluss
keine Audiosignale.
Wenn Sie weitere Informationen über die
Anschlussmöglichkeiten Ihres BDP100 an Ihr mit DVI/
HDMI ausgestattetes Anzeigegerät benötigen, wenden
Sie sich b tte Ihren Arcam-Händler.
Fehlerbehebung HDMI
Video-Probleme
Kein Bild (leerer Bildschirm)
Prüfen Sie, ob das HDMI-Kabel korrekt an beiden Enden
<
angeschlossen ist. Wenn ein HDMI-fähigen A/V-Receiver
verwenden, schließen Sie den BDP100 direkt an das
Anzeigegerät an, um herauszunden, wo der Fehler liegen
kann.
Prüfen Sie, ob das Anzeigegerät auf die Wiedergabe des
<
HDMI-Eingangs eingestellt ist (d.h. nicht auf andere
Videoeingänge).
Prüfen Sie, ob der HDMI-Eingang des Receivers und/oder
<
des Displaygeräts aktiviert ist. Schlagen Sie im Handbuch
des angeschlossenen Gerätes für weitere Informationen
nach, wie das zu erfolgen hat.
Die Verwendung eines alternativen Video-Anzeigegeräts
<
(z.B. Anschluss an Composite Videoausgang). Prüfen Sie,
ob das Video ausgegeben wird.
Schlagen Sie im Handbuch des Anzeigegeräts nach, um
<
sicherzustellen, dass es die Ausgabeformate verarbeiten
kann, die vom BDP100 geliefert werden. Der BDP100
unterstützt folgende Ausgabeformate:
720 x 480p (NTSC Progressive Scan) 1280 x 720p
720(1440) x 480i (NTSC Interlaced) 1920 x 1080i
720 x 576p (PAL Progressive Scan) 1920 x 1080p
720(1440) x 576i (PAL Interlaced)
Das angeschlossene Gerät muss mindestens eine dieser
Normen unterstützen, damit es mit dem BDP100
funktioniert.
Kein Bild (Rauschen)
Rauschen wird angezeigt, wenn der Inhaltschutzalgorithmus das
angeschlossene Gerät nicht authentizieren kann. Dies ist z. B. der
Fall, wenn ein DVI-Gerät an den BDP100 angeschlossen ist, das
HDCP nicht unterstützt (z. B. ein Computermonitor).
Um dieses Problem zu isolieren, entfernen Sie alle Disks aus dem
BDP100. Anschließend schalten Sie sowohl den BDP100 also auch
das angeschlossene Displaygerät aus. Schalten Sie das Displaygerät
ein uns anschließend den BDP100. An dieser Stelle sollte das
Leerlauf-Logo des BDP100 auf dem Displaygerät angezeigt
werden. Wenn dies nicht der Fall ist, überprüfen Sie bitte die oben
aufgeführten Punkte für einen leeren Bildschirm.
Wenn das Rauschen bei der Wiedergabe einer kopiergeschützten
Disk (Blu-ray/DVD) erscheint, dann ist die Authentizierung
fehlgeschlagen. Bitte wenden Sie sich für weitere Informationen an
Ihren Händler.
Audioprobleme
Der vom HDMI-Anschluss übertragene Audiotyp hängt
von der Konguration des BDP100 ab (siehe „Audio
Setup“ auf seite D-21 ). Wälen Sie eine Einstellung, die den
Möglichkeiten Ihres Audiosystems entspricht. Beachten
Sie, dass reine DVI-Geräte (der Anschluss benötigt ein
HDMI nach DVI Konverterkabel) über diesen Anschluss
Audio nicht unterstützen.
Deutsch
D-7
Page 80
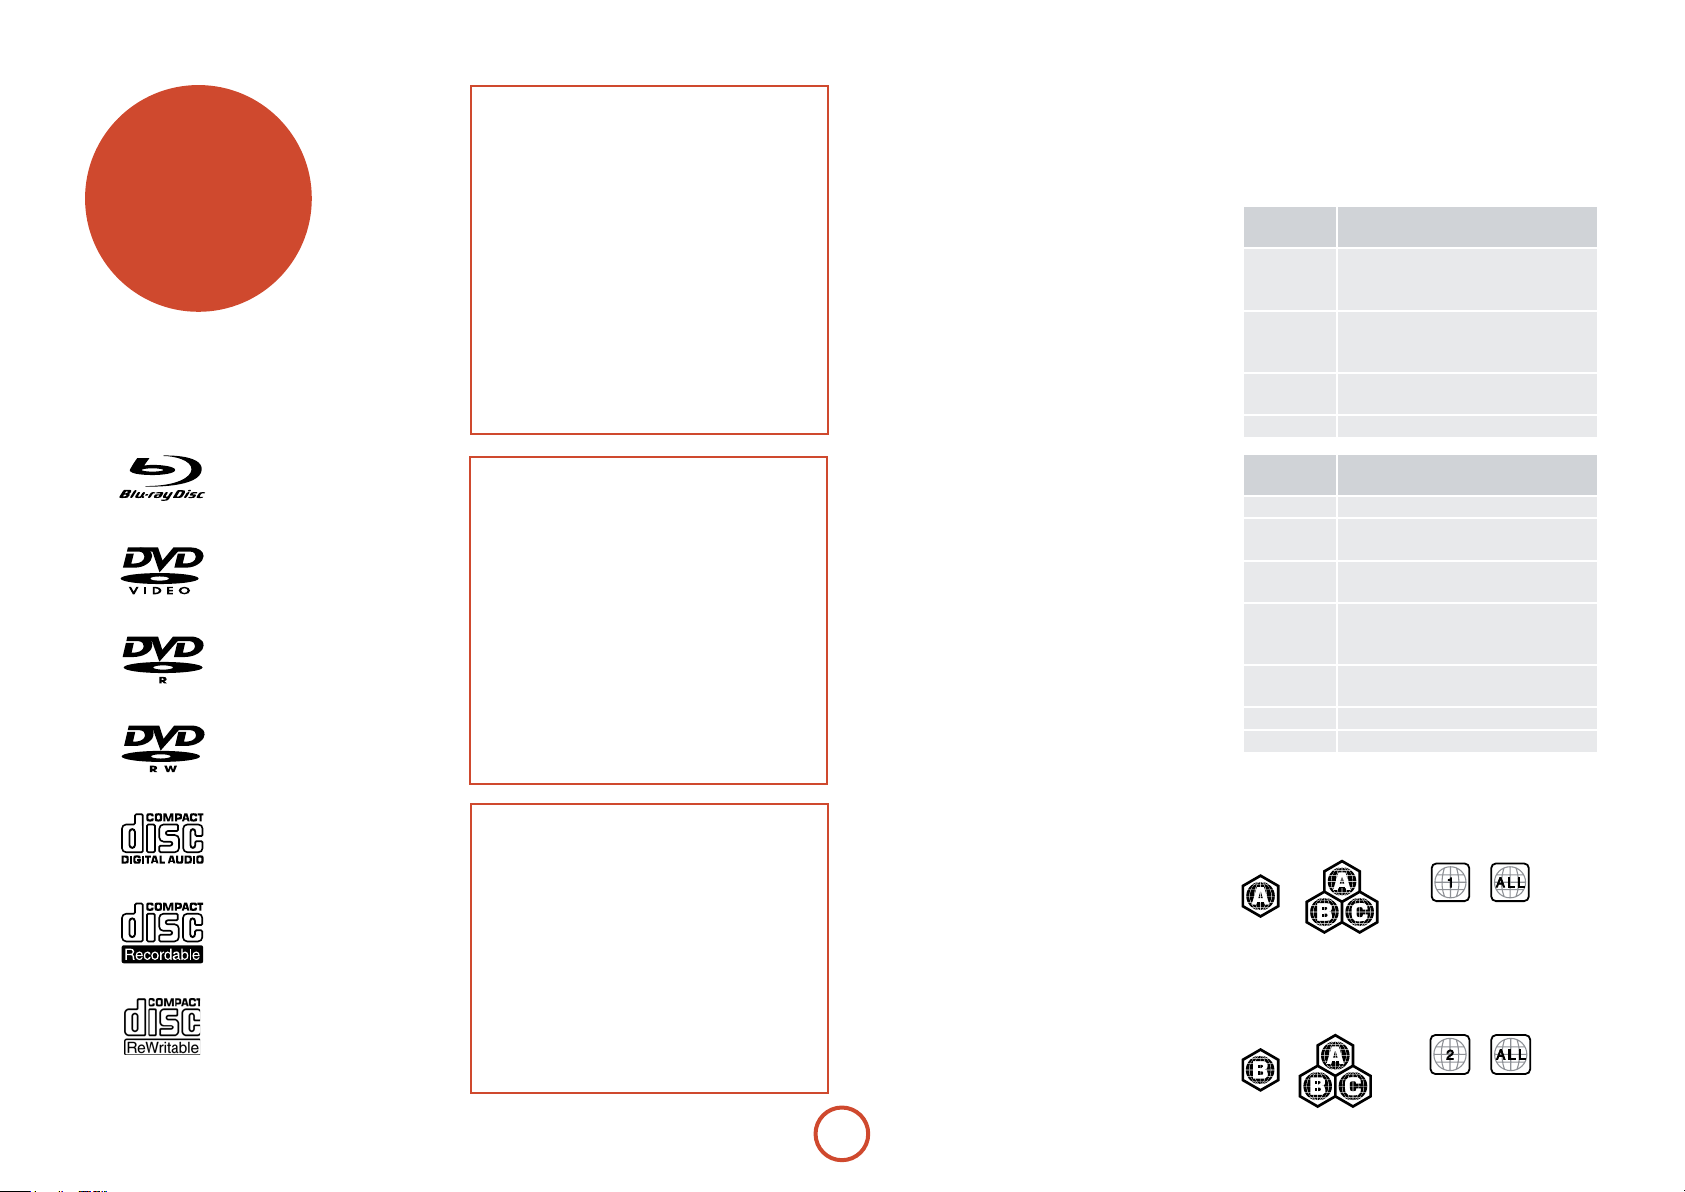
Disk- u.
Dateiformate
Abspielbare Disks
Der Player unterstützt folgende Diskarten:
Blu-ray Disks
DVD-Video
DVD-R
DVD-RW
CD-Audio
CD-R
CD-RW
HINWEIS
< Es können nur BD-RE/-R, DVD-R/-RW und
CD-R/-RW Disks wiedergeben werden, die im
UDF oder ISO9660-Format aufgezeichnet wurden.
< Dieses Gerät unterstützt Version 2.0 BD-ROM,
Version 3.0 und BD-RE Ver 2.0 BD-R.
< Es können keine BD-RE/-R, DVD-R/-RW und
CD-R/-RW Disks wiedergeben werden, die nicht
abgeschlossen wurden.
< Einige 8-cm BD-REs/8 cm BD-Rs können mit
diesem Gerät nicht wiedergegeben werden.
< Wenn ein BD-Java-Titel wiedergegeben wird, kann
das Laden länger als ein normaler Titel dauern und
einige Funktionen werden langsamer ausgeführt.
< Wenn Sie eine Audio-CD wiedergegeben wird, die
mit DTS-ES oder Dolby Digital EX aufgenommen
wurde, kann diese rauschen.
Nicht abspielbare Disks
Es werden vom BDP100 nur die aufgeführten Disktypen
unterstützt. Geben Sie keine Disk wieder, die nicht
unterstützt wird.
Einige BD-RE/BD-R, DVD-RWs/DVD-Rs
oder CD-Rs/CDRWs können aufgrund eines
unvollständigen Abschlusses der Disk, schlechter
Aufnahmequalität oder des physischeb Zustands der
Disk, inkompatiblen Eigenschaen des Aufnahmegerät
oder der Autorensoware usw. nicht wiedergegeben
werden. Versuchen Sie die Disk mit einer niedrigeren
Geschwindigkeit aufzunehmen oder versuchen Sie eine
andere Medienmarke.
Schlagen Sie in der Bedienungsanleitung Ihres
Aufnahmegeräts oder der Soware für weiter
Informationen nach.
HINWEIS
< Buchstaben außer „A~Z“, „a~z“, „0~9“, „ - “ können
nicht angezeigt werden.
< Dieses Gerät unterstützt Multisession-Disks. Einige
Multisession-Disks brauchen zum Laden sehr lange
und einige können überhaupt nicht geladen werden.
< Es kann möglich sein, dass während der Wiedergabe
bestimmte Funktionen nicht benutzt werden
können.
< Die Wiedergabe einiger Dateien kann nicht möglich
sein, auch wenn sie die Erweiterung einer Datei
haben, die auf diesem Player abspielbar ist.
< Von DRM (Digital Rights Management) geschützte
Dateien können nicht abgespielt werden.
Abspielbare Dateien
Der Player unterstützt folgende Dateitypen:
< MP3 (“.mp3“)
Abtasterate: 44,1kHz, 48kHz
Bitrate: Bis zu 320 kBps.
ID3-Tags werden nicht unterstützt.
MP3i und MP3 Pro werden nicht unterstützt.
< WMA (“.wma”)
Abtasterate: 44,1kHz, 48kHz
Bitrate: Bis zu 192 kBps.
WMA-Tags werden nicht unterstützt.
< AAC (“.m4a”)
Abtasterate: 44,1kHz, 48kHz
Bitrate: Bis zu 320 kBps.
AAC-Tags werden nicht unterstützt.
< JPEG (“.jpg, .jpeg”)
Maximale Auösung: 4.272 x 2.848 Pixel.
Bilder, die im JPEG-Format im progressiven Format
gespeichert wurden, können nicht wiedergegeben
werden.
< AVI (“.avi”)
Wiedergabecodec: Xvid
Maximale Bildgröße: 1920 x 1080 bei 30 FPS
< WMV (“.wmv”)
Wiedergabecodec: WMV9
Maximale Bildgröße: 1920 x 1080 bei 30 FPS
Regionalcode
Sowohl Blu-ray Disk-Player und Blu-ray Disks oder DVDs
sind entsprechend zur Region codiert, in der sie verkau
wurden. Falls die Codes nicht übereinstimmen, kann die
Disk nicht wiedergegeben werden.
Blu-ray DiskRegionalcode
A + B + C Alle Bereiche
DVD-
Regionalcode
Alle Alle Bereiche
Die Symbole geben an, das die Disk in Nordamerika
abgespielt werden kann:
Blu-ray Disks: DVDs:
Die Symbole geben an, das die Disk in Europa abgespielt
werden kann:
Blu-ray Disks: DVDs:
Bereich/Land
A Nordamerika, Mittelamerika,
Südamerika, Korea, Japan, Taiwan,
Hongkong und Südostasien
B Europa, Grönland, Französische
Territorien, Mittlerer Osten, Afrika,
Australien und Neuseeland
C Indien, China, Russland, Zentral- und
Südasien
Bereich/Land
1 Nordamerika
2 Europa, Japan, Mittlerer Osten, Ägypten,
Südafrika, Grönland
3 Taiwan, Korea, Philippinen, Indonesien,
Hongkong
4 Mexiko, Südamerika, Mittelamerika,
Australien, Neuseeland, Pazische Inseln,
Karibik
5 Russland, Osteuropa, Indien, der größte
Teil Afrikas, Nordkorea, Mongolei
6 China
D-8
Page 81
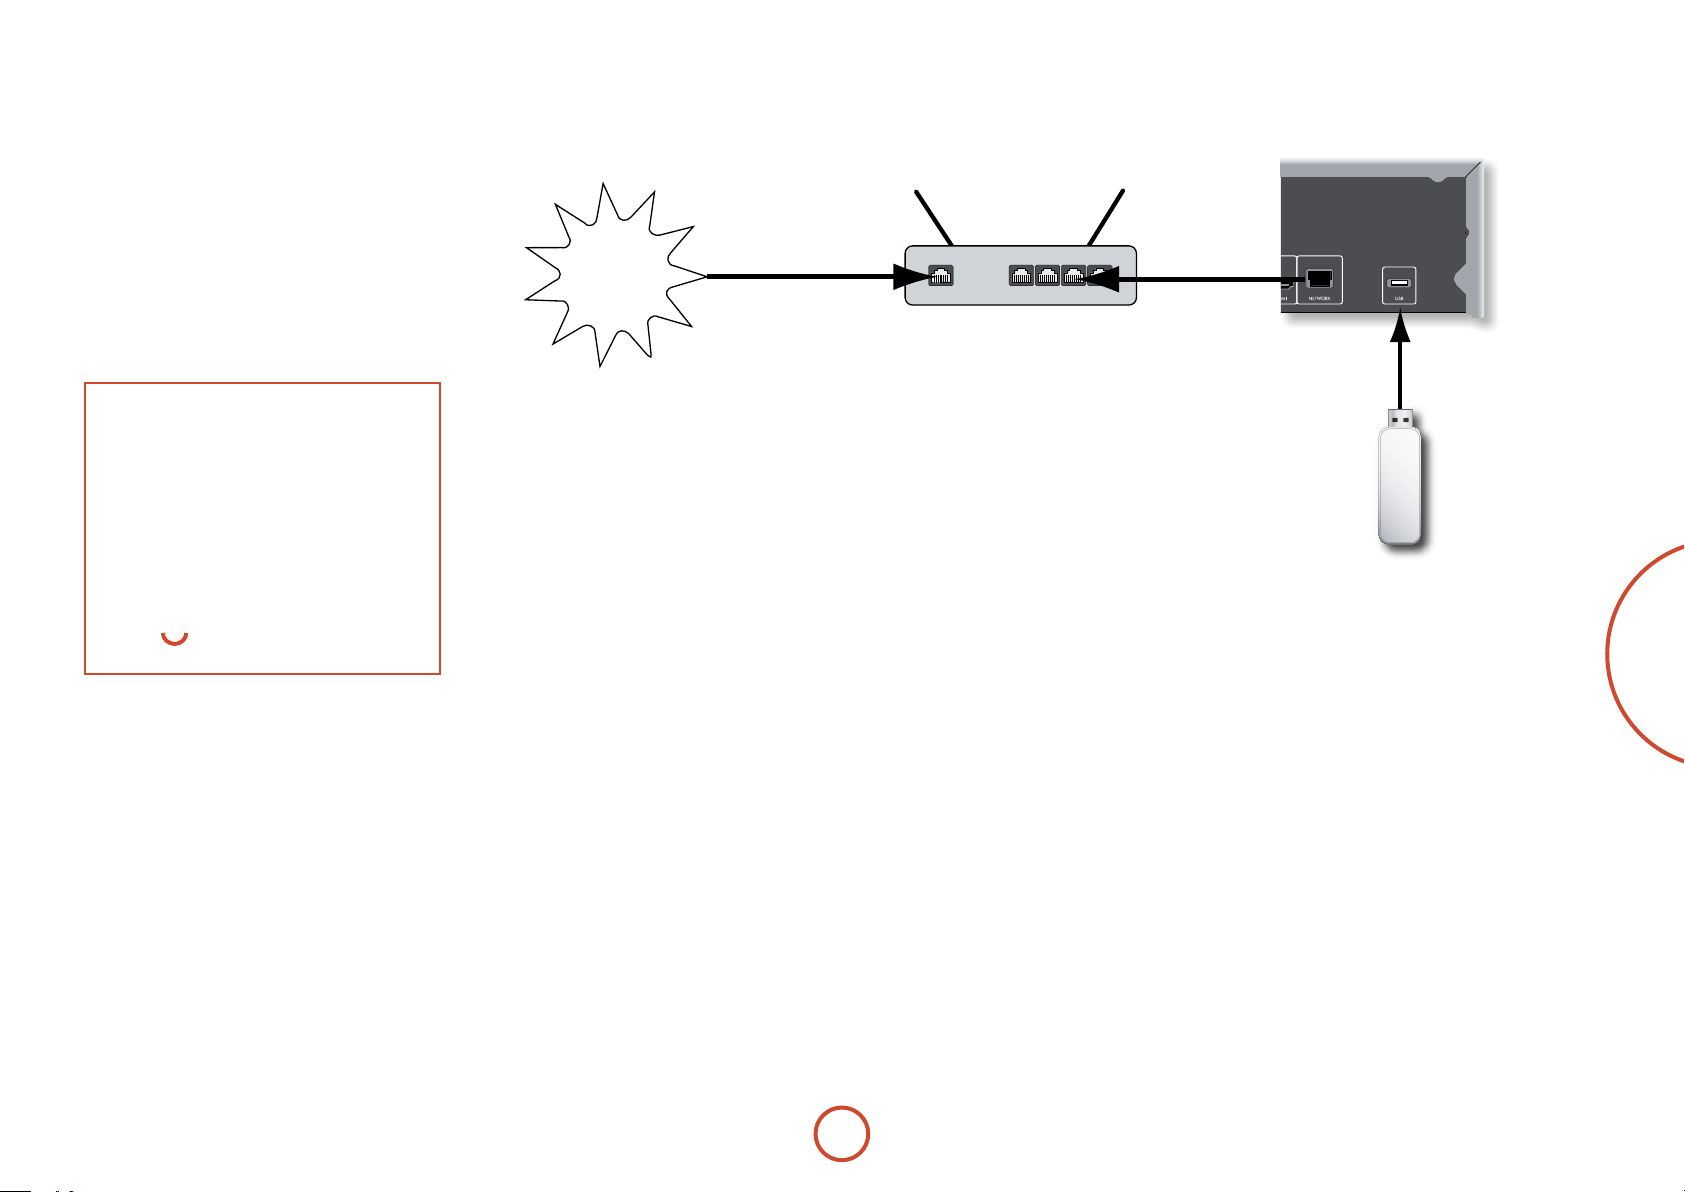
Netzwerkanschluss
BD-Live-Disks können das Herunterladen von
zusätzlichen Inhalten aus dem Internet aktivieren.
Um den Online-Inhalt zu genießen, verbinden Sie
die Netzwerk-Buchse des BDP100 über ein EthernetPatchkabel mit einem LAN-Port an Ihrem NetzwerkRouter (erhältlich bei einem Computer-Fachhändler).
Ein lokales Netzwerk mit Internet-Verbindung ist
erforderlich. Wenn Sie sich nicht über einen Router
(z.B. direkter Anschluss eines einzelnen Computers)
mit dem Internet verbinden, wenden Sie sich bitte zur
Einrichtung eines Heimnetzwerks an Ihren InternetServiceprovider oder einen IT-Fachmann.
Internet
Router
LAN
Arcam BDP100
ANMERKUNG
< Wenn der Player ohne konguriertes
Netzwerk eingeschaltet wird, wird ein PopupFenster mit einer Option auf dem Bildschirm
angezeigt, mit der mittels der ROTEN
Funktionstaste auf der Fernbedienung aus die
Netzwerkeinstellungen zugegrien werden
kann. Drücken der ROTEN Taste önet direkt
das Netzwerkeinstellungs-Menü. Siehe
seite D-22 für weiter Informationen.
< Vergessen Sie nicht die Taste
von u zu drücken, damit auf die rote Taste
zugegrien werden kann.
S
gefolgt
USB-Anschluss
Für die Wiedergabe von Medien können USBSpeichergeräte (Flash-Laufwerke) verwendet
werden und sie werden für die Speicherung von
heruntergeladenen BD-Live Inhalten benötigt. Um
BD-Live Inhalte zu genießen, werden die folgenden
Spezikationen empfohlen:
• Speichergröße 2 GB
• Format FAT32
• USB 2.0 Hochgeschwindigkeit (480 MBps)
Schließen Sie das USB-Gerät an der USB-Buchse auf der
Rückseite des Geräts an.
USB-
Flashlaufwerk
Deutsch
D-9
Page 82

Allgemeine
Bedienungs-
hinweise
ULTRA HGH PERFORMANCE 24-BIT DAC
Einleitung
Unter „Allgemeine Bedienungshinweise“ wird erklärt,
wie eine Blu-ray-Disk (BD), DVD, CD oder eine
andere Diskformate wiedergegeben werden. Beachten
Sie, dass es möglicherweise der Player für Ihr System
richtig konguriert werden muss, bevor eine optimale
Wiedergabe erzielt wird. Die Konguration des Players
wird ab seite D-20 beschrieben.
Anspruchsvollere Funktionen - wie z. B. spezielle
Wiedergabe-Modi, die Programmierung von Sprüngen
und die Wiedergabe von Sequenzen werden später
in diesem Handbuch unter „Erweiterter Betrieb“
beschrieben.
Einschalten
Schalten Sie das Gerät mit
LED leuchtet grün auf, wenn das Gerät eingeschaltet
wird und leuchtet rot auf, wenn es sich im StandbyModus bendet. Mit der Fernbedienung kann der
Standby-Modus aufgerufen oder verlassen werden.
Wenn die POWER-Taste im Standby-Modus gedrückt
wird (oder die Stromversorgung unterbrochen wird),
bendet sich das Gerät im Standby-Modus, wenn die
Stromversorgung wiederhergestellt wird.
Beachten Sie, dass sich der Fernbedienungssensor
auf der rechten Seite des Displays bendet. decken
Sie ihn nicht ab oder die Fernbedienung wird nicht
funktionieren.
POWER Taste ein. Die Status-
Einlegen einer Disk
Drücken Sie
auf der Fernbedienung) und legen Sie eine Disk mit
1
der Wiedergabeseite nach unten auf die CD-Schublade
(Einige Disks haben zwei Seiten, in diesem Fall legen Sie
die Seite nach oben ein, die mit ‚Seite A‘ beschriet ist,
um Seite A abzuspielen).
Drücken Sie
CD-Schublade zu schließen. Die CD wird nach einer
Pause von ein paar Sekunden geladen.
Wiedergabe einer Disk
Sobald die Schublade geschlossen wurde, kann
das Laden einer Disk einige Zeit dauern. Wenn die
Einstellung ‚Optical Disc Autoplay (Autom. Wiedergabe
einer optischen Disk‘ auf ON (Ein) eingestellt wurde
(Standardeinstellung), wird die Wiedergabe automatisch
gestartet. (Weitere Informationen nden Sie unter
„Optical Disc Autoplay (Autom. Wiedergabe einer
optischen Disk“ auf seite D-22 ).
Wenn Autoplay nicht eingestellt ist, wird das
Hauptmenü des Players dem Bildschirm angezeigt.
Wählen Sie mit den Cursortasten die Disk und drücken
anschließend
Manche Titel beginnen mit der Anzeige eines Menüs.
Wählen Sie mit den Cursor-Pad den Menüpunkt ‚Play
movie (Film wiedergeben)‘ (oder ähnlich) und starten
Sei mit
OK die Wiedergabe.
Drücken Sie bei Disks, die nicht automatisch
wiedrgegeben werden, die Taste
Bedienfeld oder drücken Sie 4 auf der Fernbedienung.
auf dem vorderen Bedienfeld (oder
</1
auf dem vorderen Bedienfeld, um die
</1
, um die Wiedergabe zu starten.
O
auf dem vorderen
4/ ;
Erhöhte Wiedergabegeschwindigkeit
Drücken Sie
Bedienfeld oder auf der Fernbedienung, um den
schellen Vor- oder Rücklauf einzuschalten. Folgende
Geschwindigkeiten für die schnelle Wiedergabe
stehen zur Verfügung: x2, x4, x8, x16, x32, x64 und
x128 (hängt vom Disktyp ab). Drücken Sie mehrmals
diese Taste, um zyklisch durch die unterschiedlichen
Geschwindigkeiten zu gehen. Um zur normalen
Wiedergabegeschwindigkeit zurückzukehren, drücken
Sie PLAY.
Kapitel/Tracks überspringen
Drücken Sie
einer CD) zu überspringen.
Beim Rückwärtsspringen kehrt der erste Tastendruck
zum Anfang des aktuellen Kapitels zurück. Durch
erneutes Drücken der Taste gelangen Sie zum Anfang
des vorherigen Kapitels.
Wiedergabe vorübergehend anhalten
Um Sie Wiedergabe vorübergehend anzuhalten,
drücken Sie
auf der Fernbedienung. Zur Fortsetzung der Wiedergabe
drücken Sie 4/
auf der Fernbedienung.
Anhalten der Wiedergabe
Zum Anhalten der Wiedergabe drücken Sie die Taste
auf dem vorderen Bedienfeld oder
</1
Fernbedienung.
oder 7 auf der dem vorderen
8
oder 0, um Kapitel (oder Tracks auf
/
auf dem vorderen Bedienfeld oder
4/ ;
auf dem vorderen Bedienfeld oder
;
auf der
<
;
4
Für einen ‘Wiederaufnahmestop’ während der
Wiedergabe einer BD/DVD drücken Sie einmal <.
Wenn Sie jetzt 4 drücken, wird die Wiedergabe ab dem
Punkt fortgesetzt, an dem sie angehalten wurde.
Für ein ‘vollständiges Anhalten’ drücken Sie zweimal
auf dem vorderen Bedienfeld oder
</1
Fernbedienunge. Die Wiedergabe beginnt am Anfang
der Disk.
HINWEIS
Wenn Sie eine Taste drücken und das Gerät diese
Funktion nicht akzepiert, erscheint auf dem
TV-Bildschirm.
Bedienungen werden gelegentlich nicht akzeptiert,
selbst wenn nicht angezeigt wird.
Ungültige Bedienungen können wie erwartet
aureten, wenn:
< Die Regionalcodes des Geräts simmen nicht
mit deneDiskherstellersn der Disk überein
und die Wiedergabe ist nicht erlaubt.
< Die Kindersicherung verhindert eine
Bedienung des Geräts.
(Weitere Informationen nden Sie unter
„Kindersicherung“ auf seite D-21 .)
< BD/DVD Videobedienungen und Funktionen
können von den Erläuterungen in dieser
Bedienungsanleitung abweichen und
einige Bedienungen können wegen den
Einstellungen des Diskherstellers nicht
erlaubt sein.
<
auf der
D-10
Page 83

Fernbedienung
Der BDP100 wird mit der CR104 UniversalFernbedienung geliefert.
Benutzung der Fernbedienung
Bitte beachten Sie bei der Benutzung der
Fernbedienung die folgenden Hinweise:
< Achten Sie darauf, dass sich keine
Hindernisse zwischen Fernbedienung und
Fernbedienungssensor auf dem vorderen
Bedienfeld benden. Die Fernbedienung
hat einen Arbeitsbereich von etwa 7
Metern. (Falls der Fernbedienungssensor
abgedeckt ist, steht IR auf der der Rückseite
der Fernbedienungseingangsbuchse zur
Verfügung. Bitte wenden Sie sich für weitere
Informationen an Ihren Händler).
< Die Funktion der Fernbedienung
kann gestört werden, wenn starke
Sonneneinstrahlung oder Fluoreszenzlicht
auf den Fernbedienungssensor des Geräts
scheint.
< Wechseln Sie die Batterien, wenn Sie
eine Verringerung der Reichweite der
Fernbedienung bemerken.
Einsetzen der Batterien in die
Fernbedienung
1. Önen Sie das Batteriefach durch Drücken auf
die Rückseite der Fernbedienung.
2. Legen Sie vier „AAA“-Batterien in das
Batteriefach ein - zwei nach oben, zwei nach
unten, wie in der Abbildung.
3. Setzen Sie das hintere Ende des Deckels auf
die Plastikmarkierung der Fernbedienung.
Diese verhält sich wie ein Scharnier, und Sie
können nun das Ende des Deckels mit einem
Klick einrasten lassen.
Hinweise zu Batterien:
Falsche Handhabung von Batterien kann zu
<
Gefährdungen wie Auslaufen oder Bersten
führen.
Alte und neue Batterien nicht mischen.
<
Verwenden Sie keine nicht-identischen Batterien
<
zusammen - obwohl sie ähnlich aussehen, können
unterschiedliche Batterien unterschiedliche
Spannungen haben.
Achten Sie darauf, dass das Plus- (+) und
<
Minuszeichen (-) an den Enden jeder Batterie den
Angaben im Batteriefach entsprechen.
Entfernen Sie die Batterien aus Geräten, die einen
<
Monat oder länger nicht verwendet werden.
Beachten Sie bei der Entsorgung von erschöpen
<
Batterien bitte die staatlichen oder örtlichen
Vorschrien in Ihrem Land oder Ihrer Region.
Deutsch
D-11
Page 84
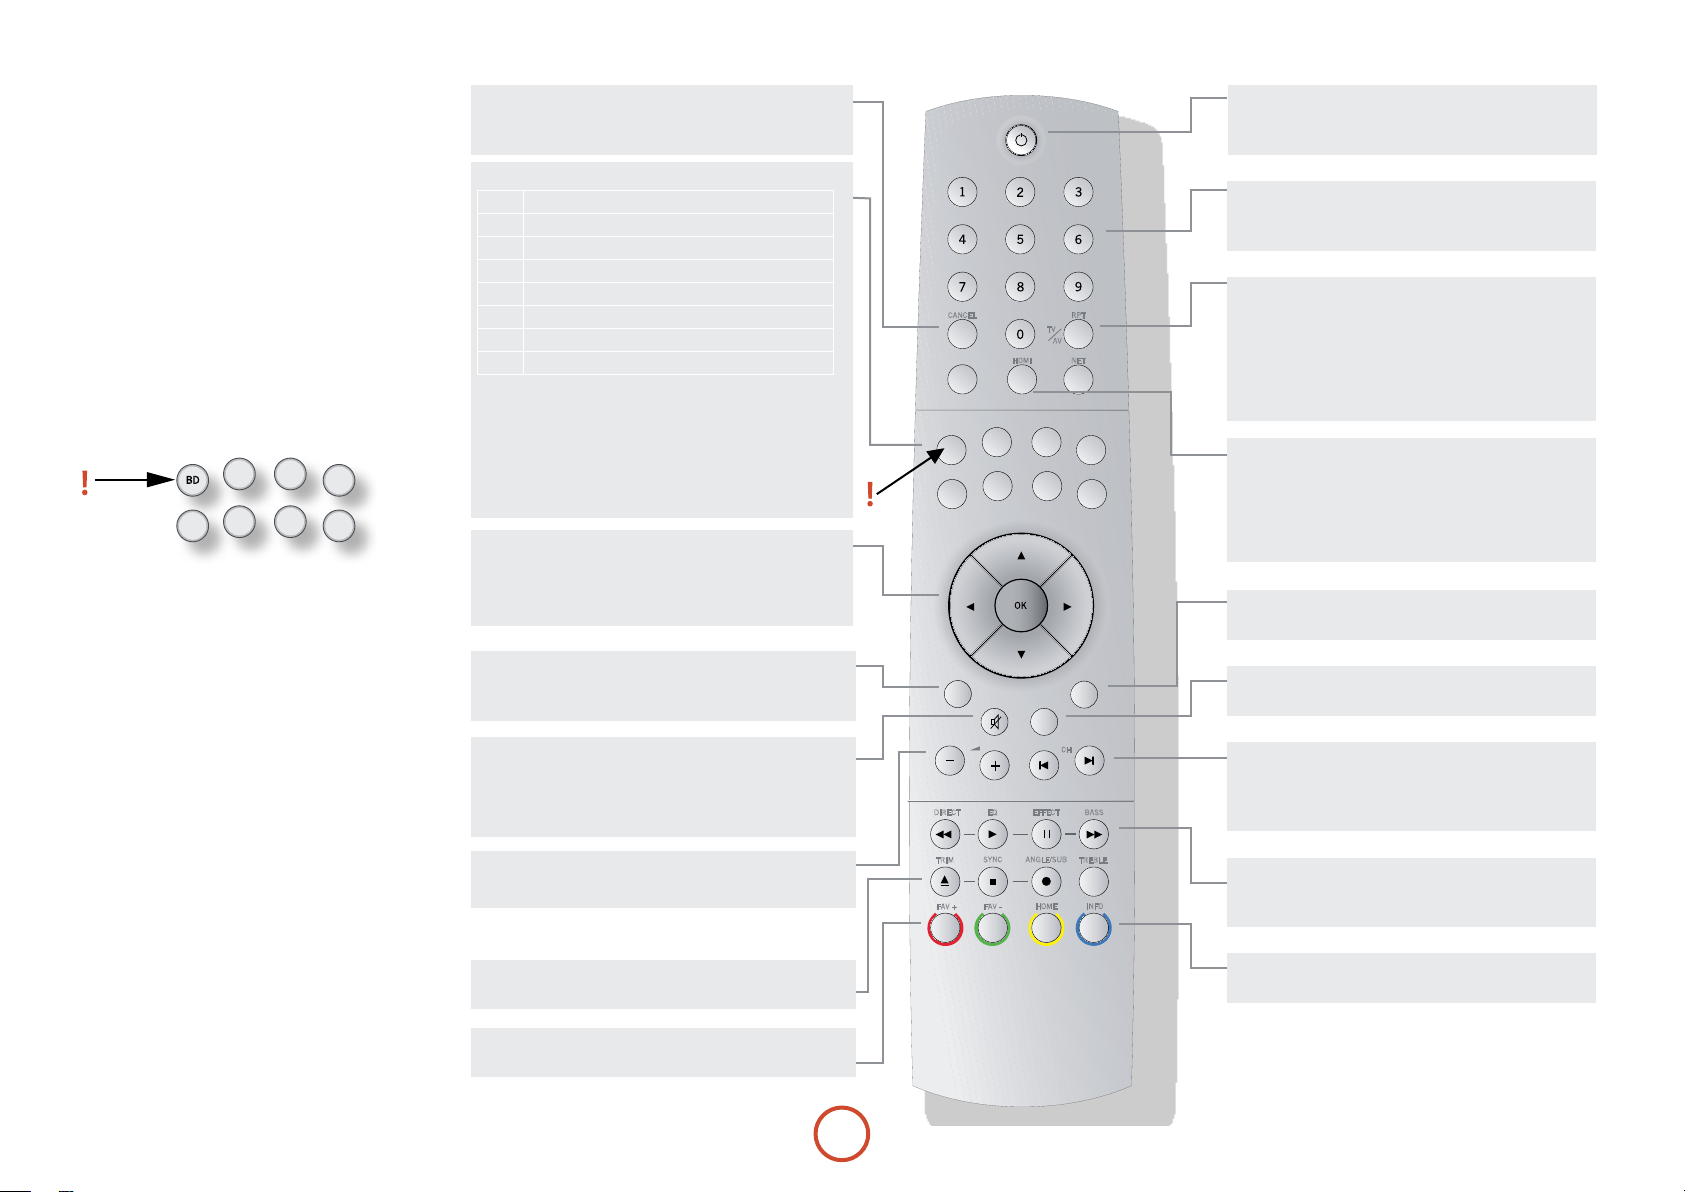
Steuern des BDP100
Die CR1040 ist eine hochentwickelte „Universal“Fernbedienung, die bis zu acht Geräte steuern kann
- einschließlich des BDP100. Da sie eine „lernfähige“
Fernbedienungs ist, kann sie fast jede beliebige
Funktion von einer vorhandenen Fernbedienung eines
Einzelgeräts kopieren. Sie können auch die CR104auf
die Ausgabe einer Befehlsequenz („Makros“) mittels
eines einzigen Tastendrucks programmieren.
Wählen Sie zuerst die Quelltaste
Denken Sie daran, zuerst eine Quelltaste auszuwählen,
bevor Sie Befehlstasten drücken - die Befehle sind je
nach der ausgewählten Quelle verschieden!
Zur Steuerung des BDP100 mittels der Fernbedienung,
drücken Sie zuerst die
AMP
BD-Quelltaste.
AVSAT
PVR VCR
TUN
CD
DISP (Display)
Durchläu die Helligkeitsoptionen für das Display (Dimmen
- Hell, Aus).
Auswahl der Quelle und Konguration der Fernbedienung
BD
BD Eingang/BD Steuerungen
SAT
Satellitendecodereingangt/SAT-Steuerung
AV
Fernseher (Ton)-Eingang/AV-Steuerungen
TUN
Radiotunereingang/TUN-Steuerungen
AMP
Arcam Verstärker
PVR
Videorekorder-Eingang/Steuerungen
VCR
Video-Kassettenrekorder-Eingang/Steuerungen
CD
CD-Playereingang/CD-Steuerungen
Zum Auswählen des Eingangs und erneuten Kongurieren
der Fernbedienung drücken Sie einmal die entsprechende
Taste.
Wenn Sie die Fernbedienung ohne Änderung des Eingangs
erneut kongurieren möchten, halten Sie die Taste gedrückt,
bis die Power-LED einmal aulinkt.
Navigationstasten
Mit den Pfeiltasten können Sie sich in den Einstellungsmenüs
des BDP100 und den Diskmenüs bewegen.
Bestätigen Sie eine Auswahl mit OK.
Ein/Standby
Den BDP100 kann mittels der Fernbedienung in oder aus
dem Standby-Modus umgeschaltet werden.
Ziernstasten
Für die Dateneingabe verwendet. Auch für den direkten
Zugri auf einzelne Tracks auf Audio-CDs.
RND
DISP
T
RND
Schaltet die Zufallswiedergabe (‘shue’) von Kapiteln/
Tracks ein- oder aus.
Drücken Sie SHIFT gefolgt von RND, um zyklisch durch die
SHIFT
STATUS
iPOD
Wiederholungsoptionen für die Wiedergabe (Kap tel, Titel,
Disk usw.) zu gehen.
BD
PVR
AMP
TUN
VCR
CD
STATUS
Schaltet die Anzeige von Diskinformationen um.
Drücken Sie SHIFT gefolgt von STATUS, um den 24p-Mode
AV
SAT
zu aktivieren oder deaktivieren (unterstützt nur Disks und
Fernseher).
MENU
Aktiviert das BD-„Popup“-Menü oder das DVD-Menü.
MODE
Diese Taste aktiviert die Picture-in-Picture-Funktion der
zwe te Videoquelle, sofern vorhanden.
MUTE
Einmal drücken, um einen Arcam Verstärker stumm zu
schalten. Erneut drücken (oder +/ Lautstärke verwenden),
um die Stummschaltung aufzuheben.
VOLUME +/– (LAUTSTÄRKE +/–)
Zum Einstellen der Lautstärke eines kompatiblen Verstärkers
OPEN
Önet und schließt das Disklaufwerk
SETUP
Rufen Sie mit SETUP das Systemeinstellungsmenü auf.
D-12
MODE
SETUP TITLE AUDIO SUBT
23425
CR104
MENU
RTN
U
SRCH
RTN
Geht zum vorherigen Menü zurück.
0 /
Drücken, um rückwärts zum vorherigen Track zu springen
(
) oder vorwärts zum nächsten Track (/).
0
Wiedergabesteuerung
Pause (
), Play (4) und Stop (<). SHIFT+Pause aktiviert
;
die langsame Wiedergabe (Zeitlupe).
Erweiterte Steuerungen
Diese Tasten werden auf der nächsten Seite beschrieben.
Page 85

Erweiterte Steuerungen
HINWEIS
Viele dieser Bedienelemente sind entsprechend
zu den Funktionen beschriet, die anderen
Gerätemodi zugewiesen sind. Zum Beispiel,
die Taste
Receivers, wenn die Fernbedienung sich im
AMP-Modus (Verstärkermodus) bendet.
aktiviert den Bassregler eines A/V-
8
ROT/GRÜN/GELB/BLAU
Die farbcodierten Tasten
bieten interaktive Steuerelemente für Blu-ray Disks und
weitere Playerfunktionen, sie werden auf dem Bildschirm
angezeigt. Sie werden zuerst mit einem Tastendruck
auf SHIFT und sofortigen nachfolgenden Drücken der
benötigen Taste aufgerufen. Ihre Funktion hängt von der
Disk und dem angezeigten Teil der Disk ab.
ROT, GRÜN, GELB und BLAU
Wiedergabesteuerungstasten
Schneller Rücklauf.
7
Startet die Wiedergabe.
4
Wiedergabe vorübergehend anhalten. Zum Fortsetzen der Wiedergabew
;
drücken Sie 4. Drücken Sie im Pausemodus ; Geht ein Bild weiter.
SHIFT +
Schneller Vorlauf.
8
Önet und schließt das Disklaufwerk
1
<
Wiedergabe beenden
Durchläu verschiedene Kamerawinkel, falls auf der Disk vorhanden.
=
aktiviert die Zeitlupe.
;
R
F V
SETUP TITLE AUDIO SUBT
A U
E E
SRCH
N
ANGLE (Blickwinkel)
Zeigt das Blickwinkel-Menü an, um
aus verschiedener Kameraperspektiven
auszuwählen, falls diese auf der Disk
vorhanden sind.
Deutsch
SETUP
Achten Sie darauf, dass keine Disk abgespielt
wird und drücken Sie
„Einstellungen“-Menü aufzurufen.
TITEL
Drücken Sie
einer DVD (eine Funktion, die nur bei
Multititel-Disks anwendbar ist) oder das
Hauptmenü einer Blu-ray Disk zuzugreifen.
SETUP, um das
TITLE, um auf das Titel’-Menü
AUDIO
Einige Disks bieten die Möglichkeit,
verschiedene Audiotracks auszuwählen.
Drücken Sie
der verfügbaren Tracks aufzurufen. Siehe
“Auswahl einer Tonspur” auf seite D-16.
AUDIO, um das Menü zur Auswahl
D-13
SRCH (Suche)
Zeigt das Suchmenü mit den Optionen
Uhrzeit, Titel und Track an.
SUBT (Untertitel)
Durchläu die verfügbaren UntertitelSprachen, einschließlich ‚O (Aus)‘. Einige
Disks erzwingen Untertitel und überschreiben
alle Setup-Einstellungen.
Page 86

Nützliche Informationen
Hintergrundbeleuchtung
Wenn eine Taste gedrückt wird, leuchtet eine blaue
Hintergrundbeleuchtung für fünf Sekunden auf. Dies
hil Ihnen bei der Benutzung der Fernbedienung
bei schlechten Lichtverhältnissen. Wenn sich die
Hintergrundbeleuchtung einschalten, ist möglicherweise
ein leiser Ton von der Fernbedienung zu hören. Dies ist
absolut normal.
Die Power LED blinkt
Kurzes Aulinken zeigt einen gültigen Tastendruck an.
Mehrerfaches kurzes Aulinken überträgt
Informationen (z. B. einen Gerätcode) oder zeigt
den Anfang und den erfolgreich Abschluss einer
Programmsequenz an.
Langes Aulinken weist auf einen ungültigen
Tastendruck oder eine ungültige Eingabe hin.
Das Symbol ‚*‘ wird in dr Bedienungsanleitung dazu
verwendet, ein Aulinken der Power LED darzustellen.
Timeouts und nicht zugeordnete Tasten
Zeitabschaltung - Nach 10 Sekunden verläßt die CR104
den Programmierstatus und kehrt zum Normalbetrieb
zurück.
Timeout Dauertastendruck - Nachdem eine beliebige
Taste kontinuierlich für 30 Sekunden gedrückt wurde,
beendet die CR104 das Senden der IR-Übertragung, um
Batteriestrom zu sparen. Die CR104 bleibt ausgeschaltet,
bis alle Tasten losgelassen wurden.
Nich zugewiesene Tasten - Die CR104 ignoriert alle
nicht zugewiesenen Tastendrucke für einen bestimmten
Gerätemodus und startet nicht das Senden der
IR-Übertragung.
Anzeige bei niedriger Spannung
Wenn die Batterien erschöp sind, blinkt die
IR-Übertragungsanzeige auf der CR104 (die LED
unterhalb der Power-Taste) fünf Mal, wenn Sie eine
Taste drücken:
* * * * *
Wenn das der Fall ist, legen Sie bitte so schnell wie
möglich vier neue AAA Alka-Batterien ein.
Gerätemodus / Quelltasten
Da die CR104 sowohl Ihren BDP100, AVR500, AVR600
oder AV888 als auch eine Reihe anderer Geräte steuern
kann, verfügen viele der Tasten abhängig vom auf der
Fernbedienung ausgewählten „Gerätemodus“ über mehr
als eine Funktion.
Die Gerätemodustasten (siehe unten) wählen die Quelle
auf dem AVR500/AVR600/AV888 aus. Mit einem
kurzen Tastendruck auf eine dieser Tasten wird ein
Befehl übermittelt, der die Quelle an dem Gerät ändert.
Auch die Funktionalität der Fernbedienung ändert sich,
um das ausgewählte Quellgerät zu steuern. Es ist, als
wenn Sie acht verschiedenen Fernbedienungen in Ihrer
Hand halten!
AVSAT
TUN
PVR VCR
AMP
BD
SAT
AV
BDP100 Blu-ray Player
Satelliten-Settop-Box
Audiovisueller Audioeingang
(mit TV zu verwenden)
TUN
TUNER
AMP
VERSTÄRK ER
DAB, Sirius, UKW- oder
MW-Tuner
Steuert den Verstärker und SetupFunktionen des AVR500/AVR600
und AV888
PVR
PERSÖ NLICHER
VIDEOR ECORDER
VCR
CD
Videorekorder
(oder digitaler Videorekorder)
Video-Kassettenrekorder
Compact-Disk Player
Wenn Sie eine Gerätemodustaste für etwa vier
Sekunden gedrückt halten, ändern Sie den Gerätemodus
der CR104 ohne ohne Wechsel der Signalquelle am
AVR500/AVR600/AV888. Dies kann auch durch
Drücken von S, gefolgt von einer Gerätemodustaste
durchgeführt werden (innerhalb von zwei Sekunden).
Mit diesen beiden Methoden können Sie das Gerät
wechseln, das von der CR104 gesteuert wird, ohne auch
die AVR500/AVR600/AV888-Quelle zu ändern, so dass
die Wiedergabe nicht unterbrochen wird.
Jeder Gerätemodus ändert das Verhalten von vielen
CD
CR104-Tasten, um die Signalquelle entsprechend zu
steuern. Zum Beispiel:
Im
CD-Modus gibt
Im
AV-Modus stellt
den vorherigen CD-Track wieder.
0
den Befehl TV-„Kanal abwärts“
0
zur Verfügung.
Die CR104 bleibt in dem zuletzt gewählten
Gerätemodus. Deshalb ist es nicht nötig vor jeder
Befehlstaste eine Gerätemodustaste zu drücken, wenn
beispielsweise nur die Tracks einer CD wiedergeben
oder überspringen.
Navigationstasten
Fernbedienungen von anderer Unterhaltungselektronik
in Ihrem System. O bestätigt eine Einstellung.
Die Navigationstasten steuern in
Setup- oder Bildschirmmenüs den
Cursor. Darüber hinaus kopierten sie
die Navigationsfunktionen der Original-
Lautstärkeregler
Standardmäßig ist die CR104 so eingestellt, dass die
Tasten für die Lautstärkeregelung immer die Lautstärke
eines Arcam-Verstärkers oder -Receivers steuern,
unabhängig davon, auf welchen Gerätmodus die
Fernbedienung derzeit eingestellt ist. Dies kennt man
auch als Lautstärke- ‚Punch rough‘.
Wenn Sie beispielsweise gerade eine CD wiedergeben,
bendet sich die CR104 wahrscheinlich im
CD-Gerätemodes, um den CD-Player zu steuern.
Sie können direkt die Lautstärkeregler auf der
Fernbedienung verwenden, um die Lautstärke eines
Arcam-Verstärkers einzustellen, ohne vorher A
drücken zu müssen, um die Fernbedienung in den
AMP (Verstärker)-Gerätemodus umzuschalten. Die
Lautstärkeregler werden vom CD-Gerätemodus auf der
Fernbedienung zum AMP (Verstärker)-Gerätemodus
„durchgereicht“. Das „Durchreichen“ der Lautstärke
kann falls gewünscht individuell für jeden Gerätemode
deaktiviert werden.
Die CR104 entspricht Abschnitt 15 der
FCC-Bestimmungen.
Dieses Produkt wurde getestet und entspricht den
Grenzwerten eines Digitalgeräts der Klasse B, gemäß
Teil 15 der FCC-Bestimmungen. Diese Grenzwerte
sind so ausgelegt, dass sie annehmbaren Schutz
gegen störende Interferenzen im Heimbereich
bieten. Dieses Gerät verursacht und verwendet
Energie im Radiofrequenzbereich und kann auf
solchen Frequenzen ausstrahlen. Falls es nicht
entsprechend den Anweisungen installiert und
verwendet wird, so kann es störende Interferenzen
bei Funkkommunikation hervorrufen. Allerdings
gibt es keine Garantie, dass bei einer bestimmten
Installation keine Interferenzen aureten werden.
Falls dieses Gerät abträgliche Interferenzen beim
Funk- oder Fernsehempfang verursacht, was
ermittelt werden kann, indem man das Gerät
ein- und ausschaltet, so sollte der Benutzer die
Interferenz auf eine oder mehrere der folgenden
Arten beheben:
Die Empfangsantenne neu ausrichten/aufstellen.
Den Abstand zwischen dem Gerät und dem
Empfänger vergrößern.
Das Gerät mit einer Steckdose verbinden, die Teil
eines anderen Schaltkreises ist als der Empfänger.
Wenden Sie sich an den Händler oder an einen
erfahrenen Radio- und Fernsehtechniker, um Hilfe
zu erhalten.
D-14
Page 87

Andere Gerät steuern
Methode 1 (Direkte Codeeinstellung)
Dieser Abschnitt beschreibt den einfachste
(bevorzugten) Weg die Gerätemodusetasten der CR104
zu programmieren, um Nicht-Arcam-Geräte in Ihrem
System zu steuern.
AVSAT
D
PVR VCR
AMP
Einige der Modi sind für den Arcam-Betrieb
<
gesperrt, können aber nötigenfalls freigeschaltet
werden (siehe „Sperren/Freigeben eines
Gerätemodus“ auf seite D-28).
A Modus steuert nur Arcam-Geräte.
<
BD-Modus Gesperrt
SAT-Modus Freigegeben
AV-Modus Freigegeben
RADIO-Modus Gesperrt
AUX-Modus Gesperrt
VCR-Modus Freigegeben
CD-Modus Gesperrt
Hier ist ein konkretes Beispiel, wie man a Taste
programmiert. um einen Addison-Fernseher zu steuern.
Das Prinzipien zur Steuerung anderer Geräte ist genau
identisch.
1. Achten Sie darauf, dass Ihr Gerät eingeschaltet ist
(nicht nur in Standby).
2. Suchen Sie für den Gerätetyp, den Sie mit der
CR104 steuern möchten, die richtige GerätecodeTabelle (z.B. TV).
3. Finden Sie die Zeile mit den Codes für den
Gerätehersteller (z.B. Addison) (seite 34 ). Der
beliebteste Code wird zuerst aufgeführt.
4. Drücken Sie die entsprechende Gerätemodustaste
(z.B. a) auf dem CR104.
5. Halten Sie S gedrückt, uis die rote Power-LED
zweimal aulinkt:
* *
einmal, wenn Sie die Taste drücken, dann nach
etwa drei Sekunden das zweite Mal).
6. Geben Sie mit den Zierntasten die ersten
vier-stelligen Code ein. Die Power-Taste blinkt
zweimal auf:
* *
.
7. Richten Sie die CR104 auf das Gerät und drücken
TUN
CD
(Sie blinkt tatsächlich
Sie P. Wenn sich das Gerät abschaltet, ist der
Setup abgeschlossen.
8. Schalten Sie das Gerät wieder ein und testen Sie
alle Funktionen der CR104 um sicherzugehen,
dass sie ordnungsgemäß funktionieren.
9. Wichtig! Schreiben Sie Ihre Gerätecodes auf
der rechten Seite der Seite auf, damit Sie diese
nicht vergessen, falls Sie die CR104 zurücksetzen
müssen.
Was muss ich machen, wenn ich mein Gerät
immer noch nicht steuern kann?
Wenn Ihr Gerät nicht reagiert, wiederholen Sie
<
die obigen Schritte, bis einer der Gerätecodes für
Ihre Marke funktioniert.
Wenn keiner der für Ihre Marke aufgeführten
<
Codes mit Ihrem Gerät funktioniert oder wenn
Ihre Marke nicht aufgeführt ist, versuchen Sie
die Bibliotheksuchmethode, die im nächsten
Abschnitt beschrieben wird.
Anmerkungen:
Einige Codes sind ziemlich ähnlich. Wenn Ihr
<
Gerät mit einem der Codes nicht reagiert oder
nicht richtig funktioniert, versuchen Sie einen
anderen Code, der unter Ihrer Marke aufgelistet
ist.
Wenn Ihr die Original-Fernbedienung Ihres
<
Geräts nicht über eine P (POWER)-Taste
verfügt, drücken Sie $ stattdessen P beim
Einrichten Ihres Geräts.
Vergessen Sie nicht die entsprechende Gerätetaste
<
zu drücken, bevor Sie das Gerät steuern möchten.
Viele Fernseher lassen Sich mit P nicht
<
einschalten. Bitte versuchen Sie mit einer
Zierntaste („Kanal auswählen“) Ihren Fernseher
wieder einzuschalten.
Für die Suche nach dem Code für ein
<
anderes Gerät folgen Sie den obenstehenden
Anweisungen, aber drücken Sie während Schritt 2
die entsprechende Gerätetaste anstelle von a.
Methode 2 (Bibliotheksuche)
Dieser Abschnitt beschreibt eine weitere Möglichkeit
die CR104 zu programmieren, um Geräte von
Drittanbietern steuern.
Die Bibliothekssuche lässt Sie alle Codes im Speicher
der CR104 scannen. Es kann viel länger dauern als
die bisherige Methode, deswegen verwenden Sie diese
Methode nur, wenn:
Ihr Gerät reagiert nicht auf die CR104, nachdem
<
Sie Codes ausprobiert haben, die für Ihre Marke
aufgelistet werden.
Ihre Marke ist überhaupt nicht in den
<
Gerätecode-Tabellen aufgeführt.
Beispiel: Suche nach einem Fernsehercode
1. Schalten Sie Ihren Fernseher ein (nicht auf
Standby) und richten Sie die CR104 auf ihn.
2. Drücken Sie a auf Ihrer CR104.
3. Halten Sie S gedrückt, bis die Power-LED
zweimal aulinkt.
4. Drücken Sie 9 9 1. Die Power-Taste blinkt
zweimal auf: * *.
5. Drücken Sie P.
6. Richten Sie die CR104 auf Ihren Fernseher and
drücken Sie wiederholt [, bis sich Ihr Fernseher
ausschaltet.
Jedesmal, wenn Sie [ drücken, sendet die CR104
eine POWER-Signal vom nächten Code, der in seinem
Speicher enthalten ist. Im schlimmsten Fall müssen
Sie diese Taste bis zu 150 Mal drücken, deshalb ist
Geduld nötig! Wenn Sie einen vorhergehenden Code
übersprungen haben, gehen Sie einen Schritt zurück,
indem Sie ] drücken. Während Sie diese Taste
drücken, vergessen Sie nicht die CR104 ständig auf
Ihrem Fernseher zu richten.
7. Sobald sich der Fernseher ausschaltet, drücken Sie
, um den Code zu speichern.
S
Anmerkungen:
Viele Fernseher lassen Sich mit P nicht
<
einschalten. Bitte versuchen Sie mit einer
Zierntaste („Kanal auswählen“) Ihren Fernseher
wieder einzuschalten.
Wenn Sie Ihren Fernseher nicht richtig steuern
<
können, setzen Sie bitte die Suchmethode fort: Sie
verwenden möglicherweise den falschen Code.
Für die Suche nach dem Code für ein
<
anderes Gerät folgen Sie den obenstehenden
Anweisungen, aber drücken Sie während Schritt 2
die entsprechende Gerätemodustaste anstelle von
.
a
Wenn Ihr die Original-Fernbedienung Ihres
<
Geräts nicht über eine P (STANDBY)-Taste
verfügt, drücken Sie während Schritt 5
stattdessen $.
Code durch Blinken anzeigen
Sobald Sie Ihre CR104 eingerichtet haben, können Sie
Ihre Geräteeinstellcodes für künige Referenzzwecke
durch Blinken anzeigen.
Beispiel: Ihren Fernsehercode durch Blinken
anzeigen.
1. Drücken Sie einmal die entsprechende
Gerätemodustaste (z. B. a).
2. Halten Sie S gedrückt, bis die rote Power-LED
zweimal aulinkt *
einmal auf, wenn Sie die Taste drücken und
anschließend zweimal nach etwa drei Sekunden).
3. Drücken Sie 9 9 0. Die P-Taste blinkt
zweimal auf.
4. Für die erste Zier des vierstelligen Codes
drücken Sie
1 und zählen Sie jedes rote
Aulinken. Wenn nichts aulinkt, lautet die
Zier „0“.
5. Für die zweite, dritte und vierte Zier
wiederholen Sie den vorherigen Schritt, indem Sie
der Reihen nach 2, 3, or 4 drücken.
Jetzt haben Sie den vierstelligen Code.
Notieren Sie die Codes.
Notieren Sie sich für die Zukun die Codes für Ihre
Geräte in den Feldern unten.
Gerät Code
1
2
3
4
5
6
7
8
(Sie blinkt tatsächlich
*
Deutsch
D-15
Page 88

Erweiterter
Betrieb
Diskinformationen
Zum Anzeigen dcer Diskinformationen auf dem
Fernsehbildschirm drücken Sie STATUS. Die angezeigten
Informationen hängen vom Disktyp ab.
Bei einer Audio-CD:
Disktyp
Verstrichene Zeit
(aktueller Track)
Drücken Sie erneut
Aktueller Track/
Gesamtanzahl der Tracks
Track : 1 / 11
0 : 00 : 23
CD DA
Fortschrittsbalken
STATUS, um das Display
0 : 06 : 46
Gesamte
Trackdauer
Wiederholungsmodus
Off O ff P lay
Zufälliger
Wiedergabemodus
auszuschalten.
Suche
Mit der h Taste können Sie nach einem bestimmten
Titel, Kapitel oder Track auf dem Medium suchen.
Zeigen Sie mit h das Suchfeld an. Wählen Sie den
Suchtyp durch wiederholtes Drücken von h:
Videodisks Audiodisks Mediendateien
Gehe zu Titel Gehe zu Track Gehe zu Dateinr.
Gehe zu Kapitel Gehe zu Zeit
Gehe zu Zeit
Geben Sie die Suchdaten mit den Zierntasten der
Fernbedienung ein. Starten Sie mit
die Wiedergabe
O
ab einer ausgewählten Stelle.
Menüs
Viele von BD-Video- und DVD-Videodisks enthalten
ein Diskmenü, Top-Menü oder Popup-Menü, das Sie
durch die verfügbaren Funktionen in der Disk führt.
Die Inhalte der Menüs und entsprechende
Menüoperationen hängen von der
Disk ab.
< Diskmenu: Zum Anzeigen
des Diskmenüs („Top-Menü“)
drücken Sie
< Popup-Menu: Zum Anzeigen
des Diskmenüs „Popupmenü“
Wiedergabemodus
drücken Sie
Navigieren Sie mit den Cursor-Tasten
der Fernbedienung in den Menüs.
Heben Sie einen Punkt hervor und
drücken Sie
um ihn auszuwählen. Drücken Sie
O
andernfalls die ensprechende Menütaste zum Verlassen
des Menüs.
HINWEIS
Wenn das sekundäre Audio nicht zu hören ist,
stellen Sie den Digitalausgang auf PCM Stereo,
Mixed Bitstream, PCM 5.1 oder PCM 7.1. (Weitere
Informationen nden Sie unter „Digitalausgang“
auf seite D-21 ).
Wenn die primären und sekundären Audiostreams
alle eingeschaltet sind, werden sie gemischt und
zusammen wiedergegeben. Stellen Sie Audio-PIP
auf Of (Aus), um den sekundären Audiostream
auszuschalten.
am Fernseher.
t
am Fernseher.
U
Auswahl einer Tonspur
Einige Disks enthalten mehrere Audiostreams, wie eine
Standard Dolby Digital 5.1- und eine High-Denition
Dolby TrueHD 7.1 Surround-Tonspur. Der Audiostream
kann während der Wiedergabe gewechselt werden. Das
sekundäre Audio (z.B. Kommentar des Regisseurs) von
Blu-Ray Disks (falls vorhanden) kann auch gewechselt
werden (wenn Alternativen verfügbar sind).
Anmerkung: Die Audiosprache kann mittels des
Einstellungsmenüs gewechselt werden. Siehe seite D-21.
Zeigen Sie mit
Informationen an:
Aktueller Audiostream/Gesamtzahl der Streams
Primäres Audio
Au dio
PI P Aud io
Sekundäres Audio
Markieren Sie entweder die primäre (Audio) oder die
sekundäre (PIP) Audiostream-Auswahl mit Hilfe der
'/,
Zeigen Sie mit
Sie mit '/, den gewünschten Audiostream hervor
und drücken Sie anschließend O, um ihn auwählen.
die aktuellen Audiostream-
o
01 / 04 E NG D olby Dig ital
Off
-Tasten.
alternative Audiostreams an. Heben
>
Untertitel
Einige Disks enthalten mehrere Untertitel Die Untertitel
können während der Wiedergabe gewechselt werden.
Die Untertitel für das sekundäre Video (z.B. Kommentar
des Regisseurs) von Blu-Ray Disks (falls vorhanden)
können auch gewechselt werden (wenn Alternativen
verfügbar sind).
Anmerkung: Die Untertitelsprache kann mittels des
Einstellungsmenüs gewechselt werden. Siehe seite D-21 .
Zeigen Sie mit
Informationen an:
Aktueller Untertitel/Gesamtzahl der Untertitel
Primärer Untertitel
S ubtitl e
PI P Su btitle
Sekundärer Untertitel
Markieren Sie entweder die primäre (Untertitel)- oder
die sekundäre (PIP-Untertitel)-Auswahl mit Hilfe der
'/,
Zeigen Sie mit
mit '/, den gewünschten Untertitel hervor und
drücken Sie anschließend O, um ihn auwählen.
die aktuellen Untertitel-
b
01 / 08 E NG
Off
-Tasten.
alternative Untertitel an. Heben Sie
>
D-16
Page 89

Bonusview u. BD-Live
BonusView und BD-Live sind die Funktionen des Bluray Diskformats.
BonusView bietet Bild-in-Bild und virtuelle
Paketfunktionen für kompatible Disks. BD-Live-Disks
verfügen zusätzlich über eine Vielzahl von Funktionen
über das Internet.
Virtuelles Paket/BD-Live-Daten müssen auf einem
USB-Speichergerät gespeichert werden, das an
den BDP100 angeschlossen ist. Um in den Genuss
dieser Funktionen kommen, schließen Sie ein USBSpeichergerät (mindestens 1 GB, 2 GB oder mehr
Speicherkapazität empfohlen), das FAT 32 und USB 2.0
Hochgeschwindigkeit (480 Mbit/s) unterstützt, an den
USB-Anschluss an. (Weitere Informationen nden Sie
unter „USB-Anschluss“ auf seite D-9.)
< Wenn nicht genügend Speicherplatz frei ist,
werden die Daten nicht kopiert/heruntergeladen.
Löschen Sie nicht benötigte Inhalte oder
verwenden Sie ein neues USB-Speichergerät.
< Wenn ein USB-Speichergerät mit anderen
Inhalten (zuvor aufgezeichnet) verwendet
wird, können die Video- und Audiodaten nicht
ordnungsgemäß wiedergegeben werden.
< Wenn das USB-Speichergerät während der
Wiedergabe von virtuellen Paket/BD-LIVE
Inhalten von diesem Gerät abgesteckt wird, wird
die Wiedergabe der Disk angehalten.
< Es kann einige Zeit dauern, benötigte Inhalte zu
laden (Lesen/Schreiben).
Bild-in-Bild (zweite Videoquelle)
Einige Blu-ray Disks enthalten sekundäre
Videobildschirme, die als kleines Video überlagert
in der Ecke des Bildschirms wiedergegeben werden
können. Zum Anzeigen des PiP-Menüs drücken Sie die
Taste
auf der Fernbedienung:
M
PI P Off
Rufen Sie mit
Cursortasten auf der Fernbedienung einen sekundären
Videostream '/,. Zeigen Sie mit O das
sekundäre Video im PiP-Modus an.
HINWEIS
< Zum Wiedergeben sekundären Audios oder
< Sekundäres Video ist möglicherweise nicht
das PiP-Menü auf. Wählen Sie mit den
>
zur Anzeige sekundärer Untertitel siehe
„Auswahl einer Tonspur“ oder „Untertitel“
auf seite D-16.
für jede Szene eine Disk vorhanden. Die
Funktion hängt von der Disk ab, schlagen Sie
im Handbuch der CD für weitere Einzelheiten
nach.
Virtual Package
Blu-ray-Disks unterstützen Virtual-Paket, um
zusätzliche Inhalte für die interaktive Anzeige
automatisch von der Disk oder aus dem Internet in
USB-Speicher zu übertragen. Zu den verfügbaren
Funktionen gehören sekundäres Video und Audio,
Untertitel und Filmtrailer.
HINWEIS
< Wiedergabemethoden hängen von der Disk
ab - schlagen Sie im Handbuch der Disk nach.
< Wiedergabefunktionen können die Nutzung
der farbigen Tasten auf der Fernbedienung
verlangen. Um auf die farbigen
Funktionstasten auf der Fernbedienung
CR104 zuzugreifen, drücken Sie zuerst
S
BD-Live
Der BDP100 ist kompatibel mit BD-Live, mit dem
eine Vielzahl von Funktionen möglich sind, wenn er
mit BD-Live-kompatiblen Disks verwendet wird. Mit
BD-Live können Inhalte, wie die neuesten Filmtrailer
und BD-J interaktive Spiele aus dem Internet in den
USB-Speicher heruntergeladen werden.
Die verfügbaren BD-Live-Funktionen hängen
vollständig von der Blu-ray-Disk ab. Schlagen Sie im
Handbuch der Disk für Bedienungsinformationen nach.
HINWEIS
< Der BDP100 muss mit dem Internet
verbunden sein, um BD-Live-Funktionen zu
verwenden. Siehe unter “Netzwerkanschluss”
.
auf seite D-9 und unter “Network” auf seite E-22
< Der BD-Live Internetzugriff kann mittels
derBD-Live Internetzugri-Einstellung im
System menu deaktiviert werden. Siehe
“System” auf seite D-22
< Wiedergabefunktionen können die Nutzung
der farbigen Tasten auf der Fernbedienung
verlangen. Um auf die farbigen
Funktionstasten auf der Fernbedienung
CR104 zuzugreifen, drücken Sie zuerst
S
.
Deutsch
HINWEIS
< Die Verwendung der BD-Live-Funktionen
kann nicht möglich sein, wenn nicht
genügend Speicherplatz auf dem USBSpeichergerät vorhanden ist. In diesem
Fall schlagen Sie unter „Blu-Ray Speicher
löschen?“ auf seite D-22 nach, um den Inhalt von
Virtual Package und die BD-LIVE- Inhalte
auf dem USB-Speichergerät zu löschen.
< Der Betrieb von USB-Speichergeräten wird
nicht garantiert.
< Verwenden Sie zum Verbinden eines USB-
Speichergeräts mit dem USB-Anschluss keine
USB-Verlängerungskabel.
D-17
Page 90
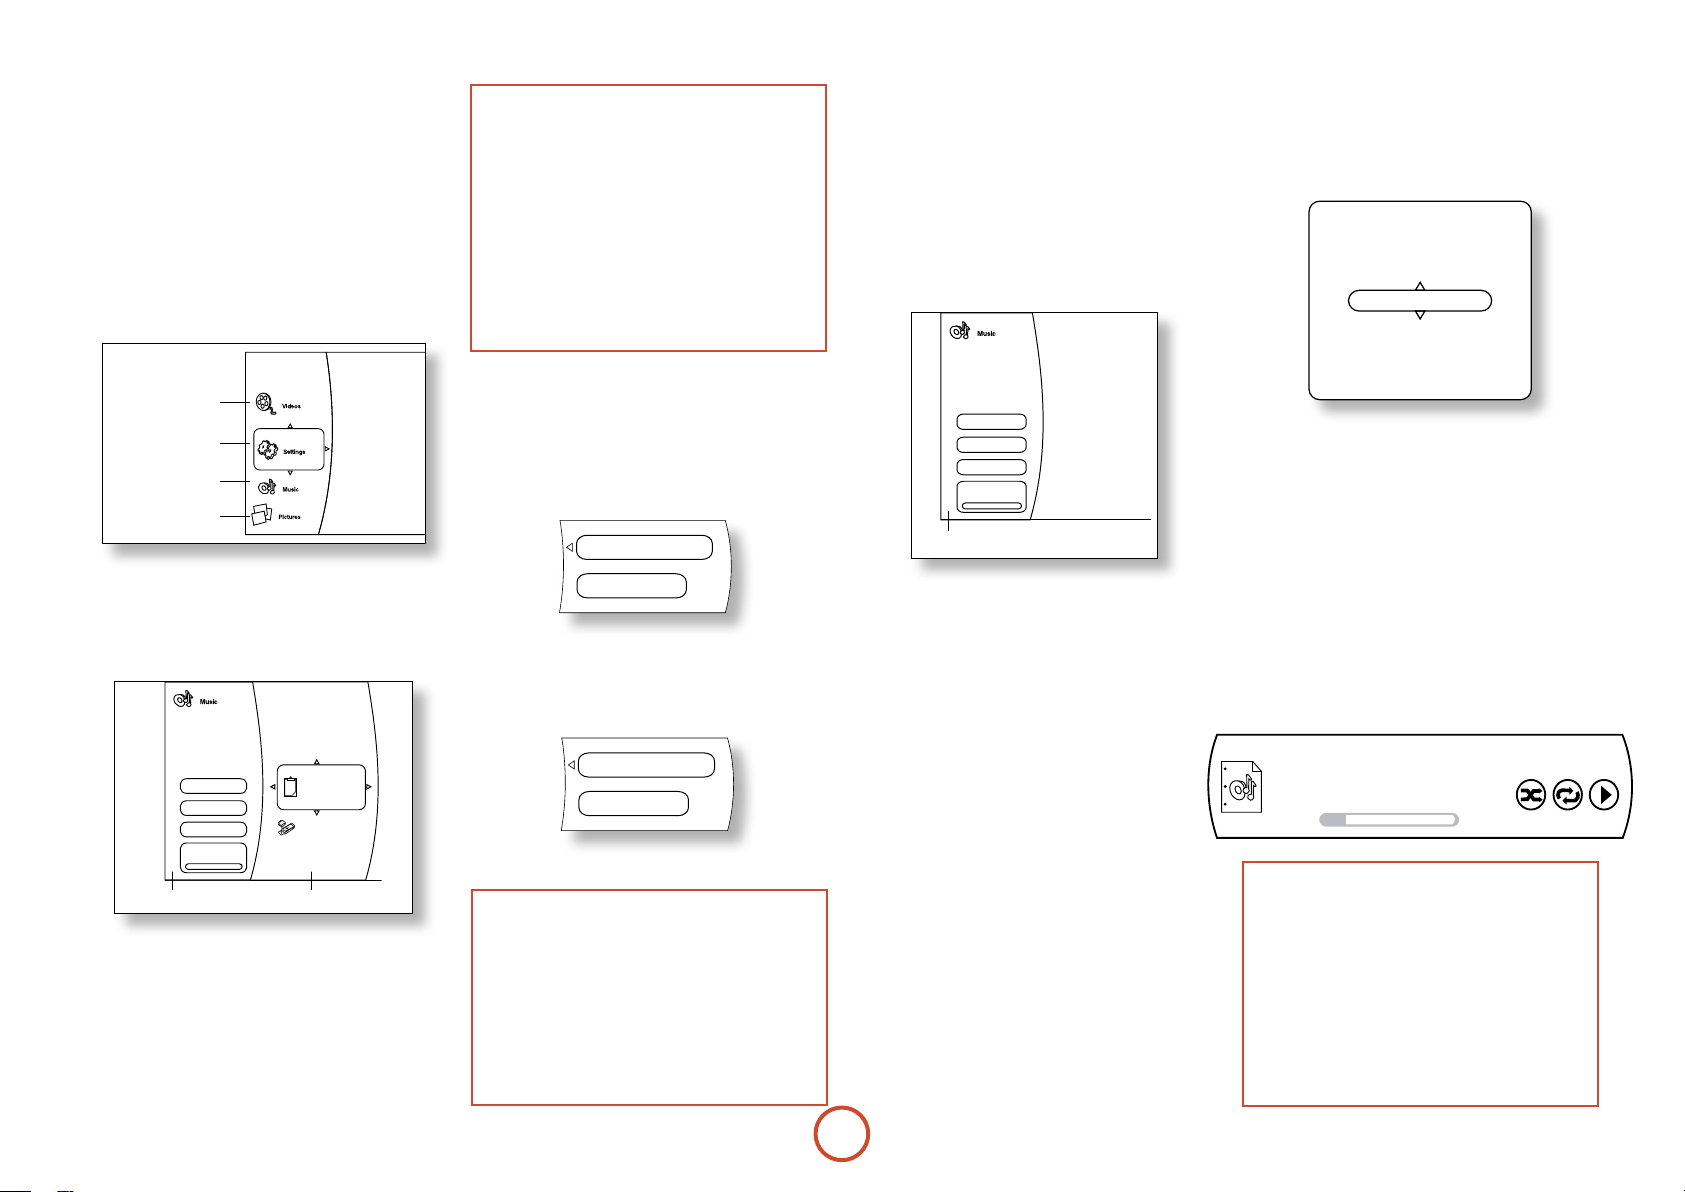
Dateien wiedergeben
Please select Play mode
Play All
Play Selection
Play Current Folder
Cancel
Video- und Audiodateien können von einem USBMedium oder von CD-R/RW Disks wiedergegeben
werden. Folgende Formate werden unterstützt:
< Video: AVI, WMV
< Bild: JPG
< Audio: MP3, WMA
Zur Wiedergabe von Mediendateien stecken Sie das
USB-Gerät oder die optische Disc in den Player. Das
Hauptmenü wird mit den Musik-, Video- und/oder
Bilddateisymbolen angezeigt:
Videodatei
Systemein-
stellungen
Musikdatei
JPEG-Datei
Heben Sie mit den '/, Cursortasten auf
der Fernbedienung die Mediendateien hervor, die
wiedergegeben/angezeigt werden sollen. Wählen Sie
den Dateityp aus. Das „Wiedergabe“-Menü wird
mit
>
angezeigt:
Mus ic
2 ite m(s )
Main Men u
Pl ay Fil es
B rows e Pic tur es
Now Pl ayi ng
Wiedergabemenü
Um alle verfügbaren Dateien ohne Auswahl
wiederzugeben, gehen Sie mit< zum Wiedergabemenü,
wie oben beschrieben.
Um eine einzelne Dateien auszuwählen, verwenden Sie
die
'/,
das Mediengerät zu markieren und zum Medienmenü
zu navigieren. Wählen Sie mit > das Mediengerät und
zeigen Sie die Datei und Verzeichnisinhalte an.
Cursortasten auf der Fernbedienung, um
Pl ayli st
US B 1
Medienmenü
HINWEIS
< Sie können nur den gewählten Dateityp
(Musik, Bild oder Video) suchen, auch
wenn eine CD-R/CD-RW oder ein USBSpeichergerät einen Mix aus Musik, Bild- und
Videodateien enthält. Um einen anderen
Dateityp wiederzugeben, kehren Sie mit der
SETUP-Taste zum Hauptmenü zurück.
< Wenn es auf dem ausgewählten Medium
oder in dem Verzeichnis abspiebare Dateien
oder Verzeichnisse gibt, wird „Empty (Leer)“
angezeigt.
Eine einzelne Datei kann wiedergegeben oder Dateien
können zu einer Playlist hinzugefügt werden, um eine
Dateiauswahl wiederzugeben.
Heben Sie eine Datei mittels der Cursortasten auf der
Fernbedienung
die Datei aus.
O
'/,/</>
A dd T o P la ylis t
P lay (F ile)
hervor. Wählen Sie mit
Wenn die Datei nicht zu der Playliste hinzugefügt
wurde, wird das folgende Menü angezeigt:
Wenn die Datei schon zur Playliste hinzugefügt wurde,
wird das folgende Menü angezeigt:
R emo ve from P lay lis t
P lay (F ile)
HINWEIS
< „Wiedergeben (Datei)“ kann nicht für
JPEG-Bilder ausgewählt werden. Fügen Sie
die Bilder zur Playliste hinzu, die angezeigt
werden sollen, um eine Diashow der Bilder zu
starten.
< Die Playliste wird gelöscht, wenn das
USB-Gerät entfernt oder die optische Disk
ausgeworfen wurde.
Heben Sie mit '/, den Cursortasten auf der
Fernbedienung einen Menüpunkt hervor und drücken
Sie zum Auswählen O.
Wählen Sie „Wiedergeben (Datei)“, um eine einzelne
Datei wiederzugeben oder wählen Sie „Zur Playliste
hinzufügen“, um die Datei zur Playliste hinzuzufügen.
Wenn Sie die gewünschten Dateien zur Playliste
hinzugefügt wurden, gehen Sie mit
<
auf der
Fernbedienung zum Wiedergabememü zurück.
Das Wiedergabemenü
Mus ic
2 ite m(s )
Main Men u
Pl ay Fil es
B rows e Pi ctur es
Now Pl ayi ng
Wiedergabemenü
Die im Wiedergabemenü aufgelisteten Punkte variieren
je nach ausgewähltem Medium und aktuellem Status.
Drücken Sie bei der Wiedergabe eines Mediums die
Taste STOP, um das Wiedergabemenü anzuzeigen.
Wählen Sie mittels den
'/,
Cursortasten eine
Option und wählen Sie diese mit O aus.
< Hauptmenü: Zurück zum Hauptmenü
< Dateien wiedergeben: Geht zum
Wiedergabemenü zurück.
< Bilder/Musik durchsuchen: Ändert den
Dateityp, der wiedergegeben soll, navigiert
zum Mediengerät und zeigt den ausgewählten
Dateityp an.
< Alle zur Playliste hinzufügen: Fügt alle Dateien
zur Playliste hinzu.
< Alle von der Playliste löschen: Löscht alle Dateien
aus der Playliste.
< Vorheriges Verzeichnis: Geht zum vorherigen
Verzeichnis oder Menü zurück.
< Bei der Wiedergabe: Zeigt den
Wiederghabestatus von Musikdateien an.
D-18
Das Wiedergabemodusmenü
Heben Sie mit '/, den Cursortasten auf der
Fernbedienung den Punkt „Dateien wiedergeben“
hervor und drücken Sie O zum Anzeigen die
Wiedergabemodusmenüs.
Wählen Sie mittels den '/, Cursortasten eine
Option und wählen Sie diese mit O aus.
< Alle wiedergeben: Gibt alle Dateien des
ausgewählten Typs auf der Disk oder des Geräts
wieder.
< Auswahl wiedergeben: Gibt alle zur Playlist
hinzugefügten Elemente wieder.
< Aktuelles Verzeichnis wiedergeben: Gibt alle
Dateien des ausgewählten Typs im aktuellen
Verzeichnis wieder.
< Abbrechen: Zurück zum Wiedergabemenü
Wenn ein Wiedergabeoption ausgewählt wurde,
werden die Medien wiedergegeben und die „Bei der
Wiedergabe“-Informationstafel wird angezeigt:
File : 1 / 1 Anima ls - When I drea m. mp3
Title :
Artis t :
Album
0 : 00 : 28 0 : 04 : 36
HINWEIS
< Bei der Wiedergabe von JPEG-Dateien
wird jede Datei für eine gewisse Zeitdauer
angezeigt. Diese kann mittels
gefolgt durch & auf der Fernbedienung oder
durch Aufrufen des Diashow-Effektemenüs
angepasst werden, wie nebenstehend
beschrieben.
< Der auswählbare Wiedergabemodus
variiert je nach Betriebszustand und den
ausgewählten Medien usw.
Off Off P lay
SHIFT
Page 91

Erweiterte Wiedergabesteuerung
Die folgenden erweiterten Steuerung sind während
der Disk- oder Dateiwiedergabe verfügbar (je nach
Medientyp):
Zeitlupe
Drücken Sie SHIFT gefolgt von &, um die Zeitlupe zu
aktivieren. Drücken Sie erneut diese Tastenkombination,
um die Wiedergabegeschwindigkeit zu verändern. Die
Geschwindigkeiten /, / and / sind verfügbar.
Zeitintervall
Bei der Anzeige einer JPEG-Diashows, kann das
Zeitintervall zwischen den Bildern zwischen 5, 10, 15
und 30 Sekunden gewechselt werden. Drücken Sie
SHIFT gefolgt von
Zeitintervallen zu wechseln.
Schnelle Wiedergabe
Drücken Sie während der Wiedergabe ) oder
, um den schnellen Rück- oder Vorlauf zu
(
aktivieren. Weitere Tastendrucke verändern die
Wiedergabegeschwindigkeit. Die 2-, 4-, 8-, 16-, 32-,
64- und 128-fache Geschwindigkeit der normalen
Geschwindigkeit steht zur Verfügung. Kehren Sie mit
wieder zur normalen Geschwindigkeit zurück.
$
Dateiinformationen anzeigen
Drücken Sie zum Anzeigen der Datei-Informationstafel
die Taste STATUS. Die Datei-Informationstafel zeigt
folgende Informationen an:
Aktuelle Datei/Gesamte Dateianzahl
Dateityp
Verstrichene Zeit
, um zwischen unterschiedlichen
&
Titel
File : 2 / 3 .. L ove.Actua lly.DVD Div...
0 : 01 : 59 1 : 04 : 56
Fortschrittsbalken
Gesamte Wiedergabezeit der
aktuellen Datei
Wiederholungsmodus
Zufälliger
Wiedergabemodus
Diashow-Eekte
Drücken Sie beim Betrachten einer Diashow die
-Taste, um das Diashowmenü anzuzeigen:
U
S lide S how E ffec ts
S lide S how Del ay
Heben Sie mit '/, den Cursortasten auf der
Fernbedienung einen Menüpunkt hervor und drücken
Sie zum Auswählen >.
< Diashow-Eekte: Wählen Sie mit den
Cursortasten einen der folgenden Eekte:
<Horizontales Rollen
<Ausblenden
<Rollade
<Kein
Bestätigen Sie die Auswahl mit
< Diashow-Verzögerung: Wählen Sie mit den
Cursortasten die Zeitverzögerung
'/,
zwischen den Bildern:
<5 Sekunden
<2 Sekunden
<1 Sekunde
<Keine
<10 Sekunden
<15 Sekunden
<30 Sekunden
Bestätigen Sie die Auswahl mit
Off O ff P lay
Wiedergabe
modus
No ne
5 s ec (s )
O
.
'/,
O
Musik während des Betrachtens von Bildern
wiedergeben
Drücken Sie während der Wiedergabe von
Musikdateien die Taste O, um das Wiedergabemenü
anzuzeigen. Heben Sie mit den '/, Cursortasten
auf der Fernbedienung „Bilder durchsuchen“ hervor
und drücken Sie O. Wählen Sie die Bilder und geben
Sie sie wie auf Seite unter “Das Wiedergabemenü” auf
seite D-18 beschrieben, wieder. Die JPEG-Bilder werden
während der Musikwiedergabe weiterhin angezeigt.
HINWEIS
< Bei der Wiedergabe von JPEG-Dateien
und gleichzeitiger Musik, beeinussen die
Wiedergabesteuerungen nur die Wiedergabe
der JPEG-Dateien.
< Steuerung der Musikdateien:
1. Zum Beenden der JPEG-Diashow und
zum Anzeigen des Wiedergabemenüs
Drücken Sie die „stop“-Taste
2. Heben Sie mit den
Cursortasten auf der Fernbedienung
.
„Bei der Wiedergabe“ hervor und
drücken Sie O. Die Steuerelemente
für die Wiedergabe beeinflussen jetzt
Musikwiedergabe.
'/,
#
Deutsch
.
Drücken Sie erneut Status, um die DateiInformationstafel auszublenden. Beachten Sie, dass
die Datei-Informationstafel bei der Wiedergabe von
Musikdateienst stets gezeigt wird.
D-19
Page 92
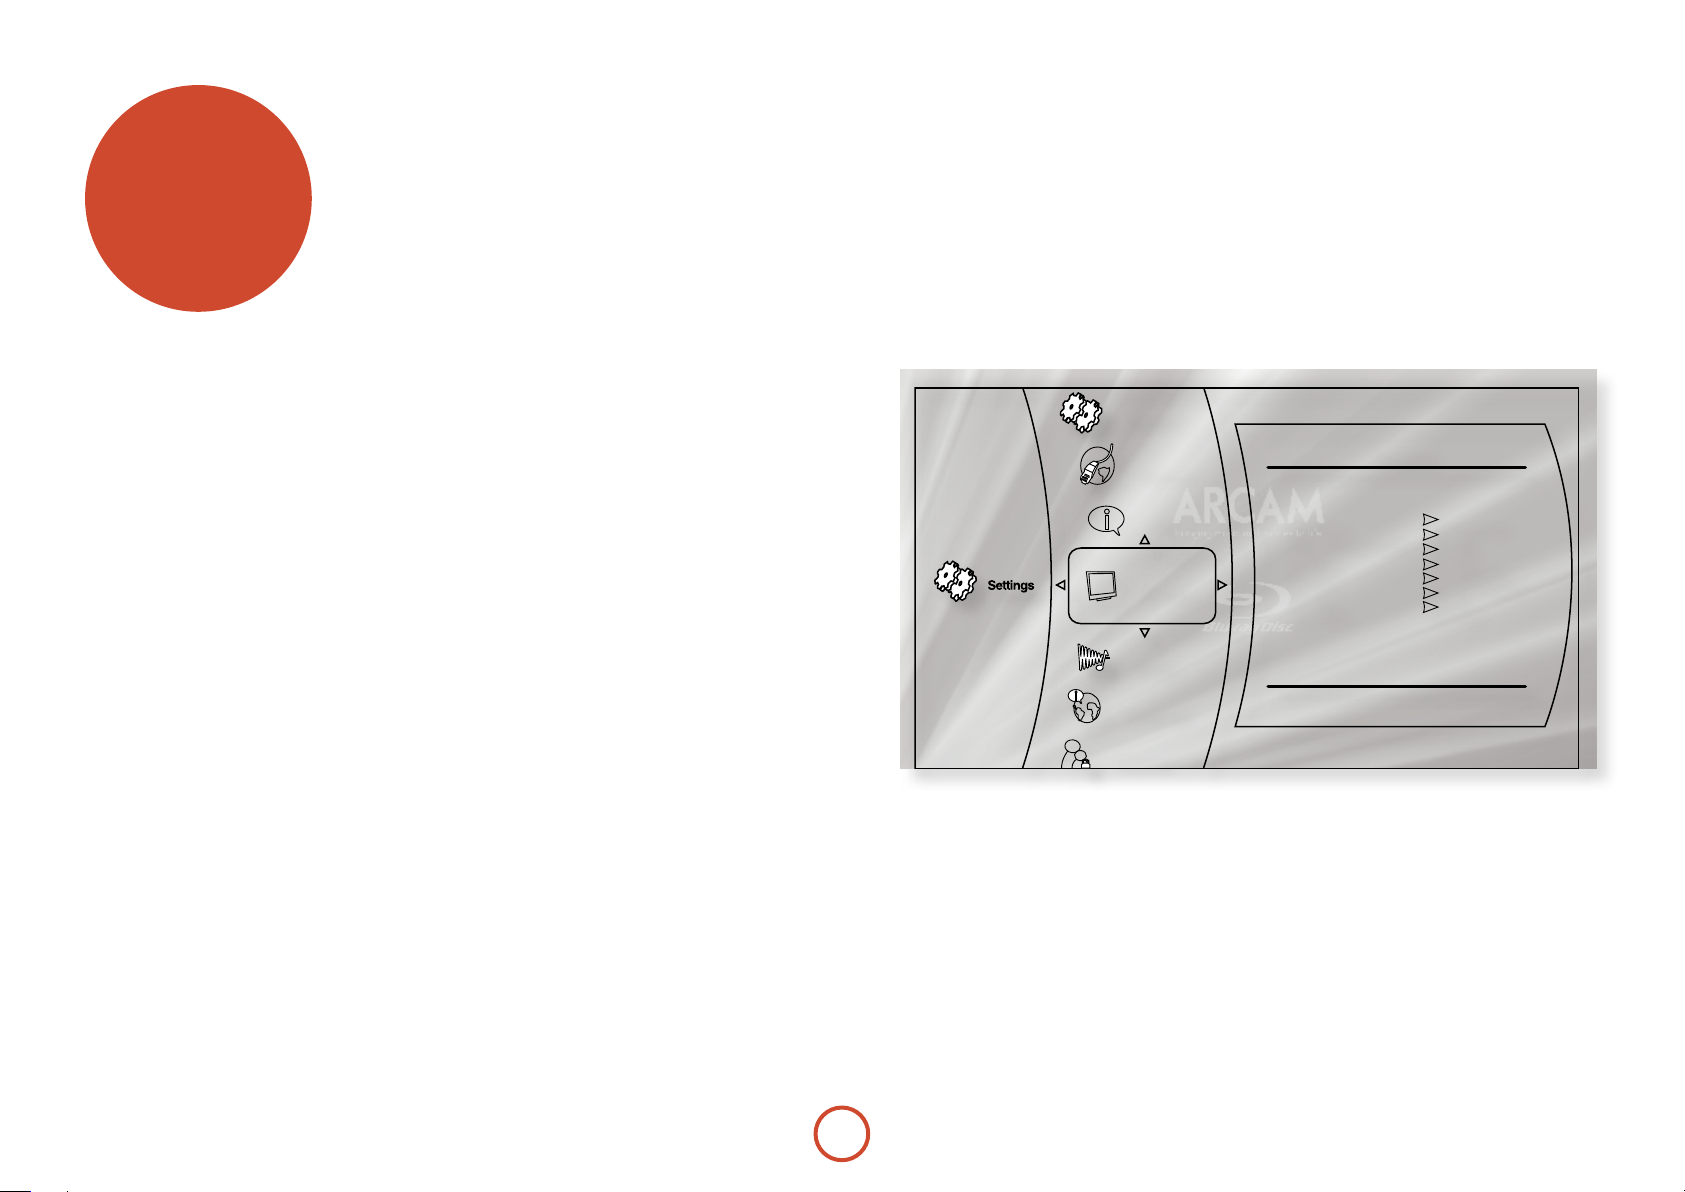
Einstellungs-
menüs
Mit den Einstellungsmenüs können Sie alle
Einstellungen Ihres BDP100 kongurieren. Die
nächsten Seiten führen Sie durch die Menüpunkte und
erklären Ihnen ihre Funktion Die Einstellungsmenüs
können entmutigend aussehen, wenn Sie noch keine
Erfahrung bei der Einrichtung eines Heimkinos haben,
aber die meisten von ihnen müssen nur einmal bei der
Ersteinstellung des Systems konguriert werden.
Die einzige Möglichkeit, die Einstellungsmenüs unter
Benutzung der On-Screen-Display (OSD)-Fähigkeit des
BDP100 anzuzeigen, besteht auf Ihrem Anzeigegerät
(Fernseher oder Projektor). Um das OSD für die
Ersteinrichtung anzuzeigen, schließen einen der
Video-Ausgänge an Ihr Anzeigegerät an (oder an einen
SV-Receiver, der an Ihr Anzeigegerät angeschlossen ist).
Aufrufen des Einstellungsmenüs
Zum Aufrufen des Einstellungsmenüs verwenden Sie
die ' und , Cursortasten, mit denen Sie die
„Einstellungen“-Option im Hauptmenü hervorheben.
Wenn das Hauptmenü momentan nicht angezeigt
wird, zeigen Sie es mit SETUP auf der Fernbedienung
an. Beachten Sie, dass während der Wiedergabe von
Musik-, Video- oder JPEG.Dateien weitere Tastendrucke
erforderlich sind, um die Verzeichnisstruktur zu
verlassen. Rufen Sie mit > das Einstellungenmenü auf.
Instabiles OSD-Menü oder instabile
Bildanzeige?
Die Standard-Videoauösung des BDP100-Ausgangs
beim ersten Einschalten wurde nach den nationalen
Standards des Landes gewählt, so dass die meisten
Anzeigegeräte sich mit das Video-Signal automatisch
synchronisieren können. Dies kann im Abschnitt
Videoausgänge des Setupmenüs geändert werden.
Wenn die Ausgangsauösung und die Bildrate auf eine
Einstellung eingestellt wurden, die Ihr Anzeigegerät
nicht unterstützt, kann das Bild instabil oder
möglicherweise gar nicht angezeigt werden. Wenn
dies geschieht, schließen Sie den BDP100 mit Hilfe des
Composite-Videoanschlusses direkt an Ihr Anzeigegerät
an, um die Menüs anzuzeigen. Sobald die richtigen
Videoeinstellungen eingegeben worden sind, kann ein
Anschluss mit höherer Qualität verwendet werden.
Navigieren in den Menüs
Sie können sich mit den Cursor (Pfeil)-Tasten auf der
Fernbedienung in den Menüs des BDP100 bewegen.
1. Zum anzeigen des Hauptmenüs drücken Sie die
SETUP-Taste.
2. Bewegen Sie sich mit den Tasten
den Überschrien des Hauptbereichs im linken
Feld nach oben oder unten.
3. Sobald Sie den Hauptbereich hervorgehoben
haben, den Sie benötigen, rufen Sie den Bereich
mit der Taste
auf.
E
4. Bewegen Sie sich mit den Tasten
den Bereichseinstellungen im rechten Feld nach
oben oder unten. Einige Einstellungen werden
grau dargestellt. Diese dienen entweder nur zur
Information (z. B. eingehende Abtastfrequenz)
oder sind derzeit nicht wählbar (z. B. NetzwerkIP-Adresse, wenn DHCP verwendet wird).
5. Ein Tastendruck auf > wählt eine Einstellung
zum Ändern aus.
6. Ändern Sie mit
und C die Einstellung.
B
7. Bestätigen Sie die Einstellung mit
zu Schritt 4 zurück, um die anderen Einstellungen
in dem aktuellen Bereich anzupassen.
8. Gehen Sie mit
oder RETURN zum vorherigen
<
Bildschirm zurück, um einen anderen Bereich
zum Einstellen auszuwählen.
und C in
B
und C in
B
OK. Gehen Sie
S ys tem
Ne twork
Info
Dis play
Audio
L angua ge
P arenta l
Dis play
HD MI S tatu s
HD MI P ref erre d F orm at
TV T ype
R es olu tion
TV A s pec t
F ilm M ode
C olor De pth
C onne cted
720 p
NT S C
HD MI A uto
16: 9 P ill arb ox
Of f
24 Bi t
D-20
Page 93

Display
TV-Typ – Stellt das Format des Videosignals ein. Wenn
die Farbe oder Bildqualität des analogen Videos nicht
korrekt dargestellt wird, ändern Sie diese Einstellung. Es
muss bei normalem Gebrauch nicht angepasst werden.
< NTSC: Videostandard in den USA und Kanada.
< PAL: Videostandard in Europa, Australien und
China.
Auösung – Einstellen der Videoauösung der
und COMPONEN T VIDEO-Ausgänge.
< HDMI Auto: Stellt die bevorzugte Auösung für
den Fernseher ein.
< 1080p: Full HD Progressive Video.
< 1080i: Interlaced HD-Video.
< 720p: Progressive HD-Video.
< 480p/576p: 480 Zeilen (NTSC) oder 576 Zeilen
(PAL) Pprogressive Video
< 480i/576i: 480 Zeilen (NTSC) oder 576 Zeilen
(PAL) Standardauösung Interlaced Video
ANMERKUNG
< Die HDMI-Einstellung „Auto“ kann
möglicherweise nicht auf die bestmögliche
Auösung eingestellt werden. Wenn Sie ein
1080p Full HD-Anzeigegerät besitzen, stellen
Sie die Auösung auf 1080p.
< Für vollständige Details über die
Ausgangseauösungen, die an
unterschiedlichen Ausgängen verfügbar sind,
schlagen Sie in der Tabelle auf seite D-25 nach.
TV-Bildseitenverhältnis – Stellt das Seitenverhältnis
(Format) Ihres Displays ein.
< 16:9 Breitbild: Für Breitbild-Fernseher. 4:3 Bilder
werden vergrößert, bis sie auf den Bildschirm
passen.
< 16:9 Pillarbox: Für Breitbild-Fernseher. 4:3 Bilder
werden vollständig, mit vertikalen schwarzen
Balken an den Seiten angezeigt.
< 4:3 Letterbox: Für 4:3 nicht Breitbild-Fernseher.
Breitbild-Inhalte (16:9) werden mit schwarzen
Balken am oberen und unteren Rand angezeigt.
24p-Modus – Aktiviert oder deaktiviert den 24 Bilder
pro Sekunde-Videoausgang (1080/24p).
HDMI-
ANMERKUNG
< 1080/24p Videosignale können nur mittels
HDMI-Anschluss ausgegeben werden.
< Die angeschlossenen Geräte (AV-Receiver,
Fernseher/Projektor) müssen
1080/24p-kompatibel sein.
< Die Auösung muss auf 1080p oder HDMI
Auto eingestellt werden.
< Ein: Wählt die Ausgabe von 24p-Signalen auf dem
HDMI-Ausgang.
< Aus: Deaktiviert den 24p-Videoausgang.
Farbtiefe – Stellt das Niveau der Deep-ColorVerarbeitung ein, die auf den HDMI-Videoausgang
angewendet wird.
< 36 Bit: Wählt die Ausgabe von 36 Bit Deep-Color-
Signalen auf dem
< 30 Bit: Wählt die Ausgabe von 30 Bit Deep-Color-
Signalen auf dem
< 24 Bit: Wählt die Ausgabe von 24 Bit
Standardfarbsignalen auf dem
(Deep-Color aus).
ANMERKUNG
< Die angeschlossenen Geräte (AV-Receiver,
Fernseher/Projektor) müssen Deep-Colorkompatibel sein, um 30/36 Bit Deep-ColorSignale zu verwenden. Schlagen Sie in der
Bedienungsanleitung Ihres AV-Receivers und
Fernsehers nach.
< Alle System-HDMI-Anschlusskabel müssen
Deep-Color-kompatibel sein, um 30/36 Bit
Deep-Color-Signale zu verwenden.
< Wenn nach dem Ändern der Deep-Color-
Einstellung das Bild ackert oder anormal
dargestellt wird, schließen Sie das Gerät mit
einem Composite-Videokabel an und ändern
Sie die Einstellung auf einen Wert, der vom
Anzeigegerät unterstützt wird.
HDMI-Ausgang.
HDMI-Ausgang.
HDMI-Ausgang
Audio
PCM-Downsampling – Stellt die maximale Abtastrate
des Audioausgangs des OPTIS CHEN oder KOAXIALEN
DIGITALAUSG ANG EIN.
< 96kHz: Gibt digitales Audio mit einer 96 kHz-
Abtastrate aus (beste Qualität).
< 48kHz: Gibt digitales Audio mit einer 48kHz-
Abtastrate aus (am besten kompatibel).
ANMERKUNG
< Wenn die angeschlossenen Geräte (z. B.
AV-Receiver) 96kHz nicht unterstützen,
führt diese Einstellung zu keiner Tonausgabe
oder lautem Rauschen. Wenn das der Fall ist,
stellen Sie PCM-Downsampling auf 48kHz.
Digitaler Ausgang – Stellt die Audioformatausgabe auf
HDMI, OP TISCH oder KOAXIAL DIG ITALAUSGAN G.
< Bitstream HD: Ausgabe des HD-Bitstream Blu-
ray-Disk Soundtracks für die Decodierung in
Ihrem AV-Receiver (HDMI nur Ausgang, benötigt
kompatibelen AV-Receiver).
< Bitstream Legacy: Ausgabe von zugehörigem
veraltetem Format für den Soundtrack. Diese
Option ist für ältere AV-Receiver geeiget, die nicht
mit HD, HDMI-Audio oder DTS kompatibel
sind.
< Bitstream Mixed: Wandelt Surround-Audio in
DTS 5.1 Surround-Format um. Diese Option
bietet für DTS-kompatiblen AV-Receiver die beste
Qualität, die nicht mit HD oder HDMI-Audio
kompatibel sind.
< PCM 7.1: Dekodiert alle Formate im Player und
gibt PCM-Audio aus. Verwenden Sie diese Option
für HD-Receiver, die nicht alle HD-Formate
decodieren können. Die
KOAXIALEN Digitlausgänge geben Stereo PCM-
Audio aus.
< PCM 5.1: Wie PCM 7.1, aber alle Surround-
Soundtracks im HD 7.1-Format werden in das
5.1-Surroundformat konvertiert (nur
Ausgang).
< PCM Stereo: Dekodiert alle Formate im Player
und gibt PCM-Audio aus. Alle SurroundSoundformate werden in Stereo auf allen
Audioausgängen konvertiert.
ANMERKUNG
< Das Signal am
durch die unterstützten Formate der
angeschlossenen Geräte erkannt.
< Für vollständige Einzelheiten über die
Ausgabeformate schlagen Sie in der Tabelle
auf seite D-25 nach.
Kontrolle des Dynamikbereichs – Legt fest, ob der
Dynamikbereich zwischen den lautesten und leisesten
OPTISC HEN und
HDMI-
HDMI-Ausgang wird auch
Töne komprimiert wird, wenn ein Dolby Digital-,
Dolby Digital Plus- oder DolbyTrueHD-Audiotrack
wiedergegeben wird.
< Ein: Schaltet die Kontrolle des Dynamikbereichs
ein, so dass leise Geräusche besser hörbar sind.
< Aus: Schaltet die Kontrolle des Dynamikbereichs
aus.
< Auto: Ermöglicht die eingebettete Kodierung
innerhalb einer Dolby TrueHD-Tonspur, um
den Dynamikbereich einzustellen. Für andere
Tonspuren ist die Antwort wie ‚Ein‘.
Sprache
OSD – Stellt die Sprache für das On Screen Display
(OSD) ein.
Menü – Stellt die Sprache für das Diskmenü und das
Popup-Menü ein.
< Auto: Stellt bevorzugte Sprache der Disk ein.
Audio – Stellt die Sprache für die Tonspur ein.
< Auto: Stellt bevorzugte Sprache der Disk ein.
Untertitel – Stellt die Sprache für die Untertitel ein.
< Aus: Zeigt keine Untertitel an.
ANMERKUNG
< Die Möglichkeit, eine bestimmte Sprache
auswählen können, hängt von der
Wiedergabe-Disk ab.
Kindersicherung
Einstellungen der Kindersicherung können aktiviert
werden, um das Anzeigen von Disks oder Szenen
zu verhindern, die ungeeignet für Kinder sind. Zum
Aktivieren oder Deaktivieren der Kindersicherung ist
ein 4-stelliger Code erforderlich. Die Kindersicherung
besitzt verschiedene Ebenen. Abhängig zur eingestellten
Stufe kann eine Disk angehalten oder bestimmte Szenen
geschnitten oder durch alternative Szenen ersetzt
werden. Das hängt von der Disk ab.
Aktivieren der Kindersicherung:
1. Wählen Sie das Kindersicherungsmenü:
Einstellungen > Kindersicherung
2. Wenn Kindersicherung eingeschaltet ist, müssen
Sie Ihre PIN mittels der numerischen Tasten auf
der Fernbedienung eingeben. Die Standard-PIN
lautet 3308.
u
>
Deutsch
D-21
Page 94
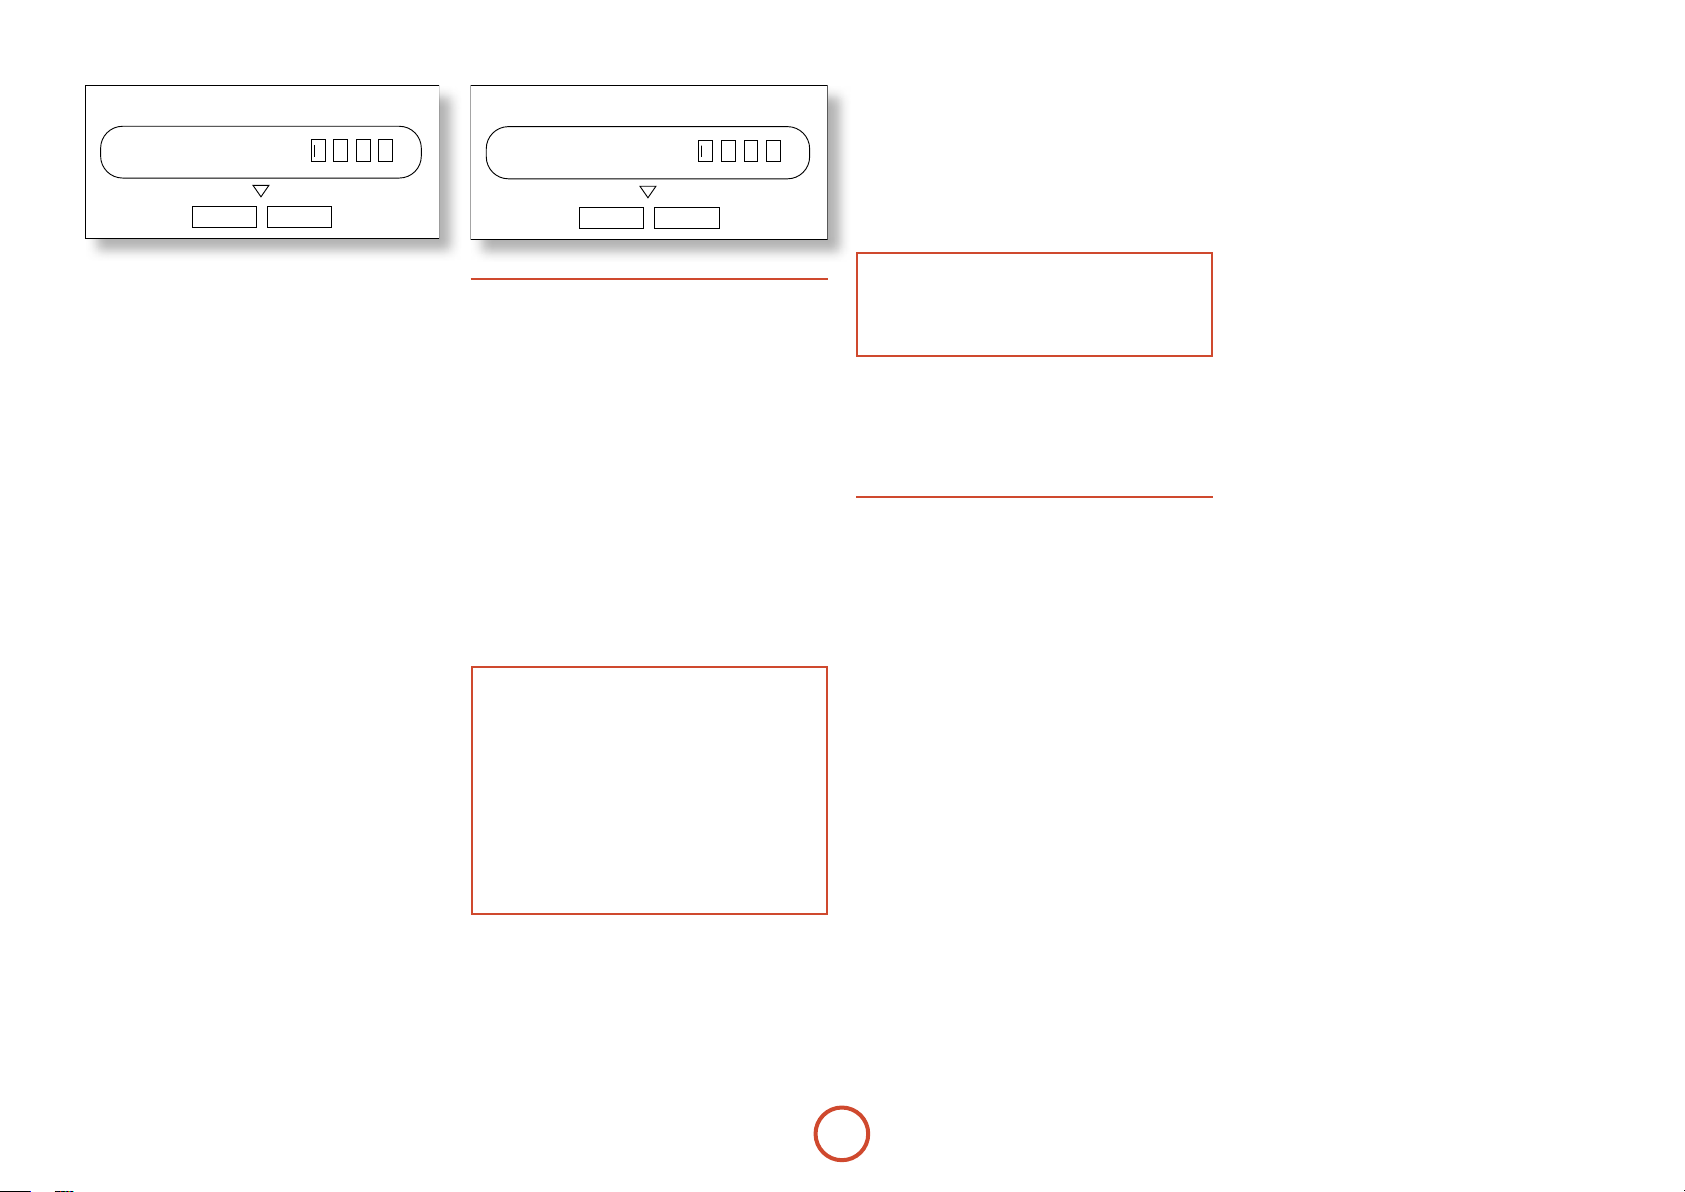
P lea s e Input 4 -Digit P are nta l P as sword :
P arental Pa s s word
OK Ca ncel
3. Sobald das Kindersicherungsmenü geöffnet
wurde, wählen Sie mit den '/, Cursortasten
auf der Fernbedienung aus folgenden Punkten.
Wählen Sie mit > einen Punkt.
Kindersicherung – Legt fest, ob Kindersicherung
aktiviert oder deaktiviert ist.
< Aus: Alle Disks werden wiedergeben.
< Ein: Die Diskwiedergabe wird entsprechend zur
eingestellten Kindersicherungsstufe mit dem
folgenden Menüpunkt eingestellt.
Altersstufe – Stellen Sie den Grad der
Diskbeschränkung ein. Je niedriger der Wert, desto
strenger die Beschränkung.
< 1 [Kid Safe]: Geeignet für Kinder.
< 2 [G]: Allgemeines Publikum.
< 3 [PG]: Elterliche Aufsicht empfehlenswert
< 4 [PG-13]: Ungeeignet für Kinder unter 13
Jahren.
< 5 [PG-R]: Elterliche Aufsicht erforderlich.
< 6 [R]: Eingeschränkt: Kinder unter 17 Jahren
dürfen nur mit einer erwachsenen Elternteils
oder erziehungsberechtigten Begleitperson Kinos
besuchen.
< 7 [NC-17]: Kinos dürfen nicht jemanden jünger
als 17 Jahre einlassen.
< 8 [Erwachsen]: Disks mit einer beliebigen
Bewertung (Erwachsene/Allgemein/Kinder)
können wiedergeben werden.
Kindersicherungspasswort – Drücken Sie bei
hervorgehobener Option die Taste
Passwort einzugeben. Geben Sie mit den numerischen
Tasten auf der Fernbedienung einen neuen 4-stelligen
Code ein, gehen mit den Curortasten auf der
Fernbedienung zur Taste OK auf dem Bildschirm und
drücken anschließend OK auf der Fernbedienung. Sie
werden aufgefordert, den Code zur Bestätigung erneut
einzugeben, wiederholen den obenstehenden Prozess.
, um ein neues
>
Please enter a new Parental Control Password:
P arental Pa s sword
OK Cancel
System
Optische Disk Autoplay – steuert, ob eine optische
Disk (z. B. Blu-ray Disk, DVD, CD) automatisch
wiedergegeben wird, nachdem sie geladen wurde.
< Ein: Optische Disks werden automatisch
wiedergegeben.
< Aus: Zur Wiedergabe einer Disk muss
gedrückt werden.
BD-Live Internetzugang – Legt die Einschränkungen
für Internetzugang fest.
< Beschränkter Zugri: Nur Blu-ray-Disks mit
Besitzerzertizierung dürfen auf das Internet
zugreifen.
< Zugang stets zulassen: Alle BD-Live-Disks dürfen
auf BD-Live-Websites zugreifen.
< Beschränkter Zugri: Keine BD-Live-Disks darf
auf BD-Live-Websites zugreifen.
ANMERKUNG
< Die Online verfügbaren Funktionen hängen
von der Disk ab.
< Beachten Sie die BD-Live-Anweisungen der
Disk für Informationen über den Zugri auf
Online-Inhalte.
< Um den Zugri auf Online-Inhalte zulassen,
muss der BDP100 mit dem Internet
verbunden und korrekt eingerichtet sein.
Siehe seite D-9 für Netzwerkverbindungen und
seite D-22 für Netzwerkeinstellungen.
BD-Live-Speicher – BD-Live-Inhalte werden auf dem
eingesteckten USB-Speichergerät gespeichert. Dieser
Menüpunkt zeigt den restlichen Speicherplatz auf dem
USB-Speichergerät an.
Blu-Ray-Speicher löschen – Wenn dieser Punkt
hervorgehoben ist, drücken Sie
Inhalte zu löschen, die auf dem USB-Speichergerät
gespeichert sind.
OK, um die BD-Live-
PLAY
Bildschirmschonerdauer –Legt die Dauer eines
Standbilds fest, bevor der Bildschirmschoner
angezeigt wird. Der Bildschirmschoner verhindert
Bildschirmschäden durch Einbrennen eines Standbilds.
< Aus: Deaktiviert die Bildschirmschonerfunktion.
< 5/10/20/30 Minuten: Legt die Zeitspanne fest, die
ein Standbild angezeigt werden kann, bevor der
Bildschirmschoner aktiviert wird.
ANMERKUNG
< Der Bildschirmschoner kann durch Drücken
einer beliebigen Taste auf dem Gerät oder der
Fernbedienung deaktiviert werden.
Einstellungen zurücksetzen – Wenn dieser
Punkt hervorgehoben ist, drücken Sie OK, um
alle Einstellungen auf die Werkseinstellungen
zurückzusetzen (ausgenommen die der
Kindersicherung).
Netzwerk
Wenn Sie auf BD-Live-Websites nutzen und
Inhalte herunterladen möchten, ist ein aktiver und
kongurierter Internetzugang erforderlich. Siehe seite D-9
für physikalische Anschlüsse.
Die meisten Heim-Netzwerke kongurieren die
Verbindung mittels DHCP automatisch. Wenn Ihr
Netzwerk nicht automatisch konguriert wird, müssen
Sie folgende Einstellungen kennen:
IP-Adresse
<
Subnetzmaske
<
Gateway
<
Primärer DNS
<
Sekundärer DNS
<
Kabelgebundenes Netzwerk
Wählen und drücken Sie zum Einstellen der NetzwerkVerbindungsparameter OK.
Linkstatus – Nur zur Information
MAC-Adresse – Nur zur Information
IP-Modus – Legt fest, ob die Netzwerkeinstellungen
automatisch oder manuell eingestellt werden.
Aus: Deaktiviert die Netzwerkfunktionen.
<
Manuell: Die Einstellungen manuell eingeben,
<
nur für erfahrene Benutzer.
Dynamisch: Lässt mittels des Netzwerk-DHCP-
<
Servers den angeschlossenen Router oder das
Modem die Netzwerk-Einstellungen automatisch
kongurieren. Diese Einstellung sollte für die
meisten Heimnetzwerke verwendet werden.
Die folgenden Einstellungen sind nur verfügbar, wenn
der IP-Modus auf Manuell eingestellt ist:
IP-Adresse – Drücken Sie OK, um die von Ihrem
Netzwerk-Administrator zugewiesene IP-Adresse Ihres
Players festzulegen. Navigieren Sie mit den Cursortasten
zwischen den Segmenten und geben Sie die Adresse mit
den Zierntasten auf der Fernbedienung ein. Gehen Sie
zur OK-Taste auf dem Bildschirm und drücken Sie zum
Speichern der Einstellungen OK auf der Fernbedienung.
Subnetzmaske – Drücken Sie OK, um die
Subnetzmaske des Netzwerks festzulegen. Navigieren
Sie mit den Cursortasten zwischen den Segmenten und
geben Sie die Subnetzmaske mit den Zierntasten auf
der Fernbedienung ein. Gehen Sie zur OK-Taste auf
dem Bildschirm und drücken Sie zum Speichern der
Einstellungen OK auf der Fernbedienung.
Gateway – Drücken Sie OK, um die IP-Adresse des
Internet-Gateways festzulegen. Navigieren Sie mit den
Cursortasten zwischen den Segmenten und geben Sie
die Adresse mit den Zierntasten auf der Fernbedienung
ein. Gehen Sie zur OK-Taste auf dem Bildschirm und
drücken Sie zum Speichern der Einstellungen OK auf
der Fernbedienung.
Primärer DNS – Drücken Sie OK, um die IP-Adresse
des primären DNS festzulegen. Navigieren Sie mit den
Cursortasten zwischen den Segmenten und geben Sie
die Adresse mit den Zierntasten auf der Fernbedienung
ein. Gehen Sie zur OK-Taste auf dem Bildschirm und
drücken Sie zum Speichern der Einstellungen OK auf
der Fernbedienung.
Sekundärer DNS – Drücken Sie OK, um die IP-Adresse
des sekundären DNS festzulegen. Navigieren Sie mit den
Cursortasten zwischen den Segmenten und geben Sie
die Adresse mit den Zierntasten auf der Fernbedienung
ein. Gehen Sie zur OK-Taste auf dem Bildschirm und
drücken Sie zum Speichern der Einstellungen OK auf
der Fernbedienung.
Netzwerk-Test
Starten Sie mit OK einen Netzwerk Test. Wenn die
automatische Konguration (DHCP) vom Netzwerk
unterstützt wird, konguriert dieser auch automatisch
die Netzwerkeinstellungen, wenn diese nicht
konguriert wurden.
D-22
Page 95

Fehlerbehebung
Sollte sich mit dem System ein Problem ergeben, dann überprüfen Sie zunächst mit dieser Tabelle, bevor Sie sich an den Kundendienst wenden.
Wenn die Störung weiterhin besteht, versuchen Sie das Problem durch erneutes Aus- und Einschalten des Gerätes zu lösen. Wenn es Ihnen nicht gelingt, das Problem zu lösen, wenden Sie sich
an Ihren Händler. Sie dürfen unter keinen Umständen versuchen, das Gerät selbst reparieren, da dies die Garantie erlöschen lässt!
Problem Mögliche Ursache Abhilfe
Keine Stromversorgung: • Das Netzkabel ist nicht angeschlossen.
• Schlechter Kontakt an der Steckdose oder die Steckdose wurde ausgeschaltet.
Keine Wiedergabe • Die Disk wurde verkehrt herum eingelegt.
• Die Disk ist nicht abspielbar.
• Die Disk ist verschmutzt.
• Die aufgenommene Disk wurde nicht richtig abgeschlossen.
• Die Altersstufe ist nicht richtig eingestellt.
• Das Symbol für einen ungültigen Vorgang wird angezeigt.
Fehlfunktion • Die Disk ist verkratzt, verschmutzt, schlecht aufgenommen oder nicht
abspielbar.
Kein Bild • Die Videokabel wurden abgesteckt.
• Falsche Auswahl der Eingangsquelle am Fernseher.
• Die Disk ist nicht abspielbar.
Rauschen oder
verzerrtes Bild
Abnormales Bild oder
kein Bild
Kurze Pause zwischen
den Bildern
Kein Ton • Die Audiokabel wurden abgesteckt.
Rauschen oder
verzerrtes Bild
BD-LIVE Inhalte
können nicht geladen
werden
Die Fernbedienung
funktioniert nicht.
• Das Gerät ist mit einem Aufnahmegerät direkt verbunden und der
Kopierschutz-Funktion ist aktiviert.
• Die Disk ist verschmutzt.
• Das Gerät bendet sich im schnellen Vor- oder Rücklauf oder bei der
Einzelbildwiedergabe.
• Die Auösung wurde für Videosignale nicht richtig eingestellt, die über die
COMPONENT- und HDMI-Ausgänge ausgegeben werden.
• Der Fernseher unterstützt kein HDCP.
• Die TV-Typ dieses Gerät unterscheidet sich von dem Ihres Fernsehers oder
DVD-Players.
• Der Layerübergang erfolgt während der Wiedergabe von DVD-Videos usw.
bei der Umkodierung in das Dual-Layerformat.
• Die Lautsprecher wurden vom Verstärker abgesteckt.
• Falsche Auswahl der Eingangsquelle am Verstärker.
• Die Disk ist verschmutzt.
• Schlechte Verbindungen.
• Schlechte Verbindung zwischen diesem Gerät und dem Breitband-Router
und/oder Modem.
• Das USB-Speichergerät ist abgesteckt.
• Die BD-Live-Internetzugang ist auf „Beschränkter Zugri“ eingestellt.
• Die BD-Disk unterstützt kein BD-LIVE.
• Die Netzwerkeinstellungen ist nicht richtig eingerichtet.
• Die Batterien sind nicht eingelegt oder sind erschöp.
• Der Fernbedienungssensor wurde abgedeckt.
• Schließen Sie das Netzkabel gut an.
• Prüfen Sie die Steckdose mit einer Lampe oder einem anderen Gerät.
• Legen Sie die Disk mit der bedruckten Seite nach oben ein.
• Verwenden Sie eine abspielbare Disk.
• Reinigen Sie die Disk.
• Legen Sie eine Disk ein, die richtig abgeschlossen wurde.
• Stellen Sie die richtige Altersstufe ein. (Siehe seite D-21).
• Stellen Sie die richtige Einstellung her.
• Drücken Sie den Netzschalter, um das Gerät auszuschalten, drücken Sie erneut den
Netzschalter und entfernen Sie anschließend die Disk.
• Schließen Sie die Kabel richtig an.
• Wählen Sie die richtige Eingangsquelle.
• Verwenden Sie eine abspielbare Disk.
• Schließen Sie das Gerät derart an, dass das Bildsignal direkt an den Fernseher
übertragen wird.
• Reinigen Sie die Disk.
• Manchmal können einige wenige Bildverzerrungen aureten. Es handelt sich nicht
um eine Fehlfunktion.
• Stellen Sie die richtige Auösung ein. (Siehe seite D-21).
• Dieses Gerät überträgt keine Videosignale über den HDMI-Anschluss zu einem
Fernseher, der kein HDCP unterstützt. Es handelt sich nicht um eine Fehlfunktion.
• Stellen Sie den richtigen TV-Typ ein. (Siehe seite D-21).
• Manchmal tritt eine kurze Pause auf. Es handelt sich nicht um eine Fehlfunktion.
• Schließen Sie die Kabel richtig an.
• Schließen Sie die Lautsprecher richtig an.
• Wählen Sie die richtige Eingangsquelle.
• Reinigen Sie die Disk.
• Überprüfen Sie die Verbindungen und schließen Sie alle Kabel gut an.
• Überprüfen Sie die Verbindungen und schließen Sie alle Kabel gut an.
• Schließen Sie das USB-Speichergerät an dieses Gerät an.
• Stellen Sie ihn auf „Zugang stets zulassen“ ein (Siehe seite D-22.)
• Legen Sie eine Disk ein, die BD-LIVE unterstützt.
• Stellen Sie die richtigen Netzwerkeinstellungen ein. (Siehe seite D-22).
• Ersetzen Sie die Batterien.
• Entfernen Sie das Hindernis.
Deutsch
D-23
Page 96

Audio- u. Video-
Ausgabeformate
START
Audio-Ausgabeformat
Das Audio-Ausgabeformat, das an den digitalen
Audioausgängen zu Verfügung steht, hängt von
dem wiedergegebenen Soundtrackformat ab, dem
verwendeten Audioausgang und der Digitalausgangs-
Einstellung im Audio-Einstellungenmenü ab (“Audio”
auf seite D-21). Di e Tabelle gegenüber stellt alle möglichen
Kombinationen dar.
Verwenden Sie das Flussdiagramm auf dieser Seite, um
Sie zur richtigen Einstellung Ihres Heimkino-Setups zu
führen.
Benutzen Sie einen AC-Receiver?
JA
Schließen Sie Audio mittels
HDMI an?
JA
Ist Ihr Receiver
mit HDMI1.3 (Dolby
TrueHD/DTS HD)
kompatibel?
JA
NEIN
NEIN
NEIN
Verwenden Sie „PCM-Stereo“?
NEIN
Schließen Sie
digitales Audio optisch
oder koaxial an?
JA
Unterstützt Ihr Receiver
das DTS-Audioformat?
JA
Verwenden Sie „Bitstream
Mixed“
NEIN
Verwenden Sie
„Bitstream Legacy“?
Möchten Sie
sekundäres Audio
von Blu-ray Disks
wiedergeben?
NEIN
Verwenden Sie
„Bitstream HD“?
Besitzen
JA
Sie ein 7.1-Format
Surround-Sound
Lautsprechersystem?
Verwenden Sie „PCM 7.1“?
JA
NEIN
Besitzen Sie
ein Surround-Sound
Lautsprechersystem?
Verwenden Sie „PCM 5.1“?
JA
NEIN
Verwenden Sie
„PCM-Stereo“?
D-24
Page 97

Audioformat Einstellung Digitalausgang HDMI-Ausgang Optischer/Koaxausgang
Bitstream HD Dolby Digital 5.1 Dolby Digital 5.1
Bitstream Legacy Dolby Digital 5.1 Dolby Digital 5.1
Dolby Digital
Dolby Digital Plus /
Dolby TrueHD
DTS-HD High
Resolution Audio/
DTS-HD Master
Audio
DTS
LPCM 7.1
(48 kHz / 96 kHz)
LPCM 5.1 192 kHz
LPCM 2.0
(44,1 H / 48 H)
Bitstream Mixed DTS 5.1 DTS 5.1
PCM 7.1 PCM 5.1 PCM Stereo
PCM 5.1 PCM 5.1 PCM Stereo
PCM Stereo PCM Stereo PCM Stereo
Bitstream HD Dolby Digital Plus / Dolby
TrueHD
Bitstream Legacy Dolby Digital 5.1 Dolby Digital 5.1
Bitstream Mixed DTS 5.1 DTS 5.1
PCM 7.1 PCM 7.1 PCM Stereo
PCM 5.1 PCM 5.1 PCM Stereo
PCM Stereo PCM Stereo PCM Stereo
Bitstream HD DTS-HD High Resolution
Audio / DTS-HD Master Audio
Bitstream Legacy DTS 5.1 DTS 5.1
Bitstream Mixed DTS 5.1 DTS 5.1
PCM 7.1 PCM 7.1 PCM Stereo
PCM 5.1 PCM 5.1 PCM Stereo
PCM Stereo PCM Stereo PCM Stereo
Bitstream HD DTS 5.1 DTS 5.1
Bitstream Legacy DTS 5.1 DTS 5.1
Bitstream Mixed DTS 5.1 DTS 5.1
PCM 7.1 PCM 5.1 PCM Stereo
PCM 5.1 PCM 5.1 PCM Stereo
PCM Stereo PCM Stereo PCM Stereo
Bitstream HD PCM 7.1 PCM Stereo
Bitstream Legacy PCM 7.1 PCM Stereo
Bitstream Mixed DTS 5.1 DTS 5.1
PCM 7.1 PCM 7.1 PCM Stereo
PCM 5.1 PCM 5.1 PCM Stereo
PCM Stereo PCM Stereo PCM Stereo
Bitstream HD PCM Stereo PCM Stereo
Bitstream Legacy PCM Stereo PCM Stereo
Bitstream Mixed DTS 5.1 PCM Stereo
PCM 7.1 PCM Stereo PCM Stereo
PCM 5.1 PCM Stereo PCM Stereo
PCM Stereo PCM Stereo PCM Stereo
Bitstream HD PCM Stereo PCM Stereo
Bitstream Legacy PCM Stereo PCM Stereo
Bitstream Mixed DTS 2.0 DTS 2.0
PCM 7.1 PCM Stereo PCM Stereo
PCM 5.1 PCM Stereo PCM Stereo
PCM Stereo PCM Stereo
Dolby Digital 5.1
PCM Stereo
Video-Ausgangsauflösung
Die folgende Tabelle zeigt die Video-Ausgangsauösung
für jeden Videoausgang bei verschiedenen Einstellungen
für die Auösung (siehe “Display” auf seite D-21).
Einstellung
Auösung
Composite Videoausgang Component Videoausgang HDMI-Ausgang
NTSC PAL NTSC PAL NTSC PAL
HDMI Auto 480i 576i 1080i 1080i Bevorzugt Bevorzugt
1080p 480i 576i 1080i 1080i 1080p 1080p
1080i 480i 576i 1080i 1080i 1080i 1080i
720p 480i 576i 720p 720p 720p 720p
480p/576p 480i 576i 480p 576p 480p 576p
480i/576i 480i 576i 480i 576i 480i 576i
HINWEISE:
< Wenn die HDMI- und Component-Videoausgänge gleichzeitig benutzt werden, gibt der
Component-Videoausgang Standardauösung (480i/576i Auösung) aus.
< Kopiergeschützte DVDs können in Standard-Videoauösung über die analoge Ausgänge
ausgegeben werden (Komponenten- oder Composite).
< Wenn der BDP100 auf eine Auösung eingestellt ist, die Ihr Fernseher nicht unterstützt,
wird kein Bild angezeigt. Wenn dies der Fall ist, schließen Sie den Composite
Videoausgang an Ihren Fernseher an. Wählen Sie den entsprechenden Videoeingang an
Ihrem Fernseher, um das Menü „Einstellungen“ anzuzeigen. Ändern Sie die Auösung auf
einen Wert, der von Ihrem Fernseher unterstützt wird und ändern Sie anschließend die
Ausgänge wieder auf die gewünschte Konguration.
< Die „HDMI Auto“-Einstellung verwendet den Wert für die Auösung, den der
Fernseher anfordert. Das könnte nicht die beste Auösung sein. Es ist ratsam, in der
Bedienungsanleitung Ihres Fernsehers nachzuschlagen, um die beste Auösung zu suchen
und diese Auösung manuell einstellen.
Videoausgänge
Deutsch
D-25
Page 98

Einrichten der
CR104
Code anlernen
Die CR104 enthält eine komplette Bibliothek mit
vorprogrammierten Codes. Nachdem Sie die CR104
für Ihr Gerät eingerichtet haben, stellen Sie fest, dass
es eine oder mehrere Funktionen auf Ihrer OriginalFernbedienung gibt, die auf der Tastatur der CR104
keinen Platz haben. Als Komfortmerkmal bietet die
CR104 eine Code-Lernfunktion, mit der Sie bis zu 16
Funktionen von einer Original-Fernbedienung auf die
Tastatur der CR104 kopieren können.
Bevor Sie beginnen, achten Sie darauf, dass:
Die Original-Fernbedienung richtig funktioniert.
<
Die Fernbedienungen nicht auf Ihr Gerät
<
ausgerichtet sind.
In die Fernbedienungen neue Batterien eingelegt
<
sind.
Die Fernbedienungen nicht direktem Sonnenlicht
<
oder starken Leuchtstoröhren ausgesetzt sind.
Angelernte Funktionen hängen von der Betriebsart
ab: Sie könnten theoretisch bis zu acht verschiedene
Funktionen einer einzigen Taste zuweisen (die
CR104 kann insgesamt 16 angelernte Funktionen
verwalten).
Beispiel: So kopieren Sie die „Text anhalten“Funktion von einer TV-Fernbedienung auf
die (-Taste Ihrer CR104:
1. Legen Sie beide Fernbedienungen mit einem
Abstand von 2 bis 5 cm auf eine ache Oberäche,
mit den IR-Sensoren zueinander ausgerichtet.
2. Halten Sie auf der CR104 S, bis die Power-LED
zweimal aulinkt:
3. Drücken Sie 9 7 5. Die Power-Taste blinkt
zweimal auf:
4. Drücken Sie auf der CR104 die Gerätetaste, die
zum „Quell“-Gerät passt (z. B. wenn Sie eine
TV-Funktion anlernen möchten, drücken Sie
a
5. Drücken Sie auf der CR104 die Taste, der Sie der
erlernten Funktion zuweisen möchten (z. B. ().
Die Gerätetaste blinkt schnell.
6. Halten Sie auf der Original-Fernbedienung
die Funktionstaste gedrückt, die Sie anlernen
möchten (z. B.
Gerätetaste der CR104 zweimal aufsblinkt:
* *
* *
).
TEXT HA LTE N SIE) gedrückt, bis die
.
* *
.
.
7. Wenn Sie von dem gleichen Quellgerät andere
Funktionen anlernen möchten, wiederholen Sie
einfach die Schritte 5 und 6, während Sie die
nächste Taste drücken, die Sie anlernen möchten.
8. Halten Sie zum Verlassen des Code-Anlernmodus
gedrückt, bis die Gerätetaste zweimal aulinkt:
S
.
* *
9. Um die angelernte Funktion auf der CR104
anzuwenden, drücken Sie die Gerätmodustaste,
gefolgt von der Funktionstaste.
In diesem Beispiel drücken Sie a gefolgt von
(
Versetztes Anlernen
Sie können ein angelernte Funktion einer CR104-Taste
zuweisen, ohne diese dabei ihre ursprüngliche Funktion
verliert.
Sie können versetzte Anlernfunktionen einer beliebigen
Taste zuweisen, ausgenommen für: Gerätemodustasten
(z. B. a), S, oder Zierntasten (0 bis 9).
1. Um ein versetzte Anlernfunktion zuzuweisen,
befolgen Sie einfach die Code-Anlernschritte
im vorherigen Abschnitt. Drücken Sie während
Schritt 5 einmal S bevor Sie die Taste drücken,
der Sie die angelernte Funktion zuweisen
möchten.
2. Um auf die versetzte Funktion zuzugreifen,
drücken Sie S und anschließend die Zieltaste.
Wichtige Hinweise
Sobald Sie eine Codeanlernsitzung beginnen,
<
haben Sie etwa 10 Sekunden, um jeden Schritt
durchzuführen. Ein längerer Timeout bedeutet,
dass Sie den Vorgang erneut starten müssen.
Die Lernfunktion hängt vom Modus ab - Sie
<
können eine Funktion mittels Modus auf eine
Taste kopieren.
Die CR104 kann maximal 16 Funktionen lernen.
<
Um eine angelernte Funktion zu ersetzen, weisen
<
Sie einfach der gleichen Taste eine neue Funktion
zu.
Angelernte Funktionen bleiben erhalten, wenn Sie
<
die Batterien wechseln.
Wenn das Anlernen des Codes fehlschlägt,
<
versuchen Sie den Abstand zwischen den beiden
Fernbedienungen zu verändern und achten Sie
darauf, dass das Umgebungslicht nicht zu hell ist.
Eine angelernte Funktion löschen
1. Halten Sie S gedrückt, bis die Power-LED
zweimal aulinkt: * *.
2. Drücken Sie 9 7 6. Die Power-Taste blinkt
zweimal auf: .
3. Drücken Sie einmal die Gerätemodustaste.
Wenn Sie beispielsweise eine Ihrer angelernten
TV-Funktionen löschen möchten, drücken a.
4. Drücken Sie zweimal die Taste, die Sie erneut
zuweisen möchten. Die Fernbedienung blinkt
zweimal auf: * * zum Bestätigen.
Die ursprüngliche Funktion der CR104 wurde
wiederhergestellt.
Eine angelernte versetzte Funktion löschen:
Zum Löschen einer versetzen, angelernten Funktion,
drücken Sie S, bevor Sie die Taste drücken, die erneut
zugewiesen werden soll (während Schritt 4 oben).
Löschen ALLER angelernten Funktionen
innerhalb eines bestimmten Gerätemodus
1. Halten Sie S gedrückt, bis die Power-LED
zweimal aulinkt:
2. Drücken Sie 9 7 6 – die Power-LED blinkt
zweimal auf:
3. Drücken Sie zweimal die passende
Gerätemodustaste.
* *
* *
.
.
D-26
Page 99

Makros erstellen
Sie können Ihre CR104 so programmieren, dass sie mit
einem einzigen Tastendruck eine Befehlssequenz sendet.
Jede Befehlssequenz, die Sie regelmäßig benutzen, kann
als Komfortmerkmal auf einen einzigen Tastendruck
reduziert werden.
Sie möchten vielleicht beispielsweise Ihren Fernseher,
Videorecorder und Satellitenreceiver gleichzeitig
einschalten.
In allen Modi ist ein Taste verfügbar, die mit
<
einem Makro programmiert ist. Sie ersetzt für alle
Modi die verschiedenen Funktionen dieser Taste.
Ein Makro kann aus bis zu acht Tastendrucken
<
bestehen.
Beispiel: Der Taste h eine Makro zuweisen
1. Halten Sie S gedrückt, bis die Power-LED
zweimal aulinkt: * *.
2. Drücken Sie
3. Drücken Sie h (Das Makro wird zu dieser Taste
zugewiesen).
4. Drücken Sie a, P, w, P, z, P. (Dies sind
die Makro-Schritte, die Sie aufzeichnen möchten.)
5. Um den Makro zu speichern, halten Sie S
gedrückt, bis die Power-LED zweimal aulinkt:
* *
Wenn Sie jetzt h drücken, schaltet die CR104 Ihren
Fernseher, VCR und Satellitenreceiver um.
Das wichtige Wort ist hier „schaltet um“.
<
Wenn beispielsweise der Fernseher und
Satellitenreceiver derzeit eingeschaltet sind, der
Videorekorder aber ausgeschaltet ist, schaltet
ein Tastendruck auf h den Fernseher und
Satellitenreceiver aus und schaltet den VCR ein
(anstatt alle drei Geräte ein- oder ausschalten).
Denken Sie bei der Verwendung von Makros
<
daran, dass Sie den Modus wechseln oder S
verwenden müssen und das jeder Tastendruck
(einschließlich der Umschaltmodi und das
Drücken von S) als ein Makroschritt zählt. Sie
können eine Makrotaste nicht innerhalb eines
anderen Makros verwenden.
9 9 5
.
.
Wenn die Größe des Speichers ein bestimmtes
<
Makro überschritten wird, leuchtet die PowerLED für fünf Sekunden auf. Sie können jedoch
die Makroschritte bis zu diesem Zeitpunkt durch
Drücken von S speichern oder Sie können die
Aufzeichnung von Makros durch Drücken einer
beliebigen anderen Taste beenden.
Die Verzögerung zwischen Tastendrucken
<
wird als Teil des Makros aufgezeichnet. Eine
Verzögerung von bis zu 30 Sekunden ist zulässig.
Beispiel: Zuweisung des Makros zu der
zugewiesenen h Taste aufheben
1. Halten Sie S gedrückt, bis die Power-LED
zweimal aulinkt: * *.
2. Drücken Sie 9 9 5.
3. Drücken Sie h.
4. Halten Sie S gedrückt, bis die Power-LED
zweimal aulinkt: * *.
Durchreichen der Lautstärke
Durchreichen der Lautstärke heißt, dass egal welcher
Gerätemodus ausgewählt wurde, die CR104 die
Lautstärke des AVR500, AVR600 oder AV888 regelt.
Sie müssen A auf ihrer CR104 nicht drücken. Diese
Funktion ist standardmäßig eingeschaltet.
Es gibt aber auch Zeiten, zu denen Sie in einem
bestimmten Gerätemodus jedoch die Lautstärke eines
Geräts direkt regeln möchten.
Beispiel: Abbrechen des Durchreichens der
Lautstärke für einen Fernseher (AV-Modus)
1. Drücken Sie einmal a.
2. Halten Sie S gedrückt, bis die Power-LED
zweimal aulinkt: * *.
3. Drücken Sie 9 9 3.
4. Drücken Sie -. Die Power-Taste blinkt viermal
auf.
Jetzt können Sie TV (AV)-Modus die Lautstärke- oder
Mute-Funktion Ihres Fernsehers direkt steuern.
Alle Einstellungen zum Durchreichen der
Lautstärke vollständig löschen
1. Halten Sie S gedrückt, bis die Power-LED
zweimal aulinkt: * *.
2. Drücken Sie 9 9 3.
3. Drücken Sie +. Die Power-Taste blinkt viermal
auf *
* * *
Egal in welchen Modus Sie sich benden, Sie haben
jetzt direkten Zugri auf die Lautstärke- oder
Mutefunktionen, vorausgesetzt diese sind vorhanden.
Sie müssen jetzt in den
Lautstärke des AVR500/AVR600/AV888 zu ändern.
Beispiel: Wiederherstellung der StandardEinstellungen für das Durchreichen der
Lautstärke für alle Gerätemodi
1. Halten Sie S gedrückt, bis die Power-LED
zweimal aulinkt:
2. Drücken Sie
3. Drücken Sie A. Die Power-LED blinkt zweimal
auf: * *.
.
AMP-Modus umschalten, um die
.
* *
9 9 3
.
Tasten-Mover
Manchmal werden Sie vielleicht feststellen, dass eine
Taste, die Sie häug für Ihr System verwenden, sich als
Komfortmerkmal an der „falschen“ Stelle auf der CR104
bendet. Es ist ganz einfach, einer leichter zugänglichen
Taste eine Lieblingsfunktion zuzuweisen. Es ist sogar
möglich, eine Funktion von einem Gerätemodus zum
einem anderen zu verschieben.
Beispiel: Zuweisen der D-Funktion an die
-Taste im Satellitenreceivermodus
U
1. Drücken Sie z.
2. Halten Sie S gedrückt, bis die Power-LED
zweimal aulinkt: * *.
3. Drücken Sie 9 9 4.
4. Drücken Sie die Taste, die Sie verschieben
möchten (z. B. D)
5. Drücken Sie die Taste, zu der Sie die Taste
verschieben möchten (z. B. U).
Drücken Sie im SAT-Gerätemodus jetzt entweder D
oder U, um die CR104 zum Senden der D Funktion
zu veranlassen.
Um die Funktionalität der beiden Tasten vollständig
zu wechseln, die U Funktionaliät auf die D-Taste zu
legen, wiederholen Sie den Vorgang noch einmal, aber
wechseln die D und U-Tastendrucke in dem Beispiel.
Beachten Sie, dass die Funktion, die auf die neue Taste
kopiert wurde, immer die ursprüngliche Funktion der
alten Taste ist.
Wiederherstellen einer verschobenen Taste
Um eine Taste auf seine vorherige Funktion
zurückzusetzen, wiederholen Sie das obige
Beispiel, indem Sie die Taste zweimal drücken, die
wiederhergestellt werden soll (kopiert diese auf sich
selbst zurück).
Alle verschobenen Tasten für einen
Gerätemodus wiederherstellen.
Um alle Tasten in einem Gerätemodus auf
ihre ursprünglichen funktionellen Positionen
wiederherzustellen, wiederholen Sie das obige Beispiel,
drücken aber die entsprechende Gerätemodustaste (z. B.
) im Beispiel bei den Punkten 1, 4 und 5.
A
Deutsch
D-27
Page 100

Eine Taste zwischen Gerätemodi kopieren
Es ist möglich, die Funktionen zwischen Gerätemodi zu
kopieren. Beachten Sie jedoch, dass Tastenfunktionen
Gerätemodus-spezisch sind und somit wirksam
zum ursprünglichen Gerätemodus beim Kopieren
„durchgereicht“ werden.
Das folgende Beispiel kopiert die AVR500/AVR600/
AV888
DIREK T-Funktion vom CR104 AMP-Gerätemodus
zur versetzen Funktion der # Taste auf AV
Gerätemodus.
1. Halten Sie S gedrückt, bis die Power-LED
zweimal aulinkt: * *.
2. Drücken Sie 9 9 4.
3. Drücken Sie die Gerätemodustaste der Funktion,
die Sie verschieben möchten (z. B.A).
4. Drücken Sie die Funktionstaste, die Sie
verschieben möchten (z. B. )/
5. Drücken Sie die Gerätemodustaste, die Sie
verschieben möchten (z. B.a)
6. Drücken Sie die S-Tastengrak
7. Drücken Sie die Taste, zu der Sie die Funktion
kopieren möchten (z. B. #)
Wenn Sie lieber die Taste zur Hauptfunktion der
-Taste kopieren möchten, anstatt die versetzte
#
Funktion, lassen Sie Punkt 6 im obigen Beispiel weg.
DIREK T)
Modus-Mover
Wenn zu Ihrem Unterhaltungselektronik-Setup
Geräte des gleichen Typs gehören (z.B. zwei Fernseher,
vielleicht sogar von verschiedenen Herstellern), können
Sie weiterhin beide Geräte mit der CR104 steuern. Sie
müssen einfach einen nicht genutzte Gerätemodustaste
erneut zuweisen.
HINWEIS
Achten Sie vor der Verwendung des ModusMovers darauf, dass sowohl die Quell- und ZielGerätemodustasten freigegeben sind (siehe nächster
Abschnitt).
Beispiel: Mit der z-Taste einen zweiten
Fernseher steuern
1. Halten Sie S gedrückt, bis die Power-LED
zweimal aulinkt: * *.
2. Drücken Sie 9 9 2.
3. Drücken Sie die Gerätemodustaste für den
Gerätetyp, den Sie steuern möchten (z.B. für einen
Fernseher drücken Sie a).
4. Drücken Sie die Gerätemodustaste, die Sie
verwenden möchten (z.B. z).
5. Vergessen Sie nicht, die CR104 zur Steuerung
des zweiten Geräts einzurichten, indem eine der
Methoden unter “Andere Gerät steuern” auf seite D-15
verwendet wird.
Beachten Sie, dass das Durchreichen der
Lautstärkeregelung nicht auf einen Gerätemodus
angewandt wurde, der mittels Modus-Mover kopiert
wurde. Allerdings kann die Durchreichfunktion der
Lautstärkeregelung wiederhergestellt werden, wenn Sie
den Modus-Mover verwendet haben, indem Sie -, +
und @ aus dem AMP-Gerätemodus auf die gleichen
physikalischen Tasten auf den neu verschobenen
Gerätemodus mit dem letzten Beispiel unter ModusMover kopieren.
Wiederherstellung einer verschobenen
Gerätemodustaste in ihren ursprünglichen
Zustand
1. Halten Sie S gedrückt, bis die Power-LED
zweimal aulinkt: * *.
2. Drücken Sie 9 9 2.
3. Drücken Sie zweimal die Gerätemodustaste, die
Sie wiederherstellen möchten .
Sperren/Freigeben eines
Gerätemodus
Wenn Sie zuerst Ihren CR104 auspacken und die
Batterien einlegen, können bestimmte ArcamKomponenten bequem automatisch gesteuert werden
(z. B. DVD-Player, Verstärker, Tuner und CD-Player).
Wir erreichen dies durch die Vorprogrammierung
Arcam spezischer Gerätecodes auf die entsprechenden
Gerätmodustasten und anschließendem Sperren des
Gerätemodus, so dass Sie ihn nicht versehentlich
umprogrammieren können.
Wenn Sie diese gesperrten Standardeinstellungen
überschreiben möchten - um beispielsweise einem
CD-Player von einem Drittanbieter zu steuern - Sie
müssen zuerst den CD-Modus entsperren, bevor Sie die
CR104 mit einer der Methoden einrichten können, die
am Anfang dieser Anleitung beschrieben wurden.
Hier sind die werkseitigen Standardeinstellungen:
Gerätemodus Standardstatus Standard-
Arcamcodes
BD
SAT
AV
TUN
AMP
VERSTÄRK ER
PVR
PERSÖ NLICHER
VIDEOR ECORDER
VCR
CD
Für Mehrraum-Lösungen sind alternative Codes oder
im Falle von Codeunstimmigkeiten mit Produkten
anderer Hersteller verfügbar.
Zum Beispiel:
AMP (Systemcode 19) 1954
Sie müssen den Systemcode am Produkt, das Sie steuern
möchten, sowie an der CR104 ändern.
Gesperrt 0762
Freigegeben 1205
Freigegeben 0586
Gesperrt 2009
Gesperrt 1242
Freigegeben 1930
Freigegeben 0111
Gesperrt 2010
HINWEIS
Der
AMP-Gerätemodus kann nur zum Steuern eines
Arcam-Verstärkers verwendet werden, wie dem
AVR500, AVR600 und AV888, entweder mit seinen
Standard- oder alternativem IR-Systemcodes.
So schalten Sie eine Gerätemodus-Sperreinstellung um:
1. Drücken Sie die Gerätemodustaste, die Sie
freigeben möchten (z. B.
2. Halten Sie S gedrückt, bis die Power-LED
zweimal aulinkt: * *.
3. Drücken Sie 9 8 2.
Die Power-LED blinkt zweimal auf, wenn gesperrt
<
und viermal, wenn freigegeben wird.
Wenn Sie eine ungültige Tastenkombination
<
eingeben, blinkt die Power-LED lange auf und
kehrt zum normalen Betrieb zurück.
Während die Gerätemodustaste gesperrt ist, sind
die Funktionen direkte Codeeinrichtung und
Verschiebemodus nicht verfügbar.
c
).
D-28
 Loading...