

Page 1
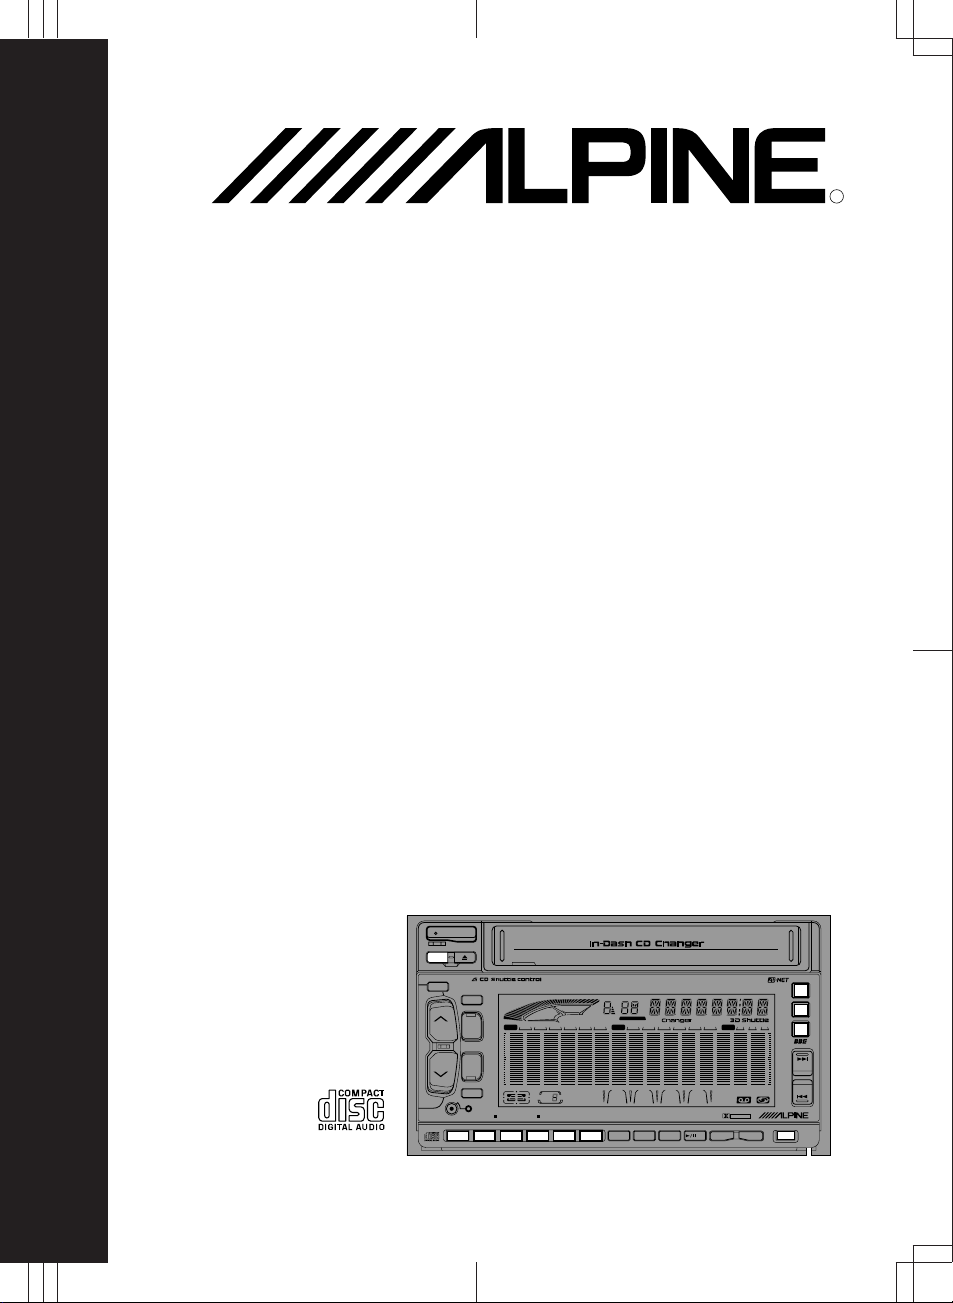
3DA-W882E
In-Dash CD Changer/Cassette/
DSP Receiver
• OWNER'S MANUAL (page 2- page 67)
Please read this manual to maximize your
enjoyment of the outstanding performance and
feature capabilities of the equipment, then retain
the manual for future reference.
R
40W x 4
EJECTOPEN
O/C
CLOSE
SUB W.
MODE
CLK TITLE
SOURCE
DEMO
BAND
PROG
DISP
INTLZ PWR
123456 789101112
RLFRMIN.
FLAT MALE FEMA. POPS ROCK NEWS
EQ
T.S.M.
63•160•400•1K•2.5K•6.3K•16K
S.P.S.
USER
PRESET
DISC TITLE MEMORY SUB WOOFER LEVEL CONTROL
COMPACT DISC CHANGER
IN-DASH CD CHANGER / CASSETTE / DSP RECEIVER 40Wx4
MAX
LEVEL
DISC
NORM.
STAD. LIVE HALL CHUR.
SUR
MTL
B C NR
REPEAT
B.SKIP
D.A.P.
MONO
TUNE
M.I.X.ALL
RPT ALL
DX ST
MHCT
SCAN
B/C NR
A.MEMO
3DA-W882E
DANCE
1 2 3
BBE
••
FUNC
DOLBY B•C NR
MANU/DISCREW FF
DN UP
EQ BAND
(3DA-W882E)
EQ
SUR
BBE
UP
SEEK
TRACK
P.S.
EQ
LEVEL
DN
FUNC
Page 2

English
2
Page 3
English
Precautions
This label is intended to alert the user to the presence of important
Warning
DO NOT DISASSEMBLE OR ALTER
Attempts to disassemble or alter may lead to an accident, fire and/or electric shock.
KEEP SMALL ARTICLES OUT OF THE REACH OF CHILDREN
Store small articles (batteries, screws, etc.) in places not accessible to children. If
swallowed, consult a physician immediately.
USE THE CORRECT AMPERE RA TING WHEN REPLACING FUSES
Replace fuses only with fuses of the same ampere rating. Failure to do so may result in a
fire and/or damage to the vehicle.
HALT USE IMMEDIATELY IF A PROBLEM APPEARS
When problems appear, stop using the system immediately and contact the dealer from
whom you purchased the equipment. Some problems which may warrant immediate
attention include a lack of sound, noxious odors or smoke being emitted from the unit, or
foreign objects dropped inside the unit.
DO NOT OPERA TE THE REMOTE CONTROL WHILE DRIVING
Do not change settings while driving. If operation requiring a prolonged view of the display
is required, stop the vehicle in a safe location before attempting operation.
Caution
DO NOT BLOCK VENTS OR RADIA TOR PANELS
Do not block air vents or heat discharge plates. Blocking them will cause heat to build up
inside and may result in fire.
DO NOT RAISE THE VOLUME EXCESSIVELY
Keep the volume at a level where you can still hear outside noises while driving. Driving
while unable to hear outside sounds could cause an accident.
DO NOT USE THIS EQUIPMENT OUTSIDE THE VEHICLE
Do not use this equipment for purposes other than those listed for a vehicle. Failure to do
so may result in an electric shock or an injury.
KEEP FOREIGN OBJECTS OUT OF THE CD OR CASSETTE COMPARTMENT SLOT
Keep any foreign objects, including fingers, out of the CD or cassette compartment slot.
STOP THE VEHICLE BEFORE CARRYING OUT ANY OPERATION THAT COULD
INTERFERE WITH YOUR DRIVING
If loading or unloading a CD or cassette interferes with your driving, stop the vehicle in a
safe location before attempting operation.
DO NOT MIX NEW BA TTERIES WITH OLD BATTERIES. INSERT WITH THE CORRECT BA TTER Y POLARITY
Do not mix new batteries with old batteries and do not replace with other than specified
batteries. When inserting the batteries, be sure to observe proper polarity (+ and –) as
instructed. Battery rupture or chemical leakage can cause an injury or equipment malfunction.
operating instructions.
Failure to heed the instructions will result severe injury or death.
This label is intended to alert the user to the presence of important
operating instructions.
Failure to heed the instructions can result injury or material damage.
3
Page 4
English
Contents
Page
6 ....................................................................... Precautions
Basic Operation
10 ......................................................Initial System Start-Up
10 ............................................... Turning Power On and Off
11 ......................................................Subwoofer On and Off
12 .................................................................. Demonstration
13 ......................................................Sound Guide Function
14 ..................................... Adjusting Volume/Balance/Fader
Radio Operation
15 ..................................................................Manual Tuning
16 .................................................... Automatic Seek Tuning
17 .................................... Manual Storing of Station Presets
18 .................................................... Mono/Stereo Switching
19 .............................. Automatic Memory of Station Presets
20 ..............Storing into Direct Access Preset (D.A.P.) Band
21 ................................................. Tuning to Preset Stations
22 ................................................... Displaying Station Titles
23 ..................................................................Titling Stations
25 .................Searching Titled Stations (Title Search Menu)
CD Operation
26 .................................................. Preparation for Playback
27 ....................................................Normal Play and Pause
28 ............................................ Fast Forward and Backward
28 ......................................................................Repeat Play
29 ......................................................... Music Sensor (Skip)
30 ....................................................... M.I.X. (Random Play)
31 ..........................................................Scanning Programs
32 .........................................................To Display CD Titles
33 ........................................................................Titling Disc
35 ............................................................. Erasing Disc Title
36 ..................... Searching Titled Discs (Title Search Menu)
4
37 ..................................................... CD Shuttle Operation
Cassette Player Operation
40 .................. Opening and Closing of the Movable Display
41 ........................................................................... Playback
42 ..................................... Dolby B/C NR (Noise Reduction)
42 ......................................................................Repeat Play
43 ................................................ Fast Forward and Rewind
43 ......................................................... Blank Skip (B.SKIP)
44 ............................................................... Manual Reverse
45 ..................................................... Program Sensor (P.S.)
Page 5
English
Contents
Page
Equalizer Surround Operation
46 ........................................................ Selecting BBE Mode
47 ..................................... Sound Position Selector (S.P.S.)
48 ..................................................... DSP Surround Presets
49 ............................................................. Equalizer Presets
50 ...................................... Adjusting the Equalizer Settings
51 ................................... Memorizing the Equalizer Settings
52 .................................Recalling the Memorized Equalizer/
Surround Settings
52 ........................................... Switching the Display Modes
Clock Operation
54 ................................................................ Displaying Time
55 ..................................................................... Setting Time
56 .............................................................. Remote Control
59 .........................................................................Disc Care
60 ........................................................ In Case of Difficulty
65 ................................................................. Specifications
• Dolby noise reduction manufactured under license from Dolby
Laboratories Licensing Corporation. "DOLBY" and the double-D
symbol are trademarks of Dolby Laboratories Licensing
Corporation.
5
Page 6
+60°C
–10°C
English
Precautions
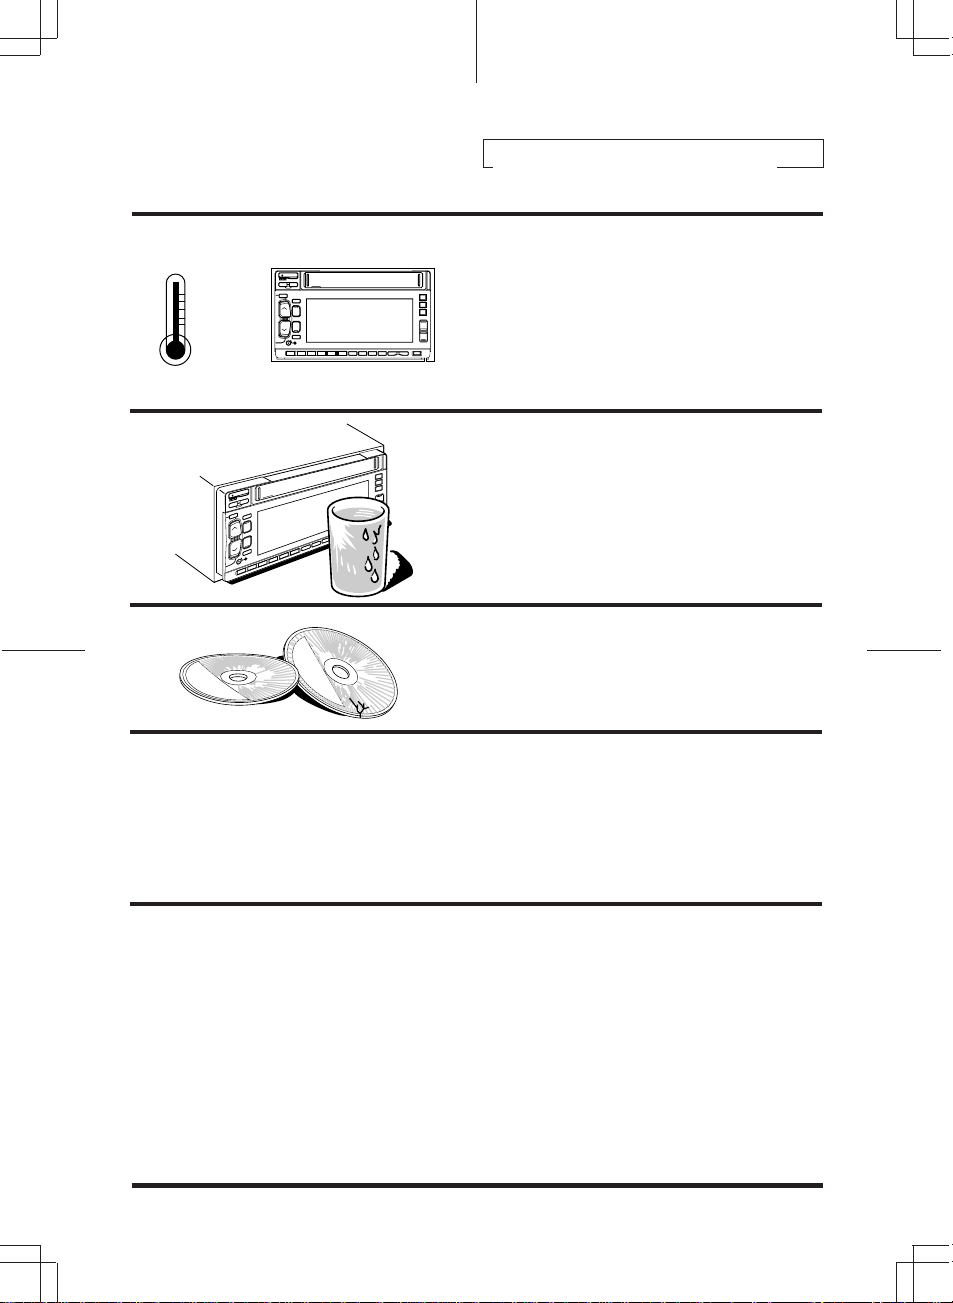
Thermal Protection Circuit
Be sure the temperature inside the vehicle is
between +60°C (+140°F) and –10°C (+14°F)
before attempting to play a disc. If the temperature is over +60°C (+140°F), the protection
circuit functions to stop the CD player, and "HITEMP" is displayed.
Moisture Condensation
You may notice the CD playback sound
wavering due to condensation. If this happens,
remove the disc from the player and wait about
an hour for the moisture to evaporate.
Damaged Disc
Do not attempt to play cracked, warped, or
damaged discs. Playing a bad disc could
severely damage the playback mechanism.
6
Maintenance
If you have problems, do not attempt to repair
the unit yourself. Return it to your Alpine dealer
or the nearest Alpine Service Station for
servicing.
Irregular Shaped Discs
Make sure the discs you use in this unit do not
have any irregularities. The outer and inner
edges should be round and smooth. Use of
irregularly shaped discs may cause damage to
the mechanism.
Page 7
Center Hole
Bumps
English
Precautions
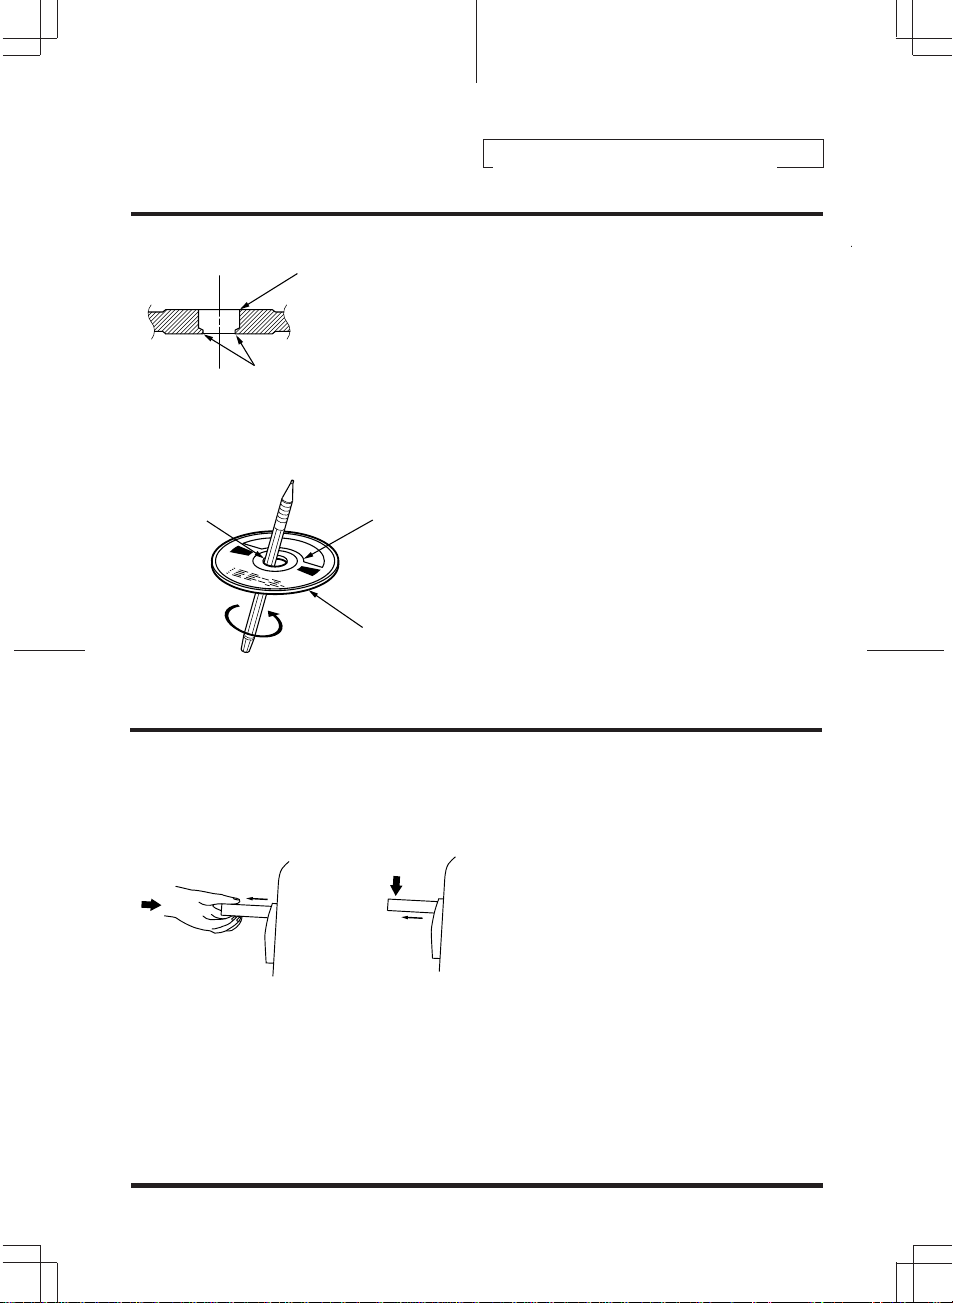
New Discs
As a protective measure, the CD player will
automatically eject discs that have either been
inserted incorrectly or have irregular surfaces. If
a new disc is ejected immediately after loading,
use your finger to feel around the outer edge of
the CD and its center hole. If you feel any small
bumps or irregularities, this could inhibit proper
loading of the disc. To remove the bumps, rub
the inside edge of the hole and outside edge of
the disc with a ball-point pen or other such
instrument, then insert the disc again.
Center Hole
IMPROPER
New Disc
Outside (Bumps)
IMPROPER
Handling Magazine
When discs are being exchanged in the 3DAW882E, the magazine is pushed out from the
changer. While this operation is in progress, do
not try to pull out the magazine or stop its
movement in any way, as this could cause
damage to the mechanism. In addition, be
aware of the changer's operation so it will not
interfere with your driving. For example, before
changing gears, check the position of the
magazine so as not to hit it while it is changing
discs.
CAUTION:
Do not insert anything other than magazine into
insertion slot.
7
Page 8
English
Precautions
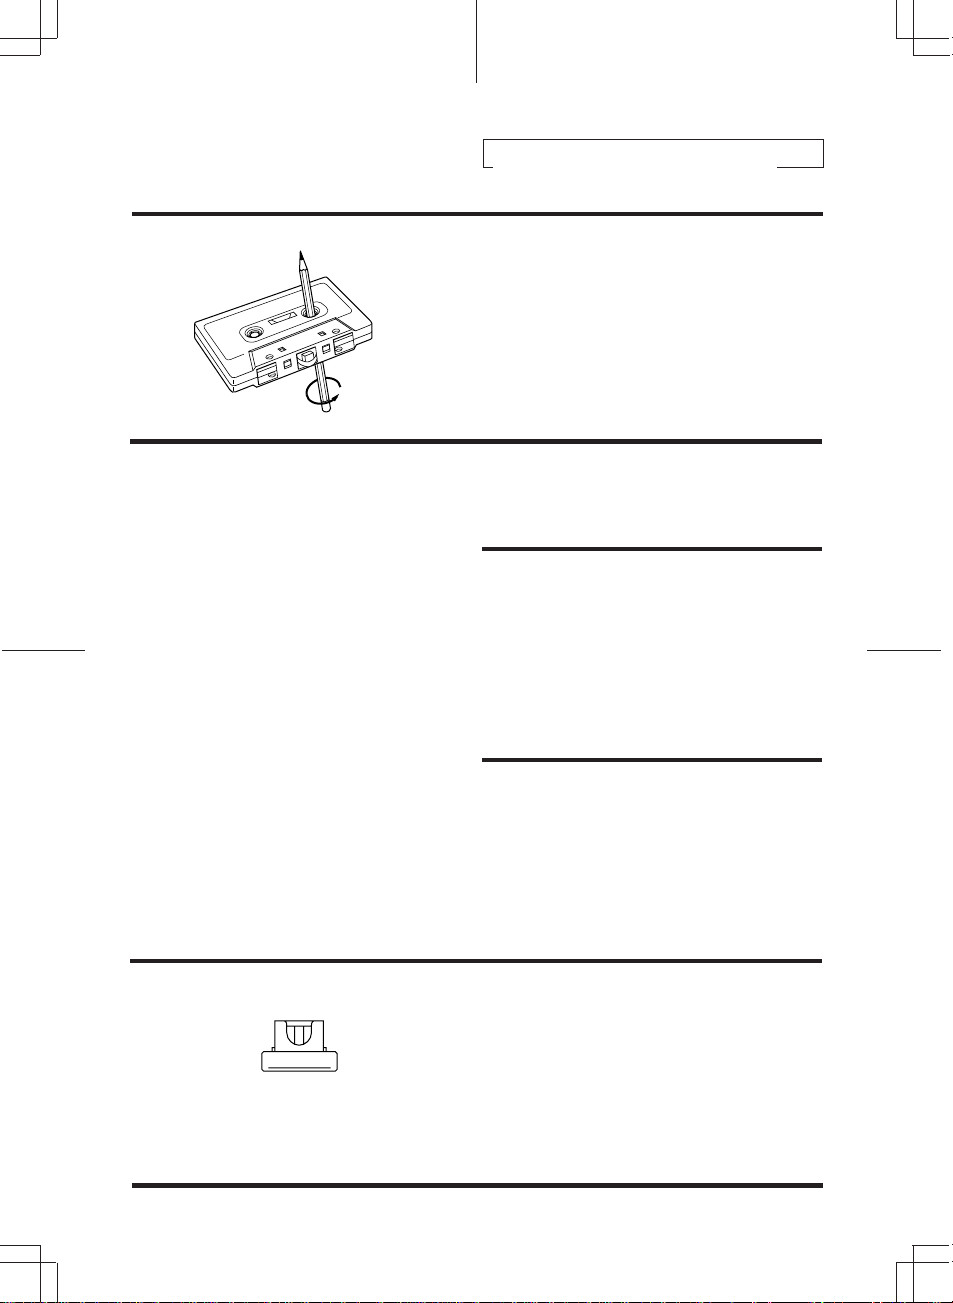
Tape Slack
Check and make sure any slack in the tape is
taken up before inserting the tape into the unit.
A loose tape can get caught in the mechanism
and cause damage to the unit and the tape
itself. Tighten the tape by inserting a pencil or a
similar instrument into the spindle hole and turn
until all the slack has been taken up.
Excessively Thin Tape
C-120 type cassette tapes are not recommended for use in automobile tape players.
Precision Tape Mechanism
Prevent any foreign objects from entering the
cassette opening as the precision mechanism
and tape head may be damaged.
Never play dirty or dusty tapes – they can
damage the tape head.
8
Tape Head Cleaning
Periodic cleaning (approximately every 20
hours of use) of the tape head with a wet type
head-cleaning cassette tape (available at audio
stores) is necessary for best performance.
Fuse Replacement
When replacing the fuse(s), the replacement
must be of the same amperage as shown on
the fuse holder. If the fuse blows more than
once, carefully check all electrical connections
for shorted circuitry. Also have your vehicle’s
voltage regulator checked.
Page 9
English
Precautions
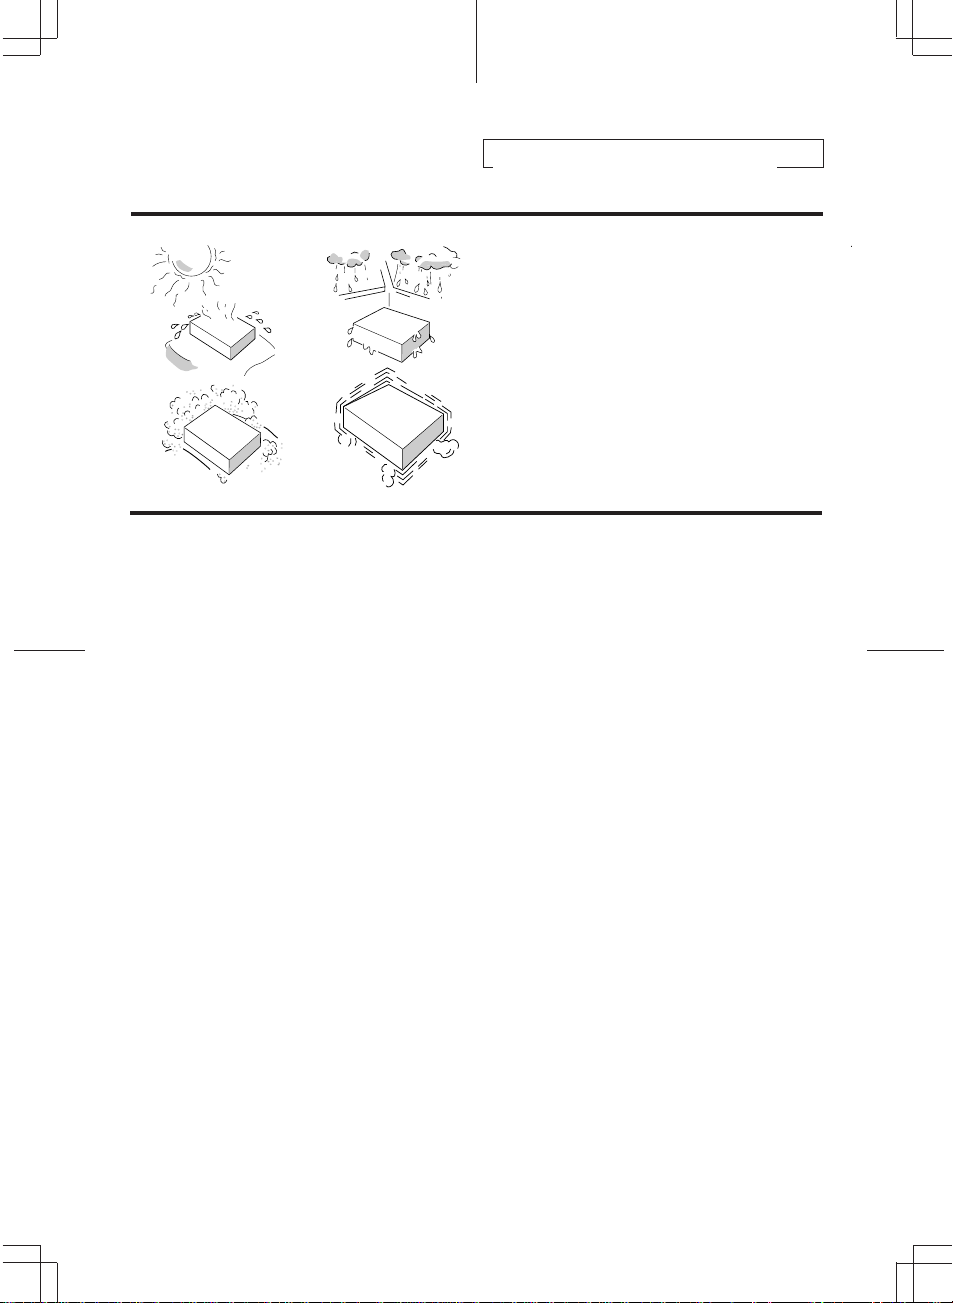
Installation Location
Make sure the 3DA-W882E player/receiver will
not be exposed to:
• Direct sun and heat
• High humidity
• Excessive dust
• Excessive vibrations
9
Page 10
English
Basic Operation
1
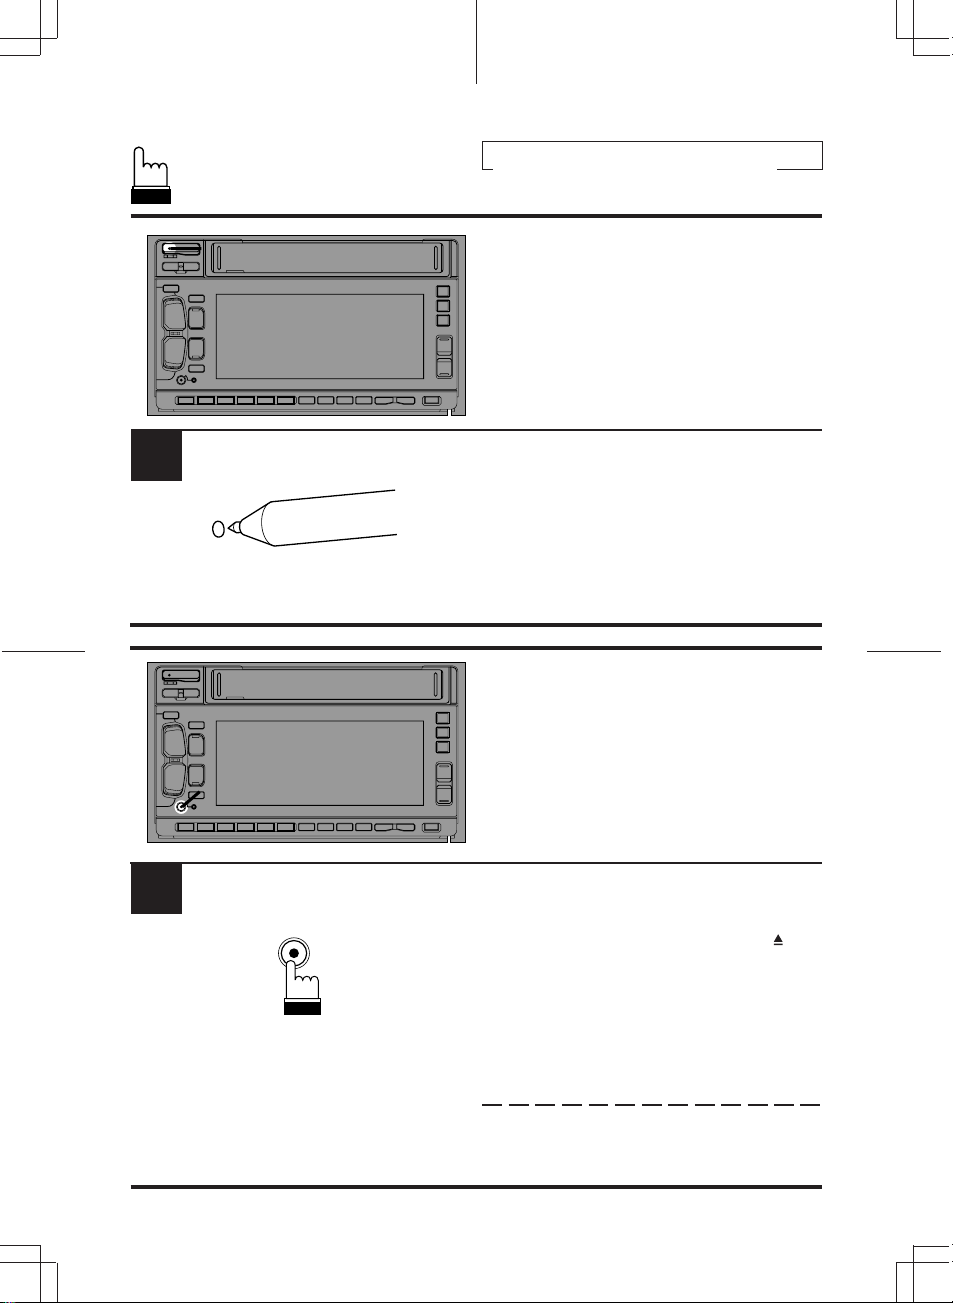
Initial System Start-Up
1
1
1
INTLZ PWR
Immediately after installing or applying power to
the unit, it should be initialized. At the upper-left
corner of the front panel is a small button. Using
a pencil or other pointed object, press this reset
button to complete the initialization procedure.
Turning Power On and Off
Press the PWR button to turn on the unit.
Note: The unit can be turned on by pressing
any other button except the eject ( h ),
O/C and CLK buttons.
The volume level gradually increases to the
previous level you were listening to before the
unit was turned off.
10
Press the PWR button again to turn off the unit.
Page 11

English
Basic Operation
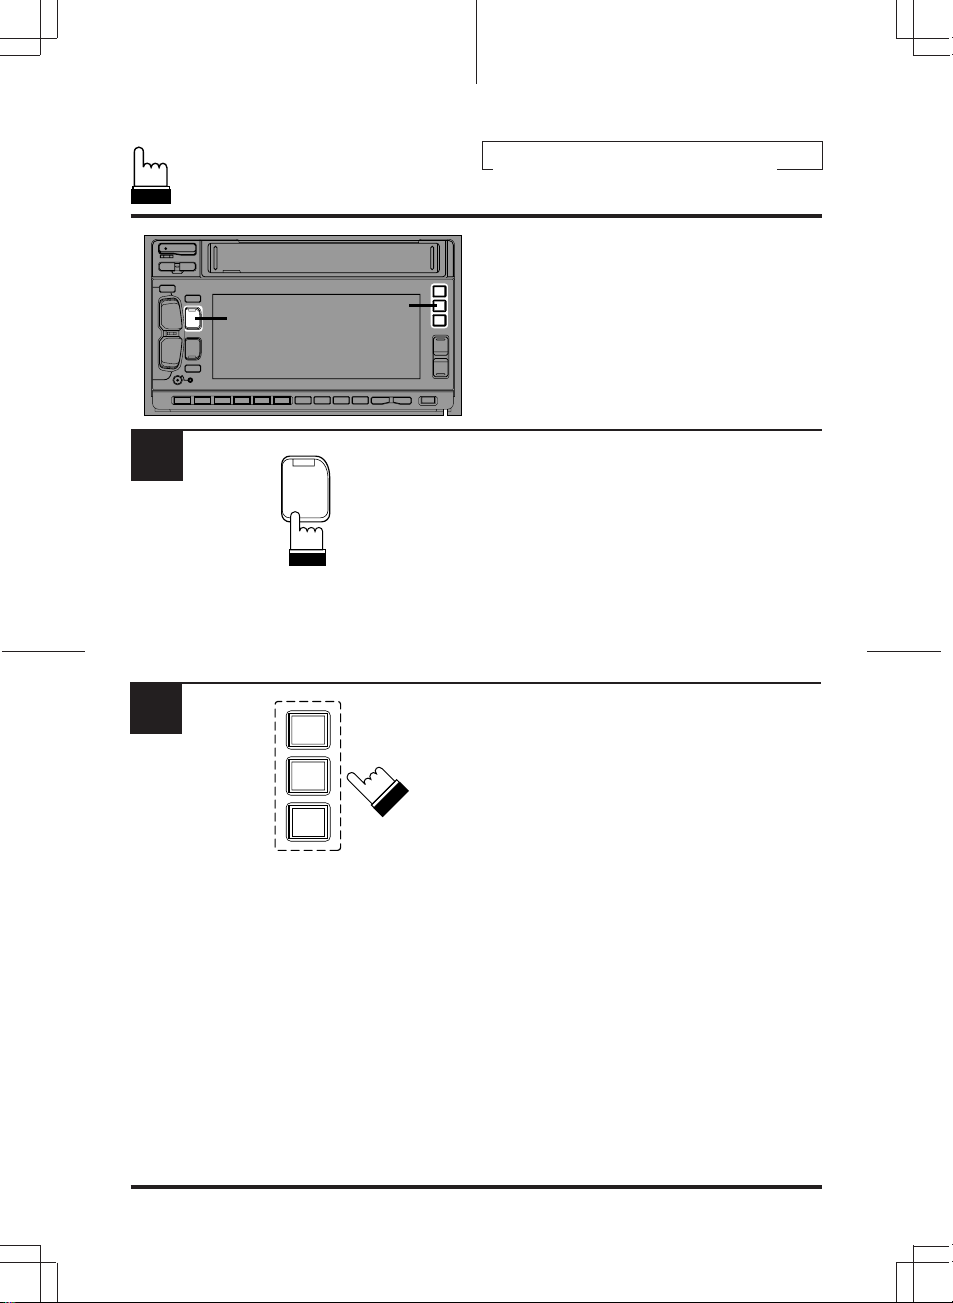
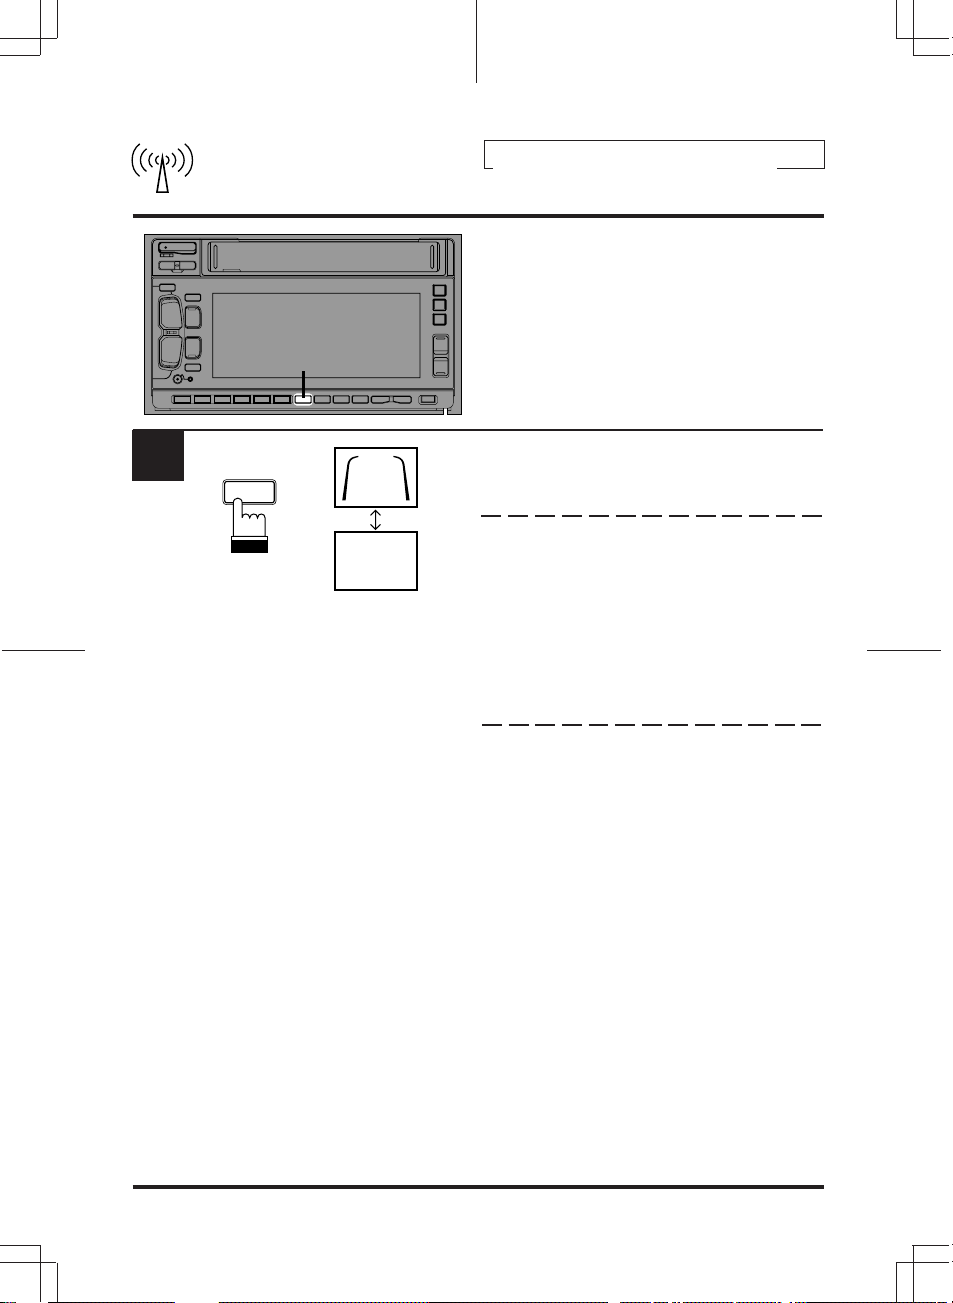
Subwoofer On and Off
This unit is not equipped with a low pass filter.
1
Turn on the Subwoofer Output when an
amplifier having the built-in filter is connected to
drive your subwoofer.
1
SUB W.
MODE
SUBW ON
SUBW OFF
Press and hold the SUB W. button for at least 3
seconds.
With each press, Subwoofer is toggled On or
Off.
Notes:
• Initial mode is "SUBW OFF."
• Leave the "SUBW OFF" as long as the
Subwoofer output is not being used.
• When the subwoofer is turned on, the
subwoofer output level can be adjusted. For
more details, refer to the Adjusting Volume/
Balance/Fader section on page 14.
11
Page 12
English
Basic Operation
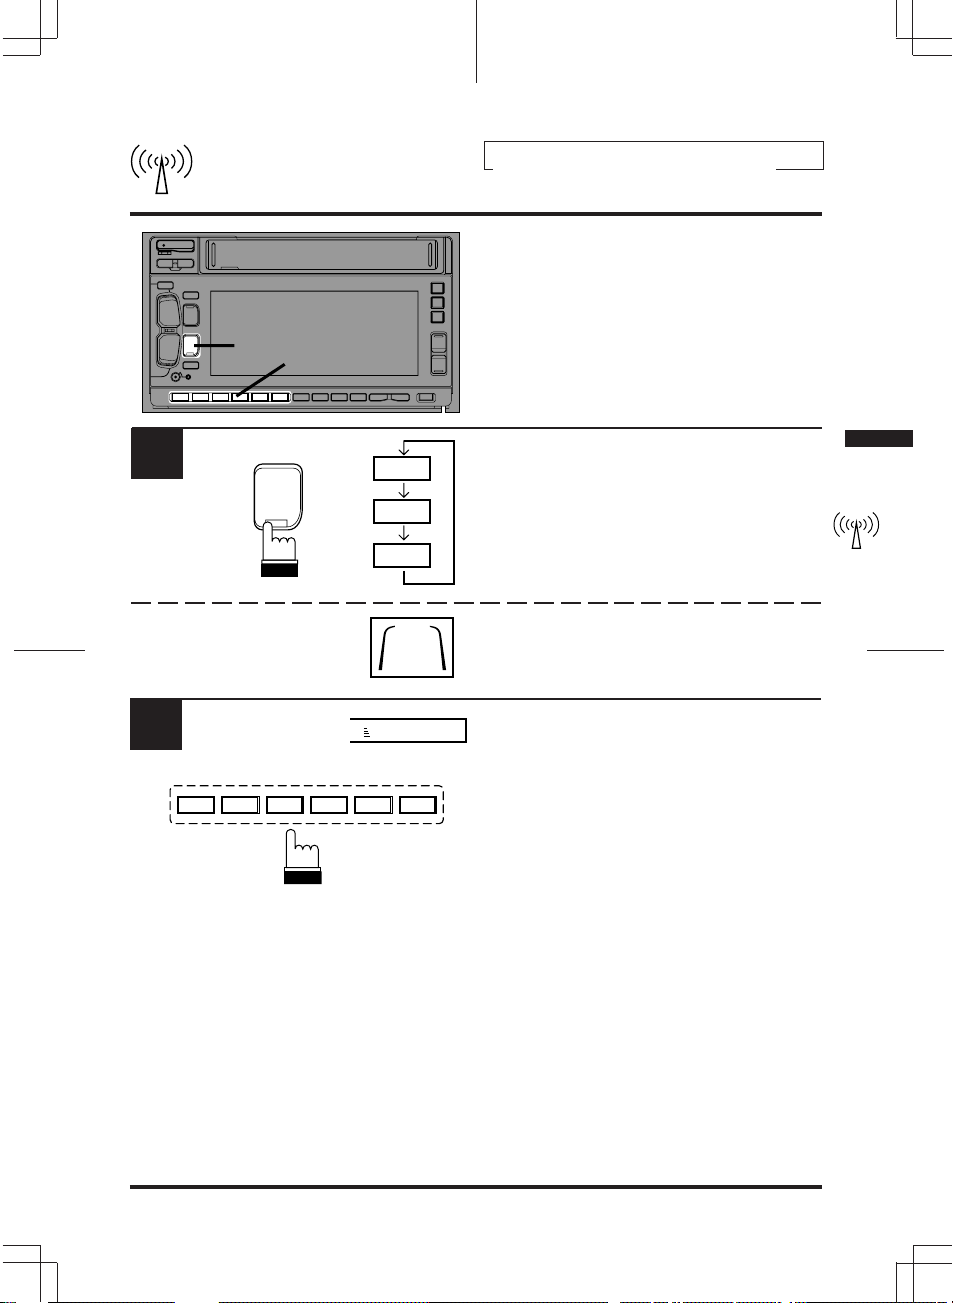
Demonstration
Equalizer/surround/BBE demonstration
functions are provided in this unit.
1
2
1
2
SOURCE
DEMO
EQ
SUR
BBE
Press and hold the DEMO button for at least 2
seconds to activate the DEMO mode.
The unit automatically performs the following
operations.
1 Equalizer scanning operation (set by the
manufacturer).
2 Surround scanning operation (set by the
manufacturer).
3 BBE scanning operation.
4 Operations 1 – 3 are carried out repeatedly.
To end the DEMO mode, press one of EQ,
SUR, and BBE buttons.
12
Page 13
1
English
Basic Operation
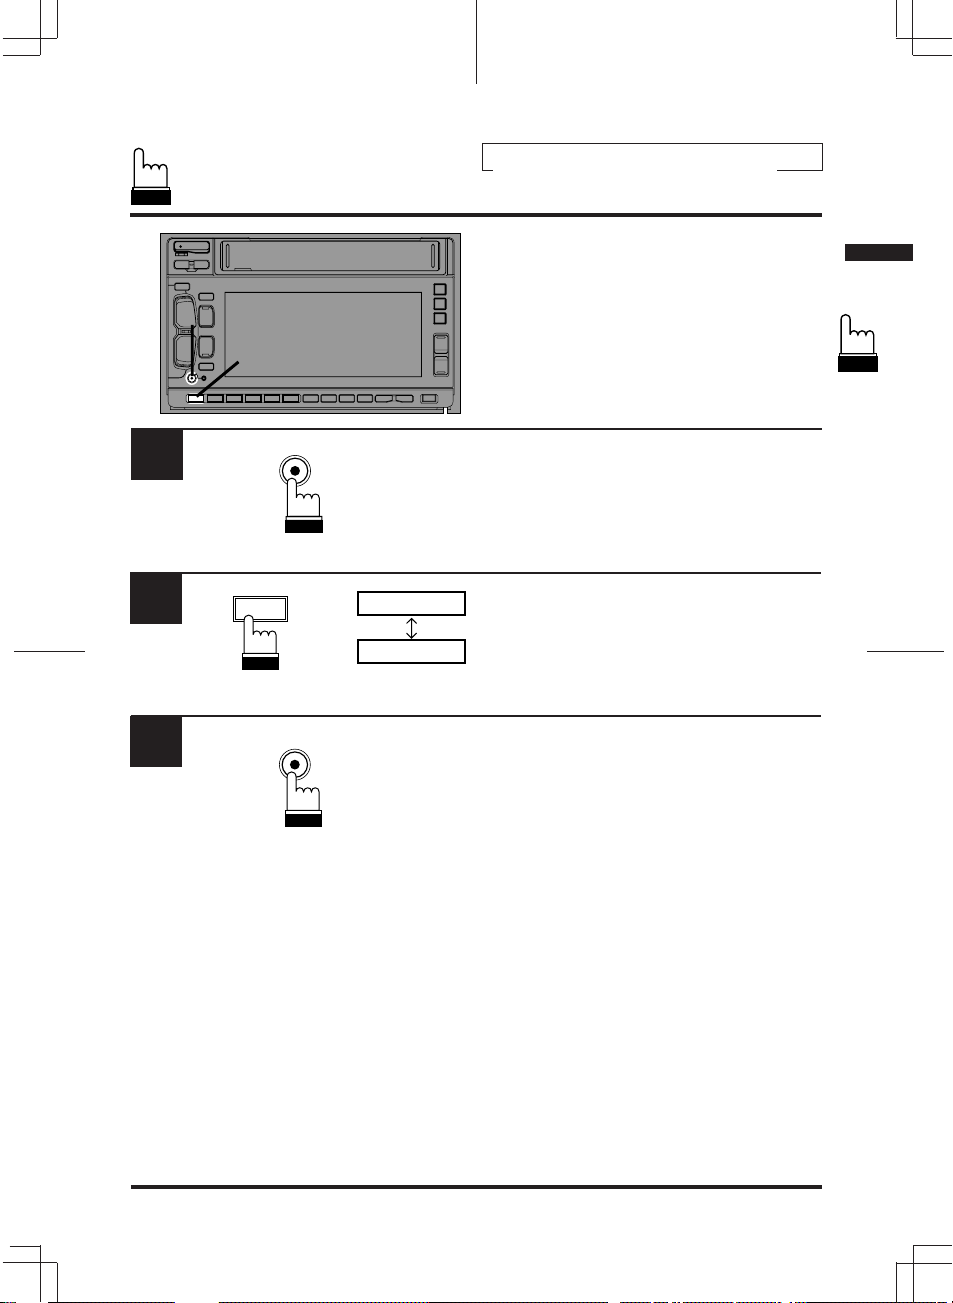
Sound Guide Function
This function will give audible feedback with
varying tones depending upon the button
pressed.
1.#
2
Press and hold the PWR button for more than 3
seconds.
INTLZ PWR
2
3
1
INTLZ PWR
BEEP ON
BEEP OFF
Press the Preset 1 button and the display
shows "BEEP ON."
Pressing the button again turns the Sound
Guide function off. "BEEP OFF" will be
displayed and no tones will be heard.
Press the PWR button to activate the normal
mode.
Note: The caution beeps for disc change and
eject operations of the built-in 3D Shuttle,
or for opening and closing of the movable
display, will be audible regardless of the
BEEP ON or OFF display.
13
Page 14
English
Basic Operation
1
1
2
2
SUB W.
MODE
VOL
BAL
FAD
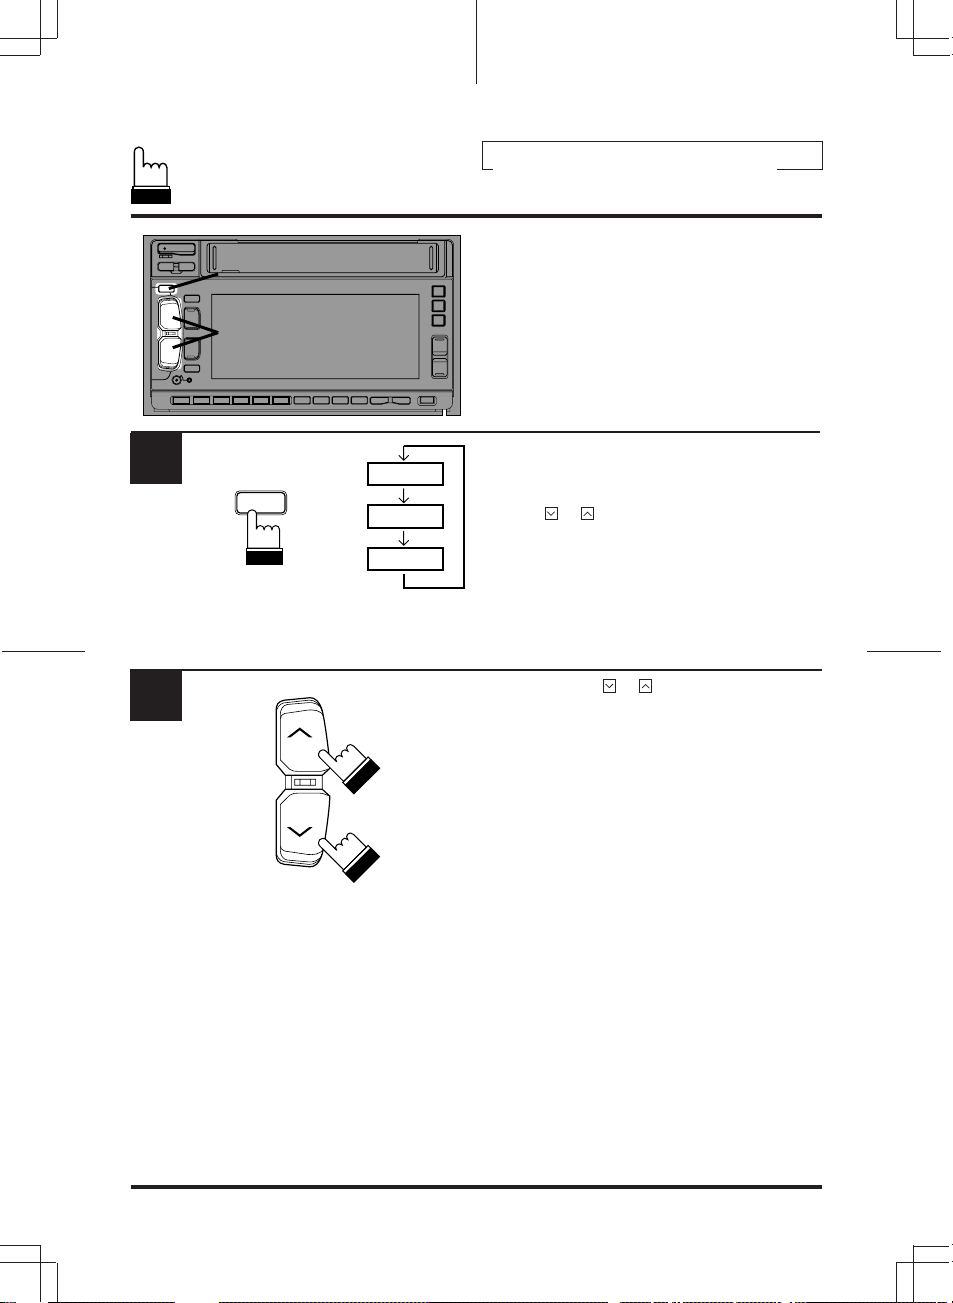
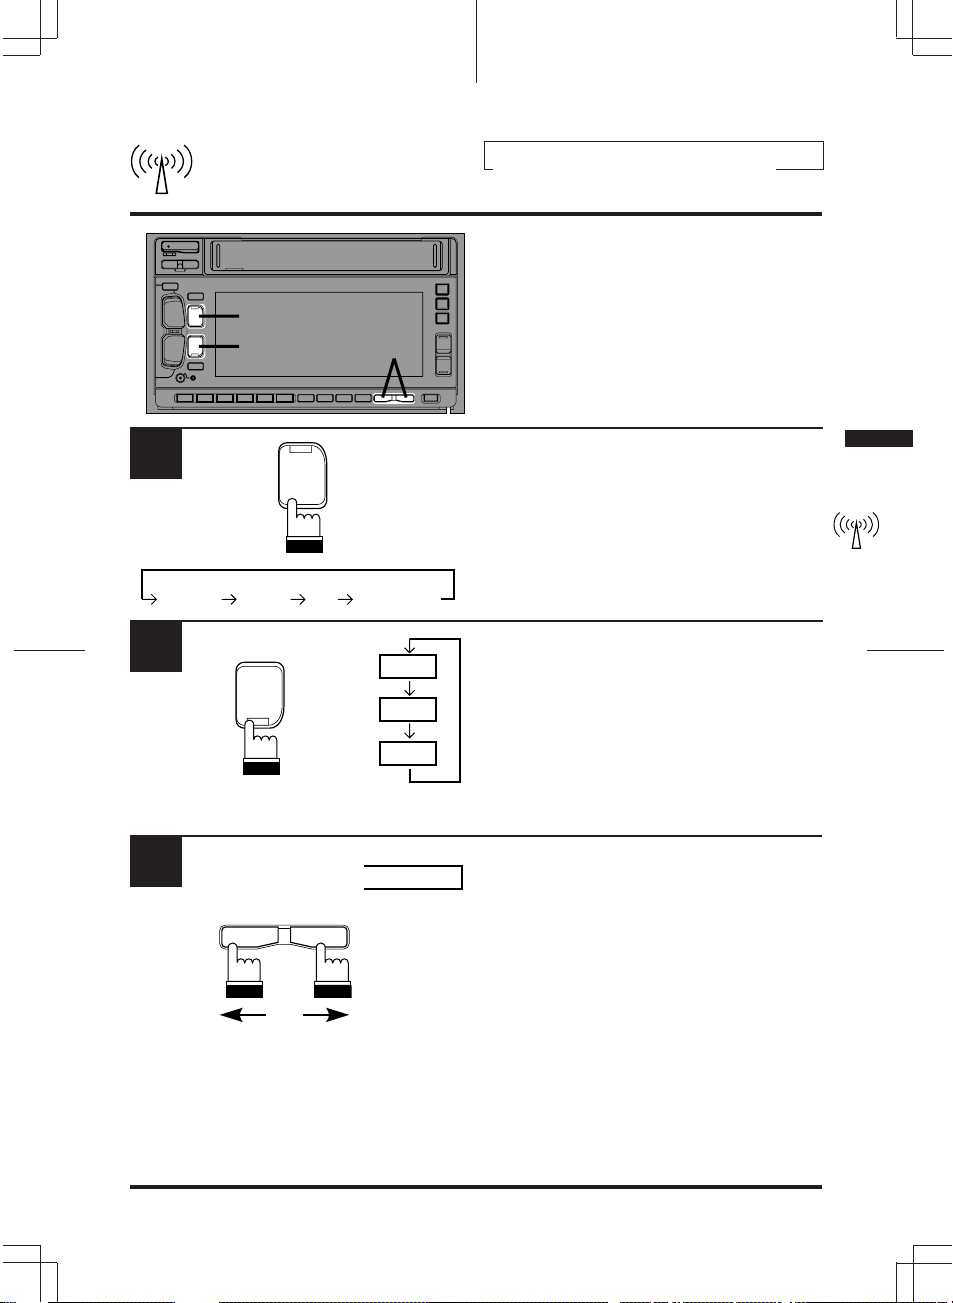
Adjusting Volume/Balance/Fader
Press and release the MODE button repeatedly
to choose the desired mode.
Notes:
• If the or button is not pressed in 5
seconds after selecting the BAL and FAD
modes, the unit automatically returns to the
VOL mode.
• With the Subwoofer mode turned on,
Subwoofer output level can be adjusted.
Press the button or until the desired sound
is obtained in each mode.
14
Page 15
Radio Operation
English
1
TUNER
2
3
1
2
SOURCE
DEMO
TAPE
BAND
PROG
DN UP
11 12
3D
T.S.M.
MANU/DISCREW FF
EQ BAND
3
F1
*
F1
F2
AM
90.10
CD SHUTTLE
Manual Tuning
Press the SOURCE button to select the radio
mode.
(* Only with the CD shuttle connected.)
Press the BAND button repeatedly until the
desired radio band is displayed.
Press the [ or ] button to move
downward or upward one step respectively until
the desired station frequency is displayed.
Note: The "ST" indicator in the display shows
that a stereo broadcast is being received.
Downward
Upward
15
Page 16

Radio Operation
English
1
2
3
TUNER
1
2
SOURCE
TAPE*3D
BAND
PROG
9
DEMO
T.S.M.
43
CD SHUTTLE
F1
F2
AM
DX
Automatic Seek Tuning
Press the SOURCE button to select the mode.
(* Only with the CD shuttle connected.)
Press the BAND button repeatedly until the
desired radio band is displayed.
Press the 9 (TUNE) button to illuminate the
DX indicator in the display. With the DX mode
activated, both strong and weak stations will be
tuned automatically.
Press again to return to the local mode. The DX
indicator will turn off and only strong stations
will be tuned.
16
4
Press the DN (c) or UP (f) button to
F1
90.10
UP
DN
automatically seek a station downward or
upward respectively.
The unit will stop at the next station it finds.
Press the same button again to seek next
station.
Page 17
English
Radio Operation
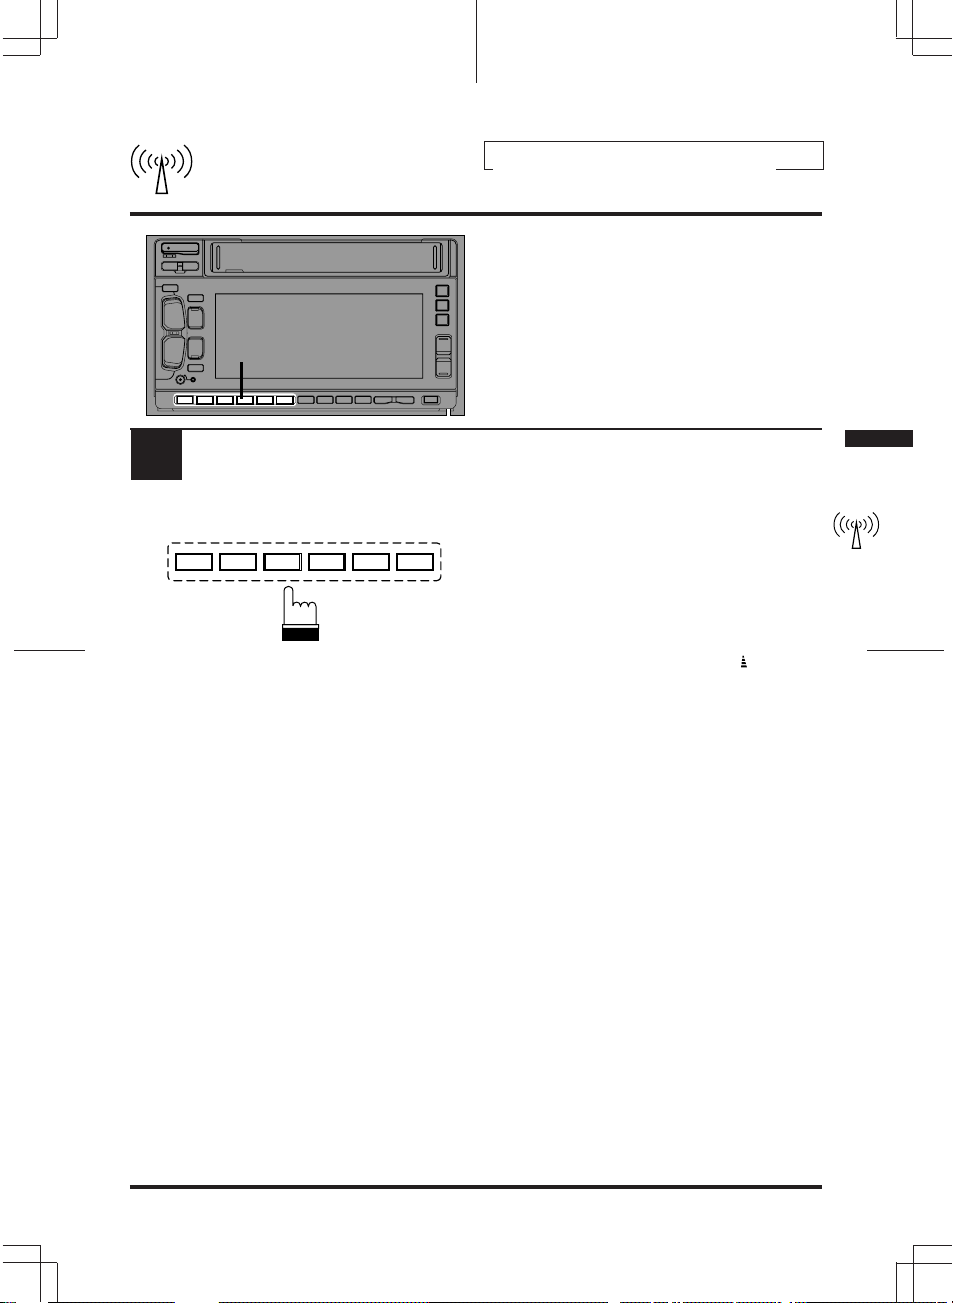
Manual Storing of Station
1
Presets
1
123456
1. Tune in the desired radio station you wish to
store in the preset memory.
2. Press and hold any one of the preset
buttons (1 through 6) for at least 2
seconds. The frequency display will begin
to blink.
3. Press the preset button into which you wish
to store the station while the display is
blinking (within 5 seconds).
The display stops blinking once the station
has been memorized. The display shows the
band, preset No. with a triangle ( ) and the
station frequency memorized.
4. Repeat the procedure to store 5 other
stations onto the same band.
To use this procedure for other bands,
simply select the band desired and follow
steps 1 – 3 above.
A total of 24 stations can be stored in the preset
memory (6 stations for each band; FM1, FM2,
AM and D.A.P.).
Note: If you store a station in a preset memory
which already has a station, the current
station will be cleared and replaced with
the new station.
17
Page 18
English
Radio Operation
Mono/Stereo Switching
1
1
"ST" indicator appears when a stereo station is
MONO
8
MONO
tuned in.
Press the 8 (MONO) button to switch from
stereo to monaural FM reception. This will help
in reducing the noise of weak FM Stereo
broadcasts. In the monaural mode, the "ST"
indicator turns off. Press the 8 (MONO)
button again to return to the stereo mode.
(OFF)
18
Page 19
English
Radio Operation
Automatic Memory of
1
2
Station Presets
1
2
BAND
PROG
10
T.S.M.
F1
F2
AM
A.MEMO
Press the BAND button repeatedly until the
desired radio band is displayed.
Press the 0(A. MEMO) button. The frequency on the display continues to change
while the automatic memory is in progress.
The tuner will automatically seek and store 6
strong stations in the selected band in order of
signal strength.
When the automatic memory has been
completed, the tuner goes to the station stored
in the preset location No. 1.
Note: If no stations are stored, the tuner will
return to the original station you were
listening to before the auto memory
procedure began.
19
Page 20
English
Radio Operation
Storing into Direct Access
Preset (D.A.P.) Band
A combination of radio stations from any band,
AM and FM (up to 6 stations) can be manually
preset onto the D.A.P. band.
1
1
7
D.A.P.
D.A.P.
Press the 7 (D.A.P.) button to activate the
D.A.P. mode.
Press the BAND button to select FM or AM.
The selected band will be displayed.
To memorize stations onto the D.A.P. band,
(OFF)
follow the steps for the automatic or Manual
Storing of Station Presets section above.
To cancel the D.A.P. mode, press the
(D.A.P.) button.
7
20
Page 21
English
Radio Operation
Tuning to Preset Stations
1
2
1
2
BAND
T.S.M.
PROG
F2
AM
D.A.P.
F2
2
90.10
123456
F1
Press the BAND button repeatedly until the
desired band is displayed.
Press the 7 (D.A.P.) button when the station
desired was stored using the D.A.P. function.
Press the station preset button ( 1 through
) that has your desired radio station in
6
memory. The display shows the band, preset
number with a triangle and frequency of the
station selected.
21
Page 22

English
Radio Operation
1
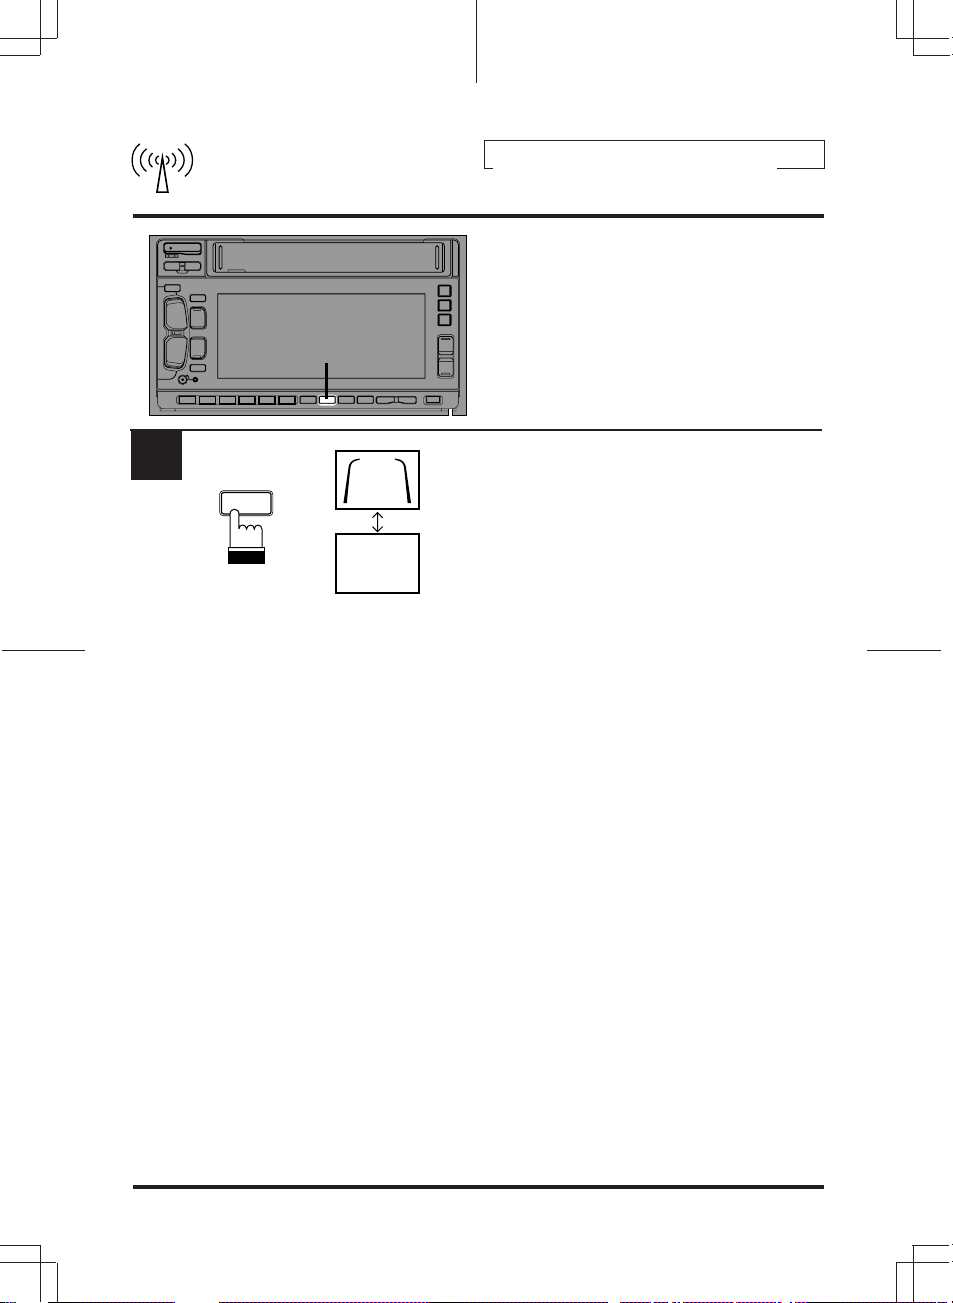
Displaying Station Titles
1
Title not entered
CLK TITLE
90.10
12:58
ALPINE
Title entered
If a title has been entered for the selected
station, it can be displayed in place of the
frequency. The display will toggle between the
frequency and title display with each press of
the TITLE button.
(Refer to page 23 to title stations.)
NORMAL Mode
CLOCK PRIORITY Mode
STATION TITLE Mode
22
Page 23

2.#
English
Radio Operation
Titling Stations
4
1
2
3
4
CLK TITLE
UP
DN
CLK TITLE
or
or/ou/o
BLPINE
A
or/ou/o
or
ALPINE
Tune in a station to be titled.
Press the TITLE button twice (once if you are
already in the Clock Priority mode) to select the
preset station titling mode. "--------" will appear
in the display. (Refer to page 22).
Press and hold the TITLE button for at least 3
seconds. The first digit will blink.
Press the DN (c) or UP (f) button to select
the desired letter/numeral/symbol available for
naming ("A" for example).
23
Page 24

5
6
5
CLK TITLE
A
or/ou/o
ALPINE
or
English
Radio Operation
Titling Stations (Continued)
Press the TITLE button to store the first
character. The first character will stop blinking
and the display will automatically advance to
the next character. When that character begins
to blink, you may choose the next letter or
symbol of your title.
Repeat the steps and above to complete
the titling. All 8 character positions should be
filled. Use spaces where characters are not
needed (for example at the end of a 5 character
title, use 3 spaces to complete the title).
24
7
After the last character has been entered
(character number 8), the title will automatically
be stored.
Notes:
• When you want to erase a title, enter the
" " symbol into all spaces.
When the title memory is used up, the
display shows "FULL DATA." Storing new
station titles after the "FULL DATA"
message has been displayed, causes
previously stored titles to be erased. The
new station titles will replace the old titles
beginning with the first one created.
• A total of 24 titles for AM and FM stations
may be entered.
Page 25

English
Radio Operation
Searching Titled Stations
(Title Search Menu)
1
2
3
4
BAND
PROG
T.S.M.
UP
DN
BAND
PROG
CLK TITLE
F1
T.S.M.
ALPINE
Press the TITLE button to activate the Title
Display mode.
Press and hold the T.S.M. button for at least 2
seconds while the station title is displayed.
The titled station in memory blinks in the
display.
Press the DN (c) or UP (f) button to select
the desired station title.
Press the T.S.M. button to play the selected
station.
The unit will automatically search the station
and will play that station.
25
Page 26

1
Magazine
English
CD Operation
Preparation for Playback
Insert your discs (up to 3) into the disc slots of
the CD magazine with the label side facing up.
CD
2
3
Insert the CD magazine all the way into the
3DA-W882E with the arrow pointing toward the
unit as shown here.
To remove discs from the CD magazine, first
find the lever corresponding to the CD you
would like to remove. Push the lever away from
the magazine. The disc will come halfway out
from the CD magazine. Carefully grasp the
edge of the disc as shown and remove.
Note: Hold the disc so you will not leave
fingerprints on the disc surface (refer to
"Disc Care" section).
Notes:
1. Do not insert heat-deformed discs into the
CD magazine.
2. Do not forcibly remove the CD magazine by
hand.
3. Only one disc can be inserted in each
housing slot. Attempting to insert another
disc may cause damage.
4. Only compact discs containing the mark
shown can be used.
5. 3-inch (8cm) CD's cannot be used.
26
Page 27

1
English
CD Operation
4
2
1
43
3
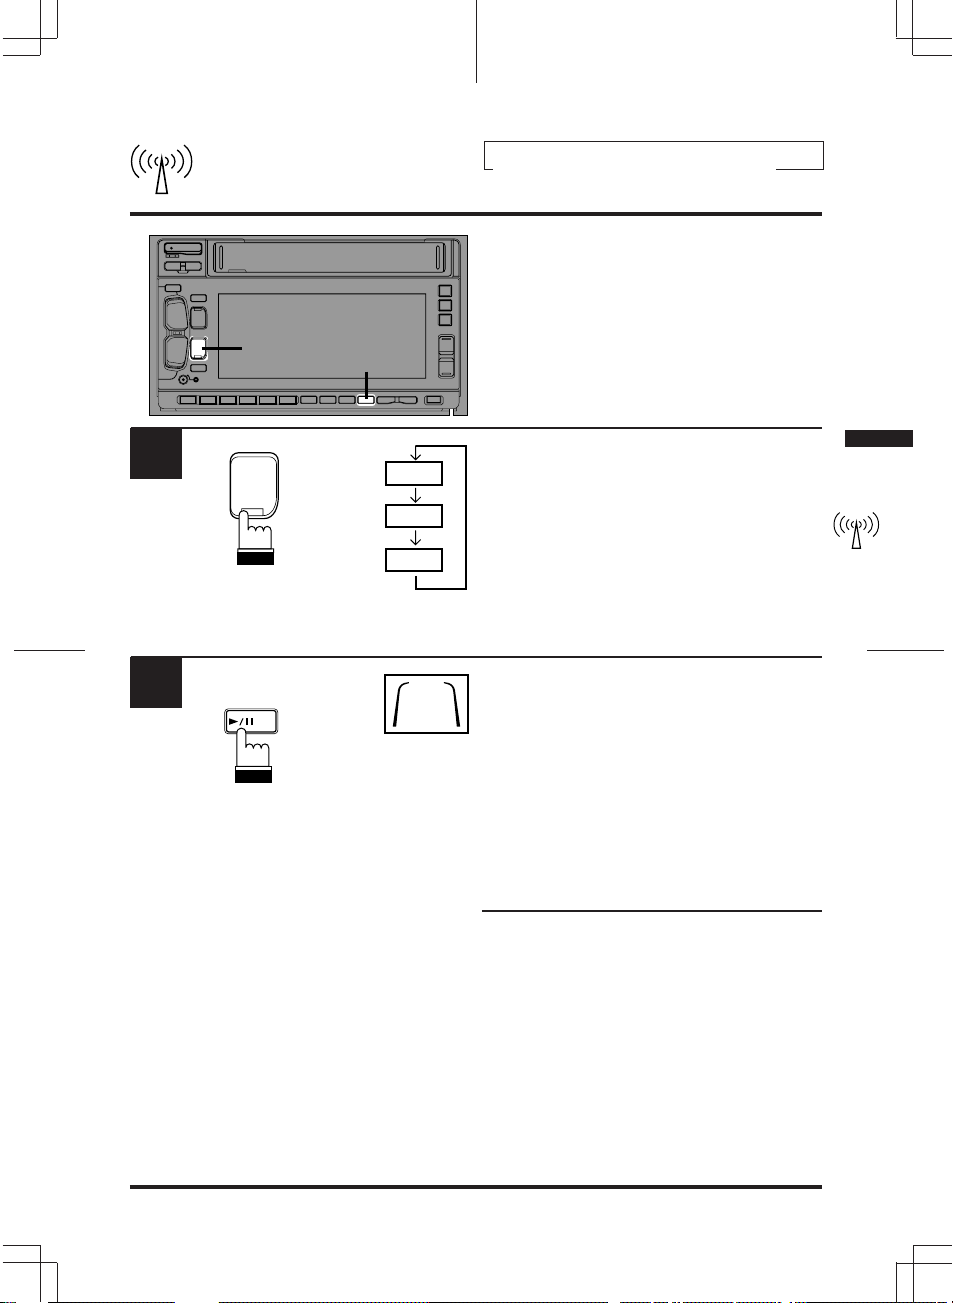
Normal Play and Pause
Insert the magazine all the way as instructed on
top of the magazine.
2
3
4
TUNER
or
SOURCE
DEMO
10
CD SHUTTLE
3
T02 0'07
DISC
TAPE*3D
123
MANU/DISCREW FF
DN UP
11 12
EQ BAND
EJECT
Press the SOURCE button repeatedly to select
the 3D mode.
(* Only with the CD shuttle connected.)
Press one of the preset number buttons
(1 – 3) to select a disc set in the magazine. The disc can also be selected with the
disc select switch.
The selected disc number is displayed and the
playback starts.
The preset number switches 1 – 3 are
corresponding to the disc No. 1 – 3.
Press the 0 button to pause the CD play. To
resume playback, press the 0 button again.
Press the eject (h) button to eject the magazine.
27
Page 28

English
CD Operation
Fast Forward and Backward
1
1
1
Press and hold the DN (c) or UP (f) button to
UP
DN
quickly move backward or forward until you
reach the desired section of the track.
Repeat Play
1
Press the 8 (RPT) button to play back
repeatedly the track being played. The unit
8
RPT
RPT ALL
enters the Repeat mode and the track will be
played repeatedly.
Press the 8 (RPT) button again to deactivate
the repeat play.
28
(OFF)
RPT
Note: If the RPT ALL mode is selected, the unit
repeatedly plays back all tracks on the
disc selected.
Page 29

1
English
CD Operation
Music Sensor (Skip)
1
Momentarily press the DN (c) button once to
DN
return to the beginning of the current track. If
you wish to access a track further back,
repeatedly press until you reach the desired
track.
T04
UP
T05
Press the UP (f) button once to advance to
the beginning of the next track. If you wish to
access a track further ahead, press repeatedly
until the desired track is reached.
(The example shows the Music Sensor
operation starting from track No. 4.)
Note: The music sensor feature is functional in
the play or pause mode.
29
Page 30

1
English
CD Operation
M.I.X. (Random Play)
1
Press the 7 (M.I.X.) button in the play or
pause mode. The unit enters the M.I.X. mode
7
M.I.X.
M.I.X.
and the tracks on the disc will be played back in
a random sequence. After all the tracks on the
disc have been played back once, the player
will load the next disc and begin a new random
sequence until the M.I.X. mode is canceled.
(OFF)
To cancel M.I.X. play, press the 7 (M.I.X.)
button again.
Note: If a CD Shuttle equipped with the ALL
M.I.X. function is connected, ALL M.I.X.
will also be selectable. In this mode, the
tracks on all the CD’s in the current
magazine will be included in the random
playback sequence.
30
Page 31

English
CD Operation
Scanning Programs
1
1
Press the 9 (SCAN) button to activate the
Scan mode. The first 10 seconds of each track
9
SCAN
SCAN
will be played back in succession.
To stop the Scan, press the 9 (SCAN) button
(OFF)
to deactivate the Scan mode.
31
Page 32

English
CD Operation
1
To display CD Titles
1
CLK TITLE
T08 11'03
T08 12:58
ALPINE
Title not entered
Characters and Symbols
A B C D E F G H I J K L
Title entered
In the 3D/CD Shuttle mode, after a title has
been entered for a CD, it can be displayed by
pressing the TITLE button. The display will
toggle between Normal, Clock and CD Title with
each press of the CLK/TITLE button (see
example below). (Refer to page 33 to title the
disc.)
NORMAL Mode
CLOCK PRIORITY Mode
CD TITLE Mode
32
M
N O P Q R S T U V W X
Z 0 1 2 3 4 5 6 7 8 9
Y
<
> / + -
Blank
Page 33

1.@
English
CD Operation
Titling Disc
3
1
2
3
CLK TITLE
CLK TITLE
UP
DN
or
or/ou/o
BLPINE
Press the TITLE button to select the disc-titling
mode. (Refer to page 32).
Press and hold the TITLE button for at least 3
seconds. The first digit will blink.
Press the DN (c) or UP (f) button to select
the desired letter/numeral/symbol available for
naming ("A" for example).
33
Page 34

4
5
4.^
CLK TITLE
AL
English
CD Operation
Titling Disc (Continued)
Press the TITLE button to store the first
character. The first character will stop blinking
and the display will automatically advance to
the next character. When that character begins
to blink, you may choose the next letter or
symbol of your title.
Repeat the steps and above to complete
the titling. Pressing the TITLE button after
entering the eighth character, automatically
stores the title into memory.
In case of storing a title of less than 8 characters:
For example, after 3rd digit character is
completed, 4th digit character is blinking. Then,
go to step .
34
6
CLK TITLE
Press and hold the TITLE button for at least 3
seconds to record the title.
Notes:
• When the display shows "FULL DATA", the
memory is full and no input is accepted. In
order to input new titles, old titles must be
deleted first. Refer to the section "Erasing
Disc Title" on page 35 to delete titles.
• The 3D Shuttle can memorize up to 30 CD
titles maximum.
• The CD Shuttle memory capacity depends
upon the model being used.
• In the case of the 3D Shuttle, the memorized
titles will be erased if the battery power lead
is disconnected, keep this in mind when
touching power cables.
Page 35

CD Operation
Erasing Disc Title
English
1
2
3
4
5
OPEN
O/C
CLOSE
OPEN
O/C
CLOSE
CLK TITLE
UP
DN
CLK TITLE
ALPINE
Press the TITLE button to select the disc titling
mode. Then, press and hold for at least 3
seconds.
Press and hold the O/C button for at least 3
seconds to activate the title scanning mode.
The title in the display will blink, for example
"ALPINE".
Press the DN (c) or UP (f) button repeatedly
until the disc title you want to erase is displayed.
Press and hold the O/C button for at least 3
seconds to erase the disc title displayed.
Press and hold the TITLE button for at least 3
seconds to cancel the disc title erasing mode.
35
Page 36

English
CD Operation
Searching Titled Discs (Title
Search Menu)
1
2
3
4
BAND
PROG
T.S.M.
CLK TITLE
UP
DN
BAND
T.S.M.
PROG
ALPINE
Press the TITLE button to activate the Title
Display mode.
Press and hold the T.S.M. button while the title
is displayed.
The title in memory blinks in the display.
Press the DN (c) or UP (f) button to select
the desired disc title.
Press the T.S.M. button to play the selected
disc.
The unit will automatically search the disc and
will play that disc.
36
Page 37

English
CD Shuttle Operation
Operation of 6-Disc Shuttle
(Option)
If an Ai-NET applicable CD Shuttle made by
1
3
2
2
ALPINE is connected, this unit can operate the
CD Shuttle.
1
2
3
TUNER
UP
DN
SOURCE
DEMO
TAPE*3D
123456
CD SHUTTLE
5
T01
DISC
or
MANU/DISCREW FF
DN UP
11 12
EQ BAND
5
T05 0'16
DISC
Disc
No.
Track
No.
Elapsed
time for
playback
Press the SOURCE button to activate the CD
Shuttle mode.
The mode will change each time the button is
pressed.
(* Only with the CD Shuttle connected)
Press one of the buttons 1 – 6 to select a
disc set in the CD Shuttle. The disc can also be
selected with the disc select switch.
The disc No. selected is displayed.
Press the DN (c) or UP (f) button lightly to
specify a music number (track number).
The playback will begin.
Notes:
• The CD shuttle can be operated in the same
way as this unit.
• The preset switch numbers 1 – 6 are
corresponding to the disc No. 1 – 6.
37
Page 38

English
CD Shuttle Operation
Operation of 12-Disc CD
Shuttle (Option)
If an Ai-NET applicable CD Shuttle made by
1
3
2
ALPINE is connected, this unit can operate the
CD Shuttle.
1
TUNER
2
Disc No. 1 2 6 11 12
SOURCE
DEMO
TAPE*3D
MANU/DISCREW FF
DN UP
11 12
EQ BAND
CD SHUTTLE
3
UP
DN
Press the SOURCE button to activate the CD
Shuttle mode.
The mode will change each time the button is
pressed.
(* Only with the CD Shuttle connected)
Press the Disc Select button to select a disc set
in the CD Shuttle. The disc can also be
selected with the Disc Select switch.
The disc No. selected is displayed.
The disc can be selected directly if you use the
function switch. (Refer to page 39.)
Press the DN (c) or UP (f) button lightly to
specify a music number (track number).
38
Page 39

1
2
FUNC
English
CD Shuttle Operation
How to Use the Function
Mode
When the 12-disc CD Shuttle is connected, a
disc can be directly selected.
21
Press the FUNC button. The FUNC indicator
lights up and the unit enters the FUNC mode.
FUNC
Press one of 7 – ] buttons and select a
disc set in the CD Shuttle magazine.
8 9 10 11 127
DN UP
Notes:
• One of discs 1-6 can be selected by
pressing one of the buttons 1 –
regardless of the FUNC mode.
• If a disc is selected by pressing one of the
buttons 1 – ] during the FUNC mode,
the FUNC mode is released.
6
39
Page 40

1
OPEN
O/C
CLOSE
1.@
Cassette Player
Operation
Opening and Closing of
the Movable Display
Press the O/C button.
The movable display opens.
English
40
2
OPEN
O/C
CLOSE
To close the movable display, press the O/C
button again.
Notes:
• When the movable display is opened, do not
place any object on the display and be
careful not to bump or apply any pressure to
the door while it is open. This can cause
damage to the mechanism.
• Under low ambient temperature conditions,
the display may be dark for a short period
immediately after the power is turned on.
Once the LCD has warmed up, the display
will return to normal.
Page 41

Cassette Player
Operation
Playback
English
1
2
TUNER
1
SOURCE
DEMO
TAPE*3D
10
CD SHUTTLE
PAUSE
TAPE
3
1
2
When a tape cassette is inserted with the
movable display opened, the display closes
automatically and the playback starts.
When a cassette is already inserted, press the
SOURCE button to select the TAPE mode. The
mode will change each time the button is
pressed.
(*Only with a CD Shuttle connected.)
Press the 0 button to pause the tape
playback.
Press again to resume tape playback.
3
OPEN
O/C
CLOSE
Pressing the O/C button stops the playback and
ejects the cassette. The movable display will
open automatically.
Notes:
• Make sure the cassette tape is fully inserted
into the mechanism before pressing the O/C
button to close the movable display.
• After a cassette tape is inserted, the tape
bias is automatically set. For high bias tapes
(metal, CrO2, etc.) MTL will be displayed.
41
Page 42

Cassette Player
English
Operation
Dolby B/C NR (Noise Reduction)
1
1
1
B/C NR
Press the 7 (B/C NR) button in the tape
B C NR
7
B C NR
(OFF)
mode to select the Dolby B NR or C NR to play
a Dolby B NR or C NR encoded tape respectively. The B or C indicator appears in the
display to show your selection. A reduction in
tape hiss should also be noticed, with a
properly encoded tape.
To deactivate the Dolby NR mode, press the
(B/C NR) button until the B NR and C NR
7
indicators disappear.
Repeat Play
1
REPEAT
Press the 8 (RPT) button and the unit enters
the Repeat mode. The current program will be
played back repeatedly.
42
8
REPEAT
(OFF)
Press the 8 (RPT) button to stop the repeat
play.
Page 43

1
MANU/DISCREW FF
DN UP
11 12
EQ BAND
21
Cassette Player
English
Operation
Fast Forward and Rewind
Press the REW or FF ([ or ]) button
during tape play to fast rewind or forward the
tape respectively.
The tape side indicator ( or ) blinks.
When the end of the tape is reached in the
rewind mode, the player stops automatically
and begins playing from the beginning of the
same side. When the end of the tape is reached
in the fast forward mode, the player stops
automatically and begins playing from the
beginning of the opposite side.
2
1
10
Press the 0 button to stop fast rewinding or
forwarding to resume tape play.
The tape side indicator stops blinking.
Blank Skip (B.SKIP)
1
B.SKIP
9
B.SKIP
(OFF)
Press the 9 (B.SKIP) button during tape play
to skip over parts of the tape without sound
lasting 15 seconds or longer. The Blank Skip
function will be highlighted in the display.
Pressing the button again cancels the blank
skip mode.
43
Page 44

Cassette Player
Operation
Manual Reverse
English
1
BAND
PROG
T.S.M.
Press the PROG button during tape play to
change the direction of play. The tape side
indicators ( and ) change to show which side
of the cassette is being played.
44
Page 45

Cassette Player
Operation
Program Sensor (P.S.)
English
1
Press the P.S. DN button once to return to the
DN
PS-1
UP
PS+1
beginning of the current selection being played.
If you wish to return to a selection further back,
press repeatedly until the number of selections
you would like to skip is shown in the display.
The display will show PS-1 with the first press
and will increase by one with each successive
press up to PS-9. The tape indicator will blink
showing the direction of your search.
Press the P.S. UP button once to advance to
the beginning of the next selection. If you wish
to advance to a selection further ahead, press
repeatedly until the number of selections you
would like to skip is shown in the display.
The display will show PS+1 with the first press
and will increase with each successive press up
to PS+9. The tape indicator will blink showing
the direction of your search during searching
operation.
Notes:
• The program sensor feature is functional in
the tape play mode only.
• You can advance to the 9th (max.) program
or return to the 8th (max.) programme.
45
Page 46

Equalizer/Surround
English
Operation
Selecting BBE Mode
The BBE (Barcus Berry Electronics) processor
installed in this unit is designed to correct the
phase distortion inherent in most loudspeaker
1
designs. Ensuring the phase integrity of the
signal driving the speakers improves the
accurate reproduction of the sound. When used
in conjunction with the equalizer and sound field
effects, optimum sound space enhancement
can take place.
1
123
BBE
1 23
BBE
123
BBE
123
BBE
BBE
(OFF)
Press the BBE button.
With each press of the BBE button the mode
will change from the highest effect (BBE 1) to
the least effect (BBE 3). BBE2 will be somewhere in-between.
Note: The BBE processor is most effective
when used in conjunction with the other
surround effects.
Notes:
• The mode currently set is displayed by
pressing the BBE/SUR/EQ button once.
Then, the effect is changed by each
successive press (within 5 seconds).
• While this making this adjustment, other
operations will not be accepted.
• When turning the unit power on for the first
time after resetting, each mode is set to
default.
46
Page 47

Equalizer/Surround
English
Operation
Sound Position Selector
(S.P.S.)
This feature gives the user the ability to adjust
the time delay of the 4 main speakers to
provide the ideal sound stage for each listener
1
2
in the car. The staging can be optimized for the
front passenger, driver, front passenger and
driver, or front and rear passengers and driver.
1
2
SPS-1
Front right seat
DISP
S.P.S.
UP
DN
SPS-2
Front left seat
Press the S.P.S. button for at least 2 seconds.
Press the DN (c) or UP (f) button within 5
seconds of above operation to select the
preferable position.
SPS-3
Front seats
SPS-4
All seats
SPS OFF
(OFF)
47
Page 48

1.@.#.$.%.^
Equalizer/Surround
English
Operation
DSP Surround Presets
The 3DA-W882E employs DSP (Digital Signal
Processing) to duplicate mathematically various
listening environments. Six typical surround
settings are provided for a variety of musical
source material as follows.
1
2
3
4
5
SUR
SUR
SUR
SUR
SUR
NORMAL
NORMAL
T
T
S
S
D
D
A
A
LIVE
HALL
HALL
CHURCH
CHURCH
NORMAL (Flat)
Press the SUR (SURROUND) button to select
the Surround OFF (Flat) mode.
I
I
U
U
STADIUM
M
M
Press the SUR button to select the mode which
duplicates the acoustics of a large outdoor
stadium.
LIVE
Press the SUR button to select the mode which
duplicates the acoustics of a small, intimate
concert hall with few reflections.
HALL
Press the SUR button to select the mode which
duplicates the acoustics of a large concert hall
with limited reflections.
CHURCH
Press the SUR button to select the mode which
duplicates the acoustics of a large cathedral with
high ceilings and many reflections.
48
6
SUR
DANCE
DANCE
DANCE
Press the SUR button to select the mode which
duplicates the acoustics of a dance hall with
moderate reflections.
Page 49

1.@.#.$.%.^
Equalizer/Surround
English
Operation
Equalizer Presets
Six typical equalizer settings are preset at the
factory for a variety of musical source material.
1
2
3
4
5
Setting 1: FLAT
EQ
EQ
EQ
EQ
EQ
Press the EQ (EQUALIZER) button to select
the flat frequency response.
Setting 2: MALE (VOCAL)
Press the EQ button to select the MALE setting.
Setting 3: FEMALE (VOCAL)
Press the EQ button to select the FEMALE
setting.
Setting 4: POPS
Press the EQ button to select the POPS setting.
Setting 5: ROCK
Press the EQ button to select the ROCK
setting.
6
EQ
Setting 6: NEWS
Press the EQ button to select the NEWS
setting.
49
Page 50

Equalizer/Surround
English
Operation
Adjusting the Equalizer
Settings
You can modify the Equalizer settings to create
a response curve more appealing to your
personal taste.
1
2
3
EQ
- - - - - - - - - -
MANU/DISCREW FF
DN UP
11 12
EQ BAND
UP
DN
EQ
FLAT
Press the EQ (EQUALIZER) button repeatedly
to select the Equalizer setting preset which you
wish to adjust.
The example shows FLAT mode.
Within 5 seconds after the operation of ,
press the EQ BAND DN ( [) or UP (])
button to select the frequency band to adjust.
The BAND indicator of the selected frequency
will blink.
Press the LEVEL DN ( < ) or LEVEL UP ( > )
button while the frequency range is blinking to
decrease or increase the level respectively.
Repeat Steps and to adjust other
frequency ranges.
To adjust other Equalizer settings, repeat Steps
to .
50
Page 51

1
Equalizer/Surround
English
Operation
Memorizing the
Equalizer Settings
Press the EQ button to select the desired
EQ
equalizer setting (factory preset or your own)
you wish to store in memory.
2
EQ SUR BBE
123456
3
123456
USER
PRESET
Within 5 seconds after operating step , press
and hold any one of the Preset buttons (1 –
) for at least 2 seconds. The indicators blink
6
for 5 seconds showing the unit is ready for
storing.
While the indicators are blinking, press the
Preset button (1 – 6) into which you wish
to store the selected equalization setting.
Repeat Steps to to store other settings.
The example shows the setting has been stored
at the Preset 2.
Note: You can store the BBE and Surround
settings as well as the Equalizer settings
in the Presets.
51
Page 52

1
EQ
SUR
BBE
BBE
Equalizer/Surround
Operation
Recalling the Memorized
Equalizer/Surround Settings
Press the desired mode button, EQ, SUR or
1
BBE.
English
52
2
123456
1
DISP
S.P.S.
USER
PRESET
To recall your preset, pressing one of the preset
switches (1 – 6) within 5 seconds after
the operation in Section . This provides sound
characteristics of your own design.
Switching the Display
Modes
Press the DISP (DISPLAY) button to select the
desired Display pattern mode.
Each press changes the display patterns as
shown in page 53.
Page 53

Equalizer/Surround
Operation
English
Pattern
1
2
3
4
5
6
Display
63• 160• 400•1K• 2.5K• 6.3K• 16K••
63• 160• 400•1K• 2.5K• 6.3K• 16K••
63• 160• 400•1K• 2.5K• 6.3K• 16K••
63• 160• 400•1K• 2.5K• 6.3K• 16K••
63• 160• 400•1K• 2.5K• 6.3K• 16K••
63• 160• 400•1K• 2.5K• 6.3K• 16K••
Description
EQ Pattern
Spectrum Analizer Pattern
Peak Hold Pattern
Peak Value Increasing Pattern
"i" Character Pattern
Block Pattern
10
7
63• 160• 400•1K• 2.5K• 6.3K• 16K••
8
63• 160• 400•1K• 2.5K• 6.3K• 16K••
9
Mirror Pattern
Spectrum Dual Stack Pattern
Scan Display
(Repeats from DISP2 to DISP8 for every 5
seconds endlessly.)
CD
TAPE
RADIO
Operation Mode Display
Displays each mode of operation.
53
Page 54

1.@
English
Clock Operation
Displaying Time
1
2
CLK TITLE
CLK TITLE
12:00
Press the CLK (Clock) button to display the
time. The unit displays the time.
Note: Selecting any tuner or CD function while
in the clock mode will interrupt the time
display momentarily. The function
selected will be displayed for about 5
seconds before the time returns to the
display. The time will be displayed even
with power to the head unit turned off, as
long as the ignition key is on.
Press the CLK (Clock) button to turn off the
time and to show other functions.
54
Page 55

1
324
English
Clock Operation
Setting Time
1
2
3
4
CLK TITLE
CT
4
H
5
M
6
12:30
12:00
9:00
9:35
9:35
Make sure you are in the Clock mode by
pressing the Clock button (see page 54). Then,
press and hold the CLK (Clock) button for at
least 3 seconds. The time indication will begin
to blink.
To set the time to the nearest hour, press the
CT button while the time indication is blinking.
For example, if the time shown in the display is
9:35, the CT function will change it to 10:00. If
the display shows 9:29, the CT function will set
the time to 9:00.
Example: To adjust to 9:35
Press the "H" button to adjust the hours while
the time indication is blinking.
Press the "M" button to adjust the minutes while
the time indication is blinking.
The time automatically sets after 5 seconds of
inactivity. It can be manually set by pressing the
CLK button immediately after making adjustments. The time display stops blinking when
set.
55
Page 56

1
2
3
4
5
MUTE
PWR
ENT
CD-CHG
BAND
SOURCE A.PROC
PROG
REMOTE CONTROL UNIT
VOLUME
Remote Control
Controls
1Mute Button
Press the button to lower the volume by
20 dB instantly. Press the button again to
6
7
cancel.
2Power Switch
Press the switch to turn the power on/off.
kk
3
k
Button
kk
Press the button to switch between the
Play and Pause modes for the tape player
or CD.
4CD Changer Button
Press the button to change to the CD
changer operation.
5Band/Program Button
Radio mode: BAND Button
Tape mode: Program Button
6Volume Adjustment Buttons
To increase the volume level.....
Press the button
To decrease the volume level.....
Press the button
7 Button
Radio mode: Pressing the button will
select, in ascending order, stations
programmed into the radio's presets as
shown below.
Tape mode: Pressing the button enters
the Program Sensor Up mode. This
allows for music selection towards the
end of the tape. See page 45 for
Program Sensor operation.
3D/CD Shuttle mode: DISC Select (UP)
Button
Press the button to select a disc in
ascending order.
Equalizer/Surround mode: After calling
each mode with the A. PROC button,
press the button to select each
mode.
→1 →2 • • •6
English
56
Page 57

8
w
MUTE
PWR
ENT
CD-CHG
BAND
SOURCE A.PROC
PROG
REMOTE CONTROL UNIT
VOLUME
Remote Control
8 Button
Radio mode: SEEK (DN) Button
Tape mode: REW Button
3D/CD Shuttle mode: Press the button to
go back to the beginning of the current
track.
9 Button
Radio mode: SEEK (UP) Button
Tape mode: FF Button
9
3D/CD Shuttle mode: Press the button to
advance to the beginning of the next track.
p
p Button
Radio mode: Pressing the button will
select, in descending order, stations
q
programmed into the radio's presets as
shown below.
Tape mode: Pressing the button enters the
Program Sensor Down mode. This allows
for music selection towards the beginning of
the tape. See page 45 for Program Sensor
operation.
3D/CD Shuttle mode: DISC Select (DN)
Button
Press the button to select a disc in
descending order.
Equalizer/Surround mode: After calling
each mode with the A. PROC button, press
the button to select each mode.
→6 →5 • • •1
English
qA. PROC Button
Press the button to switch between the
Equalizer/Surround modes.
wAudio Select Button
Press to select the audio source.
57
Page 58

English
d
Remote Control
Battery Replacement
Applicable battery: Use two UM-4 or equivalent.
Opening the battery cover
Slide out the battery cover while firmly pressing
outward.
58
e
e
Replacing the battery
Put the batteries in the case as illustrated.
d
Closing the cover
Push the cover as illustrated until a click is
heard.
Page 59

CORRECT
English
Disc Care
Correct Handling
Do not drop the disc while handling. Hold the
disc so you will not leave fingerprints on the
surface. Do not affix tape, paper, or gummed
labels on the disc. Do not write on the disc.
INCORRECT
Transparent Sheet
CORRECT
Disc Cleaning
Fingerprints, dust, or soil on the surface of the
disc could cause the CD player to skip. For
routine cleaning, wipe the playing surface with a
clean, soft cloth from the centre of the disc to
the outer edge. If the surface is heavily soiled,
dampen a clean soft cloth in a solution of mild
neutral detergent before cleaning the disc.
Disc Accessories
There are various accessories available on the
market for protecting the disc surface and
improving sound quality. However, most of
them will influence the thickness and/or
diameter of the disc. Using such accessories
can cause the disc to be out of standard
specifications and may create operational
problems. We recommend not using these
accessories on discs played in Alpine CD
players.
Disc Stabilizer
59
Page 60

In Case of Difficulty
If you encounter a problem, please review the
items in the following check list. This guide will
help you isolate the problem if the unit is at
fault. Otherwise, make sure the rest of your
system is properly connected or consult your
authorized Alpine dealer.
Initial Turn-on After Installation
English
Symptom
No function or display.
Cause and Solution
• Car's ignition is off.
– If connected per instructions, the unit will
not operate with the car's ignition off.
• Improper connection of power leads.
– Check connections of the power leads.
• Blown fuse.
– Check the fuses on the Battery leads;
replace with the proper value if
necessary.
60
Page 61

In Case of Difficulty
Radio Mode
English
Symptom
Unable to receive stations.
Unable to tune stations in the seek mode.
Broadcast is noisy.
Cause and Solution
• No antenna or open connection in cable.
– Make sure the antenna is properly
connected; replace the antenna or cable
if necessary.
• You are in a weak signal area.
– Make sure the tuner is in the DX mode.
• If the area you are in is not known to be a
weak signal area, the antenna may not be
grounded and connected properly.
– Check your antenna connections; make
sure the antenna is properly grounded at
its mounting location.
• The antenna may not be the proper length.
– Make sure the antenna is fully extended;
if broken, replace the antenna with a new
one.
• The antenna is not the proper length.
– Extend the antenna fully; replace it if it is
broken.
• The antenna is poorly grounded.
– Make sure the antenna is grounded
properly at its mounting location.
61
Page 62

In Case of Difficulty
CD Mode
English
Symptom
CD not functioning.
CD playback sound is wavering.
Unable to Fast-Forward or Backward.
Sound skips due to vibration.
Sound skips without vibration.
Cause and Solution
• Out of operating temperature range +50°C
(+120°F) for CD.
– Allow the car's interior (or trunk) tempera-
ture to cool.
• Moisture condensation in the CD Module.
– Allow enough time for the condensation
to evaporate (about 1 hour).
• The CD has been damaged.
– Eject the CD and discard; using a
damaged CD in your unit can cause
damage to the transport.
• Improper mounting.
– Securely re-mount the unit.
• Disc is very dirty.
– Clean the disc.
• Disc has scratches.
– Change the disc.
• Dirty or scratched disc.
– Clean the disc: damaged discs should be
replaced.
Output sounds dull.
62
Tape Mode
• The tape head needs cleaning.
– Clean the tape head.
• Incorrect Dolby NR in use.
– Check Dolby NR switch setting.
Page 63

In Case of Difficulty
Indication for 3D Head Unit
English
Indication
HI TEMP
T
NO MAGZN
ERROR
Cause and Solution
• Protective circuit is activated due to high
temperature.
– The indicator will disappear when the
temperature returns to within operation
range.
• No disc is loaded.
– Select a disc.
• No magazine is loaded.
– Insert a magazine.
• Malfunction in the unit.
– Press the eject button and remove the
CD from the CD magazine. Inspect the
CD for any deformities or irregularities
(see pages 6 – 7). If there appears to be
no problems with the disc, insert the CD
back into the magazine. When the
"ERROR" indication disappears from the
display, insert the magazine into the unit.
If the magazine does not eject, consult
your Alpine dealer.
• Magazine ejection not possible.
– Press the magazine eject button. If the
magazine does not eject, consult your
Alpine dealer.
• Magazine ejects without CD.
– Press the eject button to activate the
eject function. Insert an empty CD
magazine into the 3D Shuttle to receive
the disc left inside the unit.
If the CD cannot be removed, consult
your Alpine dealer.
63
Page 64

In Case of Difficulty
Indication for CD Shuttle
English
Indication
HI TEMP
ERROR-01
ERROR-02
Cause and Solution
• Protective circuit is activated due to high
temperature.
– The indicator will disappear when the
temperature returns to within operation
range.
• Malfunction in the CD Shuttle.
– Consult your Alpine dealer.
Press the magazine eject button and pull
out the magazine. Check the indication.
Insert the magazine again. If the
magazine cannot be pulled out, consult
your Alpine dealer.
• Magazine ejection not possible.
– Press the magazine eject button.
If the magazine does not eject, consult
your Alpine dealer.
• A disc is left inside the CD Shuttle.
– Press the EJECT button to activate the
eject function. When the CD Shuttle
finishes the eject function, insert an
empty CD magazine into the CD Shuttle
to receive the disc left inside the CD
Shuttle.
64
NO MAGZN
NO DISC
• No magazine is loaded into the CD Shuttle.
– Insert a magazine.
• No indicated disc.
– Choose another disc.
Page 65

English
Specifications
FM TUNER SECTION
Tuning Range ......................................................................................................87.5 – 108.0 MHz
Mono Usable Sensitivity ...........................................................................9.3 dBf (0.8µV/75 ohms)
50 dB Quieting Sensitivity ...................................................................... 13.5 dBf (1.3µV/75 ohms)
Alternate Channel Selectivity ................................................................................................. 80 dB
Signal-to-Noise Ratio ............................................................................................................. 65 dB
Stereo Separation .................................................................................................................. 35 dB
Capture Ratio ........................................................................................................................2.0 dB
AM TUNER SECTION
Tuning Range ........................................................................................................ 531 – 1,602 kHz
Usable Sensitivity ................................................................................................... 22.5µV/27.0 dB
CD SECTION
Frequency Response ................................................................................... 5 – 20,000 Hz (±1 dB)
Wow & Flutter (% WRMS)........................................................................Below measurable limits
Total Harmonic Distortion................................................................................... 0.008% (at 1 kHz)
Dynamic Range ..................................................................................................... 95 dB (at 1 kHz)
Signal-to-Noise Ratio .............................................................................................................95 dB
Channel Separation............................................................................................... 85 dB (at 1 kHz)
65
Page 66

English
Specifications
TAPE PLAYER SECTION
Tape Speed ....................................................................................... 1-7/8 ips (4.8 cm/sec) ±0.7%
Wow & Flutter ........................................................................................................................ 0.06%
Tape Signal-to-Noise Ratio
With Dolby B NR On/Off ............................................................................................. 68/60 dB
With Dolby C NR On/Off/ ............................................................................................ 75/60 dB
Frequency Response
With Alpine Test Tape..........................................................................30 – 20,000 Hz (±3 dB)
EQUALIZER SECTION
Number of Bands............................................................................................................................7
Equalizer Centre Frequency Range............................................ 63/160/400 Hz/1/2.5/6.3/16 kHz,
±12 dB for each range
66
Page 67

English
Specifications
REMOTE CONTROL
Battery Type ................................................................................................. "AAA" sized dry battry
Battery Quantity.............................................................................................................................. 2
Dimensions (W x H x D) .................................... 56mm (2-1/4") x 14mm (9/16") x 105mm (4-1/8")
Weight (without battery) ................................................................................................. 50 g (1 oz)
GENERAL
Power Requirement..................................................................... 14.4V DC (11 – 16V (allowable))
Maximum Power Output* ................................................................................................... 40W x 4
Output Voltage.................................................................................................... 500 mV/10k ohms
Maximum Pre-Output Voltage.................................................................................... 2V/10k ohms
Weight................................................................................................................... 3 kg (6 lbs. 9 oz)
CHASSIS SIZE
Width............................................................................................................................. 178mm (7")
Height ................................................................................................................. 100mm (3-15/16")
Depth ...................................................................................................................... 156mm (6-1/8")
NOSEPIECE SIZE
Width....................................................................................................................... 170mm (6-3/4")
Height ....................................................................................................................... 96mm (3-3/4")
Depth ............................................................................................................................19mm (3/4")
* Under maximum operating voltage and input
signal, into 4 ohms.
Note: Due to product improvement, specifications
and design are subject to change without
notice.
67
 Loading...