

Page 1
Copy E-mail Fax Type File Design Publish
Scanning has never before
been this easy.You need no
previous experience to use the
intelligent ScanWise interface
Do it ScanWise!
for your Agfa scanner.Do it ScanWise!Do it ScanWise!
Page 2

Copy E-mail Fax Type File Design Publish
To find how to make perfect scans for a
wide range of applications, open a tab menu.
1
Click the numbered light bulbs at the side of
the descriptions to view useful tips.
Having read the relevant tips, you can return
to the same point in the description by
clicking this icon in the upper left corner.
Page 3
Copy E-mail Fax Type File Design Publish
Original Type
menu
Destination
menu
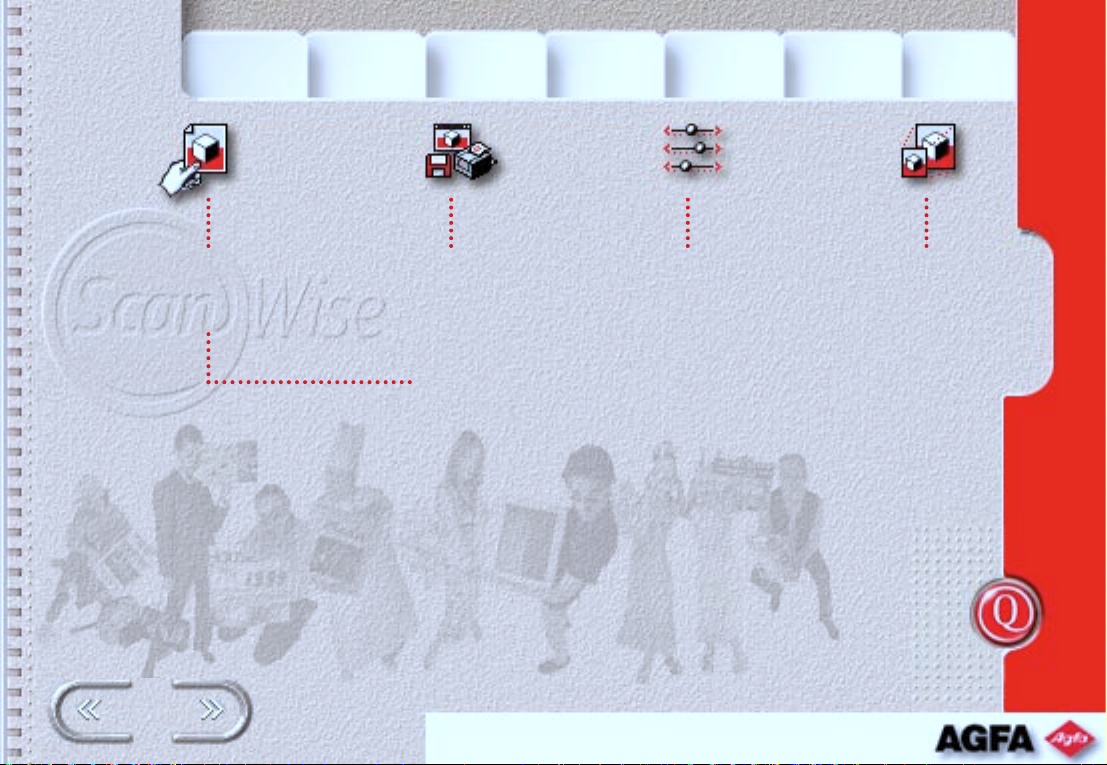
The four ScanWise menuÕs (Original Type,
Destination, Image Control and Dimensions)
appear as buttons to the left of the preview
window in the interface. Click on them to
manually adjust the settings.
Image Control
menu
Have fun!
Dimensions
menu
Page 4
Copy
Copy it ScanWise! If you have a color or black and white
Copy it ScanWise!Copy it ScanWise!
E-mail Fax Type File Design Publish
printer configured on your computer,
ScanWise will find it.You can then make
copies of photos, or any other types of
original images, by scanning them
directly to the printer.
Page 5
Copy
E-mail Fax Type File Design Publish
How it works
Imagine youÕre the marketing manager for a
manufacturer of handbags and you want to copy the
latest proposals from your advertising agency to
distribute among colleagues.
You have an HP 720c color inkjet printer, which is
loaded with photo-quality AgfaJet glossy paper.
You place the original on the scanner bed and then
launch ScanWise. At the end of the automatic
Preview scan, the AutoSelect feature has located your
original and selected its borders. ScanWise even
detects the type of your original: it senses image- or
text-based documents.
321
When your original is selected, you then make
some very simple choices from the four tab
menus. Normally you start with the top tab and
progress down to the SCAN button.
Page 6

Copy
E-mail Fax Type File Design Publish
The first tab opens the Original Type menu. Your
54
original is a contract proof made from the screened
films that will be used for printing.You select the
ÒPrint (others)Óoption so that ScanWise will remove
the dots from the proof to improve the inkjet print
quality (descreening).
The second Destination tab menu displays the list of
6
compatible programs and printers available on your
system. ScanWise finds these items when it launches.
Here you click the printer option.
Image Control is the third tab, which allows you to
987
define the appearance of your final scan. Color mode
has already been selected by ScanWise but there are
two ways to fine-tune your results.Normally you
would rely on the highly intelligent PhotoGenie
software to optimize the results, but you can also
manually adjust the brightness, contrast and
saturation sliders.
Page 7
Copy
E-mail Fax Type File Design Publish
You use the last tab menu, Dimensions, to set the size
1514
of the printed image.This is either indicated as a
percentage of the original size,or you enter its
dimensions.
After these four simple settings have been made, you
1816
can hit the SCAN button.The normal printer dialog
then opens, allowing you to alter settings if necessary.
And thatÕs all you have to do: ScanWise now makes
the final scan and feeds it directly to your printer.
TheyÕll be crazy about these simulated Frisian Cow
handbags - theyÕre definitely worth putting money
into!
Page 8
Copy
Fax Type File Design Publish
Suppose you have some photos or
drawings that you would like to send to
a colleague by e-mail.These could be
Share it ScanWise!
Share it ScanWise!Share it ScanWise!
urgent work-related items or simply
your latest holiday snaps. ScanWise
automatically scans your originals and
places them directly into your favorite
e-mail application: itÕs as easy as
typing the e-mail itself!
Page 9
Copy
E-mail
Fax Type File Design Publish
How it works
LetÕs say you want to send some snaps of your latest
ascent of Everest to your Granny in Wichita by e-mail.
Well who knows?
You place your photos on the scanner bed and then
click the Preview button. ScanWise finds the photos
and selects their borders. Assuming you were
wearing some trendy climbing gear, it will also detect
the fact that they are colored originals!
321
Now you choose one option from each of the four
tab menus. Starting with the top Original Type menu,
you descend swiftly towards the SCAN button.
You pick ÒPhoto - glossyÓ from the Original Type tab
54
menu and then move on to the Destination tab
menu.
Page 10

Copy
E-mail
6
111098
1514
Fax Type File Design Publish
This Destination menu displays the list of compatible
programs and printers available on your system.
ScanWise finds these as it launches.You click the
ÒMail recipientÓ as your destination.
In the third Image Control tab you find that Color
mode has already been selected by ScanWise.
Normally you would rely on the highly intelligent
PhotoGenie software to optimize the results, but you
can also manually adjust the brightness, contrast and
saturation sliders.
So that Granny wonÕt have to waste on-line time, you
set the image size to 50% in the last Dimensions
menu.The default resolution setting for e-mail
images intended for on-screen viewing is lower
than printed images.
Page 11
Copy
E-mail
1816
Fax Type File Design Publish
You repeat these four simple settings for each
original, and then hit the SCAN button. ScanWise
now makes the final scans, opens your e-mail
application, creates a new mail and then pastes in the
images as attachments. All you need to add is
GrannyÕs e-mail address and wish her a very happy
90th birthday.Even free fall couldnÕt be simpler!
Page 12

Copy E-mail
Fax it ScanWise! When you have software on your
Fax it ScanWise!Fax it ScanWise!
Fax
computer to send faxes via your modem,
ScanWise will locate this.You can then
immediately fax hard-copy documents,
images or drawings just like a
conventional fax machine.
Type File Design Publish
Page 13
Copy E-mail
Fax
Type File Design Publish
How it works
Imagine itÕs your seventh birthday! YouÕve put a lot of
effort into creating your own party invitation but itÕs
too late to post it to your friends.Some of them donÕt
have an e-mail connection but their parents do own
fax machines.
Calmly put your card on the scanner bed.Open
ScanWise and click the Preview button.Your card
appears with a border surrounding it. But thereÕs also
a red outline that you definitely didnÕt draw. DonÕt
panic: itÕs only clever ScanWise showing you that it
will use AutoRotate to straighten up your card so that
it will fax perfectly.You obviously werenÕt calm
enough!
Page 14

Copy E-mail
1
Fax
Opening the first Original Type menu,you click the
432
Original artwork option.
In the next tab menu called Destination, you select
6
the fax option.
Then in the third Image Control menu you select the
987
Grayscale mode and you see that PhotoGenie has
done a great job in adjusting the tonal ranges,
preserving all your artistic details! You donÕt bother
altering the other sliders.
Type File Design Publish
Page 15

Copy E-mail
Fax
Since you want to send your invitation at full size,
thereÕs no need to go into the Dimensions menu
because this will be already set to 100%.
So all you have to do is click the SCAN button.
The normal dialog box of your fax application opens
to allow you to give the fax number and thatÕs it.
Get into your party gear!
Type File Design Publish
Page 16
Copy E-mail Fax
If youÕve installed the optical character
recognition program (OCR) that was
supplied with your scanner, ScanWise
Type
File Design Publish
Type it ScanWise!
Type it ScanWise!Type it ScanWise!
can easily save you hours of re-typing
printed matter. Documents are scanned,
converted to text and then automatically
loaded into your favorite word
processor.
Page 17

Copy E-mail Fax
Type
File Design Publish
How it works
YouÕre a head chef for the duration of this example,
if not for life! ItÕs time to revitalize the image of your
restaurant so youÕve decided to whip up a new,
dynamic menu.The old menu was typed out
manually so you donÕt have digital text files.
Rather than wasting valuable time re-typing it,
you use ScanWise to do the job in seconds.
Having fed your old menu into the scanner, you click
the Preview button in ScanWise.
The menu is automatically selected in the Preview
42
window and is outlined in red.This tells you that
in your haste you laid the menu on an angle.
If you scan lines of text on an angle, your OCR
program may have problems recognizing the
characters. For error-free results, ScanWise uses
Page 18
Copy E-mail Fax
its built-in AutoRotate function to square up the text.
Icons on the preview indicate the settings detected
by ScanWise. One of these shows that your menu has
been recognized as text, so you donÕt need to open
the first Original Type menu.
In the second Destination tab menu, you choose your
19
word processor.
The combination of a text Original Type and the word
138
processor Destination tells ScanWise that OCR must
be used, resulting in the Image Control and
Dimensions tab menus being disabled.
So that couldnÕt have been much simpler: all you
had to do was open a single menu!
Type
File Design Publish
Page 19
Copy E-mail Fax
ScanWise gets cooking, converting your old menu to
Line Art, passing this image into your OCR program,
then opening your word processor and pasting in the
converted text.You can immediately add your latest
mouth-watering creations, before sending the file to
a design bureau.
DonÕt you wish you had such reliable, fast-moving,
self-motivated staff?!
Type
File Design Publish
Page 20
Copy E-mail Fax Type
File it ScanWise! Suppose you have a number of originals
File it ScanWise!File it ScanWise!
to scan for later use in various
applications, ScanWise automatically
saves these in the format and location
of your choice.
File
Design Publish
Page 21

Copy E-mail Fax Type
File
Design Publish
How it works
Having just returned from a Mayan architecture
pilgrimage, youÕve got one more week of summer
holiday to prepare your history courses for the
new academic year.You bravely carried back an
over-loaded back-pack full of photos,post cards,
brochures, tickets and other items.
These will undoubtedly form a wonderful record of
ChichŽn Itz‡ and other Mayan sites but you still have
to scan them all!
ScanWise is the perfect tool for the job, automating
virtually the whole scanning process. Since youÕre
not sure at this stage how you are going to use all
the images, youÕve decided to scan and save
them as RGB TIFF files.
The quickest way to scan a large number of
varied originals is to first sort them into sets of
Page 22

Copy E-mail Fax Type
similar types. So you fill the scanner bed, leaving a
small space between each original. Then launch
ScanWise and click the Preview button.
The fact that all originals on the scanner bed are of
3
21
the same type means you can now choose default
settings that will be applied to them all.
In the first tab menu called Original Type,you select
the correct option for the group of originals now on
the scanner bed.
In the second Destination menu you right-click the
6
ÒFileÓoption on a PC and select ÒPropertiesÓfrom the
menu that opens. On a Macintosh you double-click
the option. This opens a dialog where you
indicate the folder that files will be saved into
by clicking the ÒChoose...Óbutton.You pick TIFF
from the ÒFile typeÓ drop-down menu, activate
the ÒEmbed color profilesÓ checkbox to include
File
Design Publish
Page 23

Copy E-mail Fax Type
ICC profiles in your files. Then you indicate the
default image resolution, make sure the ÒAsk filename
before each scanÓcheckbox is not ticked, and finally
click OK to save these settings as defaults.ICC profiles
ensure that the color in your scans will be correctly
interpreted on any Macintosh or Windows PC.
The File option is now selected.
In the next Image Control menu ScanWise
128
intelligently sets the color mode for you,but there
is nothing to stop you scanning colored originals
in Grayscale or Line Art mode.
You donÕt need to open the Dimensions menu
15
because the default scale is 100%.
Now that all of the defaults are set, you click
the Preview button again. All originals are
automatically assigned these settings.
File
Design Publish
Page 24

Copy E-mail Fax Type
This working method avoids having to activate each
original in turn to set its options.When you click the
SCAN button, all originals are scanned sequentially
and are saved in the location and format you
specified.
Now you can sit back and remember those mystical
dawns in ChichŽn Itz‡, before the onslaught of the
new academic year!
File
Design Publish
Page 25

Copy E-mail Fax Type File
Design it ScanWise! While you are working in an image
Design it ScanWise!Design it ScanWise!
editing application, such as Adobe
Photoshop,ScanWise is directly
accessible,allowing you to scan new
source material without leaving the
application.
Design
Publish
Page 26

Copy E-mail Fax Type File
Design
Publish
How it works
Today youÕre a textile designer, working on a new
range of summer dress fabrics.Working in Photoshop
to experiment with different colorways, you decide
that your overall design is too flat.To introduce some
texture you decide to scan a piece of coarse,handmade paper.
Without leaving Photoshop,after placing the paper
on your scanner bed you select the ScanWise driver
from the File menu.This directly opens the ScanWise
interface and an automatic Preview begins.
242
After the Preview scan is complete,the whole piece of
paper is now selected but you spot a couple of
areas that contain some really chunky
vegetation: looks like someone threw a palm
tree in there!
Page 27

Copy E-mail Fax Type File
Since you donÕt want the full, automatic selection
made by ScanWise, you click the Remove Selection
button at the top-right of the interface to delete it.
After clicking the ÒNew SelectionÓtool at the top of
the interface, you now draw two selection rectangles
around the details that interest you.These overlap
but thatÕs no problem.You adjust their sizes with the
corner handles and shift their positions by dragging
anywhere inside the selection rectangles.
Now you need to set up the scanning options for
23
222120
each selection. In the Original Type tab menu, you
pick the ÒOriginal artworkÓoption.
The Destination tab menu is disabled, so you
6
open the Image Control menu. ScanWise opted
for Color, but in this case you want to create
Grayscale images that you can use as layer
Design
Publish
Page 28
Copy E-mail Fax Type File
masks in Photoshop.You click the Grayscale button
and make sure that PhotoGenie is switched on.
Moving to the Dimensions tab menu, you enter the
15
width of your repeat pattern.You see that the default
image resolution is too low, so clicking the arrow to
the right of this information opens a menu where you
type in the new resolution for this scan.
Having set the options for both selections, you click
17
the SCAN button. Two new Photoshop documents
are opened, containing your textures. All you have to
do is copy and paste these into layer masks and you
can then make color corrections through them to
introduce your chunky texture!
The possibilities are endless. Scan real leaves as
Line Art, pressed flowers in full Color: whatever
you need, just scan it in.
Design
Publish
Page 29
Copy E-mail Fax Type File
So now itÕs time to turn up that Havanan bolero and
drift off to sunny palm beaches: this design is going
to be a winner!
Design
Publish
Page 30

Copy E-mail Fax Type File Design
Publish
Publish it ScanWise!
Publish it ScanWise!Publish it ScanWise!
With a word processor on your system,
such as Microsoft Word, you can scan
images directly into documents without
intermediate processing. Add an OCR
application to the work flow and
ScanWise even scans editable text
straight into your pages.
Page 31
Copy E-mail Fax Type File Design
Publish
How it works
You just stepped into the shoes of a graphic designer
who is working on a documentary book of graffiti
and artwork produced in Berlin before the Wall came
down.YouÕve made a mock-up of the front cover and
you have the layout worked out. In order to convince
your publisher to print the book, you want to make
up a Word document containing some images to
illustrate your text.
YouÕve put the front cover design on your scanner
bed and have launched ScanWise.After the
automatic Preview has finished,the cover is
displayed with its borders selected.
Now you set up the scanning options by leafing
242
through the four tab menus. In the first Original
Type menu, you select ÒOriginal artworkÓ. Then
you move to the second Destination menu and
pick your word processor.
Page 32

Copy E-mail Fax Type File Design
Image Control is the next menu. Here you find that
86
ScanWise has already selected Color mode for you,
using its AutoDetect function.You decide to rely on
the built-in, intelligent PhotoGenie software to
optimize both the color and detail of your design.
So thereÕs nothing to do in this menu: youÕre
beginning to feel a little redundant!
At least your input is needed in the last Dimensions
menu. Intended for the European market, the book
will have an A4 format,so you enter a height of
303 mm to allow for bleed.ScanWise automatically
calculates the scaling factor for you.
When you hit the SCAN button, ScanWise
1817
captures your design and PhotoGenie
simultaneously enhances it.The word processor
you chose is now automatically opened by
ScanWise, a new document is created and the
Publish
Page 33

Copy E-mail Fax Type File Design
image is pasted into it. Following the same procedure
you scan your other images and then add the text.
Within minutes you have produced a very acceptable
sample of your proposed layout.
With such a good result, youÕre certain that your
publisher will break down any barriers preventing
you going to press!
Publish
Page 34
We have built optimal default settings
into ScanWise to allow you to scan
originals and to place them directly into
the application of your choice with only
a single click of the SCAN button.
To streamline your scanning, check the
following interface settings (it may be
One-click scanningOne-click scanningOne-click scanning
useful to print this page as a guide).
Page 35

1. Select ÒOptions...Ófrom the Tools menu on
a PC or ÒPreferences...Óon a Macintosh.
2. In the Intelligence tab menu, turn on the
ÒFind multiple originalsÓoption in the
ÒAutoSelectÓ section.
3. Make sure the ÒAutoPreview at startupÓ
checkbox is ticked (on).
4. In the Preview tab menu,turn on the ÒAlwaysÓ
option in the ÒDisplay setting iconsÓ section
and click OK to confirm these changes.
5. Open the Original Type tab menu. Drag the
option that describes the originals you are most
likely to be scanning to the top of the list.
Page 36

6. Open the Destination tab menu, right-click the
option to which you want to scan and select
ÒPropertiesÓfrom the menu that opens (doubleclick the option on a Macintosh). A dialog now
opens, which allows you to change the default
settings as required.When scanning to a file, for
example, the following default settings can be
specified: the image resolution; the folder in
which the file should be saved; the file format;
whether to include ICC profiles or not; whether
filenames for each scan will be requested or
automatically created.
7. When the defaults have been set, drag this
destination to the top of the list. AutoSelect
uses the first option in the list as its default
destination, when ScanWise is first
launched.
Page 37

How it works
¥ You place your original image(s) on the scanner
bed and then launch ScanWise.
¥ A preview is made automatically, which selects
your original(s).The first icon displayed on each
selection in the Preview window shows the
Original Type(s) that ScanWise will use.
¥ The Destination is set to the first option in the
list, as indicated by the second icon on each
selection.
¥ A third icon indicates the detected color mode.
PhotoGenie optimization is on by default so
there is no need to open the Image Control
menu.
¥ The output size will be 100% by default so if
this is acceptable, you donÕt need to open
the Dimensions menu.
¥ You only need one click: the SCAN button!
Page 38

1
Tip 1 - Icons showing the Original Type,
Destination and Color Mode for each original
can be displayed in the Preview window.
To set the options for this display mode, open
the Tools menu and click ÒOptions...Ó on a PC,
or ÒPreferences...Óon a Macintosh.
Then select the ÒPreviewÓ tab.
Page 39

2
Tip 2 - The automatic Preview scan that
activates when ScanWise launches can be
turned on or off by changing the
preference settings in ScanWise.
Page 40

3
Tip 3 - If your original is not squarely placed
on the scanner bed, ScanWise draws a red
outline around it to indicate that the
AutoRotate feature will correct this during
scanning. If you donÕt want auto-rotation,
click on the red outline to remove it.
Page 41

4
Tip 4 - The Guide Me mode is both started
and stopped by the button at the top-left of
the interface.This mode guides you
through all tab menus and explains their
functions.
Page 42

5
Tip 5 - If you put more than one original
on the scanner bed, ScanWise will make
multiple selections.The tab menu settings
for each selection are then chosen
individually. Every selection can have
different settings.
Page 43

6
Tip 6 - If the ScanWise AutoSelect function
finds a text-based document, it automatically
sets the Original Type to ÒTextÓ. Otherwise it
uses the first option in the Original Type list
when ScanWise is first launched. If you select
a different type, this becomes the automatic
default for any non-text documents that are
selected during the current ScanWise session.
Drag your most commonly used Original
Type to the top of the list to avoid the
manual setting of this tab menu in most
cases.
Page 44

7
Tip 7 - Microsoft Windows users will find
that the Destination tab menu contains a
list of all currently defined printers and fax
applications. On the Macintosh platform,
the current setting of the Chooser in the
Apple menu will determine which printer or
fax will be the target of the ÒPrinter/FaxÓ
destination. If necessary, change the
Chooser setting before making your scan.
Page 45

8
Tip 8 - Drag commonly-used options to the
top of the Destination list for rapid access.
The first option will always be the default
setting when ScanWise is launched, so make
this your most frequently used destination.
This will save you having to open the
Destination tab menu for most scans.
When you pick a different destination,
this becomes the default setting for both
manual and automatic selections while
you remain in ScanWise.
Page 46

9
Tip 9 - To view or change the default
output settings of a specific option in the
Destination list, right-click the option on a
PC and select ÒPropertiesÓ from the menu
that opens, or double-click the option on
a Macintosh.
Page 47

10
Tip 10 - Generally speaking, the ÒMail
recipientÓ destination will be your normal
e-mail application.The default Mail
recipient on Windows platforms is the last
MAPI-compliant e-mail application that has
been installed or configured. On Macintosh
platforms using operating systems below
8.5, the Mail recipient is determined by the
preference settings of the third-party
Internet Config utility. From system 8.5
onwards, the settings of the built-in
Internet control panel are used.
Page 48

11
Tip 11 - Many destinations require a scan to be
saved on your computer, including the ÒMail
recipientÓ and ÒWeb imageÓ options.The Agfa
default location of these scans on a Windows
NT system is your ÒPersonalÓfolder. On
Windows 95 and 98 systems they will be saved
in the ÒMy DocumentsÓ folder.The default
location on a Macintosh will be in a ÒScanWise
ImagesÓfolder on your Desktop. An alternative
location can be individually set for each
destination.To do this within Windows on a PC,
right-click the option in the Destination tab
menu and select ÒPropertiesÓ from the menu
that opens. On a Macintosh, double-click the
option. Clicking the ÒChoose...Óbutton allows
you to browse through your folders to select
an alternative. In all cases except the ÒFileÓ
destination, the names of the scans will be
ÒUntitledXÓ, where X is an incremental
number beginning from zero.
Page 49

12
Tip 12 - When scanning to the ÒFileÓ destination,
the names of scans are either allocated
automatically or they are supplied by you.
This setting is changed on a PC by rightclicking the option in the Destination tab menu
and selecting ÒPropertiesÓ from the menu that
opens. On a Macintosh, double-click the option.
If the ÒAsk filename before each scanÓcheckbox
is ticked, a Save dialog will be displayed for
every selected original before it is scanned.
This dialog also allows you to pick a different
format from the normal default setting.If the
checkbox is not ticked, the names of the
scans will be ÒUntitledXÓ, where X is an
incremental number beginning from zero.
Page 50

13
Tip 13 - When icons are displayed on the
Preview selections, the current default
destination is indicated. If this is the
destination you want, there is no need to
open the Destination menu.
Page 51

14
Tip 14 - Double-click the slider controls to
reset them to the neutral position.
Page 52

15
Tip 15 - PhotoGenie is highly intelligent,
often improving the quality of poor
originals.When PhotoGenie is on, you donÕt
normally need to alter the correction
sliders. PhotoGenie is automatically
switched on by default.
Page 53

16
Tip 16 - Double-click the percentage slider
control to reset it to 100%.
Page 54

17
Tip 17 - When entering physical dimensions,
the units of measurement can be chosen
from the drop down lists at the side of the
numeric entry fields.
Page 55

18
Tip 18 - For most destinations,the optimum
resolution of the final scan is predefined.You
can change this default value on a PC by rightclicking its entry in the Destination tab menu
and selecting ÒPropertiesÓ from the menu that
opens (double-click the option on a
Macintosh).The new value is used for all
following scans.To return to the Agfa default
image resolution, click the ÒResetÓ button.
In the Dimensions tab menu you can override
this default image resolution, for only the
actively selected original, by clicking the arrow
to the right of the Image Resolution
information. All other selections continue to
use the default settings that have been
separately defined for each option in the
Destination tab menu, as explained in the
previous paragraph.
Page 56

19
Tip 19 - If you want to put text and
diagrams directly into your word processor
as an image, rather than using OCR to
convert to editable text, select an option
other than Text in the Original Type menu.
Alternatively, scan to a file or an image
editor and add the image to your document
later.
Page 57

20
Tip 20 - If you make a Preview after having
drawn manual selections, they will be
deleted.
Page 58
21
Tip 21 - When you draw a selection
manually, its settings will be the same as
those you set for the previously active
image, or they will revert to default ones if
you have not chosen any settings during
the current session. For creating multiple
selections with the same settings, draw the
first, choose your settings for this and then
draw the other selections.
Page 59

22
Tip 22 - Clicking on overlapping selections
activates the uppermost one. If you have
difficulty activating a certain selection
due to the overlapping order, use the
ÒNext selectionÓtool to loop through all
selections.
Page 60

23
Tip 23 - When a selection is active, it has
resizing handles on all corners and sides.
Dragging a handle on one of the sides
changes the position of that side only.
Using a corner handle changes the two
adjoining sides simultaneously. If you place
the cursor inside an active selection, you
can drag the whole selection to a new
position.
Page 61

24
Tip 24 - ScanWise can be launched directly
from within certain applications, such as image
editors or word processors.The method and
availability depends upon both the type of
computer and its operating system.Within
image editors, the ScanWise option is normally
selected from the ÒAcquireÓ or ÒImportÓ
submenu in the ÒFileÓmenu. The option might
be named ÒTWAIN_32Óon PC platforms, or
ÒAgfa ScanWiseÓon Macintosh platforms.
From other applications,ScanWise might
be started via the ÒInsertÓ menu.
 Loading...