

Page 1

AGFA ePhoto Smile Camera – Getting Started 1
Getting Started
ePhoto Smile Camera
Page 2
AGFA ePhoto Smile Camera – Getting Started 2
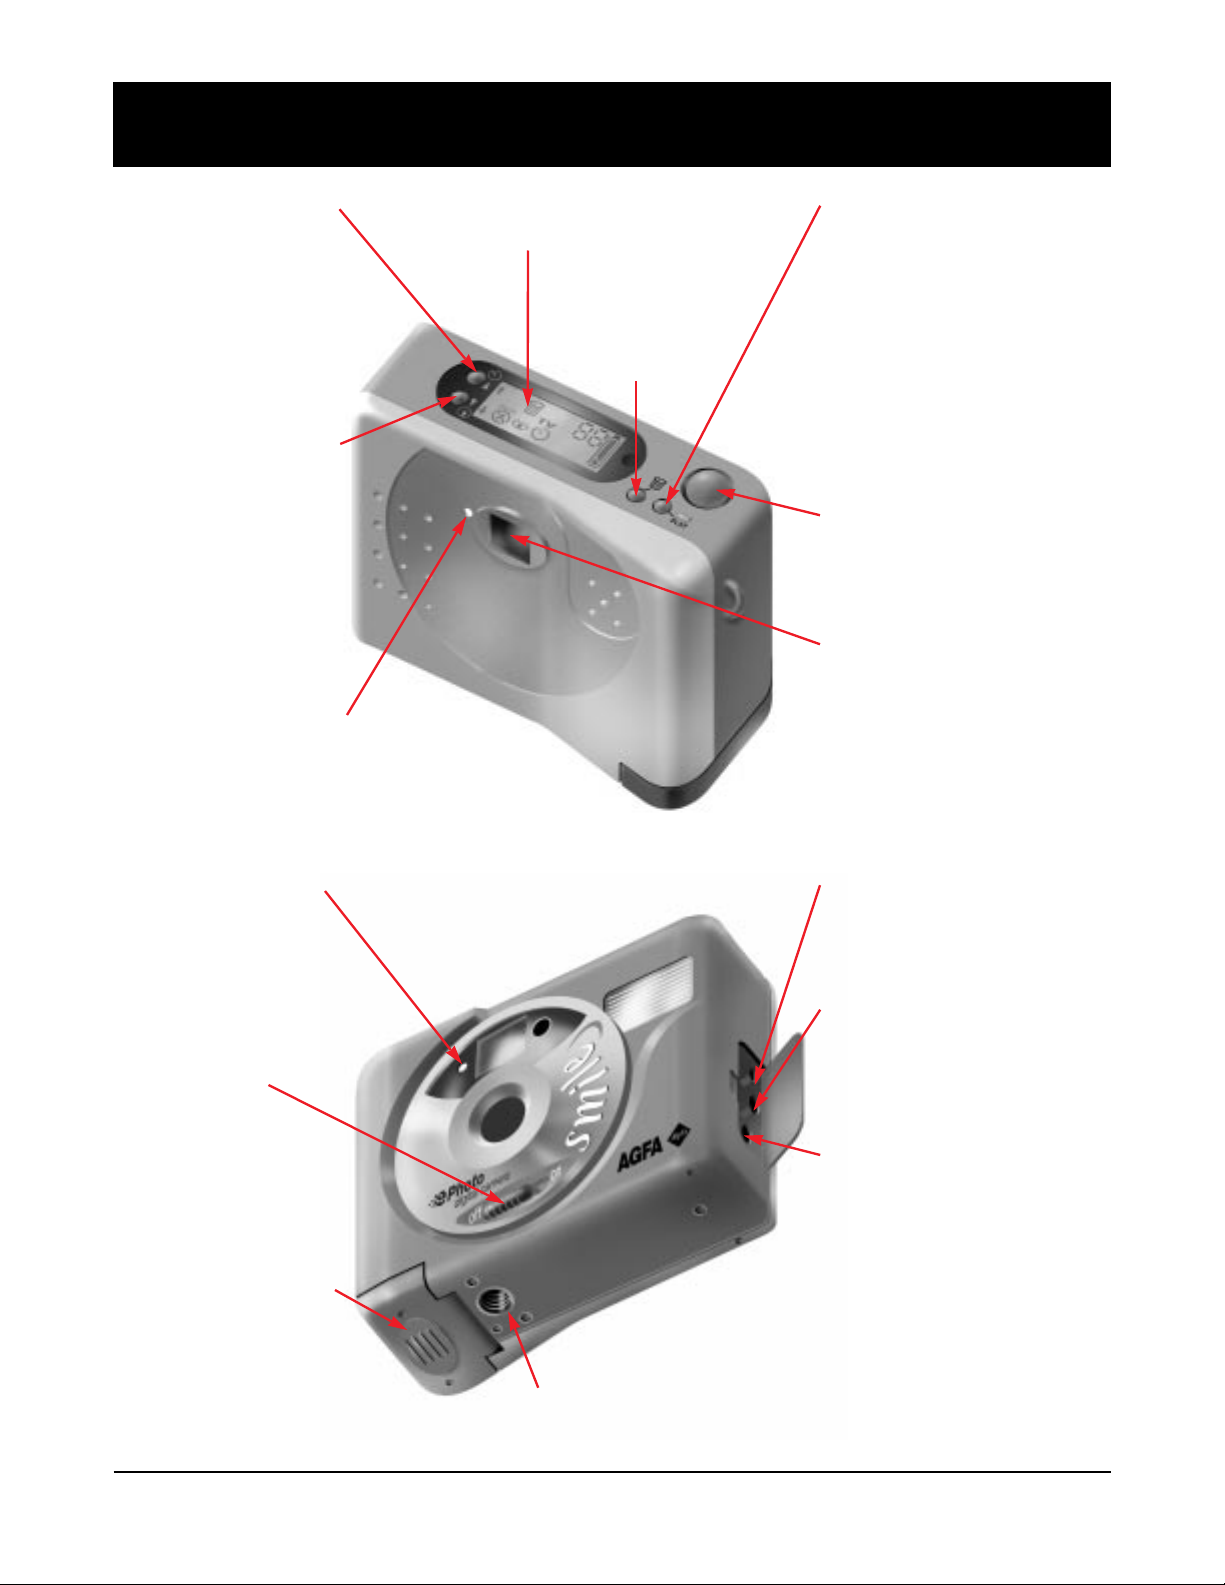
On/Off Switch
T o switch on or off
the camera (the
lenscover will be
opened or closed).
T ripod Mount
T o mount your camera on a tripod.
Battery Compartment
T o insert 2 AA
batteries (Alkaline,
NiMH, NiCad or
Lithium).
Serial Port Connector
T o connect your camera with
a serial cable to your PC to
download images.
Video Port Connector
T o connect your camera
with a video cable to the
video port of your television
set or VCR.
DC Power Input Port
T o connect your camera to a
power supply you need a
power adapter (not
included). If you buy a
power adapter make sure it
has an input voltage range
from 4.5 to 5.0 V and 1 A.
Selftimer/Next Button
• T o picture yourself with
a shutter delay of 10
seconds.
• T o select the next
image to erase or
preview.
Display
T o see the settings of the active mode.
Erase Button
T o access the
Erase display.
Shutter Button
T o shoot an image in
Record Mode or to erase
an image.
Record/Play Button
T o select the Record or
Play Mode.
¥ Record Mode: to
activate the Selftimer button
and Flash functions.
¥ Play Mode: to activate
the Next and Previous
buttons.
Flash/Previous Button
• T o set the flash
options (automatic
flash, no flash, fill-in
flash, ‘red eye’ flash).
• T o select the previous
image to erase or
preview.
Viewfinder
T o frame the image you want
to take. Through the
Viewfinder you only see 80%
of the final image.
Green Action Indicator
This green light blinks as an indication that the
camera is processing the captured image or
charging the flash.
Red Action Indicator
This red light blinks as
an indication that the
selftimer is activated
or functions as ‘redeye’ flash.
Getting to Know Your ePhoto Smile Camera
Page 3
AGFA ePhoto Smile Camera – Getting Started 3
Record Mode
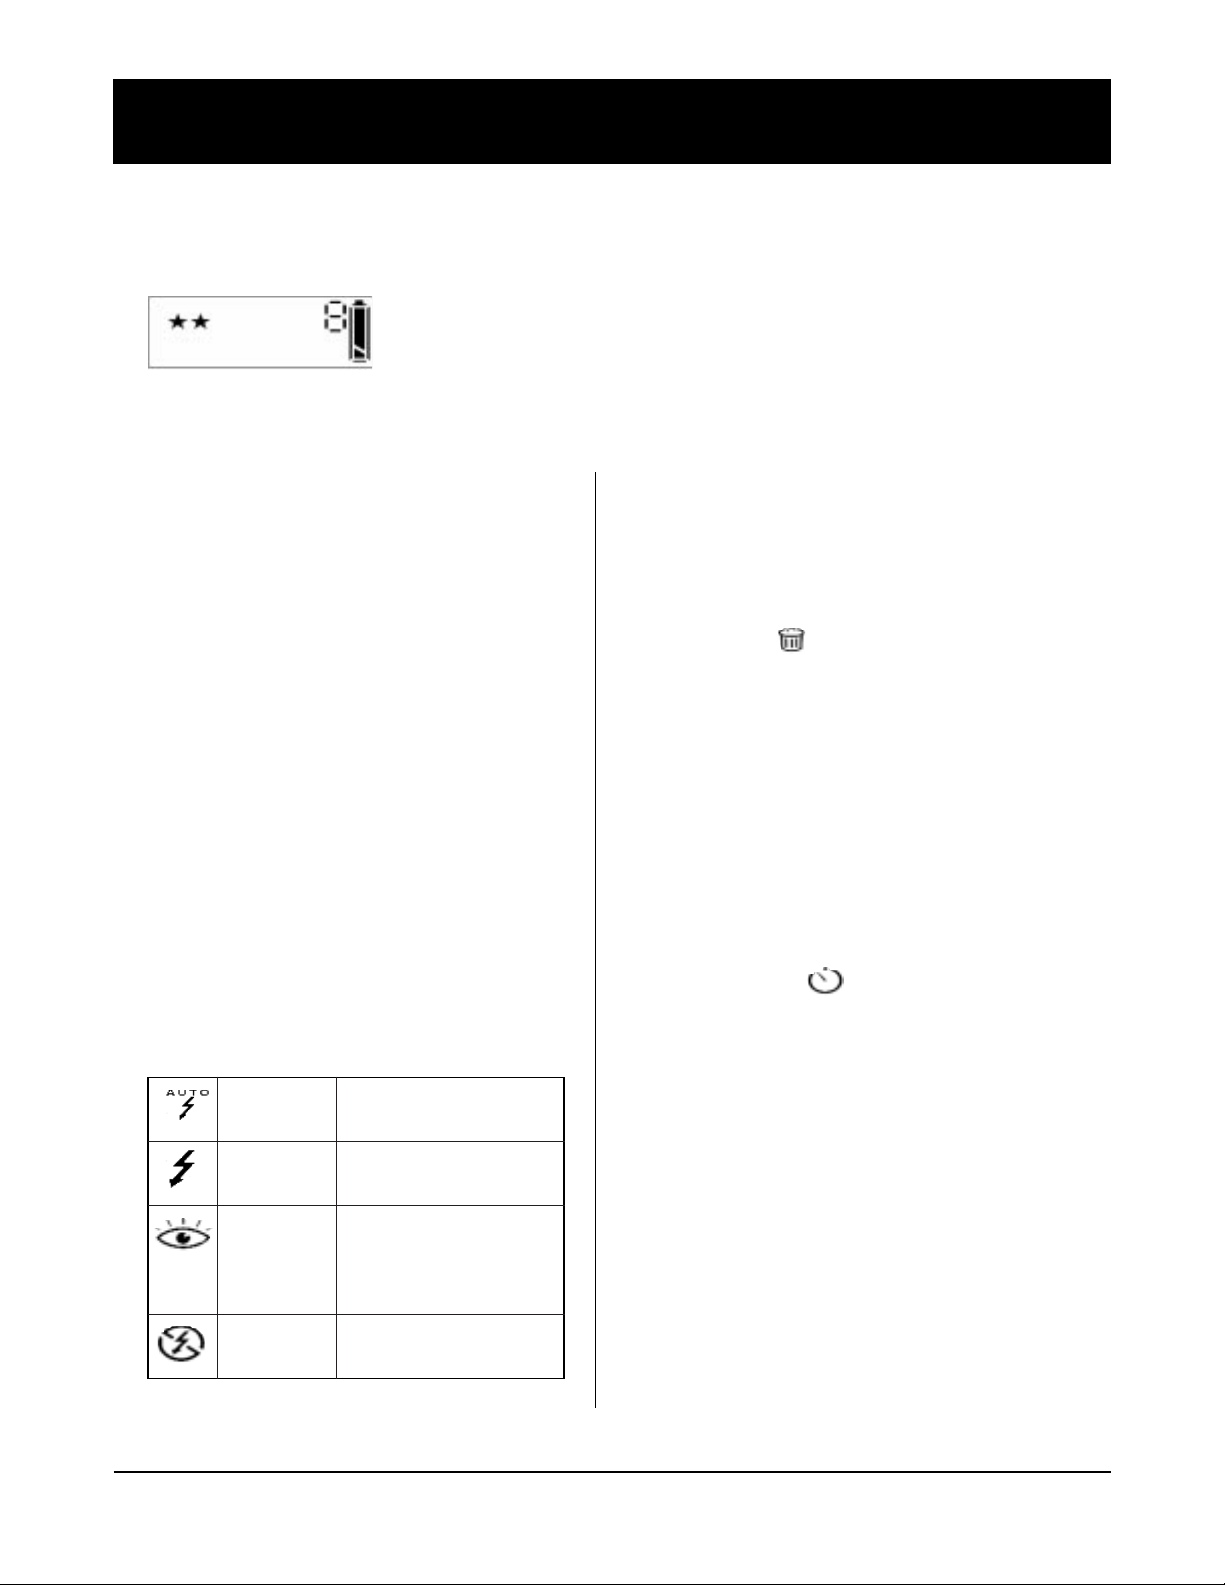
Whenever you see two stars on the display, the camera is in Record Mode.
■ You can store a maximum of 16 images in the camera’s 2MB memory. The number on the display
indicates how many images still can be recorded/stored.
■ By default the camera is activated in Record Mode. Using the Record/Play button you can
toggle between Record and Play mode.
automatic flash The green action indicator blinks
until the flash is loaded.
fill-in The green action indicator blinks
flash always on until the flash is loaded.
‘red-eye’ flash The green action indicator blinks
until the flash is loaded.
The red action indicator
functions as preflash.
no flash
3 . Press the Shutter button to record an image.
Erasing the Last Image
1 . Press the Erase button.
The T rash icon appears. The number that is
shown corresponds to the last image taken.
2 . Press the Shutter button.
The action indicator blinks until the image is erased.
Using the Selftimer
1 . Activate the camera in Record mode.
2 . Point your camera to the view you want to record.
3 . Press the Selftimer button.
The Selftimer icon appears on the display.
4 . Press the Shutter button to activate the selftimer.
The red selftimer indicator in front of the camera
starts blinking. After 10 seconds the image will be
taken.
The action indicator blinks until the flash is loaded.
Recording an Image
1 . Switch the On/Off button on.
The lenscover opens, the light indicator blinks and
you hear a double beep.
2 . Press the Shutter button and hold your camera until
you hear a beep.
The action indicator blinks until the image is stored in
the camera’s memory .
The moment the action indicator stops blinking you
can record another image.
❖
Note: The camera enters the sleep mode after one
minute without any buttons pressed. The camera
will wake up again after pressing any button.
Changing the Flash Setting
1 . Use the Record/Play button to select Record mode.
2 . Press the Flash/Previous button to change the flash
option.
On the display you see the icons of the option you set:
Page 4

AGFA ePhoto Smile Camera – Getting Started 4
Play Mode
Whenever you see the letter “P” on the display, the camera is in Play Mode.
Selecting Images to Watch
1 . Use the Record/Play button to select Play Mode.
2 . Press the Next or Previous button to select the number of the desired image.
You can see the image number on the display.
Watching Images on a TV set
1 . Use the Record/Play button to select Play Mode.
2 . Connect your camera to a television using the video cable.
3 . Use the Next or Previous button to see the images that correspond to the displayed numbers.
Erasing Images in Play Mode
❖ Note: To preview the images before erasing, connect your camera to a TV set first.
1 . Press the Erase button.
The T rash icon appears.
2 . Select the image you want to erase with the Next or Previous button.
❖
Note: T o erase all images at a time, press the Next or Previous button until ‘ALL’ appears on the display.
3 . Press the Shutter button.
The T rash icon blinks until the image(s) is(are) erased.
Page 5

AGFA ePhoto Smile Camera – Getting Started 5
Installing Agfa PhotoWise
1 . Insert the PhotoWise CD-ROM in the CD-ROM drive
of your Windows computer .
The installation starts automatically.
2 . Follow the instructions in the successive screens.
❖
Note: If you want to consult the PhotoWise User’s Guide
PDF-file, you need Acrobat Reader . If it is not installed
yet, confirm to install Acrobat Reader during the
installation procedure of Agfa PhotoWise.
Downloading your First Images
Start Agfa PhotoWise
■ From the Start menu, choose: \Programs\Agfa
PhotoWise\Agfa PhotoWise 2.0.
The Agfa PhotoWise main window appears.
Connect the Camera to your PC
1 . Plug one end of the serial cable in your PC’ s 9-pin
serial port connector .
2 . Plug the other end of the serial cable into the
Smile’s serial port connector.
3 . Switch on your camera.
❖
Note: Check whether the full battery icon is
displayed. Replace batteries if necessary.
❖
Note: The moment the camera is connected to the
PC, all camera buttons will be disabled.
❖
Note: The camera will enter sleep mode after 5
minutes without any commands sent through the
serial cable.
Preview the images that are stored in the camera
■ Click See Pictures.
Thumbnails of the images in the camera appear as a
filmstrip.
Select the image(s) you want to download
■ Select the image(s) in the filmstrip you want to save.
Selected images are displayed in a red frame.
❖
Note: Holding down the CTRL-key, you can select
several images at a time.
Download the selected image(s)
■ Select an option in the Save Pictures drop-down list:
New Dated Envelope: to create a dated envelope and
save the image(s) in it.
New Envelope: to create a new envelope and save the
image(s) in it.
Existing Envelope: to save the image(s) in an existing
envelope.
The envelope appears in the Pictures tab.
Advanced Workflow
■ T o learn how to modify , delete, save, ... images please
refer to:
■■ the online help of PhotoWise
Select Show Help in the Help menu to display an
overview of all available help topics.
■■ the PhotoWise User’s Guide
T o consult or print this PDF-file you need to
install the Acrobat Reader from your PhotoWise
CD-ROM. Then choose \Programs\Agfa
PhotoWise\PhotoWise User’s Guide from the
Start menu.
Agfa PhotoWise: the Image Editing Software
Page 6

AGFA ePhoto Smile Camera – Getting Started 6
■ Never touch the lens with your fingers.
If necessary, clean the lens with a lens brush or soft cloth.
■ Keep in mind that the focal range of the ePhoto Smile is
6 inch to infinity. Objects closer by will be unsharp.
■ Keep in mind that the flash range of the ePhoto Smile is
1-2 yards. Objects closer by, will be overexposed when
recorded with flash.
■ Do not record an image in the direction of the sun or other
light sources.
■ Do not switch off the camera while it is processing a
recorded image. If you do so the image will not be stored.
■ When you have downloaded your images to the PC, switch
of your camera to conserve battery power.
■ As all digital camera’s the Smile camera records with a
shutter latency (in this case of 1 second). Hold the camera
after pushing the Shutter button until you hear a beep.
Especially keep in mind the shutter latency when recording
moving objects.
■ When inserting the batteries see that the pole-marks on the
batteries (+ and -) correspond to those on the battery
compartment.
■ Checking the Battery Status.
The display always indicates the status of the battery.
Full Nearly empty Empty
When the Battery Status is ‘Nearly empty’ you have to
replace the batteries. Nearly empty batteries disable the
flash function and interfere the PC-camera communication.
Extra Applications
• Video-conferencing using your PC: install a
FrameGrabber Card in your PC, connect your PC to
the Smile’s video port connector with the video cable.
• Capturing images using your TV: connect your TV set
in Record mode to the Smile’s video port connector
with the video cable, press the Shutter button.
• Video Recording using your Smile and a VCR:
connect your VCR in Record mode to the Smile’s
video port connector with the video cable.
Useful Tips
Safety Information
• If you buy a power adapter make sure it has an
input voltage range from 4.5 to 5.0 V and 1 A.
Using an AC adapter with other specifications
could damage your Smile camera.
• Use only the following AA batteries: Alkaline,
NiMH, NiCad or Lithium.
• T o reduce the risk of electric shock, do not
expose the camera to rain or moisture and do not
disassemble the camera. Refer all servicing to
qualified service personnel.
• Do not use batteries that show signs of leakage,
corrosion or swelling, or that are excessively
warm.
• Avoid using the camera in excessively cold or
warm conditions. Allow the camera to adapt to
sudden changes of temperature.
Page 7

AGFA ePhoto Smile Camera – Getting Started 7
T o get various kinds of help on your Smile camera, visit
our website at: http://support.agfa.com/homeOffice.
The most effective way to find an answer to your problem
is to execute the successive steps described below.
1. Create an Agfa e-Service Account
You need to create an Agfa e-Service account profile
to benefit from:
• personalized one-to-one online technical
support;
• access to customized self-help tools and
technical information;
• automatic e-mail notification of all new support
tip documents;
• the latest Agfa product news.
T o create an Agfa e-Service account and to register
your Smile camera, click Create Account.
If you already have an Agfa e-Service account, click
Register to add new products to your e-Service
profile.
2. Consult the Support Documents / Solution Finder
Database
Click the Support Documents tab or the Solution
Finder Database tab to consult the standard answers
on various problems/questions.
3. One-to-One Support
If you do not find an answer to your problem/question
in the Support Documents or in the Solution Finder
Database, click One-to-One Support to open a
personal case. Describe your problem as accurate as
possible.
4. Contact the Nearest Service Office
Select the Service Offices tab to find the telephone
number of your nearest Agfa Service Office.
5. Consult the Software Library
Select the Software Library tab to retrieve available
PhotoWise software updates for your Smile camera.
More Information on Your ePhoto Smile Camera
 Loading...