

AEG EHS746K User Manual
Electronic gas hob
EHS 746 K
Operating instructions
SKHR SICZ

2
The innovative features of your gas hob
Your new gas hob offers several innovative
functions that distinguish it from
conventional gas hobs.
z Electronic control of all functions.
z Touch controls to activate the hob
functions simply by touching them with
a finger.
z Electronic Timer to programme your
cooking.
z Automatic reignition of the burners
if the flame is accidentally extinguished.
z Residual heat indicator to advise
that the pan supports and the burners
are still hot.
z Children safety device to prevent
the controls from being accidentally
operated.
z General shutdown to turn off all the
burners at once for an emergency.
z Safety device in case of power failure
or burner ignition failure.
3

Contents
For the User
The innovative features of your gas hob ........................................................ 3
For your safety ............................................................................................... 5
Description of the hob .................................................................................... 7
Operating instructions .................................................................................... 8
Touch controls ........................................................................................... 8
How to light a burner.................................................................................. 9
How to turn off a burner .............................................................................11
In case of ignition failure ............................................................................ 11
In case of accidental extinguishing (automatic reignition) ......................... 12
How to turn off all the burners at once....................................................... 13
Burner safety Cut-off Function .................................................................. 13
Hob Safety Cut-off Function ...................................................................... 13
Protection against overheating .................................................................. 14
Child Safety Function ................................................................................ 14
The Electronic Timer ................................................................................. 15
How to programme the burner to switch off .............................................. 16
How to set the Minute Minder Function...................................................... 18
Safety and energy saving advice.................................................................... 19
Cleaning and maintenance ............................................................................ 20
Periodical maintenance.................................................................................. 21
Something not working .................................................................................. 22
Technical assistance and spare parts ........................................................... 23
Guarantee........... ........................................................................................... 23
For the installer
Instructions for the installer ............................................................................ 24
Technical Data ............................................................................................... 24
Gas connection .............................................................................................. 25
Electrical connection ...................................................................................... 27
Adaptation to different types of gas ................................................................ 28
Building In ........ ............................................................................................. 32
Installation possibilities ................................................................................... 34
4

For your safety
This new appliance is easy to use. Nevertheless, it is important to carefully read this
booklet before installing or using the appliance for the first time. This will allow you to
obtain best performance, avoid improper actions, use the appliance in complete safety
and also respect the environment.
Installation
z Installation of the appliance and
connection to the power supply must
only be carried out by QUALIFIED
PERSONNEL. Before any intervention,
make sure the appliance is
DISCONNECTED from the power
supply.
z Ensure that air can freely circulate
around the appliance. Poor ventilation
produces a lack of oxygen.
z Ensure that the gas and electrical supply
complies with the type stated on the
rating plate, located below the front edge
of the glass top.
z This appliance is not connected to a
combustion products evacuation device.
It must be installed and connected in
accordance with current installation
regulations. Particular attention shall be
given to the relevant regulations regarding
ventilation.
z When in use a gas cooking appliance
will produce heat and moisture in the
room in which it has been installed.
Ensure there is a continuous air supply,
keeping air vents in good condition or
installing a cooker hood with a venting
hose.
z When using the hob for a long period
time, the ventilation should be improved,
by opening a window or increasing the
extractor speed.
z After unpacking the appliance, make
sure the product is not damaged and that
the power cable is in perfect condition.
Otherwise, contact the dealer before
installing the appliance.
z The manufacturer declines any liability
should these safety measures not be
observed.
Child Safety
z This hob is designed to be operated by
adults. Do not allow children to play near
or with the hob. It is highly
recommended to activate the child safety
function every time the hob is not
operated.
z The hob gets hot during use and some
time after it is switched off. The hob is
supplied with special indicators for the
residual heat (see chapter “How to light
a burner”). Children should be kept away
from the appliance until it has cooled
down and the residual heat indicators
are off.
During use
z This instruction booklet must be kept
with the appliance for any future
reference. If the appliance is sold or
transferred to another person, ensure the
booklet is passed on to the new user.
z This hob is intended for domestic cooking
only. It is not designed for commercial
or industrial purposes.
z It is dangerous to modify or try to modify
the characteristics of this product.
z Keep the appliance clean. Food residuals
increase the risk of fire.
z This appliance cannot be cleaned with
steam or with a steam cleaning machine.
z In case of malfunctions, never attempt
to repair the appliance on your own.
Repairs carried out by unqualified
5

persons can cause damage and
accidents. Refer to the contents of this
booklet (see chapter “Something not
working”). If you do not find the
information required, contact the nearest
Assistance Centre. Servicing of this
appliance must be carried out by an
authorized Technical Assistance Centre.
Always insist on genuine spare parts.
z After using the appliance, deactivate it
by using the main ON/OFF touch control
and make sure the relevant red indicator
is off. Then, lock all the hob controls by
touching the “Lock” Control .
z When using other electrical appliances,
ensure the cable does not come into
contact with the hot surfaces of this
cooking appliance.
Environmental Information
z All the materials used are environment
friendly and recyclable. Please make
your contribution to safeguarding the
environment by using the special
differentiated collection channels.
z Dismantled or no longer used appliances
are not worthless waste. Through
ecological disposal, various materials
used in the production of your appliance
can be recycled.
z Find out about the current possibilities
of disposal from your specialised dealer,
or from your local Council.
z When disposing of an old appliance,
make it unusable, by cutting off the
cable.
This appliance complies with the following EEC Directives:
-73/23 and 90/683 (on Low Voltage);
-89/336 (on Electromagnetic Compatibility);
-90/396 (on Gas Appliances)
-93/68 (on General Standards) and subsequent amendments.
The symbol on the product or on its
packaging indicates that this product may
not be treated as household waste. Instead
it shall be handed over to the applicable
collection point for the recycling of electrical
and electronic equipment. By ensuring this
product is disposed of correctly, you will
help prevent potential negative
consequences for the environment and
human health, which could otherwise be
caused by inappropriate waste handling of
this product. For more detailed information
about recycling of this product, please
contact your local city office, your
household waste disposal service or the
shop where you purchased the product.
Guide to Use the instructions
The following symbols will be found in the
text to guide you throughout the
Instructions:
Safety Instructions
Step by step instructions for an
))
)
))
operation
Hints and Tips
Environmental Information
These instructions are only valid for countries whose identification symbols are given on
the cover of the instruction booklet and on the appliance.
6
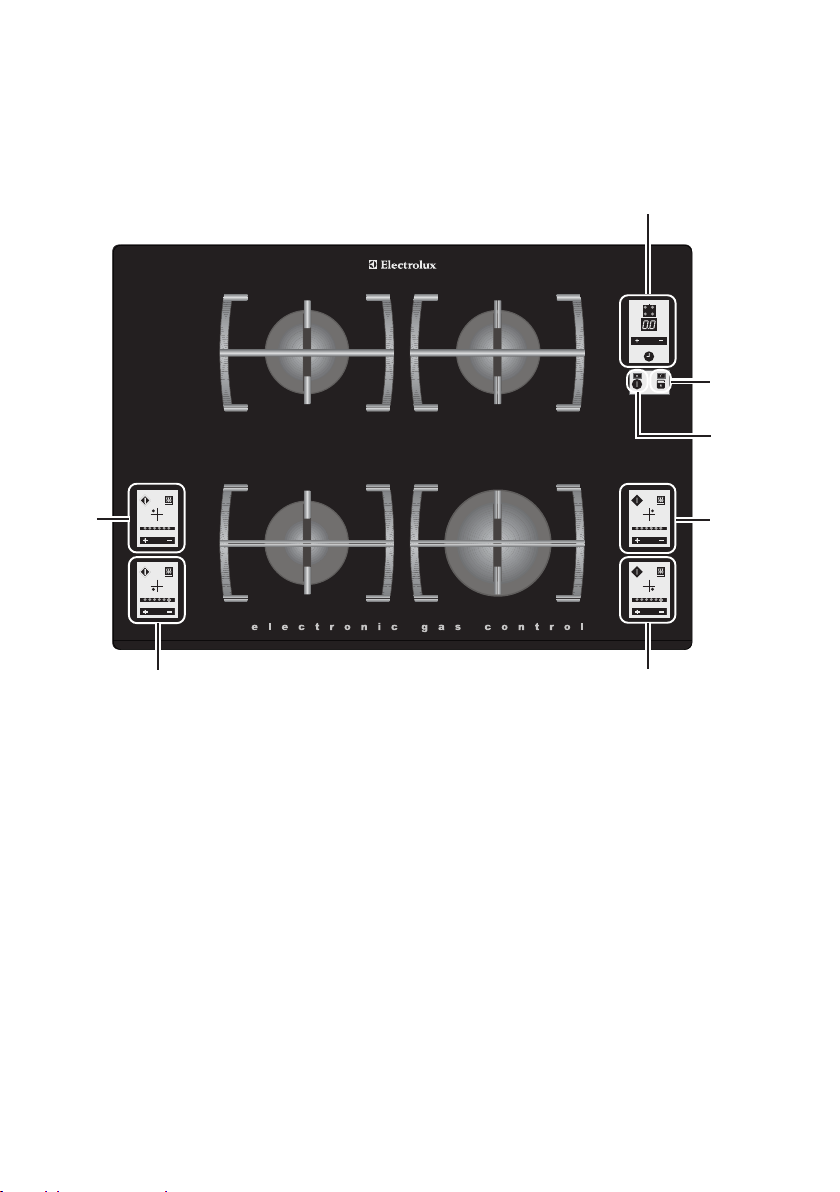
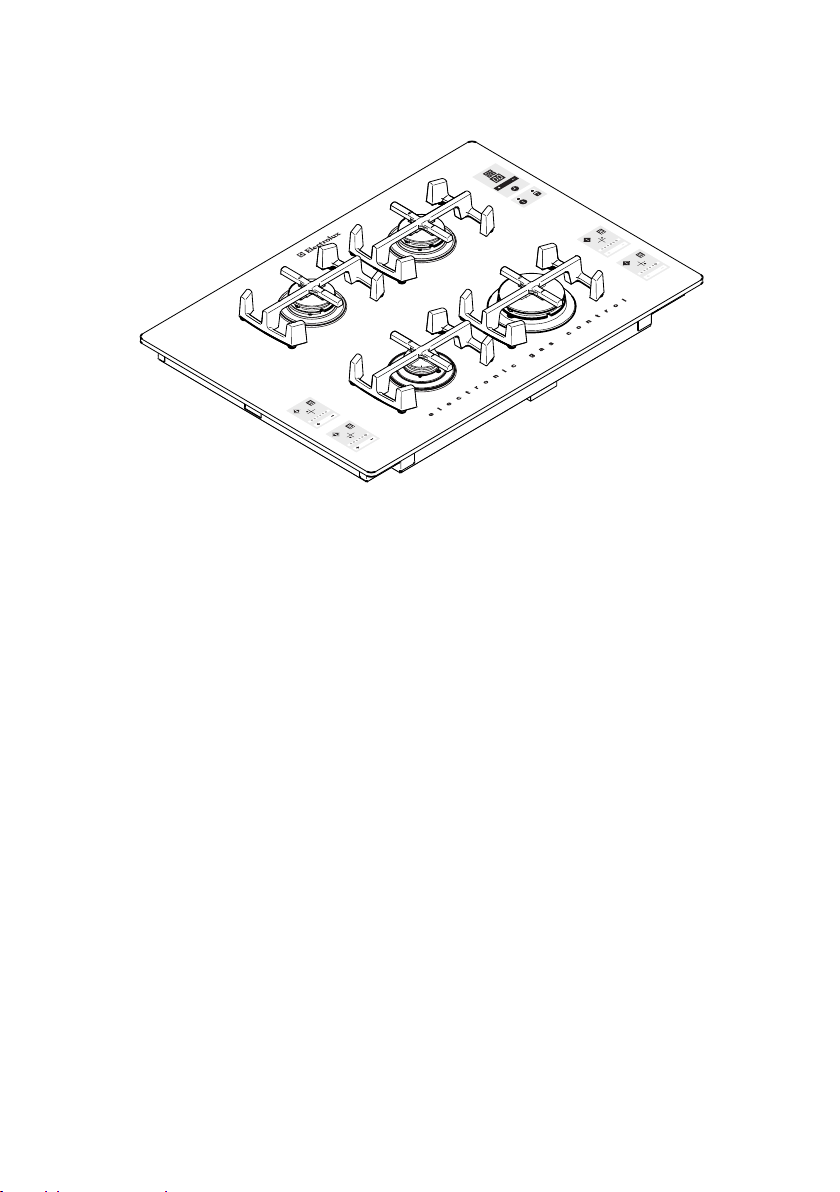
Description of the hob
Timer control
zone
Rear
left
burner
control
zone
Front left
burner
control zone
Semirapid
burner
Auxiliary
burner
Semirapid
burner
Rapid
burner
Child
Safety
Control
Main
ON/OFF
switch
Rear right
burner
control
zone
Front right
burner
control zone
7

Operating instructions
Before using the appliance,
remove all packaging, including
the advertising labels and any
protective film.
Touch Controls
The hob is supplied with special Touch
Controls. To operate your hob, simply touch
the required control with a fingertip.
Ensure to only touch one control at a time
during use.
Here follow the symbols for the main Touch
Controls, and the relevant indicators
Main ON/OFF Touch Control
Burner Ignition Touch Control
Flame level indicators
Increasing Touch Control for the
flame level
Decreasing Touch Control for the
flame level
Residual heat indicator
Burner
control zone
8

)
How to light a burner
1. Touch the main ON/OFF Control for
about 3 seconds to switch on the hob.
The red indicator next to the touch
control lights up, an acoustic signal
sounds and the hob is ready to use.
2. Touch the Burner Ignition Control of
the required burner. The flame level
indicators located right below the
symbols and illuminate.
9
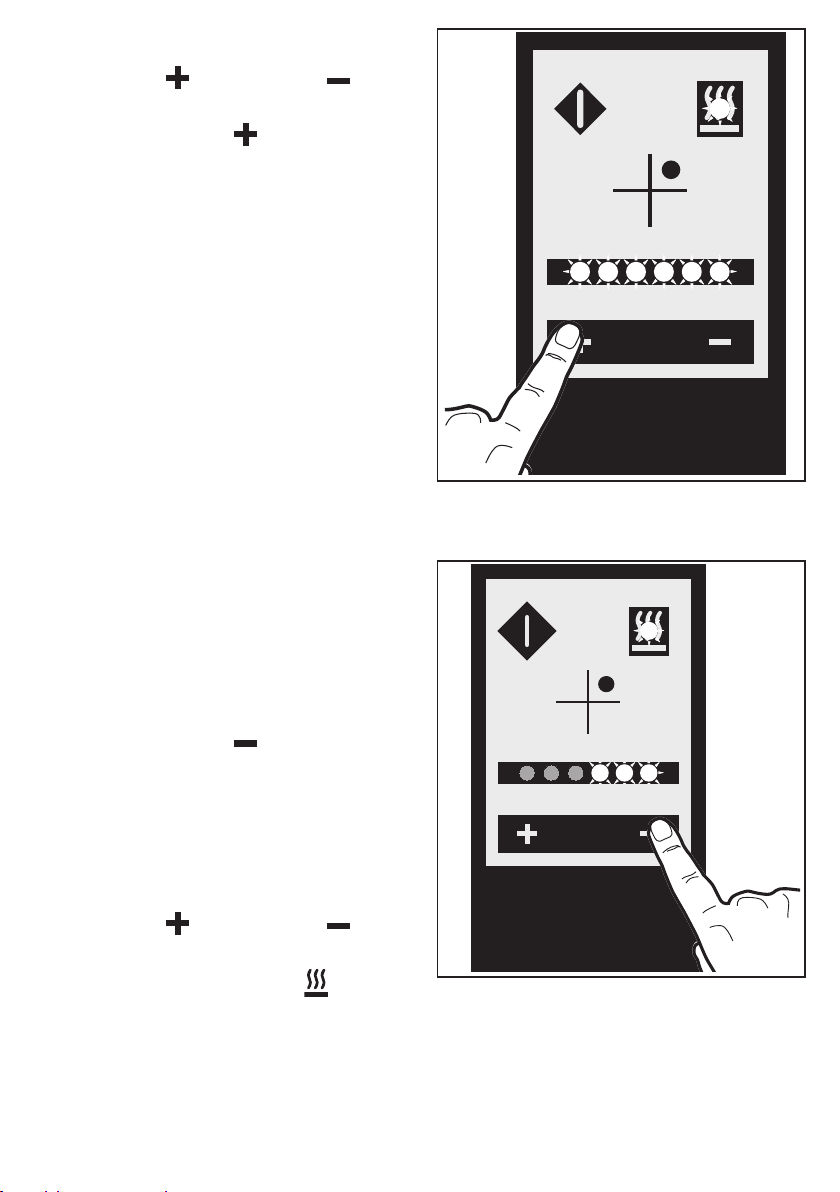
3. Within about 3 seconds, touch the
Increasing or Decreasing Touch
Control to light the burner.
- If touch control is selected, the
burner automatically lights at maximum
flame level (all the flame level indicators
illuminate).
- If touch control is selected, the
burner automatically lights at medium
flame level (three flame level indicators
illuminate).
4. To adjust the burner flame level, use the
Increasing or Decreasing Touch
Control.
The residual heat indicator lights up
immediately after the burner is lit.
This means that the cooking zone is
getting hot: the indicator remains on until
the pan support and the burner have
cooled down.
10

How to turn off a burner
)
1. To turn off a burner press the relevant
Burner Ignition Touch Control . All the
flame level indicators go off.
The residual heat indicator remains on
until the pan support and the burner have
cooled down.
In case of ignition failure
)
The hob ignition device generates a series
of small sparks for about 6 seconds.
If the flame does not light during this period,
the gas flow to the burner is interrupted.
After 3 seconds, the ignition device
automatically repeats the ignition procedure
for another 6 seconds.
After three failed ignition attempts, a safety
device is set on the burner. The flame level
indicators flash.
Caution! When the safety device is
set on a burner, the burner controls
cannot be operated for about 60
seconds.
After 60 seconds, you can remove the safety
device on the burner by touching both the
Increasing Control and the Decreasing
Control at the same time.
Then, follow the instructions given in the
paragraph “How to light a burner”.
Caution! Check that the burner cap
and crown are correctly positioned
(see diagram).
If the ignition problem persists, refer
to chapter “Something not working”.
Never use a manual spark gas-lighter
if the burner ignition device does not
work correctly. If necessary, use a
match.
F
A - Burner pan support
B - Burner cap
C - Burner crown
D - Burner body
E - Thermocouple
F - Spark plug
A
B
C
D
E
11
 Loading...