AEG BSS 4823 User guide [ml]


GB

Bluetooth Sound System

Instruction Manual

35


PL

System dźwiękowy Bluetooth

Instrukcja obsługi/Gwarancja

41


H

Bluetooth Hangrendszer

Használati utasítás Інструкція з

48


UA

Акустична система Bluetooth

експлуатації Руководство по

54


RUS

Звуковая система Bluetooth

эксплуатации

60


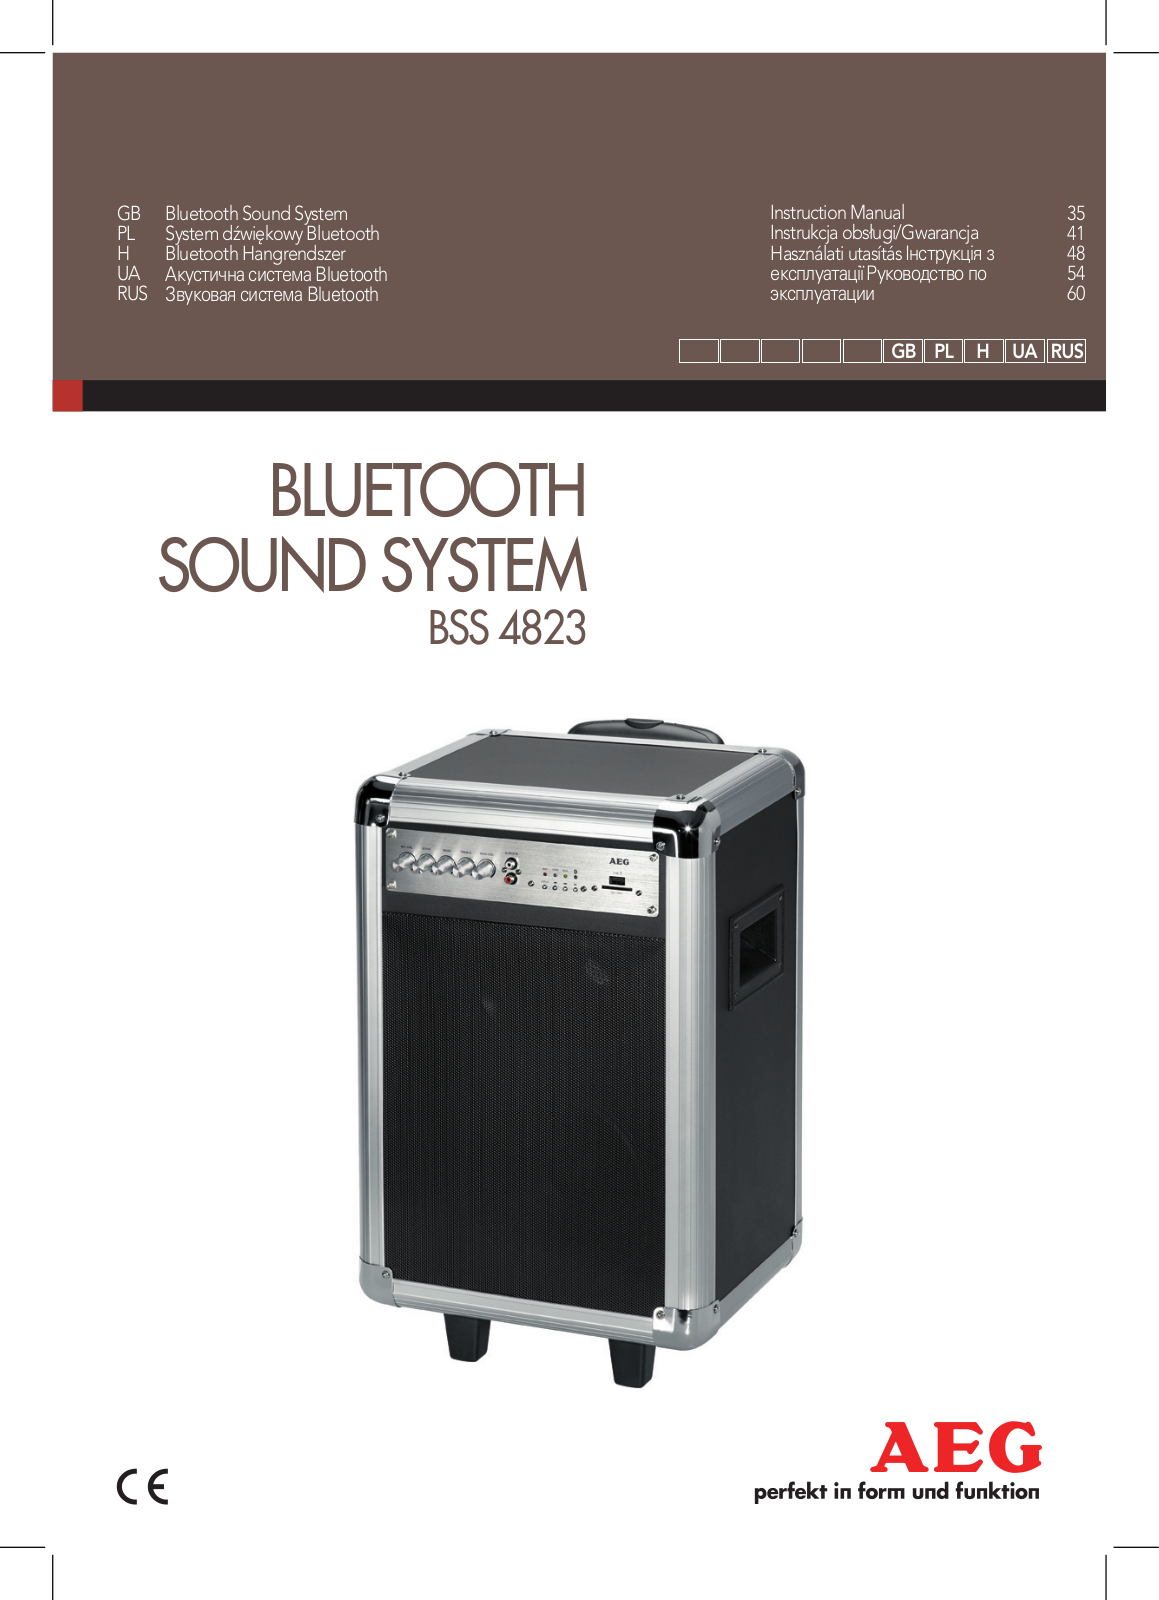
BLUETOOTH

SOUND SYSTEM

BSS 4823

2 Inhalt

English


Contents


Location of Controls...........................................................

Page

3

Instruction Manual..............................................................

Page 35

Technical Specifications.....................................................

Page 39

Disposal................................................................................

Page 40

Język polski


Spis treści


Lokalizacja kontrolek........................................................

Strona

3

Instrukcja użytkowania.....................................................

Strona 41

Dane techniczne...............................................................

Strona 46

Warunki gwarancji.............................................................

Strona 46

Usuwanie............................................................................

Strona 47

Magyarul


Tartalom


A kezelőszervek elhelyezkedése.....................................

Oldal

3

Használati útmutató..........................................................

Oldal 48

Műszaki adatok..................................................................

Oldal 53

Hulladékkezelés.................................................................

Oldal 53

Українська


Зміст


Розташування органів керування..............................

стор.

3

Інструкція з експлуатації..............................................

стор. 54

Технічні характеристики..............................................

стор. 59

Русский


Содержание


Расположение элементов.............................................

стр. 3

Руководство по эксплуатации......................................

стр. 60

Технические характеристики.......................................

стр. 65

AEG BSS 4823 User guide

3 Übersicht der Bedienelemente

Locatie van bedieningselementen

Lokalizacja kontrolek

Situation des commandes

A Kezelőszervek Elhelyezkedése

Ubicación de los controles

Розташування органів керування

Posizione dei comandi

Расположение элементов

Location of Controls


Instruction Manual

Thank you for choosing our product. We hope you will enjoy using the appliance.

Symbols in these Instructions for Use

WARNING:

Warns of dangers for your health and indicates potential risks of injury.

CAUTION:

Indicates potential dangers for the device or other objects.

NOTE: Highlights tips and information for you.

General Safety Guidelines

Before using this device, carefully read this user manual and keep it together with the Warranty Certificate, cashier receipt and if possible, the original package inclusive its interior packing. If you hand on the device to any third person, include the user manual as well.

Toavoidtheriskoffire orelectricshock,youshouldnot exposethedevicetorainorhumidity.Donotusethe device near water (e.g. bathroom, swimming pool, humid cellars).

Donotusetheunitinextremelyhot,cold,dusty,ordamp places.

Theunitisdesignedsolelyforprivateuseanditsintended purpose. This unit is not designed for commercial use.

Makesurethatthepowercableisnotbent,pinched,or comes into contact with heat sources.

Makesurethatthepowercableisnotatrippinghazard.

Nevertouchthemainsplugorthecordwithwethands.

Alwaysconnecttheunittoaproperlyinstalledplug socket. Be sure the device voltage corresponds to the grid voltage.

Themainsplugmustalwaysbeeasilyaccessible.

Alwaysinstallbatteriesinthecorrectdirection.

Avoidcoveringthedevice’sventopenings.

Nevercovertheventholeswithobjects,suchasmagazines, tablecloths, curtains etc.

Thisapplianceshallnotbeexposedtodrippingor splashing water and that no object filled with liquids such as vases shall be placed on apparatus.

Opensourcesoffire, suchase.g.burningcandlesmay not be placed onto the unit.

Neveropenthedevice’scase.Improperrepairscancause severe danger to the user. If the device or particularly the power cord is damaged, don’t use the device any further and have it repaired by a qualified specialist. Check the power cord regularly for damages.

English 35

Toavoidanydanger,adamagedpowercordmustbe replaced only by the producer, its customer service or a similarly qualified person with an equal cord.

Ifthedevicewon’tbeusedoveranextendedperiodof time, disconnect the power cord and remove the batteries.

Protecttherechargeablebatteryfromsevereshockor pressure.

These symbols may be found on the device and shall indicate the following:

The lightning symbol warns the user of dangerously high voltages inside the case.

Theexclamationmarksymbolpointsto important instruction or maintenance remarks in the accompanying guidelines.

Children and disabled persons

Forthesafetyofyourchildren,keepanypackingparts

(plastic bags, cartilage, Styrofoam etc.) out of their reach.

WARNING!

Don’t let small children play with foils for danger of suffocation!

Thisdeviceisnotintendedforusebypersons(including children) with reduced physical, sensory or mental capabilities,orlackofexperienceand/orknowledge unless they have been given supervision or instructions concerning the use of the device by a person responsible for their safety.

Supervisechildrentoensuretheydonotplaywiththe device.

Location of Controls

Front

1BAT (Battery) indicator lamp

2PWR (Power) indicator lamp

3AUX (USB, SD CARD, AUDIO IN) indicator lamp

4 (Bluetooth) indicator lamp

5USB port

6SD CARD slot

7 button (play/pause)

8button(nextmusicfile)

9button (previous music file)

10INPUT button

11AUDIOINjack(2xRCA)

12MAIN VOL (Volume) control

13TREBLE (Treble) control

14BASS (Bass) control

15ECHO (Echo) control

16MIC VOL (Microphone volume) control

36 English

Side

17USB CHARGING port

18DC-12 V IN input

19AC/DC POWER mains switch a DC ON (12 V operation) b OFF (Off)

c AC ON (mains operation)

20AC INPUT mains cable connector Carrying handles (not shown)

Rear (not shown)

Extendablehandle

Delivery scope (not shown)

2x Microphone

1x 12Vcaradaptercable

1x Mainscable

First Use of the Device/Introduction

Selectaproperplaceforthedevice.Adry,level,andslip proof surface is suitable.

Makesurethedeviceisventilatedsufficiently!

Removetheprotectivefilm fromthedevice,ifpresent.

Power supply

1.Make sure the grid voltage corresponds to the specifications on the rating plate.

2.Connect the provided mains cable to the AC INPUT connector (20) on the side of the device.

3.Insert the mains plug to a properly installed socket.

4.Set the mains switch to “AC ON” position (19c).

NOTE:

Disconnect from mains power supply during longer periods of non-use.

Operation via 12 V car adapter

The 12 V cigarette lighter adapter is suitable for cars that feature a 12 V power supply with negative grounding.

1.Connect the provided car adapter cable to the DC-12 V IN input (18) on the side of the device.

2.Connect the other end of the cable to the cigarette lighter receptacle in your car.

3.Set the mains switch to “DC ON” position (19a).

4.Disconnect the 12 V adapter from the device and cigarette lighter receptacle after use.

CAUTION:

Onlyusethecaradaptercableprovided.

Usetheprovidedcaradaptercableforthisdeviceonly.

Do not use for other devices.

Donotusethedevicewhiledriving.Makesurethe device is securely attached or stored away in order not to fall inside the vehicle in case of an accident.

USB CHARGING port (17)

Use the port on the side of the device to charge your smartphone. When operated via mains cable, the device supplies 5 V/1 A. Use the USB cable of your smartphone for the connection.

NOTE:

Duetothevarietyofsmartphonetypesavailableand their different charging capacity, the charging time depends on the smartphone used and its operating condition.

Thisportisnotsuitableforplayingaudiofiles.

Battery operation

It is possible to operate this device with the built-in battery.

General information

Chargethebatterycompletelybeforeyouuseittooperate the device.

Avoidfullydischargingthebattery.

Chargethebatterycompletelyaftereachuse.

WhentheBATindicatorlamp(1)startsflashing, thebattery must be recharged.

Charging the battery

1.Connect the mains cable provided to the AC INPUT connector (20) on the side of the device.

2.Connect the mains plug to a properly installed socket.

3.Set the mains switch to “AC ON” position (19c).

Depending on the battery’s capacity charging can take up to 11 hours.

CAUTION:

Never leave the device unattended during charging.

NOTE:

Thebatterycanonlybechargedwhenthespeakeris switched on.

Ifyoudonotusethedeviceforalongerperiodoftime, you should charge the battery at least once every 3 months. Even when switched off, the battery discharges continuously.

Whenthebatteryisalmostempty,theBATindicator lamp will start flashing. The battery requires recharging.

Ifthebatteryhasbeendischargedcompletely,the device cannot be recharged via mains socket. In such a case, recharge the battery using the DC-12 V IN input (18). Even when switched off (mains switch at OFF position) the battery can be charged via this input.

Operation

AC/DC POWER mains switch (19)

Use the switch to select one of the following operating modes:

-DC ON

Set the mains switch to position (a) when you want to operate the device via DC-12 V IN connection or via builtin battery. The PWR indicator lamp lights up green.

-OFF

The device is off. To disconnect the unit completely from the mains, pull the mains plug from the socket.

-AC ON

Set the mains switch to position (c) when you want to operate the device via AC INPUT connection. Or when you want to charge the battery in parallel. The PWR indicator lamp lights up green.

NOTE:

Afterapprox.3minuteswithoutsignalinput,thedevicewill automatically switch to standby mode. The PWR indicator lamp (2) lights up red. To use the device again, press the INPUT button (10).

If you do not wish to use the device again, set the mains switch to “OFF”. Otherwise the built-in battery would discharge.

Volume

Use the MAIN VOL control (12) to adjust the volume as desired.

Select the operating mode

Repeatedly press the INPUT button (10) to select the desired operating mode.

USBSD CARDAUDIO INBluetooth

NOTE:

USB and SD CARD operating modes can only be selected, if a proper storage medium has been connected.

Sound settings (13/14)

Use the TREBLE and BASS controls to adjust treble and bass.

NOTE:

Ifnecessary,adjusttheEQsettingsonyourplayback device in order to generate a better sound.

SettingsadjustedwiththeTREBLEandBASScontrols do not affect the sound of the microphones.

Microphone operation

You may activate the microphones for sing-along function during each operating mode. It is possible to use both microphones at the same time.

Insert batteries (batteries not included)

1.Open the battery compartment on the bottom of the microphones.

English 37

2.Insert 2 type AA/R6 1.5 V batteries into each of the two microphones. Make sure that the polarity is correct (see battery compartment).

3.Close the battery compartment.

Batteries could leak battery acid. If you do not use the microphones for a longer period of time, remove the batteries.

WARNING:

Donotexposethebatteriestointenseheat,suchassunlight, fire, or the like. Danger of explosion!

CAUTION:

Donotmixbatteriesofdifferenttypesoroldandnew batteries.

Donotdisposeofbatteriesthroughnormalhousehold waste. Return used batteries to dedicated collection facilities or to your dealer.

Using the microphones

1.Slide the switch on the microphone upwards. The switch will show “ON”. The microphones will automatically connect with the speaker.

2.Use the MIC VOL control (16) to adjust the volume of the microphones.

3.Use the ECHO control (15) to generate echo effects.

4.Switch off the microphones when not in use. Slide the switch downwards. “OFF” appears.

CAUTION:

To avoid audio feedback (sharp whistling sound), use the microphones outside of the speaker’s reverberation distance.

NOTE:

The special radio frequencies could cause interference at the TV. When using the microphones try not to place the device near TVs.

Playing back music files

You have four options to play back your own music files: via cable, wireless via Bluetooth, via USB port, or via card slot.

By cable (Cable not included)

1.If required, use a suitable adapter (not included).

Connecttheexternaldeviceasfollows:

Withacinchcable(2xRCA)totheAUDIOINjacks(11).

2.Use the INPUT button (10) to select AUX mode.

3.Start the playback of your audio source. Listen to the sound playback via the speaker.

4.For the further procedure, please refer to the user manual oftheexternalaudiosource.

38 English

NOTE:

Ifpossible,adjustthevolumeoftheexternalunittoacomfortable level.

Cordless via Bluetooth

Bluetooth involves a technology for wireless radio connection of devices over a short distance. Devices with Bluetooth standard are transmitting between 2.402 and 2.480 GHz in the ISM band (Industrial, Scientific and Medical). Interference canbecausedforexamplebyWLAN-networks,DABradios, cordless phones, or microwave ovens which work on the same frequency band.

This device offers you the possibility to use a Bluetoothenableddevice.Thefunctionalradiusislimitedtoapprox.15 metres depending on the surroundings and the unit used.

If your playing device supports the A2DP profile (Advanced Audio Distribution Profile) and has a music-player function, then you can also wirelessly transfer music to the device. The A2DP profile involves a multi-vendor Bluetooth profile. By streaming, stereo-audio signals are wirelessly transferred between the playing device (source) and the receiving device. To be able to remotely control the source, the playback device must support the AVRCP profile (Audio Video Remote Control Profile).

Due to the different device manufacturers, models, and software versions, a full functionality cannot be guaranteed.

Loggingondevices(Pairing)

Before you listen to music via the unit, you must pair the devices.

1.Ensure, that the Bluetooth function is activated in your player (e.g. mobile phone). For this, refer to the operation manual of your player.

2.Use the INPUT button (10) to select Bluetooth mode. The indicator lamp (4) lights up. After that, a beep sounds and the indicator lamp starts flashing.

3.Chose the Bluetooth menu in your player and register the device in your player. For this, refer to the operation manual of your player. The device “AEG BSS4823” will show in your player as a selection.

NOTE:

Onlyoneplaybackunitcanbeconnectedto the speaker. If the speaker is already connected to another playback unit, the speaker will not appear in the BT selection menu.

Doyouexperienceanyproblemswhen connecting?Problemscanoccuriftoomany playback units were previously connected with the speaker. Reset the memory of the speaker by pressing and holding the INPUT button (10) forapprox.3seconds.

4.Now enter the password “0000” in your player, depending on the device manufacturers, model, and software version.

After successful registration, a beep will sound and the indicator lamp will light up. For the further procedure, please refer to the user manual of the playback unit. If possible, adjustthevolumeoftheexternalunittoacomfortablelevel.

NOTE:

Dependingonthedevicemanufacturer,youneedto perform the registration (PAIRING) again to connect the devices.

TheBluetoothcompatibilitycannotbeensuredfor devices (e.g. mobile phones) getting released in the future.

Toensureanoptimalconnection,makesurethatthe battery of your player is completely charged.

Someofthemobilephonebrandshaveanenergy-sav- ing mode. Deactivate the energy-saving mode as it can otherwise result in problems during the data transfer through Bluetooth.

Tobeabletotransferaudiodata,Bluetoothneedsto stay activated in your player. Observe the operation manual of your player.

Ifamobilephoneonwhichyouareplayingmusic receives a call, the music will be interrupted. The sound however is not played back via the speaker. After you have ended the call, the devices are connected to each other again and playback continues.

USB port (5)

This device has been developed in line with the latest technical advances in the USB field. The wide range of different

USB storage devices of all types which are currently on the market, unfortunately do not allow us to guarantee full compatibility with all USB storage devices. For this reason, in rare cases there may be problems in playing back files from USB storage devices. This is not a malfunction of the device.

1.Use the INPUT button (10) to select USB mode.

2.Connect a USB storage device directly into the port. Playback will automatically start after a few seconds. The AUX indicator lamp flashes during playback.

For operation, please refer to the section “Description of the controls”.

NOTE:

Alwaysdirectly connect a USB storage medium to the USB port to prevent any malfunctions.

TheUSBportisnot designedforchargingexternal devices.

CAUTION:

Switch the device to a different operating mode before you remove the USB storage device.

Memory card slot (6)

1.Use the INPUT button (10) to select SD CARD mode.

2.Insert the memory card with the contacts facing up into the appropriate slot. Playback will start after a few seconds. The AUX indicator lamp flashes during playback.

For operation of the device, please refer to chapter “Description of the Controls”.

CAUTION:

Select another operating mode before removing the memory card.

Description of the controls

NOTE:

Depending on your playback unit, not all functions might be supported.

(7)

You can pause and continue music playback. Press again to continue playback.

(9)

Press1x= Restartofthesongfromthebeginning.(Not during USB/CARD mode)

Press2x= Skiptotheprevioussong.

Press3x= Skiptothesongbeforetheprevioussong.

(8)

Presstoskiptothenextsongandthefollowingsongs.

Cleaning

CAUTION:

Do not submerge the device in water.

Beforecleaningdisconnectfrommainspowersupply.

Cleanthedevicewithasoftdampclothwithoutdetergents.

Troubleshooting

Fault

Cause

Solution

Unit cannot

Unit crashes and

Disconnect from the

be operated.

“hangs”.

mains for around


5 seconds. Then


switch the unit on


again.


English


39


Fault

Cause

Solution


No audio

Speaker is not paired

Check whether a


signal via the

to the audio source.

connectionexists.If


Bluetooth


necessary, pair the


connection


speaker again to the


audio source.


Volume too low

Increase the volume


on the speaker.


Increase the volume


on the audio source.


Speaker

Pairing does not

Check whether the


cannot be

work

audio source supports


connected


the A2DP protocol.


Audio source is

Switch on the audio


switched off

source.


Bluetooth is switched

Switch on the Blue-


off at the audio

tooth function in the


source.

audio source.


Bluetooth version is

Use a different play-


not supported.

back unit.


Sharp

Audio feedback

Use the microphones


whistling


outside of the


sound during


speaker’s reverbera-


microphone


tion distance.


operation.


Battery cannot

The battery has

Charge the battery


be recharged.

been discharged

using the DC-12 V IN


completely.

input (18).


No sound in

Input level too low.

Press and hold but-


all operating


ton (8) to increase the


modes.


input level.


Technical Specifications


Model:..................................................................................


BSS 4823

Power supply:.........................................................


AC 230 V, 50 Hz

................................................................


DC 12 V/5 A

Power Consumption:..............................................................

100 W

Battery:....................................................................


12 V 12000 mAh

Charging time:.............................................

approx.11hours.

Operating time:................................................

up to 36 hours.

Protection class:.................................................................................


II

Net weight:..................................................................


approx.17kg

Microphones


Voltage supply:................................................


2x1.5VtypeAA/R6

Transmission frequency:..................................

636-865 MHz, UHF

Channels:............................................................................................


2


Power:......................................................................................


50 mW

Bluetooth


Bluetooth support:........................................................

V2.1 + EDR

Range:..................................................................


approx.15metres

Transmission frequency:......................................

2.402-2.480 GHz

Protocols:.....................................................................


A2DP/AVRCP

40 English

The right to make technical and design modifications in the course of continuous product development remains reserved.

This device has been tested according to all relevant current CE guidelines, such as electromagnetic compatibility and low voltage directives, and has been constructed in accordance with the latest safety regulations.

Disposal

Meaning of the “Wheelie Bin” Symbol

Take care of our environment, do not dispose of electrical applicances via the household waste.

Dispose of obsolete or defective electrical appliances via municipal collection points.

Please help to avoid potential environmental and health impacts through improper waste disposal.

You contribute to recycling and other forms of utilization of old electric and electronic appliances.

Your municipality provides you with information about collecting points.

Battery disposal

The device contains a built-in rechargeable battery. Waste batteries and accumulators must not be disposed of through household waste. Remove the batteries/accumulators bevore disposing of the product. In order to do so, please contactaqualified expert.

Instrukcja użytkowania

Dziękujemy za wybór naszego produktu. Mamy nadzieję, że korzystanie z urządzenia sprawi Państwu radość.

Symbole użyte w tej instrukcji obsługi

OSTRZEŻENIE:

Niebezpieczeństwo dla zdrowia oraz potencjalne ryzyko obrażeń ciała.

UWAGA:

Oznacza potencjalne zagrożenie urządzenia lub innych obiektów.

WSKAZÓWKA: Podświetlone wskazówki oraz informacje.

Generalne wskazówki dotyczące bezpieczeństwa

Przed użyciem urządzenia, należy dokładnie przeczytać podręcznik użytkowania i zachować go wraz z gwarancją, paragonem oraz w razie możliwości wraz z oryginalnym opakowaniem zawierającym wewnętrzne elementy. W razie przekazania urządzenia osobom trzecim, należy dołączyć podręcznik użytkowania.

Abyuniknąćryzykaporażeniaprądem,niewolnonarażać urządzenia na działanie deszczu ani wilgoci. Nie korzystać z urządzenia w pobliżu wody (np. w łazience, na basenie, w wilgotnych piwnicach)

Urządzenianienależyużywaćwbardzogorących,zimnych, zakurzonych ani wilgotnych miejscach.

Zurządzenianależykorzystaćwyłączniedocelówprywatnych i zgodnie z przeznaczeniem. Urządzenie to nie jest przeznaczone do użytku komercyjnego.

Sprawdzić,czykabelzasilającyniejestskręcony,zaczepiony lub nie styka się ze źródłami gorąca.

Sprawdzić,czykabelzasilanianiepowodujeryzykapotknięcia.

Wtyczkizasilającejanikablanienależynigdydotykać mokrymi rękoma.

Urządzenienależyzawszepodłączaćdoprawidłowo zainstalowanego gniazda elektrycznego. Sprawdzić, czy napięcie urządzenia odpowiada napięciu w sieci.

Wtyczkazasilającamusibyćzawszełatwodostępna.

Zawszeinstalowaćbaterięwewłaściwymkierunku.

Nieprzykrywaćotworówwentylacyjnychurządzenia.

Nienależynigdyzasłaniaćotworówwentylacyjnych przedmiotami, takimi jak czasopisma, obrusy, firanki itp.

Urządzenianienależywystawiaćnadziałaniekapiącejani rozchlapującej się wody, a także nie należy na nim stawiać naczyń wypełnionych wodą, takich jak wazony z kwiatami.

Naurządzeniunienależystawiaćźródełotwartegoognia, takich jak zapalone świeczki.

Język polski 41

Nieotwieraćobudowyurządzenia.Nieprawidłowowykonane naprawy mogą stwarzać niebezpieczeństwo dla użytkownika. Jeśli samo urządzenie lub, w szczególności, kabel zasilający, są uszkodzone, nie korzystać z urządzenia i zlecić jego naprawę specjaliście z odpowiednimi kwalifikacjami. Regularnie sprawdzać kabel pod kątem uszkodzeń.

Abyuniknąćniebezpieczeństw,uszkodzonykabelzasilający należy wymienić na kabel tego samego rodzaju wyłącznie u producenta, w serwisie konsumenckim lub u osoby z podobnymi kwalifikacjami.

Jeśliurządzenieniejestużywaneprzezdłuższyokres czasu, odłączyć kabel zasilania i wyjąć baterie.

Chronićakumulatorprzedsilnymiwstrząsamilubciśnieniem.

Poniższe symbole znajdują się na urządzeniu i oznaczają:

Symbol błyskawicy ostrzega użytkownika przed niebezpiecznie wysokimi napięciami wewnątrz.

Symbol wykrzyknika wskazuje ważne instrukcje lub uwagi dotyczące konserwacji w dołączonych instrukcjach.

Dzieci i osoby niepełnosprawne

Zewzględunabezpieczeństwodzieci,trzymaćczęści opakowania (torby plastikowe, kartony, styropian, itp.) poza ich zasięgiem.

OSTRZEŻENIE!

Małe dzieci nie mogą bawić się folią ze względu na niebezpieczeństwo uduszenia!

Urządzenianiepowinnyużywaćosoby(takżedzieci),które mają ograniczone możliwości fizyczne, sensoryczne lub umysłowe, którym brakuje doświadczenia i/lub wiedzy, chyba, że znajdują się pod nadzorem osoby odpowiedzialnej za ich bezpieczeństwo albo osoba ta przedstawiła im instrukcje dotyczące używania urządzenia.

Należydopilnować,abydzieciniebawiłysięurządzeniem.

Lokalizacja kontrolek

Przód

1Wskaźnik świetlny BAT (bateria)

2Wskaźnik świetlny PWR (moc)

3Wskaźnik świetlny AUX (USB, SD CARD, AUDIO IN)

4Wskaźnik świetlny (Bluetooth)

5Port USB

6Slot karty SD CARD

7Przycisk (odtwarzanie/pauza)

8Przycisk (następny plik muzyczny)

9Przycisk (poprzedni plik muzyczny)

10Przycisk INPUT

11GniazdkoAUDIOINtypujack(2xRCA)

42 Język polski

12Kontrolka MAIN VOL (głośność)

13Kontrolka TREBLE (soprany)

14Kontrolka BASS (basy)

15Kontrolka ECHO (echo)

16Kontrolka MIC VOL (głośność mikrofonu)

Bok

17Port USB CHARGING

18Wejście DC-12 V IN

19Przełącznik sieciowy AC/DC POWER a DC ON (napięcie 12 V)

b OFF (wyłączony)

c AC ON (zasilanie sieciowe)

20Złącze kabla sieciowego AC INPUT Uchwyty do przenoszenia (niepokazane)

Tył (niepokazany)

Rozkładany uchwyt

Zestaw (niepokazany)

2x mikrofon

1x kabeladapterasamochodowego12V

1x kabelsieciowy

Pierwsze użycie urządzenia/wstęp

Wybraćodpowiedniemiejscedlaurządzenia.Odpowiednia jest sucha, pozioma i antypoślizgowa powierzchnia.

Sprawdzić,czyurządzeniejestodpowiedniowentylowane!

Usunąćwarstwęochronnązurządzenia,oilejest.

Zasilanie

1.Sprawdzić, czy napięcie sieciowe jest zgodne ze specyfikacjami na plakietce znamionowej.

2.Podłączyć załączony kabel sieciowy do złącza AC INPUT (20) z boku urządzenia.

3.Włożyć wtyczkę kabla sieciowego do prawidłowo zainstalowanego gniazdka.

4.Ustawić przełącznik sieciowy w pozycji „AC ON” (19c).

WSKAZÓWKA:

Wyjąć wtyczkę z gniazdka, jeśli nie korzystamy z urządzenia przez dłuższy czas.

Praca poprzez adapter samochodowy 12 V

Adapter zapalniczki 12 V jest odpowiedni do samochodów, które wyposażone są w zasilanie 12 V z ujemnym uziemieniem.

1.Podłączyć załączony kabel adaptera samochodowego do wejścia DC-12 V IN (18) z boku urządzenia.

2.Podłączyć drugą końcówkę kabla do gniazdka zapalniczki w samochodzie.

3.Ustawić przełącznik sieciowy w pozycji „DC ON” (19c).

4.Odłączyć adapter 12 V od urządzenia i wyjąć go z gniazdka zapalniczki po użyciu.

UWAGA:

Korzystaćwyłączniezdostarczonegokablaadaptera samochodowego.

Używaćdołączonegokablaadapterasamochodowego tylko do tego urządzenia. Nie używać do innych urządzeń.

Niekorzystaćzurządzeniapodczasjazdy.Sprawdzić, czy urządzenie jest dobrze zamocowane lub schowane, aby nie przewróciło się wewnątrz samochodu podczas wypadku.

Port USB CHARGING (17)

Za pomocą portu znajdującego się z boku urządzenia można naładować smartfon. Podczas pracy z użyciem kabla sieciowego urządzenie dostarcza 5 V/1 A. Użyć kabla USB w smartfonie celem połączenia.

WSKAZÓWKA:

Zpowoduróżnychtypówsmartfonów,jakiedzisiajsą dostępne oraz różnych możliwości ładowania, czas trwania ładowania zależy od używanego smartfona oraz jego stanu.

Tenportnienadajesiędoodtwarzaniaplikówaudio.

Zasilanie bateryjne

Możliwa jest praca urządzenia z wbudowaną baterią.

Ogólne informacje

Całkowicienaładowaćbaterię przedużyciemjejdopracy urządzenia.

Unikaćcałkowitegorozładowaniabaterii.

Naładowaćcałkowiciebateriępokażdymużyciu.

KiedywskaźnikBAT(1)zaczynamigać,należynaładować baterię.

Ładowanie baterii

1.Podłączyć załączony kabel sieciowy do złącza AC INPUT (20) z boku urządzenia.

2.Włożyć wtyczkę kabla sieciowego do prawidłowo zainstalowanego gniazdka.

3.Ustawić przełącznik sieciowy w pozycji „AC ON” (19c).

Zależnie od pojemności baterii ładowanie może zabrać do 11 godzin.

UWAGA:

Nigdy nie zostawiać urządzenia bez nadzoru podczas ładowania.

WSKAZÓWKA:

Baterięmożnanaładowaćtylko,gdywłączonyjest głośnik.

Loading...
+ 24 hidden pages