

AEG 49332I-MN User Manual

49332I-MN
COOKER USER MANUAL

2
CONTENTS
4 SAFETY INFORMATION
8 PRODUCT DESCRIPTION
9 BEFORE FIRST USE
10 HOB - DAILY USE
15 HOB - HELPFUL HINTS AND TIPS
17 HOB - CARE AND CLEANING
18 OVEN - CONTROL PANEL
20 OVEN - DAILY USE
22 OVEN - CLOCK FUNCTIONS
23 OVEN - ADDITIONAL FUNCTIONS
24 OVEN - USING THE ACCESSORIES
26 OVEN - HELPFUL HINTS AND TIPS
35 OVEN - CARE AND CLEANING
39 WHAT TO DO IF…
41 INSTALLATION
ENVIRONMENT CONCERNS
Recycle the materials with the symbol . Put the packaging in applicable containers
to recycle it.
Help protect the environment and human health and to recycle waste of electrical
and electronic appliances. Do not dispose appliances marked with the symbol
with the household waste. Return the product to your local recycling facility or
contact your municipal office.
VISIT OUR WEBSITE FOR:
- Products
- Brochures
- User manuals
- Trouble shooter
- Service information
www.aeg.com
LEGEND
Warning - Important Safety information.
General information and tips
Environmental information
Subject to change without notice

FOR PERFECT RESULTS
Thank you for choosing this AEG product. We have created it to give you
impeccable performance for many years, with innovative technologies that help
make life simpler – features you might not find on ordinary appliances. Please spend
a few minutes reading to get the very best from it.
ACCESSORIES AND CONSUMABLES
In the AEG webshop, you’ll find everything you need to keep all your AEG
appliances looking spotless and working perfectly. Along with a wide range of
accessories designed and built to the high quality standards you would expect, from
specialist cookware to cutlery baskets, from bottle holders to delicate laundry bags…
ENGLISH
3
Visit the webshop at:
www.aeg.com/shop
CUSTOMER CARE AND SERVICE
We recommend the use of original spare parts.
When contacting Service, ensure that you have the following data available.
The information can be found on the rating plate.
Model
PNC
Serial Number

4
SAFETY INFORMATION
Before the installation and use, read
this manual carefully:
• For your own safety and the safety of
your property
• For the protection of the environment
• For the correct operation of the appliance.
Always keep these instructions with the
appliance also if you move or sell it.
The manufacturer is not responsible if
incorrect installation or use results in
damage.
CHILDREN AND VULNERABLE
PEOPLE SAFETY
• This appliance can be used by children aged from 8 years and above
and persons with reduced physical,
sensory or mental capabilities or lack
of experience and knowledge if they
have been given supervision or instruction concerning use of the appliance in safe way and understand the
hazards involved. Children shall not
play with the appliance.
• Keep all packaging away from children. There is the risk of suffocation
or physical injury.
• Keep children and animals away from
the appliance when the door is open
or the appliance is in operation.
There is the risk of injury or other permanent disability.
• If the appliance has Child lock or Key
lock function, use it. It prevents children and animals from accidental operation of the appliance.
GENERAL SAFETY
• Do not change the specifications of
this appliance. There is the risk of injury and damage to the appliance.
• Do not let the appliance stay unattended during operation.
• Switch off the appliance after each
use.
INSTALLATION
• The adjustment conditions for this
appliance are described on the label
(or data plate).
• Only an approved technician can install and connect the appliance. Contact an approved service centre. This
is to prevent the risks of structural
damage or physical injury.
• Make sure that the appliance is not
damaged because of transport. Do
not connect a damaged appliance. If
necessary, contact the supplier.
• Remove all packaging, stickers and
layers from the appliance before first
use. Do not remove the rating plate.
It can invalidate the guarantee.
• Fully obey the laws, ordinances, directives and standards in force in the
country where you use the appliance
(safety regulations, recycling regulations, electrical or gas safety rules
etc.).
• Be careful when you move the appliance. The appliance is heavy. Always
use safety gloves. Do not pull the appliance by the handle.
• Make sure that the appliance is disconnected from the power supply
during the installation (if applicable).
• Keep the minimum distances to the
other appliances and units.
• Do not put the appliance on a base.
ELECTRICAL CONNECTION
• The appliance must be earthed.
• Make sure that the electrical data on
the rating plate agree with your domestic power supply.
• Information on the voltage is on the
rating plate.
• You must have the correct isolation
devices: line protecting cut-outs,
fuses (screw type fuses removed from
the holder), earth leakage trips and
contactors.

• The electrical installation must have
an isolation device which lets you disconnect the appliance from the
mains at all poles. The isolation device must have a contact opening
width of minimum 3 mm.
• The shock protection parts must be
fixed in such a way that they cannot
be undone without tools.
• Always use a correctly installed
shockproof socket.
• When you connect electrical appliances to mains sockets, do not let cables touch or come near the hot appliance door.
• Do not use multi-way plugs, connectors and extension cables. There is a
risk of fire.
• Make sure not to squash or cause
damage to the mains plug (if applicable) and cable behind the appliance.
• Make sure that the mains connection
is accessible after the installation.
• Do not pull the mains cable to disconnect the appliance. Always pull
the mains plug (if applicable).
• Do not replace or change the mains
cable. Contact the service centre.
USE
• Only use the appliance for domestic
cooking tasks. Do not use the appliance for commercial and industrial
use. This is to prevent physical injury
to persons or prevent damage to
property.
• Always monitor the appliance during
operation.
• Always stay away from the appliance
when you open the door while the
appliance is in operation. Hot steam
can release. There is a risk of burns.
• Do not use this appliance if it is in
contact with water. Do not operate
the appliance with wet hands.
• Do not use the appliance as a work
surface or storage surface.
• The cooking surface of the appliance
becomes hot during use. There is a
risk of burns. Do not put metallic objects, for example cutlery or sauce-
ENGLISH
pans lids, on the surface, as they can
become hot.
• The interior of the appliance becomes hot during use. There is a risk
of burns. Use gloves when you insert
or remove the accessories or pots.
• The appliance and its accessible
parts become hot during use. Take
care to avoid touching the heating
elements. Young children must be
kept away unless continuously supervised.
• Open the door carefully. The use of
ingredients with alcohol can cause a
mixture of alcohol and air. There is
the risk of fire.
• Do not let sparks or open flames
come near the appliance when you
open the door.
• Do not put flammable products or
items that are wet with flammable
products, and/or fusible objects
(made of plastic or aluminium) in,
near or on the appliance. There is a
risk of explosion or fire.
• Set the cooking zones to "off" after
each use.
• Do not use the cooking zones with
empty cookware or without cookware
• Do not let cookware boil dry. This
can cause damage to the cookware
and hob surface.
• If an object or cookware falls on the
hob surface, the surface can be damaged.
• Do not put hot cookware near to the
control panel because the heat can
cause a damage to the appliance.
• Be careful when you remove or install
the accessories to prevent damage
to the appliance enamel.
• Cookware made of cast iron, cast aluminium or with damaged bottoms
can scratch the hob surface if you
move them on the surface.
• Discoloration of the enamel has no
effect on the performance of the appliance.
• To prevent damage or discoloration
to the enamel:
5

6
– do not put any objects directly on
the appliance floor and do not
cover it with aluminium foil;
– do not put hot water directly into
the appliance;
– do not keep moist dishes and food
in the appliance after you finish the
cooking.
• Do not apply pressure on the open
door.
• Do not put flammable materials in
the compartment below the oven.
Keep there only heat-resistant accessories (if applicable).
• Do not cover oven steam outlets.
They are at the rear side of the top
surface (if applicable).
• Do not put anything on the hob that
is liable to melt.
• If there is a crack on the surface, disconnect the power supply. There is a
risk of electric shock.
• Do not put heat-conducting materials (e.g. thin metal mesh or metalplated heat conductors) under the
cookware. Excessive heat reflection
can damage the cooking surface.
• If you have an implanted pacemaker,
you must keep your upper body a
minimum of 30 cm away from the induction cooking zones while they operate.
• Do not use the appliance during a
power cut.
CARE AND CLEANING
• Before maintenance, make sure that
the appliance is cold. There is a risk
of burns. There is a risk that the glass
panels can break.
• Keep the appliance clean at all times.
A build-up of fats or other foodstuff
can result in a fire.
• Regular cleaning prevents the surface
material from deteriorating.
• For your personal safety and the
safety of your property, only clean
the appliance with water and soap.
Do not use flammable products or
products that can cause corrosion.
• Do not clean the appliance with
steam cleaners, high-pressure cleaners, sharp objects, abrasive cleaning
agents, abrasive sponges and stain
removers.
• If you use an oven spray, follow the
instructions from the manufacturer.
Do not spray anything on the heating
elements and the thermostat sensor
(if applicable).
• Do not clean the glass door with
abrasive cleaning agents or metal
scraper. Heat resistant surface of the
inner glass can break and shatter.
• When the door glass panels are damaged they become weak and can
break. You must replace them. Contact the service centre.
• Be careful when you remove the door
from the appliance. The door is
heavy.
• Bulb lamps used in this appliance are
special lamps selected for household
appliances use only. They cannot be
used for the full or partial illumination
of a household room.
• If it becomes necessary to replace
the lamp use one of the same power
and specifically designed for household appliances only.
• Disconnect the appliance from the
power supply before the replacement of the oven lamp. There is the
risk of electrical shock. Cool down
the appliance. There is a risk of
burns.
• Do not clean catalytic enamel.
SERVICE CENTRE
• Only an approved engineer can repair or work on the appliance. Contact an approved service centre.
• Use only original spare parts.
DISPOSAL OF THE APPLIANCE
• To prevent the risk of physical injury
or damage:
– Disconnect the appliance from the
power supply.

– Cut off the mains cable and dis-
card it.
– Discard the door catch. This pre-
vents children or small animals
ENGLISH
from being closed inside of the appliance. There is a risk of suffocation.
7
8
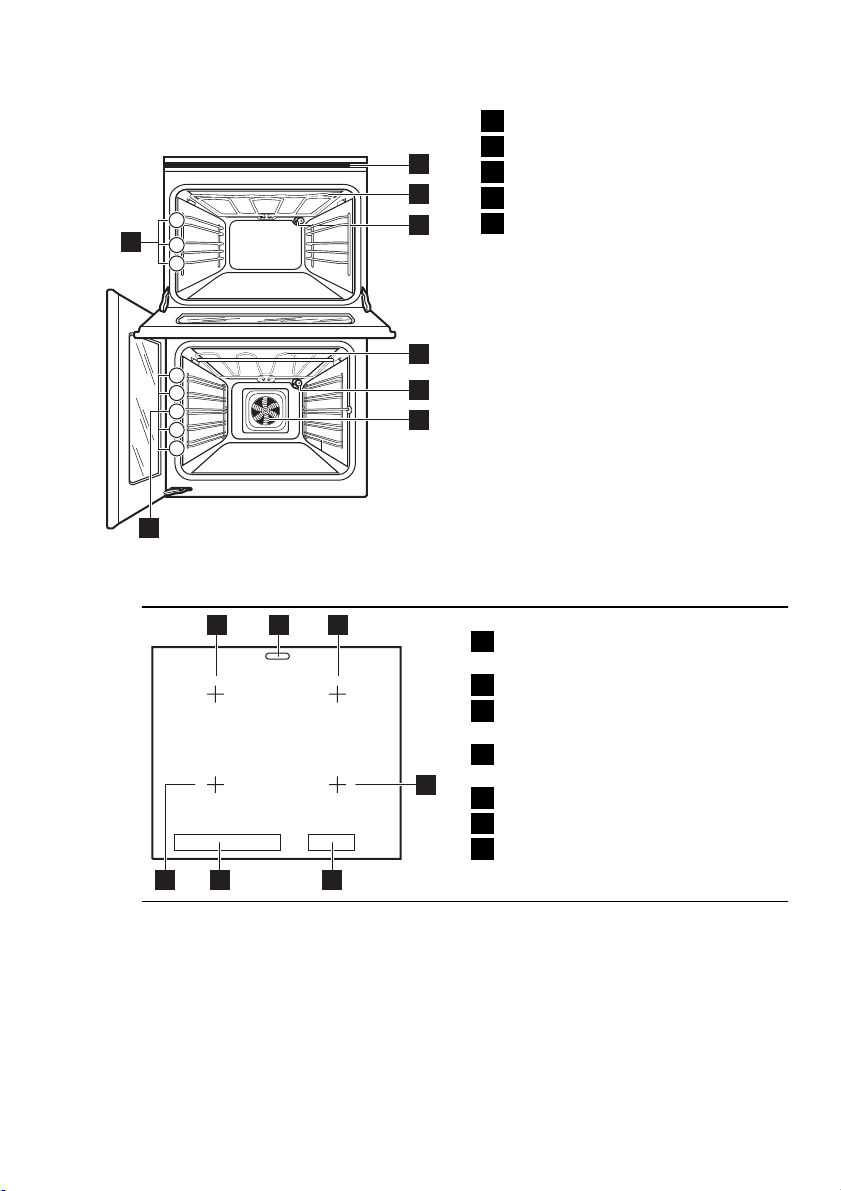
PRODUCT DESCRIPTION
GENERAL OVERVIEW
3
5
2
1
5
4
3
2
1
5
COOKING SURFACE LAYOUT
Hob
1
Grill
1
2
3
2
3
4
2
Oven lamp
3
Fan and heating element
4
Shelf positions
5
1 3
2
67
5
ACCESSORIES
• Oven shelf
For cookware, cake tins, roasts.
• Deep roasting pan
Induction cooking zone 2300 W,
1
with the Power function 3200 W
Steam outlet
2
Induction cooking zone 2300 W,
3
with the Power function 3200 W
Induction cooking zone 2300 W,
4
4
with Power function 3200 W
Oven control panel
5
Hob control panel
6
Induction cooking zone 2300 W,
7
with the Power function 3200 W
To bake and roast or as a pan to collect fat.
• Roasting pan grid
To put in the deep roasting pan.
BEFORE FIRST USE
ENGLISH
9
WARNING!
Refer to "Safety information"
chapter.
INITIAL CLEANING
• Remove all accessories and removable shelf supports (if applicable).
• Clean the appliance before first use.
Refer to the chapter "Care and
cleaning".
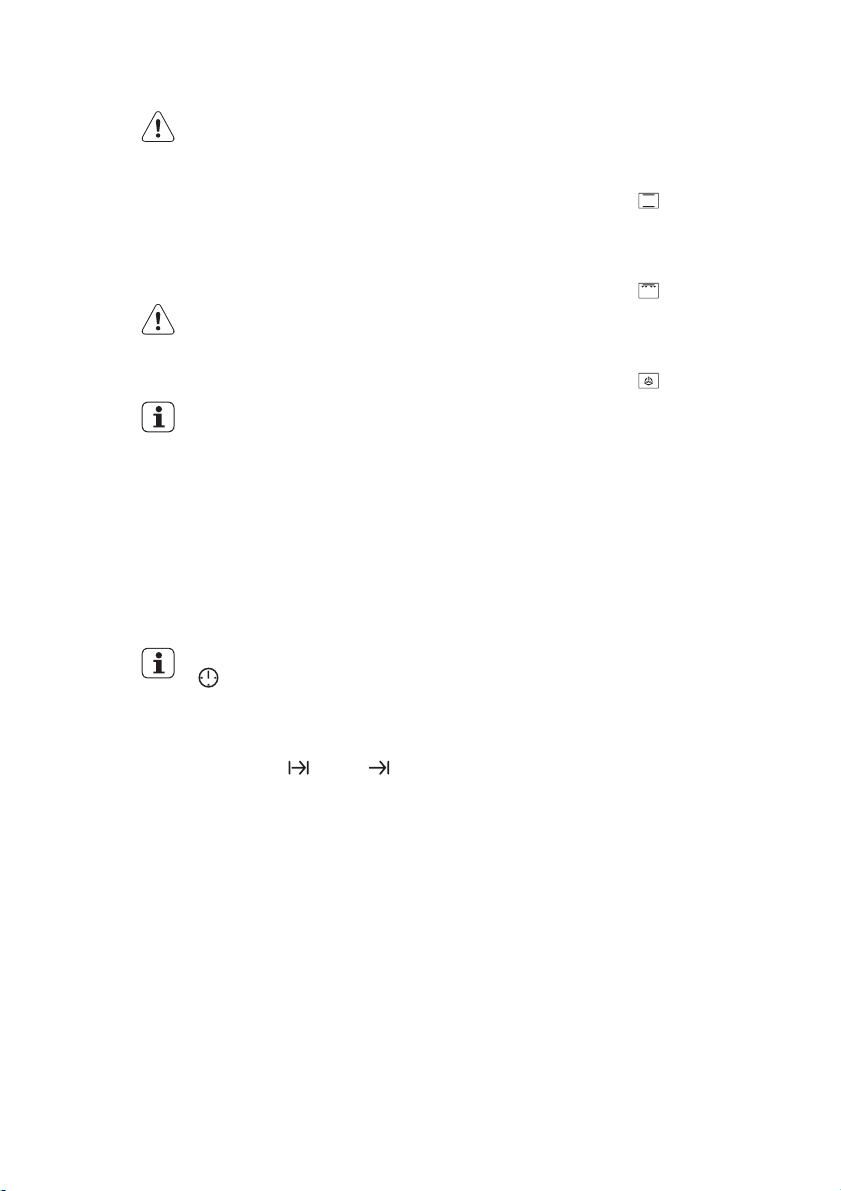
SETTING THE TIME
You must set the time before
you operate the oven.
When you connect the appliance to the
electrical supply or after a power cut,
the indicator for the Time function
flashes.
Press the + or - button to set the correct time.
After approximately five seconds, the
flashing stops and the display shows
the time of day you set.
You can only change the time
if :
• The child safety device is not
on.
• None of the clock functions
Duration
• No oven function is set.
or End is set.
PREHEATING
Preheat the empty appliance to burn
off the remaining grease.
1.
Set the function and the maximum temperature.
2.
Let the appliance operate for one
hour.
3.
Set the function and the maximum temperature.
4.
Let the appliance operate for ten
minutes.
5.
Set the function and the maximum temperature.
6.
Let the appliance operate for ten
minutes.
Accessories can become hotter than
usually. The appliance can emit an
odour and smoke. This is normal. Make
sure that the airflow is sufficient.
10
HOB - DAILY USE
WARNING!
Refer to "Safety information"
chapter.
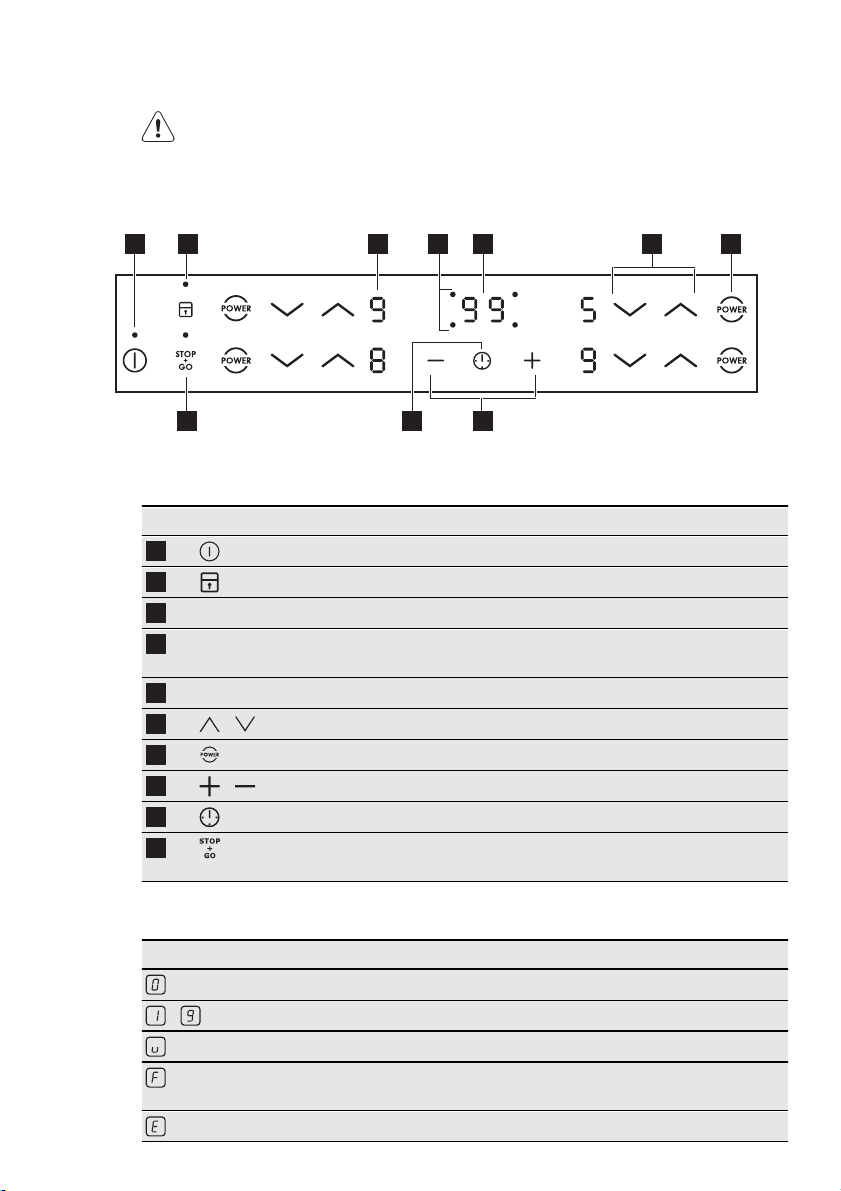
CONTROL PANEL LAYOUT
1 2 3 4 5 6 7
Use the sensor fields to operate the appliance. The indicators, displays and
sounds tell which functions operate.
Sensor field Function
1
2
Heat setting display Shows the heat setting.
3
Timer indicators for the cook-
4
ing zones
Timer display Shows the time in minutes.
5
6
7
8
9
10
/
/
8910
Activates or deactivates the hob.
Locks or unlocks the control panel.
Shows for which zone you set the time.
Increase or decrease the heat setting.
Activates the Power function.
Increase or decrease the time.
Selects the cooking zone.
Activates or deactivates the Stop and Go
function.
HEAT SETTING DISPLAY
Display Description
The cooking zone is off.
-
The cooking zone operates.
The Stop and Go function is on.
The cookware is unsuitable or too small, or there is no
cookware on the cooking zone.
There is a malfunction.
Display Description
Residual heat indicator: a cooking zone is still hot.
The lock/child safety function is on.
The Power function is on.
The automatic heat-up function is on.
ENGLISH
11
ACTIVATING AND
DEACTIVATING THE HOB
Touch for 2 seconds to activate the
hob. Touch
for 1 second to deacti-
vate the hob.
HEAT SETTING
Touch to increase the heat setting.
Touch
to decrease the heat setting.
The display shows the heat setting.
11
10
9
8
7
6
5
4
3
2
1
0
123456789
POWER FUNCTION
The Power function makes more power
available to the induction cooking
zones. The Power function is activated
for 10 minutes at most. After that, the
Touch
and at the same time to
deactivate the cooking zone.
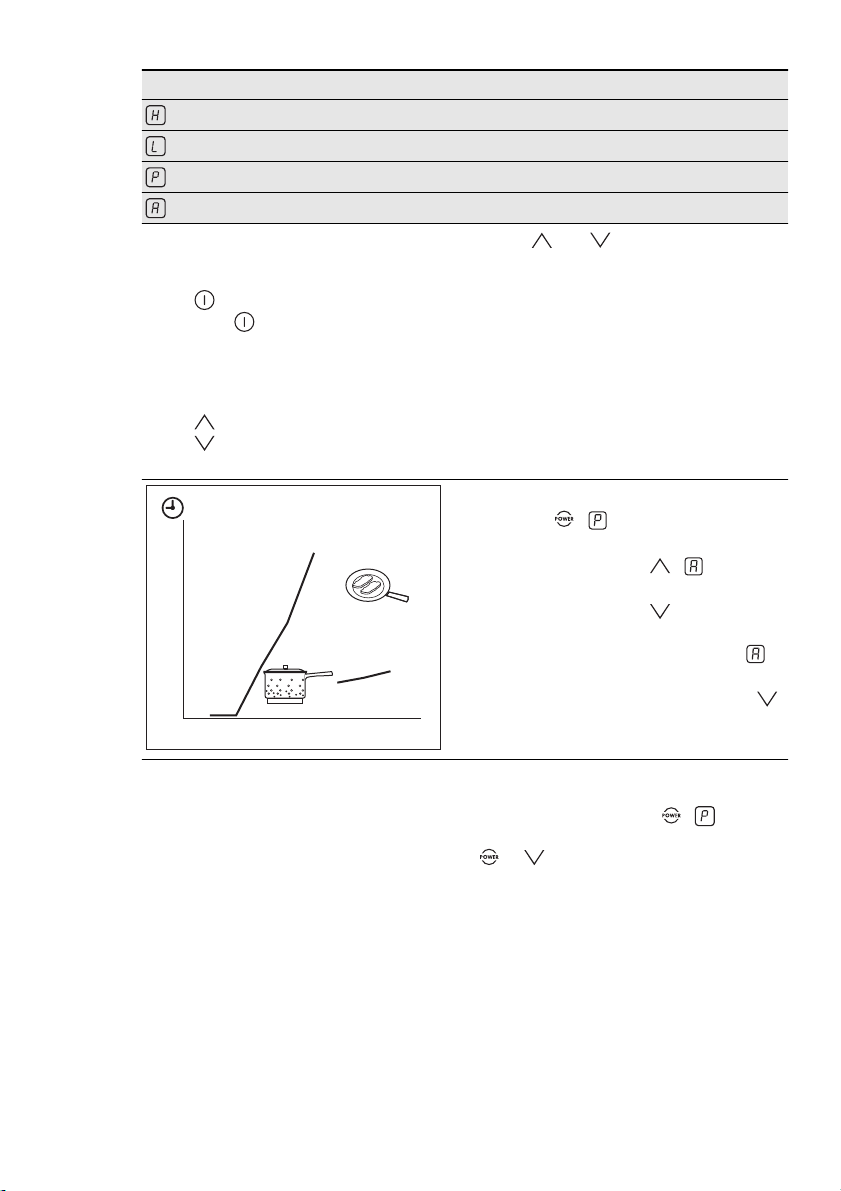
AUTOMATIC HEAT-UP
The automatic heat-up function lets you
get the necessary heat setting in a
shorter time. It sets the highest heat
setting for some time (refer to the diagram), and then decreases it to the necessary heat setting.;
To start the automatic heat-up:
1.
Touch . comes on in the display.
2.
Immediately touch . comes
on in the display.
3.
Immediately touch again and
again until the necessary heat set-
ting comes on. After 3 seconds
comes on in the display.
4.
To deactivate the function touch
.
induction cooking zone automatically
changes back to the highest heat set-
ting. To activate, touch
on in the display. To deactivate, touch
or .
. comes
12
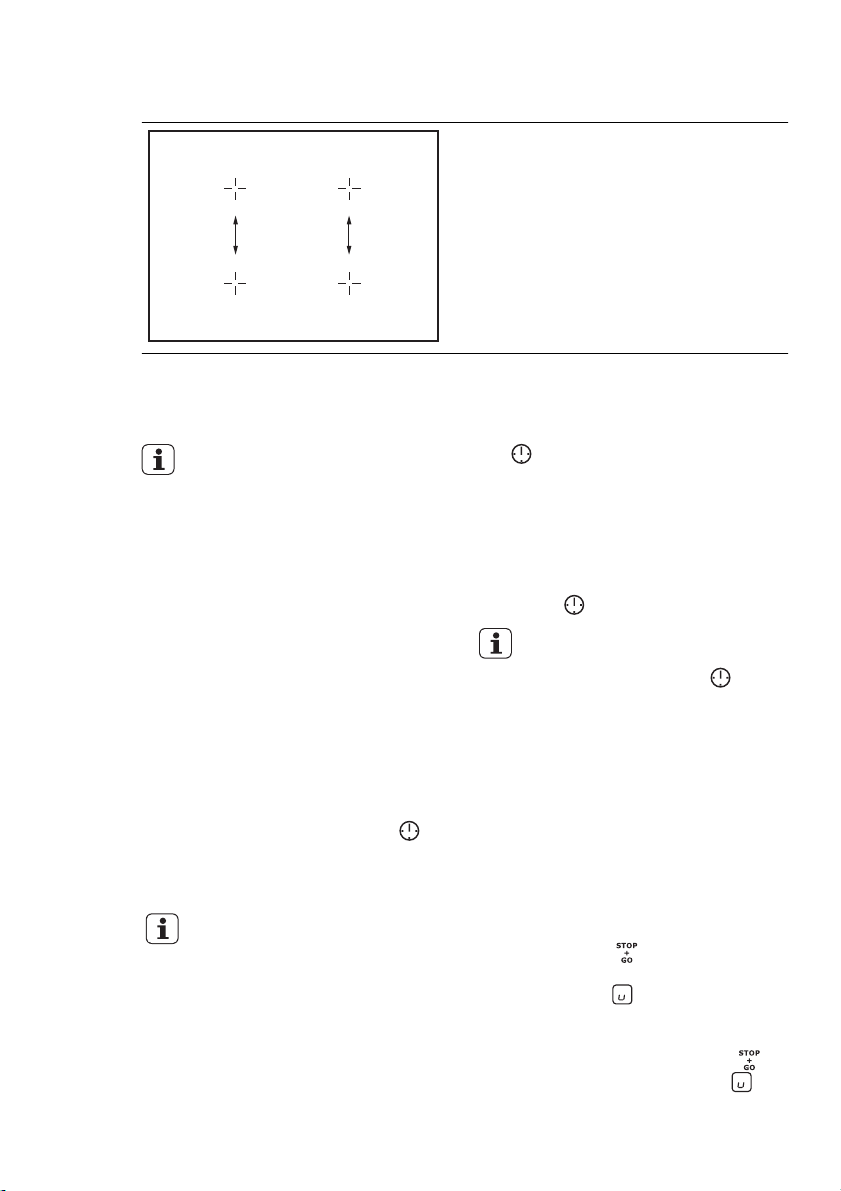
POWER MANAGEMENT
The power management divides the
power between two cooking zones in a
pair (see the illustration). The Power
function increases the power to the
maximum level for one cooking zone in
the pair and decreases the power in the
second cooking zone. The display for
the reduced zone changes between
two levels.
POWER MANAGEMENT FOR
THE RIGHT COOKING ZONES
AND THE TOP OVEN
The right cooking zones and the
top oven use the same energy
source (the same electrical
phase) when they operate at the
same time. The power management prevents a circuit overload.
The more power the top oven uses during its operation, the less is available
for the right cooking zones. When a
zone cannot use the full power, the display for the zone changes between the
two levels.
TIMER
Use it to set an automatic switch-off
time for a cooking zone.
1.
Set the cooking zone. Touch
again and again until the indicator
for the necessary cooking zone
comes on.
You must set the cooking zone
before you activate the timer.
2.
Set the heat setting for the cooking
zone. You can also set it after you
activate the timer.
3.
To activate the timer or change the
set time, touch + or - on the hob
control panel. The maximum time
you can set is 99 minutes.
The indicator of the cooking zone
flashes slowly. The timer starts to
count down.
4.
To see the remaining time, touch
again and again until the indicator for the necessary cooking zone
flashes quickly. The display shows
the remaining time.
When the set time ends, 00 flashes
and an acoustic signal sounds. The
cooking zone deactivates.
5.
Touch to stop the signal.
To deactivate the timer before
the set time is completed, set
the cooking zone with
touch -. The remaining time
counts down to 00. The indicator of the cooking zone goes
out.
You can use the timer as a Minute
Minder when the cooking zones do not
operate. To do this, set the cooking
zone and activate the timer but do not
set the heat setting.
and
STOP AND GO
The Stop and Go function sets all
cooking zones that operate to the low-
est heat setting (
This function does not deactivate the
timer function.
•
To activate this function, touch
The display shows the symbol
).
.
.
•
To deactivate this function, touch
. The display shows the heat setting
that you set before.
When the Stop and Go function
operates, you cannot change
the heat settings.
LOCK
When the cooking zones operate, you
can lock the control panel but not
.
It prevents an accidental change of the
heat setting.
This function does not deactivate the
timer function.
1.
Set the heat setting.
2.
To activate this function, touch .
The display shows the symbol
for 4 seconds.
3.
To deactivate this function, touch
. The display shows the heat set-
ting that you set before.
When you deactivate the appliance, the function is deactivated.
When you activate the appliance, the
display shows SAFE .
The locking/unlocking function
locks or unlocks the oven interface at the same time.
CHILD SAFETY DEVICE
This function prevents an accidental operation of the hob.
Activating the child safety device
1.
Touch to activate the hob. Do
not set the heat settings.
2.
Touch for 4 seconds. The display shows the symbol
child safety device operates.
3.
Touch to deactivate the hob.
Deactivating the child safety device
1.
Touch to activate the hob. Do
not set the heat settings.
2.
Touch for 4 seconds. The display shows the symbol
3.
Touch to deactivate the hob.
. The
.
ENGLISH
13
Overriding the child safety device for
one cooking session
1.
Touch to activate the hob. The
display shows the symbol
2.
Touch for 4 seconds.
3.
Set the heat settings in less than 10
.
seconds. You can operate the hob.
4.
When you deactivate the hob, the
child safety device operates again.
The child safety device function
locks the hob and oven at this
same time.
RESIDUAL HEAT INDICATOR
The residual heat indicator comes on
when a cooking zone is hot.
WARNING!
There is a risk of burns from residual heat.
AUTOMATIC SWITCH-OFF
The hob deactivates automatically if:
• All cooking zones are deactivated.
• You do not set the heat setting after
you activate the hob.
• You spill something or put something
on the hob control panel for more
than 10 seconds (a pan, a cloth, etc.).
An acoustic signal sounds and the
hob deactivates. Remove the object
or clean the control panel.
• The hob becomes too hot (e.g. when
a saucepan boils dry). Before you use
the hob again, the cooking zone
must be cool.
• You use incorrect cookware. The display shows the symbol
cooking zone deactivates automatically after 2 minutes.
• You do not deactivate a cooking
zone or change the heat setting. After some time (see the table), the display shows the symbol
hob deactivates.
Heat setting Switch-off time
-
and the
and the
6.0 h
14
Heat setting Switch-off time
-
5.0 h
4.0 h
Heat setting Switch-off time
-
1.5 h
HOB - HELPFUL HINTS AND TIPS
WARNING!
Refer to "Safety information"
chapter.
COOKWARE FOR INDUCTION
COOKING ZONES
In induction cooking a powerful
electromagnetic field generates
an almost instant heat inside the
cookware.
Cookware material
• correct: cast iron, steel, enamelled
steel, stainless steel, a multi-layer
bottom (marked as correct by a manufacturer).
• not correct: aluminium, copper,
brass, glass, ceramic, porcelain.
Cookware is correct for an induction
hob if …
• ... some water boils very quickly on a
zone set to the highest heat setting
• ... a magnet pulls on to the bottom of
the cookware.
The bottom of the cookware
must be as thick and flat as possible.
Put the cookware on the cross
which is on the cooking surface.
Cover the cross fully. The magnetic part of the bottom of the
cookware must be 150mm minimum. Induction cooking zones
adapt to the dimension of the
bottom of the cookware automatically. You can cook with the
large cookware on two cooking
zones at the same time.
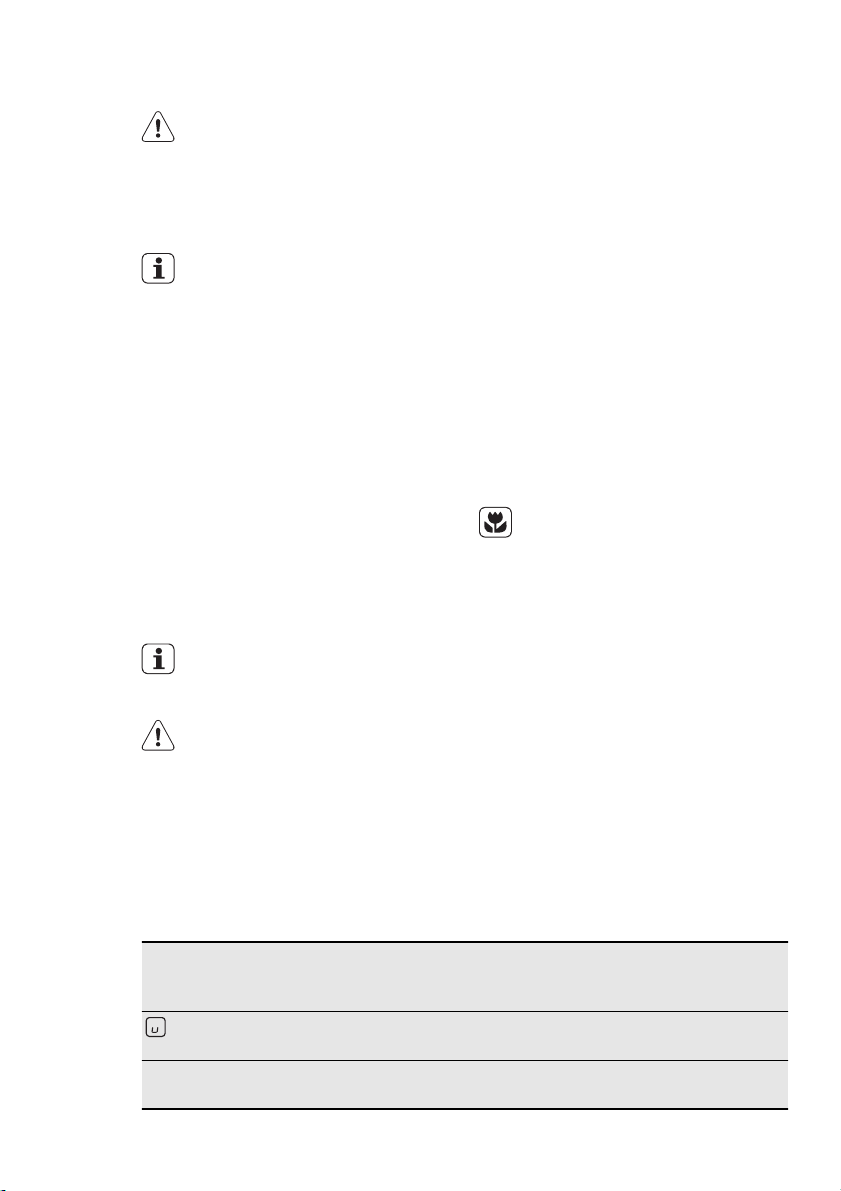
Heat
setting
1-2 Hollandaise sauce, melt: butter,
Use to: Time Hints
Keep cooked foods warm as re-
1
chocolate, gelatine
ENGLISH
OPERATING NOISES
If you can hear
• cracking noise: cookware is made of
different materials (Sandwich construction).
• whistling: you use one or more cooking zones with high power levels and
the cookware is made of different
materials (Sandwich construction).
• humming: you use high power levels.
• clicking: electric switching occurs.
• hissing, buzzing: the fan operates.
The noises are normal and do not refer to any defects.
ENERGY SAVING
• If possible, always put the lids
on the cookware.
• Put cookware on a cooking
zone before you start it.
EXAMPLES OF COOKING
APPLICATIONS
The data in the table is for guidance
only.
quired
5-25
min
Cover
Mix occasionally
15
 Loading...