

ACTIVEON CCA10W User manual
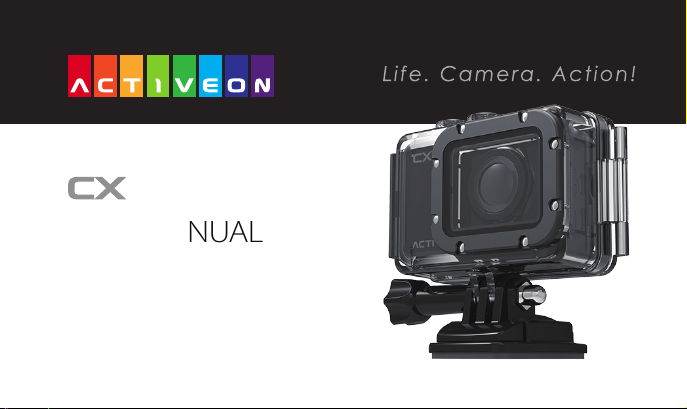
USER MANUAL
www.activeon.com

Table Of Contents
1. Name of each part
2. Operation & button description
3. Start the camera
4. LCD screen shot
5. Graphical icon description
6. Video recording
7. Photo shoot
8. User menu
8-1. Playback mode
8-2. User setting
9. Rechargeable Battery
10. Smart phone control
11. Connect ACTIVEON CX to smartphone(using ACTIVEON App)
12. Transferring data to computer
13. Firmware update
14. Features and specications
15. Inside the Package
※ CAUTION
※ FCC RADIO FREQUENCY INTERFERENCE STATEMENT
※ RF Exposure Information (SAR)
1
2
3
4
5
6
7
7
8
9
12
13
13
15
16
17
18
20
20
21
www.activeon.com
* Please read this manual carefully before the use!
ENGLISH
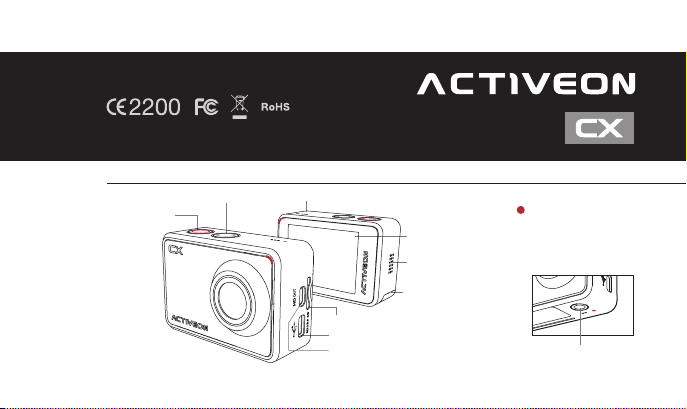
1. Name of each part
Mode / Navigation Internal MIC
Power / Shutter
LCD Screen
Speaker
Li-ion
microSD Card Slot (microSD Card not included)
Mini USB port
HD OUT
* Please use “Micro HDMI" cable on HD OUT port.
* Cable not included.
battery slot
LED Indicator
(Top, Bottom, Front, Back)
Tripod hole (Bottom)
1
2. Operation & button description
●
ACTIVEON CX is operated by two buttons. ( button , button )
●
( )button features “Power, Shutter and Enter”.
●
( )button features “Mode change, Navigation and User menu”.
●
The feature of buttons are dened as below table.
Function Button Description
Power On / O
Press ( ) button and hold for 2 seconds
* If Auto Power o is set, the camera will automatically shut down in 3 minutes
when there is no operation.
2
REC Start / Stop
Conrm
setting menu
Press ( ) button to start video recording or photo shoot
(Video / Photo / Burst / Timelapse)
Within user setup mode, press ( ) button to enter setting
menu in each category
Function Button Description
Press the (
Mode change
User menu Press the (
Navigator Press the (
) button to switch modes
(Video > Photo > Photo burst > Photo timelapse)
) button and hold for 2 seconds to enter user setup mode
) button to move select bar on OSD menu or change setting
3. Start the camera
1. Open the battery cover and insert ACTIVEON CX Li-ion battery.
2. Insert microSD Card on the microSD Card slot.
3. Press the ( ) button and hold for two seconds. (The camera will turn on and LCD screen will display live image.)
(The camera will not record when microSD Card is not inserted.)
3
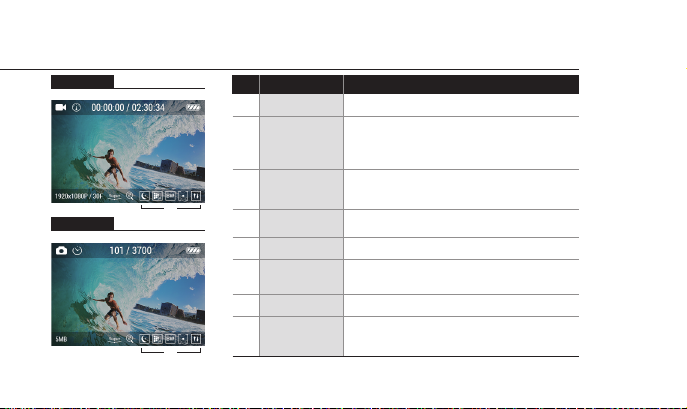
4. LCD screen shot
Video screen
① ② ③ ④
⑥ ⑦ ⑧
⑤
Photo screen
① ② ③ ④
⑥ ⑦ ⑧
⑤
4
Current mode
①
②
Recording time
③
④
⑤
⑥
⑦
⑧
FunctionNo.
Shooting
mode
information
Battery
Resolution
FOV
Zoom
Eect setting
Description
Shows current mode (video or photo)
Shows current shooting mode
(Video - Auto stop / Looping / Timelapse)
(Photo - Self timer / Timelapse / Burst)
Shows recording time information
(Current recording time / Usable recording time)
Shows battery capacity status
Video / Photo Resolution
While shooting video or photo, it shows viewing
angle mode (Super wide / Wide / Medium / Narrow)
Shows current zoom level (None / x2 / x3 / x4)
Shows current eect setting
(Eect / Quality / Filter / AE meter / Upside Down)
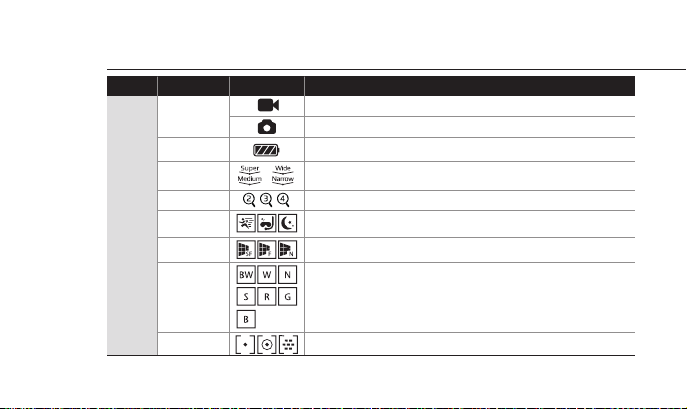
5. Graphical icon description
Function IconsMode Description
Current mode
Battery
FOV
Zoom
Live
screen
Eect
Image quality
Video mode
Photo mode
Shows battery capacity status
Shows FOV setting status (Super wide / Wide / Medium / Narrow)
Shows current zoom level (None / x2 / x3 / x4)
Shows current recording eect status (Sports / Aqua / Night)
Shows current recording image quality status (Super Fine / Fine / Normal)
Filter
AE Meters
Shows current recording lter status.
(O / Black&White / Warm / Negative / Sepia / Red / Green / Blue)
Shows current recording AE meter status (Spot / Center / Average)
5
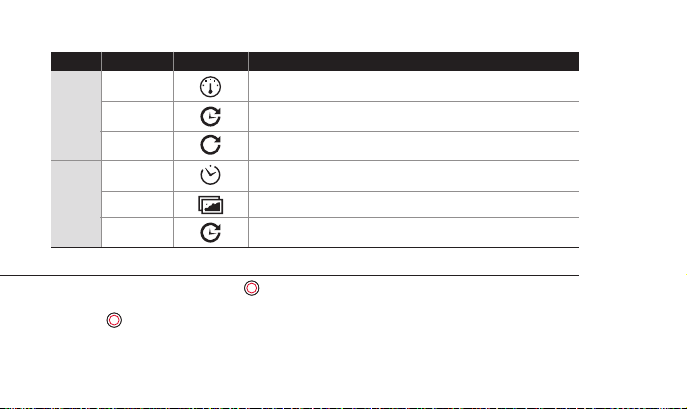
Video
Photo
Function
Auto stop
Timelapse
Looping
Self Timer
Burst
Timelapse
IconsMode
Records video until set time.
(1min / 5min / 10min / 30min)
Captures images in set intervals and creates a timelapse video le.
(1sec / 3sec / 5sec / 10sec /30sec / 60sec)
Continuously records a video for a set time until you stop.
(5min / 20min / 60min / 120min)
Captures an image after a set time.
(5sec / 10sec / 15sec )
Photo burst shooting (3/1sec , 5/1sec)
Captures images continuously in set intervals until you stop.
(1sec / 3sec / 5sec / 10sec / 30sec / 60sec)
Description
6. Video recording
1. After the camera is turned on, Press( ) button to start video recording.
2. When the camera starts to record, LED light blinks* and shows recording time on the screen.
3. Press( ) button to stop recording.
4. You can adjust video settings in “User Menu”.
* If LED o option is selected in user setup, LED light will not blink.
6
7. Photo shoot
●
Press ( ) button to change to photo mode.
●
Mode changes as
Video mode Photo mode Photo burst Photo timelapse
1. Press ( ) button to shoot photo.
2. In 'Photo Timelapse' mode, Press ( ) button to stop photo shooting.
3. You can adjust photo settings in “User Menu”.
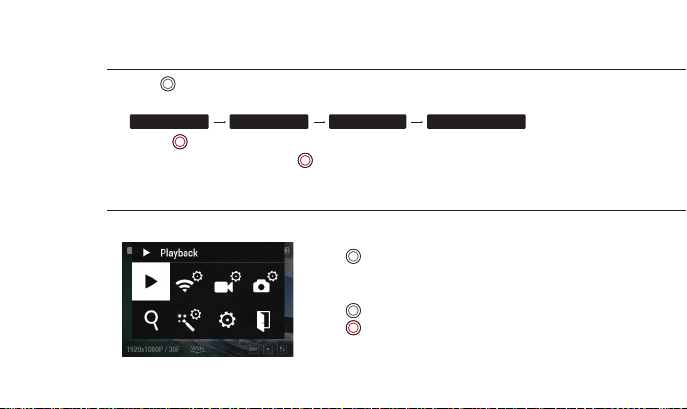
8. User menu
●
You can view recorded video/photo and adjust settings in “User Menu”.
1. Press ( )button and hold for two seconds to enter user menu.
2. User menu is divided into seven categories.
(Playback, WiFi, Video, Photo, Zoom, Eect and General setting)
3. Press ( ) button to move to next option.
4. Press ( ) button to select and conrm each user menu
within sub-menu.
in turn.
7
 Loading...