

Page 1

PRODUCT
EM-1A, EM-1D™
SUPPORT
Product No. 2204, 2208
FAA PMA Approved under A3-06-1402-
MANUAL
Y1-03-0014
(25-60-01)
Overhaul Manual
with Illustrated Parts List
Rev. R
Portable Safety Megaphone
ACR Electronics, Inc.
5757 Ravenswood Road
Fort Lauderdale, Fl 33312
+1(954) 981-3333 • Fax +1 (954) 983-5087
www.acrelectronics.com
Email: Info@acrelectronics.com
A Chelton Group company
Page 2

TABLE OF CONTENTS
SECTION TITLE PAGE
1.0 Description 1
2.0 Technical Data 1
3.0 Operation 2
4.0 Cleaning 4
5.0 Battery Replacement 4
6.0 Testing 4
7.0 Trouble Shooting 5
8.0 Disassembly 6
9.0 Inspection Check 6
10.0 Repair 6
11.0 Assembly 7
12.0 Parts List 9
ILLUSTRATION
Figure 1 Block Diagram 3
ACR/EM-1A & EM-1D
Portable Safety Megaphone
Figure 2 Illustrated Parts List 8
ACR/EM-1A & EM-1D
Portable Safety Megaphone
1
Y1-03-0014 Rev. R
Page 3
1.0 DESCRIPTION
1.1 The ACR/EM-1A, 1D is a battery operated solid state megaphone
specifically developed for use in enclosed areas such as in the interior of
an aircraft or ship cabin. It has been designed to minimize regenerative
acoustic feedback that results in whistling and other oscillations of this
nature. It has a 90° sound projection angle to direct the sound to persons
in its immediate vicinity, as well as in the rear sections of any aircraft.
The amplifier frequency band-pass has been selected to produce a crisp,
clear reproduction of voice signals. The operating power level is also
sufficient to provide adequate sound under high ambient noise level
conditions without being over-powering. Specific attention has been
given to the physical size so that it can be used effectively in a crowded
environment.
The EM-1A & EM-1D are the same except for installed options:
MODEL MANUAL GAIN ALARM ACTUATOR BATTERY MONITOR
Visual Audible
OPTIONS MATRIX
EM-1A Yes Yes Yes No
EM-1D Yes No Yes Yes
1.2 The integrated circuit amplifier only uses a small current when turned
“ON”. Large currents necessary to drive the speaker are utilized only on
voice peaks. This extends the life of the batteries so that several hours of
operation may be expected when used normally in an intermittent manner.
Batteries should be replaced periodically as recommended by the
manufacturer. (See section 5.0) A simplified block diagram of the
megaphone is shown in Figure 1.
2.0 TECHNICAL DATA
Dimensions 5.5” max diameter bell, 11.5” max long
Weight 2.3 lbs., including batteries
Materials Horn, handle – Anodized Aluminum
Housing – Aluminum
Attachment Neck strap at top of unit
2
Y1-03-0014 Rev. R
Page 4

Gain Control* Thumb operated
Amplifier Integrated circuit, 2 watts power output
Speaker Re-entrant horn and driver type;
input power five (5) watts;
90° dispersion angle
Microphone High Sensitivity
Batteries Six (6) standard 1½ volt “AA” cells
Power Drain 25 milliamps static current
550 milliamps maximum current
Frequency Response 500 to 3500 Hz
Anti-Removal Alarm* Warbling tone 500 – 1200 Hz
Alarm Actuator* Plug pin, retained by nylon cord
Battery Test Circuits Visual Flashing Green LED*
Acoustical Beep*
*Optional feature (see options matrix)
3.0 OPERATION
3.1 A siren, incorporated into the megaphone, is automatically activated by
unplugging the alarm plug pin.*
Note: A long lanyard with an alarm plug pin is supplied with the
megaphone for use as an anti-theft alarm (optional).
3.2 Squeezing the handle automatically stops the siren, and the megaphone is
ready for use. Re-insert the alarm pin so that alarm will not be reactivated
when pressure on the handle is removed.
3.3 Hold the megaphone in one hand. Place mouth almost in contact with the
microphone mouthpiece at the rear of the assembly. Squeeze the handle,
which will flex slightly, turning the megaphone “ON” and speak slowly
with loud, crisp, clear tones.
Megaphones without the optional gain control knob are preset to a
standard level via control under access hole plug.
3
Y1-03-0014 Rev. R
Page 5

3.4 Adjust the volume control knob to a suitable sound level. The volume
control may be adjusted with the thumb of the same hand holding the
megaphone.*
3.5 When not in use, carry the megaphone by the neck strap, attached to top of
unit.
SPEAKER
ASSEMBLY
VISUAL
BATTERY
CHECK
AUDIO AMPLIFIER
SIREN CIRCUIT &
BATTERY MONITOR
MEGAPHONE
SUB-ASSEMBLY
++
LED
*
ALARM
PLUG PIN
VOLUME
CONTROL
MICROPHONE
ASSEMBLY
-
N.O.
N.C.
+-
HANDLE
SWITCH
BATTERY
PACK
(6 x AA)
FIGURE 1
BLOCK DIAGRAM
ACR/EM-1A, EM-1D PORTABLE SAFETY MEGAPHONE
3.6
Two types of battery monitor are available on the EM-1 series
Visual - when megaphone is activated by squeezing the handle, a green
Battery Monitor
megaphones.*
LED indication means the remaining battery capacity is greater than 50%
of initial capacity. If the green LED is out, replace batteries.
-
4
Y1-03-0014 Rev. R
Page 6

Audible - when megaphone is activated by squeezing the handle, a chirp
heard in the speaker means the remaining battery capacity is greater than
50% of initial capacity. If beep is not present, replace battery.
4.0 CLEANING
4.1 External surfaces of the megaphone may be cleaned with a soft cloth,
dampened in a solution of mild household detergent. Do not immerse in
water or use strong solvents. Clean electrical contacts with cloth
dampened with isopropyl alcohol.
5.0 BATTERY REPLACEMENT (see Figure 2)
5.1 The power supply used in the megaphone consists of six standard 1 ½ volt
“AA” size batteries. Current drain is minimal (12 mA) with the
megaphone “ON”, and increases when the user speaks into the
microphone.
5.2 Battery replacement is accomplished by removing three set screws (3)
while holding the microphone and mouthpiece assembly (2) in place. The
six battery cells, contained in three tubes with two cells per tube, are
immediately accessible and will drop out when the megaphone is tilted.
New batteries may be dropped into the tubes, observing polarity marking
adjacent to each tube.
5.3 Replace microphone and mouthpiece assembly (2). Align keyway and
secure with the three set screws (3).
CAUTION: Observe polarity of cells carefully before replacement.
6.0 TESTING
Note: The megaphone consists of three major assemblies; the microphone and
mouthpiece assembly, the megaphone sub-assembly, and the horn and
speaker assembly. To locate a defect, follow the procedure outlined
below:
6.1 Squeeze the handle. If a clicking sound is heard, the speaker is operating.
6.2 Remove the pin that activates the siren. If the alarm is of normal
amplitude and sound character, the amplifier and siren circuitry are
functioning properly. If the amplification is low, check the batteries and
5
Y1-03-0014 Rev. R
Page 7

then the amplifier. If the sound character is abnormal, check the batteries
and then the siren circuitry.*
6.3 If no sound is heard, remove the microphone and mouthpiece assembly
and the batteries. Check that both the microphone and battery contacts are
clean. If not, clean with a mild, non-abrasive cleaner such as alcohol.
6.4 Test amplifier and speaker assembly by replacing the microphone with a
spare microphone assembly. If no sound can be produced after
microphone replacement, it may be assumed that the amplifier or speaker
assembly is defective.
6.5 To test the speaker, disassemble the speaker. Disconnect one wire and
apply 1 ½ volts intermittently across the speaker. If no clicks are heard,
the speaker is defective.
* Optional Feature (see options Matrix)
7.0 TROUBLESHOOTING
7.1 Testing procedure for locating defects is given in paragraph 6.0. Possible
faults and corrections are summarized below for ready reference.
TROUBLE POSSIBLE CAUSE CORRECTION
No sound from speaker when
handle is squeezed (Step 6.1)
No siren when alarm pin is pulled
(Step 6.2)*
Sound is abnormally low or
distorted
Speaker does not respond to Step
6.5
Exhausted batteries, defective
microphone, speaker or amplifier
assembly
Exhausted batteries, defective
siren circuitry or defective
amplifier
Exhausted batteries or wrong
polarity of battery series
Defective speaker Replace speaker
Replace defective component
Replace defective component
Check proper insertion of
batteries or replace batteries.
*Optional Feature (see options Matrix)
6
Y1-03-0014 Rev. R
Page 8

8.0 DISASSEMBLY (see Figure 2)
8.1 Megaphone should be disassembled for repair or replacement of
components only.
8.1.1 Remove microphone and mouthpiece assembly (2) by removing
the three set screws (3).
8.1.2 Remove battery cells (4) from the three tubes by tilting megaphone
to allow cells to drop out into the hand.
8.1.3 Unplug alarm plug pin (5) from side of housing.*
8.1.4 Remove volume control knob (6) (pulls off).
8.1.5 Remove the three oval head screws (11) at periphery of the speaker
end of the housing (15).
8.1.6 Extract speaker (7) and megaphone assembly (10) by firstly
turning horn (18) clockwise 45°. Pull entire assembly gently until
it stops. Turn horn (18) counterclockwise 45°, then pull the entire
assembly out.
8.1.7 Separate Speaker Assembly (7) and Megaphone Subassembly (10)
by firstly unplugging the speaker wires from the "out" header.
Remove hex screw that holds the assemblies together.
8.1.8 Disassembly in steps 8.1.1 through 8.1.7 above is sufficient to
examine the megaphone for faults and testing. Further
disassembly is not recommended.
9.0 INSPECTION / CHECK
9.1 Inspect unit for any evidence of damaged parts, loose mountings or broken
leads and dirty electrical contacts.
10.0 REPAIR
10.1 The megaphone consists of three major sub-assemblies; the Microphone
and Mouthpiece Assembly, the Megaphone Sub-Assembly, and the Horn
and Speaker Assembly. Repairs are restricted to the replacement of these
defective sub-assemblies or the batteries and lanyard assemblies.
11.0 ASSEMBLY
7
Y1-03-0014 Rev. R
Page 9

11.1 Assembly of the megaphone is in reverse order of disassembly. Follow
these instructions:
11.1.1 Attach Horn (18) and Speaker Assembly (7) to Megaphone
Subassembly (10). Ensure alignment with location pins. Pass
speaker wires through the provided slot.
11.1.2 Plug speaker connector into the "out" header on PCB.
11.1.3 Push entire assembly gently into the housing (15), until it stops.
Turn clockwise 45° and push all the way in. Turn
counterclockwise 45° and align holes.
11.1.4 Secure with screws (11).
11.1.5 Replace volume control knob (6) on volume control shaft.
11.1.6 Plug the alarm plug (5) attached to lanyard into jack in the side of
the case near volume control.*
11.1.7 Replace the six batteries (4) in three tubes at microphone end of
megaphone case.
CAUTION: Observe polarity of batteries during installation
procedure (see instructions at battery tube openings of the
megaphone).
11.1.8 Replace microphone and mouthpiece assembly (2). Align keyway,
and secure with the three setscrews (3).
11.1.9 Steps 11.1.1 through 11.1.8 complete the assembly of the
megaphone. After assembly, test unit in accordance with
Paragraph 6.0, Testing.
8
Y1-03-0014 Rev. R
Page 10
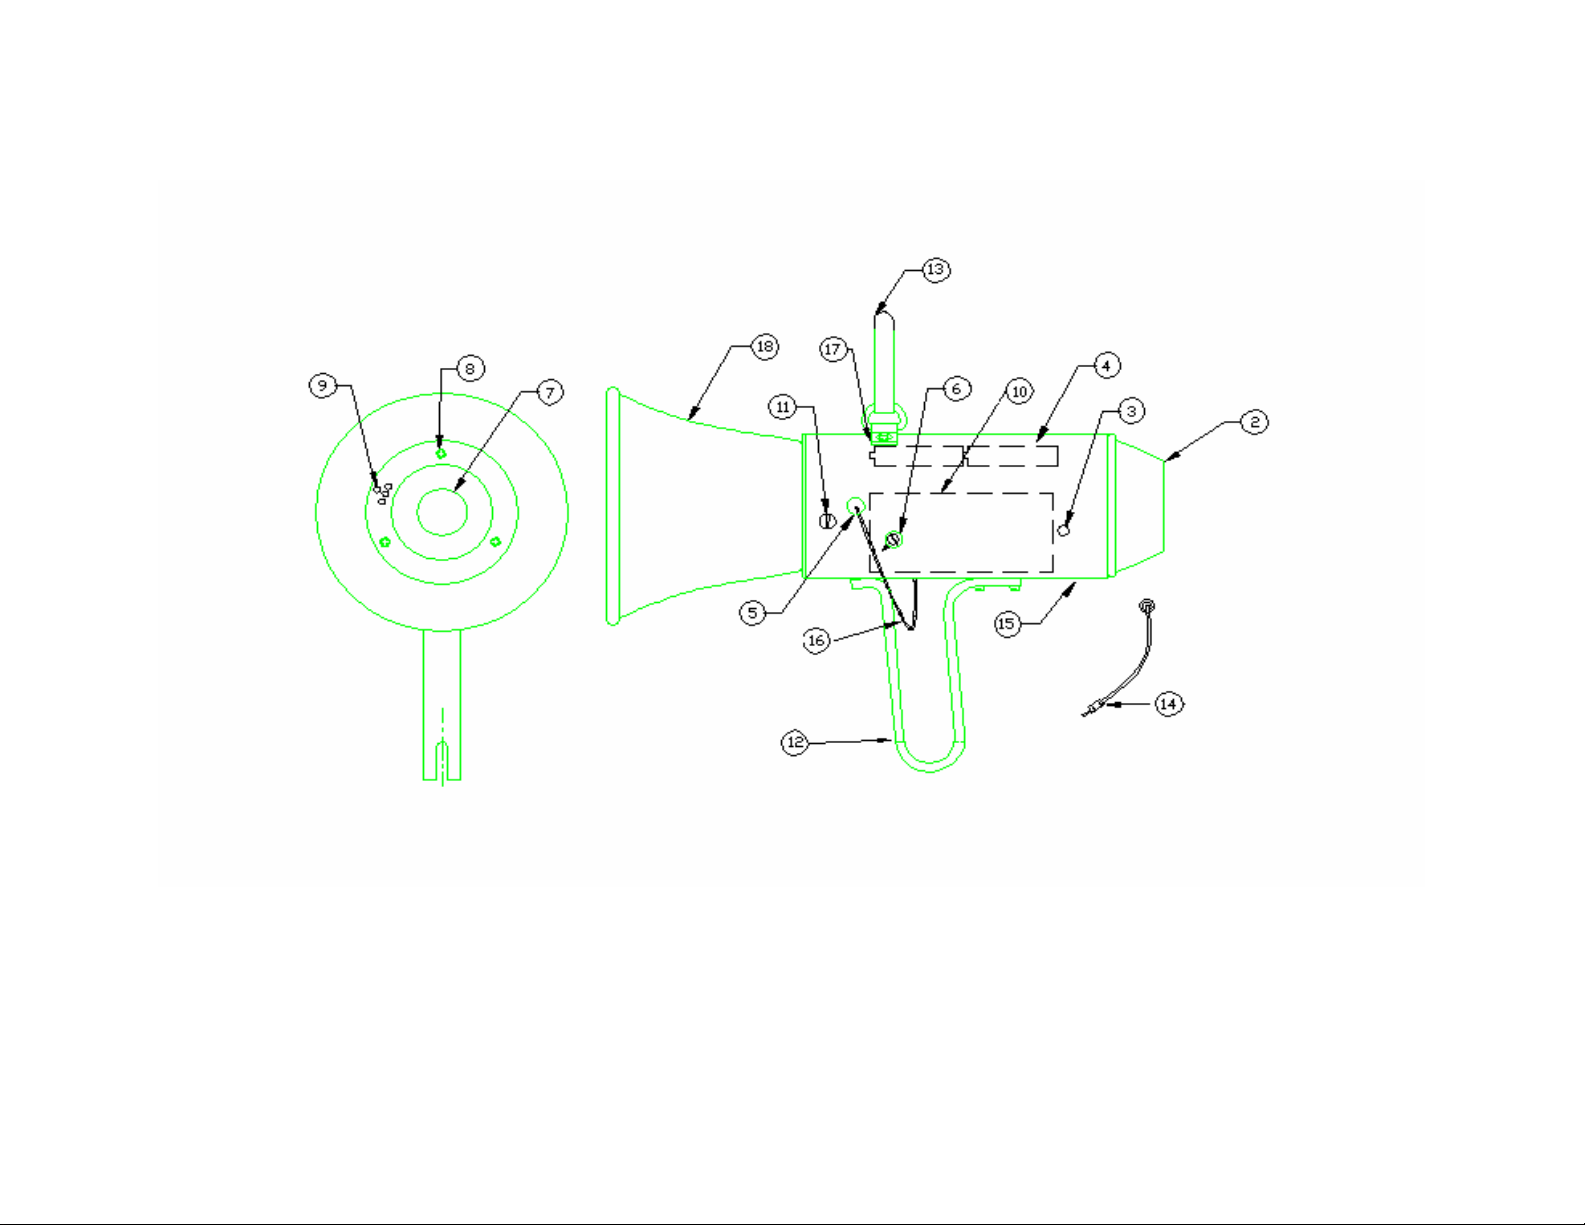
FIGURE 2
ACR / EM-1A, EM-1D PORTABLE SAFETY MEGAPHONE
ILLUSTRATED PARTS LIST
8
Page 11

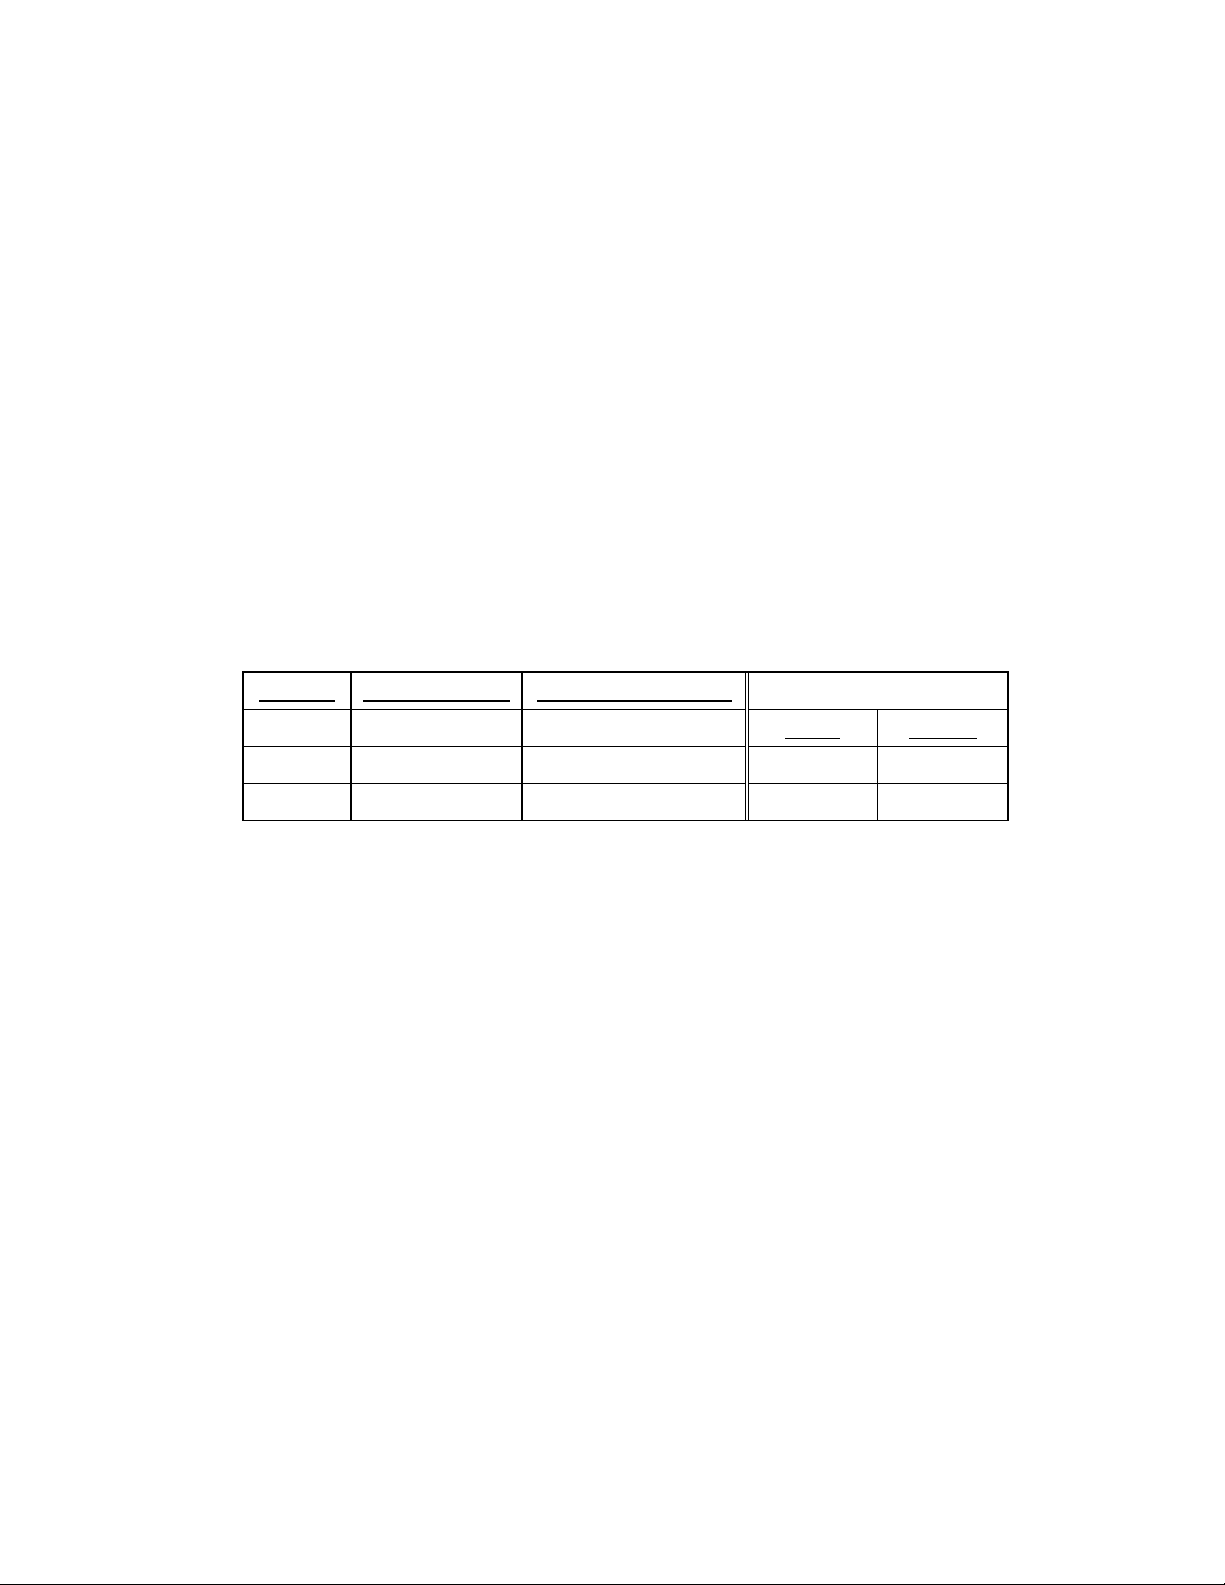
12.0 PARTS LIST
12.1 Replaceable parts are illustrated in Figure 2, and listed below in the table.
Part numbers shown in the “Part Number” column may be ordered from
ACR unless another manufacturer’s name is given in parenthesis in the
“Description” column., In this case, replacement parts can be obtained
directly from the original manufacturer. Standard parts (MS-, AN-, etc.)
and commercially available hardware (‘Commercial’) should be obtained
from commercial sources.
ITEM QTY NOMENCLATURE ORDER SPARE PARTS
EM-1A EM-1A EM-1D
1 1
2 1 Microphone & Mouthpiece Assy 9211 9211 9211
3 1 Socket Setscrew Kit 9416 9416 9416
4 6 Battery AA Alkaline Commercial Commercial Commercial
6 1 Knob, control 9022 9022.1 9022.1
7 1 Speaker Assembly 9417
8 3 Screw, Self tap (#4 x ¾) Commercial N/A N/A
9 2 Wire leads speaker (#26AWG) Commercial N/A N/A
10 1 Megaphone Subassy 9417
11 3 Screw Machine (#4-40 x 3/8) Commercial Commercial Commercial
12 1 Handle Kit 9423 9423 9423
13 & 17 1 Strap Assembly Kit 9233 9233 9233
14 1 Lanyard Assembly, Anti theft 9164 9164 N/A
15 1 Housing Megaphone A1-18-1149 A1-18-1149 A1-18-1151-1
16 1 Lanyard Assembly, Siren 9161 9161 N/A
18 1 Horn, Megaphone A1-17-0809 A1-17-0809 A1-17-0809
Megaphone, Safety Obsolete #2204
S/N < 9000
(upgrade kit)
(upgrade kit)
♦
S/N ≥ 9000
9418 9418
9420 9422
♦
ALL S/N
#2208
♦
S/N ≥ 9000 are date coded 4/99 +
9
 Loading...