

Page 1
1
INSTALLATION
RS232
7
1
2
GRÆNSEFLADESTIK
USB
D-Sub
RBG
5
R
W
9
D-Sub
2
RBG
Y
4
2
3
6
5
8
USB
D-Sub
D-Sub
HDTV adapter
Y
E62405SP
R
Bemærk: Stikgrænseflade afhænger af modellens specifikationer
Page 2
English Dansk
Quick Start
1
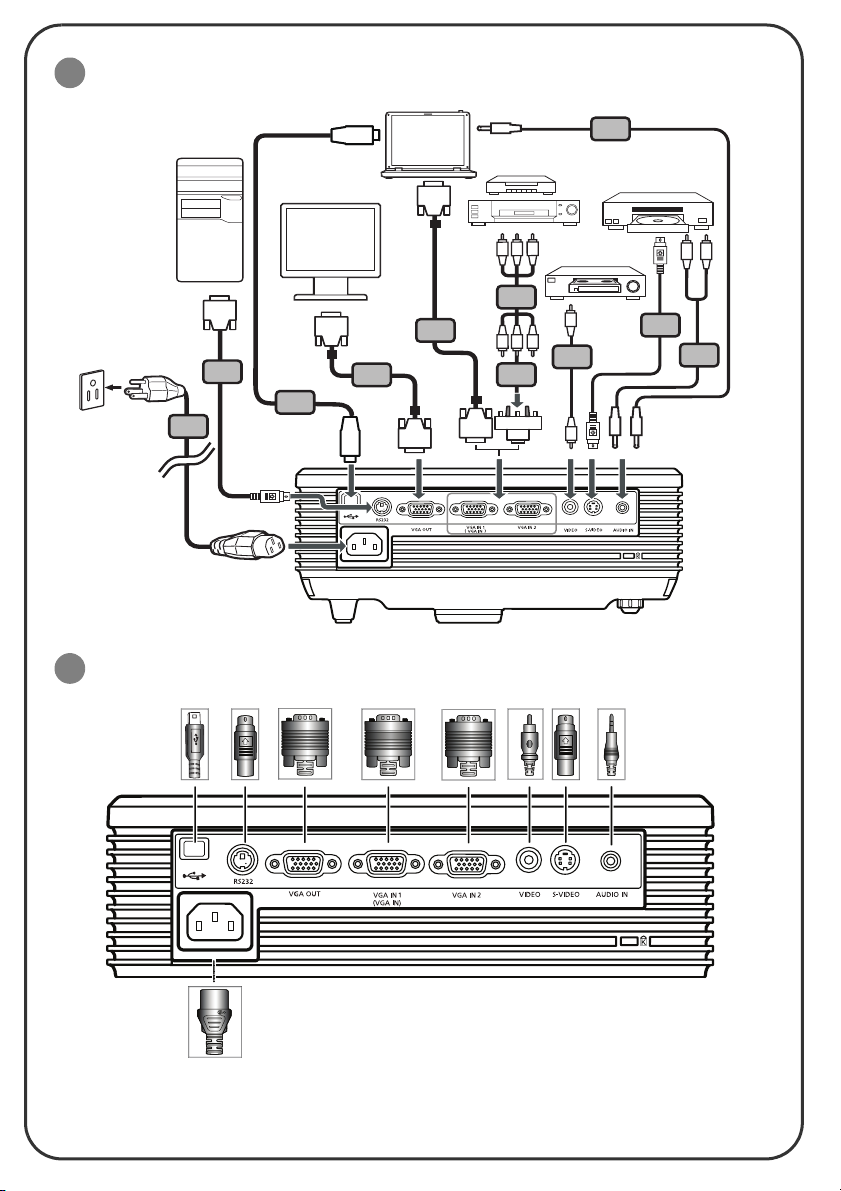
INSTALLATION
1. Power cord
2. VGA cable
3. VGA to component video/HDTV
adapter
4. Composite video cable
5. Audio cable
6. S-Video cable
7. RS232 cable
8. USB cable
9. 3 RCA component cable
Note: Connector interface is subject to model's specifications
2
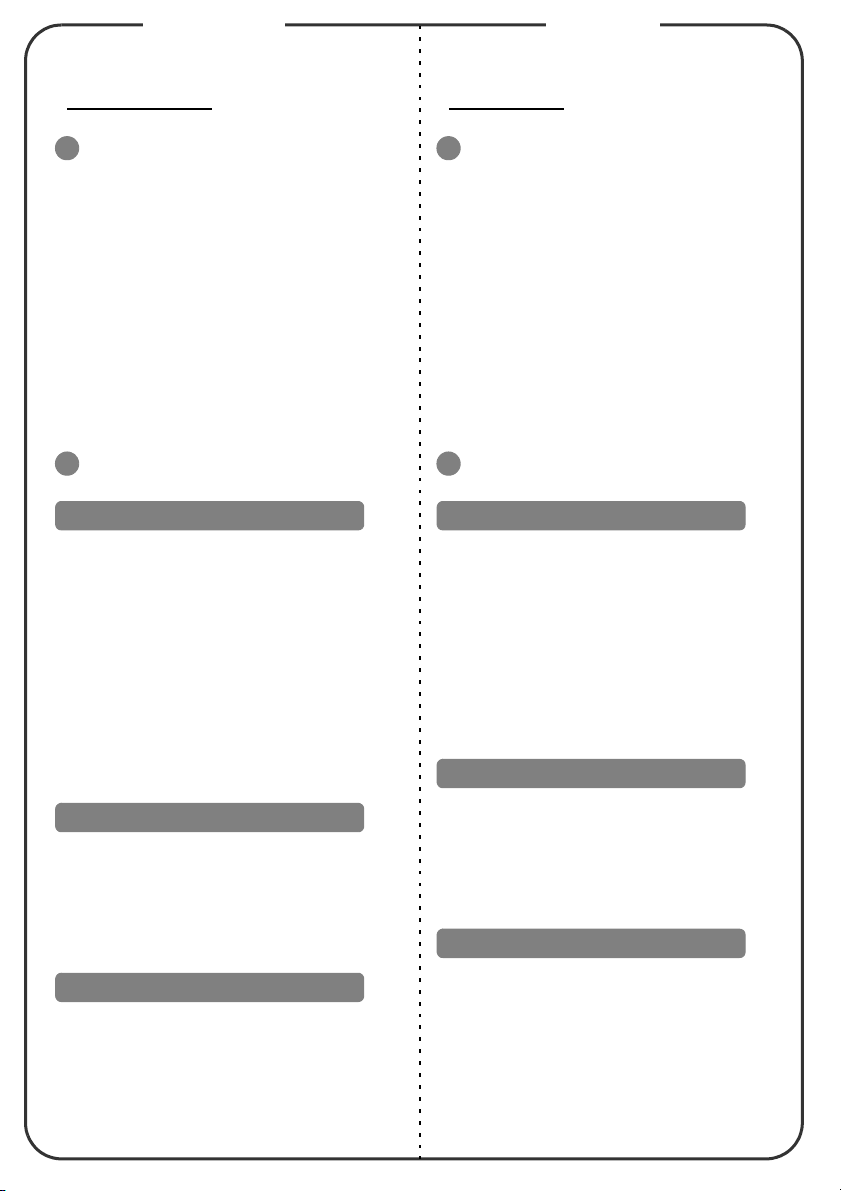
INTERFACE CONNECTOR
Connecting to a Computer
1. Ensure the projector and your
computer are turned off.
2. Connect one end of the VGA cable to
the "VGA IN" connector on the
projector; connect the other end to
the VGA connector on the computer
and tighten the screws.
3. Connect one end of the power cord
into the AC power socket on the
projector; connect the other end to an
electrical outlet.
Kvikstart
1
INSTALLATION
1. El-ledning
2. VGA kabel
3. VGA til komponentvideo/HDTV
adapter
4. Komposit video kabel
5. Lydkabel
6. S-video kabel
7. RS232 kabel
8. USB kabel
9. 3 RCA komponentkabel
Bemærk: Stikgrænseflade afhænger af modellens specifikationer
2
GRÆNSEFLADESTIK
Tilslutter til en computer
1. Kontroller, at projektoren og
computeren er slukket.
2. Forbind VGA kablets ene ende til
projektorens "VGA IN" stik og den
anden ende til computerens VGA
stik. Stram derefter skruerne.
3. Forbind netledningens ene ende til
projektorens AC strømstik og den
anden ende til en stikkontakt.
Sådan tændes der for projektoren
Powering On the Projector
1. Remove the lens cap.
2. Turn on the projector first and then
the computer.
3. Adjust the position, focus and zoom.
4. Run your presentation.
Powering Off the Projector
1. Press the power button twice.
2. Do not remove AC power cord from
outlet until the projector fans shut
down.
1. Fjern linsehætten.
2. Tænd først for projektoren og
derefter for computeren.
3. Juster position, fokus og zoom.
4. Kør din præsentation.
Sådan slukkes der for projektoren
1. Tryk to gange på strømkontakten.
2. Fjern ikke AC netledningen fra
kontakten, før projektorens
ventilatorer har stoppet.
 Loading...