

English
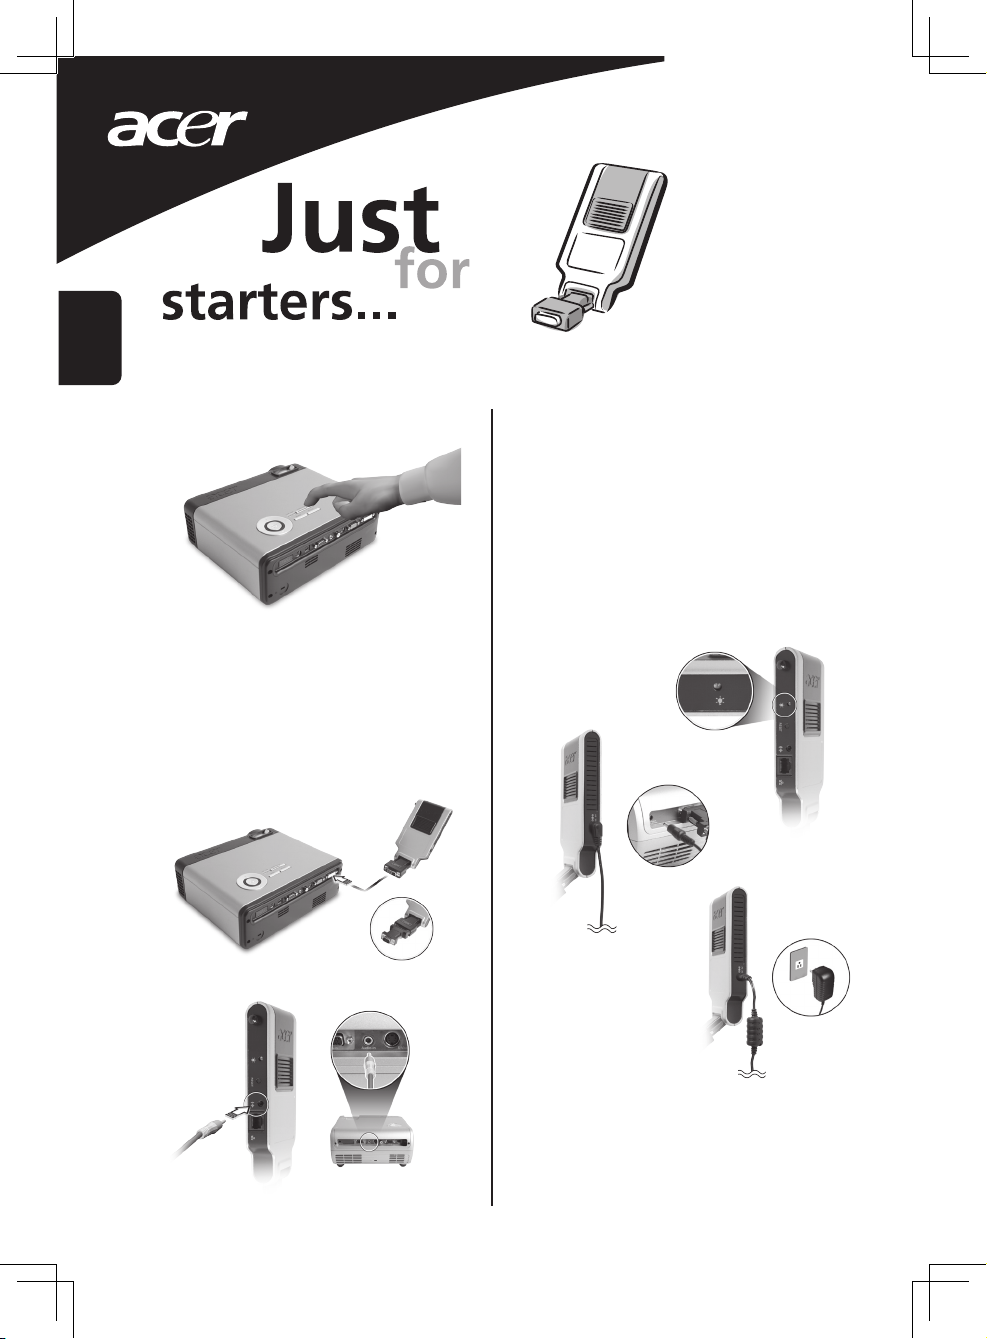
A. Hardware connection:
Turn on the projector.
1.
Attach the Acer WPG. Use the
DVI-to-VGA converter if needed.
Plug one end of the audio cable into
your projector’s audio-in jack, and the
other end into the Acer WPG’s audio
jack.
Check the power LED on the left side of
the WPG.
If the LED is off, please plug one end
of the DC-to-DC cable into the power
jack and the other into the projector’s
5V DC-out jack (if fitted), or use the 5V
power adapter to supply power.
Once the power is connected, the power
LED should turn red.
3.
After a short time, the WPG’s default
screen will be projected, showing brief
software installation instructions.
4.
2.
Acer WP100
Quick Guide
English
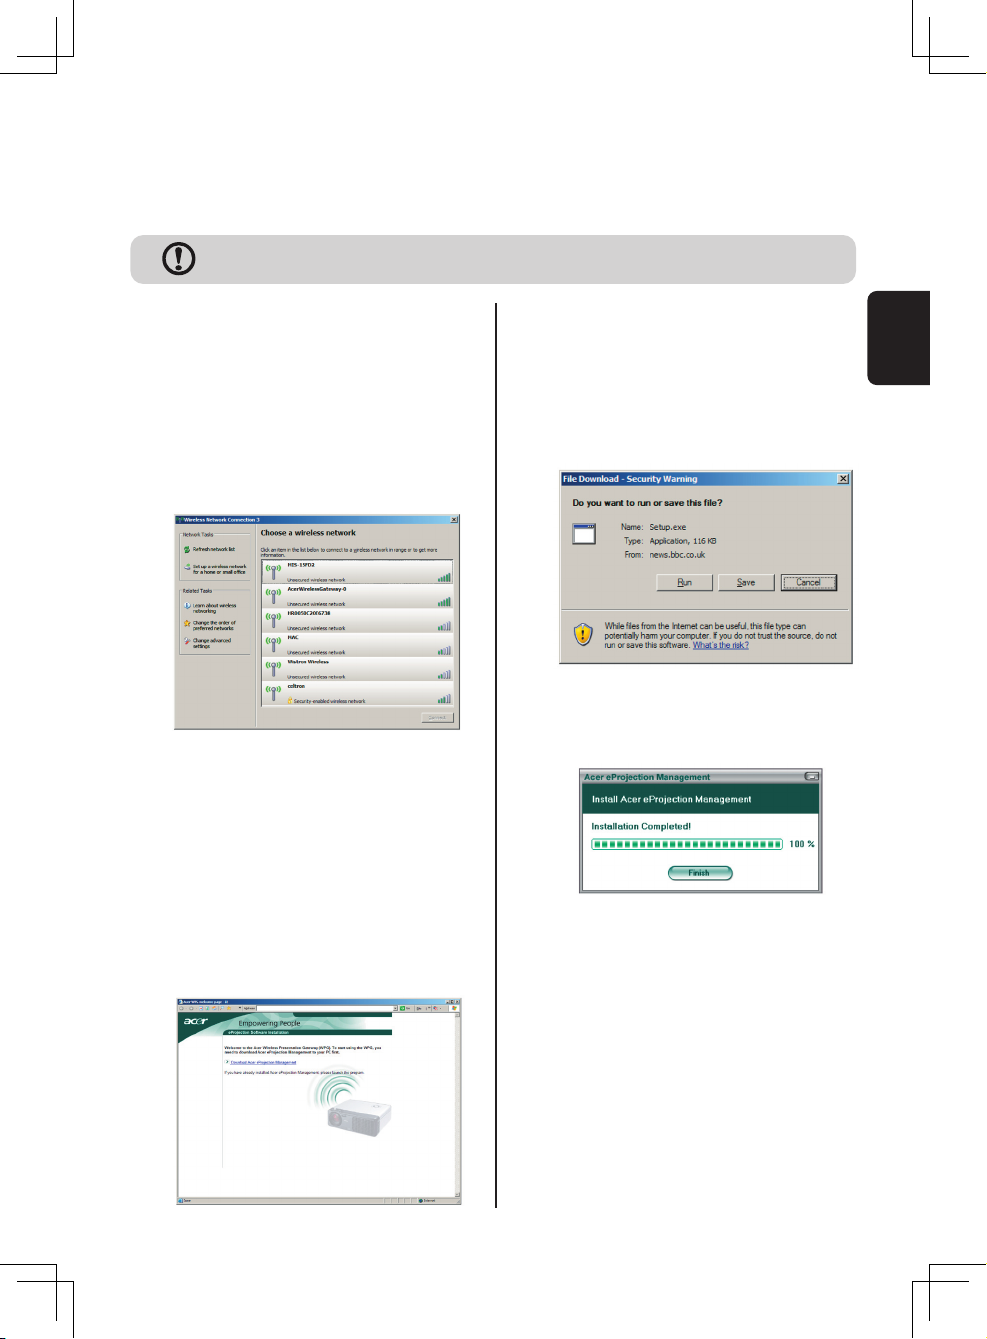
B. Software Installation:
Switch on your notebook, and activate
the wireless LAN.
1.
Scan for available WLAN APs using your
preferred WLAN manager.
2.
The software is stored on the WPG. Please follow the steps below
to download and install the software.
Select the AP labeled
"AcerWirelessGateway-" from the list of
available APs. Connect to this AP.
3.
If you receive any security warnings,
select "Connect Anyway".
4.
Click on the link to download and
install the driver.
If you receive any security warnings,
click "OK" to proceed with the
installation procedure.
During the driver installation, your
screen may flicker.
6.
Once the installation is complete, the
Acer WPG software will open.
7.
Once you’re connected, the PC screen
will be projected and the WPG’s power
LED will turn green.
8.
Once the connection is established,
open your Internet browser.
If the default Internet browser is set to
a blank screen, just enter the URL for
any website.
You will automatically be taken to the
Acer WPG welcome page, where you
will be able to download the driver.
5.
To download the software, you must remove LAN cable from your PC and ensure
that your browser is set to open up a website.
 Loading...