

Acer APG User Manual

1
English
Acer Projector Gateway
Introduction
The Acer Projector Gateway (APG) is a smart, integrated system that enhances
presentations via your Acer projector. The APG provides versatile source
connectivity, the latest eDisplayPro Management tools for networking display,
supports for media contents playback via the built-in decoder and more.
Networking APG features
• With high-performance wireless projection via an acer USB WiFi adapter or
an RJ-45 port for wired connections (only for the models with RJ-45 port).
• The projector can act as an access point (AP) or work in WiFi con-current
mode when doing networking display.
• Users can easily launch the Acer eDisplayPro Management to do Full
screen, L/R, 4-split screen projection and enable high quality video
streaming.
• Powerful wireless display features ready for devices with different OS (MS
Windows, Mac OS, Android, iOS)
• Supports wireless network security (WPA-PSK, WPA2-PSK).
• Acer Projector Gateway Web Management enables a web-based control of
Acer projector for Windows NB/PC (only when the projector is in AP mode).
• Supports firmware upgrade via USB flash drive.
• Crestron compliant (only for the models with RJ-45 port).
Multi-media features
• Fancy and stylish user interface for better experience.
• You can enjoy media & documents playback via internal memory, USB flash
drive and SD card (for selected models).
• Supports high resolution JPEG and BMP picture formats, slideshow and
various slideshow effects for the best viewing experience.
• Supports MP3, PCM and WMA...audio formats, music spectrum and
random play function for your pleasing.
• Supports MPEG4, H.264, WMV, MKV and RMVB...video formats and
smooth video playback with 1080p@30Hz.
• Supports office documents playback (Word, Excel, PowerPoint, PDF).
• Easy control for all media functions by the remote control.
• You can mirror or extend your screen via the source USB B or USB
Connection.
2
English
Getting Started
Connecting multi-media device to the projector
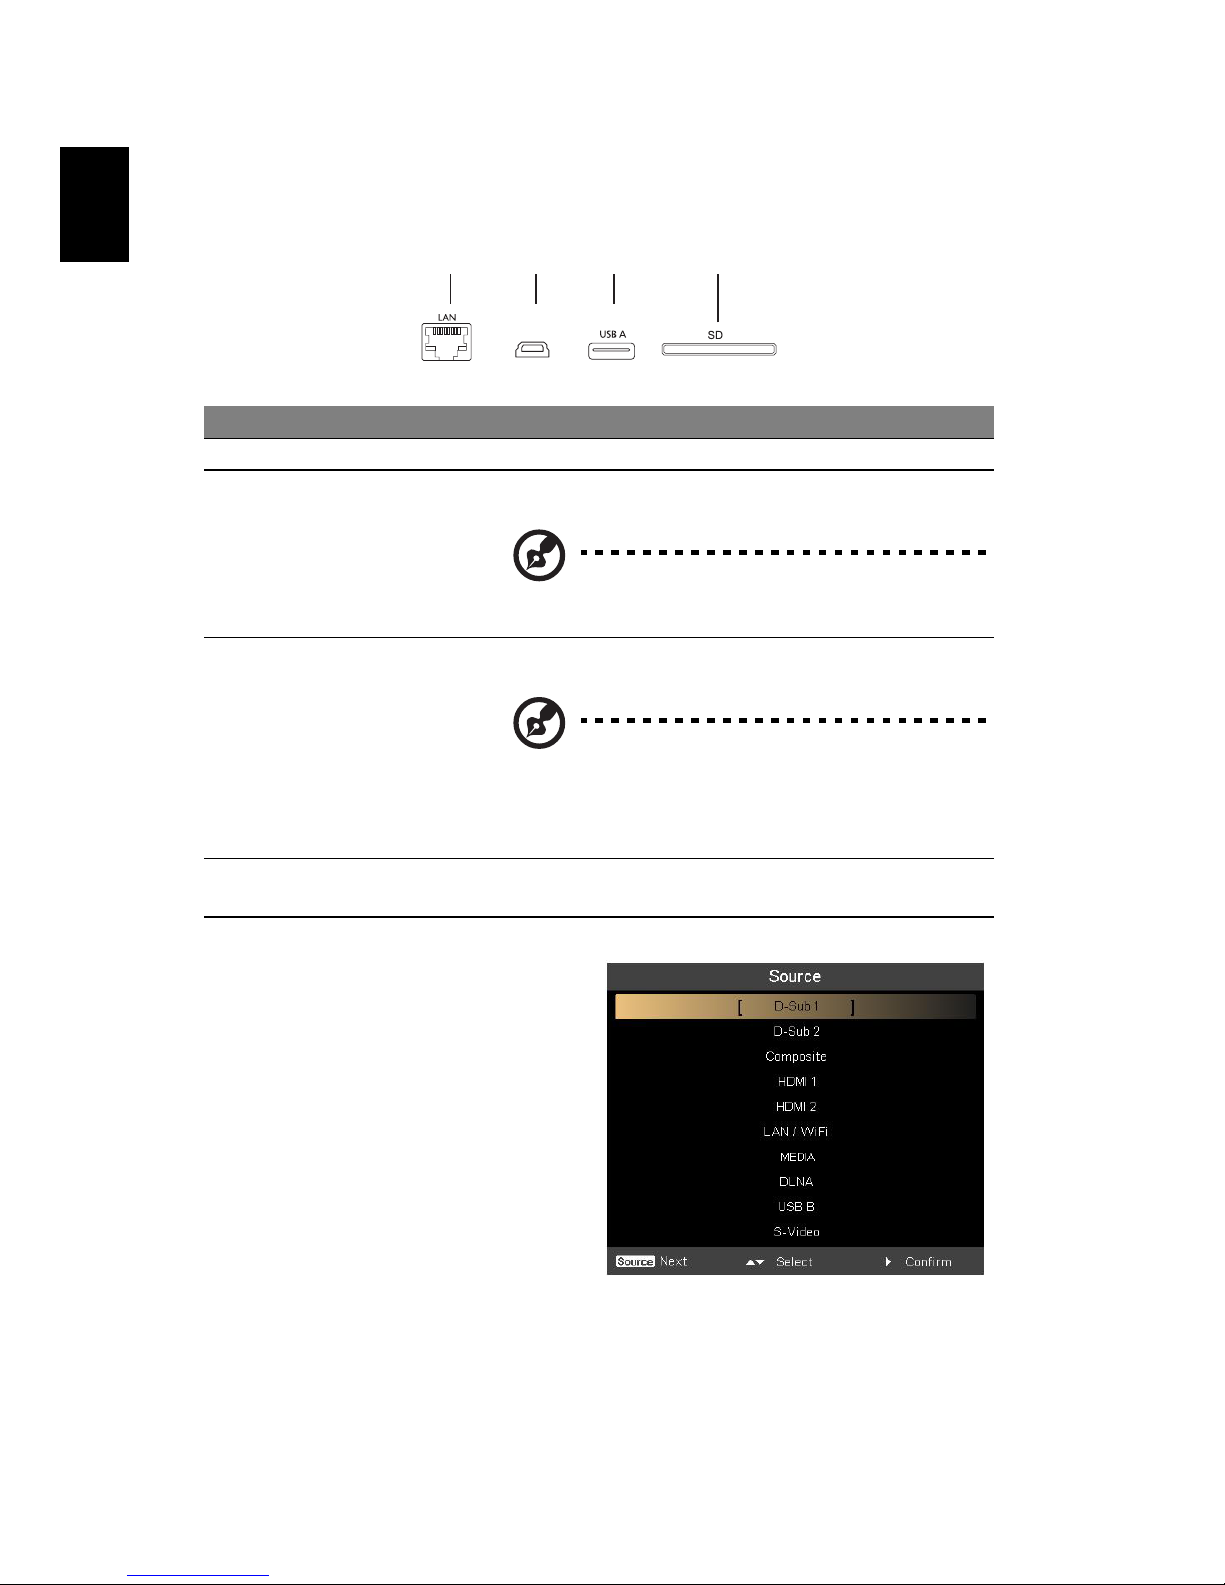
To switch between different inputs,
press SOURCE on the projector or
remote control to open the Source
menu that allows you to select an
input signal source.
# Component Description
1 LAN port Connects to an Ethernet 10/100-based network.
2 Mini USB Projects NB/PC screen via mini USB (USB B or USB
Connection).
NOTE: USB Type A is for USB display (K1
series).
3 USB Type A Connects to USB flash drive for multimedia playback.
Or connects to a USB WiFi adapter (optional).
NOTE: To enable wireless function, the
USB Wireless Adaptor must be plugged
into the USB A/USB A1/Wireless Dongle
port.
4SD card slot (for
selected models)
Insert the SD card for multimedia playback.
123 4
USB B

3
English
Copyright © 2015. Acer Incorporated.
All Rights Reserved.
Changes may be made periodically to the information in this publication
without obligation to notify any person of such revisions or changes.
Such changes will be incorporated in new editions of this manual or
supplementary documents and publications.
This company makes no representations or warranties, either expressed or
implied, with respect to the contents hereof and specifically disclaims the
implied warranties of merchantability or fitness for a particular purpose.
4
English
Control Panel and Remote Control
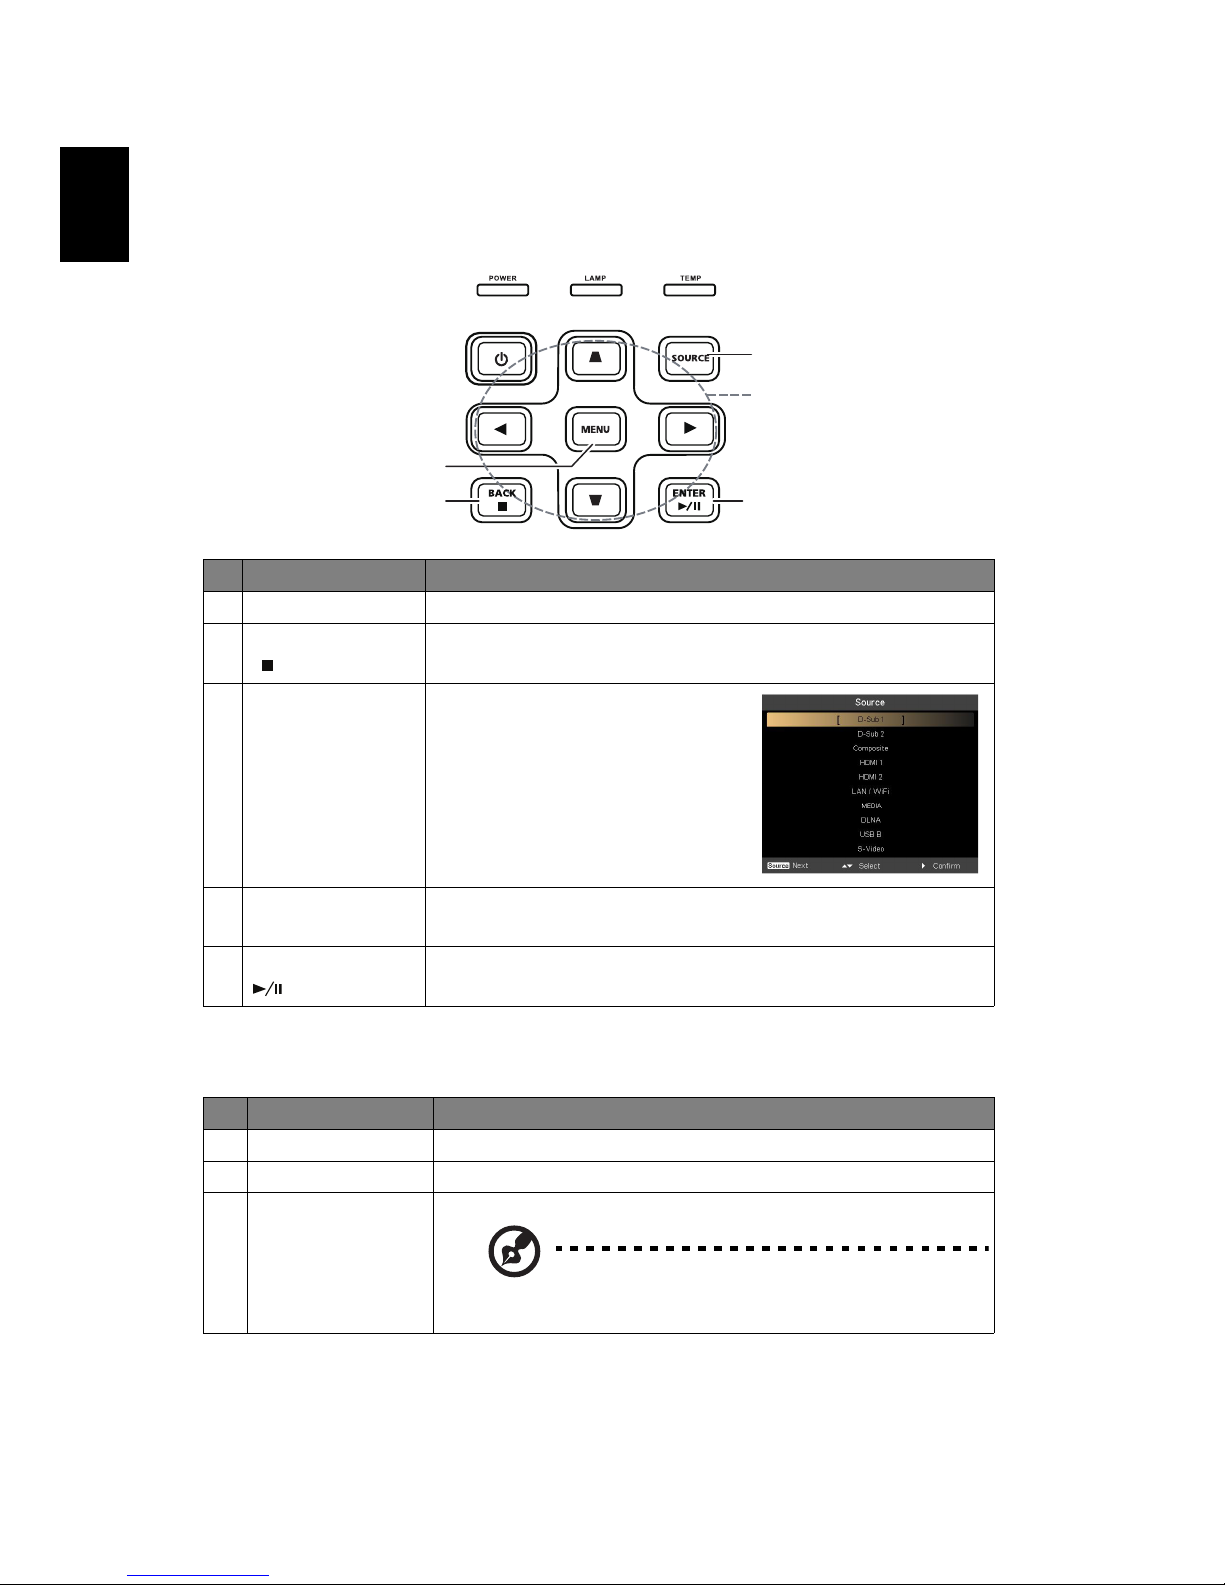
Control Panel
Remote Control
# Function Description
1 MENU Launches the projector Onscreen Display (OSD) menu.
2BACK
Stop
Cancels your selection, or goes back to previous page.
Stops the playing of media files.
3 SOURCE Press to open the Source
menu that allows you to select
an input signal source.
4 Four directional
selection keys
Selects the media files or features in four directions.
5ENTER
Play/Pause
Confirms your selection of items.
Plays/Pauses the of playing media files.
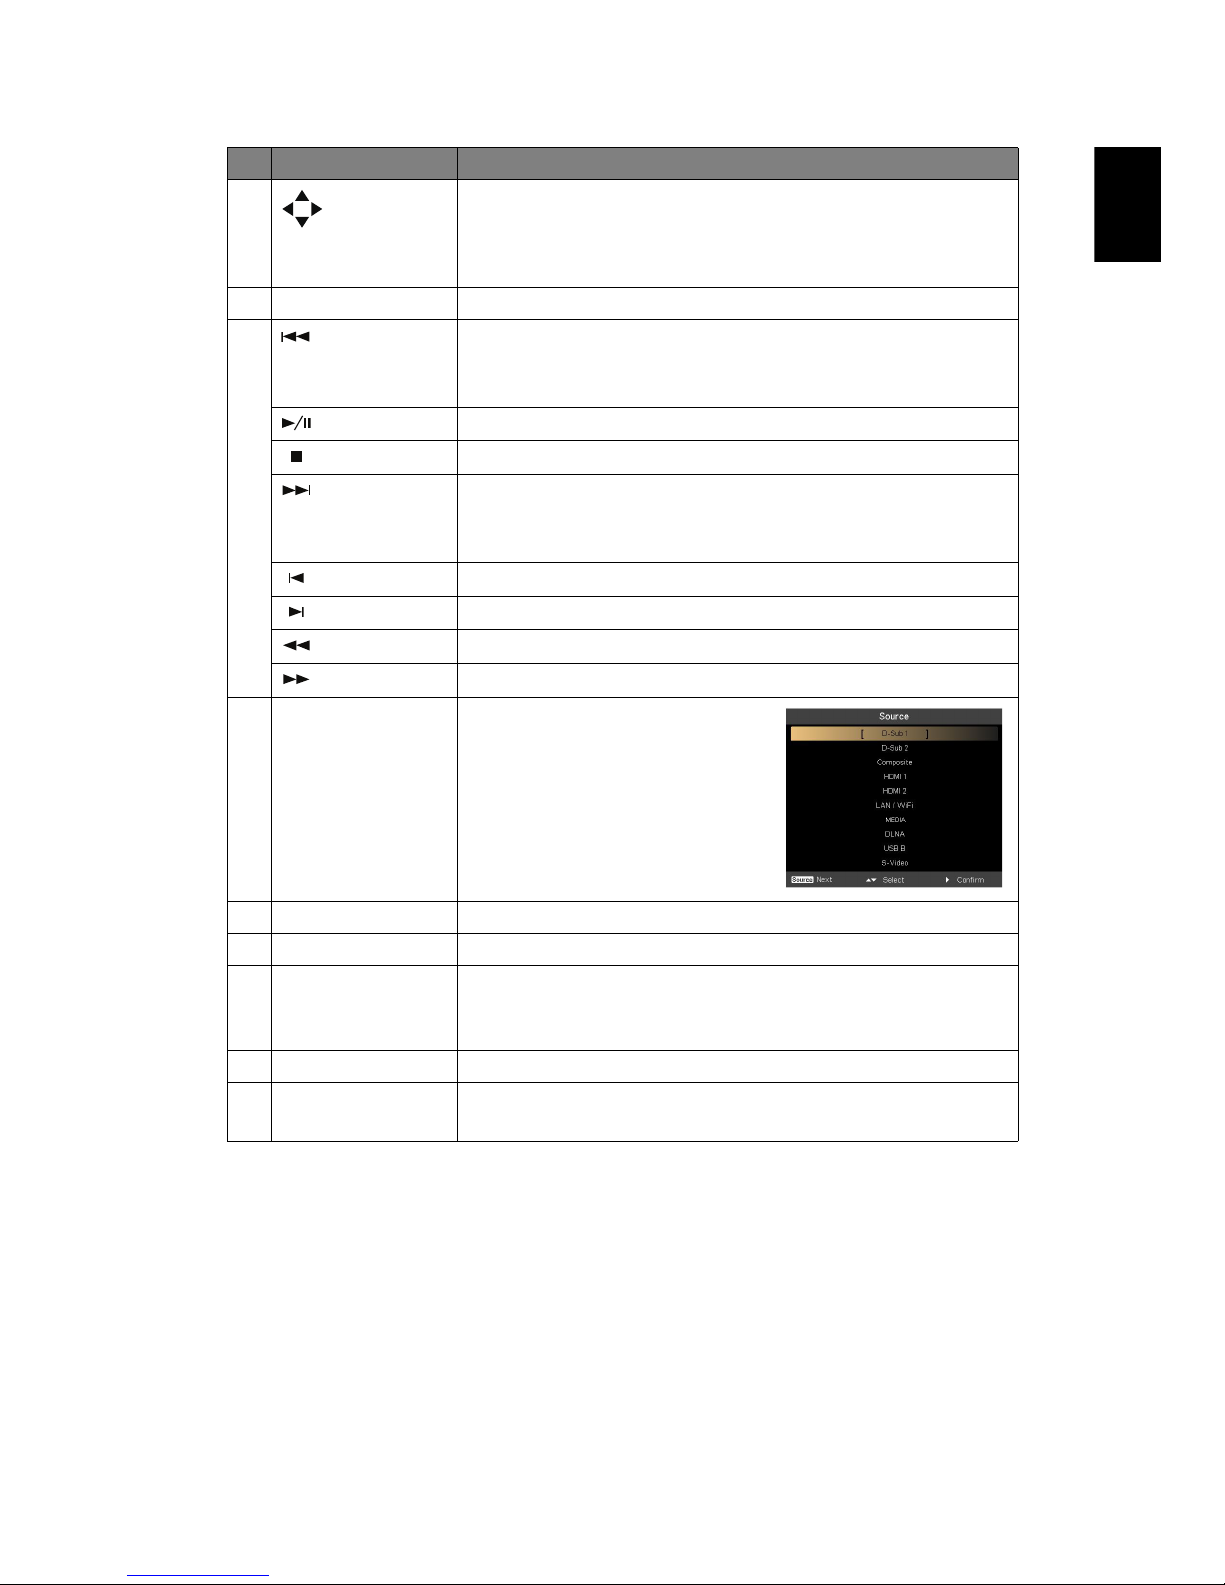
# Function Description
1 ENTER Confirms your selection of items.
2 BACK Cancels your selection, or goes back to previous page.
3 MEDIA HOME Goes to MEDIA HOME page.
NOTE: This button is only available when
the input signal is MEDIA.
3
1
2
5
4
5
English
4Four
directional
select pad
Selects the media files or features in four directions.
5 VOL +/- Increases/decreases the volume.
6
Rewind
• Goes to the previous file.
• Rewinds the playing of media files with a long
press for 1 second.
Play/Pause
Plays/Pauses the playing of media files.
Stop
Stops the playing media files.
Fast-forward
• Goes to the next file.
• Fast-forwards the playing of media files with a
long press for 1 second.
Previous
Goes to the previous file.
Next
Goes to the next file.
Rewind
Rewinds the playing of media files.
Fast-forward
Fast-forwards the playing of media files.
7 SOURCE Press to open the Source
menu that allows you to
select an input signal source.
8 MENU Launches the projector Onscreen Display (OSD) menu.
9 MEDIA SETUP Opens MEDIA SETUP page.
10 PAGE ^/v
PgUp/PgDn
For computer mode only. Use the button to select the
next or previous page. This function is only available
when connected to a computer via a USB cable.
11 INFO Displays information of the selected file.
12 A/a Launches the projector OSD subtitle menu during video
playback.
# Function Description
6
English
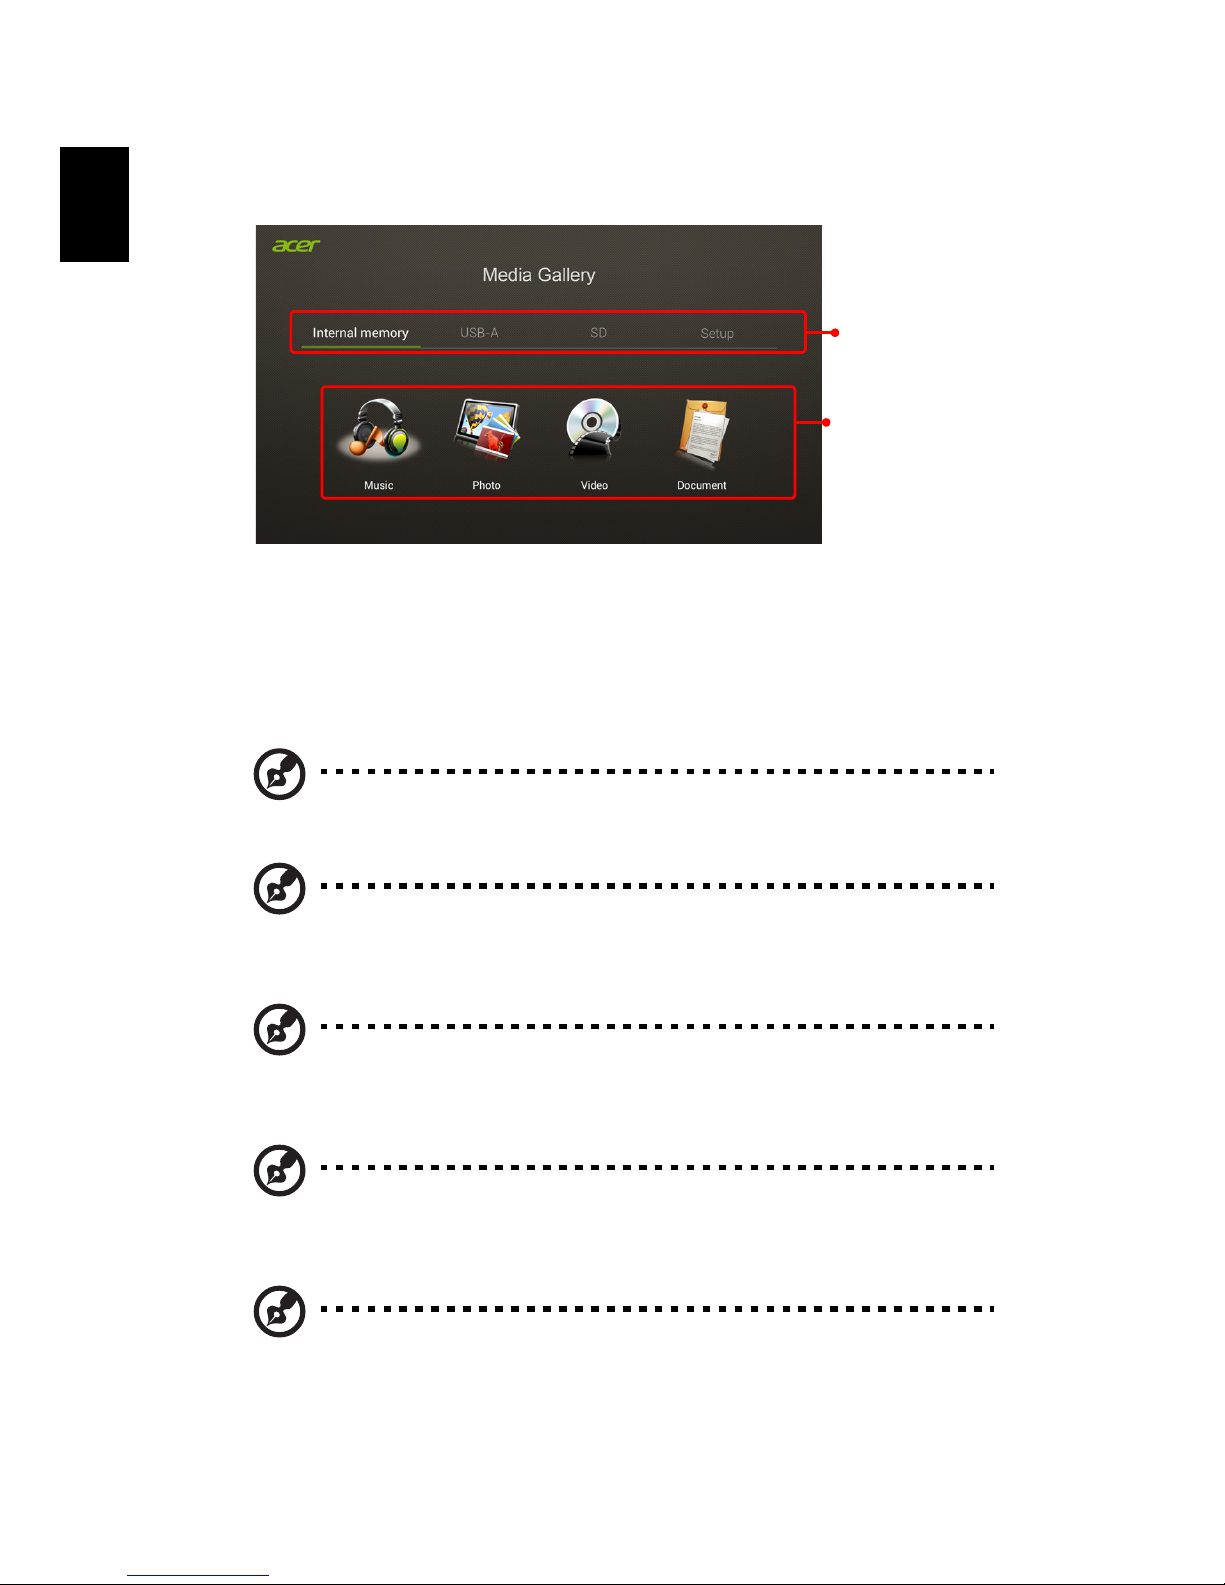
Media Mode
This mode allows you to browse media files stored in different devices, such as
RAM (internal memory), USB flash drive, USB hard drive and SD card (for
selected models) when connected to the projector. No matter where you are,
you can always press MEDIA HOME to go back to MEDIA HOME page.
Adjust projector source to MEDIA.
NOTE: Document mode is an optional function.
NOTE: Supported capacity for USB flash drive: up to USB 3.0 64GB,
for USB hard drive: up to 1TB.
NOTE: Supported capacity for SD/SDHC/MicroSD: up to 64GB Class
2-10.
NOTE: Some external USB hard drives may not be supported due
to lack of USB power.
NOTE: Disks with partitions are not supported.
Main features
Content
sources
Main Home page
7
English
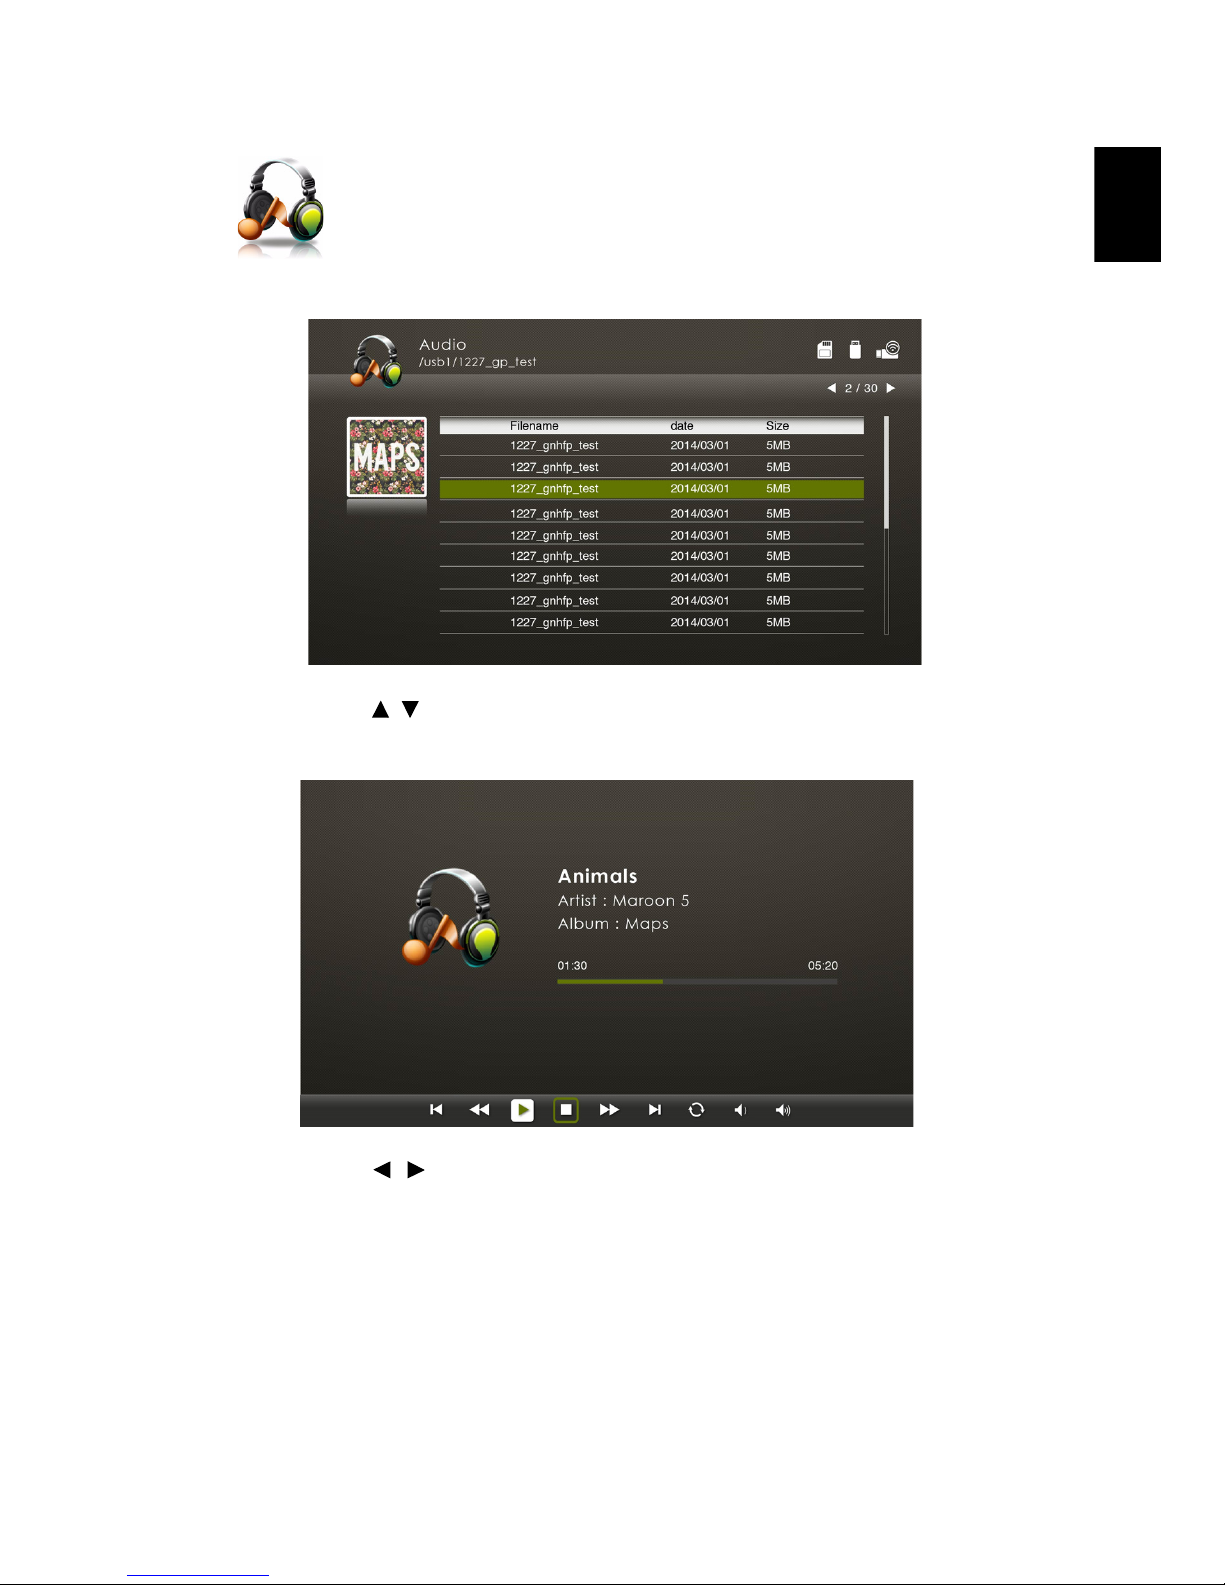
Music
When viewing music files
You can press
/ to select the file and press ENTER to access.
When playing music
You can press / to select a feature such as PLAY/STOP/REPEAT/REWIND/
FAST-FORWARD/VOLUME UP/VOLUME DOWN and press ENTER to execute.
8
English
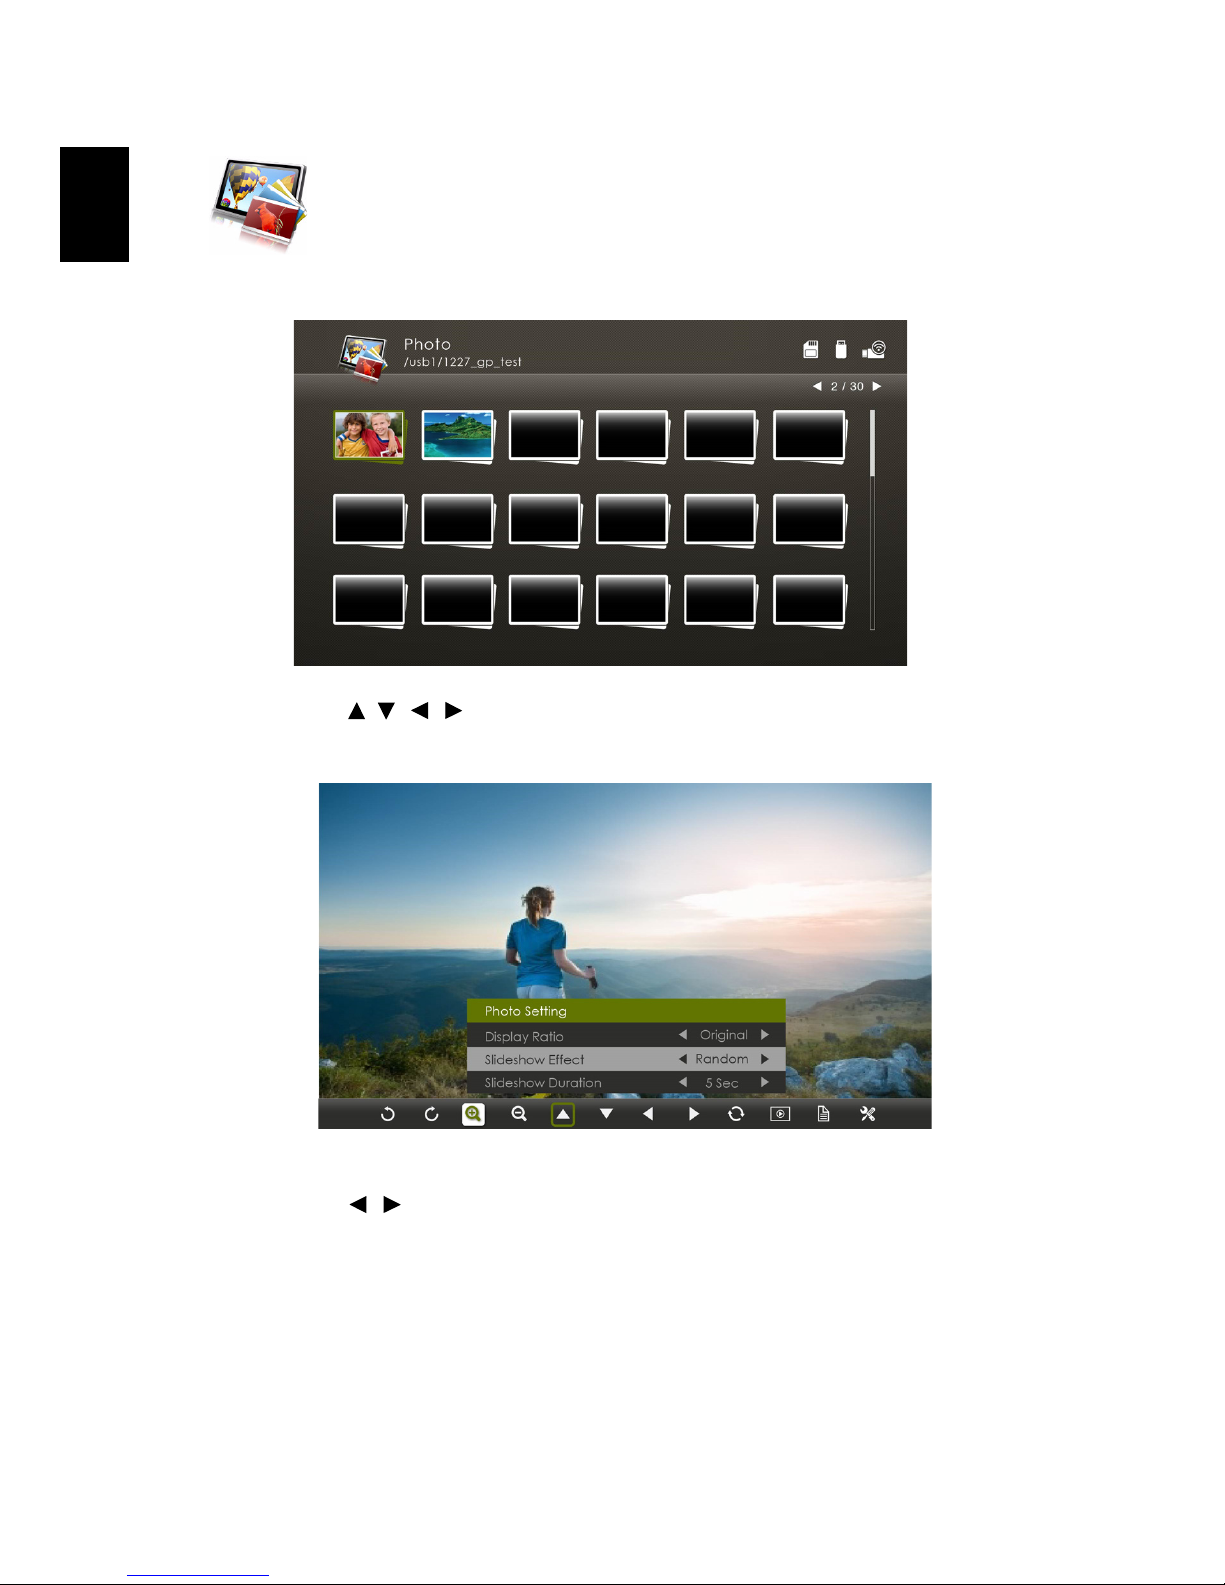
Photo
When viewing photos
You can press
/ / / to select the file and press ENTER to access.
When playing photos
You can press / to select a feature and press ENTER to execute. For details
on the Photo Setting, see "Photo Setting".
9
English
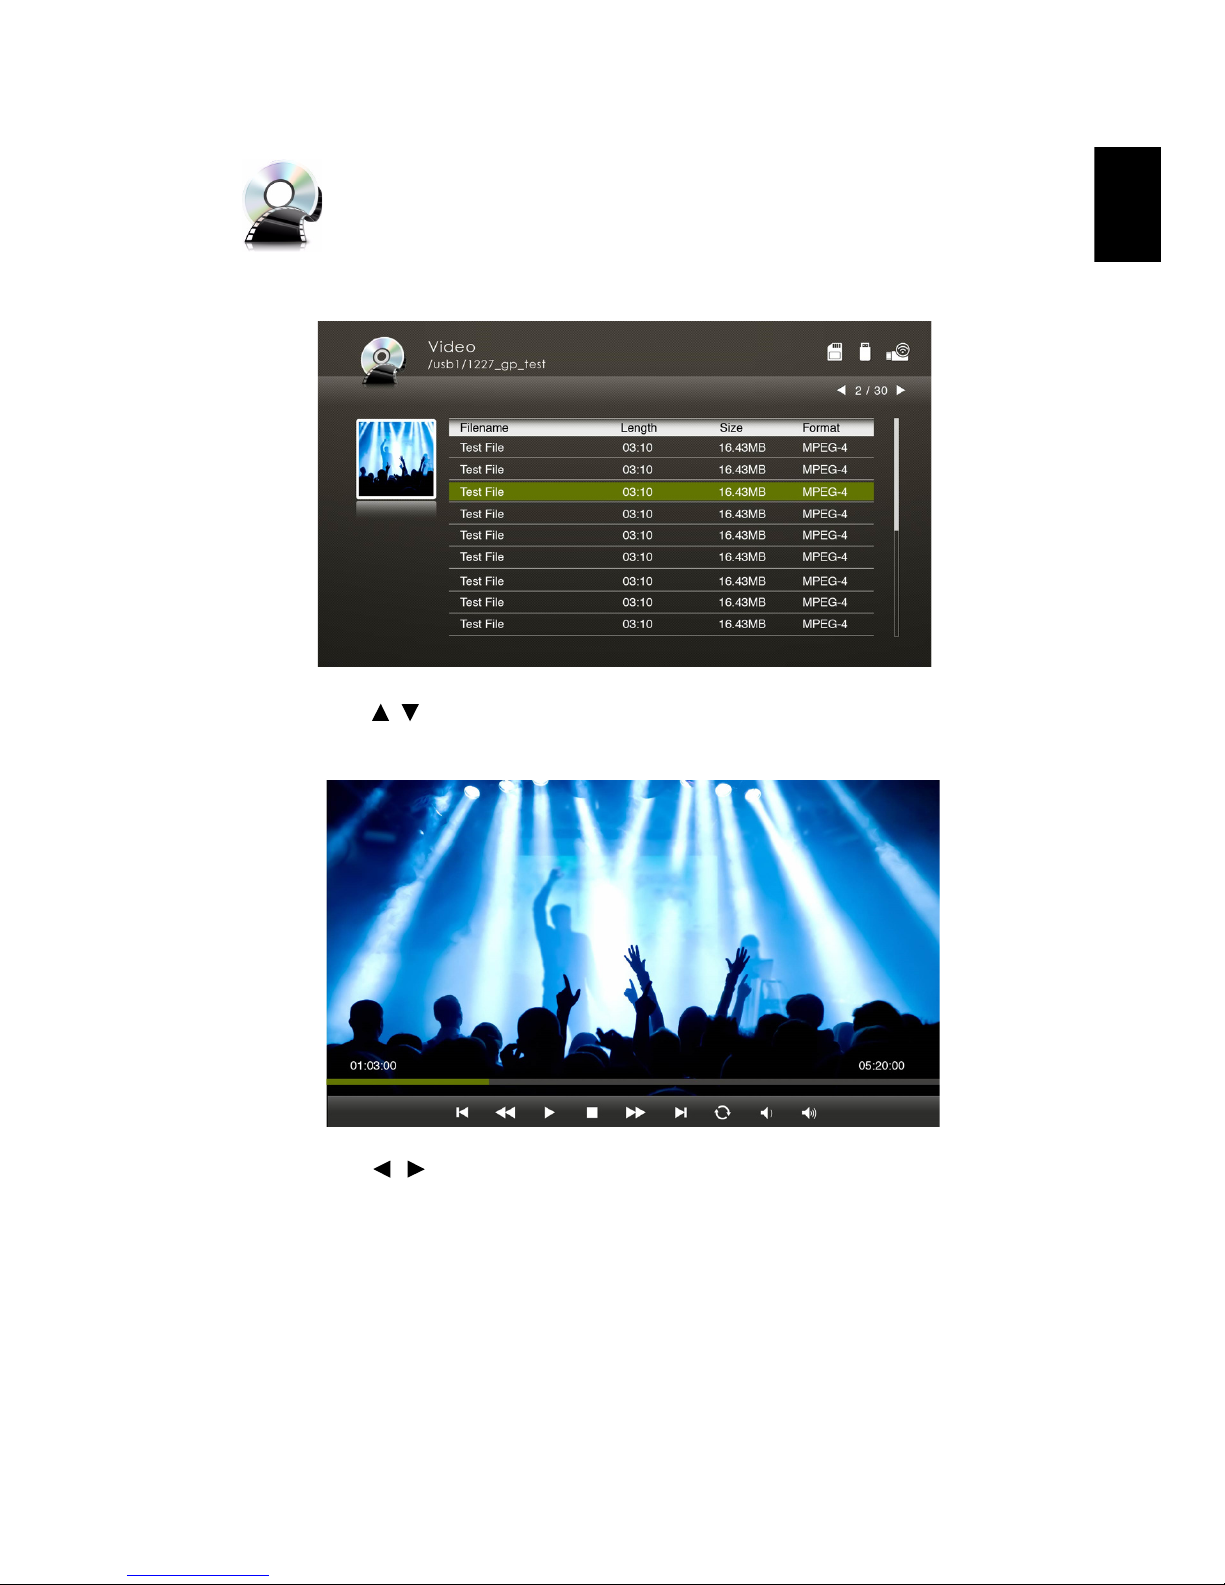
Video
When viewing video files
You can press
/ to select the file and press ENTER to access.
When playing videos
You can press / to select a feature such as PLAY/STOP/REPEAT/REWIND/
FAST-FORWARD/VOLUME UP/VOLUME DOWN and press ENTER to execute. For
details on the Video Setting, see "Video Setting".
10
English
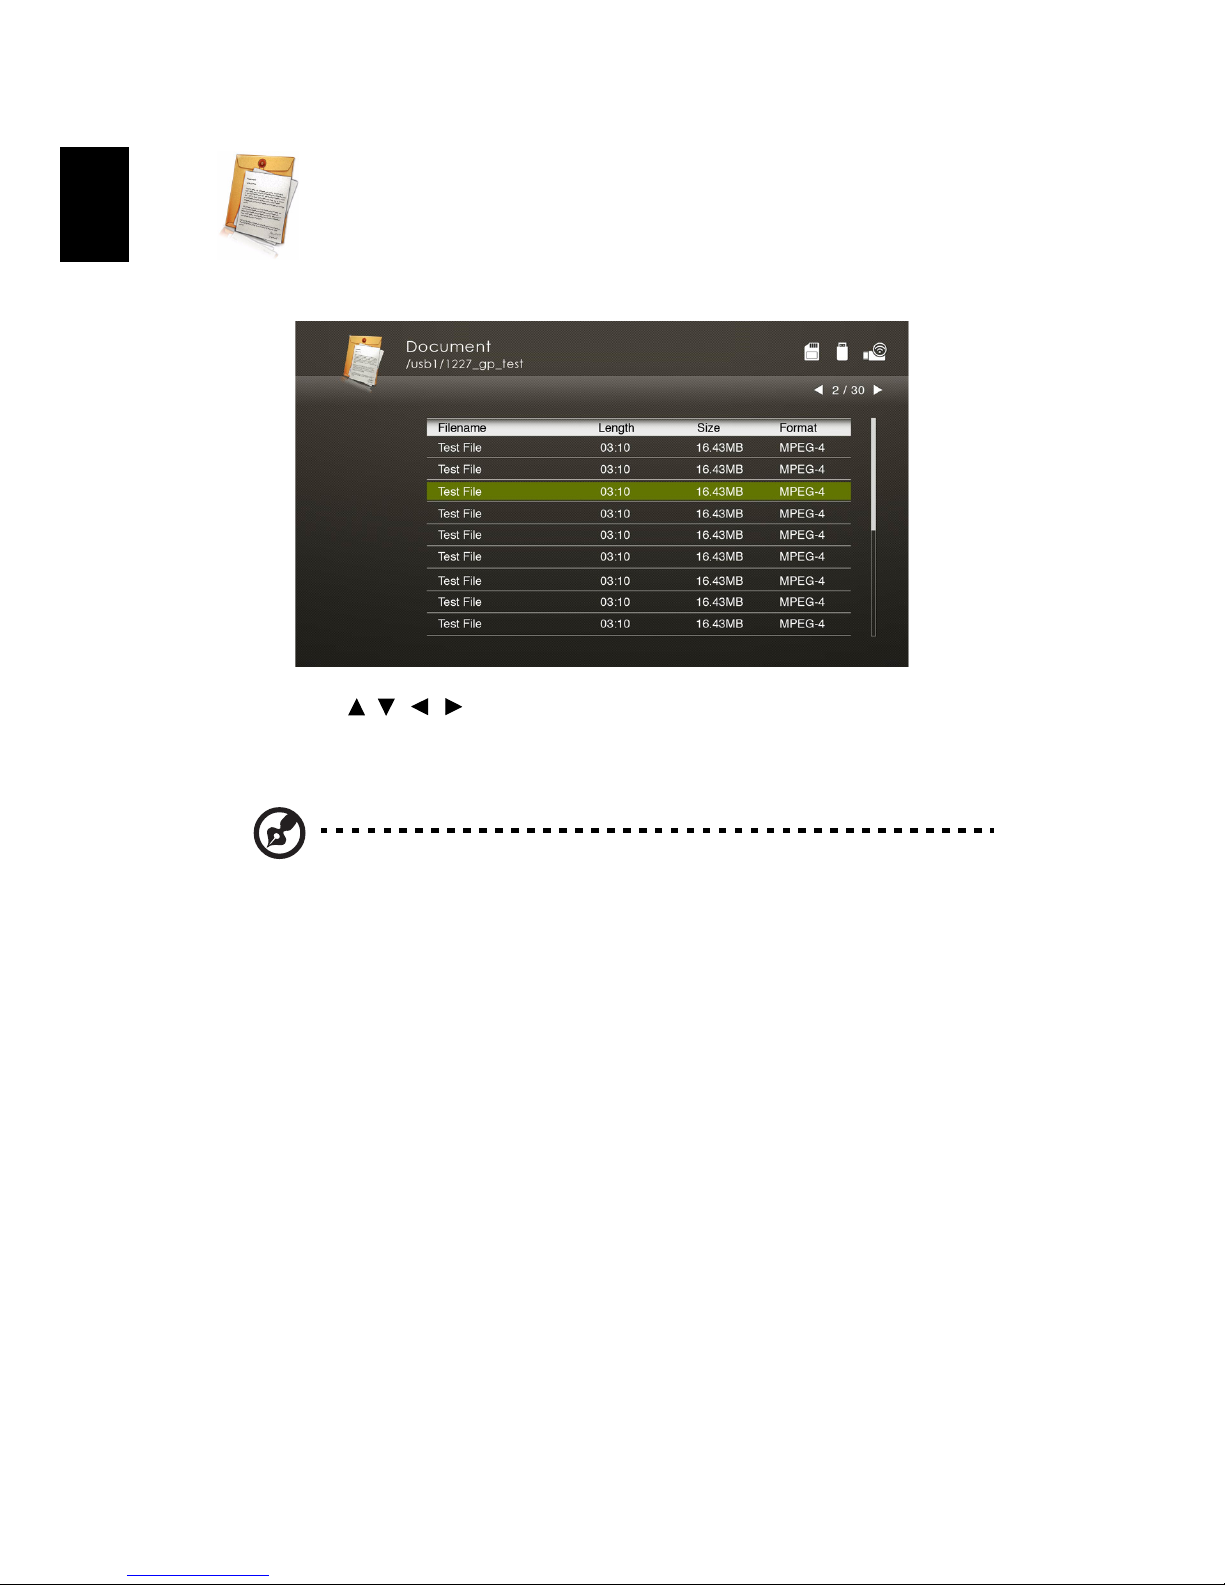
Document (optional)
When viewing document files
You can press
/ / / to select the file and press ENTER to view it. Button
operations are different when viewing different types of documents.
For details on the Document Setting, see "Document Setting".
NOTE: Office Reader:
1 All IPR, including but not limited to copyright, in the Picsel Products is
owned by Picsel suppliers.
2 The End User may not:
• Make copies of the Picsel Products or make them available for
use by third parties.
• Reverse engineer, disassemble, reverse translate, or in any way
decode the Picsel Products or any copy or part of it in order to
derive any source code, save only as is permitted by any
applicable law.
3 Picsel make no representations or warranties whether express or
implied (by statute or otherwise) relating to the performance, quality,
merchantability or fitness for a particular purpose of the Picsel
Products or otherwise and all such representations or warranties are
specifically disclaimed and excluded.
4 Picsel agrees and acknowledges that Picsel and the Picsel Products will
not be specifically mentioned in the end user license agreement.

11
English
NOTE: No support for advanced settings, such as Microsoft Word
drawing plug-in or table background settings.
NOTE: Contents outside the defined borders in Microsoft Word
will not be displayed.
NOTE: Microsoft PowerPoint slide effects not supported.
NOTE: Worksheets are displayed individually and sequentially
when the workbook has multiple worksheets.
NOTE: Page layout and numbering may be changed during
decoding.
NOTE: Objects embedded in files cannot be activated or viewed.
NOTE: Decoding may take a while for large files with complex
contents.
12
English
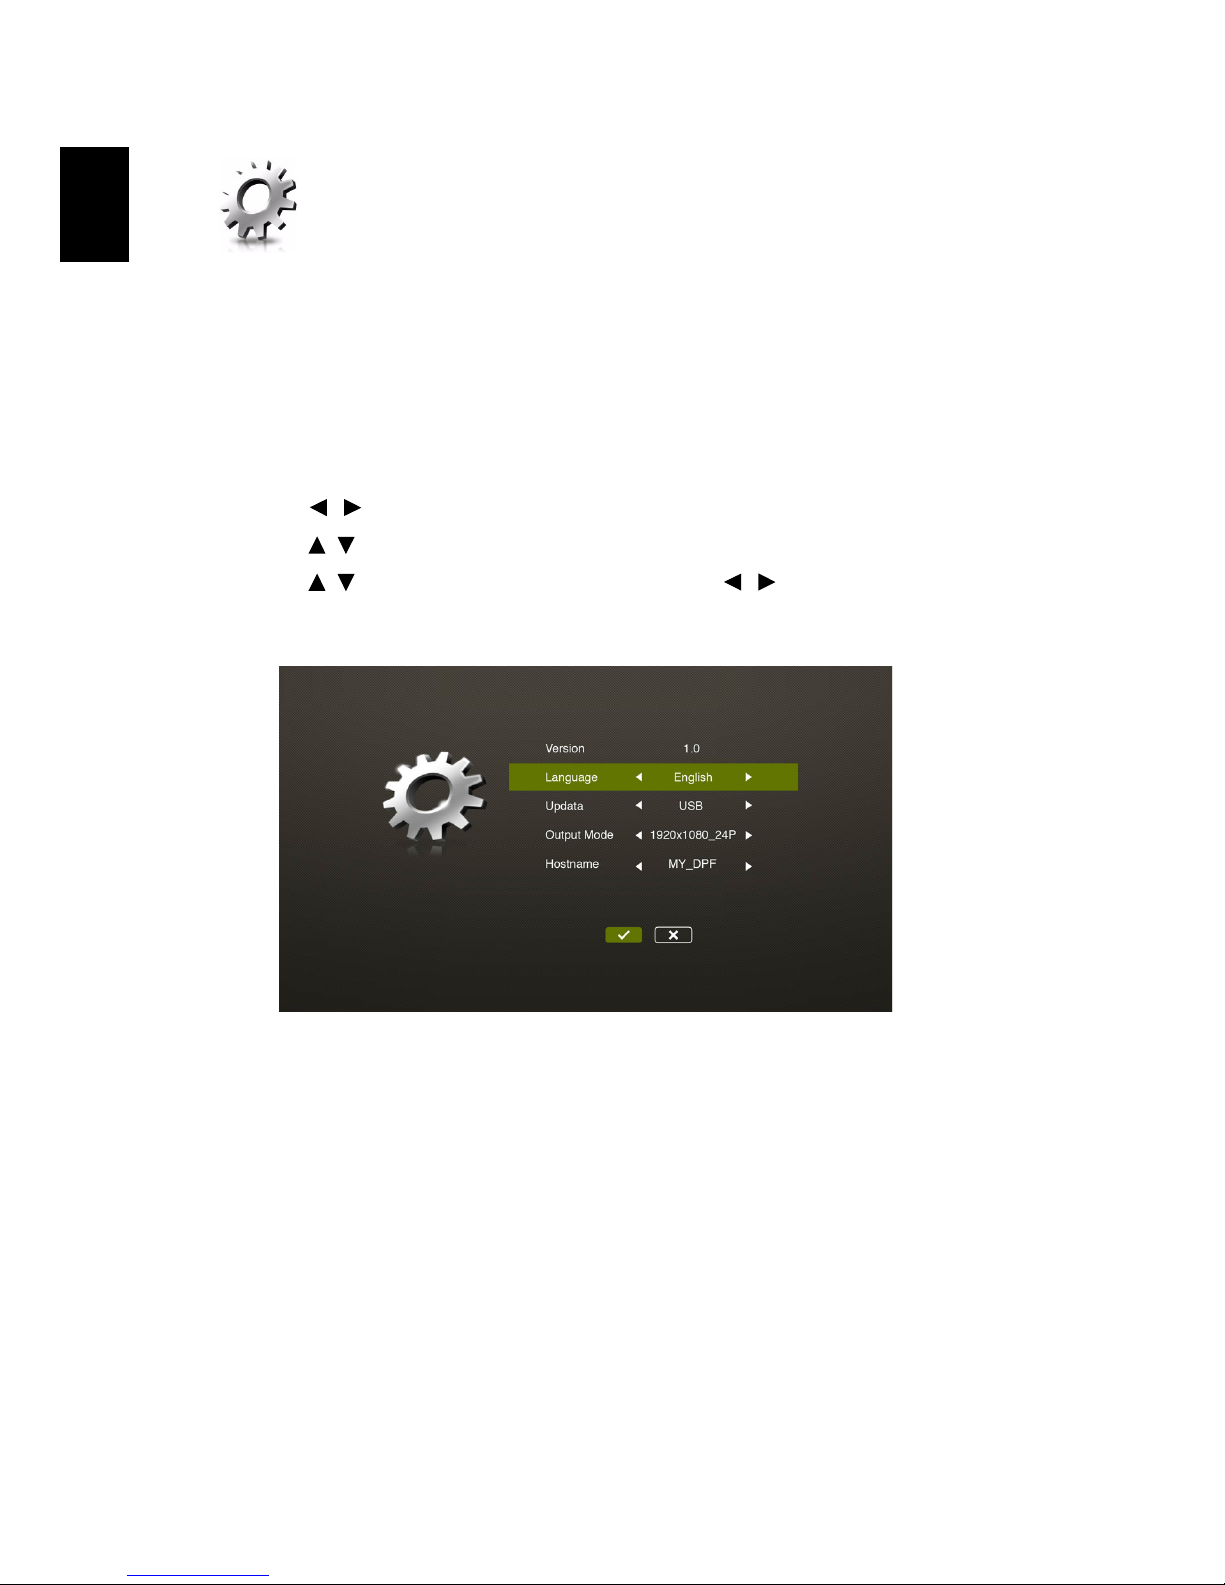
Media Setup
Media setup page allows you to adjust settings for file listing and playing. To
use the media setup page:
Press MEDIA SETUP when listing or playing media files to access individual menu
items for different types of media files.
Or you can follow below steps to access all menu items.
1 Adjust projector source to MEDIA.
2 Press / to select Setup and press ENTER.
3 Press / to select a main menu item and press ENTER to enter.
4 Press / to select a submenu item and press / to change setting
values.
5 To exit, press "X".
13
English
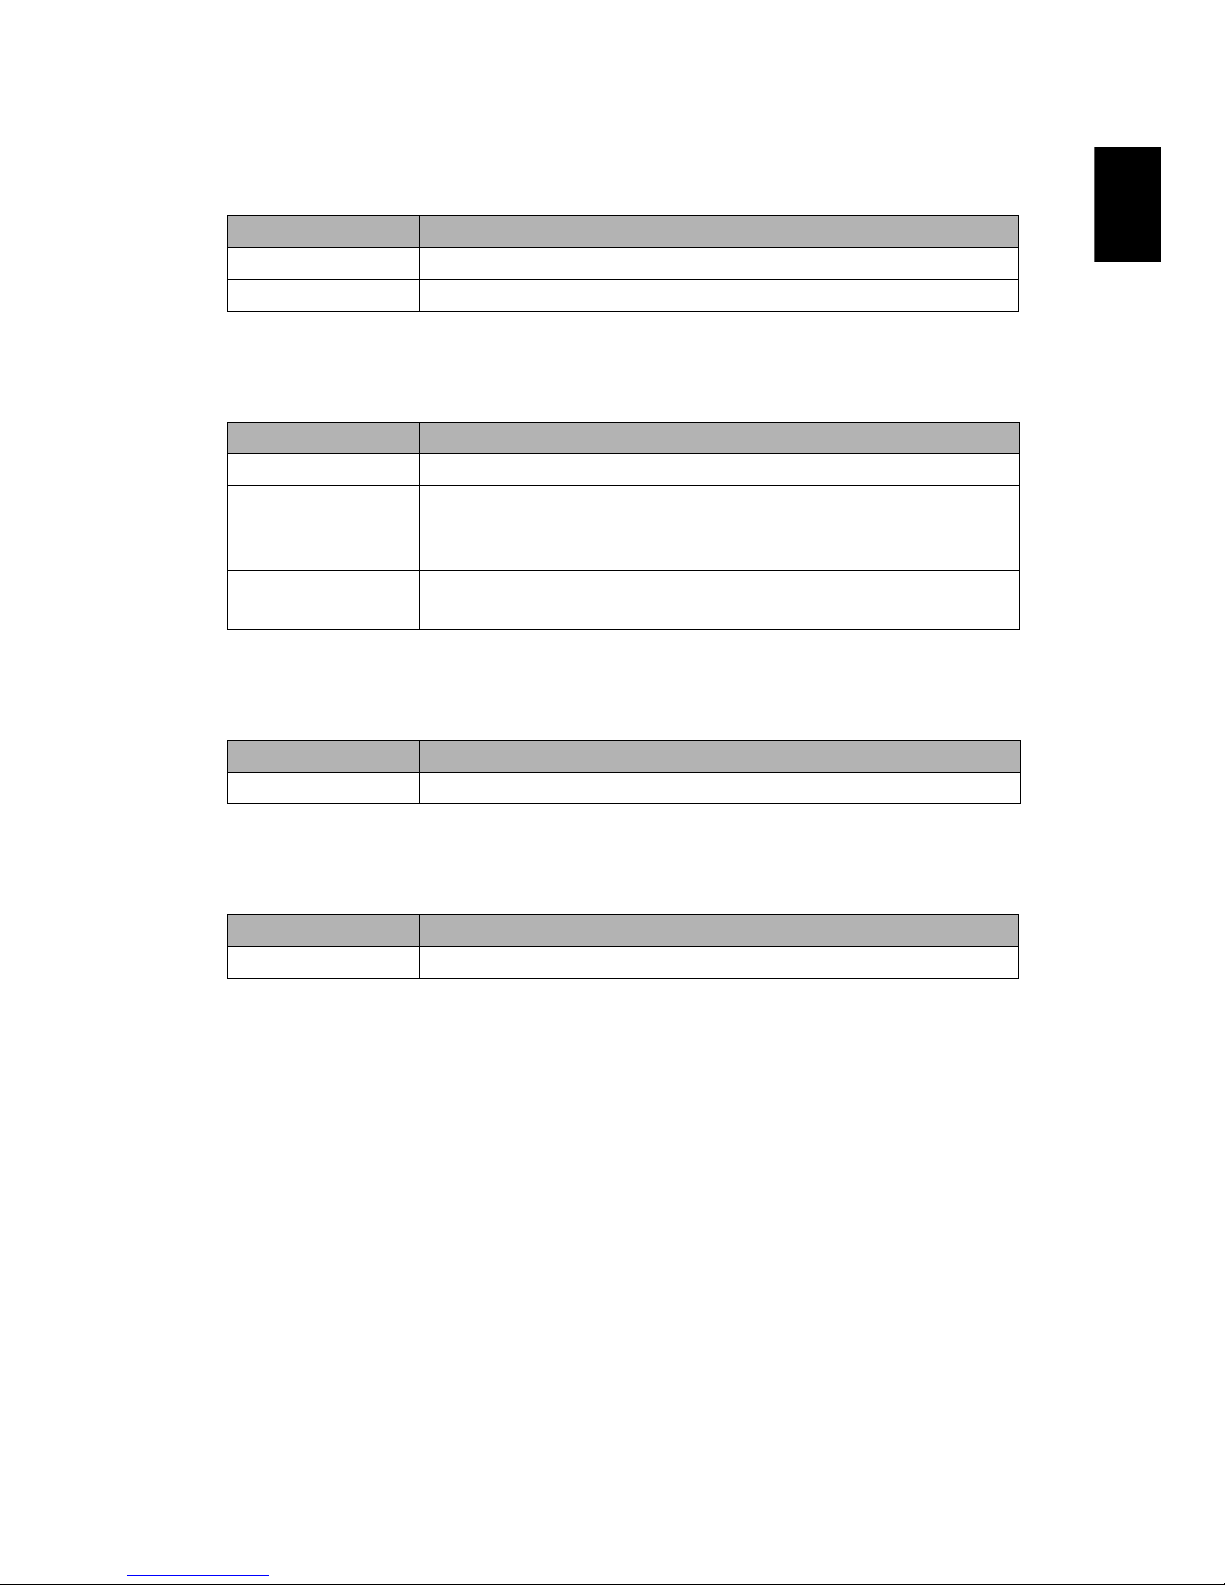
Video Setting
Photo Setting
Music Setting
Document Setting
Firmware Upgrade
There are 2 ways to do this:
• Using a USB flash drive
1 Download new media FW files by one compressed file from acer global
website.
2 Copy all uncompressed files in USB flash drive (Acer_Upgrade.bin as
released and Acer_upgradeinfo.ini), and plug in projector.
3 Check projector source upto USB A.
4 Media Gallery > Setup > Firmware Upgrade.
5 Confirm to go.
6 Projector will show welcome screen automatically when upgrade finishes.
Menu item Options
Display Ratio Letter box/Cut screen/Full screen/Original
Repeat Mode Sequence/Single/Random/Once
Menu item Options
Display Ratio Original/Full screen
Slideshow Pattern
Random/Ring Diffusion/Middle Enlarge/Expand Blink/
Window Shades/Linear Interaction/Cross Interleaved/
Banding Alternate
Slideshow
Duration
10 sec/30 sec/1 min
Menu item Options
Repeat Mode Sequence/Single/Random/Once
Menu item Options
Display Ratio Fit to screen/Fit to width/Fit to height
 Loading...