

Page 1

Digital Data Manager
Model 747
Installation and Setup Guide
Version 3.xx Software
3M Library Systems
3M Center, Building 225-4N-14
St. Paul, MN 55144-1000
www.3M.com/library
Page 2

© 3M 2011. All rights reserved.
Digital Data Manager Model 747 Installation and Setup Guide
78-8123-9045-4, R ev . D
3M is a trademark of 3M. Adobe and Acrobat are registered trademarks of Adobe Systems Incorporated.
Microsoft, Microsoft Office, Microsoft Access, DirectX, Windows, Windows XP, Windows Vista and
Windows 7 are trademarks or registered trademarks of Microsoft Corporation. CompactFlash is a
registered trademark of SanDisk Corporation. SanDisk Corporation is a licensee of Secure Digi tal (SDseri es) trademarks. All other tradema rks are p ro perty of their respective owners.
Page 3

Installation and Setup Contents
Introduction.................................................................................... 1
About Data Manager.......................................................................................................................1
Related documents ........................................................................................................................1
Installation and setup overview....................................................................................................2
Installing Data Manager for the first time.....................................................................................2
Upgrading Data Manager............................................................................................................2
Step 1 – Install Data Manager and DLA software .......................... 3
Computer requirements.................................................................................................................3
Privileges required for Data Manager...........................................................................................3
Installing Data Manager software .................................................................................................4
Installing Digital Library Assistant (DLA) software.....................................................................5
Step 2 – Install memory-card drive (new drive only) ..................... 6
Before you begin............................................................................................................................6
If you have problems......................................................................................................................6
Step 2.1 - Install the new memory-card drive..............................................................................6
Step 2.2 - Check the memory-card drive’s operation.................................................................7
Procedure....................................................................................................................................7
Removing a memory card............................................................................................................8
Step 2.3 - Configure memory card eject privileges.....................................................................8
Step 3 – Determine import/export format requirements................ 9
Step 3.1 – Determine data-format requirements .........................................................................9
Step 3.2 – Generate list files..........................................................................................................9
Step 4 – Create list folders........................................................... 10
Step 4.1 – Create shelf-order, search-list, and import folders.................................................10
Step 4.2 – Move the list files into the correct folders...............................................................10
Step 4.3 – Start Data Manager software.....................................................................................11
Step 4.4 – Specify list folder and export/import locations.......................................................12
Step 5 – Define list barcode validation parameters..................... 13
Step 6 – Set export parameters ................................................... 14
Export-format parameters..........................................................................................................14
About location IDs......................................................................................................................14
Step 6.1 – Create export formats ................................................................................................15
To create export formats............................................................................................................15
Designating a default export format (optional)...........................................................................16
Step 6.2 – Set up Duplicate Item Definitions (optional)............................................................17
© 3M 2011. All rights reserved.
Page 4

Step 7 – Test your export formats................................................ 18
Step 7.1– Debug your export formats ........................................................................................18
Step 7.2 – Export lists and check for errors and warnings......................................................19
Procedure..................................................................................................................................19
About debugging export errors and warnings............................................................................20
Step 7.3 – View the exported lists on the DLA or other equipment ........................................21
Step 8 – Set import parameters ................................................... 22
Overview........................................................................................................................................22
Step 8.1 – Create and preview import formats..........................................................................23
Step 8.2 – Create collection categories......................................................................................24
Step 8.3 - Export collection-category labels to the memory card...........................................25
Step 8.4 – Test your import formats...........................................................................................26
Optional Procedures..................................................................... 27
Specifying language settings (optional)....................................................................................27
Designating a default export format (optional).........................................................................28
Designating a default import format (optional).........................................................................29
Using command-line scripts to automate Data Manager (optional)........................................30
Command-line operations and arguments................................................................................32
Command-line error codes and messages................................................................................33
3M Service.................................................................................... 34
Information to gather ...................................................................................................................34
3M Service phone numbers.........................................................................................................34
3M Library Systems Web Site .....................................................................................................34
© 3M 2011. All rights reserved.
Page 5

3M™ DATA MANAGER MODEL 747 SOFTWARE LICENSE
Use of the 3M Data Manager Model 747 Software (“Software”) is governed by the terms of the
license between 3M and Customer. The Software may be used by Customer and its employees
and agents only for Customer’s benefit and in accordance with the license between 3M and
Customer, as set forth below.
1. 3M Data Manager Model 747 Software. As used in this License, “Software” means the proprietary
3M Data Manager Model 747 Software licensed to Customer, including any updates (e.g., maintenance
releases, modifications to existing functionality or new functionality) that may be provided to Customer by
3M during the term of this License. 3M is under no obligation to issue updates.
2. License. During the term of this License, 3M grants Customer the nonexclusive, nontransferable right
to install the Software on a single computer at a single Customer location (“Site”) and to use the Software
solely for Customer’s internal business purposes. Title to all copies of the Software will be and remain
vested in 3M or its licensors. Title to media on which the Software is provided will be vested in Customer.
3. Prohibitions. Customer may not, without the prior written consent of 3M (i) sublicense, lease, lend or
transfer the Software to any third party; (ii) use, or permit the use of, the Software for the benefit of, or by,
any third party except in the normal course of Customer’s business; (iii) make copies of the Software
except in the normal course of use or for archival purposes; (iv) use the Software at any location other
than the Site; or (v) disassemble, reverse engineer or create derivative works of the Software except as
permitted by law.
4. Operating Results. Customer is solely responsible for the use it makes of the Software, including,
but not limited to, monitoring and verifying the input to and output from the Software.
5. LIMITED WARRANTY AND DISCLAIMER. 3M warrants to Customer that, for a ninety (90) day
period following delivery of the Software, the then-current version of the Software will perform in
substantial accordance with the corresponding documentation when used as in structed. If the Software
fails to meet this warranty, 3M’s sole obligation and Customer’s sole remedy will be, at the option of 3M,
correction of the Software to perform as warranted or refund of the applicable separate license fee paid.
This warranty is void if the Software is modified or used with software or equipment for which it was not
intended. EXCEPT FOR THIS LIMITED WARRANTY, 3M DISCLAIMS ANY AND ALL WARRANTIES,
WHETHER EXPRESS OR IMPLIED, INCLUDING WITHOUT LIMITATION ANY IMPLIED
WARRANTIES OF MERCHANTABILITY, FITNESS FOR A PARTICULAR PURPOSE, NONINFRINGEMENT AND TITLE AND THOSE ALLEGEDLY ARISING FROM TRADE USAG E OR
COURSE OF DEALING. 3M DOES NOT WARRANT THAT THE SOFTWARE IS FREE FROM ALL
BUGS, ERRORS OR OMISSIONS.
6. Limitation of Liability. 3M will not be liable to Customer for any loss or damage resulting from lost
data or information. Further, except for personal injury, 3M will not be liable for any indirect, special,
incidental or consequential damages or economic loss based upon breach of wa rranty, breach of
contract, negligence, strict liability in tort or any other legal theory, even if 3M has been advised of the
possibility of such damages. THE PARTIES AGREE THAT 3M’s MAXIMUM CUMULATIVE LIABILITY
FOR ACTUAL DAMAGES FOR ALL MATTERS ARISING OUT OF OR RELATING TO THIS LICENSE
SHALL NOT EXCEED TEN THOUSAND DOLLARS ($10,000).
© 3M 2011. All rights reserved.
Page 6

7. Term and Termination. This License will terminate (i) if either party materially breaches a provision
of this License and fails to cure such breach within thirty (30) days after receiving a written notice of
breach from the nonbreaching party; or (ii) if Customer discontinues use of the Software. Upon
termination of this License for any reason, Customer shall cease all further use of the Software and
destroy or return to 3M all copies then in its possession or under its control. At 3M’s request, Customer
will certify to 3M in writing that it is in full compliance with the requirements of this paragraph.
8. U.S. Government End Users. This provision applies to all acquisitions of this Software by or for the
Federal Government or by any prime contractor or subcontractor (at any tier) for the Federal Government
under any contract, grant, cooperative agreement, other transaction, or other agreement with the Federal
Government. By accepting delivery of this Software, the Federal Government hereby agrees that this
Software qualifies as “commercial” computer software within the meaning of the acq uisition or financial
assistance regulations applicable to this procurement. The terms and conditions of this License shall
apply to the Government’s use and disclosure of this Software and shall supersede any conflicting
contract terms and conditions. If this License fails to meet the Government’s needs or is inconsistent with
federal law, the Federal Government agrees to return this Software, unused, to 3M. The following
additional statement applies only to acquisitions governed by DFARS Subpart 227.4 (October 1988):
“Restricted Rights—Use, duplication and disclosure by the Government is subject to restrictions as set
forth in subparagraph (c)(1)(ii) of the Rights in Technical Data and Computer Software clause at DFARS
252.227-7013 (OCT. 1988).”
9. General Provisions. This License constitutes the entire agreement between 3M and Customer with
respect to use of the Software. This License is governed by and construed under Minnesota law,
excluding its conflicts of law provisions. This License may not be amended, assigned, sublicensed or
transferred by Customer without 3M’s prior written consent. Failure of 3M to enforce any provision will not
constitute a waiver of such provision or of the right to enforce such provision. If any provision of this
License is held to be unenforceable by a court, the validity and enforceability of the other provisions will
not be affected.
© 3M 2011. All rights reserved.
Page 7

Introduction
About Data Manager
3MTM Digital Data Manager (Data Manager) software is used to transfer
information between your circulation system and 3M equipment such as the
TM
Digital Library Assistant (DLA). Primary functions include:
3M
Processing circulation data files (list files) generated by your
circulation system and then exporting them to memory cards used by
the DLA or other 3M equipment.
Creating import and export formats that define which information
appears on the DLA or other 3M equipment.
Importing data collected by the DLA and creating a formatted text file
that can be used to update your circulation system data.
Related documents
3MTM Digital Data Manager Model 747 Data Format Guide – contains
detailed information on the data requirements and data format types
supported by Data Manager software. This guide will assist you in
determining which supported format type is the best match for your
library’s data files.
TM
3M
3M
3M
3M workstation and conversion station documentation – describe
Digital Data Manager Model 747 Staff Guide – describes how
to manage, export and import the list files used by the circulation
system and the DLA or other 3M equipment.
TM
Barcode Filters User Guide – describes how to set up and use
barcode filters.
TM
Digital Library Assistant User Guide – describes how to use the
DLA, which uses data imported from Data Manager.
how these systems use search lists and order lists.
© 3M 2011. All rights reserved. 1
Page 8

Installation and setup overview
The steps required to install Data Manager 3.xx software will vary depending upon the
installation type. See the descriptions below for an overview of installation procedures.
Data Manager installation and setup should be performed by
someone having in-depth knowledge of the library’s circulation
system.
Installing Data Manager for the first time
You must complete all the setup steps listed below before you can use Data
Manager software. Once you complete the initial setup, day-to-day operations are
relatively simple and straightforward.
Procedure Page Number
Step 1 – Install Data Manager and DLA software
Step 2 – Install memory-card drive
Step 3 – Determine import/export format
Step 4 – Create list folders
Step 5 – Define list barcode validation parameters
Step 6 – Set export parameters
Step 7 – Test your export formats
Step 8 – Set import parameters
...........................................................................10
................................................................6
......................................................9
....................................................................14
...............................................................18
............................................................22
.........................................3
...................................13
Upgrading Data Manager
If an older version of Data Manager software (v2.0 or higher) is installed on
your computer, installing version 3.2 (or higher) will remove the older version
and migrate your settings and formats to the new version.
Procedure Page Number
Step 1 – Install Data Manager and DLA software
.........................................3
2 © 3M 2011. All rights reserved.
Page 9
Step 1 – Install Data Manager and DLA software
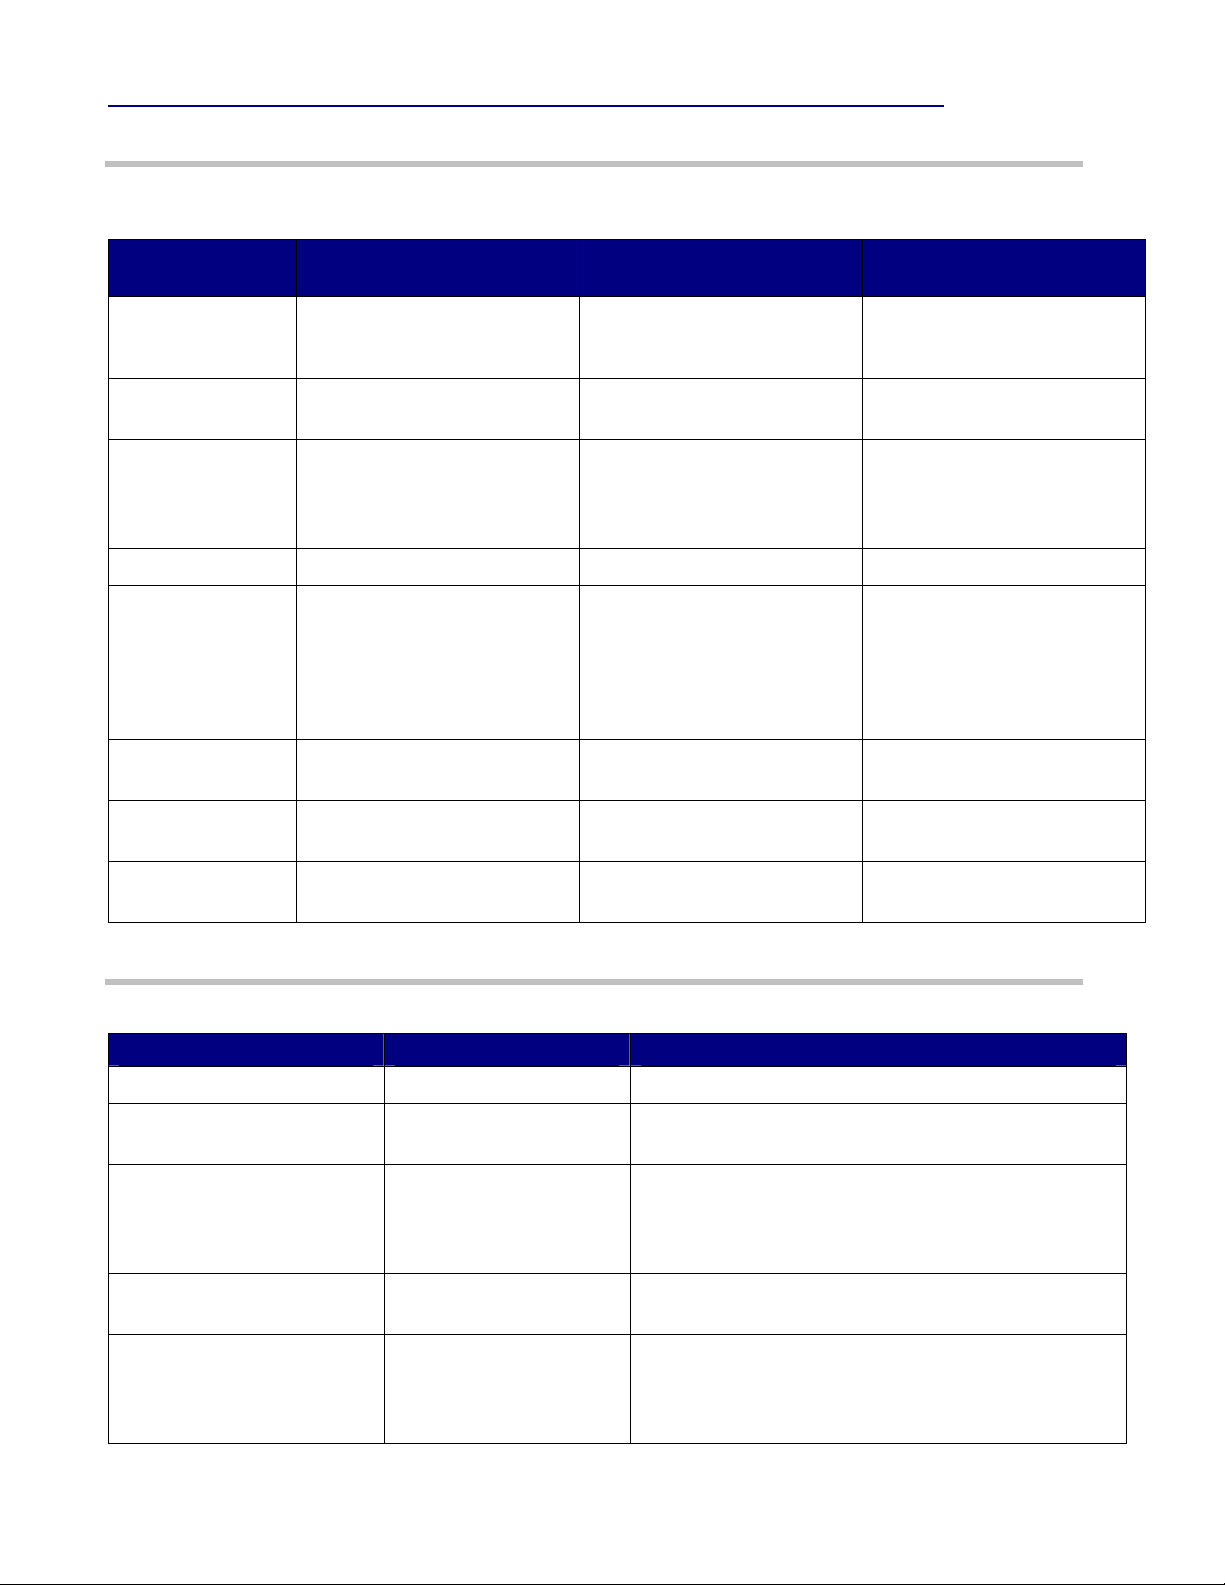
Computer requirements
Before you install Data Manager software, make sure that your computer
meets the following requirements:
Computer
Requirements
Processor
RAM
Hard drive
CD/DVD drive
Monitor
USB ports
Keyboard,
mouse
Memory card
drive
Windows XP®,
SP2 or SP3
233 MHz minimum, 300 MHz
or higher recommended
128 MB minimum, 256 MB or
higher recommended
Minimum 40 GB hard disk
with at least 15 GB space
available for data
CD or DVD drive DVD drive DVD drive
800 x 600 SVGA minimum DirectX® 9 support with
One port required for USB
memory-card drive
Windows-compatible Windows-compatible Windows-compatible
USB memory-card drive
included
Privileges required for Data Manager
Windows Vista®
Business/Ultimate, SP1
1GHz 32-bit (x86) or 64-bit
(x64) minimum
1 GB minimum
2 GB recommended
Minimum 40 GB hard disk
with at least 15 GB space
available for data
WDDM driver, 128 MB
graphics memory (minimum),
Pixel Shader 2.0 in
hardware, 32 bits per pixel
One port required for USB
memory-card drive
USB memory-card drive
included
Windows® 7
Professional
1GHz minimum, 32-bit (x86)
or 64-bit (x64)
1 GB minimum
2 GB recommended
Minimum 40 GB hard disk
with up to 200 MB space
reserved for log and statistics
files
DirectX® 9 support with
WDDM driver, 128 MB
graphics memory (minimum),
Pixel Shader 2.0 in
hardware, 32 bits per pixel
One port required for USB
memory-card drive
USB memory-card drive
included
The following computer privileges are required to perform Data Manager tasks.
Task Required Privileges Notes
To install Data Manager Administrator privileges
To create Data Manager
folders (as part of setup)
To change Data Manager
settings
To write to Data Manager
folders
To eject the memory card Eject privileges on the
© 3M 2011. All rights reserved. 3
Administrator privileges
Write access to the 3M
section of the Windows
Registry and 3M folder in
the Program Files folder
Read and write access
to folders
memory card
At installation, Data Manager changes system
settings so this access is available to all system
users.
The administrator must grant this access to staff
members who use these folders.
The default is to limit eject privileges to
administrators. If non-admistrators will be working
with the memory card, administrators must give them
eject privileges.
Page 10
Installing Data Manager software
If an older version of Data Manager software (v2.0 or higher) is installed on
your computer, installing version 3.2 (or higher) will remove the older version
and migrate your settings and formats to the new version.
Database files reside in these locations:
• Version 3.1 or lower — C:\Program Files\3M Library Systems\ Data Manager
• Version 3.2 or higher — C:\ProgramData\3M Library Systems\ Data Manager
.
Procedure
1 If Adobe® Acrobat® Reader is not installed on
your computer, install it before you install the
new version of Data Manager. (You can
download the free Reader application from the
Adobe website.) You will need this application
to display Data Manager online help.
2 Insert the Data Manager CD-ROM into the
CD-ROM drive on your computer.
The CD-ROM will automatically start the
installation program.
If the install program does not start, use
Windows Explorer to display the
contents of the CD-ROM and doubleclick on Setup.exe.
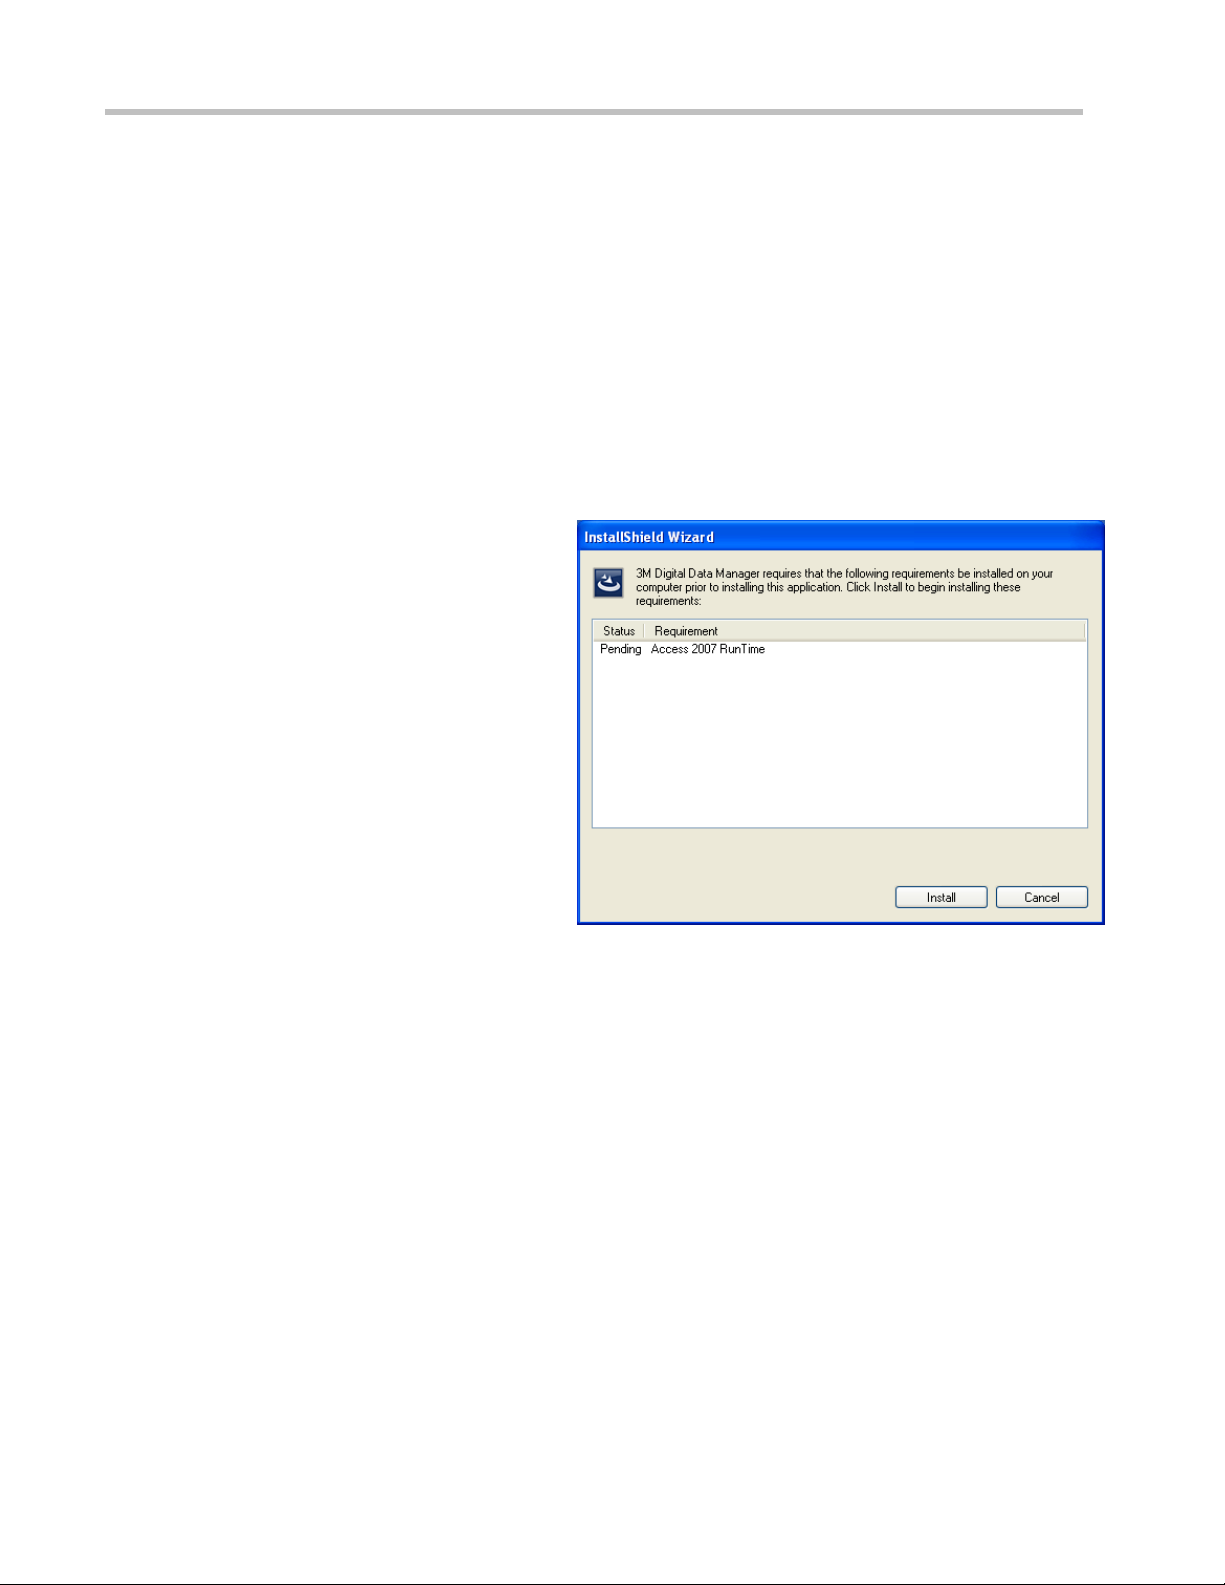
3 If Microsoft® Access™ 2007 (MS Office® or
RunTime) is not installed on your computer,
this window (Figure 1) will appear. Click
Install to install MS Access 2007 RunTime
software.
Figure 1: MS Access™ 2007 RunTime installation.
4 © 3M 2011. All rights reserved.
Page 11
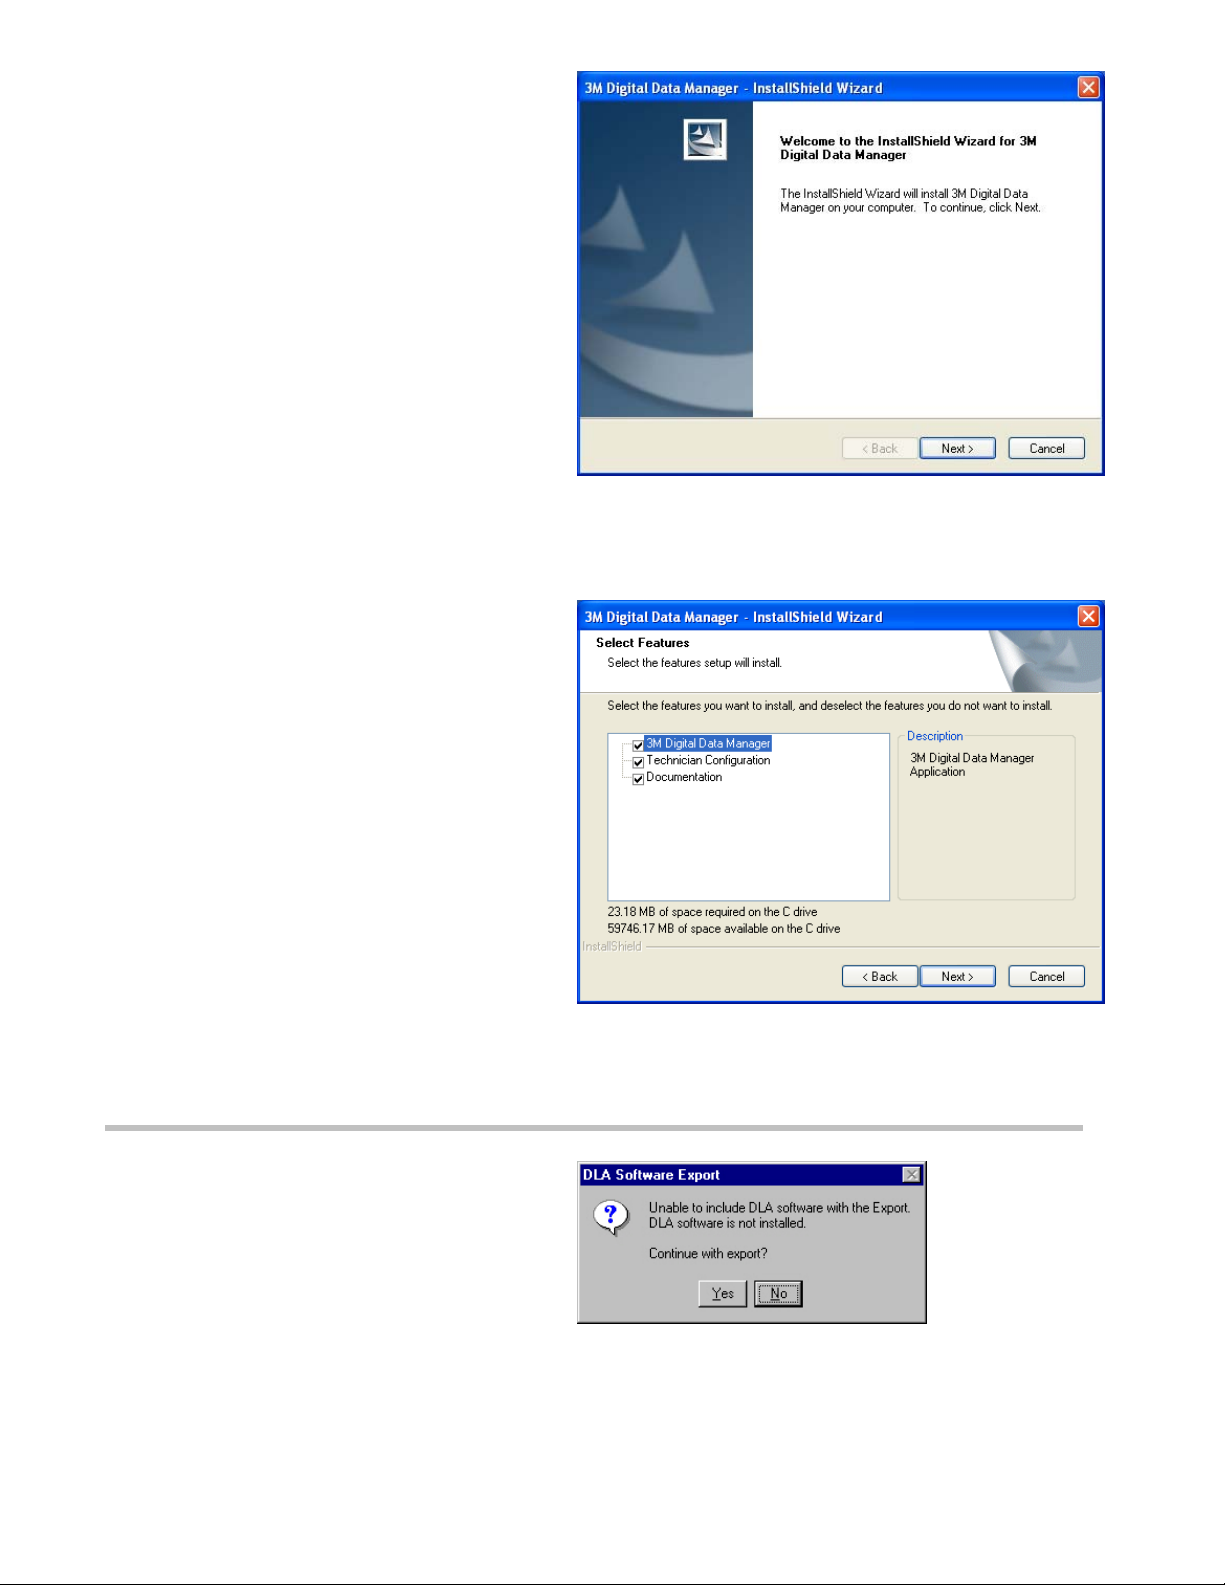
4 Click Next to begin installing Data Manager
software.
5 Click Next at each screen to follow the
installation instructions. For a typical
installation, accept the default settings on
each screen.
6 On the final screen, click Finish to complete
the installation. A 3M Data Manager icon will
be created on your Windows desktop.
Figure 2: Click the Next button to begin installing
Data Manager software.
Figure 3: For most installations, select all
components.
Installing Digital Library Assistant (DLA) software
Install 3M DLA software on the same computer
that you will use to run Data Manager. Data
Manager software will be used to load DLA
software onto the DLA.
After you install DLA software onto the computer,
Data Manager will copy it to the memory card
each time you perform an export to the DLA.
See the 3M
TM
Digital Library Assistant User Guide
for DLA software installation instructions.
© 3M 2011. All rights reserved. 5
Page 12

Step 2 – Install memory-card drive (new drive only)
Before you begin
The procedures that follow are only for users with new memorycard drives. If you are already using a drive delivered with a
previous version of Data Manager, installing the new drive is not
required.
Please read the manufacturer’s instructions before installing or
using the new memory-card drive.
If you have problems
If these installation procedures do not work on your computer,
call 3M Service (see the last page in this guide).
Step 2.1 - Install the new memory-card drive
With the computer running, plug the memory-card drive USB
cable into an available USB port. Windows XP, Vista or Windows
7 will discover the new drive and install the appropriate driver.
6 © 3M 2011. All rights reserved.
Page 13

Step 2.2 - Check the memory-card drive’s operation
e
)
e
)
Procedure
1 After Windows installs the memory-card drivers,
double-click the My Computer icon on the desktop.
2 Two new drive icons called Removable Disk
appear in the My Computer window. (See Figure
1.)
Windows automatically creates these icons
and assigns the next available letters to them.
(See Figure 2.)
The first drive letter (in this example, E:) is
assigned to the CompactFlash®
slot and card used for Data Manager data.
(This is the drive letter that you will select in
Data Manager as your import/export location.)
To avoid confusion, you may want to rename
this drive slot with a name such as “DM
Drive.”
The second drive letter (in this example, F:) is
assigned to the unused Secure Digital™
slot of the drive.
(CF) drive
(SD)
Removable
Disk (E:)
Removable
Disk (F:)
Figure 1: Windows creates two new Removable
Disk icons for the new memory-card drive.
The drive letters that Windows assigns to
each of the two drive slots may vary
depending on the types of devices connected
to your computer.
3 Insert a memory card into the lower (CF) slot on the
front of the memory-card drive.
To remove a memory card from the drive slot, always
follow the procedure Removing a memory card
which appears on page 8.
Slot 1 – Not used Slot 2 – Data Manager memory-card drive
Removabl
Disk (F:
Slot 1 is a Secure Digital (SD)
drive, which is not used by
Data Manager.
*
Slot 2 is a CompactFlash (CF) drive that accepts memory cards used
with the DLA. This is the drive used by Data Manager.
The memory-card drive (slot 2) is assigned the lower of the two new
* The drive letters that Windows assigns to the two drives may vary depending on the types of devices
connected to your computer.
,
Removabl
Disk (E:
*
drive letters that appear in the My Computer window.
Figure 2: Data Manager uses the CompactFlash (CF) drive (slot 2).
© 3M 2011. All rights reserved. 7
Page 14

Removing a memory card
IMPORTANT!
Always use the following procedure to remove the memory card from the memory-card drive.
You must have “eject” privileges to remove the
DO NOT remove a memory card while the activity light on the memory-card drive is flashing.
If you remove the memory card before the activity light stops flashing, you may corrupt the
data files on the memory card (making it impossible for other equipment to read the data).
If this happens, you may have to use Windows to reformat the memory card.
memory card.
1 Important! - Wait until the export or import operation completes.
When the activity light on the memory-card drive stops flashing,
the import/export operation is complete.
2 Make sure that there are no open windows that display the memory-
card drive or its contents.
3 On the Windows desktop, double-click My Computer.
4 Right click on the memory-card drive’s Removable Disk icon.
The memory-card drive appears as two different removable-
disk icons.
The first drive letter is assigned to the CompactFlash portion of
the drive (used by Data Manager). You may want to rename the
compact flash drive with a name such as “DM Drive.”
The second drive letter (not used) is assigned to the Secure
Digital portion of the drive.
5 On the pop-up menu, click Eject.
Important! - After clicking Eject, you must wait ten seconds
before removing the memory card.
6 Wait 10 seconds and then remove the memory card.
Figure 3: Right-click the removable
disk icon and click Eject.
Step 2.3 - Configure memory card eject privileges
Staff members who will work with memory cards must be given eject
privileges which, by default, are reserved for administrators.
1 Use one of the following paths to change “eject” privileges:
In Windows XP or Vista, select Control Panel > Administrative Tools > Local Security Policy >
Local Policies > Security Options > Devices: Allowed to format and eject removable media.
In Windows 7, select Control Panel > System and Security > Administrative Tools > Local Security
Policy > Local Policies > Security Options > Devices: Allowed to format and eject removable
media.
2 Assign privileges as required, then click OK.
8 © 3M 2011. All rights reserved.
Page 15

Step 3 – Determine import/export format requirements
Use the 3MTM Digital Data Manager Model 747 Data Format Guide for step-by-step information
on setting up Data Manager parameters. These parameters (such as import/export formats and
barcode validation) depend on the format of the text files that you generate from your circulation
system.
Make sure that you can consistently generate accurate lists from your circulation system.
As you use Data Manager, the export procedures help identify problems with the data in
your circulation system (such as missing information and incomplete barcodes)
You may have to correct inconsistencies and errors in the records stored in your circulation
system.
Step 3.1 – Determine data-format requirements
You must complete this step before you can configure the Data Manager software.
Before attempting to use Data Manager…
1 Follow the steps in the Data Format Guide to determine file formats and format parameters.
Step 1
Step 2
Step 3
Step 4
2 Record your parameter settings on the 3M
Determine the List Barcode Validation parameters necessary to extract
barcode data from the list files that you generate from your circulation system.
Determine the file formats for the list files that you will generate from your
circulation system.
Determine export format parameters that specify what fields will be exported
from these list files for display on the DLA or other 3M Digital ID equipment.
Determine import format parameters that specify formats for the text files that
Data Manager creates from the data collected by the DLA. Data Manager
formats these files so they can be used to update data in your circulation
system.
TM
Digital Data Manager Data Format Worksheet.
Step 3.2 – Generate list files
1 Use your circulation system to generate shelf-order lists and search lists.
Make sure that the file format matches one of the three format types supported by Data
Manager. (See the Data Format Guide for descriptions and examples of file formats.)
Important: If your library uses a location-based shelving system, your circulation system
must also generate Location Lists that identify designated locations in the library with
location IDs and descriptions.
2 Save these files in a location that is accessible to the computer you will use to run Data
Manager software.
These list files will be used to test the export formats that you create.
© 3M 2011. All rights reserved. 9
Page 16

Step 4 – Create list folders
Before you can use Data Manager, you must create Shelf Order List,
Search List, and Pull List folders. Once created, you can configure Data
Manager to display the contents of these folders.
Data Manager software uses lists that are stored in these folders
only.
The data lists generated from your circulation system must be placed
in their respective folders.
Note: If location lists are used, they must be placed into the Shelf
Order List folder.
Step 4.1 – Create shelf-order, search-list, and import folders
1 Create folders for your lists:
a Create a folder for shelf-order lists (which
will also hold location lists if used).
b Create a folder for search lists .
c Create a folder for your pull lists.
You may create the folders on a local hard
drive or on a network drive.
The three list folders must be separate
(one list folder cannot be located within
another list folder).
You may name folders anything you like.
Storing lists on a network d rive may
degrade (slow) performance.
Figure 4: Create list folders in a location on your hard
drive that is easily accessible.
2 Create an import destination folder.
Data Manager creates a category folder for
each collection category that you create.
These folders are stored in the Import File
Destination folder. (See Step 8.2 – Create
collection categories
on page 24.)
3 Ensure that staff members who will be working
with these folders have read and write access to
them.
Step 4.2 – Move the list files into the correct folders
1 Locate the shelf-order lists, pull lists, search lists and location lists (if used) that you generated earlier.
2 Move list files into the correct folders:
Move the shelf-order files into the shelf-order lists folder. Also,
if location lists are used, move them into this folder.
Move the search list files into the search lists folder.
Move the pull list files into the pull lists folder.
You may add or remove files from the folders at any time.
10 © 3M 2011. All rights reserved.
Page 17

Step 4.3 – Start Data Manager software
1 Double-click the 3M Data Manager icon on your
PC desktop.
- or -
Use the Start button (located on the Windows task
bar) to start Data Manager software.
The Data Manager main screen appears.
The file list remains blank until you select listfolder locations.
2 Enter Admin Setup.
a From the Admin Setup menu, click Enter
Password.
The Enter Password dialog box appears.
b Type the admin password in the Password
text box.
c Click OK.
© 3M 2011. All rights reserved. 11
Page 18

Step 4.4 – Specify list folder and export/import locations
4a
6
1 Insert a memory card into the memory-card drive.
2 Start Data Manager software.
3 From the Admin Setup menu, click Folders. The
Folders dialog box appears.
4 From the Folders dialog box, specify the
locations for the folders that you created earlier.
a Specify the Shelf Order Lists folder location.
b Specify the Search Lists folder location.
c Specify the Pull Lists folder location.
d Specify the Import File Destination folder
location (a user-created folder where Data
Manager saves data that it imports from a
memory card.)
Click the Browse buttons to select the list
folders that you created earlier (see page 10).
If a folder does not exist, enter the path of the
new folder that you want to create.
4b
4c
5 Select the Export/Import Location (memory-card
drive).
Use the Browse button to select the memory-
card drive that you will use with Data Manager.
6 Check the Save data for faster exporting of the
same lists checkbox to save a backup copy of the
latest export on your hard drive.
This allows faster exporting if you are exporting
the same group of lists to multiple memory
cards.
Always enable this option unless your computer
has limited hard-disk space.
7 Click OK. The list folders (and any files and
subfolders in these folders) appear in the main
window. (See Figure 5.)
Can’t Find Export/Import Location
The following warning message appears if a memory
card is not in the memory-card drive.
4d
5
If the drive letter shown in the message is correct,
click OK.
Figure 5: Once you define folder locations, the
folders and their contents appear in the main
window.
12 © 3M 2011. All rights reserved.
Page 19

Step 5 – Define list barcode validation parametersStep 5 – Define list barcode validation parameters
3
Barcode validation parameters are used to validate the barcode data in the
list files generated from your circulation system. Records with invalid
barcodes are not exported and will generate an export error.
The Data Format Guide includes detailed descriptions and
examples of barcode validation parameters.
Refer to the Data Form at Worksheet that you completed
earlier for barcode validation settings.
To define barcode validation parameters
1 From the Admin Setup menu,
click List Barcode Validation.
The List Barcode Validation Parameters
dialog box appears.
2 Assign the Valid Length parameters.
After processing (removal of any invalid
characters), the final length must be within
the range specified here.
If all barcodes are the same length, enter
the same minimum and maximum length.
3 Select Valid Characters.
Define which characters are allowed in a
valid barcode by checking the appropriate
valid character boxes.
2
Other characters can be entered in the
Additional Valid Characters text box.
4 Click OK.
© 3M 2011. All rights reserved. 13
Figure 6: Barcode validation parameters are used to
test the barcode data in each record of the list files
generated from your circulation system.
Page 20

Step 6 – Set export parameters
Export formats must be assigned to a list file before the list file can be
exported onto a memory card for use by the DLA or other equipment.
See the Data Format Guide for detailed descriptions and examples
of various export formats.
Export-format parameters
Each export format includes a set of export-format
parameters that allow you to specify:
The field and record delimiters for list files created by
your circulation system.
The field within the item record that contains the
barcode information.
The portions of the item record that will be displayed
(on the DLA or other equipment) as Primary and
Secondary Information fields.
Any labels that you want to include in the Primary and
Secondary Information fields. (The DLA and other
equipment display these labels to help you interpret the
displayed data.)
If Location tags are used by the library, export-format
parameters allow you to specify location IDs and
descriptions that will be displayed (on the DLA or other
equipment) as Location Information fields.
About location IDs
Location IDs are used by many libraries, especially larger
facilities, to clearly identify specific areas in a building such
as individual shelving units, groups of units, and areas
located on different floors or wings throughout a facility.
If location IDs are used with Data Manager, the exportformat parameters described above are used to prepare
location barcodes and descriptions for display on a DLA or
other 3M equipment.
Check Shelf Order
6/24 Ready to Find Items
Someday Soon
PS3513.A413 S5 1941
2
The Walking Spell
PS3513.A632 C3
DLA_073
Primary Info Field
(approximately 25
characters on DLA)
Lost
HomeShelve SaveClear
The Walking Spell
PS3513.A632 C3
Secondary Info Field
(approximately 29
characters on DLA)
Figure 7: An export format defines what
information appears in the Primary and
Secondary Info Fields on the DLA or other
equipment. (If location IDs are used, location
information is displayed as well as primary and
secondary information.)
When location IDs are used, the DLA or other equipment
displays corresponding Location information with item ID
Primary and Secondary information. (Figure 7 shows
Primary and Secondary information only.)
14 © 3M 2011. All rights reserved.
Page 21

Step 6.1 – Create export formats Step 6.1 – Create export formats
The Data Format Guide includes detailed descriptions and examples of
export-format parameters.
To create export formats
1 From the Admin Setup menu, click Export
Formats.
The Export Formats dialog box
appears.
2 Click New.
The New/Edit Export Format dialog box
appears. (See Figure 9.)
3 Type a name in the Format Name text box.
This name will appear on the drop-down
list in the main window’s Format column.
2
Figure 8: Click New to create a new format.
3
4 Click the Format Type drop-down list and
select the format type generated from your
circulation system.
You should have recorded the format type
on the Data Format Worksheet.
5 Define the parameter values.
a Click (select) a parameter in the list.
b Type the parameter value in the text box
located at the bottom of the dialog box.
c Press the Enter key.
You can also click Update or select
another parameter to enter a value.
d Continue until all parameter values are
entered.
6 Designate default export formats (optional).
See Designating a default export
format (optional)
on page 16 for details.
4
5
Figure 9: Each Format Type has a different set of
parameters.
7 Click OK when you are finished.
The new format appears in the Export
Formats dialog box.
© 3M 2011. All rights reserved.
15
Page 22

Designating a default export format (optional)
If you set default export formats, Data Manager
assigns the default export format to any new list file
that you add to a list folder.
List files that you move into the Shelf Order Lists
folder are assigned the Order Default export
format.
List files that you move into the Search Lists folder
are assigned the Search Default export format.
List files that you move into the Pull Lists folder are
assigned the Pull Default export format.
To designate a default export format
1 From the Available Formats list,
select a format.
2 Click Set as Order Default or
Set as Search Default or Set as Pull Default.
Any new list files placed into these folders are
automatically assigned the default format for
that folder.
The same format can be set as the Order
Default, Search Default, and Pull Default.
Figure 10: Select an import format and click
Set Default.
Figure 11: Once you set a default export
format, you can clear it and set a different
default.
16 © 3M 2011. All rights reserved.
Page 23

Step 6.2 – Set up Duplicate Item Definitions (optional) Step 6.2 – Set up Duplicate Item Definitions (optional)
3
Duplicate item checking is helpful if your library has groups of items (each item
with a unique barcode) that are shelved together, and the shelf order within the
group is not important (for example, multiple copies of the same book).
Duplicate item checking is used with shelf-order lists only.
1 From the Admin Setup menu, click Duplicate Item
Definition.
The Duplicate Item Definition dialog box appears.
2 Click the Enable duplicate item checking based on
checkbox to enable or disable duplicate item checking.
Duplicate item checking enabled (checked
When checking shelf order with the DLA, groups of
consecutive items (that meet the specified match
criteria) can be shelved together in any order.
Duplicate item checking not enabled (not checked )
When checking shelf order with the DLA, each item will
have its own distinct shelf position.
)
2
3 Select the Match Criteria for shelf-order lists.
Matching Primary Information Fields
Any consecutive records in the shelf-order list that have
identical information in their primary information fields
will be exported with the same shelf position.
Matching Secondary Information Fields
Any consecutive records in the shelf-order list that have
identical information in their secondary information
fields will be exported with the same shelf position.
Matching Primary and matching Secondary Fields
Any consecutive records in the shelf-order list that have
identical information in both primary and secondary
information fields will be exported with the same shelf
position.
4 Click OK.
Figure 12: Duplicate item checking is only
used with shelf-order lists.
© 3M 2011. All rights reserved. 17
Page 24

Step 7 – Test your export formats
Step 7.1– Debug your export formats
Follow this procedure whe never you create a new export format or edit
an existing export format.
To preview the file export
1 Select a list file from the main window.
2 Apply an export format to the list file.
Click in the list file’s format column
to display a pop-up list of export
formats. (See Figure 13.)
3 From the View menu, click Preview
File Export.
A Notepad window displays the
first 1000 records. (See Figure 14.)
Figure 13: Select a file to preview and assign an export format.
4 Check the export preview for any missing information, invalid
barcodes, and formatting problems.
If you encounter excessive errors and warnings, check your export-format settings:
If the primary, secondary or location (if used) info fields include the
wrong information, check the export format parameters.
If primary, secondary or location (if used) information are not displayed
correctly, check the field-start position and field length parameters
defined in your export format.
If all barcodes are invalid, check the barcode validation parameters
that you set earlier.
Missing information may also be caused by incorrect data in your
circulation system.
If information is difficult to read, you may want to insert additional
spaces between field labels and/or other information.
Figure 14: Check for missing information and any formatting problems that may affect how the
primary, secondary or location (if used) information fields are displayed. Note that the Location ID
column is not visible, and is located to the right of the Secondary Information column.
18 © 3M 2011. All rights reserved.
Page 25

Step 7.2 – Export lists and check for errors and warnings Step 7.2 – Export lists and check for errors and warnings
Once you have set up export parameters and previewed the export, you can
export the list files and check for any errors and warnings.
The Data Manager Staff Guide provides descriptions on how to use
the Summary Log and Export Log.
Procedure
1 Insert a memory card into the memory-card drive.
2 Click Refresh .
This displays any changes such as adding or
removing files from the list folders.
3 Select (check ) the lists and collection categories
that you want to export.
Make sure the order that the shelf-order lists
appear in the main window matches the
physical location of items in the library.
4 From the toolbar, click Export .
The Export Lists and Categories dialog
displays a list of the files to be exported.
5 Click OK.
Data Manager exports the selected lists and
collection categories to the memory card.
Records with errors will not be exported.
Figure 15: Check (
that you want to export.
) the lists and categories
6 Check the Summary Log (located in the bottom
pane of the main window) for any export errors or
warnings.
7 Correct any errors and warnings that are listed in the
Error Log.
Errors are caused by missing or invalid
barcodes in the list files generated by your
circulation system.
Warnings may be caused by missing primary,
secondary or location (if used) information in the
list files generated by your circulation system.
Figure 16: Scroll down the summary log to view
any export errors and warnings.
Summary Log
© 3M 2011. All rights reserved. 19
Page 26

About debugging export errors and warnings
You should have debugged your export formats in Step 7.1– Debug your export formats on
page 18. As you begin to use Data Manager to export data, you will occasionally encounter
errors and warnings.
If you encounter excessive errors and warnings
There may still be problems with your export formats.
See Step 7.1– Debug your export formats
on page 18 for more information.
If you encounter a few errors and warnings
There may be problems with the circulation records in your list files.
Errors may be caused by missing or invalid barcodes in the list files generated by your
circulation system.
Warnings may be caused by missing (or incomplete) primary, secondary or location (if
used) information in the list files generated by your circulation system.
You may want to create an in-house policy on how to deal with problems with circulation
records. The Data Manager export log is a text file that lists these problems.
See the Staff Guide for more information on using the the export log to identify errors
and warnings.
Detecting errors and warnings
Export debugging may require you to repeat the export process until you eliminate any
export errors and warnings. To ensure that export errors and warnings are reported for each
export, follow the guidelines below.
Export errors and warnings are only reported if the list file(s) were processed during export.
This processing occurs if:
The file is new.
The file has been changed and saved.
An existing file is replaced with a new file that has the same name.
A file’s export format or label was changed.
If none of the above applies, you can select Clear Database from the File menu.
For example: if you export a file and encounter 50 errors and you export it again without
changing the file (or changing any of the items listed above):
The file is not processed.
The number of warnings and errors reported for that file will be zero.
The 50 records that had errors will not be exported.
20 © 3M 2011. All rights reserved.
Page 27

Step 7.3 – View the exported lists on the DLA or other equipment
The final check of an export format requires that you view the exported
information on the 3M equipment where the lists will be displayed.
1 Insert the memory card into the DLA (or other
equipment).
2 Make sure that primary, secondary and location
(if used) information is displayed correctly. If
location information is used, it typically is
displayed near its corresponding primary and
secondary information.
For lists used by the DLA:
Perform the Sort & Shelve or Collect Data
function on the DLA to display your shelforder export format.
See the Data Format Guide for detailed
information on display planning.
Figure 17: Make sure that primary and secondary
information is displayed correctly.
3 If necessary, edit the export format to make the
information displayed more usable.
You may want to insert field labels,
additional spaces, and/or other information
that may help the user.
If primary, secondary or location (if used)
information, e.g., call number, date, etc. is
not displayed correctly, check the field-
start position and field-length parameters
defined in your export format.
Figure 18: Export formats for some tasks (such as
weeding) may include “field labels” and additional
information not found in shelf-order lists.
© 3M 2011. All rights reserved. 21
Page 28

Step 8 – Set import parameters
You must set up import formats and export collection category labels to a
memory card before
collection category labels are exported to a memory card for use by the DLA.
Overview
attempting to use the DLA to collect data. These
Data Manager software can import collected Item IDs from
a memory card and save them as formatted text files.
These text files can be used to update data stored in your
circulation system (e.g., inventory dates).
Collection Categories
Use Data Manager to create different collection category
labels that are exported to a memory card and displayed
on the DLA.
When you use the DLA to collect Item IDs (read from
Collected data can be saved in a specific category.
Import Formats
Each time you import a collection category, Data Manager
saves the collected Item IDs from that category in a
separate, formatted text file.
Data Manager saves these files in folders located in the
Each file name includes the import date.
TM
RFID tags) you can save the Item IDs to the
3M
memory card in any of the collection categories that
you exported earlier.
This helps ensure that the imported text files do not
contain “mixed use” item IDs (e.g., inventory and
weeded items in the same file).
Import File Destination folder.
Figure 19: Import format parameters allow you
to add any headers or command codes
required by your circulation system.
Barcode Prefix
Use Data Manager to create Import Formats that
determine how these text files are formatted.
Use the import format parameters (e.g., header string,
barcode prefix, etc.) to add any special headers and
command codes required by your circulation system.
Figure 19 shows an example of a formatted text file
with barcode prefixes, headers, etc. Your formatted
files may look quite different depending upon your
circulation system requirements.
Default Import Formats
If you designate a default import format: each time you add
a category, the default import format automatically appears
in the Import Format text box.
22 © 3M 2011. All rights reserved.
Page 29

Step 8.1 – Create and preview import formats Step 8.1 – Create and preview import formats
Data Manager imports the Item IDs from a
collection category and/or Pull-list Results and
converts them into text files. An Import Format
defines how these text files are formatted.
The import format should include any command
codes required by your circulation system.
The import format can also add primary and/or
secondary information to each record in imported
collection and pull-list results text files.
Data Manager automatically assigns the “Pulled”
and “Not Pulled” import formats to pull-list results.
You can edit these formats but you cannot assign
different formats to pull results.
To define input format parameters
1 From the Admin Setup menu, click Import
Formats.
2 Click New to create a new import format.
To edit an existing import format
Select an existing Import Format and click Edit.
Figure 20: Import Formats dialog box.
3 Define the Import Format Parameters.
See the Data Format Guide for detailed
descriptions and examples of input format
and date/timestamp characters.
To check the import format
1 Click Preview to check the import format.
The characters shown (abc1234567890,
etc.) are generated as a sample barcode.
2 Click OK when you are done.
To designate a default import format
1 From the Admin Setup menu, click Import
Formats.
2 From the Available Import Formats list,
select the format that you want to designate as
the default format.
Figure 21: Import Format Parameters.
Header String
Barcode Prefix
3 Click Set Default.
When you add a category, the default
import format automatically appears in the
Import Format text box.
Figure 22: Preview the import format to ensure that the
formatting meets your circulation system’s
requirements.
© 3M 2011. All rights reserved. 23
Page 30

Step 8.2 – Create collection categories
You can create collection categories for various tasks. For example, you
might create an “in-house” collection category where you save the Item IDs
for each in-house item that you read with the DLA.
1 From the Data Manager List Actions menu,
click Add Category to display the Add
Category window.
2 Define the following parameters:
Category Name – type the name that you
want displayed in the Collection
Categories listing.
Category Label – type the description (up
to 10 characters) to be displayed in the Data
Manager Label column and on the DLA.
Import Format – select the Import Format
that you want to apply to collected data that
you save in this category.
3 Click OK. Data Manager creates a new category
folder (with the same name as the category
name) in the Import File Destination Folder.
Permanent Collection Categories
Data Manager automatically creates Default,
Inventory and Locations collection categories
that you cannot uncheck, delete or move (see
figures). You can view them in Data Manager,
and they are always automatically exported
during each export procedure.
Figure 23: You can create collection categories for various
collection tasks.
Default — The Default collection label is
always exported, which ensures that you
always have at least one collection category
(on the memory card) where you can save
data.
Inventory — The Inventory category is
always exported, and accepts data collected
when you select the DLA’s Background
Inventory function. Because the Inventory
category is reserved for background
inventory only, it is not displayed on the
Save Data DLA screen.
Locations — The Locations category is
always exported, whether your library uses
location IDs or not to identify specific
locations or areas in your facility. When
location IDs are used, the DLA or other
equipment displays location information with
corresponding primary and secondary
information.
Figure 24: When you create a new collection category, it
appears in the Collection Categories listing.
Figure 25: Data Manager creates a category folder for each
collection category that you create (In-house Use in this
example). These folders are stored in the Import File
Destination folder. Default, Inventory and Locations folders
are automatically created by Data Manager.
24 © 3M 2011. All rights reserved.
Page 31

Step 8.3 - Export collection-category labels to the memory card Step 8.3 - Export collection-category labels to the memory card
Before you can use the DLA’s Collect Data function, you must export
collection-category labels to a memory card. (See the Staff Guide for detailed
descriptions of the export procedure.)
During normal operation, each time you prepare a memory card, you export
the list files and collection categories that you want to appear on the DLA.
To export collection category labels
1 Insert the memory card into the memory-
card drive.
2 Select each collection category label(s) that
you want to export.
Any shelf order and/or search lists that
you select will also be exported.
The collection-category labels appear
on the DLA in the order that they appear
in Data Manager. If desired, use the Up
and Down arrows in the Data Manager
toolbar to rearrange the list.
3 On the toolbar, click Export .
4 Data Manager saves the selected collection-
category labels to the memory card.
You can view these collection category
labels on the DLA.
Figure 26: Select (check) the collection categories (and
lists) that you want to export to the memory card.
Figure 27: The label that you assign to each category
appears on the DLA.
© 3M 2011. All rights reserved. 25
Page 32

Step 8.4 – Test your import formats
The final test for your import formats requires using the DLA to collect Item
IDs, importing the collected Item IDs, and verifying that your circulation
system accepts the formatted text files created by Data Manager.
To test your import formats
1 Export collection categories to a memory card.
2 Use the DLA to collect Item IDs and save them
to each collection category.
See the DLA User Guide for descriptions
on how to collect data.
3 Transfer the memory card from the DLA to the
Data Manager memory-card drive.
4 Click Import to import the Item IDs from
the memory card.
Data Manager saves the collected Item
IDs from each category as a separate,
formatted text file.
Each category has a separate folder
where the formatted text files for that
category are saved. These folders are
located in the Import File Destination
folder that you designated earlier.
Figure 28: Click Import to import collected Item IDs from
a memory card.
5 View the imported text files to ensure that any
header or command codes required by your
circulation system are correct.
a From the main Data Manager window,
open the Collection Categories folder.
b Select the text file that you want to view.
c On the toolbar, click View File .
6 Use your circulation system to process the
formatted text files.
Make sure that the circulation data was
updated correctly.
Import file list order
The text file lists collected Item IDs in expected
shelf order if the collected Item IDs appear in
one or more of the shelf-order lists on the
memory card.
Any collected Item ID that does not appear on
any of the shelf-order lists on the memory card
is displayed at the bottom of the list.
Figure 29: View the formatted text file to ensure that it
meets the requirements of your circulation system.
26 © 3M 2011. All rights reserved.
Page 33

Optional Procedures
Specifying language settings (optional)
The administrator can specify which languages
that staff will be able to select.
To select which languages will be available in the View Languages menu
1 Enter the Administrator password to access
the Admin Setup menus.
2 From the Admin Setup menu, click
Language Settings.
The Language Settings dialog box
appears.
3 In each of the four pop-up lists, select the
languages that you want to appear in the
Language menu selection (or select None).
Up to four languages can be
displayed.
If you select one language, the
Languages selection will not appear in
the View menu.
4 Click OK.
5 The languages that you selected now
appear in the View Language menu.
© 3M 2011. All rights reserved. 27
Page 34

Designating a default export format (optional)
If default export formats are set, Data Manager assigns
the default export format to any new list file that you
move into either list folder.
List files that are moved into the Shelf Order Lists
folder are assigned the Order Default export format.
List files that are moved into the Search Lists folder
are assigned the Search Default export format.
To designate a default export format
1 From the Admin Setup menu, click Export
Formats.
The Export Formats dialog box appears.
2 From the Available Formats list,
select a format.
3 Click Set as Order Default and/or
Set as Search Default.
Any new list files placed into either folder will
be automatically assigned the default format
for that folder.
The same format can be set as the Order
Default and the Search Default.
Figure 30: Select an export format and
click Set Default.
Figure 31: Once you set a default export
format, you can clear it and set a different
default.
28 © 3M 2011. All rights reserved.
Page 35

Designating a default import format (optional) Designating a default import format (optional)
When you add a category, the default import format
automatically appears in the Import Format text box
(see Figure 33).
Data Manager creates default import formats
[(+) Pulled and (-) Not-Pulled] that are always used
for pull-list results.
You can edit the import format parameters for the
[(+) Pulled and (-) Not-Pulled] default to make the
pull-list results files compatible with your facility
database.
To designate a default import format
1 From the Admin Setup menu, click Import
Formats.
The Import Formats dialog box appears.
2 From the Available Import Formats list,
select the format that you want to be the default
format.
3 Click Set Default.
Figure 32: Select an import format and
click Set Default.
4 Now, when you create a new category the default
import format automatically appears in the Import
Format text box.
Figure 33: When you add a category, the default
import format automatically appears in the
Import Format text box.
© 3M 2011. All rights reserved. 29
Page 36

Using command-line scripts to automate Data Manager (optional)
As shown on page 32, Data Manager includes a set of command-line parameters that
can be used to automate program functions and operations. As described in the following
procedures, you may use these parameters with Windows XP/Vista or Windows 7 task
scheduling to automatically trigger and execute a wide range of Data Manager tasks.
If Data Manager is installed on a Windows XP or Vista computer:
1 In Control Panel, select Scheduled Tasks.
2 In the Scheduled Tasks list, select Add
Scheduled Task. The Scheduled Task Wizard
appears.
3 Click Next to continue. A list of applications
appears.
4 Select 3M Digital Data Manager, then click Next.
5 In the task name field, enter a description of the
task.
6 Select task frequency (daily, one time, etc.), then
click Next.
7 Select task start time, start date and days when the
task will run, then click Next.
8 Enter username and password, then click Next.
9 On the next screen, select Open advanced
properties for this task when I click Finish, then
click Finish. The screen shown below appears.
10 In the Run field, enter your script as shown in the
example. Be sure to separate each parameter with
a space.
11 Make changes in the Schedule, Settings and
Security tabs if necessary, then click Apply. Click
OK to exit. Your new Data Manager task is now
active and displayed in the Scheduled Tasks list.
Figure 34: Separate each parameter in the Run field
with a space.
30 © 3M 2011. All rights reserved.
Page 37

If Data Manager is installed on a Windows 7 computer: If Data Manager is installed on a Windows 7 computer:
1 In the Start menu, go to Accessories > System
1 In the Start menu, go to Accessories > System
Tools and then select Task Scheduler. The Task
Tools and then select Task Scheduler. The Task
Scheduler window appears.
Scheduler window appears.
2 In the Actions pane, select Create Basic Task.
2 In the Actions pane, select Create Basic Task.
The Create Basic Task Wizard appears.
The Create Basic Task Wizard appears.
3 Enter a descriptive task name in the Name field,
3 Enter a descriptive task name in the Name field,
then click Next.
then click Next.
4 Select task frequency (daily, one time, etc.), then
4 Select task frequency (daily, one time, etc.), then
click Next.
click Next.
5 Select task start time, start date and days when the
5 Select task start time, start date and days when the
task will run, then click Next.
task will run, then click Next.
6 Select Start a program as the task action, then
6 Select Start a program as the task action, then
click Next.
click Next.
7 Browse for and select the DataManager.exe file as
7 Browse for and select the DataManager.exe file as
shown in the example.
shown in the example.
8 Enter your script in the Add arguments (optional)
8 Enter your script in the Add arguments (optional)
field as shown in the example. Be sure to separate
field as shown in the example. Be sure to separate
each parameter with a space. Click Next.
each parameter with a space. Click Next.
9 Check your new task script on the Summary page,
9 Check your new task script on the Summary page,
and make changes if necessary.
and make changes if necessary.
10 On the Summary page, select Open the
10 On the Summary page, select Open the
Properties dialog for this task when I click
Properties dialog for this task when I click
Finish, then click Finish. The Properties window
Finish, then click Finish. The Properties window
for the new task appears.
for the new task appears.
11 Make changes in the Properties tabs if necessary,
11 Make changes in the Properties tabs if necessary,
then click OK to exit. Your new Data Manager task
then click OK to exit. Your new Data Manager task
is now active and displayed in the Task Scheduler
is now active and displayed in the Task Scheduler
list.
list.
Figure 35: Separate each parameter in the Add arguments (optional) field with a space.
© 3M 2011. All rights reserved. 31
Page 38

Command-line operations and arguments
The following command-line parameters can be used to automate Digital Data Manager functions. Multiple
commands in a script must be separated by spaces. (See following page for error codes a nd messages.)
Command Description
Command-line help:
-? Displays the following list of Data Manager command-line parameters.
Command-line operations:
-export Export order list(s) using the current configuration. The application
automatically exits after the operation is performed (see show_success and
show_failure arguments).
-export_pull Export pull list(s) using the current configuration. The application
automatically exits after the operation is performed (see show_success and
show_failure arguments).
-import Import item information using the current configuration. The application
automatically exits after the operation is performed (see show_success and
show_failure arguments).
-clear_database Clear the internal database. The application automatically exits after the
operation is performed (see show_success and show_failure arguments).
Command-line arguments that modify normal behavior:
-no_splash Omits the splash screen during startup.
-show_display Shows the user interface during execution of a command-line operation. The
application will close automatically after a command-line operation is
performed unless show_success or show_failure is specified and invoked.
-show_success Shows the user interface after successful completion of a command-line
operation. The application must be closed manually.
-show_failure Shows the user interface after an unsuccessful completion of a command-line
operation. The application must be closed manually.
-overwrite_import Allows an export operation to overwrite unimported data on the export target,
without prompting the user.
-overwrite_pull_results Allows an export operation to overwrite unimported pull results on the export
target, without prompting the user.
-ignore_dla_software_
export_failure
-on_startup "task" Specifies a task, with optional parameters, to be executed at startup before
Allows an export operation to continue after failing to export the DLA software,
without prompting the user.
the application is fully initialized. If any of the tasks fail, the application will not
start. This argument may be specified multiple times to define multiple onstartup tasks. The tasks are executed in the order they appear on the
command line.
-on_exit "task" Specifies a task, with optional parameters, to be executed upon exiting the
application when there are no errors (the application exit code is 0). This
argument may be specified multiple times to define multiple on-exit tasks. The
tasks are executed in the order they appear on the command line.
-on_failure "task" Specifies a task, with optional parameters, to be executed upon exiting the
application with errors (the application exit code is not 0). This argument may
be specified multiple times to define multiple on-failure tasks. The tasks are
executed in the order they appear on the command line.
32 © 3M 2011. All rights reserved.
Page 39

Command-line error codes and messages
The codes listed below appear when command-line operations or a rguments are used to
automate Digital Data Manager operations. Note that any non-zero code indicates an error.
Error Code Error Message
0 (0x0) Operation successful (no error).
1 (0x1) Operation cancelled.
2 (0x2) Error while parsing a file.
3 (0x3) Insufficient space for export.
4 (0x4) Disk is out of space (non-export operation).
5 (0x5) Export disk is out of space.
6 (0x6) Error while accessing the database.
7 (0x7) No records found during export.
8 (0x8) Error while accessing export files.
9 (0x9) Access denied at export target.
10 (0xA) Export files are missing.
11 (0xB) Unknown error.
12 (0xC) Data Manager is already running in another pro ce ss.
13 (0xD) The startup task has failed.
14 (0xE) The exit task has failed.
The most common error when running a command-line operation is 1 (0x1 ) Operation
cancelled. This error will be returned when any prerequisite is not met, such as having
unimported data at the destination without selecting "-overwrite_import" (see previous
page).
If the exit code is 13, the startup task has failed and the Data Manager operation was not
run.
If the exit code is 14, the exit task has failed but the Data Manager operation completed
successfully.
There is no exit code for a failed "failure task." The original exit code for the failed Data
Manager operation is returned.
© 3M 2011. All rights reserved. 33
Page 40

3M Service
Information to gather
Before you call for service, please have the following information available:
• The name, address, and telephone number of your facility
• A description of the problem or the issue you want addressed
• The model number and serial number of the equipment (located on the
serial label), if the call is in regard to a system problem
Model Number __________________________________
Serial Number __________________________________
3M Service phone numbers
For questions regarding your system, call one of the following numbers.
In the United States In Canada In other countries
1-800-328-0067 English 1-800-268-6235 Call your local 3M office.
Francais 1-800-567-3193
3M Library Systems Web Site
The 3M Library Systems Web site can be located at http://www.3M.com/library.
For additional information in the United States about 3M SelfCheck systems, go to
http://www.3M.com/us/library
.
34 © 3M 2011. All rights reserved.
 Loading...