

Page 1
Oxygen 3D Family
Installation and User’s Guide
5225 Betsy Ross Drive
Santa Clara, California 95054
www.dynamicpictures.com
Page 2

Copyright 1996, 1997, 1998 by Dynamic Pictures, Inc. All rights reserved.
Dynamic Pictures and the Dynamic Pictures logo are registered trademarks, and Oxygen and
PowerThreads are trademarks of Dynamic Pictures, Inc. Pentium is a registered trademark and PCI
is a trademark of Intel. Alpha is a trademark of Digital Equipment Corporation. OpenGL is a
registered trademark of Silicon Graphics. Softimage and Softimage|3D are registered trademarks of
Softimage, Inc., a wholly owned subsidiary of Microsoft Corporation. Microsoft, Windows, Windows
NT, and/or other Microsoft products referenced herein are either trademarks or registered
trademarks of Microsoft. CrystalEyes is a trademark of StereoGraphics. SolidWorks is a trademark of
SolidWorks, Inc. Heidi and 3D Studio MAX are trademarks of Autodesk. LightWave is a trademark
of NewTek. Pro/ENGINEER is a registered trademark of Parametric Technology Corporation.
Unigraphics is a registered trademark of Electronic Data Systems. SDRC is a registered trademark
and I-DEAS is a trademark of Structural Dynamics Research Corporation. Lightscape and the
Lightscape Visualization System are trademarks of Lightscape Technologies, Inc. MicroStation and
the MicroStation Stylized “M” logo are registered trademarks and Bentley and the “B” Bentley logo
are trademarks of Bentley Systems, Incorporated. All other trademarks and registered trademarks
are the property of their respective holders. Portions of the product described in this
documentation incorporate technology licensed from Digital Equipment Corporation. The software
described in this document is furnished under a license and may be used or copied only in
accordance with the terms of such license.
Caution: Changes or modifications to the Oxygen 3D graphics accelerator card not expressly
approved by Dynamic Pictures, Inc. void the user’s warranty.
FCC NOTICE: This equipment has been tested and found to comply with the limits for a Class B
digital device, pursuant to Part 15 of the FCC Rules. These limits are designed to provide reasonable
protection against harmful interference in a residential installation. This equipment generates, uses,
and can radiate radio frequency energy. If product is not installed and used in accordance with
the instruction manual, it may cause harmful interference to radio communications; however, there
is no guarantee that interference will not occur in a particular installation. If this equipment does
cause harmful interference to radio or television reception, which can be determined by turning the
equipment off and on, the user is encouraged to try to correct the interference by one or more of the
following measures:
1) Re-orient or relocate the receiving antenna;
2) increase the separation between the equipment and receiver;
3) connect the equipment into an outlet on a circuit different from that to which the
receiver is connected; or
4) consult Dynamic Pictures or an experienced radio/TV technician for assistance.
Compliance with FCC rules requires that a shielded cable be used to connect to other equipment.
This device complies with Part 15 of FCC Rules. Operation is subject to the following two conditions:
(1) this device may not cause harmful interference, and (2) this device must accept any interference
received, including interference that may cause undesired operation.
This Class B digital apparatus meets all the requirements of the Canadian Interference-Causing
Equipment Regulations. Cet appareil numérique de la classe B respecte toutes les exigences du
Règlement sur le matérial brouilleur du Canada.
Dynamic Pictures, Inc. makes no representation that the use of its products in the manner described
in this publication will not infringe on existing or future patent rights, nor do descriptions contained
n this publication imply the granting of licenses to make, use, or sell equipment or software in
accordance with the description.
There are no warranties implied by this owner’s guide. Any warranties granted by Dynamic Pictures,
Inc. with respect to the product described in this owner’s guide were granted through a separate
OEM or reseller agreement. No responsibility is assumed for the use or reliability of software on
equipment that is not supplied by Dynamic Pictures, Inc. or its affiliated companies.
Page 3

Table of ContentsTable of Contents
Welcome to Oxygen.....................................................................................1
System Requirements................................................................................4
Installation Instructions............................................................................5
Installing Your Software..................................................................5
Installing Oxygen on Windows NT 4.0.................................6
Installing Oxygen on Windows 95...................................... 13
Installing Your Oxygen Card............................................................18
Start Menu................................................................................................21
Performance Tuning.................................................................................23
Oxygen Control Panel.....................................................................24
Tuning Your Applications for Optimal Performance........................33
Display Resolutions and Settings ...................................................37
Troubleshooting.......................................................................................40
Technical Support ....................................................................................45
Technology Overview...............................................................................46
Appendix A: Installing Oxygen on Windows NT 3.51..................................56
Appendix B: Installing Your Heidi Driver..................................................57
Appendix C: Using Dual Oxygen Cards ......................................................60
Appendix D: Warranty Information...........................................................65
Appendix E: Mechanical and Electrical Specifications............................66
Appendix F: Declaration of Conformity .....................................................67
Appendix G: Software License Agreement...............................................68
Index.......................................................................................................70
Installation and User’s Guide 3
Page 4

Table of FiguresTable of Figures
Figure 1: My Computer Window...............................................................................................6
Figure2: Drivers Folder............................................................................................................7
Figure 3: Setup Icon.................................................................................................................8
Figure 4: Oxygen 3D Family Setup..........................................................................................9
Figure 5: Installation Directory Window...............................................................................10
Figure 6: Finish Setup.............................................................................................................12
Figure 7: Display Properties - Settings................................................................................13
Figure 8: Change Display Type...............................................................................................14
Figure 9: Select Device Window............................................................................................15
Figure 10: Open Window..........................................................................................................16
Figure 11: System Settings Change.......................................................................................17
Figure 12: Monitor Video Connector.......................................................................................19
Figure 13: Stereoscopic Viewing Connector.........................................................................19
Figure 14: Oxygen 3D Submenu..............................................................................................21
Figure 15: Oxygen Control Panel - Oxygen Status..............................................................25
Figure 16: Oxygen Control Panel - Memory Options............................................................27
Figure 17: Oxygen Control Panel - Advanced Options........................................................29
Figure 18: Oxygen Control Panel - Support Information.....................................................32
Figure 19: Oxygen Chip Block Diagram.................................................................................47
Figure 20: Oxygen 102 3D Graphics Accelerator.................................................................49
Figure 21: Oxygen 202 3D Graphics Accelerator..................................................................51
Figure 22: Oxygen without PowerThreads Technology......................................................53
Figure 23: Oxygen with PowerThreads Technology...........................................................53
Figure 24: Oxygen 402 3D Graphics Accelerator................................................................55
Figure 25: VGA Jumper (VGA Enabled).................................................................................62
Figure 26: VGA Jumper (VGA Disabled)................................................................................63
Page 5

Dynamic Pictures Oxygen 3D Family
Has Won the Following Awards
V 3.0
Installation and User’s Guide 5
Page 6

Page 7

Welcome to OxygenWelcome to Oxygen
Congratulations on selecting a 3D graphics accelerator card from the
industry leader, Dynamic Pictures
card provides fast, interactive 3D graphics for Intel and Alpha
computers.
! Your award-winning Oxygen
About This User’s Guide
This guide details the installation, software configuration, and
capabilities of your new Oxygen graphics accelerator card.
Once you have installed your Oxygen card and driver software, use the
Performance Tuning section on page 23 to enhance the performance of
the 3D graphics applications you use.
Electronic User’s Guide
There is an electronic version of the Oxygen documentation that is
stored as an Adobe Acrobat file on your Oxygen CD-ROM. The
Oxygen.pdf file may be read using the Adobe Acrobat Reader software
provided in the Software Gallery on the Oxygen CD-ROM and is found
in the following directory on the Oxygen CD-ROM:
<CDROMDrive>:\DOC
where CDROMDrive is the letter of your computer’s CD-ROM drive.
The Oxygen.pdf file is updated periodically. Please visit the
Documentation page on our web site at:
http://www.dynamicpictures.com/oxygendoc.html
where you can download the latest version of the Oxygen.pdf.
Installation and User’s Guide 1
Page 8

About Dynamic Pictures
Dynamic Pictures is the industry leader in computer graphics
acceleration technology. We design, manufacture, market, and support
graphics acceleration hardware and software products for personal
computers and desktop workstations. Dynamic Pictures’ awardwinning 2D and 3D graphics accelerator cards are setting industry
standards for uncompromising performance, competitive prices, and
outstanding customer support.
Dynamic Pictures also develops premier software technology for
OpenGL
standard. The integrated technology solutions offered by Dynamic
Pictures serve animation, visual computing and CAD/CAM
professionals running Intel and Alpha systems. Dynamic Pictures is
committed to delivering the fastest, most fully featured 3D graphics
technology to the Windows NT
Dynamic Pictures is the industry’s only 3D graphics card company that
designs and produces graphics chips, cards, and software drivers.
Consequently, Dynamic Pictures delivers higher performance and
greater compatibility than any other company. To learn more about
Dynamic Pictures, get the latest news on the Oxygen product line,
register your new Oxygen 3D graphics accelerator card or download
software driver updates, visit us on the World Wide Web at:
Remember to complete your user registration card. Registration
activates your warranty and ensures that you will be advised of future
product updates and releases.
NOTE: You can register electronically by selecting “Register Online” on
the Oxygen 3D pop-up menu once you have installed your software.
For more information, see the Register Online section on page 22.
, dramatically accelerating applications built on this
market.
http://www.dynamicpictures.com
2 Dynamic Pictures Oxygen 3D Family
Page 9

Oxygen 3.0 Release
The Oxygen 3.0 release brings exciting changes and new additions to
the Oxygen 3D Family.
PowerThreadsPowerThreads Technology for Multi-threaded OpenGL Technology for Multi-threaded OpenGL
The Oxygen 3.0 release is the fastest Oxygen software technology ever
introduced. The addition of PowerThreads technology for multithreaded OpenGL adds a new boost of power to the unrivaled Oxygen
3D acceleration. For more information, refer to the PowerThreads
Technical Overview section on page 52.
CD-ROM MediaCD-ROM Media
Dynamic Pictures is pleased to offer Oxygen software on CD-ROM.
This new format enables us to provide you with improved installation
capabilities. To facilitate periodic updates, drivers can still be
downloaded from the Dynamic Pictures web site at:
http://www.dynamicpictures.com/drivers.cgi
Software GallerySoftware Gallery
You now have the opportunity to install and review the latest samples,
demos or releases from leading 3D software vendors. The SOFTWARE
GALLERY directory found on your Oxygen CD-ROM highlights the
latest achievements in 3D graphics software.
If you are interested in a particular vendor or their products, please
visit the Dynamic Pictures web site at:
http://www.dynamicpictures.com/swgallery.html
We know that you will enjoy this valuable bonus. If you have
suggestions for the Software Gallery, please let us know in the
comments section of your registration card or send us an email to:
marketing@dynamicpictures.com
Installation and User’s Guide 3
Page 10

System RequirementsSystem Requirements
In order to use your Oxygen card, your computer system must meet
certain hardware and software system requirements.
Hardware
• One or more Intel or Alpha processors
• 32 Megabytes (MB) of RAM
• 2 MB of available hard disk space
• PCI bus with at least one bus-master capable slot available.
If you want to use dual displays, two PCI slots and two
identical Oxygen cards are required. (See Appendix C: Using
Dual Oxygen Cards for more details.)
• One or more VGA multisync monitor(s)
Software
• Windows NT
computer;
• Or Windows 95 installed on your computer
NOTE: Oxygen drivers running under Windows 95 display 2D
graphics only.
4 Dynamic Pictures Oxygen 3D Family
version 4.0 or later installed on your
Page 11

Installation InstructionsInstallation Instructions
This chapter details how to install your Oxygen software drivers and
Oxygen card. You must install both the software and the card to
experience accelerated graphics.
NOTE: Dynamic Pictures recommends running Windows NT 4.0 or
later. This guide assumes that Windows NT is already installed on
your computer. If not, you must install Windows NT before you install
your Oxygen software. For more information about installing Windows
NT, please consult your Windows documentation.
If your computer already has a video card installed:
• First, install your software from the Oxygen CD-ROM;
• remove your old card; and
• install your new Oxygen card.
If your system has no other video card:
• First, install your Oxygen card; then
• follow the software installation instructions in the next
section.
Dynamic Pictures supports the Oxygen card on multiple system
platforms. Platforms may differ in their installation instructions for
PCI
option cards. Consult the hardware installation guide for your
workstation or PC if you require additional assistance.
Installing Your Software
Your Oxygen graphics accelerator card includes special software you
need to install and configure. These video drivers allow your computer
to harness the acceleration potential of your Oxygen card. The
following section describes the installation process for Windows NT
4.0. If you are running Windows NT 3.51, please refer to Appendix A:
Installing Oxygen on Windows NT 3.51 for installation instructions.
Installation and User’s Guide 5
Page 12
Installing your Oxygen software on Windows NT 4.0Installing your Oxygen software on Windows NT 4.0
This section describes the installation of the Oxygen software drivers
for Windows NT 4.0. If you are running Windows NT version 3.51,
refer to page 56. Please ensure that you have closed all Windows
applications programs before beginning the Oxygen software
installation process.
NOTE: All figures are examples of what you should see on your screen.
Slight differences between the figures and your display are common
and should not cause concern.
1. Log in to Windows NT 4.0 using any account that has
administrator privileges.
2.
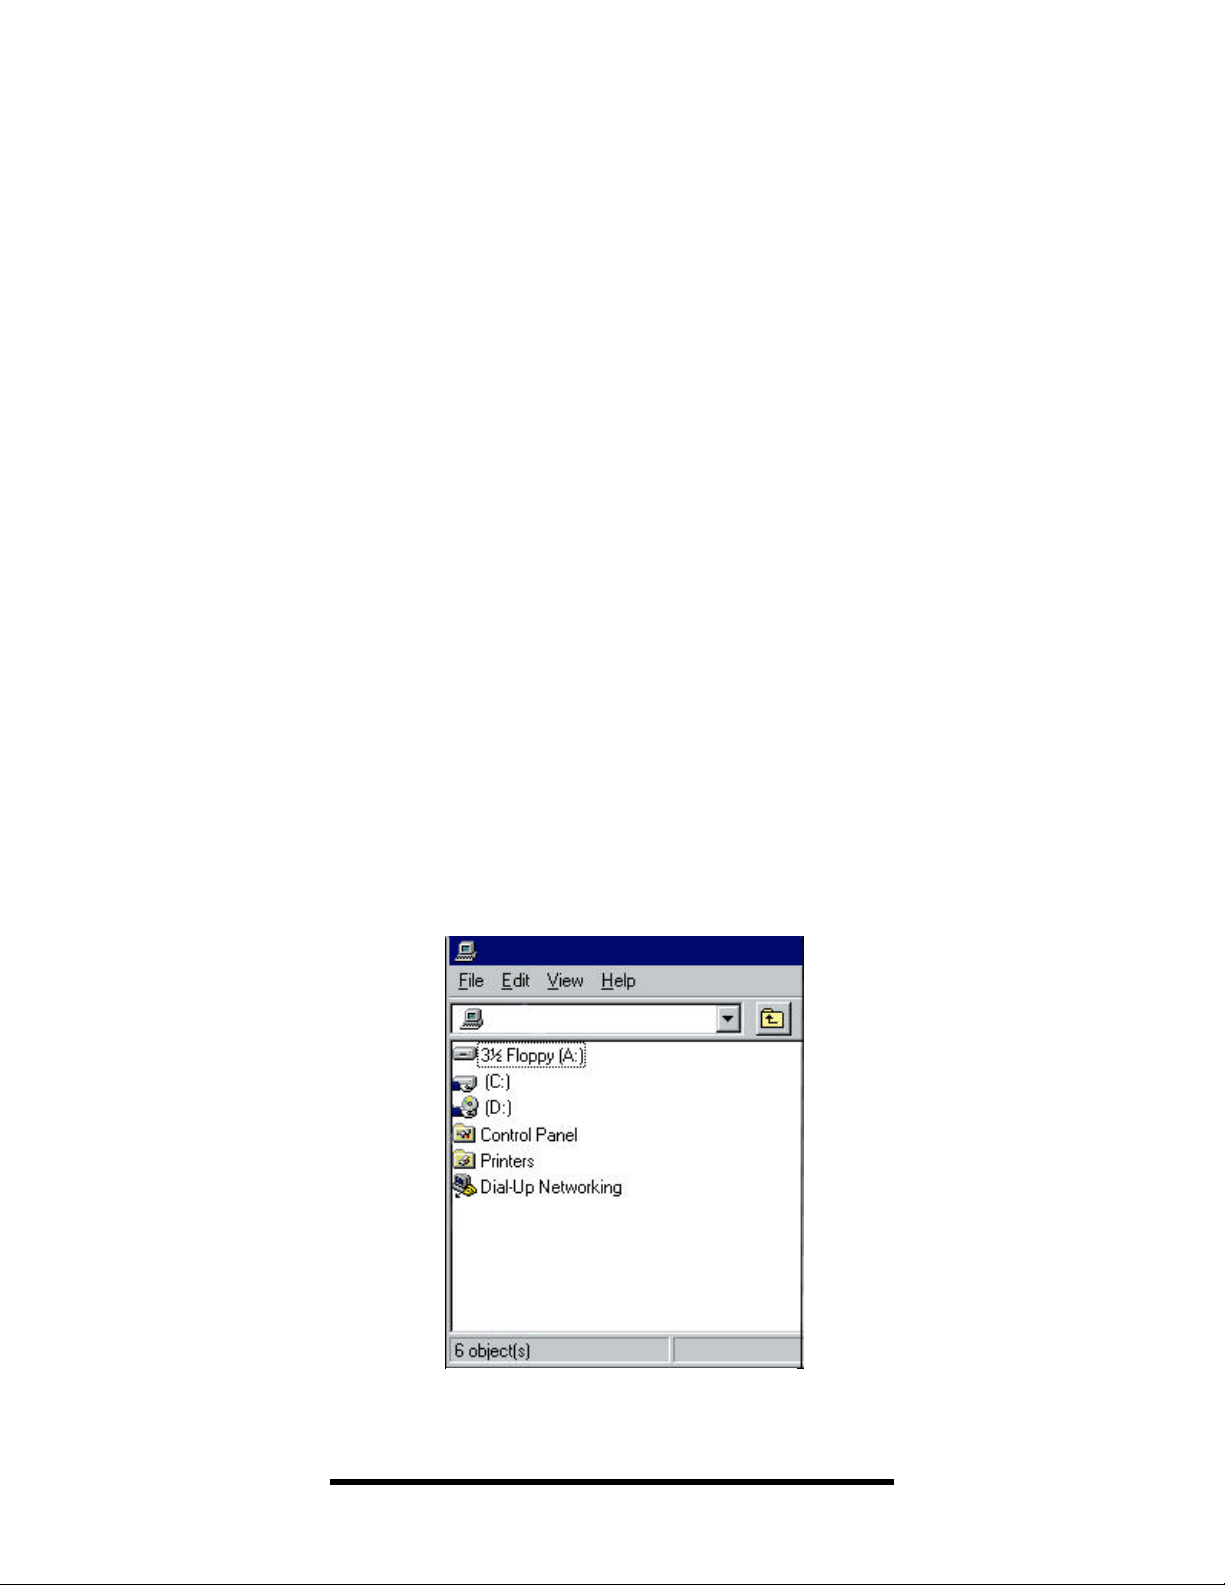
Insert the Oxygen CD-ROM into the CD-ROM drive on your
computer. Double-click on the My Computer icon found in the
upper left corner of your desktop. The My Computer window
appears and should look similar to Figure 1.
Figure 1: My Computer Window
6 Dynamic Pictures Oxygen 3D Family
Page 13
3. Now select your CD-ROM drive by double clicking on the
appropriate icon, usually D:\. The contents of the CD-ROM are
displayed.
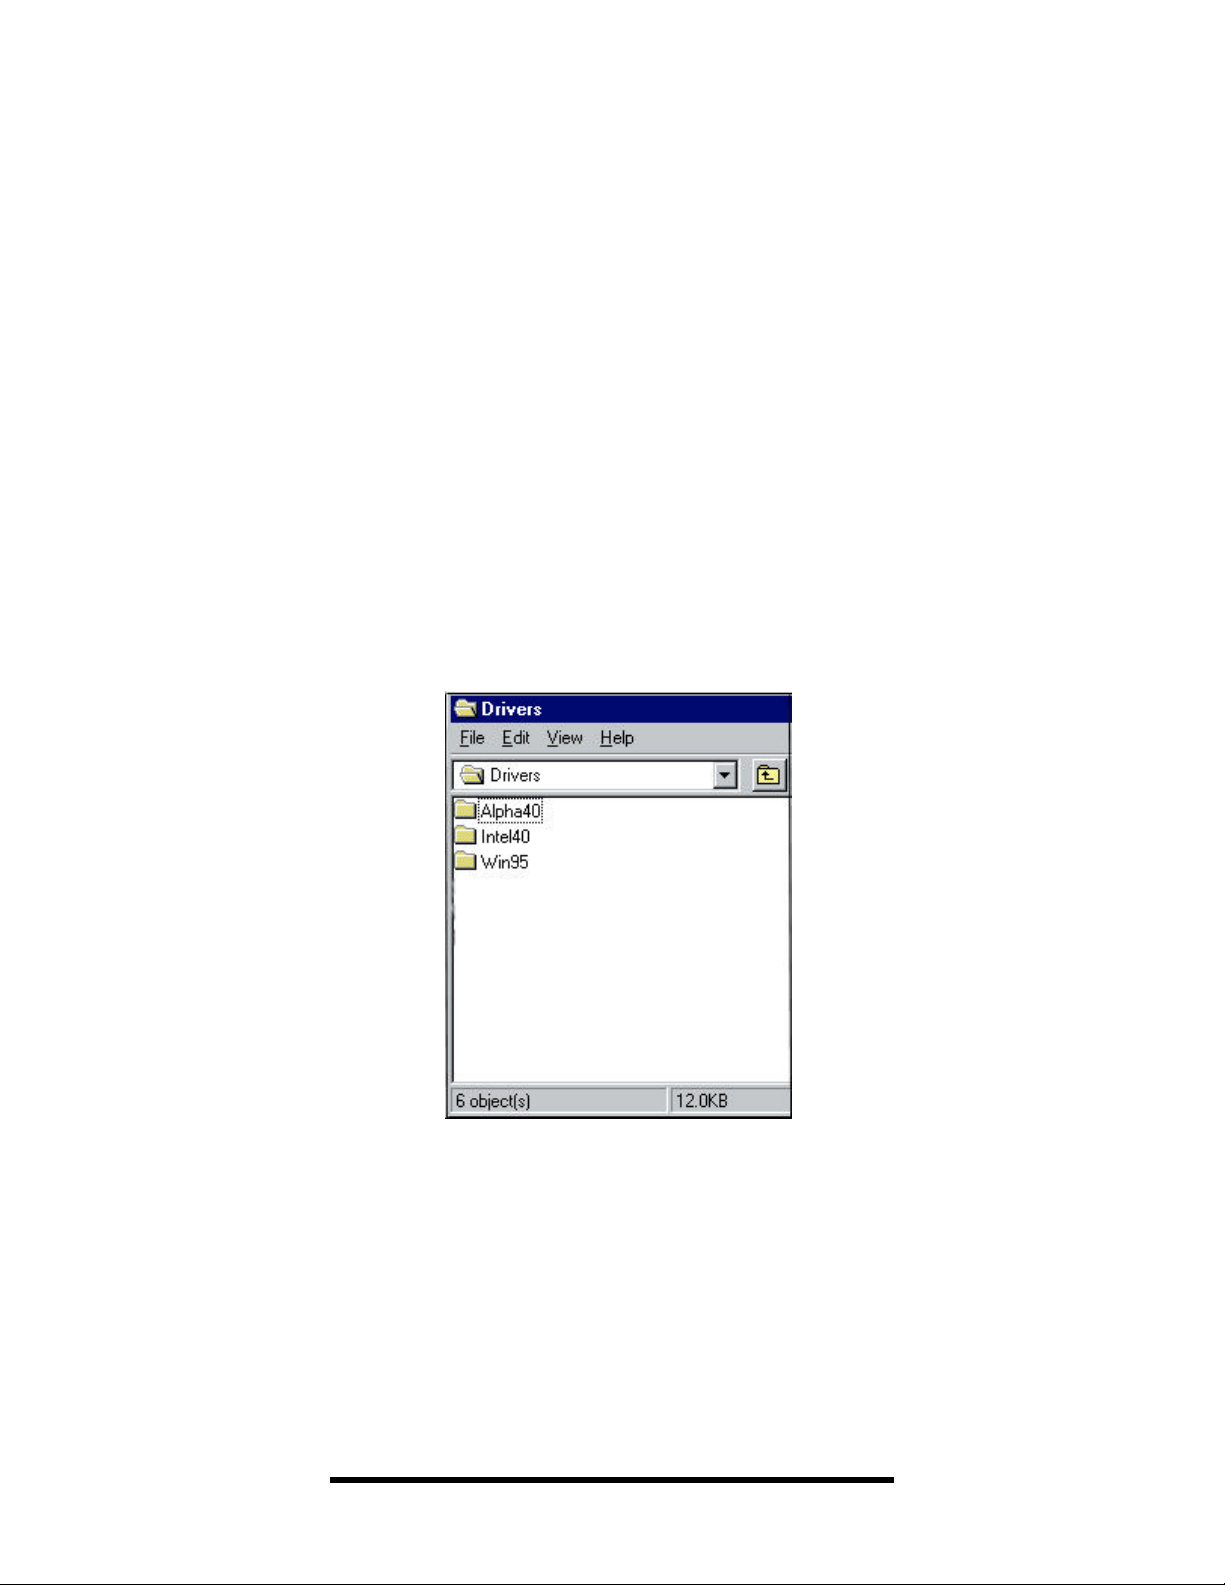
4.
Double-click on the DRIVERS folder. This will display the
operating systems and platforms that the drivers support
(Figure 2).
Figure 2: Drivers Folder
5.
Choose the correct driver for installation. If you are using a DEC
Alpha machine, then double-click on the ALPHA40 folder. If you
are using an Intel system, double-click on the INTEL40 folder.
Installation and User’s Guide 7
Page 14

6. Double-click on the DISK1 folder.
7.
Now simply double-click the Setup icon (Figure 3) to launch the
Oxygen 3D Family software installer.
Figure 3: Setup Icon
8 Dynamic Pictures Oxygen 3D Family
Page 15
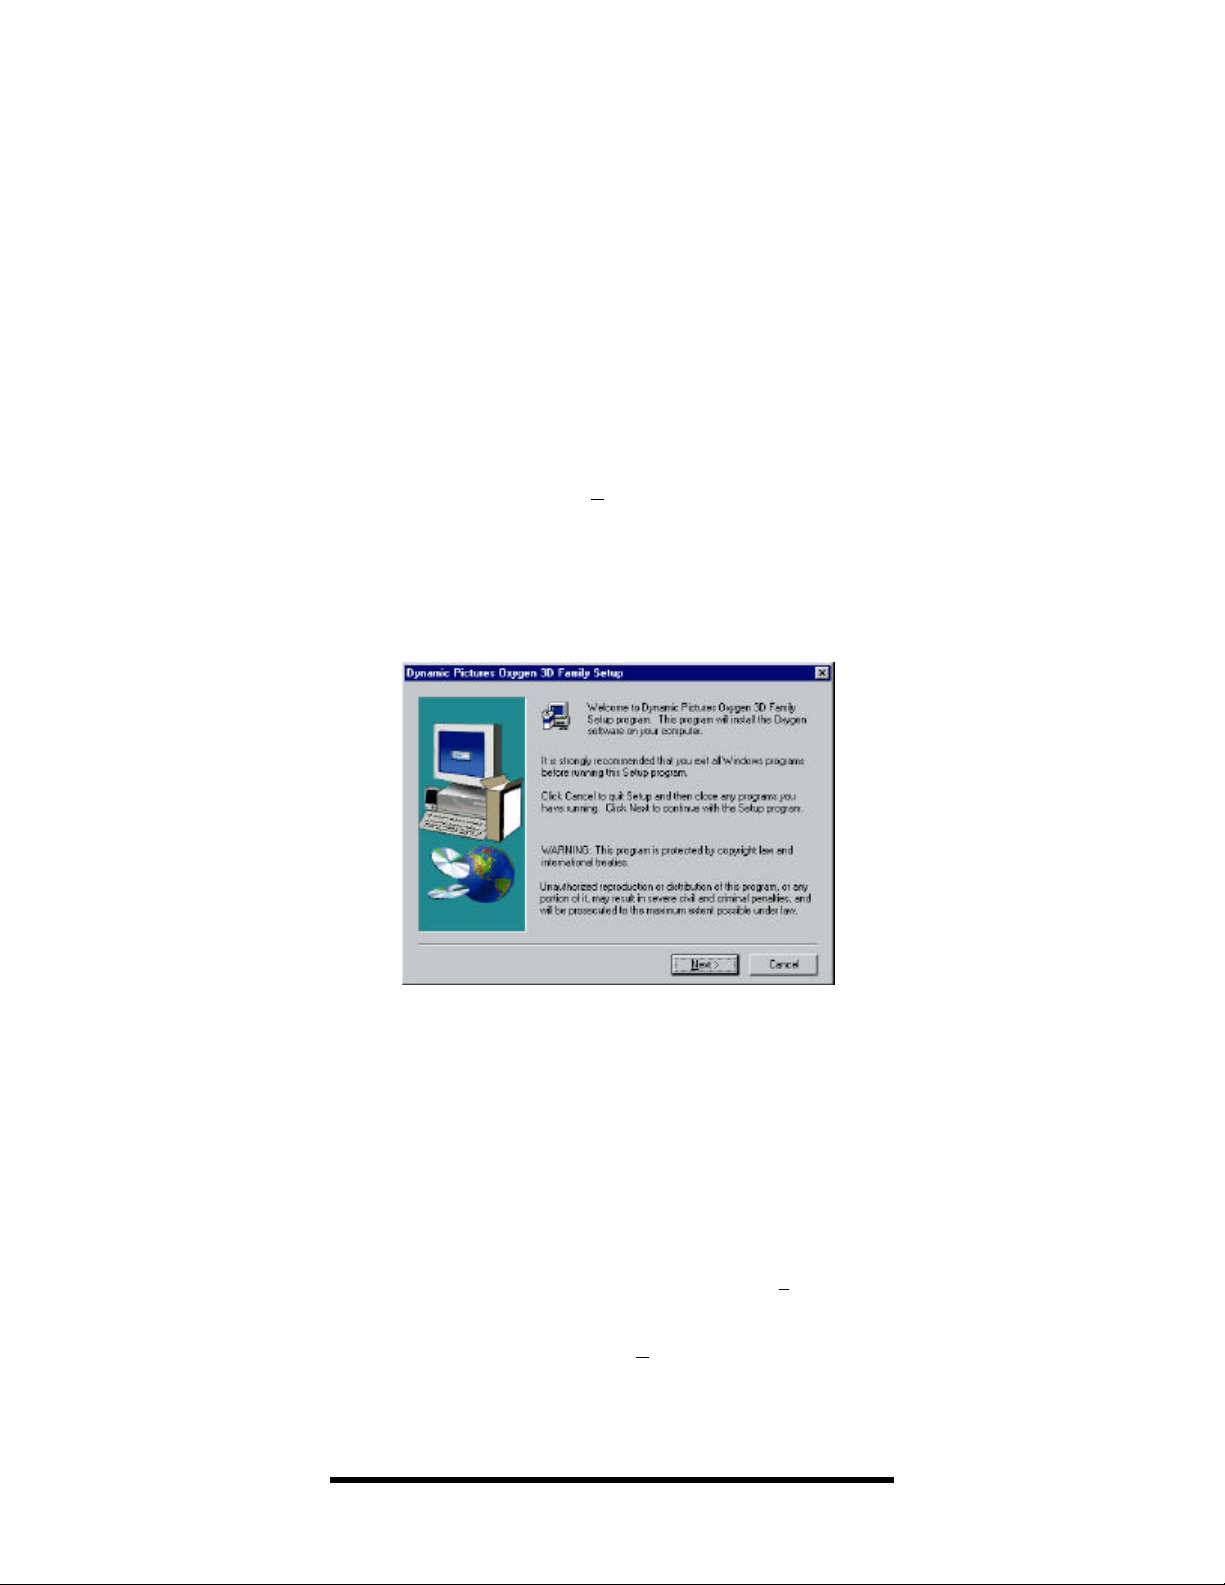
8. The Setup program will take you through the actions required to
install your Oxygen software. If you have exited all other Windows
applications, then click the “Next” button in the Welcome window
(Figure 4). Otherwise, click the “Cancel” button to exit the Oxygen
3D Family Setup program; close all other Windows applications
and resume your Oxygen software installation by repeating steps 1
through 8.
Figure 4: Oxygen 3D Family Setup
9.
The Electronic License Agreement should be displayed. Please
take a moment to review the Oxygen software use, distribution,
and restriction guidelines. You may examine the printed copy of
the license agreement found in Appendix G: Software License
Agreement on page 68 of this manual. In addition, you are bound
by license agreements associated with any third-party software
products included for distribution on the Oxygen CD-ROM. To
accept the terms of the license agreement, click the “Yes” button.
NOTE: If you are unwilling to agree to the terms set forth in the
license agreement, then click the “No” button to exit the Setup
program. Return the card, CD-ROM and all package contents
along with your receipt to the place of purchase for a full refund.
Installation and User’s Guide 9
Page 16
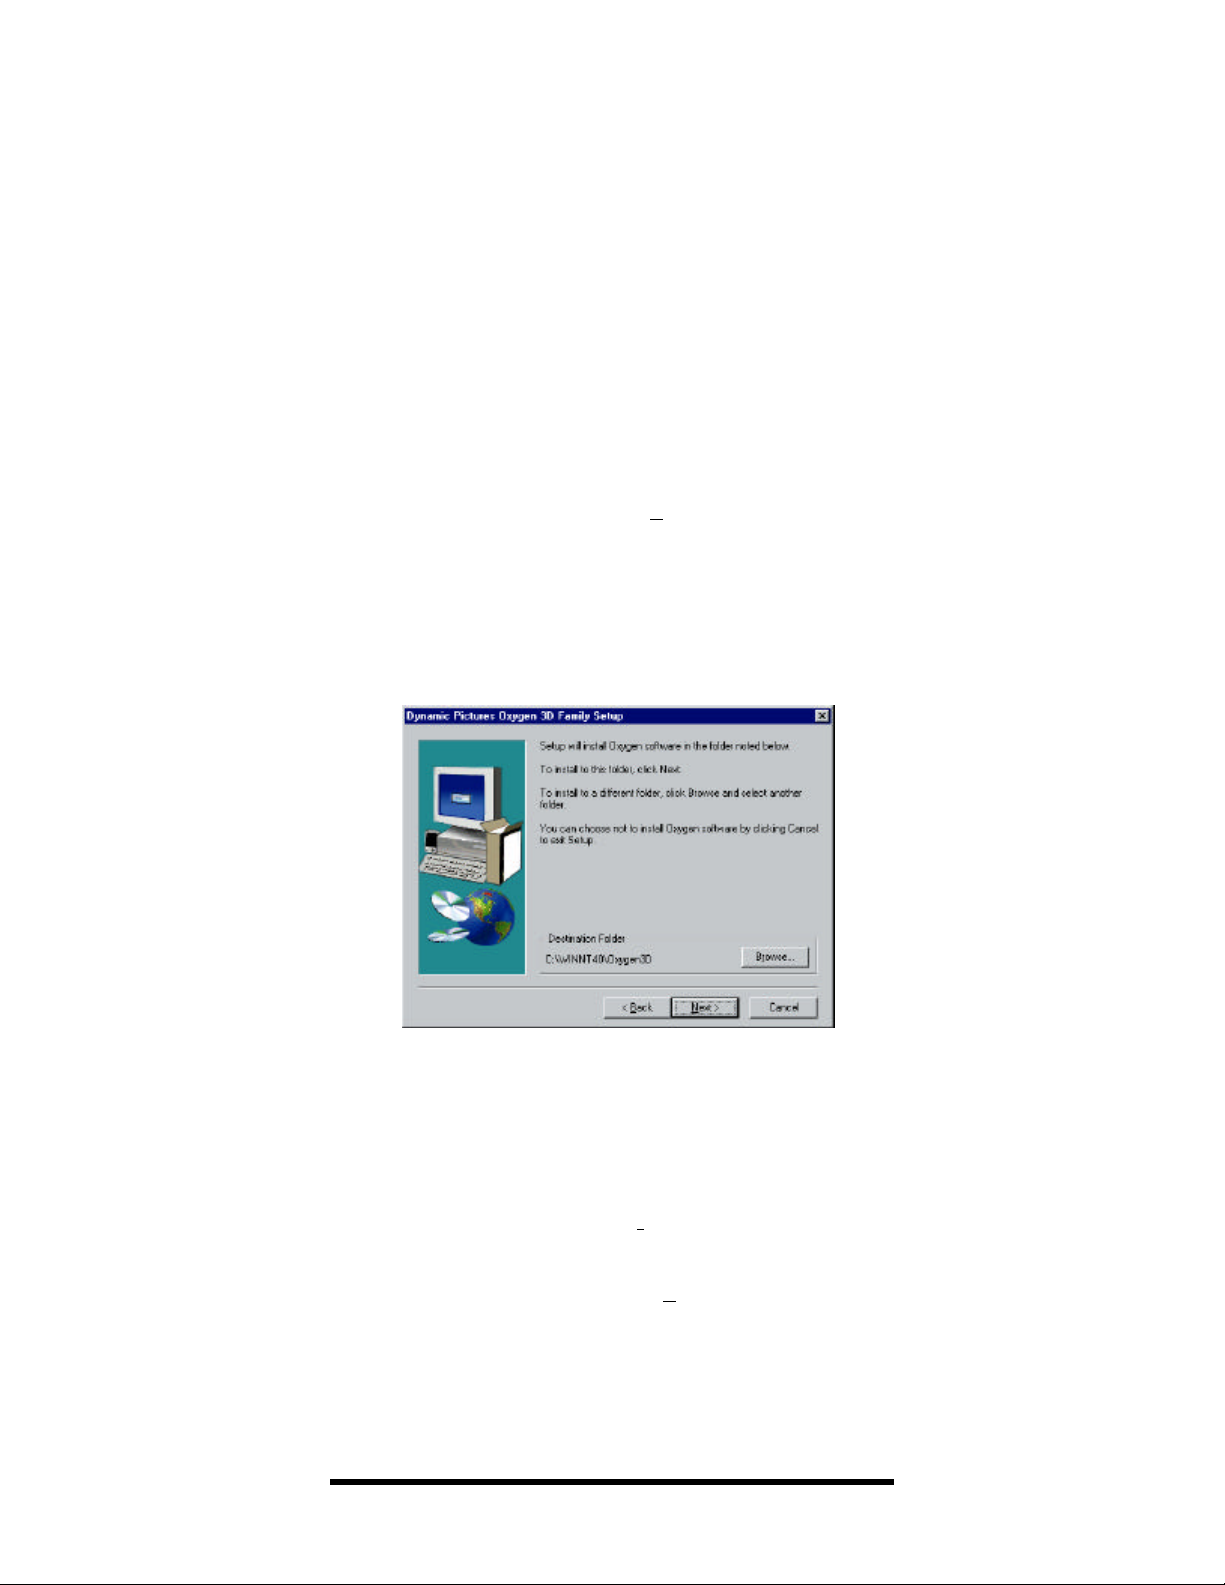
10. You must now choose the destination location for your Oxygen
software (Figure 5). You may click “Next” to install the software to
the default directory which is:
<SystemDrive>:\WINNT40\OXYGEN3D
where SystemDrive is the letter (e.g., C, D, F, etc.) of the drive
where Windows NT is installed.
Figure 5: Installation Directory Window
If you installed Windows NT to a directory other than the default
or you want to choose another destination directory for the
Oxygen software, then click the “Browse” button and the Choose
Folder window will appear. Navigate to the appropriate
installation directory, then click the “OK” button. Upon returning
to the Destination window, click the “Next” button.
10 Dynamic Pictures Oxygen 3D Family
Page 17

11. The Program Folder is where the Oxygen 3D Family Setup will add
the program icons required for your Oxygen card. You may create
a new folder such as the default provided, OXYGEN3D, or you can
choose an existing folder from the scrolling listbox by clicking on
the folder to highlight your choice. Once you have identified the
Program Folder, click the “Next” button.
12. Setup is now installing the required Oxygen software files onto
your Windows NT system.
NOTE: 3D Studio MAX R1 users must also install the Oxygen
Heidi driver. Refer to Appendix B: Installing Your Heidi Driver on
page 57. 3D Studio MAX R2 users need not install the Heidi driver
since 3D Studio MAX R2 supports the OpenGL Oxygen driver that
the setup program is currently installing.
13.
Once complete, you must restart your computer to activate your
new Oxygen software.
If you have not yet installed your Oxygen card:
• Select the “No...” radio button (Figure 6);
• Click “Finish” and shutdown your system.
• Once you turn your computer’s power off, install your
Oxygen card and reboot your system.
Installation and User’s Guide 11
Page 18
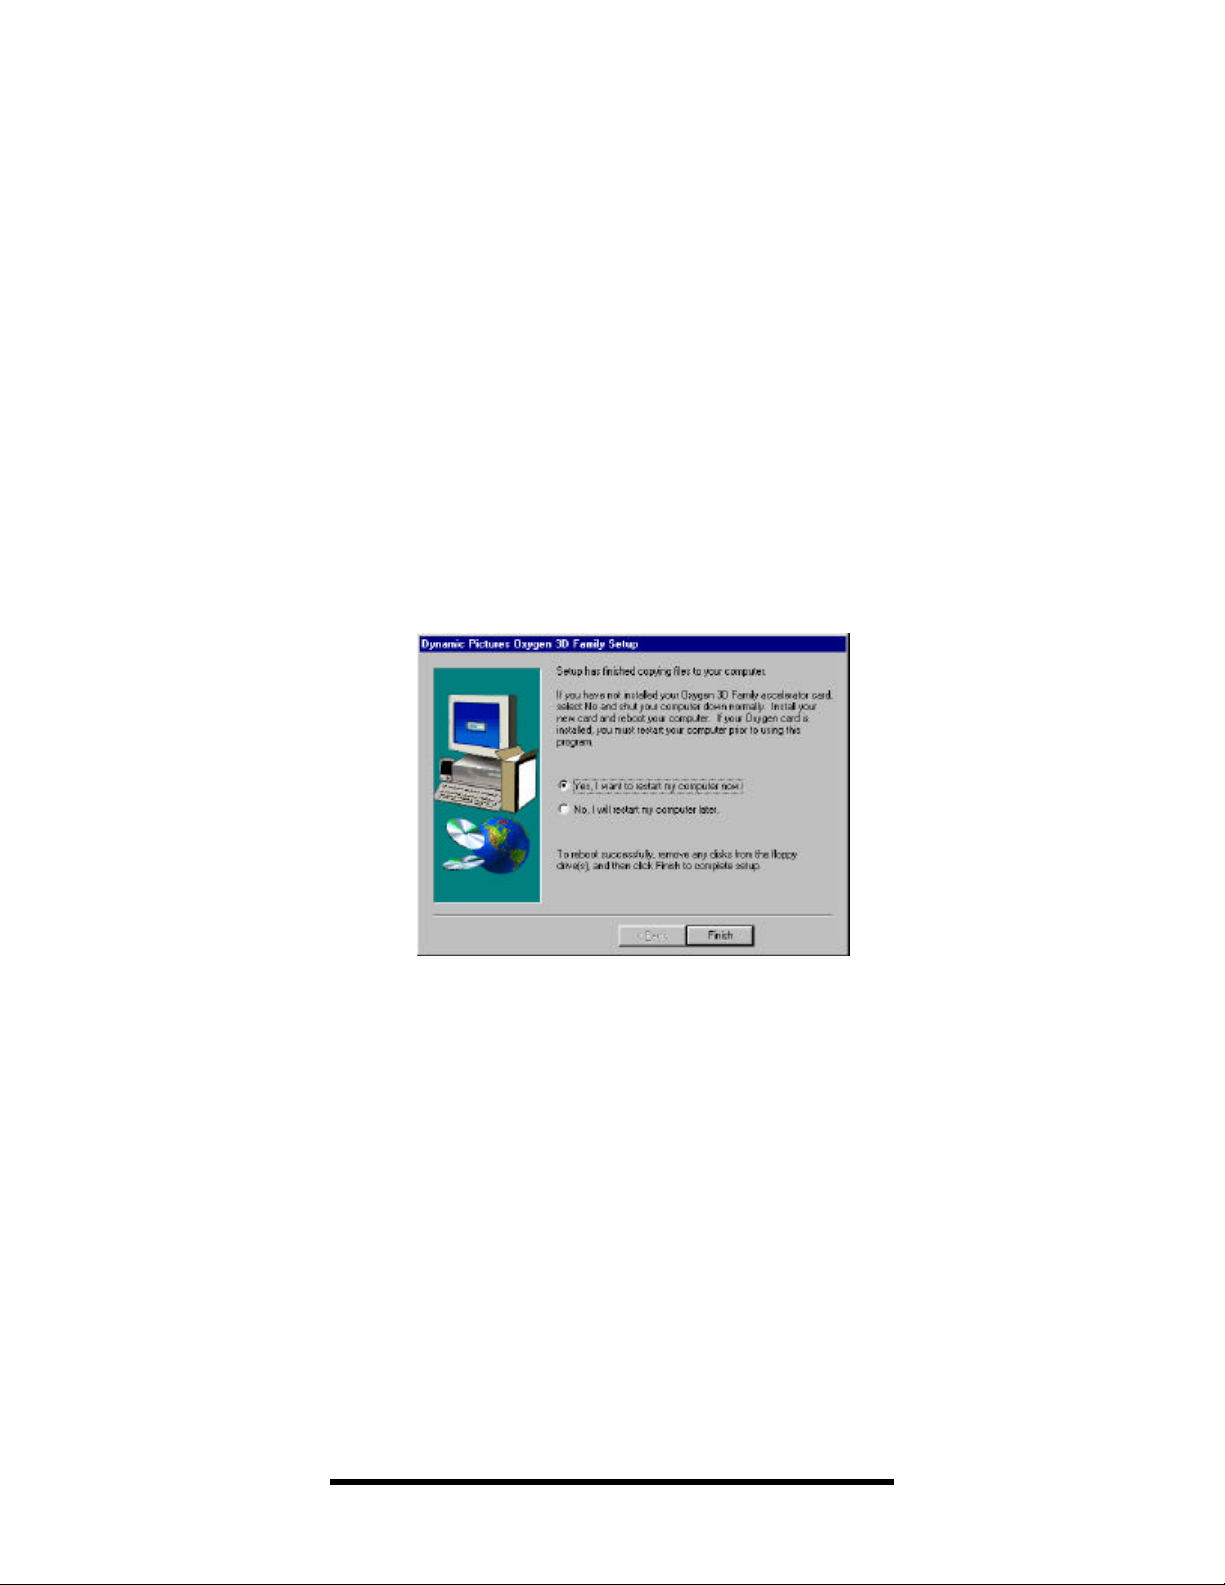
If you have already installed your new Oxygen card:
Figure 6: Finish Setup
• Select the “Yes...” radio button (Figure 6); and
• Click “Finish”. Your computer will be restarted and you
can begin using your new Oxygen 3D graphics
accelerator!
14.
Once your Oxygen hardware and software are installed, refer to the
Performance Tuning section on page 23 for tips about how to
optimize your Oxygen card performance while running your
application. It is important to note that not all resolution settings
offer accelerated 3D performance.
resolutions, refer to the Monitor Resolution Tables on page 38.
12 Dynamic Pictures Oxygen 3D Family
For a list of supported Oxygen
Page 19
Installing your Oxygen software on Windows 95Installing your Oxygen software on Windows 95
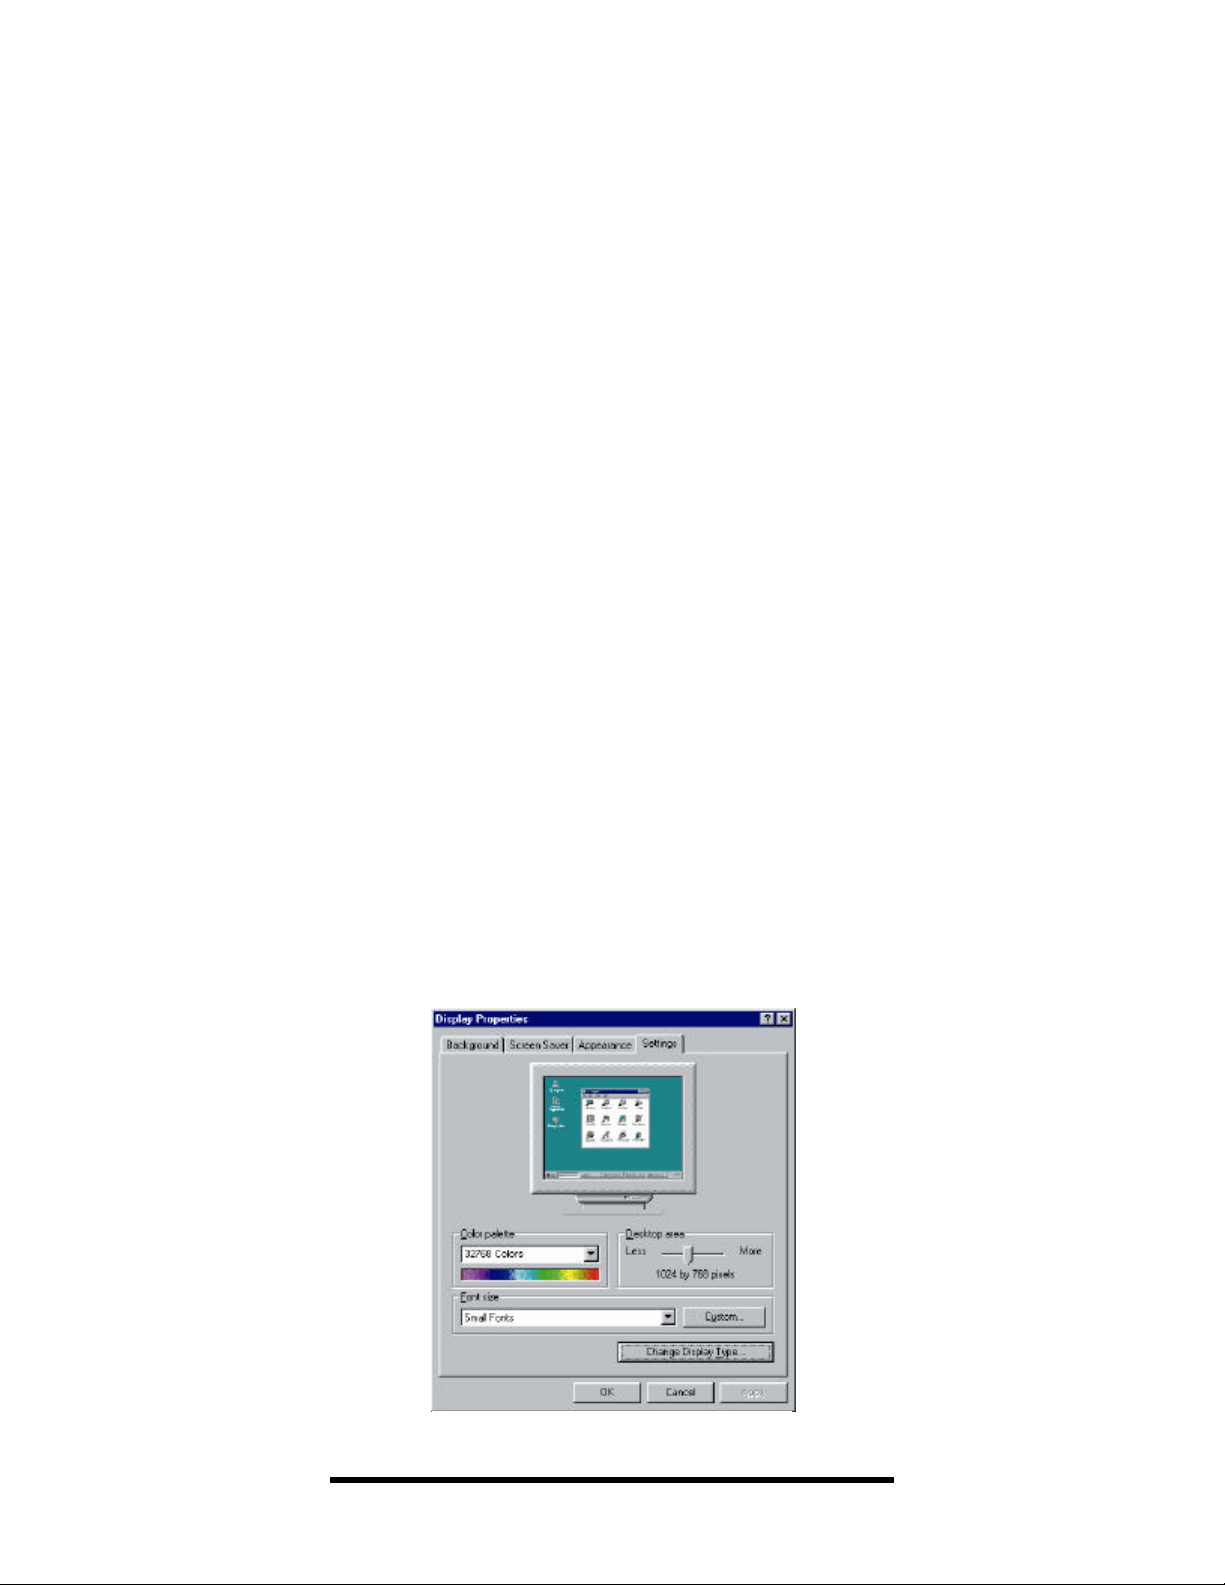
Figure 7: Display Properties - Settings
Your Oxygen graphics accelerator card also includes video drivers
supported under Windows 95.
NOTE: The Windows 95 Oxygen drivers support 2D graphics
acceleration only. They are not intended nor should they be used for
3D graphics acceleration.
1.
Log in to your network under Windows 95 using any account
that has administrator privileges.
2.
Access the Start menu by clicking the “Start” button located
in the lower left corner of your desktop. Click the “Control
Panel” selection from Settings pop-up menu. The Control
Panel window is now displayed.
3.
To activate the Display Properties applet, double-click the
Display icon on the Control Panel.
4.
The Display Properties applet contains tabbed dialog boxes
that allow you to change the visual properties of your
computer display. Click the “Settings” page (Figure 7).
Installation and User’s Guide 13
Page 20
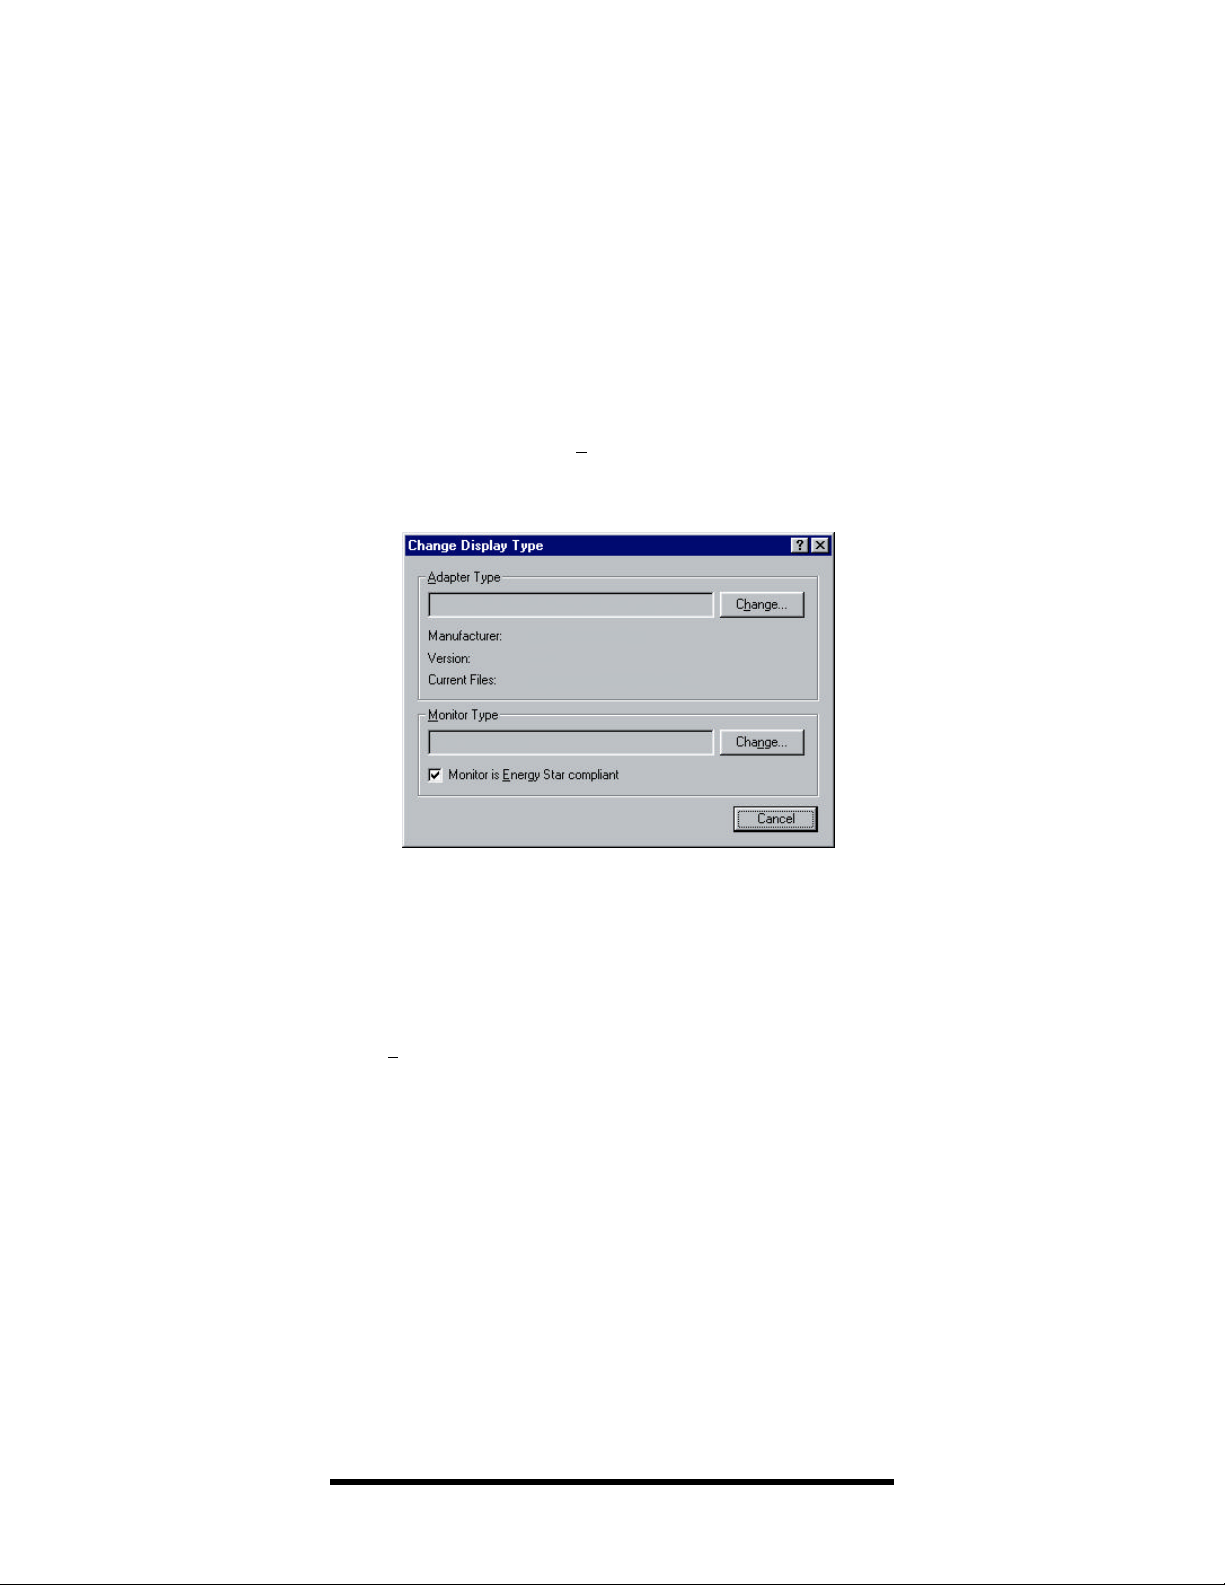
5. Click the “Change Display Type…” button in the lower right
Figure 8: Change Display Type
corner of the “Settings” page. The Change Display Type window
appears (Figure 8).
6.
The Change Display Type window shows the graphics adapter and
display drivers currently installed in your system. To replace the
installed drivers with your new Oxygen drivers, click the
“Change…” button under adapter type. The Select Device window
appears.
14 Dynamic Pictures Oxygen 3D Family
Page 21
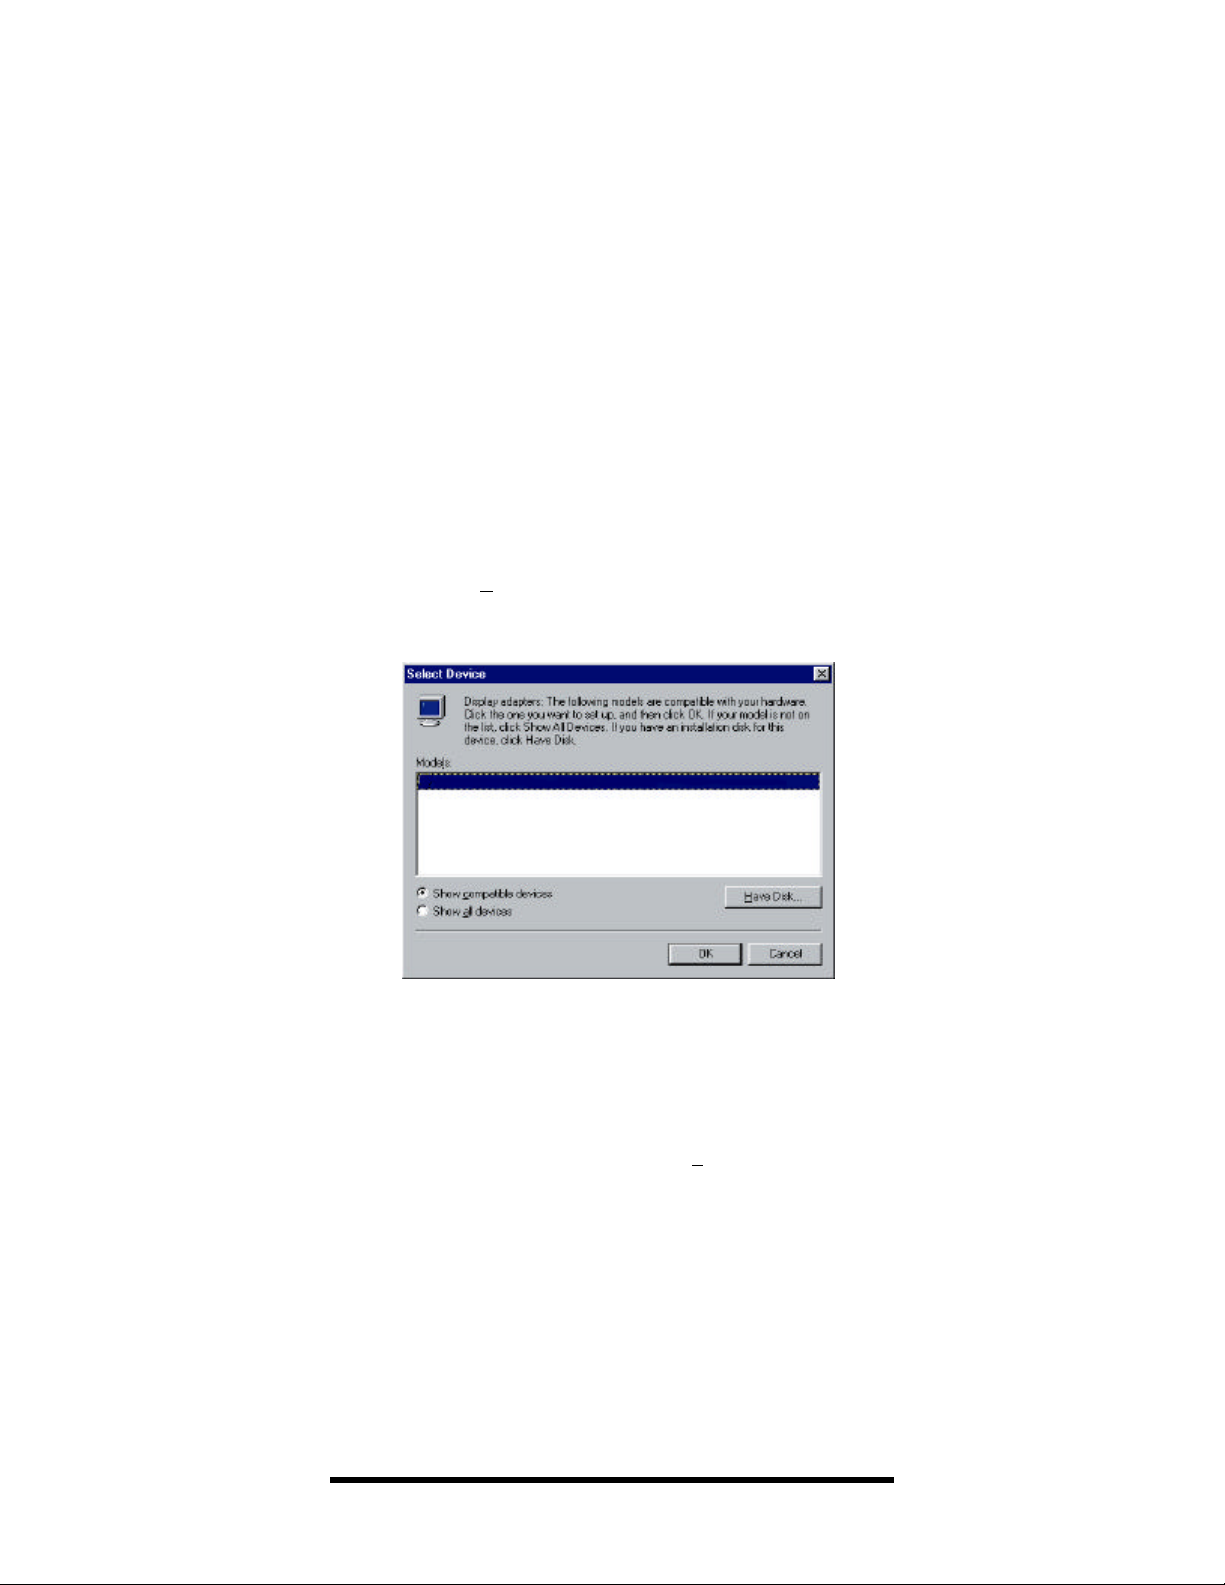
7. The Select Device window allows you to select new display drivers
Figure 9: Select Device Window
(Figure 9). A standard list of available drivers is displayed here.
These standard drivers do not support your Oxygen card. To
install your Dynamic Pictures Oxygen driver software from your
CD, click the “Have Disk…” button.
8. The Install From Disk window appears and allows you to specify
the drive from which you wish to install your software. Insert your
Oxygen CD-ROM in the drive. Click the “Browse…” button to
display the Open window.
Installation and User’s Guide 15
Page 22

Figure 10: Open Window
9. In the Open window (Figure 10), choose your CD-ROM drive,
usually “D:\”, from the “Drives” listbox at the bottom of the
window. Double-click on the DRIVERS folder and you will see a
list of folders named for the corresponding operating systems that
Oxygen supports. Double-click on the WIN95 folder.
10.
Choose the oxygen.inf file and click the “OK” button. The Install
From Disk window reappears. In the “Copy manufacturer’s files
from” box, you should see:
<CDROMDrive>:\DRIVERS\WIN95
where CDROMDrive is the drive letter (e.g., C, D, F, etc.) of your
computer’s CD-ROM drive.
11.
Click the “OK” button and a new Select Device window should
appear with the “Show compatible devices” radio button selected
and “Dynamic Pictures Oxygen Rendering Controller” listed. Click
the “OK” button.
12.
Once your new Oxygen software has been copied to your system,
close the Change Display Type window by clicking the “Close”
button in the lower right corner.
16 Dynamic Pictures Oxygen 3D Family
Page 23
13. Now accept your changes and activate your new driver by clicking
the “Apply” button in the lower right corner of the Display
Properties applet.
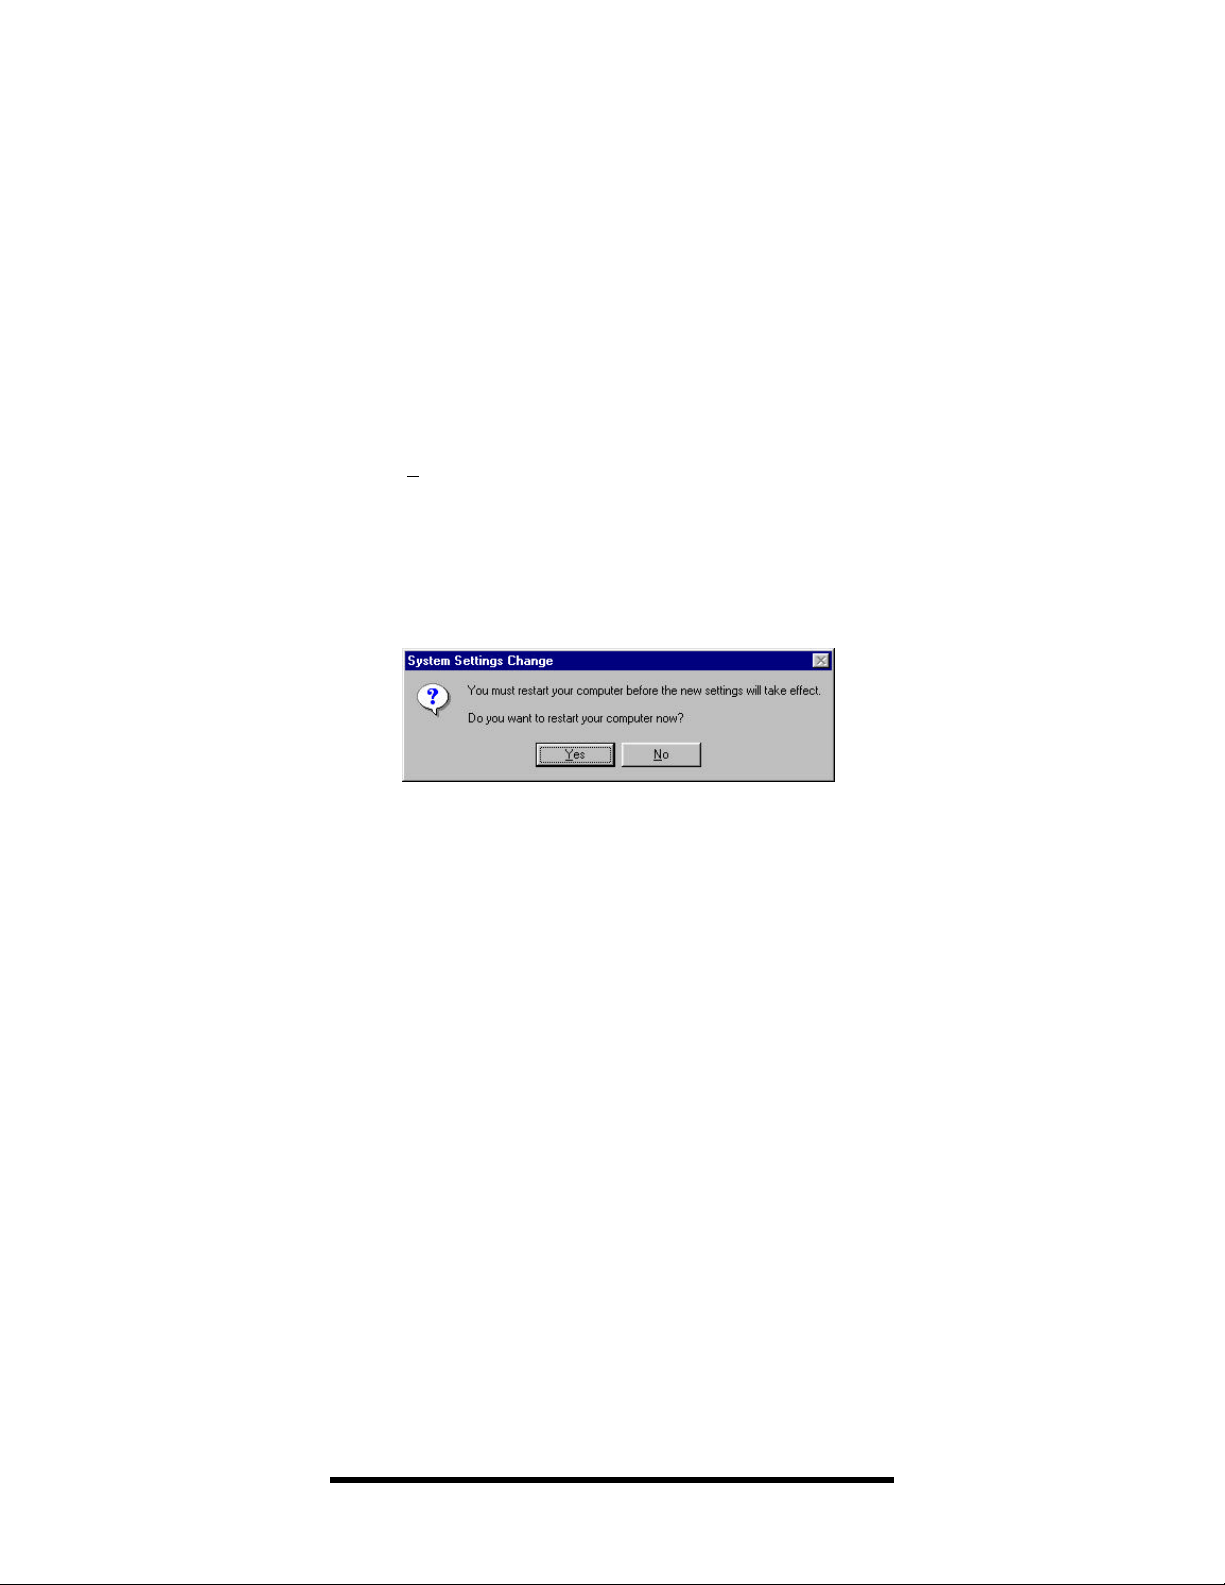
14.
The System Settings Change window appears (Figure 11),
instructing you that you must restart your computer for your new
driver to take effect.
Figure 11: System Settings Change
If you have already installed your new Oxygen card:
• Remove the Oxygen CD-ROM from the drive; and
• Click the “Yes” button to reboot your computer and start
using your new Oxygen card.
If you have not installed your new Oxygen card:
• Click the “No” button and close any open applications.
• Remove the Oxygen CD-ROM from the drive; and
• Shutdown your system.
• Once you turn your computer’s power off, install your
Oxygen card and reboot your system.
NOTE: Please be advised that you have only installed the Oxygen
software drivers for Windows 95. If you are running Windows NT and
Windows 95 in a dual-boot configuration, you must also install the
Oxygen software drivers that support OpenGL under Windows NT.
Refer to the Installing your Oxygen software on Windows NT 4.0 section
on page 6 or Appendix A: Installing Oxygen on Windows NT 3.51 on
page 56 for instructions and additional information.
Installation and User’s Guide 17
Page 24

Installing Your Oxygen Card
To install your Oxygen card, you will need a philips-head screwdriver
and the anti-static wrist strap included with your Oxygen card. Refer to
the Oxygen card layout diagram (Figures 20, 21 & 24) in the Technology
Overview section on page 46 to identify the parts of your Oxygen card
discussed in this section.
It is also recommended that you refer to the printed instructions from
your computer manufacturer for specific details on opening the
computer and installing cards.
Caution: Static Electricity Static Electricity
To avoid damage to your Oxygen card from static electricity discharge,
leave the card in the anti-static bag until you are properly grounded. To
be grounded during the hardware installation procedures, use the antistatic wrist strap provided.
To install your Oxygen card:To install your Oxygen card:
1. Power off your computer. Make sure you save any work in
progress first and properly exit any open applications. It is
recommended that you back up your system before installing any
new hardware or software.
2. Unplug the power cords from the computer and its peripherals.
3. Remove the computer’s cover, following the instructions provided
by the computer manufacturer.
4. Attach the anti-static strap to your wrist and clip the other end to a
part of conductive metal on your computer’s chassis.
5. If you already have a video card in your computer, you will need to
remove it before installing your Oxygen card. Unplug the monitor
cable from the old card, and then unscrew the card from the
chassis. You can now remove the old card from your computer.
18 Dynamic Pictures Oxygen 3D Family
Page 25

6. Install the Oxygen card in an empty PCI slot, following the
instructions provided by the computer manufacturer for installing
PCI option cards. You should always handle your Oxygen card by
its edges.
NOTE: The PCI slot in which you install your Oxygen card must be
bus-master capable. Some PCs do not allow PCI bus-master
capability from all PCI slots, so be sure to check your motherboard
or PC documentation before selecting a slot for your Oxygen card.
7. Make sure you screw the faceplate of the Oxygen card to the
system chassis to provide mechanical support and proper
grounding. This step is critical to the proper operation of your new
card. You may now remove the anti-static wrist strap and save it
for future use.
8. Connect the video cable from your monitor to the monitor video
connector on your card (Figure 12).
Figure 12: Monitor Video Connector
9. If you have the appropriate stereoscopic viewing hardware and
specially configured Oxygen 202 or Oxygen 402, connect the stereo
cable to the stereoscopic infrared transmitter and to the
stereoscopic viewing connector shown (Figure 13). You can also
find more information on stereo viewing in the Stereo 3D
Technical Overview section on page 54.
Figure 13: Stereoscopic Viewing Connector
Installation and User’s Guide 19
Page 26

10. Replace the computer’s cover; plug in your computer and its
peripherals.
11. Power on your system and log in to Windows NT. You are now
using your Oxygen graphics accelerator card.
12. Be sure to register your Oxygen card to activate your warranty and
to receive notification of future software updates. It is important
that you include your Oxygen serial number, which is located
either in the upper right corner of the card or on a barcoded
sticker on the card’s reverse.
13. If you are a user of 3D Studio MAX R1, you will also need to install
the Oxygen Heidi driver, as described in Appendix B: Installing
Your Heidi Driver on page 57.
NOTE: The Oxygen 402 card may consume more than the maximum
allowable power for one PCI slot. When installing the Oxygen 402, be
sure that at least one PCI, EISA, or ISA slot in your system is left empty.
This will guarantee that sufficient power will be available for the
Oxygen 402 card. This is not required for users of the Oxygen 102 or
Oxygen 202 cards. Refer to Appendix E: Mechanical and Electrical
Specifications for power consumption details.
20 Dynamic Pictures Oxygen 3D Family
Page 27

Start MenuStart Menu
This section briefly outlines the purpose of each option on the Oxygen
3D submenu. Although there are many methods of accessing the
Oxygen 3D Family utilities, we recommend that you use the Start
Menu. Click the “Start” button and then click the Oxygen 3D submenu
option under “Programs” (Figure 14).
Figure 14: Oxygen 3D Submenu
Control Panel
The Oxygen 3D control panel enables you to choose a variety of
performance optimizations. The selections you make will depend on
the type of 3D work that you are doing.
E-Doc
Clicking the “E-Doc” option opens the Oxygen Electronic User’s Guide
in Adobe Acrobat Reader. If you do not have Adobe Acrobat Reader
installed, you may download the software from Adobe’s web site at
http://www.adobe.com or install Adobe Acrobat Reader from the
Software Gallery directory of your Oxygen CD-ROM.
Installation and User’s Guide 21
Page 28

Online Update
Click the “Driver Update” option if you want to update your Oxygen 3D
driver software. This option launches your web browser and
automatically opens the drivers page on the Dynamic Pictures web site.
You can download the latest drivers or select “Driver Archives” in
order to download older drivers.
Periodically, the Oxygen Electronic User’s Guide is updated. Clicking
the “E-Doc Update” option launches your web browser and opens the
documentation page on the Dynamic Pictures web site. From here, you
may review or download the latest version of the Oxygen Electronic
User’s Guide.
Register Online
To facilitate the Oxygen registration process, select “Register Online” to
launch your web browser. Simply click the “Register” link to the
Dynamic Pictures web site. By typing the answers to a few simple
questions, you can register your Oxygen card in just seconds!
Release Notes
Click “Release Notes” in order to read the latest information available
about the release. The Release Notes summarize release enhancements,
changes to the Control Panel, and late-breaking technical information
about the drivers. It is important to review the Release Notes to ensure
that you are aware of details specific to your platform.
Uninstall
The Oxygen uninstall program will seamlessly remove Oxygen 3D
software from your computer system.
22 Dynamic Pictures Oxygen 3D Family
Page 29

Performance TuningPerformance Tuning
Although you can achieve industry-leading graphics performance
using the default settings of your software applications and Oxygen
card, you can enhance performance in particular areas through
selective allocation of hardware resources and customization of
application configuration files.
Hardware Resources Affecting Performance
The combination of your Oxygen 3D accelerator card and the
capabilities of the other components in your computer determine the
graphics performance of your computer.
HardwareHardware
The speed and configuration of your computer affects the speed of the
graphics your Oxygen card displays. Optimal graphics performance is
achieved in a system with faster processors, multiple processors, faster
memory or larger amounts of memory.
MonitorsMonitors
The refresh rate of your monitor is the speed with which it redraws
graphics on the screen. A monitor with a faster refresh rate appears to
flicker less when displaying graphics. Your Oxygen card supports
refresh rates from 60Hz to 100Hz.
Dynamic Pictures recommends using a monitor with a vertical refresh
rate of at least 75Hz for the best high-resolution graphics appearance.
Oxygen 102 delivers optimal performance at a resolution of 1024x768
in 16-bit color mode. With its 16MB or 32MB of memory, Oxygen 202
and Oxygen 402 respectively deliver optimized performance at a
resolution of 1280x1024. For additional information about display
resolution, please refer to the Display Resolutions and Settings section
on page 37.
Installation and User’s Guide 23
Page 30

Oxygen Control Panel
The Oxygen 3D control panel is Dynamic Pictures’ graphical user
interface for viewing and setting options relevant to your Oxygen card.
Many graphics applications use the full range of features offered by the
Oxygen card. However, certain software applications focus only on one
or two areas, and do not utilize other features at all. Given that your
Oxygen card has a fixed amount of memory, the Oxygen control panel
enables you to manipulate how the graphics memory is allocated for
various operations.
The control panel has four pages that enable you to manage resources
that affect the performance of your Oxygen card: Oxygen Status,
Memory Options, Advanced Options and Support Information.
The Oxygen 3D contol panel opens on the Oxygen Status page
(Figure 15) which displays the current settings of your installed 3D
accelerator card.
Click the Memory Options page (Figure 16) to configure the use of your
Oxygen card’s memory and maximize performance based on your
application’s specific needs.
Click the Advanced Options page (Figure 17) to adjust other graphics
and display options for your Oxygen card such as enabling support for
a dual display or stereo 3D.
Click the Support Information page (Figure 18) to view contact
information for the Dynamic Pictures support team. This page also has
a test button that will help you verify that your Oxygen hardware and
software are properly installed.
24 Dynamic Pictures Oxygen 3D Family
Page 31

Oxygen Status PageOxygen Status Page
Figure 15: Oxygen Control Panel (Oxygen Status)
At-a-glance, the Oxygen Status page (Figure 15) provides current
information about your Oxygen card installation and configuration.
ModelModel
Identifies the particular model number of the Oxygen card installed in
your system.
Total Graphics MemoryTotal Graphics Memory
Total amount of memory available on your Oxygen card. Allocation of
this memory for texture mapping, z-buffering, etc. is made according
to your performance optimization selections.
Driver VersionDriver Version
Refers to version number of the Oxygen software driver that you are
currently using. You can download the latest driver releases from our
web site.
Installation and User’s Guide 25
Page 32

Display ResolutionDisplay Resolution
Indicates the current resolution being used by your monitor. Not all of
the resolution settings supported by your monitor necessarily offer
accelerated 3D performance. For a list of resolutions supported by your
Oxygen card, refer to the Monitor Resolution Tables on page 38.
Pixel DepthPixel Depth
Identifies the number of color planes (known as bits) stacked on top of
each other to create a pixel. If the pixel depth is 16-bit, then Oxygen
displays five bits each of red, blue and green and a one-bit overlay, for
a total of 32,768 colors.
Z-buffer DepthZ-buffer Depth
Specifies the bit depth of the Z-buffer. Oxygen cards support 16-bit
and 24-bit Z-buffers. Using a Z-buffer provides added realism to a
scene by modifying the positioning and visibility of pixels as a function
of distance.
Refresh RateRefresh Rate
The rate at which your monitor repaints the displayed image from the
top of the screen to the bottom. Oxygen cards support multiple refresh
rates for each resolution, but a refresh rate of at least 75Hz is
recommended.
Installed Oxygen CardsInstalled Oxygen Cards
Refers to the number of Oxygen cards installed in your system. Oxygen
supports dual displays if you have two identical Oxygen cards installed
in your system; however, you must enable dual monitor mode, which
is found on the Advanced Options page.
26 Dynamic Pictures Oxygen 3D Family
Page 33

Memory Options PageMemory Options Page
Figure 16: Oxygen Control Panel (Memory Options)
The Memory Options page (Figure 16) shows how much memory is
allocated based on the settings you selected in the Display control
panel, as well as how much memory is available for texture mapping
and other features.
Performance of the Oxygen 102 card is optimized using 1024x768
resolution with 16-bit color, double buffered for many applications.
The Oxygen 202 (16MB of memory) is optimized using 1280x1024 with
16-bit color, double buffered. The Oxygen 402 (32MB of memory)
performs well using 24-bit, true color displays up to 1280x1024
resolution or 16-bit color, double buffered displays up to 1600x1200.
These settings deliver the best performance and leave the most room to
store textures in memory. However, the Oxygen 3D Family memory
system is very flexible, and other configurations are available. See the
Display Resolutions and Settings section on page 37 for details.
Installation and User’s Guide 27
Page 34

Z-BufferZ-Buffer
The Oxygen 3D Family supports 16-bit or 24-bit Z-buffers. The default
depth is 16-bit. Dynamic Pictures recommends that you leave this
setting unchanged except when you are working with very large models
and see undesirable artifacts. Increased Z-buffer precision will allocate
up to 24-bits for Z-buffering, although the actual depth will depend on
available memory. Selecting None will turn off the Z-buffer, and all 3D
acceleration. This should be avoided, unless you are working with 2D
graphics only and require the additional memory.
Texture MemoryTexture Memory
A texel is an individual component of a texture map. Depending on
your texture mapping requirements, you can specify the texel bit depth
used in texture mapping. For best performance, keep textures stored as
32-bit texels by selecting the Optimize for performance option.
If you are using large textures, select the Optimize for memory
utilization option. This will store textures at the currently selected
frame buffer bit depth. Despite a slight performance penalty, this
enables a larger dimensioned texture to be stored efficiently.
If you are not using texture mapping, select the Disable hardware
texture mapping option. This will free memory for other uses by
preventing memory allocation for texture mapping.
The Oxygen card can render textures whether or not memory is
available on the card, but texturing performance is much higher when
using on-card memory. If you are using textures and experience
performance degradation, try switching to settings that free up on-card
memory (e.g., lower resolution, smaller Z-buffer or fewer colors).
Dynamic AllocationDynamic Allocation
After memory allocation for the front buffer, back buffer, and Z-buffer
is complete, the remaining memory is available for Alpha buffering,
stencil buffering or 2D bitmaps by checking the appropriate boxes. You
can also increase available memory by disabling double buffering.
To restore the original Memory Options settings, click the “Factory
Defaults” button. For additional assistance, click the “Help” button.
28 Dynamic Pictures Oxygen 3D Family
Page 35

Advanced Options PageAdvanced Options Page
Figure 17: Oxygen Control Panel (Advanced Options)
The Advanced Options page (Figure 17) enables you to set various
application or platform specific parameters that can affect
performance. A series of check boxes let you enable or disable certain
features.
Adjust for model imprecisionAdjust for model imprecision
When checked, hardware sub-pixel precision is used to eliminate
distortion resulting from 3D model imprecision.
Always draw with anti-aliased linesAlways draw with anti-aliased lines
When checked, all lines will be drawn anti-aliased; otherwise, lines will
not be drawn anti-aliased unless specifically requested by the
application. Enabling this feature results in smoother lines at a slight
performance cost. Recommended for use in applications where text
fonts are drawn using OpenGL lines (e.g., some international versions
of Pro/ENGINEER). For best performance with most OpenGL and
Heidi applications, leave this option unchecked. If you select certain
memory options, this alternative is grayed out and unavailable.
Installation and User’s Guide 29
Page 36

Use mip-mapping texture calculationsUse mip-mapping texture calculations
If checked, mip-mapping will be used for texture calculation when
requested by an OpenGL application. If disabled, only the largest map
will be used and texture calculations will be done with bi-linear
sampling. Mip-mapping is disabled by default for maximum OpenGL
application performance. Heidi applications are unaffected.
Sync buffer swap to vertical refreshSync buffer swap to vertical refresh
If enabled, double buffer swapping occurs during your monitor’s
vertical blank period. Although there is a slight performance loss, this
feature improves the appearance of artifacts by eliminating inter-frame
tearing.
Enable dual monitor modeEnable dual monitor mode
If two Oxygen 102, two Oxygen 202 or two Oxygen 402 cards are
installed in the system, checking this option enables the use of dual
displays. The cursor will track from one screen to the next. Disabling
this option turns off dual display, even if two cards are present. This
option is grayed out if you do not have two Oxygen cards installed.
Use AlphaUse Alpha processor optimizations processor optimizations
If enabled, this feature optimizes operations possible on most Alphaprocessor subsystems. If disabled, compatibility with all Alpha
systems is ensured.
We recommend enabling this feature in order to maximize
performance unless you have a DeskStation Raptor processor. These
users may experience boot problems and should leave this feature
disabled. If your system does not boot after enabling this feature,
reboot and press the <Space Bar> when the system prompts you to
enter the “Last known good boot” menu. Select “Last known good
boot” option by pressing “L” under Windows NT 4.0 or highlighting
that option in the Windows NT 3.51 menu. The option and any other
NT registry changes since the last good boot will then be restored back
to their previous states. You may also contact your hardware
manufacturer for more details.
30 Dynamic Pictures Oxygen 3D Family
Page 37

Enable Back Buffer Copy ModeEnable Back Buffer Copy Mode
This option optimizes performance of Kinetix 3D Studio MAX R2.
Used in conjunction with settings in 3D Studio MAX R2, double buffer
swapping is performed by copying the contents of the back buffer into
the front buffer. The contents of the back buffer will remain
unchanged. If disabled, front and back buffer contents are actually
swapped, which is faster for most applications. Refer to page 34 for
more information about specific settings within 3D Studio MAX R2.
Show stereo modes in display control panelShow stereo modes in display control panel
If checked, you may view and select from the supported stereo 3D
resolutions as shown in the Display Panel. Supported stereo 3D
resolutions are:
Screen
Resolution
768 x 768 16 105/140
1024 x 768 16 105/120/140
1280 x 512 16 139.32
768 x 768 32 105/140
1024 x 768 32 105/120/140
1280 x 512 32 139.32
Color
Depth
Vertical Refresh (Hz)
Supported stereo 3D resolutions will be shown in the Display Panel in
addition to the non-stereo 3D resolutions. If the applications that you
are developing or using are not stereo 3D applications and you
select a stereo 3D resolution, performance will degrade. This results
from the Oxygen card producing the left and right views required for
stereo 3D and equates to double the number of images in the same
time period. This rapid image production appears as a significant
performance degradation when viewed in an application that does not
support stereo 3D. If you do not wish to view a stereo application in
stereo 3D mode, then deselect the “Show stereo modes in display control
panel”. For more information about stereo 3D, see the Stereo 3D
Technical Overview.
To restore the original Advanced Options settings, click the “Factory
Defaults” button. For additional assistance, click the “Help” button.
Installation and User’s Guide 31
Page 38

Support Information PageSupport Information Page
Figure 18: Oxygen Control Panel (Support Information)
The Support Information page (Figure 18) contains basic support
contact details, as well as an OpenGL system test.
Click the “Test” button to verify that your Oxygen drivers are installed
properly. This test will bring up a dialog box stating whether a basic
test of OpenGL acceleration passes, indicating successful installation
and operation of your Oxygen card.
32 Dynamic Pictures Oxygen 3D Family
Page 39

Oxygen Software Partners
Your Oxygen card has been tested with a variety of graphics software
packages. As testing continues and performance optimizations are
made, the results and techniques are posted on the Dynamic Pictures
web site as well as the web sites of our software partners.
Software Application Web Site
3D Studio MAX http://www.ktx.com/
Lightscape http://www.lightscape.com/
LightWave 3D http://www.newtek.com/
MicroStation http://www.bentley.com/
Pro/ENGINEER http://www.ptc.com/
SDRC I-DEAS http://www.sdrc.com/
Softimage|3D http://www.softimage.com/
SolidWorks 97 http://www.solidworks.com/
Unigraphics http://www.ug.eds.com/ug/
For additional information, visit the partners’ page on our web site at:
http://www.dynamicpictures.com/swpartners.html
Tuning Your Applications for Optimal Performance
Many graphics applications can be tailored to your needs. These
applications perform better if they have information about special
hardware on which they run, such as your Oxygen card. This section
contains information on several applications that may enable you to
realize higher performance. You will also want to consult your software
application documentation.
General Tuning SuggestionsGeneral Tuning Suggestions
To eliminate shape breakup, enable the “Increased Z-buffer precision”
radio button in the Z-buffer box on the Memory Options page of the
Oxygen control panel.
To avoid shading problems, check the “Adjust for model imprecision”
box on the Advanced Options page of the Oxygen control panel.
Installation and User’s Guide 33
Page 40

Softimage||\\\Softimage||\\\||3D3D
You must set the environment variable
SI_OVERLAY=USE_ONE_BIT since Oxygen drivers are
optimized for this setting. In this mode, one bit will be used to display
an overlay plane. Softimage may attempt to put more than one bit of
overlays into the overlay plane if the SI_OVERLAY variable is not set.
Setting this variable can be accomplished in the System Control Panel.
On the Memory Options page in the Oxygen control panel, enable the
“Increased Z-buffer precision” option for Z-buffer
enable the “16-bit Z-buffer” option); the “Optimize for performance”
option for Texture Memory; the “Alpha buffer” and “Stencil buffer”
options for Dynamic Allocation.
Disable the “Use mip-mapping for texture calculations” option on the
Advanced Options page in the Oxygen control panel. Softimage|3D does
not use mip-mapping and this will speed up texture loads.
At 1280x1024 resolution, Oxygen 202 users should use 16-bit color for
optimal performance.
(102 users should
3D Studio MAX3D Studio MAX R1 R1
3D Studio MAX R1 requires the additional installation of the Dynamic
Pictures Oxygen Heidi driver. For installation and usage instructions,
refer to Appendix B: Installing Your Heidi Driver on page 57.
3D Studio MAX3D Studio MAX R2 R2
When starting 3D Studio MAX, you may specify the default graphics driver
type as OpenGL by including the following line in the 3dsmax.ini file in the
[WindowState] section:
GFXType=OpenGL
You may have 3D Studio MAX prompt for a choice by specifying “-h” on the
command line used to invoke 3D Studio MAX.
34 Dynamic Pictures Oxygen 3D Family
Page 41

If you are rendering a scene in which the background stays relatively
constant and there is little action in the foreground, you might want to
alter your application and Oxygen settings.
1)
Open the Oxygen 3D control panel Advanced Options page
and click on the “Enable back buffer copy mode” option.
2)
In 3D Studio MAX, open the page: File/Preferences/Viewports
and click on the “Configure Driver” button. Uncheck the
“Redraw Scene On Window Expose” option and make sure
that the “Use Incremental Scene Updates (OpenGL
Extension)” option is checked.
These optimizations increase performance when swapping the front
and back buffers. Only active objects in the scene are re-drawn in the
back buffer while static scenery is copied from the previous frame.
LightscapeLightscape
Proceed to the Memory Options page in the control panel. Since
Lightscape provides many opportunities to leverage texture mapping,
make sure that you select the “Optimize for memory utilization” radio
button in the Texture Memory box.
LightWave 3DLightWave 3D
For best performance, you must enable OpenGL support in
LightWave’s Options/Layout View box. Also, select the “OpenGL
Smooth Shaded” option within LightWave Modeler’s
Display/Options/Preview Type menu. The software will then use
OpenGL hardware acceleration.
If you require full-screen 2D bitmaps in LightWave Modeler, check the
“2D Bitmaps” option on the Memory Options page in the Oxygen
control panel.
Installation and User’s Guide 35
Page 42

Due to 3D back buffer and Z-buffer requirements, not all resolutions
can satisfy both 2D and 3D requests for LightWave Modeler. Try
changing resolutions for optimal performance.
Proceed to the Memory Options page in the control panel. Since
LightWave is heavily reliant on texture mapping, make sure that you
select the “Optimize for memory utilization” radio button in the
Texture Memory box.
Pro/ENGINEERPro/ENGINEER
Parametric Technology’s Pro/ENGINEER CAD software can more fully
utilize the capabilities of the Oxygen card if you modify the
“config.pro” file with the following lines:
SHADE_STRIPS_LONG YES
GRAPHICS OPENGL
For additional information regarding Pro/ENGINEER’s configuration
files, please refer to your Pro/ENGINEER manual.
UnigraphicsUnigraphics
Users of Unigraphics should enable the “Increased Z-buffer precision”
radio button in the Z-buffer box on the Memory Options page of the
Oxygen control panel.
36 Dynamic Pictures Oxygen 3D Family
Page 43

Display Resolutions and Settings
A monitor that supports 1024x768 resolution at 75 Hz vertical refresh
rate is the minimum recommended for use with Oxygen. Choose a
resolution, number of colors, and refresh rate that is high enough to
meet the needs of your graphics application as well as your personal
preference. Performance will vary at certain settings due to the amount
of frame buffer memory available.
The following tables detail the 3D display settings supported by your
Oxygen card. The first column lists resolution, measured in pixels. The
second column contains bit depth information. Bit depth is another
way of expressing the number of colors available. A color bit depth of
16 colors (15 bits of color plus a 1-bit overlay) yields 32768 colors, and
a bit depth of 32 (24 bits of RGB plus 8-bit overlays) equals 16.7 million
colors. The latter is often referred to as “true color”. The third column
indicates the depth of the Z-buffer. In a few cases, 3D graphics are not
accelerated and the graphics are instead drawn in software through the
GDI interface. The final column lists the refresh rates supported.
NOTE: Please be aware that when you change resolutions, you should
not use the “Test” button in the Display Control Panel. Selecting this
button may cause a blue screen. If a blue screen occurs, please reboot
your system.
Installation and User’s Guide 37
Page 44

Monitor Resolution TablesMonitor Resolution Tables
Screen
Resolution
800 x 600 16 16 or 24-bit 75
1024 x 768 16 16 or 24-bit 60/70/72/75/85/90/100
1152 x 900 16 16-bit 66/76
640 x 480 32 16-bit 75
Color
Depth
Z-Buffer Depth Vertical Refresh (Hz)
Table 1: Oxygen 102 Supported Display Configurations
Screen
Resolution
1024 x 768 16 16 or 24-bit 60/70/72/75/85/90/100
1152 x 900 16 16 or 24-bit 66/76
1280 x 1024 16 16 or 24-bit 60/66/72/75/85/90
1600 x 1200 16 16-bit 60
640 x 480 32 16 or 24-bit 75
800 x 600 32 16 or 24-bit 75
1024 x 768 32 16 or 24-bit 60/70/72/75/85/90/100
1152 x 900 32 16 or 24-bit 66/76
1280 x 1024 32 16 or 24-bit 60/66/72/75
Color
Depth
Z-Buffer Depth Vertical Refresh (Hz)
Table 2: Oxygen 202 Supported Display Configurations
Screen
Resolution
1024 x 768 16 16 or 24-bit 60/70/72/75/85/90/100
1152 x 900 16 16 or 24-bit 66/76
1280 x 1024 16 16 or 24-bit 60/66/72/75/85/90/100
1600 x 1200 16 16 or 24-bit 60/65/68/70/72/75/80
640 x 480 32 16 or 24-bit 75
800 x 600 32 16 or 24-bit 75
1024 x 768 32 16 or 24-bit 60/70/72/75/85/90/100
1152 x 900 32 16 or 24-bit 66/76
1280 x 1024 32 16 or 24-bit 60/66/72/75
Color
Depth
Z-Buffer Depth Vertical Refresh (Hz)
Table 3: Oxygen 402 Supported Display Configurations
38 Dynamic Pictures Oxygen 3D Family
Page 45

Upgrading Your Oxygen Driver
New drivers for your Oxygen card are posted to the Dynamic Pictures
web site. If you need to upgrade your Oxygen driver, follow the
directions in this section. If you are installing Dynamic Pictures’ driver
software for the very first time, follow the directions in the Installing
Your Software section on page 5.
If you have access to the Internet, you can easily locate and download
new Oxygen software drivers from Dynamic Pictures’ web site at:
http://www.dynamicpictures.com/drivers.cgi
To download and install updated Oxygen drivers:To download and install updated Oxygen drivers:
1. Point your web browser to the Dynamic Pictures home page, and
then select the Software Driver Updates link. From this page, you
will be able to download the appropriate Oxygen driver for your
hardware platform. The driver file that will be downloaded to your
machine is a self-extracting archive.
2. From the Windows NT Explorer, create a new directory on your
hard drive for the drivers (e.g., “C:\temp\dpi”). Then move the
“.exe” file to this new directory.
3. Double-click on the self-extracting “.exe” file to decompress the
driver files into the newly created directory.
4. After carefully reviewing the Release Notes found in the release.txt
file, begin the software installation process detailed in the
Installing Your Software section on page 5 of this manual.
5. Restart your computer. You are now using your new driver.
6. To verify the successful installation of your new drivers, launch
the Oxygen Control Panel after restarting. The version number
displayed in the control panel should match the version you just
installed.
Installation and User’s Guide 39
Page 46

TroubleshootingTroubleshooting
If you have trouble installing your Oxygen hardware or software, you
may be able to fix it using this section or the information in the Oxygen
Release Notes.
Hardware Troubleshooting
Problem: When I restart my system after installing my Oxygen card
and software driver, the system hangs or nothing is displayed on my
monitor.
Solution: The problem could be one of several things. Here are
conditions to check (not an all inclusive list):
• Monitor: Confirm that your monitor is connected to the
Oxygen card, the monitor is plugged in to a wall socket, and it
is powered. Also, verify that your monitor is compatible with
the resolution and refresh rate you selected.
• Oxygen card is loose: The cables that attach to your Oxygen
card could be loose, or the Oxygen card itself might not be
seated properly on your motherboard. First, try removing and
attaching your monitor cable. If that does not work, power off
your computer, remove and reseat your Oxygen card,
pressing the card down firmly to ensure a good connection,
then screw the bracket on the card to the system chassis.
Remember to use the anti-static wrist strap when opening
your computer and handling the card.
• Cable connected to wrong card: if you have multiple video
cards installed in your computer, make sure the monitor
cable is connected to the Oxygen card.
40 Dynamic Pictures Oxygen 3D Family
Page 47

• Bus-master capable slot: If you still do not see anything on
your monitor, your Oxygen card may not be in a bus mastercapable slot in your computer. On some PCs, not all slots are
bus master-capable slots. Consult your computer or
motherboard documentation for more information on your
PCI bus and master-capable slots.
• VGA jumper disabled: Is the VGA jumper on your Oxygen
card set to the factory position, "VGA enabled"? Compare the
jumper on your card to the illustration on page 62. Your
Oxygen card must have VGA enabled to display VGA mode
2D graphics on your monitor. See Appendix C: Using Dual
Oxygen Cards for additional details on setting your VGA
jumper.
• Multiple displays: Not all computers support multiple video
cards simultaneously. If you are attempting to use more than
one video card and monitor, you may wish to contact your
computer or motherboard manufacturer to confirm that this
is a supported display configuration.
• VGA Jumper enabled using two Oxygen cards: If you are
using two identical Oxygen cards to drive two monitors, you
must disable VGA on one of the Oxygen cards. Refer to
Appendix C: Using Dual Oxygen Cards for more information
about switching your VGA jumper.
Problem: My monitor is either not displaying anything, or displaying
something, but what is displayed is distorted, scrambled or smaller
than I expected.
Solution: Your vertical refresh may be set higher than your monitor is
capable of displaying. Displaying at a refresh rate that is too high can
damage your monitor. Select a lower refresh rate using the Display
Control Panel. For more information about your monitor and vertical
refresh rates, see the manual that accompanied your monitor.
Installation and User’s Guide 41
Page 48

Problem: After installing an Oxygen 202 or Oxygen 402 card, there are
no VGA graphics or the system hangs on boot-up.
Solution
: Enter CMOS Setup at boot-up and disable ‘VGA Palette
Snoop’, if available. To do this, you must reinstall your old graphics
card, and during system boot, enter CMOS Setup. (The command to
enter setup is usually displayed at system start-up.) Consult your
system documentation for changing CMOS settings, then disable ‘VGA
Palette Snoop’, if present. Choose Exit and Save CMOS settings.
Alternatively, you may need to update your system to the newest
version of your system BIOS. (Oxygen 202 and Oxygen 402 cards
require a system BIOS that is compatible with a VGA display device
that is behind a PCI-to-PCI bridge.) Consult your hardware system
documentation for information on updating your system BIOS to a
current version. (If your system is equipped with a Flash BIOS,
software updates may be available on the World Wide Web. Check
your BIOS manufacturer’s web site for an update.)
Problem
: After installing an Oxygen 202 or Oxygen 402 card, the
system hangs, pauses, or crashes to a Windows “blue screen” during
operation.
Solution: Enter CMOS Setup at boot-up and disable ‘PCI Bursting’ if
available. To do this, during system boot, enter CMOS Setup. (The
command to enter setup is usually displayed at system start-up.)
Consult your system documentation for changing CMOS settings and
disable ‘PCI Bursting’, if present. Choose Exit and Save CMOS settings.
Alternatively, you may need to update your system to the newest
version of your system BIOS. Consult your hardware system
documentation for information on updating your system BIOS to a
current version.
On systems with more than three (3) PCI slots, it may be necessary to
move your Oxygen card to the opposite set of three slots. More than
three PCI slots implies that your system is bridging a second bus and
the system may not support every hierarchy of these bridges. Thus, the
Oxygen 202 or Oxygen 402 card must be moved to the proper set of PCI
slots.
42 Dynamic Pictures Oxygen 3D Family
Page 49

Problem: After installing the Oxygen card, network problems
appeared.
Solution
: There may be a conflict between your Ethernet card and
your Oxygen card. If your Ethernet adapter is an ISA adapter rather
than a PCI adapter, then check system diagnostics for IRQ conflicts.
(The Oxygen 202 card requires two and the Oxygen 402 card requires
four of the PCI interrupt lines, which your system may assign to one or
more IRQs. Other PCI devices may share these same IRQs.)
To solve this problem, from the Start Menu, select Programs then
Administrative Tools and run Windows NT Diagnostics. Then click the
“Resources” tab. Make sure the IRQ button is selected and check for
any devices sharing IRQ settings.
If two IRQs conflict, then change the Ethernet IRQ in the Network
Control Panel applet. Click on the Adapters tab, then select your
network adapter and click “Properties” to change the IRQ setting to an
open IRQ number. For additional details, consult your Ethernet
adapter documentation or vendor for information on changing IRQ
settings or for obtaining a newer Ethernet driver for your adapter.
Problem
: After installing an Oxygen 202 card or an Oxygen 402 card,
network problems appeared.
Solution
: Your Ethernet adapter software driver may be unable to
process requests. If using a PCI adapter and your system has more than
three (3) PCI slots, you should try changing the relative positions of the
Oxygen and Ethernet cards within PCI busses. More than three (3) PCI
slots implies that your system is bridging a second bus and the
configuration may be incompatible with the Oxygen 202 or Oxygen
402. Updating the Ethernet adpater’s driver and/or re-installing the
driver software may be required.
Installation and User’s Guide 43
Page 50

Software Troubleshooting
Problem: I installed a new driver (either from the Oxygen CD-ROM or
from the Dynamic Pictures web site), and the available resolution(s) or
performance is not what I expected.
Solution: You may not have fully installed the Dynamic Pictures driver
or an installed driver file may have been corrupted. You can confirm if
the driver is installed and its version number by using the Oxygen
control panel (Figure 15). It should be the same as the version number
of the driver you most recently installed. You can also use the “Test”
button on the Support Information page in the Oxygen control panel to
verify successful installation.
When driver file corruption occurs, it is often a result of a media error
or a communications error during the download procedure. Try
downloading and/or installing the driver again.
Alternatively, you may have selected a display setting that is
incompatible with accelerated 3D graphics. For example, the Oxygen
202 can support a maximum resolution of 1280x1024 when
accelerating 3D graphics in true color mode. Selecting a true color
resolution higher than this will greatly reduce performance. Refer to
the Monitor Resolutions Tables on page 38 to select a setting that offers
hardware accelerated 3D graphics.
You must restart your system for the new driver to be loaded by the
Windows NT operating system.
Problem: After installing my software and Oxygen card, or after
selecting a new resolution, when restarting my computer Windows
displays the message, “Invalid Display Settings” and “The default
display resolution has been temporarily used by the system.”
Solution: You should soon see a window that allows you to select a
display resolution. Once you have selected your preferred resolution,
your Oxygen card should work as expected.
44 Dynamic Pictures Oxygen 3D Family
Page 51

Technical SupportTechnical Support
Dynamic Pictures is committed to customer satisfaction. Your Oxygen
graphics accelerator card is covered by a three year parts and labor
limited warranty. Details of the warranty are described in Appendix D:
Warranty Information on page 65. For additional information or for
technical support, please contact your local Dynamic Pictures Oxygen
reseller, or reach us electronically at:
support@dynamicpictures.com
Software driver updates and other new information can be found on
the Dynamic Pictures web site at:
http://www.dynamicpictures.com
All software releases undergo extensive quality assurance testing. In
addition to OpenGL conformance and Windows compatibility tests,
real-world CAD applications, benchmarks, and demo programs are
employed to ensure optimized, stable drivers. However, if you
encounter what you believe to be a problem with the graphics
subsystem, please let us know. You can send electronic mail to the
address above.
When reporting problems electronically, please be sure to note the
graphics accelerator model, operating system, computer hardware
configuration (including memory and CPU), Oxygen driver version,
graphics application (including version number), and a detailed
description of the problem you are having. Please be sure to include a
description of the steps necessary to reproduce the problem.
Installation and User’s Guide 45
Page 52

Technology OverviewTechnology Overview
NOTE: You need not read this chapter to install and use your Oxygen
card and its software.
This chapter describes the award-winning technology upon which the
Oxygen 3D graphics architecture is based. Your Oxygen card utilizes
the all new Oxygen chip, transforming your computer system into a
blazingly fast 3D graphics powerhouse.
Hardware Technical Overview
Oxygen graphics accelerators are PCI cards designed for professional
graphics users in application areas such as mechanical CAD, scientific
visualization, and animation. The Oxygen card delivers high-end 3D
workstation graphics performance and features to PC users running
the Windows NT operating system.
The Oxygen 3D Family delivers accelerated 3D graphics, stereoscopic
viewing, windowing operations, and video display through the tight
integration of high-performance proprietary hardware. Dynamic
Pictures Oxygen chip powers this scalable graphics architecture while
providing smooth shading, depth-buffering, dithering, anti-aliasing,
transparency, alpha blending, stenciling, stippling, accumulation
buffering, and texture mapping, coupled with a VGA interface.
Most simply, your Oxygen card works as follows: graphics data comes
from the processor and main computer memory, over the PCI bus, to
the Oxygen card. These graphics primitives are read, interpreted, and
rendered by the Dynamic Pictures Oxygen chip. The geometry, now
translated into discrete pixels, is stored in the card’s memory until it is
passed through a video Digital to Analog Converter (DAC) for display
on your monitor.
46 Dynamic Pictures Oxygen 3D Family
Page 53

The Oxygen chip integrates rendering, texturing and plane equation
setup calculations–graphics functions other 3D graphics cards divide
among several chips. The result with the Oxygen card is increased
speed on a smaller card.
Figure 19: Oxygen Chip Block Diagram
The Oxygen Chip block diagram (Figure 19) shows the components
and functions of the Oxygen chip. The Dispatcher interfaces with the
PCI bus, using a built-in memory FIFO to transfer commands and data
from the computer’s main memory system to the graphics subsystem
for processing.
The data is then split into two paths and processed in parallel,
pipelined stages. Attribute information (i.e. color and transparency) is
calculated in the Plane Equation path. Positional information
(i.e. which pixels should be lit) is calculated in the Geometry path. Each
path does its work in two stages: Setup and Rendering. The Oxygen
chip processes three primitives at any given time: one in the
dispatcher, one in the setup stage, and one in the rendering stage.
Installation and User’s Guide 47
Page 54

The Oxygen 102 (Figure 20) is equipped with a single Oxygen chip and
8 MB of SDRAM. The Oxygen 202 (Figure 21) features two Oxygen
chips operating in parallel, and 16 MB of SDRAM. Finally, the Oxygen
402 (Figure 24) features four Oxygen chips operating in parallel, and 32
MB of SDRAM.
In the case of the Oxygen 102, rendered data from the Oxygen chip is
stored in the 8 MB of SDRAM on the card until it is passed through the
high-end video DAC (Digital to Analog Converter), which supports
color mapping, overlay planes, cursor control, and video clock
generation.
Alternatively, the card’s VGA chip can drive the video display through
a separate port on the video DAC. The VGA chip drives the display
during the boot up process and when operating the system in fullscreen VGA mode (e.g., when playing a VGA-based video game).
In the case of the Oxygen 202 and Oxygen 402, multiple Oxygen chips
operate in parallel, simultaneously rendering to different parts of the
frame buffer. Each Oxygen chip has its own dedicated 8MB of SDRAM.
The unified memory architecture of the Oxygen 3D Family allows
allocation for front buffer, back buffer, Z-buffer, texture memory and
overlays depending on the needs of the user and the desired
applications. Please refer to the Oxygen Control Panel section on page
24 for more details.
48 Dynamic Pictures Oxygen 3D Family
Page 55

Figure 20: Oxygen 102 3D Graphics Accelerator
Installation and User’s Guide 49
Page 56

Software Technical Overview
The Oxygen graphics accelerator card supports the Windows NT
operating system, accelerating 3D applications built on the OpenGL
application programming interface (API). OpenGL is the predominant
3D API in the technical computing community.
The software environment for the Oxygen card presents two APIs to
the applications programmer
Windows NT windowing API. Used together, OpenGL and WGL
provide a 3D programming interface. The OpenGL API supports the 3D
geometry and rendering pipelines, while the WGL API presents
interfaces that allow the OpenGL API to interact with the Windows
operating system.
Dynamic Pictures’ OpenGL implementation is supported through
Microsoft’s Installable Client Driver mechanism. By default, Microsoft
provides a software OpenGL implementation where all graphics
primitives are converted to 2D GDI calls. All 2D and 3D OpenGL
graphics requests are intercepted by Oxygen software drivers and
directed to the Oxygen card for dramatically accelerated performance.
Oxygen also includes support for Heidi, a graphics library used by
Kinetix 3D Studio MAX R1 and other Autodesk applications. If you are
a 3D Studio MAX R1 user, please refer to Appendix B: Installing Your
Heidi Driver section on page 57.
− WIN32 and OpenGL. WIN32 is the
50 Dynamic Pictures Oxygen 3D Family
Page 57

Figure 21: Oxygen 202 3D Graphics Accelerator
Installation and User’s Guide 51
Page 58

PowerThreads™ Technical Overview
In order to provide the fastest 3D graphics performance, it is vital that
3D graphics hardware and software be tightly integrated and
optimized. Dynamic Pictures, the only 3D graphics card company to
design, develop, and manufacture its own graphics chips and
accelerator boards, is in the ideal position to leverage this integration
from the initial product concept through execution. The result is the
new PowerThreads technology for multi-threaded OpenGL.
PowerThreads technology enables users of multi-CPU systems to
utilize existing computing resources to accelerate geometry
transformation. In a standard dual CPU configuration, the CPU is overworked while processing all geometry transformation requests for the
Oxygen chips (Figure 22). Thus, the graphics card does not benefit
from the combined power of both CPUs. However, PowerThreads
technology automatically enables the Oxygen 3D Family of cards to
take full advantage of the new breed of multi-processor PCs. In its
simplest form, PowerThreads-enabled drivers intercept the OpenGL
requests and give them to each CPU to process in parallel (Figure 23).
Coupled with the multi-chip Oxygen architecture, each host CPU can
now simultaneously communicate with multiple Oxygen chips. This
new technology increases rendering and texture mapping performance
by alleviating bottlenecks in the graphics pipeline.
The PowerThreads architecture is particularly appealing to multiprocessor system users who work with 3D graphics applications that
are written for only one CPU. Even if an application is not multithreaded, PowerThreads technology delivers multi-threaded
performance. For example, when a quad processor Oxygen 402 card is
installed in a dual processor system, PowerThreads technology enables
each CPU to concurrently feed data to two Oxygen chips, so all four
Oxygen chips render in parallel. The performance gains are
independent of the way in which the application is written.
The PowerThreads architecture is designed to leverage integrated
hardware and software resources in order for you to rocket along in the
bottleneck-free zone!
52 Dynamic Pictures Oxygen 3D Family
Page 59

Figure 22: Without PowerThreads technology, a single CPU is
operations
burdened with all geometry transformation
Figure 23: With PowerThreads technology, enabling
each CPU to use multiple Oxygen chips for
geometry transformation operations
maximizes performance
Installation and User’s Guide 53
Page 60

Stereo 3D Technical Overview
Historically stereo has been a very expensive feature offered only on
highly specialized virtual reality systems, and high-end SGI UNIX (or
equivalent) systems. Now Dynamic Pictures brings stereo 3D to the PC.
High resolution stereo 3D is presented in “stereo pairs”, which are the
“left eye” and “right eye” frames required to see an image in full stereo
3D. Video output of the two images is double buffered left and right
views which must be output at the same refresh rate as the monocular
(or normal) image to avoid discernible flicker while operating in stereo
3D mode. This is a significant workload for a graphics card because
the output requires twice the number of scan lines displayed in the
same time interval. In other words, without employing any additional
techniques the board must output ‘twice as many pixels, twice as fast.”
To generate stereo 3D correctly, an accelerator board should be capable
of displaying the stereo pairs in a window. Oxygen is the only graphics
card that supports what is called true, full-page flipping, timemultiplexed or field sequential stereo in an NT window. This window is
then “decoded” into the independent left and right views by Liquid
Crystal Display (LCD) shuttering glasses or similar devices. There are
methods of producing stereo that achieve faster frame rates but images
are “stretched” and suffer from diminished quality.
The Oxygen 402 3D graphics accelerator card has a connector that
enables the card to behave as a stereoscopic viewing system (Figure
24). Any OpenGL application that supports stereo 3D operation can
take advantage of this feature today. Viewing of stereo 3D images on
the monitor requires your Oxygen 402 card and an infrared emitter
with glasses. CrystalEyes
combines the power of StereoGraphics' CrystalEyes with the awardwinning Dynamic Pictures Oxygen 3D graphics accelerators delivers
industry leading, high quality stereo 3D under Windows NT.
For more information regarding stereo 3D options, contact Dynamic
Pictures, Inc. at (408) 327-9000. For questions regarding your
CrystalEyes eyewear and emitter included with the CrystalEyes Oxygen
product, please contact StereoGraphics directly at (415) 459-4500.
54 Dynamic Pictures Oxygen 3D Family
®
Oxygen
™
is a complete solution that
Page 61

Figure 24: Oxygen 402 3D Graphics Accelerator
Installation and User’s Guide 55
Page 62

Appendix A: Installing Oxygen onAppendix A: Installing Oxygen on
Windows NT 3.51Windows NT 3.51
Oxygen 3.0 supports the Windows NT 4.0 platform only. Previous
versions of the Oxygen driver software supporting Windows NT 3.51
may be found on our web site at:
http://www.dynamicpictures.com/drivers.cgi.
Please ensure that you have closed all Windows applications programs
before beginning the Oxygen software installation process.
1.
Log in to Windows NT 3.51 using any account that has
administrator privileges.
2.
Using your web browser, go to the Dynamic Pictures web site and
download the required self-extracting “.exe” file into a temporary
directory (i.e. “TEMP”).
3.
Download the Windows NT 3.51 Oxygen Driver Installation .pdf
file and follow the instructions for completing the driver
installation.
56 Dynamic Pictures Oxygen 3D Family
Page 63

Appendix BAppendix B: Installing Your Heidi: Installing Your Heidi Driver Driver
NOTE: This section is for Kinetix 3D Studio MAX R1 users only.
Heidi is an interface layer that allows applications to operate without
knowing specific details of the display hardware. Your Oxygen card will
accelerate the performance of 3D Studio MAX R1, but only if the
Oxygen Heidi driver is installed. The Oxygen Heidi driver software is
available for download from our web site at:
http://www.dynamicpictures.com/drivers.cgi.
Installing and using your Heidi driver requires two basic steps:
• After you have completed the installation of your Oxygen card
and driver software, and also completed the installation of 3D
Studio MAX R1, you will need to install the Oxygen Heidi
driver.
• When launching 3D Studio MAX R1 for the first time, you will
need to instruct the application to use the Oxygen Heidi
driver.
Heidi driver files always end with a .HDI extension, and are stored in
the DRIVERS directory. This directory is located in the 3D Studio MAX
R1 top-level directory where the 3D Studio MAX R1 executable
program (3DSMAX.EXE) resides. The default location for the Heidi
drivers folder is:
<SystemDrive>:\3DSMAX\DRIVERS
where SystemDrive is the letter (e.g., C, D, E, etc.) of the drive where
Windows NT is installed. If you are unsure of where 3D Studio MAX R1
is installed, contact your system administrator.
Installation and User’s Guide 57
Page 64

To install the Oxygen Heidi driver:
Please ensure that you have closed all Windows applications programs
before beginning the Oxygen software installation process.
The following steps assume that 3D Studio MAX R1 is installed in
C:\3DSMAX, and that you are running a command shell.
1.
Using your web browser, go to the Dynamic Pictures web site and
download the self-extracting “.exe” file into a temporary directory
(i.e. “TEMP”).
2.
Expand the self-extracting .”exe” file by double-clicking on the
file icon.
3. Running a command shell from the temporary directory you
created, type COPY OXYGEN.HDI C:\3DSMAX\DRIVERS\
Alternatively, if you are running the Windows NT Explorer or the File
Manager, drag the file called OXYGEN.HDI from the temporary
directory you created to the directory C:\3DSMAX\DRIVERS.
NOTE: Kinetix is no longer supporting 3D Studio MAX R1 running
under Windows NT 3.51. You are advised to upgrade to 3D Studio
MAX R2.
To select the Oxygen Heidi Driver in 3D Studio MAX R1:
The first time 3D Studio MAX R1 is launched, you will be presented
with the Driver Setup dialog box. If you have already been running 3D
Studio MAX R1, you may not be presented with this window at startup, in which case you need to bring up the Driver Setup window from
within 3D Studio MAX R1.
1. From the 3D Studio MAX File Menu, choose “Preferences…”
4.
Select the Viewports tab.
58 Dynamic Pictures Oxygen 3D Family
Page 65

5. In the Display Drivers section, click the “Choose Driver…” button.
The Driver Setup window will appear.
6.
Choose the Custom Driver radio button, and select OXYGEN.HDI
from the pop-up list.
5. Click the “OK” button.
6. You must now exit 3D Studio MAX R1 and re-launch the
application to use the Dynamic Pictures Oxygen Heidi driver and
take advantage of your Oxygen card. Perform these steps only
when switching Heidi drivers.
If you start 3D Studio MAX from a command shell, you may bring up
the Driver Setup dialog by launching the application with the
command:
3DSMAX -H
Troubleshooting Your Heidi Driver Installation
If you are experiencing problems when running 3D Studio MAX R1,
you can effectively bypass the Oxygen card and use the unaccelerated
default Heidi driver. To do this, bring up the 3D Studio MAX R1 Driver
Setup window, and select the “Software Z Buffer” option. All graphics
are drawn as Windows GDI primitives.
NOTE: Using the “Software Z Buffer” option will substantially degrade
performance, so it should not be left enabled.
You can compare the appearance and performance of any graphics
with those viewed using the Oxygen Heidi driver. Reinstall the driver
using the steps outlined in the Installing Your Software section on
page 5. If you continue to experience problems, please send e-mail to:
support@dynamicpictures.com
Installation and User’s Guide 59
Page 66

Appendix C: Using Dual Oxygen CardsAppendix C: Using Dual Oxygen Cards
Oxygen software drivers version 2.1 or later can support two Oxygen
cards in the same system. This configuration requires two available
PCI slots in the system and two monitors - one for each card. Once
installed, the dual Oxygen cards, which must be the same model
number, provide you with twice the desktop area for accelerated 3D
graphics. The supported resolution for each display in this dual screen
configuration is 1024 x 768 at all pixel depths.
NOTE: Both displays will be set to the same resolution, and other
resolutions are not supported when two cards are installed.
Once the Oxygen drivers and the two Oxygen cards are installed,
detection of the two cards and setup of the “jumbo desktop” are
automatic. However, you can disable the second card and monitor
using the Oxygen control panel.
Dual Oxygen card installationDual Oxygen card installation
To take advantage of dual screen support, install Oxygen drivers
version 2.1 or later, as described in the Installing Your Software section.
Next, install your Oxygen cards as described in the Installing Your
Oxygen Card section on page 18. The second Oxygen card should be
installed only after disabling the onboard VGA jumper. Please refer to
Switching Your Jumper section on page 62 for details on switching the
jumper. Restarting Windows NT will make both cards operational.
In addition to the Oxygen chip for accelerated graphics performance,
your Oxygen card contains a VGA chip, which enables you to display
simple VGA 2D graphics, often used while your system is starting up.
Do not use a separate VGA card in the same machine with your Oxygen
card(s).
60 Dynamic Pictures Oxygen 3D Family
Page 67

Enable onboard VGA on one of the Oxygen cards. For configuration
purposes, call this the “primary” card. Install this Oxygen card in the
lower numbered PCI slot in the system. Usually this means the left slot
in desktop systems and the lower slot in tower systems. Since this card
will drive the left half of the “jumbo desktop” connect this card to the
left monitor. Make sure that this monitor supports at least 1024x768
resolution at 60 Hz.
Next, disable VGA on the second Oxygen board and install this in the
upper or right slot. This card drives the right half of the desktop and
should be connected to the right monitor. When you power up the
system, the VGA boot screen will appear on the left screen and then
Windows NT will appear on both the screens.
NOTE: Only one Oxygen card can have the VGA jumper set to the
enabled position, and at least one must have VGA disabled for proper
operation. Both Oxygen cards must have VGA disabled if the
motherboard VGA is enabled. Do not use a separate VGA card with
your Oxygen card.
Switching Your JumperSwitching Your Jumper
You can use the jumper on your Oxygen card to enable or disable the
VGA subsystem. A jumper is a simple hardware switch. There is only
one jumper on your Oxygen card. Your VGA jumper is set in the
factory for single monitor operation.
Caution: Static Electricity
To avoid damage to your Oxygen card from static electricity discharge,
leave the card in the anti-static bag until you are properly grounded.
During the hardware installation and jumper switching procedures,
use the anti-static wrist strap included with your Oxygen card.
Find the jumper on the diagram of your Oxygen card (Figure 20, 21 or
24) in the Hardware Technical Overview section. The jumper on your
card is set in the factory to the VGA enabled position, as pictured
(Figure 25). This is the position recommended for most users.
Installation and User’s Guide 61
Page 68

NOTE: Some computers may not support the Oxygen card when the
jumper is moved and the VGA subsystem is disabled, as some
computers do not support the simultaneous use of more than one
video card.
To switch your VGA jumper:To switch your VGA jumper:
1. Ground yourself to the system chassis using the anti-static wrist
strap. It is now safe to remove your Oxygen card from the
protective bag. Always handle the card by the edges.
2.
Carefully slide the VGA jumper (blue or black in color) up and off
the two metal prongs on which it rests. This breaks the connection
between the “VGA” prong and the center prong.
Figure 25: VGA Jumper (VGA Enabled)
62 Dynamic Pictures Oxygen 3D Family
Page 69

3. Slide the jumper down, connecting the center prong and the “NOVGA” prong that was not in contact before. The Oxygen card is
now set to the VGA disabled position (Figure 26).
Figure 26: VGA Jumper (VGA Disabled)
4.
You can now install your configured Oxygen card as instructed in
the Installing Your Oxygen Card section on page 18. Each Oxygen
card will display accelerated graphics on the monitor to which it is
connected.
Installation and User’s Guide 63
Page 70

Dual display differences between Windows NT 3.51 and 4.0Dual display differences between Windows NT 3.51 and 4.0
Due to the way Windows NT implements desktops under these two
versions, dual screen operation differs slightly in the way application
windows behave when maximized and where system dialog boxes
appear. Under Windows NT 3.51, when an application is maximized, it
is maximized to one full screen size whereas under Windows NT 4.0,
the application window becomes the size of both screens. However,
once an application is created, it can be moved to any screen and can
be resized to span both screens. A maximized application can be
moved but not sized unless changed to its non-maximized size.
Under Windows NT 3.51, system dialog boxes are centered on the
“primary” screen and the task manager appears on this screen. In
Windows NT 4.0, the system dialog boxes appear straddling the two
monitors and can be moved. In addition, the task manager can appear
anywhere on the screen when running Windows NT 4.0.
Oxygen control panel dual screen operationOxygen control panel dual screen operation
The control panel applet that is shipped with your Oxygen card allows
you to disable the dual screen operation, in cases where you only want
to use one display. When disabled, one display is operational and the
other display is blank. After disabling this option, Windows NT must
be restarted for this change to take effect.
This option is provided so that one of the Oxygen cards can be used at
resolutions other than 1024x768 without having to remove the second
Oxygen card. Once the dual screen option is disabled, it has to be reenabled with the control panel applet before both the screens are
operational again.
This option is grayed out in the Oxygen control panel unless there are
two Oxygen cards detected in the system.
NOTE: The Oxygen Status page in the Oxygen control panel will show
how many Oxygen cards are detected. For more information, refer to
the Oxygen Control Panel section on page 24.
64 Dynamic Pictures Oxygen 3D Family
Page 71

Appendix D: Warranty InformationAppendix D: Warranty Information
THREE (3) YEAR PARTS AND LABOR LIMITED WARRANTYTHREE (3) YEAR PARTS AND LABOR LIMITED WARRANTY
Dynamic Pictures warrants that the Product will be free from defects in materials
and/or workmanship for a period of three (3) years from the date of purchase. During
the warranty period, Dynamic Pictures will correct any defects in material or
workmanship, or any failure of the product to conform to hardware specifications, at
no-charge for in-house labor and materials. Shipping costs must be pre-paid by Buyer.
Any replacements parts/products will be new or serviceably used, and are warranted
for the remainder of the original warranty or thirty (30) days from the date of shipment
of the parts/products, whichever is longer. The warranty period is not extended as a
result of purchasing any additional parts/products from Dynamic Pictures. Buyer must
notify Dynamic Pictures in writing if there is a defect in material or workmanship.
Written notice in all events must be received by Dynamic Pictures before expiration of
the warranty period. This warranty is non-transferable. A purchase receipt or other
proof of date of original purchase will be required before warranty is rendered. This
warranty only covers failures due to defects in materials or workmanship that occur
during normal use. It does not cover damage that occurs in shipment or failures that
are result from, but are not limited to, accident, misuse, abuse, neglect, mishandling,
misapplication, alteration, modification, fire, flood, earthquake, explosion, lightning,
line power surge, introduction of sand, dust, humidity and liquids, or service by
anyone other than Dynamic Pictures or an authorized Dynamic Pictures service center,
or damage that is attributable to acts of God.
LIMITS AND EXCLUSIONSLIMITS AND EXCLUSIONS
THE WARRANTY STATED ABOVE IS THE ONLY WARRANTY APPLICABLE TO
THIS PRODUCT. ALL OTHER WARRANTIES, EXPRESS OR IMPLIED (INCLUDING
ALL IMPLIED WARRANTIES OF MERCHANTABILITY OR FITNESS FOR A
PARTICULAR PURPOSE) ARE HEREBY DISCLAIMED. DYNAMIC PICTURES SHALL
NOT BE LIABLE FOR INCIDENTAL OR CONSEQUENTIAL DAMAGES RESULTING
FROM THE USE OF THIS PRODUCT, OR ARISING OUT OF ANY BREACH OF THIS
WARRANTY.
Some states do not allow limitations on how long an implied warranty lasts, so the
above limitation may not apply to you. Some states do not allow the exclusion or
limitation of incidental or consequential damages, so the above limitation or exclusion
may not apply to you. The warranty gives you specific legal rights, and you may also
have other rights state to state.
Installation and User’s Guide 65
Page 72

Appendix E: Appendix E: Mechanical and ElectricalMechanical and Electrical
SpecificationsSpecifications
Mechanical
The Oxygen 102 graphics accelerator card is a mechanically compliant
PCI option card in the PCI short-card form factor of 6.875 inches by 4.2
inches by 0.57 inches.
The Oxygen 202 graphics accelerator card is a mechanically compliant
PCI option card in the PCI form factor of 9.25 inches by 4.2 inches by
0.57 inches.
The Oxygen 402 graphics accelerator card is a PCI option card in the
PCI form factor of 12.28 inches by 4.2 inches by 0.59 inches.
Electrical
The Oxygen 102 card has a maximum power consumption of 10.5
watts, the Oxygen 202 card has a maximum power consumption of 24.7
watts, and the Oxygen 402 card has a maximum power consumption of
35.4 watts. The following table lists the measured current draw at all
supply voltages.
Maximum PCIMaximum PCI Power Consumption Power Consumption
Supply (Volts) Consumption (Amps)
Oxygen 102 Oxygen 202 Oxygen 402
+5 +/- 5% 2.0 4.7 6.7
+3.3 +/- 5% 0 0 0
+12 +/- 5% 0 0 0
-12 +/- 5% 0 0 0
66 Dynamic Pictures Oxygen 3D Family
Page 73

Appendix F: Declaration of ConformityAppendix F: Declaration of Conformity
We, Dynamic Pictures, Incorporated,
5225 Betsy Ross Drive
Santa Clara, CA 95054-1102
Phone 408-327-9000
Fax 408-327-9010
United States of America
declare under our sole responsibility that the products
Dynamic Pictures® Oxygen™ 102
Dynamic Pictures® Oxygen™ 202
Dynamic Pictures® Oxygen™ 402
to which this declaration relates is in conformance with the following standards:
EN55022:1987
EN50082-1:1992
IEC 801-2:1984
IEC 801-3:1984
IEC 801-4:1987
following the provisions of the 89/336/EEC Directive.
Santa Clara California, March 1, 1997
Dynamic Pictures, Inc.
We, Dynamic Pictures, Incorporated,
5225 Betsy Ross Drive
Santa Clara, CA 95054-1102
Phone 408-327-9000
Fax 408-327-9010
United States of America
declare under our sole responsibility that the product
Dynamic Pictures® Oxygen™ 202
Dynamic Pictures® Oxygen™ 402
complies with Part 15 of FCC Rules. Operation is subject to the following two
conditions: (1) this device may not cause harmful interference, and (2) this device
must accept any interference received, including interference that may cause undesired
operation.
Installation and User’s Guide 67
Page 74

Appendix G: Software License AgreementAppendix G: Software License Agreement
This is a legal contract between you, the end user, and Dynamic Pictures, Inc. By using the
software package accompanying this manual or pre-installed on your system, you are accepting
and agreeing to be bound by the terms of this License. If you are not willing to be bound by the
terms of this License, promptly return this manual with the unopened software envelope, Oxygen
card and any other accompanying items together with your receipt to your place of purchase for a
full refund.
SOFTWARE LICENSE AND RESTRICTIONSSOFTWARE LICENSE AND RESTRICTIONS
The enclosed SOFTWARE delivered to you pursuant to these terms and conditions may embody
and include certain software programs in object code (machine-readable but not human-readable
form). Use of the SOFTWARE can result in the production of human-readable features such as
documentation, report formats, menus, audible prompts and tone sequences. Such SOFTWARE
and features constitute either the copyrighted property or proprietary trade secret information, or
both, of Dynamic Pictures, Inc. or its licensors, and shall be held in confidence by you. Dynamic
Pictures, Inc. or its licensors retain title to the SOFTWARE (excluding media on which recorded),
all copies thereof, and all intellectual property rights, and no title to the SOFTWARE, copies
thereof or intellectual property rights are transferred to you. You are hereby granted, for internal
use only, a personal, nontransferable, nonexclusive and perpetual license to use only one copy of
the SOFTWARE on the computer on which the SOFTWARE was originally mounted. Except as
specifically authorized by this License, you may not copy the SOFTWARE or the human-readable
features referred to above for any purpose (except for a copy for backup purposes). All such
copies are the proprietary information of DPI and its licensors and suppliers and are subject to
their copyrights. You shall not, whether through the use of disassemblers or any other means
whatsoever (including but not limited to manual, mechanical or electrical means), reverse
engineer, decompile, disassemble or derive source code from the SOFTWARE, or attempt to
permit any third party to do any of the foregoing, including causing the SOFTWARE to be
destroyed or disabled or deriving the rules or protocols embodied in the SOFTWARE. Any
attempt to do any of these things shall be a material breach of this License, which shall
immediately entitle Dynamic Pictures, Inc. to exercise any remedy that may exist at law or in
equity. You may not transfer, loan, rent, lease, distribute or grant any rights in the SOFTWARE or
accompanying documentation in any form without the prior written consent of Dynamic Pictures,
Inc.
LIMITED WARRANTYLIMITED WARRANTY
Dynamic Pictures, Inc. warrants that the SOFTWARE licensed to you under this License will
perform in accordance with Dynamic Pictures, Inc. published specifications for a period of three
(3) years after the date of delivery to you as evidenced by your receipt (Warranty Period). If the
SOFTWARE does not conform during the Warranty Period, you agree to provide written notice of
such failure to Dynamic Pictures, Inc. and Dynamic Pictures, Inc. will repair or replace the
SOFTWARE or refund the full purchase price. Dynamic Pictures, Inc. does not warrant that the
use of the SOFTWARE will be uninterrupted or error-free and hereby disclaims all liability on
account thereof. THE REMEDIES PROVIDED HEREIN ARE YOUR SOLE AND EXCLUSIVE
REMEDIES FOR BREACH OF WARRANTY. THIS WARRANTY IS IN LIEU OF ALL OTHER
WARRANTIES OR CONDITIONS, EXPRESS OR IMPLIED, INCLUDING WARRANTIES OR
CONDITIONS OF MERCHANTABILITY AND FITNESS FOR A PARTICULAR PURPOSE. SOME
STATES OR COUNTRIES DO NOT ALLOW THE EXCLUSION OF IMPLIED WARRANTIES OR
CONDITIONS, SO THE ABOVE EXCLUSION MAY NOT APPLY TO YOU.
68 Dynamic Pictures Oxygen 3D Family
Page 75

LIMITED LIABILITYLIMITED LIABILITY
NOTWITHSTANDING ANY PROVISION IN THIS LICENSE TO THE CONTRARY, DYNAMIC
PICTURES, INC. OR ITS LICENSORS WILL NOT BE LIABLE FOR ANY SPECIAL, INCIDENTAL,
INDIRECT OR CONSEQUENTIAL DAMAGES, HOWEVER CAUSED, OR ANY THEORY OF
LIABILITY, WHETHER OR NOT DPI HAS BEEN ADVISED OF THE POSSIBILITY OF SUCH
DAMAGE OR LOSS. IN NO EVENT SHALL DYNAMIC PICTURES, INC. LIABILITY ARISING
UNDER THIS LICENSE EXCEED THE AMOUNT PAID BY YOU FOR THE SOFTWARE GIVING
RISE TO SUCH LIABILITY. THIS LIMITATION IS INTENDED TO LIMIT THE LIABILITY OF DPI
AND SHALL APPLY NOTWITHSTANDING ANY FAILURE OF ESSENTIAL PURPOSE OF ANY
LIMITED REMEDY. SOME STATES OR COUNTRIES MAY NOT ALLOW THE FOREGOING
LIMITATION, SO THE FOREGOING MAY NOT APPLY TO YOU.
CONFIDENTIALITYCONFIDENTIALITY
The SOFTWARE contains confidential trade secret information belonging to Dynamic Pictures,
Inc. or its licensors, and you may use the SOFTWARE only pursuant to the license set forth
herein. In addition, you may not disclose the SOFTWARE to any third party.
RESTRICTED RIGHTS NOTICERESTRICTED RIGHTS NOTICE
Use, duplication or disclosure by the United States Government is subject to restrictions as set
forth in subparagraphs (c)(1) and (c)(2) of the Commercial Computer Software - Restricted
Rights clause at FAR Section 52.277-19 or (c)(1)(ii) of the Rights in Technical Data and Computer
Software clause at DFARS Section 252.277-7013, as applicable. Unpublished - rights reserved
under the copyright laws of the United States. Contractor: Dynamic Pictures, Inc., 5225 Betsy Ross
Drive, Santa Clara, California 95054.
You may terminate this License at any time by destroying all copies, mergers or modifications of
the SOFTWARE and accompanying materials. Dynamic Pictures, Inc. may immediately terminate
your License upon notice for failure to comply with the terms and conditions of this License.
Upon such termination, you agree to destroy all copies, mergers and modifications of the
SOFTWARE and accompanying documents. You agree that a breach of this License will result in
irreparable damages to Dynamic Pictures, Inc. This License is the entire agreement between you
and Dynamic Pictures, Inc. with respect to the use and licensing of the SOFTWARE, and
supersedes all proposals, warranties, prior agreements or any other communications between the
parties relating to the subject matter hereof. This License will be governed by and construed in
accordance with the laws of California without regard to conflicts of law principles or the UN
Convention on the Sale of Goods. If for any reason a court of competent jurisdiction finds any
provision of this License, or portion thereof, to be unenforceable, that provision of the License
shall be enforced to the maximum extent permissible so as to effect the intent of the parties, and
the remainder of this License shall continue in full force and effect. Should you have any questions
concerning this License, please write to: Dynamic Pictures, Inc., 5225 Betsy Ross Drive, Santa
Clara, California 95054.
Installation and User’s Guide 69
Page 76

IndexIndex
3D Studio MAX....................
2, 11, 20, 31, 33, 34, 50,
57, 58, 59
About Dynamic Pictures ......1
Advanced Options Tab..........
See Oxygen Control Panel
Alpha...........1, 2, 4, 7, 28, 30
anti-aliased lines................29
Awards ...............................5
bi-linear sampling.............. 30
BIOS.................................42
bus-master capable slot..4, 41
CD-ROM............................ 3
CMOS............................... 42
DAC ........................... 46, 48
dispatcher..........................47
Dual Displays
differences: WinNT 3.51
and WinNT 4.0..............64
enable dual monitor mode
..................................... 30
switching your jumper... 61
using dual oxygen cards.60
dynamic allocation ........ 28
Electronic License...............9
Electronic User’s Guide....... 1
Ethernet card.....................43
field sequential stereo........ 54
FIFO................................. 47
geometry........................... 47
geometry processing..........52
Heidi
2, 11, 20, 29, 30, 34, 50,
57, 58, 59
Installation Instructions .......5
Oxygen Card................. 18
Oxygen for Win 95 ........13
Oxygen for WinNT 3.5156
Oxygen for WinNT 4.0... 6
Intel.........................1, 2, 4, 7
IRQ.................................. 43
jumbo desktop .................. 60
LCD................................. 54
Lightscape...............2, 33, 35
LightWave 3D.............33, 35
Memory Options Tab
See Oxygen Control Panel
MicroStation..................2, 33
mip-mapping.................... 30
monocular ........................ 54
multi-CPU systems........... 52
OpenGL ...............................
2, 3, 11, 17, 29, 32, 35, 45,
50, 52, 54
OpenGL API .................... 50
Oxygen 3.0 Release ............ 3
Oxygen 3D Family ...............
1, 3, 4, 8, 9, 11, 21, 27, 28,
46, 48, 52
Oxygen Chip .................... 47
Oxygen Control Panel....... 24
Advanced Options Tab.. 29
Memory Options Tab.... 27
Oxygen Status Tab........ 25
Support Information Tab32
Oxygen Status Tab
See Oxygen Control Panel
PCI.......................................
2, 4, 5, 19, 20, 41, 42, 43,
46, 47, 60, 61, 66
PCI bursting ..................... 42
Performance Optimizations
3D Studio MAX............ 34
Lightscape.................... 35
LightWave 3D.............. 35
Pro/ENGINEER............ 36
70 Dynamic Pictures Oxygen 3D Family
Page 77

Softimage|3D ................ 34
Performance Tuning..........23
Hardware ...................... 23
Monitors ....................... 23
Oxygen Control Panel ... 24
pixel depth ........................26
plane equation...................47
PowerThreads ...........2, 3, 52
Pro/ENGINEER...... 2, 33, 36
refresh rate..................23, 26
Register Online .............2, 22
registration................ 2, 3, 22
Release Notes ....................22
rendering...........................47
Resolutions Supported
Oxygen 102...................38
Oxygen 202...................38
Oxygen 402...................38
SDRAM............................48
SDRC I-DEAS..................33
Softimage|3D ................2, 33
Software Gallery .................3
Software License ...............68
Software Partners..............33
SolidWorks 97 ..................33
Specifications
Mechanical....................66
Electrical....................... 66
Start Menu ........................21
stereo 3D............... 24, 31, 54
Support Information Tab.......
See Oxygen Control Panel
System Requirements ......... 4
Table of Contents ............... 3
Technical Support............. 45
Technology
Hardware Overview...... 46
PowerThreads Overview52
Software Overview ....... 50
Stereo 3D Overview ...... 54
texel ................................. 28
Texture Memory............... 28
Troubleshooting
Hardware...................... 40
Heidi Driver Installation 59
Software....................... 44
true color.......................... 37
unified memory architecture
..................................... 48
Unigraphics.............2, 33, 36
Uninstall........................... 22
Upgrading Your Oxygen
Driver........................... 39
VGA chip......................... 48
VGA jumper................ 41, 61
VGA palette snoop ........... 42
Warranty .......................... 65
WGL API......................... 50
Z-Buffer........................... 28
Z-buffer depth .................. 26
2 Dynamic Pictures Oxygen 3D Family
Page 78

Page 79

Installation and User’s Guide 1
 Loading...