

ZyXEL Communications NWD2105 User Manual
NWD2105
Wireless N-lite USB Adapter
Version 1.0
Edition 1, 05/2010
www.zyxel.com
www.zyxel.com
Copyright © 2010
ZyXEL Communications Corporation

About This User's Guide
About This User's Guide
Intended Audience
This manual is intended for people who want to configure the NWD2105 using the
ZyXEL utility.
Tips for Reading User’s Guides On-Screen
When reading a ZyXEL User’s Guide On-Screen, keep the following in mind:
• If you don’t already have the latest version of Adobe Reader, you can download
it from http://www.adobe.com.
• Use the PDF’s bookmarks to quickly navigate to the areas that interest you.
Adobe Reader’s bookmarks pane opens by default in all ZyXEL User’s Guide
PDFs.
• If you know the page number or know vaguely which page-range you want to
view, you can enter a number in the toolbar in Reader, then press [ENTER] to
jump directly to that page.
• Type [CTRL]+[F] to open the Adobe Reader search utility and enter a word or
phrase. This can help you quickly pinpoint the information you require. You can
also enter text directly into the toolbar in Reader.
• To quickly move around within a page, press the [SPACE] bar. This turns your
cursor into a “hand” with which you can grab the page and move it around freely
on your screen.
• Embedded hyperlinks are actually cross-references to related text. Click them to
jump to the corresponding section of the User’s Guide PDF.
Related Documentation
• Quick Start Guide
The Quick Start Guide is designed to help you get up and running right away. It
contains information on setting up your network and configuring for Internet
access.
• Online Help
Embedded web help for descriptions of individual screens and supplementary
information.
• Support Disc
Refer to the included CD for support documents.
Documentation Feedback
Send your comments, questions or suggestions to: techwriters@zyxel.com.tw
NWD2105 User’s Guide
3
About This User's Guide
Thank you!
The Technical Writing Team, ZyXEL Communications Corp.,
6 Innovation Road II, Science-Based Industrial Park, Hsinchu, 30099, Taiwan.
Need More Help?
More help is available at www.zyxel.com.
• Download Library
Search for the latest product updates and documentation from this link. Read
the Tech Doc Overview to find out how to efficiently use the documentation in
order to better understand how to use your product.
• Knowledge Base
If you have a specific question about your product, the answer may be here.
This is a collection of answers to previously asked questions about ZyXEL
products.
• Forum
This contains discussions on ZyXEL products. Learn from others who use ZyXEL
products and share your experiences as well.
4
Customer Support
Should problems arise that cannot be solved by the methods listed above, you
should contact your vendor. If you cannot contact your vendor, then contact a
ZyXEL office for the region in which you bought the device.
See http://www.zyxel.com/web/contact_us.php for contact information. Please
have the following information ready when you contact an office.
• Product model and serial number.
• Warranty Information.
• Date that you received your device.
• Brief description of the problem and the steps you took to solve it.
NWD2105 User’s Guide

Document Conventions
Document Conventions
Warnings and Notes
These are how warnings and notes are shown in this User’s Guide.
Warnings tell you about things that could harm you or your
NWD2105.
Note: Notes tell you other important information (for example, other things you may
need to configure or helpful tips) or recommendations.
Syntax Conventions
• The NWD2105 may be referred to as the “NWD2105”, the “device”, the “system”
or the “product” in this User’s Guide.
• Product labels, screen names, field labels and field choices are all in bold font.
• A key stroke is denoted by square brackets and uppercase text, for example,
[ENTER] means the “enter” or “return” key on your keyboard.
•“Enter” means for you to type one or more characters and then press the
[ENTER] key. “Select” or “choose” means for you to use one of the predefined
choices.
• A right angle bracket ( > ) within a screen name denotes a mouse click. For
example, Maintenance > Log > Log Setting means you first click
Maintenance in the navigation panel, then the Log sub menu and finally the
Log Setting tab to get to that screen.
• Units of measurement may denote the “metric” value or the “scientific” value.
For example, “k” for kilo may denote “1000” or “1024”, “M” for mega may
denote “1000000” or “1048576” and so on.
•“e.g.,” is a shorthand for “for instance”, and “i.e.,” means “that is” or “in other
words”.
NWD2105 User’s Guide
5
Document Conventions
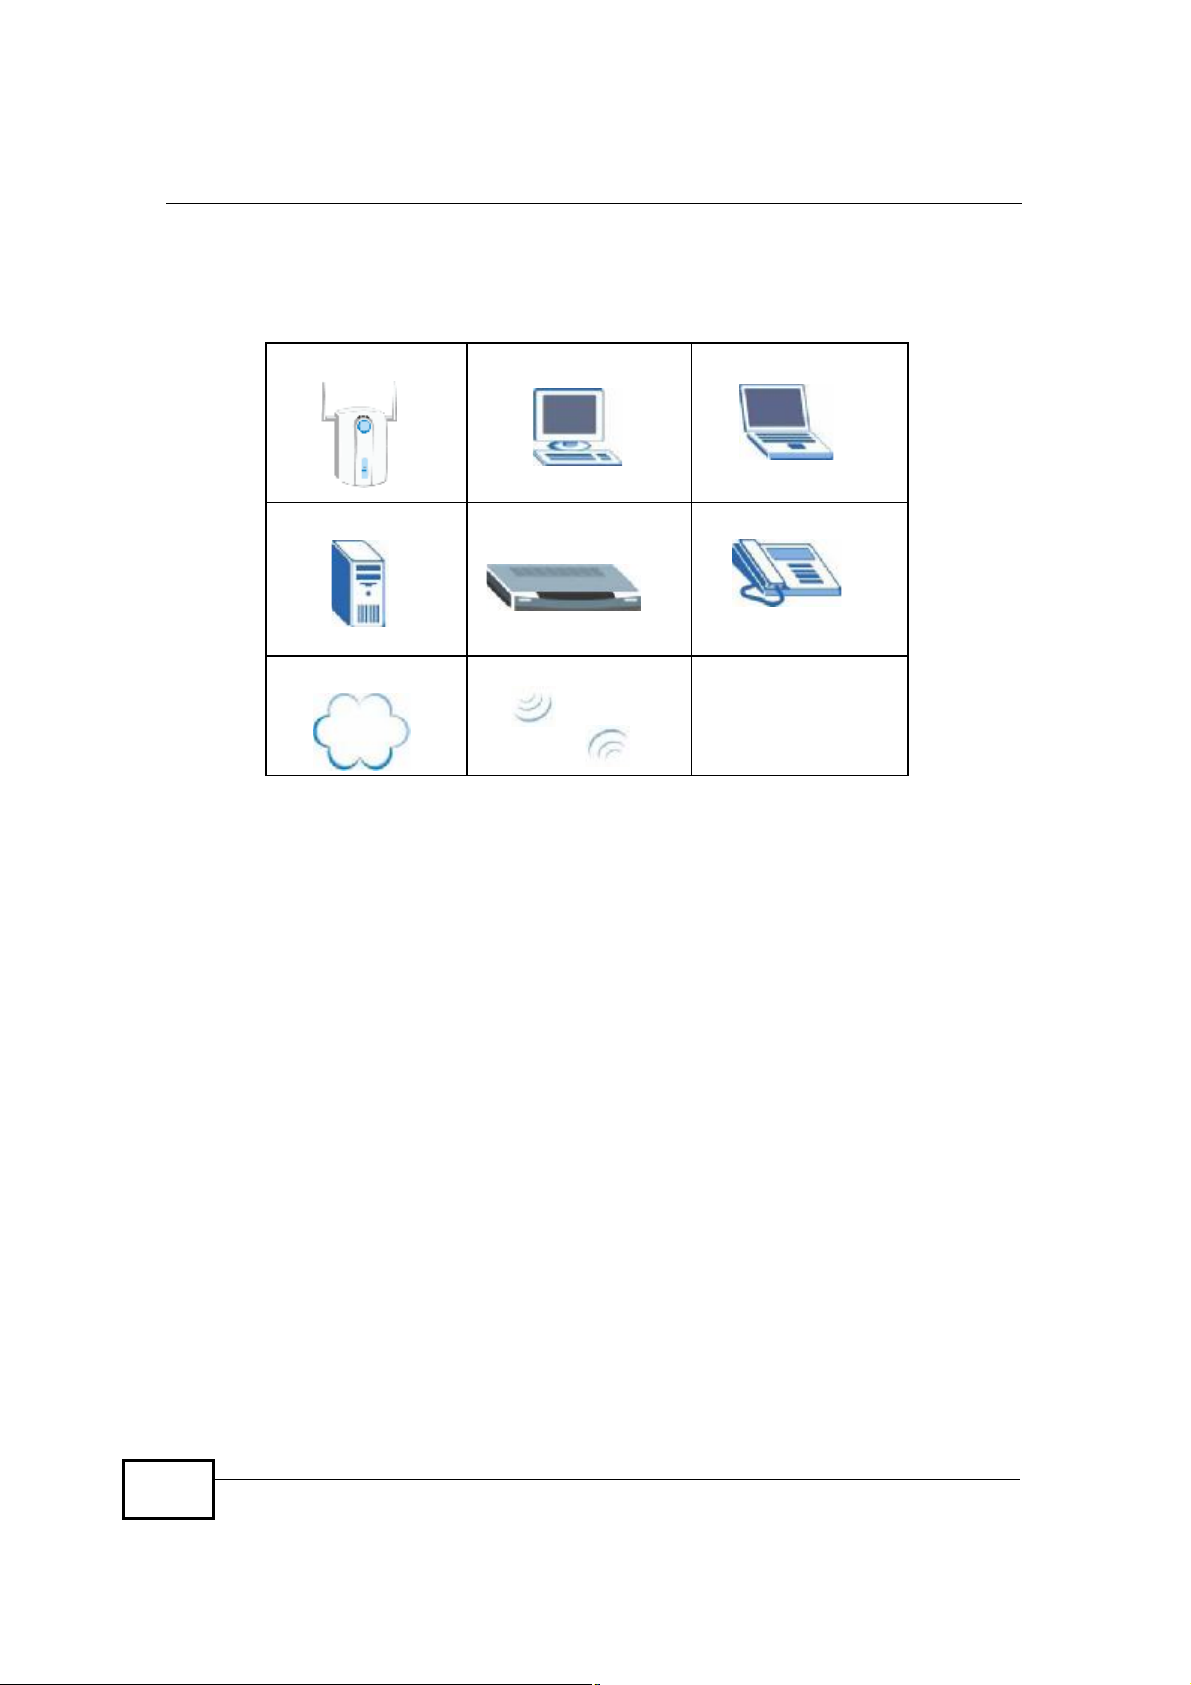
Icons Used in Figures
Figures in this User’s Guide may use the following generic icons.
Wireless Access Point Computer Notebook computer
Server Modem Telephone
Internet Wireless Signal
6
NWD2105 User’s Guide

Safety Warnings
Safety Warnings
• Do NOT use this product near water, for example, in a wet basement or near a swimming
pool.
• Do NOT expose your device to dampness, dust or corrosive liquids.
• Do NOT store things on the device.
• Do NOT install, use, or service this device during a thunderstorm. There is a remote risk
of electric shock from lightning.
• Connect ONLY suitable accessories to the device.
• Ground yourself (by properly using an anti-static wrist strap, for example) whenever
working with the device’s hardware or connections.
• ONLY qualified service personnel should service or disassemble this device.
• Antenna Warning! This device meets ETSI and FCC certification requirements when using
the included antenna(s). Only use the included antenna(s).
Your product is marked with this symbol, which is known as the WEEE mark.
WEEE stands for Waste Electronics and Electrical Equipment. It means that
used electrical and electronic products should not be mixed with general waste.
Used electrical and electronic equipment should be treated separately.
NWD2105 User’s Guide
7

Safety Warnings
8
NWD2105 User’s Guide

Contents Overview
Contents Overview
Introduction and Configuration ............................................................................................15
Getting Started ...........................................................................................................................17
Tutorial .......................................................................................................................................23
Wireless LANs ...........................................................................................................................37
Station Mode ..............................................................................................................................49
AP Mode ....................................................................................................................................75
Maintenance ..............................................................................................................................85
Troubleshooting and Specifications ....................................................................................89
Troubleshooting .........................................................................................................................91
Product Specifications ...............................................................................................................95
Appendices and Index ...........................................................................................................99
NWD2105 User’s Guide
9

Contents Overview
10
NWD2105 User’s Guide

Table of Contents
Table of Contents
About This User's Guide..........................................................................................................3
Document Conventions............................................................................................................5
Safety Warnings........................................................................................................................7
Contents Overview...................................................................................................................9
Table of Contents....................................................................................................................11
Part I: Introduction and Configuration.................................................15
Chapter 1
Getting Started........................................................................................................................17
1.1 Overview ..............................................................................................................................17
1.1.1 What You Need to Know ............................................................................................17
1.1.2 Before You Begin .......................................................................................................18
1.2 About Your NWD2105 .......................................................................................................18
1.2.1 Hardware ....................................................................................................................18
1.3 Application Overview ...........................................................................................................19
1.3.1 Infrastructure ..............................................................................................................19
1.3.2 Ad-Hoc .......................................................................................................................20
1.4 Hardware and Utility Installation ..........................................................................................20
1.4.1 ZyXEL Utility Icon .......................................................................................................20
1.5 Configuration Methods .......................................................................................................21
1.5.1 Enabling Windows Wireless Configuration ................................................................21
1.5.2 Accessing the ZyXEL Utility ......................................................................................21
Chapter 2
Tutorial.....................................................................................................................................23
2.1 Overview ..............................................................................................................................23
2.1.1 What You Can Do in This Tutorial ..............................................................................23
2.1.2 What You Need to Know ............................................................................................23
2.1.3 Before You Begin .......................................................................................................24
2.2 Connecting to an AP using Wi-Fi Protected Setup (WPS) ..................................................24
2.2.1 Push Button Configuration (PBC) ..............................................................................24
2.2.2 PIN Configuration .......................................................................................................25
2.3 Connecting to an AP Without Using WPS ...........................................................................29
NWD2105 User’s Guide
11

Table of Contents
2.3.1 Manually Connecting to a Wireless LAN ...................................................................29
2.3.2 Creating and Using a Profile ......................................................................................31
2.4 Configuring the NWD2105 as an AP ...................................................................................34
Chapter 3
Wireless LANs.........................................................................................................................37
3.1 Overview ..............................................................................................................................37
3.1.1 What You Can Do in This Section ..............................................................................37
3.1.2 What You Need to Know ............................................................................................37
3.1.3 Before You Begin .......................................................................................................38
3.2 Wireless LAN Overview ......................................................................................................38
3.3 Wireless LAN Security ........................................................................................................39
3.3.1 User Authentication and Encryption ...........................................................................39
3.4 WiFi Protected Setup ...........................................................................................................41
3.4.1 Push Button Configuration .........................................................................................42
3.4.2 PIN Configuration .......................................................................................................42
3.4.3 How WPS Works ........................................................................................................44
3.4.4 Limitations of WPS .....................................................................................................47
Chapter 4
Station Mode............................................................................................................................49
4.1 Overview ..............................................................................................................................49
4.1.1 What You Can Do in This Section ..............................................................................49
4.1.2 What You Need to Know ............................................................................................49
4.1.3 Before You Begin .......................................................................................................50
4.2 ZyXEL Utility Screen Summary ...........................................................................................50
4.3 The Link Info Screen ..........................................................................................................51
4.3.1 Trend Chart ................................................................................................................53
4.4 The Site Survey Screen .....................................................................................................54
4.4.1 Security Settings .......................................................................................................55
4.4.2 Summary Screen .......................................................................................................61
4.5 The Profile Screen ..............................................................................................................62
4.5.1 Adding a New Profile ..................................................................................................64
4.6 The Adapter Screen ...........................................................................................................68
4.6.1 WPS: PBC (Push Button Configuration) ....................................................................69
4.6.2 WPS: PIN - Use this Device’s PIN .............................................................................69
4.6.3 WPS: PIN - Use the PIN from the AP or Wireless Router ..........................................70
4.7 Security Settings in Windows Vista ....................................................................................71
4.7.1 Using PEAP in Vista ...................................................................................................72
4.7.2 Using TLS in Vista .....................................................................................................73
Chapter 5
AP Mode...................................................................................................................................75
12
NWD2105 User’s Guide

Table of Contents
5.1 Overview ..............................................................................................................................75
5.1.1 What You Can Do in This Section ..............................................................................76
5.1.2 What You Need to Know ............................................................................................76
5.1.3 Before You Begin .......................................................................................................77
5.2 AP Mode Screen Summary .................................................................................................77
5.3 The Link Info Screen ..........................................................................................................78
5.4 The Configuration Screen ...................................................................................................79
5.4.1 Security Settings .......................................................................................................80
5.5 The MAC Filter Screen ........................................................................................................83
Chapter 6
Maintenance............................................................................................................................85
6.1 Overview ..............................................................................................................................85
6.1.1 What You Can Do in This Section ..............................................................................85
6.1.2 What You Need to Know ............................................................................................85
6.1.3 Before You Begin .......................................................................................................85
6.2 The About Screen ...............................................................................................................86
6.3 Uninstalling the ZyXEL Utility ..............................................................................................86
6.4 Upgrading the ZyXEL Utility ................................................................................................87
Part II: Troubleshooting and Specifications........................................89
Chapter 7
Troubleshooting......................................................................................................................91
7.1 Power, Hardware Connections, and LEDs ..........................................................................91
7.2 Accessing the ZyXEL Utility .................................................................................................92
7.3 Link Quality ..........................................................................................................................92
7.4 Problems Communicating with Other Computers ...............................................................93
Chapter 8
Product Specifications...........................................................................................................95
Part III: Appendices and Index..............................................................99
Appendix A Setting Up Your Computer’s IP Address...........................................................101
Appendix B Wireless LANs..................................................................................................131
Appendix C Windows Wireless Management......................................................................147
Appendix D Wireless for Windows 7....................................................................................173
NWD2105 User’s Guide
13

Table of Contents
Appendix E Legal Information..............................................................................................179
Index.......................................................................................................................................185
14
NWD2105 User’s Guide

PART I
Introduction and
Configuration
Getting Started (17)
Tutorial (23)
Wireless LANs (37)
Station Mode (49)
AP Mode (75)
Maintenance (85)
15

16

CHAPTER 1
Getting Started
1.1 Overview
The ZyXEL NWD2105 wireless N-lite USB adapter brings you a better Internet
experience over existing 802.11 networks. With data rates of up to 150 Mbps, you
can enjoy a breathtaking high-speed connection at home or in the office. It is an
excellent solution for daily activities such as file transfers, music downloading,
video streaming and online gaming.
This section includes:
• About Your NWD2105 on page 18
• Application Overview on page 19
• Hardware and Utility Installation on page 20
• Configuration Methods on page 21
1.1.1 What You Need to Know
The following terms and concepts may help as you read through this section, and
subsequently as you read through the rest of the User’s Guide.
Access Point
An Access Point (AP) is a network device that acts as a bridge between a wired
and a wireless network. Outside of the home or office, APs can most often be
found in coffee shops, bookstores and other businesses that offer wireless
Internet connectivity to their customers.
Infrastructure
An infrastructure network is one that seamlessly combines both wireless and
wired components. One or more APs often serve as the bridge between wireless
and wired LANs.
NWD2105 User’s Guide
17
Chapter 1Getting Started
Ad-Hoc
An Ad-Hoc wireless LAN is a self-contained group of computers connected
wirelessly and which is independent of any other networks and Access Points.
1.1.2 Before You Begin
• Read the Quick Start Guide for information on making hardware connections
and using the ZyXEL utility to connect your NWD2105 to a network.
1.2 About Your NWD2105
Your NWD2105 is an IEEE 802.11n compliant wireless LAN adapter. It can also
connect to IEEE 802.11b/g wireless networks. The NWD2105 is WPS (Wi-Fi
Protected Setup) compliant. WPS allows you to easily connect to another WPSenabled device.
The NWD2105 is a USB adapter which connects to an empty USB port on your
computer.
See your NWD2105’s Quick Start Guide for installation instructions, and see the
section on product specifications in this User’s Guide for detailed information.
1.2.1 Hardware
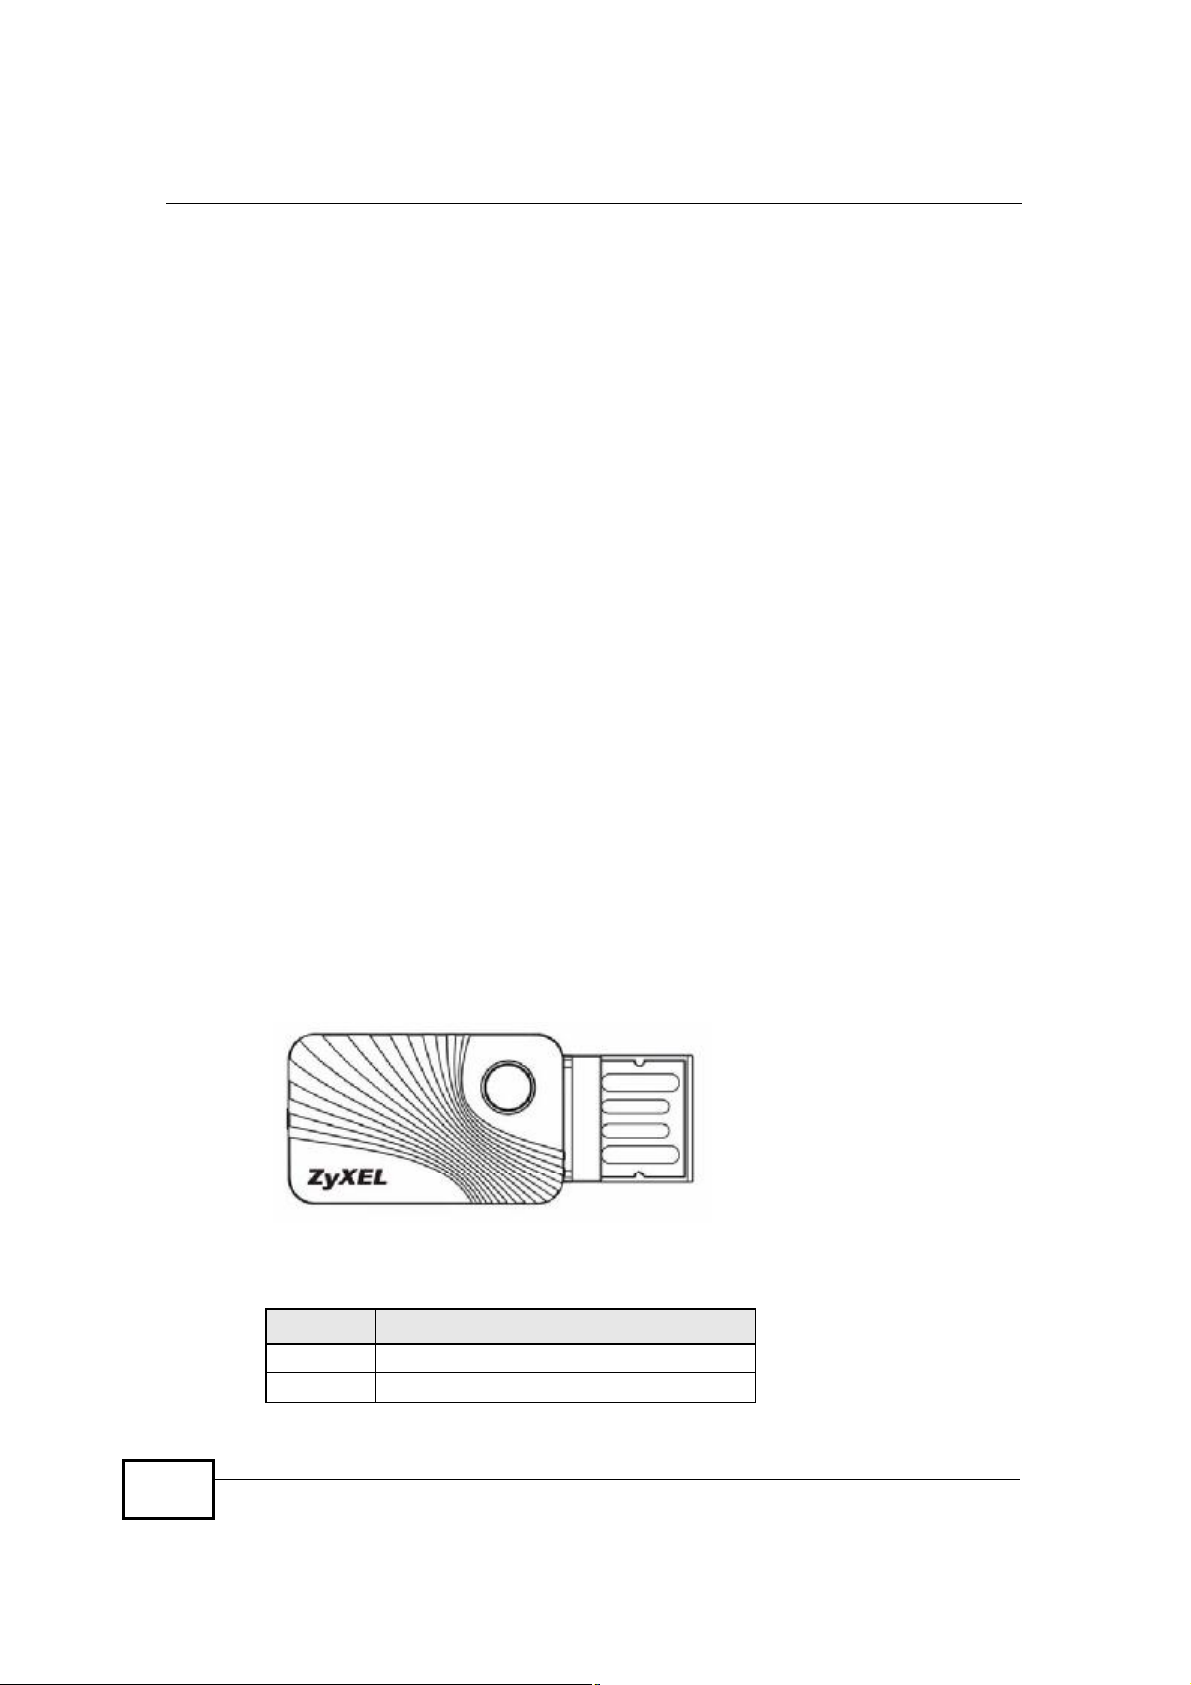
This section describes the NWD2105’s physical appearance.
Figure 1 The NWD2105
The following table describes the NWD2105.
Table 1 NWD2105 External View
LABEL DESCRIPTION
ALED and also a WPS button
BUSB connector
A
B
18
NWD2105 User’s Guide
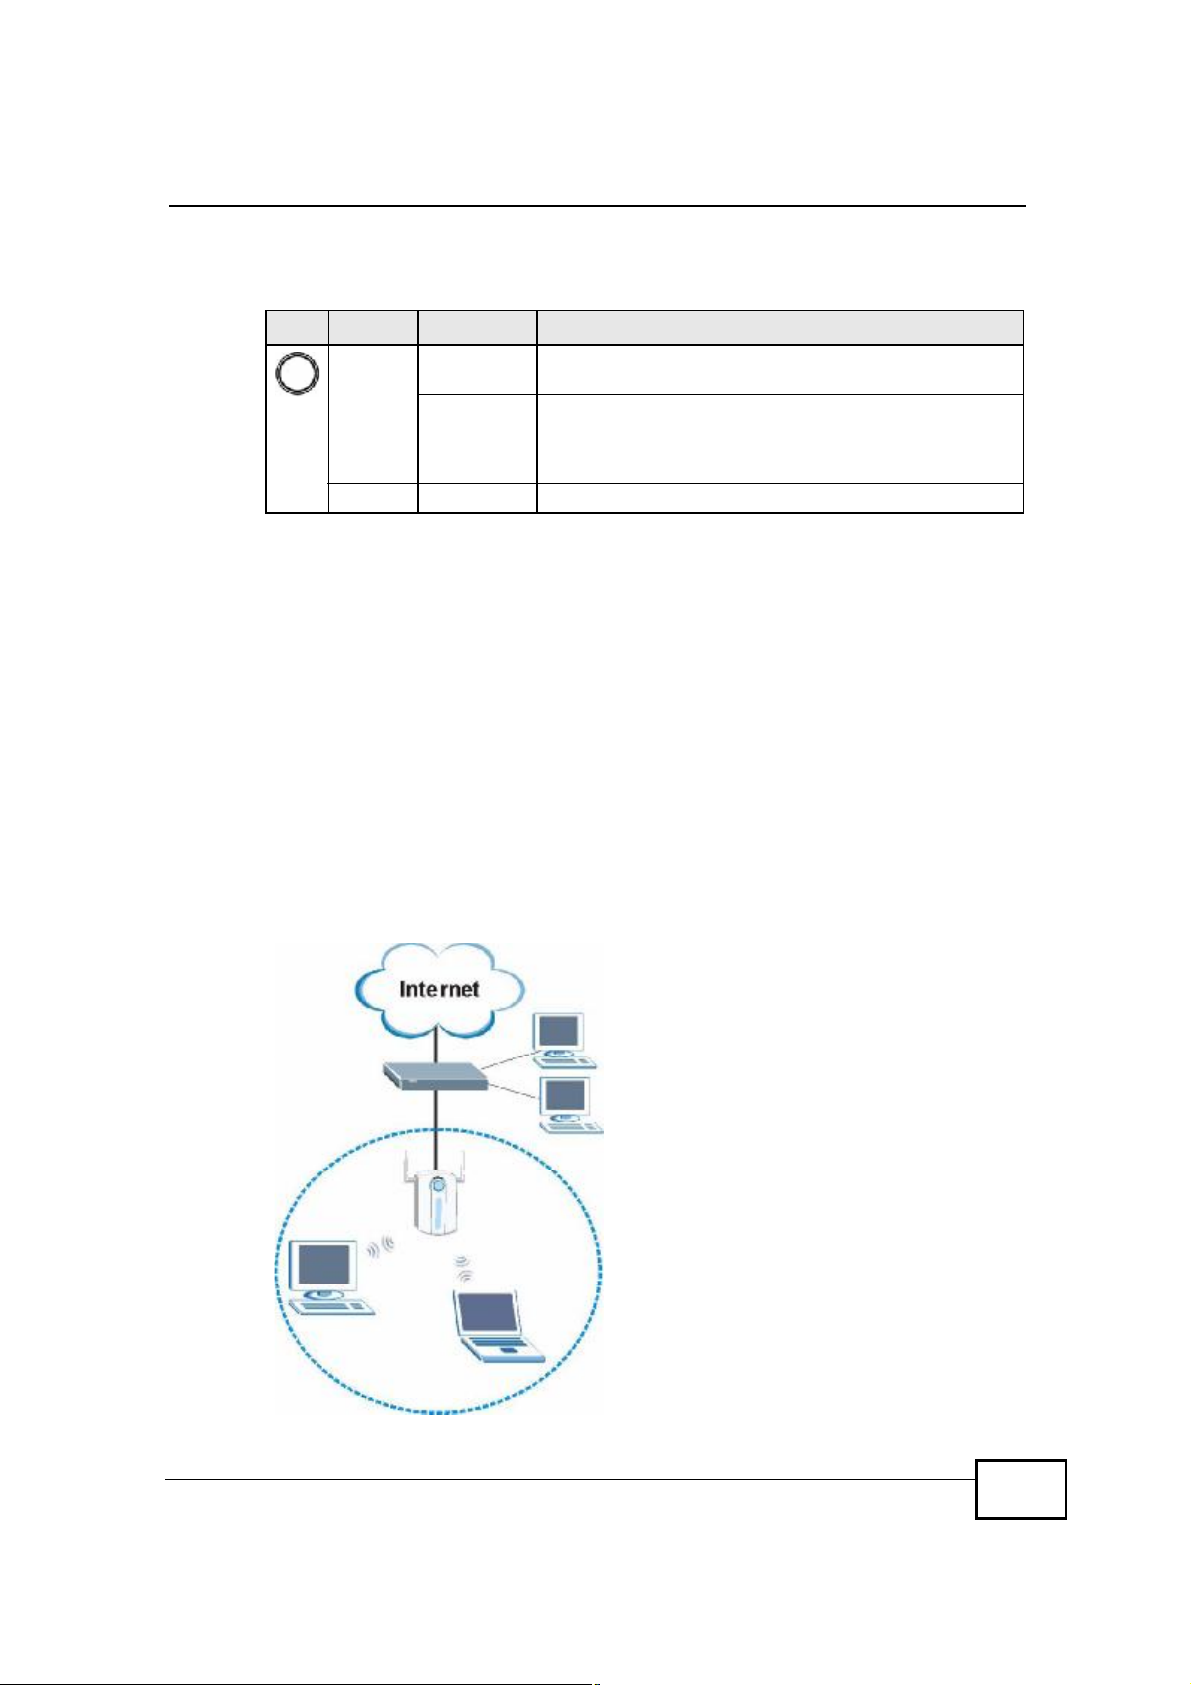
The following table describes the operation of the NWD2105’s LEDs.
Table 2 NWD2105 LEDs
LED COLOR STATUS DESCRIPTION
OrangeSlow
Blinking
Rapid
Blinking
OffThe NWD2105 is turned off.
The NWD2105 is turned on, connected to an AP, and is
not transmitting or receiving data.
The NWD2105 is turned on, connected to an AP, and is
transmitting or receiving data. It also blinks when the
WPS feature is being used or a WPS connection is being
initiated.
1.3 Application Overview
This section describes some network applications for the NWD2105. You can either
set the network type to Infrastructure and connect to an AP or use Ad-Hoc
mode and connect to a peer computer (another wireless device in Ad-Hoc mode).
Chapter 1Getting Started
1.3.1 Infrastructure
To connect to a network via an access point (AP), set the NWD2105 network type
to Infrastructure (see Chapter 4 on page 62). Through the AP, you can access
the Internet or the wired network behind the AP.
Figure 2 Application: Infrastructure
NWD2105 User’s Guide
19
Chapter 1Getting Started
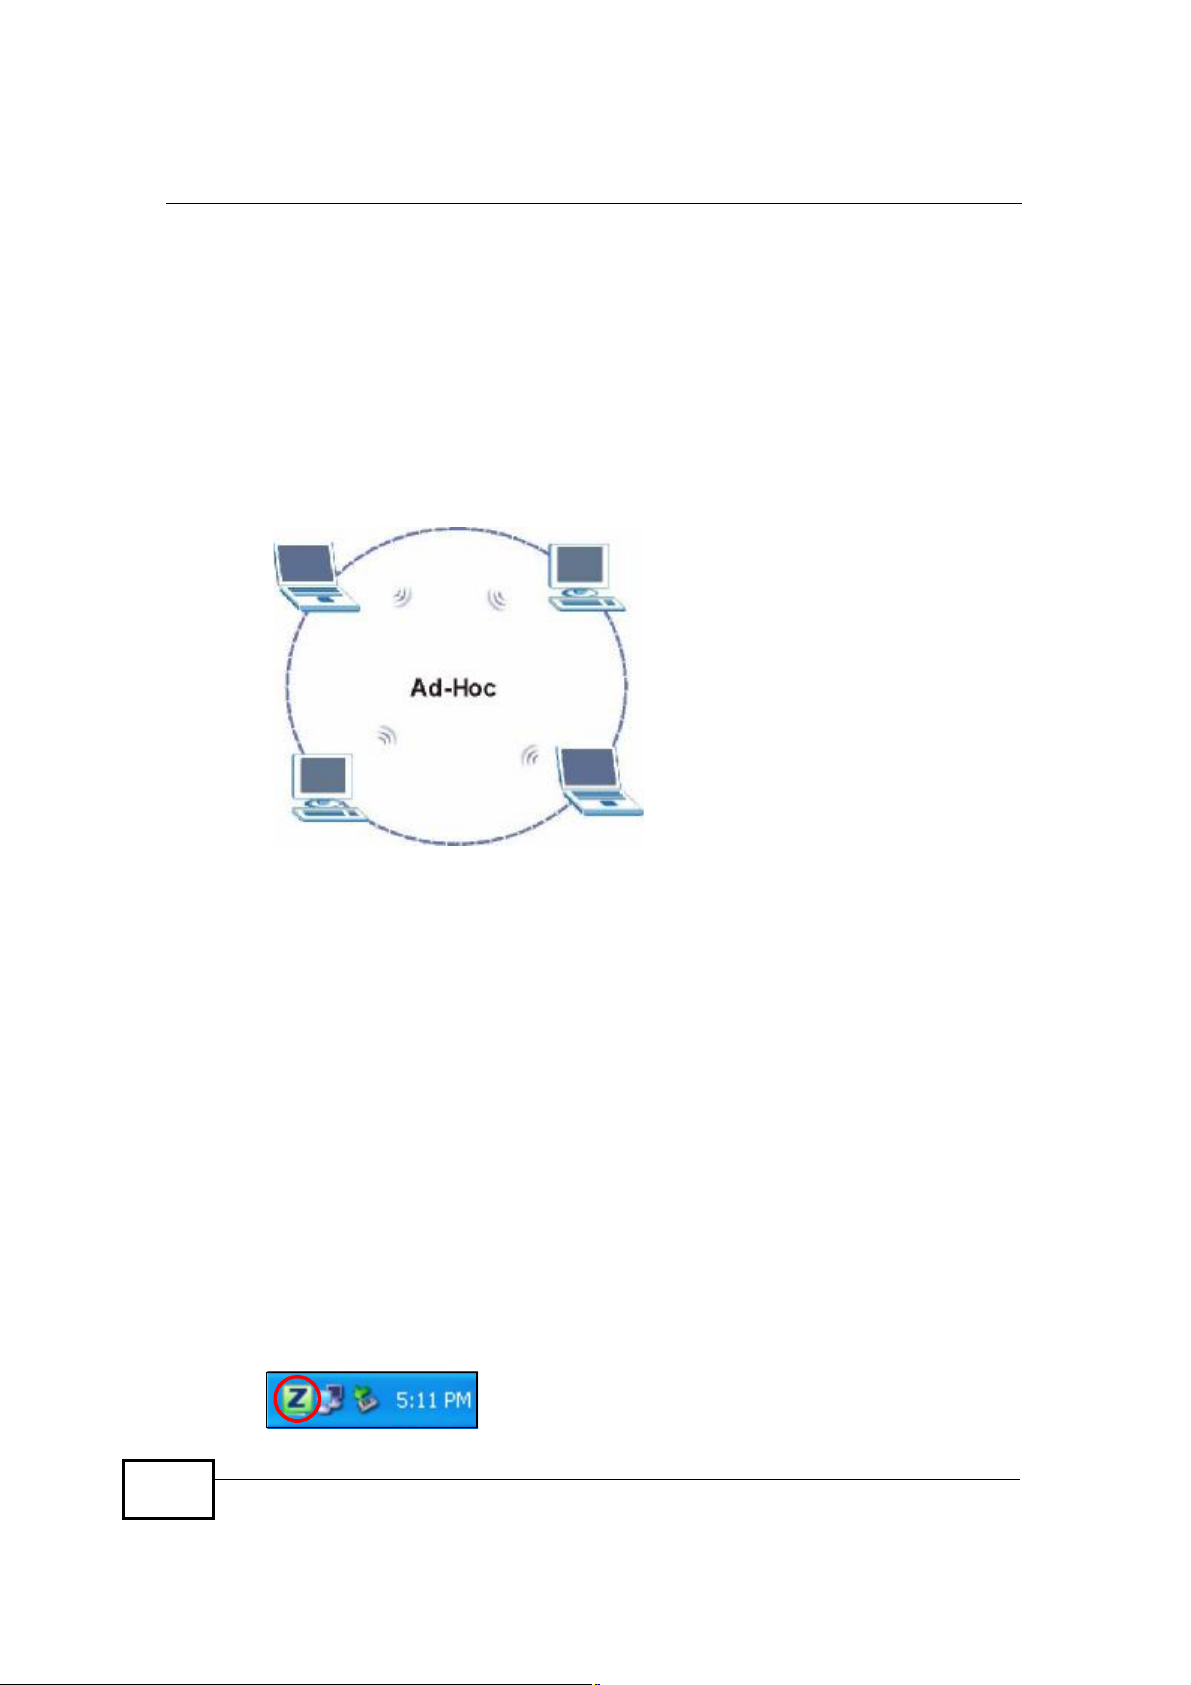
1.3.2 Ad-Hoc
To set up a small independent wireless workgroup without an AP, use Ad-Hoc (see
Chapter 4 on page 62).
Ad-Hoc does not require an AP or a wired network. Two or more wireless clients
communicate directly with each other.
Note: Wi-Fi Protected Setup (WPS) is not available in ad-hoc mode.
Figure 3 Application: Ad-Hoc
1.4 Hardware and Utility Installation
Follow the instructions in the Quick Start Guideto install the ZyXEL utility and
make hardware connections.
1.4.1 ZyXEL Utility Icon
After you install and start the ZyXEL utility, an icon for the ZyXEL utility appears in
the system tray.
Note: The ZyXEL utility system tray icon displays only when the NWD2105 is installed
properly.
Note: When you use the ZyXEL utility, it automatically disables Wireless Zero
Configuration (WZC) in Windows XP.
Figure 4 ZyXEL Utility: System Tray Icon
20
NWD2105 User’s Guide
The color of the ZyXEL utility system tray icon indicates the status of the
NWD2105. Refer to the following table for details.
Table 3 ZyXEL Utility: System Tray Icon
COLOR DESCRIPTION
RedThe NWD2105 is not connected to a wireless network.
GreenThe NWD2105 is connected to a wireless network.
1.5 Configuration Methods
To configure your NWD2105, use one of the following applications:
• Wireless Zero Configuration (WZC, the Windows XP wireless configuration tool)
or WLAN AutoConfig (the Windows Vista wireless configuration tool).
• The ZyXEL utility.
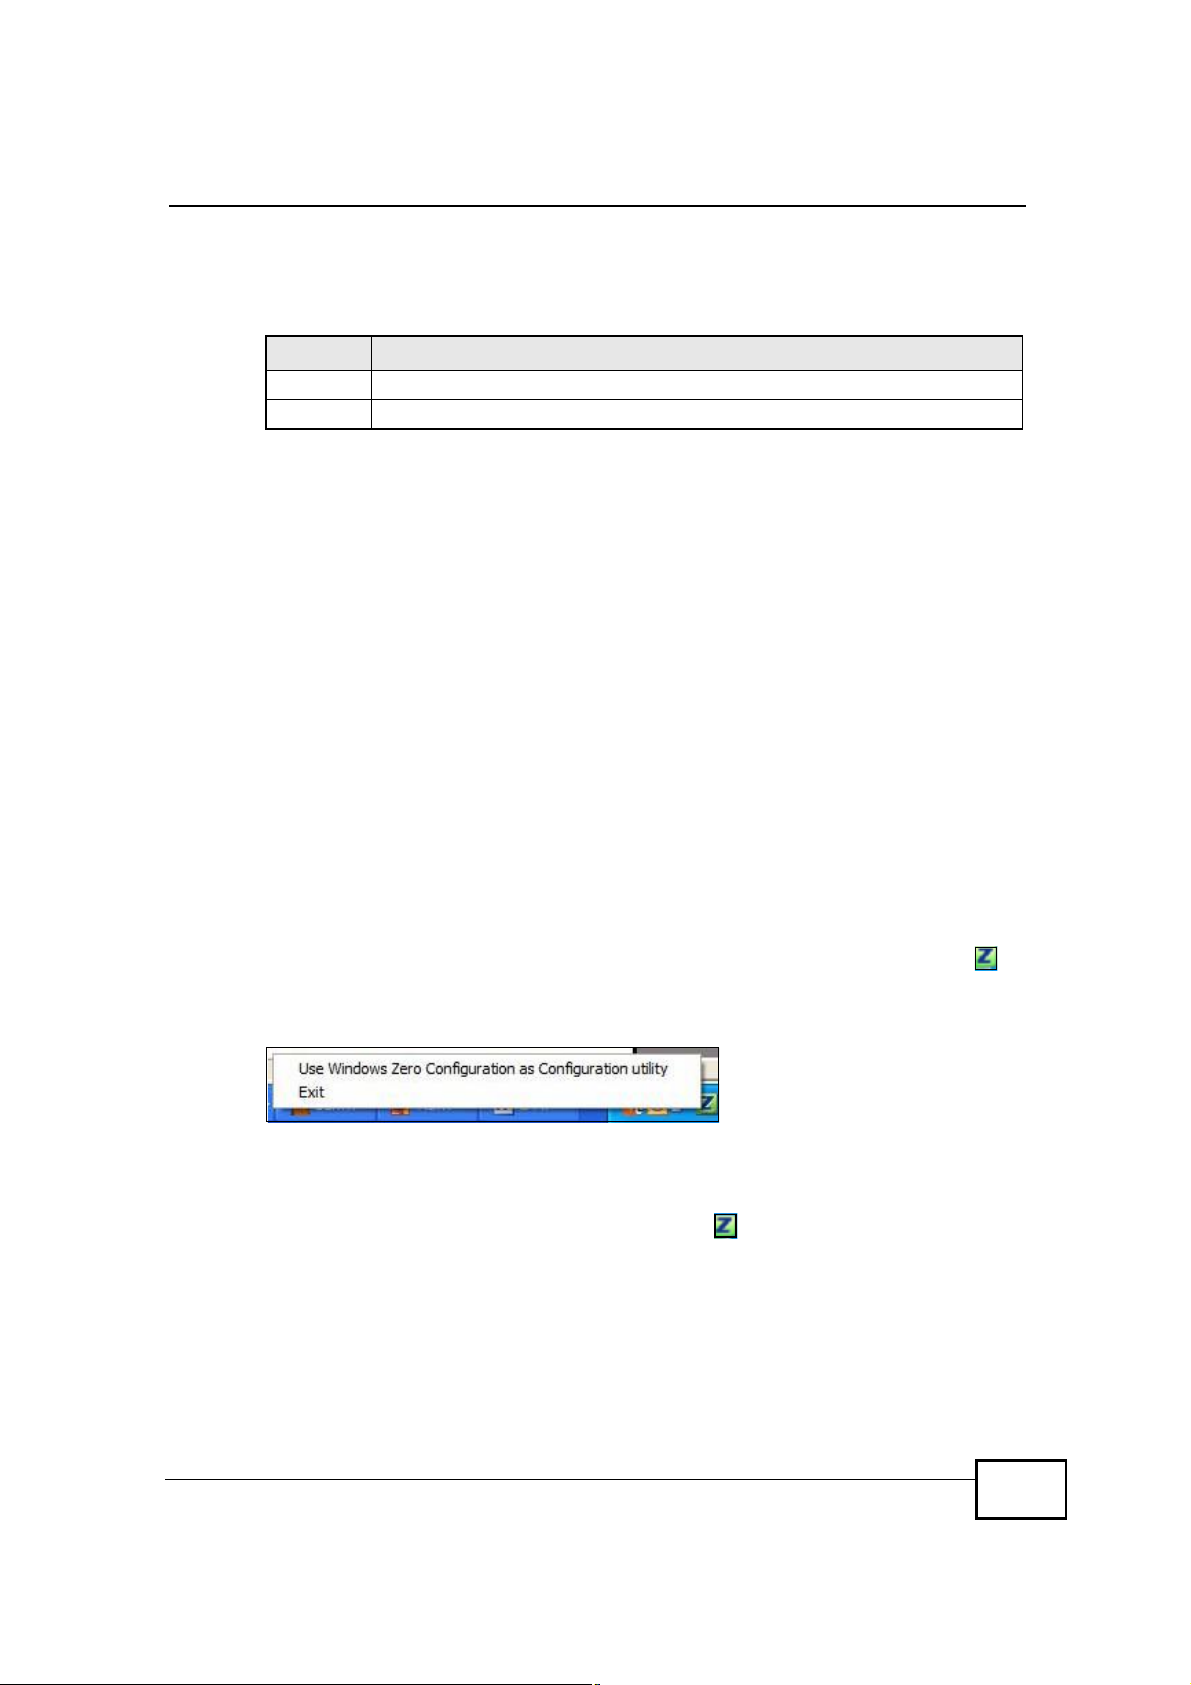
Note: Do NOT use Windows XP’s Wireless Zero Configuration tool at the same time
you use the ZyXEL utility.
Chapter 1Getting Started
1.5.1 Enabling Windows Wireless Configuration
Note: When you use the ZyXEL utility, it automatically disables Windows XP’s
wireless configuration tool.
If you want to use the Windows XP wireless configuration tool to configure the
NWD2105, you need to disable the ZyXEL utility. Right-click the utility icon ( )
in the system tray and select Exit.
Figure 5 Enable WZC
Refer to the appendices for information on how to use the Windows wireless
configuration tool to manage the NWD2105.
To reactivate the ZyXEL utility, double-click the ( ) icon on your desktop or click
Start > (All) Programs > Wireless N-lite USB Adapter Utility > Wireless N
USB Adapter Utility.
1.5.2 Accessing the ZyXEL Utility
Double-click on the ZyXEL wireless LAN utility icon in the system tray to open the
ZyXEL utility.
NWD2105 User’s Guide
21

Chapter 1Getting Started
The ZyXEL utility screens are similar in all Microsoft Windows versions. Screens for
Windows XP are shown in this User’s Guide.
Note: Click the icon (located in the top right corner) to display the online help
window.
22
NWD2105 User’s Guide
CHAPTER 2
Tutorial
2.1 Overview
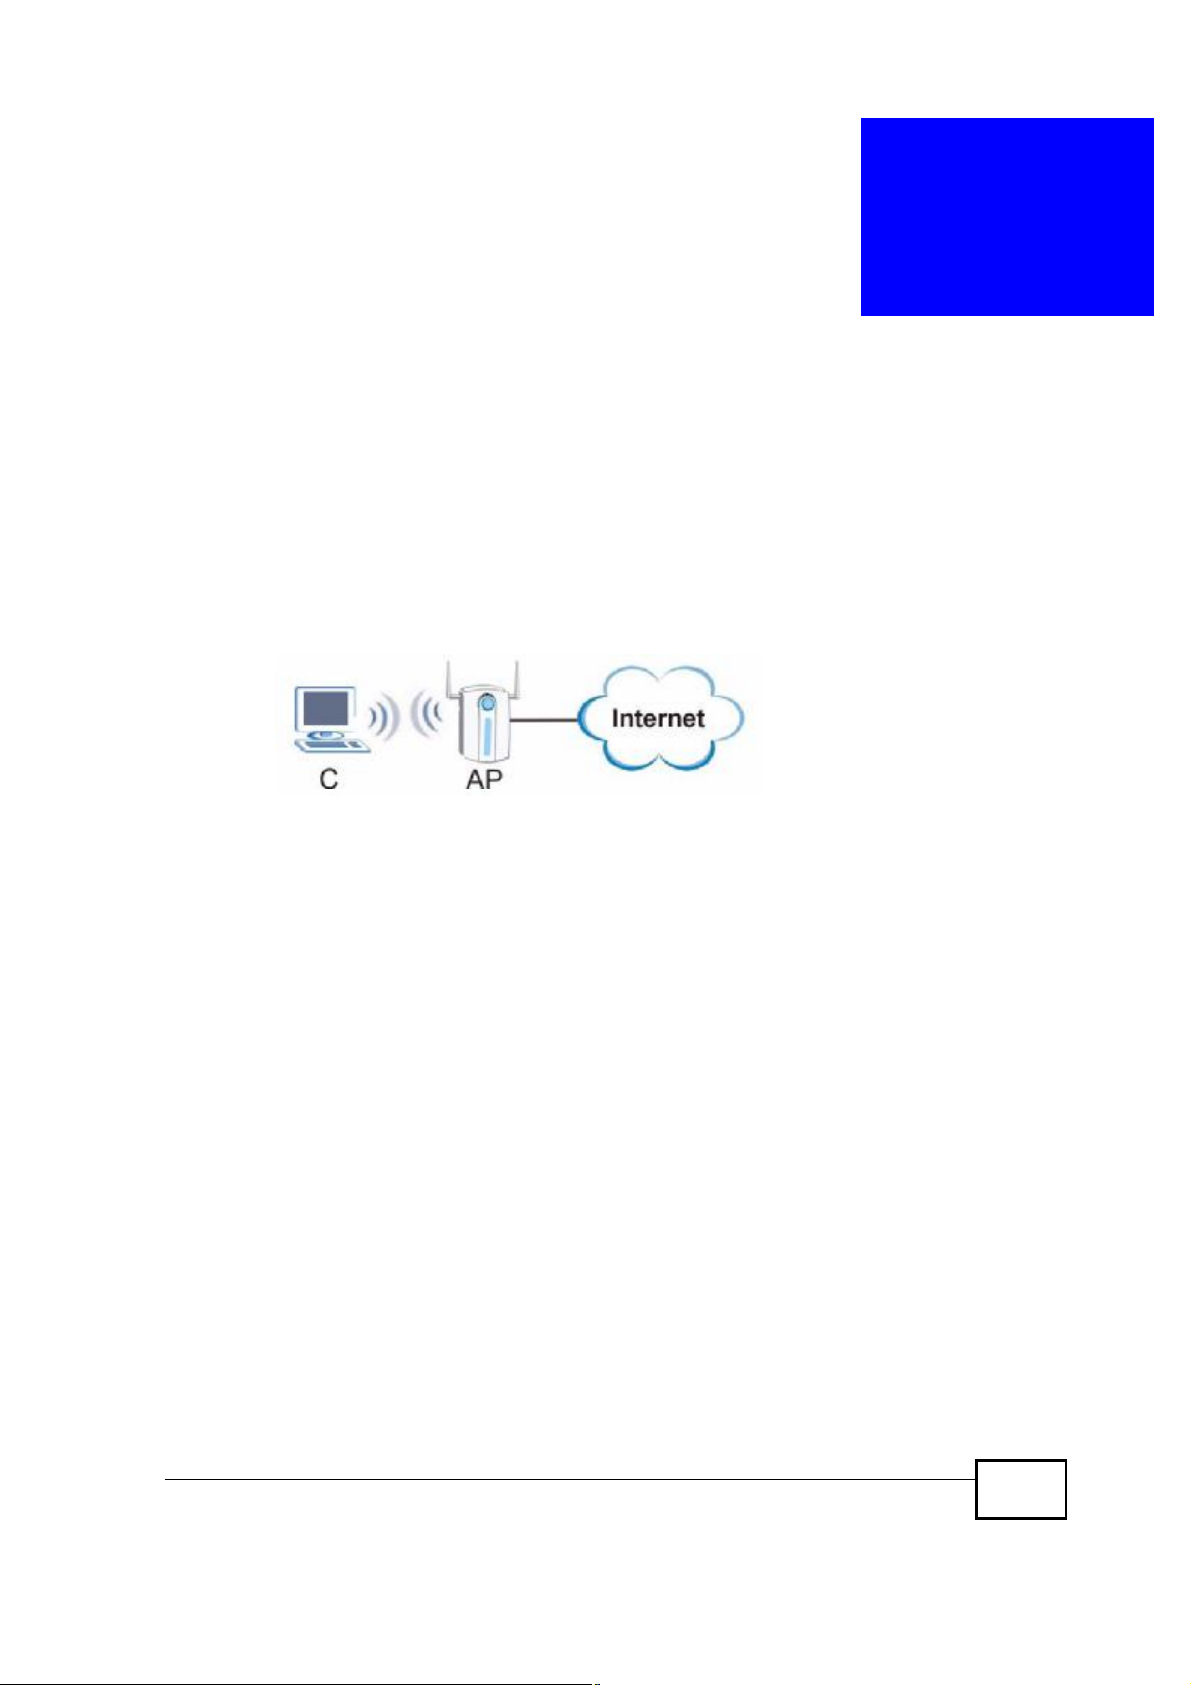
This tutorial shows you how to join a wireless infrastructure network using the
ZyXEL utility. The wireless client is labeled C and the Access Point is labeled AP.
Figure 6 Infrastructure Network
2.1.1 What You Can Do in This Tutorial
• Connect securely either to an infrastructure AP using the WPS protocol. See
Section 2.2 on page 24 for details.
• Connect securely to an infrastructure AP using many of the strongest and most
common encryption protocols. See Section 2.3 on page 29 for details.
• Save a your settings so that you can later connect again to an infrastructure AP
with a single click. See Section 2.3.2 on page 31 for details.
• Configure your NWD2105 as an Access Point (AP), allowing other devices to
connect to it and share its network connections. See Section 2.4 on page 34 for
details.
2.1.2 What You Need to Know
The following term may help as you read through this section.
WPS
Wi-Fi Protected Setup (WPS) is a security protocol that lets two or more devices
connect securely to one another with a minimum amount of hassle on your part. It
most cases, establishing a secure connection with another WPS device is as easy
as pushing a button.
NWD2105 User’s Guide
23

Chapter 2Tutorial
2.1.3 Before You Begin
• Make sure that you have already familiarized yourself with the NWD2105’s
features and hardware, as described in Chapter 1 on page 17.
• You should have valid login information for an existing network Access Point,
otherwise you may not be able to make a network connection right away.
2.2 Connecting to an AP using Wi-Fi Protected
Setup (WPS)
This section gives you an example of how to set up your wireless network using
WPS. This example uses the NWD2105 as the wireless client, and ZyXEL’s
NBG334W as the Access Point (AP).
Note: The Access Point must be a WPS-aware device.
There are two WPS methods for creating a secure connection. This tutorial shows
you both.
• Push Button Configuration (PBC) - create a secure wireless network simply
by pressing a button. See Section 2.2.1 on page 24.This is the easier method.
• PIN Configuration - create a secure wireless network simply by entering a
wireless client's PIN (Personal Identification Number) in the NWD2105’s
interface. See Section 2.2.2 on page 25. This is the more secure method, since
one device can authenticate the other.
2.2.1 Push Button Configuration (PBC)
1 Make sure that your access point is turned on and that it is within range of the
computer with the NWD2105 installed.
2 Make sure that you have installed the NWD2105’s driver and utility on your
computer.
3 In the NWD2105’s utility, click the Adapter tab, enable WPS and select PBC
(Push Button Configuration). In the screen that appears, click Start.
4 Log into the AP’s web configurator and locate its WPS settings section. On the
NBG334W, press the Push Button button in the Network > Wireless Client >
WPS Station screen.
24
Note: It doesn’t matter which button is pressed first. You must press the second
button within two minutes of pressing the first one.
NWD2105 User’s Guide
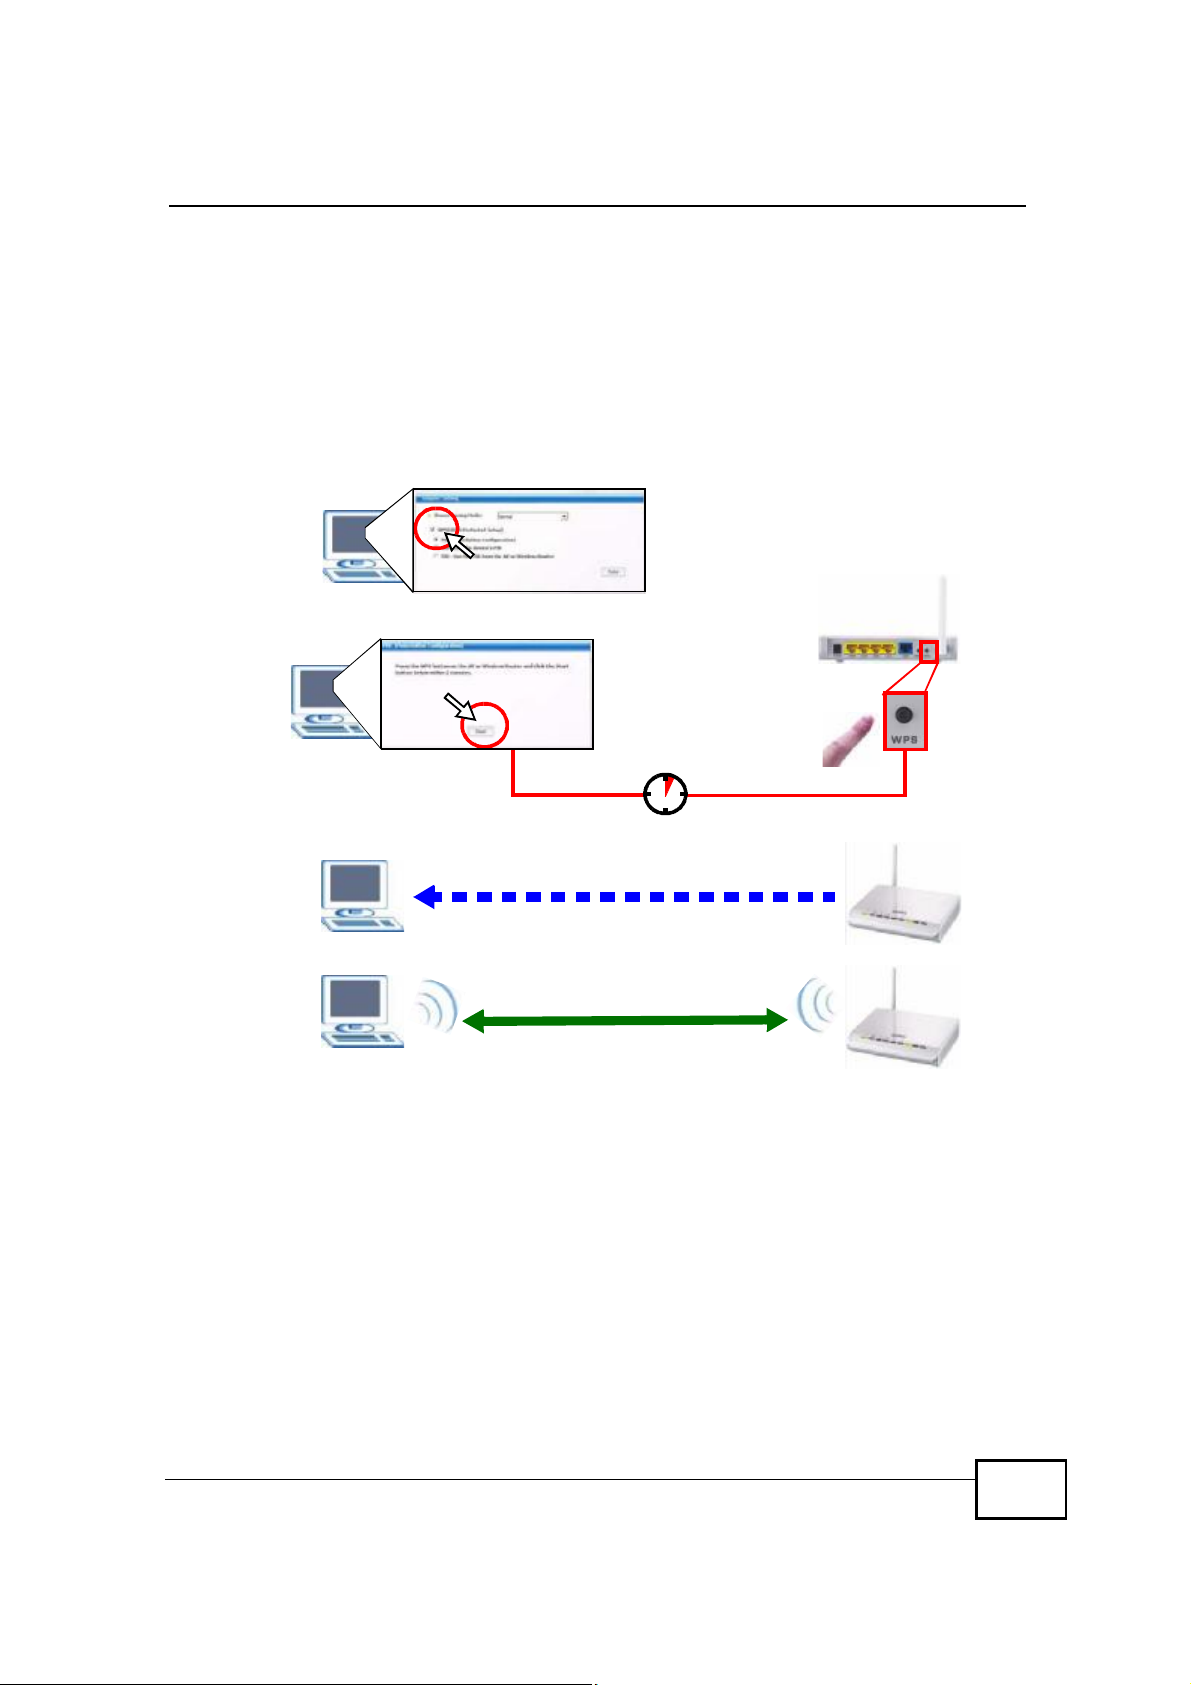
Chapter 2Tutorial
The AP sends the proper configuration settings to the NWD2105. This may take up
to two minutes. Then the NWD2105 is able to communicate with the AP securely.
The following figure shows you an example to set up wireless network and security
by pressing a button on both the AP (the NBG334W in this example) and the
NWD2105.
Figure 7 Example WPS Process: PBC Method
You
SECURITY INFO
COMMUNICATION
AP
WITHIN 2 MINUTES
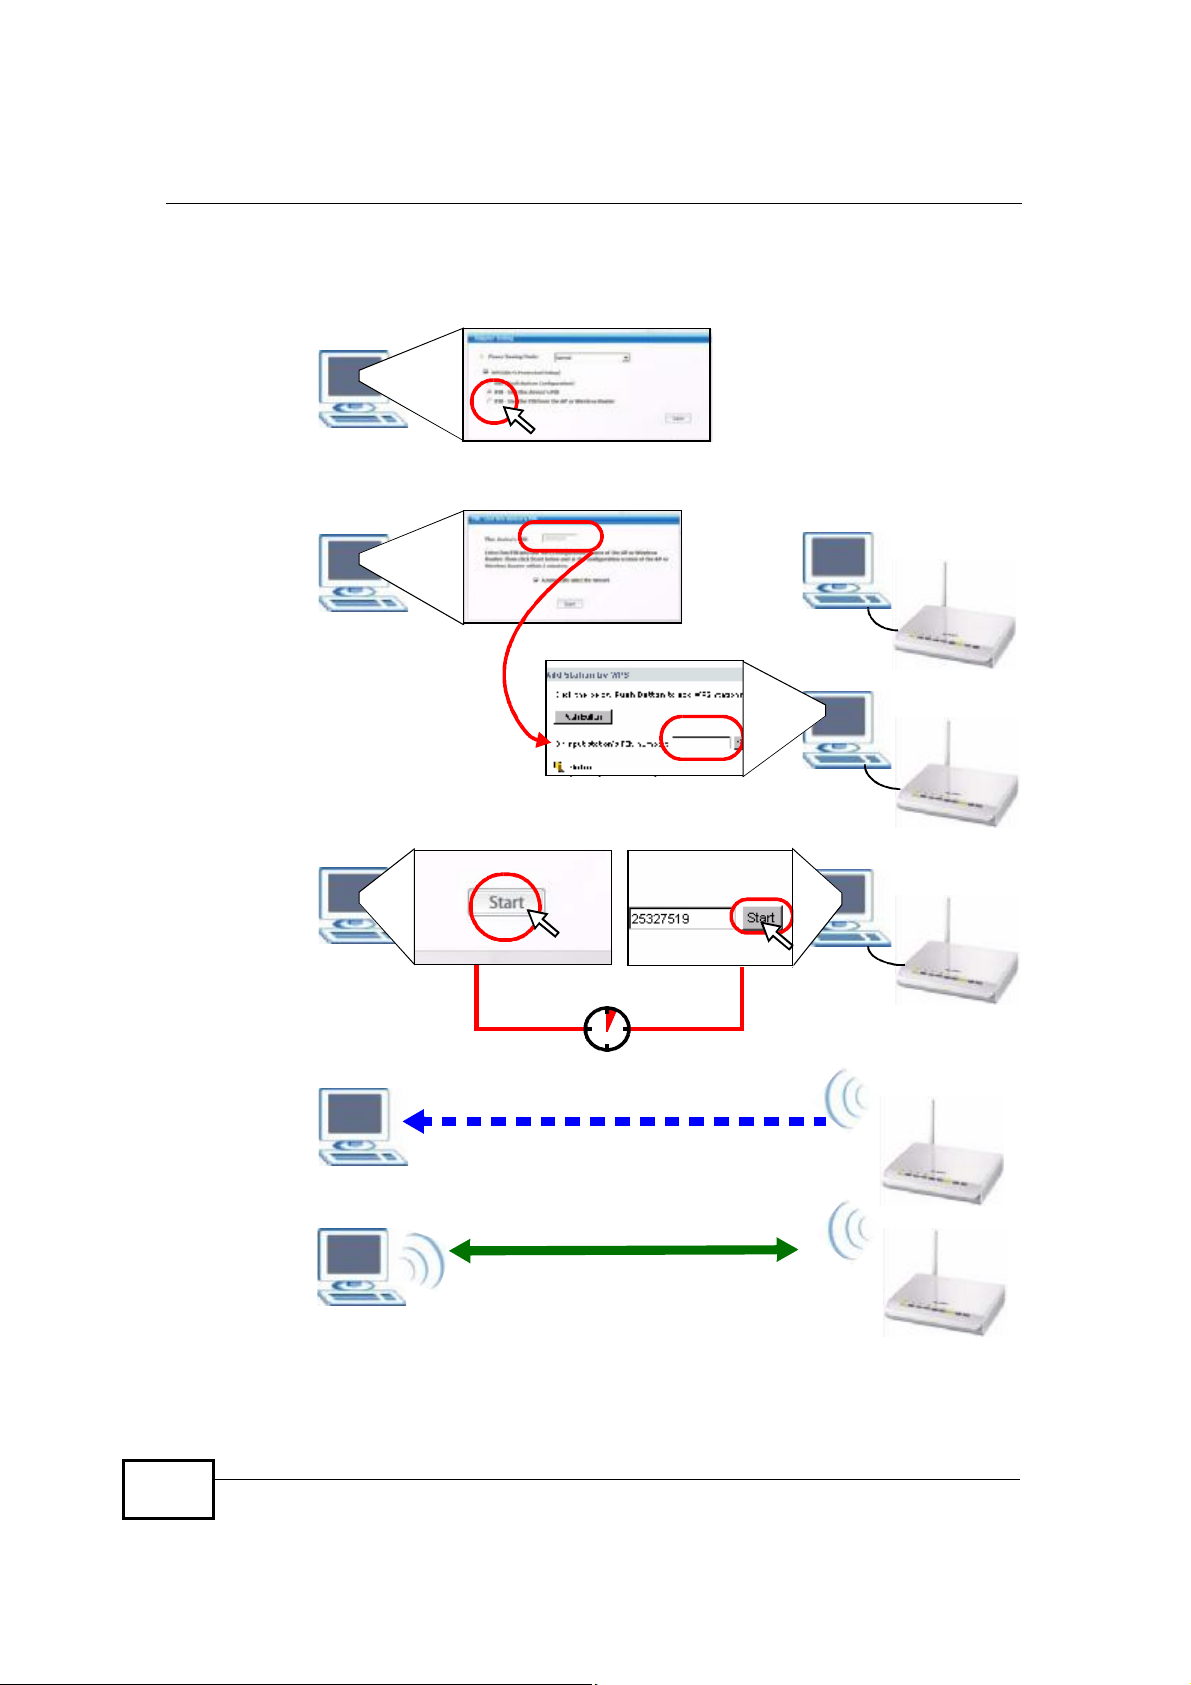
2.2.2 PIN Configuration
When you use the PIN configuration method, you need to use both the NWD2105’s
utility and the AP’s configuration interface.
1 In the NWD2105’s Adaptor tab, select WPS and PIN - Use this Device’s PIN.
Note down the PIN in the screen that appears.
2 Enter the PIN number in the AP’s configuration interface. In the NBG334W, use the
PIN field in the Network > Wireless LAN > WPS Station screen.
NWD2105 User’s Guide
25

Chapter 2Tutorial
3 Click the Start buttons on both the NWD2105 utility screen and the AP’s
configuration utility (the WPS Station screen on the NBG334W) within two
minutes.
The NBG334W authenticates the wireless client and sends the proper
configuration settings to the wireless client. This may take up to two minutes.
Then the wireless client is able to communicate with the NBG334W securely.
26
NWD2105 User’s Guide

Chapter 2Tutorial
The following figure shows you the example of configuring the wireless network
and security on the NWD2105 and the AP (ZyXEL’s NBG334W in this example) by
using the PIN method.
NWD2105 User’s Guide
27
Chapter 2Tutorial
Figure 8 Example WPS Process: PIN Method
You
AP
28
WITHIN 2 MINUTES
Authentication by PIN
SECURITY INFO
COMMUNICATION
NWD2105 User’s Guide
Chapter 2Tutorial
2.3 Connecting to an AP Without Using WPS
There are three ways to connect the wireless client (the NWD2105) to a network
without using WPS.
• Configure nothing and leave the wireless client to automatically scan for and
connect to any available network that has no wireless security configured.
• Manually connect to a network (see Section 2.3.1 on page 29).
• Configure a profile to have the wireless client automatically connect to a specific
network or peer computer (see Section 2.3.2 on page 31).
2.3.1 Manually Connecting to a Wireless LAN
This example illustrates how to manually connect your wireless client to an access
point (AP) configured for WPA-PSK security and connected to the Internet. Before
you connect to the access point, you must know its Service Set IDentity (SSID)
and WPA-PSK pre-shared key. In this example, the AP’s SSID is “SSID_Example3”
and its pre-shared key is “ThisismyWPA-PSKpre-sharedkey”.
After you install the ZyXEL utility and then insert the wireless client, follow the
steps below to connect to a network using the Site Survey screen.
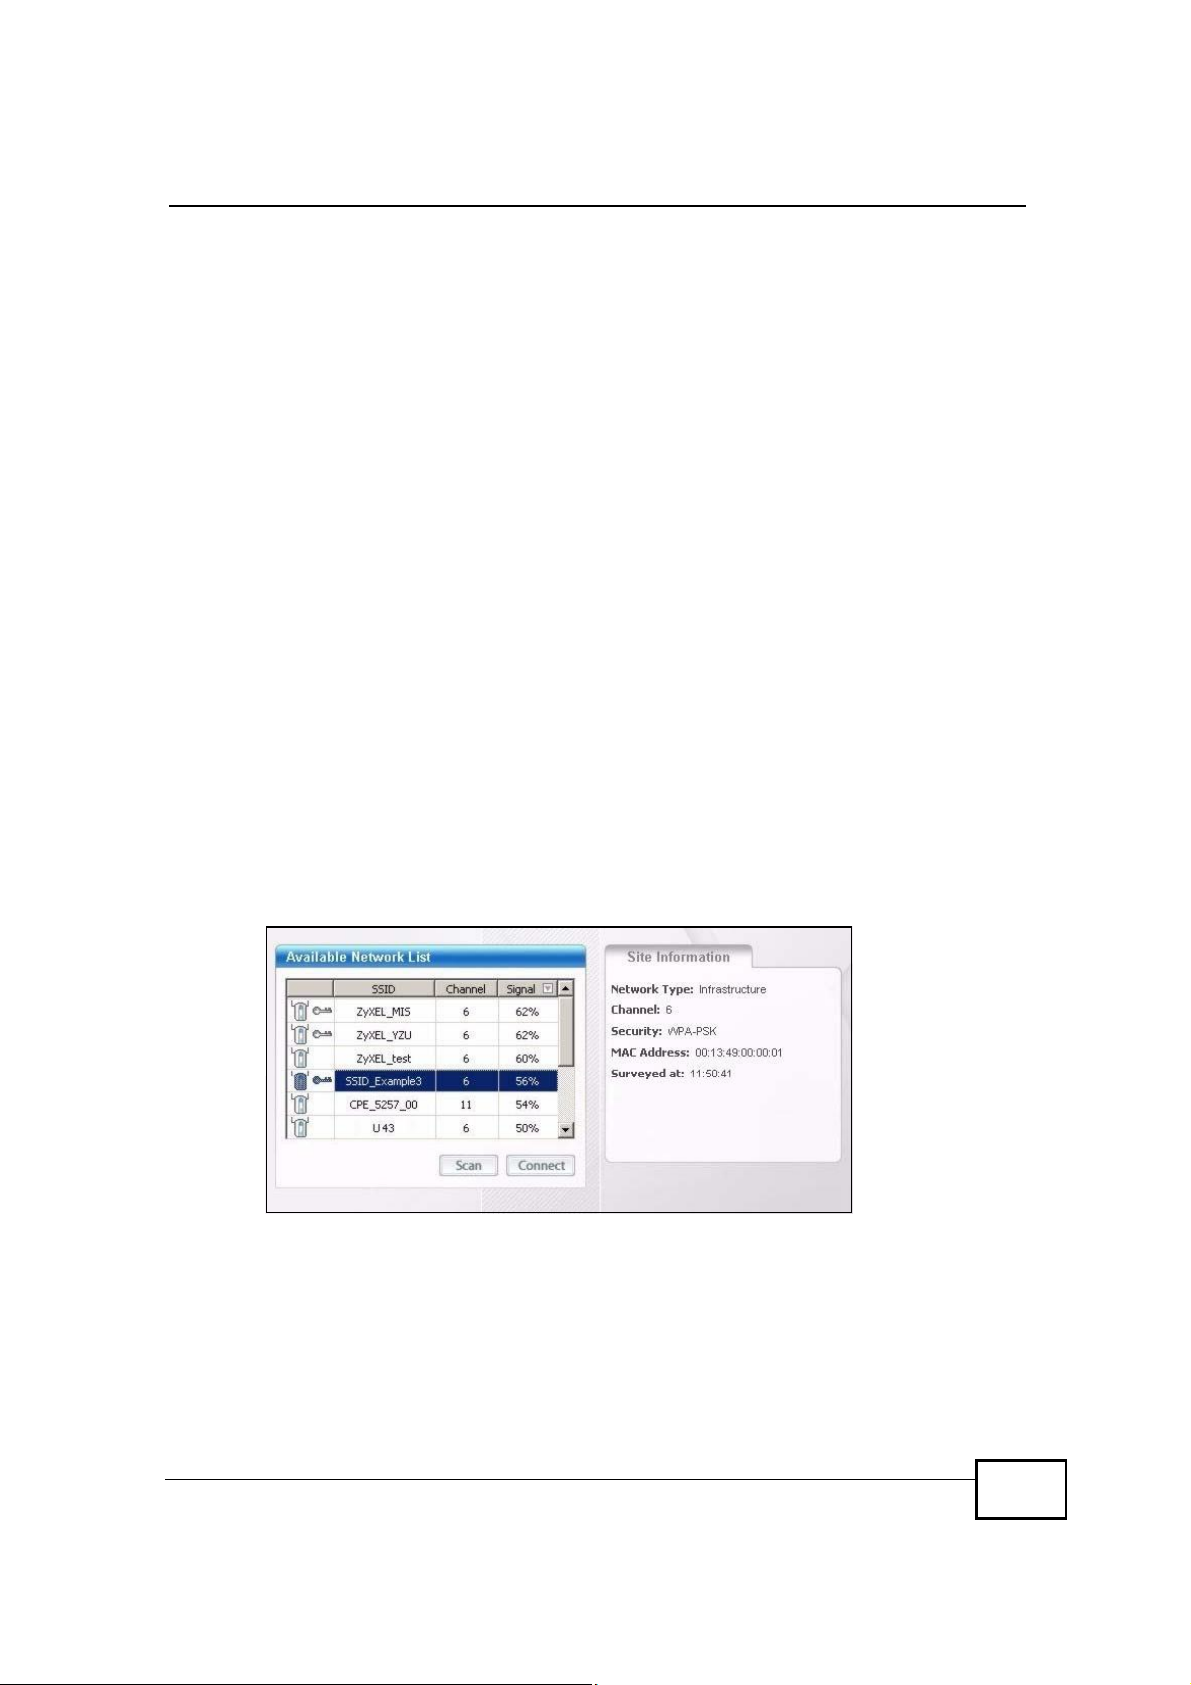
1 Open the ZyXEL utility and click the Site Survey tab to open the screen shown
next.
Figure 9 ZyXEL Utility: Site Survey
2 The wireless client automatically searches for available wireless networks. Click
Scan if you want to search again. If no entry displays in the Available Network
List, that means there is no wireless network available within range. Make sure
the AP or peer computer is turned on, or move the wireless client closer to the AP
or peer computer. See Table 4.4 on page 54 for detailed field descriptions.
NWD2105 User’s Guide
29

Chapter 2Tutorial
3 To connect to an AP or peer computer, either click an entry in the list and then
click Connect or double-click an entry (SSID_Example3 in this example).
4 When you try to connect to an AP with security configured, a window will pop up
prompting you to specify the security settings. Enter the pre-shared key and leave
the encryption type at the default setting.
Use the Next button to move on to the next screen. You can use the Back button
at any time to return to the previous screen, or the Exit button to return to the
Site Survey screen.
Figure 10 ZyXEL Utility: Security Settings
5 The Summary window appears. Check your settings and click Save to continue.
Figure 11 ZyXEL Utility: Summary
30
NWD2105 User’s Guide
Chapter 2Tutorial
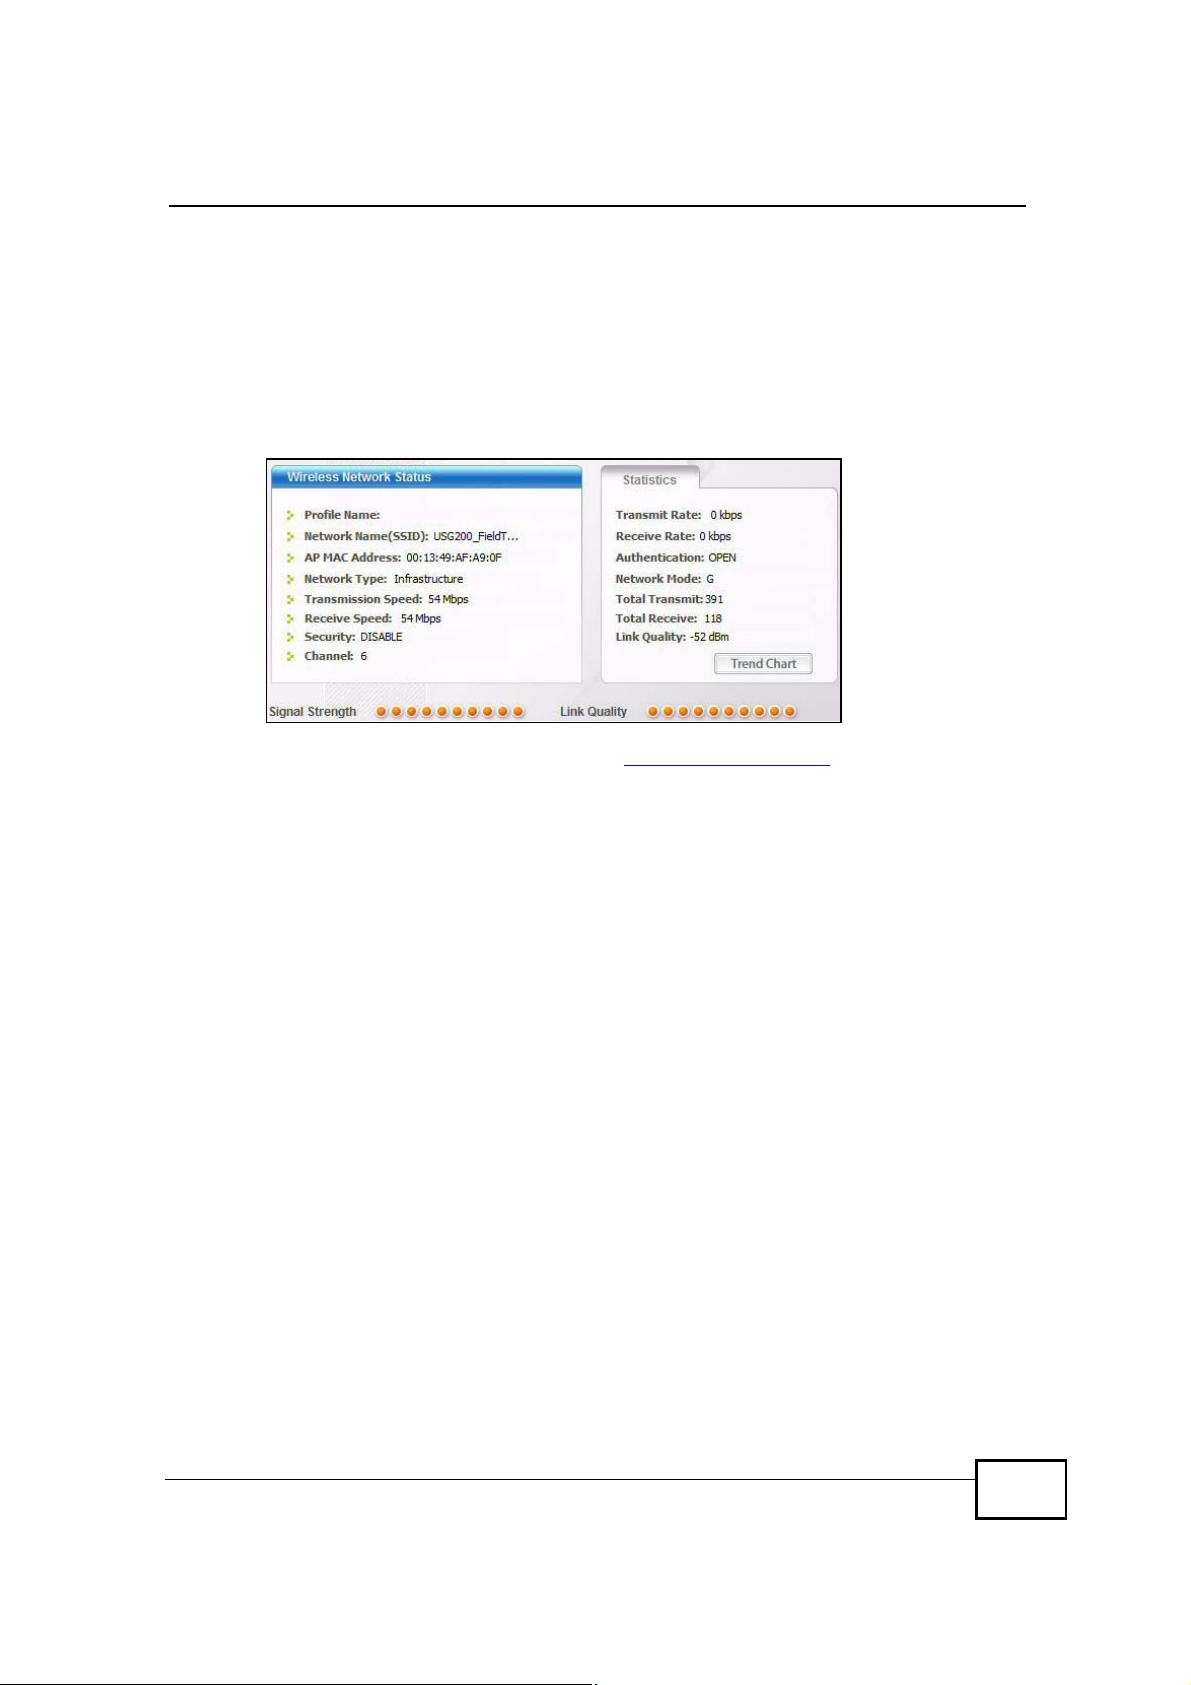
6 The ZyXEL utility returns to the Link Info screen while it connects to the wireless
network using your settings. When the wireless link is established, the ZyXEL
utility icon in the system tray turns green and the Link Info screen displays
details of the active connection. Check the network information in the Link Info
screen to verify that you have successfully connected to the selected network. If
the wireless client is not connected to a network, the fields in this screen remain
blank. See Table 4.3 on page 51 for detailed field descriptions.
Figure 12 ZyXEL Utility: Link Info
7 Open your Internet browser and enter http://www.zyxel.com or the URL of any
other web site in the address bar. If you are able to access the web site, your
wireless connection is successfully configured. If you cannot access the web site,
check the Troubleshooting section of this User's Guide or contact your network
administrator if necessary.
2.3.2 Creating and Using a Profile
A profile lets you automatically connect to the same wireless network every time
you use the ZyXEL utility. You can also configure different profiles for different
networks, for example if you connect a notebook computer to wireless networks at
home and at work.
This example illustrates how to set up a profile and connect the wireless client to
an access point configured for WPA-PSK security. In this example, the AP’s SSID is
“SSID_Example3” and its pre-shared key is “ThisismyWPA-PSKpre-sharedkey”.
You have chosen the profile name “PN_Example3”.
NWD2105 User’s Guide
31
 Loading...