

Media Server
NSA210, NSA221, NSA310, NSA320, NSA325
Default Login Details
Web
Address
User Name admin
Password 1234
www.zyxel.com
Firmware Version 4.40
Edition 2, 07/2012
www.zyxel.com
nsa210
nsa221
nsa310
nsa320
IMPORTANT!
READ CAREFULLY
BEFORE USE.
KEEP THIS GUIDE
FOR FUTURE
REFERENCE.
IMPORTANT!
Copyright © 2012
ZyXEL Communications Corporation

IMPORTANT!
READ CAREFULLY BEFORE USE.
KEEP THIS GUIDE FOR FUTURE REFERENCE.
Disclaimer
This is a User’s Guide for a series of products. Not all products support all firmware features.
Screenshots and graphics in this book may differ slightly from your product due to differences in
your product firmware or your computer operating system. Every effort has been made to ensure
that the information in this manual is accurate.
Related Documentation
•Quick Start Guide
The Quick Start Guide is designed to help you get your NSA up and running right away. It
contains information on setting up your network and configuring for Internet access.
• Web Configurator Online Help
The embedded Web Help contains descriptions of individual screens and supplementary
information.
Media Server User’s Guide2

Contents Overview
Contents Overview
User’s Guide ...........................................................................................................................15
Getting to Know Your NSA ......................................................................................................... 17
NAS Starter Utility for NSA221, NSA310, NSA320, and NSA325 ..............................................21
NAS Starter Utility for NSA210 ...................................................................................................31
Web Configurator Basics ........................................................................................................... 47
Tutorials ..................................................................................................................................... 67
Technical Reference ............................................................................................................151
Status Screen ........................................................................................................................... 153
System Setting .........................................................................................................................157
Storage .....................................................................................................................................161
Network ...................................................................................................................................175
Applications .............................................................................................................................. 185
Package Management .............................................................................................................229
Auto Upload .............................................................................................................................279
Dropbox .................................................................................................................................... 293
Using Time Machine with the NSA ...........................................................................................297
Users ........................................................................................................................................301
Groups ..................................................................................................................................... 307
Shares ...................................................................................................................................... 311
Maintenance Screens ..............................................................................................................319
Protecting Your Data ................................................................................................................341
Troubleshooting .......................................................................................................................343
Product Specifications ..............................................................................................................361
Media Server User’s Guide
3

Contents Overview
4
Media Server User’s Guide

Table of Contents
Table of Contents
Contents Overview ..............................................................................................................................3
Table of Contents .................................................................................................................................5
Part I: User’s Guide ......................................................................................... 15
Chapter 1
Getting to Know Your NSA.................................................................................................................17
1.1 Overview ...........................................................................................................................................17
1.1.1 Hard Disks for 2-Bay Models ................................................................................................... 18
1.1.2 Hard Disks for 1-Bay Models ................................................................................................... 18
1.1.3 COPY/SYNC Button ................................................................................................................19
1.1.4 RESET Button .........................................................................................................................19
Chapter 2
NAS Starter Utility for NSA221, NSA310, NSA320, and NSA325 ....................................................21
2.1 Overview ...........................................................................................................................................21
2.2 Starting the NAS Starter Utility ..........................................................................................................21
2.3 NAS Seeker Screen ..........................................................................................................................21
2.4 Main NAS Starter Utility Screen ........................................................................................................23
2.5 Initialization Wizard ........................................................................................................................... 24
2.5.1 Default Configuration ............................................................................................................... 24
2.5.2 Manual Configuration ..............................................................................................................25
2.5.3 Directory of the NAS ................................................................................................................26
2.6 Import Files or Folders with zPilot .....................................................................................................27
2.7 Network Drive ....................................................................................................................................28
2.8 Manage the Device ...........................................................................................................................29
2.9 Configure System Settings ................................................................................................................29
Chapter 3
NAS Starter Utility for NSA210 ..........................................................................................................31
3.1 Overview ...........................................................................................................................................31
3.2 Starting the NAS Starter Utility ..........................................................................................................31
3.3 NAS Discovery Screen ......................................................................................................................32
3.4 Main NAS Starter Utility Screen ........................................................................................................33
3.5 Initialization Wizard ........................................................................................................................... 34
3.5.1 Default Configuration ............................................................................................................... 35
3.5.2 Manual Configuration ..............................................................................................................37
Media Server User’s Guide
5

Table of Contents
3.5.3 Directory of the NAS ................................................................................................................42
3.6 Import Files or Folders with zPilot .....................................................................................................43
3.7 Add a Network Drive to My Computer ............................................................................................... 44
3.8 Manage the Device ...........................................................................................................................44
3.9 Configure Network Setting ................................................................................................................45
Chapter 4
Web Configurator Basics...................................................................................................................47
4.1 Overview ...........................................................................................................................................47
4.2 Accessing the NSA Web Configurator ..............................................................................................47
4.2.1 Access the NSA Via NAS Starter Utility ...................................................................................47
4.2.2 Web Browser Access ...............................................................................................................48
4.3 Login .................................................................................................................................................49
4.4 Home Screens .................................................................................................................................50
4.4.1 Now Playing (Music) ................................................................................................................ 53
4.4.2 Exif and Google Maps (Photos) ...............................................................................................54
4.4.3 Slideshow and CoolIris (Photos) .............................................................................................54
4.4.4 Favorite ....................................................................................................................................55
4.4.5 File Browser ............................................................................................................................ 56
4.4.6 Share and Folder Names ........................................................................................................59
4.4.7 Application Zone ......................................................................................................................60
4.4.8 System Settings ......................................................................................................................61
4.5 Administration Screens ....................................................................................................................62
4.5.1 Global Administration Icons .................................................................................................... 63
4.5.2 Navigation Panel ....................................................................................................................63
4.5.3 Main Window ..........................................................................................................................64
4.5.4 Status Messages .................................................................................................................... 65
4.5.5 Common Screen Icons ...........................................................................................................65
4.5.6 Session Example (Windows) ...................................................................................................66
Chapter 5
Tutorials...............................................................................................................................................67
5.1 Overview ...........................................................................................................................................67
5.2 Windows 7 Network ..........................................................................................................................67
5.2.1 If the NSA Icon Does Not Display ............................................................................................69
5.2.2 NSA Icon Right-click Options ..................................................................................................70
5.3 Windows 7 Network Map ..................................................................................................................71
5.4 Playing Media Files in Windows 7 .....................................................................................................74
5.5 Windows 7 Devices and Printers ......................................................................................................74
5.5.1 Windows 7 Desktop Shortcut ..................................................................................................76
5.6 Creating a Volume in a 2-Bay NSA ...................................................................................................77
5.6.1 Creating a RAID 1 Volume ...................................................................................................... 77
5.6.2 Migrate Button .........................................................................................................................78
6
Media Server User’s Guide

Table of Contents
5.6.3 Create an Internal Volume Button ...........................................................................................78
5.7 Creating a Volume in a 1-Bay NSA ...................................................................................................79
5.7.1 Creating a RAID 1 Volume ...................................................................................................... 80
5.7.2 Migrate Button .........................................................................................................................80
5.7.3 Create a SATA Volume Button .................................................................................................81
5.7.4 Creating a PC Compatible Volume ..........................................................................................83
5.8 Deleting a Volume .............................................................................................................................86
5.9 File Sharing Tutorials ........................................................................................................................ 87
5.9.1 Creating a User Account .........................................................................................................87
5.9.2 Creating a Share .....................................................................................................................89
5.9.3 Creating a Group .....................................................................................................................91
5.9.4 Accessing a Share From Windows Explorer ...........................................................................92
5.9.5 Accessing a Share Using FTP .................................................................................................94
5.9.6 Accessing a Share Through the Web Configurator .................................................................95
5.10 Download Service Tutorial ..............................................................................................................96
5.10.1 Copying/Pasting a Download Link .........................................................................................96
5.10.2 Installing the Link Capture Browser Plugin ............................................................................99
5.10.3 Using the Link Capture Browser Plugin ...............................................................................104
5.10.4 Configuring the Download Service Preferences ..................................................................106
5.10.5 Using Download Service Notification ...................................................................................108
5.11 Broadcatching Tutorial ................................................................................................................... 111
5.12 Printer Server Tutorial ................................................................................................................... 115
5.13 Copy and Flickr Auto Upload Tutorial ........................................................................................... 117
5.14 FTP Uploadr Tutorial ..................................................................................................................... 118
5.15 Web Configurator’s Security Sessions ..........................................................................................121
5.15.1 Customizing the NSA’s Certificate .......................................................................................122
5.15.2 Downloading and Installing Customized Certificate .............................................................123
5.15.3 Turn on the NSA’s Web Security .........................................................................................127
5.16 Using FTPES to Connect to the NSA ............................................................................................134
5.17 Using a Mac to Access the NSA ...................................................................................................135
5.17.1 Finder ..................................................................................................................................136
5.17.2 Go Menu ..............................................................................................................................137
5.18 How to Use the BackupPlanner ....................................................................................................138
5.18.1 Creating an Archive Backup ................................................................................................138
5.18.2 Creating a Synchronization Backup ....................................................................................141
5.18.3 Restoring Archived Files by Backup Job .............................................................................144
5.18.4 Restoring by Backup Files ...................................................................................................147
Part II: Technical Reference.......................................................................... 151
Chapter 6
Status Screen....................................................................................................................................153
Media Server User’s Guide
7

Table of Contents
6.1 Overview .........................................................................................................................................153
6.2 The Status Screen ..........................................................................................................................153
Chapter 7
System Setting..................................................................................................................................157
7.1 Overview .........................................................................................................................................157
7.2 What You Can Do ...........................................................................................................................157
7.3 What You Need to Know .................................................................................................................157
7.4 The Server Name Screen ..............................................................................................................158
7.5 The Date/Time Screen ....................................................................................................................158
Chapter 8
Storage ..............................................................................................................................................161
8.1 Overview .........................................................................................................................................161
8.1.1 What You Need to Know About Storage ................................................................................ 161
8.2 The Storage Screen ........................................................................................................................162
8.2.1 Disk Replacement Restrictions ..............................................................................................162
8.2.2 Storage Screen ......................................................................................................................163
8.2.3 Volume Status ........................................................................................................................ 164
8.3 Creating an Internal (SATA) Volume ...............................................................................................165
8.4 Editing a Volume .............................................................................................................................167
8.4.1 Scanning a Volume ................................................................................................................168
8.5 Creating an External (USB) Volume ................................................................................................ 168
8.5.1 External Disks ........................................................................................................................169
8.6 Storage Technical Reference ..........................................................................................................170
8.6.1 Volumes and RAID ................................................................................................................170
8.6.2 Choosing a Storage Method for a Volume .............................................................................170
8.6.3 Storage Methods ................................................................................................................... 171
Chapter 9
Network .............................................................................................................................................175
9.1 Overview .........................................................................................................................................175
9.2 What You Can Do ...........................................................................................................................175
9.3 What You Need to Know .................................................................................................................175
9.4 The TCP/IP Screen .........................................................................................................................176
9.5 UPnP Port Mapping Screen ............................................................................................................178
9.5.1 UPnP and the NSA’s IP Address ...........................................................................................179
9.5.2 UPnP and Security ................................................................................................................ 180
9.5.3 The NSA’s Services and UPnP ..............................................................................................180
9.5.4 Configuring UPnP Port Mapping ........................................................................................... 181
9.6 The PPPoE Screen ........................................................................................................................182
Chapter 10
Applications ......................................................................................................................................185
8
Media Server User’s Guide

Table of Contents
10.1 Overview .......................................................................................................................................185
10.2 What You Can Do ......................................................................................................................... 185
10.3 What You Need to Know ...............................................................................................................185
10.4 FTP Server ....................................................................................................................................188
10.5 The Media Server Screens .........................................................................................................189
10.5.1 The Media Server Share Publish Screen ..........................................................................191
10.5.2 The Media Server ID3 Tag Decoding Screen ....................................................................192
10.5.3 The Media Server iTunes Server Screen .......................................................................... 193
10.5.4 The Media Server SqueezeCenter Screen ........................................................................193
10.6 The Download Service Screen ......................................................................................................194
10.6.1 Adding a Download Task .....................................................................................................197
10.6.2 Configuring General Settings ..............................................................................................199
10.6.3 Configuring the P2P Download Settings ............................................................................. 201
10.6.4 Edit IP Filter ........................................................................................................................203
10.6.5 Selecting Files to Download ................................................................................................204
10.6.6 Displaying the Task Information ..........................................................................................205
10.7 The Web Publishing Screen ..........................................................................................................206
10.8 The Broadcatching Screen ............................................................................................................207
10.8.1 Adding a Broadcatching Channel ........................................................................................209
10.8.2 Editing a Broadcatching Channel .......................................................................................212
10.9 The Print Server Screen ...............................................................................................................213
10.9.1 Print Server Rename ..........................................................................................................214
10.10 The Copy/Sync Button Screen .................................................................................................... 215
10.11 Technical Reference ....................................................................................................................216
10.11.1 Sharing Media Files on Your Network ................................................................................216
10.11.2 Download Service ..............................................................................................................217
10.11.3 Link Capture Browser Plugin .............................................................................................218
10.11.4 Download Service Notification ...........................................................................................218
10.11.5 P2P Download Security .....................................................................................................219
10.11.6 Web Publishing Example ...................................................................................................221
10.11.7 Web Publishing .................................................................................................................. 222
10.11.8 Channel Guides for Broadcatching ....................................................................................223
10.11.9 Printer Sharing ...................................................................................................................224
10.11.10 Copying Files ................................................................................................................... 224
10.11.11 Synchronizing Files ..........................................................................................................225
Chapter 11
Package Management ......................................................................................................................229
11.1 Overview ....................................................................................................................................... 229
11.2 What You Can Do ..........................................................................................................................229
11.3 What You Need to Know ...............................................................................................................229
11.4 Package Management Screen .....................................................................................................230
11.4.1 Displaying the Package Information ...................................................................................232
Media Server User’s Guide
9

Table of Contents
11.5 eMule Screens ...........................................................................................................................233
11.5.1 eMule Server Screen ..........................................................................................................233
11.5.2 Add Server ..........................................................................................................................234
11.5.3 Edit Server .......................................................................................................................... 235
11.5.4 My Info ................................................................................................................................235
11.5.5 eMule Task Screen ............................................................................................................ 236
11.5.6 Add Task .............................................................................................................................238
11.5.7 Preferences ......................................................................................................................... 240
11.5.8 Edit IP Filter ........................................................................................................................243
11.5.9 Share Browsing ...................................................................................................................243
11.5.10 Task Info ............................................................................................................................ 245
11.5.11 eMule Search Screen .......................................................................................................246
11.6 DyDNS Screen ............................................................................................................................247
11.7 NFS Screen .................................................................................................................................248
11.7.1 Add/Edit NFS Share ............................................................................................................250
11.7.2 NFS Session .......................................................................................................................251
11.8 SMART Screen ...........................................................................................................................251
11.8.1 SMART Brief Summary .......................................................................................................253
11.8.2 SMART Full Summary ........................................................................................................254
11.9 Protect Screens ........................................................................................................................... 255
11.10 Backup Screens .........................................................................................................................255
11.10.1 Backup: Step 1 ..................................................................................................................256
11.10.2 Backup: Step 2 ..................................................................................................................258
11.10.3 Backup: Step 3 ..................................................................................................................260
11.10.4 Backup: Step 4 ..................................................................................................................261
11.10.5 Edit Job Screen .................................................................................................................. 262
11.10.6 Edit Job: Step 1 ................................................................................................................. 263
11.10.7 Edit Job: Step 2 ................................................................................................................. 264
11.10.8 Restore Archive Screen ..................................................................................................... 265
11.10.9 Restore Archive: Step 1 ................................................................................................265
11.10.10 Restore Archive: Step 2 .................................................................................................. 266
11.10.11 Restore Archive: Step 3 ..................................................................................................267
11.11 Restore Screen ...........................................................................................................................267
11.11.1 Restore: Step 1 .................................................................................................................268
11.11.2 Restore: Step 2 .................................................................................................................269
11.11.3 Restore: Step 3 .................................................................................................................270
11.11.4 Restore: Step 4 .................................................................................................................271
11.12 Polkast Setup ..............................................................................................................................271
11.13 Technical Reference ....................................................................................................................275
11.13.1 S.M.A.R.T Attributes ..........................................................................................................275
Chapter 12
Auto Upload ......................................................................................................................................279
10
Media Server User’s Guide

Table of Contents
12.1 Overview .......................................................................................................................................279
12.2 What You Can Do ......................................................................................................................... 279
12.3 What You Need to Know ...............................................................................................................279
12.4 The Flickr/YouTube Screen .......................................................................................................... 279
12.4.1 Configuring the Flickr Settings ............................................................................................280
12.4.2 Configuring the YouTube Settings ......................................................................................285
12.5 The FTP Uploadr Screen .............................................................................................................288
12.5.1 Adding or Editing an FTP Server Entry ..............................................................................289
12.5.2 The FTP Uploadr Preferences Screen ...............................................................................290
Chapter 13
Dropbox .............................................................................................................................................293
13.1 Overview .......................................................................................................................................293
13.2 Dropbox Screen ............................................................................................................................293
13.3 How to Use Dropbox with the NSA ...............................................................................................295
Chapter 14
Using Time Machine with the NSA..................................................................................................297
14.1 Overview .......................................................................................................................................297
14.2 Time Machine Screen ...................................................................................................................297
14.3 Using Time Machine .....................................................................................................................297
Chapter 15
Users..................................................................................................................................................301
15.1 Overview .......................................................................................................................................301
15.2 What You Can Do ......................................................................................................................... 301
15.3 The Users Screen ........................................................................................................................301
15.3.1 User Icons ...........................................................................................................................303
15.3.2 Adding or Editing an Account .............................................................................................303
15.3.3 Usernames .......................................................................................................................... 305
15.4 Displaying User Info ......................................................................................................................305
Chapter 16
Groups ...............................................................................................................................................307
16.1 Overview .......................................................................................................................................307
16.2 What You Can Do ......................................................................................................................... 307
16.3 The Groups Screen ......................................................................................................................307
16.3.1 Adding or Editing a Group ...................................................................................................308
16.3.2 Group Names ......................................................................................................................309
Chapter 17
Shares................................................................................................................................................ 311
17.1 Overview ....................................................................................................................................... 311
Media Server User’s Guide
11

Table of Contents
17.2 What You Can Do ......................................................................................................................... 311
17.3 The Shares Screen ...................................................................................................................... 311
17.3.1 Adding or Editing Share ......................................................................................................313
17.3.2 Configuring Advanced Share Access ................................................................................. 314
17.3.3 Public and ANONYMOUS Share Access Rights .................................................................315
17.4 The Recycle Bin Configuration Screen ........................................................................................315
17.4.1 Recycle Bins ........................................................................................................................ 315
17.4.2 Configuring Recycle Bins ....................................................................................................316
17.5 The Share Browser Screen .......................................................................................................... 316
17.5.1 Moving or Copying Files .....................................................................................................318
Chapter 18
Maintenance Screens .......................................................................................................................319
18.1 Overview .......................................................................................................................................319
18.2 What You Can Do ......................................................................................................................... 319
18.3 The Power Screen .......................................................................................................................319
18.3.1 Notes on NSA-310 ...............................................................................................................319
18.3.2 Editing the Power Control Schedule Screen ......................................................................322
18.4 The Log Screen ............................................................................................................................323
18.4.1 Report Config Screen ..........................................................................................................324
18.4.2 Email Setting ......................................................................................................................325
18.4.3 Report Setting .....................................................................................................................326
18.4.4 Syslog Server Setting .........................................................................................................326
18.5 The Configuration Screen ............................................................................................................327
18.6 SSL Certification ..........................................................................................................................328
18.6.1 Modifying or Creating a Certificate .....................................................................................329
18.7 The Firmware Upgrade Screen .....................................................................................................330
18.8 The Shutdown Screen ..................................................................................................................331
18.9 Technical Reference ......................................................................................................................332
18.9.1 Log Classes .........................................................................................................................332
18.9.2 Log Severity Levels .............................................................................................................333
18.9.3 Log Messages .....................................................................................................................333
Chapter 19
Protecting Your Data ........................................................................................................................341
19.1 Overview .......................................................................................................................................341
19.2 Protection Methods ....................................................................................................................... 341
19.3 Configuration File Backup and Restoration ................................................................................... 341
Chapter 20
Troubleshooting................................................................................................................................343
20.1 Troubleshooting Overview ............................................................................................................ 343
20.2 Power, Hardware, Connections, and LEDs ...................................................................................343
12
Media Server User’s Guide

Table of Contents
20.3 NAS Starter Utility ......................................................................................................................... 345
20.4 NSA Login and Access .................................................................................................................346
20.4.1 Enabling Scripting of Safe ActiveX Controls ........................................................................348
20.5 I Cannot Access The NSA ............................................................................................................ 350
20.6 Users Cannot Access the NSA .....................................................................................................350
20.7 External USB Drives .....................................................................................................................352
20.8 Firmware .......................................................................................................................................352
20.9 File Transfer ..................................................................................................................................352
20.10 Networking .................................................................................................................................. 353
20.11 Some Features’ Screens Do Not Display ....................................................................................353
20.12 Media Server Functions ..............................................................................................................354
20.13 Download Service and Broadcatching Functions ........................................................................356
20.14 Web Publishing ...........................................................................................................................357
20.15 Auto Upload ................................................................................................................................358
20.16 Package Management ................................................................................................................358
20.17 Backups ......................................................................................................................................359
Chapter 21
Product Specifications.....................................................................................................................361
21.1 LEDs .............................................................................................................................................361
21.2 Supported Media Server Content Formats ...................................................................................362
21.3 Supported iTunes Server Content Formats ...................................................................................363
Appendix A Setting Up Your Computer’s IP Address ...................................................................... 365
Appendix B Pop-up Windows, JavaScripts and Java Permissions..................................................393
Appendix C Common Services........................................................................................................403
Appendix D Importing Certificates ...................................................................................................407
Appendix E Open Source Licences .................................................................................................433
Appendix F Legal Information..........................................................................................................565
Index ..................................................................................................................................................569
Media Server User’s Guide
13

Table of Contents
14
Media Server User’s Guide

PART I
User’s Guide
15

16
1.1 Overview
NSA
This chapter covers the main features and applications of the NSA.
Use the NSA to do the following.
• Share files between computers on your network.
• Back up files from your computers to the NSA.
•Use the COPY/SYNC button to copy or synchronize files between the NSA and USB devices like
card readers, MP3 players, mass storage devices, and digital cameras without using a computer.
• Have the NSA handle large file downloads.
• Automatically download files from website feeds for convenient viewing.
• Play the NSA’s video, music and photo files on your computers using the included media client
software.
• Play the NSA’s video, music and photo files on hardware-based media clients like the DMA-2501.
• Use the NSA’s website to share files with remote users.
• Use iTunes on your computer to play video and music files stored on the NSA.
• Share printers.
• Automatically upload photo and video files to your FTP server, Flickr and YouTube accounts.
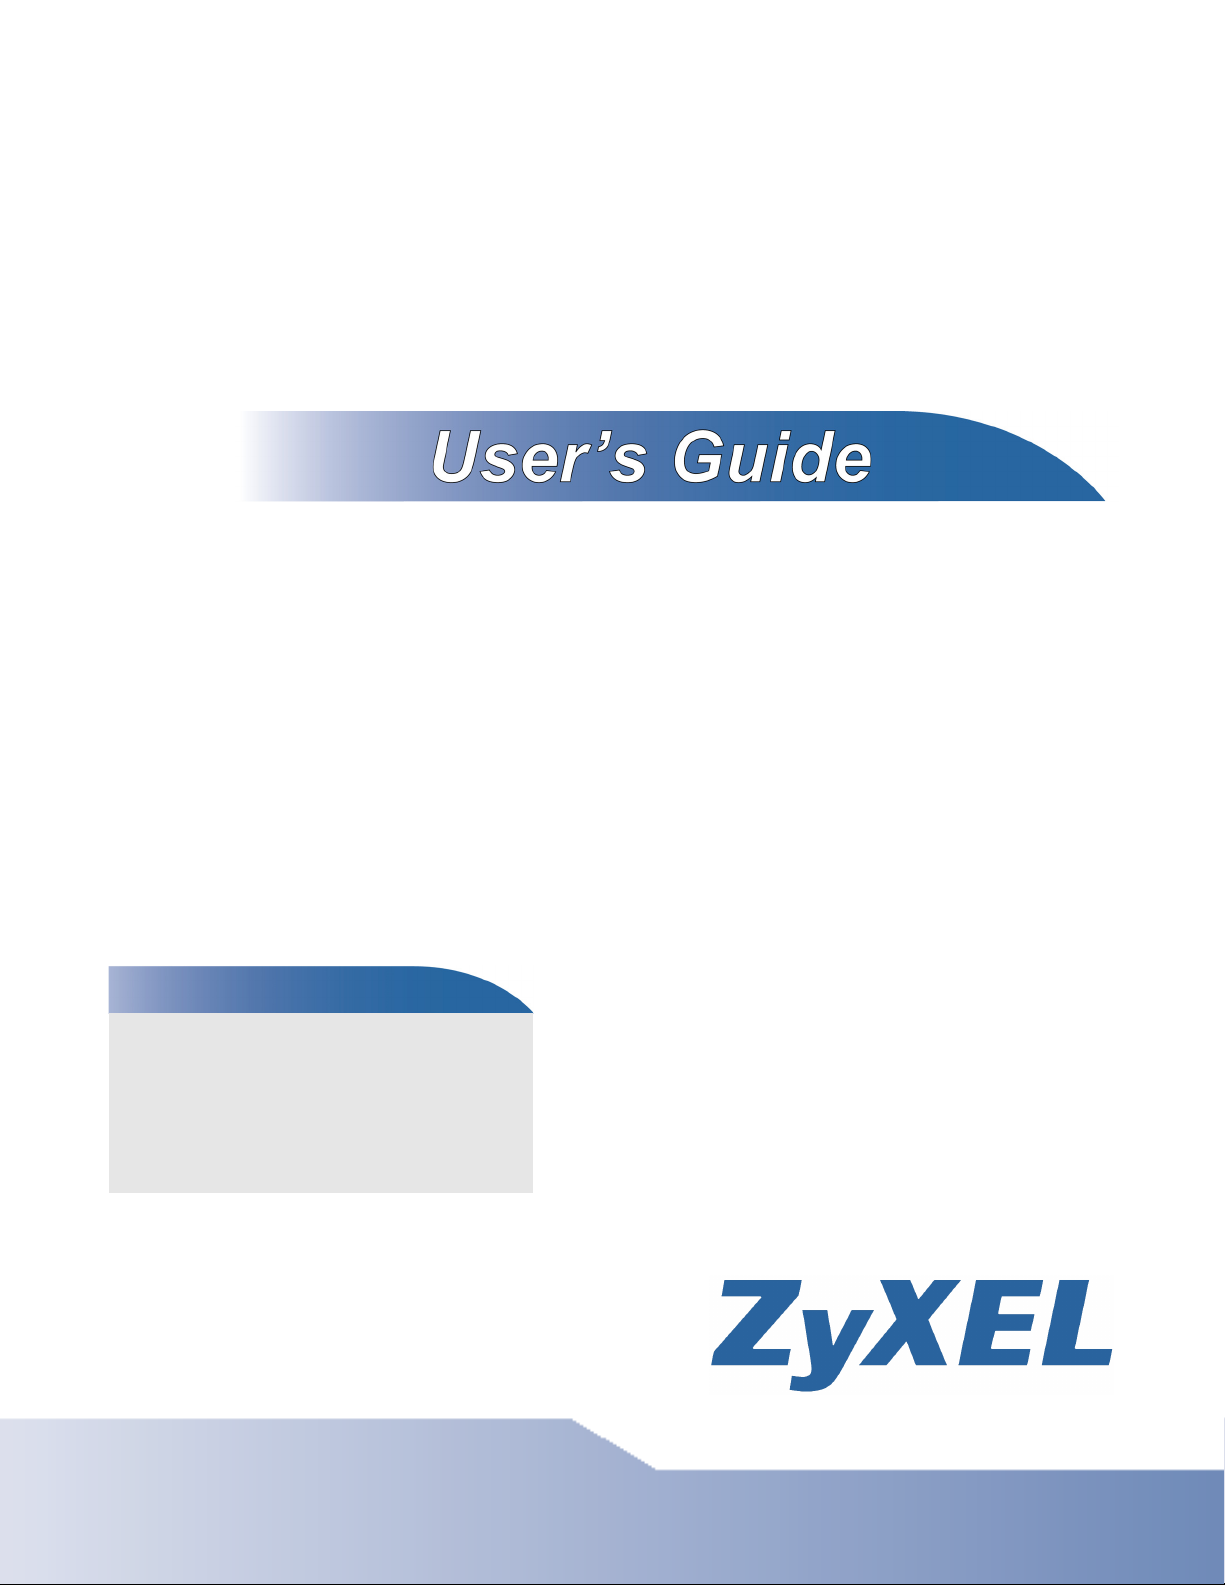
Figure 1 Example of the NSA in a Home Network
CHAPTER 1
Getting to Know Your NSA
Media Server User’s Guide 17

Chapter 1 Getting to Know Your NSA
Above is the NSA in a home network. Users back up and share data on the NSA. The DMA-2501
plays the NSA’s media files on the TV. A USB hard drive provides extra storage space and files are
copied directly from the USB mass storage device to the NSA.
Place the NSA behind a firewall and/or IDP (Intrusion Detection and Prevention) device to protect it
from attacks from the Internet.
Note: See Chapter 21 on page 361 for a more detailed list of NSA features.
Refer to the Quick Start Guide for hardware connections and how to install and remove hard drives
from the disk trays.
Note: Turn off and disconnect the NSA before you install or remove the internal hard disk
or disks.
• The NSA320, NSA325, and NSA221 are 2-bay models.
• The NSA310 and NSA210 are 1-bay models.
1.1.1 Hard Disks for 2-Bay Models
The 2-bay NSA models have two internal hard disk bays. Install one or two SATA (Serial Advanced
Technology Attachment) hard disks. Note that both SATA hard disks are treated as internal or SATA
volumes in the Storage > Volume screen (Section 8.3 on page 165). Any hard disk connected to
the USB port(s) is considered an external or USB volume.
1.1.2 Hard Disks for 1-Bay Models
The 1-bay NSA models have one internal hard disk bay and one external SATA (eSATA) port. This
allows you to connect one internal SATA (Serial Advanced Technology Attachment) hard disk and
one eSATA hard disk (optional).
Initializing the internal hard disk configures it as a JBOD volume by default. JBOD stands for Just a
Bunch Of Disk and in this storage method, all disk space is used for your data - none is used for
backup. If you are not using an eSATA hard disk, JBOD is the only storage method you can use.
If you attach an eSATA (external SATA) hard disk, you can create a RAID 1 volume. RAID 1 allows
data recovery in case your hard disk fails. To create a RAID 1 volume on the NSA, you must delete
the JBOD volume created by the firmware. Refer to Section 8.3 on page 165 for the Storage screen
where you can create the RAID 1 volume.
The eSATA hard disk can also be configured as a JBOD or a PC Compatible Volume. See Section
8.1.1 on page 161 for more information on these storage methods.
Note that both SATA and eSATA hard disks are treated as internal or SATA volumes in the Storage
screen (Section 8.3 on page 165). Any hard disk connected to the USB port(s) is considered an
external or USB volume.
18
Media Server User’s Guide
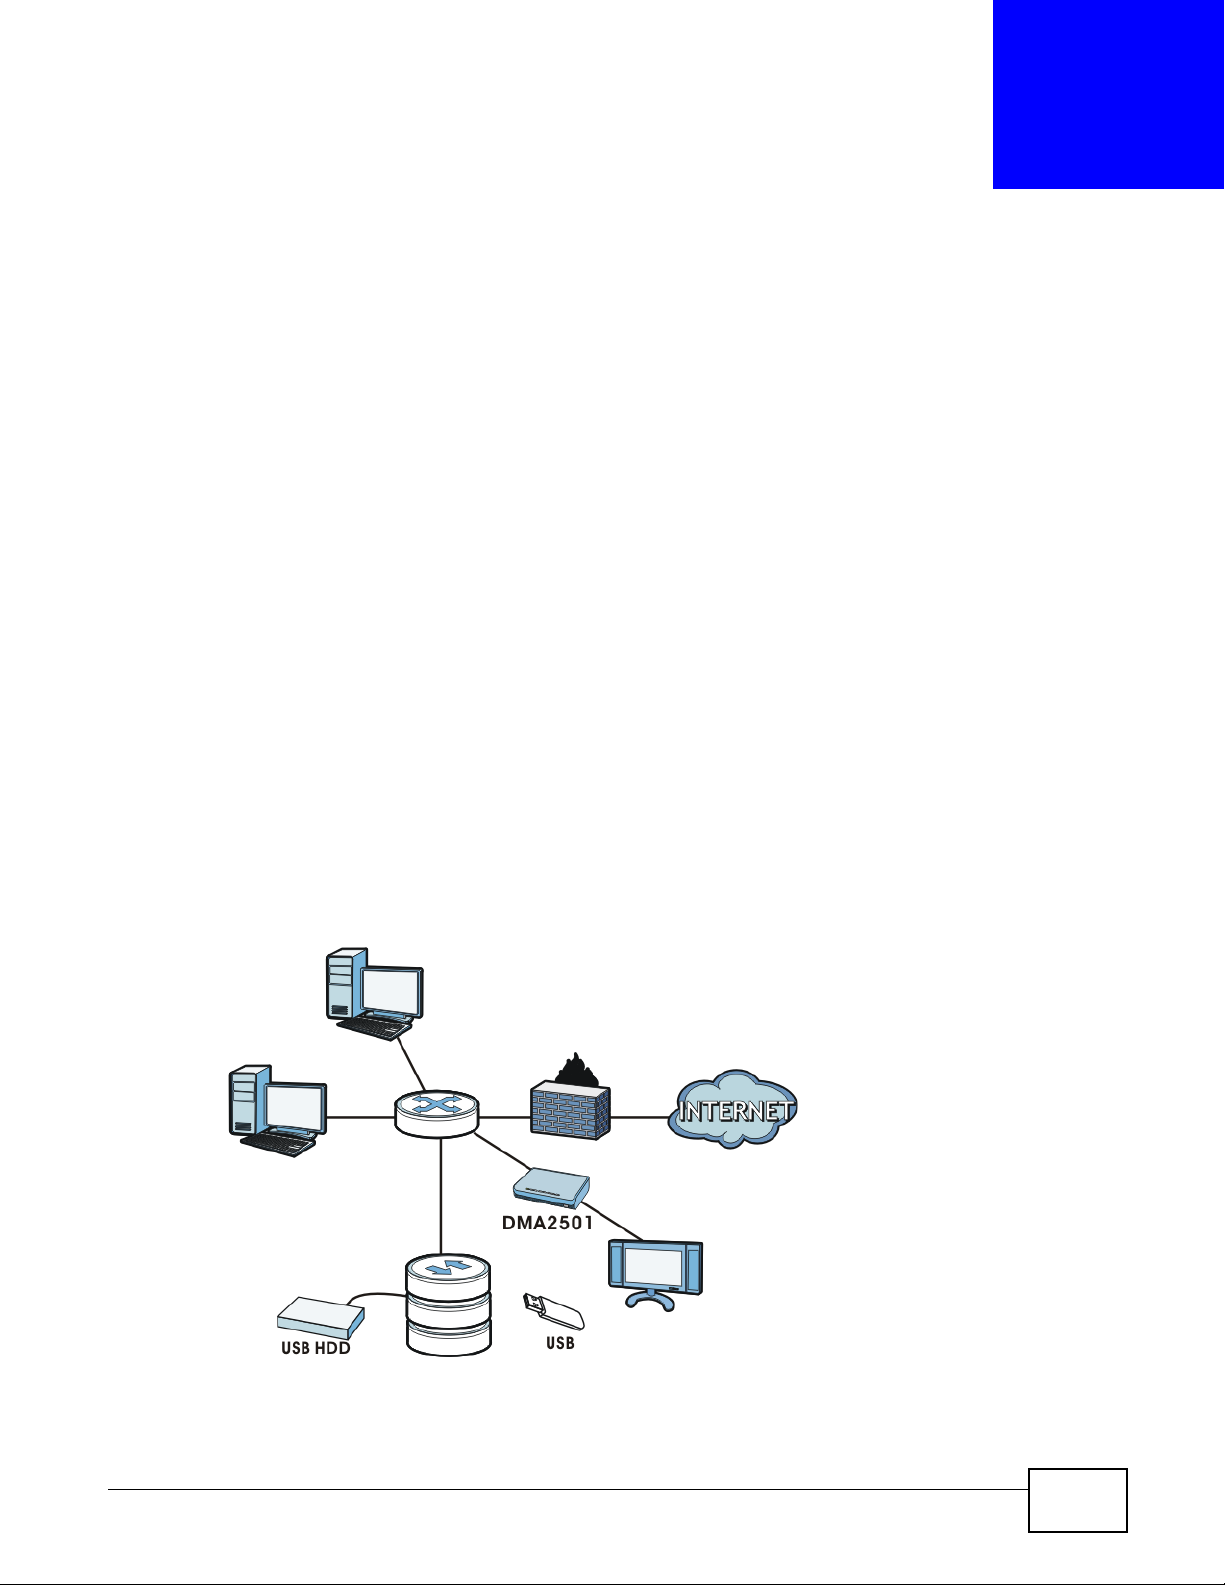
1.1.2.1 NSA210 Firmware
Hard disk
Your N S A 2 10 ’s
firmware is
installed in the
hard disk.
FW
Press
1 Beep
2 Beeps
IP Address
Password
Clear All Settings
5 more seconds
Release to
Release to Reset
Before you can start using your NSA210, you have to install the firmware on the hard disk. Use the
NAS Starter Utility to do this. See Chapter 3 on page 31 for more information on the NAS Starter
Utility.
Figure 2 NSA210 Hard Disk Partition
1.1.3 COPY/SYNC Button
Use the COPY/SYNC button on the front panel to copy or synchronize files between a connected
USB device and the NSA. See Section 10.10 on page 215 for more details on how to configure the
copy/sync settings.
Chapter 1 Getting to Know Your NSA
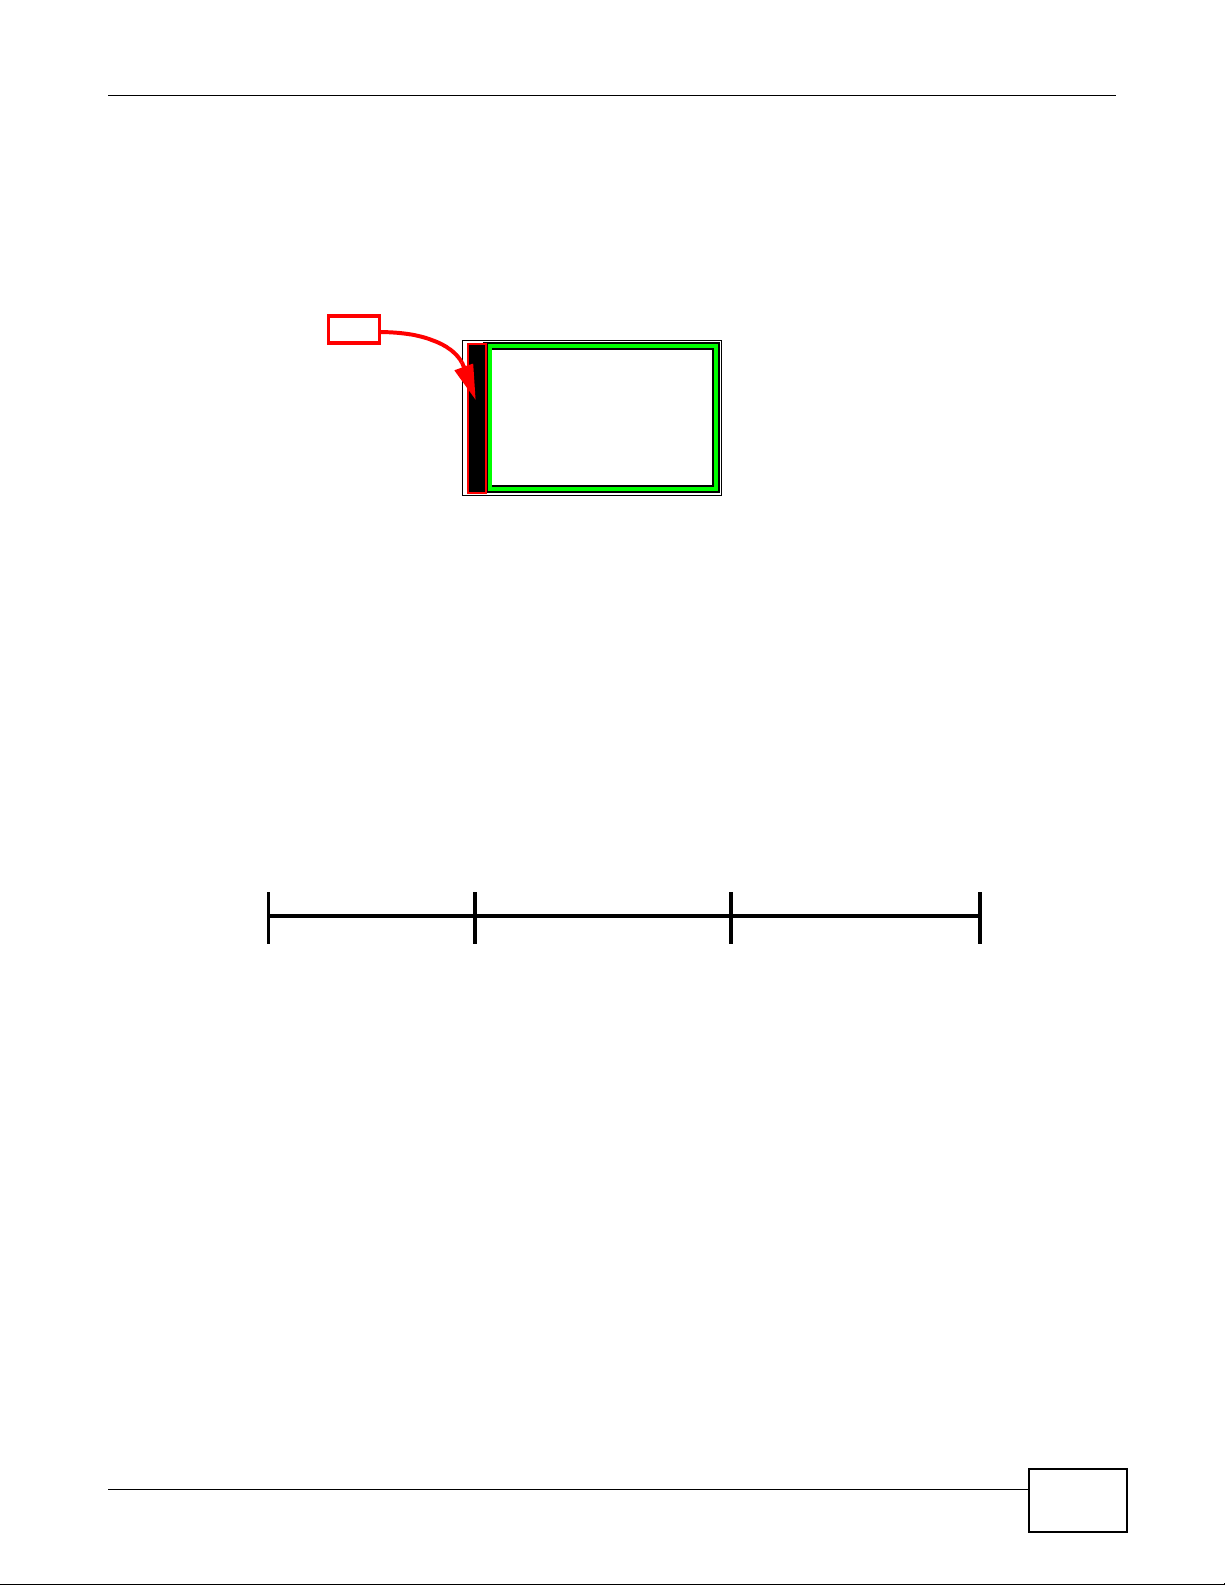
1.1.4 RESET Button
Use the RESET button on the rear panel to restore the NSA’s default settings.
Figure 3 The RESET Button
• Press the RESET button until you hear one beep (after about two seconds), then release it. You
will hear one more beep after you release the button.
This resets the NSA’s IP address and password to the default values.
• Press the RESET button until you hear two beeps. After the second beep, continue pressing the
button for five more seconds, then release it. You will hear three quick beeps after you release
the button.
This resets the NSA to the factory default configuration. All settings you have configured on the
NSA, including IP address, password, user accounts, groups, and so on will be reset to the
factory defaults.
The reset process does NOT affect the volume settings, nor data stored on the NSA.
You should periodically back up your configuration file to your computer (see Section 18.5 on page
327 for details about managing the NSA’s configuration file). You could then restore your
configuration in the event that you or someone else reset the NSA to the factory defaults.
Media Server User’s Guide
19

Chapter 1 Getting to Know Your NSA
Note: You should keep the NSA in a secure location in order to prevent unauthorized reset
of the device.
You may need to close and re-open the NAS Starter Utility to discover the NSA. This is because the
NSA automatically re-acquires IP address information, so its IP address may change. If no IP
address information is assigned, the NSA uses Auto-IP to assign itself an IP address and subnet
mask. For example, you could connect the NSA directly to your computer. If the computer is also
set to get an IP address automatically, the computer and the NSA will choose addresses for
themselves and be able to communicate.
20
Media Server User’s Guide

NAS Starter Utility for NSA221, NSA310,
Note: This NAS Starter Utility is for NSA221, NSA310, NSA320, and NSA325. Installing
this version of the NAS Starter Utility will uninstall previous versions.
2.1 Overview
This chapter describes the NAS Starter Utility for NSA310, NSA320, NSA325, and NSA221. Use the
NAS Starter Utility to find, set up, and manage the NSA as well as copy files to it and access the
files on it.
Make sure you have a backup of any existing data in the hard disk before
installing it in the NSA. Using the initialization wizard formats the hard
disk and deletes all data in the process.
CHAPTER 2
NSA320, and NSA325
There is a NAS Starter Utility available for Windows XP, Windows Vista, or Windows 7. Click Help to
open a web help page about the NAS Starter Utility screens. NAS Starter Utility screens are shown
here as they display with the Windows platform.
Note: Refer to the Quick Start Guide for your NSA’s hardware connections and the steps
for installing the NAS Starter Utility.
2.2 Starting the NAS Starter Utility
• The NAS Starter Utility broadcasts a request packet when you first run it. Each NSA has an NAS
Starter Utility Agent that always listens and responds to requests from the NAS Starter Utility.
The NAS Starter Utility receives the response packet that contains information, such as host
name, IP, and so on.
• If you plan to use more than one NSA in your network, configure them with unique server
names. This enables you to identify each NSA in the NAS Starter Utility screens.
2.3 NAS Seeker Screen
Use this screen to view the NSAs in your network. The NSA’s Server Name. The default is ‘nsa’
followed by the number of your model (‘nsa320’ for example). See Section 2.9 on page 29 for how
to change it to a more recognizable one in your network.
Media Server User’s Guide 21
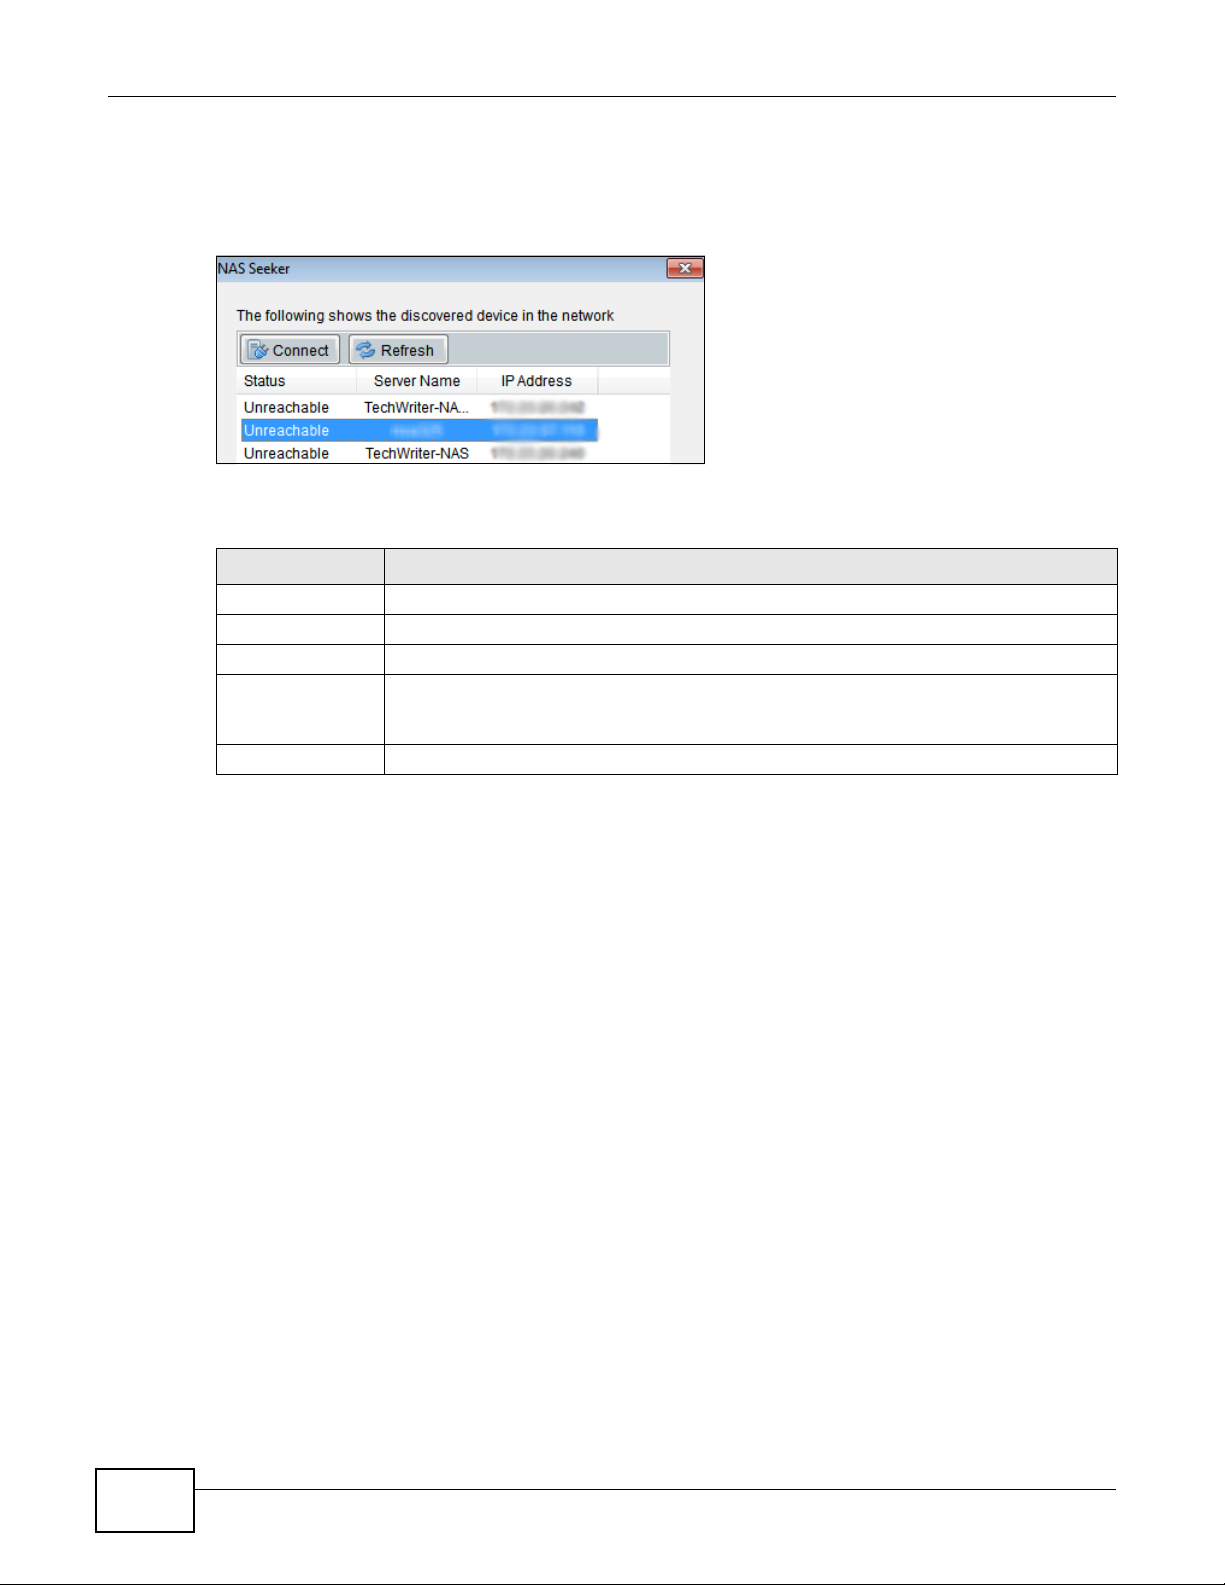
Chapter 2 NAS Starter Utility for NSA221, NSA310, NSA320, and NSA325
Start the NAS Starter Utility (click the icon in your Desktop or in Start > Programs > ZyXEL >
NAS Starter Utility). The first time you open the NAS Starter Utility the discovery screen appears
as follows.
Figure 4 NAS Seeker
The following table describes the labels in this screen.
Table 1 NAS Seeker
LABEL DESCRIPTION
Connect Select a NSA and click this to connect to it.
Refresh Click this to refresh the screen. The NAS Starter Utility does not automatically refresh.
Status This shows whether the NSA is Online, Unreachable, Configuring, or Config Failed.
Server Name This is the server name you configured for the NSA. If you have more than one NSA in
your network, it is recommended that you give each one a unique name for identification
purposes.
IP Address This is the current IP address of the NSA.
22
Media Server User’s Guide
Chapter 2 NAS Starter Utility for NSA221, NSA310, NSA320, and NSA325
2.4 Main NAS Starter Utility Screen
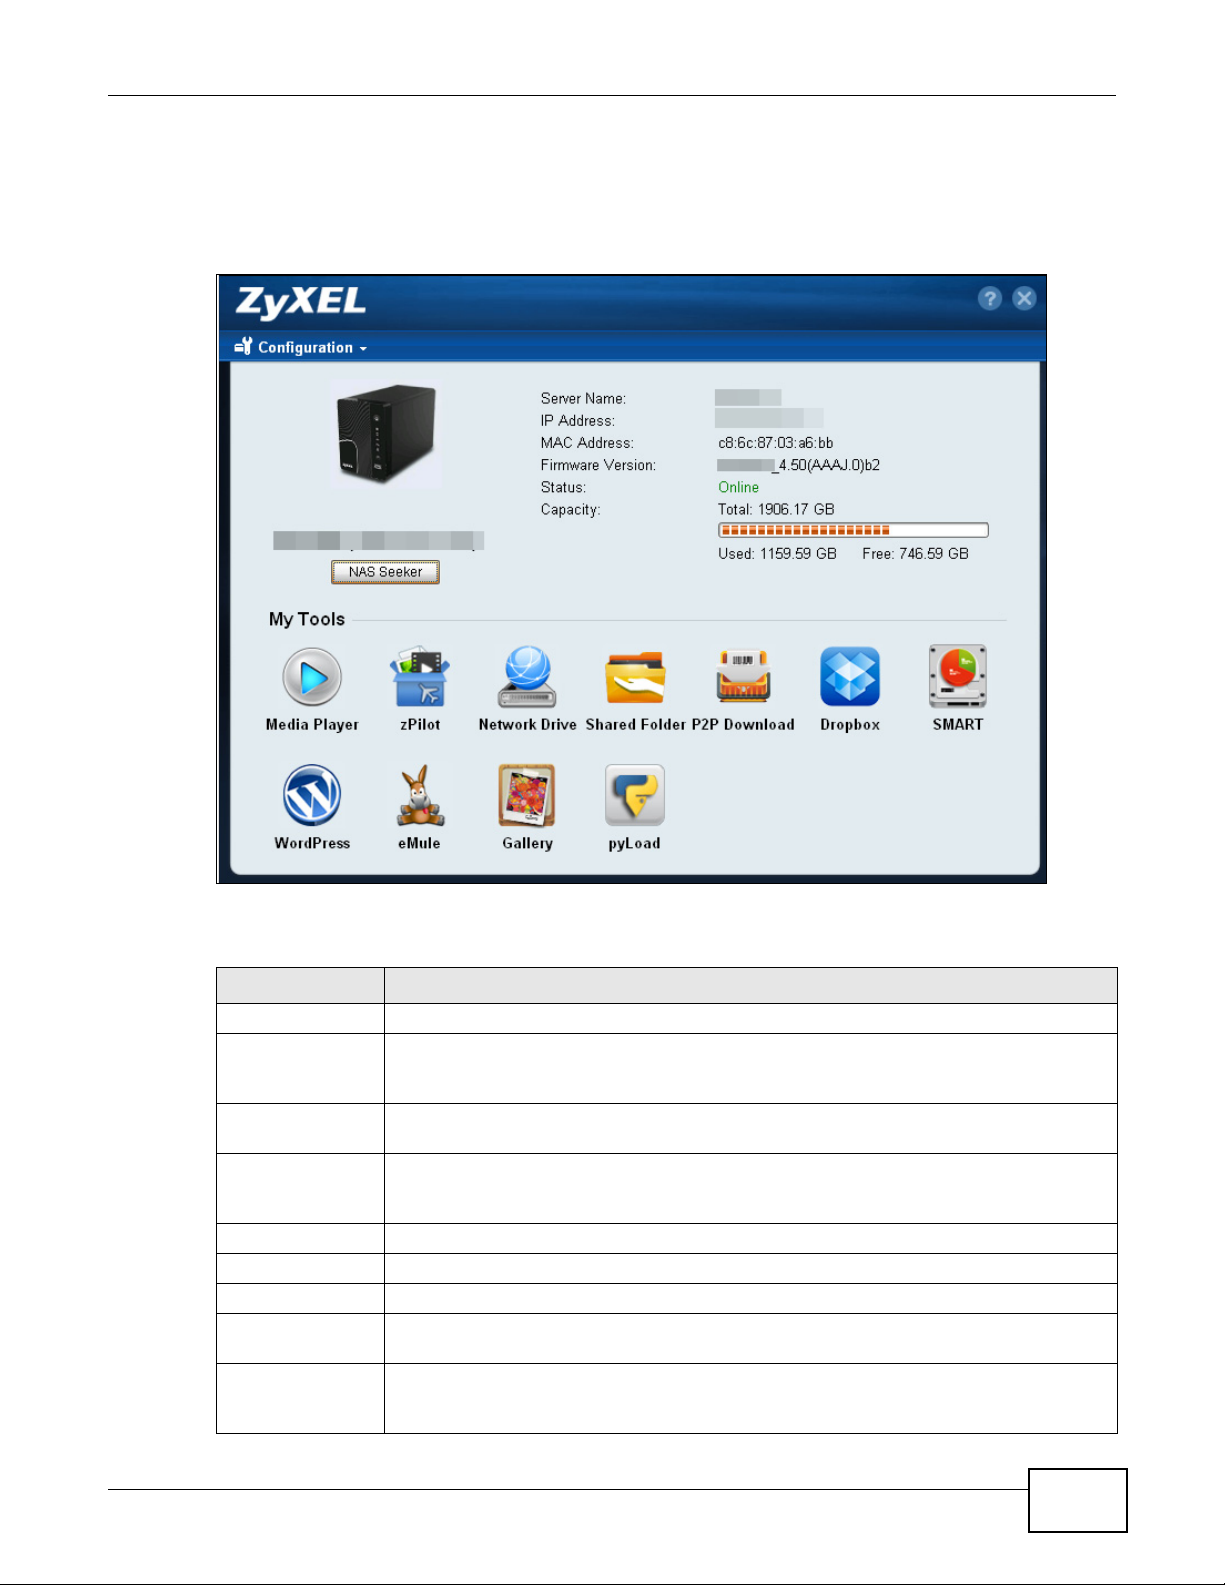
The main NAS Starter Utility screen displays after you select an NSA in the NSA Seeker screen.
Figure 5 NAS Starter Utility Main Screen
The following table describes the labels in this screen.
Table 2 NAS Starter Utility Main Screen
LABEL DESCRIPTION
? Click this to display the utility help.
Configuration Click this to run the initialization wizard (see the utility help for details), configure system
settings (see Section 2.9 on page 29), or go to the NSA’s Web Configurator login screen
(see Section 4.3 on page 49).
NAS Seeker Click this to use the NSA Seeker screen (Section 2.3 on page 21) to find and connect to a
Server Name This is the server name you configured for the NSA. If you have more than one NSA in
IP Address This is the current IP address of the NSA.
MAC Address This is the NSA’s unique physical hardware address (MAC).
Firmware Version This shows the version of firmware the NSA is currently using.
Status This shows whether the NSA is Online, Uninitialized, Unreachable, Configuring, or
Run Initialization
Wizard
different NSA on your network.
your network, it is recommended that you give each one a unique name for identification
purposes.
Config Failed.
This button displays if the NSA detects an installed hard disk that the NSA has not yet
configured. Click the button to run the initialization wizard (see the utility help for
details).
Media Server User’s Guide
23
Chapter 2 NAS Starter Utility for NSA221, NSA310, NSA320, and NSA325
Table 2 NAS Starter Utility Main Screen
LABEL DESCRIPTION
Capacity This shows the NSA’s total, in-use, and remaining storage capacity.
Media Player Click this to go to the Home screens where you can play media files. See Section 4.4 on
page 50 for details on the Home screen.
zPilot Click this to launch the zPilot to drag and drop files onto the NSA.
Network Drive Click this to add the NSA as a network drive in your computer’s Windows Explorer.
Shared Folder Click this to log into the NSA’s file directory in Windows Explorer.
P2P Download Click this to use the NSA to manage file downloads, including P2P downloads.
Dropbox Click this to use your Dropbox account to move files to the NSA and have the NSA
download *.torrent files.
Time Machine Click this to use the Time Machine backup system for Mac OS X.
SMART This displays when the NSA has the SMART package installed. Click this to view hard disk
WordPress This displays when the NSA has the WordPress package installed. Click this to create and
eMule This displays when the NSA has the eMule package installed. Click this to use the NSA’s
Gallery This displays when the NSA has the Gallery package installed. Click this to use your NSA
pyLoad This displays when the NSA has the pyLoad package installed. Click this to use pyLoad to
health and performance details.
manage a blog or website. Use the NSA administrator credentials to log in. The
administrator can then create accounts for other users.
eMule peer-to-peer (P2P) file-sharing console to download and share files from the
Internet. See Section 11.5 on page 233 for details.
to host pictures. You can upload images in your local computer or shares to this
application. Use the NSA administrator account to log in to the Gallery console.
have the NSA manage your downloads, including those from one-click hosting sites.
2.5 Initialization Wizard
Use these screens to set up the NSA for the first time. The wizard will configure the NSA’s basic
settings.
You must log in using an admin account. The default administrator username is ‘admin’ and the
default password is ‘1234’ and click Login.
Choose Default Configuration (recommended) or manual configuration. Use the manual option if
you need to name the NSA to configure specific network settings. Click Next.
2.5.1 Default Configuration
1 The NAS Starter Utility checks the Internet connection.
2 Type a new administrator password (and retype it to confirm). If you do not want to change the
administrator password, you can leave the fields blank and just click Next.
3 Specify usernames and passwords for the individuals you want to be able to access the NSA.
24
Media Server User’s Guide
4 Check your settings. If they are OK, click Next. Otherwise click Back. If you want to change
anything other than the user accounts, keep clicking Back until you can change the wizard type to
manual.
5 Wait while the NAS Starter Utility configures the NSA.
After the NAS Starter Utility finishes configuring the NSA, you can select Run zPilot to launch the
zPilot to drag and drop files onto the NSA (see Section 2.6 on page 27) after clicking Finish or just
click Finish to return to the main NAS Starter Utility screen (see Section 2.4 on page 23).
2.5.2 Manual Configuration
1 Set up the NSA’s basic network configuration first.
Table 3 NAS Starter Utility > Config
LABEL DESCRIPTION
Get IP
automatically from
DHCP server
Assign IP Manually Select this if you want to assign the NSA a fixed IP address, subnet mask and default
Select this if the NSA is automatically assigned an IP address from the ISP or a DHCP
server in your network.
gateway.
Chapter 2 NAS Starter Utility for NSA221, NSA310, NSA320, and NSA325
Note: Do not configure an IP address that is already in use in your network. This results to
a network IP address conflict and makes the NSA inaccessible.
Use DNS server
from DHCP server
Assign DNS server
manually
Domain Name System (DNS) is for mapping a domain name to its corresponding IP
address and vice versa. Select this if the NSA is automatically given DNS information
from the ISP or a DHCP server in your network.
If you were given specific IP address(es) of the DNS server(s), select this and enter the
primary and secondary DNS in the corresponding fields.
2 If your Internet connection requires you to enter a user name and password to connect to the
Internet, enter them here and click Next. If you do not need to enter a user name and password to
connect to the Internet, click Skip.
3 The NAS Starter Utility checks the Internet connection.
4 Type a new administrator password (and retype it to confirm) and click Next. If you do not want to
change the administrator password, you can leave the fields blank and just click Next.
5 Specify a name to uniquely identify the NSA on your network. Choose the time zone of your
location. This sets the time difference between your time zone and Greenwich Mean Time (GMT).
6 Select how to configure the hard disks.
With only one hard disk installed, just click Next. If you have two hard disks installed choose one
of the following:
• RAID 1: Use this to mirror all data on one disk to the other disk to protect against data loss.
• Individual Disks: Use this if you want maximum storage capacity and/or you have other means
of protecting your data. This creates two JBOD volumes (with one disk in each), a failure of
one disk (volume) should not affect the other volume (disk).
Media Server User’s Guide
25

Chapter 2 NAS Starter Utility for NSA221, NSA310, NSA320, and NSA325
• JBOD: Use this if you want maximum storage capacity and/or you have other means of
protecting your data. This combines the two physical disks into a single virtual one, so they
appear as a single large disk.
• RAID 0: Use this if you want maximum speed for your disks, and/or you have other means of
protecting your data. RAID 0 has the fastest read and write performance but if one disk fails
you lose all your data from both disks.
7 This screen lists the shares the NAS Starter Utility creates on the NSA by default. Select the ones
you want to use as network drives in Windows Explorer.
8 Specify usernames and passwords for the individuals you want to be able to access the NSA and
click Next.
9 If the settings are OK, click Next. Otherwise click Back. If you want to change anything other than
the user accounts, keep clicking Back until you can change the wizard type to manual.
10 Wait while the NAS Starter Utility configures the NSA.
After the NAS Starter Utility finishes configuring the NSA, you can click Show the directory of the
NAS to see the NSA’s shares (see Section 2.5.3 on page 26) or click Finish to return to the main
NAS Starter Utility screen (see Section 2.4 on page 23).
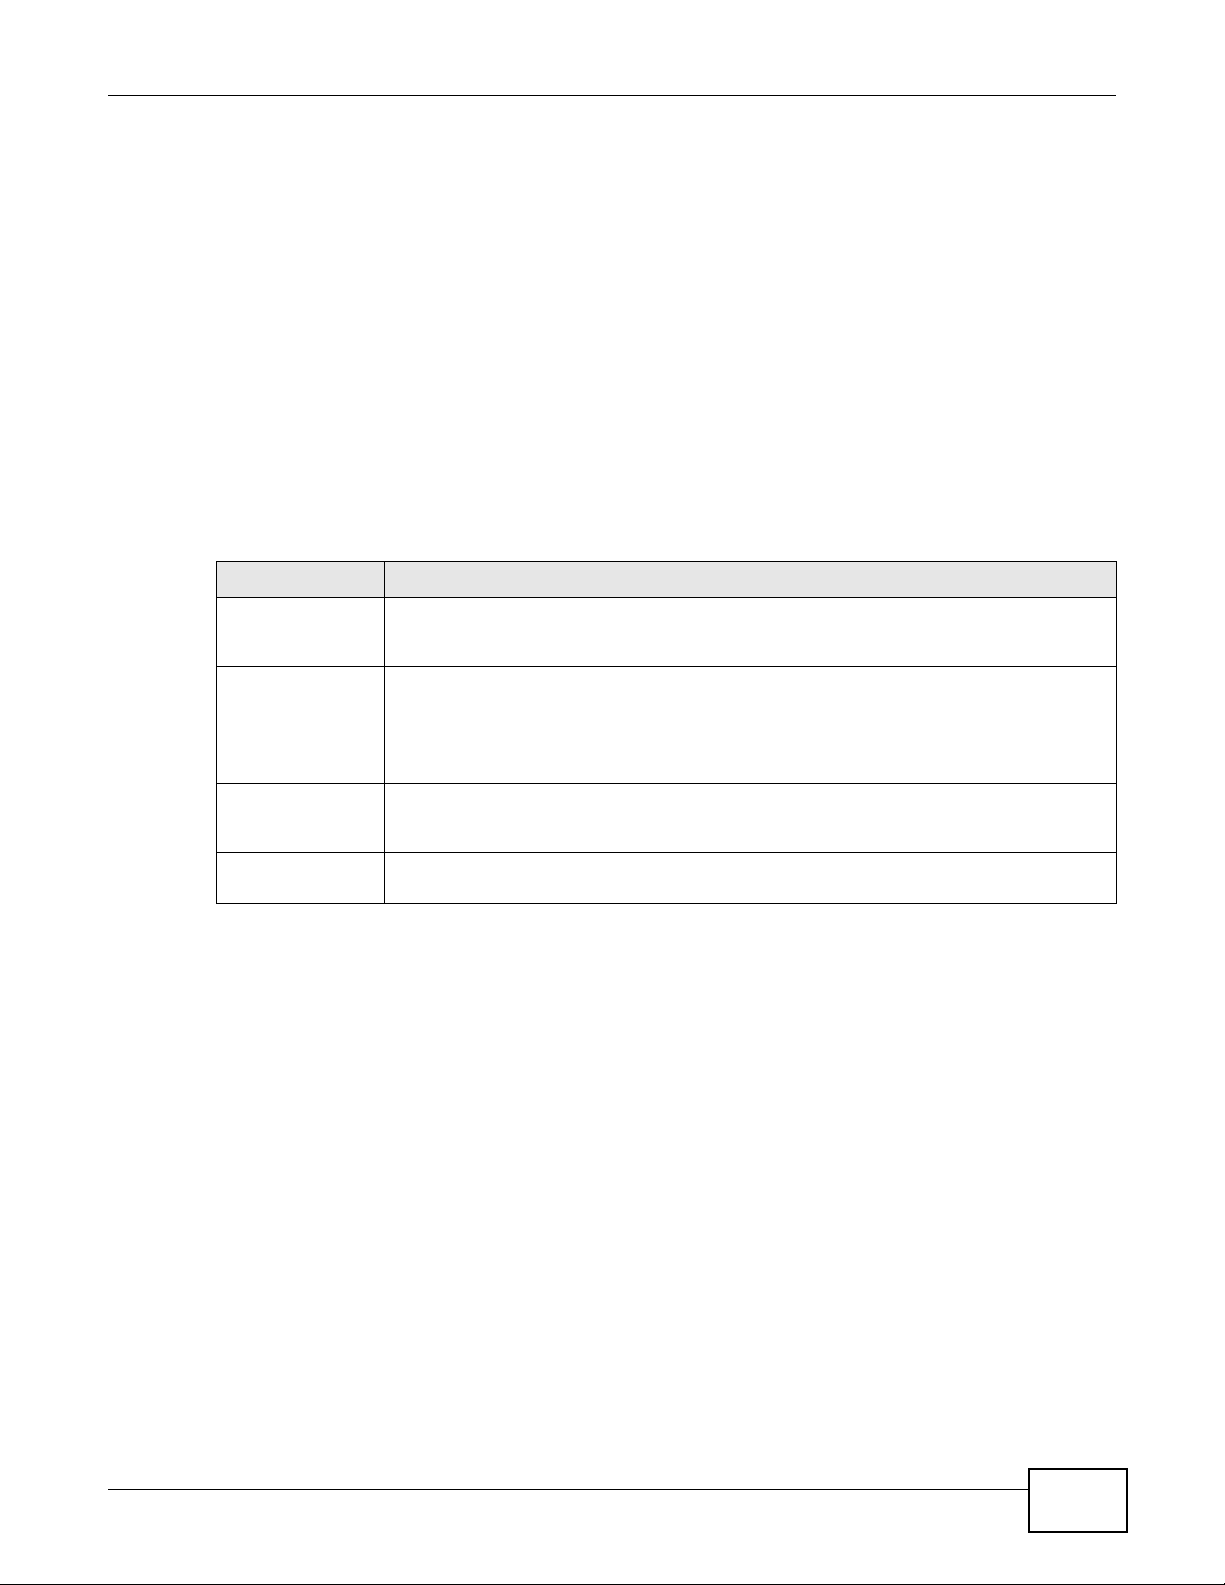
2.5.3 Directory of the NAS
Click Shared Folder to log into the NSA’s file directory in Windows Explorer. Enter the
administrator user name and password and click Login.
Figure 6 Login
26
Media Server User’s Guide
Chapter 2 NAS Starter Utility for NSA221, NSA310, NSA320, and NSA325
The utility opens the NSA’s directory in Windows Explorer.
Figure 7 Directory
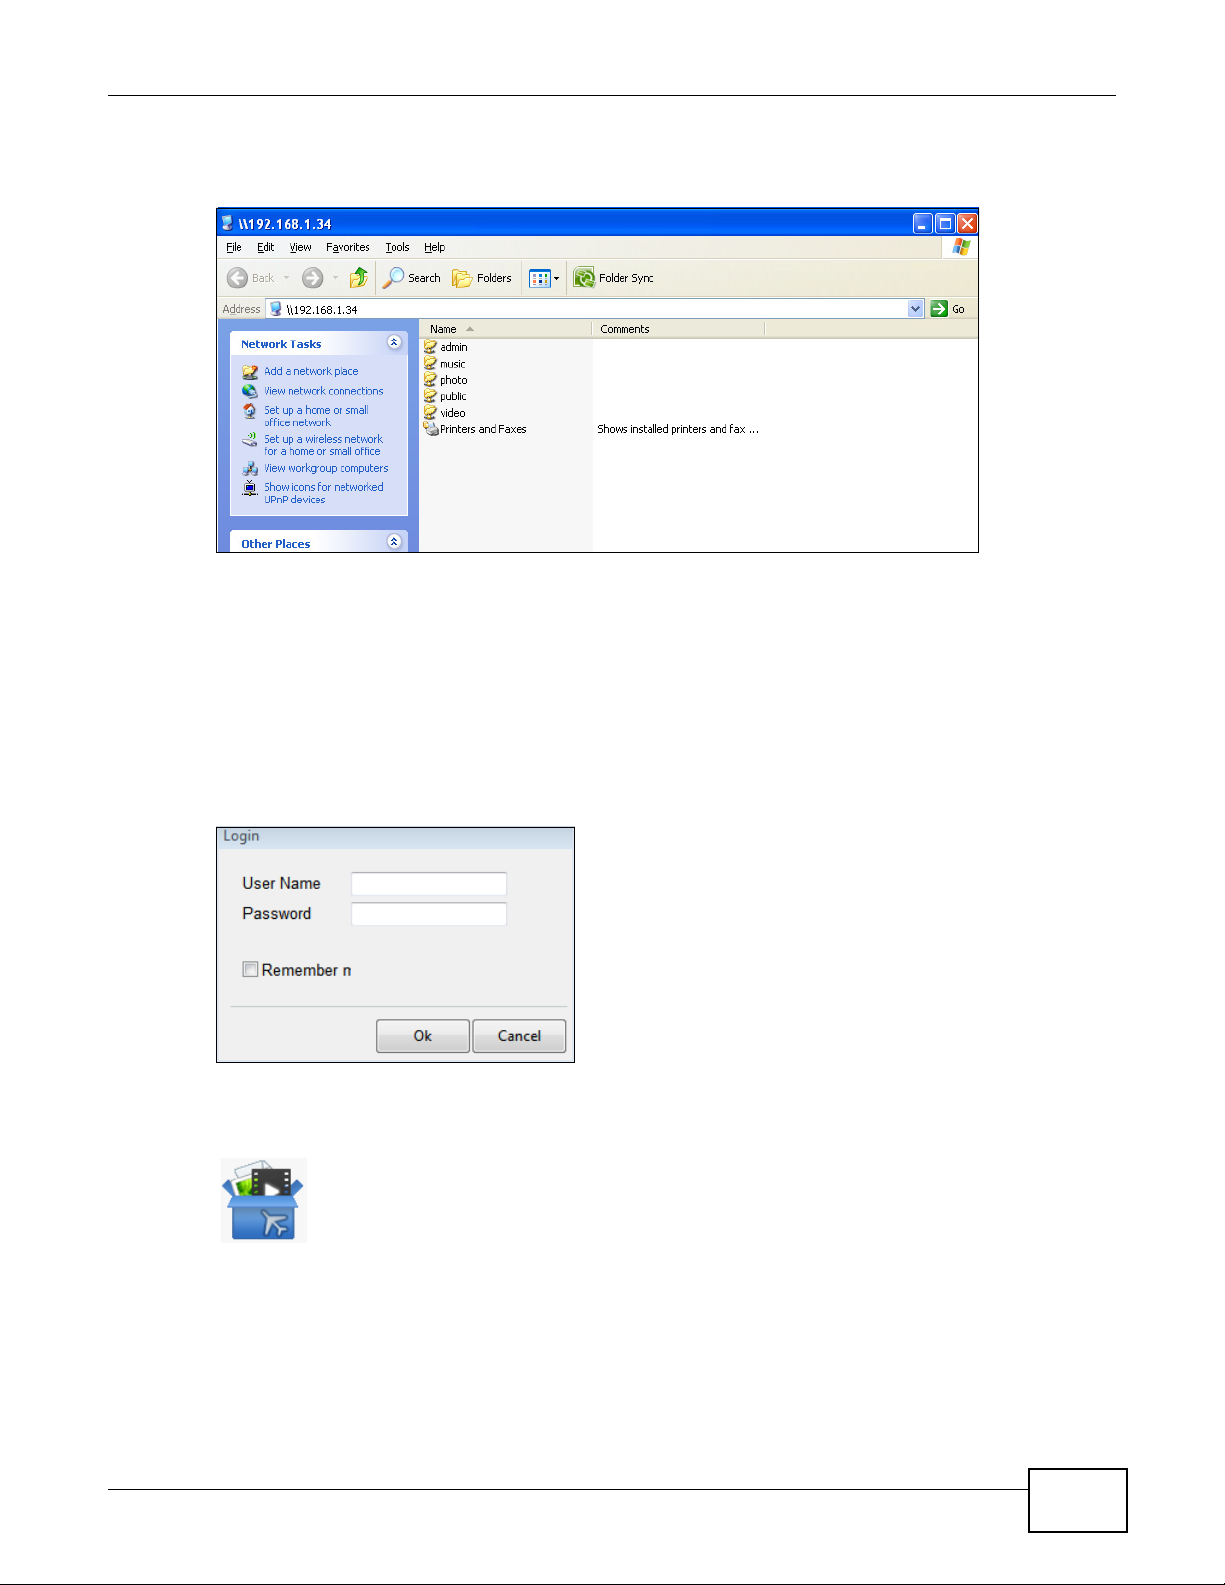
2.6 Import Files or Folders with zPilot
In the main NAS Starter Utility screen click zPilot to be able to drag and drop files from your
computer to the NSA.
Enter the administrator user name and password and click Login.
Figure 8 Login
The zPilot icon displays.
Figure 9 zPilot
Drag files onto the zPilot icon to move them to the NSA. zPilot automatically sorts music, photo, and
video files into the Music, Photo, and Video folders. zPilot automatically sorts the types of media
files listed in Table 128 on page 362 (except for the subtitles). Other types of files go to the Public
Media Server User’s Guide
27
Chapter 2 NAS Starter Utility for NSA221, NSA310, NSA320, and NSA325
folder. For folders of files you are prompted to choose the target destination. The zPilot icon shows
the transfer rate.
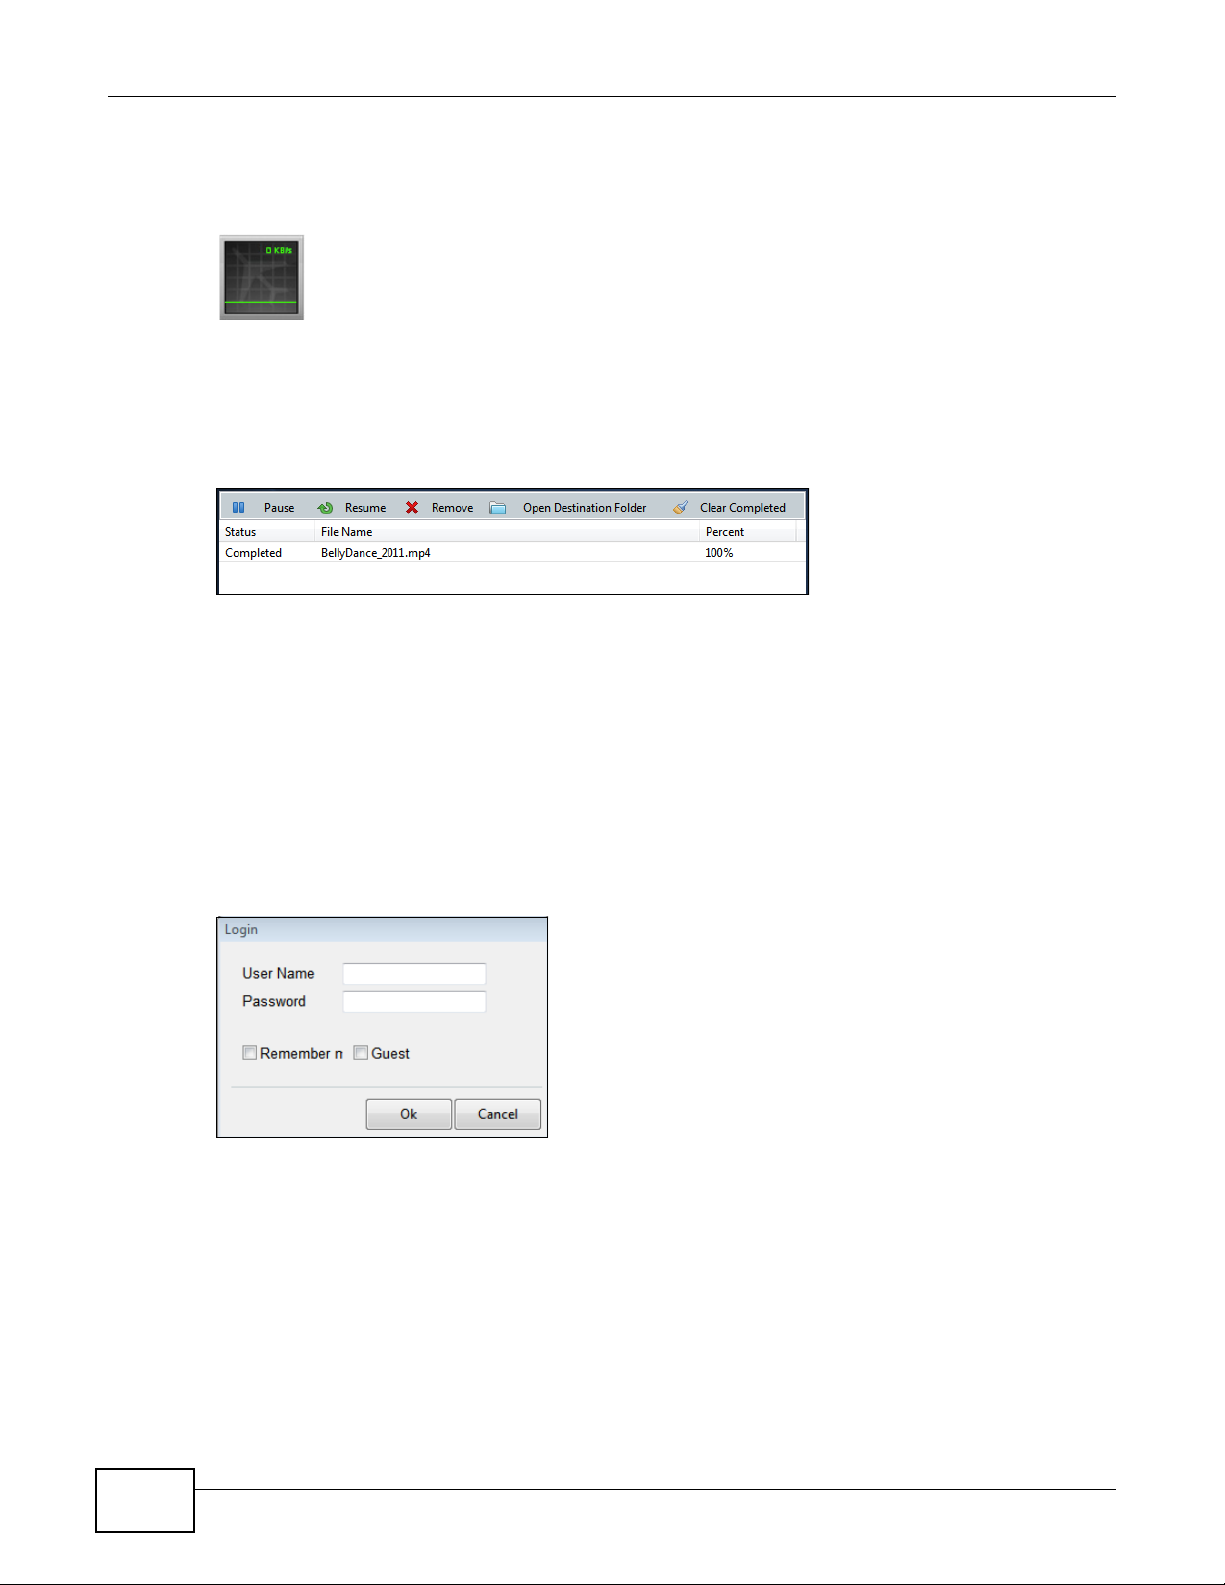
Figure 10 zPilot Showing Transfer Rate
Double-click the zPilot icon to display status details about the file transfers. Select an entry and
click Pause, Resume, or Remove to control the transfer. After the transfer finishes you can select
the entry and click Open Destination Folder to see the file on the NSA. Click Clear Completed to
clear completed transfers from the list.
Figure 11 zPilot Transfer Details
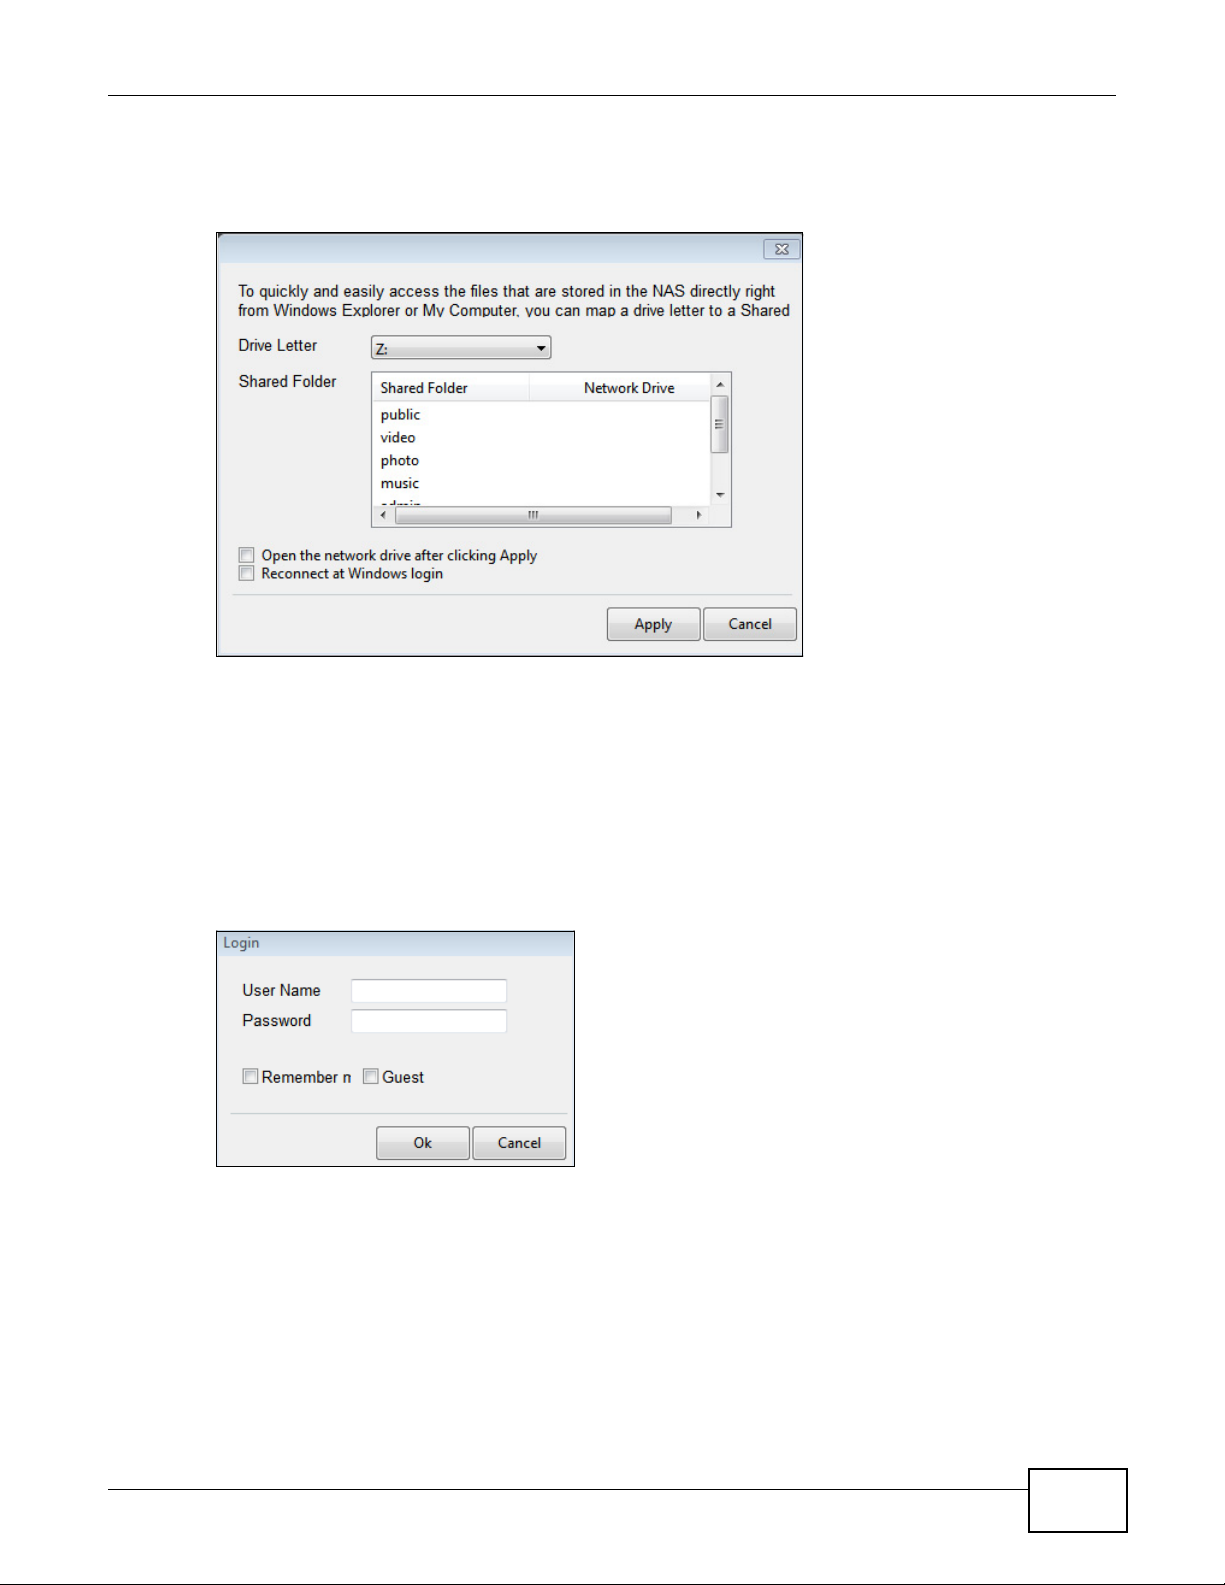
2.7 Network Drive
In the main NAS Starter Utility screen click Network Drive to add the NSA as a network drive in
your computer’s Windows Explorer.
Enter your user name and password and click Login to be able to add the NSA’s shares to which
you have access as network drives. Otherwise select Guest and click Login to be able to add the
NSA’s public shares as network drives.
Figure 12 Login
Select a share on the NSA and the drive letter on your computer to which you want to map it. The
shares that each user can select to map depends on the user’s permissions. For example, if share1
is private to user1, then only user1 is allowed to map share1. The table displays the NSA shares
that are already mapped to drive letters on your computer. After you click Apply you can see the
28
Media Server User’s Guide
Chapter 2 NAS Starter Utility for NSA221, NSA310, NSA320, and NSA325
new drive in Windows Explorer (My Computer) where you can access and use it like your
computer’s other drives.
Figure 13 Network Drive
2.8 Manage the Device
In the main NAS Starter Utility screen click Configuration > Manage the Device to log into the
NSA’s administration screens where you can manage the NSA.
Enter the administrator user name and password and click Login.
Figure 14 Login
See Section 4.5 on page 62 for more on the administration screens.
2.9 Configure System Settings
Use these screens to be able to change the NSA’s server name, time zone, PPPoE, IP address,
subnet mask, default gateway, or DNS settings.
Media Server User’s Guide
29

Chapter 2 NAS Starter Utility for NSA221, NSA310, NSA320, and NSA325
Click Configuration > System Setting in the main utility screen to display the following screen.
Figure 15 NAS Starter Utility > Configuration > System Setting
The following table describes the labels in this screen.
Table 4 NAS Starter Utility > Configuration > System Setting
LABEL DESCRIPTION
Server Name Specify a name to uniquely identify the NSA on your network. You can enter up to 15
alphanumeric characters with minus signs allowed but not as the last character. The
name must begin with an alphabetic character (a-z) and is case sensitive.
Time Zone Choose the time zone of your location. This will set the time difference between your
time zone and Greenwich Mean Time (GMT).
Enable PPPoE
Connection
Automatically get
IP address
Manually assign IP
address
Click this if your Internet connection requires you to enter a user name and password to
connect to the Internet. Enter your user name and password
Select this if the NSA is automatically assigned an IP address from the ISP or a DHCP
server in your network.
Select this if you want to assign the NSA a fixed IP address, subnet mask and default
gateway.
Note: Do not configure an IP address that is already in use in your network. This results to
a network IP address conflict and makes the NSA inaccessible.
Use from DHCP
server
DNS Domain Name System (DNS) is for mapping a domain name to its corresponding IP
Domain Name System (DNS) is for mapping a domain name to its corresponding IP
address and vice versa. Select this if the NSA is automatically given DNS information
from the ISP or a DHCP server in your network.
address and vice versa.
Select Use from DHCP server if the NSA is automatically given DNS information from
the ISP or a DHCP server in your network.
Select Manually assign DNS server if you were given specific IP address(es) of the
DNS server(s). Enter the primary and secondary DNS in the corresponding fields.
30
Media Server User’s Guide

3.1 Overview
This chapter describes the NAS Starter Utility for NSA210. Use the NAS Starter Utility to find, set
up, and manage the NSA as well as copy files to it and access the files on it.
Make sure you have a backup of any existing data in the hard disk before
installing it in the NSA. Using the initialization wizard formats the hard
disk and deletes all data in the process.
There is a NAS Starter Utility available for Windows XP, Windows Vista, or Windows 7. Click Help to
open a web help page about the NAS Starter Utility screens. NAS Starter Utility screens are shown
here as they display with the Windows platform.
CHAPTER 3
NAS Starter Utility for NSA210
Note: Refer to the Quick Start Guide for your NSA’s hardware connections and the steps
for installing the NAS Starter Utility. The NAS Starter Utility software version
number is 2.02.
Note: If you have a NSA221, NSA310, NSA320 or NSA325, it is recommended to use the
latest version of the NAS Starter Utility (see Chapter 2 on page 21). Installing the
latest version of the utility will uninstall previous versions.
Note: If the NSA210 will be used on the same network as the NSA221, NSA310, NSA320,
or NSA325, utility version 2.02 must first be used to install firmware on the
NSA210. You can then install the latest version of the utility for NSA221, NSA310,
NSA320, or NSA325 on your computer (see Chapter 2 on page 21). The NSA210
can be configured by Web Configurator by entering its IP address or server name
(see the NAS Seeker on Section 2.3 on page 21) into your web browser (see
Section 4.2.2 on page 48).
3.2 Starting the NAS Starter Utility
• The NAS Starter Utility broadcasts a request packet when you first run it. Each NSA has an NAS
Starter Utility Agent that always listens and responds to requests from the NAS Starter Utility.
The NAS Starter Utility receives the response packet that contains information, such as host
name, IP, and so on.
• If you plan to use more than one NSA in your network, configure them with unique server
names. This enables you to identify each NSA in the NAS Starter Utility screens.
Media Server User’s Guide 31

Chapter 3 NAS Starter Utility for NSA210
3.3 NAS Discovery Screen
Use this screen to view the NSAs in your network. The NSA’s Server Name. The default is ‘nsa’
followed by the number of your model (‘nsa210’ for example). See Section 3.9 on page 45 for how
to change it to a more recognizable one in your network.
Start the NAS Starter Utility (click the icon in your Desktop or in Start > Programs > ZyXEL >
NAS Starter Utility). The first time you open the NAS Starter Utility the discovery screen appears
as follows.
Figure 16 NAS Discovery
The following table describes the labels in this screen.
Table 5 NAS Discovery
LABEL DESCRIPTION
Refresh Click this to refresh the screen. The NAS Starter Utility does not automatically refresh.
Hostname This is the server name you configured for the NSA. If you have more than one NSA in
your network, it is recommended that you give each one a unique name for identification
purposes.
If you have several NSAs connected to your computer/network, hover your mouse over
the host name to view the details of each device. A box pops up containing details about
the NSA.
Hostname shows the NSA’s configured server name.
IP shows the NSA’s current IP address.
Model ID shows the NSA’s model name.
Firmware Version shows the version of firmware the NSA is currently using.
Status shows whether the NSA is Online, Unreachable, Configuring, or Config
Failed.
32
Media Server User’s Guide

3.4 Main NAS Starter Utility Screen
The main NAS Starter Utility screen displays after you select a NSA in the NSA Discovery screen.
Figure 17 NAS Starter Utility Main Screen
Chapter 3 NAS Starter Utility for NSA210
The following table describes the labels in this screen.
Table 6 NAS Starter Utility Main Screen
LABEL DESCRIPTION
Discovery Click this to use the NSA Discovery screen (Section 3.3 on page 32) to find and select the
bar The bar shows the NSA’s in-use and remaining storage capacity.
Name This is the server name you configured for the NSA. If you have more than one NSA in
Firmware This shows the version of firmware the NSA is currently using.
IP address This is the current IP address of the NSA.
Status This shows whether the NSA is Online, Unreachable, Configuring, or Config Failed.
NAS Discovery Click this to use the NSA Discovery screen (Section 3.3 on page 32) to find and select the
Import files or
folders with zPilot
Add a network
drive to My
Computer
Manage the device Click this to log into the advanced administration screens. See Section 4.5 on page 62 for
Play Media Files
from Home Screen
NSA on your network to which you want to connect.
your network, it is recommended that you give each one a unique name for identification
purposes.
NSA on your network to which you want to connect.
Click this to launch zPilot to drag and drop files onto the NSA.
Click this to add the NSA as a network drive in your computer’s Windows Explorer.
details on the administration screens.
Click this to enjoy your media files though your web browser. See Section 4.4 on page 50
for details on the Home screen.
Media Server User’s Guide
33

Chapter 3 NAS Starter Utility for NSA210
Table 6 NAS Starter Utility Main Screen
LABEL DESCRIPTION
Show the directory
of the NSA
Run the
Initialization
Wizard
Configure network
setting
Click this to open the NSA’s file directory in Windows Explorer. See Section 3.5.3 on page
42 for details.
Click this to set up the NSA for the first time. See Section 3.5 on page 34 for details.
Click this to change the NSA network settings such as the NSA’s name, IP address,
subnet mask, default gateway, DNS, or PPPoE. See Section 3.9 on page 45 for details.
3.5 Initialization Wizard
Use these screens to set up the NSA for the first time. The wizard will configure the NSA’s basic
settings. It also installs the firmware on the hard disk.
Click Run the Initialization Wizard in the main utility screen to display the following screen.
You must log in using an admin account. The default administrator username is ‘admin’ and the
default password is ‘1234’ and click Next.
Figure 18 Initialization Wizard Welcome
34
Media Server User’s Guide

Choose Default Configuration (recommended) or manual configuration. Use the manual option if
you need to name the NSA to configure specific network settings. Click Next.
Figure 19 Initialization Wizard: Wizard Type
3.5.1 Default Configuration
Chapter 3 NAS Starter Utility for NSA210
1 The NAS Starter Utility checks the Internet connection.
Figure 20 Check Network Connection
2 Type a new administrator password (and retype it to confirm). If you do not want to change the
administrator password, you can leave the fields blank and just click Next.
Figure 21 Change Admin Password
Media Server User’s Guide
35

Chapter 3 NAS Starter Utility for NSA210
3 Specify usernames and passwords for the individuals you want to be able to access the NSA.
Figure 22 Create User Accounts
4 Check your settings. If they are OK, click Next. Otherwise click Back. If you want to change
anything other than the user accounts, keep clicking Back until you can change the wizard type to
manual.
Figure 23 Confirm Settings
5 Wait while the NAS Starter Utility configures the NSA.
Figure 24 Setting the NAS
36
Media Server User’s Guide

Chapter 3 NAS Starter Utility for NSA210
After the NAS Starter Utility finishes configuring the NSA, you can click Show the directory of the
NAS to see the NSA’s shares (see Section 3.5.3 on page 42) or click Finish to return to the main
NAS Starter Utility screen (see Section 3.4 on page 33).
Figure 25 Setting the NAS
3.5.2 Manual Configuration
1 Set up the NSA’s basic network configuration first.
Figure 26 Setup Network
The following table describes the labels in this screen.
Table 7 NAS Starter Utility > Config
LABEL DESCRIPTION
Get IP
automatically from
DHCP server
Assign IP Manually Select this if you want to assign the NSA a fixed IP address, subnet mask and default
Select this if the NSA is automatically assigned an IP address from the ISP or a DHCP
server in your network.
gateway.
Media Server User’s Guide
Note: Do not configure an IP address that is already in use in your network. This results to
a network IP address conflict and makes the NSA inaccessible.
37

Chapter 3 NAS Starter Utility for NSA210
Table 7 NAS Starter Utility > Config
LABEL DESCRIPTION
Use DNS server
from DHCP server
Assign DNS server
manually
Domain Name System (DNS) is for mapping a domain name to its corresponding IP
address and vice versa. Select this if the NSA is automatically given DNS information
from the ISP or a DHCP server in your network.
If you were given specific IP address(es) of the DNS server(s), select this and enter the
primary and secondary DNS in the corresponding fields.
2 If your Internet connection requires you to enter a user name and password to connect to the
Internet, enter them here and click Next. If you do not need to enter a user name and password to
connect to the Internet, click Skip.
Figure 27 PPPoE
3 The NAS Starter Utility checks the Internet connection.
Figure 28 Check Network Connection
38
Media Server User’s Guide

Chapter 3 NAS Starter Utility for NSA210
4 Type a new administrator password (and retype it to confirm) and click Next. If you do not want to
change the administrator password, you can leave the fields blank and just click Next.
Figure 29 Change Admin Password
5 Specify a name to uniquely identify the NSA on your network. Choose the time zone of your
location. This sets the time difference between your time zone and Greenwich Mean Time (GMT).
Figure 30 Enter general information
Media Server User’s Guide
39

Chapter 3 NAS Starter Utility for NSA210
6 Select how to configure the hard disks.
Figure 31 Choose HDD Configuration
With only one hard disk installed, just click Next. If you have two hard disks installed choose one
of the following:
• RAID 1: Use this to mirror all data on one disk to the other disk to protect against data loss.
• Individual Disks: Use this if you want maximum storage capacity and/or you have other means
of protecting your data. This creates two JBOD volumes (with one disk in each), a failure of
one disk (volume) should not affect the other volume (disk).
• JBOD: Use this if you want maximum storage capacity and/or you have other means of
protecting your data. This combines the two physical disks into a single virtual one, so they
appear as a single large disk.
• RAID 0: Use this if you want maximum speed for your disks, and/or you have other means of
protecting your data. RAID 0 has the fastest read and write performance but if one disk fails
you lose all your data from both disks.
7 This screen lists the shares the NAS Starter Utility creates on the NSA by default. Select the ones
you want to use as network drives in Windows Explorer.
Figure 32 Connect Network Drives
40
Media Server User’s Guide

Chapter 3 NAS Starter Utility for NSA210
8 Specify usernames and passwords for the individuals you want to be able to access the NSA and
click Next.
Figure 33 Create User Accounts
9 If the settings are OK, click Next. Otherwise click Back. If you want to change anything other than
the user accounts, keep clicking Back until you can change the wizard type to manual.
Figure 34 Confirm Settings
10 Wait while the NAS Starter Utility configures the NSA.
Figure 35 Setting the NAS
Media Server User’s Guide
41

Chapter 3 NAS Starter Utility for NSA210
After the NAS Starter Utility finishes configuring the NSA, you can click Show the directory of the
NAS to see the NSA’s shares (see Section 3.5.3 on page 42) or click Finish to return to the main
NAS Starter Utility screen (see Section 3.4 on page 33).
Figure 36 Setting the NAS
3.5.3 Directory of the NAS
Enter the administrator user name and password and click Login.
Figure 37 Login
The utility opens the NSA’s directory in Windows Explorer.
Figure 38 Directory
42
Media Server User’s Guide

3.6 Import Files or Folders with zPilot
In the main NAS Starter Utility screen click Import files or folders with zPilot to be able to drag
and drop files from your computer to the NSA.
Enter the administrator user name and password and click Login.
Figure 39 Login
The zPilot icon displays.
Figure 40 zPilot
Chapter 3 NAS Starter Utility for NSA210
Drag files onto the zPilot icon to move them to the NSA. zPilot automatically sorts music, photo, and
video files into the Music, Photo, and Video folders. zPilot can automatically sort the types of
media files listed in Table 128 on page 362 (except for the subtitles). Other types of files go to the
Public folder. For folders of files you are prompted to choose the target destination. The zPilot icon
shows the transfer rate.
Figure 41 zPilot Showing Transfer Rate
Double-click the zPilot icon to display the NAS Starter Utility screen with status details about the file
transfers. Click the “x” button next to a file entry to stop transferring the file. Click
clear completed transfers from the list.
Figure 42 zPilot Showing Transfer Rate
Clean Up to
Media Server User’s Guide
43

Chapter 3 NAS Starter Utility for NSA210
3.7 Add a Network Drive to My Computer
In the main NAS Starter Utility screen click Add a network drive to My Computer to add the NSA
as a network drive in your computer’s Windows Explorer.
Enter your user name and password and click Login to be able to add the NSA’s shares to which
you have access as network drives. Otherwise select Guest and click Login to be able to add the
NSA’s public shares as network drives.
Figure 43 Login
Select a share on the NSA and the drive letter on your computer to which you want to map it. The
shares that each user can select to map depends on the user’s permissions. For example, if share1
is private to user1, then only user1 is allowed to map share1. The table displays the NSA shares
that are already mapped to drive letters on your computer. After you click OK you can see the new
drive in Windows Explorer (My Computer) where you can access and use it like your computer’s
other drives.
Figure 44 Network Drive Mapping
3.8 Manage the Device
In the main NAS Starter Utility screen click Manage the Device to log into the NSA’s
administration screens where you can manage the NSA.
44
Media Server User’s Guide

Enter the administrator user name and password and click Login.
Figure 45 Login
See Section 4.5 on page 62 for more on the administration screens.
3.9 Configure Network Setting
Use these screens to change the NSA network settings such as the NSA’s name, IP address, subnet
mask, default gateway, DNS, or PPPoE.
Click Configure network setting in the main utility screen to display the following screen.
Figure 46 NAS Starter Utility > Configure network setting
Chapter 3 NAS Starter Utility for NSA210
The following table describes the labels in this screen.
Table 8 NAS Starter Utility > Configure network setting
LABEL DESCRIPTION
NAS Name Specify a name to uniquely identify the NSA on your network. You can enter up to 15
Get IP
automatically from
DHCP server
Assign IP Manually Select this if you want to assign the NSA a fixed IP address, subnet mask and default
Media Server User’s Guide
alphanumeric characters with minus signs allowed but not as the last character. The
name must begin with an alphabetic character (a-z) and is case sensitive.
Select this if the NSA is automatically assigned an IP address from the ISP or a DHCP
server in your network.
gateway.
Note: Do not configure an IP address that is already in use in your network. This results to
a network IP address conflict and makes the NSA inaccessible.
45

Chapter 3 NAS Starter Utility for NSA210
Table 8 NAS Starter Utility > Configure network setting
LABEL DESCRIPTION
Use DNS server
from DHCP server
Assign DNS server
manually
PPPoE Click this if your Internet connection requires you to enter a user name and password to
Domain Name System (DNS) is for mapping a domain name to its corresponding IP
address and vice versa. Select this if the NSA is automatically given DNS information
from the ISP or a DHCP server in your network.
If you were given specific IP address(es) of the DNS server(s), select this and enter the
primary and secondary DNS in the corresponding fields.
connect to the Internet.
If your Internet connection requires you to enter a user name and password to connect to the
Internet, select Enable PPPoE Connection and enter your user name and password.
Figure 47 PPPoE
46
Media Server User’s Guide

4.1 Overview
This chapter describes how to access the NSA web configurator and provides an overview of its
screens.
The web configurator is an HTML-based management interface that allows easy NSA setup and
management using an Internet browser.
Use Internet Explorer 7.0, Mozilla Firefox 3.6, Safari 5, Google Chrome 10, or later versions of
these browsers. The recommended screen resolution is 1024 by 768 pixels or higher.
In order to use the web configurator you need to allow:
• Web browser pop-up windows from your device. Web pop-up blocking is enabled by default in
Windows XP SP (Service Pack) 2.
• JavaScript (enabled by default).
CHAPTER 4
Web Configurator Basics
4.2 Accessing the NSA Web Configurator
Make sure your NSA is properly connected and that your computer is in the same subnet as the
NSA (refer to the Quick Start Guide or the appendices).
4.2.1 Access the NSA Via NAS Starter Utility
If you don’t know the IP address of the NSA, then use the NAS Starter Utility to find it. Refer to the
Quick Start Guide for how to install and run the NAS Starter Utility. See Chapter 2 on page 21 for
Media Server User’s Guide 47

Chapter 4 Web Configurator Basics
more information on the NAS Starter Utility for NSA310, NSA320, NSA325, and NSA221 and
Chapter 3 on page 31 for more information on the NAS Starter Utility for NSA210.
Figure 48 NAS Starter Utility Main Screen for NSA310, NSA320, NSA325, and NSA221
4.2.2 Web Browser Access
Configure the server name of your NSA using the Network Configuration screen (Section 3.9 on
page 45) of the NAS Starter Utility. Open your browser and type in the server name of the NSA. The
default is ‘nsa’ followed by the number of your model (‘nsa320’ for example).
Figure 49 NSA URL
48
Media Server User’s Guide

4.3 Login
The default username and password are ‘admin’ and ‘1234’ respectively. Enter your username and
password. See Chapter 15 on page 301 for how to create other user accounts. If you use the option
to stay logged in for two weeks (assuming you do not log out), make sure you keep your computer
secure from unauthorized access. Click User Login to go to the Home screens where you can play
media files. Click Administrator Login to go to the advanced administration screens.
Figure 50 NSA Login Screen
Chapter 4 Web Configurator Basics
Media Server User’s Guide
49
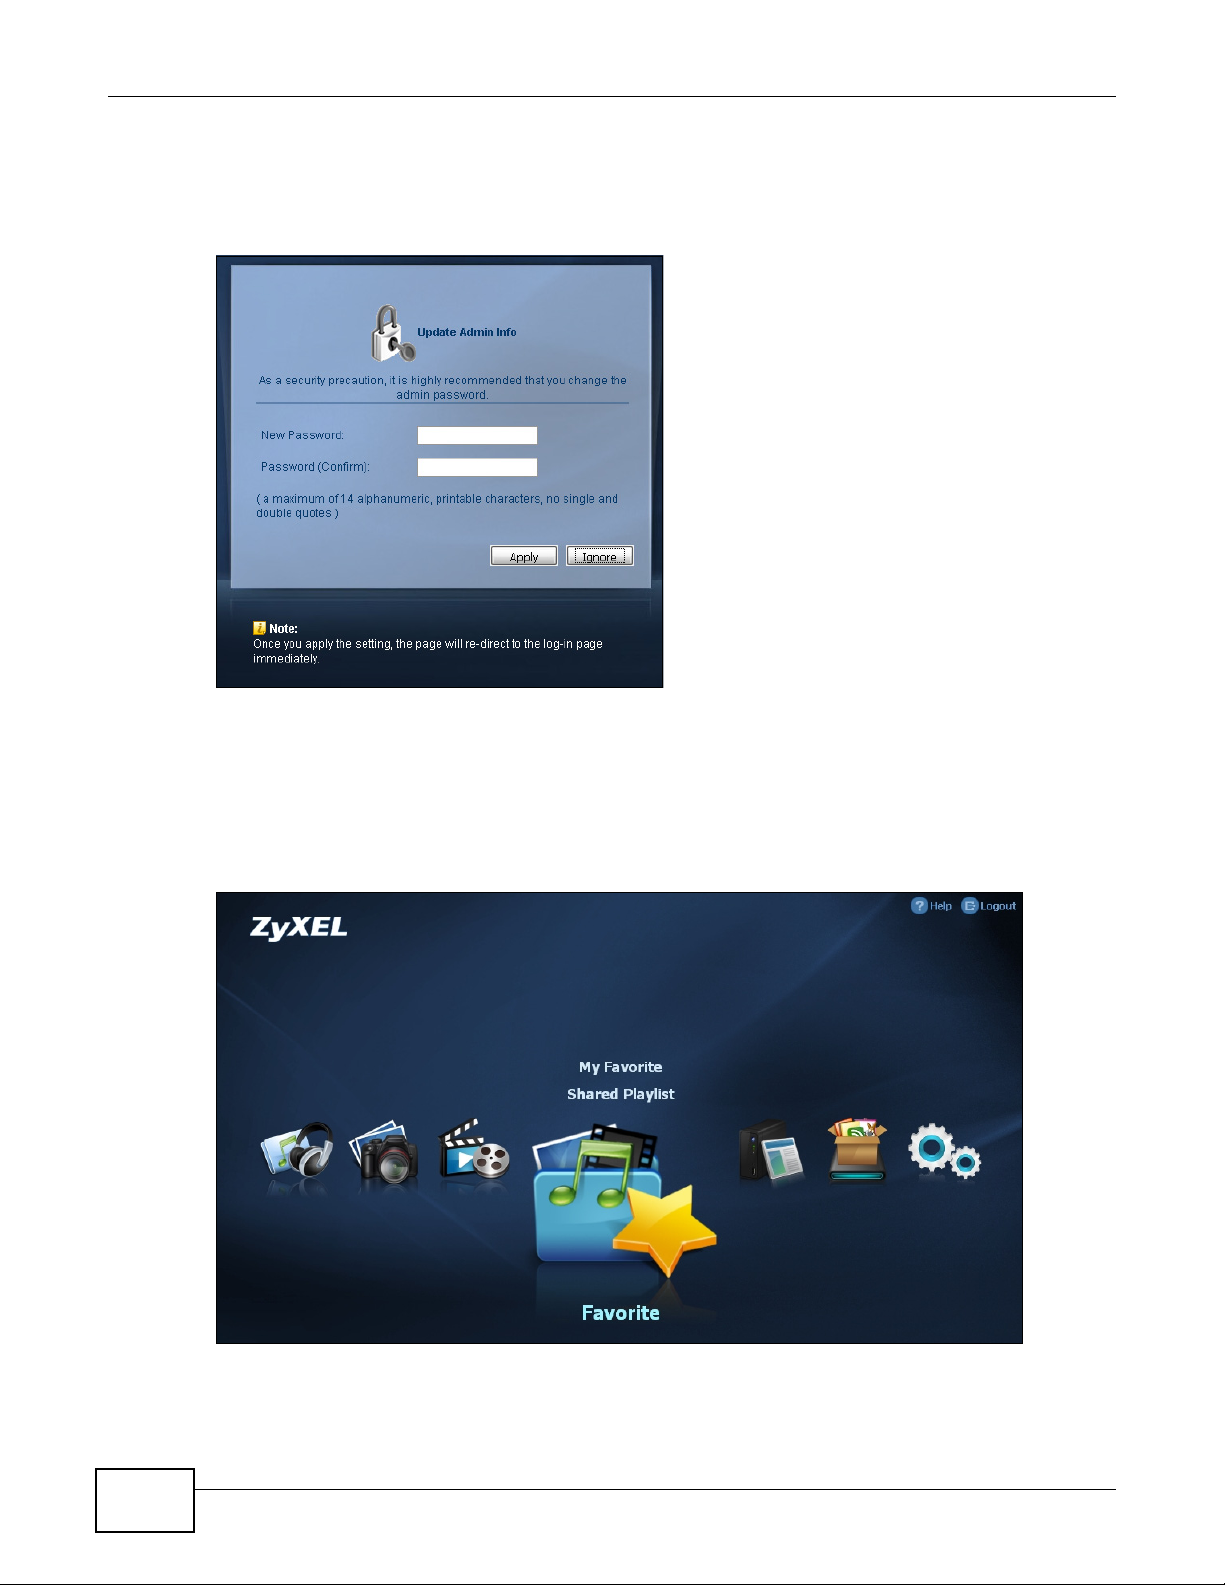
Chapter 4 Web Configurator Basics
If you have not done so yet, you should see a screen asking you to change your password (highly
recommended) as shown next. Type a new password (and retype it to confirm) and click Apply or
click Ignore.
Figure 51 Change Password Screen
4.4 Home Screens
The Home screen after you log in using User Login.
Figure 52 Home
50
Note: If you did not select the option to stay logged in for two weeks when you logged in,
the web configurator management session automatically times out if it is left idle
for 15 minutes. Simply log back into the NSA if this happens to you.
Media Server User’s Guide
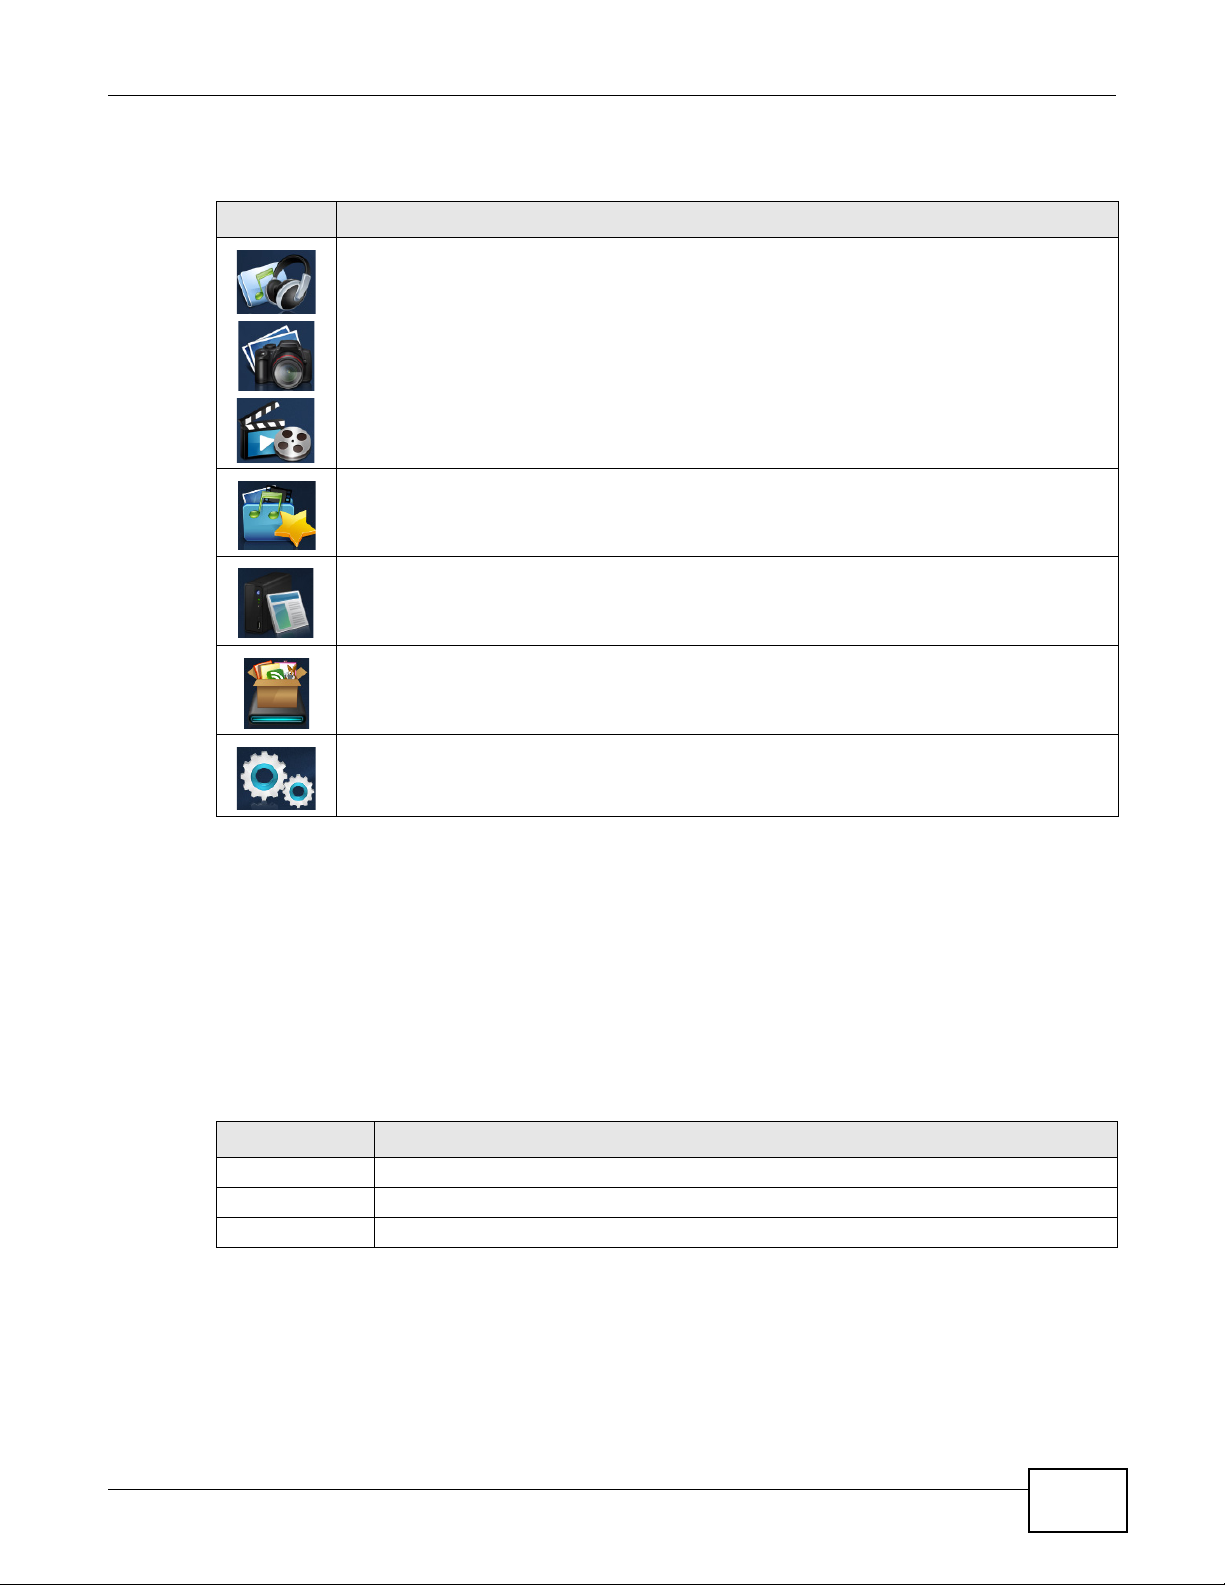
Chapter 4 Web Configurator Basics
The main Home screen displays icons for the various features you can access.
Table 9 Main Home Screen Icons
ICON DESCRIPTION
Use Music, Photo, and Video to play and organize your music, picture, and video files.
Use Favorite to create and edit playlists.
Use File Browser to see your files in a tree-folder structure.
Administrators can use Application Zone to install, access, and manage the NSA’s
applications.
Use System to edit general system settings or log into the administrator advanced
configuration screens.
Note: Your browser may need Windows Media Player and VLC plugins installed to play
music and video files. To get the VLC plugins, you have to download and install VLC
(use the .exe file). To install a VLC plugin for Firefox, when you install VLC, you
have to select the Mozilla plugin option. To display your photos as a 3-D wall for
quick browsing, install the CoolIris plugin.
Current VLC plugins may not support srt file format subtitles when playing videos.
The icons at the top-right of the screen are visible from most screens. Use them to navigate
between the screens and menus. The following table describes the icons.
Table 10 Global Home Labels and Icons
LABEL/ICON DESCRIPTION
Home Click this to return to the Home screen.
Help Click this to open a web help page specific to the screen you are currently configuring.
Logout Click this at any time to exit the web configurator.
Media Server User’s Guide
51

Chapter 4 Web Configurator Basics
A
B
D
C
Here are some Home screen descriptions. A music screen is shown here as an example. Other
screens work in a similar way.
Figure 53 Music Screen
This table describes common labels in the Home media screens. Not every item displays in every
screen.
Tabl e 11 Home Media Screens
LABEL DESCRIPTION
A Click a letter to go to the first item starting with that letter.
B View files. Double-click an item to play it.
C Shows which page is displaying and the total number of pages of entries. Click an arrow or
D Select the sorting criteria:
Thumbnail Click this to view the files as thumbnails.
type a number to go to another page of entries.
Artist - Sort music by artist.
All - All of the menu’s files display here.
Genre - Sort music by category.
Folder - List the folders containing music files.
Album - List the identified music albums.
Current Playlist - Show the playing and queued songs.
The NSA categorizes files into genres and albums according to the information stored in
your files. Files may not appear in the proper folders if they have missing, incorrect or
incomplete information.
52
Media Server User’s Guide

Tabl e 11 Home Media Screens
LABEL DESCRIPTION
List Click this to view the files as a list.
Play Click this to play the currently selected file. You can also double-click a file to play it.
Delete Select an item and click Delete to remove it.
Rename Select an item and click Rename to change its name.
Note: When you change a file name, make sure you keep the file extension unchanged.
Add to Current
Playlist
Add to Playlist Click this to add the selected music file to a playlist.
Search Click this to look for a file or folder by name.
Refresh Click this to update the display in the screen.
Now Playing This link is available when a song is playing. Click it to see details about the song that is
Click this to add the selected music file to the currently playing playlist.
currently playing.
4.4.1 Now Playing (Music)
A Now Playing link displays when a song is playing. Click it to display a panel like the following.
This screen displays the name of the current song and it’s play progress and lets you control the
playback.
Chapter 4 Web Configurator Basics
Figure 54 Now Playing
Media Server User’s Guide
53

Chapter 4 Web Configurator Basics
4.4.2 Exif and Google Maps (Photos)
Click a photo’s EXIF button to display or hide the photo’s Exchangeable image file format (Exif)
data.
Figure 55 Exif Information
If a photo’s Exif data includes GPS location data, click the latitude or longitude link to display the
location in Google Maps. Click Clear to delete the markers of other photos and only display the
current photo’s marker.
Figure 56 Google Maps
4.4.3 Slideshow and CoolIris (Photos)
In a Photo menu click the SlideShow button to display the menu’s files as a slideshow. Move your
cursor over the slideshow’s screen to display full screen, previous, pause, and next buttons for
controlling the slideshow.
54
Media Server User’s Guide

Chapter 4 Web Configurator Basics
Note: Your browser must have the Flash Player plug-in installed to view slideshows.
Figure 57 Slideshow
When the CoolIris plugin is installed in your browser, click the Launch CoolIris button to display
your photos as a 3-D wall for quick browsing.
4.4.4 Favorite
Use the Favorite menu to manage your playlists.
4.4.4.1 Shared Playlist
Use Favorite > Shared Playlist to view and play playlists that you created externally (in iTunes,
Windows Media Player, VLC media player, or Winamp for example) and saved to the NSA. When
using zPilot to move files to the NSA, playlists are automatically put into the music share.
Media Server User’s Guide
55

Chapter 4 Web Configurator Basics
4.4.4.2 My Favorite
Use Favorite > My Favorite to create, edit, and play playlists. These playlists are specific to the
NSA and cannot be used in external music players.
Figure 58 Favorite > My Favorite
This table describes labels in this menu.
Table 12 Favorite > My Favorite
LABEL DESCRIPTION
New Click this to create a new playlist.
Edit Double-click a playlist or select it and click Edit to go to a screen where you can remove
Delete All Within a playlist click Delete All to remove all of the playlist’s songs.
4.4.5 File Browser
Click File Browser to open the following screen. Use the file browsing screens to play, open,
upload, and download files. A share is a set of user access permissions for a specific folder on a
volume (gives someone access to a folder). It is equivalent to the Windows concept of a shared
folder, but the access rights are independent of the folder (you configure the share and the folder
separately). You can map a share to a network drive for easy and familiar file transfer for Windows
users.
• A folder icon with a hand indicates a share.
56
songs from the playlist.
Media Server User’s Guide

Chapter 4 Web Configurator Basics
• The administrator owns and manages the public shares.
• Double-click a media file to open it. Double-click other types of files to be able to save them.
• Click to the right of a file or folder name to select it.
• Use the [SHIFT] key to select a range of entries. Hold down the [CTRL] key to select multiple
individual entries.
• Drag and drop files to open a screen that lets you choose whether to copy or move them.
• You can upload files of up to 2 GB in size.
• You can download individual files of up to 4 GB in size with Mozilla Firefox and Internet Explorer 7
and later or up to 2 GB in size with Internet Explorer 6.
Figure 59 File Browser
The following table describes the labels in this screen.
Table 13 File Browser
LABEL DESCRIPTION
Up Click this to go to the next higher layer in the share’s folder tree.
Name This column identifies the names of folders and files in the share. Click a file’s file name to
Size This column displays a file’s size in bytes.
Last Modified This column displays the last time the file or folder was changed (in year-month-day
Create New
Folder
Media Server User’s Guide
open the file or save it to your computer. Click a folder’s name to display the folder’s contents.
hour:minute:second format).
Click this to open the following screen where you can create a new folder within the share.
Specify a name to identify the folder. See Section 4.4.6 on page 59 for more information on
folder names. Click Apply to create a folder or click Cancel to exit this screen.
57

Chapter 4 Web Configurator Basics
Table 13 File Browser (continued)
LABEL DESCRIPTION
Configure
Share
Upload Click this to open the following screen where you can add files to the share.
Select a share and click this link to open a screen where you can see and configure share
management details.
Use the Browse button to locate your file/s and c li ck Apply to upload the file. Click Cancel to
close this screen.
Note: Do not refresh the screen while an upload is going on.
Download Select a file and click this to save the file to your computer.
Note: Do not refresh the screen while a download is going on.
Restore When you are in a recycle bin folder, select a folder or file and click this to restore it.
4.4.5.1 Configure Share Screen
In the File Browser screen, select a share and click Configure Share to open the following screen
where you can see and configure share management details.
Figure 60 File Browser > Configure Share
58
Media Server User’s Guide

Chapter 4 Web Configurator Basics
The following table describes the labels in the this screen.
Table 14 File Browser > Configure Share
LABEL DESCRIPTION
Share Name Configure a name to identify this share. Type a share name from 1 to 239 single-byte (no
Volume This shows the volume the share is on. It is read-only.
Make this share
owned by
Enable This Share Select this option to allow users to access this share. When this option is not selected,
Enable Recycle Bin Select this option to keep deleted items in a recycle bin. When you delete an item, a
Publish this share
to Media Server
Publish this share
to Web
Share Access Select who can access the files in the share and how much access they are to be given. If
Chinese characters allowed for example) ASCII characters. The name cannot be the
same as another existing local share. See Section 4.4.6 on page 59 for more information
on share names. This is not configurable for the NSA’s default admin, music, photo,
public, and video shares.
Select the administrator or user account that is to own (manage) this share. The share
owner controls access rights to the share. This is not configurable for the NSA’s default
admin and public shares.
you cannot see and access this share.
recycle folder is created within the share, and the deleted item is stored in the recycle
bin. Later if you want to retrieve a deleted item, you can select the item from the recycle
folder and move/copy the item to another share.
Select this option to make the share’s files available to media clients.
Select this option to let people use a web browser to access this share’s files without
logging into the Home screens.
you publish the share to the media server or the web, all users will have at least readonly access to the share, regardless of what you configure here.
Select Keep it private to owner to allow only the share owner to read files in the share,
delete files in the share and save files to the share.
Select Make it public to allow anyone (with or without a user account on the NSA) to
read files in the share, delete files in the share and save files to the share.
Select Advanced to select which individual users can read the share’s files, which users
can delete the share’s files, and which users are blocked from doing either.
Apply Click this to save your changes.
Cancel Click this to return to the previous screen without saving.
4.4.6 Share and Folder Names
The name can only contain the following characters:
• Alphanumeric (A-z, 0-9) and Unicode.
The NSA allows FTP access to shares, folders or files with names encoded in the UTF-8 (8-bit
UCS/Unicode Transformation Format) format. So your FTP client must support UTF-8 in order to
access shares, folders or files on the NSA with Unicode names.
•Spaces
• _ [underscores]
•. [periods]
•- [dashes]
Other limitations include:
• All leading and trailing spaces are removed automatically.
Media Server User’s Guide
59

Chapter 4 Web Configurator Basics
• Multiple spaces within names are converted to a single space.
• Share names must be unique (they cannot be the same as other share names).
• The NSA creates automatic volume names for external (USB) disk volumes. These are a type of
share, so the share name you configure cannot conflict with the external (USB) disk volume
names. “ExtVol1” or “ExtVol2” are examples of external (USB) disk volume names.
• Folder names must be unique (they cannot be the same as other folder names).
• The minimum character length of a name is one character, that is a name cannot be blank.
• The maximum character length of share name is 239 characters.
• Unicode is supported for share names, although your FTP client must support UTF-8. Full support
should be available in all Windows versions after Windows 2000.
4.4.7 Application Zone
Administrators can click Application Zone to go to a screen where you can enable or disable
various applications for file sharing and downloading.
Figure 61 Application Zone
60
The following table describes the labels in the this screen.
Table 15 Application Zone
LABEL DESCRIPTION
Name This is the name of the application.
Description This is a brief description of the application. See Chapter 10 on page 185 for more
information.
Management
Page
Enable Select a disabled application and click this to turn on the application. Some applications are
Click this link to go the application’s management page where you can configure settings for
it. See Chapter 10 on page 185 for more information.
always enabled and cannot be disabled.
Media Server User’s Guide

Table 15 Application Zone (continued)
LABEL DESCRIPTION
Disable Select an enabled application and click this to turn off the application. Select the Flickr or
Youtube Uploadr entry and click this to cancel all uploading. Some applications are always
enabled and cannot be disabled.
Pause Select the Flickr or Youtube Uploadr entry and click this to pause current uploading. Resume
will resume current uploading.
Resume Select the Flickr or Youtube Uploadr entry and click this to resume current uploading.
4.4.8 System Settings
Click System > Settings to open the following screen. Use this screen to change general settings
and an account password.
Figure 62 System > Settings
Chapter 4 Web Configurator Basics
The following table describes the labels in this screen.
Table 16 System > Settings
LABEL DESCRIPTION
Double Click Behavior
Setting
Slide Effect Enable the Ken Burns effect to have the NSA automatically pan and zoom photos in
Media Server User’s Guide
Select Replace current playlist and start to play to have double clicking a song
cause the NSA to immediately stop any currently playing song and start playing the
double-clicked song.
Select Append to current playlist to have double clicking a song add a song to the
end of the current playlist.
slideshows. Disable it to display photos in slideshows normally.
61

Chapter 4 Web Configurator Basics
3
4
1
2
Table 16 System > Settings (continued)
LABEL DESCRIPTION
Slide Interval Select how long to display each image in a slideshow before changing to the next.
Video Playback Select Play Next to play the rest of the video files in a folder. So for example, a folder
Account Name Type the user name of the account for which you want to change the password.
Old Password Type the user’s current password.
New Password Create a new password for the user. You can type from one to 14 single-byte (no
Password (Confirm) You must type the exact same password that you just typed in the above field.
Language Select the web configurator language from the drop-down list box.
Go to system
administration page
Apply Click this to save your changes.
Reset Click this to refresh the screen.
Cancel Click this to exit the screen without saving your changes.
has video files 1~10 and you play video 3. When video 3 finishes the device continues
playing the rest of the videos in the folder (4~10). It does not loop back and play
videos 1 and 2.
Chinese characters allowed for example) ASCII characters.
This link appears when you are logged in as the administrator. Click it to open the
advanced administration screens. See Section 4.5 on page 62 for more on the
advanced administration screens.
4.5 Administration Screens
The System > Administration link displays when you log in as the administrator. Click System >
Administration in the Home screen to open the advanced administration screens.
The Status screen is the first advanced administration screen that displays.
Figure 63 Status
62
Media Server User’s Guide

4.5.1 Global Administration Icons
1
2
The icons and language label at the top-right of the screen ( ) are visible from most of the
administration screens. The following table describes the ‘global’ icons and labels.
Table 17 Global Labels and Icons
LABEL/ICON DESCRIPTION
Language Select the web configurator language from the drop-down list box.
Help Click this to open web help specific to the screen you are in.
About Click this to view the model name, firmware version and copyright.
Home Click this to return to the Home screens.
Logout Click this at any time to exit the web configurator. This is the same as clicking the Logout link
at the bottom of the navigation panel.
4.5.2 Navigation Panel
The navigation panel on the left of the Web Configurator screen ( ) contains screen links. Click a
link to display sub-links. There are no sub-links for the Status screen. Certain screens also contain
hyper links that allow you to jump to another screen.
Chapter 4 Web Configurator Basics
The following table describes the navigation panel screens.
Table 18 Screens Summary
LINK SCREEN FUNCTION
Status This screen shows system information, the status of the volumes, and the
users who are currently using the NSA.
System
Setting
Storage Volume View volume and disk information and create and edit volumes. A volume is a
Network TCP/IP Assign the NSA a dynamic or static IP address and DNS information.
Server Name Specify the NSA’s server name and workgroup name.
Date & Time Chose a time zone and/or allow the NSA to synchronize with a time server.
storage area that can span one or more internal disks or a single external
(USB) disk.
UPnP Port
Mapping
PPPoE Configure PPPoE settings for a direct Internet connection.
Configure your Internet gateway to allow access from the WAN (Internet) to
services on the NSA.
Media Server User’s Guide
63

Chapter 4 Web Configurator Basics
3
Table 18 Screens Summary (continued)
LINK SCREEN FUNCTION
Applications FTP Server Enable FTP file transfer to/from the NSA, set the number of FTP connections
Media Server Enable or disable the sharing of media files and select which shares to share.
Download
Service
Web
Publishing
Broadcatching Subscribe the NSA to feeds to download frequently updated digital content like
Print Server View and manage the NSA’s list of printers and print jobs.
Copy/Sync
Button
Package Set up more useful applications in your NSA. The NSA can download multiple
Auto Upload Flickr/YouTube
Auto Upload FTP Uploadr
Sharing Users View, create and edit administrator and user accounts to let people use the
Groups View, create and edit groups. Groups allow you to organize users into specific
Shares View, create and edit shares. Shares are shared folders to which you can allow
Maintenance Power Configure power saving settings for the NSA and have the NSA turn itself off
Log View the NSA’s logs and configure how you want to receive the log reports.
Configuration Back up and/or restore the NSA configuration file.
SSL Configure HTTPS and the NSA’s SSL certificate.
FW Upgrade Upload/upgrade new firmware to your NSA.
Shutdown Restart the NSA or shut it down.
Logout Click this to exit the web configurator. This is recommended to prevent
allowed, an FTP idle timeout, and the character set.
Have the NSA handle large file downloads.
Let people use a web browser to access files in shares without logging into the
Home screens.
TV programs, radio talk shows, Podcasts (audio files), YouTube videos, or even
P2P downloads.
Copy or synchronize files between a USB device and the NSA.
packages/files at once and automatically goes through all the installation
steps.
Upload files in selected shares to your Flickr and/or YouTube accounts.
Upload files in selected shares to FTP servers.
NSA.
groups. You can create shares accessible only by the group members.
specific users read/write access rights.
and on or reboot according to the schedules you configure.
unauthorized administrator access to the NSA.
4.5.3 Main Window
The main window () shows the screen you select in the navigation panel. It is discussed in the
rest of this document.
The Status screen is the first administration screen to display. See Chapter 6 on page 153 for more
information about the Status screen.
64
Media Server User’s Guide

4.5.4 Status Messages
4
The message text box at the bottom of the screen () displays status messages as you configure
the NSA.
4.5.5 Common Screen Icons
The following table explains some icons that appear in several configuration screens.
Table 19 Common Configuration Screen Icons
ICON DESCRIPTION
Edit
Click this to go to a screen where you can change the configuration settings of an entry.
Delete
Click this to delete an entry from the list.
Edit
Click this to jump to related item’s configuration screen.
Refresh
Chapter 4 Web Configurator Basics
Click this to refresh the data for the field or value with which it is associated.
User
See the chapter on user accounts for detailed information on variants of this icon.
Share
See the chapter on shares for detailed information on variants of this icon.
Healthy
This represents a healthy volume.
Degraded
This represents a degraded RAID 1 volume. Replace the faulty disk. If the replacement disk
does not contain any partition, the NSA automatically restores the volume. If the replacement
disk already contains a volume, you need to delete the volume and then click the Repair icon
to fix the degraded RAID volume.
Down
This represents a down volume.
Scan Disk
Click this to scan a hard disk for file system errors.
Eject
Click this before you remove an external hard drive so that you do not lose data that is being
transferred to or from that hard drive.
Locate
Click this to cause the LED on the external storage device to blink.
Repair
If you replace a faulty disk with a disk that contains a volume, you need to delete the volume
and then click this to fix the degraded RAID volume.
Media Server User’s Guide
65

Chapter 4 Web Configurator Basics
4.5.6 Session Example (Windows)
Open Windows Explorer and type two back slashes followed by the NSA name or IP address.
Initially you can only read and write to the Public, Video, Music, and Photo folders until you
create other shares on the NSA. This session is then displayed as shown in the following figure.
Session Example (Windows)
66
Media Server User’s Guide

5.1 Overview
This chapter provides tutorials that show how to use the NSA.
• Windows 7 Network, see page 67
• Windows 7 Network Map, see page 71
• Playing Media Files in Windows 7, see page 74
• Windows 7 Devices and Printers, see page 74
• Creating a Volume in a 2-Bay NSA, see page 77
• Creating a Volume in a 1-Bay NSA, see page 79
• Deleting a Volume, see page 86
• File Sharing Tutorials, see page 87
• Download Service Tutorial, see page 96
• Broadcatching Tutorial, see page 111
• Copy and Flickr Auto Upload Tutorial, see page 117
• FTP Uploadr Tutorial, see page 118
• Web Configurator’s Security Sessions, see page 121
• Using FTPES to Connect to the NSA, see page 134
• Using a Mac to Access the NSA, see page 135
• How to Use the BackupPlanner, see page 138
CHAPTER 5
Tutorials
5.2 Windows 7 Network
To see your NSA in a Windows 7 home or work network:
Media Server User’s Guide 67

Chapter 5 Tutorials
1 Click Start > Control Panel. Set View by to Category and click Network and Internet.
2 Click View network computers and devices.
68
Media Server User’s Guide

Chapter 5 Tutorials
3 The NSA icon displays twice because the NSA is both a media server and a storage device. Double-
click either NSA icon to open the Web Configurator login screen.
5.2.1 If the NSA Icon Does Not Display
The network containing the NSA must be set as a home or work network in order for the NSA icons
to display. If the network containing the NSA displays as “Public”:
1 Click Network and Sharing Center and then the network’s link (circled in the figure).
Media Server User’s Guide
69

Chapter 5 Tutorials
2 Use the Set Network Location screen to set the network’s location to home or work.
5.2.2 NSA Icon Right-click Options
Right-click the NSA’s icon to see these options:
• Install/Uninstall: Click Install to add the NSA as a device in your computer. After you install
the NSA you can see it in the computer’s list of devices (see Section 5.5 on page 74. Click
Uninstall to remove the NSA from the list of devices installed in your computer.
• View device web page opens the Web Configurator login screen.
• Create shortcut adds a desktop shortcut to the Web Configurator login screen.
70
Media Server User’s Guide

• Properties opens a window of NSA details and troubleshooting information.
Chapter 5 Tutorials
• Manufacturer identifies the company that produced the NSA.
• Model identifies the NSA model.
•
Model number identifies the NSA model number.
• Device webpage shows the IP address for accessing the Web Configurator.
• Serial number is unavailable because the NSA does not have one.
• MAC address is the NSA’s unique physical hardware address (MAC). You need the MAC
address to register the product at myZyXEL.com. Customer support may also request it for
troubleshooting purposes.
• Unique identifier is a unique UPnP ID that the NSA generated.
• IP address is the NSA’s IP address. It is also the IP address for accessing the Web
Configurator.
5.3 Windows 7 Network Map
To see your NSA in a Windows 7 home or work network map:
Media Server User’s Guide
71

Chapter 5 Tutorials
2
1
1 Click Start > Control Panel > View network status and tasks (or Network and Sharing
Center if you view the Control Panel by icons).
2 Click See full map (1 in the figure).
The network containing the NSA must be set as a home or work network in order to use the full
map feature. If the network containing the NSA displays as “Public”, click the network’s link (2 in
the figure, although it is already set to home here) and use the Set Network Location screen to
set the network’s location to home or work (see page 70).
72
Media Server User’s Guide

Chapter 5 Tutorials
3 Double-click the NSA’s icon to open the Web Configurator login screen. See Section 5.2.2 on page
70 for the NSA icon’s right-click options.
Media Server User’s Guide
73

Chapter 5 Tutorials
5.4 Playing Media Files in Windows 7
In Windows 7, the NSA automatically displays as a library in Windows Media Player.
Figure 64 NSA in Windows Media Player
5.5 Windows 7 Devices and Printers
After you use the NSA’s network icon’s install option you can manage the NSA from the Windows 7
Devices and Printers folder.
74
Media Server User’s Guide

Chapter 5 Tutorials
Click Start > Control Panel > Hardware and Sound > Devices and Printers. Select the NSA
icon to display information about the NSA. Double-click the NSA icon to open a properties window
(see page 71). Right-click the icon to display these options:
• Download NAS Starter Utility downloads the NSA’s Starter Utility. It lets you find, set up, and
manage the NSA as well as copy files to it and access the files on it. See Chapter 3 on page 31 for
details.
• Create shortcut has Windows make a desktop shortcut to this screen.
• Troubleshoot opens Windows’ device troubleshooting wizard.
• Remove device removes the NSA from the Windows 7 Devices and Printers folder.
• Properties opens a window of NSA details and troubleshooting information (see page 71).
Media Server User’s Guide
75

Chapter 5 Tutorials
5.5.1 Windows 7 Desktop Shortcut
This is the NSA’s desktop shortcut. Double-click it to open a properties window (see page 71).
1 Right-click the NSA’s desktop shortcut icon to see these options:
• Open file location takes you to the Windows 7 Devices and Printers folder.
• Download NAS Starter Utility downloads the NSA’s Starter Utility. It lets you find, set up, and
manage the NSA as well as copy files to it and access the files on it. See Chapter 3 on page 31 for
details.
• Restore previous versions is the Windows 7 option for restoring a file or folder. It does not
apply to this shortcut.
• Send to give you options for copying the shortcut to another location.
• Cut removes this shortcut so you can paste it somewhere else.
• Copy copies the shortcut so you can paste it somewhere else.
• Create shortcut has Windows make a desktop shortcut to this icon.
76
Media Server User’s Guide

• Delete sends the shortcut to the recycle bin.
• Rename lets you change the name of the shortcut.
• Troubleshoot opens Windows’ device troubleshooting wizard.
• Remove device removes the NSA from the Windows 7 Devices and Printers folder.
• Properties opens a window of details about the shortcut.
5.6 Creating a Volume in a 2-Bay NSA
This section shows you how to create a volume in your 2-bay NSA.
Creating a volume deletes all existing data in the hard disk. Make sure
you have a backup of your existing data before following the steps in this
section.
Your NSA has two bays for Serial Advanced Technology Attachment (SATA) hard disks. The JBOD
storage method is used if you are using a single hard disk for your NSA.
Chapter 5 Tutorials
This JBOD volume shows up in the Storage > Volume screen (Section 8.3 on page 165) as
follows.
5.6.1 Creating a RAID 1 Volume
This storage method allows recovery of data if your hard disk fails. To create a RAID 1 volume, you
must install two SATA hard disks in your NSA. There are two ways to create a RAID 1 volume:
• Click the Migrate button - If you already have a SATA hard disk with a volume and you later
install a second SATA hard disk in your NSA, use the Migrate button to convert the existing JBOD
volume to a RAID 1 volume.
• Click the Create an internal volume button - Use this if there are no existing volumes in your
NSA.
Media Server User’s Guide
77

Chapter 5 Tutorials
5.6.2 Migrate Button
Do the following steps to create a RAID 1 volume.
1 Once you install a second SATA hard disk in the NSA, the Storage > Volume screen shows the
Migrate button.
2 Click the
be created. This may take quite a while depending on how much data you have in the original
volume.
Migrate button and you can see the following progress bar. Wait for the RAID 1 volume to
5.6.3 Create an Internal Volume Button
If you do not have an existing volume in the Storage > Volume screen, do the following steps to
create a RAID 1 volume.
1 In the Storage > Volume screen, click Create an Internal Volume.
2 In the Disk Configuration screen, you can select the storage method.
•Type in the Volume Name for your RAID 1 volume. The volume name can be 1 to 31 characters
(a-z, 0-9, " " [spaces], "_", and ".").
• Choose RAID 1 and click Apply.
78
Media Server User’s Guide

Chapter 5 Tutorials
This deletes all existing data in the SATA hard disk. Make sure you have
a backup of any existing data in the hard disk.
The NSA starts creating the volume and you can see the following progress bar. Wait for the RAID 1
volume to be created.
3 The Storage > Volume screen displays with your RAID 1 volume.
5.7 Creating a Volume in a 1-Bay NSA
This section shows you how to create a volume on your 1-bay NSA.
Creating a volume deletes all existing data in the SATA or eSATA hard
disk. Make sure you have a backup of your existing data before following
the steps in this section.
Media Server User’s Guide
79

Chapter 5 Tutorials
Your NSA has a single bay for a SATA (Serial Advanced Technology Attachment) hard disk. The
firmware installed during hard disk initialization (Chapter 3 on page 31) automatically creates a
JBOD volume on your SATA hard disk. JBOD is the default storage method if you are using a single
hard disk for your NSA.
This JBOD volume shows up in the Storage > Volume screen (Section 8.2 on page 162) as
follows.
When you attach an eSATA hard disk to your NSA, you can configure this volume as: 1) a backup to
your SATA hard disk (RAID 1); or 2) as a separate storage drive (either another JBOD or a PC
Compatible Volume).
5.7.1 Creating a RAID 1 Volume
This storage method allows recovery of data if your hard disk fails. To create a RAID 1 volume, you
must connect an eSATA hard disk to your NSA. There are two ways to create a RAID 1 volume:
• Click the Migrate button - This is a quick way to create a RAID 1 volume. Use this to
automatically synchronize data in the internal hard disk to the eSATA hard disk.
• Click the Create a SATA volume button - Use this if there are no existing volumes in your NSA.
5.7.2 Migrate Button
Do the following steps to create a RAID 1 volume.
1 Once you attach the eSATA hard disk to the NSA, the Storage > Volume screen shows the
Migrate button.
80
Media Server User’s Guide

Chapter 5 Tutorials
2 Click the Migrate button and you can see the following progress bar. Wait for up to 10 minutes for
the RAID 1 volume to be created.
5.7.3 Create a SATA Volume Button
If you do not have an existing volume in the Storage > Volume screen, do the following steps to
create a RAID 1 volume.
1 In the Storage > Volume screen, click Create a SATA Volume.
2 In the Disk Configuration screen, you can select the storage method.
•Type in the Volume Name for your RAID 1 volume. The volume name can be 1 to 31 characters
(a-z, 0-9, " " [spaces], "_", and ".").
• Choose RAID 1 and click Apply.
This deletes all existing data in the eSATA hard disk. Make sure you have
a backup of any existing data in the hard disk.
Media Server User’s Guide
81

Chapter 5 Tutorials
The NSA starts creating the volume and you can see the following progress bar. Wait for 2 minutes
for the RAID 1 volume to be created.
3 The Storage > Volume screen displays with your RAID 1 volume.
82
Media Server User’s Guide

5.7.4 Creating a PC Compatible Volume
You can use your eSATA hard disk as a separate storage volume. The following section shows you
how to create a PC Compatible Volume. Use this storage method if you have an eSATA hard disk
that will be connected to a Windows computer when it is not connected to the NSA. However, the
computer’s platform (for example, Windows XP SP2) should support the file system you selected for
the eSATA hard disk.
1 Connect the eSATA hard disk to your NSA and go to the Storage > Volume screen. Click Create a
SATA Volume.
Chapter 5 Tutorials
2 In the Disk Configuration screen, you can select the storage method.
•Type in the Volume Name for your PC Compatible volume. The volume name can be 1 to 31
characters (a-z, 0-9, " " [spaces], "_", and ".").
• Choose PC Compatible Volume.
• Select the File System you want to use (NTFS in this example). Make sure this file system is
supported by the Windows platform you are using in your computer. Refer to Table 28 on page
169 for file systems supported by your NSA. Click Apply.
This deletes all existing data in the eSATA hard disk. Make sure you have
a backup of any existing data in the hard disk.
Media Server User’s Guide
83

Chapter 5 Tutorials
The NSA starts creating the volume and you can see the following progress bar. Wait for 2 minutes
for the volume to be created.
3 The Storage > Volume screen displays with your PC Compatible Volume.
84
Media Server User’s Guide

5.7.4.1 Checking Your PC Compatible Volume
The files in the eSATA hard disk that you configured as a PC Compatible Volume should be
accessible when you connect the eSATA hard disk to your computer.
You can configure the features of your NSA to save files to your eSATA hard disk. For example, you
can refer to Section 5.11 on page 111 to use the Broadcatching feature of your NSA to download
files to your eSATA disk.
1 When asked for the Location of Downloaded Files, make sure you save the completed files to
the eSATA hard disk (Volume 2 in this example).
Chapter 5 Tutorials
2 The files downloaded by the NSA should be in the Volume 2 folder. You can check this when you
access the Volume 2 folder from My NSA > Share Browser screen as follows.
Media Server User’s Guide
85

Chapter 5 Tutorials
3 Disconnect the eSATA hard disk from the NSA. Connect the eSATA hard disk to your computer. On
some systems, you can see the following notification.
4 The computer assigns a letter to the eSATA hard disk (drive F in this example) that is accessible
from the My Computer screen. Double click the eSATA drive and check your files. They should be
the same files that are in the My NSA > Share Browser screen.
5.8 Deleting a Volume
Delete an existing volume in your NSA by doing the following steps.
86
Media Server User’s Guide

Chapter 5 Tutorials
1 In the Storage > Volume screen, select the volume you want to delete and click the delete icon.
2 A confirmation window appears as follows. Click Yes.
This deletes all existing data in the volume. Make sure you have a
backup of any existing data in the hard disk.
5.9 File Sharing Tutorials
The following sections cover using the NSA for file sharing. This chapter assumes you have already
followed the Quick Start Guide instructions to perform initial setup and configuration (so you have a
working volume). See the rest of this User’s Guide for details on configuring the NSA’s various
screens.
5.9.1 Creating a User Account
Bob wants to create accounts for his sons Jimmy and Kevin. This is how he would do it.
Media Server User’s Guide
87

Chapter 5 Tutorials
1 At the NSA web configurator login screen enter the administrator account and password and click
Administrator Login to go to the advanced administration screens.
2 Click Sharing > Users to open the Users screen. Then click Add User.
88
Media Server User’s Guide

Chapter 5 Tutorials
3 Configure the screen as follows and write down the username and password to give to Jimmy. If the
username and password are the same as Jimmy’s Windows login, Jimmy will not need to enter a
username and password when he logs into his share from his computer. Set the Account Type to
User so Jimmy doesn’t get to configure the whole NSA. Click Apply to create the account.
4 The account now displays in the Users screen.
Now that Bob has created Jimmy’s account, he can go through the steps again to create another
account for Kevin. After both accounts are created, he can go to Section 5.9.2 on page 89 to create
shares for Jimmy and Kevin.
5.9.2 Creating a Share
Suppose Bob has already created separate accounts for his sons Jimmy and Kevin. Now Bob wants
to create a share for each son. He also wants to make sure that each son can only access his own
share (to keep them from deleting each other’s files). This is how he would do it.
Media Server User’s Guide
89

Chapter 5 Tutorials
1 In the NSA’s administration web configurator screens, click Shares > Add Share. Click Add Share
to create a new share.
2 Specify a name for the share and select which volume it should be on. Configure the screen as
follows. Then click Edit.
90
Media Server User’s Guide

Chapter 5 Tutorials
3 Configure the screen as follows to give Jimmy full access right to the share. Then click Apply to
create the share.
Now that Bob has created Jimmy’s share, he can go through the steps again to create another
share for Kevin.
5.9.3 Creating a Group
After creating user accounts for Jimmy and Kevin, Bob wants to create a group for his sons and
another one for the parents. Bob can assign access rights to his sons’ group for certain shares such
as a cartoons share and allow only the parents’ group to access the scary movie share. This is how
he would create the group.
1 In the NSA’s administration web configurator screen, click Groups > Add Group.
Media Server User’s Guide
91

Chapter 5 Tutorials
2 Specify a name for the group. Select the user(s) you want to add to the group from the Available
User(s) list and click Add Selected User(s). Configure the screen as follows. Then click Apply to
create the group.
Now that Bob has created a group for Jimmy and Kevin, he can go through the steps again to
create another group for the parents. Then he can see the rest of the tutorials for how to use the
groups in assigning access rights to shares.
5.9.4 Accessing a Share From Windows Explorer
If you map a NSA share (where data is stored) to a Windows network drive, you can use Windows
Explorer to transfer files to and from the NSA as if it was another folder on your computer. Here he
maps Jimmy’s share to Jimmy’s computer.
1 Start Windows Explorer and go to the NSA’s server name. The default is ‘nsa’ followed by the
number of your model (‘nsa320’ for example).
2 Click Tools > Map Network Drive.
92
Media Server User’s Guide
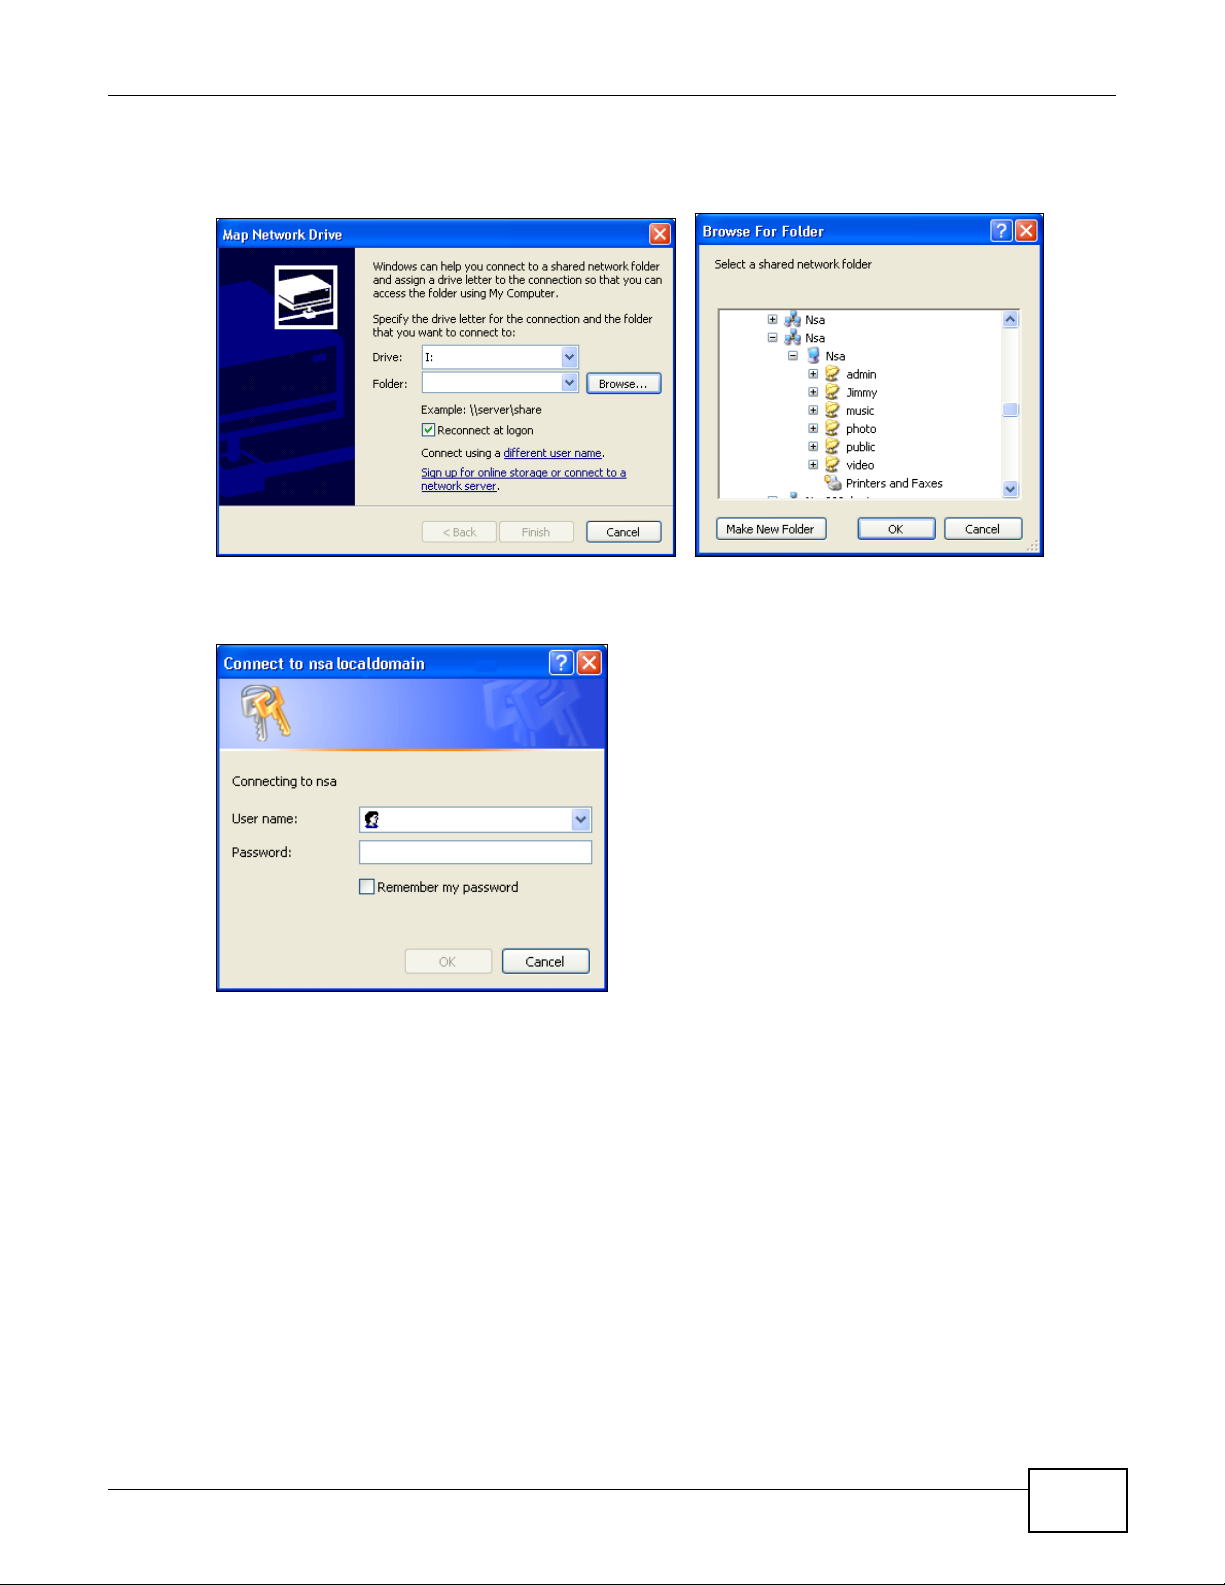
Chapter 5 Tutorials
3 Select the network drive that you want to map the NSA to from the Drive list box. This example
uses I. Then browse to and select the share on the NSA. Click Finish.
4 Enter the username and password for Jimmy’s account and click OK. You do not need to do this if
the username and password are the same as Jimmy’s Windows login.
Media Server User’s Guide
93

Chapter 5 Tutorials
5 After the mapping is done, you can then simply copy and paste or drag and drop files from/to your
local computer’s drives to or from this network folder. Just like the NSA’s share was another folder
on your computer.
Now that Bob has mapped Jimmy’s share to Jimmy’s computer, he can go through the steps again
to map Kevin’s share to Kevin’s computer.
5.9.5 Accessing a Share Using FTP
You can also use FTP to access the NSA. Suppose Jimmy is temporarily using a different computer
and wants to access his share without mapping it to the computer. This is how he would do it.
1 Open the FTP client (Windows Explorer is used here) and type “ftp://username@server” where
“username” is the account’s username and “server” is the NSA’s IP address or server name.
94
Media Server User’s Guide

Chapter 5 Tutorials
2 Enter your password and click Login.
3 Now you can access files and copy files from/to your local computer’s drives to or from this network
folder.
5.9.6 Accessing a Share Through the Web Configurator
You can browse and access files through the web configurator.
Media Server User’s Guide
95

Chapter 5 Tutorials
1 Log into the NSA web configurator (see Section 4.3 on page 49) using the appropriate user name
and password (this example uses Jimmy’s) and click File Browser. Click a share (the Jimmy share
in this example) to see the top level of the share’s contents.
2 Click a folder’s file name to browse the folder. You can open files or copy them to your computer.
You can also create new folders and upload additional files to the share.
3 Click the logout icon when your are done.
5.10 Download Service Tutorial
This tutorial covers using the NSA to download a file from the Internet. Use this same procedure for
P2P downloads as well as regular HTTP (web) and FTP downloads. See Section 10.11.2 on page 217
for more on the download service.
5.10.1 Copying/Pasting a Download Link
1 Open your Internet browser (this example uses Internet Explorer).
96
Media Server User’s Guide

Chapter 5 Tutorials
2 Find a download link for the file you want. In this example, www.zyxel.com has a Download Now
link for downloading a datasheet for ZyXEL’s GS-2024 (a device for making phone calls over the
Internet).
Note: Make sure the link opens either the file you want or a pop-up window about how to
handle the file.
Note: It is also OK for the link to open a .torrent file. If you are redirected to a screen that
says the download should start in a few seconds, there may be a link to click if the
download does not start automatically. See if that link opens the file or the pop-up
window.
3 Right-click the download link and select Copy Shortcut in Internet Explorer (or Copy Link
Location in Firefox).
Media Server User’s Guide
97

Chapter 5 Tutorials
4 Log into the NSA web configurator (see Section 4.3 on page 49) using the administrator account
and click Application Zone and the Application Zone > Download Service link.
5 Click Add.
98
Media Server User’s Guide

6 Right-click the URL field and select Paste.
7 The URL displays in the URL field. Click Apply.
Chapter 5 Tutorials
8 After a few moments, the download task appears in the Download Service screen’s Active tab.
The download appears in the Completed tab when it is done. By default the NSA stores all
downloads in the admin share’s download folder. See Section 5.9.4 on page 92, Section 5.9.5 on
page 94, or Section 5.9.6 on page 95 for how to access a share.
5.10.2 Installing the Link Capture Browser Plugin
In addition to copying and pasting a download link to the Download Service screen, you can also
install a link capture browser plugin in your web browser. Use the plugin to easily add a download
link to the NSA’s download service. See Section 10.11.3 on page 218 for more on the link capture
browser plugin.
Media Server User’s Guide
99

Chapter 5 Tutorials
Note: At the time of writing the plugin supports Internet Explorer 6.0/7.0 and Mozilla
Internet Explorer
1 Open the folder containing the link capture browser plugin.
2 Double-click on the plugin to display the following screen. Click I Agree to begin installation.
Firefox 2.0/3.0; it does not support Windows 7.
3 Select a location to save the plugin and click Install. Close the screen once the installation is
complete.
100
Media Server User’s Guide
 Loading...