

Page 1

NSA-2401
Network Storage Appliance
User’s Guide
Version 1.10
3/2009
Edition 1
DEFAULT LOGIN
LAN1 IP Address 192.168.1.3
LAN2 IP Address 192.168.100.3
Username admin
Password 1234
www.zyxel.com
Page 2

Page 3

About This User's Guide
About This User's Guide
Intended Audience
This manual is intended for people who want to configure the NSA using the Web
Configurator.
Related Documentation
• Quick Start Guide
The Quick Start Guide is designed to help you get up and running right away. It contains
information on setting up your network and configuring for Internet access.
• Web Configurator Online Help
Embedded web help for descriptions of individual screens and supplementary
information.
• Supporting Disk
Refer to the included CD for support documents.
• ZyXEL Web Site
Please refer to www.zyxel.com
certifications.
for additional support documentation and product
User Guide Feedback
Help us help you. Send all User Guide-related comments, questions or suggestions for
improvement to the following address, or use e-mail instead. Thank you!
The Technical Writing Team,
ZyXEL Communications Corp.,
6 Innovation Road II,
Science-Based Industrial Park,
Hsinchu, 300, Taiwan.
E-mail: techwriters@zyxel.com.tw
Customer Support
In the event of problems that cannot be solved by using this manual, you should contact your
vendor. If you cannot contact your vendor, then contact a ZyXEL office for the region in
which you bought the device. See http://www.zyxel.com/web/contact_us.php for contact
information. Please have the following information ready when you contact an office.
• Product model and serial number.
• Warranty Information.
• Date that you received your device.
• Brief description of the problem and the steps you took to solve it.
NSA-2401 User’s Guide
3
Page 4
Document Conventions
Document Conventions
Warnings and Notes
These are how warnings and notes are shown in this User’s Guide.
1 Warnings tell you about things that could harm you or your device.
" Notes tell you other important information (for example, other things you may
need to configure or helpful tips) or recommendations.
Syntax Conventions
• The NSA may be referred to as the “NSA”, the “device” or the “system” in this User’s
Guide.
• Product labels, screen names, field labels and field choices are all in bold font.
• A key stroke is denoted by square brackets and uppercase text, for example, [ENTER]
means the “enter” or “return” key on your keyboard.
• “Enter” means for you to type one or more characters and then press the [ENTER] key.
“Select” or “choose” means for you to use one of the predefined choices.
• A right angle bracket ( > ) within a screen name denotes a mouse click. For example,
Maintenance > Log > Log Setting means you first click Maintenance in the navigation
panel, then the Log sub menu and finally the Log Setting tab to get to that screen.
• Units of measurement may denote the “metric” value or the “scientific” value. For
example, “k” for kilo may denote “1000” or “1024”, “M” for mega may denote “1000000”
or “1048576” and so on.
• “e.g.,” is a shorthand for “for instance”, and “i.e.,” means “that is” or “in other words”.
4
NSA-2401 User’s Guide
Page 5
Document Conventions
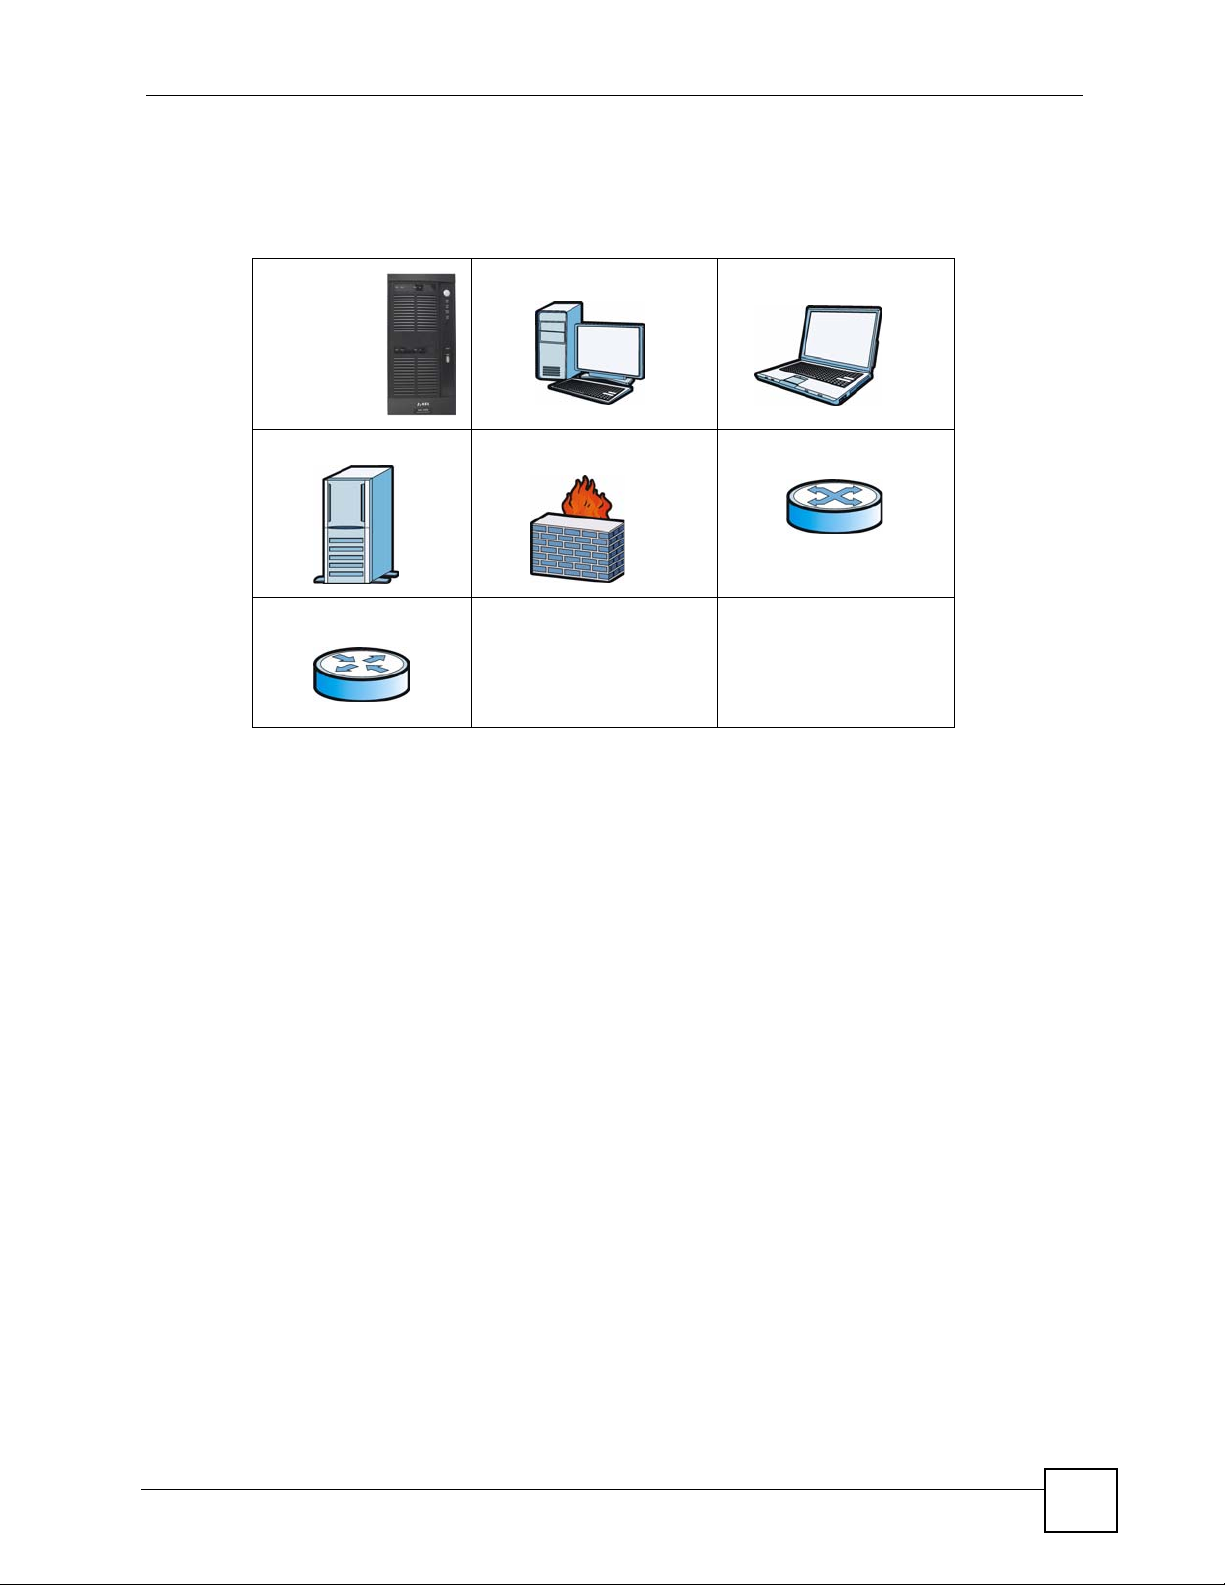
Icons Used in Figures
Figures in this User’s Guide may use the following generic icons. The NSA icon is not an
exact representation of your device.
NSA Computer Notebook computer
Server Firewall Switch
Router
NSA-2401 User’s Guide
5
Page 6

Safety Warnings
Safety Warnings
1 For your safety, be sure to read and follow all warning notices and instructions.
• Do NOT use this product near water, for example, in a wet basement or near a swimming
pool.
• Do NOT expose your device to dampness, dust or corrosive liquids.
• Do NOT store things on the device.
• Do NOT install, use, or service this device during a thunderstorm. There is a remote risk
of electric shock from lightning.
• Connect ONLY suitable accessories to the device.
• Do NOT open the device or unit. Opening or removing covers can expose you to
dangerous high voltage points or other risks. ONLY qualified service personnel should
service or disassemble this device. Please contact your vendor for further information.
• ONLY qualified service personnel should service or disassemble this device.
• Make sure to connect the cables to the correct ports.
• Place connecting cables carefully so that no one will step on them or stumble over them.
• Always disconnect all cables from this device before servicing or disassembling.
• Use ONLY an appropriate power adaptor or cord for your device.
• Connect the power adaptor or cord to the right supply voltage (for example, 110V AC in
North America or 230V AC in Europe).
• Do NOT allow anything to rest on the power adaptor or cord and do NOT place the
product where anyone can walk on the power adaptor or cord.
• Do NOT use the device if the power adaptor or cord is damaged as it might cause
electrocution.
• If the power adaptor or cord is damaged, remove it from the power outlet.
• Do NOT attempt to repair the power adaptor or cord. Contact your local vendor to order a
new one.
• Do not use the device outside, and make sure all the connections are indoors. There is a
remote risk of electric shock from lightning.
• CAUTION: RISK OF EXPLOSION IF BATTERY (on the motherboard) IS REPLACED
BY AN INCORRECT TYPE. DISPOSE OF USED BATTERIES ACCORDING TO THE
INSTRUCTIONS. Dispose them at the applicable collection point for the recycling of
electrical and electronic equipment. For detailed information about recycling of this
product, please contact your local city offi ce, your household waste disposal service or the
store where you purchased the product.
• Do NOT obstruct the device ventilation slots, as insufficient airflow may harm your
device.
6
NSA-2401 User’s Guide
Page 7

Safety Warnings
Your product is marked with this symbol, which is known as the WEEE mark. WEEE
stands for Waste Electronics and Electrical Equipment. It means that used electrical and
electronic products should not be mixed with general waste. Used electrical and
electronic equipment should be treated separately.
NSA-2401 User’s Guide
7
Page 8

Safety Warnings
8
NSA-2401 User’s Guide
Page 9

Contents Overview
Contents Overview
Introduction and Tutorials .....................................................................................................29
Getting to Know Your NSA ........................................................................................................31
Introducing the Web Configurator .............................................................................................. 35
Tutorials .....................................................................................................................................55
Web Configurator ................................................................................................................. 115
Status Screen ..........................................................................................................................117
System Setting Screen ... .... ... ... ... .... ... ... ... ... ........................................................... ... ... ... ... ..... 121
Storage Screens .....................................................................................................................125
Network Screens ..................................................................................................................... 159
Sharing Screens ...................................................................................................................... 173
Protect Screens ....................................................................................................................... 197
Application Screens .................................................................................................................223
Maintenance Screens .............................................................................................................229
Troubleshooting and Specifications ..................................................................................247
Troubleshooting ......................................................................................................................249
Product Specifications ............................................................................................................. 257
Appendices and Index .........................................................................................................263
NSA-2401 User’s Guide
9
Page 10

Contents Overview
10
NSA-2401 User’s Guide
Page 11

Table of Contents
Table of Contents
About This User's Guide..........................................................................................................3
Document Conventions............................................................................................................4
Safety Warnings ........................................................................................................................6
Contents Overview ...................................................................................................................9
Table of Contents....................................................................................................................11
List of Figures.........................................................................................................................17
List of Tables...........................................................................................................................25
Part I: Introduction and Tutorials ......................................................... 29
Chapter 1
Getting to Know Your NSA.....................................................................................................31
1.1 NSA-2401 Overview . .... ... ... ... .... ... .......................................................... ... ... .... ... ................31
1.1.1 Front Panel LEDs ................................................... .... ... ... ... ... .... ... ... ... .... ...................32
1.1.2 Power Button .......................... ... ... .... ... .......................................................... ... ... .... ... 33
1.1.3 COPY Button ....................... ... ... ... .... .......................................................... ... ... ... .... ...33
Chapter 2
Introducing the Web Configurator ........................................................................................35
2.1 Web Configurator Overview .................................................................................................35
2.2 Accessing the NSA Web Configurator ............. ... .... ... ... ... .... ... ... ... ....................................... 35
2.2.1 Access the NSA Using the NDU ................................................................................ 35
2.2.2 Web Browser Access ................ ... ........................................................... ... ... ... ... .... ... 36
2.3 Login .......................................... ... ... .......................................................... ... .......................36
2.4 User-level Screens Overview ...................... ... ... .... .......................................................... ... 37
2.5 My NSA Screen ...................................................................................................................38
2.5.1 My NSA Share Browsing Screen ........................................... .... ... ... ... .... ...................40
2.5.2 My NSA Share Browsing Move to or Copy to Screen ................................................42
2.5.3 My NSA Share Configuration ................. ... .... ... ... ....................................................... 42
2.5.4 My NSA Change Share Properties Screen ................................................................43
2.5.5 Share and Folder Names .................... ... ... .... ... ... ... .... ... ... .......................................... 45
2.5.6 Share Paths ........... ... ... .... ... .......................................................... ... ... .... ... ... ... ... .......46
2.5.7 Password Screen ...................................................................................................... 46
NSA-2401 User’s Guide
11
Page 12

Table of Contents
2.6 Administration Screens .... ... ... .... ... ... ... ... .... ... ... .......................................................... ... ....... 47
2.6.1 Global Administration Icons ....................................................................................... 48
2.6.2 Navigation Panel ....................... ... .... ..........................................................................49
2.6.3 Main Window .......................... ... .......................................................... .... ... ... ... ... .......51
2.6.4 Status Messages .......... .... ... .......................................................... ... .......................... 51
2.6.5 Common Screen Icons ..................... ... ... ... .......................................................... .... ... 51
2.7 NSA RESET Button ............................................................................................................. 52
2.7.1 Reset ................................................ ... ... .......................................................... .......... 52
2.7.2 Reload Factory Default Configuration File ................................................................. 52
Chapter 3
Tutorials...................................................................................................................................55
3.1 Overview ............. .......................................................... ... .... ... ... .......................................... 55
3.2 How to Configure Sharing ...................................................................................................55
3.2.1 Setting Up User Accounts ............ .... ... .......................................................... ... ... .... ... 55
3.2.2 Setting Up Groups .................. ... ... .... .......................................................... ... ... ... .... ... 58
3.2.3 Setting Up Shares ............... ... ... ... ........................................................... ... ... ... ... .... ... 59
3.3 How to Use Shares .............................................................................................................. 61
3.3.1 Using a Share with Windows Explorer ................... .... ... ... ... ... .... ... ............................. 61
3.3.2 Using a Share with a Web Browser ................................................................. ... .... ... 62
3.4 How to Find the NSA in OS X .............................................................................................. 65
3.5 How to Configure Security ...................................................................................................68
3.5.1 Configuring Security for Web Configurator Sessions .................................................68
3.5.2 Using FTPES to Connect to the NSA .........................................................................81
3.5.3 Controlling Access to Shares, Folders, and Files ...................................................... 83
3.6 Power Resume ......... .... ... ... ... .......................................................... .... ... ... ... .... ... ... ... ... ....... 89
3.7 How to Use Backups and Snapshots ..................................................................................89
3.7.1 Creating a Snapshot Job ............................................................................................90
3.7.2 Configuring Snapshot Image Access .........................................................................91
3.7.3 Using a Snapshot Image to Restore Files .................................. ................... ............. 91
3.7.4 Creating a Synchronization Backup ........................................................................... 92
3.7.5 Creating an Archive Backup ....................................................................................... 96
3.7.6 Restoring Archived Files by Backup Job .................................................................... 99
3.7.7 Restoring by Backup Files ........ ... .... ... ... ... .... ... ... ..................................................... 102
3.8 Printer Server Tutorial ............................................. ........................................................... 104
3.9 How to Increase the NSA’s Storage Capacity .................................................................... 106
3.9.1 Connecting External USB Hard Drives .................................................................... 107
3.9.2 Adding an Internal Hard Drive to an Existing Disk Array .......................................... 107
3.9.3 Using a Disk Array’s Increased Capacity ...... ... ... ... .................................................. 1 09
3.9.4 Migrating a RAID to Higher Capacity Hard Drives ....................................................110
Part II: Web Configurator .....................................................................115
12
NSA-2401 User’s Guide
Page 13

Table of Contents
Chapter 4
Status Screen....................................................................................................................... 117
4.1 Status Screen ..... ... ... .... ... ... ... .... ... .......................................................... ... ... .... ... ...............117
Chapter 5
System Setting Screen.........................................................................................................121
5.1 Date/Time ........... ... ... .... ... ... ... .... ... .......................................................... ... ... .... ... ... ........... 121
5.1.1 Time Lag .......................................... ... ... ... .... ... ........................................................ 122
Chapter 6
Storage Screens...................................................................................................................125
6.1 Storage Screens Overview ..................................... ... ... ... .... ... ... ........................................ 125
6.1.1 What You Can Do in the Storage Screens ...............................................................125
6.1.2 What You Need to Know About Storage ....................................... ... ... .... ... ... ... ... .... . 125
6.2 Internal Storage Status Screen ..................................... ... .... ... ... ... ... .... ... ... ... .... ... ..............127
6.3 Disk ..................................................................... .... ........................................................... 128
6.3.1 Internal Disks Screen ............................................................................................... 128
6.3.2 S.M.A.R.T Screen .................................. ... .... ... ... ... .... ... ........................................... 129
6.4 Arrays ........................... .......................................................... ... ........................................ 132
6.4.1 RAID Levels ..................................... ... ... .......................................................... ... .... . 132
6.4.2 Array Status .............................................................................................................. 134
6.5 RAID Screen ................. .......................................................... ... ... ... .... ... ... ... .... ... ..............135
6.5.1 Creating a New RAID ...............................................................................................138
6.6 Internal Volume Screen .....................................................................................................139
6.6.1 Creating or Editing an Internal Volume ......................... ... ... ... .... ... ... ... .... .................142
6.6.2 USB Key Creation .................. ... .......................................................... .... ... ... ... ... .....143
6.7 External Storage Disk Screen ................................................. ... ... ... .... ... ... ... .... ... ... ... ... .... . 145
6.8 External Volume Screen ....................................................................................................147
6.8.1 Creating or Editing an External Volume ................................................................... 149
6.9 Technical Reference . .... ... ... ... .... ... ... ... .......................................................... .... ... ... ... ... ..... 151
6.9.1 Storage Terminology ........................................ ... ... .... ... ... ... ... .................................. 151
6.9.2 JBOD ................... ... ... ... .... ... ... .......................................................... ... .... .................152
6.9.3 RAID 0 ....................... ... .... ... ... ... ... ........................................................... ... ... ...........153
6.9.4 RAID 1 ....................... ... .... ... ... ... ... ........................................................... ... ... ...........153
6.9.5 RAID 10 ..................... ... .... ... ... ... ... ........................................................... ... ... ...........154
6.9.6 RAID 5 ....................... ... .... ... ... ... ... ........................................................... ... ... ...........155
6.9.7 Hot-spare ..... ... .... ... ... .......................................................... ... .... ... ... ........................155
6.9.8 RAID and Data Protection ........................................................................................ 156
6.9.9 S.M.A.R.T Attributes .... .... ... ... ... ... .... ... ... ............................................................. .... . 156
Chapter 7
Network Screens...................................................................................................................159
7.1 Network Screens Overview ............................................................................................... 159
NSA-2401 User’s Guide
13
Page 14

Table of Contents
7.1.1 What You Can Do in the Network Screens .............................................................. 159
7.1.2 What You Need to Know About the Network Screens ..... ... ... .... ... ... ... .... ... ... ... ... .... . 159
7.2 TCP/IP Screen .......... .... ... ... ... .... .......................................................... ... ... ... .... .................160
7.2.1 Configuring the TCP/IP Screen ........................................... ... .... ... ... ... .... ... ..............162
7.3 Windows/CIFS .................................... ... .... ... ... .......................................................... ........164
7.3.1 Windows/CIFS Screen .............. ... .... ... ... .......................................................... ... .... . 166
7.4 NFS Screen ........... ... ........................................................... ... ... ... ... .... .............................. 168
7.4.1 Add or Edit NFS Share Screen ................................................................................169
7.4.2 NFS Session Screen ................................................................................................ 170
Chapter 8
Sharing Screens.............................................................................................................. ......173
8.1 Overview ............. .......................................................... ... .... ... ... ........................................ 173
8.1.1 What You Can Do In The Sharing Screens ... ................................ ........................... 173
8.1.2 What You Need to Know About The Sharing Screens ............................ ... ... ... ... .... . 173
8.2 Users ............................ ... .......................................................... ... ..................................... 175
8.2.1 Create a New Account & Change Account Properties ............................... ... ... ... .... . 178
8.2.2 View User Information ..............................................................................................181
8.3 Groups ....................................... ... ... .......................................................... ... .... .................182
8.3.1 Add a New Local Group & Change Group Properties ............ ............. ............. ........ 184
8.4 Shares ............................. ... ... .......................................................... .... .............................. 186
8.4.1 Create a New Share & Edit a Share ....................................................................... 188
8.4.2 ACL Configuration ...................................................... ... ... ... ..................................... 190
8.4.3 Recycle Bin ......................................... ... ... .... ... ... ... .... ..............................................194
8.4.4 DFS ..................... ... .......................................................... ... ... .................................. 194
Chapter 9
Protect Screens.....................................................................................................................197
9.1 Protection Methods Overview ............................................................................................ 197
9.1.1 What You Can Do in the Protect Screens ................................................................ 198
9.1.2 What You Need to Know About Protection Methods ............................................... . 198
9.2 NSA Backup Screens ........................................................................................................200
9.2.1 Backup Summary ............................................. ... ..................................................... 200
9.2.2 Creating a Backup Job ............................................................................................. 202
9.2.3 Editing a Backup Job ............................................................................................... 208
9.2.4 Restoring by Backup Job .................................... ... .... ... ... ... ... .... .............................. 209
9.3 Restoring by Backup Files ......................................... ... ... .... ... ... ... ... .... ... ... ... .... ... ... ... ... .....212
9.3.1 Protect > Restore: Step 2 ......................................................................................... 213
9.3.2 Protect > Restore: Step 3 ......................................................................................... 214
9.3.3 Protect > Restore: Step 4 ......................................................................................... 215
9.4 Snapshots ........... ... ... .... ... .......................................................... ... ... .... ... ... ........................215
9.4.1 Creating/Editing Snapshots ................. ... ... .... ... ... ... .... ... ... ........................................ 218
9.4.2 Snapshot Images .......................................................................................... ... ... .... . 219
14
NSA-2401 User’s Guide
Page 15

Table of Contents
9.5 Backup Software Screen ....... .... ... ... ... ... .............................................................. ... ... ........220
Chapter 10
Application Screens .............................................................................................................223
10.1 Overview .......................................................................................................................... 223
10.1.1 What You Can Do In The Application Screens .. ... .... ... ... ... ... .... ... ... ........................ 223
10.1.2 What You Need to Know About The Application Screens ......................................223
10.2 FTP ..................................................................................................................................224
10.3 Print Server ...................................................................................................................... 226
10.3.1 Print Server Rename ............................ .......... ............. ............. ............. ............ ..... 226
10.4 Copy Button ..................................................................................................................... 227
10.4.1 Changing the Copy Button Share .......................................................................... 227
Chapter 11
Maintenance Screens..........................................................................................................229
11.1 Overview ..........................................................................................................................229
11.1.1 What You Can Do In The Maintenance Screens .................................................... 229
11.1.2 What You Need to Know About The Maintenance Screens ................................... 229
11.2 Log ..................................................................................................................................230
11.2.1 Search ....................................................................................................................232
11.2.2 Log Records Configuration ............. ...................... ....................... ...................... ..... 232
11.2.3 Log Buzzer Priority Configuration ...... ....................... ...................... ....................... . 233
11.2.4 Report Configuration .............................................................................................. 233
11.2.5 Export Log ..............................................................................................................236
11.3 Configuration .................................................................................................................... 237
11.3.1 Restoring the Configuration File .............................................................................238
11.4 SSL .................................................................................................................................. 239
11.5 Firmware Upgrade ...........................................................................................................241
11.6 Power Management .........................................................................................................242
11.6.1 Power Control Schedule ......................................................................................... 244
11.7 Shutdown .........................................................................................................................245
Part III: Troubleshooting and Specifications..................................... 247
Chapter 12
Troubleshooting...................................................................................................................249
12.1 Troubleshooting Overview ...............................................................................................249
12.2 Power, Hardware Connections, and LEDs .... ... .... ... ... ... .... ... ........................................... 249
12.3 NSA Login and Access ...................................................................................................251
12.4 Users Cannot Access the NSA ........................................................................................ 253
12.5 Backups and Snapshots ..................................................................................................254
NSA-2401 User’s Guide
15
Page 16

Table of Contents
12.6 External USB Disks .........................................................................................................255
Chapter 13
Product Specifications.........................................................................................................257
13.1 Feature Tables ................................................................................................................. 257
13.2 Specification Tables .........................................................................................................259
13.3 Power Consumption ........................................................................................................261
Part IV: Appendices and Index ........................................................... 263
Appendix A Log Messages...................................................................................................265
Appendix B Setting Up Your Computer’s IP Address...........................................................275
Appendix C Importing Certificates........................................................................................299
Appendix D Open Source Licences .....................................................................................323
Appendix E Legal Information ..............................................................................................353
Index.......................................................................................................................................355
16
NSA-2401 User’s Guide
Page 17

List of Figures
List of Figures
Figure 1 NSA Overview .......................................................................................................................... 31
Figure 2 NSA Front Panel LEDs ............................................................................................................. 32
Figure 3 NDU Main Screen ....................................................................................................................36
Figure 4 NDA URL .................................................................................................................................. 36
Figure 5 NSA Login Screen ....................................................................................................................37
Figure 6 Change Password Screen ........................................................................................................ 37
Figure 7 My NSA ................................................................................................................................... 38
Figure 8 My NSA Screen .......................................................................................................................39
Figure 9 My NSA Share Browsing .........................................................................................................40
Figure 10 My NSA Share Browsing > Move to (or Copy to) .................................................................. 42
Figure 11 My NSA Share Configuration ................................................................................................ 42
Figure 12 My NSA Change Share Properties ........................................................................................ 43
Figure 13 My NSA Change Share Properties > Share Access Configuration ................... ... ... ... ... .... ... 45
Figure 14 Password ............................................................................................................................... 46
Figure 15 Status .................................................................................................................................... 48
Figure 16 Navigation Panel Links ...........................................................................................................49
Figure 17 Reset and Reload Timeline .................................................................................................... 53
Figure 18 Administrator Login ................................................................................................................ 56
Figure 19 My NSA .................................................................................................................................. 56
Figure 20 Sharing > Users ...................................................................................................................... 57
Figure 21 Sharing > Users > Create a New Account ............... ... ... ... .... ... ... ... ... .... ... ... ... .... ... ... ... ... .... ... 57
Figure 22 Groups .................................................................................................................................... 58
Figure 23 Sharing > Groups > Add Share .............................................................................................. 59
Figure 24 Shares .................................................................................................................................... 59
Figure 25 Sharing > Shares > Add Share ..............................................................................................60
Figure 26 Share Access Configuration ...................................... ................................................ .............60
Figure 27 Sharing > Shares > Add Share ..............................................................................................61
Figure 28 Mapping a Share .................................................................................................................... 61
Figure 29 Entering the Share Username and Password ........................................................................ 62
Figure 30 Creating a Folder ................................... ................ ................. ................ ............. ................... 62
Figure 31 Using the Folder ..................................................................................................................... 62
Figure 32 User Login ....................... ... ... ... .... ... .......................................................... ... ... .......................63
Figure 33 Gonzo’s My NSA Screens ......................................................................................................63
Figure 34 Gonzo Share Screen ..............................................................................................................64
Figure 35 Strategy Folder Screen ........................................................................................................... 65
Figure 36 Upload Files Screen ..................... ... ... ... ... .... ... ... ... .... ... ... ... .... ................................................ 65
Figure 37 Opening the Finder ............................. ... ... .... ... ... ... .... ... ... ... .... ... ............................................. 66
Figure 38 Displaying the NSA ................................................................................................................ 66
NSA-2401 User’s Guide
17
Page 18

List of Figures
Figure 39 Displaying the NSA ................................................................................................................ 67
Figure 40 Alternate Method for Displaying the NSA ............................................................................... 67
Figure 41 Connecting to the NSA ........................................................................................................... 68
Figure 42 Maintenance > SSL .............................................................................................................. 69
Figure 43 Maintenance > SSL > Edit a Self-Signed Certificate ................................................ ............. 69
Figure 44 Maintenance > SSL > Edit a Self-Signed Certificate ................................................ ............. 70
Figure 45 Maintenance > SSL .............................................................................................................. 71
Figure 46 Downloading the NSA’s Certificate ....................... .................................... ............................. 71
Figure 47 Downloading the NSA’s Certificate ....................... .................................... ............................. 72
Figure 48 Certificate ............................................................................................................................... 72
Figure 49 Certificate Import Wizard: Welcome ....................................................................................... 73
Figure 50 Certificate Import Wizard: Certificate Store ............................................................................ 73
Figure 51 Certificate Import Wizard: Finish ............................................................................................74
Figure 52 Security Warning ................... ... .... ... ... ... ... .... ... ... ... .... ... ... ... .................................................... 74
Figure 53 Certificate Import Wizard: Successful .................................................................................... 74
Figure 54 Maintenance > SSL .............................................................................................................. 75
Figure 55 Maintenance > SSL > Force HTTPS Warning ........................................ ...... ....... ... ...... ....... ... 76
Figure 56 Firefox: Secure Connection Failed ......................................................................................... 76
Figure 57 Firefox: Secure Connection Failed ......................................................................................... 77
Figure 58 Firefox: Add Security Exception .............................................................................................77
Figure 59 Firefox: Add Security Exception .............................................................................................78
Figure 60 Firefox: Add Security Exception .............................................................................................79
Figure 61 Firefox: Add Security Exception .............................................................................................80
Figure 62 HTTPS Login ..........................................................................................................................81
Figure 63 FileZilla Site Manager .................................... ... ... ................................................................. 82
Figure 64 FileZilla Unknown Certificate Warning ..................................... ......... .......... .......... ......... ....... 83
Figure 65 Sharing > Shares ................................................ ....................................................................83
Figure 66 Sharing > Shares > Edit Share .............................. .... ... ... ... .... ... ... ... ... .................................... 84
Figure 67 Share Access Configuration ...................................... ................................................ .............84
Figure 68 Sharing > Shares ................................................ ....................................................................85
Figure 69 Sharing > Shares > ACL Configuration ..................................................................................85
Figure 70 Sharing > Shares > ACL Configuration > New ACL ............... ................................................ 86
Figure 71 Sharing > Shares > ACL Configuration > New ACL > Strategy ............................................. 86
Figure 72 Sharing > Shares > ACL Configuration > New ACL > Strategy > Set ACL ............................ 87
Figure 73 Sharing > Shares > ACL Configuration > New ACL > Strategy ............................................. 88
Figure 74 Sharing > Shares > ACL Configuration > New ACL > Strategy ............................................. 88
Figure 75 Maintenance > Power Management ......................................................................................89
Figure 76 Protect > Snapshot ............ ... ... .... ... ... ... ... .... ... ... ... .... ... ... ... .................................................... 90
Figure 77 Protect > Snapshot > Add Job ..............................................................................................91
Figure 78 Protect > Snapshot > Snapshot Image Access ........................ ............................................. 91
Figure 79 Using a Snapshot Image ........................................................................................................92
Figure 80 Protect > Backup ..................................... .... ... ... ... .... ... ... ... .... ... ............................................. 92
Figure 81 Protect > Backup > Add Job: Step 1 . ... ... .... ... ... ... .... ... ... ....................................................... 93
18
NSA-2401 User’s Guide
Page 19

List of Figures
Figure 82 Protect > Backup > Add Job: Step 2 . ... ... .... ... ... ... .... ... ... ....................................................... 94
Figure 83 Protect > Backup > Add Job: Step 3 . ... ... .... ... ... ... .... ... ... ....................................................... 95
Figure 84 Protect > Backup > Add Job: Step 3 . ... ... .... ... ... ... .... ... ... ....................................................... 95
Figure 85 Protect > Backup > Add Job: Step 4 ......................................................................................96
Figure 86 Protect > Backup ..................................... .... ... ... ... .... ... ... ... .... ... ............................................. 96
Figure 87 Protect > Backup > Add Job: Step 1 . ... ... .... ... ... ... .... ... ... ....................................................... 97
Figure 88 Protect > Backup > Add Job: Step 2 . ... ... .... ... ... ... .... ... ... ....................................................... 98
Figure 89 Protect > Backup > Add Job: Step 3 . ... ... .... ... ... ... .... ... ... ....................................................... 99
Figure 90 Protect > Backup > Add Job: Step 4 . ... ... .... ... ... ... .... ... ... ....................................................... 99
Figure 91 Protect > Backup ..................................... .... ... ... ... .... ... ... ... .... ... ........................................... 100
Figure 92 Protect > Backup > Restore Archive: Step 1 .................................................. .... ... ... ... ... .... . 100
Figure 93 Protect > Backup > Restore Archive: Step 2 .................................................. .... ... ... ... ... .... . 101
Figure 94 Protect > Backup > Restore Archive: Step 3 .................................................. .... ... ... ... ... .... . 101
Figure 95 Protect > Backup > Restore Archive: Progress ..................................... .............................. 102
Figure 96 Protect > Restore: Step 1 ............................................... ... .... ... ... ... ... .... .............................. 102
Figure 97 Protect > Restore: Step 2 ............................................... ... .... ... ... ... ... .... .............................. 103
Figure 98 Protect > Restore: Step 3 ............................................... ... .... ... ... ... ... .... .............................. 103
Figure 99 Protect > Restore: Step 4 ............................................... ... .... ... ... ... ... .... .............................. 104
Figure 100 Printer Sharing .................................................................................................................. 104
Figure 101 Printer Connected to NSA: Windows Explorer ..................................................................105
Figure 102 Printer Connected to NSA: Windows Explorer Warning .................................................... 105
Figure 103 Printer Driver Needed ........................................................................................................ 105
Figure 104 Applications > Print Server ................................................................................................106
Figure 105 Printer Screen in Windows Explorer ..................................................................................106
Figure 106 Connecting a USB Hard Drive ............................................................................................107
Figure 107 Storage > External Storage > Disk ....................................................................................107
Figure 108 Storage > Internal Storage > Disk ..................................................................................... 108
Figure 109 Storage > Internal Storage > RAID .................................................................................... 108
Figure 110 Storage > Internal Storage > RAID > Add Disk .................................................................. 109
Figure 111 Storage > Internal Storage > Disk ...................................................................................... 109
Figure 112 Storage > Internal Storage > Volume ..................................................................................110
Figure 113 Storage > Internal Storage > Volume > Edit .......................................................................110
Figure 114 Storage > Internal Storage > Disk .......................................................................................111
Figure 115 Storage > Internal Storage > Disk > Eject ................................................. ... .... .................. 111
Figure 116 Storage > Internal Storage > Disk > Eject ...........................................................................111
Figure 117 Status: RAID Degraded .......................................................................................................112
Figure 118 Storage > Internal Storage > RAID .....................................................................................112
Figure 119 Storage > Internal Storage > RAID > Repair ......................................................................112
Figure 120 Storage > Internal Storage > RAID .....................................................................................113
Figure 121 Status Screen ......................................................................................................................117
Figure 122 System Setting > Date/Time ...............................................................................................121
Figure 123 Disks, RAIDs, and Volumes ...............................................................................................125
Figure 124 Storage > Internal Storage > Status ...................................................................................127
NSA-2401 User’s Guide
19
Page 20

List of Figures
Figure 125 Storage > Internal Storage > Disk ..................................................................................... 128
Figure 126 Storage > Internal Storage > Disk > S.M.A.R.T. (Brief Summary) ..................................... 130
Figure 127 Storage > Internal Storage > Disk > S.M.A.R.T. (Full Summary) ......................................131
Figure 128 Storage > Internal Storage > RAID .................................................................................... 135
Figure 129 Storage > Internal Storage > RAID > Create ....................................................................138
Figure 130 Storage > Internal Storage > Volume ................................................................................140
Figure 131 Storage > Internal Storage > Volume > Create ...... ... ........................................................ 142
Figure 132 Selecting the USB Device .................................................................................................144
Figure 133 Creating a Duplicate USB Key ..........................................................................................144
Figure 134 Creating a Duplicate USB Key: Eject ................................................................................145
Figure 135 Creating a Duplicate USB Key: Insert ...............................................................................145
Figure 136 Storage > External Storage > Disk ....................................................................................145
Figure 137 Storage > External Storage > Volume ............................................................................... 147
Figure 138 Storage > External Storage > Volume > Create ................................................................ 149
Figure 139 Stand Alone Teaming Mode ...............................................................................................160
Figure 140 Fault Tolerance Teaming Mode ..........................................................................................161
Figure 141 Load Balancing Teaming Mode ..........................................................................................161
Figure 142 Link Aggregation Teaming Mode ........................................................................................ 161
Figure 143 Jumbo Frames ...................................................................................................................162
Figure 144 Network > TCP/IP ...............................................................................................................163
Figure 145 Active Directory Example Application .................................................................................166
Figure 146 Network > Windows/CIFS (Workgroup) ............................................................................. 166
Figure 147 Network > Windows/CIFS (Domain) ...................................................................................167
Figure 148 Network > NFS .................................................................................................................. 168
Figure 149 Network > NFS > Add NFS Share ....................................................................................169
Figure 150 Network > NFS > NFS Session ........................................................................................170
Figure 151 Sharing > Users .................................................................................................................. 175
Figure 152 Sharing > Users > Add User ............................................................................................. 178
Figure 153 My NSA ........................................................................................................................... 180
Figure 154 Password ............................................................................................................................ 180
Figure 155 Sharing > Users > User Information ................................................................................... 181
Figure 156 Sharing > Groups ............................................................................................................... 182
Figure 157 Sharing > Groups > Add a New Local Group ....................... .............................................. 1 84
Figure 158 Sharing > Shares ................................................................................................................186
Figure 159 Sharing > Shares > Create a New Share ........................ ................................................. .188
Figure 160 Sharing > Shares > Create a New Share > Share Access Configuration .........................189
Figure 161 Sharing > Shares > ACL Configuration ..............................................................................190
Figure 162 Sharing > Shares > ACL Configuration > New ACL Configuration .................................... 191
Figure 163 Shares > ACL Configuration > New ACL Configuration > ACL Permission ...... ... ... ... ... .... . 192
Figure 164 Sharing > Shares > Configuration ......................................................................................194
Figure 165 Sharing > Shares > DFS ....................................................................................................194
Figure 166 Protect > Backup ............................................................................................................... 201
Figure 167 Protect > Backup > Add Job: Step 1 .................................................................................202
20
NSA-2401 User’s Guide
Page 21

List of Figures
Figure 168 Protect > Backup > Add: Step 2 ........................................................................................ 204
Figure 169 Protect > Backup > Add Job: Step 3 .................................................................................206
Figure 170 Protect > Backup > Add Job: Step 4 ..................................................................................207
Figure 171 Protect > Backup > Edit Job: Step 1 ............................................. ............. ............. ........... 208
Figure 172 Protect > Backup > Edit Job: Step 2 ............................................. ............. ............. ........... 209
Figure 173 Protect > Backup > Restore Archive: Step 1 ..................................................................... 210
Figure 174 Protect > Backup > Restore Archive: Step 2 ......................................................................211
Figure 175 Protect > Backup > Restore Archive: Step 3 ......................................................................211
Figure 176 Protect > Restore: Step 1 ..................................................................................................212
Figure 177 Protect > Restore: Step 2 ..................................................................................................213
Figure 178 Protect > Restore: Step 3 ..................................................................................................214
Figure 179 Protect > Restore: Step 4 ..................................................................................................215
Figure 180 Protect > Snapshot > Snapshot Jobs ................................................................................ 216
Figure 181 Protect > Snapshot > Add Job .......................................................................................... 218
Figure 182 Protect > Snapshot > Snapshot Images .................................... ................................ ........ 219
Figure 183 Protect > Backup Software ................................. ....................................... ........................ 221
Figure 184 Printer Sharing .................................................................................................................. 224
Figure 185 Applications > FTP ............................................................................................................ 225
Figure 186 Applications > Print Server ................................................................................................226
Figure 187 Applications > Print Server > Rename ..............................................................................226
Figure 188 Applications > Copy Button ............................................................................................... 227
Figure 189 Applications > Copy Button > Edit ..................................................................................... 228
Figure 190 Maintenance > Log ............................................................................................................. 230
Figure 191 Maintenance > Log ............................................................................................................. 231
Figure 192 Maintenance > Log > Log Classes .....................................................................................231
Figure 193 Maintenance > Log > Search Filters ............................................. ... .... ... ... ... .... ... ... ... ........232
Figure 194 Maintenance > Log > Log Config > Log Records Configuration ........................................ 232
Figure 195 Maintenance > Log > Log Config > Buzzer Priority ............................................................233
Figure 196 Maintenance > Log > Log Report Configuration > Mail Setting ............... ... ... .... ... ... ... ... .....234
Figure 197 Maintenance > Log > Log Report Configuration > Report Setting ..................................... 235
Figure 198 Maintenance > Log > Log Report Configuration > Syslog Server Setting .......................... 236
Figure 199 Maintenance > Configuration ............................................................................................237
Figure 200 Maintenance > Configuration > Restore ............................................................................238
Figure 201 Maintenance > Configuration > Restore > Restarting ...................................................... . 239
Figure 202 Maintenance > SSL ..........................................................................................................239
Figure 203 Maintenance > SSL > Edit a Self-Signed Certificate ........................................................ .241
Figure 204 Maintenance > FW Upgrade ............................................................................................. 242
Figure 205 Maintenance > Power Management ............................................................. .... ... ... ... ........243
Figure 206 Maintenance > Power Management > Edit ....................................................................... 244
Figure 207 Maintenance > Shutdown ............................................................. ..................................... 246
Figure 208 Maintenance > Shutdown > Confirm Restart ........................................ ... ... ... .....................246
Figure 209 Maintenance > Shutdown > Confirm Shutdown ................................................................. 246
Figure 210 Power Adaptor Pinout. .......................................................................................................261
NSA-2401 User’s Guide
21
Page 22

List of Figures
Figure 211 Windows XP: Start Menu ....................................................................................................276
Figure 212 Windows XP: Control Panel ...............................................................................................276
Figure 213 Windows XP: Control Panel > Network Connections > Properties ......................... ... ... .... . 277
Figure 214 Windows XP: Local Area Connection Properties ............................................................... 277
Figure 215 Windows XP: Internet Protocol (TCP/IP) Properties .................. ... ... .... ... ... ... .....................278
Figure 216 Windows Vista: Start Menu ................................................................................................. 279
Figure 217 Windows Vista: Control Panel ............................................................................................ 279
Figure 218 Windows Vista: Network And Internet ................................................................................ 279
Figure 219 Windows Vista: Network and Sharing Center ..................................................................... 280
Figure 220 Windows Vista: Network and Sharing Center ..................................................................... 280
Figure 221 Windows Vista: Local Area Connection Properties ............................................................ 281
Figure 222 Windows Vista: Internet Protocol Version 4 (TCP/IPv4) Properties ...................................282
Figure 223 Mac OS X 10.4: Apple Menu .............................................................................................. 283
Figure 224 Mac OS X 10.4: System Preferences ................................................................................. 283
Figure 225 Mac OS X 10.4: Network Preferences ............................................................................... 284
Figure 226 Mac OS X 10.4: Network Preferences > TCP/IP Tab. ........................................................284
Figure 227 Mac OS X 10.4: Network Preferences > Ethernet ................ ................................... ........... 285
Figure 228 Mac OS X 10.4: Network Utility .......................................................................................... 285
Figure 229 Mac OS X 10.5: Apple Menu .............................................................................................. 286
Figure 230 Mac OS X 10.5: Systems Preferences ............................................................................... 286
Figure 231 Mac OS X 10.5: Network Preferences > Ethernet ................ ................................... ........... 287
Figure 232 Mac OS X 10.5: Network Preferences > Ethernet ................ ................................... ........... 288
Figure 233 Mac OS X 10.5: Network Utility .......................................................................................... 288
Figure 234 Ubuntu 8: System > Administration Menu ..........................................................................289
Figure 235 Ubuntu 8: Network Settings > Connections ...................... .... .............................................. 2 89
Figure 236 Ubuntu 8: Administrator Account Authentication ................................................................ 290
Figure 237 Ubuntu 8: Network Settings > Connections ...................... .... .............................................. 2 90
Figure 238 Ubuntu 8: Network Settings > Properties ........................................................................... 291
Figure 239 Ubuntu 8: Network Settings > DNS ...................................................................................291
Figure 240 Ubuntu 8: Network Tools ....................................................................................................292
Figure 241 openSUSE 10.3: K Menu > Computer Menu .....................................................................293
Figure 242 openSUSE 10.3: K Menu > Computer Menu .....................................................................293
Figure 243 openSUSE 10.3: YaST Control Center ..............................................................................294
Figure 244 openSUSE 10.3: Network Settings ....................................................................................294
Figure 245 openSUSE 10.3: Network Card Setup ...............................................................................295
Figure 246 openSUSE 10.3: Network Settings ....................................................................................296
Figure 247 openSUSE 10.3: KNetwork Manager ................................................................................. 297
Figure 248 openSUSE: Connection Status - KNetwork Manager ........................................................297
Figure 249 Internet Explorer 7: Certification Error ................................................................................ 300
Figure 250 Internet Explorer 7: Certification Error ................................................................................ 300
Figure 251 Internet Explorer 7: Certificate Error ........................ ................ ................ ................ ........... 300
Figure 252 Internet Explorer 7: Certificate ............................................................................................ 301
Figure 253 Internet Explorer 7: Certificate Import Wizard .................................................................... 301
22
NSA-2401 User’s Guide
Page 23

List of Figures
Figure 254 Internet Explorer 7: Certificate Import Wizard .................................................................... 302
Figure 255 Internet Explorer 7: Certificate Import Wizard .................................................................... 302
Figure 256 Internet Explorer 7: Select Certificate Store .................................................. .... .................302
Figure 257 Internet Explorer 7: Certificate Import Wizard .................................................................... 303
Figure 258 Internet Explorer 7: Security Warning ............................................ .......... ...... .......... ........... 303
Figure 259 Internet Explorer 7: Certificate Import Wizard .................................................................... 304
Figure 260 Internet Explorer 7: Website Identification .................................. ............................. ........... 304
Figure 261 Internet Explorer 7: Public Key Certificate File ........................................ ... ... .... ... ..............305
Figure 262 Internet Explorer 7: Open File - Security Warning ... ... ... ... .... ... ... ........................................ 305
Figure 263 Internet Explorer 7: Tools Menu ......................................................................................... 306
Figure 264 Internet Explorer 7: Internet Options ..................................................................................306
Figure 265 Internet Explorer 7: Certificates .......................................................................................... 307
Figure 266 Internet Explorer 7: Certificates .......................................................................................... 307
Figure 267 Internet Explorer 7: Root Certificate Store .......................................................................... 307
Figure 268 Firefox 2: Website Certified by an Unknown Authority .......................................................308
Figure 269 Firefox 2: Page Info ............................................................................................................ 308
Figure 270 Firefox 2: Tools Menu ......................................................................................................... 309
Figure 271 Firefox 2: Options ............................................................................................................... 309
Figure 272 Firefox 2: Certificate Manager ...........................................................................................310
Figure 273 Firefox 2: Select File ........................... ................ ................. ................ ..............................310
Figure 274 Firefox 2: Tools Menu ..........................................................................................................311
Figure 275 Firefox 2: Options ................................................................................................................311
Figure 276 Firefox 2: Certificate Manager ...........................................................................................312
Figure 277 Firefox 2: Delete Web Site Certificates .............................................................................. 312
Figure 278 Opera 9: Certificate signer not found ................................................................................. 313
Figure 279 Opera 9: Security information ............................................................................................. 313
Figure 280 Opera 9: Tools Menu .......................................................................................................... 314
Figure 281 Opera 9: Preferences ......................................................................................................... 314
Figure 282 Opera 9: Certificate manager ............................................................................................315
Figure 283 Opera 9: Import certificate .................................................................................................315
Figure 284 Opera 9: Install authority certificate ........................ ........................................................... 316
Figure 285 Opera 9: Install authority certificate ........................ ........................................................... 316
Figure 286 Opera 9: Tools Menu .......................................................................................................... 317
Figure 287 Opera 9: Preferences ......................................................................................................... 317
Figure 288 Opera 9: Certificate manager ............................................................................................318
Figure 289 Konqueror 3.5: Server Authentication ................................................................................319
Figure 290 Konqueror 3.5: Server Authentication ................................................................................319
Figure 291 Konqueror 3.5: KDE SSL Information ................................................................................ 319
Figure 292 Konqueror 3.5: Public Key Certificate File ..................... ... .... ... ... ... ... .... ... ... ... .... ... ... ... ... .....320
Figure 293 Konqueror 3.5: Certificate Import Result ............................................................................320
Figure 294 Konqueror 3.5: Kleopatra ...................................................................................................320
Figure 295 Konqueror 3.5: Settings Menu ............................................................................................321
Figure 296 Konqueror 3.5: Configure ...................................................................................................321
NSA-2401 User’s Guide
23
Page 24

List of Figures
24
NSA-2401 User’s Guide
Page 25

List of Tables
List of Tables
Table 1 Disk Drive LEDs ........................................................................................................................32
Table 2 NSA LEDs ................................................................................................................................. 32
Table 3 User-level Global Labels and Icons ..........................................................................................38
Table 4 My NSA Screen ........................................................................................................................39
Table 5 My NSA Share Browsing Icons ................................................................................................. 40
Table 6 My NSA Share Browsing ..........................................................................................................41
Table 7 My NSA Share Browsing > Move to (or Copy to) ............ ... ... .................................................... 42
Table 8 My NSA Share Configuration Icons ..........................................................................................43
Table 9 My NSA Share Configuration .................................................................................................... 43
Table 10 My NSA Change Share Properties .........................................................................................43
Table 11 My NSA Change Share Properties > Share Access Configuration ........................................ 45
Table 12 Password ................................................................................................................................ 47
Table 13 Global Labels and Icons ........ ... .... ... ... ... ... .... ... ... ... .... ... ... ....................................................... 48
Table 14 Screens Summary ..................................................................................................................50
Table 15 Common Configuration Screen Icons ................. ... .............................................................. ... 51
Table 16 Status Icons ...........................................................................................................................118
Table 17 Status .....................................................................................................................................118
Table 18 System Setting > Date/Time .................................................................................................121
Table 19 Storage > Internal Storage > Status ...................................................................................... 127
Table 20 Storage > Internal Storage > Disk Icons .............................................................................. 129
Table 21 Storage > Internal Storage > Disk ........................................................................................ 129
Table 22 Storage > Internal Storage > Disk > S.M.A.R.T. (Brief Summary) ....................................... 130
Table 23 Storage > Internal Storage > Disk > S.M.A.R. T. (Full Summary) .................................... .... . 131
Table 24 RAID Array Levels Quick Comparison .................................................................................. 133
Table 25 Storage > Internal Storage > RAID Icons .............................................................................136
Table 26 Storage > Internal Storage > RAID ...................................................................................... 138
Table 27 Storage > Internal Storage > RAID > Create ....................................................................... 139
Table 28 Storage > Internal Storage > Volume Icons .........................................................................140
Table 29 Storage > Internal Storage > Volume ................................................................................... 141
Table 30 Storage > Internal Storage > Volume Create ....................................................................... 142
Table 31 Selecting the USB Device .....................................................................................................144
Table 32 Storage > External Storage > Disk Icons .............................................................................146
Table 33 Storage > External Storage > Disk ....................................................................................... 146
Table 34 Storage > External Storage > Volume Icons ........................................................................ 147
Table 35 Storage > External Storage > Volume ..................................................................................148
Table 36 Storage > External Storage > Volume Create ...................................................................... 149
Table 37 JBOD .................................................................................................................................... 152
Table 38 RAID 0 .................................................................................................................................. 153
NSA-2401 User’s Guide
25
Page 26

List of Tables
Table 39 RAID 1 .................................................................................................................................. 153
Table 40 RAID 10 ................................................................................................................................ 154
Table 41 RAID 5 .................................................................................................................................. 155
Table 42 S.M.A.R.T. Attributes ............................................................................................................. 156
Table 43 Network > TCP/IP ............................................... ... .... ... ... ... .... ... ... ........................................ 163
Table 44 Network > Windows/CIFS ..................................................................................................... 167
Table 45 Network > NFS Icons ............................................................................................................ 168
Table 46 Network > NFS ...................................................................................................................... 169
Table 47 Network > NFS > Add NFS Share ........................................................................................170
Table 48 Network > NFS > NFS Session ............................................................................................ 171
Table 49 Sharing > Users Icons ........................................................................................................... 175
Table 50 Sharing > Users ....................................................................................................................176
Table 51 Sharing > Users > Create a New Account ............................................................................ 178
Table 52 Sharing > Users > User Information > Quota List .................................................................181
Table 53 Sharing > Groups Icons ........................................................................................................182
Table 54 Sharing > Groups .................................................................................................................. 183
Table 55 Sharing > Groups > Add a New Local Group ....................................................................... 184
Table 56 Sharing > Shares Icons .............................................. ... ... ... .... ... ... ... ... .... ... ... ... .... ... ..............186
Table 57 Sharing > Shares ...... ... .... ... ... ... .... ... ... ... ... .... ........................................................................187
Table 58 Sharing > Shares > Create a New Share .............................................................................188
Table 59 Sharing > Shares > Create a New Share > Share Access Configuration ............................. 189
Table 60 Sharing > ACL Configuration Icons .......................................................................................190
Table 61 Sharing > Shares > Create a New Share > Share Access Configuration ............................. 191
Table 62 Sharing > Shares > ACL Configuration > New ACL Configuration Icons .............................191
Table 63 Sharing > Shares > Create a New Share > Share Access Configuration ............................. 192
Table 64 Shares > ACL Configuration > New ACL Configuration > ACL Permission .......................... 193
Table 65 Shares > ACL Configuration > New ACL Configuration > ACL Permission .......................... 194
Table 66 Sharing > Shares > DFS .......................................................................................................195
Table 67 Protection Methods Overview ............................................................................................... 197
Table 68 Protect > Backup Icons ........................................................................................................ 201
Table 69 Protect > Backup ................................................................................................................. 202
Table 70 Protect > Backup > Add Job: Step 1 .................................................................................... 203
Table 71 Protect > Backup > Add Job: Step 2 .................................................................................... 205
Table 72 Protect > Backup > Add Job: Step 3 .................................................................................... 206
Table 73 Protect > Backup > Add Job: Step 4 .................................................................................... 207
Table 74 Protect > Backup > Edit Job: Step 1 ..................... .... ... ... ... .... ... ... ... ... .... ... ... ........................208
Table 75 Protect > Backup > Edit Job: Step 2 ..................... .... ... ... ... .... ... ... ... ... .... ... ... ........................209
Table 76 Protect > Backup > Restore Archive: Step 1 ................................................... .... ... ... ... ... .... . 210
Table 77 Protect > Backup > Restore Archive: Step 2 ................................................... .... ... ... ... ... .... .. 211
Table 78 Protect > Backup > Restore Archive: Step 3 ................................................... .... ... ... ... ... .... . 212
Table 79 Protect > Restore: Step 1 ............................................. ........................................................ 212
Table 80 Protect > Restore: Step 2 ............................................. ........................................................ 213
Table 81 Protect > Restore: Step 3 ............................................. ........................................................ 214
26
NSA-2401 User’s Guide
Page 27

List of Tables
Table 82 Protect > Restore: Step 4 ............................................. ........................................................ 215
Table 83 Protect > Snapshot > Snapshot Jobs Icons .........................................................................217
Table 84 Protect > Snapshot > Snapshot Jobs ................................................................................... 218
Table 85 Protect > Snapshot > Add Job ........................ ... ... .... ... ... ... .... ... ... ... ... .... ... ... ... .... ... ... ... ........ 219
Table 86 Protect > Snapshot > Snapshot Images Icons .....................................................................220
Table 87 Protect > Snapshot > Snapshot Images ..............................................................................220
Table 88 Applications > FTP ........... ... ... ... .... ... ... ... ... .... ... .....................................................................225
Table 89 Applications > Print Server ............................................ ... ... .... ... ... ... ... .... ... ... ... .... ... ..............226
Table 90 Applications > Print Server > Rename .................................................................................. 227
Table 91 Applications > Copy Button ................................................................................................... 227
Table 92 Applications > Copy Button > Edit ........................................................................................ 228
Table 93 Applications > Copy Button > Edit ........................................................................................ 228
Table 94 Maintenance > Log Icons ....... ... .... ... ... ... ... .... ............................................................. ...........230
Table 95 Maintenance > Log > Search Filters ..................................................................................... 232
Table 96 Maintenance > Log > Log Config > Log Records Configuration ........................................... 233
Table 97 Maintenance > Log > Log Config > Buzzer Priority .............................................................. 233
Table 98 Maintenance > Log > Log Report Configuration > Mail Setting ........................................... . 234
Table 99 Maintenance > Log > Log Report Configuration > Report Setting ........................................ 235
Table 100 Maintenance > Log > Log Report Configuration > Syslog Server Setting ..........................236
Table 101 Maintenance > Configuration ..............................................................................................237
Table 102 Maintenance > Configuration ..............................................................................................238
Table 103 Maintenance > SSL ............................................................................................................240
Table 104 Maintenance > Configuration ..............................................................................................241
Table 105 Maintenance > FW Upgrade ...............................................................................................242
Table 106 Maintenance > Power Management ................................................................................... 243
Table 107 Maintenance > Power Management > Edit ......................................................................... 245
Table 108 Maintenance > Shutdown ................................................................................................... 246
Table 109 Physical Features ...............................................................................................................257
Table 110 Firmware Features ..............................................................................................................257
Table 111 NSA Hardware Specifications ................................... ... ... ... .... ... ... ... ... .................................. 259
Table 112 NSA Firmware Specifications ..............................................................................................260
Table 113 Power Consumption in Watts (W) .......................................................................................261
Table 114 Log Messages ..................................................................................................................... 265
NSA-2401 User’s Guide
27
Page 28

List of Tables
28
NSA-2401 User’s Guide
Page 29

PART I
Introduction and
Tutorials
Getting to Know Your NSA (31)
Introducing the Web Configurator (35)
29
Page 30

30
Page 31

CHAPTER 1
Getting to Know Your NSA
1.1 NSA-2401 Overview
The NSA (Network Storage Appliance) allows secure storage and management of data on
your network. Windows, Apple, or Linux users can access data on it as if it was on their own
computers. The NSA’s two Gigabit Ethernet ports can connect to two different LANs. Users
on either LAN (or connected through the Internet) can back up and share data on the NSA.
Two USB ports let you share USB printers and use external USB hard drives for extra storage
space.
Figure 1 NSA Overview
LAN1
LAN2
USB1
USB2
• The NSA’s SATA II (Serial Advanced Technology Attachment) hard disk serial links are
compatible with all major hard drive manufacturers.
• RAID (Redundant Array of Independent Disks) protects your data even if a hard disk fails.
• The snapshot and backup features let you further protect your data.
• The NSA offers powerful security features. Use HTTPS or FTPES for secure file
transfers. Create encrypted volumes so an attacker who removes the physical drive still
cannot read the data. The NSA can also record all user access to files and folders.
• The NSA lets you publish or mirror files to another NSA as a backup that others can
access (at a branch office for example).
• See the specifications appendix for a more detailed list of NSA features.
NSA-2401 User’s Guide
31
Page 32

Chapter 1 Getting to Know Your NSA
1.1.1 Front Panel LEDs
The front panel LEDs tell you important information about the NSA.
Figure 2 NSA Front Panel LEDs
Disk Drive LEDs
The following table describes the disk drive LEDs. Refer to the Quick Start Guide to see how
to install and remove hard drives from the disk trays.
Table 1 Disk Drive LED s
LED COLOR STATUS DESCRIPTION
PWR Green Off The hard disk drive tray is empty or not connected properly.
ALM Red Off The hard disk drive is working properly if connected.
LEDs
On The hard disk drive is connected properly to the NSA.
Blinking The NSA is reading data from the hard disk drive or writing data
to it.
On The hard disk drive has a problem, is not installed, or you have
used the Web Configurator to eject it (shut it down).
Blinking The NSA is resynching or reshaping the hard disk drive.
The following table describes the LEDs related to the NSA itself.
1 The SYS LED blinks orange when firmware is being uploaded to the NSA. Do
not turn off or reset the NSA while the firmware update is in progress!
Table 2 NSA LEDs
LED COLOR STATUS DESCRIPTION
PWR Green Off The NSA is turned off.
On The NSA is turned on and receiving power.
32
NSA-2401 User’s Guide
Page 33

Chapter 1 Getting to Know Your NSA
Table 2 NSA LEDs (continued)
LED COLOR STATUS DESCRIPTION
SYS Red On The NSA has passed system tests.
Blinking The NSA is starting up or shutting down.
Quick blinking indicates a RAID array is in degraded mode.
Orange On The NSA is unlocking an encrypted volume or there are no
Blinking Firmware is being uploaded to the NSA.
Green On The NSA has fully booted and is operating normally.
LAN1/LAN2 Green Off The LAN is not connected.
On The NSA has a successful 10/100 Mbps Ethern e t
Blinking The 100M LAN is sending or receiving packets.
Orange On The NSA has a successful 1000 Mbps Ethernet connection.
Blinking The 1000M LAN is sending or receiving packets.
COPY Green On A USB device is connected to the NSA.
Blinking The NSA is copying files from the USB device.
Red On Copying files from the USB device failed. Press the COPY
Off No USB device is connected.
volumes in the NSA.
connection.
button to set the COPY LED back to green.
1.1.2 Power Button
Press the power button on the front panel to turn the NSA on and off.
• To turn the NSA on: press the power button and release it.
• To turn the NSA off, press the power button in and hold it until you hear a beep. Then
release the button. The SYS light blinks red until the NSA is shut down.
• If the above shut-down procedure does not work (which may happen if the NSA has
crashed), hold the power button in a few more seconds until you hear a second beep. The
NSA turns off immediately.
1.1.3 COPY Button
Use the COPY button on the front panel to copy files from a connected USB device to the
NSA. Use the Applications > Copy Button screen (Section 10.4 on page 227) to choose
where the NSA stores the files. The name of the folder created for the copied files consists of
the date and time of the copy in year_month_day_hour_minute_second format.
NSA-2401 User’s Guide
33
Page 34

Chapter 1 Getting to Know Your NSA
34
NSA-2401 User’s Guide
Page 35

CHAPTER 2
Introducing the Web
Configurator
This chapter describes how to access the NSA Web Configurator and provides an overview of
its screens.
2.1 Web Configurator Overview
The Web Configurator is an HTML-based management interface that allows easy NSA setup
and management via Internet browser. Use Internet Explorer 6.0, Mozilla firefox 1.0,
Netscape Navigator 7.0 or later versions of these browsers. The recommended screen
resolution is 1024 by 768 pixels or higher.
In order to use the Web Configurator you need to allow JavaScripts.
2.2 Accessing the NSA Web Configurator
Make sure your NSA is properly connected (refer to the Quick Start Guide).
2.2.1 Access the NSA Using the NDU
If you don’t know the IP address of the NSA, then use the NDU to find it. Refer to the Quick
Start Guide to see how to install and run the NDU.
NSA-2401 User’s Guide
35
Page 36

Chapter 2 Introducing the Web Configurator
Figure 3 NDU Main Screen
From the NDU main page click the icon under Admin to see the Web Configurator screen
login screen.
2.2.2 Web Browser Access
Open your browser and type in the IP address of the NSA. If the NSA does not get IP
addresses from a DHCP server, the default LAN1 IP address is 192.168.1.3 and the default
LAN2 IP address is 192.168.100.3.
Figure 4 NDA URL
2.3 Login
The default user name and password are ‘admin’ and ‘1234’ respectively. Enter your user
name and password, then click Login. Non-admin users can change their passwords by using
the username and password in the My NSA > Password screen. See Section 2.5.7 on page 46
for details.
36
NSA-2401 User’s Guide
Page 37

Chapter 2 Introducing the Web Configurator
Figure 5 NSA Login Screen
You should see a screen asking you to change your password (highly recommended) as shown
next. Type a new password (and retype it to confirm) and click Apply or click Skip.
Figure 6 Change Password Screen
" The Web Configurator session automatically times out after 15 minutes.
Simply log back into the NSA if this happens to you.
2.4 User-level Screens Overview
All users (including the administrator) first see the user-level access My NSA screen after
login.
NSA-2401 User’s Guide
37
Page 38

Chapter 2 Introducing the Web Configurator
Figure 7 My NSA
The icons and language label at the top-right of the screen are visible from most screens. Use
the tabs at the top of the screen to navigate between the user-level screens and menus. The
following table describes the ‘global’ icons and tabs in the user-level screens.
Table 3 User-level Global Labels and Icons
LABEL/ICON DESCRIPTION
Language Select th e Web Configurator l anguage from the drop-down list box.
Help Click the Help icon to open a web help page specific to the screen you are
currently configuring.
Logout Click the Logout icon at any time to exit the Web Configurator.
My NSA Click this tab to go to screens where you can manage your shares and access the
files on public shares. The administrator must go into the administration screens to
manage other user’s shares.
Password Click this tab to go to a screen where you can change your password.
Administration This tab displays when you log in as the admin istrator. Click the tab to go to
screens where you can manage advanced configurations.
2.5 My NSA Screen
Use the My NSA screens to manage your shares and access the files in folders to which you
have access.
38
A share is a set of user access permissions for a specific folder on a volume (gives someone
access to a folder). It is similar to a shared folder in Windows, but the access rights are
independent of the folder (you configure the share and the folder separately). You can map a
share to a network drive for easy and familiar file transfer for Windows users.
NSA-2401 User’s Guide
Page 39

Chapter 2 Introducing the Web Configurator
The main My NSA screen displays the shares to which you have access.
Figure 8 My NSA Screen
The following table describes this screen.
Table 4 My NSA Screen
LABEL DESCRIPTION
My Own Shares These are the shares that you own (and manage). The share icons are folder
shaped. Click a share icon to access the share’s contents.
System Share
This icon displays for a system share created by the NSA.
User-created Share
This icon displays for a user-created share.
External (USB) Share
This icon displays for a share on an external (USB) device. An
external share’s icon disappears if the share is not currently
available (because the USB device was removed for example).
The administrator owns and manages the public shares.
Configure Click this button to see and configure the management details for a share.
Other Shares These are other shares on the internal hard drives or external (USB) devices that
you can access (but not manage).
NSA-2401 User’s Guide
39
Page 40

Chapter 2 Introducing the Web Configurator
2.5.1 My NSA Share Browsing Screen
Click My NSA and then click a share to open the following screen. Use the My NSA share
browsing screens to see and access share contents.
• Click a folder’s name to go into the folder.
• Click a file’s name to be able to save the file to your computer.
• Click the play icon to play the file. At the time of writing this is only for MP3 files.
• Click to the right of a file or folder name to select it.
• Use the [SHIFT] key to select a range of entries. Hold down the [CTRL] key to select
multiple individual entries.
Figure 9 My NSA Share Browsing
40
The following table describes the icons in this screen.
Table 5 My NSA Share Browsing Icons
ICON
DESCRIPTION
Create Folder
Click this icon to open a screen where you can create a new folder.
Upload
Click this button to copy a file from your computer to this location in the
NSA.
NSA-2401 User’s Guide
Page 41

Chapter 2 Introducing the Web Configurator
Table 5 My NSA Share Browsing Icons (continued)
ICON
DESCRIPTION
Delete
Select a folder(s) or file(s) and click this icon to remove the folder(s) or
file(s).
Move
The administrator can select a folder or file and click this button to move it
to another location within this share or another share that you can access.
Copy
The administrator can select a folder or file and click this button to move
create a copy of it in another location within this share or another share
that you can access.
Sort
Click a column’s heading cell to sort the table entries by that column’s
criteria. Click the heading cell again to reverse the sort order.
Up One Level
Click this icon to go to the next higher layer in the share’s folder tree.
Folder
Click this icon to browse the folder.
File
Click this icon to select a file.
The following table describes the labels in this screen.
Table 6 My NSA Share Browsing
LABEL DESCRIPTION
Current location This is the name of the share and folder path that you are in.
Type The icon in this column identifies the entry as a folder or a file.
Name This column identifies the names of folders and files in the share.
Size This column displays a file’s size.
Modified Date This column displays the last time the file or folder was changed (in year-
Close Click this button to return to the My NSA screen.
NSA-2401 User’s Guide
The folder with an arrow pointing up is the link that takes you to the next
higher layer in the share’s folder tree.
Click a file’s name to open the file or save it to your computer.
Click a folder’s name to display the folder’s contents.
month-day hour:minute:second format).
41
Page 42

Chapter 2 Introducing the Web Configurator
2.5.2 My NSA Share Browsing Move to or Copy to Screen
The administrator can select a folder or file in the My NSA share browsing screens and click
the Move to button or the Copy to button to display a share browsing screen like the
following. Use the share browsing screen to select the target path for moving or copying the
folder or file.
Figure 10 My NSA Share Browsing > Move to (or Copy to)
The following table describes the labels in this screen.
Table 7 My NSA Share Browsing > Move to (or Copy to)
LABEL DESCRIPTION
Shares Select the target share.
Path Select a folder on the NSA. You can also browse to find or create a folder on the NSA or
Yes Click this button to move or copy the file.
Close Click this button to return to the My NSA share browsing screen.
type the location of the folder using forward slashes as branch separators.
2.5.3 My NSA Share Configuration
Use the My NSA share configuration screens to see and configure share management details.
Click My NSA and then the Configure button of one of your shares to open the following
screen. This screen displays a share’s management details.
Figure 11 My NSA Share Configuration
42
NSA-2401 User’s Guide
Page 43

Chapter 2 Introducing the Web Configurator
The following table describes the icons in this screen.
Table 8 My NSA Share Configuration Icons
ICON
DESCRIPTION
Share
This is the share icon followed by the name of the share.
User
This is the icon for the owner of the share.
Share Browsing
Click this icon or link to see and access the share’s contents.
Edit Share
Click this icon or link to configure the share’s management details.
Delete Share
Click this icon or link to remove the share and its contents.
The following table describes the labels in the this screen.
Table 9 My NSA Share Configuration
LABEL DESCRIPTION
Share Owner The share belongs to (and is managed by) this user account. The share
owner controls access rights to the share.
Location The share is for a folder on this volume.
Path This is the share’s file path.
2.5.4 My NSA Change Share Properties Screen
Use the My NSA Change Share Properties screen to configure share management details.
Click My NSA and a share’s Configure button. Then click Edt Share to open the following
screen. This screen displays a share’s management details.
Figure 12 My NSA Change Share Properties
The following table describes the labels in the this screen.
Table 10 My NSA Change Share Properties
LABEL DESCRIPTION
Share Name Enter the name of the shared folder. The text may consist of 1 to 255 characters.
See Share Name Details on page 44 for more information.
Volume Select a volume for the share to be located on.
NSA-2401 User’s Guide
43
Page 44

Chapter 2 Introducing the Web Configurator
Table 10 My NSA Change Share Properties (continued)
LABEL DESCRIPTION
Make this share
owned by
Enable this share Select this to activate the share.
Enable action log Select this to keep a log of all actions performed on the share.
Enable recycle-bin Select this to create a recycle bin on the share. Whenever a user with sufficient
Share Access Choose whether the share is public or private, or choose Advanced to open the
Apply Click this to save your changes.
Cancel Click this to discard changes and close the window.
Select an owner for the share.
permissions deletes a file or folder, it is stored here until it is deleted permanently.
Share Access Configuration screen (see Section 2.5.4.1 on page 44).
Share Name Details
Use any character except double quotes (“), single quotes (‘), slashes (\ or /), square brackets ([
]), colons (:), semi-colons (;), angle brackets (< >), the plus sign (+), semi-colons (;), commas
(,), question marks (?), asterisks (*), and the equals sign (=).
• All leading and trailing spaces are removed automatically.
• Multiple spaces within names are converted to a single space.
• Share names must be unique (they cannot be the same as other share names).
• Share names cannot use names reserved for “automatic shares” of external USB disk
volumes be unique, for example, “USB[0-9]{1,2}”, that is, a share named “USB”
followed by a one or two digit number).
2.5.4.1 Share Access Configuration
This screen allows you to assign permissions to a share.
44
NSA-2401 User’s Guide
Page 45

Chapter 2 Introducing the Web Configurator
Figure 13 My NSA Change Share Properties > Share Access Configuration
The following table describes the labels in this screen.
Table 11 My NSA Change Share Properties > Share Access Configuration
LABEL DESCRIPTION
Available Users/Groups This displays a list of users and groups that have not yet been assigned
an authority level for the share. You can assign users and groups by
selecting them and clicking the right arrow.
Full
Read Only
Deny
Apply Click this to save your changes.
Cancel Click this to discard changes and close the window.
Assign users and groups one of the following authority levels.
Full - Grants read/write privileges.
Read Only - Grants read-only privileges; files and folders cannot be
modified, moved, or removed.
Deny - Removes all privileges; files and folders cannot be read,
modified, moved, or removed.
You can remove users from any given authority level by selecting them
and clicking the left arrow.
2.5.5 Share and Folder Names
The name can only contain the following characters:
• Alphanumeric (A-z 0-9) and Unicode.
The NSA allows FTP access to shares, folders or files with names encoded in the UTF-8
(8-bit UCS/Unicode Transformation Format) format. So your FTP client must support
UTF-8 in order to access shares, folders or files on the NSA with Unicode names.
• Spaces
• _ [underscores]
NSA-2401 User’s Guide
45
Page 46

Chapter 2 Introducing the Web Configurator
•. [periods]
• - [dashes]
Other limitations include:
• All leading and trailing spaces are removed automatically.
• Multiple spaces within names are converted to a single space.
• Share names must be unique (they cannot be the same as other share names).
• The NSA creates automatic volume names for external (USB) disk volumes. These are a
type of share, so the share name you configure cannot conflict with the external (USB)
disk volume names. “ExtVol1” or “ExtVol2” are examples of external (USB) disk volume
names.
• Folder names must be unique (they cannot be the same as other folder na mes).
• The minimum character length of a name is one character, that is a name cannot be blank.
• The maximum character length of share name is 255 characters.
• Unicode is supported for share names, although your FTP client must support UTF-8. Full
support should be available in all Windows versions after Windows 2000.
2.5.6 Share Paths
A share path is the full path to a folder on a volume that will be shared, for example, /mynsa/
topsecret/ugs/. This is independent from a “share name” which is the name shown for this
share when accessing the share via CIFS or FTP. The path should start with a '/' (forward
slash) followed by a parent folder, child folders leading to the folder that is to be shared.
2.5.7 Password Screen
Click Password to open the following screen. Use this screen to change an account’s
password. Enter a new password and confirm it by re-entering it.
Figure 14 Password
46
NSA-2401 User’s Guide
Page 47

The following table describes the labels in this screen.
Table 12 Password
LABEL DESCRIPTION
Account Name Type the user name of the account for which you want to change the
password.
Old Password Type the user’s curren t password.
New Password Create a new password for the user. You can type from one to 14 single-
byte (no Chinese characters allowed for example) ASCII characters.
Retype to confirm You must type the exact same password that you just typed in the above
field.
Apply Click this button to save your changes back to the NSA.
Cancel Click this button to begin configuring this screen afresh.
2.6 Administration Screens
The Administration tab displays when you log in as the administrator. Click Administration
in the My NSA screens to open the advanced administration screens.
Chapter 2 Introducing the Web Configurator
The first time you access the administration screens, the setup wizard opens. See the online
help for details on the setup wizard screens. After you configure the setup wizard, the Status
screen displays when you enter the advanced administration screens.
NSA-2401 User’s Guide
47
Page 48

Chapter 2 Introducing the Web Configurator
Figure 15 Status
2
3
1
4
2.6.1 Global Administration Icons
The icons and language label at the top-right of the screen ( ) are visible from most of the
administration screens. The following table describes the ‘global’ icons and labels.
Table 13 Global Labels and Icons
LABEL/ICON DESCRIPTION
Language Select th e Web Configurator l anguage from the drop-down list box.
Help
Click this icon to open a web help page specific to the screen you are currently
configuring.
About
Click this icon to view the model name, firmware version and copyright.
Wizards
Click this icon to open a sub-menu of wizard(s).
1
48
NSA-2401 User’s Guide
Page 49

Table 13 Global Labels and Icons
2
LABEL/ICON DESCRIPTION
Home
Click this icon to return to the user-level (My NSA) screens.
Logout
Click this icon at any time to exit the Web Configurator. This is the same as
clicking the Logout link at the bottom of the Navigation panel.
2.6.2 Navigation Panel
The navigation panel on the left of the Web Configurator screens ( ) contains screen links.
Click a minus (-) link to hide a category’s screen links. Certain screens also contain hyper
links that allow you to jump to another screen.
Click the Status icon to open the Status screen.
Figure 16 Navigation Panel Links
Chapter 2 Introducing the Web Configurator
NSA-2401 User’s Guide
49
Page 50

Chapter 2 Introducing the Web Configurator
The following table describes the navigation panel links.
Table 14 Screens Summary
CATEGORY SUB-LINK FUNCTION
Status This screen shows system information, the status of the volumes,
System Setting Date/Time Choose a time zone and/or allow the NSA to synchronize with a
Storage Internal
Storage
External
Storage
Network TCP/IP Configure the NSA’s teaming mode, IP address, and DNS
Windows/CIFS Specify the NSA’s server name and workgroup name and choose
NFS Configure NFS settings so computers with Unix or Linux operating
Sharing Users Create users who may use the NSA. Y ou may set user passwords,
Groups Create user groups and add group members.
Shares Create shared folders to which you can allow users and/or groups
Protect Backup Create and manage data backups to an external USB disk drive or
Restore Restore a previous backup from another NSA or external USB
Snapshot Create and manage snapshots (records of changes to an internal
Backup
Software
Applications FTP Enable FTP file transfer to/from the NSA, set the number of FTP
Print Server View and manage the NSA’s list of printers and print jobs.
Copy Button Configure the copy button share location.
Maintenance Log View the NSA system logs and configure where to send log and
Configuration Manage the NSA configuration file.
SSL Configure HTTPS and the NSA’s SSL certificate.
F/W Upgrade Upload new firmware to your NSA.
Power
Management
and the users who are currently using the NSA.
time server.
View and configure the NSA’s installed disks, RAIDs, and
volumes.
View and configure the NSA’s USB-connected disks and volumes.
settings. You can also perform a ping test.
a workgroup or domain authentication method.
systems can access the NSA.
define storage limits per user, and associate users to a group(s).
read/write access rights.
another NSA over the network.
hard drive connected to the NSA.
volume at a particular moment in time).
Use this screen to display the backup software license keys.
connections allowed, an FTP idle timeout, and the character set.
report emails.
Set the hard drive sleep timer.
50
Shutdown Restart your NSA or turn it off.
Logout Click Logout to exit the Web Configurator. This is recommended
to prevent unauthorized administrator access to the NSA.
NSA-2401 User’s Guide
Page 51

2.6.3 Main Window
Chapter 2 Introducing the Web Configurator
The Web Configurator’s main window () shows the screen you select in the navigation
panel. It is discussed in the rest of this document.
The Status screen is the first administration screen to dis play. See Chapter 4 on page 117 for
more information about the Status screen.
2.6.4 Status Messages
The message text box at the bottom of the screen () displays status messages as you
configure the NSA.
2.6.5 Common Screen Icons
The following table explains some icons that appear in several configuration screens.
Table 15 Common Configuration Screen Icons
ICON DESCRIPTION
wizard
Click this icon to open the Disk Setup Wizard to create a new disk array or volume.
Eject
Select a hard drive and click this icon to shut it down. Do this before removing a hard
drive to help increase its usable lifetime.
3
4
Note: Ejecting a disk from a JBOD or RAID0 array causes the array to
fail.
RAID
This icon represents a disk array. See the chapter on the stor age screens for more
details.
Volume
This icon represents a storage volume. See the chapter on the storage screens for
more details.
Disk
This icon shows the status of a hard disk. See the chapter on the storage screens for
more details.
Create
If you have disk space available for a new disk array, then click this icon to open a
screen where you can create a new disk array.
Delete
Select an entry and click this icon to remove the entry.
Edit
Select an entry and click this icon to modify it’s settings.
NSA-2401 User’s Guide
51
Page 52

Chapter 2 Introducing the Web Configurator
Table 15 Common Configuration Screen Icons (continued)
ICON DESCRIPTION
User
This is a user icon. See the chapter on the sharing screens for details on variants of
this icon.
Share
This is a share icon. See the chapter on shares for details on variants of this icon.
2.7 NSA RESET Button
Use the RESET button on the front panel of the NSA to reset either just the NSA’s admin
password and IP address settings or the whole factory default configuration file. Use an object
such as an unfolded paper clip to press the RESET button.
" Ideally you should back up the current NSA configuration file before resetting
or reloading the factory default configuration file.
2.7.1 Reset
Do the following to only reset the administrator password and IP address settings to the
defaults.
Press the RESET button and hold it for two seconds (you will hear one beep) and release it.
The NSA sounds another single beep after you release the button as confirmation.
2.7.2 Reload Factory Default Configuration File
Do the following to reload the factory default configuration file. This resets the admin
password and IP address settings to the default settings AND erases all other configurations
such as user/group/share names, passwords, and share access rights.
Press the RESET button and hold it for ten seconds (you will hear three beeps) and release it.
The NSA sounds three more beeps after you release the button as confirmation.
52
NSA-2401 User’s Guide
Page 53

Figure 17 Reset and Reload Timeline
Beep Beep Beep
Chapter 2 Introducing the Web Configurator
02 10
Press
button
Release Release
to reset to reload and restart
Seconds
" The NSA automatically restarts to complete reloading the factory default
configuration file.
NSA-2401 User’s Guide
53
Page 54

Chapter 2 Introducing the Web Configurator
54
NSA-2401 User’s Guide
Page 55

CHAPTER 3
Tutorials
3.1 Overview
These tutorials show you how to perform the following common tasks:
• How to Configure Sharing: page 55
• How to Use Shares: page 61
• How to Find the NSA in OS X: page 65
• How to Configure Security: page 68
• Power Resume: page 89
• How to Use Backups and Snapshots: page 89
• How to Increase the NSA’s Storage Capacity: page 106
3.2 How to Configure Sharing
This section covers how to create user accounts, groups, and shares.
You can customize account permissions to give different users different levels of access to
individual files and folders hosted on the NSA. For example, if you intend to use the NSA
within a single department you may decide to give all the members of that department read
and write access to all the files located on it. You could also decide to give management read
and write access to some files and give other employees read-only access. Using the tools built
into the ZyXEL Web Configurator, you can do just this.
3.2.1 Setting Up User Accounts
As the administrator of the NSA, one of the first tasks you will want to do is set up accounts
for everyone who needs to use it. Suppose you need accounts for a vice president named
Gonzo and a manager named Kermit. Do the following to create a user account.
NSA-2401 User’s Guide
55
Page 56

Chapter 3 Tutorials
1 Log into the Web Configurator using your administrator Username and Password.
Figure 18 Administrator Login
2 In the My NSA screen, click Administration.
Figure 19 My NSA
56
NSA-2401 User’s Guide
Page 57

Chapter 3 Tutorials
3 Once the Web Configurator workspace appears, click Sharing > Users to open the user
account management area.
Figure 20 Sharing > Users
4 Click Add Account to open the Create a New Acc ount screen.
Figure 21 Sharing > Users > Create a New Account
NSA-2401 User’s Guide
57
Page 58

Chapter 3 Tutorials
• Enter an account name and password.
• Set how many megabytes of storage the account can use in each of the NSA’s
volumes. You can set a different quota for each volume. A value of “0” MB means
unlimited storage.
• Enter the user’s e-mail address and any details or identifying information specific to
the user account.
• Select the groups to which you want to assign this account.
• Click Apply.
5 Repeat these steps for the other user accounts you need.
3.2.2 Setting Up Groups
After you create accounts, the next thing you’ll want to do is organize the user accounts into
groups. This example creates a senior management group with vice president Gonzo as a
member. You can add other members later.
1 Click Sharing > Groups > Add Group.
Figure 22 Groups
58
NSA-2401 User’s Guide
Page 59

2 Specify a name for the group. Select Gonzo and click Add Selected User(s) to include
Gonzo in the group. Click Apply.
Figure 23 Sharing > Groups > Add Share
3.2.3 Setting Up Shares
Chapter 3 Tutorials
You’ve created accounts for Gonzo and Kermit and now you want to create a share for each of
them. You also have a senior management group. You want to allow the users in the senior
management group to access both shares while Kermit can access his own share.
1 Click Sharing > Shares > Add Share.
Figure 24 Shares
NSA-2401 User’s Guide
59
Page 60

Chapter 3 Tutorials
2 Specify a name for the share and select the volume it should be on. Select Kermit as the
Figure 25 Sharing > Shares > Add Share
3 Include Senior-Management under Full and click Apply. This way both Kermit and
Figure 26 Share Access Configuration
owner and set the Share Access to Advanced and click Edit.
the senior managers have full access to the share.
60
NSA-2401 User’s Guide
Page 61

Chapter 3 Tutorials
4 Back in the Edit Shares screen, click Apply.
Figure 27 Sharing > Shares > Add Share
Now that you have created Kermit’s share, you can go through the steps again to create
another share for Gonzo. For Gonzo’s share, set the Share Access to Keep it private to
owner.
3.3 How to Use Shares
Here is how people use the shares you have created. In this example Gonzo creates a folder
named “Strategy” and puts files named 2009-Plan.doc and 2010-2014-Plans.doc into it.
3.3.1 Using a Share with Windows Explorer
Gonzo wants to use his share from his computer at the office.
1 Open Windows explorer and click Tools > Map Network Drive to open the Map
Network Drive screen.
2 In the Folder field, enter two backslashes followed by the IP address of the NSA
(192.168.1.35), another backslash, and the name of the share (Gonzo) and click Finish.
Figure 28 Mapping a Share
NSA-2401 User’s Guide
61
Page 62

Chapter 3 Tutorials
3 Enter Gonzo’s username and password and click OK.
Figure 29 Entering the Share Username and Password
4 Now Gonzo can use the share like a drive on his computer. Click File > New > Folder
Figure 30 Creating a Folder
and create a folder named “Strategy”.
5 Copy and paste the 2009-Plan.doc file into the Strategy folder.
Figure 31 Using the Folder
3.3.2 Using a Share with a Web Browser
Now Gonzo wants to use his web browser to add the 2010-2014-Plans.doc file to his Strategy
folder.
62
NSA-2401 User’s Guide
Page 63

Chapter 3 Tutorials
1 Open Firefox and enter http://192.168.1.35 to open the login screen. Enter Gonzo’s
username and password and clicks Login.
Figure 32 User Login
2 Click the Gonzo share.
Figure 33 Gonzo’s My NSA Screens
NSA-2401 User’s Guide
63
Page 64

Chapter 3 Tutorials
3 Open the Strategy share.
Figure 34 Gonzo Share Screen
64
NSA-2401 User’s Guide
Page 65

4 Click Upload.
Figure 35 Strategy Folder Screen
Chapter 3 Tutorials
5 Browse to the 2010-2014-Plans.doc file and click Apply.
Figure 36 Upload Files Screen
3.4 How to Find the NSA in OS X
Here’s how to find the NSA-2401 OS X. This example uses Mac OS X 10.5 (Leopard).
NSA-2401 User’s Guide
65
Page 66

Chapter 3 Tutorials
1 Click the Finder icon in the dock.
Figure 37 Opening the Finder
2 Select All under Shared in the sidebar. An entry for the NSA appears in the Network
list.
Figure 38 Displaying the NSA
66
NSA-2401 User’s Guide
Page 67

Chapter 3 Tutorials
3 Click the triangle beside the NSA’s name to display the shares that Gonzo can use.
Figure 39 Displaying the NSA
Alternatively, you can also connect directly to the NSA from the Go Menu in the
Finder. Simply click Go > Connect to Server.
Figure 40 Alternate Method for Displaying the NSA
NSA-2401 User’s Guide
67
Page 68

Chapter 3 Tutorials
4 When the Connect to Server dialog box opens, type smb:// and the IP address of your
Figure 41 Connecting to the NSA
5 Once connected, you can now access the NSA from the finder or directly from the
NSA-2401 or click Browse to find it in your network. Click Connect.
desktop.
3.5 How to Configure Security
Use these tutorials to help you secure your NSA. See also Chapter 6 on page 125 for details on
encrypting volumes.
3.5.1 Configuring Security for Web Configurator Sessions
These tutorials show you how to configure security for the NSA’s Web Configurator sessions.
You will customize the NSA’s self-signed SSL certificate and distribute it to your users.
68
NSA-2401 User’s Guide
Page 69

3.5.1.1 Customizing the NSA’s Certificate
1 Click Maintenance > SSL and then select Edit a self-signed CA certificate and click
Edit.
Figure 42 Maintenance > SSL
Chapter 3 Tutorials
2 Next, let’s modify the certificate by changing the Common Name to this NSA’s IP
address of 192.168.1.35, the Organization to “Test” and the Key Length to 2048.
Figure 43 Maintenance > SSL > Edit a Self-Signed Certificate
NSA-2401 User’s Guide
69
Page 70

Chapter 3 Tutorials
3 The NSA restarts its network services and returns you to the login screen.
Figure 44 Maintenance > SSL > Edit a Self-Signed Certificate
70
NSA-2401 User’s Guide
Page 71

3.5.1.2 Downloading and Installing the NSA’s Customized Certificate
1 Log in and return to Maintenance > SSL. Under Modify the Existing Certificate, click
Download.
Figure 45 Maintenance > SSL
Chapter 3 Tutorials
2 Save the file to your computer.
Figure 46 Downloading the NSA’s Certificate
NSA-2401 User’s Guide
71
Page 72

Chapter 3 Tutorials
3 Find the certificate file on your computer and double-click it.
Figure 47 Downloading the NSA’s Certificate
4 Install the certificate. The rest of the steps in this section are an example of installing a
Figure 48 Certificate
certificate in Windows. See Appendix C on page 299 for other examples. In the
Certificate dialog box, click Install Certificate.
72
NSA-2401 User’s Guide
Page 73

5 In the Certificate Import Wizard, click Next.
Figure 49 Certificate Import Wizard: Welcome
Chapter 3 Tutorials
6 Leave Automatically select certificate store based on the type of certificate selected
and click Next.
Figure 50 Certificate Import Wizard: Certificate Store
NSA-2401 User’s Guide
73
Page 74

Chapter 3 Tutorials
7 In the Completing the Certificate Import Wizard screen, click Finish.
Figure 51 Certificate Import Wizard: Finish
8 If you are presented with another Security Warning, click Yes.
Figure 52 Security Warning
9 Finally, click OK when presented with the successful certificate installation message.
Figure 53 Certificate Import Wizard: Successful
74
NSA-2401 User’s Guide
Page 75

3.5.1.3 Turn on the NSA’s Web Security
Now that you have customized the NSA’s certificate and installed it in your computer, you can
turn on security for your Web Configurator sessions. This example uses Firefox 3.0. See
Appendix C on page 299 for more information on browsers and certificates.
1 Close your web browser and open it again to reset its session with the NSA. Log in and
click Maintenance > SSL. Select Force HTTPS and click Apply.
Figure 54 Maintenance > SSL
Chapter 3 Tutorials
NSA-2401 User’s Guide
75
Page 76

Chapter 3 Tutorials
2 A warning screen pops up if applying your change may disconnect some users. Click
Figure 55 Maintenance > SSL > Force HTTPS Warning
3 The NSA logs you out and automatically redirects your formerly non-secure (HTTP)
Apply to continue.
connection to a secure (HTTPS) connection. Your browser may give you a warning
about the device’s public key certificate. Add an exception to allow your browser to
bypass the warning.
Figure 56 Firefox: Secure Connection Failed
76
NSA-2401 User’s Guide
Page 77

4 Click Add Exception.
Figure 57 Firefox: Secure Connection Failed
Chapter 3 Tutorials
5 Click Get Certificate.
Figure 58 Firefox: Add Security Exception
NSA-2401 User’s Guide
77
Page 78

Chapter 3 Tutorials
6 Before you add an exception, verify that the device to which you are trying to connect is
Figure 59 Firefox: Add Security Exception
providing the correct certificate. Click View.
78
NSA-2401 User’s Guide
Page 79

Chapter 3 Tutorials
7 The SHA1 fingerprint must match the NSA’s certificate you downloaded from the NSA
to your computer. (Double-click the NSA’s certificate file and then click Details and
look at the Thumbprint). Click Close.
Figure 60 Firefox: Add Security Exception
NSA-2401 User’s Guide
79
Page 80

Chapter 3 Tutorials
8 If the certificate fingerprints match, click Confirm Security Exception, otherwise click
Figure 61 Firefox: Add Security Exception
Cancel.
80
NSA-2401 User’s Guide
Page 81

9 The login screen displays.
Figure 62 HTTPS Login
Chapter 3 Tutorials
Now, anyone who connects to the NSA’s Web Configurator screens will automatically do so
by HTTPs. Use a secure method to let your users know the correct fingerprint for the NSA’s
certificate so they can check it before adding a security exception (as in steps 6 to 7 on pages
78 to 79). See the next section for how to use FTPES with the NSA for secure FTP transfers.
3.5.2 Using FTPES to Connect to the NSA
This section covers how to use FTP over Explicit TLS with the NSA for secure FTP transfers.
Before you go through this section, read Section 3.5.1 on page 68 to configure HTTPS. This
example uses FileZilla.
NSA-2401 User’s Guide
81
Page 82

Chapter 3 Tutorials
1 Open FileZilla and click File > Site Manager > New Site.
Figure 63 FileZilla Site Manager
• Configure the Host field with the NSA’s address.
• Set the Servertype to FTPES - FTP over explicit TLS/SSL.
• Configure the account name and password.
• Click Connect.
82
NSA-2401 User’s Guide
Page 83

Chapter 3 Tutorials
2 A security warning screen displays. The SHA1 fingerprint must match the NSA’s
certificate you downloaded from the NSA to your computer. (Double-click the NSA’s
certificate file and then click Details and look at the Thumbprint). If they match, click
OK.
Figure 64 FileZilla Unknown Certificate Warning
The shares and folders to which Gonzo has access display. Now you can use FTP to securely
transfer files to or from the NSA. Use a secure method to let your users know the correct
fingerprint for the NSA’s certificate so they can check it before adding a security exception.
3.5.3 Controlling Access to Shares, Folders, and Files
Gonzo wants to give Kermit and the senior management group read-only access to the
Strategy folder. However Kermit is not to see the 2010-2014-Plans file. The following
sections show how to configure the “Gonzo” share’s access settings and Access Control List
(ACL) settings.
3.5.3.1 Configuring the Share’s Access
First you need to give Kermit and the senior management read-only access to the share.
1 Click Sharing > Shares. Select the Gonzo share and click Edit Share.
Figure 65 Sharing > Shares
NSA-2401 User’s Guide
83
Page 84

Chapter 3 Tutorials
2 Set the Share Access to Advanced and click Edit.
Figure 66 Sharing > Shares > Edit Share
3 Move Senior-Management and Kermit to Read Only. Click Apply in this screen and
Figure 67 Share Access Configuration
again in the edit screen.
84
NSA-2401 User’s Guide
Page 85

3.5.3.2 Setting the ACL to Deny Access to a File
Now you need to stop Kermit from accessing the 2010-2014-Plans file.
1 Select the Gonzo share, and click ACL Properties.
Figure 68 Sharing > Shares
2 Click New ACL.
Figure 69 Sharing > Shares > ACL Configuration
Chapter 3 Tutorials
NSA-2401 User’s Guide
85
Page 86

Chapter 3 Tutorials
3 Open the Strategy folder.
Figure 70 Sharing > Shares > ACL Configuration > New ACL
4 Select the 2010-2014-Plans.doc file and click Set ACL.
Figure 71 Sharing > Shares > ACL Configuration > New ACL > Strategy
86
NSA-2401 User’s Guide
Page 87

Chapter 3 Tutorials
5 Move Gonzo to Deny.
Figure 72 Sharing > Shares > ACL Configuration > New ACL > Strategy > Set ACL
NSA-2401 User’s Guide
87
Page 88

Chapter 3 Tutorials
6 A Restricted File icon appears beside the 2010-2014-Plans.doc file. Click Close.
Figure 73 Sharing > Shares > ACL Configuration > New ACL > Strategy
7 This screen lists the Strategy share’s ACLs. Click Close.
Figure 74 Sharing > Shares > ACL Configuration > New ACL > Strategy
You are done configuring the 2010-2014-Plans.doc file’s ACL settings. Only Gonzo can edit
or delete the files in the Strategy folder. Kermit and any member of the senior management
group can log into the NSA and view the contents of the Strategy folder, although Kermit
cannot see the 2010-2014-Plans.doc file.
88
NSA-2401 User’s Guide
Page 89

3.6 Power Resume
T o keep the NSA operating as much of the time as possible, do the following to have the NSA
automatically restart when the power comes back on after a power failure.
Click Maintenance > Power Management. Select Always Power On and click Apply.
Figure 75 Maintenance > Power Management
Chapter 3 Tutorials
3.7 How to Use Backups and Snapshots
Use the NSA’s backup and snapshot features to backup your files and folders.
• Do snapshots frequently (hourly or daily for example) since they are faster than backups.
Snapshots help protect against accidental file loss or damage caused by hackers.
• Schedule backups for times when the network is not busy (like at night or on weekends).
For example, you might do daily backups of important individual files or folders and a
weekly general archive. You can save backups to another location so your files can
survive even if the original RAID or NSA fails.
NSA-2401 User’s Guide
89
Page 90

Chapter 3 Tutorials
3.7.1 Creating a Snapshot Job
Here’s an example of configuring hourly snapshots for a volume.
1 Click Protect > Snapshot > Add Job.
Figure 76 Protect > Snapshot
90
NSA-2401 User’s Guide
Page 91

Chapter 3 Tutorials
2 Enter a name for the job, select the volume of which to take snapshots, set the number of
snapshot images to keep (2 in this example). For the frequency, set it to occur every
hour. Click Apply.
" It’s strongly recommended to set the maximum amount of snapshots setting
as low as possible as a high amount of snapshots can significantly reduce the
volume’s file write performance.
Figure 77 Protect > Snapshot > Add Job
3.7.2 Configuring Snapshot Image Access
Taking a snapshot creates an image file that you use to restore files. By default, only the
administrator can access the snapshot images. You want to allow users to access snapshot
images in the shares that they use.
Click Protect > Snapshot > Snapshot Image Access to open the following screen. Then
select User Share Permissions and click Apply.
Figure 78 Protect > Snapshot > Snapshot Image Access
3.7.3 Using a Snapshot Image to Restore Files
To use a snapshot to restore files, use the MyNSA screens, CIFS (Windows Explorer), or FTP
to browse to the folder named “snap-share”. Open or copy the folder or file that you want to
restore.
NSA-2401 User’s Guide
91
Page 92

Chapter 3 Tutorials
For example, Gonzo accidently overwrote his 2009-Plan.doc file.
Use Windows Explorer to browse to the Gonzo share. (The Quick Start Guide covers how to
map a share to a Windows network drive).
Figure 79 Using a Snapshot Image
• There is a snap-share folder with a folder for each snap-shot of volume contents to which
Gonzo has access. A snap-shot folder’s name identifies the take number of the individual
snapshot, the time the snapshot was taken (in year month, day, hour, minute, second
format) and the name of the snapshot job.
• The take4_080904160008_hourly_example folder contains a 5yearPlan folder with a
2009-Plan.doc file. Gonzo can open the 2009-Plan.doc file or copy it to another location.
3.7.4 Creating a Synchronization Backup
Gonzo has an important folder that the German branch office uses on a daily basis. Because
Gonzo updates the files frequently , you decide to create a backup job that has the NSA publish
the contents of the folder to an NSA in the German branch office. To create a synchronization
backup:
1 Click Protect > Backup > Add Job.
Figure 80 Protect > Backup
92
NSA-2401 User’s Guide
Page 93

Chapter 3 Tutorials
2 Name the backup job and select Synchronization.
Gonzo wants only his current set of files in the remote NSA’s folder, so you select
Mirror to make the target folder identical to the source folder. The NSA deletes any
other files in the target folder.
Figure 81 Protect > Backup > Add Job: Step 1
NSA-2401 User’s Guide
93
Page 94

Chapter 3 Tutorials
3 Select the folder that needs to be mirrored (the Gonzo share’s Strategic-Partners folder
Figure 82 Protect > Backup > Add Job: Step 2
in this example) and Remote.
• Enter the other NSA’s address and administrator password.
• Click Show target content to display the remote NSA’s contents.
• Select the destination on the remote NSA (Backups in this example).
• Click Next.
94
NSA-2401 User’s Guide
Page 95

Chapter 3 Tutorials
4 Click OK in the warning dialog box.
Figure 83 Protect > Backup > Add Job: Step 3
5 For this example, assume the connection to the German branch office is a good one and
not many files need to be backed up so leave the compression off.
• Turn on the encryption to protect these sensitive files during the transfer. The final
files stored on the remote NSA will be unencrypted (usable).
• Restrict the bandwidth usage to 256 KB/s to stop the archives from using all of your
network connection’s available bandwidth.
• You don’t have to configure a purge policy for a synchronization backup.
• Click Next.
Figure 84 Protect > Backup > Add Job: Step 3
NSA-2401 User’s Guide
95
Page 96

Chapter 3 Tutorials
6 Schedule the backup to occur every morning at 3:00 and click Done.
Figure 85 Protect > Backup > Add Job: Step 4
You do not need to use a special restore process to use the files a synchronization backup
creates. The copy of files that the NSA creates on the other NSA’s Backups share can be used
directly by anyone with access to that share.
3.7.5 Creating an Archive Backup
To backup the NSA every week to a remote NSA:
1 Click Protect > Backup > Add Job.
Figure 86 Protect > Backup
96
NSA-2401 User’s Guide
Page 97

Chapter 3 Tutorials
2 Identify the backup job and select Archive.
New files are often added to the shares that you need to back up and existing files are not
frequently changed so select Incremental. The NSA does a full backup first and later
only copies source files that are new and/or modified since the last backup. This example
sets the NSA to do another full backup after every four incremental backups.
Figure 87 Protect > Backup > Add Job: Step 1
NSA-2401 User’s Guide
97
Page 98

Chapter 3 Tutorials
3 Select the volume1 check box to select all the folders and files.
Figure 88 Protect > Backup > Add Job: Step 2
Select Remote and enter the other NSA’s address, username, password, and share name.
If you want to make sure the remote NSA is reachable, click T est Connection.
98
NSA-2401 User’s Guide
Page 99

Chapter 3 Tutorials
4 In this example, the target NSA is on the LAN so leave the compression off.
Security is already configured on the target NSA so you can leave the encryption of f,
too.
Have the NSA keep 3 backups.
Figure 89 Protect > Backup > Add Job: Step 3
5 Set the frequency to Weekly. Schedule the backup for 5:00 every Saturday morning.
Figure 90 Protect > Backup > Add Job: Step 4
3.7.6 Restoring Archived Files by Backup Job
If you have backup jobs for which the NSA has already performed backups, you can restore
the files based on the backup job. Gonzo accidently deleted all of the files in his share and
needs to do the following to restore them.
NSA-2401 User’s Guide
99
Page 100

Chapter 3 Tutorials
1 Click Protect > Backup screen, select a backup job and click Restore Archive.
Figure 91 Protect > Backup
2 Select which backup to use and click Next.
Figure 92 Protect > Backup > Restore Archive: Step 1
100
NSA-2401 User’s Guide
 Loading...