

ZyXEL Communications GBIC-LX-10, SFP-100BX1310-20, GBIC-SX, GBIC-ZX-80, SFP-100BX1550-20 User Manual
...
GBIC and SFP
Transceivers
User’s Guide
Version 1.00
October 2004
Corporate Headquarters
ZyXEL Communications Corp.
Tel: +886-3-578-3942
Fax: +886-3-578-2439
Email:sales@zyxel.com.tw
http://www.zyxel.com
http://www.zyxel.com.tw
Denmark
Tel: +45 39 55 07 00
Fax: +45 39 55 07 07
Email:sales@zyxel.dk
http://www.zyxel.dk
Finland
Tel: +358-9-4780 8400
Fax: +358-9-4780 8448
Email:sales@zyxel.fi
http://www.zyxel.fi
France
Tel: +33 (0)4 72 52 97 97
Fax: +33 (0)4 72 52 19 20
Email:info@zyxel.fr
http://www.zyxel.fr
Germany
Tel: +49 2405 6909 0
Fax: +49 2405 6909 99
Email:sales@zyxel.de
http://www.zyxel.de
North America
Tel: +1-800-255-4101
Tel: +1-714-632-0882
Fax: +1-714-632-0858
Email:sales@zyxel.com
http://www.us.zyxel.com
Norway
Tel: +47 22 80 61 80
Fax: +47 22 80 61 81
Email:sales@zyxel.no
http://www.zyxel.no
Spain
Tel: +34 902 195 420
Fax: +34 913 005 345
Email:sales@zyxel.es
http://www.zyxel.es
Sweden
Tel: +46 31 744 7700
Fax: +46 31 744 7701
Email:sales@zyxel.se
http://www.zyxel.se
Introduction
Use a transceiver module for connection
to a remote device. The GBIC and SFP
(also known as mini-GBIC) transceiver
modules are hot swappable. This means
that you can install and remove a
module while your device is operating.
The GBIC and SFP modules provide
duplex single-mode or multi-mode
connections.
GBIC Transceiver Modules
The GBIC module uses either 3.3V or
5V power input and SC-type connectors.
SFP Transceiver Modules
The SFP module uses 3.3V power input
and LC-type connectors.
Handling, Safety and
Environmental Guidelines
Read the following guidelines before
installing and using a GBIC or SFP
module.
Handling Warning
GBICs and SFPs are static sensitive. To
prevent damage from electrostatic
discharge (ESD), it is recommended you
attach an ESD preventive wrist strap to
your wrist and to a bare metal surface
when you install or remove a GBIC or
SFP module.
GBIC and SFP modules are dust
sensitive. When not in use, always keep
the dust plug on. Avoid getting dust and
other contaminant into the optical bores,
as the optics do not work correctly when
obstructed with dust.
Safety Warning
Fiber-optic GBIC and SFP modules are
equipped with a Class 1 laser, which
emits invisible radiation. Read the
following safety warnings carefully.
• To avoid possible eye injury, do not
look into an operating fiber-optic
module’s connectors.
• Laser radiation is present when the
device or system is powered up.
• Only trained and qualified personnel
should be allowed to install or replace
these modules.
Note: Class 1 Laser Product.
Appareil A` Laser De Classe 1
Laser Produkt Der Klasse 1.
Environmental Warnings
Dispose of your fiber-optic module
according to all national laws and
regulations.
Installing and Removing a
GBIC Module
This section describes how you install
and remove a GBIC module.
Note: Disconnect all fiber-optic cables
from a GBIC module before installing or
removing it.
Do NOT remove and install a GBIC
module more often than is absolutely
necessary. Doing so may shorten the
useful life of the GBIC module.
Installing a GBIC module
Follow these steps to install a GBIC
module.
1 Attach an ESD preventive wrist
strap to your wrist and to a bare
metal surface.
2 Remove the GBIC module from its
protective packaging.
3 Locate the transmit (Tx) and the
receive (Rx) markings on the GBIC
module.
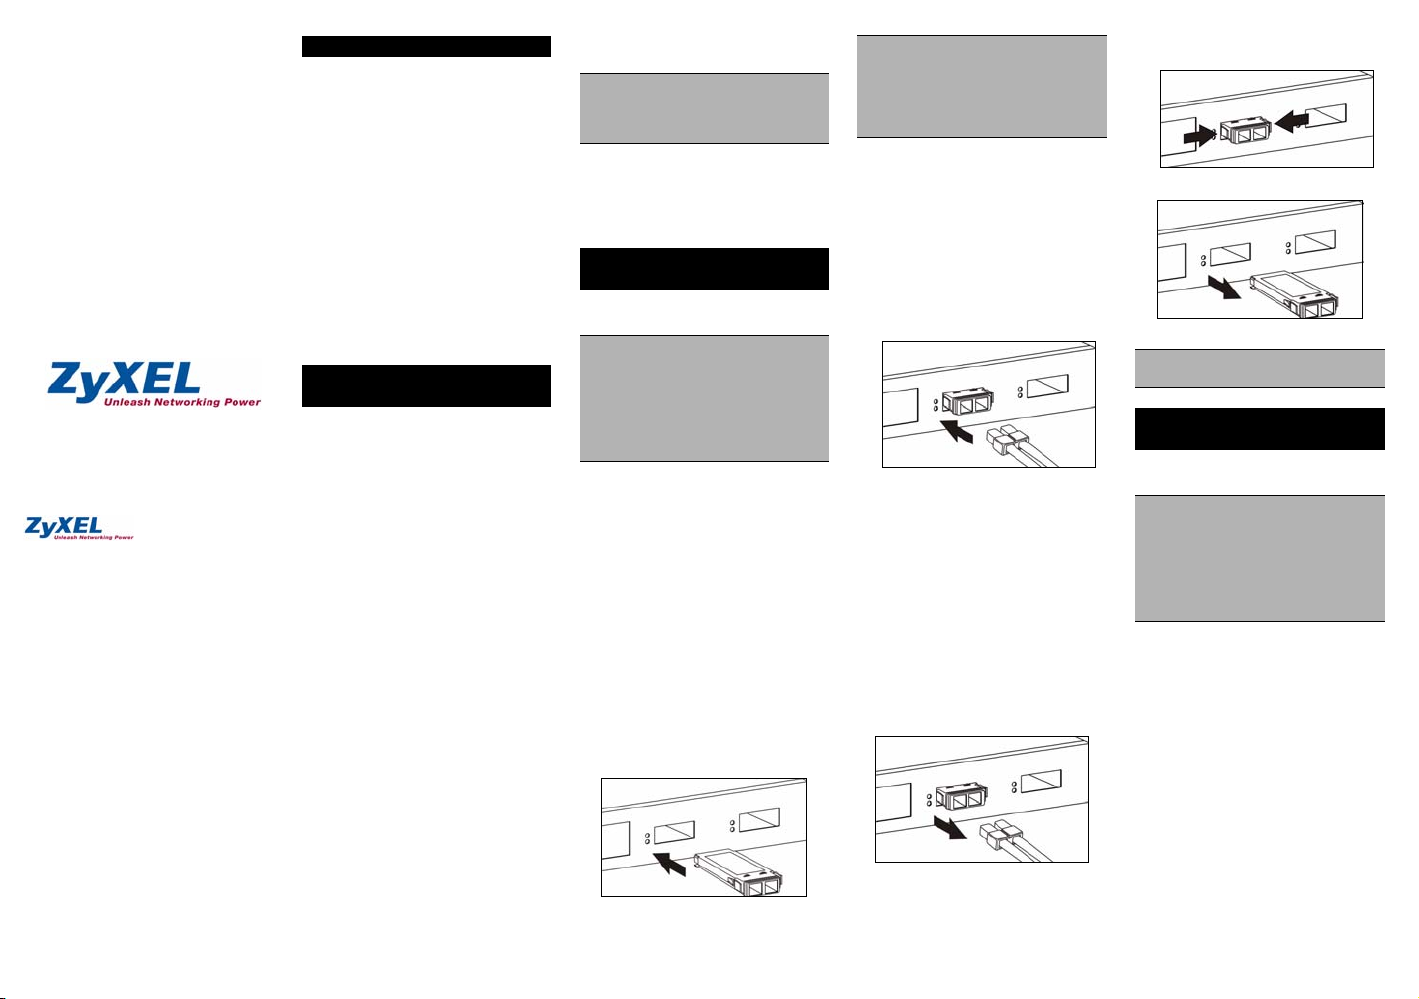
4 Align the GBIC module in front of
the slot opening on a device.
5 Insert the GBIC module into the slot
until the GBIC module snaps into
place.
Note: GBIC module installation
orientation varies depending on your
device. Your GBIC module comes with a
mechanism that prevents incorrect
insertion. Do NOT force or twist the
GBIC module into a slot.
Connecting a Fiber-optic Cable
Follow the steps to connect a fiber-optic
cable to the GBIC module.
1 Remove the dust plugs from the
GBIC module and the cables.
2 Identify the signal transmission
direction of the fiber-optic cable and
the GBIC module. Insert one end of
the fiber-optic cable into the GBIC
module.
3 Insert the other end of the fiber-
optic cable into a remote device.
Refer to the user’s guide that comes
with your device for GBIC module slot
status.
Removing a GBIC Module
Follow the steps below to remove a
GBIC module.
1 Attach an ESD preventive wrist
strap to your wrist and to a bare
metal surface.
2 Disconnect all fiber-optic cables
from the GBIC module.
3 Insert the dust plug onto the GBIC
module.
4 Using your thumb and index finger,
grasp the tabs on both sides of the
GBIC module and carefully slide it
out of the slot.
Note: Do NOT force or twist the module
out of a slot.
Installing and Removing an
SFP Module
This section describes how you install
and remove a SPF module.
Note: Disconnect all fiber-optic cables
from an SFP module before installing or
removing it.
Do NOT remove and install an SFP
module more often than is absolutely
necessary. Doing so may shorten the
useful life of the SFP module.
Installing an SFP Module
Follow the steps below to install an SFP
module.
1 Attach an ESD preventive wrist
strap to your wrist and to a bare
metal surface.
2 Remove the SFP module from its
protective packaging.
3 Locate the transmit (Tx) and the
receive (Rx) markings on the SFP
module.
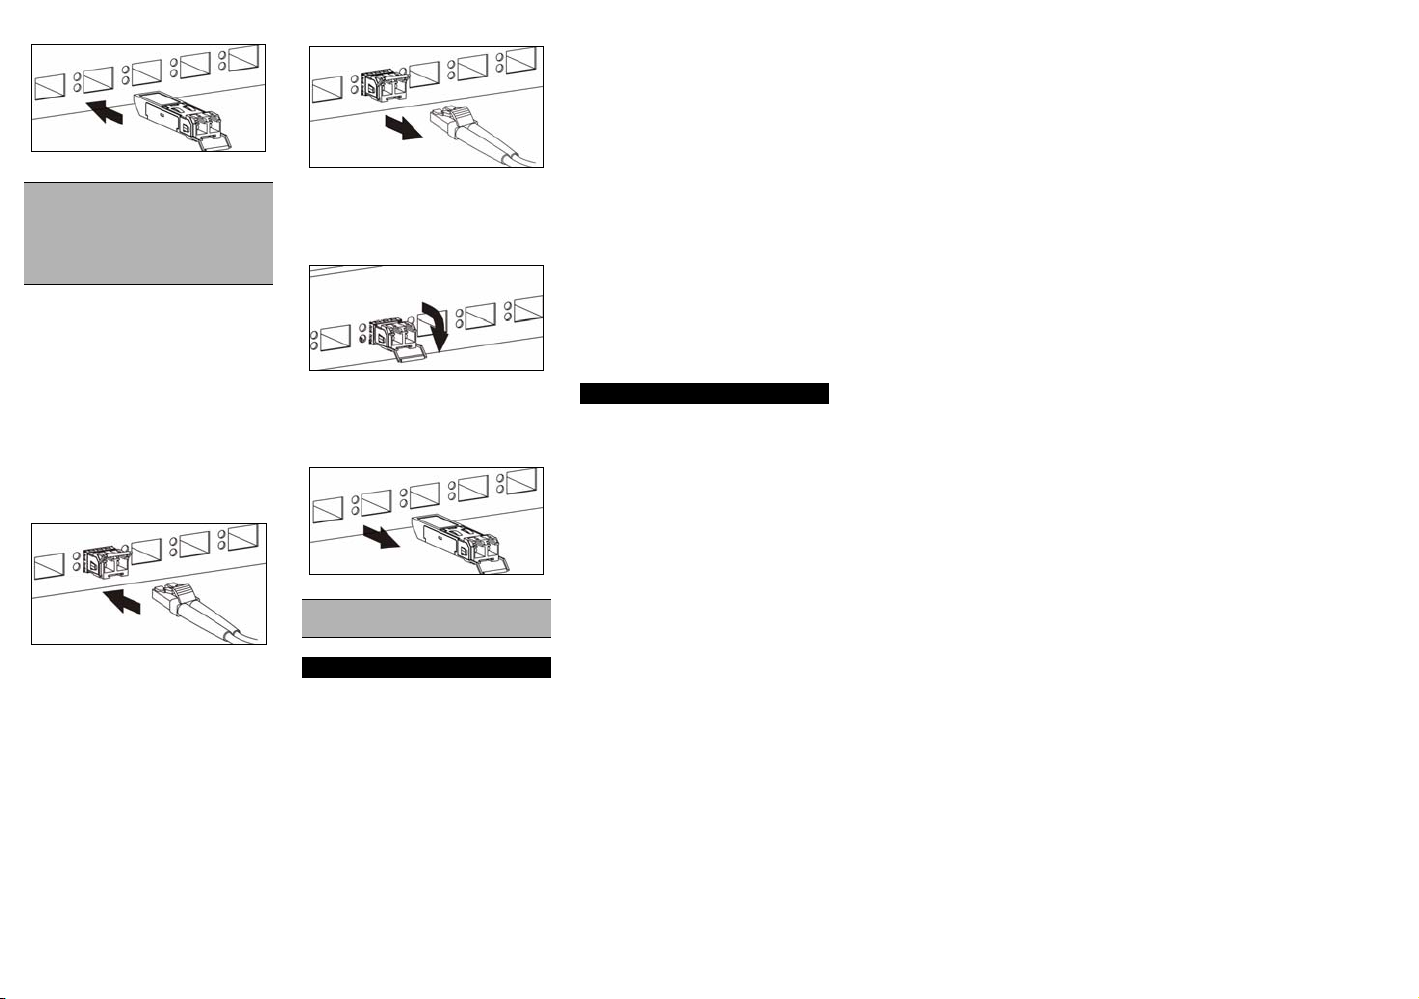
4 Align the SFP module in front of the
slot opening on a device.
5 Insert the SFP module into the slot
until the SFP module snaps into
place
.
Note: SFP module installation
orientation varies depending on your
device. Your SFP module comes with a
mechanism that prevents incorrect
insertion. Do NOT force or twist the SFP
module into a slot.
Connecting a Fiber-optic Cable
Follow the steps described to connect a
fiber-optic cable to the SFP module.
1 Remove the dust plugs from the
SFP module and the cables.
2 Identify the signal transmission
direction of the fiber-optic cable and
the SFP module. Insert one end of
the fiber-optic cable into the SFP
module.
3 Insert the other end of the fiber-
optic cable into a remote device.
Refer to the user’s guide that comes
with your device for SFP module slot
status.
Removing an SFP Module
Follow the steps below to remove an
SFP module.
1 Attach an ESD preventive wrist
strap to your wrist and to a bare
metal surface on the chassis.
2 Disconnect all fiber-optic cables
from the SFP module.
3 Insert the dust plug into the ports on
the SFP module.
4 Pull out the latch and down to
unlock the SFP module.
5 Using your thumb and index finger,
grasp the tabs on both sides of the
module and carefully slide it out of
the slot.
Note: Do NOT force or twist the module
out of a slot.
Copyright
Copyright © 2004 by ZyXEL Communications Corporation.
The contents of this publication may not
be reproduced in any part or as a whole,
transcribed, stored in a retrieval system,
translated into any language, or
transmitted in any form or by any
means, electronic, mechanical,
magnetic, optical, chemical,
photocopying, manual, or otherwise,
without the prior written permission of
ZyXEL Communications Corporation.
Published by ZyXEL Communications
Corporation. All rights reserved.
Disclaimer
ZyXEL does not assume any liability
arising out of the application or use of
any products, or software described
herein. Neither does it convey any
license under its patent rights nor the
patent rights of others. ZyXEL further
reserves the right to make changes in
any products described herein without
notice. This publication is subject to
change without notice.
Trademarks
ZyNOS (ZyXEL Network Operating
System) is a registered trademark of
ZyXEL Communications, Inc. Other
trademarks mentioned in this publication
are used for identification purposes only
and may be properties of their
respective owners.
ZyXEL Limited Warranty
ZyXEL warrants to the original end user
(purchaser) that this product is free from
any defects in materials or workmanship
for a period of up to two (2) years from
the date of purchase. During the
warranty period, and upon proof of
purchase, should the product have
indications of failure due to faulty
workmanship and/or materials, ZyXEL
will, at its discretion, repair or replace
the defective products or components
without charge for either parts or labor,
and to whatever extent it shall deem
necessary to restore the product or
components to proper operating
condition. Any replacement will consist
of a new or re-manufactured functionally
equivalent product of equal value, and
will be solely at the discretion of ZyXEL.
This warranty shall not apply if the
product is modified, misused, tampered
with, damaged by an act of God, or
subjected to abnormal working
conditions.
Note
Repair or replacement, as provided
under this warranty, is the exclusive
remedy of the purchaser. This warranty
is in lieu of all other warranties, express
or implied, including any implied
warranty of merchantability or fitness for
a particular use or purpose. ZyXEL shall
in no event be held liable for indirect or
consequential damages of any kind of
character to the purchaser.
To obtain the services of this warranty,
contact ZyXEL's Service Center for your
Return Material Authorization number
(RMA). Products must be returned
Postage Prepaid. It is recommended
that the unit be insured when shipped.
Any returned products without proof of
purchase or those with an out-dated
warranty will be repaired or replaced (at
the discretion of ZyXEL) and the
customer will be billed for parts and
labor. All repaired or replaced products
will be shipped by ZyXEL to the
corresponding return address, Postage
Paid. This warranty gives you specific
legal rights, and you may also have
other rights that vary from country to
country.
 Loading...