

Page 1

ZyAIR B-1000 v.2
Secure Wireless LAN Access Point
Quick Installation Guide
Version 3.50
July 2003
Page 2

Page 3

ZyAIR B-1000 v.2 Secure Wireless LAN Access Point
Table of Contents
1 Introducing the ZyAIR ................................................................................................................ 4
2 Hardware Connections .............................................................................................................. 4
2.1 Top Panel and Connections...................................................................................................4
2.2 The LED Display.................................................................................................................... 5
3 Set Up Your Computer’s IP Address......................................................................................... 6
3.1 Windows 2000/NT/XP ........................................................................................................... 6
3.2 Testing the Connection to the ZyAIR ..................................................................................... 7
4 Configure the ZyAIR................................................................................................................... 8
4.1 Accessing the ZyAIR via the Web Configurator .................................................................... 8
4.2 Common Screen Command Buttons................................................................................... 10
4.3 Configuring the ZyAIR Using the Wizard............................................................................. 10
5 Key Features ............................................................................................................................. 12
5.1 Wireless LAN Overview.......................................................................................................12
5.2 Output Power Management................................................................................................. 12
5.3 Limit the number of Client Connections .............................................................................. 13
5.4 Configuring Wireless LAN ................................................................................................... 13
5.5 Configuring Roaming........................................................................................................... 15
5.6 Configuring IEEE 802.1x Authentication ............................................................................. 16
5.7 Local User Database and RADIUS Overview ..................................................................... 19
6 Hardware Installation ............................................................................................................... 20
6.1 Attaching Antennas.............................................................................................................. 20
6.2 Hardware Mounting Installation........................................................................................... 20
7 Troubleshooting ....................................................................................................................... 23
3
Page 4
ZyAIR B-1000 v.2 Secure Wireless LAN Access Point
1 Introducing the ZyAIR
The ZyAIR B-1000 v.2 is an IEEE802.11b compliant 11 Mpbs wireless LAN access point. It is suited for
wireless connections to the wired network in the home and small office environment. The key features of
the ZyAIR are configurable output power, limitation of client connections, IEEE 802.1x, WEP data
encryption and MAC address filtering. See your User’s Guide for more details on all ZyAIR features.
2 Hardware Connections
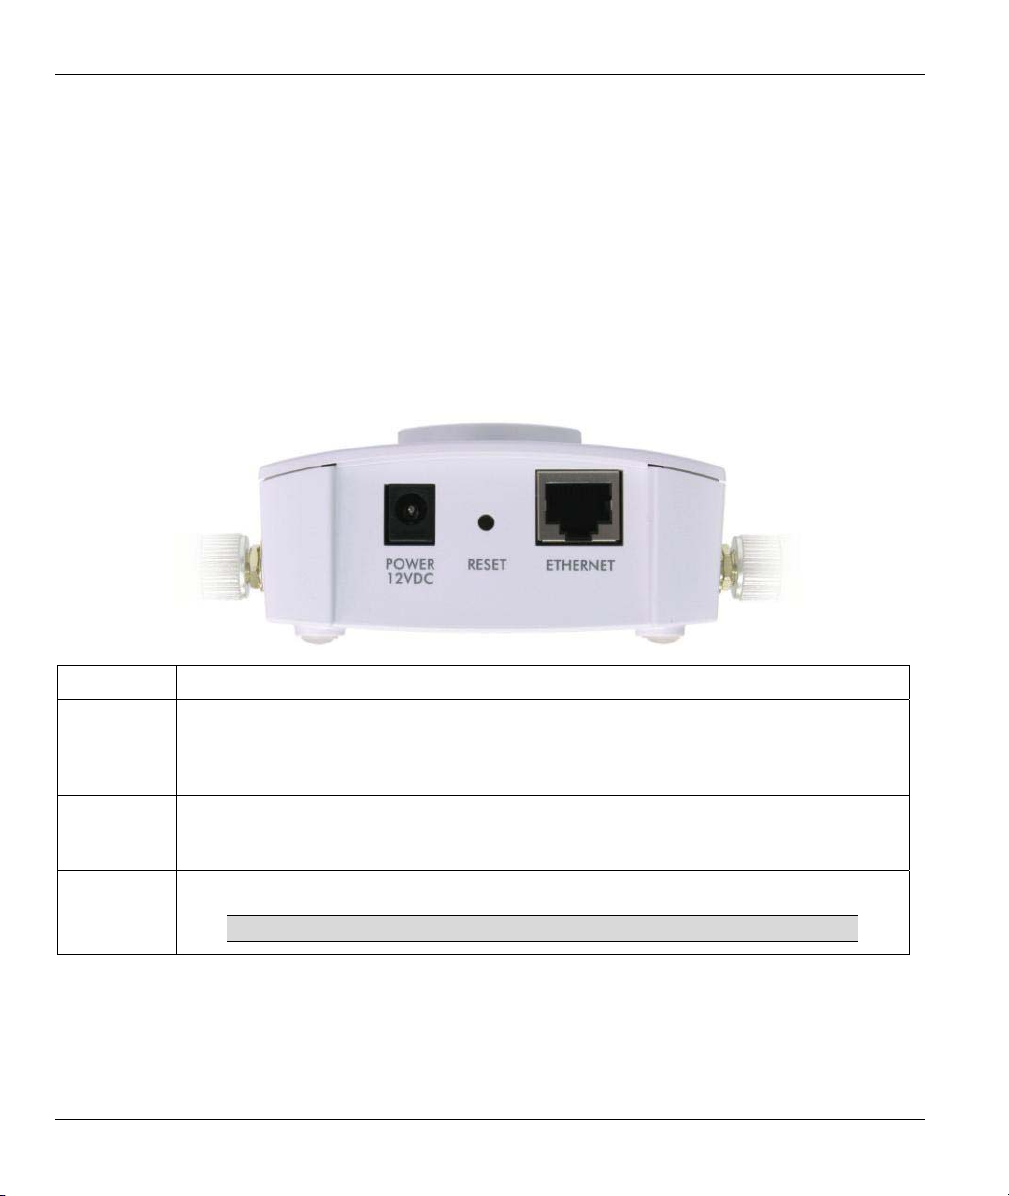
2.1 Top Panel and Connections
LABEL DESCRIPTION
ETHERNET For initial configuration use an Ethernet cable to connect a computer (with an Ethernet
card) to ETHERNET port. The port is auto-negotiating (can connect at 10 or 100Mbps)
and auto-crossover (automatically adjusts to the type of Ethernet cable you use (straightthrough or crossover)).
RESET You only need to use this button if you’ve forgotten the ZyAIR’s password. It returns the
ZyAIR to the factory defaults (password is 1234 and LAN IP address 192.168.1.2). Refer
to the User’s Guide.
POWER
12VDC
Connect the end of the included power adaptor to this power socket.
Use only the included power adaptor.
4
Page 5

ZyAIR B-1000 v.2 Secure Wireless LAN Access Point
2.2 The LED Display
The PWR and the ZyAIR LEDs turn on when the power is connected. The ETHN LED turns on, if the
ETHERNET port is properly connected. See the ZyAIR Front Panel LED Description table for more
information.
LINK LED
Figure 1 ZyAIR Front Panel
5
ZyAIR LED
ETHN LED
PWR LED
Page 6
ZyAIR B-1000 v.2 Secure Wireless LAN Access Point
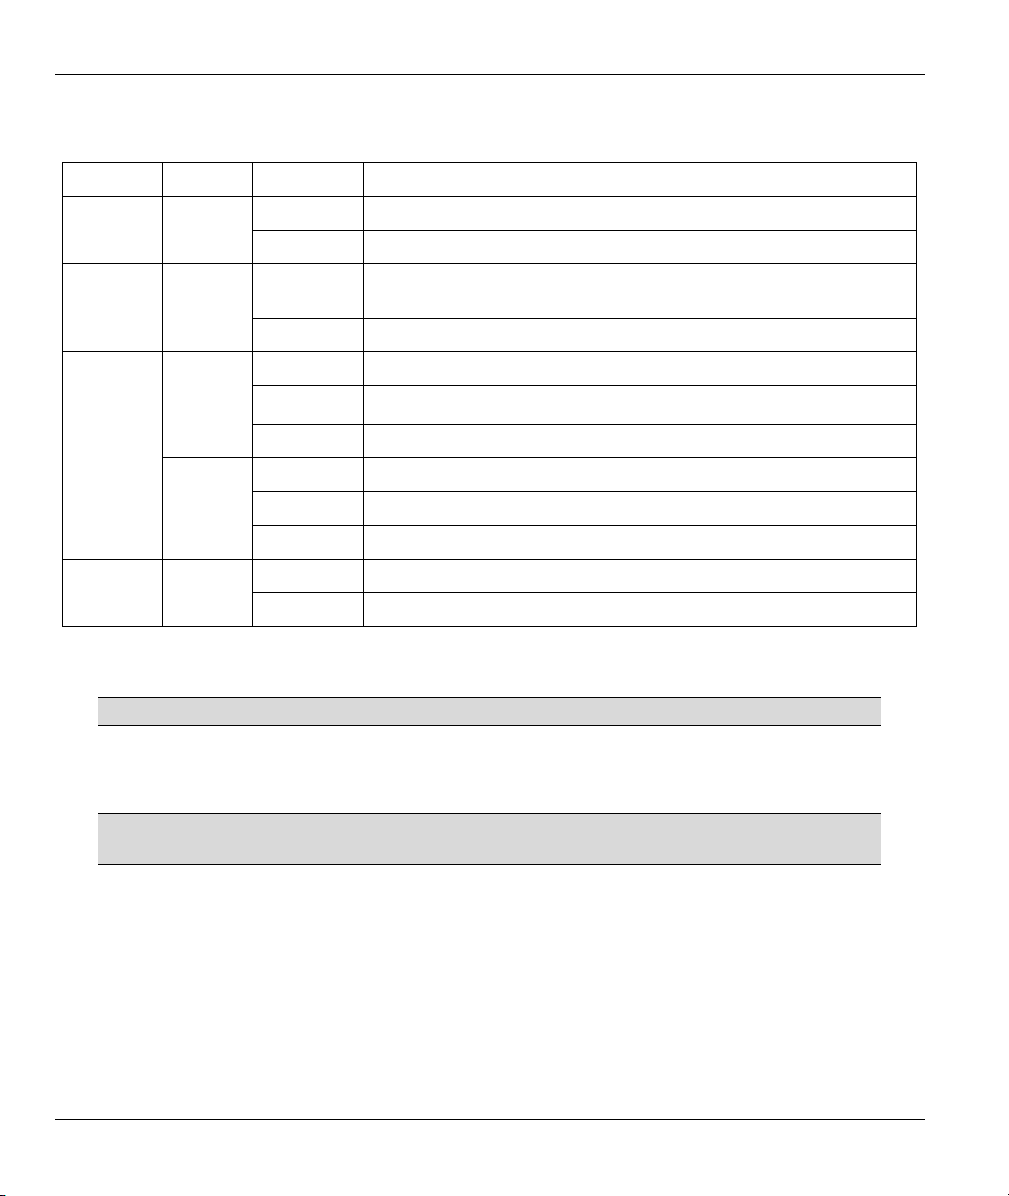
Table 1 ZyAIR Front Panel LED Description
LED COLOR STATUS DESCRIPTION
Blinking The ZyAIR is not ready or rebooting. Link Red
Off The ZyAIR has a successful reboot.
ETHN
Blue
Green
Orange
Blinking
(Breathing)
On The ZyAIR is ready, but is not sending/receiving data.
On The ZyAIR has a successful 10Mbps Ethernet connection.
Blinking The ZyAIR is sending/receiving data.
Off The ZyAIR does not have a 10Mbps Ethernet connection.
On The ZyAIR has a successful 100Mbps Ethernet connection.
Blinking The ZyAIR is sending/receiving data.
Off The ZyAIR does not have a 100Mbps Ethernet connection.
On The ZyAIR is receiving power. PWR Green
Off The ZyAIR is not receiving power.
The ZyAIR is sending/receiving data through the wireless LAN. ZyAIR
To access the ZyAIR, configure your computer’s IP address and subnet mask to be in the same range as the
ZyAIR’s.
The default IP address of the ZyAIR is 192.168.1.2.
3 Set Up Your Computer’s IP Address
Skip this section if your computer’s IP address is already in the range of
192.168.1.3 ~ 192.168.1.254 with subnet mask 255.255.255.0.
Your computer must have a network card and TCP/IP installed. TCP/IP should already be installed on
computers using Windows NT/2000/XP, Macintosh OS 7 and later operating systems. Refer to the Setting
Up Your Computer’s IP Address appendix in the User’s Guide for other operating systems.
3.1 Windows 2000/NT/XP
1. In Windows XP, click start, Control Panel. In Windows 2000/NT, click Start, Settings,
Control Panel.
6
Page 7
ZyAIR B-1000 v.2 Secure Wireless LAN Access Point
2. In Windows XP, click Network Connections.
In Windows 2000/NT, click Network and Dial-up Connections.
3. Right-click Local Area Connection and then click Properties.
4. Select Internet Protocol (TCP/IP) (under the General tab in Win XP) and click Properties.
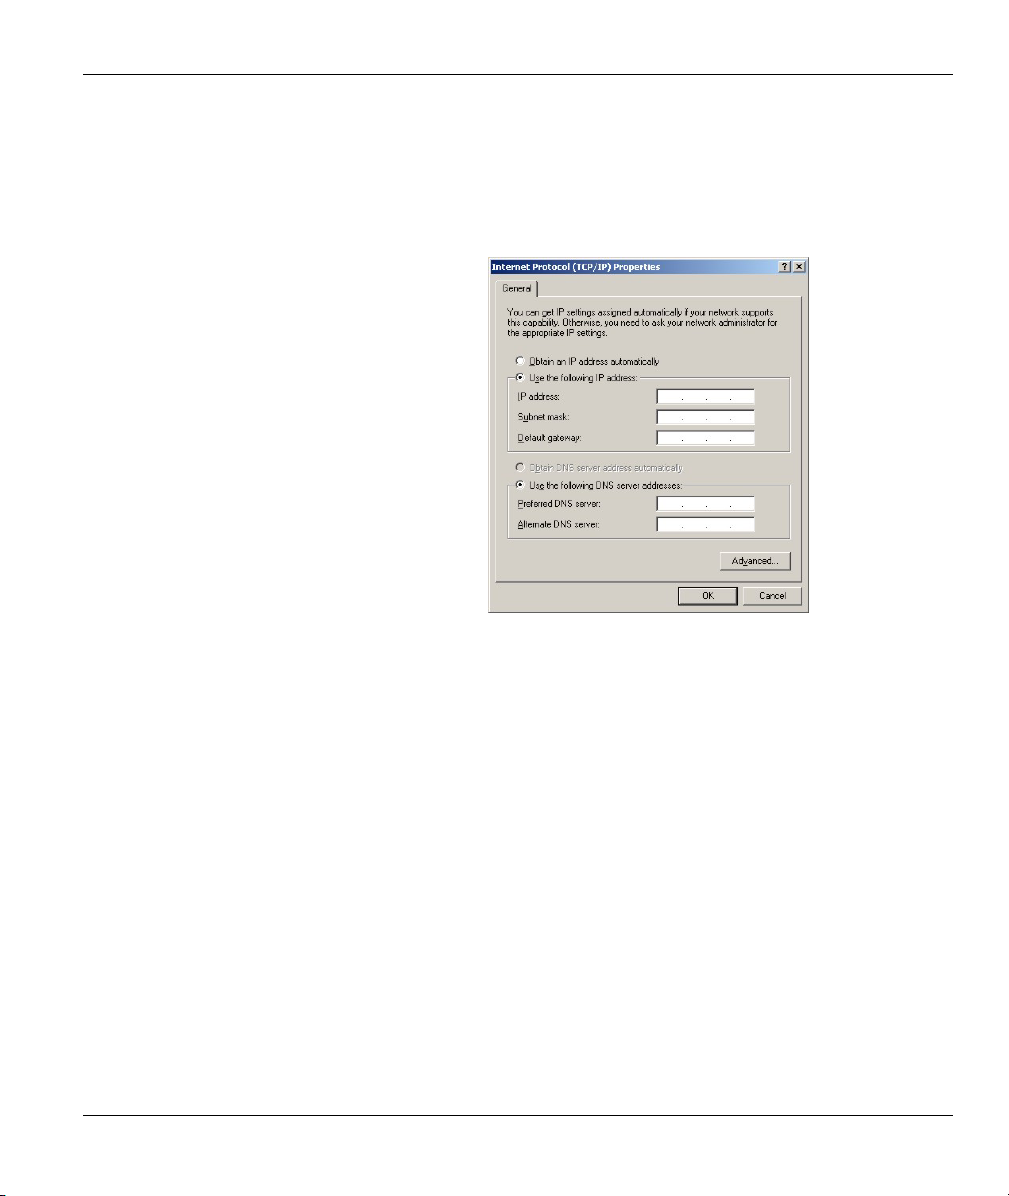
5. The Internet Protocol TCP/IP Properties
screen opens (the General tab in
Windows XP).
Configure your computer to use a static IP
address, select Use the following IP
Address and fill in the IP address
(192.168.1.3 to 192.168.1.254) and
Subnet mask (255.255.255.0) fields.
6. Leave the Preferred DNS sever and Alternate DNS server fields blank if you do not know the
IP address(es) of the DNS server.
7. Click OK to close the Internet Protocol (TCP/IP) Properties window.
8. Click OK to close the Local Area Connection Properties window.
3.2 Testing the Connection to the ZyAIR
1. Click Start, (All) Programs, Accessories and then Command Prompt.
2. In the Command Prompt window, type "ping 192.168.1.2” followed by a space and the IP address of
the ZyAIR (192.168.1.2 is the default).
7
Page 8
ZyAIR B-1000 v.2 Secure Wireless LAN Access Point
3. Press ENTER. The following screen displays.
C:\>ping 192.168.1.2
Pinging 192.168.1.2 with 32 bytes of data:
Reply from 192.168.1.2: bytes=32 time=10ms TTL=254
Reply from 192.168.1.2: bytes=32 time<10ms TTL=254
Reply from 192.168.1.2: bytes=32 time<10ms TTL=254
Reply from 192.168.1.2: bytes=32 time<10ms TTL=254
Ping statistics for 192.168.1.2:
Packets: Sent = 4, Received = 4, Lost = 0 (0% loss),
Approximate round trip times in milli-seconds:
Minimum = 0ms, Maximum = 10ms, Average = 2ms
C:\>
Your computer can now communicate with the ZyAIR via the ETHERNET port.
4 Configure the ZyAIR
The Compact Guide shows you how to use the web configurator Wizard and
introduces the ZyAIR’s key features. See your User’s Guide for configuration
details and background information on all ZyAIR features using the SMT (System
Management Terminal) and web configurator.
4.1 Accessing the ZyAIR via the Web Configurator
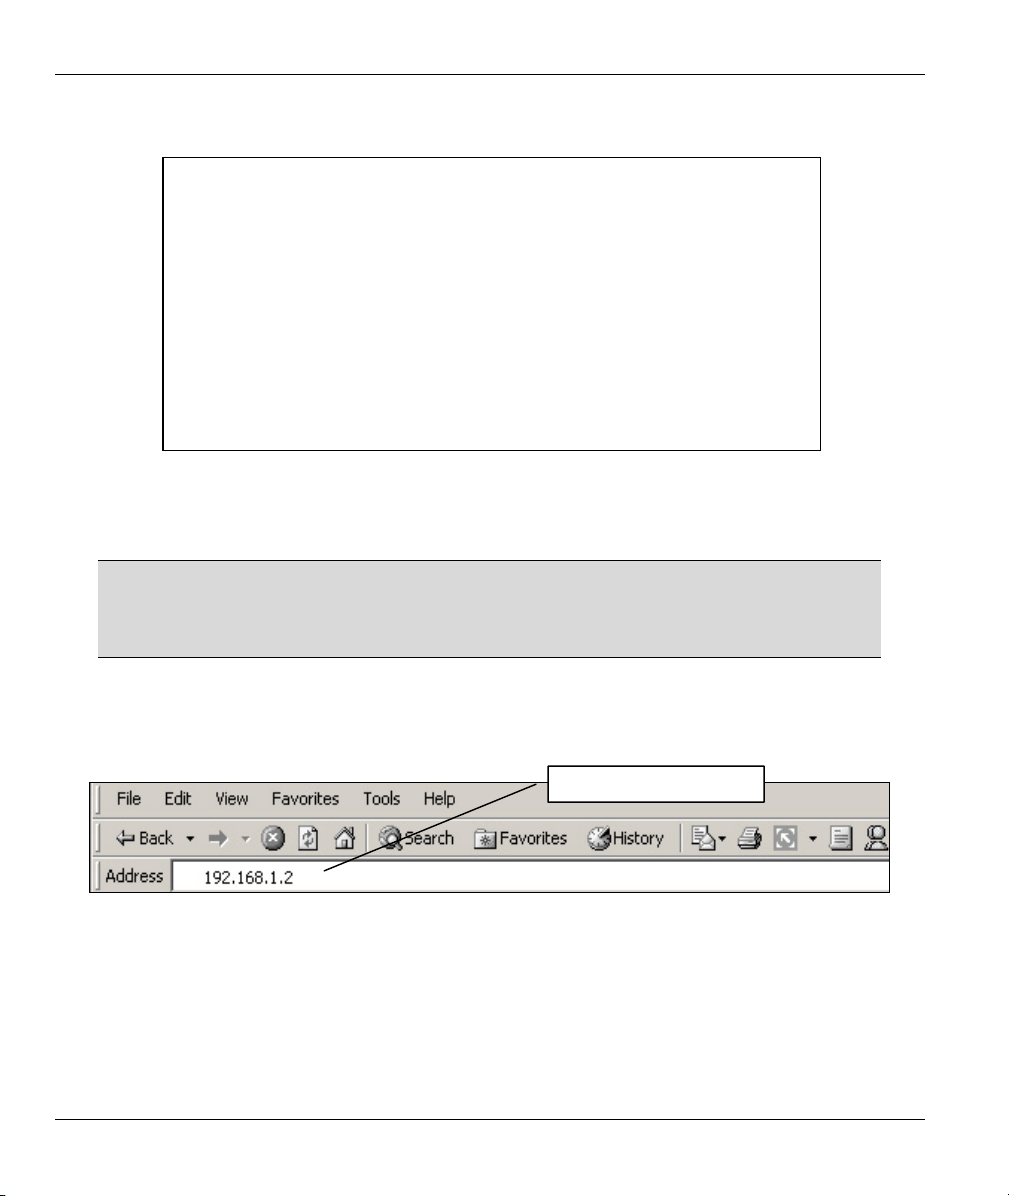
1. Launch your web browser. Enter “192.168.1.2” as the web site address.
8
Default ZyAIR IP address.
Page 9

ZyAIR B-1000 v.2 Secure Wireless LAN Access Point
2. The default password (“1234”) is already in the password field (in non-readable format). Click
Login to proceed to a screen asking you to change your password. Click Reset to revert to the
default password in the password field.
Default password.
3. It is highly recommended you change the default password! Enter a new password, retype it to
confirm and click Apply; alternatively click Ignore to proceed to the MAIN MENU screen if you
do not want to change the password now.
Change default
password.
9
Page 10

ZyAIR B-1000 v.2 Secure Wireless LAN Access Point
4. You should now see the web configurator MAIN MENU screen.
Click WIZARD SETUP to help
you configure your ZyAIR to
set up a wireless network.
The ZyAIR automatically times out after five minutes (default) of inactivity.
Simply log back into the ZyAIR if this happens.
4.2 Common Screen Command Buttons
The following table shows common command buttons found on many web configurator screens.
Back
Apply
Reset
Click Back to return to the previous screen.
Click Apply to save your changes back to the ZyAIR.
Click Reset to begin configuring this screen afresh.
4.3 Configuring the ZyAIR Using the Wizard
The wizard consists of a series of screens to help you configure your ZyAIR for wireless stations to access
your wired LAN. Refer to your User’s Guide for more background information.
10
Page 11

ZyAIR B-1000 v.2 Secure Wireless LAN Access Point
1. Click WIZARD SETUP in the main menu to display the first wizard screen shown next.
System Name is a unique name to
identify the ZyAIR in the Ethernet
network. Enter a descriptive name.
Leave the Domain Name entry
blank and click Next to continue.
2.
Use the second wizard screen to set up the wireless LAN.
ESSID is a unique name to identify
the ZyAIR in the wireless LAN.
Enter a descriptive name.
A channel is the range of radio
frequencies used by IEEE 802.11b
wireless devices.
Click Scan to have the ZyAIR
automatically select a channel. The
selected channel automatically
appears in the Channel ID field.
WEP (Wired Equivalent Privacy) encrypts data frames before transmitting over the wireless network. Select either 64-bit
or 128-bit from the WEP Encryption drop-down list box to activate WEP encryption. Select Disable to turn off WEP
data encryption.
Select ASCII or HEX WEP key input method and then follow the on-screen instructions to set up the WEP keys.
Click Next to continue.
The wireless stations and ZyAIR must use the same ESSID, channel ID and WEP
encryption key (if WEP is enabled) for wireless communication.
11
Page 12

ZyAIR B-1000 v.2 Secure Wireless LAN Access Point
3. Fill in the fields in the last wizard configuration screen.
Select Get automatically to have the
ZyAIR obtain an IP address from a DHCP
server.
You must know the IP address assigned to
the ZyAIR (by the DHCP server) to access
the ZyAIR again.
Select Use fixed IP address to give the
ZyAIR a fixed, unique IP address. Enter a
subnet mask appropriate to your network
and the gateway IP address if applicable.
Click Finish.
If you changed the ZyAIR’s IP address, you must use the new IP address if you
want to access the web configurator again.
4. Change the wireless parameter settings in the wireless stations to match those of the ZyAIR. Refer
to the user’s guide for your wireless adapter.
5 Key Features
This section shows you how to configure some of the advanced features of the ZyAIR.
Refer to your User’s Guide for more information on ZyAIR configurations.
5.1 Wireless LAN Overview
This section introduces the wireless LAN and some basic configurations. A wireless LAN can be as simple
as two computers with wireless adapters communicating in a peer-to-peer network or as complex as a
number of computers with wireless adapters communicating through access points (APs) which bridge
network traffic to the wired LAN.
5.2 Output Power Management
Output Power Management is the ability to set the level of output power.
There may be interference or difficulty with channel assignment when there is a high density of APs within
a coverage area. In this case you can lower the output power of each access point, thus enabling you to
place access points closer together.
12
Page 13

ZyAIR B-1000 v.2 Secure Wireless LAN Access Point
5.3 Limit the number of Client Connections
You may set a maximum number of wireless stations that may connect to the ZyAIR. This may be
necessary if for example, there is interference or difficulty with channel assignment due to a high density of
APs within a coverage area.
5.4 Configuring Wireless LAN
Click ADVANCED and then WIRELESS to open the Wireless screen.
Figure 2 Wireless LAN
13
Page 14

ZyAIR B-1000 v.2 Secure Wireless LAN Access Point
The following table describes the fields in this screen.
Table 2 Wireless LAN
LABEL DESCRIPTION
ESSID ESSID (Extended Service Set ID) is a unique name to identify the ZyAIR in the wireless
LAN. Enter a descriptive name (up to 32 characters).
Hide ESSID Select this check box to hide the ESSID in the outgoing beacon frame so a station
cannot obtain the ESSID through passive scanning.
Choose
Channel ID
Scan Click this button to have the ZyAIR automatically scan for and select a channel with the
RTS /CTS
Threshold
Fragmentation
Threshold
WEP
Encryption
Authentication
Method
Key 1 to Key
4
Adjacent access points (APs) should use a channel different from what you selected to
reduce interference. The wireless stations connected to the ZyAIR must use the same
channel you selected.
least interference.
(Request To Send) The threshold (number of bytes) for enabling RTS/CTS handshake.
Data with its frame size larger than this value will perform the RTS/CTS handshake.
Setting this attribute to be larger than the maximum MSDU (MAC service data unit) size
turns off the RTS/CTS handshake. Setting this attribute to zero turns on the RTS/CTS
handshake. Enter a value between 0 and 2432.
The threshold (number of bytes) for the fragmentation boundary for directed messages.
It is the maximum data fragment size that can be sent. Enter a value between 256 and
2432.
WEP (Wired Equivalent Privacy) provides data encryption to prevent unauthorized
wireless stations from accessing data transmitted over the wireless network.
Select Disable to allow wireless stations to communicate with the access points without
any data encryption.
Select 64-bit WEP or 128-bit WEP to enable data encryption.
Select Auto, Open System or Shared Key from the drop-down list box.
If you chose 64-bit WEP in the WEP Encryption field, then enter any 5 characters
(ASCII string) or 10 hexadecimal characters ("0-9", "A-F") preceded by 0x for each key.
If you chose 128-bit WEP in the WEP Encryption field, then enter 13 characters
(ASCII string) or 26 hexadecimal characters ("0-9", "A-F") preceded by 0x for each key.
There are four data encryption keys to secure your data from eavesdropping by
unauthorized wireless users. The values for the keys must be set up exactly the same
on the access points as they are on the wireless stations.
The preceding “0x” is entered automatically. You must configure all four keys, but only
one key can be activated at any one time. The default key is key 1.
14
Page 15

ZyAIR B-1000 v.2 Secure Wireless LAN Access Point
Table 2 Wireless LAN
LABEL DESCRIPTION
Enable IntraBSS Traffic
Enable
Breathing
LED
Number of
Wireless
Stations
Allowed
Output Power Set the output power of the ZyAIR in this field.
Intra-BSS traffic is traffic between wireless stations in the same BSS. Select this check
box to enable Intra-BSS traffic. If two wireless stations connect to the Internet via the
ZyAIR, then when Intra-BSS is enabled, both can access the wired network and
communicate with each other. When Intra-BSS is disabled, both can still access the
wired network but cannot communicate with each other.
Select this check box to enable the Breathing LED, also known as the ZyAIR LED.
The blue ZyAIR LED is on (dimmed) when the ZyAIR is on and blinks brightly (or
breaths) when data is being transmitted to/from its wireless stations. Clear the check
box to turn this LED off even when the ZyAIR is on and data is being
transmitted/received.
Use this field to set a maximum number of wireless stations that may connect to the
ZyAIR.
Enter the number (from 1 to 32) of wireless stations allowed.
The options are 11dBm (50mW), 13dBm (32mW), 15dBm (20mW) or 17dBm
(12.6mW).
5.5 Configuring Roaming
In a network environment with multiple access points, wireless stations are able to switch from one access
point to another as they move between the coverage areas. This is roaming. As the wireless station moves
from place to place, it is responsible for choosing the most appropriate access point depending on the signal
strength, network utilization or other factors.
If the roaming feature is not enabled on the access points, information is not communicated between the
access points when a wireless station moves between coverage areas. The wireless station may not be able
to communicate with other wireless stations on the network and vice versa.
To enable roaming on your ZyAIR, click ADVANCED, WIRELESS and then the Roaming tab. The
screen appears as shown.
15
Page 16

ZyAIR B-1000 v.2 Secure Wireless LAN Access Point
Figure 3 Roaming
The following table describes the fields in this screen.
Table 3 Roaming
LABEL DESCRIPTION
Active
Select Yes from the drop-down list box to enable roaming on the ZyAIR if you have two
or more ZyAIRs on the same subnet.
All APs on the same subnet and the wireless stations must have
the same ESSID to allow roaming.
Port Enter the port number to communicate roaming information between APs. The port
number must be the same on all APs. The default is 16290. Make sure this port is not
used by other services.
5.6 Configuring IEEE 802.1x Authentication
The IEEE 802.1x standard outlines enhanced security methods for both the authentication of wireless
stations and encryption key management. Authentication can be done using the local user database internal
to the ZyAIR (authenticate up to 32 users) or an external RADIUS server for an unlimited number of users.
To change your ZyAIR’s authentication settings, click ADVANCED, WIRELESS and then the 802.1x
tab. The screen appears as shown.
16
Page 17

ZyAIR B-1000 v.2 Secure Wireless LAN Access Point
Figure 4 Wireless 802.1x Authentication
The following table describes the fields in this screen.
Table 4 Wireless 802.1x Authentication
LABEL DESCRIPTION
Wireless Port
Control
ReAuthentication
Timer
(in seconds)
To control wireless stations access to the wired network, select a control method
from the drop-down list box. Choose from No Authentication Required,
Authentication Required and No Access Allowed.
No Authentication Required allows all wireless stations access to the wired
network without entering usernames and passwords. This is the default setting.
Authentication Required means that all wireless stations have to enter usernames
and passwords before access to the wired network is allowed.
No Access Allowed blocks all wireless stations access to the wired network.
Specify how often wireless stations have to reenter usernames and passwords in
order to stay connected. This field is activated only when you select Authentication
Required in the Wireless Port Control field.
Enter a time interval between 10 and 9999 seconds. The default time interval is
1800 seconds (30 minutes).
Note: If wireless authentication is done using a RADIUS server, the reauthentication
timer on the RADIUS server has priority.
17
Page 18

ZyAIR B-1000 v.2 Secure Wireless LAN Access Point
Table 4 Wireless 802.1x Authentication
LABEL DESCRIPTION
Idle Timeout The ZyAIR automatically disconnects a wireless station from the wired network after
a period of inactivity. The wireless station needs to enter the username and
password again before access to the wired network is allowed.
This field is activated only when you select Authentication Required in the
Wireless Port Control field. The default time interval is 3600 seconds (or 1 hour).
Authentication
Databases
This field is activated only when you select Authentication Required in the
Wireless Port Control field.
The authentication database contains wireless station login information. The local
user database is the built-in database on the ZyAIR. The RADIUS is an external
server. Use this drop-down list box to select which database the ZyAIR should use
(first) to authenticate a wireless station.
Before you specify the priority, make sure you have set up the corresponding
database correctly first.
Select Local User Database Only to have the ZyAIR just check the built-in user
database on the ZyAIR for a wireless station's username and password.
Select RADIUS Only to have the ZyAIR just check the user database on the
specified RADIUS server for a wireless station's username and password.
Select Local first, then RADIUS to have the ZyAIR first check the user database
on the ZyAIR for a wireless station's username and password. If the user name is
not found, the ZyAIR then checks the user database on the specified RADIUS
server.
Select RADIUS first, then Local to have the ZyAIR first check the user database
on the specified RADIUS server for a wireless station's username and password. If
the ZyAIR cannot reach RADIUS, the ZyAIR then checks the local user database
on the ZyAIR. When the user name is not found or password does not match in the
RADIUS server, the ZyAIR will not check the local user database and the
authentication fails.
18
Page 19

ZyAIR B-1000 v.2 Secure Wireless LAN Access Point
Table 4 Wireless 802.1x Authentication
LABEL DESCRIPTION
Dynamic WEP
Key Exchange
This field is activated only when you select Authentication Required in the
Wireless Port Control field. Also set the Authentication Databases field to
RADIUS Only. Local user database may not be used.
Select Disable to allow wireless stations to communicate with the access points
without using Dynamic WEP Key Exchange.
Select 64-bit WEP or 128-bit WEP to enable data encryption.
Up to 32 stations can access the ZyAIR when you configure Dynamic WEP Key
Exchange.
5.7 Local User Database and RADIUS Overview
EAP is an authentication protocol designed originally to run over PPP (Point-to-Point Protocol) frame in
order to support multiple types of user authentication. RADIUS is based on a client-sever model that
supports authentication, authorization and accounting. The access point (ZyAIR) is the client and the server
is the RADIUS server. RADIUS is a simple package exchange in which your ZyAIR acts as a message
relay between the wireless station and the network RADIUS server. In order to ensure network security, the
access point and the RADIUS server use a shared secret key, which is a password, they both know. The key
is not sent over the network. In addition to the shared key, password information exchanged is also
encrypted to protect the network from unauthorized access. By using EAP to interact with an EAPcompatible RADIUS server, the access point helps a wireless station and a RADIUS server to perform
mutual authentication.
To authenticate wireless users without interacting with a network RADIUS server, you can store user
profiles locally. To change your ZyAIR’s local user list, click ADVANCED, WIRELESS and then the
Local User Database tab.
If you do enable the EAP authentication, you need to specify the local user database or the external sever
for remote user authentication. To set up your ZyAIR’s local user database, click ADVANCED,
WIRELESS and then the Local User Database tab. To set up your ZyAIR’s RADIUS server settings,
click WIRELESS, then the RADIUS tab.
19
Page 20

ZyAIR B-1000 v.2 Secure Wireless LAN Access Point
6 Hardware Installation
6.1 Attaching Antennas
Follow the steps below to connect the supplied antennas.
1. Locate the antenna connectors on the sides of your ZyAIR.
2. Screw the antennas clockwise onto the antenna connectors. The antennas should be perpendicular
to the ground and parallel to each other.
Make sure the antennas are securely screwed onto the antenna connectors.
Figure 5 Attaching Antennas
6.2 Hardware Mounting Installation
In general, the best location for the access point is at the center of your intended wireless coverage area. For
better performance, mount the ZyAIR high up free of obstructions.
Free-standing
Place your ZyAIR on a flat, level surface (on a desk or shelf) that is strong enough to support the weight of
the ZyAIR with connection cables.
Wall-mounted
Follow the steps to attach your ZyAIR to a wall.
20
Page 21

ZyAIR B-1000 v.2 Secure Wireless LAN Access Point
1. Locate a high position on the wall that is free of obstructions.
2. Connect two screws (not included) in the wall 60mm apart. You can use the diagram at the end of
this guide to help you mark the screw holes correctly. Use screws with 6mm ~ 8mm (0.24" ~
0.31") wide heads. Do not screw the screws all the way in to the wall. Leave a small gap between
the head of the screw and the wall. The gap must be big enough for the screw heads to slide into
the screw slots and the connection cables to run down the back of the ZyAIR.
Make sure the screws are securely fixed to the wall and strong enough to hold
the weight of the ZyAIR with the connection cables.
3. Adjust the cables.
a. Run the connection cables down the back of the ZyAIR as shown in the following figure.
OR:
b. Run the connection cables upward and along the edge of the ceiling.
Figure 6 Run the Cables Down the Back of the ZyAIR
21
Page 22

ZyAIR B-1000 v.2 Secure Wireless LAN Access Point
Figure 7 Run the Cables Upward
4. Align the holes on the back of the ZyAIR with the screws on the wall. Hang the ZyAIR on the
screws.
Figure 8 Wall Mounting the ZyAIR
22
Page 23

ZyAIR B-1000 v.2 Secure Wireless LAN Access Point
7 Troubleshooting
PROBLEM CORRECTIVE ACTION
The PWR LED is
off.
Unplug the power adaptor and plug it in again. If the error persists, you may have a
The ETHN LED is
off.
I cannot access
the web
configurator.
I cannot ping any
computer on the
wireless LAN.
Make sure you are using the correct power adaptor and the power adaptor is
plugged into an appropriate power supply.
hardware problem. In this case, you should contact your vendor.
Check the cable connection to the ZyAIR ETHERNET port.
Make sure your computer’s network card is working properly.
Make sure the IP addresses and subnet masks of the ZyAIR and the computer are
in the same IP address range. (For example, if the ZyAIR is using the default IP
address and subnet mask, check that the IP address of the computer is in the range
192.168.1.3 ~192.168.1.254 and the subnet mask is 255.255.255.0). Refer to the
Setting Up Your Computer’s IP Address section.
If you changed the ZyAIR default IP address, then enter the new IP address as the
web site address.
The default password is “1234”. If you have changed the password and have now
forgotten it, you will need to reset the ZyAIR. Refer to the User’s Guide for how to
use the RESET button.
If the ETHN LED is off, check the cables between the ZyAIR and your computer or
hub.
Verify that the IP address and the subnet mask of the ZyAIR and the computers are
in the same range.
23
Page 24

Page 25

ZyAIR B-1000 v.2 Secure Wireless LAN Access Point
Cut out this page to make the points on the wall for the screws.
60 mm
25
 Loading...