

Zyxel WRE6605 User's Guide
Default Login Details
User’s Guide
WRE6605
AC1200 Dual Band WiFi Extender
LAN IP Address http://192.168.1.2
Password Press Smart Push Button
for two seconds
Version 1.0 Edition 1, 08/2020
Copyright © 2020 Zyxel Communications Corporation

IMPORTANT!
READ CAREFULLY BEFORE USE.
KEEP THIS GUIDE FOR FUTURE REFERENCE.
Screenshots and graphics in this book may differ slightly from what you see due to differences in release
versions or your computer operating system. Every effort has been made to ensure that the information
in this manual is accurate.
Related Documentation
•Quick Start Guide
The Quick Start Guide shows how to connect the managed device.
•Easy Link App
The Easy Link app helps you install the WRE6605, configure its settings and check signal strength.
•More Information
Go to support.zyxel.com to find other information on the WRE6605
.
WRE6605 User’s Guide
2
Document Conventions
Warnings and Notes
These are how warnings and notes are shown in this guide.
Warnings tell you about things that could harm you or your device.
Note: Notes tell you other important information (for example, other things you may need to
configure or helpful tips) or recommendations.
Syntax Conventions
• This device may be referred to as the “WRE6605” in this guide.
• Product labels, screen names, field labels and field choices are all in bold font.
Icons Used in Figures
Figures in this user guide may use the following generic icons. The WRE6605 icon is not an exact
representation of your device.
WRE6605 / Generic AP Generic Router Generic Switch
WRE6605 User’s Guide
3

Contents Overview
Contents Overview
User’s Guide ........................................................................................................................................7
Introduction ............................................................................................................................................. 8
The Web Configurator ......................................................................................................................... 13
WRE6605 Modes ................................................................................................................................... 24
Repeater Mode .................................................................................................................................... 26
Access Point Mode .............................................................................................................................. 33
Troubleshooting .................................................................................................................................... 37
WRE6605 User’s Guide
4

Table of Contents
Table of Contents
Document Conventions .................................................................. ....................................................3
Contents Overview .............................................................................................................................4
Table of Contents.................................................................................................................................5
Part I: User’s Guide............................................................................................ 7
Chapter 1
Introduction ..........................................................................................................................................8
1.1 Overview ........................................................................................................................................... 8
1.2 Ways to Manage the WRE6605 ....................................................................................................... 8
1.3 Securing the WRE6605 ...................................................................................................................... 9
1.4 Resetting the WRE6605 ..................................................................................................................... 9
1.5 Hardware ......................................................................................................................................... 10
1.5.1 Front Panel ............................................................................................................................. 10
1.5.2 Smart Push Button ................................................................................................................. 11
1.5.3 Bottom Panel ......................................................................................................................... 12
Chapter 2
The Web Configurator........................................................................................................................13
2.1 Overview ......................................................................................................................................... 13
2.2 Accessing the Web Configurator ................................................................................................. 13
2.2.1 Web Configurator Languages ............................................................................................ 13
2.2.2 Login Screen .......................................................................................................................... 14
2.2.3 Password Screen ................................................................................................................... 14
2.2.4 Main Screen ........................................................................................................................... 16
2.3 Navigating the Web Configurator ............................................................................................... 17
2.3.1 Title Bar ................................................................................................................................... 17
2.4 Technical Reference ...................................................................................................................... 18
2.4.1 Set Up your Computer’s IP Address in Windows ................................................................ 18
2.4.2 Find and Access your WRE6605 Using FindMe ................................................................... 20
2.4.3 Change a Web Browser Language .................................................................................... 22
Chapter 3
WRE6605 Modes.................................................................................................................................24
3.1 Overview ......................................................................................................................................... 24
3.1.1 System Operation Modes .................................................................................................... 24
WRE6605 User’s Guide
5

Table of Contents
Chapter 4
Repeater Mode..................................................................................................................................26
4.1 Overview ......................................................................................................................................... 26
4.2 What You Can Do .......................................................................................................................... 26
4.3 Setting your WRE6605 to Repeater Mode ................................................................................... 27
4.3.1 Repeater Mode Main Screen .............................................................................................. 27
4.4 Connecting the WRE6605 to an AP .............................................................................................. 29
4.4.1 WRE6605 SSID Behavior ......................................................................................................... 30
Chapter 5
Access Point Mode............................................................................................................................33
5.1 Overview ......................................................................................................................................... 33
5.2 What You Can Do .......................................................................................................................... 33
5.3 Set your WRE6605 to AP Mode ...................................................................................................... 33
5.3.1 AP Mode Main Screen ......................................................................................................... 34
5.4 Configure the WRE6605 Wireless Settings ....................................................................................35
Chapter 6
Troubleshooting..................................................................................................................................37
6.1 Power, Hardware Connections, and LEDs ................................................................................... 37
6.2 WRE6605 Access and Login .......................................................................................................... 38
6.3 Internet Access ............................................................................................................................... 39
6.4 Resetting the WRE6605 to Its Factory Defaults ............................................................................ 40
6.5 Wireless Problems ............................................................................................................................ 40
Appendix A Customer Support ....................................................................................................... 41
Appendix B Legal Information......................................................................................................... 47
Index...................................................................................................................................................54
WRE6605 User’s Guide
6

PART I
User’s Guide
7

1.1 Overview
WRE
The WRE6605 allows you to easily extend existing 2.4G, 5G, or dual band wireless networks. Simply plug
the WRE6605 directly into a power outlet and the LED signal strength indicator allows you to determine
the ideal installation location. The one-click Smart Push Button (Smart Push Button on page 11) lets you
set up secure, simultaneous 2.4G or 5G uplink connections to your wireless router or AP and once this is
completed, set up secure simultaneous 2.4G or 5G downlink connections to your wireless clients. You
could use the 2.4G band for regular Internet surfing and downloading while using the 5G band for time
sensitive traffic, such as high-definition video streaming, and big size file transfers.
As shown in the figure below you can set up your WRE6605 to work as a repeater or an access point.
Figure 1 Repeater Application
CHAPTER 1
Introduction
Your can create the following connections using the WRE6605:
• LAN. You can connect network devices via the Ethernet port of the WRE6605 so that they can
communicate with each other and access the Internet.
• WLAN. Wireless clients can connect to the WRE6605 to access network resources and the Internet.
1.2 Ways to Manage the WRE6605
Use any of the following methods to manage the WRE6605.
• Smart Push Button. You can use the Smart Push Button to set up a connection between your wireless
router or AP and your WRE6605, and between the WRE6605 and your wireless clients.
WRE6605 User’s Guide
8

Chapter 1 Introduction
• Easy Link App. Use Easy Link to learn how to install your WRE6605 in AP mode and/or Repeater mode,
check your signal strength and modify wireless settings. You can download the Easy Link app from the
Google Play Store or Apple store. Use this method when you are connecting the WRE6605 (in
repeater mode) to a wireless router or AP that doesn't support WPS. Scan the QR code below to
download the Easy Link app.
Note: WPS allows you to quickly set up a WiFi network with strong security, without having to
configure security settings manually. Each WPS connection works between two
devices. Both devices must support WPS (check each device’s documentation to
make sure).
Figure 2 Easy Link QR Code
• Web Configurator. Use a supported web browser to manage the WRE6605. You can also use this
method when you are connecting the WRE6605 (in repeater mode) to a wireless router or AP that
doesn't support WPS.
1.3 Securing the WRE6605
Do the following things regularly to make the WRE6605 more secure and to manage the WRE6605 more
effectively.
• Change the password. Use a password that’s not easy to guess and that consists of different types of
characters, such as numbers and letters.
• Write down the password and put it in a safe place.
1.4 Resetting the WRE6605
If you forget your password or IP address, or you cannot access the Web Configurator, you will need to
use the Smart Push Button at the bottom of the WRE6605 to reload the factory-default configuration file.
This means that you will lose all configurations that you had previously saved, the password will be reset,
and the IP address will be reset to “192.168.1.2”. Follow these steps to reset the WRE6605:
• Make sure the power LED is on.
• Press and hold the Smart Push Button for more than 10 seconds.
• Release the Smart Push Button, the power LED begins flashing. The WRE6605 reloads factory-default
settings and begins to reboot.
WRE6605 User’s Guide
9
1.5 Hardware
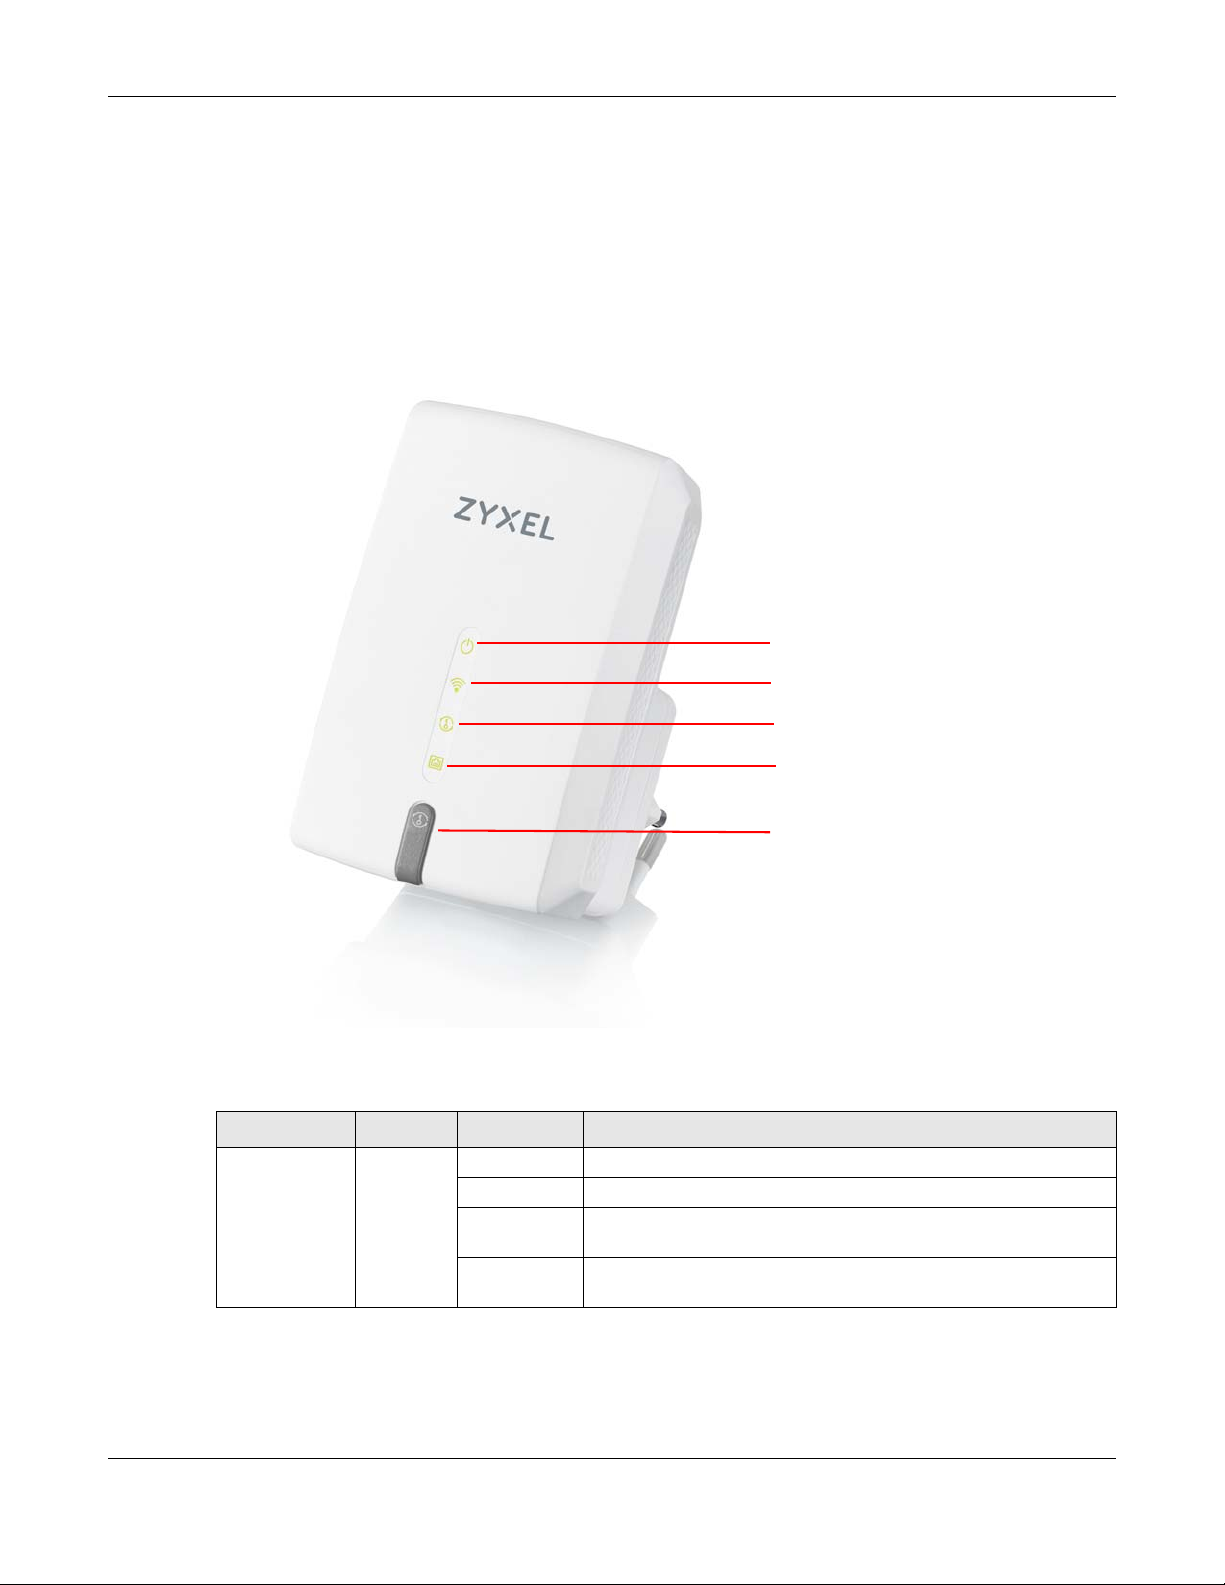
Power LED
WiFi LED
LAN LED
Smart Push Button
Smart Push LED
1.5.1 Front Panel
The LED indicators are located on the front panel. Look at the LED lights on the front panel to determine
the status of the WRE6605.
Figure 3 Front Panel
Chapter 1 Introduction
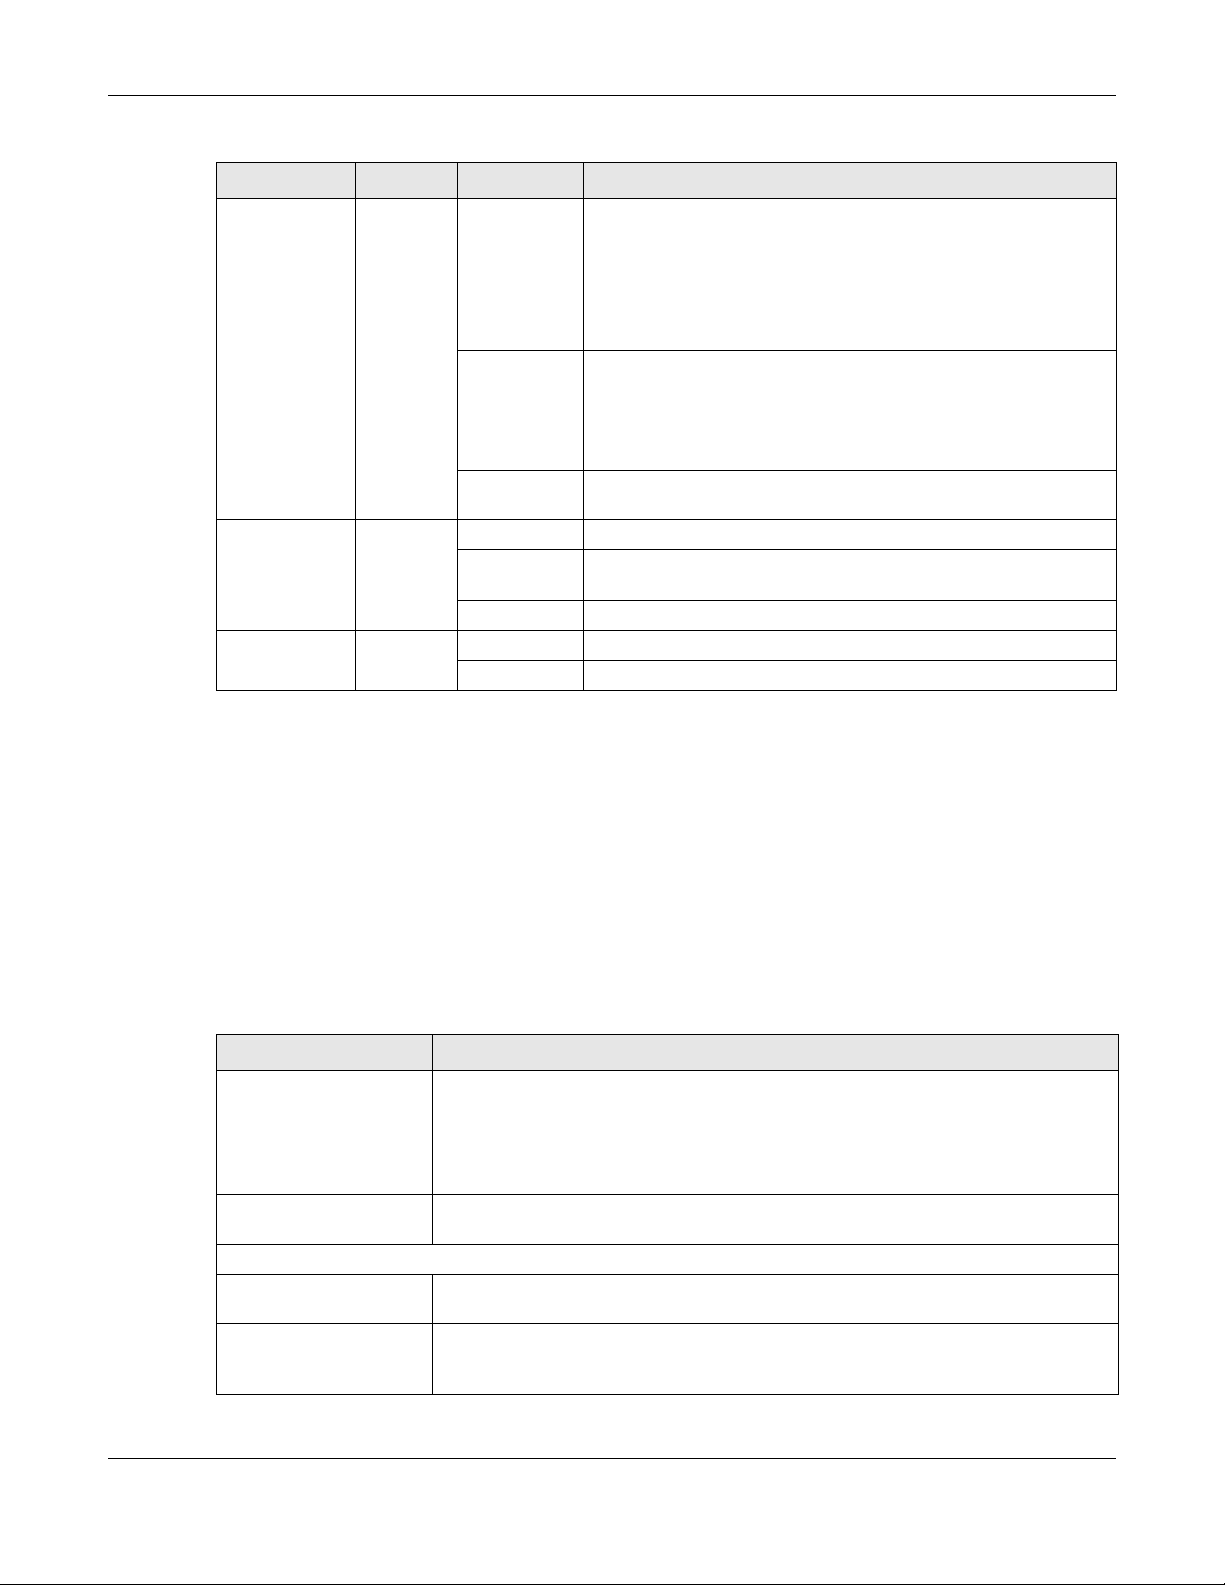
The following table describes the LEDs.
Table 1 Front Panel LEDs
LED COLOR STATUS DESCRIPTION
Power Green On The WRE6605 is receiving power and functioning properly.
Fast Blinking The WRE6605 is turning on.
Slow Blinking The WRE is authenticating your LAN device via the Web
Off The WRE6605 is not receiving power, or there is no WPS connection
Configurator or Easy Link app.
established.
WRE6605 User’s Guide
10
Chapter 1 Introduction
Table 1 Front Panel LEDs (continued)
LED COLOR STATUS DESCRIPTION
WiFi Green/
Red
Smart Push Green Slow Blinking The WRE6605 connection via Smart Push Button is ready to start,
LAN Green On LAN connection is successful.
On The WRE6605 linked successfully to a wireless network.
Different LED colors indicate the WiFi signal strength.
• Green: signifies a good connection between the WRE6605 and
the wireless router or AP.
• Red: signifies the WRE6605 is too far from the wireless router or
AP.
Blinking In AP mode and Repeater mode, it signifies data is transmitting.
Different LED colors indicate the WiFi signal strength.
• Green: signifies a signal strength of 30% ~ 100%
• Red: signifies a signal strength under 29%
Off The WRE6605 wireless LAN is off by default. There is no signal
detected or the WRE6605 is not connected to a wireless router/AP.
Fast Blinking The WRE6605 connection to a wireless router/wireless client is in
Off The WRE6605 linked successfully to a wireless network.
Off LAN connection is off.
process.
1.5.2 Smart Push Button
The Smart Push Button is an easy way to set up a secure wireless network, reboot the WRE6605 while
keeping it’s configuration or reset the WRE6605 to factory default configuration.
The Smart Push Button allows you to quickly set up a wireless network with strong security, without having
to configure security settings manually. Each connection using the Smart Push Button works only
between two devices at a time. The peer device must support WPS (WiFi Protected Security). Check
each device’s documentation to make sure if it supports WPS. When WPS is activated on a device, it has
two minutes to find another device that also has WPS activated. Then, the two devices connect and set
up a secure network by themselves.
Table 2 Smart Push Button Functions
ACTION RESULT
Hold for two seconds When using the Web Configurator, the WRE6605 uses the Smart Push Button to
Hold for more than 10
seconds
Repeater Mode
Hold for two seconds In the initial configuration, the WRE6605 begins connecting to a wireless router or AP
Hold for two seconds After the WRE6605 has successfully linked to the wireless router or AP. The WRE6605
authenticate the computer connected to the LAN port. This allows you to log into the
Web Configurator without inputting the password.
Alternatively, when using the Easy Link app, the WRE6605 uses the Smart Push Button to
link the WRE6605 with your mobile phone.
The WRE6605 resets its configuration to factory defaults and reboots.
(uplink).
begins connecting to a wireless client via WPS (downlink). See Section 1.5.2 on page
11.
WRE6605 User’s Guide
11
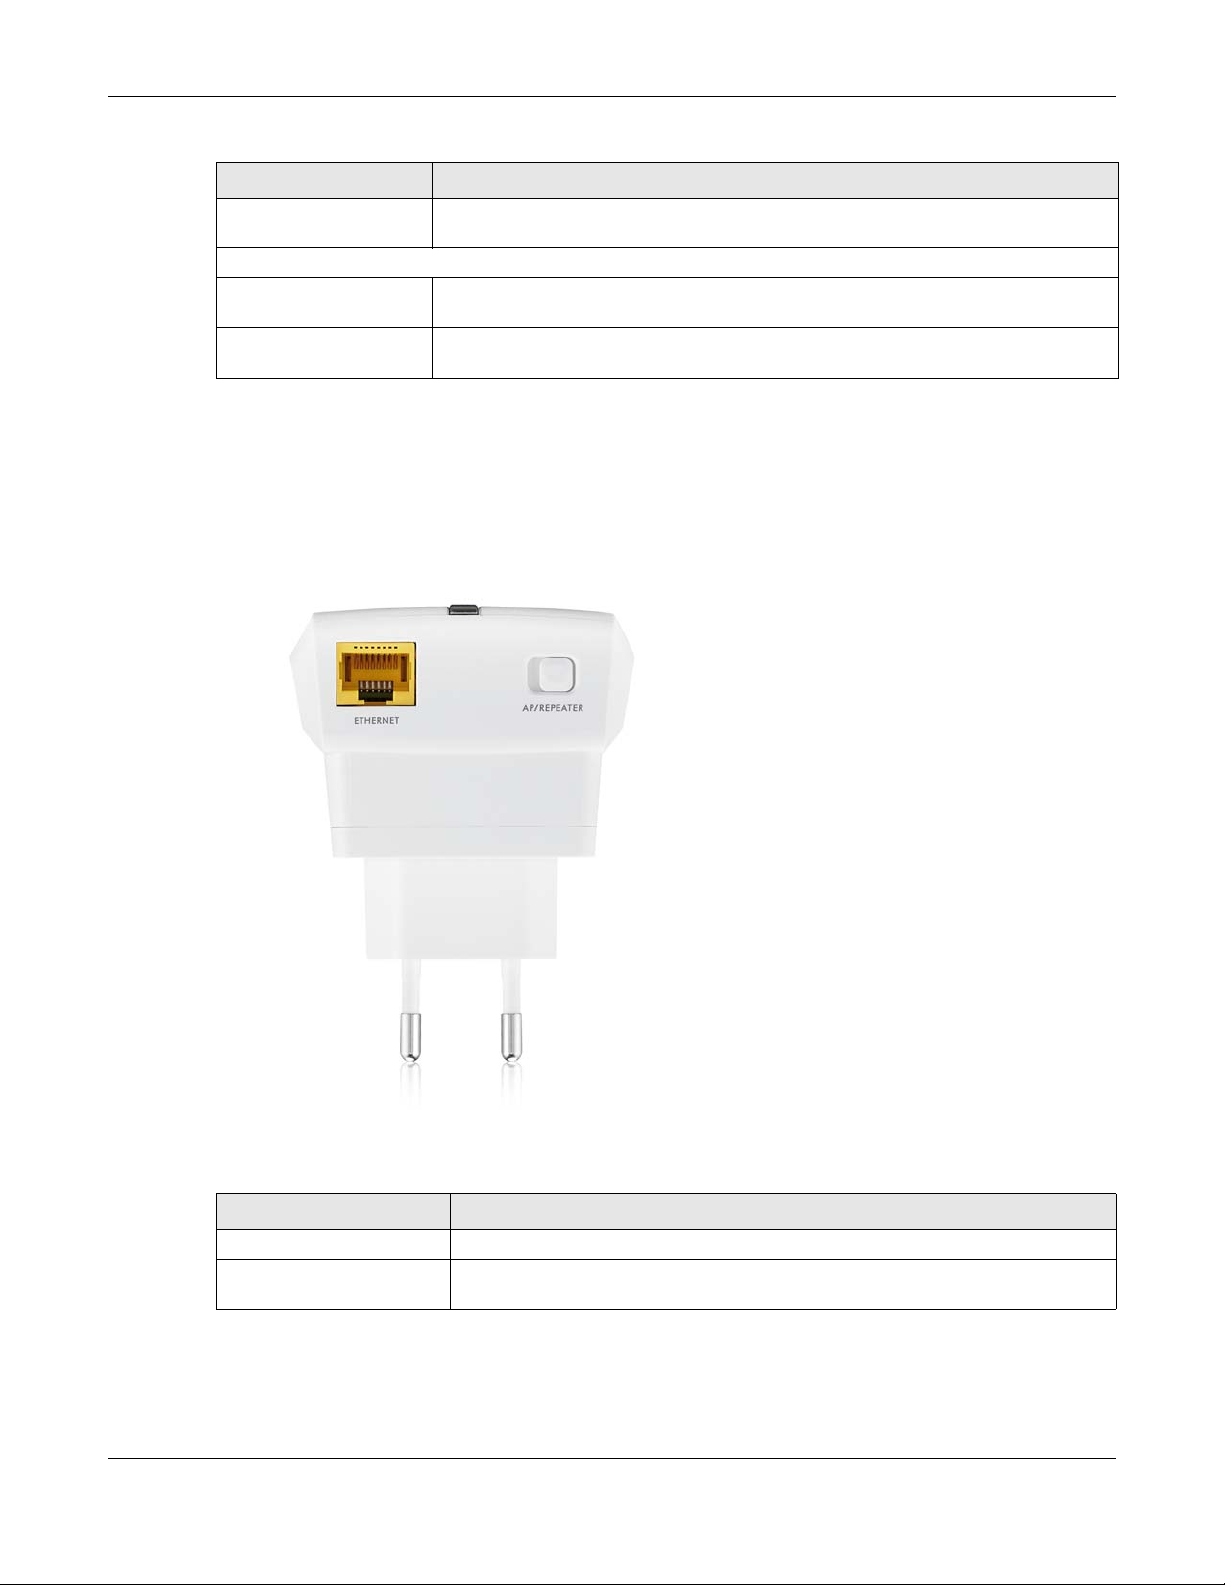
Table 2 Smart Push Button Functions
ACTION RESULT
Hold for more than 10
seconds
AP Mode
Hold for two seconds The WRE6605 begins connecting to a wireless client via WPS. See Section 1.5.2 on page
Hold for more than 10
seconds
1.5.3 Bottom Panel
The connection port, power button, and operation mode switch are located on the bottom panel.
Figure 4 Bottom Panel
Chapter 1 Introduction
The WRE6605 resets its configuration to factory defaults and reboots. Also, the power
LED will be blinking. See Section 1.4 on page 9.
11.
The WRE6605 resets its configuration to factory defaults and reboots.
The following table describes the items on the rear panel.
Table 3 Bottom Panel
LABEL DESCRIPTION
ETHERNET Connect computers or other Ethernet devices to Ethernet ports for Internet access.
AP/REPEATER Use this switch to select the system operation mode of the WRE6605. For more
information, see Chapter 3 on page 24.
WRE6605 User’s Guide
12

2.1 Overview
This chapter describes how to access the WRE6605 Web Configurator and provides an overview of its
screens.
The Web Configurator is an HTML-based management interface that allows easy system setup and
management via Internet browser. Use a browser that supports HTML5, such as Internet Explorer 11,
Mozilla Firefox, or Google Chrome. The recommended screen resolution is 1024 by 768 pixels.
In order to use the Web Configurator you need to allow:
• Web browser pop-up windows from your device.
• JavaScript (enabled by default).
• Java permissions (enabled by default).
CHAPTER 2
The Web Configurator
Refer to Chapter 6 Troubleshooting to see how to make sure these functions are allowed in Internet
Explorer.
2.2 Accessing the Web Configurator
1 Make sure your WRE6605 hardware is properly connected and prepare your computer or computer
network to connect to the WRE6605. Your computer needs to be in the same subnet as the WRE6605.
Set a static IP address between 192.168.1.3~192.168.1.254.
2 Launch your web browser.
3 Open a web browser and type “http://192.168.1.2” as the web address in your web browser.
Note: To log in to the WRE6605’s Web Configurator after the installation is completed use
FindMe to obtain the WRE6605’s new IP address. See Section 2.4.2 on page 20.
2.2.1 Web Configurator Languages
The Web Configurator displays in the same language as your browser language. The Web Configurator
is available in 6 different languages:
Table 4 Web Configurator Languages
LANGUAGES
English
German
WRE6605 User’s Guide
13
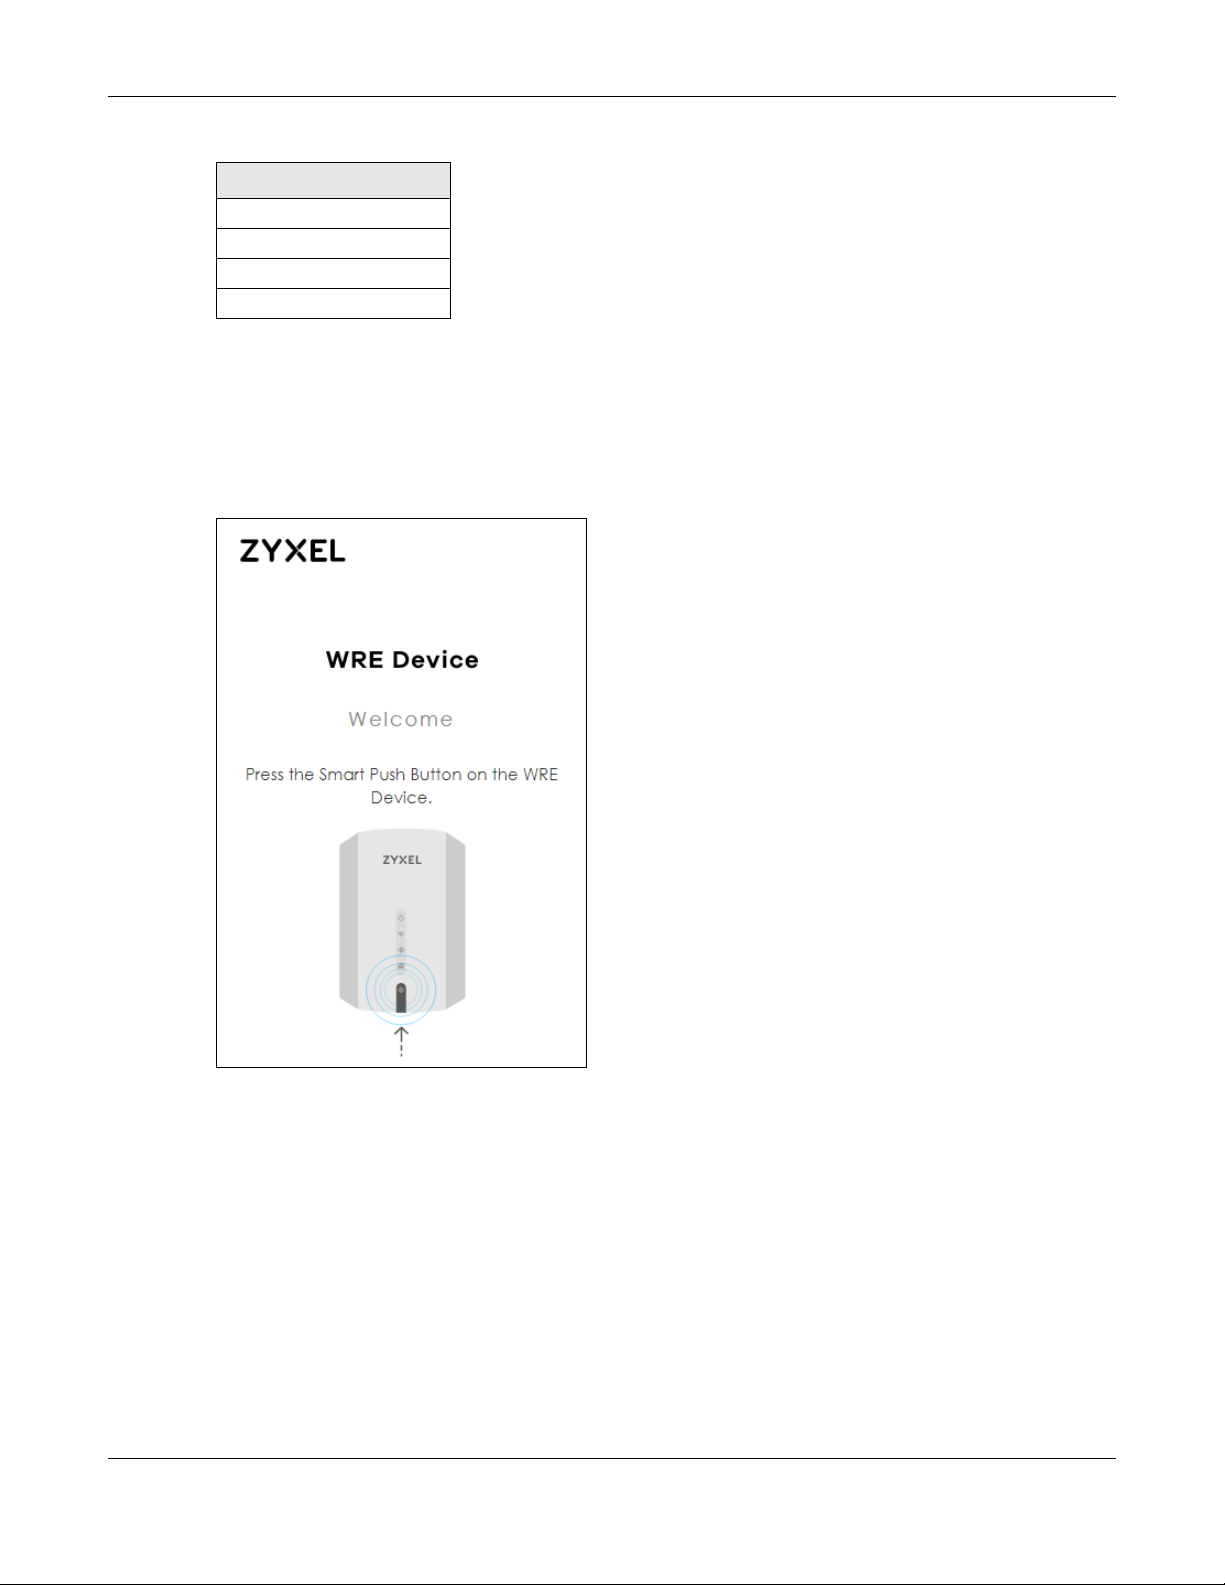
Table 4 Web Configurator Languages (continued)
LANGUAGES
Spanish
French
Italian
Traditional Chinese
Section 2.4.3 on page 22 explains how you can change your browser’s language.
2.2.2 Login Screen
The Web Configurator initially displays the following login screen.
Figure 5 Login Screen
Chapter 2 The Web Configurator
The first time you access the Web Configurator you are required to authenticate your connection with
the WRE6605 using the Smart Push Button. Press the button for 2 seconds.
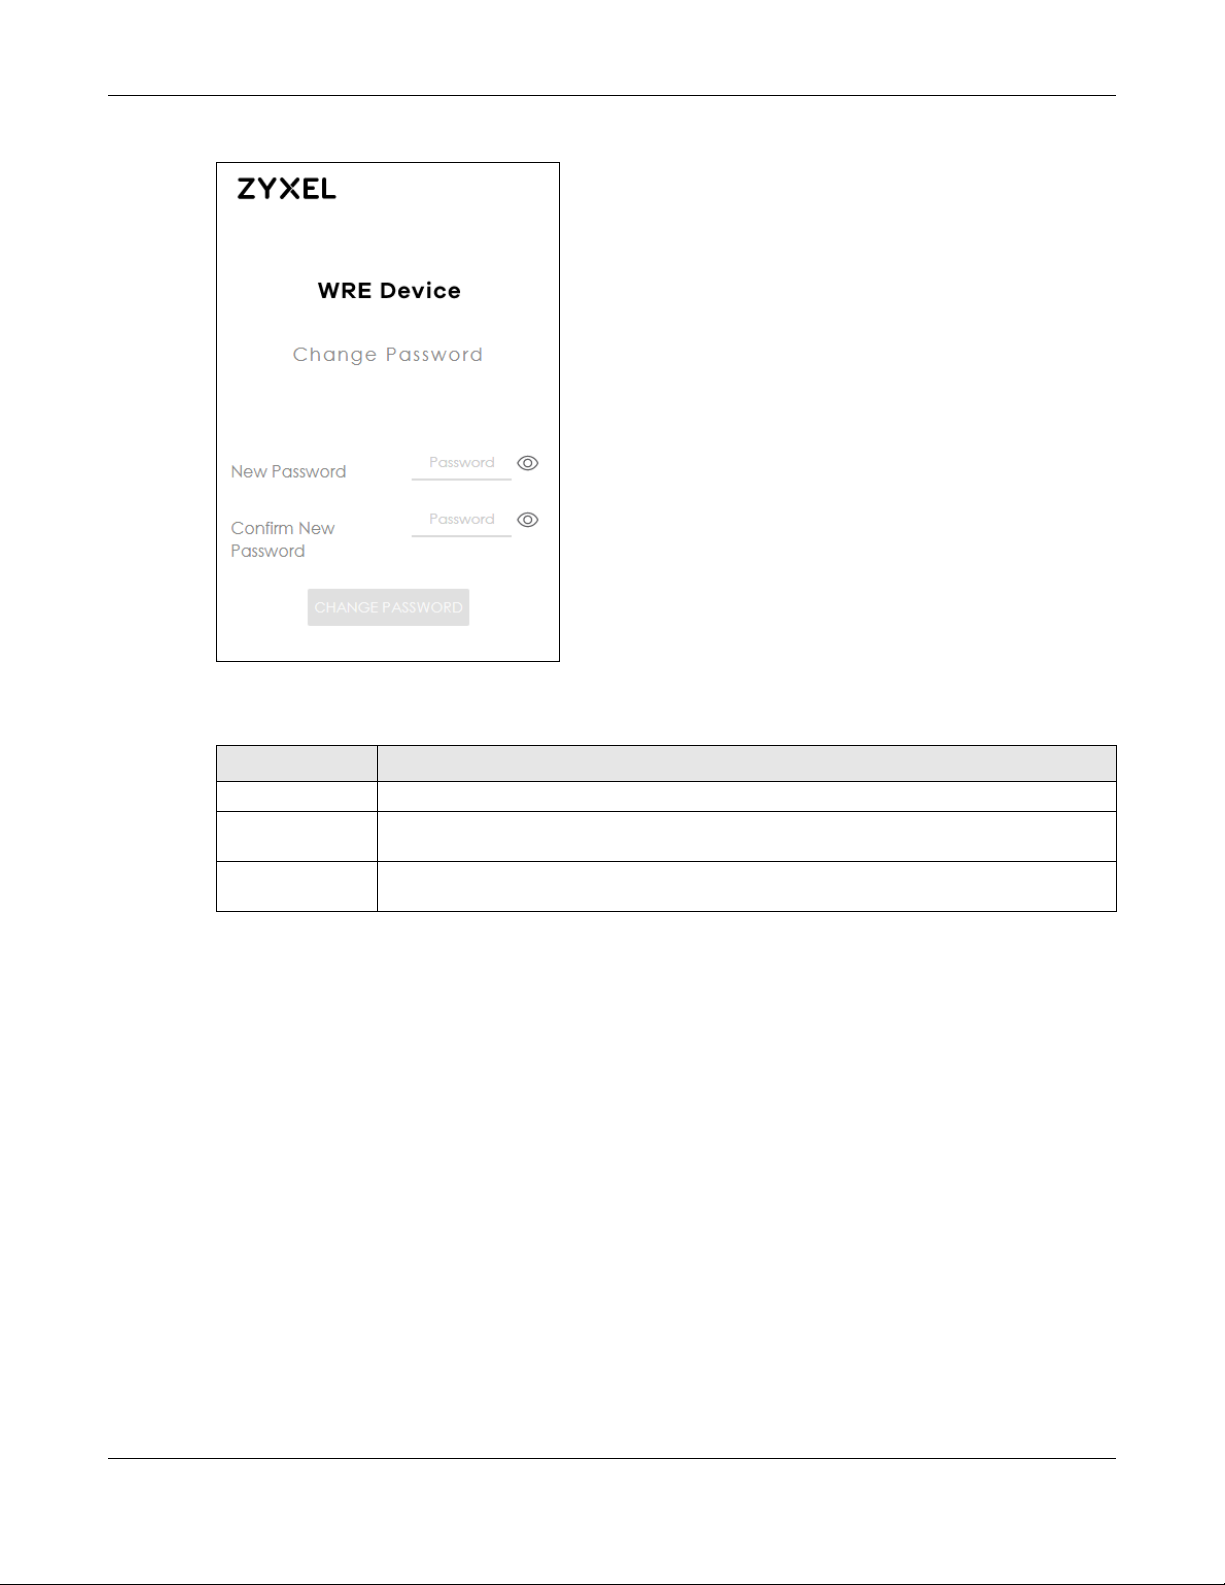
2.2.3 Password Screen
You should see a screen asking you to change your password as shown next.
WRE6605 User’s Guide
14
Chapter 2 The Web Configurator
Figure 6 Change Password Screen
The following table describes the labels in this screen.
Table 5 Change Password Screen
LABEL DESCRIPTION
New Password Type a new password.
Confirm New
Password
CHANGE
PASSWORD
Retype the password for confirmation.
Click CHANGE PASSWORD to save your changes back to the WRE6605.
Note: Once you have changed the password you cannot change it again, unless you reset
the WRE6605 back to its factory default settings. You will need to reset the WRE6605 to
the factory default settings and reconfigure the WRE6605 again.
After you have changed your password the main screen appears (see Section 2.2.4 on page 16).
Next time you log into the Web Configurator the Login screen will be different. You can choose whether
to log in with the Smart Push Button or the new password.
WRE6605 User’s Guide
15
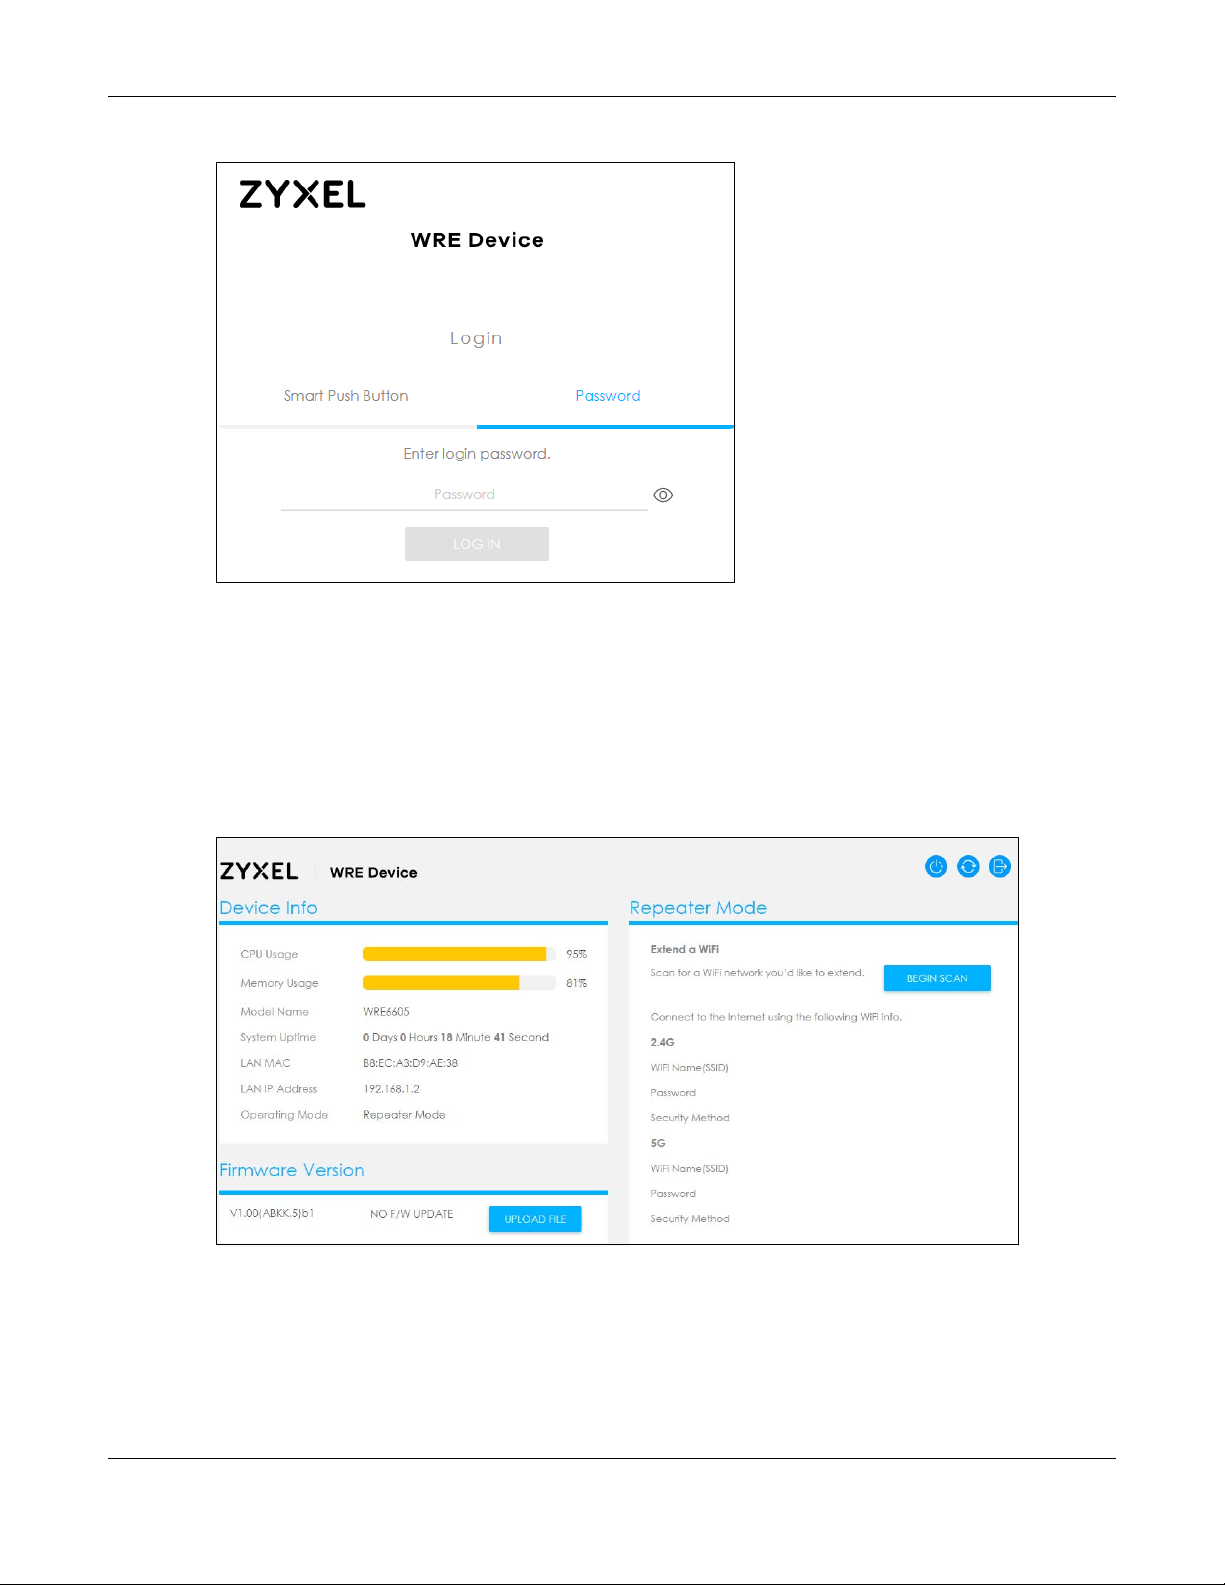
Figure 7 Login Screen After Changing the Password
2.2.4 Main Screen
Chapter 2 The Web Configurator
If you have previously logged into the Web Configurator but did not click Logout, you may be
redirected to the main screen.
If the WRE6605 is in Repeater mode the main screen displays as follows. For more information see Section
4.3.1 on page 27.
Figure 8 Main Screen: Repeater Mode
If the WRE6605 is in AP mode the main screen displays as follows. For more information see Section 5.3.1
on page 34.
WRE6605 User’s Guide
16
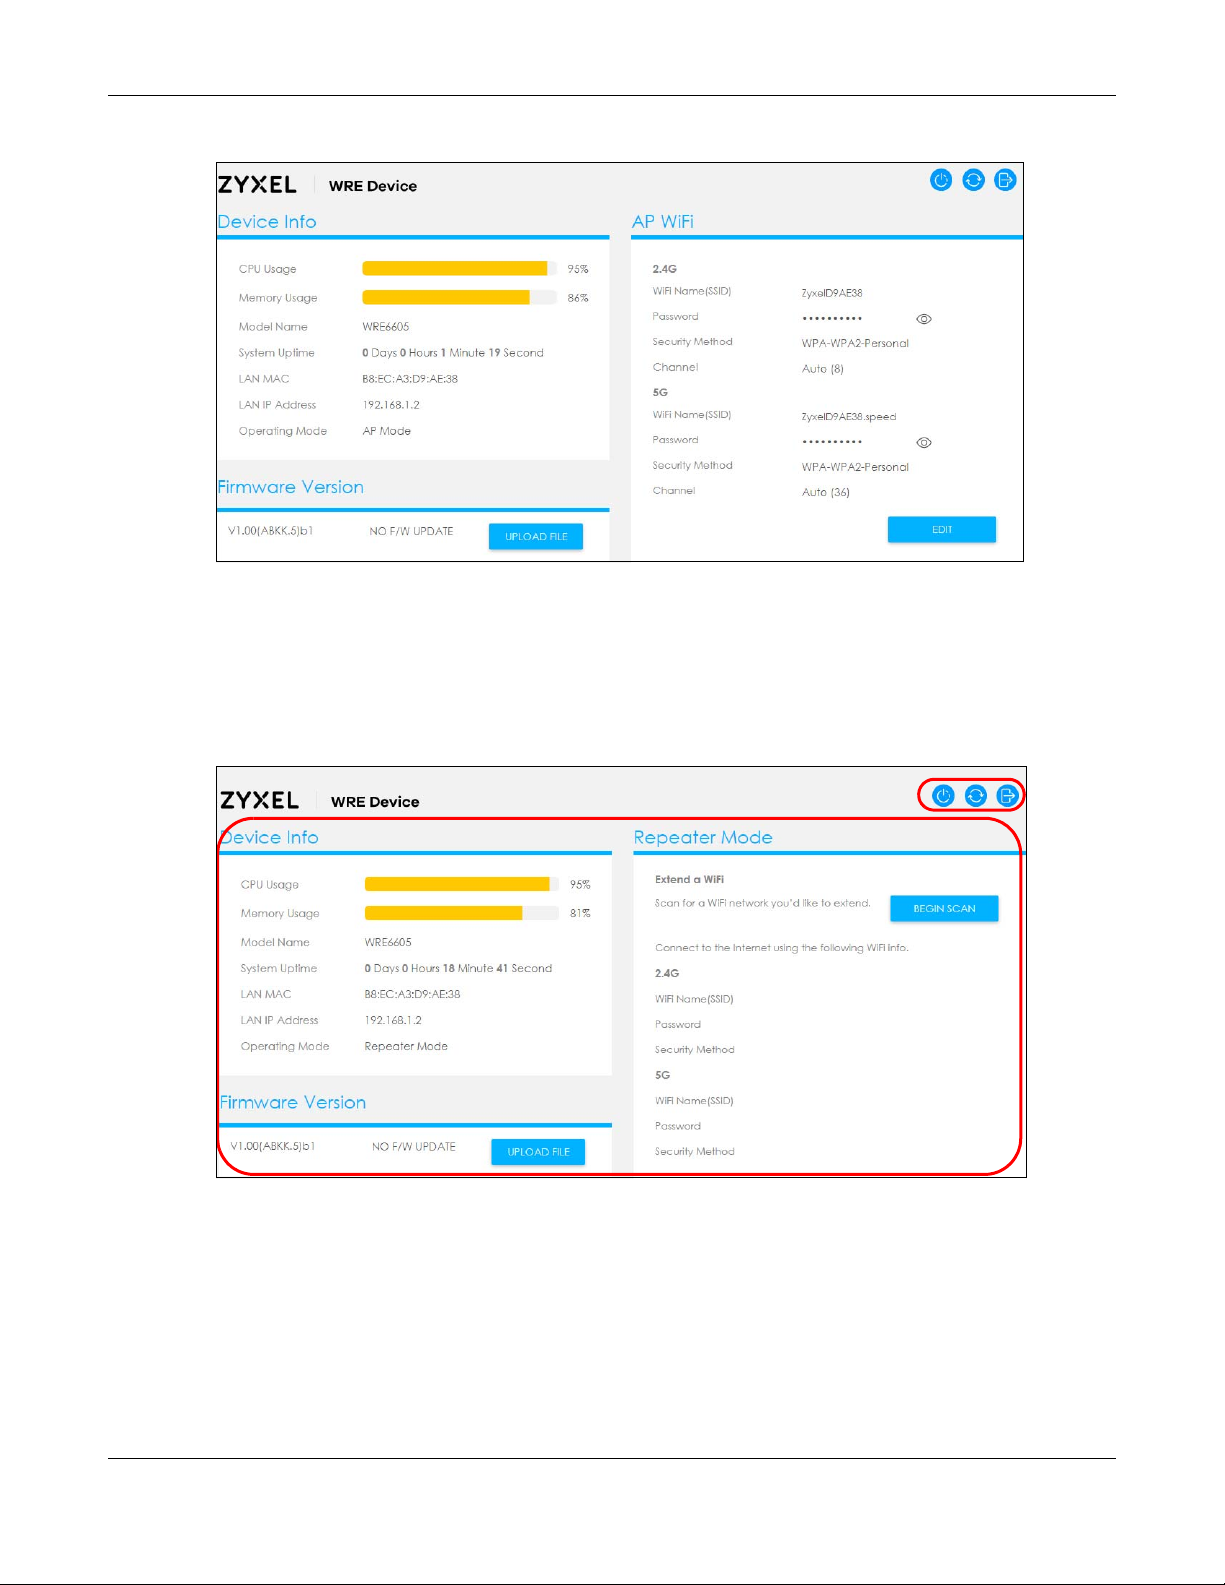
Chapter 2 The Web Configurator
B
A
Figure 9 Main Screen: AP Mode
2.3 Navigating the Web Configurator
The following summarizes how to navigate the Web Configurator from the main screen.
Figure 10 The Web Configurator’s Main Screen
The Web Configurator’s main screen is divided into these parts:
• A - Title Bar
• B - Main Window
2.3.1 Title Bar
The title bar provides some useful links that always appear over the screens below, regardless of how
deep into the Web Configurator you navigate.
WRE6605 User’s Guide
17
 Loading...