

Page 1

P-870MH-C1
VDSL Modem Over POTS
User’s Guide
Version 3.50
12/2006
Edition 1
www.zyxel.com
Page 2

Page 3

About This User's Guide
About This User's Guide
Intended Audience
This manual is intended for network administrators who want to configure the P-870MH-C1.
You should have a basic knowledge of TCP/IP networking concepts.
This manual does not provide a lot of background information about the features in the P870MH-C1. If you are not already familiar with these features, you should learn about them
from other sources, such as the Internet or the corresponding DSLAM User’s Guide.
Related Documentation
• Quick Start Guide
The Quick Start Guide is designed to help you get up and running right away. It contains a
detailed easy-to-follow connection diagram, default settings, handy checklists and
information on setting up your network and configuring for Internet access.
• Supporting Disk
Refer to the included CD for support documents.
• ZyXEL Web Site
Please refer to www.zyxel.com for additional support documentation and product
certifications.
User Guide Feedback
Help us help you. Send all User Guide-related comments, questions or suggestions for
improvement to the following address, or use e-mail instead. Thank you!
The Technical Writing Team,
ZyXEL Communications Corp.,
6 Innovation Road II,
Science-Based Industrial Park,
Hsinchu, 300, Taiwan.
E-mail: techwriters@zyxel.com.tw
P-870MH-C1 User’s Guide
3
Page 4

Document Conventions
Document Conventions
Warnings and Notes
These are how warnings and notes are shown in this User’s Guide.
1 Warnings tell you about things that could harm you or your device.
" Notes tell you other important information (for example, other things you may
need to configure or helpful tips)--or recommendations.
Syntax Conventions
• P-870MH-C1 is an abbreviation of the complete product name.
• Product labels, screen names, field labels and field choices are all in bold font.
• Command keywords are in courier new font.
• User input fields are enclosed in angle brackets <>.
sys hostname <hostname>
• In commands, the vertical bar | means “or”.
vlanQoS modechane <0|1>
• In commands, optional fields are enclosed in square brackets []. The User’s Guide
explains what happens if you do or do not enter the value in the square brackets.
sys stdio [<0..3600>]
• A key stroke is denoted by square brackets and uppercase text, for example, [ENTER]
means the “enter” or “return” key on your keyboard.
• “Enter” means for you to type one or more characters and then press the [ENTER] key.
“Select” or “choose” means for you to use one of the predefined choices.
• A right angle bracket ( > ) within a screen name denotes a mouse click. For example,
Maintenance > Log > Log Setting means you first click Maintenance in the navigation
panel, then the Log sub menu and finally the Log Setting tab to get to that screen.
• Units of measurement may denote the “metric” value or the “scientific” value. For
example, “k” for kilo may denote “1000” or “1024”, “M” for mega may denote “1000000”
or “1048576” and so on.
• “e.g.,” is a shorthand for “for instance”, and “i.e.,” means “that is” or “in other words”.
4
P-870MH-C1 User’s Guide
Page 5
Document Conventions
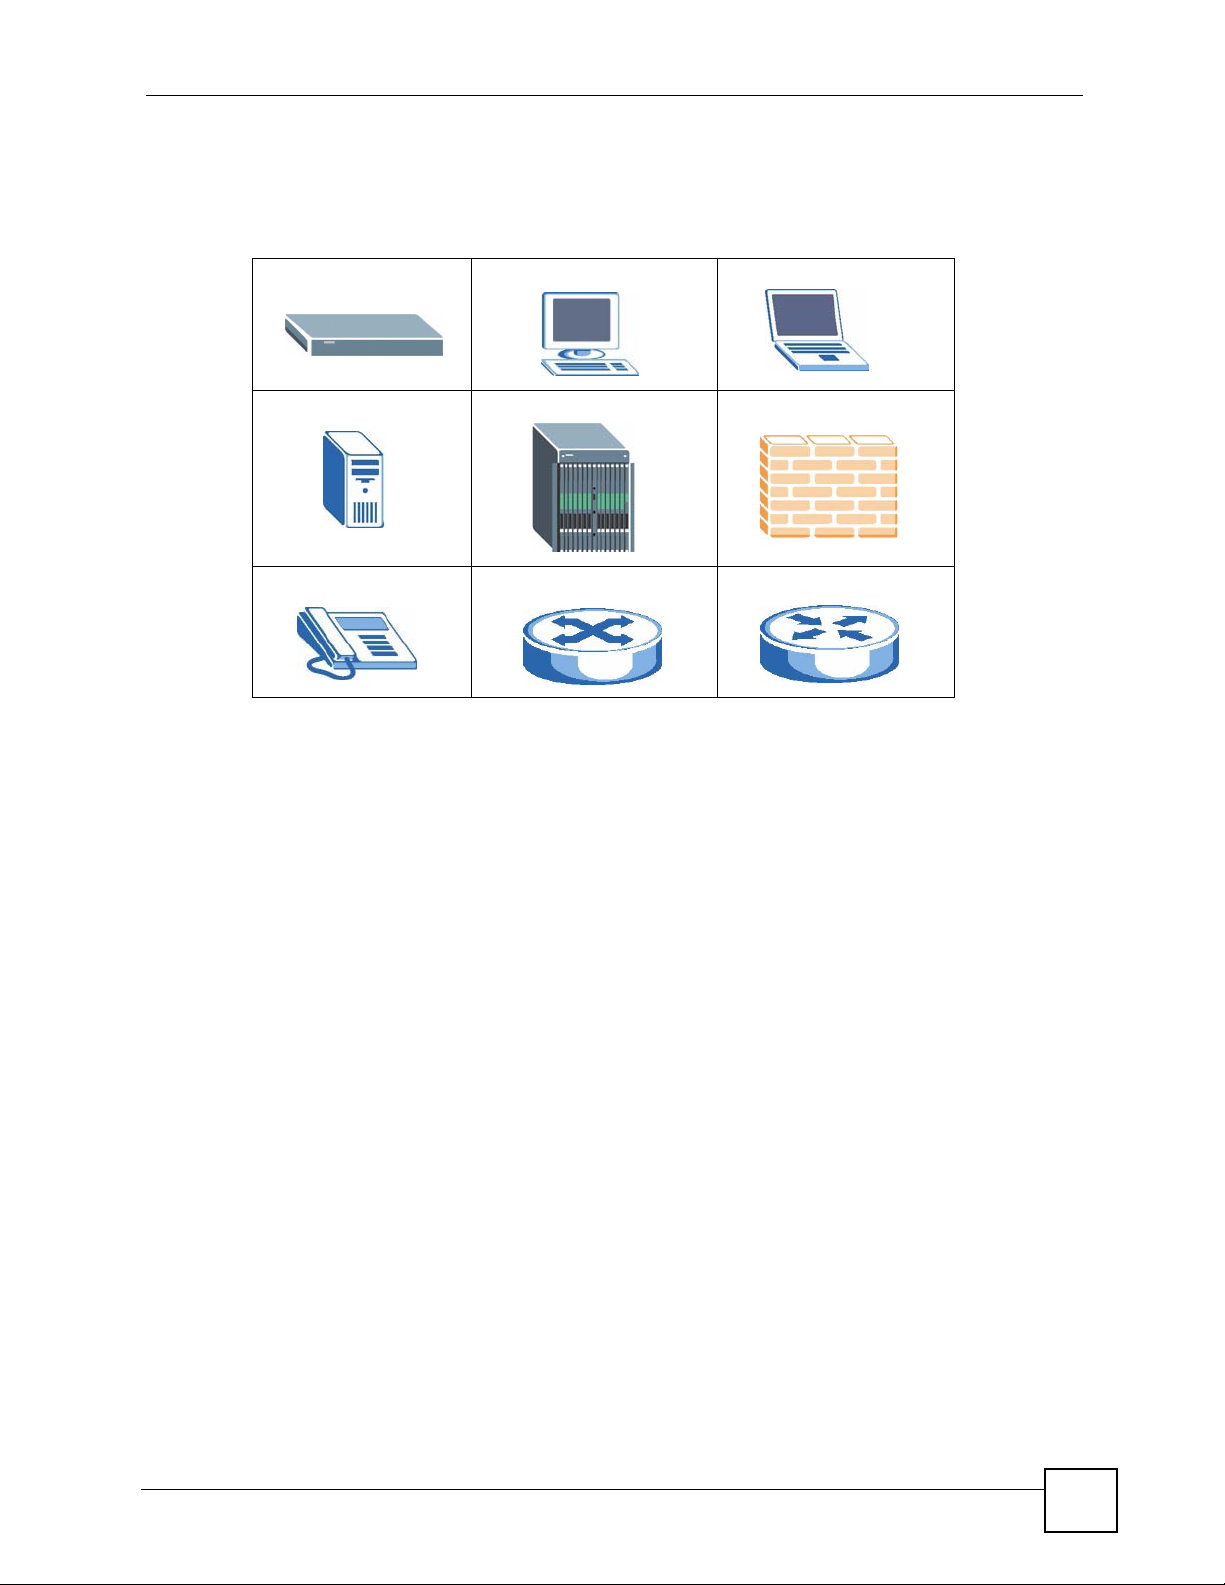
Icons Used in Figures
Figures in this User’s Guide may use the following generic icons. The P-870MH-C1 icon is
not an exact representation of your device.
P-870MH-C1 Computer Notebook computer
Server DSLAM Firewall
Telephone Switch Router
P-870MH-C1 User’s Guide
5
Page 6

Safety Warnings
Safety Warnings
1 For your safety, be sure to read and follow all warning notices and instructions.
• Do NOT use this product near water, for example, in a wet basement or near a swimming
pool.
• Do NOT expose your device to dampness, dust or corrosive liquids.
• Do NOT store things on the device.
• Do NOT install, use, or service this device during a thunderstorm. There is a remote risk
of electric shock from lightning.
• Connect ONLY suitable accessories to the device.
• Do NOT open the device or unit. Opening or removing covers can expose you to
dangerous high voltage points or other risks. ONLY qualified service personnel should
service or disassemble this device. Please contact your vendor for further information.
• Make sure to connect the cables to the correct ports.
• Place connecting cables carefully so that no one will step on them or stumble over them.
• Always disconnect all cables from this device before servicing or disassembling.
• Use ONLY an appropriate power adaptor or cord for your device.
• Connect the power adaptor or cord to the right supply voltage (for example, 110V AC in
North America or 230V AC in Europe).
• Do NOT allow anything to rest on the power adaptor or cord and do NOT place the
product where anyone can walk on the power adaptor or cord.
• Do NOT use the device if the power adaptor or cord is damaged as it might cause
electrocution.
• If the power adaptor or cord is damaged, remove it from the power outlet.
• Do NOT attempt to repair the power adaptor or cord. Contact your local vendor to order a
new one.
• Do not use the device outside, and make sure all the connections are indoors. There is a
remote risk of electric shock from lightning.
• CAUTION: RISK OF EXPLOSION IF BATTERY (on the motherboard) IS REPLACED
BY AN INCORRECT TYPE. DISPOSE OF USED BATTERIES ACCORDING TO THE
INSTRUCTIONS. Dispose them at the applicable collection point for the recycling of
electrical and electronic equipment. For detailed information about recycling of this
product, please contact your local city office, your household waste disposal service or the
store where you purchased the product.
• Do NOT obstruct the device ventilation slots, as insufficient airflow may harm your
device.
• Use only No. 26 AWG (American Wire Gauge) or larger telecommunication line cord.
• If you wall mount your device, make sure that no electrical lines, gas or water pipes will
be damaged.
6
P-870MH-C1 User’s Guide
Page 7

This product is recyclable. Dispose of it properly.
Safety Warnings
P-870MH-C1 User’s Guide
7
Page 8

Safety Warnings
8
P-870MH-C1 User’s Guide
Page 9

Contents Overview
Contents Overview
Introduction and SMT ............................................................................................................19
Introducing the P-870MH-C1 .....................................................................................................21
Introducing the SMT .................................................................................................................. 23
Configuration Using the SMT ....................................................................................................27
Introducing the FTP Server ....................................................................................................... 35
CLI ........................................................................................................................................... 39
Introducing the Command Interface .......................................................................................... 41
ip Commands ............................................................................................................................ 45
sys Commands .......................................................................................................................... 51
vdsl Commands ......................................................................................................................... 55
vlanQoS Commands ................................................................................................................. 57
Appendices and Index ...........................................................................................................65
P-870MH-C1 User’s Guide
9
Page 10

Contents Overview
10
P-870MH-C1 User’s Guide
Page 11

Table of Contents
Table of Contents
About This User's Guide ..........................................................................................................3
Document Conventions............................................................................................................4
Safety Warnings........................................................................................................................6
Contents Overview ...................................................................................................................9
Table of Contents.................................................................................................................... 11
List of Figures ......................................................................................................................... 15
List of Tables...........................................................................................................................17
Part I: Introduction and SMT................................................................. 19
Chapter 1
Introducing the P-870MH-C1.................................................................................................. 21
1.1 Overview .............................................................................................................................. 21
1.2 Ways to Manage the P-870MH-C1 ...................................................................................... 21
1.3 Good Habits for Managing the P-870MH-C1 ....................................................................... 22
1.4 LEDs .................................................................................................................................... 22
Chapter 2
Introducing the SMT ............................................................................................................... 23
2.1 SMT Introduction ................................................................................................................. 23
2.1.1 Procedure for SMT Configuration via Telnet .............................................................. 23
2.1.2 Entering Password ..................................................................................................... 23
2.1.3 SMT Menus Overview ................................................................................................ 24
2.2 Navigating the SMT Interface .............................................................................................. 24
2.2.1 System Management Terminal Interface Summary ................................................... 25
2.3 Changing the System Password ......................................................................................... 25
Chapter 3
Configuration Using the SMT ................................................................................................ 27
3.1 General Setup ..................................................................................................................... 27
3.2 Procedure To Configure Menu 1 .......................................................................................... 27
3.3 LAN Setup ........................................................................................................................... 28
3.3.1 IP Alias Setup ............................................................................................................. 29
P-870MH-C1 User’s Guide
11
Page 12

Table of Contents
3.4 System Maintenance ........................................................................................................... 30
3.4.1 System Status ............................................................................................................31
3.4.2 System Information and Console Port Setting ........................................................... 32
3.4.3 Log and Trace ............................................................................................................33
Chapter 4
Introducing the FTP Server.................................................................................................... 35
4.1 Logging in to the FTP Server ...............................................................................................35
4.2 Upload Firmware ................................................................................................................. 35
4.3 Back up the Current Configuration ...................................................................................... 36
4.4 Restoring a Previously-saved Configuration ....................................................................... 36
4.5 Logging out of the FTP Server ............................................................................................ 37
Part II: CLI ............................................................................................... 39
Chapter 5
Introducing the Command Interface .....................................................................................41
5.1 Starting the Command Interface (Logging In) ...................................................................... 41
5.1.1 Via the SMT ............................................................................................................... 41
5.1.2 Via Telnet ................................................................................................................... 41
5.2 Using the Command Interface ............................................................................................. 42
5.3 Stopping the Command Interface (Logging Out) ................................................................. 43
Chapter 6
ip Commands .......................................................................................................................... 45
6.1 ip address ............................................................................................................................ 45
6.2 ip arp status ......................................................................................................................... 45
6.3 ip igmpsnp disable ............................................................................................................... 45
6.4 ip igmpsnp disp .................................................................................................................... 46
6.5 ip igmpsnp enable ............................................................................................................... 46
6.6 ip igmpsnp maxresptime ...................................................................................................... 46
6.7 ip igmpsnp queryinterval ...................................................................................................... 46
6.8 ip igmpsnp robust ................................................................................................................ 46
6.9 ip igmpsnp Command Example ........................................................................................... 47
6.10 ip ping ................................................................................................................................ 48
6.11 ip tcp status ........................................................................................................................ 48
6.12 ip udp status ...................................................................................................................... 48
Chapter 7
sys Commands .......................................................................................................................51
7.1 sys cpu display .................................................................................................................... 51
12
P-870MH-C1 User’s Guide
Page 13

Table of Contents
7.2 sys date ............................................................................................................................... 52
7.3 sys domain .......................................................................................................................... 52
7.4 sys hostname ...................................................................................................................... 52
7.5 sys romreset ........................................................................................................................ 52
7.6 sys stdio ............................................................................................................................... 53
7.7 sys time ............................................................................................................................... 53
7.8 sys version ........................................................................................................................... 53
Chapter 8
vdsl Commands ...................................................................................................................... 55
8.1 vdsl pktcntclr ........................................................................................................................ 55
8.2 vdsl status ............................................................................................................................ 55
Chapter 9
vlanQoS Commands...............................................................................................................57
9.1 vlanQoS 1qconfig ................................................................................................................ 57
9.2 vlanQoS 1qset ..................................................................................................................... 57
9.3 vlanQoS clear ...................................................................................................................... 58
9.4 vlanQoS disp ....................................................................................................................... 58
9.5 vlanQoS modechane ........................................................................................................... 58
9.6 vlanQoS pvlanset ................................................................................................................ 59
9.7 vlanQoS ratio ....................................................................................................................... 59
9.8 vlanQoS save ...................................................................................................................... 59
9.9 vlanQoS Command Examples ............................................................................................ 60
9.9.1 Port-based VLAN ....................................................................................................... 60
9.9.2 IEEE 802.1Q VLAN .................................................................................................... 61
Part III: Appendices and Index.............................................................. 65
Appendix A Specifications................................................................................................. 67
Appendix B Legal Information........................................................................................... 69
Index......................................................................................................................................... 73
P-870MH-C1 User’s Guide
13
Page 14

Table of Contents
14
P-870MH-C1 User’s Guide
Page 15

List of Figures
List of Figures
Figure 1 High-speed Internet Access with the P-870MH-C1 .................................................................. 21
Figure 2 LEDs ........................................................................................................................................ 22
Figure 3 Login Screen ........................................................................................................................... 23
Figure 4 SMT Main Menu ....................................................................................................................... 25
Figure 5 Menu 23.1 Change Password .................................................................................................. 26
Figure 6 Menu 1 General Setup ............................................................................................................. 27
Figure 7 Menu 3.2 TCP/IP and DHCP Ethernet Setup ........................................................................... 28
Figure 8 IP Alias Network Example ........................................................................................................ 29
Figure 9 Menu 3.2.1 IP Alias Setup ........................................................................................................ 30
Figure 10 Menu 24 System Maintenance ............................................................................................... 31
Figure 11 Menu 24.1 System Maintenance : Status ............................................................................... 31
Figure 12 Menu 24.2 System Information and Console Port Speed ...................................................... 32
Figure 13 Menu 24.2.1 System Maintenance: Information ..................................................................... 32
Figure 14 Menu 24.2.2 System Maintenance : Change Console Port Speed ........................................ 33
Figure 15 Menu 24.3 System Maintenance: Log and Trace ................................................................... 34
Figure 16 Sample Error and Information Messages ............................................................................... 34
Figure 17 User Name and Password ..................................................................................................... 35
Figure 18 Prompt .................................................................................................................................... 35
Figure 19 Example: Upload Firmware Using FTP .................................................................................. 36
Figure 20 Example: Back up Current Configuration Using FTP ............................................................. 36
Figure 21 Example: Upload Firmware Using FTP .................................................................................. 37
Figure 22 Valid Commands .................................................................................................................... 41
Figure 23 Password ................................................................................................................................ 42
Figure 24 Prompt .................................................................................................................................... 42
Figure 25 Command Interface: One-level Structure ...............................................................................42
Figure 26 Command Interface: Abbreviated Commands ....................................................................... 42
Figure 27 Command Interface: Help or ? ............................................................................................... 42
Figure 28 Example: ip arp status ........................................................................................................... 45
Figure 29 Enable IGMP Snooping .......................................................................................................... 47
Figure 30 Disable IGMP Snooping ........................................................................................................ 47
Figure 31 Configure IGMP Snooping .................................................................................................... 47
Figure 32 Display Current Statistics for IGMP Snooping ....................................................................... 48
Figure 33 Example: ip tcp status ........................................................................................................... 48
Figure 34 Example: ip udp status .......................................................................................................... 49
Figure 35 Example: sys cpu display ...................................................................................................... 51
Figure 36 Example: sys version ............................................................................................................ 53
Figure 37 Example: vdsl status ............................................................................................................. 56
Figure 38 Enable Port-based VLAN (Disable IEEE 802.1Q VLAN) ...................................................... 60
P-870MH-C1 User’s Guide
15
Page 16

List of Figures
Figure 39 Look at the Current Settings for Port-based VLAN .............................................................. 60
Figure 40 Configure Port-based VLAN .................................................................................................. 61
Figure 41 Reset Port-based VLAN Settings to Default Values .............................................................. 61
Figure 42 Disable Port-based VLAN (Enable IEEE 802.1Q VLAN) ...................................................... 61
Figure 43 Enable IEEE 802.1Q VLAN (Disable Port-based VLAN) ...................................................... 62
Figure 44 Look at the Current Settings for IEEE 802.1Q VLAN ............................................................ 62
Figure 45 Create New IEEE 802.1Q VLAN and Configure Port Settings .............................................. 63
Figure 46 Configure Port Settings for Existing IEEE 802.1Q VLAN ...................................................... 64
Figure 47 Reset IEEE 802.1Q Settings to Default Values ..................................................................... 64
Figure 48 Disable IEEE 802.1Q VLAN (Enable Port-based VLAN) ...................................................... 64
16
P-870MH-C1 User’s Guide
Page 17

List of Tables
List of Tables
Table 1 LEDs ......................................................................................................................................... 22
Table 2 SMT Menus Overview ............................................................................................................... 24
Table 3 Navigating the SMT Interface ................................................................................................... 24
Table 4 Main Menu Summary ................................................................................................................ 25
Table 5 Menu 1 General Setup .............................................................................................................. 28
Table 6 Menu 3.2 TCP/IP and DHCP Ethernet Setup ........................................................................... 28
Table 7 Menu 3.2.1 IP Alias Setup ........................................................................................................ 30
Table 8 Menu 24.1 System Maintenance: Status ..................................................................................31
Table 9 Menu 24.2.1 System Maintenance: Information ....................................................................... 33
Table 10 sys cpu display Output Values ................................................................................................ 51
Table 11 sys version Output Values ....................................................................................................... 54
Table 12 Specifications .......................................................................................................................... 67
P-870MH-C1 User’s Guide
17
Page 18

List of Tables
18
P-870MH-C1 User’s Guide
Page 19

PART I
Introduction and
SMT
This part contains the following chapters.
• Introducing the P-870MH-C1 (21)
• Introducing the SMT (23)
• Configuration Using the SMT (27)
• Introducing the FTP Server (35)
19
Page 20

20
Page 21
CHAPTER 1
Introducing the P-870MH-C1
This chapter introduces the main applications and features of the P-870MH-C1. It also
introduces the ways you can manage the P-870MH-C1.
1.1 Overview
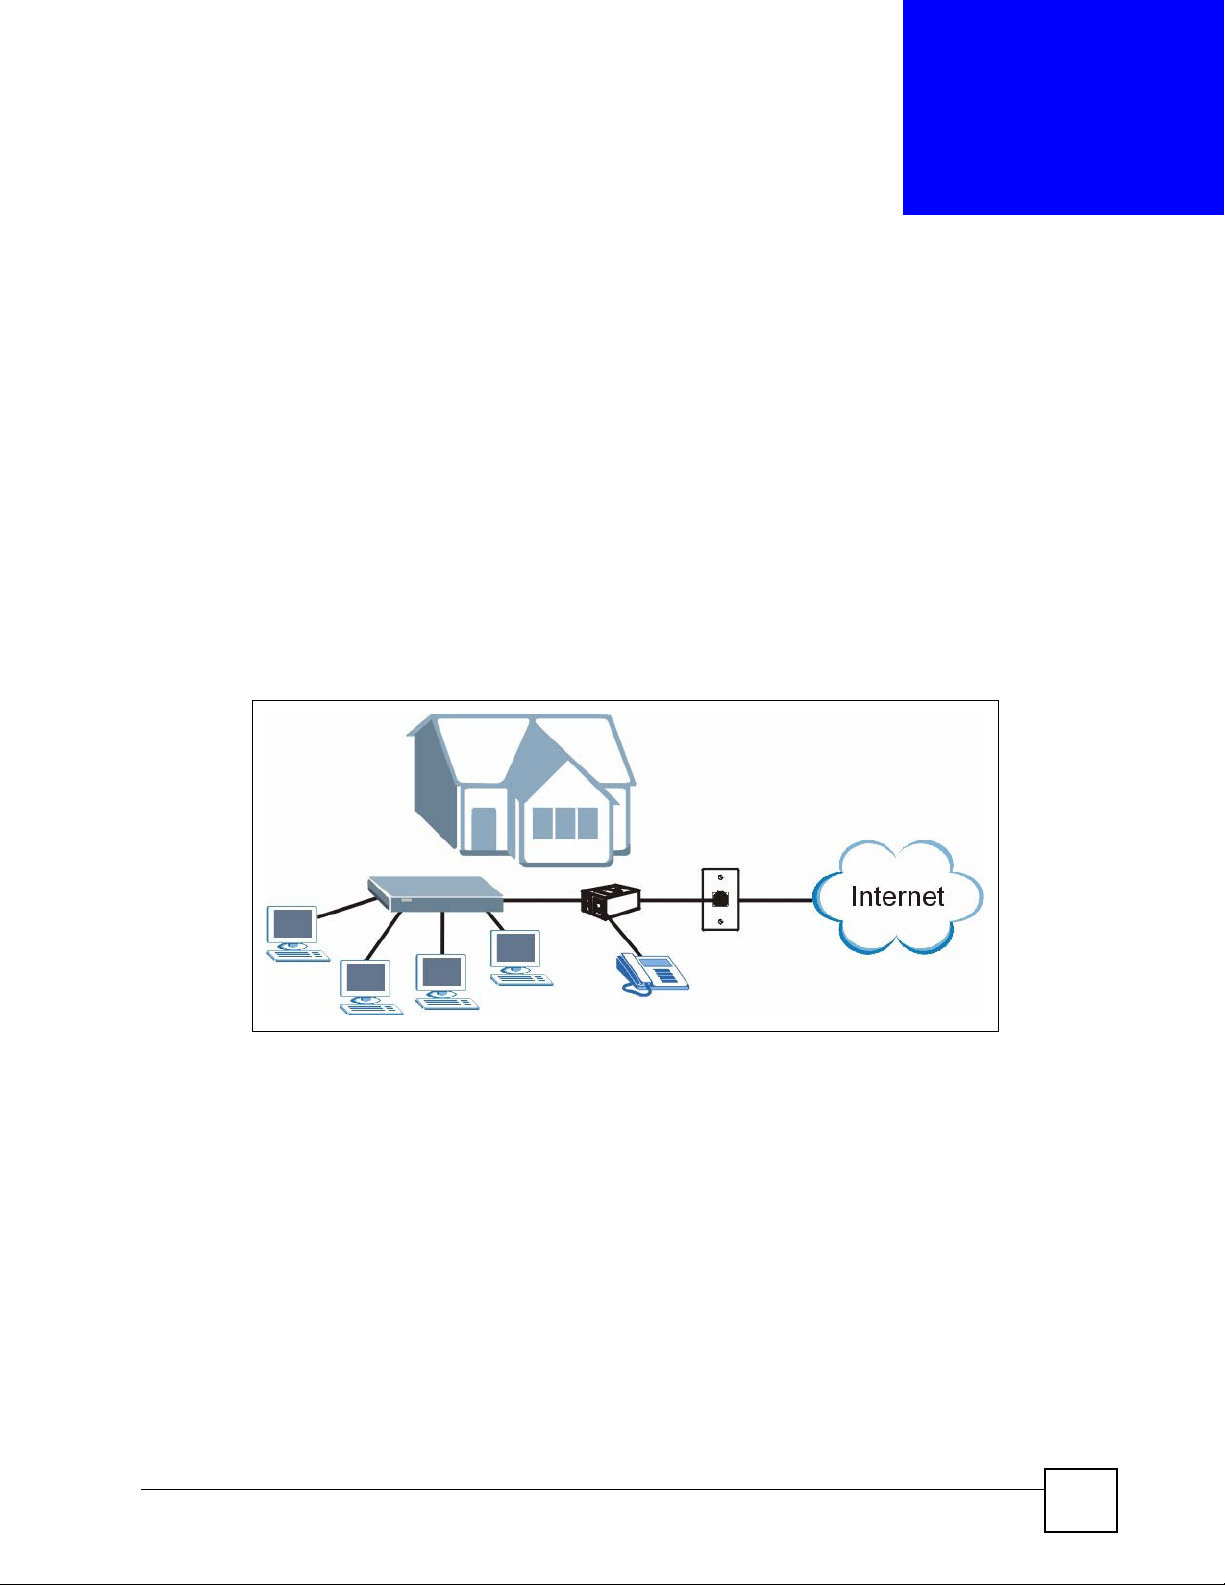
The P-870MH-C1 is a VDSL modem with a four-port switch. VDSL offers high-speed
Internet access, which is ideal for data, voice, and video services (also known as Triple Play
Service). The four-port switch lets you connect up to four computers to the P-870MH-C1. See
Appendix A on page 67 for a complete list of features.
The P-870MH-C1 is designed for high-speed Internet access at home.
Figure 1 High-speed Internet Access with the P-870MH-C1
Connect your computer(s) to the P-870MH-C1. The P-870MH-C1 uses the phone line to
provide high-speed Internet access to the computer(s). You can continue to use the phone line
for regular phone calls as well. See the Quick Start Guide for instructions to make these
connections.
1.2 Ways to Manage the P-870MH-C1
Use any of the following methods to manage the P-870MH-C1.
• SMT (System Management Terminal) (Chapter 2 on page 23). This is the recommended
method for device configuration and management. You can use the SMT to configure
most of the settings on the P-870MH-C1.
• Command interface (Chapter 5 on page 41). Only use the commands to configure
advanced settings not configurable in the SMT.
• FTP for firmware upgrades and configuration backup/restore (Chapter 4 on page 35)
P-870MH-C1 User’s Guide
21
Page 22
Chapter 1 Introducing the P-870MH-C1
1.3 Good Habits for Managing the P-870MH-C1
Do the following things regularly to make the P-870MH-C1 more secure and to manage the P870MH-C1 more effectively.
• Change the password. Use a password that’s not easy to guess and that consists of
different types of characters, such as numbers and letters.
• Write down the password and put it in a safe place.
Back up the configuration (and make sure you know how to restore it). Restoring an earlier
working configuration may be useful if the device becomes unstable or even crashes. If you
forget your password, you will have to reset the P-870MH-C1 to its factory default settings. If
you backed up an earlier configuration file, you would not have to totally re-configure the P870MH-C1. You could simply restore your last configuration.
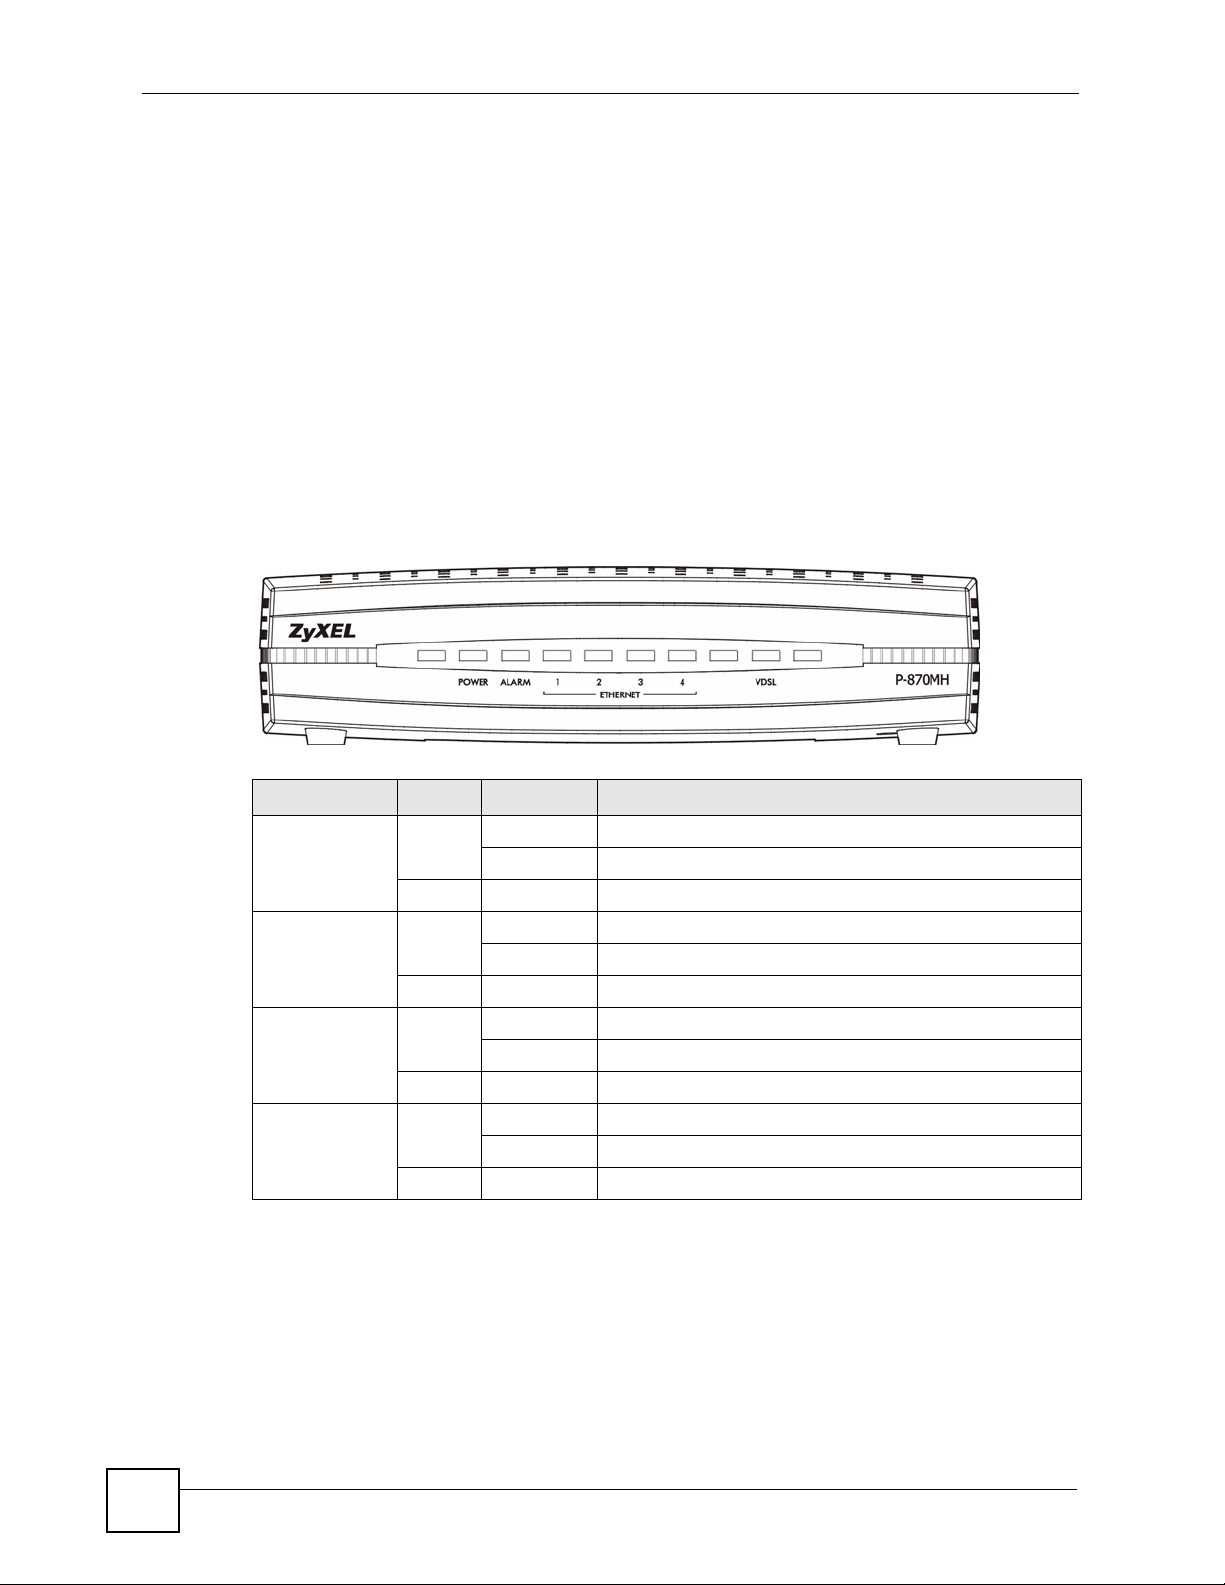
1.4 LEDs
Figure 2 LEDs
Table 1 LEDs
LED COLOR STATUS DESCRIPTION
POWER Green On The P-870MH-C1 is receiving power.
Blinking The P-870MH-C1 is performing testing.
Off The P-870MH-C1 is not receiving power.
ALARM Red On The P-870MH-C1 is functioning abnormally.
Blinks Once This LED blinks once when the P-870MH-C1 starts up.
Off The P-870MH-C1 is functioning normally.
ETHERNET 1-4 Green On The P-870MH-C1 has a successful connection on this port.
Blinking The P-870MH-C1 is sending/receiving data on this port.
Off The P-870MH-C1 does not have a connection on this port.
VDSL Green On The P-870MH-C1 has a successful DSL connection.
Blinking The P-870MH-C1 is looking for a DSL connection.
Off The P-870MH-C1 does not have a DSL connection.
22
P-870MH-C1 User’s Guide
Page 23

CHAPTER 2
Introducing the SMT
This chapter explains how to access and navigate the System Management Terminal and gives
an overview of its menus.
2.1 SMT Introduction
The P-870MH-C1’s SMT (System Management Terminal) is a menu-driven interface that you
can access from a terminal emulator over a telnet connection. This chapter shows you how to
access the SMT (System Management Terminal) menus via Telnet, how to navigate the SMT
and how to configure SMT menus.
2.1.1 Procedure for SMT Configuration via Telnet
The following procedure details how to telnet into your P-870MH-C1.
1 In Windows, click Start (usually in the bottom left corner), Run and then type "
192.168.1.2
2 Enter “
3 After entering the password you will see the main menu.
Please note that if there is no activity for longer than five minutes (default timeout period)
after you log in, your P-870MH-C1 will automatically log you out. You will then have to telnet
into the P-870MH-C1 again.
2.1.2 Entering Password
The login screen appears after you press [ENTER], prompting you to enter the password, as
shown next.
For your first login, enter the default password "
displays an asterisk "
Please note that if there is no activity for longer than five minutes after you log in, your P870MH-C1 will automatically log you out.
Figure 3 Login Screen
Enter Password: ****
1234” in the Password field.
telnet
" (the default IP address) and click OK.
1234". As you type the password, the screen
*" for each character you type.
P-870MH-C1 User’s Guide
23
Page 24

Chapter 2 Introducing the SMT
2.1.3 SMT Menus Overview
The following table gives you an overview of your P-870MH-C1’s various SMT menus.
Table 2 SMT Menus Overview
MENUS SUB MENUS
1 General Setup 1.1 Configure Dynamic DNS
3 LAN Setup 3.2 TCP/IP and DHCP Setup 3.2.1 IP Alias Setup
23 System Password
24 System Maintenance 24.1 Status
24.2 System Information and
Console Port Speed
24.3 Log and Trace 24.3.1 View Error Log
24.7 Upload Firmware 24.7.1 Upload System Firmware
24.8 Command Interpreter Mode
24.2.1 Information
24.2.2 Change Console Port Speed
24.3.2 UNIX Syslog
24.7.2 Upload System Configuration File
2.2 Navigating the SMT Interface
The SMT (System Management Terminal) is the preferred interface that you use to configure
your P-870MH-C1.
Several operations that you should be familiar with before you attempt to modify the
configuration are listed in the table below.
Table 3 Navigating the SMT Interface
OPERATION KEY STROKE DESCRIPTION
Move down to
another menu
Move up to a
previous menu
Move to a hidden
menu
Move the cursor [ENTER] or [UP]/
Entering
information
Required fields <? > or
N/A fields <N/A> Some of the fields in the SMT will show a <N/A>. This symbol
[ENTER] To move forward to a submenu, type in the number of the
[ESC] Press [ESC] to move back to the previous menu.
Press [SPACE
BAR] to change
No to Yes then
press [ENTER].
[DOWN] arrow
keys.
Type in or press
[SPACE BAR],
then press
[ENTER].
ChangeMe
desired submenu and press [ENTER].
Fields beginning with "Edit" lead to hidden menus and have a
default setting of No. Press [SPACE BAR] once to change No to
Yes, then press [ENTER] to go to the "hidden" menu.
Within a menu, press [ENTER] to move to the next field. You
can also use the [UP]/[DOWN] arrow keys to move to the
previous and the next field, respectively.
You need to fill in two types of fields. The first requires you to
type in the appropriate information. The second allows you to
cycle through the available choices by pressing [SPACE BAR].
All fields with the symbol <?> must be filled in order to be able
to save the new configuration.
All fields with ChangeMe must not be left blank in order to be
able to save the new configuration.
refers to an option that is Not Applicable.
24
P-870MH-C1 User’s Guide
Page 25

Chapter 2 Introducing the SMT
Table 3 Navigating the SMT Interface (continued)
OPERATION KEY STROKE DESCRIPTION
Save your
configuration
Exit the SMT Type 99, then press [ENTER].Type 99 at the main menu prompt
[ENTER] Save your configuration by pressing [ENTER] at the message
"Press ENTER to confirm or ESC to cancel". Saving the data on
the screen will take you, in most cases to the previous menu.
and press [ENTER] to exit the SMT interface.
After you enter the password, the SMT displays the main menu, as shown next.
Figure 4 SMT Main Menu
Copyright (c) 1994 - 2006 ZyXEL Communications Corp.
P-870MH-C1 Main Menu
Getting Started Advanced Management
1. General Setup 23. System Password
3. LAN Setup 24. System Maintenance
Advanced Applications
99. Exit
Enter Menu Selection Number:
2.2.1 System Management Terminal Interface Summary
Table 4 Main Menu Summary
# MENU TITLE DESCRIPTION
1 General Setup Use this menu to set up your general information.
3 LAN Setup Use this menu to set up your wireless LAN and LAN connection.
23 System Security Use this menu to set up wireless security and change your
password.
24 System Maintenance This menu provides system status, diagnostics, software upload
information.
99 Exit Enter this number to exit from SMT.
2.3 Changing the System Password
Change the P-870MH-C1 default password by following the steps below.
1 Enter 23 in the main menu to display Menu 23 - System Security.
2 Enter 1 to display Menu 23.1 - System Security - Change Password as shown next.
3 Type your existing system password in the Old Password field, for example “
and press [ENTER].
1234",
P-870MH-C1 User’s Guide
25
Page 26

Chapter 2 Introducing the SMT
Figure 5 Menu 23.1 Change Password
Menu 23 - System Password
Old Password= ?
New Password= ?
Retype to confirm= ?
Enter here to CONFIRM or ESC to CANCEL:
4 Type your new system password in the New Password field (up to 30 characters), and
press [ENTER].
5 Re-type your new system password in the Retype to confirm field for confirmation and
press [ENTER].
" Note that as you type a password, the screen displays an astrisk“*” for each
character you type.
26
P-870MH-C1 User’s Guide
Page 27

CHAPTER 3
Configuration Using the SMT
This chapter shows you how to configure the P-870MH-C1 using the SMT.
3.1 General Setup
Menu 1 — General Setup contains administrative and system-related information (shown
next). The System Name field is for identification purposes. However, because some ISPs
check this name you should enter your computer's "Computer Name".
• In Windows 95/98 click Start, Settings, Control Panel, Network. Click the
Identification tab, note the entry for the Computer name field and enter it as the P870MH-C1 System Name.
• In Windows 2000 click Start, Settings, Control Panel and then double-click System.
Click the Network Identification tab and then the Properties button. Note the entry for
the Computer name field and enter it as the P-870MH-C1 System Name.
• In Windows XP, click start, My Computer, View system information and then click the
Computer Name tab. Note the entry in the Full computer name field and enter it as the
P-870MH-C1 System Name.
The Domain Name entry is what is propagated to the DHCP clients on the LAN. If you leave
this blank, the domain name obtained by DHCP from the ISP is used. While you must enter
the host name (System Name) on each individual computer, the domain name can be assigned
from the P-870MH-C1 via DHCP.
3.2 Procedure To Configure Menu 1
Enter 1 in the Main Menu to open Menu 1 — General Setup.
Figure 6 Menu 1 General Setup
Menu 1 - General Setup
System Name= ?
Domain Name=
Press ENTER to Confirm or ESC to Cancel:
P-870MH-C1 User’s Guide
27
Page 28

Chapter 3 Configuration Using the SMT
Fill in the required fields. Refer to the table shown next for more information about these
fields.
Table 5 Menu 1 General Setup
FIELD DESCRIPTION
System Name Choose a descriptive name for identification purposes. This name can be up to
30 alphanumeric characters long. Spaces are not allowed, but dashes “-” and
underscores "_" are accepted.
Domain Name Enter the domain name (if you know it) here. If you leave this field blank, the ISP
may assign a domain name via DHCP. You can go to Menu 24.8 and type "sys
domainname" to see the current domain name used by your gateway.
If you want to clear this field just press the [SPACE BAR]. The domain name
entered by you is given priority over the ISP assigned domain name.
When you have completed this menu, press [ENTER] at the prompt “Press ENTER to Confirm
or ESC to Cancel:” to save your configuration, or press [ESC] at any time to cancel.
3.3 LAN Setup
This section describes how to configure the Ethernet using Menu 3.2 — TCP/IP and DHCP
Ethernet Setup.
To edit Menu 3.2, enter 3 from the main menu to display Menu 3 — LAN Setup. When Menu
3 appears, press 2 and press [ENTER] to display Menu 3.2 — TCP/IP and DHCP Ethernet
Setup as shown next
Figure 7 Menu 3.2 TCP/IP and DHCP Ethernet Setup
Menu 3.2 - TCP/IP and DHCP Ethernet Setup
DHCP= None TCP/IP Setup:
Client IP Pool:
Starting Address= N/A IP Address= 192.168.1.2
Size of Client IP Pool= N/A IP Subnet Mask= 255.255.255.0
Multicast= None
Edit IP Alias= No
Press ENTER to Confirm or ESC to Cancel:
.
The following table describes the fields in this screen.
Table 6 Menu 3.2 TCP/IP and DHCP Ethernet Setup
FIELD DESCRIPTION
DHCP If set to Server, your P-870MH-C1 can assign IP addresses, a default
gateway and DNS servers to a compuer(s) set to use a dynamic IP address.
(DHCP client).
If set to None, the DHCP server will be disabled.
When DHCP server is used, the following items need to be set:
Client IP Pool
28
P-870MH-C1 User’s Guide
Page 29

Chapter 3 Configuration Using the SMT
Table 6 Menu 3.2 TCP/IP and DHCP Ethernet Setup (continued)
FIELD DESCRIPTION
Starting Address This field specifies the first of the contiguous addresses in the IP address
Size of Client IP Pool This field specifies the size or count of the IP address pool.
TCP/IP Setup
IP Address Enter the (LAN) IP address of your P-870MH-C1 in dotted decimal notation
IP Subnet Mask Your P-870MH-C1 will automatically calculate the subnet mask based on the
Multicast IGMP (Internet Group Multicast Protocol) is a network-layer protocol used to
Edit IP Alias The P-870MH-C1 supports three logical LAN interfaces via its single
When you have completed this menu, press [ENTER] at the prompt “Press ENTER to Confirm
or ESC to Cancel:
pool.
IP address that you assign. Unless you are implementing subnetting, use the
subnet mask computed by the P-870MH-C1 (refer to the appendices for
more information).
establish membership in a Multicast group. The P-870MH-C1 supports both
IGMP version 1 (IGMP-v1) and version 2 (IGMP-v2). Press the [
BAR]
to enable IP Multicasting or select None to disable it.
physical Ethernet interface with the P-870MH-C1 itself as the gateway for
each LAN network. Press [SPACE BAR] to change No to Yes and press
[
ENTER] to display Menu 3.2.1.
” to save your configuration, or press [ESC] at any time to cancel.
SPACE
3.3.1 IP Alias Setup
IP alias allows you to partition a physical network into different logical networks over the
same Ethernet interface. The P-870MH-C1 supports three logical LAN interfaces via its single
physical Ethernet interface with the P-870MH-C1 itself as the gateway for each LAN network.
The following figure shows a LAN divided into subnets A, B, and C.
Figure 8 IP Alias Network Example
In Menu 3.2, you configure the first network. Move the cursor to Edit IP Alias field and press
[SPACEBAR] to choose Ye s and press [ENTER] to display Menu 3.2.1 — IP Alias Setup as
shown next. Use Menu 3.2.1 to configure the second and third network.
" Make sure that the subnets of the logical networks do not overlap.
P-870MH-C1 User’s Guide
29
Page 30

Chapter 3 Configuration Using the SMT
Figure 9 Menu 3.2.1 IP Alias Setup
Menu 3.2.1 - IP Alias Setup
IP Alias 1= No
IP Address= N/A
IP Subnet Mask= N/A
RIP Direction= N/A
Version= N/A
Incoming protocol filters= N/A
Outgoing protocol filters= N/A
IP Alias 2= No
IP Address= N/A
IP Subnet Mask= N/A
RIP Direction= N/A
Version= N/A
Incoming protocol filters= N/A
Outgoing protocol filters= N/A
Enter here to CONFIRM or ESC to CANCEL:
Follow the instructions in the following table to configure IP Alias parameters.
Table 7 Menu 3.2.1 IP Alias Setup
FIELD DESCRIPTION
IP Alias Choose Yes to configure the LAN network for the P-870MH-C1.
IP Address Enter the IP address of your P-870MH-C1 in dotted decimal notation
IP Subnet Mask Your P-870MH-C1 will automatically calculate the subnet mask based on the IP
RIP Direction Press [
Version Press [
Incoming
Protocol Filters
Outgoing
Protocol Filters
When you have completed this menu, press [ENTER] at the prompt “
address that you assign. Unless you are implementing subnetting, use the subnet
mask computed by the P-870MH-C1
SPACE BAR] to select the RIP direction. Choices are None, Both, In Only
or Out Only.
SPACE BAR] to select the RIP version. Choices are RIP-1, RIP-2B or RIP-
2M.
Enter the filter set(s) you wish to apply to the incoming traffic between this node and
the P-870MH-C1.
Enter the filter set(s) you wish to apply to the outgoing traffic between this node and
the P-870MH-C1.
or ESC to Cancel:
3.4 System Maintenance
This section covers the information and diagnostic tools in SMT menus 24.1 to 24.7.
These tools include updates on system status, port status, log and trace capabilities and
upgrades for the device firmware and configuration.
Press ENTER to Confirm
” to save your configuration, or press [ESC] at any time to cancel.
30
Type 24 in the main menu to open Menu 24 – System Maintenance, as shown in the
following figure.
P-870MH-C1 User’s Guide
Page 31

Figure 10 Menu 24 System Maintenance
Menu 24 - System Maintenance
1. System Status
2. System Information and Console Port Speed
3. Log and Trace
7. Upload Firmware
8. Command Interpreter Mode
Enter Menu Selection Number:
3.4.1 System Status
The first selection, System Status, gives you information on the status and statistics of the
ports, as shown next. System Status is a tool that can be used to monitor your P-870MH-C1.
Specifically, it gives you information on your line status, number of packets sent and received.
To get to System Status, type 24 to go to Menu 24 — System Maintenance. From this menu,
type 1.
Chapter 3 Configuration Using the SMT
Figure 11 Menu 24.1 System Maintenance : Status
Menu 24.1 - System Maintenance - Status
Port Status TxPkts RxPkts Cols Tx B/s Rx B/s Up Time
LAN 100M/Full 289 5582 0 214 256 0:33:55
VDSL HANDSHAKE 0 0 0 0 0 0:00:00
Port Ethernet Address IP Address IP Mask DHCP
LAN 00:13:49:BB:94:AC 192.168.1.2 255.255.255.0 None
System up Time: 0:34:00
Press Command:
COMMANDS: 1-Reset Counters ESC-Exit
The following table describes the fields in this menu. .
Table 8 Menu 24.1 System Maintenance: Status
FIELD DESCRIPTION
Port This field displays the type of the port (LAN or VDSL).
Status This shows the status of the remote node.
TxPkts The number of transmitted packets to this remote node.
RxPkts The number of received packets from this remote node.
Cols This is the number of collisions.
Tx B/s This shows the transmission rate in bytes per second.
P-870MH-C1 User’s Guide
31
Page 32

Chapter 3 Configuration Using the SMT
Table 8 Menu 24.1 System Maintenance: Status (continued)
FIELD DESCRIPTION
Rx B/s This shows the receiving rate in bytes per second.
Up Time This is the time this channel has been connected to the current remote node.
Ethernet
Address
IP Address This field displays the IP address of the LAN interface.
IP Mask This field displays the subnet mask of the LAN interface
DHCP This field displays whether DHCP server is enabled on the LAN interface.
System Uptime This field displays the time that elapsed since the device was last restarted.
Press Command Etner 1 to reset the counters.
This field displays the MAC address of the LAN interface.
Enter [ESC] to return to the previous screen.
3.4.2 System Information and Console Port Setting
To di spla y Menu 24.2 - System Information and Console Port Speed, enter 2 in Menu 24.
The screen displays as shown next. From this menu you have two choices.
Figure 12 Menu 24.2 System Information and Console Port Speed
Menu 24.2 - System Information and Console Port Speed
1. System Information
2. Console Port Speed
Please enter selection:
3.4.2.1 System Information
Enter 1 in Menu 24.2 to display the screen shown next.
Figure 13 Menu 24.2.1 System Maintenance: Information
Menu 24.2.1 - System Maintenance - Information
Name:
Routing: IP
ZyNOS F/W Version: V3.50(RT.0) | 09/01/2006
Country Code: 255
LAN
Ethernet Address: 00:13:49:BB:94:AC
IP Address: 192.168.1.2
IP Mask: 255.255.255.0
DHCP: None
Press ESC or RETURN to Exit:
32
P-870MH-C1 User’s Guide
Page 33

The following table describes the fields in this menu.
Table 9 Menu 24.2.1 System Maintenance: Information
FIELD DESCRIPTION
Name Displays the system name of your P-870MH-C1. This information can be
Routing Refers to the routing protocol used.
ZyNOS F/W Version Refers to the ZyNOS (ZyXEL Network Operating System) system firmware
Country Code This field displays the code number for your country.
LAN
Ethernet Address Refers to the Ethernet MAC (Media Access Control) of your P-870MH-C1.
IP Address This is the IP address of the P-870MH-C1 in dotted decimal notation.
IP Mask This shows the subnet mask of the P-870MH-C1.
DHCP This field shows the DHCP setting (None or Server) of the P-870MH-C1.
3.4.2.2 Console Port Speed
Chapter 3 Configuration Using the SMT
changed in Menu 1 – General Setup.
version. ZyNOS is a registered trademark of ZyXEL Communications
Corporation.
" The console port is internal and is reserved for technician use only.
You can set up different port speeds for the console port through Menu 24.2.2 – System
Maintenance – Console Port Speed.
Your P-870MH-C1 supports 9600 (default), 19200, 38400, 57600 and 115200 bps. Press
[SPACE BAR] and then [ENTER] to select the desired speed in Menu 24.2.2.
Figure 14 Menu 24.2.2 System Maintenance : Change Console Port Speed
Menu 24.2.2 - System Maintenance - Change Console Port Speed
Console Port Speed: 9600
Press ENTER to Confirm or ESC to Cancel:
Once you change the console port speed, you must also set the speed parameter for the
communication software you are using to connect to the P-870MH-C1.
3.4.3 Log and Trace
The first place you should look for clues when something goes wrong is the error logs. Follow
the procedures to view the local error/trace log:
1 Type 24 in the main menu to display Menu 24 – System Maintenance.
2 From Menu 24, type 3 to display Menu 24.3 – System Maintenance – Log and Trace.
P-870MH-C1 User’s Guide
33
Page 34

Chapter 3 Configuration Using the SMT
Figure 15 Menu 24.3 System Maintenance: Log and Trace
Menu 24.3 - System Maintenance - Log and Trace
1. View Error Log
Please enter selection:
3 Enter 1 from Menu 24.3 — System Maintenance — Log and Trace and press
[ENTER] to display the error logs.
After the P-870MH-C1 finishes displaying the error log, you will have the option to clear it.
Samples of typical error and information messages are presented in the next figure.
Figure 16 Sample Error and Information Messages
56 Wed Jan 01 00:07:04 2003 PP0b INFO Login Successfully
57 Wed Jan 01 00:07:04 2003 PP0b INFO SMT Password pass
59 Wed Jan 01 00:24:14 2003 PP0b INFO Login Successfully
60 Wed Jan 01 00:24:14 2003 PP0b INFO SMT Password pass
62 Wed Jan 01 00:34:31 2003 PP0b INFO Login Successfully
63 Wed Jan 01 00:34:31 2003 PP0b INFO SMT Password pass
Clear Error Log (y/n):
34
P-870MH-C1 User’s Guide
Page 35

CHAPTER 4
Introducing the FTP Server
This chapter explains how to log in, use, and log out of the FTP server in the P-870MH-C1.
You can use the FTP server to upload firmware, back up the current configuration, and restore
a previously-saved configuration.
" The procedures depend on the FTP client you use. The following examples use
the standard, command-based FTP client provided in Windows 2000.
4.1 Logging in to the FTP Server
1 FTP to the device. The default IP address is 192.168.1.2.
2 When prompted, leave the user name blank, and enter the password (default: 1234).
Figure 17 User Name and Password
C:\>ftp 192.168.1.2
Connected to 192.168.1.2.
220 FTP version 1.0 ready at Wed Jan 01 03:44:06 2003
User (192.168.1.2:(none)):
331 Enter PASS command
Password:
230 Logged in
The P-870MH-C1 displays the prompt.
Figure 18 Prompt
ftp>
4.2 Upload Firmware
On your computer, the new firmware file has a .bin extension. (If you have a compressed file,
uncompress it first.) On the P-870MH-C1, the firmware is called ras (no extension).
Follow these directions to upload new firmware to the P-870MH-C1.
1 Log in to the device using FTP. See Section 4.1 on page 35.
2 Change the transfer mode to binary.
P-870MH-C1 User’s Guide
35
Page 36

Chapter 4 Introducing the FTP Server
3 Transfer the .bin file from the computer to the P-870MH-C1, and rename it to ras.
Figure 19 Example: Upload Firmware Using FTP
ftp> bin
200 Type I OK
ftp> put 350rt0b4.bin ras
200 Port command okay
150 Opening data connection for STOR ras
226 File received OK
ftp: 1079080 bytes sent in 2.83Seconds 380.76Kbytes/sec.
Wait for the P-870MH-C1 to reboot.
1 Do not interrupt the P-870MH-C1 while it is uploading new firmware or
rebooting after the upload. Interrupting the P-870MH-C1 might permanently
damage it.
When the P-870MH-C1 is ready again, you can log in to confirm that the P-870MH-C1 is
running the new firmware.
4.3 Back up the Current Configuration
On the P-870MH-C1, the current configuration is stored in the file called rom-0 (no
extension).
Follow these directions to back up the current configuration.
1 Log in to the device using FTP. See Section 4.1 on page 35.
2 Change the transfer mode to binary.
3 Transfer the rom-0 file from the P-870MH-C1 to the computer, and rename it if desired.
Figure 20 Example: Back up Current Configuration Using FTP
ftp> bin
200 Type I OK
ftp> get rom-0 zyxel.rom
200 Port command okay
150 Opening data connection for RETR rom-0
226 File sent OK
ftp: 16384 bytes received in 0.13Seconds 125.07Kbytes/sec.
4.4 Restoring a Previously-saved Configuration
Follow these directions to restore a previously-saved configuration file from the computer to
the P-870MH-C1.
1 Log in to the device using FTP. See Section 4.1 on page 35.
2 Change the transfer mode to binary.
36
P-870MH-C1 User’s Guide
Page 37

Chapter 4 Introducing the FTP Server
3 Transfer the configuration file from the computer to the P-870MH-C1, and rename it to
rom-0.
Figure 21 Example: Upload Firmware Using FTP
ftp> bin
200 Type I OK
ftp> put zyxel.rom rom-0
200 Port command okay
150 Opening data connection for STOR rom-0
226 File received OK
221 Goodbye for writing flash
ftp: 16384 bytes sent in 0.00Seconds 16384000.00Kbytes/sec.
Wait for the P-870MH-C1 to reboot.
1 Do not interrupt the P-870MH-C1 while it is uploading the configuration file or
rebooting after the upload. Interrupting the P-870MH-C1 might permanently
damage it.
When the P-870MH-C1 is ready again, you can log in to confirm that the P-870MH-C1 is
using the restored configuration file.
4.5 Logging out of the FTP Server
Type quit to log out of the FTP server.
P-870MH-C1 User’s Guide
37
Page 38

Chapter 4 Introducing the FTP Server
38
P-870MH-C1 User’s Guide
Page 39

PART III
CLI
This part contains the following chapters.
• Introducing the Command Interface (41)
• ip Commands (45)
• sys Commands (51)
• vdsl Commands (55)
• vlanQoS Commands (57)
39
Page 40

40
Page 41

CHAPTER 5
Introducing the Command
Interface
This chapter explains how to log in, use, and log out of the command interface in the P870MH-C1.
1 Refer to the release notes for your device for a complete list of commands
available. Use of undocumented commands or misconfiguration can damage
the unit and possibly render it unusable.
5.1 Starting the Command Interface (Logging In)
You can access the command interface via the SMT or Telnet.
5.1.1 Via the SMT
To access the CI from the SMT, enter 8 from Menu 24 — System Maintenance. Type “exit”
to return to the SMT main menu when finished.
Figure 22 Valid Commands
Menu 24 - System Maintenance
1. System Status
2. System Information and Console Port Speed
3. Log and Trace
7. Upload Firmware
8. Command Interpreter Mode
Enter Menu Selection Number: 8
Copyright (c) 1994 - 2006 ZyXEL Communications Corp.
ras>
5.1.2 Via Telnet
Follow the steps below to log into the command interface via Telnet
1 Telnet to the device. The default IP address is 192.168.1.2.
P-870MH-C1 User’s Guide
41
Page 42

Chapter 5 Introducing the Command Interface
2 When prompted, enter the password (default: 1234).
Figure 23 Password
Password : ****
The P-870MH-C1 displays the prompt.
Figure 24 Prompt
Copyright (c) 1994 - 2006 ZyXEL Communications Corp.
ras>
You can change the prompt by setting the host name. (See Section 7.4 on page 52.)
5.2 Using the Command Interface
The P-870MH-C1 uses a one-level command structure. You must type the full command every
time. For example, enter sys version; do not enter sys, press [ENTER], and then enter
version.
Figure 25 Command Interface: One-level Structure
ras> sys version
ZyNOS version: V3.50(RT.1) | 10/01/2006
romRasSize: 1079042
system up time: 0:05:47 (8790 ticks)
bootbase version: V1.04 | 06/23/2006
ZyNOS CODE: RAS Aug 18 2006 16:54:32
Product Model: P-870MH-C1
ras>
Commands can be abbreviated to the smallest unique string that differentiates the command
from other available commands. For example, the sys version command in the previous
example can be abbreviated to s ve.
Figure 26 Command Interface: Abbreviated Commands
ras> s ve
ZyNOS version: V3.50(RT.1) | 10/01/2006
romRasSize: 1079042
system up time: 0:05:47 (8790 ticks)
bootbase version: V1.04 | 06/23/2006
ZyNOS CODE: RAS Aug 18 2006 16:54:32
Product Model: P-870MH-C1
ras>
Type help or ? to display a list of commands that are available, or type a command followed
by help or ? to display the subcommands that are available for that command.
Figure 27 Command Interface: Help or ?
ras> ?
Valid commands are:
sys exit ip vdsl
vlanQoS
ras> vdsl help
status pktcntclr
ras>
42
P-870MH-C1 User’s Guide
Page 43

Chapter 5 Introducing the Command Interface
See Chapter 7 on page 57 for a list of available commands.
5.3 Stopping the Command Interface (Logging Out)
Type exit to log out of the command interface.
P-870MH-C1 User’s Guide
43
Page 44

Chapter 5 Introducing the Command Interface
44
P-870MH-C1 User’s Guide
Page 45

CHAPTER 6
ip Commands
This chapter introduces the basic ip commands.
6.1 ip address
Syntax:
ip address [<ip>]
Parameter(s):
<ip> = Specifies the new management IP address of the P-870MH-C1.
Use this command to look or set the management IP address of the P-870MH-C1. This IP
address is the same one you use to access the P-870MH-C1. If you change this IP address, you
have to log in to the P-870MH-C1 again.
6.2 ip arp status
Syntax:
ip arp status
Use this command to look at the ARP table and ARP statistics for the P-870MH-C1.
Figure 28 Example: ip arp status
ras> ip arp status
received 569 badtype 0 bogus addr 0 reqst in 0 replies 1 reqst out 1
cache hit 168 (98%), cache miss 3 (1%)
IP-addr Type Time Addr stat iface
192.168.1.34 10 Mb Ethernet 270 00:10:B5:AE:56:9B 41 enif0
192.168.1.255 10 Mb Ethernet 0 FF:FF:FF:FF:FF:FF 43 NULL
num of arp entries= 2
6.3 ip igmpsnp disable
Syntax:
ip igmpsnp disable
Use this command to disable IGMP snooping. See Section 6.6 on page 51 for examples of this
command.
P-870MH-C1 User’s Guide
45
Page 46

Chapter 6 ip Commands
6.4 ip igmpsnp disp
Syntax:
ip igmpsnp disp
Use this command to display the current status of IGMP snooping and to look at the multicast
groups currently passing through the P-870MH-C1. See Section 6.6 on page 51 for examples
of this command.
6.5 ip igmpsnp enable
Syntax:
ip igmpsnp enable
Use this command to enable IGMP snooping. See Section 6.6 on page 51 for examples of this
command.
6.6 ip igmpsnp maxresptime
Syntax:
ip igmpsnp maxresptime [<0..255>]
Parameter(s):
<0..255> = Specifies the maximum response time for IGMP snooping.
Use this command to look at or set the maximum response time for IGMP snooping. You have
to use this command when IGMP snooping is disabled. You cannot use this command when
IGMP snooping is enabled. See Section 6.6 on page 51 for examples of this command.
6.7 ip igmpsnp queryinterval
Syntax:
ip igmpsnp queryinterval [<0..255>]
Parameter(s):
<0..255> = Specifies the query interval for IGMP snooping.
Use this command to look at or set the query interval for IGMP snooping. You have to use this
command when IGMP snooping is disabled. You cannot use this command when IGMP
snooping is enabled. See Section 6.6 on page 51 for examples of this command.
6.8 ip igmpsnp robust
Syntax:
ip igmpsnp robust [<0..255>]
46
Parameter(s):
<0..255> = Specifies the robustness setting for IGMP snooping.
P-870MH-C1 User’s Guide
Page 47

Use this command to look at or set the robustness for IGMP snooping. You have to use this
command when IGMP snooping is disabled. You cannot use this command when IGMP
snooping is enabled. See Section 6.6 on page 51 for examples of this command.
6.9 ip igmpsnp Command Example
IGMP snooping is enabled by default. If you want to configure any settings, you have to
disable IGMP snooping first. The following figure shows some examples.
Figure 29 Enable IGMP Snooping
ras> ip igmpsnp enable
IGMP Snooping is enabled
Figure 30 Disable IGMP Snooping
ras> ip igmpsnp disable
IGMP Snooping is disabled
Chapter 6 ip Commands
Figure 31 Configure IGMP Snooping
ras> ip igmpsnp disable
IGMP Snooping is disabled
ras> ip igmpsnp maxresptime 20
SP_MaxResponseTime = 20
ras> ip igmpsnp queryinterval 25
SP_QueryInterval = 25
ras> ip igmpsnp robust 20
SP_Robustness = 20
ras> ip igmpsnp enable
IGMP Snooping is enabled
ras> ip igmpsnp disp
IGMP Snooping is: Enabled
group count: 0
MaxResponseTime=20, QueryInterval=25, Robustness=20
-------------------------------------------------------GroupID LANGroup To TimeOut
--------------------------------------------------------
P-870MH-C1 User’s Guide
47
Page 48

Chapter 6 ip Commands
Figure 32 Display Current Statistics for IGMP Snooping
ras> ip igmpsnp disp
IGMP Snooping is: Disabled
group count: 0
MaxResponseTime=20, QueryInterval=25, Robustness=20
-------------------------------------------------------GroupID LANGroup To TimeOut
--------------------------------------------------------
6.10 ip ping
Syntax:
ip ping <ip>
Parameter(s):
<ip> = Specifies the IP address of the device you want the P-870MH-C1
Use this command to ping a device on the network. You can use this command to test the
network connection between the P-870MH-C1 and the device with the specified IP address.
See Section 6.2 on page 46 for examples of this command.
6.11 ip tcp status
Syntax:
ip tcp status
Use this command to look at TCP packet statistics and TCP sockets on the P-870MH-C1.
Figure 33 Example: ip tcp status
ras> ip tcp status
( 1)tcpRtoAlgorithm 4 ( 2)tcpRtoMin 0
( 3)tcpRtoMax 4294967295 ( 4)tcpMaxConn 4294967295
( 5)tcpActiveOpens 0 ( 6)tcpPassiveOpens 1
( 7)tcpAttemptFails 0 ( 8)tcpEstabResets 0
( 9)tcpCurrEstab 1 (10)tcpInSegs 562
(11)tcpOutSegs 672 (12)tcpRetransSegs 0
(14)tcpInErrs 0 (15)tcpOutRsts 0
&TCB Rcv-Q Snd-Q Local socket Remote socket State
802f5024 0 602 192.168.1.2:23 192.168.1.34:1406 Estab
802f5138 0 0 0.0.0.0:21 0.0.0.0:0 Listen
to ping.
6.12 ip udp status
Syntax:
ip udp status
Use this command to look at UDP packet statistics and UDP sockets on the P-870MH-C1.
48
P-870MH-C1 User’s Guide
Page 49

Chapter 6 ip Commands
Figure 34 Example: ip udp status
ras> ip udp status
( 1)udpInDatagrams 0 ( 2)udpNoPorts 1715
( 3)udpInErrors 0 ( 4)udpOutDatagrams 0
&UCB Rcv-Q Local socket
802bbe50 0 0.0.0.0:1024
802bbe1c 0 0.0.0.0:53
802bbde8 0 0.0.0.0:69
802bbdb4 0 0.0.0.0:263
802bbcb0 0 0.0.0.0:520
P-870MH-C1 User’s Guide
49
Page 50

Chapter 6 ip Commands
50
P-870MH-C1 User’s Guide
Page 51

CHAPTER 7
sys Commands
This chapter introduces the basic sys commands.
7.1 sys cpu display
Syntax:
sys cpu display
Use this command to look at CPU utilization for the last minute.
Figure 35 Example: sys cpu display
ras> sys cpu display
CPU usage status:
baseline 338874 ticks
sec ticks util sec ticks util sec ticks util sec ticks util
0 330060 2.60 1 330434 2.49 2 330125 2.58 3 330447 2.48
4 330176 2.56 5 330254 2.54 6 330439 2.48 7 329741 2.69
8 322693 4.77 9 327038 3.49 10 324811 4.15 11 330232 2.55
12 330245 2.54 13 330066 2.59 14 330282 2.53 15 330217 2.55
16 329978 2.62 17 330417 2.49 18 330326 2.52 19 330272 2.53
20 329968 2.62 21 330173 2.56 22 330281 2.53 23 330456 2.48
24 330439 2.48 25 330262 2.54 26 330261 2.54 27 330313 2.52
28 330242 2.54 29 330487 2.47 30 330407 2.49 31 330355 2.51
32 330454 2.48 33 330145 2.57 34 330321 2.52 35 330004 2.61
36 330174 2.56 37 330436 2.49 38 330339 2.51 39 330546 2.45
40 330252 2.54 41 330451 2.48 42 327617 3.32 43 324994 4.09
44 329210 2.85 45 323175 4.63 46 323430 4.55 47 330038 2.60
48 327282 3.42 49 313833 7.39 50 326312 3.70 51 329123 2.87
52 329937 2.63 53 330430 2.49 54 330135 2.57 55 330315 2.52
56 330416 2.49 57 330327 2.52 58 330502 2.47 59 330088 2.59
60 330479 2.47 61 330430 2.49 62 328438 3.08
Each field is described in the following table.
Table 10 sys cpu display Output Values
LABEL DESCRIPTION
baseline This field displays the total number of CPU cycles in each one-second
sec This field identifies each one-second interval. Second 0 is the first
P-870MH-C1 User’s Guide
interval.
(earliest) interval.
51
Page 52

Chapter 7 sys Commands
Table 10 sys cpu display Output Values (continued)
LABEL DESCRIPTION
ticks This field displays the number of CPU cycles that the CPU was free in
util This field displays the CPU utilization in the specified interval. This is
7.2 sys date
Syntax:
sys date [<year> <month> <date>]
Parameter(s):
<year> = Specifies the current year, in four digits <yyyy>.
<month> = Specifies the current month <1..12>.
<date> = Specifies the current day <1..31>. (Days 29, 30, and 31 are not
Use this command to look at or set the current date and time in the P-870MH-C1. If you enter
the optional parameters, the command changes the value of the setting to the specified
parameter. If you do not enter any of the parameters, the command displays the current value.
See Section 6.1 on page 45 for examples of this command.
each interval.
equal to the number of CPU cycles that the CPU was busy in each
interval, divided by the total number of CPU cycles in each interval.
allowed in some months.)
7.3 sys domain
Syntax:
sys domain
Use this command to display the domain name of the P-870MH-C1.
7.4 sys hostname
Syntax:
sys hostname [<hostname>]
Parameter(s):
<hostname> = Specifies the system name of the P-870MH-C1. The name
Use this command to look at or set the system name of the P-870MH-C1. The system name is
used in the prompt that you see when you log in to the P-870MH-C1. If the name is blank, the
prompt is ras. See Section 6.1 on page 45 for examples of this command.
7.5 sys romreset
Syntax:
sys romreset
consists of 1-9 printable characters. Spaces and tabs are not
allowed.
52
P-870MH-C1 User’s Guide
Page 53

Use this command to reset the P-870MH-C1 to its factory default settings. The P-870MH-C1
also reboots. Afterwards, you have to connect to the P-870MH-C1 again. See Section 6.1 on
page 45 for examples of this command.
7.6 sys stdio
Syntax:
sys stdio [<0..3600>]
Parameter(s):
<0..3600> = Specifies the idle timeout, in minutes, for each management
Use this command to set the idle timeout for each management session. You can also disable
the timeout by setting this value to 0. See Section 6.1 on page 45 for examples of this
command.
7.7 sys time
Syntax:
sys time [<hour> [<min> [<sec>]]]
Chapter 7 sys Commands
session. Enter 0 to disable the idle timeout.
Parameter(s):
<hour> = Specifies the current hour <0..23>.
<min> = Specifies the current minute <0..59>.
<sec> = Specifies the current second <0..59>.
Use this command to look at or set the current time in the P-870MH-C1. If you enter the
optional parameters, the command changes the value of the setting to the specified parameter.
If you do not enter any of the parameters, the command displays the current value. If you enter
some but not all of the parameters, the P-870MH-C1 continues to use the current value for
unspecified parameters.
7.8 sys version
Syntax:
sys version
Use this command to look at information about the current firmware version.
Figure 36 Example: sys version
ras> sys version
ZyNOS version: V3.50(RT.0)b2 | 07/13/2006
romRasSize: 1076656
system up time: 0:20:29 (1e065 ticks)
bootbase version: V1.04 | 06/23/2006
ZyNOS CODE: RAS Jul 12 2006 16:20:22
Product Model: P-870MH-C1
P-870MH-C1 User’s Guide
53
Page 54

Chapter 7 sys Commands
Each field is described in the following table.
Tabl e 11 sys version Output Values
LABEL DESCRIPTION
ZyNOS version This field displays the current firmware version.
romRasSize This field displays the size of the current firmware version.
system up time This field displays how long the P-870MH-C1 has been running since
bootbase version This field displays the current bootbase version. Bootbase is software
ZyNOS CODE This field displays the current ZyNOS version.
Product Model This field displays the model name.
the last time it was reset or turned on.
that contains the most basic operating instructions of the P-870MH-C1.
54
P-870MH-C1 User’s Guide
Page 55

CHAPTER 8
vdsl Commands
This chapter introduces the basic vdsl commands.
8.1 vdsl pktcntclr
Syntax:
vdsl pktcntclr
Use this command to clear the VDSL statistics in the P-870MH-C1. These statistics are
displayed by the vdsl status command.
8.2 vdsl status
Syntax:
vdsl status
Use this command to look at various statistics about the VDSL connection. You can clear
many of these statistics by using the vdsl pktcntclr command.
P-870MH-C1 User’s Guide
55
Page 56

Chapter 8 vdsl Commands
Figure 37 Example: vdsl status
ras> vdsl status
============================================================
VDSL DSP Firmware Version: 1.52
VDSL Line State: HANDSHAKE Total Transmit Power: 0.0 dB
DS Payload Rate: 0kbps Local Attenuation: 0.0 dB
US Payload Rate: 0kbps Local SNR Margin: 0.0 dB
VDSL retrain: 0 times Local avg SNR: 0.0 dB
DSP recovery: 0 times
----------------------------------------------------------- COE Parameters:
Romote Transmit Power: 0.0 dB
Romote Init SNR: 0.0 dB
Romote SNR Margin: 0.0 dB
Remote Attenuation: 0.0 dB
----------------------------------------------------------- Counters since last reset
RX Packet Count: 0 TX Packet Count: 0
Local FEC Error: 0 Remote FEC Error: 0
Local CRC Error: 0 Remote CRC Error: 0
Local SEF Error: 0 Remote SEF Error: 0
Local LOS Error: 0 Remote LOS Error: 0
----------------------------------------------------------- Failure Condition
Overall: 0
Error Code: 0 Watch Dog Timer: 83
Local LOS: 0 Remote LOS: 0
Local SEF: 0 Remote SEF: 0
Local NCDI: 0 Remote NCDI: 0
Local LCDI: 0 Remote LCDI: 0
============================================================
56
P-870MH-C1 User’s Guide
Page 57

CHAPTER 9
vlanQoS Commands
This chapter introduces the vlanQoS commands.
9.1 vlanQoS 1qconfig
Syntax:
vlanQoS 1qconfig <item#> <T|F|U> <port#> [<port#> [<port#> [...]]]
Parameter(s):
<item#> = Specifies the item number of the VLAN. See the vlanQoS 1qset
command for more information about the item number.
<T|F|U> = Specifies what type of port the specified port(s) is(are) in the
<port#> = Specifies the port number <1..5> of each port to which the
specified VLAN.
T: Tagged port
F: Forbidden port
U: Untagged port
specified type is assigned. Port 5 is the DSL port.
Use this command to configure port settings for an IEEE 802.1Q VLAN. You have to use the
vlanQoS 1qset command to create the VLAN first.
Run the vlanQoS save command to save this change to non-volatile memory. See Section
6.4 on page 48 for examples of this command.
9.2 vlanQoS 1qset
Syntax:
vlanQoS 1qset <vid>
Parameter(s):
<vid> = Specifies the VLAN ID.
Use this command to create a new IEEE 802.1Q VLAN in the P-870MH-C1. This VLAN
replaces any existing VLAN with the same item number. If there is no existing VLAN, all of
the ports are forbidden by default.
In the P-870MH-C1, each VLAN has an associated item number. You can look up the item
number by using the vlanQoS disp command. You can also calculate it. The item number
is the VLAN ID mod 8, or the remainder when the VLAN ID is divided by eight.
P-870MH-C1 User’s Guide
57
Page 58

Chapter 9 vlanQoS Commands
Run the vlanQoS save command to save this change to non-volatile memory. See Section
6.4 on page 48 for examples of this command.
9.3 vlanQoS clear
Syntax:
vlanQoS clear <p|P|1|a|A> [<item#>|<port#>]
Parameter(s):
<p|P|1|a|A> = Specifies which settings you want to clear.
<item#> = Specifies the item number of the VLAN. See the vlanQoS 1qset
<port#> = Specifies the port number <1..5>. Port 5 is the DSL port. You can
p|P: Port-based VLAN settings and QoS settings
1: IEEE 802.1Q settings
a|A: All port-based VLAN settings, IEEE 802.1Q settings, and QoS
settings
command for more information about the item number. You can
only use this parameter if you clear IEEE 802.1Q settings (option
1)
only use this parameter if you clear port-based VLAN settings
(options p or P).
Use this command to reset port-based VLAN settings and/or IEEE 802.1Q settings to their
default values. For port-based VLAN settings, you can reset a specific port or all ports. For
IEEE 802.1Q settings, you can reset a specific VLAN or all VLANs.
Run the vlanQoS save command to save this change to non-volatile memory. See Section
6.3 on page 47 and Section 6.4 on page 48 for examples of this command.
9.4 vlanQoS disp
Syntax:
vlanQoS disp
Use this command to display the current settings for port-based VLAN or IEEE 802.1Q
VLAN (whichever one is active) and for QoS. For IEEE 802.1Q VLAN, forbidden ports are
indicated by a blank value or an F.
Run the vlanQoS save command to save this change to non-volatile memory. See Section
6.3 on page 47, Section 6.4 on page 48, and Section 6.5 on page 50 for examples of this
command.
9.5 vlanQoS modechane
Syntax:
vlanQoS modechane <0|1>
58
Parameter(s):
<0|1> = Specifies whether the P-870MH-C1 uses port-based VLAN (0) or
IEEE 802.1Q VLAN (1).
P-870MH-C1 User’s Guide
Page 59

Use this command to specify whether the P-870MH-C1 uses port-based VLAN or IEEE
802.1Q VLAN. The P-870MH-C1 always uses one or the other, but the default settings for
either mode make the P-870MH-C1 behave like a regular switch.
Run the vlanQoS save command to save this change to non-volatile memory. See Section
6.3 on page 47 and Section 6.4 on page 48 for examples of this command.
9.6 vlanQoS pvlanset
Syntax:
vlanQoS pvlanset <port#> <port#> [<port#> [<port#> [...]]]
Parameter(s):
<port#> = Specifies the incoming (first parameter) and outgoing (second
Use port-based VLAN to create groups of ports that broadcast traffic to each other. For
example, if you combine ports 1, 2, and 5 (DSL), then incoming traffic on any of these ports is
broadcast to the other ports. They do not broadcast traffic to ports 3 and 4, and ports 3 and 4 do
not send traffic to ports 1, 2, or 5. If you then combine ports 3, 4, and 5, incoming traffic from
port 5 is broadcast to ports 1-4 because it is part of both groups. Incoming traffic from ports 3
and 4 is only broadcast to ports 3-5.
Chapter 9 vlanQoS Commands
parameter) port number <1..5>. Port 5 is the DSL port.
Run the vlanQoS save command to save this change to non-volatile memory. See Section
6.4 on page 48 for examples of this command.
9.7 vlanQoS ratio
Syntax:
vlanQoS ratio <0|1|2|3>
Parameter(s):
<0|1|2|3> = Specifies how much more traffic is switched for high-priority ports
Use this command to specify how much more traffic is switched for high-priority ports than
for low-priority ports. Use the vlanQoS qosset command to set the priority of each port.
Run the vlanQoS save command to save this change to non-volatile memory. See Section
6.5 on page 50 for examples of this command.
9.8 vlanQoS save
than for low-priority ports.
0: 4:1 ratio
1: 16:1 ratio
2: 64:1 ratio
3: Always switch traffic for the high-priority ports first.
Syntax:
vlanQoS save
P-870MH-C1 User’s Guide
59
Page 60

Chapter 9 vlanQoS Commands
Use this command to save the current settings for port-based VLAN, IEEE 802.1Q VLAN,
and QoS to non-volatile memory in the P-870MH-C1. Otherwise, these settings are lost when
the P-870MH-C1 reboots or restarts.
9.9 vlanQoS Command Examples
This section shows two VLAN configuration examples.
9.9.1 Port-based VLAN
Commands:
vlanQoS modechane <0|1>
vlanQoS pvlanset <port#> <port#> [<port#> [<port#> [...]]]
vlanQoS disp
vlanQoS clear <p|P|1|a|A> [<item#>|<port#>]
vlanQoS save
The P-870MH-C1 always uses either port-based VLAN or IEEE 802.1Q VLAN. In either
case, the default settings make the P-870MH-C1 behave like a regular switch.
Use port-based VLAN to create groups of ports that broadcast traffic to each other. For
example, if you combine ports 1, 2, and 5 (DSL), then incoming traffic on any of these ports is
broadcast to the other ports. They do not broadcast traffic to ports 3 and 4, and ports 3 and 4 do
not send traffic to ports 1, 2, or 5. If you then combine ports 3, 4, and 5, incoming traffic from
port 5 is broadcast to ports 1-4 because it is part of both groups. Incoming traffic from ports 3
and 4 is only broadcast to ports 3-5.
Use the vlanQoS save command to save your changes to non-volatile memory.
Examples:
Figure 38 Enable Port-based VLAN (Disable IEEE 802.1Q VLAN)
ras> vlanQoS mode 0
ras> vlanQoS save
Figure 39 Look at the Current Settings for Port-based VLAN
ras> vlanQoS mode 0
ras> vlanQoS disp
60
P-870MH-C1 User’s Guide
Page 61

Chapter 9 vlanQoS Commands
Figure 40 Configure Port-based VLAN
ras> vlanQoS mode 0
ras> vlanQoS disp
ras> vlanQoS pvlanset 1 2 5
=================== Port Base VLAN Setting =================
Outgoing
WLAN LAN1 LAN2 LAN3 LAN4 VDSL
I 0 1 2 3 4 5
n WLAN 0 v v v v
c LAN1 1 v v v
o LAN2 2 v v v
m LAN3 3 v v v v
I LAN4 4 v v v v
n VDSL 5 v v v v v v
g
================================================================ras>
vlanQoS save
ras> vlanQoS disp
Figure 41 Reset Port-based VLAN Settings to Default Values
ras> vlanQoS clear p
ras> vlanQoS save
Figure 42 Disable Port-based VLAN (Enable IEEE 802.1Q VLAN)
ras> vlanQoS mode 1
ras> vlanQoS save
9.9.2 IEEE 802.1Q VLAN
Commands:
vlanQoS modechane <0|1>
vlanQoS 1qset <vid>
vlanQoS 1qconfig <item#> <T|F|U> <port#> [<port#> [<port#> [...]]]
vlanQoS disp
vlanQoS clear <p|P|1|a|A> [<item#>|<port#>]
vlanQoS save
The P-870MH-C1 always uses either port-based VLAN or IEEE 802.1Q VLAN. In either
case, the default settings make the P-870MH-C1 behave like a regular switch.
IEEE 802.1Q VLAN allows you to specify tagged, untagged, and forbidden ports for up to
eight VLANs. If the P-870MH-C1 receives untagged frames from any port, it switches these
like a regular switch.
In the P-870MH-C1, each VLAN has an associated item number. You can look up the item
number by using the vlanQoS disp command. You can also calculate it. The item number
is the remainder when the VLAN ID is divided by eight (or VLAN ID mod 8). If you create a
VLAN with the same remainder as an existing VLAN, the new VLAN ID replaces the old one.
P-870MH-C1 User’s Guide
61
Page 62

Chapter 9 vlanQoS Commands
Use the vlanQoS save command to save your changes to non-volatile memory.
Examples:
Figure 43 Enable IEEE 802.1Q VLAN (Disable Port-based VLAN)
ras> vlanQoS mode 1
ras> vlanQoS save
Figure 44 Look at the Current Settings for IEEE 802.1Q VLAN
ras> vlanQoS mode 1
ras> vlanQoS disp
====================== 802.1Q Setting ======================
(T):TAGGING; (F):FORBIDDEN; (U):UNTAGGED;
Port ID : 0 1 2 3 4 5
Priority : L L L L L L
WLAN LAN1 LAN2 LAN3 LAN4 VDSL
ITEM VID :
0 0
1 0
2 0
3 0
4 0
5 0
6 0
7 0
================================================================
Broadcast Storm is DISABLE
Action for Unknown Multicast frames is FLOODING
================================================================
ras>
62
P-870MH-C1 User’s Guide
Page 63

Chapter 9 vlanQoS Commands
Figure 45 Create New IEEE 802.1Q VLAN and Configure Port Settings
ras> vlanQoS mode 1
ras> vlanQoS 1qset 10
ras> vlanQoS 1qconfig 2 T 1 2 5
ras> vlanQoS save
ras> vlanQoS disp
====================== 802.1Q Setting ======================
(T):TAGGING; (F):FORBIDDEN; (U):UNTAGGED;
Port ID : 0 1 2 3 4 5
Priority : L L L L L L
WLAN LAN1 LAN2 LAN3 LAN4 VDSL
ITEM VID :
0 0
1 0
2 10 T T T
3 0
4 0
5 0
6 0
7 0
================================================================
Broadcast Storm is DISABLE
Action for Unknown Multicast frames is FLOODING
================================================================
ras>
P-870MH-C1 User’s Guide
63
Page 64

Chapter 9 vlanQoS Commands
Figure 46 Configure Port Settings for Existing IEEE 802.1Q VLAN
ras> vlanQoS mode 1
ras> vlanQoS 1qconfig 2 U 2
ras> vlanQoS save
ras> vlanQoS disp
====================== 802.1Q Setting ======================
(T):TAGGING; (F):FORBIDDEN; (U):UNTAGGED;
Port ID : 0 1 2 3 4 5
Priority : L L L L L L
WLAN LAN1 LAN2 LAN3 LAN4 VDSL
ITEM VID :
0 0
1 0
2 10 T U T
3 0
4 0
5 0
6 0
7 0
================================================================
Broadcast Storm is DISABLE
Action for Unknown Multicast frames is FLOODING
================================================================
ras>
Figure 47 Reset IEEE 802.1Q Settings to Default Values
ras> vlanQoS clear p
ras> vlanQoS save
Figure 48 Disable IEEE 802.1Q VLAN (Enable Port-based VLAN)
ras> vlanQoS mode 0
ras> vlanQoS save
64
P-870MH-C1 User’s Guide
Page 65

PART III
Appendices and
Index
This part contains the following chapters.
• Specifications (67)
• Legal Information (69)
• Index (73)
65
Page 66

66
Page 67

APPENDIX A
Specifications
The following tables provide the specifications for the P-870MH-C1.
Table 12 Specifications
FEATURE SPECIFICATION
Default IP Address 192.168.1.2
Default Subnet Mask 255.255.255.0
Default Password 1234
VDSL Band plan 12a
Speed up to 100/45 Mbps
Multi-Carrier Modulation (MCM) or Quadrature Amplitude Modulation
(QAM)
Selectable Rate Adoption
Complies with ITU-T G.993.1, G.994.1
Operating Requirements Temperature: 5~40 C
Humidity: 20-80% RH (non-condensing)
Storage Requirements Temperature: -30~60 C
Humidity: 20-95% RH (non-condensing)
Power Requirements 12V AC, 1.25A
Hardware RJ-11 connector (VDSL)
Four auto MDI/MDI-X 10/100Base-TX Ethernet RJ45 ports
(ETHERNET)
RESET button
Power switch, push button
QoS Layer 2 QoS
IEEE 802.1p QoS, 2 queues support
IEEE 802.1Q tag-based and port-based support
Multicast IGMP snooping IETF draft-ietf-magmasnoop-04 or later
Bridge Transparent Bridging support
IEEE 802.1D Spanning Tree support
Ethernet over VDSL bridging
P-870MH-C1 User’s Guide
67
Page 68

Appendix A Specifications
68
P-870MH-C1 User’s Guide
Page 69

APPENDIX B
Legal Information
Copyright
Copyright © 2006 by ZyXEL Communications Corporation.
The contents of this publication may not be reproduced in any part or as a whole, transcribed,
stored in a retrieval system, translated into any language, or transmitted in any form or by any
means, electronic, mechanical, magnetic, optical, chemical, photocopying, manual, or
otherwise, without the prior written permission of ZyXEL Communications Corporation.
Published by ZyXEL Communications Corporation. All rights reserved.
Disclaimer
ZyXEL does not assume any liability arising out of the application or use of any products, or
software described herein. Neither does it convey any license under its patent rights nor the
patent rights of others. ZyXEL further reserves the right to make changes in any products
described herein without notice. This publication is subject to change without notice.
Trademarks
ZyNOS (ZyXEL Network Operating System) is a registered trademark of ZyXEL
Communications, Inc. Other trademarks mentioned in this publication are used for
identification purposes only and may be properties of their respective owners.
Certifications
Federal Communications Commission (FCC) Interference Statement
This device complies with Part 15 of FCC rules. Operation is subject to the following two
conditions:
• This device may not cause harmful interference.
• This device must accept any interference received, including interference that may cause
undesired operations.
This equipment has been tested and found to comply with the limits for a Class B digital
device pursuant to Part 15 of the FCC Rules. These limits are designed to provide reasonable
protection against harmful interference in a commercial environment. This equipment
generates, uses, and can radiate radio frequency energy, and if not installed and used in
accordance with the instructions, may cause harmful interference to radio communications.
P-870MH-C1 User’s Guide
69
Page 70

Appendix B Legal Information
If this equipment does cause harmful interference to radio/television reception, which can be
determined by turning the equipment off and on, the user is encouraged to try to correct the
interference by one or more of the following measures:
• Reorient or relocate the receiving antenna.
• Increase the separation between the equipment and the receiver.
• Connect the equipment into an outlet on a circuit different from that to which the receiver
is connected.
• Consult the dealer or an experienced radio/TV technician for help.
FCC Radiation Exposure Statement
• The device complies with FCC RF radiation exposure limits set forth for an uncontrolled
environment, under 47 CFR 2.1093 paragraph (d)(2). End users must follow the specific
operating instructions for satisfying RF exposure compliance. To maintain compliance
with FCC RF exposure compliance requirements, please follow operation instruction as
documented in this manual.
• This transmitter must not be co-located or operating in conjunction with any other antenna
or transmitter.
• IEEE 802.11b or 802.11g operation of this product in the U.S.A. is firmware-limited to
channels 1 through 11.
• To comply with FCC RF exposure compliance requirements, a separation distance of at
least 20 cm must be maintained between the antenna of this device and all persons.
注意 !
依據 低功率電波輻射性電機管理辦法
第十二條 經型式認證合格之低功率射頻電機,非經許可,公司、商號或使用
者均不得擅自變更頻率、加大功率或變更原設計之特性及功能。
第十四條 低功率射頻電機之使用不得影響飛航安全及干擾合法通信;經發現
有干擾現象時,應立即停用,並改善至無干擾時方得繼續使用。
前項合法通信,指依電信規定作業之無線電信。低功率射頻電機須忍
受合法通信或工業、科學及醫療用電波輻射性電機設備之干擾。
Notices
Changes or modifications not expressly approved by the party responsible for compliance
could void the user's authority to operate the equipment.
This device has been designed for the WLAN 2.4 GHz network throughout the EC region and
Switzerland, with restrictions in France.
This Class B digital apparatus complies with Canadian ICES-003.
Viewing Certifications
1 Go to http://www.zyxel.com
2 Select your product from the drop-down list box on the ZyXEL home page to go to that
product's page.
3 Select the certification you wish to view from this page.
.
70
P-870MH-C1 User’s Guide
Page 71

ZyXEL Limited Warranty
ZyXEL warrants to the original end user (purchaser) that this product is free from any defects
in materials or workmanship for a period of up to two years from the date of purchase. During
the warranty period, and upon proof of purchase, should the product have indications of failure
due to faulty workmanship and/or materials, ZyXEL will, at its discretion, repair or replace the
defective products or components without charge for either parts or labor, and to whatever
extent it shall deem necessary to restore the product or components to proper operating
condition. Any replacement will consist of a new or re-manufactured functionally equivalent
product of equal value, and will be solely at the discretion of ZyXEL. This warranty shall not
apply if the product is modified, misused, tampered with, damaged by an act of God, or
subjected to abnormal working conditions.
Note
Repair or replacement, as provided under this warranty, is the exclusive remedy of the
purchaser. This warranty is in lieu of all other warranties, express or implied, including any
implied warranty of merchantability or fitness for a particular use or purpose. ZyXEL shall in
no event be held liable for indirect or consequential damages of any kind of character to the
purchaser.
Appendix B Legal Information
To obtain the services of this warranty, contact ZyXEL's Service Center for your Return
Material Authorization number (RMA). Products must be returned Postage Prepaid. It is
recommended that the unit be insured when shipped. Any returned products without proof of
purchase or those with an out-dated warranty will be repaired or replaced (at the discretion of
ZyXEL) and the customer will be billed for parts and labor. All repaired or replaced products
will be shipped by ZyXEL to the corresponding return address, Postage Paid. This warranty
gives you specific legal rights, and you may also have other rights that vary from country to
country.
Registration
Register your product online to receive e-mail notices of firmware upgrades and information
at www.zyxel.com for global products, or at www.us.zyxel.com for North American products.
P-870MH-C1 User’s Guide
71
Page 72

Appendix B Legal Information
72
P-870MH-C1 User’s Guide
Page 73

Index
Index
A
applications 21
C
certifications 69
notices 70
viewing 70
Collision 31
command interface 41
abbreviating commands 42
help 42
logging in 41
logging out 43
using 42
commands
abbreviating 42
IEEE 802.1Q VLAN 61
port-based VLAN 60
Computer Name 27
configuration
backing up 36
restoring 36
copyright 69
logging out 37
restoring configuration 36
uploading firmware 35
G
General Setup 27
H
help 42
Hidden Menus 24
I
IEEE 802.1Q VLAN 61
IP Address 29, 33
IP alias 29
IP Alias Setup 29
D
DHCP 33
Diagnostic Tools 30
disclaimer 69
domain name 27
F
FCC interference statement 69
firmware
uploading 35
FTP
backing up configuration 36
logging in 35
P-870MH-C1 User’s Guide
L
LEDs 22
Logical networks 29
M
Main Menu 25
managing the device
good habits 22
using FTP. See FTP.
using Telnet. See command interface.
using the command interface. See command
interface.
73
Page 74

Index
P
Packets 31
port-based VLAN 60
product registration 71
R
RAS 33
Rate
Receiving 32
Transmission 31
registration
product 71
related documentation 3
Remote Node 32
Required fields 24
S
safety warnings 6, 71
SMT Menu Overview 24
Subnet Mask 29, 33
syntax conventions 4
System
Console Port Speed 33
Log and Trace 33
System Information 32
System Status 31
System Maintenance 31
System Management Terminal 24
System Status 31
T
Te ln e t 23
trademarks 69
74
W
warranty 71
note 71
P-870MH-C1 User’s Guide
 Loading...