

Chapter 21 Tools
Backup Configuration
Backup Configuration allows you to back up (save) the ZyXEL Device’s current
configuration to a file on your computer. Once your ZyXEL Device is configured
and functioning properly, it is highly recommended that you back up your
configuration file before making configuration changes. The backup configuration
file will be useful in case you need to return to your previous settings.
Click Backup to save the ZyXEL Device’s current configuration to your computer.
Restore Configuration
Restore Configuration allows you to upload a new or previously saved
configuration file from your computer to you r ZyXEL Device.
Table 90 Restore Configuration
LABEL DESCRIPTION
File Path Type in the location of the file you want to upload in this field or click
Browse ... to find it.
Browse... Click this to find the file you want to upload. Remember that you must
decompress compressed (.ZIP) files before you can upload them.
Upload Click this to begin the upload process.
Do not turn off the ZyXEL Device while configuration file upload is
in progress.
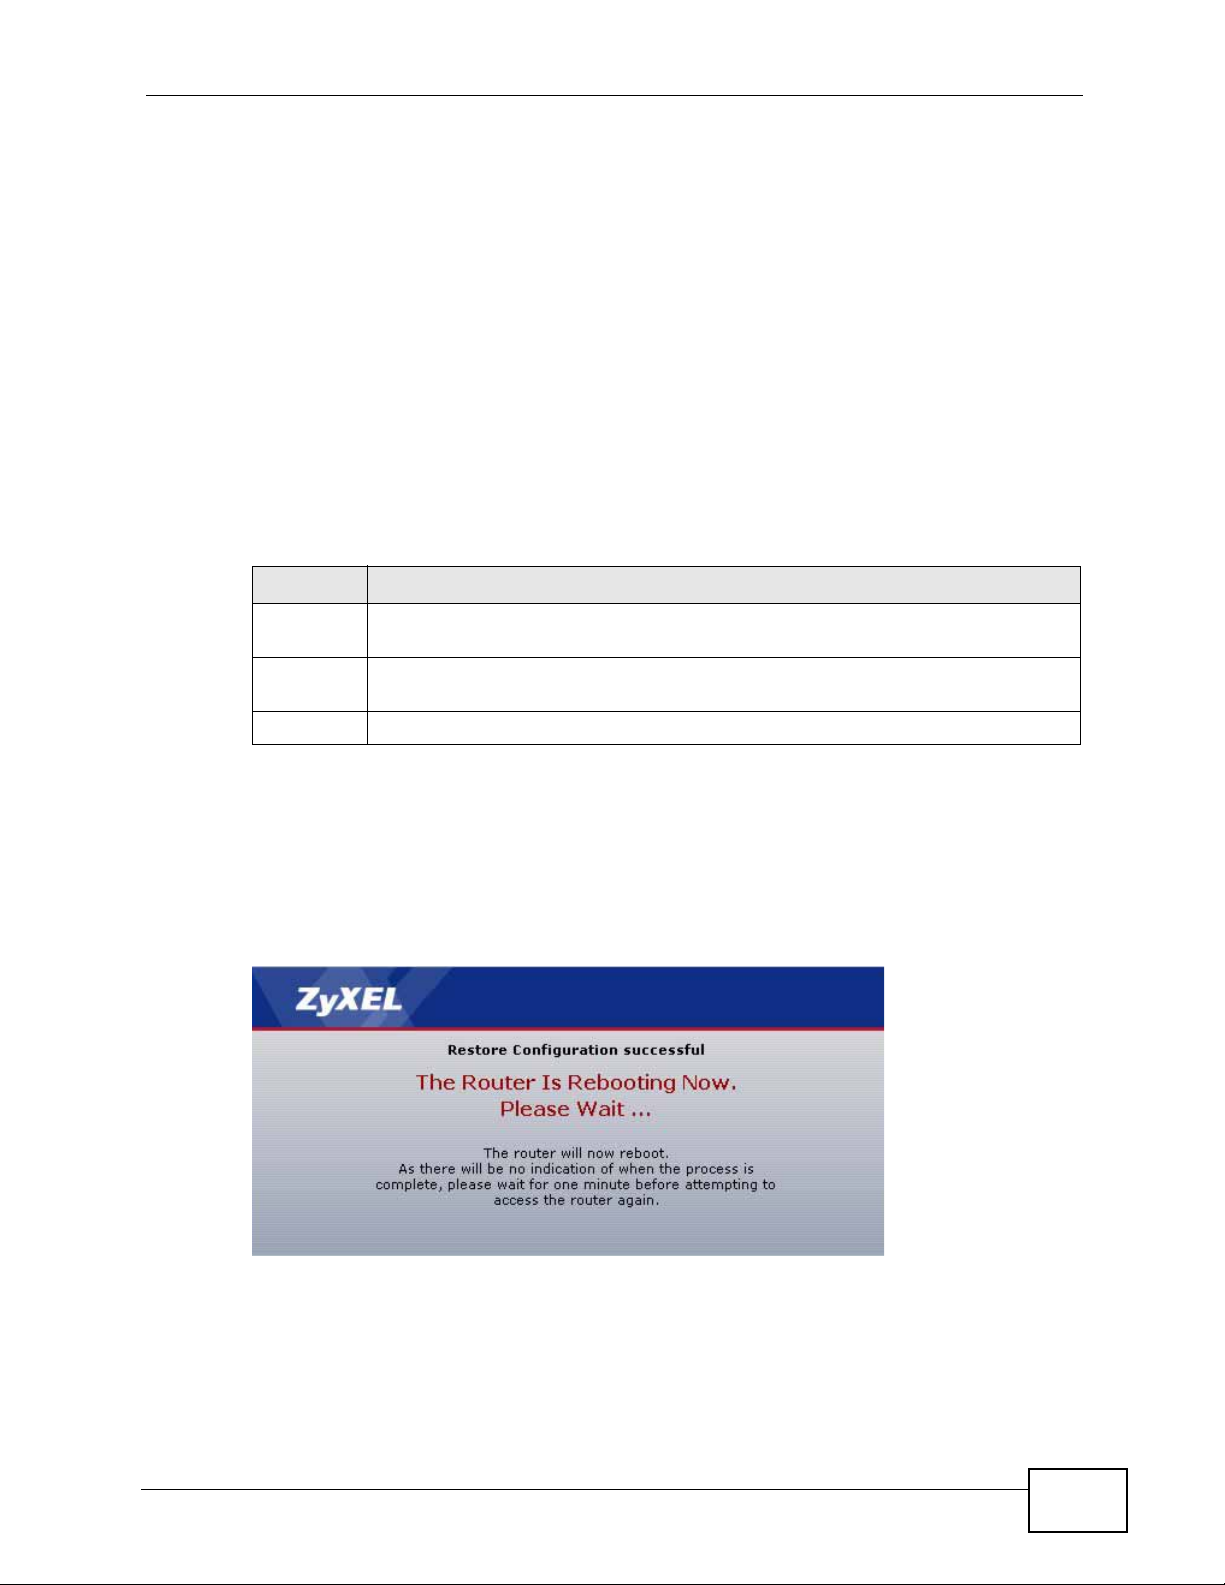
After you see a “restore configuration successful” screen, you must then wait one
minute before logging into the ZyXEL Device again.
Figure 107 Configuration Upload Successful
P-660N-T1A User’s Guide
221
Chapter 21 Tools
The ZyXEL Device automatically restarts in this time causing a temporary network
disconnect. In some operating systems, you may see the following icon on your
desktop.
Figure 108 Network Temporarily Disconnected
If you uploaded the default configuration file you may need to change the IP
address of your computer to be in the same subnet as that of the default device IP
address (192.168.1.1). See Appendix A on page 243 for details on how to set up
your computer’s IP address.
If the upload was not successful, the following screen will appear. Click Return to
go back to the Configuration screen.
Figure 109 Configuration Upload Error
222
P-660N-T1A User’s Guide

Chapter 21 Tools
Reset to Factory Defaults
Click the Reset button to clear all user-entered configuration information and
return the ZyXEL Device to its factory defaults. The following warning screen
appears.
Figure 110 Reset Warning Message
Figure 111 Reset In Process Message
You can also press the RESET button on the rear panel to reset the factory
defaults of your ZyXEL Device. Refer to Section 1.6 on page 26 for more
information on the RESET button.
21.4 The Restart Screen
System restart allows you to reboot the ZyXEL Device remotely without turning
the power off. You may need to do this if the ZyXEL Device hangs, for example.
Click Maintenance > Tools > Restart. Click Restart to have the ZyXEL Device
reboot. This does not affect the ZyXEL Device's configuration.
Figure 112 Maintenance > Tools >Restart
P-660N-T1A User’s Guide
223

Chapter 21 Tools
224
P-660N-T1A User’s Guide
CHAPTER 22
Diagnostic
22.1 Overview
These read-only screens display information to help you identify problems with the
ZyXEL Devic e.
22.1.1 What You Can Do in the Diagnostic Screens
•Use the General Diagnostic screen (Section 22.2 on page 225) to ping an IP
address.
•Use the DSL Line Diagnostic screen (Section 22.3 on page 226) to view the
DSL line statistics and reset the ADSL line.
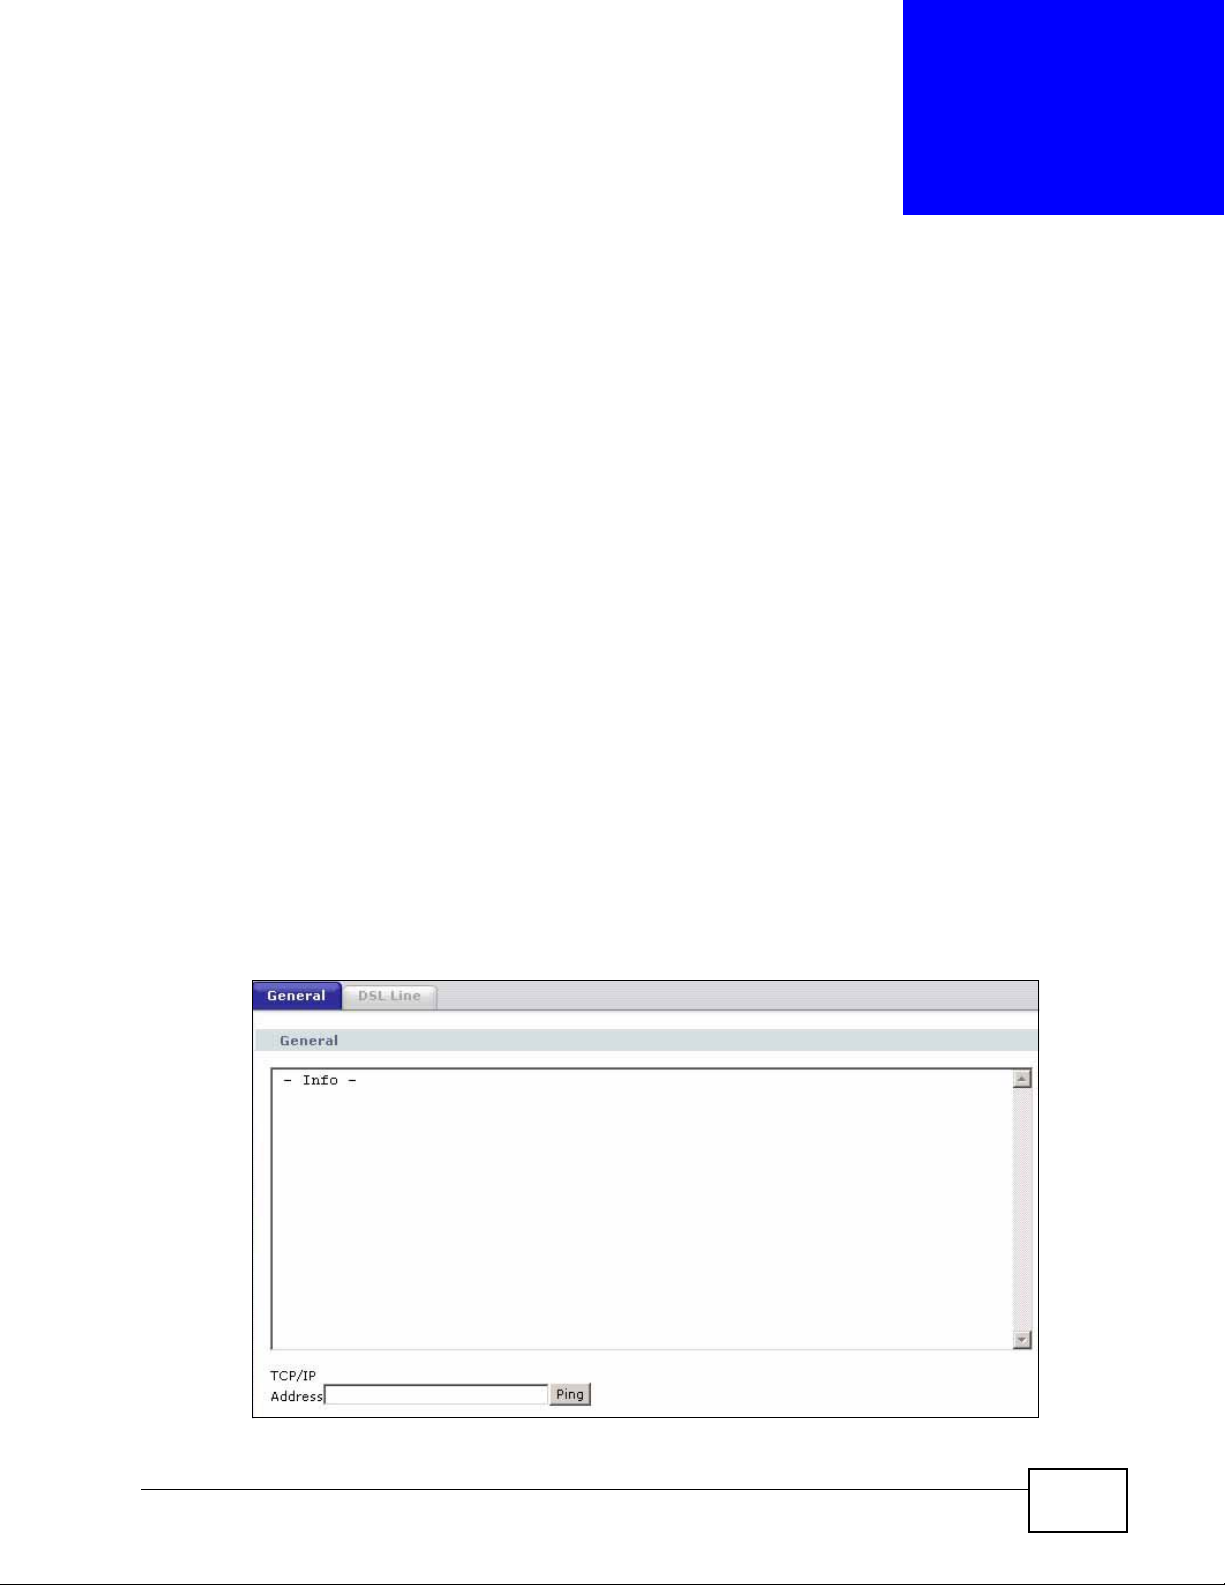
22.2 The General Diagnostic Screen
Use this screen to ping an IP address. Click Maintenance > Diagnostic to open
the screen shown next.
Figure 113 Maintenance > Diagnostic > General
P-660N-T1A User’s Guide
225
Chapter 22 Diagnostic
The following table describes the fields in this screen.
Table 91 Maintenance > Diagnostic > General
LABEL DESCRIPTION
TCP/IP
Address
Ping Click this to ping the IP address that you entered.
Type the IP address of a computer that you want to ping in order to test a
connection.
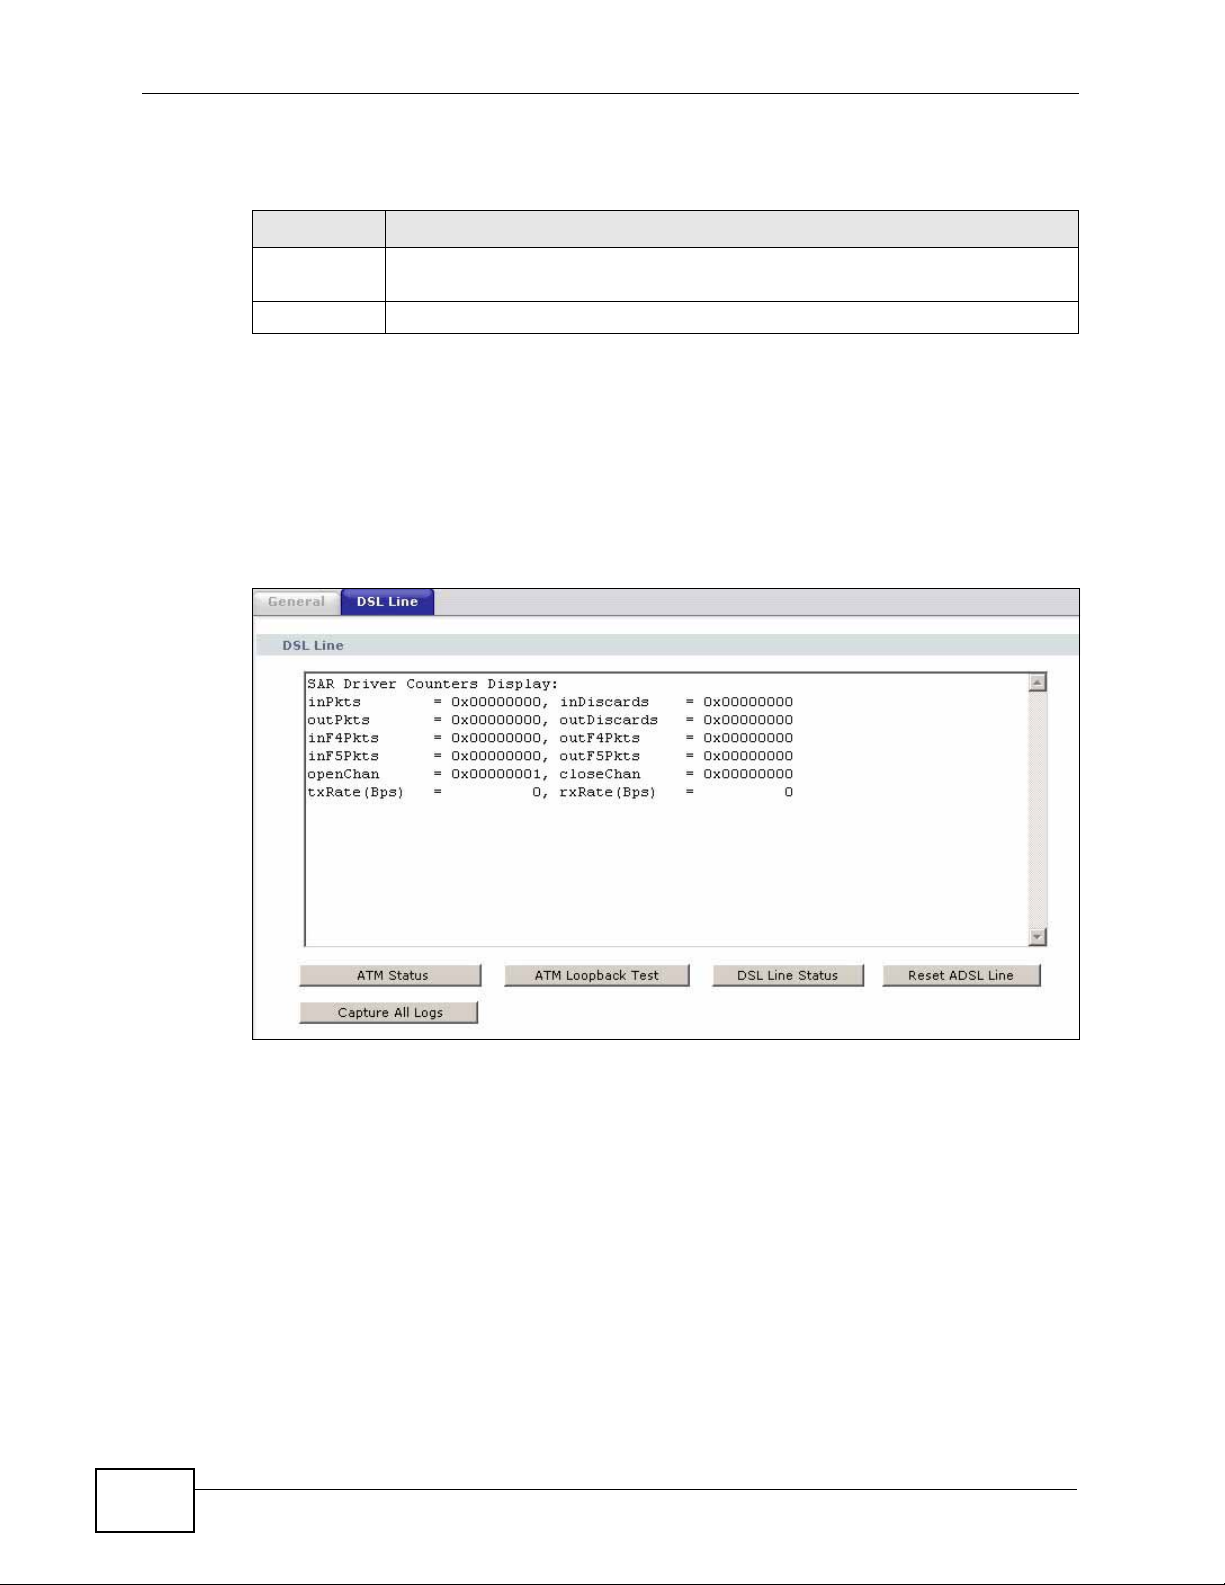
22.3 The DSL Line Diagnostic Screen
Use this screen to view the DSL line statistics and reset the ADSL line. Click
Maintenance > Diagnostic > DSL Line to open the screen shown next.
Figure 114 Maintenance > Diagnostic > DSL Line
226
P-660N-T1A User’s Guide

Chapter 22 Diagnostic
The following table describes the fields in this screen.
Table 92 Maintenance > Diagnostic > DSL Line
LABEL DESCRIPTION
ATM Status Click this to view your DSL connection’s Asynchronous Transfer Mode
(ATM) statistics. ATM is a networking technology that provides highspeed data transfer. ATM uses fixed-size packets of information called
cells. With ATM, a high QoS (Quality of Service) can be guaranteed.
The (Segmentation and Reassembly) SAR driver translates packets into
ATM cells. It also receives ATM cells and reassembles them into packets.
These counters are set back to zero whenever the device starts up.
inPkts is the number of good ATM cells that have been received.
inDiscards is the number of received ATM cells that were rejected.
outPkts is the number of ATM cells that have been sent.
outDiscards is the number of ATM cells sent that were rejected.
inF4Pkts is the number of ATM Operations, Administration, and
Management (OAM) F4 cells that have been received. See ITU
recommendation I.610 for more on OAM for ATM.
ATM Loopback
Test
outF4Pkts is the number of ATM OAM F4 cells that have been sent.
inF5Pkts is the number of ATM OAM F5 cells that have been received.
outF5Pkts is the number of ATM OAM F5 cells that have been sent.
openChan is the number of times that the ZyXEL Device has opened a
logical DSL channel.
closeChan is the number of times that the ZyXEL Device has closed a
logical DSL channel.
txRate is the number of bytes transmitted per second.
rxRate is the number of bytes received per second.
Click this to start the ATM loopback test. Make sure you have configured
at least one PVC with proper VPIs/VCIs before you begin this test. The
ZyXEL Device sends an OAM F5 packet to the DSLAM/ATM switch and
then returns it (loops it back) to the ZyXEL Device. The ATM loopback
test is useful for troubleshooting problems with the DSLAM and ATM
network.
P-660N-T1A User’s Guide
227

Chapter 22 Diagnostic
Table 92 Maintenance > Diagnostic > DSL Line (continued)
LABEL DESCRIPTION
DSL Line
Status
Click this to view statistics about the DSL connections.
noise margin downstream is the signal to noise ratio for the
downstream part of the connection (coming into the ZyXEL Device from
the ISP). It is measured in decibels. The higher the number the more
signal and less noise there is.
output power upstream is the amount of power (in decibels) that the
ZyXEL Device is using to transmit to the ISP.
attenuation downstream is the reduction in amplitude (in decibels) of
the DSL signal coming into the ZyXEL Device from the ISP.
Discrete Multi-Tone (DMT) modulation divides up a line’s bandwidth into
sub-carriers (sub-channels) of 4.3125 KHz each called tones. The rest of
the display is the line’s bit allocation. This is displayed as the number (in
hexadecimal format) of bits transmitted for each tone. This can be used
to determine the quality of the connection, whether a given sub-carrier
loop has sufficient margins to support certain ADSL transmission rates,
and possibly to determine whether particular specific types of
interference or line attenuation exist. Refer to the ITU-T G.992.1
recommendation for more information on DMT.
Reset ADSL
Line
Capture All
Logs
The better (or shorter) the line, the higher the number of bits transmitted
for a DMT tone. The maximum number of bits that can be tr ansmitted per
DMT tone is 15. There will be some tones without any bits as there has to
be space between the upstream and downstream channels.
Click this to reinitialize the ADSL line. The large text box above then
displays the progress and results of this operation, for example:
"Start to reset ADSL
Loading ADSL modem F/W...
Reset ADSL Line Successfully!"
Click this to display information and statistics about your ZyXEL Device’s
ATM statistics, DSL connection statistics, DHCP settings, firmware
version, WAN and gateway IP address, VPI/VCI and LAN IP address.
228
P-660N-T1A User’s Guide

CHAPTER 23
Troubleshooting
This chapter offers some suggestions to solve problems you might encount er. The
potential problems are divided into the following categories.
• Power, Hardware Connections, and LEDs
• ZyXEL Device Access and Login
• Internet Access
23.1 Power, Hardware Connections, and LEDs
The ZyXEL Device does not turn on. None of the LEDs turn on.
1 Make sure the ZyXEL Device is turned on.
2 Make sure you are using the power adaptor or cord included with the ZyXEL
Device.
3 Make sure the power adaptor or cord is connected to the ZyXEL Device and
plugged in to an appropriate power source. Make s ure the power source is turned
on.
4 Turn the ZyXEL Device off and on.
5 If the problem continues, contact the vendor.
One of the LEDs does not behave as expected.
1 Make sure you understand the normal behavior of the LED. See Section 1.5 on
page 25.
P-660N-T1A User’s Guide
229

Chapter 23 Troubleshooting
2 Check the hardware connections.
3 Inspect your cables for damage. Contact the vendor to replace any damaged
cables.
4 Turn the ZyXEL Device off and on.
5 If the problem continues, contact the vendor.
23.2 ZyXEL Device Access and Login
I forgot the IP address for the ZyXEL Device.
1 The default IP address is 192.168.1.1.
2 If you changed the IP address and have forgotten it, you might get the IP address
of the ZyXEL Device by looking up the IP address of the default gateway for your
computer. To do this in most Windows computers, click Start > Run, enter cmd,
and then enter ipconfig. The IP address of the Default Gateway might be the IP
address of the ZyXEL Device (it depends on the network), so enter this IP add ress
in your Internet browser.
3 If this does not work, you have to reset the device to its factory defaults. See
Section 1.6 on page 26.
I forgot the password.
1 The default admin password is 1234.
2 If this does not work, you have to reset the device to its factory defaults. See
Section 1.6 on page 26.
I cannot see or access the Login screen in the web configurator.
230
1 Make sure you are using the correct IP address.
• The default IP address is 192.168.1.1.
P-660N-T1A User’s Guide

Chapter 23 Troubleshooting
• If you changed the IP address (Section 7.2 on page 87), use the new IP
address.
• If you changed the IP address and have forgotten it, see the troubleshooting
suggestions for I forgot the IP address for the ZyXEL Device.
2 Check the hardware connections, and make sure the LEDs are behaving as
expected. See the Quick Start Guide.
3 Make sure your I nternet brow ser does not block pop-up windows and has
JavaScripts and Jav a enabled. See Appendix C on page 281.
4 Make sure your computer is in the same subnet as the ZyXEL Device. (If there are
routers between your computer and the ZyXEL Device, skip this step.)
• If there is a DHCP server on your network, make sure your computer is using
a dynamic IP address. See Appendix A on page 243. Your ZyXEL Device is a
DHCP server by default.
• If there is no DHCP server on your network, make sure your computer’s IP
address is in the same subnet as the ZyXEL Device. See Appendix A on page
243.
5 Reset the device to its factory defaults, and try to access the ZyXEL Device with
the default IP address. See Section 1.6 on page 26.
6 If the problem continues, contact the network administrator or vendor, or try one
of the advanced suggestions.
Advanced Suggestions
• Try to access the Z yXEL Device using another service, such as Telnet. If you can
access the ZyXEL Device, check the remot e management setti ngs and firewall
rules to find out why the ZyXEL Device does not respond to HTTP.
• If your computer is connected to the WAN port or is connected wirelessly, use a
computer that is connected to a ETHERNET port.
I can see the Login screen, but I cannot log in to the ZyXEL Device.
1 Make sure you have e ntered the password correctly. The default admin password
is 1234. The field is case-sensitive, so make sure [Caps Lock] is not on.
2 You cannot log in to the web configurator while someone is using Telnet to access
the ZyXEL Device. Log out of the ZyXEL Device in the other session, or ask the
person who is logged in to log out.
3 Turn the ZyXEL Device off and on.
P-660N-T1A User’s Guide
231

Chapter 23 Troubleshooting
4 If this does not work, you have to reset the device to its factory defaults. See
Section 23.1 on page 229.
I cannot Telnet to the ZyXEL Device.
See the troubleshooting suggestions for I cannot see or access the Login screen in
the web configurator. Ignore the suggestions about your browser.
I cannot use FTP to upload / download the configuration file. / I cannot use FTP to
upload new firmware.
See the troubleshooting suggestions for I cannot see or access the Login screen in
the web configurator. Ignore the suggestions about your browser.
23.3 Internet Access
I cannot access the Internet.
1 Check the hardware connections, and make sure the LEDs are behaving as
expected. See the Quick Start Guide and Section 1.5 on page 25.
2 Make sure you entered your ISP account information correctly in the wizard. These
fields are case-sensitive, so make sure [Caps Lock] is not on.
3 If you are trying to access the Internet wirelessly, make sure the wireless settings
in the wireless client are the same as the settings in the AP.
4 If you are trying to access the Internet wirelessly, make sure you enabled the
wireless LAN and have selected the correct country and channel in which your
ZyXEL Device operates in the Wireless LAN > AP screen.
5 Disconnect all the cables from your device, and follow the directions in the Quick
Start Guide again.
232
6 If the problem continues, contact your ISP.
P-660N-T1A User’s Guide

Chapter 23 Troubleshooting
I cannot access the Internet anymore. I had access to the Internet (with the ZyXEL
Device), but my Internet connection is not available anymore.
1 Check the hardware connections, and make sure the LEDs are behaving as
expected. See the Quick Start Guide and Section 1.5 on page 25.
2 Turn the ZyXEL Device off and on.
3 If the problem continues, contact your ISP.
The Internet connection is slow or intermittent.
1 There might be a lot of traffic on the network. Look at the LEDs, and check Section
1.5 on page 25. If the ZyXEL Device is sending or receiving a lot of information,
try closing some programs that use the Internet, especially peer-to-peer
applications.
2 Check the signal strength. If the signal strength i s l ow, try moving your computer
closer to the ZyXEL Device if possible, and look around to see if there are any
devices that might be interfering with the wireless network (for example,
microwaves, other wireless networks, and so on).
3 Turn the ZyXEL Device off and on.
4 If the problem continues, contact the network administrator or vendor, or try one
of the advanced suggestions.
Advanced Suggestions
• Check the settings for QoS. If it is disabled, you might consider activating it. If it
is enabled, you might consider raising or lowe ri ng the priority for some
applications.
P-660N-T1A User’s Guide
233

Chapter 23 Troubleshooting
234
P-660N-T1A User’s Guide

CHAPTER 24
Product Specifications
The following tables summarize the ZyXEL Device’s hardware and firmware
features.
24.1 Hardware Specifications
The following table summarizes the ZyXEL Device’s hardware features.
Table 93 Hardware Specifications
Dimensions 133mm (L) x 61mm (W) x 163mm (H)
Weight 200g
Power Specification 12VDC 1A
LAN Ethernet Port One auto-negotiating, auto MDI/MDI-X 10/100 Mbps RJ-45
Ethernet port
ADSL Port 1 RJ-11 for Annex A
802.11n Wireless
LAN Access
RESET Button Press for 10 seconds to restore factory defaults
Antenna 1 internal antenna, 3.5dBi
WPS Button 1 second: turn on or off WLAN
On-board WLAN module
Operation
Temperature
Storage Temperature -20º ~ 60º C
Operation Humidity 20% ~ 90% RH
Storage Humidity 20% ~ 90% RH
P-660N-T1A User’s Guide
5 seconds: enable WPS (Wi-Fi Protected Setup)
0º C ~ 40º C
235

Chapter 24 Product Specifications
Table 93 Hardware Specifications
Compliance and
Certifications
EANSI/UL-60950-1
CSA 60950-1
EN60950-1 (1992+A1+A2+A3+A4+A11)
IEC 60950-1
FCC Part 15 Class B
EN55022 Class B
EN61000-3-2
EN61000-3-3
EN61000-4-2
EN61000-4-3
EN61000-4-4
EN61000-4-5
EN61000-4-6
EN61000-4-8
EN61000-4-11
K.21 4KV
Power Adaptor Safety
Approvals
ANSI/UL 60950-1
CSA 60950-1
CE mark
GS mark or TUV certificate
EN60950-1
24.2 Firmware Specifications
The following table summarizes the ZyXEL Device’s firmware features.
Table 94 Firmware Specifications
Basic Features
Default IP
Address
Default Subnet
Mask
Default Admin
Password
192.168.1.1
255.255.255.0 (24 bits)
1234
236
P-660N-T1A User’s Guide

Table 94 Firmware Specifications (continued)
ADSL Standard
Compliance
Support Multi-Mode standard (ANSI T1.413, Issue 2; G.dmt
(G.992.1); G.lite (G992.2)).
EOC specified in ITU-T G.992.1
ADSL2 G.dmt.bis (G.992.3)
ADSL2 G.lite.bis (G.992.4)
ADSL2+ (G.992.5)
Reach Extended ADSL (RE ADSL)
SRA (Seamless Rate Adaptation)
Auto-negotiating rate adaptation
ADSL physical connection ATM AAL5 (ATM Adaptation Layer type
5)
Support multi-protocol over AAL5 (RFC2684/1483)
Support PPP over ATM AAL5 (RFC2364)
PPP over Ethernet support for DSL connection (RFC 2516)
Chapter 24 Product Specifications
Support VC-based and LLC-based multiplexing
Support up to 8 PVCs
I.610 F4/F5 OAM
TR-067/TR-100 supported
Annex A,B,I, J,L,M
Bit swapping
P-660N-T1A User’s Guide
237

Chapter 24 Product Specifications
Table 94 Firmware Specifications (continued)
Wireless LAN
Features
WDS(wireless client: TBD)
IEEE 802.11n Compliance
Frequency Range:2.4 GHz
Advanced Orthogonal Frequency Division Multiplexing (OFDM)
Data Rates:150Mbps and Auto Fallback
Wired Equivalent Privacy (WEP) Data Encryption 64/128
WLAN bridge to LAN
32 MAC Address filter
WPA, WPA-PSK,
WPA2, WPA2-PSK
WPS
IEEE 802.1x (EAP-MD5, TLS and TTLS)
WMM
Multi BSSID (4 BSSIDs)
Wireless Scheduling
Firewall DoS
Protocol and Generic Packet Filter
Stateful Inspection
Access Control List (ACL) between LAN, WAN
Real time alert via e-mail
Report and logs
20 ACL rules
Content Filtering URL Keyword Blocking
NAT Muti-NAT & Port Address Translation (PAT)
2048 NAT session
Cone NAT
Multimedia applications support (NetMeeting, CuSeeMe, ICQ,
…etc)
Microsoft PPTP under NAT/SUA
Multiple VPN (IPSec/PPTP/L2TP) pass-through
238
NAT loopback
12 NAT port forwarding
P-660N-T1A User’s Guide

Table 94 Firmware Specifications (continued)
UPnP UPnP DCP
UPnP protocols
NAT traversal
Protocol Support SIP pass-through
DNS Proxy
Dynamic DNS (www.dyndns.org)
IP Alias
DHCP client/server/relay
RIP I/ RIP II supported
Support 16 IP Static routes by Gateway
IGMP v1 and v2, v3
IP Policy Routing
UPnP support
Chapter 24 Product Specifications
Transparent bridging, VLAN-tagging pass-through bridge mode
Static DHCP
802.1Q
TR-098 complied QoS
Management Embedded Web Configurator
SNMP v1 & v2 with MIB II
TR-064 support(Need to support ZyXEL"easy install utility")
TR-111
ADSL mode selectable on GUI
Embedded FTP/TFTP Server for f/w upgrade and romfile backup
and restore
Remote Management Control: Telnet, FTP, and Web.
TR-069 HTTPS(with motive certification)
MTU adjustable on WebGUI
WAN Backup Traffic redirect
Other features rom-t
Support IGMP Proxy
P-660N-T1A User’s Guide
239

Chapter 24 Product Specifications
24.3 Standards Support
The following list, which is not exhaustive, illustrates the standards supported in
the ZyXEL Device.
Table 95 Standards Supported
STANDARD DESCRIPTION
RFC 867 Daytime Protocol
RFC 868 Time Protocol.
RFC 1058 RIP-1 (Routing Information Protocol)
RFC 1112 IGMP v1
RFC 1305 Network Time Protocol (NTP version 3)
RFC 1483 Multiprotocol Encapsulation over ATM Adaptation Layer 5
RFC 1631 IP Network Address Translator (NAT)
RFC 1661 The Point-to-Point Protocol (PPP)
RFC 1723 RIP-2 (Routing Information Protocol)
RFC 2236 Internet Group Management Protocol, Version 2.
RFC 2364 PPP over AAL5 (PPP over ATM over ADSL)
RFC 2408 Internet Security Association and Key Management Protocol
(ISAKMP)
RFC 2516 A Method for Transmitting PPP Over Ethernet (PPPoE)
RFC 2684 Multiprotocol Encapsulation over ATM Adaptation Layer 5.
RFC 2766 Network Address Translation - Protocol
IEEE 802.11 Also known by the brand Wi-Fi, denotes a set of Wireless LAN/
WLAN standards developed by working group 11 of the IEEE
LAN/MAN Standards Committee (IEEE 802).
IEEE 802.11b Uses the 2.4 gigahertz (GHz) band
IEEE 802.11g Uses the 2.4 gigahertz (GHz) band
IEEE 802.11n Uses the 2.4 gigahertz (GHz) band
IEEE 802.11d Standard for Local and Metropolitan Area Networks: Media
Access Control (MAC) Bridges
IEEE 802.11x Port Based Network Access Control.
IEEE 802.11e QoS IEEE 802.11 e Wireless LAN for Quality of Service
ANSI T1.413, Issue 2 Asymmetric Digital Subscriber Line (ADSL) standard.
G dmt(G.992.1) G.992.1 Asymmetrical Digital Subscriber Line (ADSL)
Transceivers
ITU G.992.1 (G.DMT) ITU standard for ADSL using discrete multitone modulation.
ITU G.992.2 (G. Lite) ITU standard for ADSL using discrete multitone modulation.
ITU G.992.3
(G.dmt.bis)
ITU G.992.4
(G.lite.bis)
ITU standard (also referred to as ADSL2) that extends the
capability of basic ADSL in data rates.
ITU standard (also referred to as ADSL2) that extends the
capability of basic ADSL in data rates.
240
P-660N-T1A User’s Guide

Chapter 24 Product Specifications
Table 95 Standards Supported (continued)
STANDARD DESCRIPTION
ITU G.992.5 (ADSL2+) ITU standard (also referred to as ADSL2+) that extends the
capability of basic ADSL by doubling the number of downstream
bits.
Microsoft PPTP MS PPTP (Microsoft's implementation of Point to Point Tunneling
Protocol)
MBM v2 Media Bandwidth Management v2
RFC 2383 ST2+ over ATM Protocol Specification - UNI 3.1 Version
TR-069 TR-069 DSL Forum Standard for CPE Wan Management.
1.363.5 Compliant AAL5 SAR (Segmentation And Re-assembly)
P-660N-T1A User’s Guide
241

Chapter 24 Product Specifications
242
P-660N-T1A User’s Guide

APPENDIX A
Setting Up Your Computer’s IP
Address
Note: Your specific ZyXEL Device may not support all of the operating systems
described in this appendix. See the product specifications for more information
about which operating systems are supported.
This appendix shows you how to configure the IP settings on your computer in
order for it to be able to communicate with the other devices on your network.
Windows Vista/XP/2000, Mac OS 9/OS X, and all versions of UNIX/LINUX include
the software components you need to use TCP/IP on your computer.
If you manually assign IP information instead of using a dynamic IP, make sure
that your network’s computers have IP addresses that place them in the same
subnet.
In this appendix, you can set up an IP address for:
• Windows XP/NT/2000 on page 244
• Windows Vista on page 247
• Windows 7 on page 251
• Mac OS X: 10.3 and 10.4 on page 255
• Mac OS X: 10.5 and 10.6 on page 258
• Linux: Ubuntu 8 (GNOME) on page 261
• Linux: openSUSE 10.3 (KDE) on page 266
P-660N-T1A User’s Guide
243

Appendix A Setting Up Your Computer’s IP Address
Windows XP/NT/2000
The following example uses the default Windows XP display theme but can also
apply to Windows 2000 and Windows NT.
1 Click Start > Control Panel.
2 In the Control Panel, click the Network Connections icon.
244
P-660N-T1A User’s Guide

Appendix A Setting Up Your Computer’s IP Address
3 Right-click Local Area Connection and then select Properties.
4 On the General tab, select Internet Protocol (TCP/IP) and then click
Properties.
P-660N-T1A User’s Guide
245

Appendix A Setting Up Your Computer’s IP Address
5 The Internet Protocol TCP/IP Properties window opens.
6 Select Obtain an IP addr ess automatically if your network administr ator or ISP
assigns your IP address dynamically.
Select Use the following IP Address and fill in the IP address, Subnet mask,
and Default gateway fields if you have a static IP address that was assigned to
you by your network administrator or ISP. You ma y also have to enter a Preferred
DNS server and an Alternate DNS server, if that information was provided.
7 Click OK to close the Internet Protocol (TCP/IP) Properties window.
8 Click OK to close the Local Area Connection Properties window.
Verifying Settings
1 Click Start > All Programs > Accessories > Command Prompt.
2 In the Command Prompt window, type "ipconfig" and then press [ENTER].
You can also go to Start > Control Panel > Network Connections, right-click a
network connection, click Status and then click the Support tab to view your IP
address and connection information.
246
P-660N-T1A User’s Guide
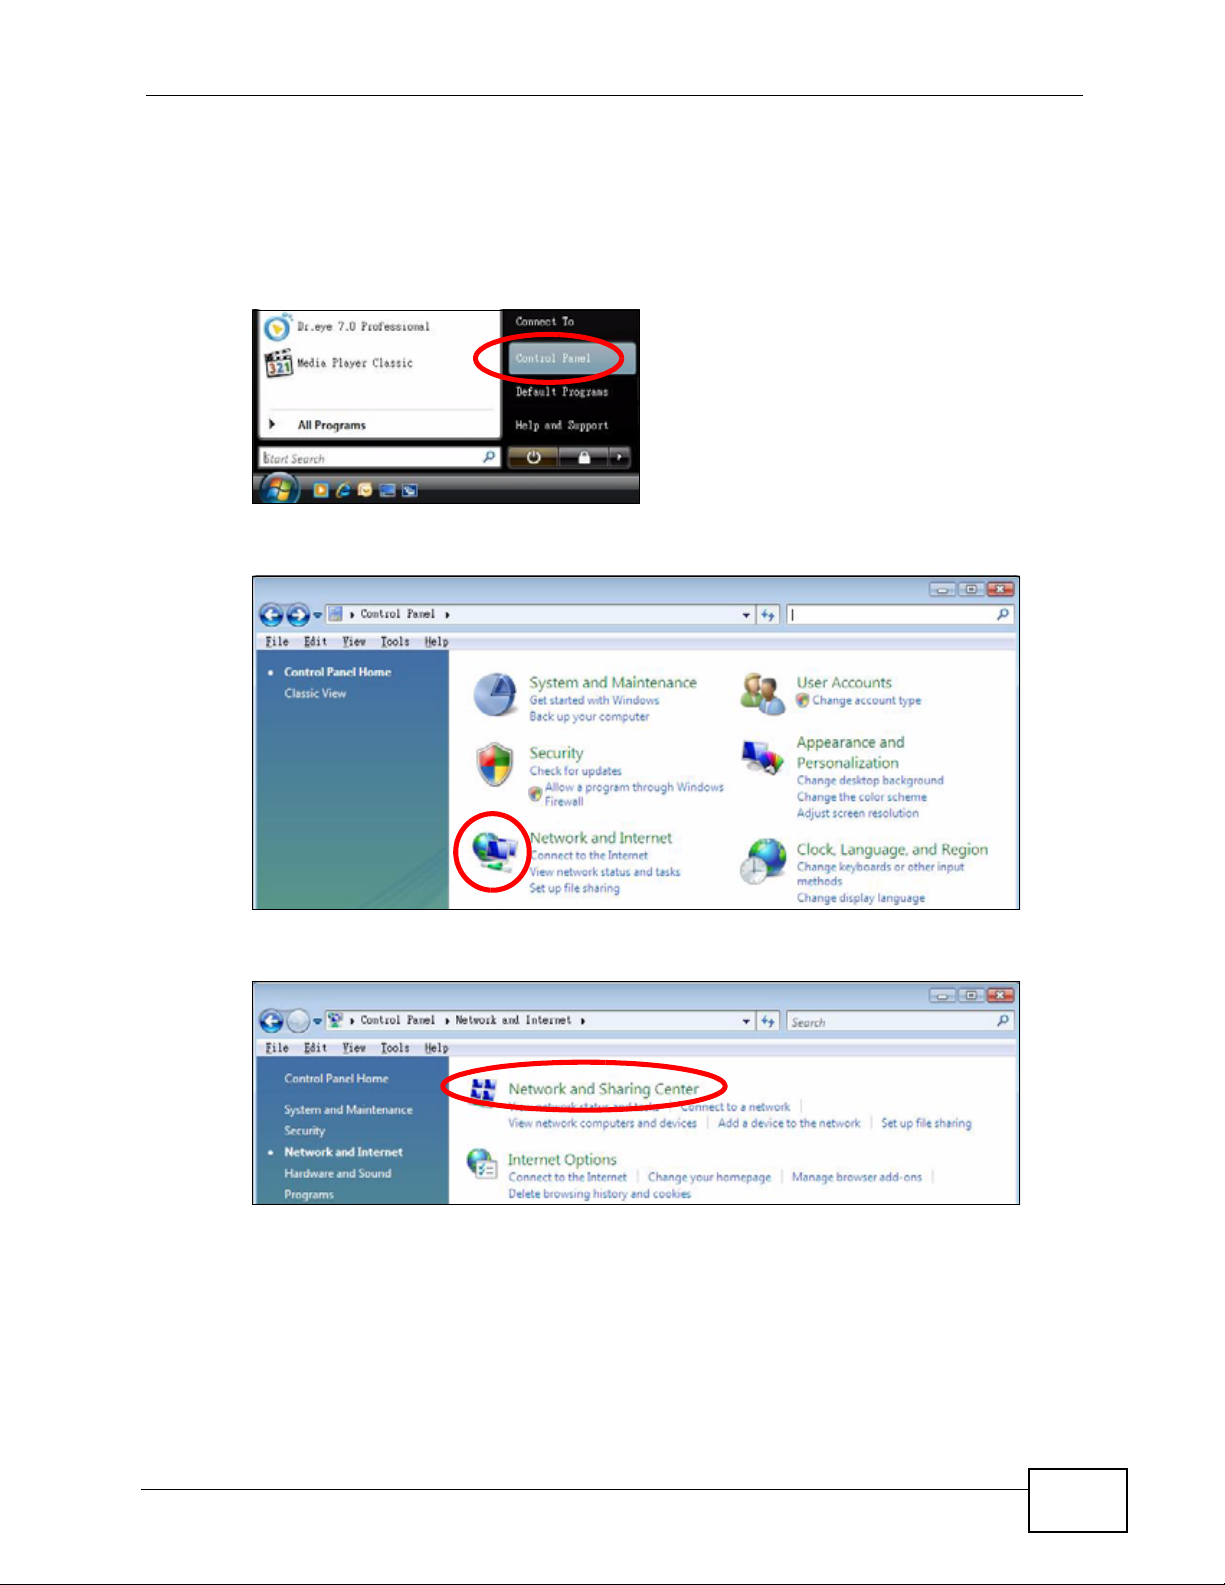
Windows Vista
This section shows screens from Windows Vista Professional.
1 Click Start > Control Panel.
2 In the Control Panel, click the Network and Internet icon.
Appendix A Setting Up Your Computer’s IP Address
3 Click the Network and Sharing Center icon.
P-660N-T1A User’s Guide
247
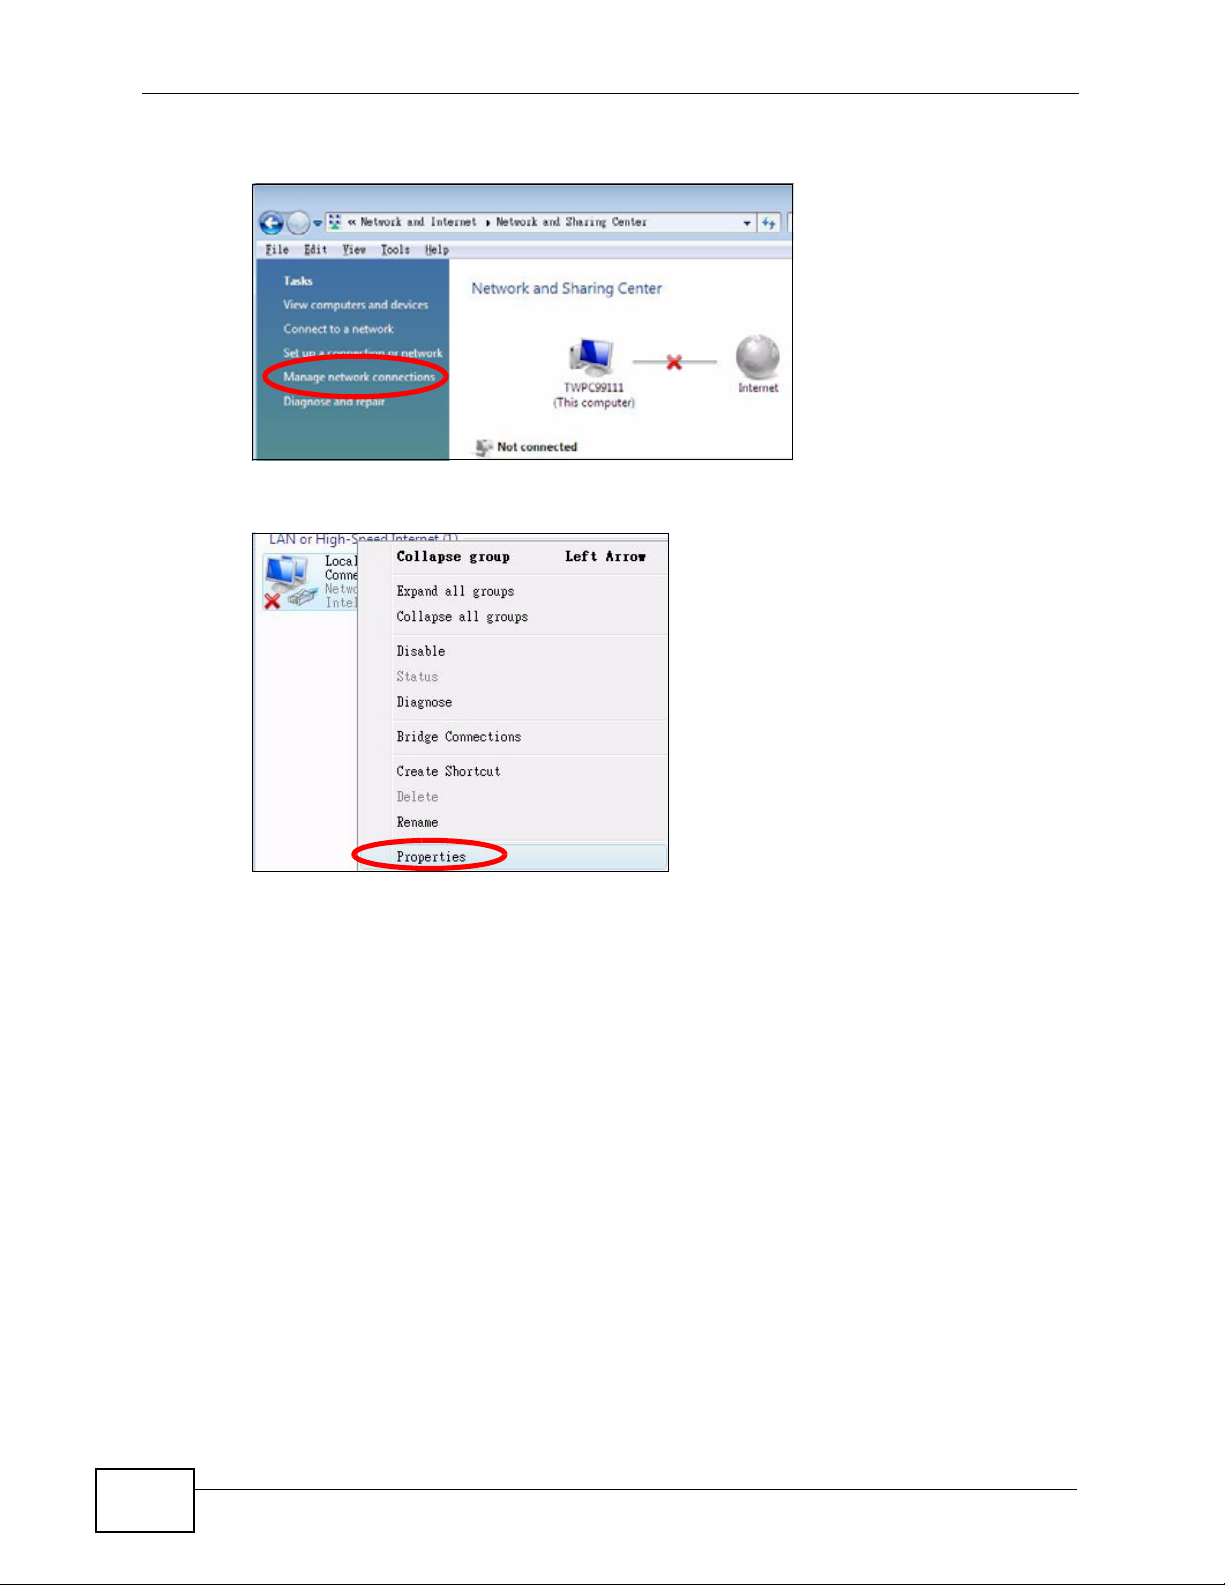
Appendix A Setting Up Your Computer’s IP Address
4 Click Manage network connections.
5 Right-click Local Area Connection and then select Properties.
Note: During this procedure, click Continue whenever Windows displays a screen
saying that it needs your permission to continue.
248
P-660N-T1A User’s Guide

Appendix A Setting Up Your Computer’s IP Address
6 Select Internet Protocol Version 4 (TCP/IPv4) and then select Properties.
P-660N-T1A User’s Guide
249

Appendix A Setting Up Your Computer’s IP Address
7 The Internet Protocol Version 4 (TCP/IPv4) Properties window opens.
8 Select Obtain an IP addr ess automatically if your network administr ator or ISP
assigns your IP address dynamically.
Select Use the following IP Address and fill in the IP address, Subnet mask,
and Default gateway fields if you have a static IP address that was assigned to
you by your network administrator or ISP. You ma y also have to enter a Preferred
DNS server and an Alternate DNS server, if that information was
provided.Click Advanced.
9 Click OK to close the Internet Protocol (TCP/IP) Properties window.
10 Click OK to close the Local Area Connection Properties window.
250
P-660N-T1A User’s Guide
 Loading...