

Page 1
MC65 Enterprise Digital Assistant
Preliminary
User Guide
Page 2

Preliminary
Page 3

MC65 Enterprise Digital Assistant
Preliminary
User Guide
72E-133769-01-
Rev. 1
March 2010
Page 4

ii MC65 User Guide
Preliminary
© 2010 by Motorola, Inc. All rights reserved.
No part of this publication may be reproduced or used in any form, or by any electrical or mechanical means,
without permission in writing from Motorola. This includes electronic or mechanical means, such as
photocopying, recording, or information storage and retrieval systems. The material in this manual is subject to
change without notice.
The software is provided strictly on an “as is” basis. All software, including firmware, furnished to the user is on
a licensed basis. Motorola grants to the user a non-transferable and non-exclusive license to use each
software or firmware program delivered hereunder (licensed program). Except as noted below, such license
may not be assigned, sublicensed, or otherwise transferred by the user without prior written consent of
Motorola. No right to copy a licensed program in whole or in part is granted, except as permitted under
copyright law. The user shall not modify, merge, or incorporate any form or portion of a licensed program with
other program material, create a derivative work from a licensed program, or use a licensed program in a
network without written permission from Motorola. The user agrees to maintain Motorola’s copyright notice on
the licensed programs delivered hereunder, and to include the same on any authorized copies it makes, in
whole or in part. The user agrees not to decompile, disassemble, decode, or reverse engineer any licensed
program delivered to the user or any portion thereof.
Motorola reserves the right to make changes to any software or product to improve reliability, function, or
design.
Motorola does not assume any product liability arising out of, or in connection with, the application or use of
any product, circuit, or application described herein.
No license is granted, either expressly or by implication, estoppel, or otherwise under any Motorola, Inc.,
intellectual property rights. An implied license only exists for equipment, circuits, and subsystems contained in
Motorola products.
MOTOROLA and the Stylized M Logo and Symbol and the Symbol logo are registered in the US Patent &
Trademark Office. Bluetooth is a registered trademark of Bluetooth SIG. Microsoft, Windows and ActiveSync
are either registered trademarks or trademarks of Microsoft Corporation. All other product or service names
are the property of their respective owners.
Motorola, Inc.
One Motorola Plaza
Holtsville, New York 11742-1300
http://www.motorola.com/enterprisemobility
Patents
This product is covered by one or more of the patents listed on the website: www.motorola.com/
enterprisemobility/patents.
Page 5

Revision History
Preliminary
Changes to the original manual are listed below:
Change Date Description
iii
Page 6

iv MC65 User Guide
Preliminary
Page 7

Table of Contents
Preliminary
Patents.................................................................................................................................................. ii
Revision History.................................................................................................................................... iii
About This Guide
Introduction........................................................................................................................................... xi
Documenta ti o n S e t ..... ............. .. .. .............. .. .. ............. .. ... ............. .. .. .............. .. .. ............. .. .. ........... xi
Configurations....................................................................................................................................... xii
Software Ver s io n s............. ........................... .. .. ............. ... .. ............. .. .. .............. .. ............................ xii
Chapter Descriptions............................................................................................................................ xiv
Notational Conventions....................................... ...................... ...................... ...................................... xiv
Related Doc um e nts ........................................................ .. .. .............. .. .. ............. ... ................................ xv
Service Information............................................................................................................................... xv
Chapter 1: Getting Started
Introduction .......................................................................................................................................... 1-1
Unpacking ............................................................................................................................................ 1-2
Accessories ......................................................................................................................................... 1-3
Getting Started ..................................................................................................................................... 1-4
Installing a mic roSD Card ............................... .. ... ............. .. .. ............. ... ......................................... 1-4
Installing the SIM Card ................................................................................................................... 1-5
Installing the Battery .......... ........................... .. .. .............. .. ........................................ .. .. ................. 1-6
Charging the Battery .......... ........................... .. .. .............. .. ........................................ .. .. ................. 1-7
Charging the Main Battery ....................................................................................................... 1-7
Charging Sp a re Batteries ........... .. ............. .. ........................................ .. ... ............. .. .. ............... 1-8
Charging Te m p e ra tu r e ................................................ .. .. ............. ... .. ............. .. ........................ 1-8
Powering On the MC65 .................................................................................................................. 1-8
Calibrating the Screen ............................................................................................................. 1-8
Carrier Acti va t io n ............. ............. .. .. .............. .. ....................................... ... .. ............. .. ... ..................... 1-10
Checking Ba tt e ry Status ........... ............. ... .. ............. .. .. .............. .. .. ............. ... ................................ 1-10
Replacing the Battery .......................................................................................................................... 1-10
Removing the microSD Card ............................................................................................................... 1-11
Battery Management ..................................... ...................... ...................... ...................... .................... 1-12
Changing the Power Settings ........................................................................................................ 1-12
Page 8

vi MC65 User Guide
Preliminary
Changing the Backlight Settings .................................................................................................... 1-12
Changing the Keypad Backlight Settings ....................................................................................... 1-12
Turning Off th e R a d io s ......................... .. ... ............. .. .. ............. ... .. ............. .. ................................... 1-12
Handstrap Replacement ...................................................................................................................... 1-14
Removal ... ............... .............. ............... ................ ............. ............... ................ .............................. 1-14
Installatio n ............... ................ ............... .............. ............... ............... .............. .............................. 1-15
Chapter 2: Using the MC65
Introduction .......................................................................................................................................... 2-1
Finger Scrolling .................................................................................................................................... 2-1
Home Screens ..................................................................................................................................... 2-1
Windows Mob ile H o m e Screen ........ .......................... .. ... ............. .. ........................................ .. .. .... 2-1
Classic Today Screen ....................... ...................... ...................... ........................................... 2-3
Status Bar .................... .......................... ... .. ............. .. .. .............. .. .................................................. 2-4
Tile Bar ... .. .......................... ... .. ............. .. ........................................ .. .. .............. .. .. .......................... 2-7
Cards ............................................................................................................................................. 2-7
Program Shortcuts ................................................................................................................... 2-8
Programs Window .................................................................................................................... 2-8
Start Screen ................................................................................................................................... 2-8
Adjusting Vo lu m e .......... ... ............. .. .. .............. .. .. ............. .. ... ............. .. ................................................ 2-12
Battery Status Indications .................................................................................................................... 2-12
Battery Reserve Options ................................................................................................................ 2-13
Main Battery Te m p e r ature Notifica tions ...... .. .......................... ... .. ............. .. ... ............. .. .. ............. .. 2-14
LED Indicators ..................................................................................................................................... 2-15
Resetting the MC65 ............................................................................................................................. 2-16
Performing a Wa rm B o o t ...... .......................... .. ... ............. .. .. ............. ... .. ............. .. ... ............. ........ 2-16
Performing a Cold Boot .................................................................................................................. 2-16
Waking the MC65 ................................................................................................................................ 2-16
Locking the E S 40 0 ........ ........................... .. ........................................ .. .. .............. .. .. ............................ 2-17
Microsoft Locking ......... .. ........................... .. .. ............. .. ... ............. .. .. .............. .. .. ............. . .............. 2-17
Password Locking .......................................................................................................................... 2-18
Motorola Locking ............................................................................................................................ 2-20
Password Locking .......................................................................................................................... 2-21
Finger Swipe Locking .................................................................................................................... . 2-22
Editing Fingerprint Swipes ................ ................. ................ ................. ................ ........................... 2-22
Edit Lock Screen ................................................. .......................................... ........................... 2-22
Audio Feedback ........................................................................................................... ............ 2-23
Keypads ..... ................... .................. .................... .................... ................. .................... ........................ 2-24
Numeric Keypad Configuration ...................................................................................................... 2-24
Alpha-numeric Keypad Configurations . ...................... .......................................... ...................... ... 2-27
PIM Keypad Configuration ............................................................................................................. 2-34
Special Character Key ............................................................................................................. 2-36
Function Buttons ............... ................................................ ................ ................. .................................. 2-38
Stylus ................................................................................................................................................... 2-38
Entering Data ....................................................................................................................................... 2-39
Data Capture . .. ........................... .. .. ............. ... .. ............. .. .. .............. .. .. ............. ... .. .............................. 2-40
Imaging .......................................................................................................................................... 2-40
Operational Modes .................... ................. ................ ................. ................ ................. ............ 2-40
Digital Came ra ................. ........................................ .. .. .............. .. .. ............. ... .. ............. .. ............... 2-40
Page 9

Table of Contents vii
Preliminary
Scanning Consideration s ...... ............. .. .. .............. .. ........................................ .. .. ............. .. ... .......... 2-41
Imager Scanning .......................... ................ ................. ................ ................................................. 2-41
Digital Camera Scanning ............................................................................................................... 2-42
Using Voice-Over-IP ............................................................................................................................ 2-43
Taking Photos ...................................................................................................................................... 2-43
Recording Video ................... .. .......................................... ...................... ...................... ....................... 2-44
Viewing Photos and Videos ...................................... ...................... ...................... ............................... 2-44
Chapter 3: Using GPS Navigation
Introduction .......................................................................................................................................... 3-1
Software Ins ta llation ..... ... .. ............. .. .. .............. .. ........................................ .. .. ............. ... .. ................... 3-1
MC65 GPS Setup ................................................................................................................................ 3-1
Operation ............................................................................................................................................. 3-2
GPS Maps on microSD Cards .................. .......................... .. .. .............. .. ....................................... 3-2
Answering a Phone Call While Using GPS ......................................... ........................................... 3-2
Losing the GPS Signal While in a Vehicle ..................................................................................... 3-2
Assisted GPS ....................................................................................................................................... 3-2
Chapter 4: Using the Phone
Introduction .......................................................................................................................................... 4-1
Making a Call ....................................................................................................................................... 4-1
Using the Phone Keypad ............................... ...................... ...................... ...................... ........... ... 4-1
Smart Dialing ................................................................................................................................. 4-2
Using Contacts ............................................................................................................................... 4-3
Using Call History .......................................................................................................................... 4-3
Making a Speed D ia l C a ll ..................................... .. ........................................ .. .. ............. .. ... .......... 4-4
Answering a Call ....... .. ........................................ .. .. .............. .. ........................................ ..................... 4-4
Incoming Call Features .................................................................................................................. 4-5
Missed Call Notification ....................................................................................................................... 4-5
Emergency Calling ............................................................................................................................... 4-5
Audio Modes ???? ............................. ...................... ...................... ...................................................... 4-5
Using a Wired Headset ............................................................ .......................................... ............ 4-6
Using a Bluetooth Headset ............................................................................................................ 4-6
Adjusting Au d io Vo l u m e ... ............. ... ....................................... ... .. ............. .. ... ............. .. .. ............... 4-7
Muting a Call ........................................................................................................................................ 4-7
Using Call History ................................................................................................................................ 4-8
Managing Call History ........................................................ ...................... ...................... ................ 4-8
Changing the Call History View ............................................................................................... 4-8
Resetting the Recent Calls Counter .............................................. ................ ........................... 4-8
Deleting All Call History Items .................................................................................................. 4-9
Viewing Call S ta t u s ...................... .. ............. ... .. ............. .. ........................................ .. .. ............. 4-10
Using the Call History Menu .................................................................................................... 4-11
Swapping Calls on GSM ................................................... .......................................... ......................... 4-11
Swapping Calls on CDMA ................. ................ ................. ................ ................................................. 4-12
Conference Calling on GSM ................................................................................................................ 4-13
Three-way C a lli n g o n CDMA ................... .. .. .............. .. .. ............. .. ... ............. .. .. .............. .. .. ................. 4-15
Establishing a GSM Data Connection ............. ...................... .......................................... .................... 4-16
Ending a Data Connection .................................. ...................... ...................... ...................... ...... ... 4-17
Page 10

viii MC65 User Guide
Preliminary
Establishing an CDMA Data Connection ............................................................................................. 4-18
Ending a Data Connection .................................. ...................... ...................... ...................... ...... ... 4-18
Configuring a GS M D a ta C o nn e c tion ........ ....................................... .. ... ............. .. .. .............. .. .. ...... 4-19
MC65 Settings ..................................................................................................................................... 4-21
Phone ............................................................................................................................................. 4-21
Sounds ..................................................................................................................................... 4-21
Security .................................................................................................................................... 4-22
Services ......................................................................................................................................... 4-23
Call Barring (Call Blocking) ...................................................................................................... 4-23
Caller ID ................................................................................................................................... 4-24
Call Forward in g .......... ............. ... ....................................... ... .. ............. .. ... ............. .. .. ............... 4-24
Call Waiting ..................... .. .. ............. ... .. ............. .. ........................................ .. .. ........................ 4-25
Voice Mail and Text Messages ....................... ...................... ...................... ...................... ....... 4-25
Fixed Dialing ............................................................................................................................ 4-26
Internet Calling ........... .......................... .. ... ............. .. .. ............. ... .. ............. .. ... ............. .. ................. 4-26
Phone Network Setup .......................................................................................................................... 4-27
Activation Test ............................................................................................................................... 4-27
NITZ ...................... ........................... ................................................................ .............................. 4-28
Chapter 5: Using Bluetooth
Introduction .......................................................................................................................................... 5-1
Adaptive Frequency Hopping ...................................................... ...................... ...................... ............ 5-1
Security ... .................... .................... .................. .................... ................... .................. .......................... 5-2
Bluetooth Configuration ....................................................................................................................... 5-3
Bluetooth Power States ....................................................................................................................... 5-3
Cold Boot ................................................................................................................................. 5-3
Warm Boot ............................................................................................................................... 5-3
Suspend ................................................................................................................................... 5-4
Resume ..... ........ ....... ......... ......... ...... ......... ......... ......... ...... ......... ......... ....... ......... ........ ............. 5-4
Using Microsoft Bluetooth Stack .......................................................................................................... 5-5
Turning the Bluetooth Radio Mode On and Off ............................................................ .................. 5-5
Enabling Bluetooth ................................................................................................................... 5-5
Disabling Blu e to o th ......... .......................... .. ... ............. .. .. ............. ... ......................................... 5-5
Discovering Bluetooth Device(s) .................................................................................................... 5-6
Available Se rv ic e s ............ .. ... ............. .. .. .............. .. .. ............. .. ........................................ ............... 5-8
Object Push Se rv ices via Beam ... .. .. .............. .. .. ............. .. ... ............. .. .. .............. .. .. ............. .. .. 5-8
Internet Sha rin g .............. ....................................... ... .. ............. .. .............................................. 5-10
Hands-free Services ....................................... ................. ................ ................. ................ ....... 5-11
Serial Port Services ................................................................................................................. 5-11
ActiveSync Using Serial Port Services .................................................................................... 5-12
Phone Book Access Profile Services .......................................... .......................................... ... 5-14
Chapter 6: Accessories
Introduction .......................................................................................................................................... 6-1
Single Slot USB Cradle ........................................................................................................................ 6-2
Charging the MC65 Battery ................... ... .. ............. .. .. .............. .. ........................................ .. .. ...... 6-2
Charging the Spare Battery ........................................................................................................... 6-3
Battery Charging Indicators ........................................................................................................... 6-3
Page 11

Table of Contents ix
Preliminary
Charging Te m p e ra tu r e ................................................ .. .. ............. ... .. ............. .. ........................ 6-3
Four Slot Charge Only Cradle ....................................................................... ................ ...................... 6-5
Charging ........................................................................................................................................ 6-5
Battery Charging Indicators ........................................................................................................... 6-5
Charging Te m p e ra tu r e ................................................ .. .. ............. ... .. ............. .. ........................ 6-5
Four Slot Ethernet Cradle .................... .......................................... ...................................................... 6-6
Charging ........................................................................................................................................ 6-6
Battery Charging Indicators ........................................................................................................... 6-6
Charging Te m p e ra tu r e ................................................ .. .. ............. ... .. ............. .. ........................ 6-6
VCD5000 Vehicle Cradle ................... ................ ................. ................................................................. 6-7
Charging the MC65 Battery ................... ... .. ............. .. .. .............. .. ........................................ .. .. ...... 6-7
Removing the MC65 ................................................................................................................ 6-7
Battery Charging Indicators ........................................................................................................... 6-8
Charging Te m p e ra tu r e ................................................ .. .. ............. ... .. ............. .. ........................ 6-8
Four Slot Battery Charger .............................................................. ...................................................... 6-9
Battery Charging ........................................................................................................................... 6-9
Battery Charging Indicators ........................................................................................................... 6-9
Charging Te m p e ra tu r e ................................................ .. .. ............. ... .. ............. .. ........................ 6-9
Cables ... ....... ...... ..... ...... ....... ....... .... ....... ...... ..... ...... ....... .... ....... ....... ...... ..... ...... ....... ............................ 6-11
Battery Charging and Operating Power ............................. ...................... ...................... ................ 6-11
LED Charge Indications ................................................................................................................. 6-12
Charging Te m p e ra tu r e ................................................ .. .. ............. ... .. ............. .. ........................ 6-13
Vehicle Holder ..................................................................................................................................... 6-14
Installation Reminders ................................................................................................................... 6-14
Device Mounting Precautions ............................... ................. ................ ................. ................ ....... 6-14
Installatio n ............... ................ ............... .............. ............... ............... .............. .............................. 6-14
Assembly ................................................................................................................................. 6-15
Windshield In s t allation .... ............. .. ........................................ .. .. .............. .. .. ............. .. ... .......... 6-15
Flat Surface In s ta llation .... .. ........................................ .. .. ............. ... .. ............. .. ... ............. .. ...... 6-16
Chapter 7: Maintenance & Troubleshooting
Introduction .......................................................................................................................................... 7-1
Maintaining the MC65 .......................................................................................................................... 7-1
Removing the Screen Protector ................................................................. ...................... .................... 7-2
Battery Safety Guidelines .................................................................................................................... 7-2
Cleaning ............................................................................................................................................... 7-3
Materials Re qu ired ......... ............. .. ... ............. .. .. .............. .. .. ............. .. ... ............. .. ............. ............. 7-3
Cleaning the MC65 ........................................................................................................................ 7-4
Housing ..... ................. .................... .................... .................. .................... ................... ............. 7-4
Display ..................................................................................................................................... 7-4
Scanner Exit Window ................................... ............................................................................ 7-4
Connector ............................................................................................................................... . 7-4
Cleaning Cradle Connectors .......................................................................................................... 7-4
Cleaning Frequency .................................................................................................................. ..... 7-5
Troubleshooting ................................................................................................................................... 7-5
MC65 ............................................................................................................................................. 7-5
Bluetooth Connection .......................... ................ ................. ................ ................. ......................... 7-7
Single Slot USB Cradle .................................................................................................................. 7-8
Four Slot Ethernet Cradle ............................ .. ...................... .......................................... ............... . 7-9
Page 12

x MC65 User Guide
Preliminary
Vehicle Cradle ................................................................................................................................ 7-10
Four Slot Battery Charger ..................................... ................. ................ ................. ....................... 7-11
Cables .... ............. ............. ........... .............. ............. ............. ........... ............. .............. ..................... 7-11
Magnetic Stripe Reader ................................................................................................................. 7-12
Appendix A: Technical Specifications
MC65 Technical Specifications ............................................................................................................ A-1
MC65 ............................................................................................................................................. A-1
MC65 Accessory Specifications .......................................................................................................... A-7
Single Slot USB Cradle .................................................................................................................. A-7
Four Slot Battery Charger ..................................... ................. ................ ................. ....................... A-7
Four Slot Charge Only Cradle ........................ ................ ................. ................ ................. .............. A-8
Four Slot Ethernet Cradle ............................ .. ...................... .......................................... ............... . A-8
Magstripe Reader ........................... .. ...................... ...................... ...................... ............... ............ A-10
Vehicle Cradle ................................................................................................................................ A-10
Cables .... ............. ............. ........... .............. ............. ............. ........... ............. .............. ..................... A-11
Glossary
Index
Page 13

About This Guide
Preliminary
Introduction
This guide provides information about using the MC65 Enterprise Digital Assistant (EDA) and accessories.
NOTE Screens and windows pictured in this guide are samples and can differ from actual screens.
Documentation Set
The documentation set for the MC65 provides information for specific user needs, and includes:
•
MC65 Quick Start Guide - describes how to get the MC65 EDA up and running.
•
MC65 User Guide - describes how to use the MC65 EDA.
•
MC65 Integrator Guide - describes how to set up the MC65 EDA and accessories.
•
Microsoft® Applications for Windows Mobile 6 User Guide - describes how to use Microsoft developed
applications.
•
Enterprise Mobility Application Guide - describes how to use Enterprise Mobility developed sample
applications.
•
Enterprise Mobility Developer Kit (EMDK) Help File - provides API information for writing applications.
Page 14

xii MC65 User Guide
Preliminary
Configurations
This guide covers the following configurations:
Configuration Radios Display Memory
MC659B WLAN: 802.11 a/b/g
WPAN: Bluetooth
v2.1 EDR
WWAN:
GSM/GPRS/EDGE/
CDMA
GPS: SiRF III
3.5” QVGA
Color
128 MB RAM/
256 MB Flash
Data Capture
Options
1D laser
scanner,
2D imager,
1D laser
scanner and
camera or
2D imager and
camera
Operating
System
Windows
Mobile 6.5
Professional
Software Versions
This guide covers various software configurations and references are made to operating system or software
versions for:
•
Adaptation Kit Update (AKU) version
•
OEM version
•
BTExplorer version
•
Fusion version
•
Phone version.
Keypads
Numeric,
Alphanumeric,
QWERTY,
QWERTZ or
AZWERTY
keypad
AKU Version
To determine the Adaptation Kit Update (AKU) version:
Tap Start > Settings > System tab > About icon > Version tab.
The second line lists the operating system version and the build number. The last part of the build number
represents the AKU number. For example, Build 18552.0.7.5 indicates that the device is running AKU version
0.7.5.
Page 15
OEM Version
Preliminary
To determine the OEM software version:
Tap Start > Settings > System tab > System Information icon > System tab.
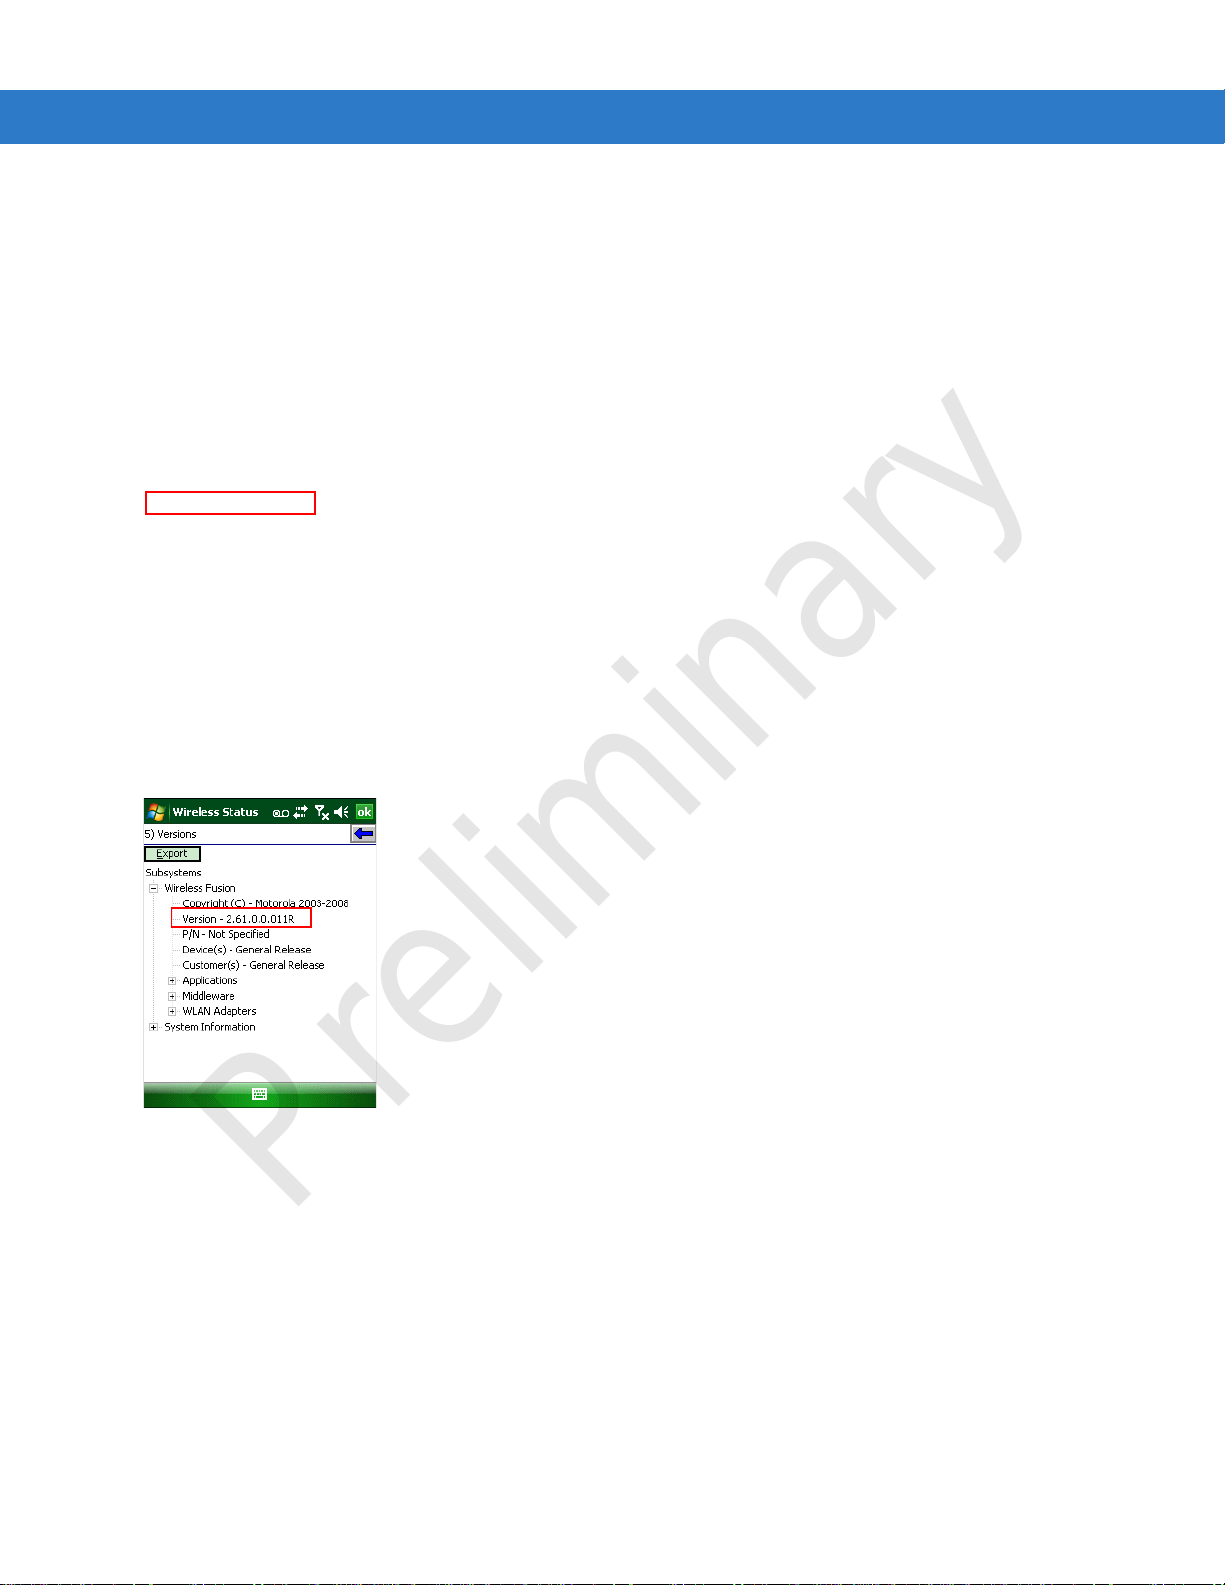
Fusion Software
About This Guide xiii
To determine the Fusion software version:
Tap Wireless Strength icon > Wireless Status > Versions.
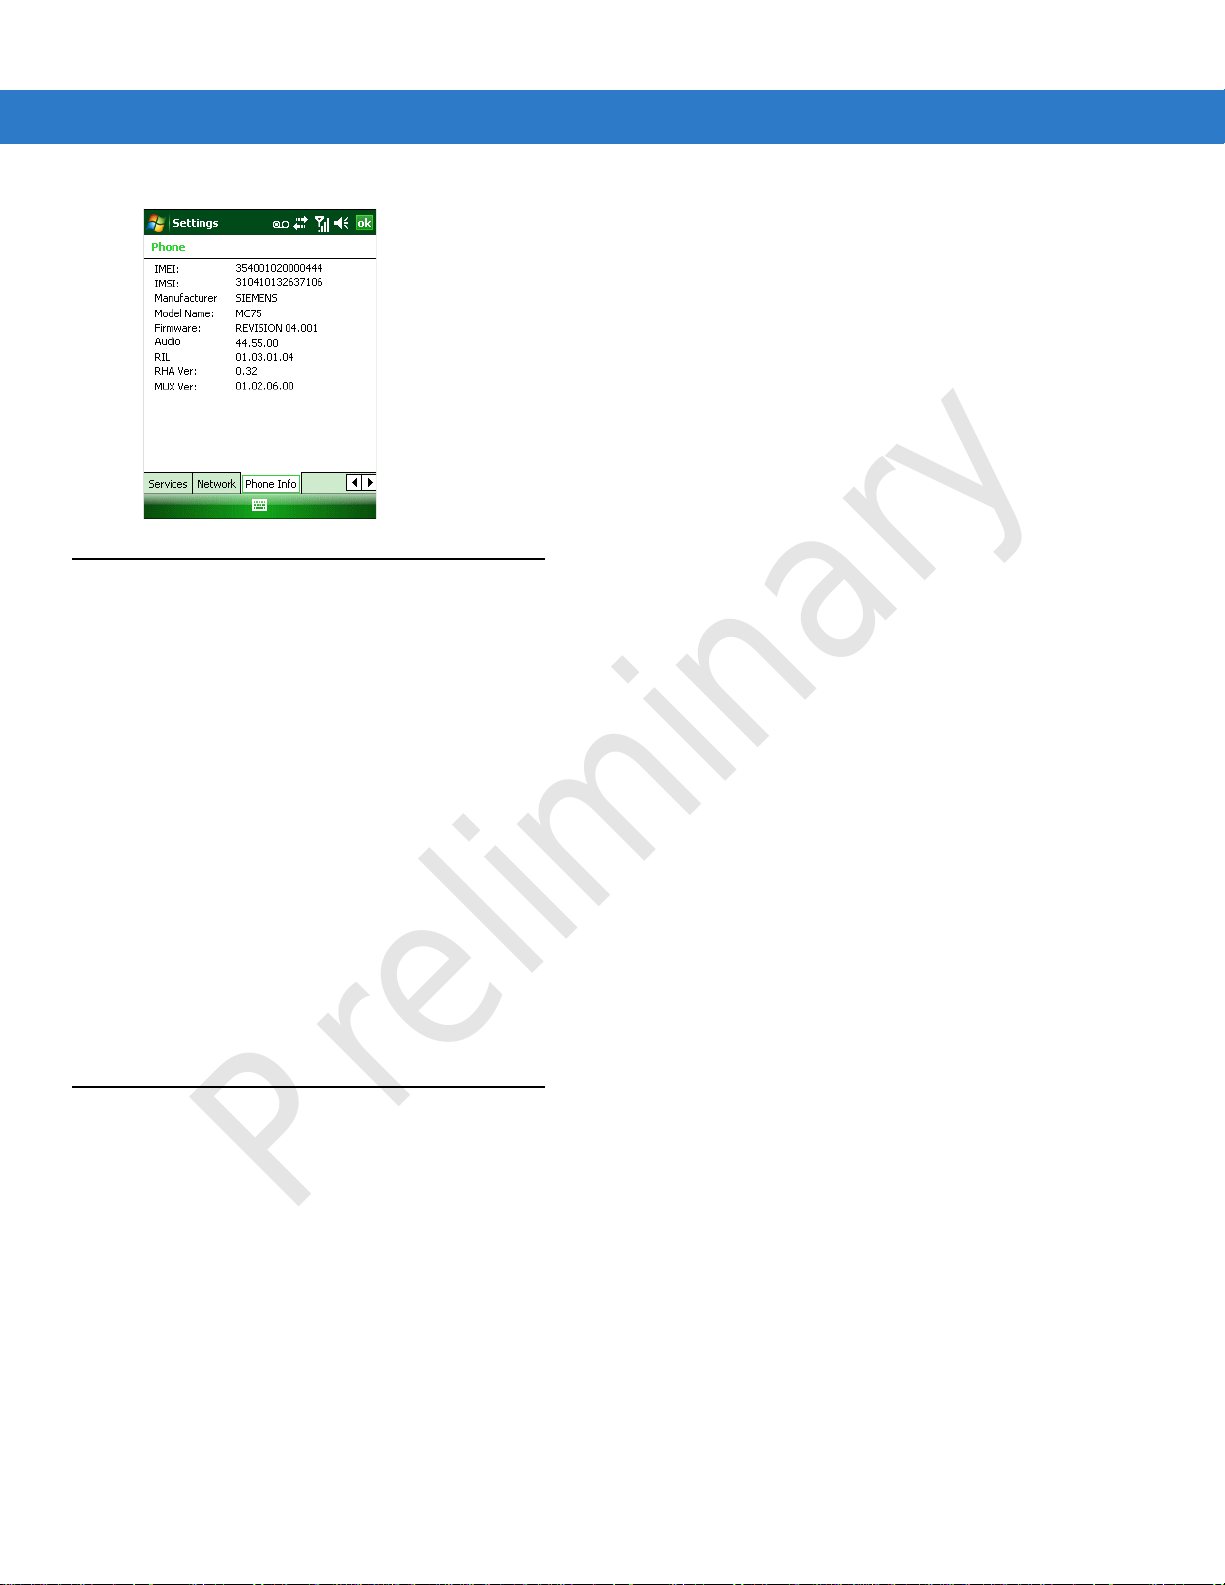
Phone Software
To determine the Phone software version:
Tap Start > Phone > Menu > Options > PhoneInfo tab or Start > Setting > Settings > PhoneInfo icon.
Page 16
xiv MC65 User Guide
Preliminary
Chapter Descriptions
Topics covered in this guide are as follows:
•
Chapter 1, Getting Started provides information on getting the MC65 up and running for the first time.
•
Chapter 2, Using th e MC65 provides basic instructions for using the MC65, including powering on and
resetting the MC65, and entering and capturing data.
•
Chapter 3, Using GPS Navigation provides information about GPS navigation with the MC65.
•
Chapter 4, Using th e Phone provides basic instructions for using the MC65 phone.
•
Chapter 5, Using Bluetooth explains Bluetooth functionality on the MC65.
•
Chapter 6, Accessories describes the available accessories and how to use them with the MC65.
•
Chapter 7, Maintenance & Troubleshooting includes instructions on cleaning and storing the MC65, and
provides troubleshooting solutions for potential problems during MC65 operation.
•
Appendix A, Technical Specifications provides the technical specifications for the MC65.
•
Appendix B, Voice Quality Manager provides information on Voice Quality Manager software.
Notational Conventions
The following conventions are used in this document:
•
“EDA” refers to the Motorola MC65 series of hand-held computers.
•
Italics are used to highlight the following:
• Chapters and sections in this and related documents
• Icons on a screen.
Page 17

•
Preliminary
Bold text is used to highlight the following:
• Dialog box, window, and screen names
• Drop-down list and list box names
• Check box and radio button names
• Key names on a keypad
• Button names on a screen.
•
bullets (•) indicate:
• Action items
• Lists of alternatives
• Lists of required steps that are not necessarily sequential
•
Sequential lists (e.g., those that describe step-by-step procedures) appear as numbered lists.
Related Documents
•
MC65 Quick Start Guide, p/n 72-114971-xx.
About This Guide xv
•
MC65 Windows Mobile 6.1 Regulatory Guide, p/n 72-108860-xx.
•
MC65 Integrator Guide, p/n 72E-108861-xx.
•
Microsoft® Applications for Windows Mobile 6 User Guide, p/n 72E-108299-xx.
•
Mobility Services Platform User Guide, p/n 72E-100158-xx.
•
Enterprise Mobility Application Guide, p/n 72E-68901-xx.
•
Enterprise Mobility Developer Kits (EMDKs), available at:
http://www.motorola.com/enterprisemobility/support
•
Latest ActiveSync software, available at: http://www.microsoft.com.
For the latest version of this guide and all guides, go to: http://www.motorola.com/enterprisemobility/manuals
Service Information
If you have a problem with your equipment, contact Motorola Enterprise Mobility support for your region. Contact
information is available at: http://www.motorola.com/enterprisemobility/contactsupport
When contacting Enterprise Mobility support, please have the following information available:
•
Serial number of the unit (found on manufacturing label)
•
Model number or product name (found on manufacturing label)
.
.
.
Page 18
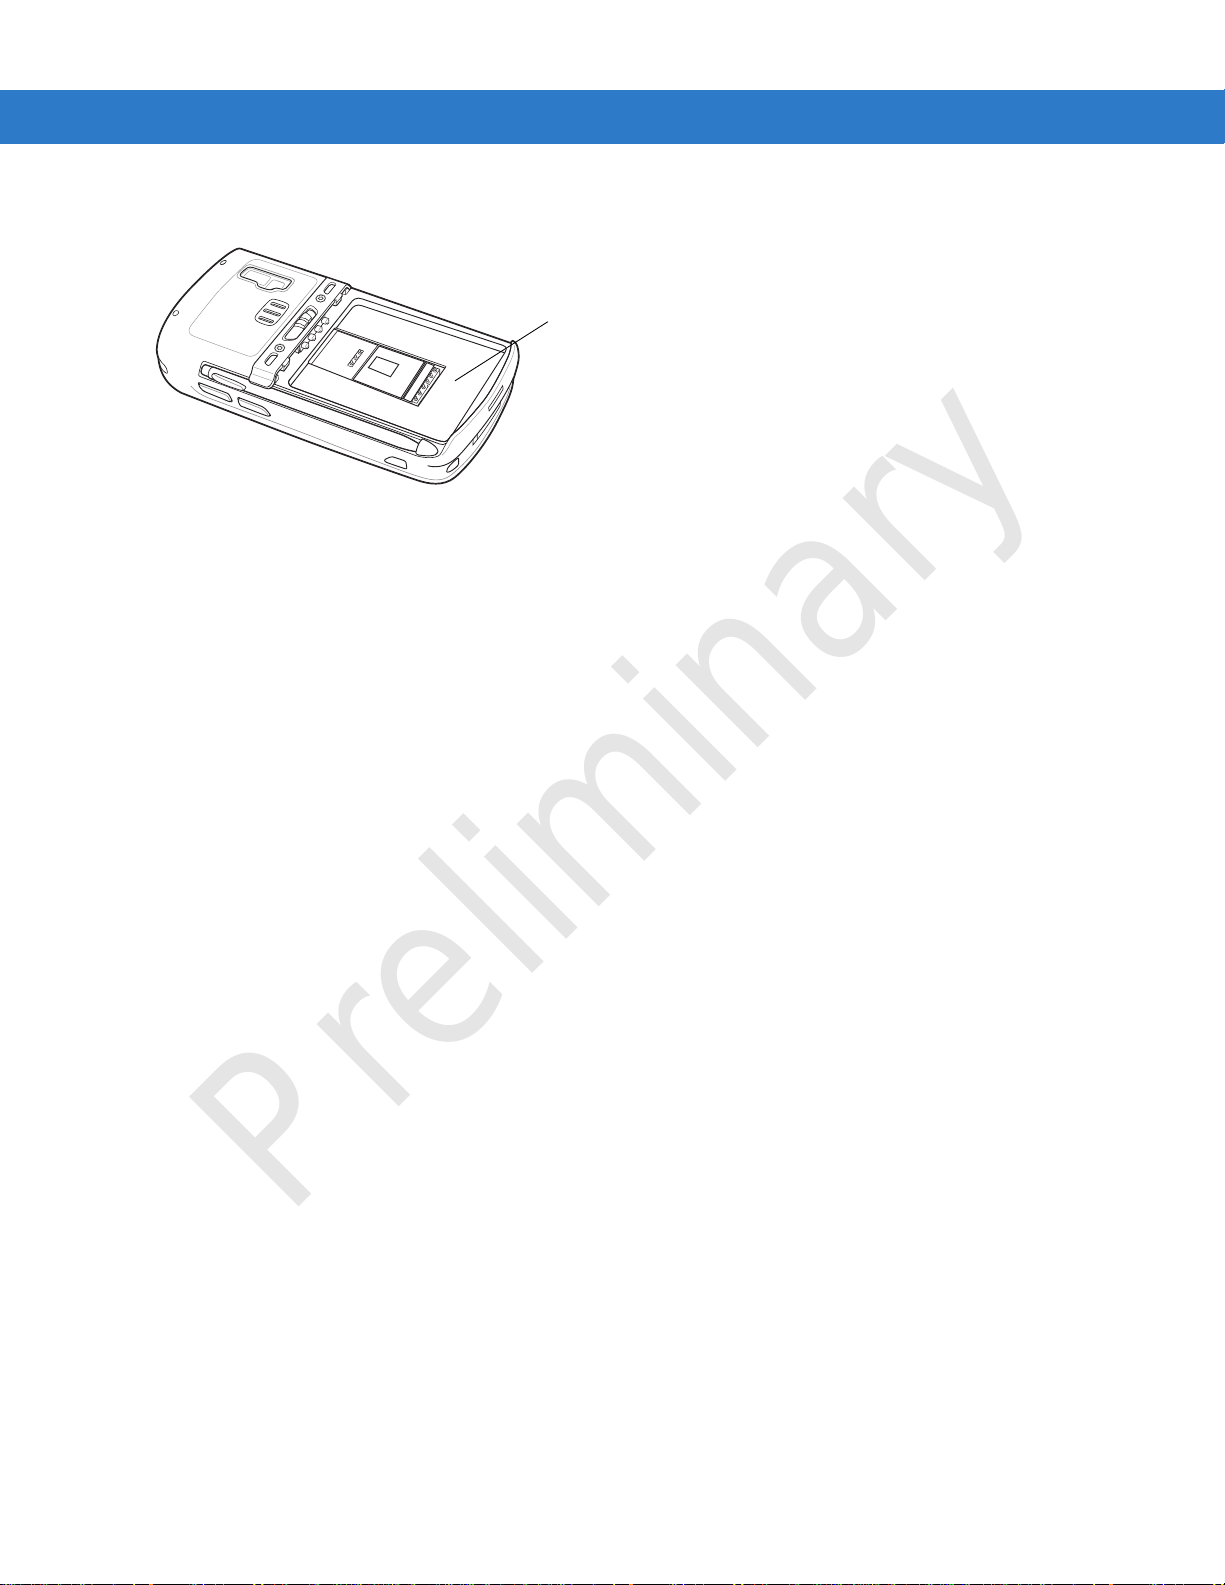
xvi MC65 User Guide
Manufacturing label
NEED WAN
DRAWING
Preliminary
•
Software type and version number.
Motorola responds to calls by email, telephone or fax within the time limits set forth in support agreements.
If your problem cannot be solved by Motorola Enterprise Mobility Support, you may need to return your equipment
for servicing and will be given specific directions. Motorola is not responsible for any damages incurred during
shipment if the approved shipping container is not used. Shipping the units improperly can possibly void the
warranty.
If you purchased your Enterprise Mobility business product from a Motorola business partner, contact that business
partner for support.
Page 19

Chapter 1 Getting Started
Scan/Decode
LED
Charging/Battery
Status LED
Radio Status
LED
Scan/Action
Button
Keypad
(Alpha-Numeric Keypad Shown)
Power Button
I/O Connector
Volume
Up/Down Button
Touch Screen with
Protective Overlay
Microphone
Preliminary
Introduction
This chapter lists the parts and accessories for the MC65 and explains how to set up the MC65 for the first time.
Figure 1-1
MC65 Front View
Page 20

1 - 2 MC65 User Guide
Battery
Speaker
Exit Window
Stylus
Battery Latch
Camera
Stylus Clip
Camera Flash
Action Button
Scan/Action Button
Handstrap
Microphone
Preliminary
Figure 1-2
Unpacking
Carefully remove all protective material from the MC65 and save the shipping container for later storage and
shipping.
Verify that you received the following:
•
•
•
•
•
•
Inspect the equipment for damage. If any equipment is missing or damaged, contact the Motorola Enterprise
Mobility Support center immediately. See page xv for contact information.
Prior to using the MC65 for the first time, remove the protective shipping film that covers the scan window, display
and camera window.
MC65 Rear View
MC65 EDA
2400 or 3600 mAh Lithium-ion battery
stylus with tether (installed)
screen protector, installed on display window
Regulatory Guide
Quick Start Guide.
Page 21

Accessories
Preliminary
Table 1-1 lists the accessories available for the MC65 EDA.
Getting Started 1 - 3
Table 1-1
Cradles
Single Slot USB Cradle CRD5500-1000UR Charges the MC65 main b attery and a spa re battery. Synchronizes
Single Slot
Ethernet/Modem/USB
Cradle
Four Slot Charge Only
Cradle
Four Slot Ethernet Cradle CRD5500-4000ER Charges up to four MC65 devices and connects the MC65 with an
Vehicle Cradle VCD5500-1000R Installs in a vehicle and charges the MC65 main battery.
Vehicl e Holder VCH5500-1000R Provides an alternative mounting solut ion for the MC6 5 in a vehicle .
Chargers
Four Slot Spare Battery
Charger
USB Charging Cable 25-108022-01R Provides power to the MC65 and USB communication with a host
MC65 Accessori es
Accessory Part Number Description
the MC65 with a host computer through a USB connection.
CRD5500-1000XR Charges the MC65 main battery and a spare battery. Synchronizes
the MC65 with a hos t computer through an Ethernet, Modem or USB
connection.
CRD5500-4000CR Charges up to four MC65 devices.
Ethernet network.
Requires the Auto Charge cable for charging the MC65 battery.
SAC5500-4000CR Charges up to four MC65 battery packs.
computer.
Charge Only Cable 25-112560-01R Connects to a power supply to provide power to the MC65.
Auto Char ge Cable VCA5500-01R Charges the MC65 using a vehicle’s cigarette lighter.
Miscellaneous
Spare 2400 mAh lithium-ion
battery
Spare 3600 mAh lithium-ion
battery
DEX Cable TBD TBD
Magnetic Stripe Reader MSR5500-100R TBD
Belt Mounted Rigid Holster SG-MC5511110-01R Clips onto belt to hold the MC65 when not in use.
Fabric Holster SG-MC5521110-01R Soft holder for added protection.
Stylus KT-119150-03R
Spring Loaded Stylus STYLUS-00001-03R
Wall Mounting Kit 8710-050006-01R Use for wall mounting the four slot cradles.
BTRY-MC55EAB00 Replacement 2400 mAh battery.
BTRY-MC55EAB02 Replacement 3600 mAh battery.
KT-119150-50R
STYLUS-00001-10R
Replacement stylus (3-pack).
Replacement stylus (50-p ack ).
Optional spring loaded stylus (3-pack).
Optional spring loaded stylus (10-pack).
Page 22

1 - 4 MC65 User Guide
Rubber access door
microSD card holder door
SIM card holder door
Preliminary
Table 1-1
Screen Protector KT-67525-01R Package of 3 screen protectors.
Software - Enterprise Mobility Developer Kits (EMDKs), availabl e at:
MC65 Accessories (Continued)
Accessory Part Number Description
Getting Started
To start using the MC65 for the first time:
•
Install a microSD card (optional)
•
Install the SIM card (GSM only)
•
Install the main battery pack.
•
Charge the MC65.
•
Power on the MC65.
Installing a microSD Card
The microSD card slot provides secondary non-volatile storage. The slot is located under the battery pack. Refer to
the documentation provided with the card for more information, and follow the manufacturer’s recommendations for
use.
http://support.symbol.com.
CAUTION Follow proper ESD precautions to avoid damaging the SD card. Proper ESD precautions include, but are
not limited to, working on an ESD mat and ensuring that the operator is properly grounded.
To install the microSD card:
1. Lift rubber access door.
2. Slide the SIM card holder door up to unlock.
3. Lift SIM card holder door.
Figure 1-3
Lift SIM Slot Holder Door
4. Lift microSD card holder door.
Page 23

Getting Started 1 - 5
microSD card
Holding tab
Preliminary
5. Insert the microSD card into card holder door ensuring that the card slides into the holding tabs on each side of
the door.
Figure 1-4
6. Close the card holder door and push down until it is securely into place.
7. Close SIM card holder door and slide down until it locks into place.
8. Close rubber access door.
Installing the SIM Card
GSM phone service requires a Subscriber Identification Module (SIM) card, or smart card. Obtain the card from the
your service provider. The card fits into the MC65 and can contain the following information:
•
•
•
•
Insert microSD Card in Holder
NOTE GSM only.
Mobile phone service provider account details.
Information regarding service access and preferences.
Contact information, which can be moved to Contacts on the MC65.
Any additional services to which you have subscribed.
NOTE For more information about SIM cards, refer to the service provider's documentation.
To install the SIM card:
1. Lift rubber access door.
2. Slide the SIM card holder up to unlock.
3. Lift the SIM card holder door.
Page 24

1 - 6 MC65 User Guide
Preliminary
Figure 1-5
4. Insert the SIM card, as shown in Figure 1-6 ensuring that the card slides into the holding tabs on each side of
the door.
Figure 1-6
5. Close SIM card holder door and slide down to lock into place.
6. Close the rubber access door.
7. Install the battery.
Lifting the SIM Cover
Inserting the SIM Card
NOTE For detailed information about WWAN activation and settings, refer to the MC65 Integrator Guide.
Installing the Battery
NOTE The MC65 ships with either a 2400 mAh or 3600 mAh battery. The 2400 mAh battery is shown in this
installation procedure.
To install the battery.
1. Insert the battery, bottom first, into the battery compartment in the back of the MC65.
2. Press the battery down into the battery compartment until the battery release latch snaps into place.
Page 25

Getting Started 1 - 7
Battery
Battery Release Latch
NEED WAN
DRAWING
Preliminary
2
1
Figure 1-7
The MC65 powers up automatically after inserting the battery if the battery has been charged previously.
Charging the Battery
Charging the Main Battery
Before using the MC65 for the first time, charge the main battery until the amber Charging/Battery Status LED
remains lit (see Table 1-2 on page 1-8 for charge status indications). To charge the MC65, use a cable or a cradle
with the appropriate power supply. For information about the accessories available for the MC65, see Chapter 6,
Accessories.
For cable and cradle setup and charging procedures refer to the MC65 Integrator Guide.
•
•
•
•
•
Inserting the Battery
CAUTION Ensure that you follow the guidelines for battery safety de scribe d in Battery Sa fety G ui de lin es on page 7-2.
USB Charging Cable
Charge On ly Cable
Single Slot USB Cradle
Four Slot C harge Only Cradle
Four Slot Ethernet Cradle.
To charge the main battery:
1. Connect the charging accessory to the appropriate power source.
2. Insert the MC65 into a cradle or attach to a cable. The MC65 begins charging. The Charging/Battery Status
LED blinks amber while charging, then turns solid amber when fully charged. See Table 1-2 for charging
indications.
Page 26

1 - 8 MC65 User Guide
Preliminary
The 2400 mAh battery fully charges in less than four hours and the 3600 mAh battery charges in less than six
hours.
Table 1-2
Off MC65 is not charging.
Slow Blinking Amber
(1 blink every 2 seconds)
Solid Amber Charging complete.
Fast Blinking Amber
(2 blinks/seco nd)
Single Blink Amber (when
Power button pressed)
Blinking Amber (when
Power button pressed)
Charging Spare Batteries
LED Charge Indicators
Charging/Battery
Status LED
MC65 is not inserted correctly in the cradle or connected to a power source.
Charger/cradle is not powered.
MC65 is charging.
Note: When the battery is initially inserted in the MC65, the amber LED flashes
once if the battery power is low or the battery is not fully inserted.
Charging error, e.g.:
•
Temperature is too low or too high.
•
Charging has gone on too long without completion (typically eight hours).
Battery depleted.
Battery over-temperature condition.
Indication
See Chapter 6, Accessories for information on using accessories to change spare batteries.
Charging Temperature
Charge batteries in temperatures from 0°C to 40°C (32°F to 104°F). Note that charging is intelligently controlled by
the MC65.
To accomplish this, for small periods of time, the MC65 or accessory alternately enables and disables battery
charging to keep the battery at acceptable temperatures. The MC65 or accessory indicates when charging is
disabled due to abnormal temperatures via its LED. See Table 1-2.
Powering On the MC65
After inserting the battery or when turning the MC65 on for the first time, the splash screen displays for about a
minute as the MC65 initializes its flash file system, then the calibration window appears. Note that these windows
also appear upon cold boot.
Calibrating the Screen
NOTE The Calibration screen can be accessed by pressing Blue key then Backspace key.
To calibrate the screen so the cursor on the touch screen aligns with the tip of the stylus:
1. Remove the stylus from its holder on the side of the MC65.
2. Carefully press and briefly hold the tip of stylus on the center of each target that appears on the screen.
Page 27

3. Repeat as the target moves around the screen, then tap the screen to continue.
Preliminary
Getting Started 1 - 9
Page 28

1 - 10 MC65 User Guide
Preliminary
Carrier Activation
Upon start up, the MC65 looks for an installed SIM card. If an active SIM card is detected the MC65 provisions
itself.
After installing the SIM card, activate your mobile service connection.
If the ES400 does not find an active SIM Card, an activation screen appears on the screen to activate on a CDMA
network.
Figure 1-8
Tap Yes.
Call your carrier from an existing phone to request over-the-air activation. You need to provide the MEID number
from the screen.
Checking Battery Status
To check the charge status of the main battery in the MC65, tap Start > Settings > System tab > Power icon to
display the Power window.
To save battery power, tap the Advanced tab and set the MC65 to turn off after a specified number of minutes.
Activation Screen
NOTE If switching from one carrier to another, refer to the ES400 User Manual for detailed infor mation.
NOTE To check battery status, remove the MC65 from any AC power source (cradle, cables, etc.)
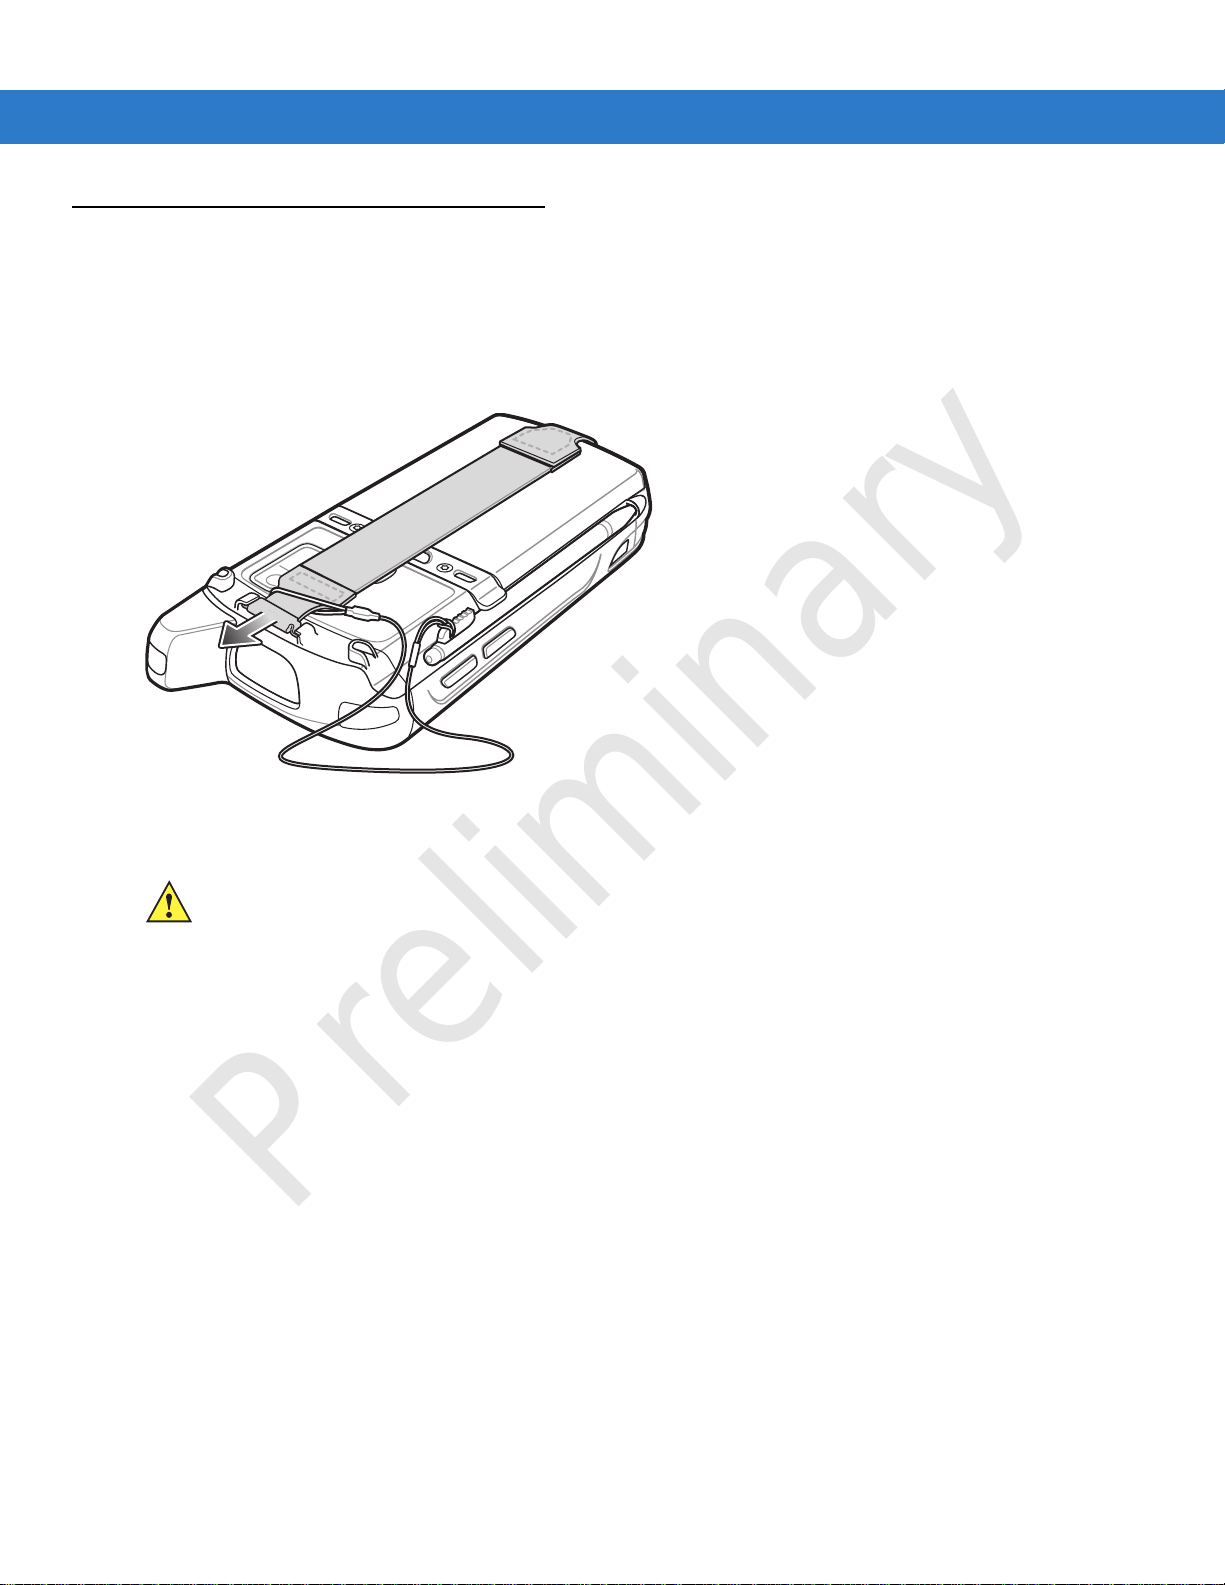
Replacing the Battery
1. Press the red Power button to suspend the MC65.
2. Use finger or stylus to slide the battery latch to the right releasing the battery. The battery ejects slightly.
Page 29

Getting Started 1 - 11
1
1
Battery Latch
NEED WAN
DRAWING
Preliminary
2
Figure 1-9
3. Lift the battery from the MC65.
4. Insert the replacement battery, bottom first, into the battery compartment in the back of the MC65.
5. Press the battery down until the battery release latch snaps into place.
The MC65 powers up after inserting the battery.
Removing the Battery
Removing the microSD Card
To remove an microSD card:
1. Press the red Power button to suspend the MC65.
2. Remove the battery.
3. Lift the rubber access door.
4. Slide SIM card holder door up to unlock.
5. Lift SIM Card holder door.
6. Lift the microSD card holder door.
7. Remove microSD card from ho lder.
8. Close microSD card holder door.
9. Close SIM card holder door.
10. Slide SIM card holder door down to lock into place.
11. Close the rubber access door.
12. Replace the battery.
Page 30

1 - 12 MC65 User Guide
Preliminary
Battery Management
Observe the following battery saving tips:
•
Leave the MC65 connected to AC power at all times when not in use.
•
Set the MC65 to turn off after a short period of non-use.
•
Set the backlight to turn off after a short period of non-use.
•
Turn off all wireless activities when not in use.
Changing the Power Settings
To set the MC65 to turn off after a short period of non-use:
1. Tap Start > Settings > System tab > Power icon > Advanced tab.
2. Select the On battery power: Turn off device if not used for check box and select a value from the
drop-down list.
3. Select ok.
Changing the Backlight Settings
To change the backlight settings in order to conserve more battery power:
1. Tap Start > Settings > System tab > Backlight icon > Battery Power tab.
2. Select the Disable backlight if device is not used for check box and select a value from the drop-down list.
3. Select the Brightness tab.
4. Tap the Disable backlight check box to turn off the display backlight, or use the slider to set a low value for the
backlight.
5. Select ok.
Changing the Keypad Backlight Settings
To change the keypad backlight settings in order to conserve more battery power:
1. Tap Start > Settings > System tab > Keylight icon > Battery Power tab.
2. Select the On battery power: Disable keylight if device if not used for check box and select a value from
the drop-down list.
3. Select the Advanced tab.
4. Tap the Disable keylight check box to turn off the keypad backlight.
5. Select ok.
Turning Off the Radios
Windows Mobile 6.1 devices include Wireless Manager, which provides a simple method of enabling, disabling,
and configuring all the device’s wireless capabilities in one place.
Page 31

To open Wireless Manager, tap Start > Settings > Connectivity > Wireless Manager > .
Preliminary
Select Wireless Manager.
Getting Started 1 - 13
Figure 1-10
To enable or disable a wireless connection, tap the specific button.
To enable or disable all wireless connections, tap and hold the All button.
To configure settings for a connection, tap Menu.
Figure 1-11
Wireless Manager Window
NOTE Wireless connection options vary depending upon configurations.
Wireless Manager Menu
Page 32
1 - 14 MC65 User Guide
Preliminary
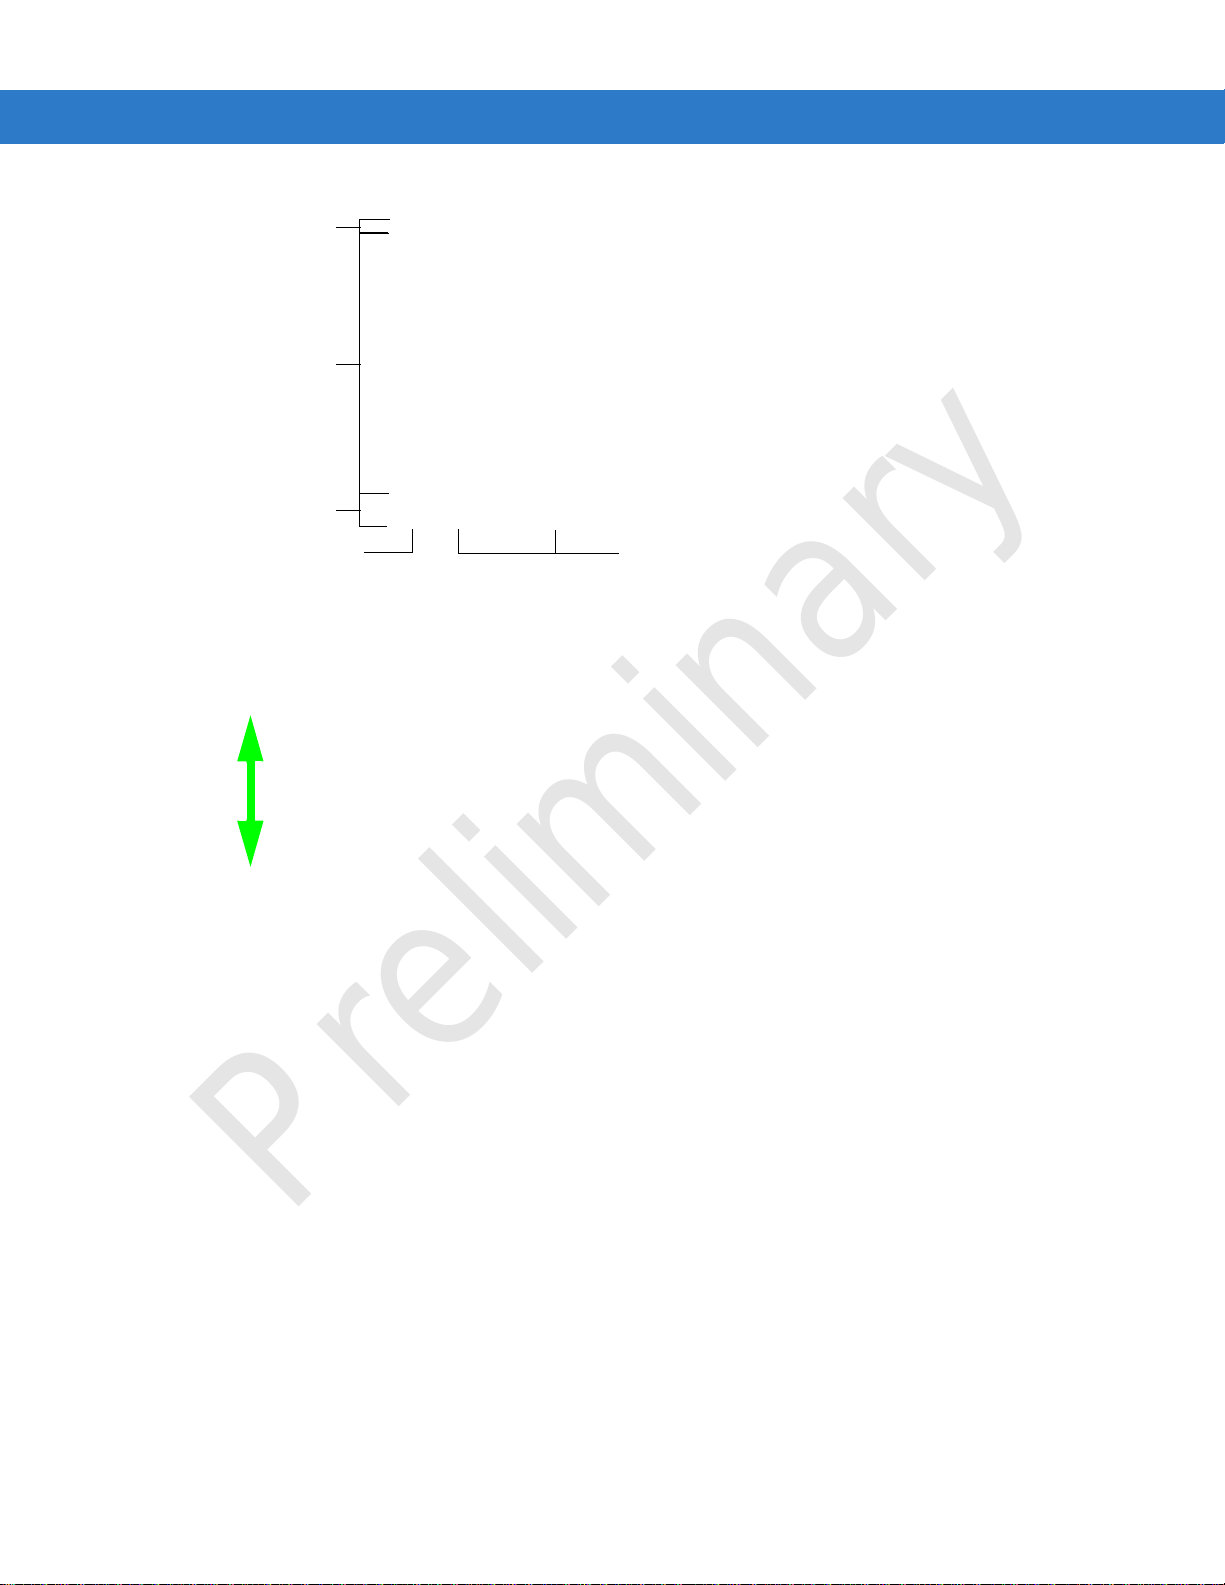
Handstrap Replacement
Removal
To remove a handstrap from the MC65:
1. Slide the handstrap clip out of the handstrap slot.
Figure 1-12
2. Remove the battery.
3. Using a small flat screwdriver, push the head of the screwdriver between the handstrap pin and the bottom of
the housing as shown below.
4. Pry the handstrap and pin up and out of the handstrap mount area.
Handstrap Clip Removal
CAUTION When removing handstrap pin, be carefully not to damage handstrap mounting area.
Page 33

Getting Started 1 - 15
12
34
Preliminary
Figure 1-13
5. Repeat for the other side of the handstrap.
6. Remove pin from the handstrap.
Figure 1-14
7. Pull handstrap through handstrap slot.
Installation
To install a new handstrap:
1. Feed bottom end of handstrap into handstrap slot on the bottom of the MC65.
Handstrap and Pin Removal
Pin Removal
Page 34

1 - 16 MC65 User Guide
Preliminary
Figure 1-15
2. Slide pin into bottom of handstrap.
3. Center the pin in the handstrap loop.
4. Pull handstrap so that the pin and bottom of handstrap slide into position in the mounting area.
Figure 1-16
Feed handstrap into Handstrap Slot
NOTE Handstrap and pin should fit securely into the handstrap mounting area. When pulling on handstrap use
enough force to engage pin into place.
Pin and Handstrap in Mounting Area
Figure 1-17
5. Slide tether loop over handstrap.
6. Insert the handstrap clip into the slot on the device. Ensure that it is securely in place.
Slide Handstrap and Tether Over Handstrap Mount
Page 35

Getting Started 1 - 17
Preliminary
Page 36

1 - 18 MC65 User Guide
Preliminary
Page 37

Chapter 2 Using the MC65
Preliminary
Introduction
This chapter explains the buttons, status icons, and controls on the MC65, and provides basic instructions for using
the MC65, including powering on and resetting the MC65, and entering and capturing data.
Finger Scrolling
Finger scrolling can be used to scroll up and down web pages, documents, and lists such as the contacts list, file
list, message list, calendar appointments list, and more.
When finger scrolling, swipe or flick your finger on the screen.
To scroll down, swipe your finger upward on the screen. To scroll up, swipe your finger downward on the screen.
To auto-scroll, flick your finger upward or downward on the screen. Touch the screen to stop scrolling.
Home Screens
The default home screen on the ES400 is the Windows Mobile Home screen. The ES400 also contains an
Motorola Enterprise Home screen.
Both Home screens contain a Status Bar at the top of the screen and a Tile Bar at the bottom of the screen. The
Windows Mobile Home screen contains application specific information and the Enterprise Home screen provides
Cards that are task specific.
Windows Mobile Home Screen
The Home screen is scrollable and contains a list of application plug-ins and an Information Status bar. The
Information Status bar highlights the application plug-in that is under it and provides additional information.
Page 38
2 - 2 MC65 User Guide
Open the Start Menu
Tiles
Status Bar
Today Screen
Tile Bar
Preliminary
Figure 2-1
Touch and hold the screen with your finger and move the Home screen up and down. As the application names
move under the Information Status bar, information relevant to that application appear in the bar.
Figure 2-2
You can also touch and hold the Information Status bar and move it up and down over an application name.
Remove your finger and the Information Status bar and application name center in the screen.
Windows Mobile Home Screen
Moving Today Screen
Page 39

Using the MC65 2 - 3
Application Icon
Application Information
Soft Key Bar
Status Bar
Today Screen
Task Tray
Preliminary
Figure 2-3
Figure 2-4
To customize the Home screen, tap > Settings > Today. On the horizontal scroll, use Appearance to
customize the background and the Items to change the display format.
Classic Today Screen
The user can change the Today screen to the classic layout that is used in Windows Mobile 6.1.
Moving Information Status Bar
Information Bar Example
Figure 2-5
Classic Today Screen
Page 40

2 - 4 MC65 User Guide
Battery
Audio
Connectivity
Notifications
Signal Strengt h
Battery
Clock
Preliminary
To change to the classic view tap > Settings > Home > Items.
Figure 2-6
Deselect the Windows Default checkbox and select any of the other checkboxes.
Tap .
The task bar at the bottom of the screen can contain the task tray icons listed in Table 2-1.
Table 2-1
Icon Name Description
Status Bar
The Status Bar at the top of the screen displays the status icons listed in Table 2-2. Tap anywhere on the Status
Bar to open the Device Management window. See XX for more information.
Home Screen Settings
Task Tray Icons
Wireless connection
status
ActiveSync Active serial connection between the MC75A and the host computer.
Indicates WLAN signal strength.
Figure 2-7
Status Bar Icons
Page 41

Using the MC65 2 - 5
Preliminary
Table 2-2
Icon Description
Notifications
Connectivity
Status Bar Icons
Backup battery low. Is there a backup battery????
Notification that one or more instant messages were received.
Notification that one or more e-mail/text messages were received.
Notification that one or more voice messages were received.
There are more notification icons than can be displayed. Tap to display remaining icons.
Indicates a reminder of an upcoming calendar event.
Connection is active.
Connection is not active.
Synchronization is occurring.
Wi-Fi available.
Wi-Fi in use.
HSDPA available. (GSM only)
3G available. (GSM only)
GPRS available. (GSM only)
EGPRS available. (GSM only)
1xRTT available. (CDMA only)
EVDO Rev. 0 available. (CDMA only)
EVDO Rev. A available. (CDMA only)
Dormant State - no data transmission during a 1x or EVDO connection. (CDMA only)
Roaming.
Page 42

2 - 6 MC65 User Guide
Preliminary
Table 2-2
Icon Description
WAN
Status Bar Icons (Continued)
Call missed.
Dialing while no SIM card is installed.
Voice call in progress.
Calls are forwarded.
Call on hold.
Speakerphone is on.
Antenna/signal ic on: wirele ss on/g ood sign al.
Antenna/signal ic on: wireles s off.
Antenna/signal icon: no service or searching.
HSDPA connecting. (GSM only)
HSDPA in use. (GSM only)
3G connecting. (GSM only)
3G in use. (GSM only)
GPRS connecting. (GSM only)
GPRS in use. (GSM only)
EGPRS connecting. (GSM only)
EGPRS in use. (GSM only)
EVDO connecting. (CDMA only)
EVDO in use. (CDMA only)
Page 43

Using the MC65 2 - 7
Preliminary
Table 2-2
Icon Description
Audio
Battery
Status Bar Icons (Continued)
SIM Card not installed. (GSM only)
All sounds are on.
All sounds are off.
Vibrate is on.
Main battery is charging.
Main battery has a full charge.
Main battery has a high charge.
Main battery has a medium charge.
Main battery has a low charge.
Main battery has a very low charge.
Tile Bar
The Tile Bar, located at the bottom of the screen, contains the Start tile to open the Start Menu. It also
displays tiles that vary depending upon the open application.
Figure 2-8
Cards
Cards are intended to provide quick access to completing common tasks. The number and type of cards available
to an end user are configurable by the system administrator. By default, the ES400 ships with four cards.
Tile Bar Examples
Page 44

2 - 8 MC65 User Guide
Tap to Configure Cards
Owner’s Company Name
Tap to Open Date and Time
Tap to Configure Card Settings
Card Settings
Tap to Open Email
Tap to Open Calendar
Owner’s Name
Preliminary
Figure 2-9
See for more information on the Enterprise Home screen.
Refer to XXX on page XX for information on configuring the Program window.
Program Shortcuts
The Program Shortcut buttons provides easy access for four applications. Just tap the icon to launch the
application. To configure the Program Shortcuts see to Program Shortcuts configuration on ....
Programs Window
The Programs window provides access to all the applications on the ES400. The window is configurable so that
you can display your favorite applications.
Card Example
Figure 2-10
To configure the Program window see to Program WIndow Configuration on ....
Start Screen
To open the Start screen, tap at the bottom left corner of the screen, or press the START key on the keypad.
Swipe upward to view more program and folder icons.
Programs Window
Page 45

Using the MC65 2 - 9
Preliminary
You can move often-used program and folder icons to the top of the Start screen for easy access.
Press and hold the icon that you want to move. Drag the icon to a new location and release.
Table 2-3 lists the default programs available on the ES400.
Table 2-3
Icon Name Description Icon Name Description
Programs on the Program Window
ActiveSync Synchronize information
between the ES400 and a
host computer or the
Exchange Server.
Contacts Keep track of friends and
colleagues.
Messenger Use this mobile version of
Windows Live Messenger.
E-mail Send an Email. Pictures &
Getting
Started
Internet
Explorer
Mobile
Launch the Getting Started
application.
Browse Web and WAP sites
as well as download new
programs and files from the
Internet.
Calendar Keep track of appointments
File Explorer Organize and manage files
Phone
Videos
Windows
Media Player
Mobile
Marketplace Purchase applications from
and create meeting
requests.
on your device.
View and manage pictures,
animated GIFs, and video
files.
Play back audio and video
files.
the Marketplace.
Microsoft My
Phone
MSN
Weather
Games Play games. Calculator Perform basic arithmetic and
Notes Create handwritten or typed
Synchronizes the ES400’s
contacts, calendar, tasks,
text messages, music,
photos videos and
documents with a Microsoft
My Phone account.
Check the local weather. MSN Money Keep track of your finances.
notes, drawings, and voice
recordings.
Windows Live Use this mobile version of
Windows Live™ to find
information on the web.
calculations, such as
addition, subtraction,
multiplication, and division.
Excel Mobile Create new workbooks or
®
view and edit Microsoft
®
Excel
workbooks.
Page 46

2 - 10 MC65 User Guide
Preliminary
Table 2-3
Icon Name Description Icon Name Description
Programs on the Program Window (Continued)
PowerPoint
Mobile
Word Mobile Create, view, and edit
Tasks Keep track of your tas ks. Home Displays the Home screen.
Internet
Sharing
Task
Manager
View Microsoft
PowerPoint
presentations.
Microsoft
Connect a notebook
computer to the Internet
using the ES400's data
connection.
Enables viewing of memory
and CPU allocations and
stops running processes .
Refer to the Microsoft
Applications for Windows
Mobile 6 User Guide for
more information.
®4
®
slides and
®
Word documents.
OneNote
Mobile
Text Send an SMS text message.
Settings
Help Access on-line Help topics.
Create new notes or view
existing notes.
Search
Phone
BT
Information
Modem Link Enables the ES400 to be
MSP Agent Interacts with MSP agents to
Search contacts, data, and
other information on the
ES400. Refer to the
Microsoft Applications for
Windows Mobile 6 User
Guide for more information.
Display information about
the Bluetooth radio and
generate a Bluetooth
address bar code.
used as a modem.
collect monitoring and asset
information to enable the
configuration, prov is io nin g,
monitoring and
troubleshooting of the
ES400. Refer to the ES400
Integrator Guide for more
information.
Wireless
Companion
Folder
AirBEAM
Client
DEMO Install Motorola MAX demos
Remote
Desktop
Open the Wireless
Companion folder.
Allows specially designed
software packages to be
transferred between a host
server and the ES400. Refer
to the ES400 Integrator
Guide for more information.
onto the ES400. Is this
going to be added?
Log onto Windows NT server
type computers and use all of
the programs that are
available on that computer
from the ES400.
Page 47

Using the MC65 2 - 11
Preliminary
Table 2-3
Icon Name Description Icon Name Description
Programs on the Program Window (Continued)
Rapid
Deployment
Client
Alarms
Adobe
Reader
Gallery
SwitchUSB
Facilitates softwa re
downloads from a Mobility
Services Platform Console
FTP server to the ES400.
Refer to the ES400
Integrator Guide for more
information.
Search
Widget
Office Mobile
Camera
Shutdown
Voice
Commander
Install Microsoft application
on the ES400.
VideoShare
Page 48

2 - 12 MC65 User Guide
Preliminary
Adjusting Volume
To adjust the system volume using the Speaker icon in the navigation bar:
1. Tap the Speaker icon. The Volume dialog box appears.
Figure 2-11
2. Tap and move the slide bar to adjust the volume.
3. Select the On or Off radio button to turn the volume on or off.
Y ou can also adjust the system volume using the Sounds & Notifications window, or use the Up/Down button on
the side of the MC65.
Volume Dialog Box
Battery Status Indications
Battery icons appear on the navigation bar indicating the battery power level. When the main battery power falls
below a predetermined level the icon indicates the status and a battery dialog box appears indicating the status of
the battery.
Figure 2-12
The Battery icon always appears in the navigation bar when the Today screen is visible. The icon indicates the
battery power level. The message displays until the Dismiss button is pressed.
Battery Status Dialog Box
Page 49

Using the MC65 2 - 13
Preliminary
Figure 2-13
Also view the battery status using the Power window. Either:
•
•
Figure 2-14
Battery Reserve Options
Battery Icon on the Title Bar
Tap the Battery icon
Tap Start > Settings > System tab > Power icon.
Settings Power Window
If the charge of the battery reaches a critical threshold, the MC65 shuts down. This threshold can be changed but
affects the amount of time that data can be retained.
1. Tap Start > Settings > System tab > Power icon > RunTime tab. A warning message appears.
Figure 2-15
2. Read the warning message and tap ok.
Warning Message
Page 50

2 - 14 MC65 User Guide
Preliminary
Figure 2-16
3. Select one of the Battery Reserve Options.
•
•
•
4. Tap ok.
Main Battery Temperature Notifications
The temperature notification system implements three levels of notification when the temperature within the battery
exceeds specific temperature thresholds:
•
•
•
RunTime Tab
Option 1: Minimum - After a low battery shutdown, data will be retained for minimum amount of time.
Battery should be replaced immediately to avoid data loss.
Option 2: Less - After a low battery shutdown, data will be retained for less than normal amount of time.
Option 3: Normal - After a low battery shutdown, data will be retained for maximum amount of time.
Level 1: Temperature Watch; this level is similar to main battery low warning. It indicates that the battery
temperature has reached the first threshold level. The user should move to an environment within proper
operating temperature.
Level 2: Temperature Warning; this level is similar to main battery very low warning. It indicates the battery
temperature has reached the second threshold level. The user should close all running applications and stop
using the MC65.
Level 3: Temperature Error; this level indicates the battery has reached an unusable temperature threshold
and immediately suspends the MC65. This level does not have any graphical notification associated with it.
Figure 2-17
Main Battery Temperature Watch Dialog Box
Page 51

Using the MC65 2 - 15
Scan/Decode
LED
Charging/Battery
Status LED
Charging/Battery
Status LED
Radio Status LED
Preliminary
Figure 2-18
NOTE The Temperature Warning dialog box remains visible until you tap Hide.
LED Indicators
The MC65 has three LED indicators. The Scan/Decode LED indicates status for scanning. The Charging/Battery
Status LED indicates battery charging and status.The Radio Status LED indicates WWAN radio status. Table 2-4
describes the LED indications.
Main Battery Temperature Warning Dialog Box
Figure 2-19
Table 2-4
Scan/Decode LED
Solid Green Successful decode/capture.
Solid Red Laser enabled, scanning/imaging in process.
Off Not enabled.
Charging/Battery Status LED
Slow Blinking Amber Main battery in MC65 is charging.
Solid Amber Main battery in MC65 is fully charged.
LED Indicators
LED Indications
LED State Indication
Page 52

2 - 16 MC65 User Guide
Preliminary
Table 2-4
Fast Blinking Amber Charging error.
Off Not charging.
Single Blink Amber (when Power button pressed) Battery depleted.
Blinking Amber (when Power button pressed) Battery over-temperature condition.
Radio Status LED (MC6574 only)
Slow Blinking Green RF (WWAN) activity.
Off No RF activity.
LED Indications (Continued)
NOTE For information about scanning/decoding, see Data Capture on page 2-40. For information about WWAN
radio status and settings, see Chapter 4, Using the Phone, or refer to the MC65 Integrator Guide.
Resetting the MC65
There are two reset functions, warm boot and cold boot. A warm boot restarts the MC65 by closing all running
programs. A cold boot also restarts the MC65, and also initializes some drivers. Data saved in flash memory or a
memory card is not lost.
LED State Indication
If the MC65 is not functioning properly, perform a warm boot first. If the MC65 still does not respond, perform a cold
boot.
Performing a Warm Boot
Hold down the red Power button for approximately five seconds. As soon as the MC65 starts to boot (splash
screen displays) release the Power button.
Performing a Cold Boot
To perform a cold boot:
•
On a numeric keypad, simultaneously press the red Power button and the and keys.
•
On an alphanumeric keypad, simultaneously press the red Power button and the and keys.
•
On an PIM keypad, simultaneously press the red Power button and the and keys.
Waking the MC65
The wake-up conditions define what actions wake up the mobile computer after it has gone into suspend mode.
The mobile computer can go into suspend mode by either pressing the Power button or automatically by Control
Page 53

Using the MC65 2 - 17
Preliminary
Panel time-out settings. These settings are configurable and the factory default settings are shown in Table 2-5 are
subject to change/update.
Table 2-5
AC power is applied. No Yes
Mobile computer is inserted into a cradle. No Yes
Mobile computer is removed from a cradle. No Yes
Mobile computer is connected to a USB device. No Yes
Mobile computer is disconnected from a USB device. No Yes
A key is pressed. No Yes
The scan triggered is pressed. No Yes
The screen is touched. No No
Bluetooth communication Yes Yes
Incoming phone call Yes Yes
Wake-up Default Settings
Condition for Wake-up Power Button Automatic Time-out
Locking the ES400
Y ou can lock the ES400 by disabling key presses and screen tap or by requiring a password or finger swipe. There
are two types of locking features available; the standard Microsoft lock and the Motorola lock. To select either the
Microsoft lock or the Motorola lock:
1. Tap > System > Lock Switch.
2. Tap the Select Lock soft key.
3. Select either Moto lock or Microsoft lock.
4. Tap .
Microsoft Locking
Locking the ES400 turns off keyboard and touch screen functionality. This is helpful when the ES400 is turned on
and you want to prevent accidental key presses.
To lock the device, tap > .
The lock screen appears.
Page 54

2 - 18 MC65 User Guide
Preliminary
Figure 2-20
Drag to either the right or left side of the screen.
Figure 2-21
If a password is set up, enter the password and then tap to unlock and display the Home screen, tap
to unlock and display the Contacts window, tap to unlock and display the Messaging window.
Lock Screen
Password Window
NOTE You can make emergency calls even when the ES400 is locked. See XXXXXXXX for more information.
Password Locking
Use the Password window to set a password to disable unauthorized access to the ES400.
NOTE If the device is configured to connect to a network, use a strong (difficult to figure out) password
to help protect network security. Password cracking tools continue to improve and the
computers used to crack passwords are more powerful than ever.
1. Tap > Settings > Lock > Password.
Page 55

Using the MC65 2 - 19
Preliminary
Figure 2-22
2. Select Prompt if device unused for check box to enable password protection.
3. From the drop-down list, select a time value for the protection to take affect after non-use.
4. From the Password type: drop -d own list, select either Simple PIN or Strong alphanumeric.
5. For a simple password, enter a four-digit password in the Password field.
For a stronger password:
a. Enter a seven character password in the Password: field. A strong password must contain at least seven
b. Re-enter the password in the Confirm: field.
6. Tap .
7. In the horizontal scroll, select Hint. Enter a hint to remember the password if you forget it.
8. Tap .
Password Window
characters and contain at least three of the following: uppercase and lowercase letters, numerals, and
punctuation.
Figure 2-23
9. In the text box, enter a hint for a password reminder.
10. Tap .
When the ES400 is not used for a period of time and the user tries to access the device, the Lock window appears.
Password Window - Hint Tab
Page 56

2 - 20 MC65 User Guide
Preliminary
Figure 2-24
1. Slide the Lock button to the left or right.
2. Enter the password to un-lock the device.
Figure 2-25
3. Tap the Unlock icon.
Motorola Locking
Lock Window
Enter Password Window
With the Motorola Lock you can use a password or fingerprint swipe to un-lock the device.
Tap > Lock.
Page 57

Using the MC65 2 - 21
Preliminary
Figure 2-26
Password Locking
1. Tap Password type to toggle between Simple and Strong.
2. For a simple password:
a. enter a four-digit password in the Password field.
b. Re-enter the password in the Confirm: field.
For a stronger password:
c. Enter a seven character password in the Password: field. A strong password must contain at least seven
d. Re-enter the password in the Confirm: field.
3. To set a hint to remember the password, tap the Hint button.
Motorola Lock Settings Window
characters and contain at least three of the following: uppercase and lowercase letters, numerals, and
punctuation.
Figure 2-27
4. In the text box, enter a hint for a password reminder.
5. Tap .
Password Window - Hint Tab
Page 58

2 - 22 MC65 User Guide
Preliminary
Finger Swipe Locking
To enable device un-locking using a fingerprint swipe:
1. Tap Add fingerprint.
Figure 2-28
2. Select a finger and slide the fingerprint across the fingerprint reader in a downward motion starting at the
bottom of the fingerprint.
3. When the fingerprint is read successfully, a green check mark appears in the first box.
4. Repeat swiping your fingerprint three more times.
5. If a red X appears in the box, re-swipe your fingerprint.
You can add up to 10 fingerprints.
Editing Fingerprint Swipes
After enrolling fingerprints you change edit the enrolled fingerprint.
1. Select the fingerprint to edit.
2. In the text box, change the name associated with this fingerprint.
3. Tap Change fingerprint to edit the fingerprint data.
4. Swipe a new fingerprint.
5. Tap Program launched to select a program to automatically launch when you swipe a particular fingerprint.
6. To remove a fingerprint, tap Remove fingerprint.
Add Fingerprint Window
7. Tap Yes to confirm deleti ng the fing erpr in t.
Edit Lock Screen
When the device suspends and you try to resume, the Motorola Lock screen appears.
Page 59

Figure 2-29
Preliminary
Using the MC65 2 - 23
Figure 2-30
You can change what information appears on the screen.
Tap Edit Lock Screen.
Figure 2-31
Select the item to display on the Lock screen. A yellow target appears when the item is enabled.
Tap when done.
Audio Feedback
To enable an audio sound to be heard upon a successful finger swipe:
Tap Audio feedback.
To change the fingerprint tap the
Motorola Lock Screen
Edit Lock Screen Window
Page 60

2 - 24 MC65 User Guide
Preliminary
Keypads
The MC65 offers three types modular keypad configurations: Numeric, alpha-numeric and PIM.
Numeric Keypad Configuration
The numeric keypad contains application keys, scroll keys, and function keys. The keypad is color-coded to
indicate the alternate function key (blue) values. Note that an application can change keypad functions so the
MC65’s keypad may not function exactly as described. See Table 2-6 for key and button descriptions and Table 2-7
on page 2-26 for the keypad’s special functions.
Figure 2-32
Table 2-6
Key Description
Blue Key
Orange Key
MC65 Numeric Keypad
MC65 Numeric Ke ypad Descriptions
Use this key to launch applications or access items (shown on the keypad in blue).
Press the Blue key once to activate this mode, followed by another key.
A single press illuminates the key and displays the following icon at the bottom of the
screen, until a second key is pressed:
Use this key to access the secondary layer o f characters and actions (shown on the keypad
in orange). Press the Orange key once to lock the keypad into Alpha state.
A single press illuminates the key and displays the following icon at the bottom of the
screen:
Press the Orange key a second time to return to the normal state.
Press the Orange key, then the Shift key to add a temporary shift (that applies only to the
next key pressed) to the orange lock state. This displays the following icon at the bottom of
the screen:
 Loading...