

ZT400™ Series Quick Reference Guide
1
3
4
2
10
9
8
7
6
5
Use this guide to operate your printer on a daily basis. For more detailed information, refer to
the User Guide.
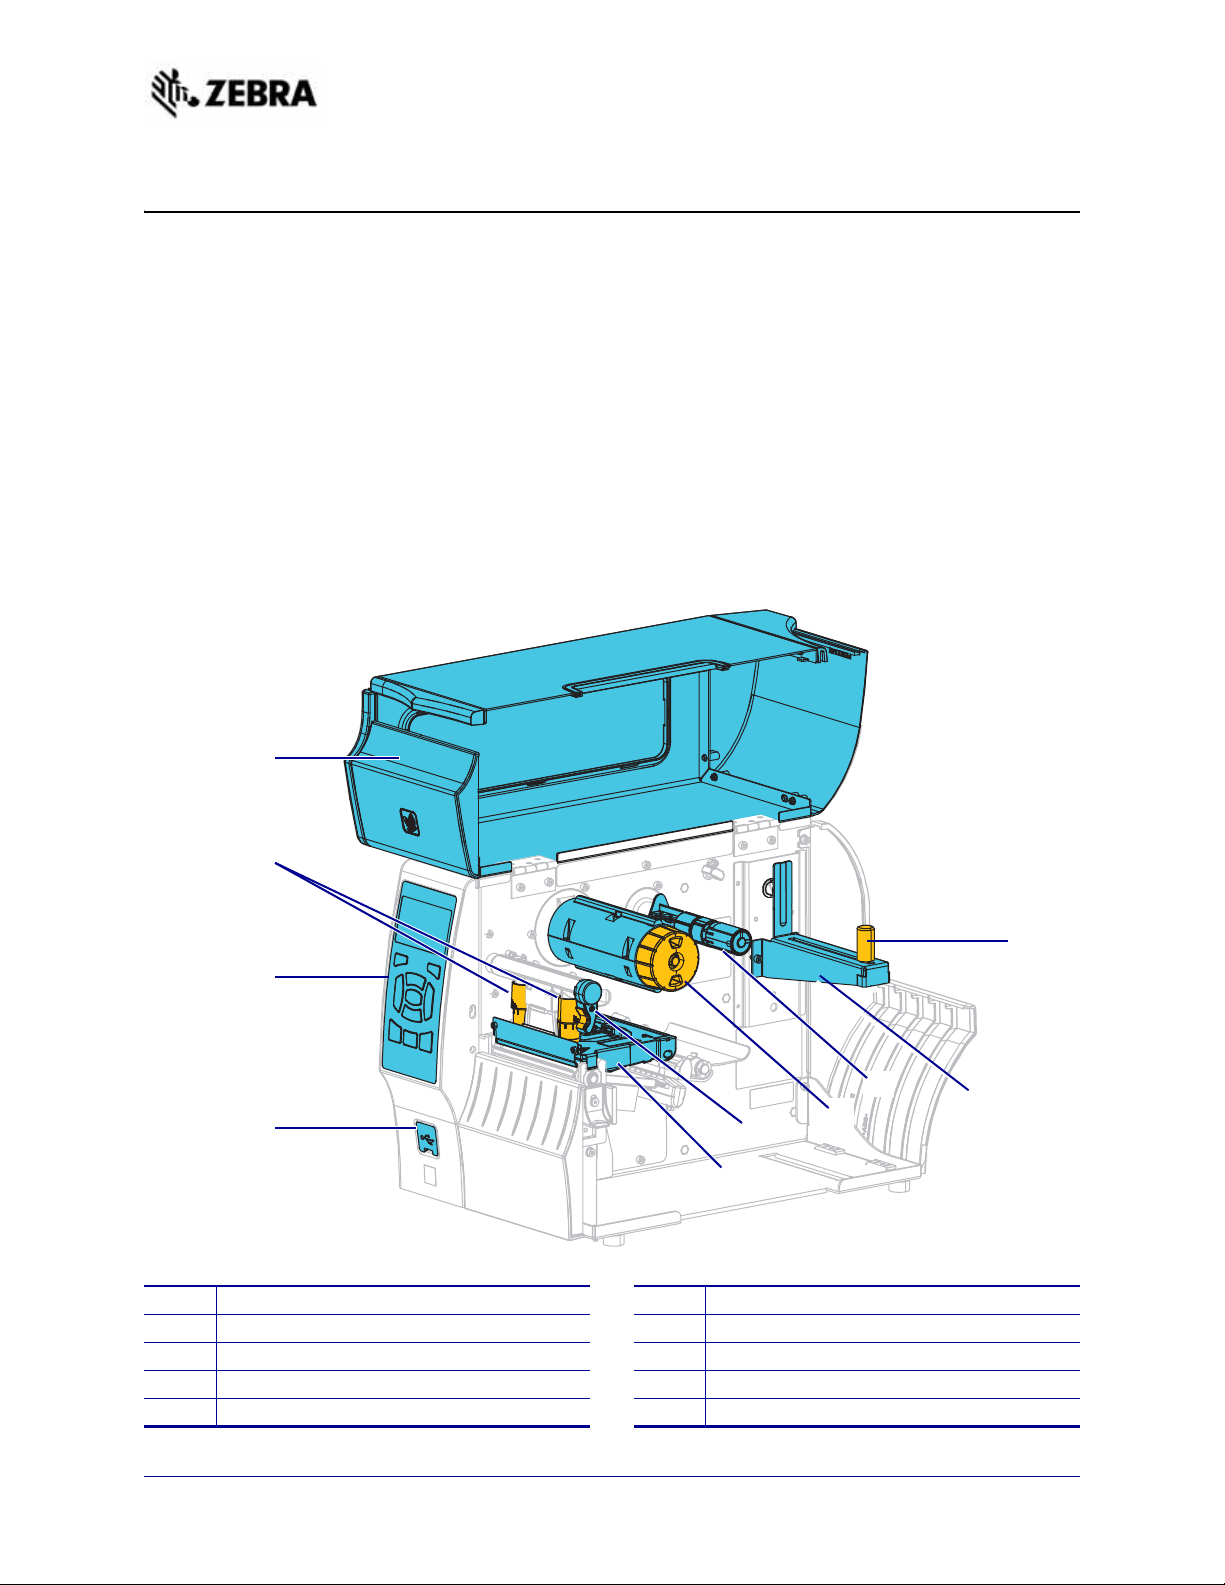
Printer Components
Figure 1 shows the components inside the media compartment of your printer. Depending on
the printer model and the installed options, your printer may look slightly different.
Familiarize yourself with these components before continuing with the printer setup
procedure.
Figure 1 • Printer Components
Media door
1
Printhead pressure adjustment toggles
2
Control panel
3
USB host port
4
Printhead assembly
5
©2015 ZIH Corp and/or its affiliates. All rights reserved. Zebra and the stylized
Zebra head are trademarks of ZIH Corp., registered in many jurisdictions worldwide.
All other trademarks are the property of their respective owners.
Printhead-open lever
6
Ribbon take-up spindle
7
Ribbon supply spindle
8
Media supply hanger
9
Media supply guide
10
P1060608-004
11/5/15
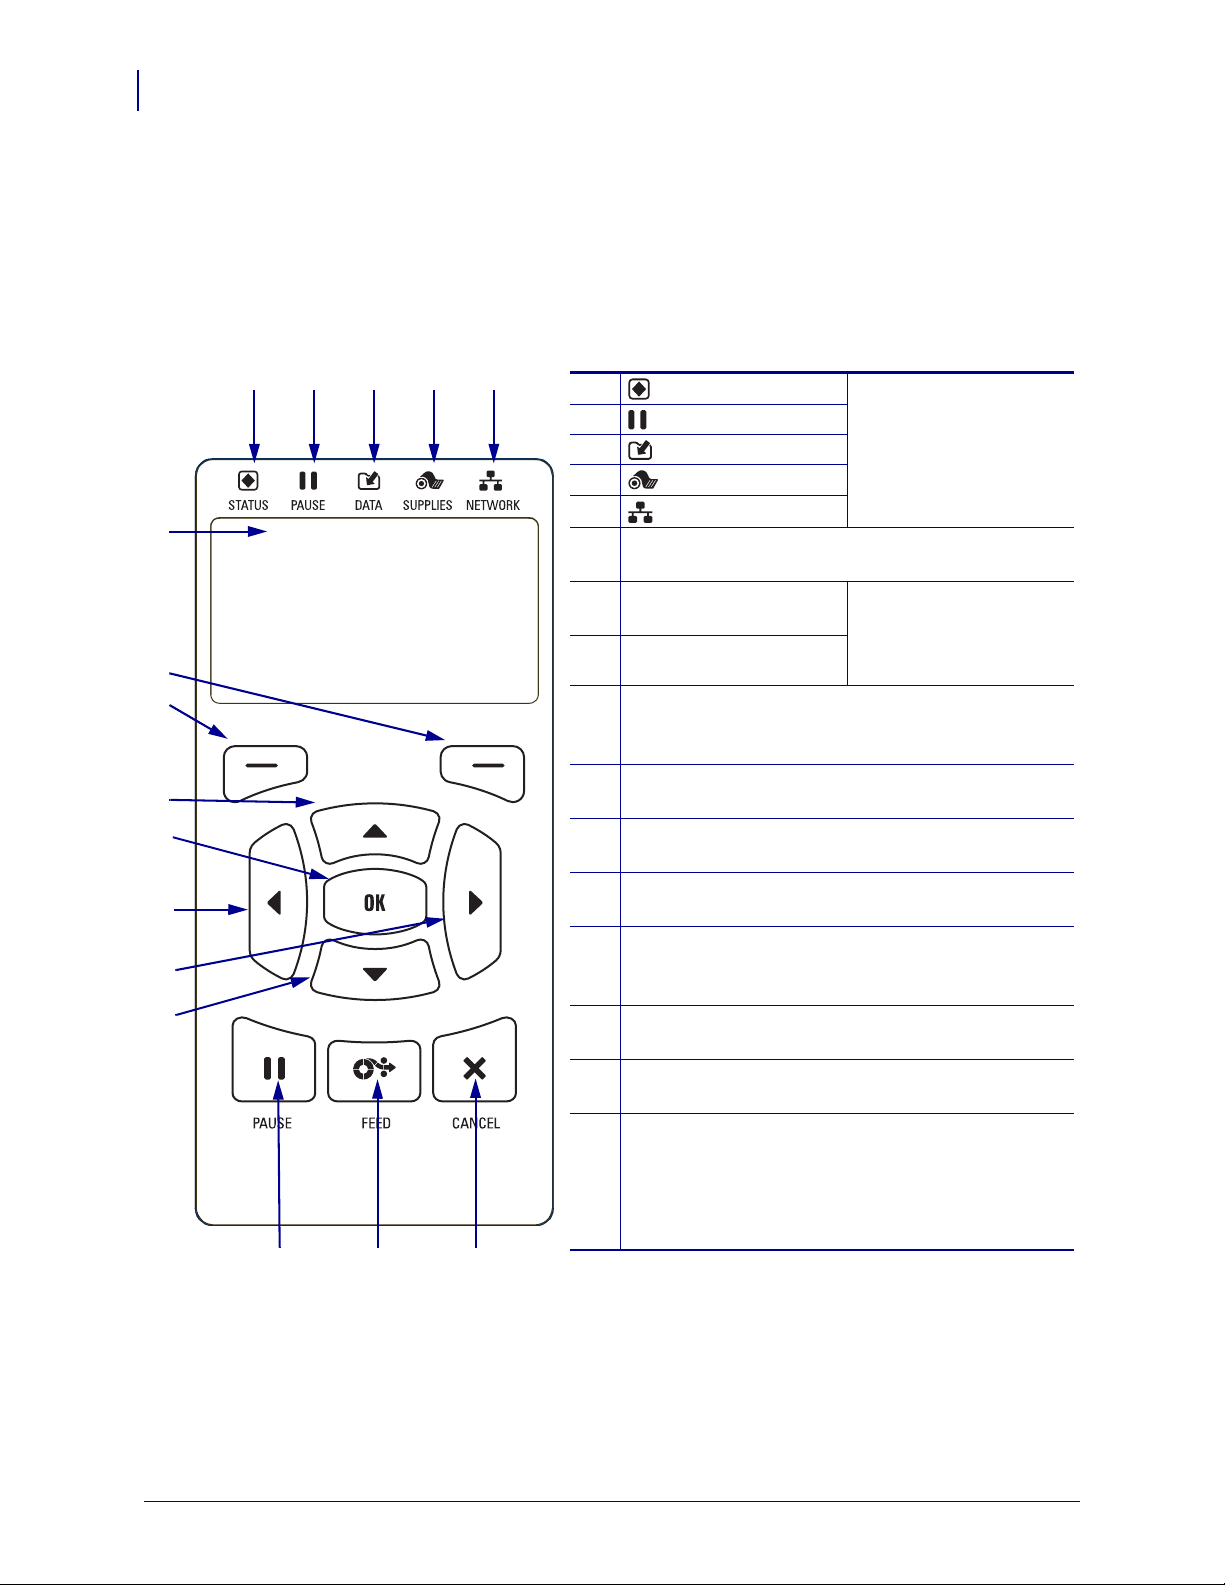
Control Panel
6
13
12
9
8
11
10
1 2 3 4 5
14 15 16
Figure 2 • Control Panel
7
1
STATUS light These indicator lights
show the current status
of the printer. For more
information, refer to the
User Guide.
2
PAUSE light
3
DATA light
4
SUPPLIES light
5
NETWORK light
6
The display shows the printer’s current status and
allows the user to navigate the menu system.
7
RIGHT SELECT
button
These buttons execute
the commands shown
directly above them in
the display.
8
LEFT SELECT button
9
The UP ARROW button changes the parameter
values. Common uses are to increase a value or to
scroll through choices.
10
The OK button selects or confirms what is shown
on the display.
11
The LEFT ARROW button, which is active only
in the menu system, navigates to th e left.
12
The RIGHT ARROW button, which is active only
in the menu system, navigates to the right.
13
The DOWN ARROW button changes the
parameter values. Common uses are to decrease a
value or to scroll through choices.
14
The PAUSE button starts or stops printer operation
when pressed.
15
The FEED button forces the printer to feed one
blank label each time the button is pressed.
16
The CANCEL button cancels label formats when
the printer is paused.
• Press once to cancel the next label format.
• Press and hold for 2 seconds to cancel all label
formats.
2
Control Panel
The control panel (Figure 2) indicates the printer’s current status and allows the u ser to control
basic printer operation.
P1060608-004 11/5/15
Preparing the Printer for Use
After you have familiarized yourself with the printer components, prepare the printer for use.
Caution • When you are loading media or ribbon, remove all jewelry that could come into
contact with the printhead or other printer parts.
Caution • Before touching the printhead assembly, discharge any built-up static electricity
by touching the metal printer frame or by using an anti-static wriststrap and mat.
To set up the printer, complete these steps:
1. Select a location for the printer that meets these conditions:
• The surface must be solid and level of sufficient size and strength to hold the printer.
• The area must include enough space for ventilation and for accessing the printer
components and connectors
• The printer should be within a short distance of an appropriate power outlet that is
easily accessible
Preparing the Printer for Use
3
• The printer must be within range of your WLAN radio (if applicable) or within an
acceptable range for other connectors to reach your data source (usually a computer).
For more information on maximum cable len gths and configuration, refer to the User
Guide.
2. Unpack and inspect the printer. If necessary, report any shipping damage. For more
information, refer to the User Guide.
3. Place the printer in the preselected location.
4.
Important • You must install the Zebra Setup Utilities program before connecting the
printer to your computer. Your computer will not install the correct printer drivers if you
connect the printer to it without the Zebra Setup Utilities program.
Install the Zebra Setup Utilities program from http://www.zebra.com/setup. Use this
program to install the printer drivers on your computer. For detailed instructions, refer to
the User Guide.
11/5/15 P1060608-004
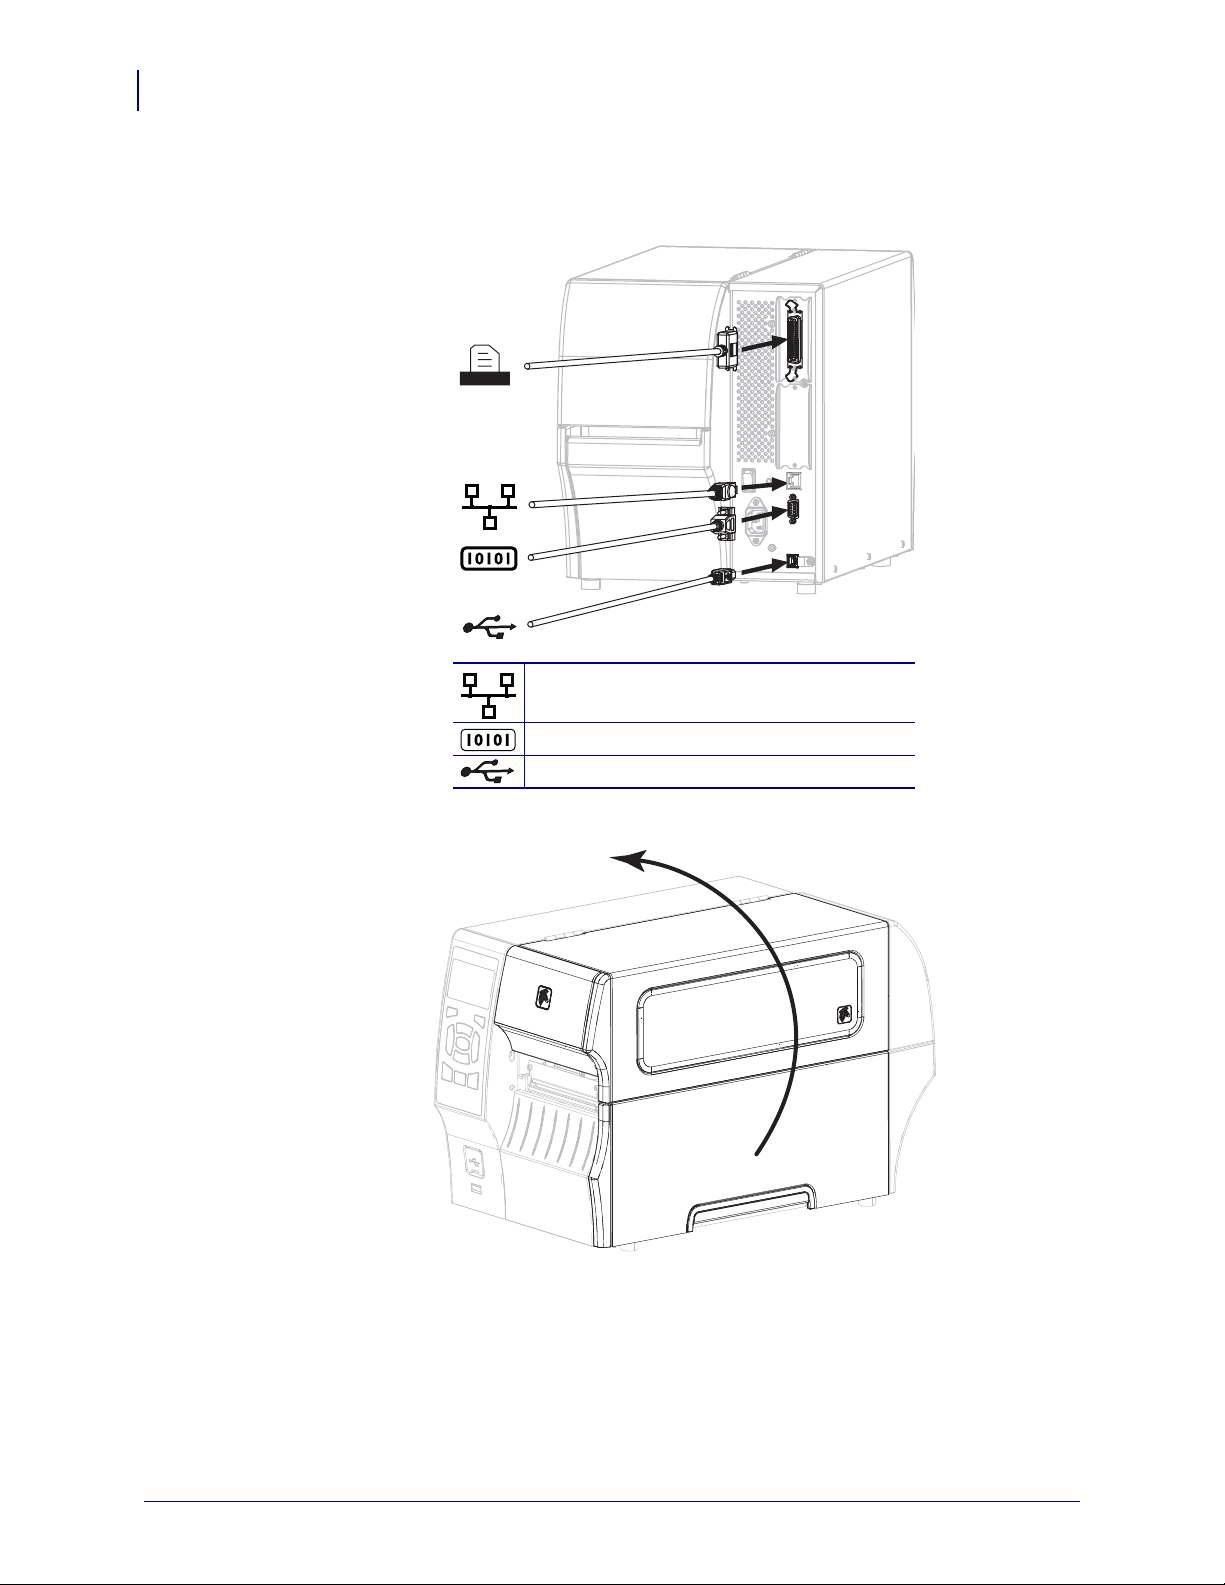
Preparing the Printer for Use
4
5. Connect the printer to a computer using one or more of the available connections. The
standard connections are shown here. A parallel connection or a ZebraNet
®
wireless
connection may also be available on your printer.
Internal wired Ethernet print server
Serial port
USB port
6. Raise the media door.
7. Load ribbon (if using Thermal Transfer mode) and medi a into the printer (see Lo ad Medi a
and Ribbon on page 9).
P1060608-004 11/5/15
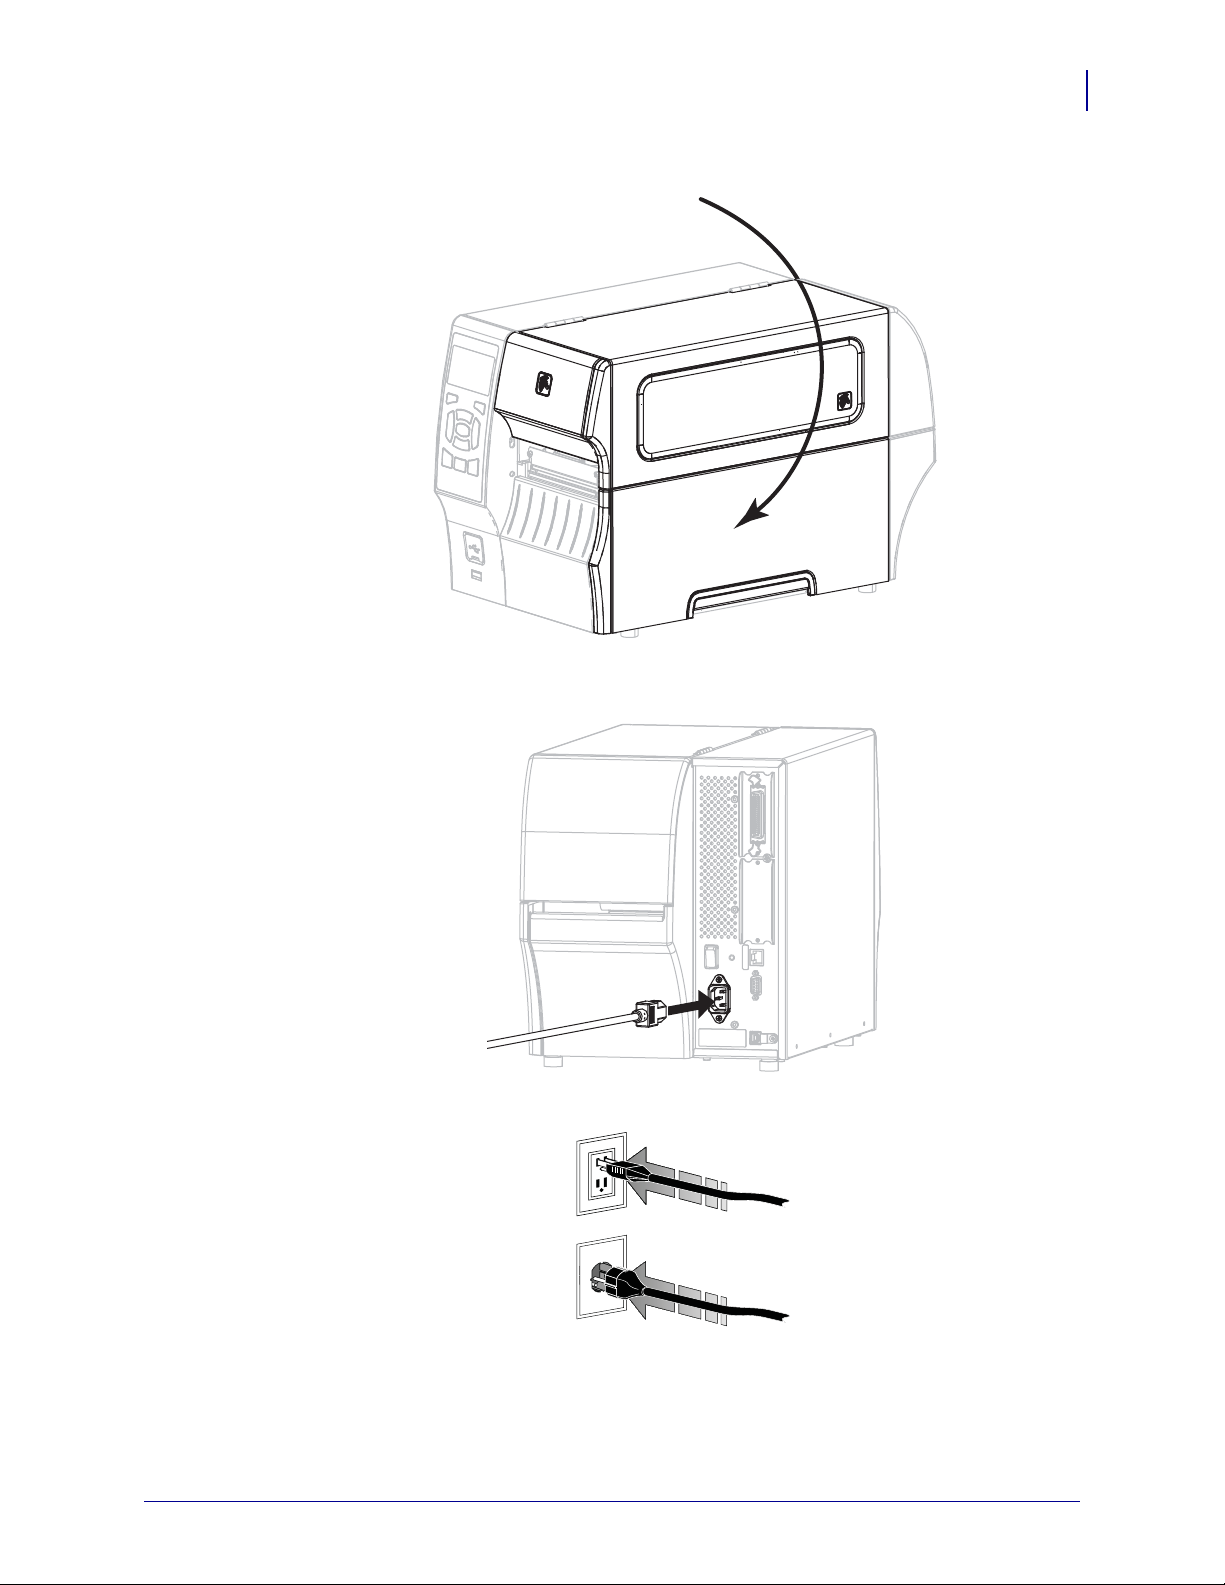
8. Close the media door.
115 VAC
230 VAC
Preparing the Printer for Use
5
9. Plug the female end of the A/C power cord into the A/C power connector on the back of
the printer.
10. Plug the male end of the A/C power cord into an appropriate power outlet.
11/5/15 P1060608-004
 Loading...