

Page 1

ZPL & CPCL
PRINTER DRIVER
FOR OPOS
Application
Programmer’s Guide
P1014152-17EN
Page 2

ZEBRA and the stylized Zebra head are trademarks of Zebra Technologies Corporation, registered in
many jurisdictions worldwide. All other trademarks are the property of their respective owners.
© 2022 Zebra Technologies Corporation and/or its affiliates. All rights reserved.
Information in this document is subject to change without notice. The software described in this document
is furnished under a license agreement or nondisclosure agreement. The software may be used or copied
only in accordance with the terms of those agreements.
For further information regarding legal and proprietary statements, please go to:
SOFTWARE:http://www.zebra.com/linkoslegal
COPYRIGHTS:http://www.zebra.com/copyright
WARRANTY:http://www.zebra.com/warranty
END USER LICENSE AGREEMENT: http://www.zebra.com/eula
Terms of Use
Proprietary Statement
This manual contains proprietary information of Zebra Technologies Corporation and its subsidiaries
(“Zebra Technologies”). It is intended solely for the information and use of parties operating and
maintaining the equipment described herein. Such proprietary information may not be used, reproduced,
or disclosed to any other parties for any other purpose without the express, written permission of Zebra
Technologies.
Product Improvements
Continuous improvement of products is a policy of Zebra Technologies. All specifications and designs are
subject to change without notice.
Liability Disclaimer
Zebra Technologies takes steps to ensure that its published Engineering specifications and manuals are
correct; however, errors do occur. Zebra Technologies reserves the right to correct any such errors and
disclaims liability resulting therefrom.
Limitation of Liability
In no event shall Zebra Technologies or anyone else involved in the creation, production, or delivery of the
accompanying product (including hardware and software) be liable for any damages whatsoever
(including, without limitation, consequential damages including loss of business profits, business
interruption, or loss of business information) arising out of the use of, the results of use of, or inability to
use such product, even if Zebra Technologies has been advised of the possibility of such damages. Some
jurisdictions do not allow the exclusion or limitation of incidental or consequential damages, so the above
limitation or exclusion may not apply to you.
Publication Date
April 28, 2022
2
Page 3

About This Document
Who Should Use This Document
The manual is targeted to an application developer who requires access to POS-specific peripheral
devices.
OPOS Web Sites
Refer to the following web sites for Open Point of Service (OPOS) information:
• Reference implementation — Common Control Objects: http://monroecs.com/opos.htm
How This Document Is Organized
The Application Programmer’s Guide is set up as follows:
• OPOS Information on page 7
• Supported Bar Codes and Fonts on page 9
• Supported Specifications and Printers on page 14
• Common Properties, Methods, and Events on page 16
• Driver Installation on page 28
• Device Manager on page 34
• Test Application on page 62
• ZPL Fonts and Bar Codes on page 70
3
Page 4

Contents
About This Document ........................................................................................................................ 6
Who Should Use This Document..................................................................................... 6
OPOS Web Sites ............................................................................................................. 6
How This Document Is Organized ................................................................................... 6
OPOS Information............................................................................................................................... 7
OLE for Retail POS Controls............................................................................................ 7
How an Application Uses an OPOS Control .................................................................... 7
Summary......................................................................................................................... 8
Supported Bar Codes and Fonts....................................................................................................... 9
Supported Bar Codes....................................................................................................... 9
Supported ZPL Fonts..................................................................................................... 10
Font D..................................................................................................................... 10
Example Command.......................................................................................... 10
Printed Image................................................................................................... 11
Font F ..................................................................................................................... 11
Example Command.......................................................................................... 11
Printed Image................................................................................................... 11
Font A ..................................................................................................................... 11
Example Command.......................................................................................... 11
Printed Image................................................................................................... 11
Supported CPCL Fonts.................................................................................................. 12
Font for Typeface 0 ................................................................................................ 12
Example Command.......................................................................................... 12
Printed Image................................................................................................... 12
Font for Typeface 1 ................................................................................................ 12
Example Command.......................................................................................... 12
Printed Image................................................................................................... 12
Font for Typeface 2 ................................................................................................ 13
Example Command.......................................................................................... 13
4
Page 5

Contents
Printed Image................................................................................................... 13
Supported Specifications and Printers .......................................................................................... 14
Specifications Supported ............................................................................................... 14
Supported Operating Systems....................................................................................... 14
Supported Printers ........................................................................................................ 15
Common Properties, Methods, and Events ................................................................................... 16
Summary of Common Properties................................................................................... 16
Summary of Common Methods ..................................................................................... 17
Summary of Common Events ........................................................................................ 17
Summary of Specific Properties..................................................................................... 18
Summary of Specific Methods ...................................................................................... 22
Summary of Events........................................................................................................ 23
Data Characters and Escape Sequences...................................................................... 23
In-line Barcode Printing.................................................................................................. 25
Driver Installation ............................................................................................................................. 28
OPOS Driver Installation................................................................................................ 28
OPOS Driver Silent Installation..................................................................................... 32
Add Printer Via Command Line .............................................................................. 32
Device Manager ................................................................................................................................ 34
Using the Device Manager............................................................................................. 34
Connecting Using Bluetooth........................................................................................... 36
Connecting Using an IP Address .................................................................................. 37
Connecting Using a Parallel Cable ............................................................................... 38
Connecting Using a Parallel Cable for 64-Bit Machines......................................... 39
Connecting Using a Serial Cable .................................................................................. 42
Connecting Using a USB Cable.................................................................................... 43
Configuration Settings.................................................................................................... 44
Adding a Printer...................................................................................................... 44
Adding a KR403 Kiosk Printer ................................................................................ 45
Output Logging ....................................................................................................... 47
Additional Font Handling............................................................................................... 48
Adding a New Font in Device Manager .................................................................. 48
Assigning Multiple Fonts......................................................................................... 51
Deleting a Font ....................................................................................................... 51
Selecting and Using a Font with Chinese Characters ............................................ 51
5
Page 6

Contents
Setting the Printer Font Information ................................................................. 51
Testing the New Font ....................................................................................... 54
Programming Tips For Using Additional ZPL Fonts....................................................... 55
Use of OPOS Character Properties ............................................................................... 56
KR403 Specific User Interface....................................................................................... 57
Kiosk Printer Settings ............................................................................................. 57
Kiosk Properties ..................................................................................................... 58
New Page:........................................................................................................ 58
Current Page:................................................................................................... 58
Kiosk Values: ................................................................................................... 58
Details for Variable Continuous Mode vs. Continuous Mode ................................. 59
Continuous Mode ............................................................................................. 59
Variable Continuous Mode 2............................................................................ 60
Implementation................................................................................................. 61
Test Application................................................................................................................................ 62
Preparing Windows and Printer for Unicode Printing..................................................... 62
Zebra OPOS Test Application........................................................................................ 63
Printing Unicode with the Test Application.................................................................... 69
ZPL Fonts and Bar Codes................................................................................................................ 70
Standard Printer Fonts................................................................................................... 70
Proportional and Fixed Spacing..................................................................................... 71
Scalable Versus Bitmapped Fonts................................................................................. 72
Scalable Fonts........................................................................................................ 72
Bitmapped Fonts .................................................................................................... 73
Magnification Factor......................................................................................... 73
Changing Bitmapped Font Size ....................................................................... 73
Font Matrices ................................................................................................................. 74
Bar Codes ..................................................................................................................... 77
Basic Format for Bar Codes ................................................................................... 78
Bar Code Field Instructions .................................................................................... 78
Bar Code Command Groups .................................................................................. 80
6
Page 7

OPOS Information
OLE for Retail POS Controls
The goal of this document is to provide an overview and programming guide for the Zebra ZPL & CPCL
Printer Driver for OPOS driver implementation.
How an Application Uses an OPOS Control
The first action the application must take on the Control is to call its Open method. The parameter for this
method selects a device name to associate with the Control. The Open method performs the following
steps:
• Establishes a link to the device name that, in our case, is the Windows
• Initializes the properties OpenResult, Claimed, DeviceEnabled, DataEventEnabled, FreezeEvents,
AutoDisable, DataCount, and BinaryConversion, as well as descriptions and version number of the
OPOS Control layers. Additional class-specific properties may also be initialized.
Several applications may have an OPOS Control open at the same time. Therefore, after the device is
opened, the application will need to call the ClaimDevice method to gain exclusive access to the device.
The device must be claimed before the Control allows access to its methods and properties. Claiming the
device ensures that other applications do not interfere with the use of the device. The application may call
the ReleaseDevice method when the device can be shared by other applications—for instance, at the end
of a transaction.
®
printer driver name.
Before using the device, the application must set the DeviceEnabled property to TRUE. This value brings
the device to an operational state, while FALSE disables the device.
After the application has finished using the device, the DeviceEnabled property should be set to FALSE,
then the ReleaseDevice method, and finally the Close method should be called to release the device and
associated resources. Before exiting, an application should close all open OPOS Controls.
7
Page 8

Summary
OPOS Information
In summary, the application follows this general sequence:
• Open method: Call to link the Control Object to the Service Object.
• ClaimDevice method: Call to gain exclusive access to the device. Required for exclusive-use devices;
optional for some sharable devices.
• DeviceEnabled property: Set to TRUE to make the device operational.
• Use the device.
• DeviceEnabled property: Set to FALSE to disable the device.
• ReleaseDevice method: Call to release exclusive access to the device.
• Close method: Call to release the Service Object from the Control Object.
8
Page 9

Supported Bar Codes and Fonts
Supported Bar Codes
Barcode Symbology Supported in ZPL Supported in CPCL
Codabar Yes Yes
Code 128 Yes Yes
* Code 128 Parsed Yes Yes
Code 39 Yes Yes
Code 93 Yes Yes
† DataMatrix
* EAN 128 Yes Yes
* EAN 13s
* EAN 8S
EANJan 13 Yes Yes
EANJan 8 Yes Yes
ltf Yes Yes
* Maxicode Yes Yes
* PDF417 Yes Yes
† QRCode
* GS1DataBar Yes Yes
* GS1DataBarExpanded Yes Yes
TF Yes No
UPC-A Yes Yes
* UPC-AS
NOTES:
*Identifies those Barcodes that have no center and right alignments, and the driver will return E_ILLEGAL when used
with PTR_BC_CENTER or PTR_BC_RIGHT.
1) Supports the UPCA with a 5-digit extension for the CPCL firmware.
2) Supports the UPCE with a 5-digit extension for the CPCL firmware.
3) Supports the EAN-x with a 5-digit extension for the CPCL firmware.
† Properties for 2D barcodes:
4) DataMatrix barcode parameters should be in the following range:
Width: 1; Height : <= 30 (depending on width of printer); Alignment: left, center, or right; Text Position: above, below, or
none
5) QRCode parameters should be in the following range:
Width: 1 < 10; Height: 2 <= 10; Alignment: left, center, or right; Text Position: Below
4
3
3
5
1
Yes No
Yes Yes
Yes Yes
Yes No
Yes Yes
9
Page 10

Supported Bar Codes and Fonts
Barcode Symbology Supported in ZPL Supported in CPCL
UPC-D No No
UPC-D2 No No
UPC-D3 No No
UPC-D4 No No
UPC-D5 No No
* OCR-A Yes Yes
OCR-B No No
UPC-E Yes Yes
* UPC-ES
NOTES:
*Identifies those Barcodes that have no center and right alignments, and the driver will return E_ILLEGAL when used
with PTR_BC_CENTER or PTR_BC_RIGHT.
1) Supports the UPCA with a 5-digit extension for the CPCL firmware.
2) Supports the UPCE with a 5-digit extension for the CPCL firmware.
3) Supports the EAN-x with a 5-digit extension for the CPCL firmware.
2
Yes Yes
† Properties for 2D barcodes:
4) DataMatrix barcode parameters should be in the following range:
Width: 1; Height : <= 30 (depending on width of printer); Alignment: left, center, or right; Text Position: above, below, or
none
5) QRCode parameters should be in the following range:
Width: 1 < 10; Height: 2 <= 10; Alignment: left, center, or right; Text Position: Below
Supported ZPL Fonts
Font Typeface
(Value for # in
ESC|#fT)
0 D 18 x 10 24 2 12
1 F 26 x 13 30 3 16
2 A 9 x 5 12 1 6
Font D
Font D will be the default font. If nothing is specified in the print command, this font will be used. The
spacing between lines shall be 24 dots. Counting the inter-character gap of 2 dots the characters are 12
dots wide. In calculating the number of characters that can be placed on an 832 dot line, the result is 69
characters.
Example Command
PrintNormal "123456789ABCDEFGHIJKLMNOPQRSTUVWXYZ6789012345678901234567890123456789"
PrintNormal "0987654321abcdefghijklmnopqrstuvwxyz65432109876543210987654321098765432"
PrintNormal "123456789012345678901234567890123456789012345678901234567890123456789"
PrintNormal "098765432109876543210987654321098765432109876543210987654321098765432"
Font Name
Font Size
(h x w)
Line
Height
Inter-Character
Gap (dots)
Total Width
(dots)
10
Page 11

Printed Image
Font F
The spacing between lines shall be 28 dots. Counting the inter-character gap of 3 dots, the characters are
16 dots wide. In calculating the number of characters that can be placed on an 832 dot line, the result is 52
characters.
Example Command
PrintNormal "ESC|1fT1234567890123456789012345678901234567890123456789012"
PrintNormal "ESC|1fT0987654321098765432109876543210987654321098765432109"
PrintNormal "ESC|1fT1234567890123456789012345678901234567890123456789012"
PrintNormal "ESC|1fT0987654321098765432109876543210987654321098765432109"
Supported Bar Codes and Fonts
Printed Image
Font A
The spacing between lines shall be 12 dots. Counting the inter-character gap of 1 dots, the characters are
6 dots wide. In calculating the number of characters that can be placed on an 832 dot line, the result is 138
characters.
Example Command
PrintNormal "ESC|2fT123456789012345678901234567890123456789012345678901234567890123456789"
PrintNormal "ESC|2fT 098765432109876543210987654321098765432109876543210987654321098765432"
PrintNormal "ESC|2fT123456789012345678901234567890123456789012345678901234567890123456789"
PrintNormal "ESC|2fT 098765432109876543210987654321098765432109876543210987654321098765432"
Printed Image
11
Page 12

Supported CPCL Fonts
Supported Bar Codes and Fonts
Font Typeface
(Value for # in
ESC|#fT)
0 7 0 (24 x 12) 24 12
1 0 3 (18 x 16) 18 16
2 Mono1* 0 (24 x 12) 24 12
Note: You must install the Mono1 font. If you do not install this font, you will not receive a printout.
Font for Typeface 0
The Font for typeface 0 will be CPCL font 7. If nothing is specified in the print command this font will be
used. The spacing between lines shall be 24 dots. Counting the inter-character gap of 2 dots, the
characters are 10 dots wide. In calculating the number of characters that can be placed on an 832 dot line,
the result is 69 characters.
Example Command
PrintNormal "0987654321abcdefghijklmnopqrstuvwxyz6543210987654321098765432109876"
PrintNormal "1234567890123456789012345678901234567890123456789012345678901234567"
PrintNormal "0987654321098765432109876543210987654321098765432109876543210987654"
Font Name
Font Size
(h x w)
Line Height Total Width (dots)
Printed Image
Font for Typeface 1
The spacing between lines shall be 28 dots. Counting the inter-character gap of 2 dots, the characters are
14 dots wide. In calculating the number of characters that can be placed on an 832 dot line, the result is 52
characters.
Example Command
PrintNormal "ESC|1fT1234567890123456789012345678901234567890123456789012"
PrintNormal "ESC|1fT0987654321098765432109876543210987654321098765432109"
PrintNormal "ESC|1fT1234567890123456789012345678901234567890123456789012"
PrintNormal "ESC|1fT0987654321098765432109876543210987654321098765432109"
Printed Image
12
Page 13

Font for Typeface 2
The Font for Typeface 2 will be Mono1. The spacing between lines shall be 24 dots. The character width
shall be 12 dots. This amounts to approximately 43 charters on a 3 inch printhead depending on the actual
print width in dots.
Example Command
PrintNormal "ESC|2fT1234567890123456789012345678901234567890123456789012"
PrintNormal "ESC|2fT0987654321098765432109876543210987654321098765432109"
PrintNormal "ESC|2fT1234567890123456789012345678901234567890123456789012"
PrintNormal "ESC|2fT0987654321098765432109876543210987654321098765432109"
Printed Image
Supported Bar Codes and Fonts
13
Page 14

Supported Specifications and Printers
Specifications Supported
• UPOS specification supported: v1.14
• ActiveX supported
• The Common Control Objects (CCO) must be installed from http://monroecs.com/opos.htm for
ActiveX to work.
• .NET framework supported: v4.8
• Use of Microsoft POS for .NET v1.14
Supported Operating Systems
• Windows 10 (32 bit and 64 bit)
• Windows 11
14
Page 15

Supported Specifications and Printers
Supported Printers
Table 1 Supported Printer Models (Alphabetical Order)
#’s -QL RW-ZQ ZQ-ZT
105SL (203 dpi, 300 dpi)
110PAX4 (203 dpi, 300 dpi)
110XiIIIPlus (203 dpi, 300 dpi, 600 dpi)
140XiIIIPlus
170PAX4 (203 dpi, 300 dpi)
170XiIIIPlus (203 dpi, 300 dpi)
220XiIIIPlus (203 dpi, 300 dpi)
EZ320
GC420d (ZPL)
GC420t (ZPL)
GK420d
GK420t
GK888d
GK888t
GT800 (203 dpi, 300 dpi, ZPL)
GX420d
GX420s
GX420t
GX430t
iMZ220 (ZPL/CPCL)
iMZ320 (ZPL/CPCL)
KR403
LP 2824 Plus (ZPL)
LP 2824-Z
LP 2844-Z
MZ 220
MZ 320
QL 220 Plus
QL 320 Plus
QL 420 Plus
QLn220 (ZPL/CPCL)
QLn320 (ZPL/CPCL)
QLn420 (ZPL/CPCL)
RW 220
RW 420
S4M (203 dpi, 300 dpi)
TLP 2824 Plus (ZPL)
TLP 2824-Z (203 dpi)
TLP 2844-Z (203 dpi)
TLP 3844-Z (300 dpi)
ZD220 (ZPL)
ZD230 (ZPL)
ZD410 (203 dpi, 300 dpi, ZPL)
ZD411 (203 dpi, 300 dpi, ZPL)
ZD420 (203 dpi, 300 dpi, ZPL)
ZD421 (203 dpi, 300 dpi, ZPL)
ZD500 (203 dpi, 300 dpi, ZPL)
ZD500R (203 dpi, 300 dpi, ZPL)
ZD611 (203 dpi, 300 dpi, ZPL)
ZD611R (203 dpi, 300 dpi, ZPL)
ZD620 (203 dpi, 300 dpi, ZPL)
ZD621 (203 dpi, 300 dpi, ZPL)
ZD621R (203 dpi, 300 dpi, ZPL)
ZD888 (ZPL)
ZE500-4 (203 dpi, 300 dpi, ZPL)
ZE500-6 (203 dpi, 300 dpi, ZPL)
ZE500R-4 (203 dpi, 300 dpi, ZPL)
ZM400 (203 dpi, 300 dpi, 600 dpi)
ZM600 (203 dpi, 300 dpi)
ZQ112 (CPCL)
ZQ120 (CPCL)
ZQ210 (CPCL)
ZQ220 (CPCL)
ZQ310 (ZPL/CPCL)
ZQ320 (ZPL/CPCL)
ZQ510 (ZPL/CPCL)
ZQ511 (ZPL,CPCL)
ZQ511R (ZPL)
ZQ520 (ZPL/CPCL)
ZQ521 (ZPL,CPCL)
ZQ521R (ZPL)
ZQ610 (ZPL/CPCL)
ZQ620 (ZPL/CPCL)
ZQ630 (CPCL, ZPL)
ZQ630R (ZPL)
ZR118 (CPCL)
ZR138 (CPCL)
ZR318(ZPL/CPCL)
ZR328 (ZPL/CPCL)
ZR338 (ZPL/CPCL)
ZR628 (ZPL/CPCL)
ZR638 (ZPL/CPCL)
ZR658 (ZPL/CPCL)
ZR668 (ZPL/CPCL)
ZT210 (203 dpi, 300 dpi, ZPL)
ZT220 (203 dpi, 300 dpi, ZPL)
ZT230 (203 dpi, 300 dpi, ZPL
ZT410 (203 dpi, 300 dpi, 600 dpi, ZPL)
ZT410R (203 dpi, 300 dpi, 600 dpi, ZPL)
ZT411 (203 dpi, 300 dpi, 600 dpi, ZPL)
ZT411R (203 dpi, 300 dpi, 600 dpi, ZPL)
ZT420 (203 dpi, 300 dpi, ZPL)
ZT420R (203 dpi, 300 dpi, ZPL)
ZT421 (203 dpi, 300 dpi, ZPL)
ZT421R (203 dpi, 300 dpi, ZPL
ZT510 (203 dpi, 300 dpi, ZPL)
ZT610 (203 dpi, 300 dpi, 600 dpi, ZPL)
ZT610R (203 dpi, 300 dpi, 600 dpi, ZPL)
ZT620 (203 dpi, 300 dpi, ZPL)
ZT620R (203 dpi, ZPL)
15
Page 16

Common Properties, Methods, and Events
This section provides the common and specific commands for properties, methods, and events.
Summary of Common Properties
Name Type/Access
AutoDisable Boolean /R/W No No
CapCompareFirmwareVersion Boolean /R No No
BinaryConversion Long R/W No No
CapPower Reporting Long /R Yes Yes
CapStatisticsReporting Boolean /R Yes No
CapUpdateFirmware Boolean /R No No
CapUpdateStatistics Boolean /R No No
CheckHealthTest String /R Yes Yes
Claimed Boolean /R Yes Yes
DataCount Long /R No No
DataEventEnabled Boolean /R/W No No
DeviceEnabled Boolean /R/W Yes Yes
FreezeEvents Boolean /R/W Yes Yes
OpenResult Long /R Yes Yes
OutputID Long /R Yes Yes
PowerNotify Long /R/W Yes Yes
PowerState Long /R Yes Yes
ResultCode Long /R Yes Yes
ResultCodeExtended Long /R Yes Yes
State Long /R Yes Yes
ControlObjectDescription String /R Yes Yes
ControlObjectVersion Long /R Yes Yes
Service ObjectDescription String /R Yes Yes
Supported for Zebra
ZPL Printer
Supported for Zebra
CPCL Printer
16
Page 17

Common Properties, Methods, and Events
Name Type/Access
ServiceObjectVersion Long /R Yes Yes
DeviceDescription String /R Yes Yes
DeviceName String /R Yes Yes
Summary of Common Methods
Name
Open Yes* Yes*
Close Yes Yes
Claim Yes* Yes*
ReleaseDevice Yes Yes
CheckHealth Yes Yes
ClearInput No No
ClearInputProperties No No
ClearOutput Yes Yes
DirectIO Yes Yes
CompareFirmwareVersion No No
ResetStatistics No No
RetrieveStatistics No No
UpdateFirmware No No
UpdateStatistics No No
*Note: The status check has been moved from the Open to the Claim function, which also implies that the driver will always open
even if the printer has an error or is not there.
Supported for Zebra
ZPL Printer
Supported for Zebra
ZPL Printer
Supported for Zebra
CPCL Printer
Supported for Zebra
CPCL Printer
Summary of Common Events
Name
DataEvent No No
DirectIOEvent Yes Yes
ErrorEvent Yes Yes
OutputCompleteEvent Yes Yes
StatusUpdateEvent Yes Yes
17
Supported for Zebra
ZPL Printer
Supported for Zebra
CPCL Printer
Page 18

Common Properties, Methods, and Events
Summary of Specific Properties
Name Type/Access
CapConcurrentJrnRec Boolean /R No No
CapConcurrentJrnSlp Boolean /R No No
CapConcurrentRecSlp Boolean /R No No
CapCoverSensor Boolean /R Yes Yes
CapTransaction Boolean /R Yes Yes
CapConcurrentPageMode Boolean /R No No
CapMapCharacterSet Boolean /R No No
CapJrnPresent Boolean /R Yes Yes
CapJrn2Color Boolean /R Yes Yes
CapJrnBold Boolean /R Yes Yes
CapJrnCartridgeSensor Long /R Yes Yes
CapJrnColor Long /R Yes Yes
CapJrnDhigh Boolean /R Yes Yes
CapJrnDwide Boolean /R Yes Yes
CapJrnDwideDhigh Boolean /R Yes Yes
CapJrnEmptySensor Boolean /R Yes Yes
CapJrnItalic Boolean /R No No
CapJrnNearEndSensor Boolean /R No No
CapJrnUnderline Boolean /R No No
CapRecPresent Boolean /R Yes Yes
CapRec2Color Boolean /R Yes Yes
CapRecBarCode Boolean /R Yes Yes
CapRecBitmap Boolean /R Yes Yes
CapRecBold Boolean /R Yes Yes
CapRecCartridgeSensor Long /R Yes Yes
CapRecColor Long /R Yes Yes
CapRecDhigh Boolean /R Yes Yes
CapRecDwide Boolean /R Yes Yes
CapRecDhighDwide Boolean /R Yes Yes
CapRecEmptySensor Boolean /R Yes Yes
CapRecItalic Boolean /R No No
CapRecLeft90 Boolean /R Yes Yes
CapRecMarkFeed Long /R Yes Yes
CapRecNearEndSensor Boolean /R No No
CapRecPapercut Boolean /R Yes Yes
CapRecRight90 Boolean /R Yes Yes
CapRecRotate180 Boolean /R Yes Yes
Supported for
Zebra ZPL Printer
Supported for
Zebra CPCL
Printer
18
Page 19

Common Properties, Methods, and Events
Name Type/Access
CapRecStamp Boolean /R No No
CapRecUnderline Boolean /R No No
CapRecPageMode Boolean /R Yes Yes
CapRecRuledLine Int32 No No
CapSlpPageMode Boolean /R No No
CapSlpRuledLIne Int32 No No
CapSlpPresent Boolean /R No No
CapSlpFullslip Boolean /R No No
CapSlp2Color Boolean /R No No
CapSlpBarCode Boolean /R No No
CapSlpBitmap Boolean /R No No
CapSlpBold Boolean /R No No
CapSlpBothSidesPrint Boolean /R No No
CapSlpCartridgeSensor Long /R No No
CapSlpColor Long /R No No
CapSlpDhigh Boolean /R No No
CapSlpDwide Boolean /R No No
CapSlpDhighDwide Boolean /R No No
CapSlpEmptySensor Boolean /R No No
CapSlpItalic Boolean /R No No
CapSlpLeft90 Boolean /R No No
CapSlpNearEndSensor Boolean /R No No
CapSlpRight90 Boolean /R No No
CapSlpRotate180 Boolean /R No No
CapSlpUnderline Boolean /R No No
AsyncMode Boolean /R/W Yes Yes
CartridgeNotify Long /R/W Yes Yes
CharacterSet Long /R/W Yes Yes
CharacterSetList String /R Yes Yes
CoverOpen Boolean /R No No
ErrorLevel Long /R Yes Yes
ErrorStation Long /R Yes Yes
ErrorString String /R Yes Yes
FontTypefaceList String /R Yes Yes
FlagWhenIdle Boolean /R/W No No
MapCharacterSet Boolean /R/W No No
MapMode*
See the NOTE Regarding MapMode:
on page 21.
Long /R/W Yes Yes
Supported for
Zebra ZPL Printer
Supported for
Zebra CPCL
Printer
19
Page 20

Common Properties, Methods, and Events
Name Type/Access
PageModeArea String /R/W Yes Yes
PageModeDescriptor Int32 R/W Yes Yes
PageModeHorizontalPosition Int32 R/W Yes Yes
PageModePrintArea String /R/W Yes Yes
PageModePrintDirection Int32 R/W Yes Yes
PageModeStation Int32 R/W Yes Yes
PageModeVerticalPosition Int32 R/W Yes Yes
RotateSpecial Long /R/W Yes Yes
JrnLineChars Long /R/W Yes Yes
JrnLineCharsList String /R Yes Yes
JrnLineHeight Long /R/W Yes Yes
JrnLineSpacing Long /R/W Yes Yes
JrnLineWidth Long /R Yes Yes
JrnLetterQuality Boolean /R/W Yes Yes
JrnEmpty Boolean /R Yes Yes
JrnNearEnd Boolean /R Yes Yes
JrnCartridgeState Long /R Yes Yes
JrnCurrentCartridge Long /R/W Yes Yes
RecLineChars Long /R/W Yes Yes
RecLineCharsList String /R Yes Yes
RecLineHeight Long /R/W Yes Yes
RecLineSpacing Long /R/W Yes Yes
RecLineWidth Long /R Yes Yes
RecLetterQuality Boolean /R/W Yes Yes
RecEmpty Boolean /R No No
RecNearEnd Boolean /R No No
RecSidewaysMaxLines Long /R Yes Yes
RecSidewaysMaxChars Long /R Yes Yes
RecLinesToPaperCut Long /R Yes Yes
RecBarCodeRotationList String /R Yes Yes
RecBitmapRotationList String /R No No
RecCartridgeState Long /R Yes Yes
RecCurrentCartridge Long /R/W Yes Yes
SlpLineChars Long /R/W No No
SlpLineCharsList String /R No No
SlpLineHeight Long /R/W No No
SlpLineSpacing Long /R/W No No
SlpLineWidth Long /R No No
SlpLetterQuality Boolean /R/W No No
Supported for
Zebra ZPL Printer
Supported for
Zebra CPCL
Printer
20
Page 21

Common Properties, Methods, and Events
Name Type/Access
SlpEmpty Boolean /R No No
SlpNearEnd Boolean /R No No
SlpSidewaysMaxLines Long /R No No
SlpSidewaysMaxChars Long /R No No
SlpMaxLines Long /R No No
SlpLinesNearEndToEnd Long /R No No
SlpBarCodeRotationList String /R No No
SlpBitmapRotationList String /R No No
SlpPrintSide Long /R No No
SlpCartridgeState Long /R No No
SlpCurrentCartridge Long /R/W No No
NOTE Regarding MapMode:
In the Zebra SO, MapMode applies only to RecLineCharsList settings.
Supported for
Zebra ZPL Printer
Supported for
Zebra CPCL
Printer
The following properties may get changed:
• RecLineChars, RecLineHeight, RecLineSpacing
• RecLineWidth, RecSidewaysMaxChars, RecSidewaysMaxLines
• RecLinesToPaperCut
The following properties are not changed:
• PageModeArea property
• PageModePrintArea property
• PageModeHorizontalPosition
• PageModeVerticalPosition
Barcode printing: printBarcode
• Due to the nature of the printer barcodes and how they are generated and printed Zebra allows only
specific DOT values for barcode width and height as outlined in the barcode notes.
Bitmap printing: printBitmap
• The width of the bitmap is ignored and therefore not converted.
21
Page 22

Common Properties, Methods, and Events
Summary of Specific Methods
Name
Supported for:
Zebra ZPL
Printer
Zebra CPCL
Printer
Name
Zebra ZPL
Supported for:
Printer
Zebra CPCL
Printer
PrintNormal Yes Yes RotatePrint Yes Yes
PrintTwoNormal No No PrintBarcode *‡ Yes Yes
PrintImmediate Yes Yes PrintBitmap
#
Yes Yes
PrintMemoryBitmap Yes Yes TransactionPrint Yes Yes
BeginInsertion No No ValidateData Yes Yes
EndInsertion No No SetBitmap Yes Yes
BeginRemoval No No SetLogo Yes Yes
ClearPrintArea Yes Yes ChangePrintSide No No
EndRemoval No No MarkFeed Yes Yes
CutPaper Yes Yes PageModePrint Yes Yes
DrawRuledLine No No
* NOTE: The provided OPOS constant for Data Matrix and QR code will not work with the PrintBarCode function. You must replace the provided OPOS
constant BarCodeSymbology.QRCode with the custom OPOS constant BarCodeSymbology.Other and BarCodeSymbology.DataMatrix with
(BarCodeSymbology.Other + 1). Additionally, to use the QR barcode, the driver uses the ^HB command, which is not supported on the KR403 printer.
You need custom firmware for this feature.
‡ NOTE: The effect of the PrintBarCode width parameter depends on the Barcode symbology being used.
# NOTE: The width parameter of the printBitmap method will be ignored as only the width of the actual bitmap will be taken into consideration.
Therefore the Map Mode parameter will not have any effect on this function.
For the following barcodes, the width parameter,
supplied in the PrintBarcode method, controls the
barcode module width in dots, and must be a value
between 1 and 10.
• Code 39, Code 128, Code 128 parsed
• Ean8s, Ean13s
• EanJan8, EanJan13
• ITF (Code 2 of 5)
For the following barcodes, the width parameter,
supplied in the PrintBarcode method, has no effect
and the barcodes print with fixed ZPL values
according to the description below:
• Code 93 has a fixed width as defined by the ZPL
command ^BY4.
• QR Code has a fixed width as defined by the
ZPL command ^BY2.
• Data Matrix has a fixed width as defined by the
ZPL command ^BY2.
• TF has a fixed width as defined by the ZPL
command ^BY4.
• UPCD1 to UPCD5 have a fixed width as defined
by the ZPL command ^BY2.
• UPCE has a fixed width as defined by the ZPL
command ^BY4.
For the following barcodes, the barcode
module width is calculated using the width
parameter supplied in the PrintBarcode
method.
• Codabar
• Ean128
• MaxiCode
• PDF417
• GS1 Data Bar and GS1 Data Bar
Expanded
• UPCA, UPCAs
• UPCEs
22
Page 23

Summary of Events
Common Properties, Methods, and Events
Name May Use After
DataEvent Not Supported No No
DirectIOEvent Open, Claim & Enable Yes Yes
ErrorEvent Open, Claim & Enable Yes Yes
OutputCompleteEvent Open, Claim & Enable Yes Yes
StatusUpdateEvent Open, Claim & Enable Yes Yes
Data Characters and Escape Sequences
The default character set of all POS printers is assumed to support at least the ASCII characters 0x20
through 0x7F, which include spaces, digits, uppercase, lowercase, and some special characters. If the
printer does not support lowercase characters, then the Service may translate them to uppercase.
Every escape sequence begins with the escape character, whose value is 27 decimal, followed by a
vertical bar (‘|’). This is followed by zero or more digits and/or lowercase alphabetic characters. The
escape sequence is terminated by an uppercase alphabetic character.
If a sequence does not begin with ESC "|", or it begins with ESC "|" but is not a valid UnifiedPOS escape
sequence, the Service will make a reasonable effort to pass it through to the printer. However, not all such
sequences can be distinguished from printable data, so unexpected results may occur.
The application can use the ESC|#E escape sequence to ensure more reliable handling of the amount of
data to be passed through to the printer. Use of this escape sequence will make an application
non-portable. The application may, however, maintain portability by performing Embedded Data Escape
sequence calls within conditional code. This code may be based upon the value of the
DeviceServiceDescription, the PhysicalDeviceDescription, or the PhysicalDeviceName property.
Supported for
Zebra ZPL
Printer
Supported for
Zebra CPCL
Printer
NOTE: This command sequence definition and the corresponding definition in the Point Card Reader
Writer Chapter, are the only known deviations from preserving the interchangeability of devices defined in
this specification. If an application finds it necessary to utilize this command sequence, please inform the
UnifiedPOS Committee with the details of its usage, so that a possible standard/generic Application
Interface may be incorporated into a future release of the UnifiedPOS Standard. In order to preserve
peripheral independence and interoperability at the Application level, it is the Committee’s position that this
command sequence should be used only as a “last resort”.
To determine if escape sequences or data can be performed on a printer station, the application can call
the validateData method. (For some escape sequences, corresponding capability properties can also be
used.)
The following escape sequences are recognized. If an escape sequence specifies an operation that is not
supported by the printer station, then it is ignored.
Commands, outlined in Table 2, perform the indicated action.
23
Page 24

Common Properties, Methods, and Events
Table 2 Commands
Name Data Remarks ZPL Printer CPCL Printer
a
Paper cut ESC |#P Cuts receipt paper. The character '#' is replaced by an
Yes
ASCII decimal string telling the percentage cut
desired. If '#' is omitted, then a full cut is performed.
For example: The C string "\x1B|75P" requests a 75%
partial cut.
a
Feed and
Paper cut
ESC |#fP Cuts receipt paper, after feeding the paper by the
RecLinesToPaperCut lines. The character '#' is
Yes
defined by the "Paper cut" escape sequence.
Feed, Paper
cut, and Stamp
ESC |#sP Cuts and stamps receipt paper, after feeding the
paper by the RecLinesToPaperCut lines. The
No No
character '#' is defined by the "Paper cut" escape
sequence.
Fire stamp ESC |sL Fires the stamp solenoid, which usually contains a
No No
graphical store emblem.
Print bitmap ESC |#B Prints the pre-stored bitmap. The character '#' is
Yes Yes
replaced by the bitmap number. See setBitmap
method.
Print top logo ESC |tL Prints the pre-stored top logo. Yes Yes
Print bottom
ESC |bL Prints the pre-stored bottom logo. Yes Yes
logo
Feed lines ESC |#lF Feed the paper forward by lines. The character '#' is
Yes Yes
replaced by an ASCII decimal string telling the
number of lines to be fed. If '#' is omitted, then one line
is fed.
Feed units ESC |#uF Feed the paper forward by mapping mode units. The
Yes Yes
character '#' is replaced by an ASCII decimal string
telling the number of units to be fed. If '#' is omitted,
then one unit
Feed reverse ESC |#rF Feed the paper backward. The character '#' is
No No
replaced by an ASCII decimal string telling the
number of lines to be fed. If '#' is omitted, then one line
is fed.
Pass through
embedded data
ESC |#E Send the following # characters of data through to the
hardware without modifying it. The character '#' is
Yes Yes
replaced by an ASCII decimal string telling the
number of bytes following the escape sequence that
should be passed through as-is to the hardware.
Print in-line
barcode
ESC |#R Prints the defined barcode in-line. The character '#' is
the number of characters following the R to use in the
Yes Yes
definition of the characteristics of the barcode to be
printed. See details below.
Note: The QR and Data Matrix codes can be
configured with the Microsoft defined constants.
Notes:
a. All printers will perform only a full cut. The Kiosk printer KR403 is the only exception. You need to configure the partial cut in the Device Manager and
use the Escape command to activate the partial cut in your data stream.
Yes
Yes
a
a
24
Page 25

Common Properties, Methods, and Events
In-line Barcode Printing
The application can use the ESC|#R escape sequence to print barcodes in-line with other print commands.
The character '#' is the number of characters following the R to use in the definition of the characteristics of
the barcode to be printed.
In the data following the R, other lower case letters and numbers are used to identify different values. The
same value definitions as defined for the printBarCode method headers and definitions are used for the
various barcode values. Converting to string the values from the definitions are consistent.
The attribute symbols are defined as follows:
s symbology h height w width a alignment
t human readable text position
d start of data
e end of sequence
The attributes must appear in the order specified in the above list.
Using a basic UPCA, center aligned, with bottom text, 200 dots height and ~400 dots wide, the command
is as follows:
ESC|33Rs101h200w400a-2t-13d123456789012e
Commands associated with Print Mode characteristics (see Table 3) are remembered until explicitly
changed.
Table 3 Print Mode Commands
Name Data Remarks ZPL Printer CPCL Printer
Font typeface
selection
Commands associated with Print Line characters (see Table 4) are reset at the end of each print method,
by an explicit reset (where applicable), or by a “Normal” sequence.
ESC |#fT Selects a new typeface for the
following data. Values for the
character '#' are:
0 = Default typeface.
= Select first typeface from the
1
FontTypefaceList property.
= Select second typeface from the
2
FontTypefaceList property.
And so on.
Yes Yes
25
Page 26
Common Properties, Methods, and Events
Table 4 Print Line Commands
Name Data Remarks ZPL Printer CPCL Printer
Bold ESC |(!)bC Prints in bold or double-strike. If '!' is specified then bold
is disabled.
Underline ESC |#uC Prints with underline. The character '#' is replaced by
an ASCII decimal string telling the thickness of the
underline in printer dot units. If '#' is omitted, then a
printer-specific default thickness is used.
Italic ESC |(!)iC Prints in italics. If '!' is specified then italic is disabled. No No
Alternate color
(Custom)
ESC |#rC Prints using an alternate custom color. The character '#'
is replaced by an ASCII decimal string indicating the
desired color. The value of the decimal string is equal to
the value of the cartridge constant used in the printer
device properties. If '#' is omitted, then the secondary
color (Custom Color 1) is selected. Custom Color 1 is
usually red.
Reverse video ESC
|(!)rvC
Prints in a reverse video format. If '!' is specified then
reverse video is disabled.
Shading ESC |#sC Prints in a shaded manner. The character '#' is
replaced by an ASCII decimal string telling the
percentage shading desired. If '#' is omitted, then a
printer-specific default level of shading is used.
Single high
ESC |1C Prints normal size. Yes Yes
and wide
Double wide ESC |2C Prints double-wide characters. Yes Yes
Double high ESC |3C Prints double-high characters. Yes Yes
Double high
ESC |4C Prints double-high/double-wide characters. Yes Yes
and wide
Scale
horizontally
RGB Color ESC |#fC Prints in
ESC |#hC Prints with the width scaled '#' times the normal size,
where '#' is replaced by an ASCII decimal string.
# color. The character '#' is replaced by an ASCII
decimal string indicating the additive amount of RGB to
produce the desired color. There are 3 digits each of Red,
Green, and Blue elements. Valid values range from "000"
to "255". (E.g., "255255000" represents yellow). Color
Matching to the subtractive percentage of CMY (Cyan,
Magenta and Yellow color components) to produce the
desired color matching specified by RGB is up to the
Service. If '#' is omitted, then the primary color is used.
Bitmap printing is not affected.
SubScript ESC
|(!)tbC
SuperScript ESC
|(!)tpC
†
Note: The justification (or alignment) associated with these ESC commands are only supported when using internal or downloaded TTF monospaced
fonts for both, ZPL and CPCL printers. Justification is not supported when using proportional fonts.
Prints SubScript characters. If '!' is specified then
SubScript is disabled.
Prints SuperScript characters. If '!' is specified then
SuperScript is disabled.
Yes Yes
No No
No No
No No
Yes Yes
No No
No No
No No
26
Page 27

Common Properties, Methods, and Events
Name Data Remarks ZPL Printer CPCL Printer
†
Center ESC |cA Aligns following text in the center. Yes Yes
†
Right justify ESC |rA Aligns following text at the right. Yes Yes
†
Left justify ESC |lA Aligns following text at the left. Yes Yes
Normal ESC |N Restores printer characteristics to normal condition. Yes Yes
†
Note: The justification (or alignment) associated with these ESC commands are only supported when using internal or downloaded TTF monospaced
fonts for both, ZPL and CPCL printers. Justification is not supported when using proportional fonts.
27
Page 28

Driver Installation
This section provides the steps to install the OPOS printer driver.
OPOS Driver Installation
To start the installation, perform the following steps.
1. Open the installation file
(where X reflects the version of this driver and changes with each new version.)
The User Account Control dialog box opens.
2. Click Yes to install the driver.
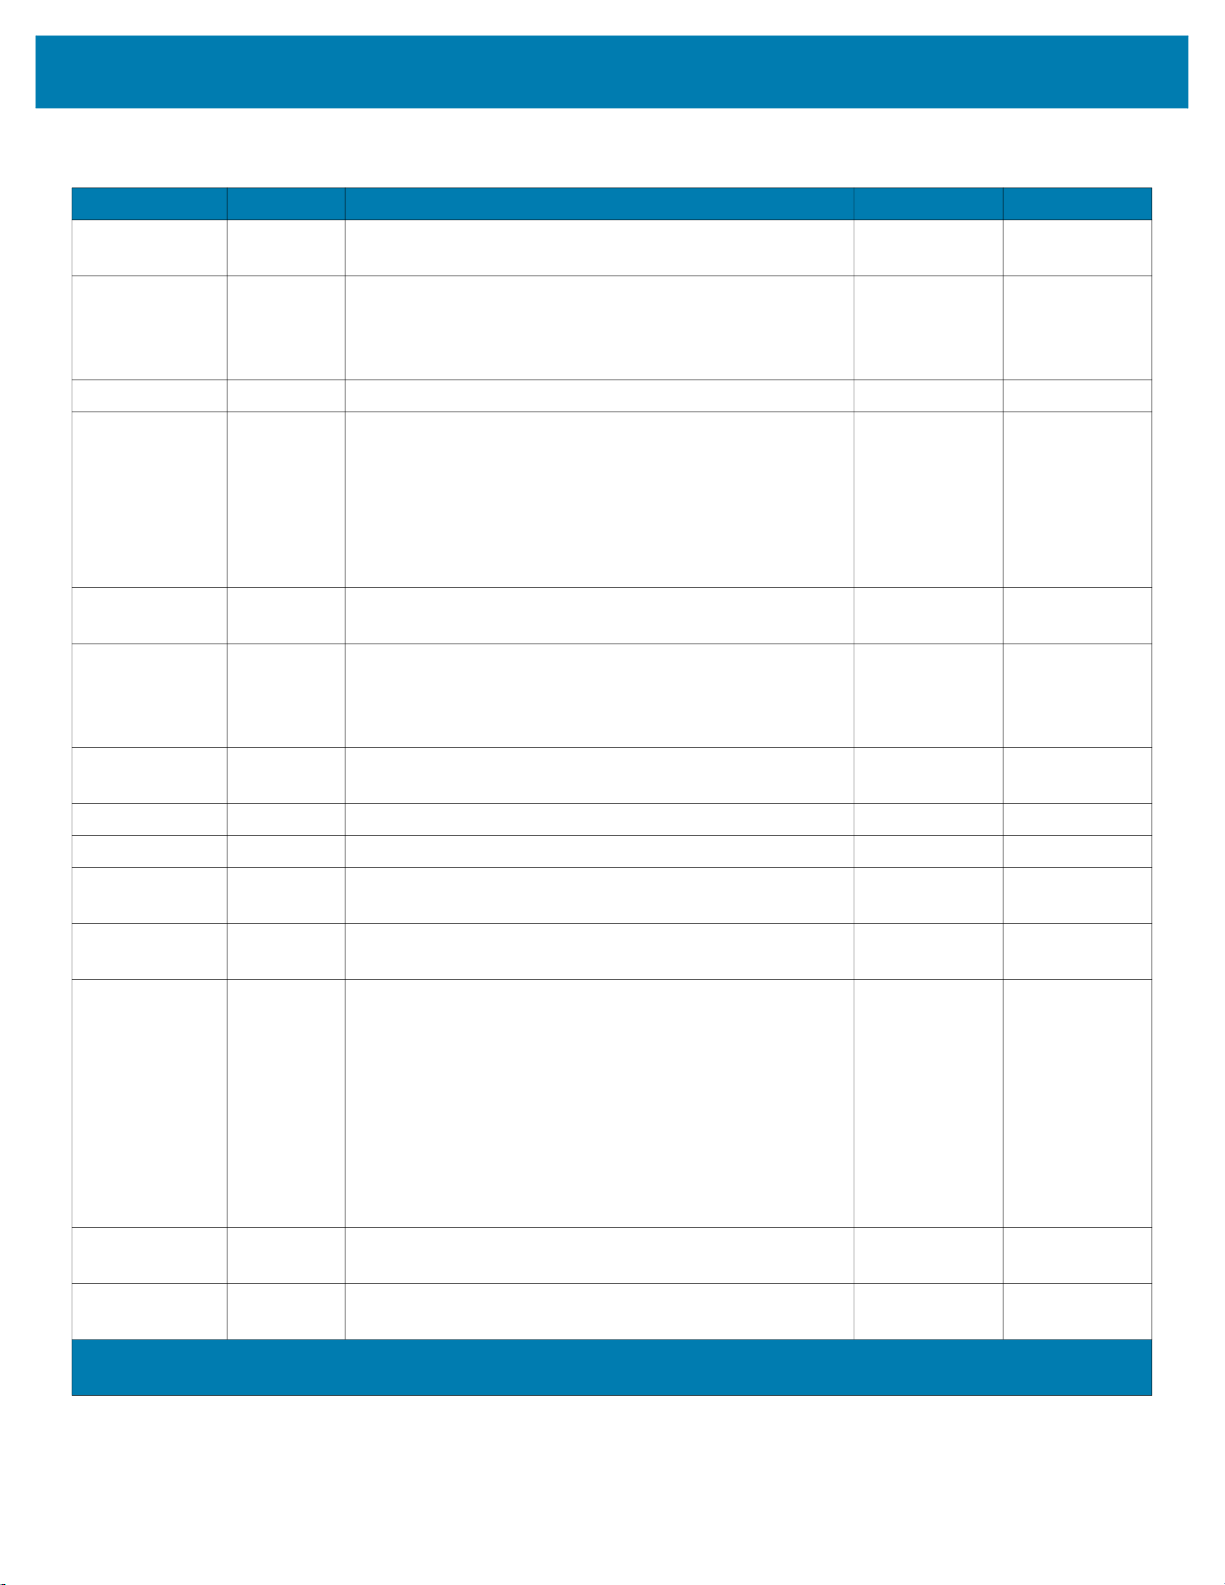
zebra-printer-opos-driver-installer-X_XX_X_XX.exe.
The Welcome to the InstallAware Wizard opens.
28
Page 29
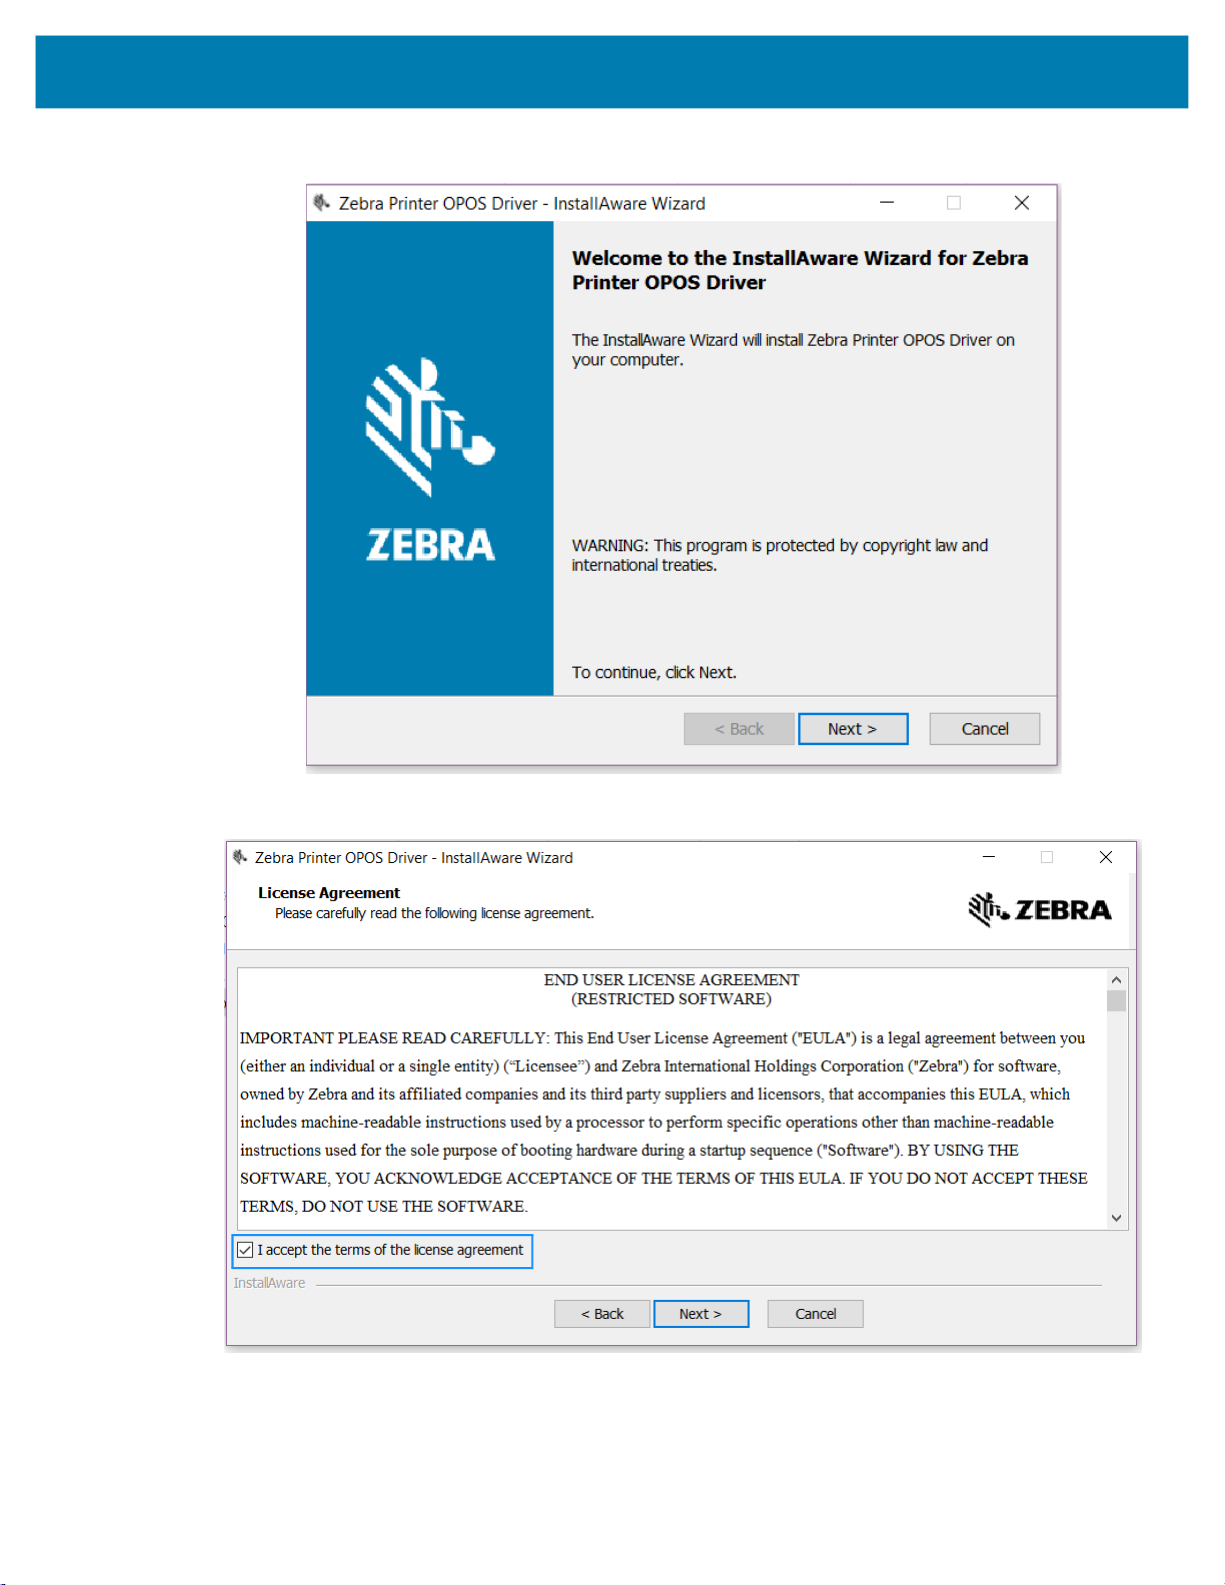
3. Click Next to continue.
Driver Installation
The License Agreement dialog box opens.
4. Select the I accept the terms of the license agreement checkbox.
29
Page 30
Driver Installation
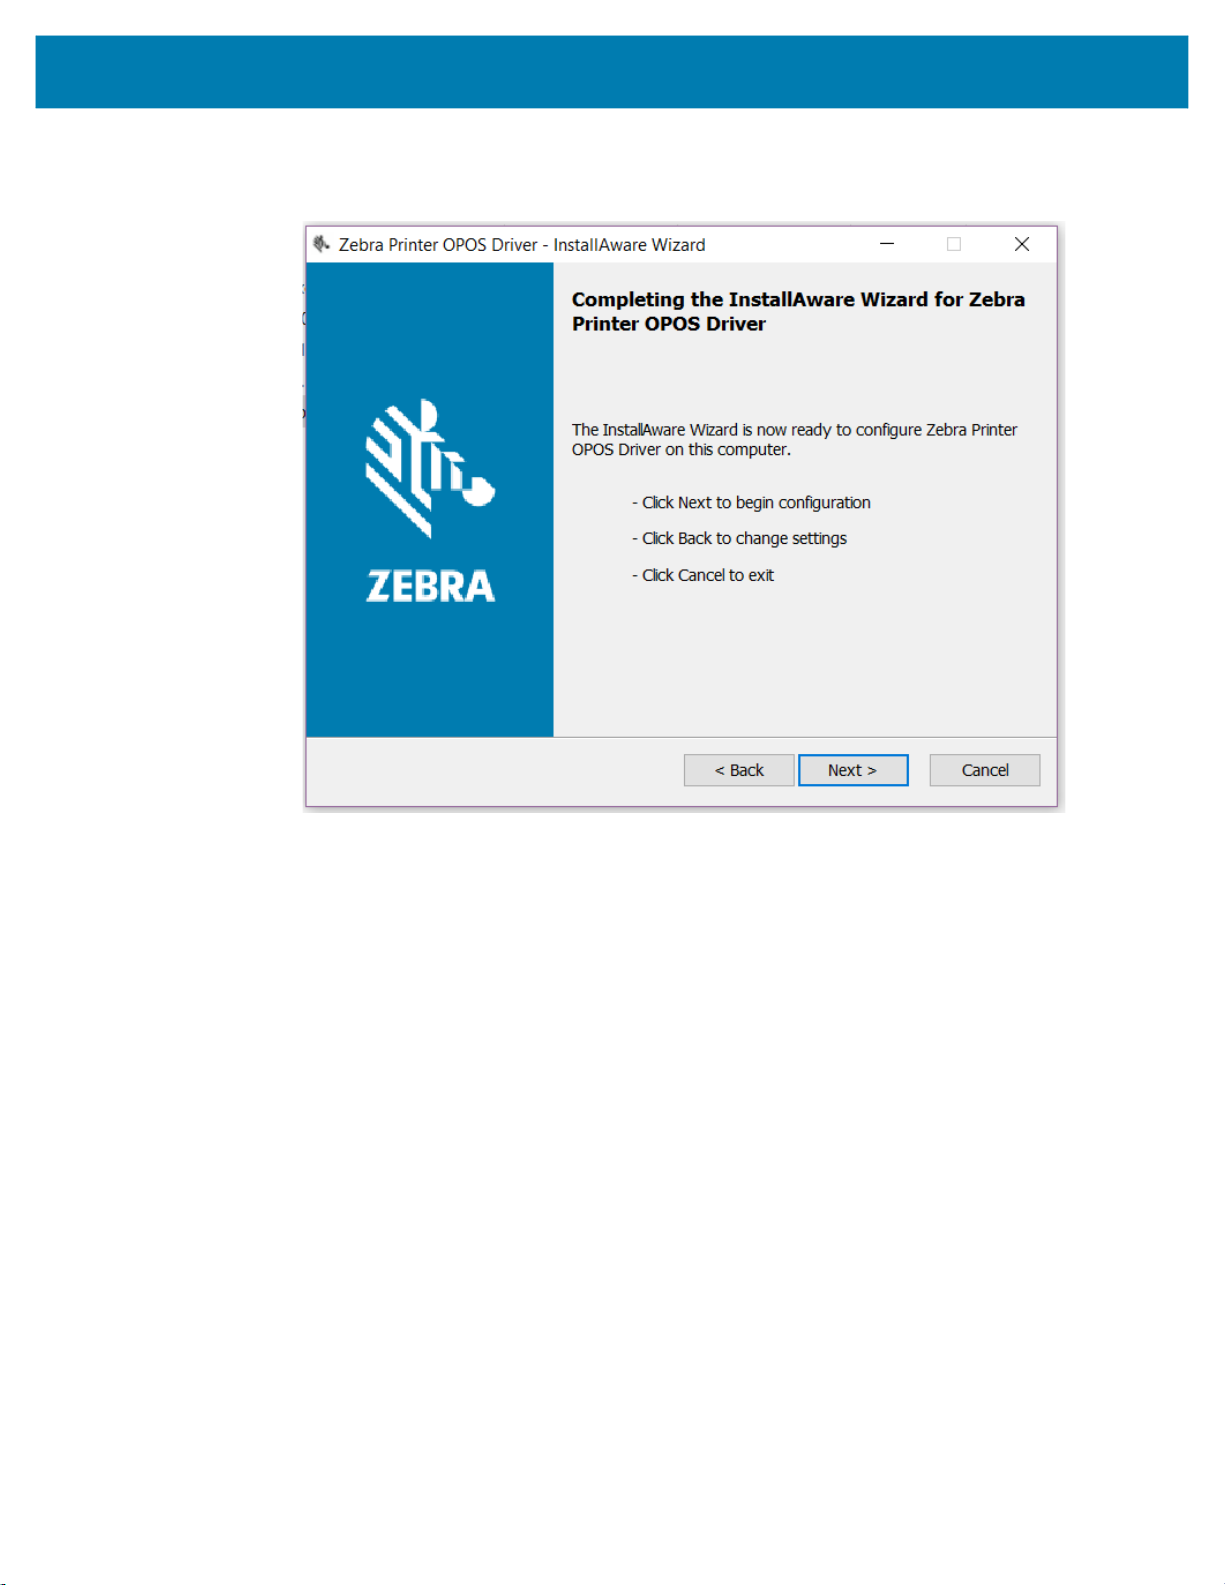
5. Click Next to accept the license agreement.
The Completing the InstallAware Wizard dialog box opens.
30
Page 31
Driver Installation
6. Click Next to confirm and begin the installation.
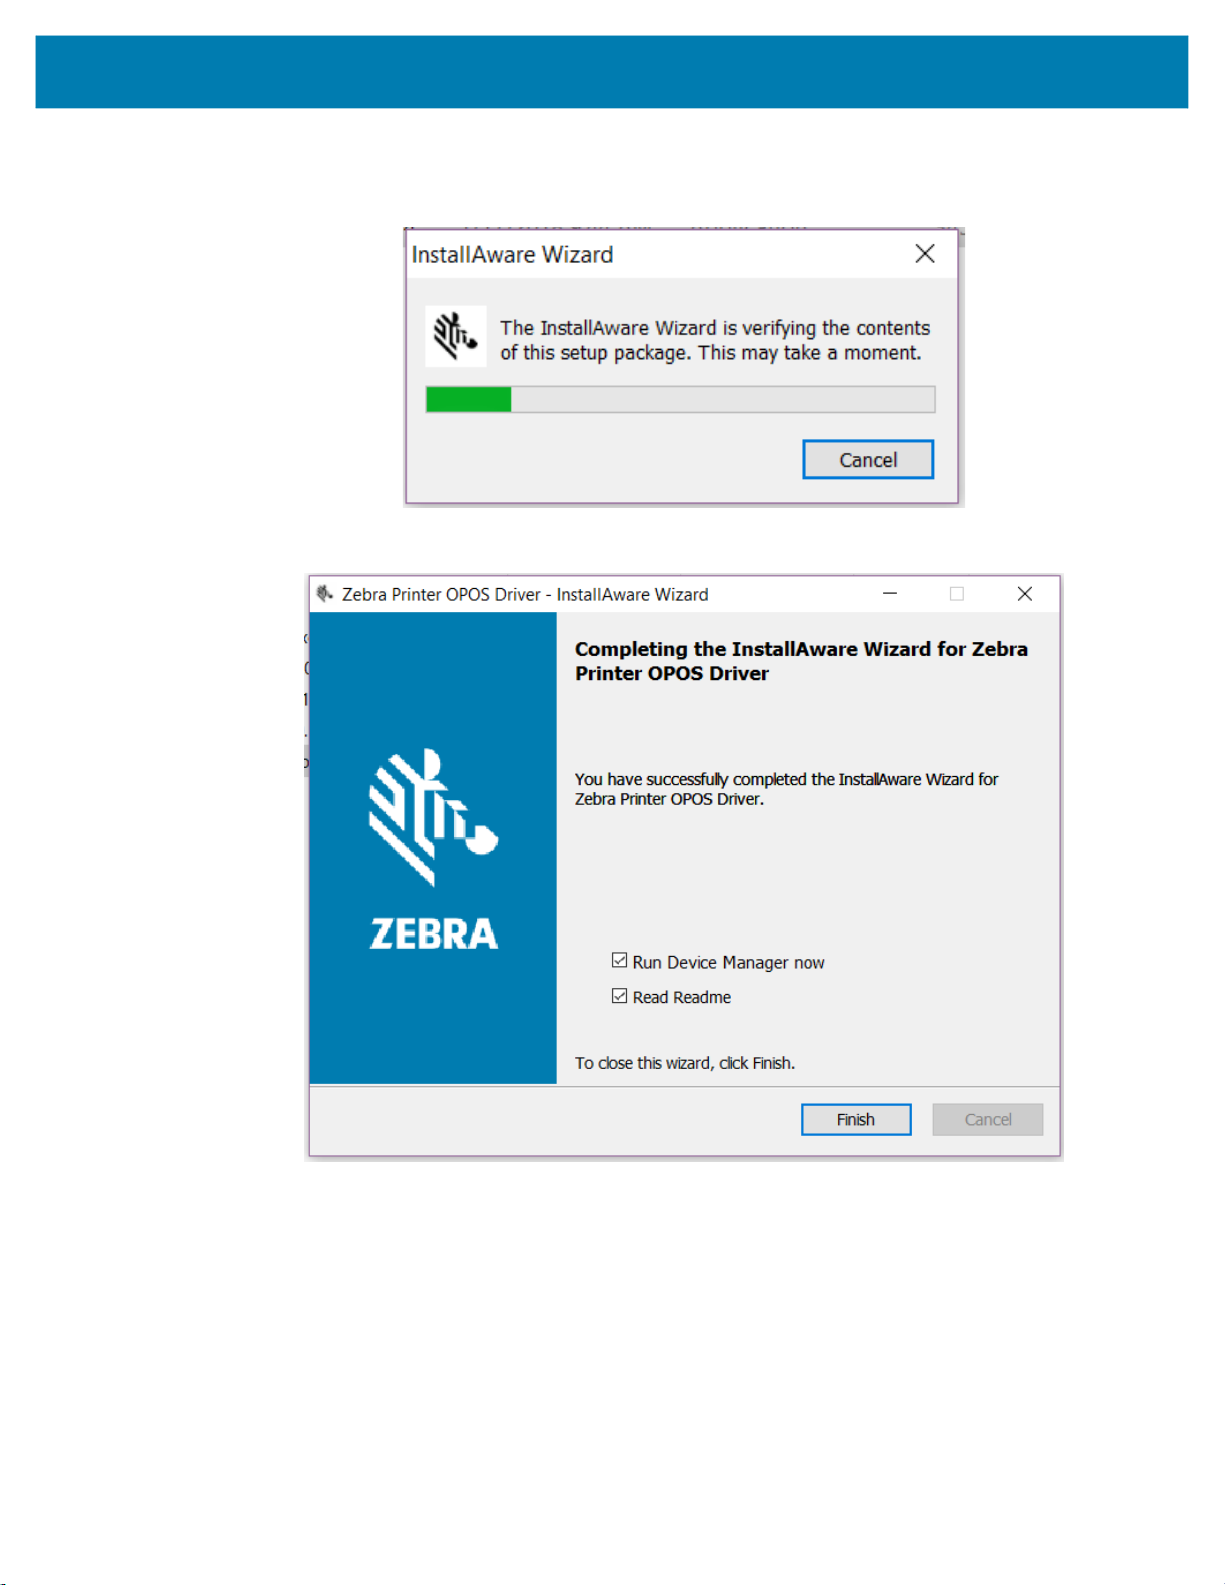
The InstallAware Wizard dialog box opens.
The Installation Complete dialog box opens.
7. Select the Read Readme checkbox, if desired, and the file will open in an Internet Explorer browser.
8. Click Finish.
9. To configure your printer for use with the OPOS driver, use the Device Manager. See Device Manager
on page 34 for more information on configuration.
31
Page 32

Driver Installation
OPOS Driver Silent Installation
To silently install the OPOS driver, you must start the executable with the /s command line parameter.
zebra-printer-opos-driver-installer-X_XX_X_XX.exe /s
This will preinstall the driver, the test application, and Device Manager, but will not install any printers. To
install a printer, you must use the Device Manager or have the Zebra Custom Application Group (CAG)
create a special driver.
Add Printer Via Command Line
To add a printer via command line you can also use the POSDM tool found in the C:\Program Files
(x86)\Microsoft Point Of Service directory.
To properly add a Zebra printer you must add all properties that the Device Manager configures when a
printer is getting added.
The following is a sample batch file to install a printer via POSDM: (Note: all the properties must be
adjusted to the printer properties that should be installed.)
@echo on
rem batch adding a new Zebra OPOS printer via Ethernet or WiFi
rem %~1=port
rem %2=printer name
rem %3=printer family
rem all properties like labellength, pagewidth, darkness, printspeed, etc. should be
established before and added to the batch
If "%~1"=="" goto usage
If "%~2"=="" goto usage
If "%~3"=="" goto usage
posdm adddevice %~1 /type:PosPrinter /soname:ZPLSO
posdm addname %~2 /type:PosPrinter /soname:ZPLSO /path:%~1
posdm addproperty PortType IP/WiFi /type:PosPrinter /soname:ZPLSO /path:%~1
posdm addproperty PortName %~1 /type:PosPrinter /soname:ZPLSO /path:%~1
posdm addproperty ModelName "%~3" /type:PosPrinter /soname:ZPLSO /path:%~1
posdm addproperty DNSName "" /type:PosPrinter /soname:ZPLSO /path:%~1
posdm addproperty interface ETHERNET /type:PosPrinter /soname:ZPLSO /path:%~1
posdm addproperty portNumber 9100 /type:PosPrinter /soname:ZPLSO /path:%~1
posdm addproperty ItemList "" /type:PosPrinter /soname:ZPLSO /path:%~1
posdm addproperty units Mm /type:PosPrinter /soname:ZPLSO /path:%~1
posdm addproperty labellength 0 /type:PosPrinter /soname:ZPLSO /path:%~1
posdm addproperty pagewidth 832 /type:PosPrinter /soname:ZPLSO /path:%~1
posdm addproperty darkness 30 /type:PosPrinter /soname:ZPLSO /path:%~1
posdm addproperty pollingInterval 60 /type:PosPrinter /soname:ZPLSO /path:%~1
posdm addproperty printspeed 5 /type:PosPrinter /soname:ZPLSO /path:%~1
posdm addproperty orientation Off /type:PosPrinter /soname:ZPLSO /path:%~1
posdm addproperty mirrorimage Off /type:PosPrinter /soname:ZPLSO /path:%~1
posdm addproperty isCutterEquipped No /type:PosPrinter /soname:ZPLSO /path:%~1
posdm addproperty EnableAuditLog On /type:PosPrinter /soname:ZPLSO /path:%~1
posdm addproperty operationmode Rewind /type:PosPrinter /soname:ZPLSO /path:%~1
32
Page 33

Driver Installation
posdm addproperty lHomeLeft 0 /type:PosPrinter /soname:ZPLSO /path:%~1
posdm addproperty lHomeTop 0 /type:PosPrinter /soname:ZPLSO /path:%~1
posdm addproperty mediatype Direct /type:PosPrinter /soname:ZPLSO /path:%~1
posdm addproperty trackingmode Continuous /type:PosPrinter /soname:ZPLSO /path:%~1
posdm addproperty DPI 203 /type:PosPrinter /soname:ZPLSO /path:%~1
posdm addproperty RecLinesToPaperCut 4 /type:PosPrinter /soname:ZPLSO /path:%~1
posdm addproperty defaultfontsize 28 /type:PosPrinter /soname:ZPLSO /path:%~1
posdm addproperty defaultfont 0 /type:PosPrinter /soname:ZPLSO /path:%~1
goto end
:usage
echo batch adding a new Zebra OPOS printer via Ethernet or WiFi
echo First parameter=port
echo Second parameter=printer name
echo Third parameter=printer family
echo all properties like labellength, pagewidth, darkness, printspeed, etc.
echo should be established before and added to the batch
:end
33
Page 34

Device Manager
This section provides information about the Device Manager and its uses.
Using the Device Manager
Use the Zebra OPOS Device Manager to add a printer. First, make a cable or wireless connection to a
supported printer with one of the following:
• Bluetooth
• IP/WiFi
• Parallel
• Serial
• USB
To connect to a supported printer, perform the following steps:
1. To run the Device Manager from the Start button on the PC, go to Start > Zebra Printer OPOS Driver >
Zebra OPOS Device Manager.
NOTE: In Windows 10 and Windows 11, you may need to run this application with Administrator rights.
34
Page 35
Device Manager
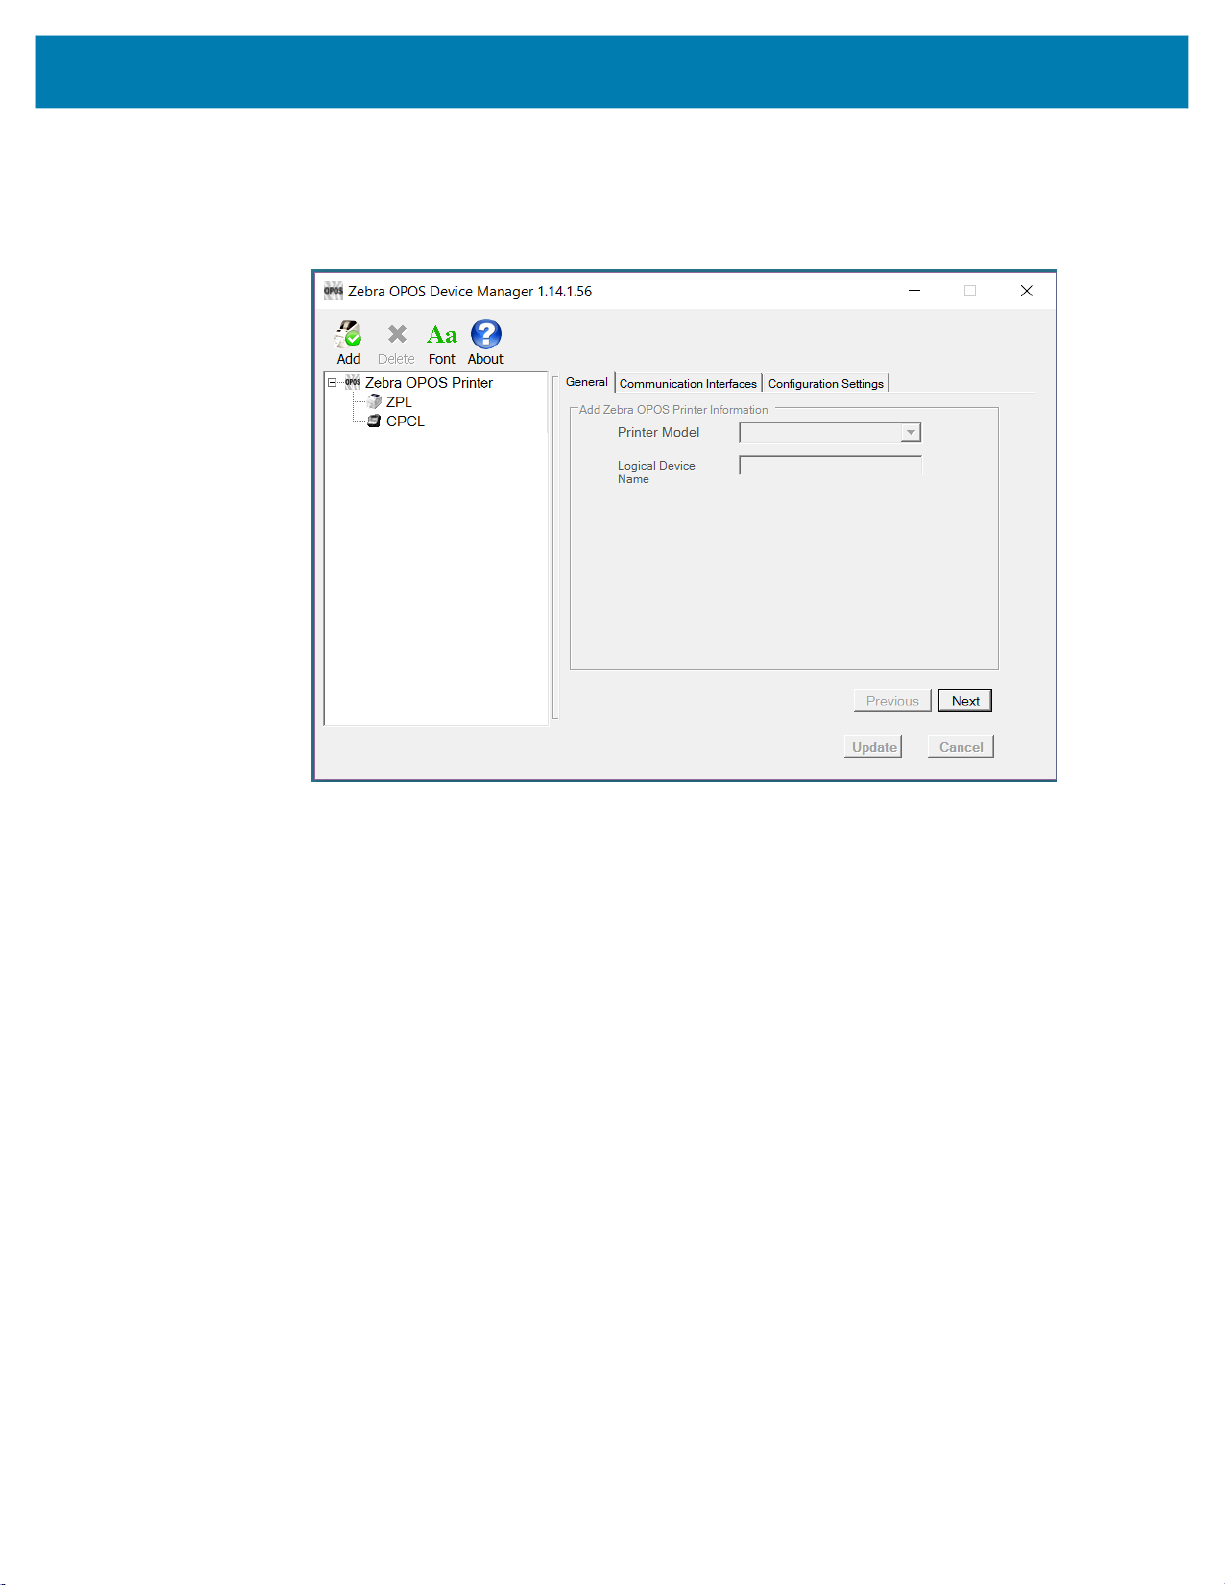
2. When the program displays, click the Add icon. The General tab is used to add a printer by selecting
the printer model using the drop-down menu.
A logical device name for the printer must be defined, as this name will be used by the OPOS
application.
3. Once these steps are complete click Next.
The Communication Interfaces dialog displays.
4. On this screen, select the port type from the drop-down menu.
5. Choose the interface to which the printer is connected.
35
Page 36

Device Manager
6. Click Search and the printer model should populate the area under Available Printer(s).
Connecting Using Bluetooth
With Bluetooth as a Port Type, make a serial cable connection, and define the Bluetooth Configuration
parameters to match the Bluetooth device.
Once this is complete, click Next.
36
Page 37

Device Manager
Connecting Using an IP Address
With IP/WiFi as a Port Type, manually enter the IP Address of the device or click Search. A search for
devices that have the same subnet as the PC running the Device Manager will start and then populate the
drop-down menu.
Once this is complete, click Next.
37
Page 38

Device Manager
Connecting Using a Parallel Cable
A parallel cable can be used to connect to the printer. Configure Port Type to Parallel.
NOTE: When connecting on a Windows 10 x64 or higher operating system, you may discover problems
with Plug and Play caused by the system settings. See Connecting Using a Parallel Cable for 64-Bit
Machines on page 39.
Parallel cable configuration
Once this is complete, click Next.
38
Page 39

Device Manager
Connecting Using a Parallel Cable for 64-Bit Machines
1. Open the Device Manager for your computer.
39
Page 40

2. Open Printer Port Properties.
Device Manager
40
Page 41

3. Select the Port Settings tab.
Device Manager
4. Select the Enable legacy Plug and Play detection checkbox.
5. Click OK to save the setting and reboot the computer.
This setting change enables the parallel port Plug and Play function and the Device Manager to find
your parallel printer.
41
Page 42
Device Manager
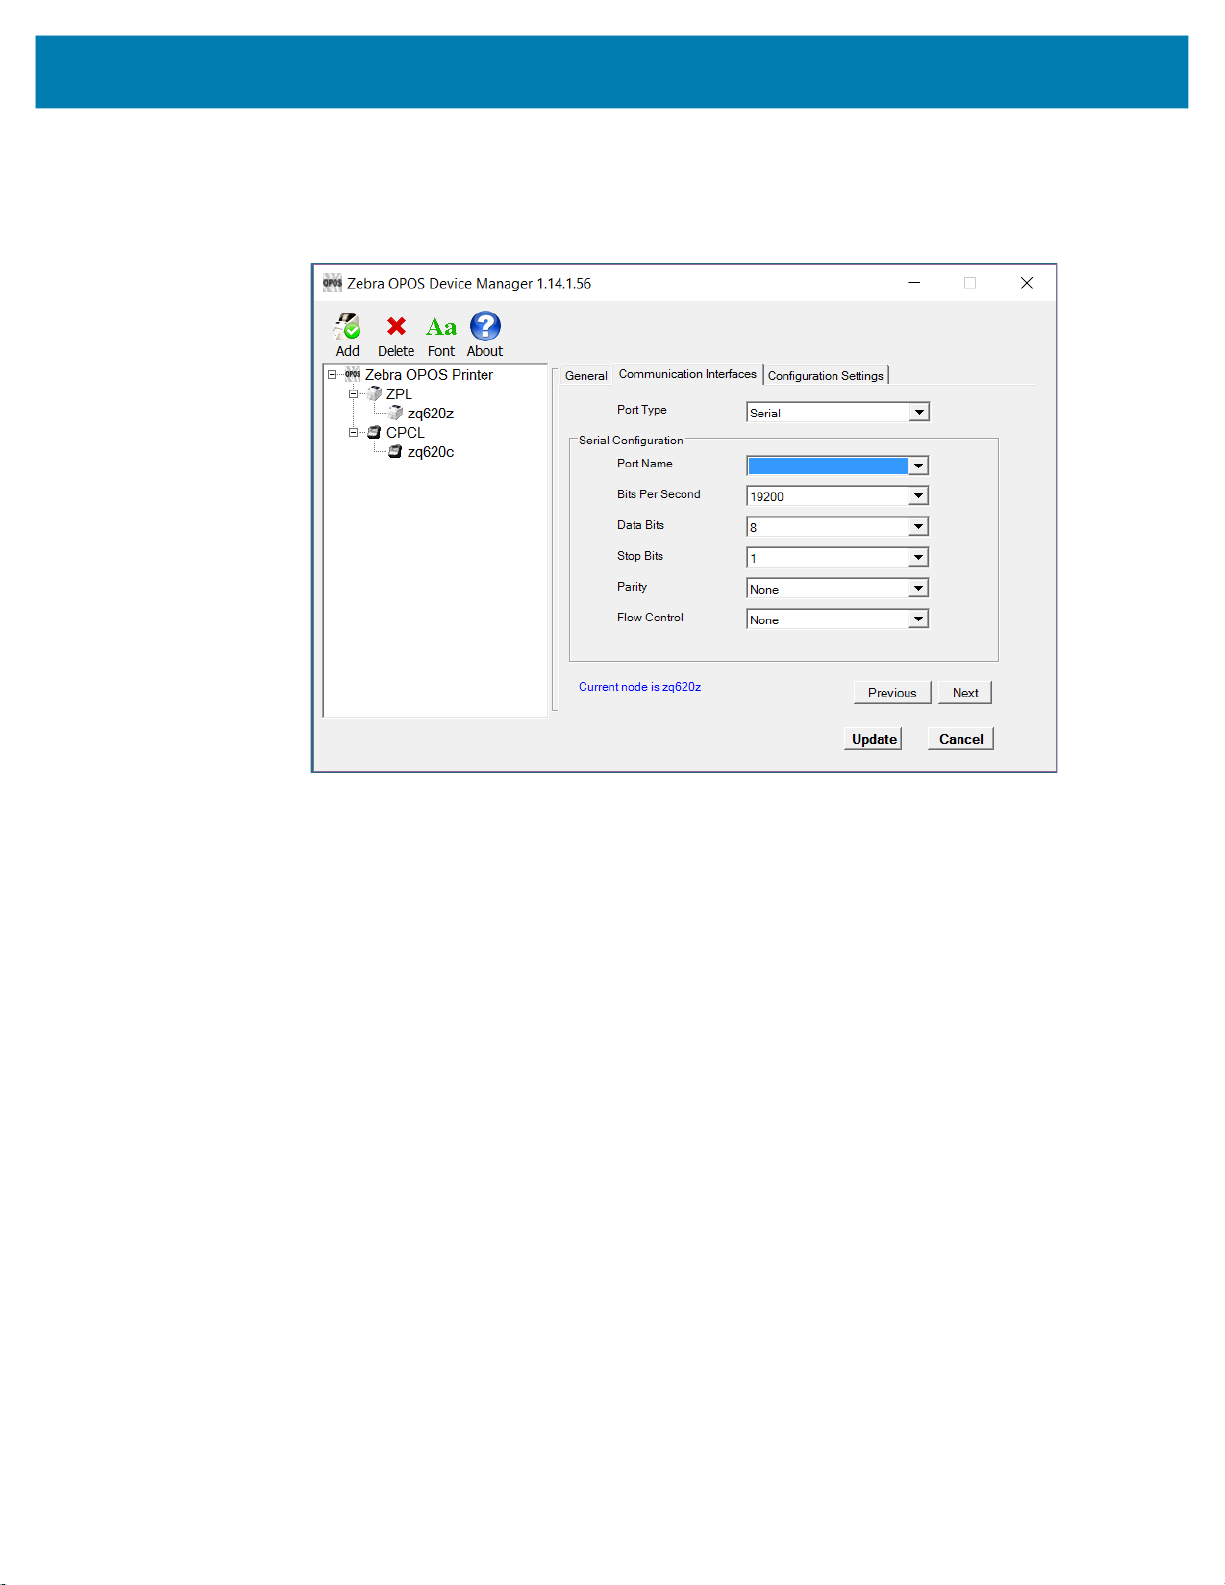
Connecting Using a Serial Cable
A serial cable can be used to connect to the printer. Configure Port Type to Serial, then configure Port
Name, Bits Per Second, Data Bits, Stop Bits, Parity and Flow Control to match the settings on the printer.
Once this is complete, click Next.
42
Page 43

Device Manager
Connecting Using a USB Cable
1. When using a USB cable, make the cable connection first.
2. Then, click Search.
This will populate the Available Printer(s) area with found printers.
3. Click on the printer.
4. Click Next.
The Configurations Settings tab displays.
43
Page 44

Configuration Settings
Adding a Printer
1. On the Configurations Settings tab, select the settings that will be used for the printer.
Device Manager
2. Once complete, click Update.
3. A message appears asking if you are sure you want to add the printer, click Yes.
The printer is added under the CPCL directory.
44
Page 45
Adding a KR403 Kiosk Printer
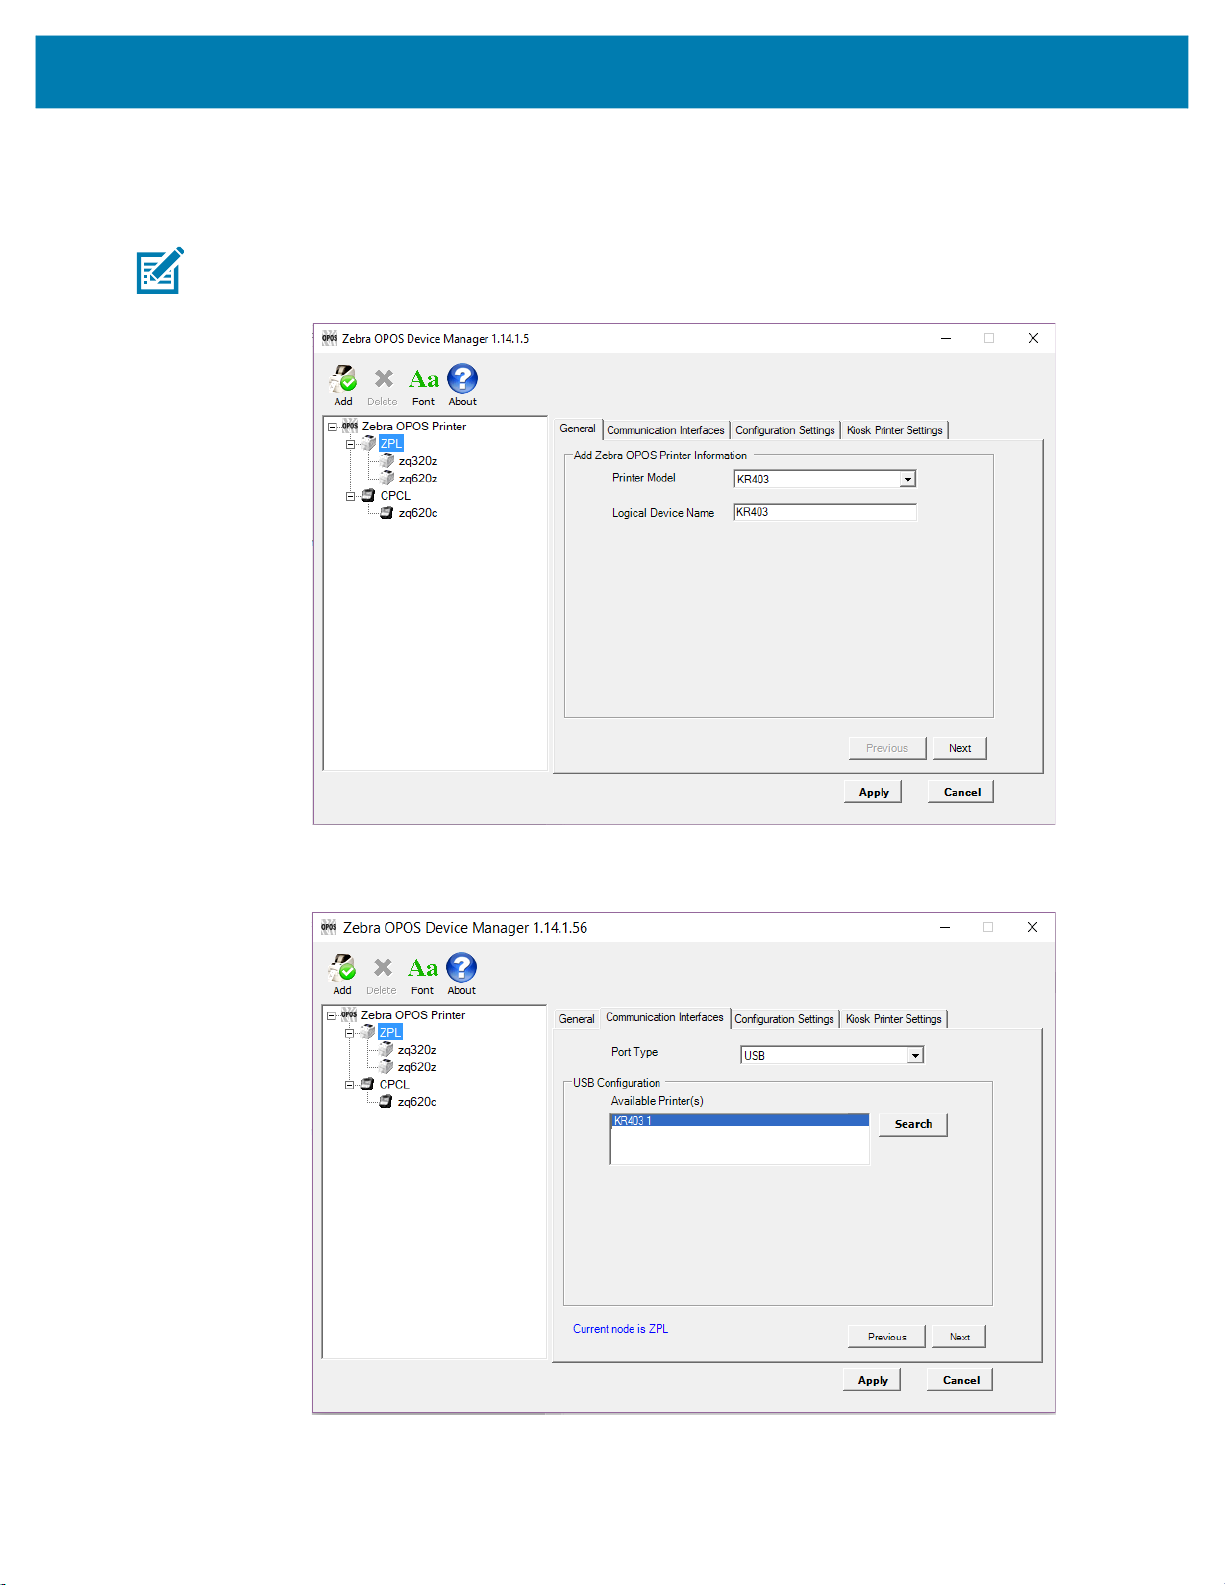
1. Open the Device Manager application, select ZPL under Zebra OPOS Printer. Click Add.
NOTE: In Windows 10 and Windows 11, you may need to run this application with Administrator rights.
2. Select KR403 from the Printer Model drop-down menu and type in the logical device name.
Device Manager
3. Click Next.
4. In the Communication Interfaces tab, select the Port Type and then click Next.
45
Page 46

Device Manager
5. In the Configuration Settings tab, select the settings such as Media Type, Tracking Mode, etc. Check
the Enable Audit Log box to enable event logging.
6. Click Next and configure the Kiosk Printer Settings.
For a detailed explanation of the Kiosk Printer Settings, see Kiosk Printer Settings on page 57.
7. Click Apply.
8. Click Yes to add the printer.
The KR403 should now be listed in the Device Manager.
46
Page 47

Output Logging
The Driver can log its printer command output for troubleshooting purposes. By default, this option is not
turned on to keep the logs from consuming disk space. In the event that the Output Logs are needed, the
feature can be activated from within the Device Manager.
To turn on Output Logging, perform the following:
1. Run the Device Manager and select the printer to be monitored.
NOTE: In Windows 10 and Windows 11, you may need to run this application with Administrator rights.
2. Click on the Configuration Settings tab and check Enable Audit Log.
Device Manager
The logs can be found at C:\ProgramData\Zebra Technologies\OPOS\LOGS.
There are two logs:
• ZebraPOS_Audit.txt - contains a running log of the OPOS commands used and the resulting driver
output.
• ZebraPOS_Status_Audit.txt - contains a running log of when status queries were sent.
To turn off the logging, perform the following:
1. Uncheck the Enable Audit Log box in the Device Manager.
NOTE: If logging is turned off or on while a printer is in the "Claimed" state, the setting change will not take
effect until the printer has been "Released".
47
Page 48

Device Manager
Additional Font Handling
In order to provide customers with the ability to add fonts to the printer and then use those in the OPOS
driver, the Device Manager UI has the following functionality.
NOTES:
• Zebra offers a pre-converted font for use with ZPL-based printers. This is a monospaced font called
“Mono1”.
• Zebra also offers a pre-converted font for use with CPCL-based printers. This is a monospaced font
called “Mono1”. As a convenience, “Mono1” is predefined as an Additional Font for the CPCL printer
models.
Fonts are included in the installation at C:\Program Files (x86)\Zebra Technologies\ZebraOPOS\FONTS.
Adding a New Font in Device Manager
The following example demonstrates how to add the “Mono1” font to a ZPL printer.
1. Open the Device Manager Application and click the Font button.
NOTE: In Windows 10 and Windows 11, you may need to run this application with Administrator rights.
1. Right-click ZPL and click Add Font.
Fonts D, F and A will be listed under ZPL.
48
Page 49

Device Manager
2. Select the Character Set Number drop-down menu, verify selectable character sets (100, 101, 102,
103, 104, 105, 106, 107, 108, 109, 110, 113, 128, 129, 130) and select the character sets by clicking
the corresponding boxes.
3. Enter Font Name, Font Height, and Width (in dots). If adding the “Mono1” font, use the name
“Mono1”, height 25, and width 13.
4. Enter Line Height, Inter Character Gap (in dots), Total Character Width, and select Yes or No to
identify if your Font supports “Right to Left”.
NOTE: For the Mono1 font the following parameter values should be added:
For CPCL:
• Font Name = Mono1.cpf
• Font Size = 0
• Font Height = 25
• Font Width = 13
• Line Height = 25
• Inter Character Gap = 0
• Total Character Width = 13
For ZPL:
• Select Character Set Number 1252
• Font Name = Mono1.ttf
• Font Height = 25
• Font Width = 13
• Line Height = 25
• Inter Character Gap = 0
• Total Character Width = 13
49
Page 50

Device Manager
5. Click Save to save the Font.
(The user will be presented with a dialog box to confirm the adding of the font.)
6. The new font should now be listed.
NOTE: When using One Shot ESC commands, the index entry for the font will be assigned by the Device
Manager to the next available font slot.
0, 1, 2 are built-in ZPL fonts and any new font will be assigned a following number.
50
Page 51
Assigning Multiple Fonts
1. To assign multiple fonts, repeat the steps in Adding a New Font in Device Manager on page 48 for
every font you want to add.
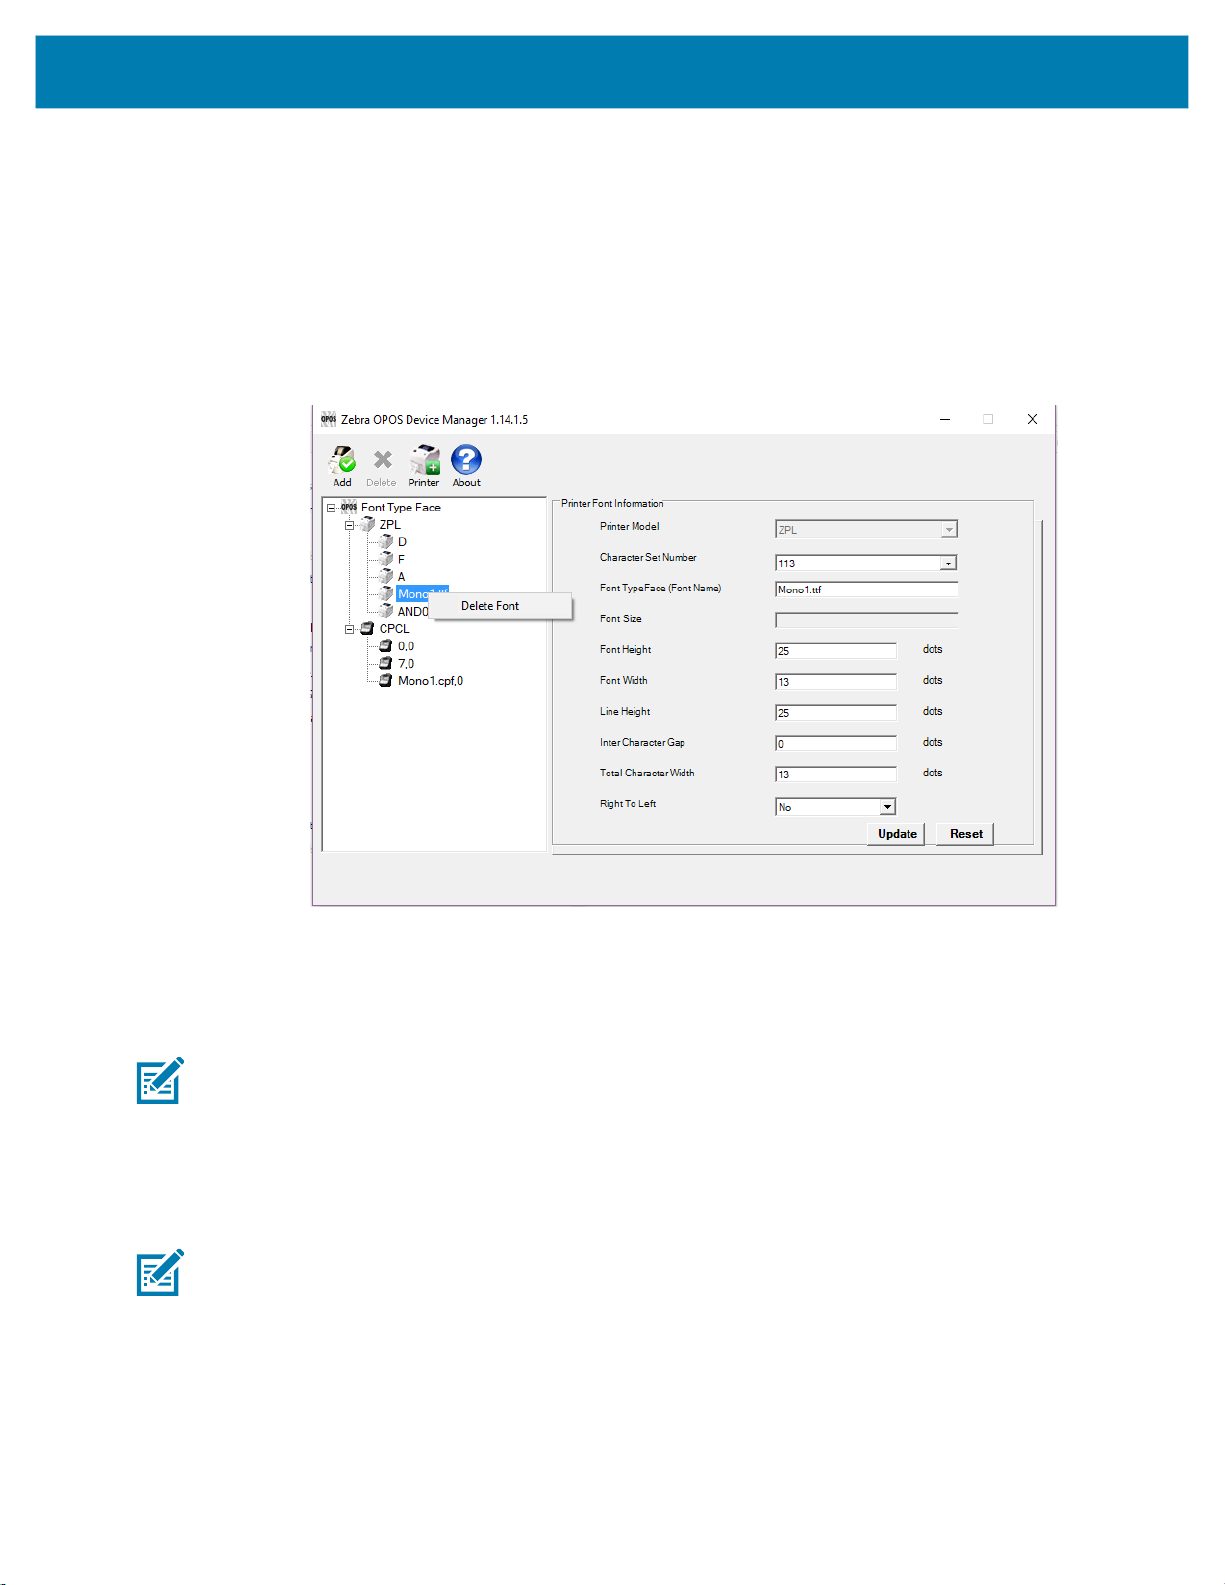
Deleting a Font
1. To delete a font from the list, simply right-click the Font you wish to delete and select Delete Font.
(The user will be presented with a dialog box to confirm the deletion of the font.)
Device Manager
Selecting and Using a Font with Chinese Characters
The Andale Mono WT S font has a character set for Simplified Chinese and is available from Zebra for
purchase. Using this font with the OPOS driver allows you to print Chinese characters.
NOTE: Other Andale Mono fonts are available for purchase from Zebra for printing Traditional Chinese,
Japanese, and Korean languages.
Setting the Printer Font Information
1. Open Device Manager and select Font button.
2. See Figure 1. In the Printer Model dialog box, select ZPL.
NOTE: This font can only be used with a ZPL printer.
51
Page 52

Figure 1 Setting the Printer Model
Device Manager
1. See Figure 2. Enter the Character Set Number for the selected font.
For the Andale font, select all numbers up to Code 128.
Figure 2 Setting the Character Set Numbers
2. See Figure 3. Add the name and all other parameters for the font.
Enter the font name exactly as it appears on the printer as this representation will be used to select the
font.
52
Page 53

Figure 3 Setting the Font Name
Device Manager
3. See Figure 4. Click Save and click Yes to add the font typeface.
Figure 4 Saving the Font Information
53
Page 54

Device Manager
4. See Figure 5. You have now added the Andale font to your OPOS driver which is available within the
OPOS application using the ESC|#fT command.
In this example, the printer now has three default fonts and one OEM font, and the OEM font target
number would be 3(ESC|3fT).
Figure 5 Confirming the New Font Type
Testing the New Font
1. See Figure 6. Open the test application to try out the new font.
2. Open, Claim and Enable the printer and enter ESC|3fT in the Print Data box.
Figure 6 Setting the Print Data
54
Page 55

Device Manager
3. See Figure 7. Press Print Normal once, and then change the CharacterSet number to 128
Click OK in the confirmation dialog.
Figure 7 Updating the Character Set Property
Now you can add Chinese text behind the ESC command in the Print Data box and print to the printer.
Programming Tips For Using Additional ZPL Fonts
In order to print in other languages, it is necessary to load a new font Swiss721 into the printer and control
it within the OPOS driver. See Adding a New Font in Device Manager on page 48 for more specific
information.
An OPOS application developer has to select the proper font encoding by selecting the new codepage as
described in the font definition.
In order to enable locale setting, we can check the currently selected language support in the OS and
select the OPOS CharacterSet value according to the following selection:
Zebra ^CI Values
0 = Single Byte Encoding - U.S.A. 1 Character Set 100
1 = Single Byte Encoding - U.S.A. 2 Character Set 101
2 = Single Byte Encoding - U.K. Character Set 102
3 = Single Byte Encoding - Holland Character Set 103
4 = Single Byte Encoding - Denmark/Norway Character Set 104
5 = Single Byte Encoding - Sweden/Finland Character Set 105
6 = Single Byte Encoding - Germany Character Set 106
7 = Single Byte Encoding - France 1 Character Set 107
8 = Single Byte Encoding - France 2 Character Set 108
CharacterSet
OPOS
Value
55
Page 56

Device Manager
OPOS
Zebra ^CI Values
9 = Single Byte Encoding - Italy Character Set 109
10 = Single Byte Encoding - Spain 110
13 = Zebra Code Page 850 113 (default)
27 = Code page 1252 1252
28 = Unicode (UTF-8 encoding) - Unicode Character Set 128
29 = Unicode (UTF-16 Big-Endian encoding) - Unicode
Character Set
30 = Unicode (UTF-16 Little-Endian encoding) - Unicode
Character Set
NOTE: If printing with a new font and character set shall occur, perform the steps in the next procedure
shown on page 56.
If using Swiss721 font (with font index 3), perform the steps below.
1. Send the ESC|3fT. With the first use, the CharacterSetNumber value (128,129,130) (assigned to the
Swiss721 font) will be appended to the default CharacterSetList property
(100,101,102,103,104,105,106,107,108,109,110,113).
CharacterSet
Value
129
130
This will throw an exception as “Selected Font doesn't support character set”. You will need to add the
appropriate character set number within 128,129,130.
2. Assign the CharacterSetNumber within the CharacterSetNumber value (128,129,130) selected for
Swiss721.
Now, the Service Object will change the CharacterSetNumber to the specified number and use it for
future printing.
NOTE: Using a proportional font may cause unexpected results. Due to the nature of proportional fonts,
the driver cannot calculate the exact text position for all text, and text wrapping may not work as expected.
The benefit this font has is that you can use international character sets with multiple languages. In
general, the use of monospaced fonts such as the Mono1 font is preferred.
Use of OPOS Character Properties
The CharacterSetList property will display all of the ASCII numeric set numbers associated with the
currently loaded fonts. The default is:
“100,101,102,103,104,105,106,107,108,109,110,113”.
If a new font is added, the new character set values will be added to the CharacterSetList so an
application can choose the new values for the respective fonts.
The CharacterSet property will initialize with 113 on “open”.
The CapMapCharacterSet property will be initialized with FALSE on “open”.
NOTE: The above setting has the effect that the MapCharacterSet property will also always show FALSE
regardless of what the user sets it to. If MapCharacterSet is set to TRUE, an error E_ILLEGAL will be
thrown.
56
Page 57

The CapCharacterSet property will initialize with DISP_CCS_ASCII on “open”. This property will change
with a different selection of the CharacterSet property.
CapCharacterSet CharacterSet
DISP_CCS_ASCII 100-110, 113
DISP_CCS_UNICODE 128,129,130
NOTE: Error handling - If a specific character set value is selected with the CharacterSet property and a
font is selected that cannot support the character set, an error E_ILLEGAL will be thrown.
NOTE: OPOS Properties - The driver does not support font mapping. The application is responsible for
this task. CapMapCharacterSet is always FALSE, which will also cause MapCharacterSet to always be
FALSE. If MapCharacterSet is set to TRUE, an error E_ILLEGAL will be thrown.
KR403 Specific User Interface
Kiosk Printer Settings
The Kiosk Printer Settings tab will appear only after adding KR403 as a Printer Model under the General
tab. The following information will assist configuring Kiosk properties.
Device Manager
57
Page 58

Kiosk Properties
New Page:
There are three settings which you may select when a new page is printed:
• Eject Upon New Page
• Retract Upon New Page
• Do Nothing
These settings instruct the printer to change the presenter function mode.
Eject Upon New Page – Ejects the current page while the new page is printed.
Retract Upon New Page – Retracts current page while the new page is printed.
Do Nothing – The current page still remains in the printer neither ejects nor retracts.
Current Page:
Retract upon Timeout – If a label is not taken, you can define a timeout value when expired will retract
the current page. Retract timeout can be defined from 0 – 300 seconds.
Device Manager
Clear Presenter – Will eject the current page before printing a new page.
Kiosk Values:
Uncut Amount – When a partial cut is made by the printer, the media left uncut can be defined from 10 to
60mm.
Cut Margin – This setting determines the margin between the cutter and the printhead. It is defined from
2 to 9mm. The default is 9mm.
Presenter Loop Length – Determines the length of the presenter loop. It is defined from 3 to 1023mm.
The default gives a loop of approximately 400mm.
With this feature, we build a loop with the imaged receipt and keep the printout in the printer to prevent the
kiosk user from taking the receipt while it is still being imaged. When the full receipt is imaged, we cut the
receipt and present a portion of the receipt to the user for them to take. This reduces jamming and print
image distortion of the receipt.
Present Length – Determines the amount of media to eject the page through the presenter module.
When the customer takes the receipt, the printer detects a movement and issues the rest of the receipt at
300 mm/s to help ensure receipt is removed undamaged. Value range from 0 to 255mm.
Kiosk Wall Compensation – By default, the printer will eject the paper 50 mm during a present cycle.
The kiosk wall compensation setting allows the user to increase the distance that media is ejected during a
present cycle. The additional distance can range from 0 to 255 mm.
58
Page 59

Device Manager
Details for Variable Continuous Mode vs. Continuous Mode
The KR403 printer supports two continuous modes. The “variable continuous mode” is different from the
“continuous mode”. Variable continuous mode allows the printer to print pages without length limitation.
NOTE: The minimum presenter length of 70 mm always applies.
• Variable continuous mode will print on continuous paper without page boundaries until a cut command
is issued.
• Continuous mode requires a defined page length and will print a page that adheres to that set page
length.
Continuous Mode
• You have a set label width
• You have a set label height (minimum length is 70 mm)
• You have a Label Home (left and top)
You print content that is not filling the page and you receive a cut command.The printer shall feed to the
end of the page and cut there.
59
Page 60

Variable Continuous Mode 1
• You have a set label width
• You have a minimum label height of 70 mm
• You have a Label Home (left and top)
You print content that is not filling the page and you receive a cut command.The printer shall feed to the
end of the page and cut there.
Device Manager
In this example, the minimum label length is not exceeded and is not different from Continuous mode.
Variable Continuous Mode 2
• You have a set label width
• You have a minimum label height of 70 mm
• You have a Label Home (left and top)
You print content that is exceeding the minimum page and you receive a cut command.
shall not feed to the end of the page and cut right after the last print.
The printer
In this example, only the minimum page length is honored and after the minimum length is exceeded the
printer can cut at any location after the last print statement.
60
Page 61

Implementation
To begin printing in variable continuous mode, we need to issue PrintNormal statements until the minimum
page length is exceeded and the cut command is received.
This means we have to establish a hybrid. Using page mode and continuous mode, you will set up a
requirement to cut at any location (other the end of the page), once the minimum page length is exceeded.
NOTES:
• This requirement is introduced due to a change in the original firmware behavior to the new minimum
page length requirement.
• Variable mode is the default mode for the KR403.
When using variable mode, you need to also set a minimum page length in order to accomplish the desired
effect. In this mode, the printer is feeding paper without length limitation (besides the minimum presenter
length).
Device Manager
61
Page 62
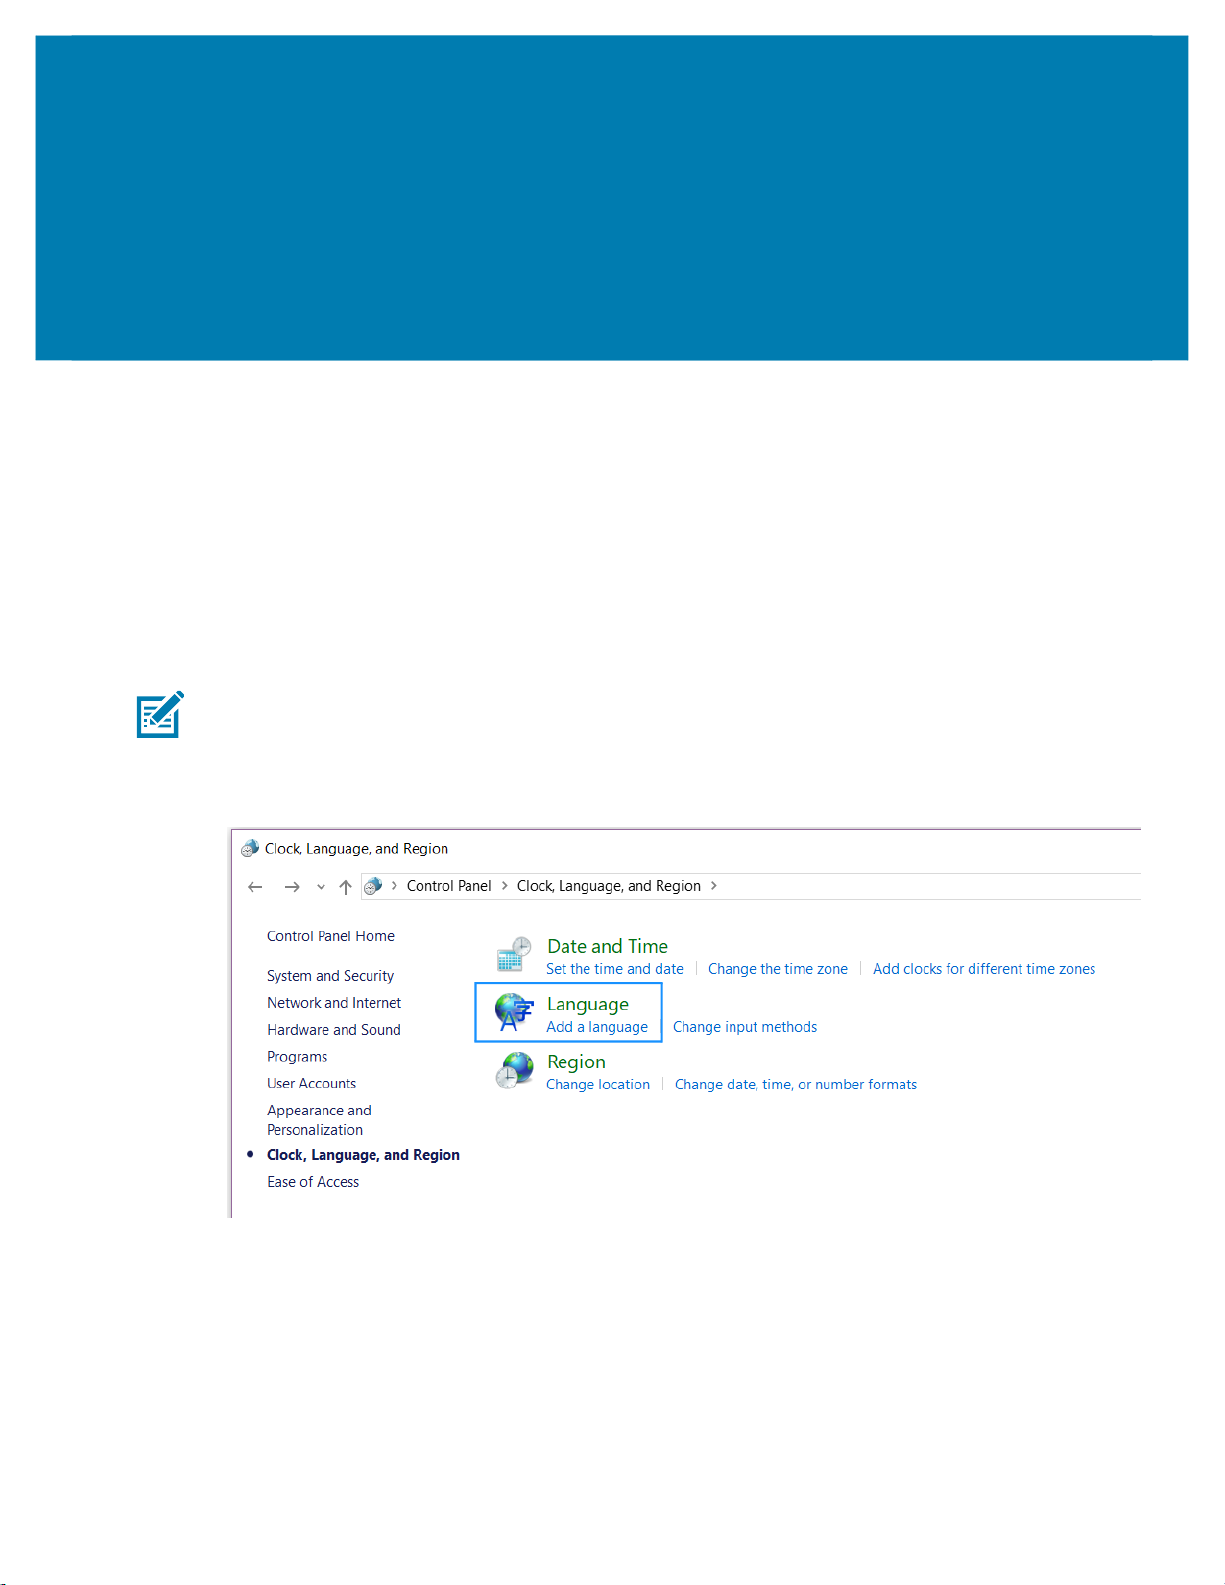
Test Application
This section provides steps and illustrations to prepare your keyboard to use additional languages and to
launch and perform various operations using the OPOS Test Application.
Preparing Windows and Printer for Unicode Printing
To print in other languages, it is necessary to load a new font into the printer and control the font within the
OPOS driver. See Adding a New Font in Device Manager on page 48 to add a new font. Before attempting
to print, be sure that the new font is already loaded in the printer in the E: directory.
NOTE: To add language support to the PC, it may require Administrative rights. If you do not have
Administrative rights, seek assistance from your IT organization.
1. Navigate to the Control Panel and click Clock, Language, and Region.
2. Select Add a language.
62
Page 63
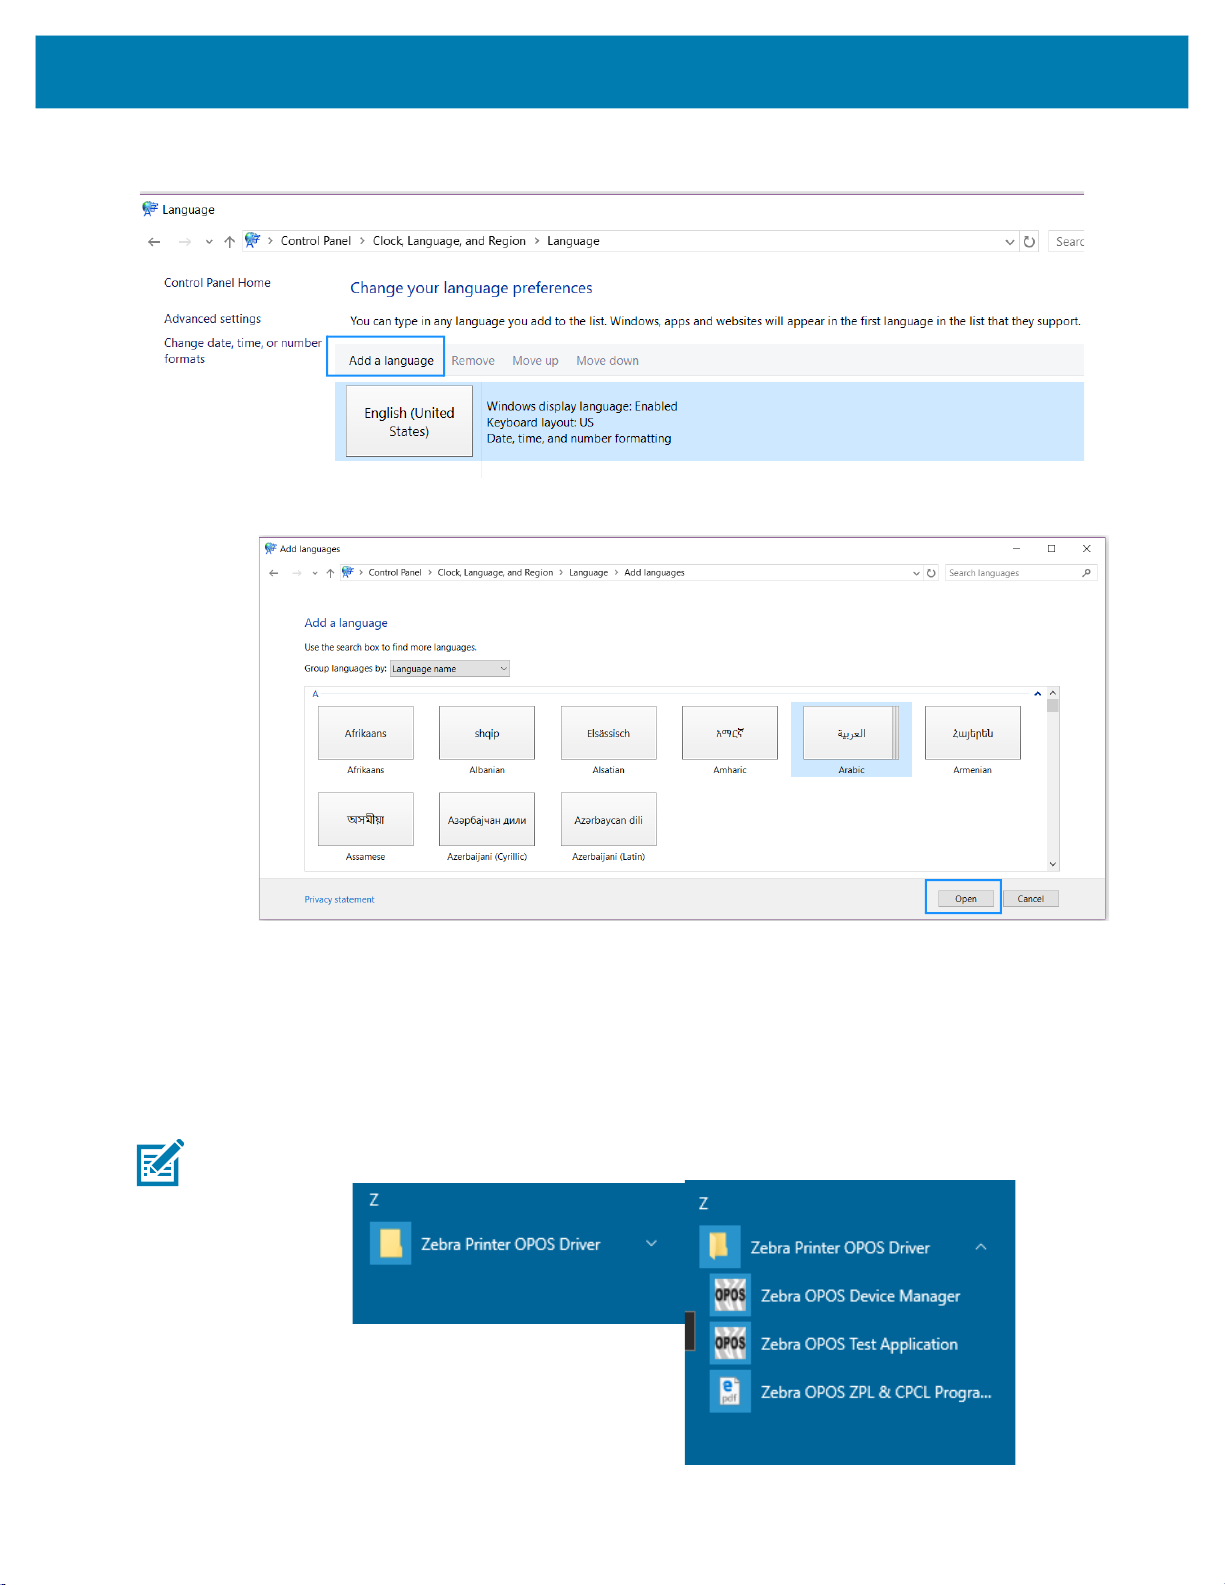
Test Application
3. Under Change your language preferences, click Add a Language.
4. Select the desired language from the menu and click Open.
Zebra OPOS Test Application
Once the printer has been added using the Device Manager, you can test the driver with the Zebra OPOS
Test Application utility.
1. From the Start menu, navigate to All Programs > Zebra Printer OPOS Driver > Zebra OPOS Test
Application.
NOTE: In Windows 10 and Windows 11, you may need to run this application with Administrator rights.
63
Page 64

Test Application
1. From the Printer Open section, choose a Printer Language from the Service Object Type drop-down
menu.
2. Choose CPCL or ZPL.
3. Select a printer in the Printer Logical Name drop-down menu.
The defined printers in the Device Manager should be available.
64
Page 65

Test Application
4. To gain exclusive access to the device, click Open, click Claim, and then check the Printer Enabled in
the Printer Open section.
You can now begin using the Test Application.
On the next pages, two methods to run a test print are described.
65
Page 66

Test One
1. Type some data into the Print Data field.
2. Click Print Normal in the Print Options area, and then click Mark Feed.
Test Application
The printer will print the contents from the Print Data field.
66
Page 67

Test Two
1. Type some data into the Data field in the Barcode Print area.
2. Then, select QRCode from the drop-down menu next to Symbology.
3. Click Print in the Barcode area and Mark Feed in the Print Options area.
Test Application
The printer will print the QR code and the data entered in the Data area.
67
Page 68

Test Application
Printing Unicode with the Test Application
Before printing with the test application, please make sure that the font has been loaded in the printer and
added in the Device Manager. (See Adding a New Font in Device Manager on page 48.)
1. Open the Zebra OPOS Test Application, select the Service Object Type (ZPL or CPCL) and then the
Printer Logical Name.
NOTE: In Windows 10 and Windows 11, you may need to run this application with Administrator rights.
1. Click Open, Claim, and check the Printer Enabled checkbox.
2. Select the new font by sending the correct OPOS one-shot command (example: ESC|3fT).
3. Type the one-shot command in the Print Data field and click Print Normal.
4. Change the Character Set value (Default is 113) by entering the correct Character Set value in the
Character Set Number box, and then click the Set CharacterSet button below.
The user will get a message showing that the Character Set was updated.
68
Page 69

ZPL Fonts and Bar Codes
This section provides information about different fonts (type faces) and bar codes that can be used with the
printer.
Standard Printer Fonts
Most Zebra printers come standard with 15 bitmapped fonts and one scalable font, see Figure 8. Additional
downloadable bitmapped and scalable fonts are also available. Character size and density (how dark it
appears) depend on the density of the printhead and the media used.
Figure 8 Examples of the Standard Printer Fonts
zero
Accessed with the ^GS
To use one of these fonts, you must either use the change alphanumeric default font command (
specify an alphanumeric field command (
^A).
70
^CF) or
Page 70

ZPL Fonts and Bar CodesFonts and Bar Codes
The standard Zebra character set is Code 850 for character values greater than 20 HEX. There are six
HEX character values below 20 HEX that are also recognized. Figure 9 shows how these character values
are printed.
NOTE: Unidentified characters should default to a space.
Figure 9 Recognized HEX Values below 20 HEX
Proportional and Fixed Spacing
Proportional spacing is different than fixed spacing. In Table 5, the intercharacter gap (ICG), the space
between characters, is constant for fonts A through H, which means that the spacing between all
characters is the same. For example, the spacing between the letters
letters
IE.
Figure 10 Example of Fixed Space Fonts Proportion
MW is the same as between the
71
Page 71

ZPL Fonts and Bar CodesFonts and Bar Codes
The baseline is the imaginary line on which the bottom (base) of all characters (except any descenders)
rest. The area between the baseline and the bottom of the matrix is used for any character “descenders.”
Baseline numbers define where the baseline is located in relationship to the top of the matrix. For example,
the baseline for font “E” is 23 dots down from the top of the matrix.
Table 5 Intercharacter Gap and Baseline Parameters
Font H x W (in dots) Type
A 9 x 5 U-L-D 1 7
B 11 x 7 U 2 11
C,D 18 x 10 U-L-D 2 14
E 28 x 15 OCR-B 5 23
F 26 x 13 U-L-D 3 21
G 60 x 40 U-L-D 8 48
H 21 x 13 OCR-A 6 21
GS 24 x 24 SYMBOL PROPORTIONAL 3 x HEIGHT/4
0 DEFAULT: 15 x 12 PROPORTIONAL 3 x HEIGHT/4
Scalable Versus Bitmapped Fonts
For scalable fonts, setting the height and width equally produces characters that appear the most
balanced. Balanced characters are pleasing to the eye because actual height and width are approximately
equal to each other. This is achieved through the use of a smooth-scaling algorithm in the printer.
For bitmapped fonts, this balancing is built into the font. In actuality, the height of a bitmap font is slightly
larger than the width. Bitmap fonts are always at the maximum size of the character’s cell.
Intercharacter Gap
(in dots)
Baseline
(in dots)
Scalable Fonts
All dot parameters used in the commands to create scalable fonts are translated into a point size because
scalable fonts are measured in point sizes, not dots. To determine how many dots to enter to obtain a
particular point size, use the following formula. The actual point size will be an approximate value.
• For printers using a 6 dot/mm printhead the “dots per inch of printer” value is 152.4
• For printers using a 8 dot/mm printhead the “dots per inch of printer” value is 203.2
• For printers using a 12 dot/mm printhead the “dots per inch of printer” value is 304.8
• For printers using a 24 dot/mm printhead the “dots per inch of printer” value is 609.6
The actual height and width of the character in dots will vary, depending on the font style and the particular
character. Therefore, some characters will be smaller and some will be larger than the actual dot size
requested. The baselines for all scalable fonts are calculated against the dot size of the cell. The baseline
is 3/4 down from the top of the cell. For example, if the size of the cell is 80 dots, the baseline will be 60
dots (3/4) down from the top of the cell.
Dots =
(Point size) x (Dots per inch of
72
72
Page 72

For more information concerning fonts and related commands, see ~DB and ~DS in the Programming
Guide (for ZPL II, ZBI 2, Set-Get-Do, Mirror, WML). You can download the latest copy of the manual
from http://www.zebra.com/manuals.
Bitmapped Fonts
Internal bitmapped fonts can be magnified from 1 to 10 times their normal (default) size. The magnification
factor is in whole numbers. Therefore, if the normal size of a bitmapped font is 9 dots high and 5 dots wide,
a magnification factor of 3 would produce a character of 27 dots high and 15 dots wide. Height and width
can be magnified independently.
Magnification Factor
The font commands contain parameters for entering the height and width of printed characters. The values
are always entered in dots. When entering these values for bitmapped fonts, use the following formula:
Base Height x Magnification Factor = Height Parameter Value
The same principle applies when calculating width.
Example:
ZPL Fonts and Bar CodesFonts and Bar Codes
Base height = 9 dots
Base width = 5 dots
To magnify a bitmapped character with the above specifics 3 times its size:
Height parameter = 27 [9 x 3]
Width parameter = 15 [5 x 3]
Changing Bitmapped Font Size
Alphanumeric field command (^A) parameters h and w control the magnification and, therefore, the
ultimate size of the font. The parameter is specified in dots, but ZPL II actually uses an integer multiplier
times the original height/width of the font. For example, if you specify
^AD,54
you get characters three times their normal size (54 dots high), but if you specify
^AD,52
you receive the same result, not characters 52 dots high.
Defining only the height or width of a bitmapped font forces the magnification to be proportional to the
parameter defined. If neither is defined, the
twice the standard height, the width will be twice the standard width.
^CF height and width are used. For example, if the height is
73
Page 73

ZPL Fonts and Bar CodesFonts and Bar Codes
^XA^LL1800
^FO50,50^CFD,26,10^FDZEBRA....^FS
^FO50,100^FD"Bar Code, Bar None"^FS
^FO50,200^AA^FDZEBRA....^FS
^FO50,250^FD"Bar Code, Bar None"^FS
^XZ
ZPL II CODE
GENERATED LABEL
Example
If a
^CF command, with height and width parameters defined, is used to set the first font, any ^A commands
(to select a different font) that follow must have the height and width parameter filled in.
If this is not done, the newly selected font will be magnified using values for the
parameters. This is an example of what happens:
Font Matrices
Type Key U = Uppercase, L = Lowercase, D = Descenders
Table 6 6 dot/mm Printhead
Font
A 9 x 5 U-L-D 0.059 x 0.039 25.4 1.50 x 0.99 1.01
B 11 x 7 U 0.072 x 0.059 16.9 1.82 x 1.50 0.066
C, D 18 x 10 U-L-D 0.118 x 0.079 12.7 2.99 x 2.00 0.05
E 21 x 10 OCR-B 0.138 x 0.085 11.7 3.50 x 2.16 0.46
F 26 x 13 U-L-D 0.170 x 0.105 9.53 4.32 x 2.67 0.37
G 60 x 40 U-L-D 0.394 x 0.315 3.18 10.0 x 8.00 0.125
H 17 x 11 OCR-A 0.111 x 0.098 10.2 2.81 x 2.48 0.40
GS 24 x 24 SYMBOL 0.157 x 0.157 6.35 3.98 x 3.98 0.251
0 Default: 15 x 12
^CF height and width
Matrix
Character Size
Type
HxW (in dots) HxW (in in.) Char./in. HxW (in mm) Char. /mm
Table 7 8 dot/mm (203 dpi) Printhead
Font
HxW (in dots) HxW (in in.) Char./in. HxW (in mm) Char. /mm
A 9 X 5 U-L-D 0.044 x 0.030 33.3 1.12 x 0.76 1.31
B 11 X 7 U 0.054 x 0.044 22.7 1.37 x 1.12 0.89
C, D 18 X 10 U-L-D 0.089 x 0.059 16.9 2.26 x 1.12 0.66
E 28 x 15 OCR-B 0.138 x 0.098 10.2 3.50 x 2.49 0.40
F 26 x 13 U-L-D 0.128 x 0.079 12.7 3.25 x 2.00 0.50
Matrix
Type
Character Size
74
Page 74
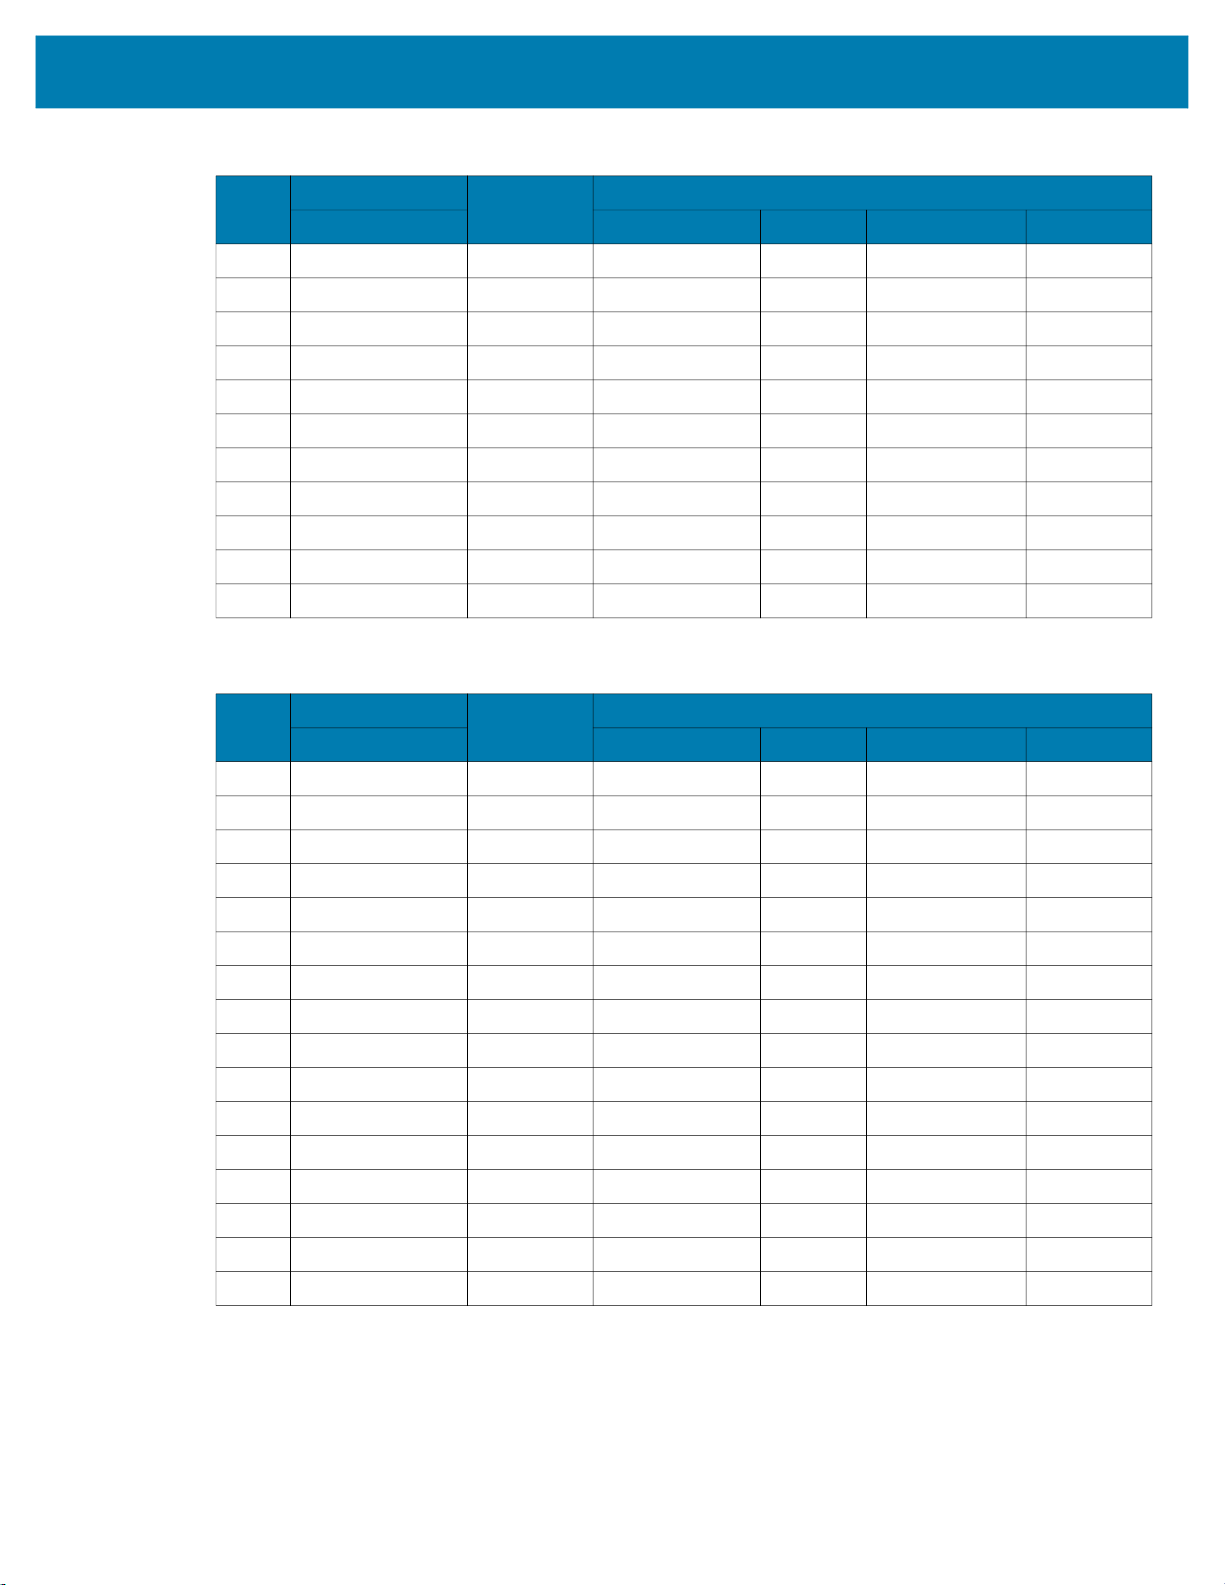
ZPL Fonts and Bar CodesFonts and Bar Codes
Table 7 8 dot/mm (203 dpi) Printhead
Font
G 60 x 40 U-L-D 0.295 x 0.197 4.2 7.49 x 5.00 0.167
H 21 x 13 OCR-A 0.103 x 0.093 10.8 2.61 x 2.36 0.423
GS 24 x 24 SYMBOL 0.118 x 0.118 8.5 2.99 x 2.99 0.334
P 20 x 18 U-L-D 0.098 x 0.089 N/A 2.50 x 2.25 N/A
Q 28 x 24 U-L-D 0.138 x 0.118 N/A 3.50 x 3.00 N/A
R 35 x 31 U-L-D 0.172 x 0.153 N/A 4.38 x 3.88 N/A
S 40 x 35 U-L-D 0.197 x 0.172 N/A 5.00 x 4.38 N/A
T 48 x 42 U-L-D 0.236 x 0.207 N/A 6.00 x 5.25 N/A
U 59 x 53 U-L-D 0.290 x 0.261 N/A 7.38 x 6.63 N/A
V 80 x 71 U-L-D 0.394 x 0.349 N/A 10.00 x 8.88 N/A
0 Default: 15 x 12 U-L-D Scalable Scalable
Table 8 12 dot/mm (300 dpi) Printhead
Font
A 9 X 5 U-L-D 0.030 x 0.020 50.8 0.75 x 0.50 2.02
B 11 X 7 U 0.036 x 0.030 33.8 0.91 x 0.75 1.32
C, D 18 X 10 U-L-D 0.059 x 0.040 25.4 1.50 x 1.00 1.00
E 42 x 20 OCR-B 0.138 x 0.085 23.4 1.75 x 1.08 0.92
F 26 x 13 U-L-D 0.085 x 0.053 19.06 2.16 x 1.34 0.74
G 60 x 40 U-L-D 0.197 x 0.158 6.36 5.00 x 4.00 0.25
H 34 x 22 OCR-A 0.111 x 0.098 10.20 2.81 x 2.48 0.40
GS 24 x 24 SYMBOL 0.079 x 0.079 12.70 1.99 x 1.99 0.52
P 20 x 18 U-L-D 0.067 x 0.060 N/A 1.69 x 1.52 N/A
Q 28 x 24 U-L-D 0.093 x 0.080 N/A 2.37 x 2.03 N/A
R 35 x 31 U-L-D 0.117 x 0.103 N/A 2.96 x 2.62 N/A
S 40 x 35 U-L-D 0.133 x 0.177 N/A 3.39 x 2.96 N/A
T 48 x 42 U-L-D 0.160 x 0.140 N/A 4.06 x 3.56 N/A
U 59 x 53 U-L-D 0.197 x 0.177 N/A 5.00 x 4.49 N/A
V 80 x 71 U-L-D 0.267 x 0.237 N/A 6.77 x 6.01 N/A
0 Default: 15 x 12 U-L-D Scalable Scalable
Matrix
Type
HxW (in dots) HxW (in in.) Char./in. HxW (in mm) Char. /mm
Matrix
Type
HxW (in dots) HxW (in in.) Char./in. HxW (in mm) Char. /mm
Character Size
Character Size
75
Page 75

ZPL Fonts and Bar CodesFonts and Bar Codes
aa
Table 9 24 dot/mm (600 dpi) Printhead
Font
Matrix
Type
Character Size
HxW (in dots) HxW (in in.) Char./in. HxW (in mm) Char. /mm
A 9 X 5 U-L-D 0.015 x 0.010 100.00 0.38 x 0.25 4.00
B 11 X 7 U 0.018 x 0.015 66.66 0.46 x 0.38 2.60
C, D 18 X 10 U-L-D 0.030 x 0.020 50.00 0.77 x 0.51 2.0
E 42 x 20 OCR-B 0.137 x 0.087 11.54 3.47 x 2.20 0.45
F 26 x 13 U-L-D 0.043 x 0.027 37.5 1.10 x 0.68 1.50
G 60 x 40 U-L-D 0.100 x 0.080 12.50 2.54 x 2.04 0.50
H 34 x 22 OCR-A 0.100 x 0.093 10.71 2.54 x 2.37 0.42
GS 24 x 24 SYMBOL 0.040 x 0.040 25.00 1.02 x 1.02 1.00
P 20 x 18 U-L-D 0.067 x 0.060 N/A 1.69 x 1.52 N/A
Q 28 x 24 U-L-D 0.093 x 0.080 N/A 2.37 x 2.03 N/A
R 35 x 31 U-L-D 0.117 x 0.103 N/A 2.96 x 2.62 N/A
S 40 x 35 U-L-D 0.133 x 0.117 N/A 3.39 x 2.96 N/A
T 48 x 42 U-L-D 0.160 x 0.140 N/A 4.06 x 3.56 N/A
U 59 x 53 U-L-D 0.197 x 0.177 N/A 5.00 x 4.49 N/A
V 80 x 71 U-L-D 0.267 x 0.237 N/A 6.77 x 6.01 N/A
0 Default: 15 x 12 U-L-D Scalable Scalable
76
Page 76

Bar Codes
ZPL Fonts and Bar CodesFonts and Bar Codes
Every bar code contains data made up of a sequence of light spaces and dark bars that represent letters,
numbers, or other graphic characters. The usable characters differ among the various kinds of bar codes.
Each bar code section in the ZPL commands provides a table of applicable characters. Start and stop
characters and check digits are used by many, but not all, bar codes. These will be indicated in the specific
bar code explanations.
Zebra printers can print the following kinds of bar codes:
Bar code modulus “X” dimensions
• Picket fence (non-rotated) orientation:
•
203 dpi = 0.0049 in. mil to 0.049 in.
• 300 dpi = 0.0033 in. mil to 0.033 in.
• Ladder (rotated) orientation:
203 dpi = 0.0049 in. mil to 0.049 in.
•
• 300 dpi = 0.0039 in. mil to 0.039 in.
Two-dimensional bar codes
• Aztec
• Code 49
• Maxi Code
• TLC39
• PDF-417
• QR Code
• Codablock
• DataMatrix
• Micro-PDF417
Bar code ratios
• 2:1
• 7:3
• 5:2
• 3:1
Linear bar codes
• Codabar
• Code 11
• Code 39
• Code 93
• Code 128 with subsets A/B C and
UCC Case Codes
• ISBT-128
• UPC-A
• UPC-E
• EAN-8
• EAN-13
• UPC and EAN 2 or 5 digit extensions
• Planet Code
• Plessey
• Postnet
• Standard 2 of 5
• Industrial 2 of 5
• Interleaved 2 of 5
• LOGMARS
• MSI
• GS1 DataBar Omnidirectional
77
Page 77
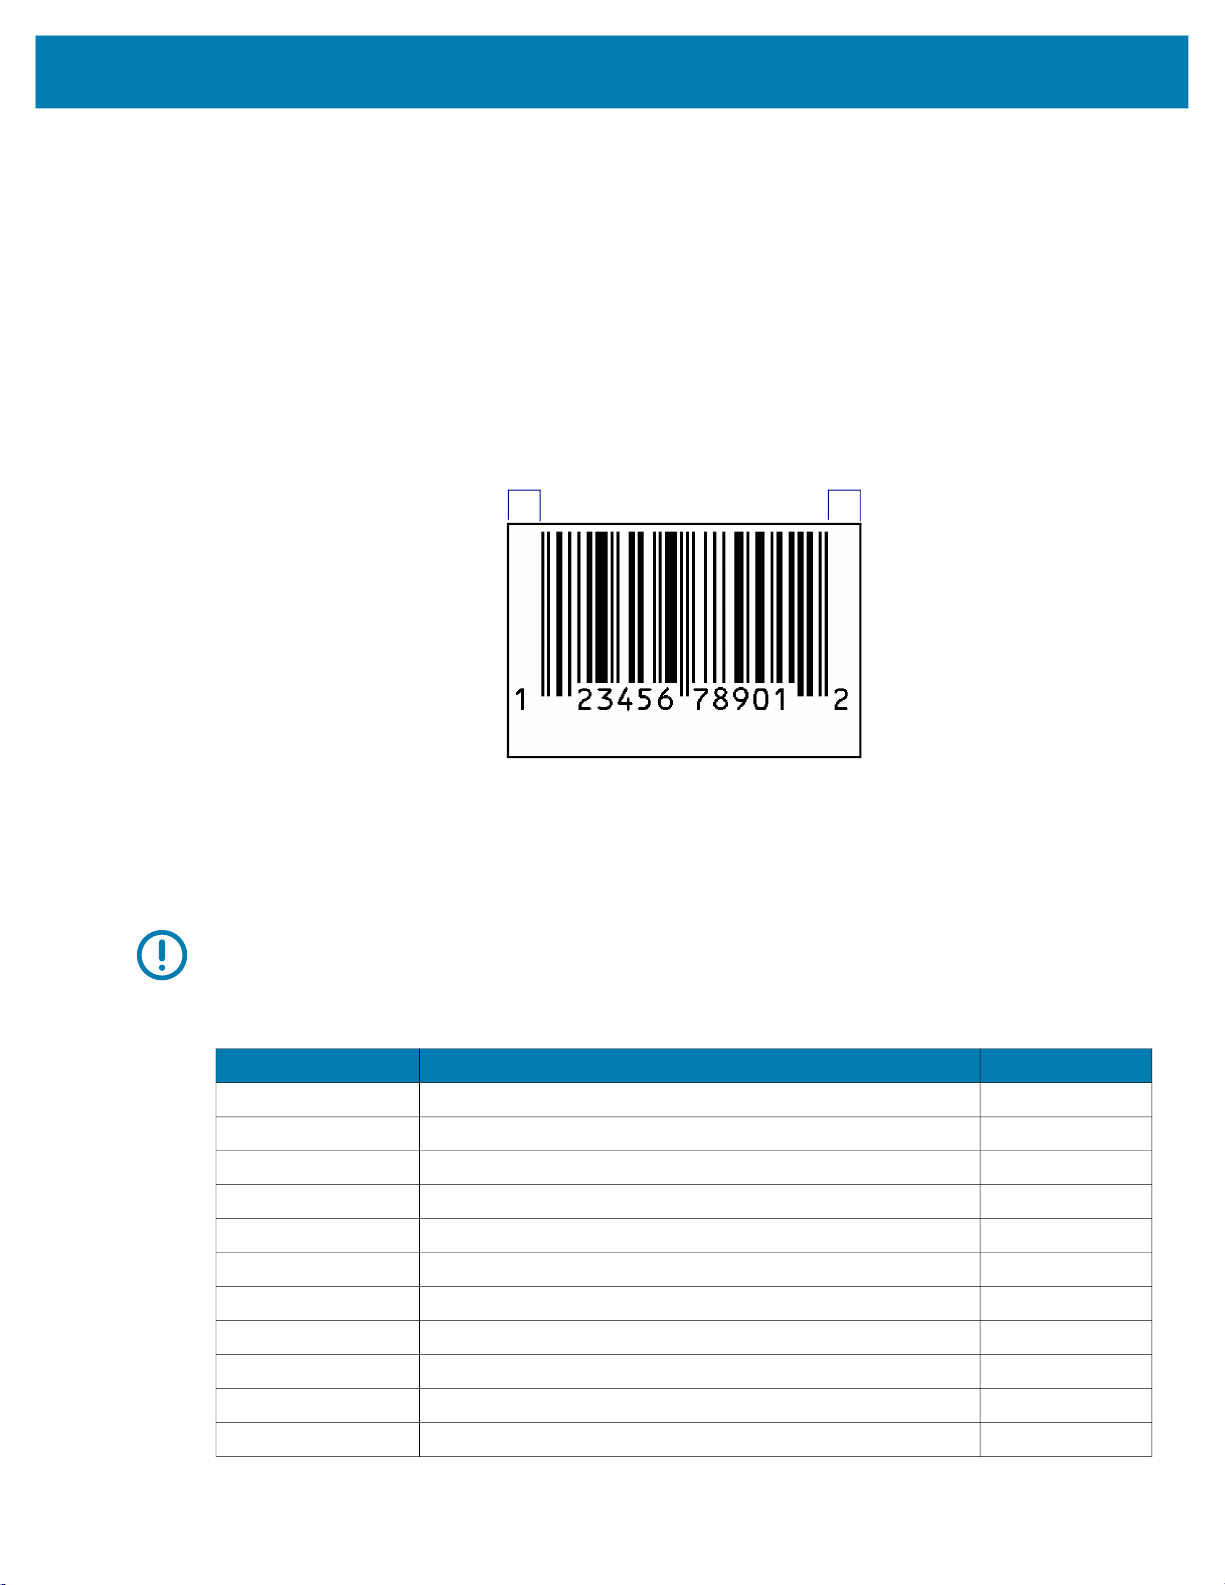
ZPL Fonts and Bar CodesFonts and Bar Codes
Basic Format for Bar Codes
The basic format for bar codes is quiet zone, start character, data, check digit, stop character, and quiet
zone. Not all bar codes require each of these elements.
Every bar code requires a quiet zone. A quiet zone (sometimes called a “clear area”) is an area adjacent to
the machine-readable symbols that ensure proper reading (decoding) of the symbols. No printing is
permissible within this area. Preprinted characters, borders, and background color are acceptable if they
are invisible to the reading device; these are used in some applications but restrict the type of reading
device that can be used. The size of the quiet zone depends on the size of bar widths (usually 10 times the
width of the narrow bar).
Figure 11 Quiet Zone in a Bar Code
Quiet Zone Quiet Zone
Bar Code Field Instructions
To create a bar code, a bar code field command must be contained in the label format. Table 10 shows the
bar code field commands. The number in brackets denotes the print ratio. Each command produces a
unique bar code.
IMPORTANT: (*) for Fixed Printing Ratio means that the ratio between the width of the bars in the code is
a fixed standard and cannot be changed.
Table 10 Bar Code Field Commands
ZPL Command Command Description Ratio
^B0
^B1
^B2
^B3
^B4
^B5
^B7
^B8
^B9
^BA
^BB
Aztec Bar Code Parameters [Fixed]
Code 11 (USD-8) [2.0 - 3.0]
Interleaved 2 of 5 [2.0 - 3.0]
Code 39 (USD-3 and 3 of 9) [2.0 - 3.0]
Code 49 (*) [Fixed]
Planet Code Bar Code [Fixed]
PDF417 (*) [Fixed]
EAN-8 (*) [Fixed]
UPC-E [Fixed]
Code 93 (USS-93)(*) [Fixed]
CODABLOCK A, E, F (*) [Fixed]
78
Page 78
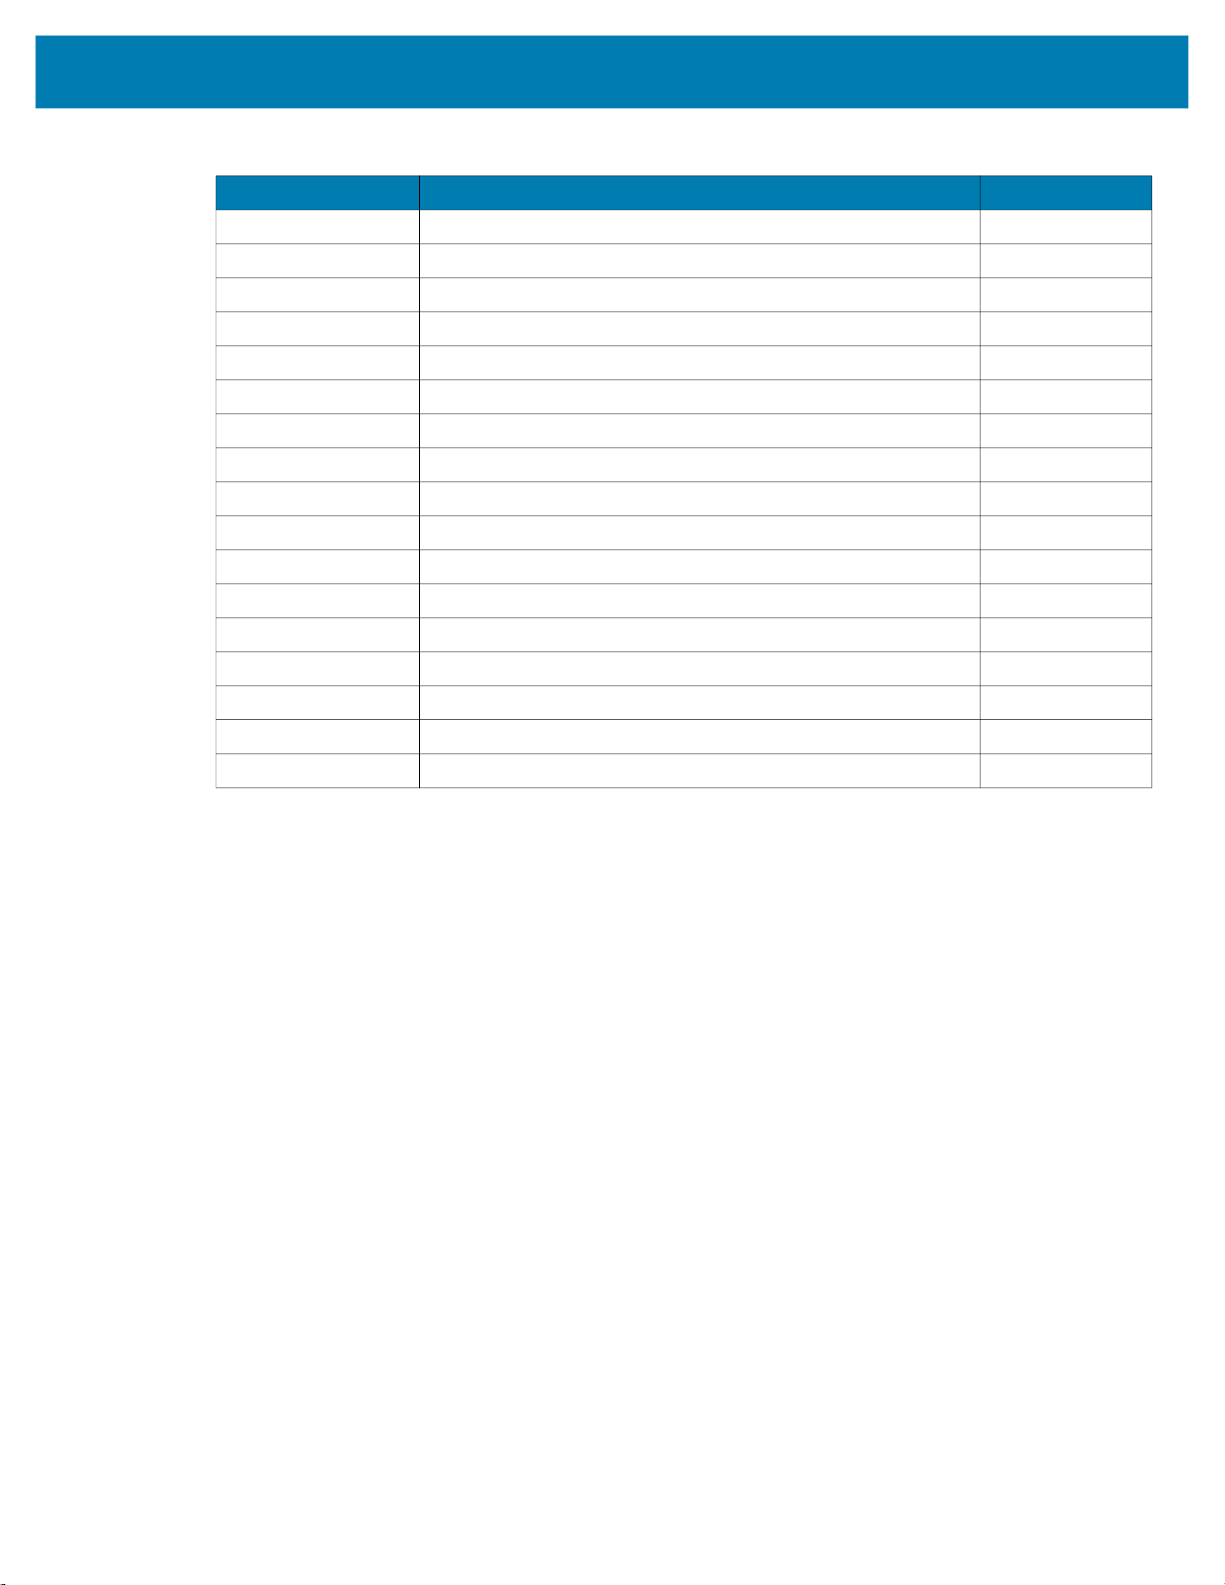
ZPL Fonts and Bar CodesFonts and Bar Codes
Table 10 Bar Code Field Commands (Continued)
ZPL Command Command Description Ratio
^BC
^BD
^BE
^BF
^BI
^BJ
^BK
^BL
^BM
^BO
^BP
^BQ
^BR
^BS
^BU
^BX
^BZ
Code 128 (USD-6) (*) [Fixed]
UPS MaxiCode (*) [Fixed]
EAN-13 [Fixed]
Micro-PDF417 [Fixed]
Industrial 2 of 5 [2.0 - 3.0]
Standard 2 of 5 [2.0 - 3.0]
ANSI Codabar (USD-4 and 2 of 7) [2.0 - 3.0]
LOGMARS [2.0 - 3.0]
MSI [2.0 - 3.0]
Aztec Bar Code Parameters [Fixed]
Plessey [2.0 - 3.0]
QR Code (*) [Fixed]
GS1 DataBar (formerly RSS) [Fixed]
UPC/EAN Extensions (*) [Fixed]
UPC-A (*) [Fixed]
Data Matrix (*) [Fixed]
PostNet (*), USPS Intelligent Mail, and Planet bar codes [Fixed]
Additionally, each bar code field command can be issued with a definition parameter string. The parameter
string defines field rotation, height, and interpretation line status for all bar codes. For some bar codes, the
parameter string also sets a check digit, start character, and/or stop character. Use the definition
parameter string to command the printer to print bar codes of appropriate heights and densities that
conform to the specifications of the application.
The use of the parameter string is optional because all parameters have default values. If the default
values for all of the bar code parameters suit the application, then only the bar code command needs to be
entered.
Parameters in bar code field commands are “position specific.” If a value (other than the default value) is
manually entered for one parameter the ZPL II delimiter character (a comma) must be used to mark the
position of the preceding parameters in the string.
To change just the third parameter, enter two commas and then the value for the third parameter. The
default values will be automatically used for the first and second parameters.
79
Page 79
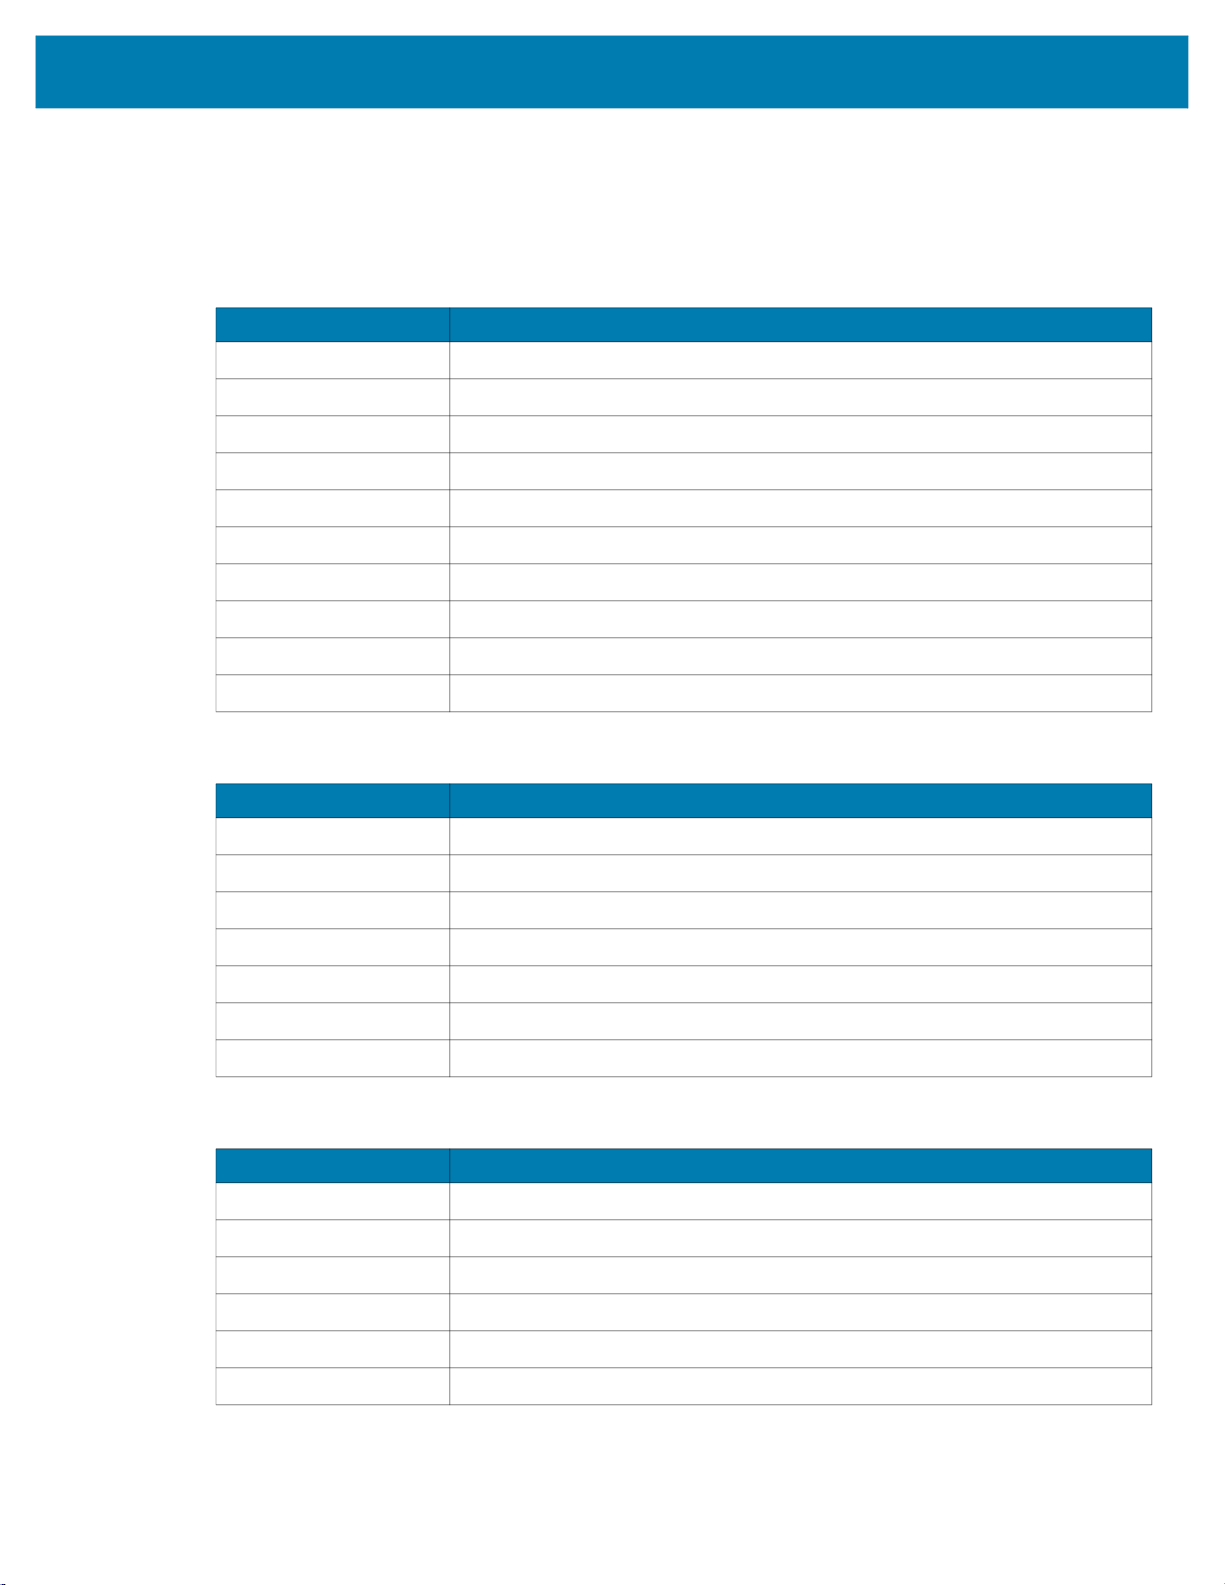
ZPL Fonts and Bar CodesFonts and Bar Codes
Bar Code Command Groups
Bar code commands are organized into four groups. Each group represents a type of bar code. Table 11
through Table 14 identify the groups and the bar codes they contain:
Table 11 Numeric Only Bar Codes
ZPL Command Command Description
^B0
Aztec Bar Code Parameters
^B1
^B5
^BI
^BJ
^BK
^BM
^BO
^BP
^BZ
Code 11
Planet Code Bar Code
Industrial 2 of 5
Standard 2 of 5
ANSI Codabar (or NW-7)
MSI
Aztec Bar Code Parameters
Plessey
PostNet (*), USPS Intelligent Mail, and Planet bar codes
Table 12 Retail Labeling Bar Codes
ZPL Command Command Description
^B0
^B8
^B9
^BE
Aztec Bar Code Parameters
EAN-8
UPC-E
EAN-13
^BO
^BS
^BU
Aztec Bar Code Parameters
UPC/EAN extensions
UPC-A
Table 13 Alphanumeric Bar Codes
ZPL Command Command Description
^B0
^B3
^BA
^BC
^BL
^BO
Aztec Bar Code Parameters
Code 39
Code 93
Code 128
LOGMARS
Aztec Bar Code Parameters
80
Page 80

ZPL Fonts and Bar CodesFonts and Bar Codes
Table 14 Two-Dimensional Bar Codes
ZPL Command Command Description
^B0
Aztec Bar Code Parameters
^B4
^B7
^BB
^BD
^BF
^BQ
^BO
^BR
^BT
^BX
Code 49
PDF417
CODABLOCK
UPS MaxiCode
MicroPDF417
QR Code
Aztec Bar Code Parameters
GS1 DataBar (formerly RSS)
TLC39
Data Matrix
81
Page 81

www.zebra.com
 Loading...