

RS6000
Ring Scanner
Quick Start Guide

2 Quick Start Guide
© 2016 Symbol Technologies LLC, a subsidiary of Zebra Technologies Corporation. All rights reserved.
Zebra reserves the right to make changes to any product to improve reliability, function, or design.
Zebra does not assume any product liability arising out of, or in connection with, the application or use of any product,
circuit, or application described herein.
No license is granted, either expressly or by implication, estoppel, or otherwise under any patent right or patent, covering or
relating to any combination, system, apparatus, machine, material, method, or process in which Zebra products might be
used. An implied license exists only for equipment, circuits, and subsystems contained in Zebra products.
Warranty
For the complete Zebra hardware product warranty statement, go to: http://www.zebra.com/warranty.
Service Information
If you have a problem using the equipment, contact your facility’s Technical or Systems Support. If there is a problem with
the equipment, they will contact the Zebra Global Customer Support Center at:
http://www.zebra.com/support
.
For the latest version of this guide go to: http://www.zebra.com/support
.

Features
Imager Window
Battery
Battery Release Latch
Finger Strap
Scan Trigger
Strap Buckle
Beeper
Asset Control Label Status LED
System LED
Comfort Pad
Two (2) Pieces
Trigger Swivel Assembly
Restore Key Battery Hook
Triggerless Strap Holder
Beeper
System LED
Comfort Pad
Two (2) Pieces
Imager Window
RS6000 Ring Scanner 3
Figure 1-1 RS6000 Triggered Configuration Features
Figure 1-2 RS6000 Triggerless Configuration Features

4 Quick Start Guide
Locking Slot
Battery
Battery Release Latch
2
3
1
Installing the Battery
1. Align the battery on top of the RS6000 and insert metal corner into the battery compartment.
2. Slide the battery all the way into the locking slot of the RS6000.
3. Firmly press the battery into the RS6000 until a click is heard ensuring the battery release latch is fully engaged with
the RS6000.
Figure 1-3 Install the Battery
Bluetooth Connection
NOTE The connection methods below apply only to Zebra Mobile Computers. For more information, refer to the RS6000 User
Guide, p/n MN-002704-xx.
NFC Tap-to-Pair
The RS6000 is NFC enabled and supports Bluetooth Tap-to-Pair.
To connect with a WT6000:
1. Check that NFC is enabled on the WT6000.
2. Align the NFC icon of the RS6000 with the NFC icon on the WT6000.
The Status LED blinks blue indicating that the RS6000 is attempting to establish connection with the WT6000. When
connection is established, the Status LED turns off and the RS6000 emits a single string of low/high beeps.
RS6000 Ring Scanner 5
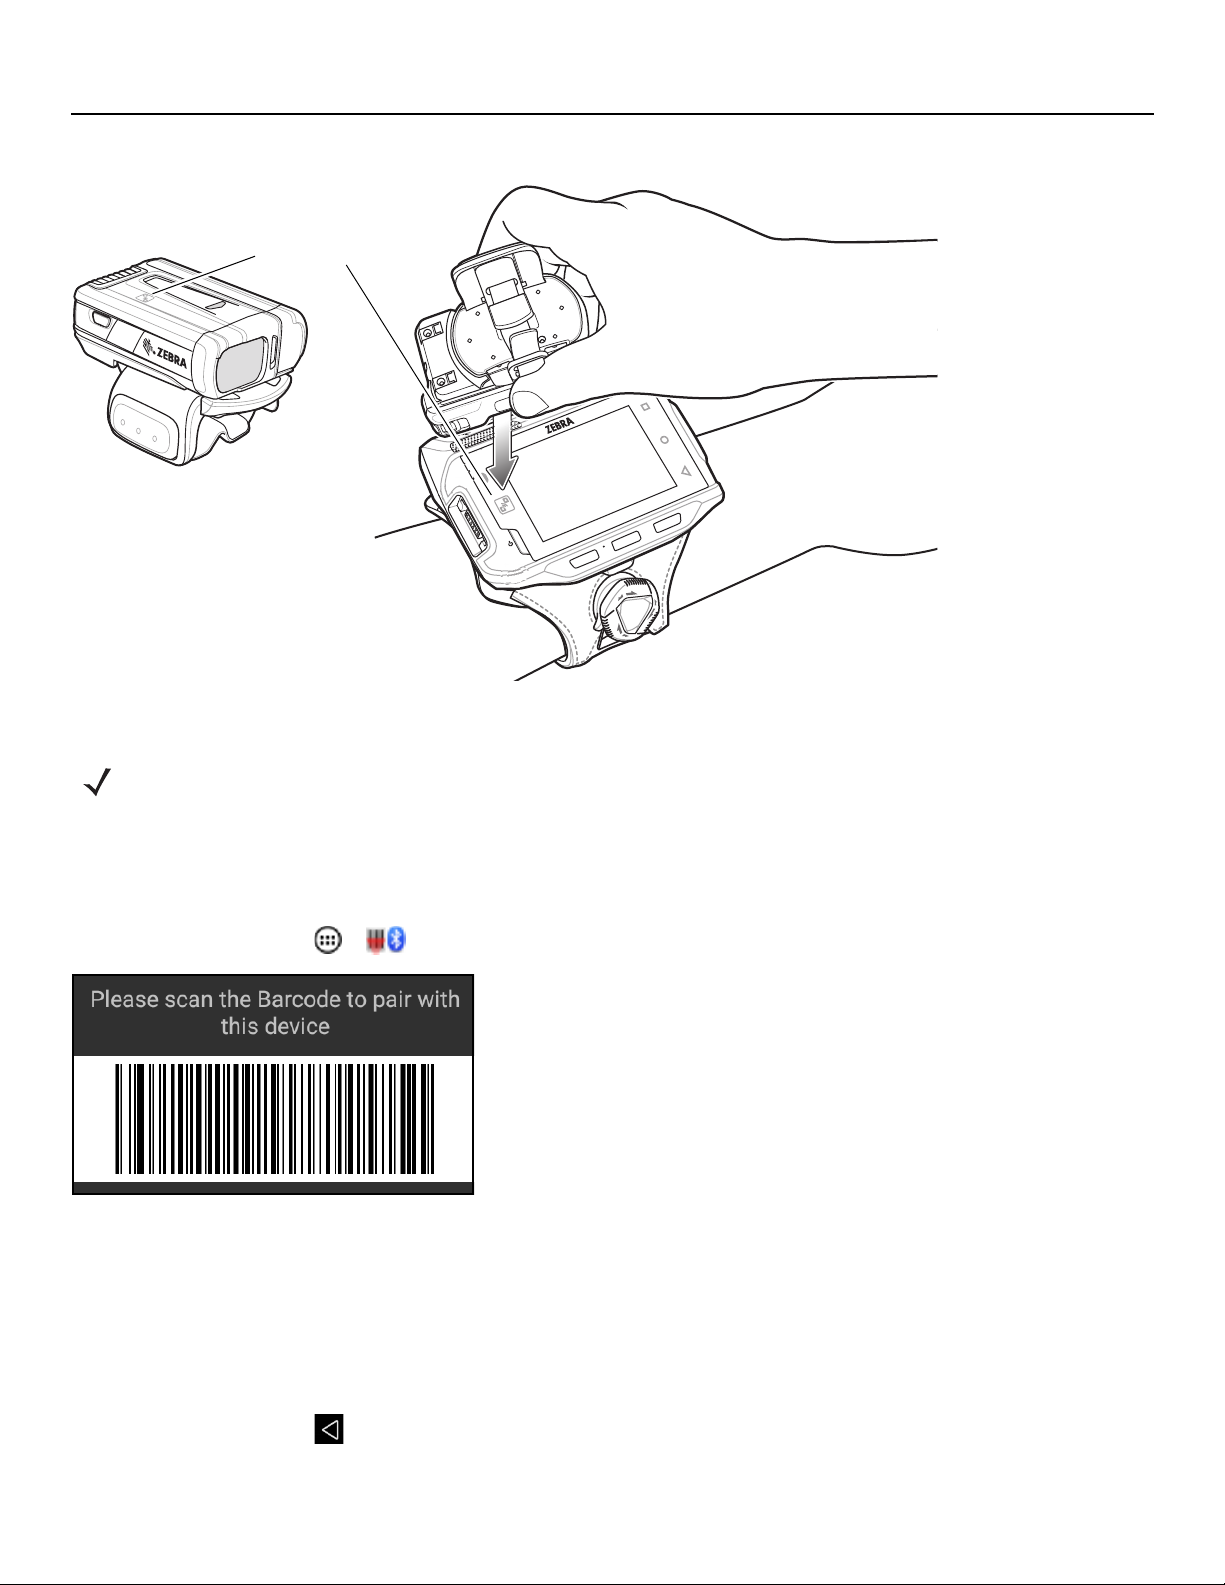
NFC Logo
Figure 1-4 Touch NFC Antennas
NOTE Not all Zebra device support NFC readers and the Tap-to-Pair feature.
Scan2Pair
To pair the RS6000 with the WT6000 using SSI:
1. On the WT6000, touch > . The Bluetooth Pairing Utility opens.
Figure 1-5 Bluetooth Pairing Utility
2. Using the RS6000, scan the bar code on the screen.
The Status LED blinks blue indicating that the RS6000 is attempting to establish connection with the WT6000. When
connection is established, the Status LED turns off and the RS6000 emits a single string of low/high beeps.
The WT6000 indicates a successful pairing attempt with a toast notification (audio and visual). When the Bluetooth
connection is established, pop-up notifications appear on the WT6000 screen.
3. On the WT6000, touch to return to the main screen.
 Loading...