

Zanussi ZOB892 USER MANUAL

Einbau-Backofen
Built-in oven
ZOB 892
Bedienungs- und Einbauanweisungen
Instruction booklet

English
Warnings - Built-in ovens
It is most important that the instruction book should be retained with the appliance for future
reference. Should the appliance be sold or transferred to another owner, or should you move
house and leave the appliance, always ensure that the book is supplied with the appliance in
order that the new owner can be acquainted with the functioning of the appliance and the
relevant warnings. These warnings are provided in the interest of safety. You must read
them carefully before installing or using the appliance.
Installation
z Any installation work must be undertaken
by a qualified electrician or competent
person.
z Installation and initial adjustment of your
oven MUST be carried out by qualified
personnel in compliance with current
regulations. Specific installation
instructions for the installer are given in this
booklet.
During use
z This appliance has been designed for
cooking edible foodstuffs only, and must
not be used for any other purposes.
z Always stand back from the oven when
opening the oven door during cooking or
at the end of it to allow any build up of
steam or heat to release.
z It is dangerous to alter the specifications
or modify the product in any way.
z Appliances become very hot with use, and
retain their heat for a long period after use.
Care should be taken to avoid touching
heating elements inside the oven.
z Always ensure that the control knobs are
in the “off” position when not in use.
z For hygiene and safety reasons, this
appliance should be kept clean at all times.
A build-up of fats or foodstuffs could result
in a fire.
z Never line any part of the oven with
aluminium foil.
z Easy clean-liners (if provided) should never
be cleaned with any other than soapy water.
z Never use steam or steam machines to
clean the appliance.
z Before any maintenance or cleaning work
is carried out on the appliance, always turn
off the isolator switch at the cooker point,
and allow to cool.
z Ensure that the shelves are put in place in
the correct way.
z This oven (even if it is linked to an electrical
cooking table) is made to function at 230 V
monophase with neutral.
Child safety
z This appliance is designed to be operated
by adults. Children should not be allowed
to tamper with the controls or play with the
product.
z Children should be supervised at all times
and should not be allowed to touch the hot
surfaces or be in the vicinity when in use
or until the appliance has cooled after use.
z During oven cooking and grilling, the
appliance door and the surrounding parts
are warmed up to a very high temperature.
Be careful and keep children away from
the appliance while you are using it. When
you connect other appliances to a plug near
the oven, check carefully that the wire does
not touch warm parts of the oven and does
not get taken in the oven door.
MANUFACTURER:
ELECTROLUX HOME PRODUCTS ITALY S.p.A.
Viale Bologna, 298
47100 FORLÌ (Italy)
21
Technical assistance
z This appliance should be serviced by an
authorized Network Service Centre, and
only genuine spare parts should be used.
z Under no circumstances should you
attempt to repair the appliance yourself.
Repairs carried out by inexperienced
persons may cause injury or serious
malfunctioning. Refer to your local Service
Centre. Always insist on genuine spare
parts.
Guide to Use the
instructions
Safety Instructions
Step by step instructions for an
)
operation
Hints and Tips
When the oven is first installed
The oven will work only if the time
of day has been set (please read
the relevant instructions).
Once the oven has been installed:
)
a) set the thermostat knob to “MAX”;
b) switch the oven function control knob to
conventional cooking ( );
c) allow the oven to run empty for
approximately 45 minutes;
d) open a window for ventilation.
During this time, an unpleasant odour may
be emitted. This is absolutely normal, and
is caused by residues of manufacturing.
Repeat this operation for the grill and fan
cooking function.
Once this operation is carried out, let the
oven cool down, then clean the oven cavity
with a soft cloth soaked in warm soapy
water.
22
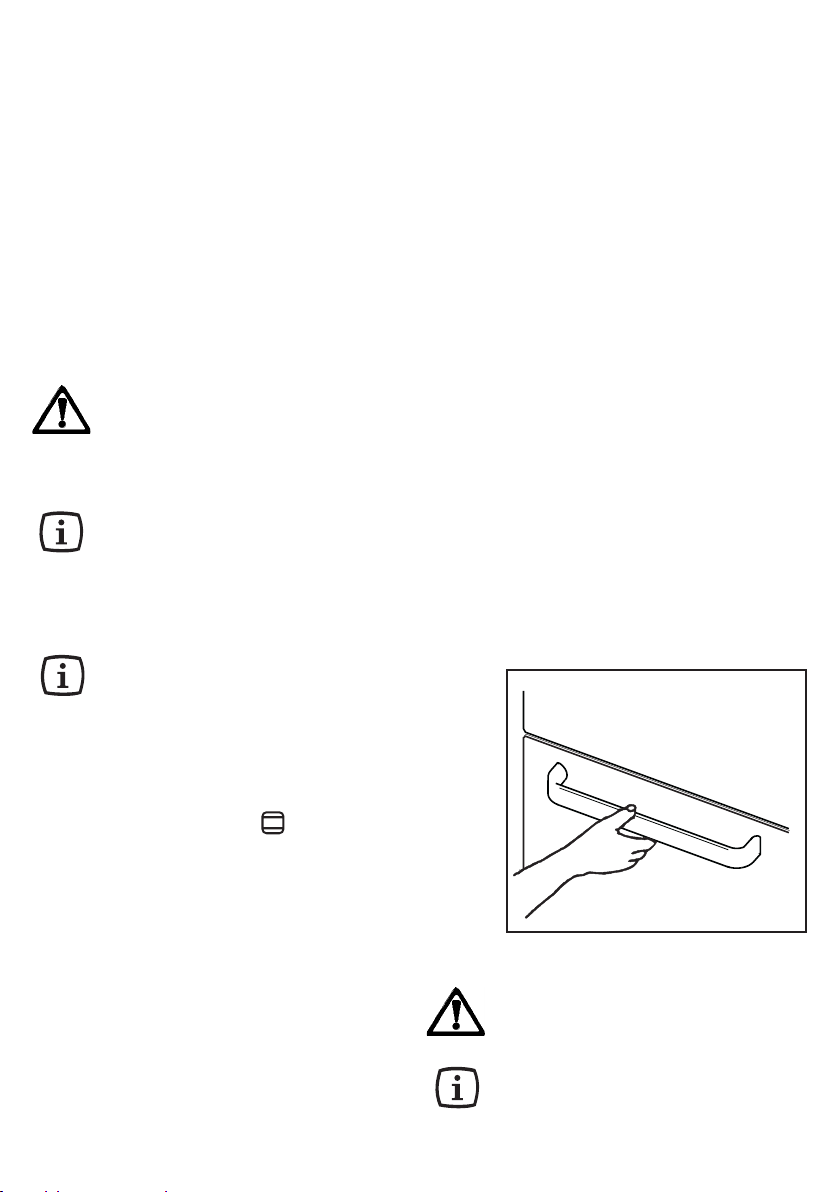
Fig. 1
To open the oven door, always
catch the handle in its central
part.
Before cooking for the first time,
carefully wash the oven accessories.
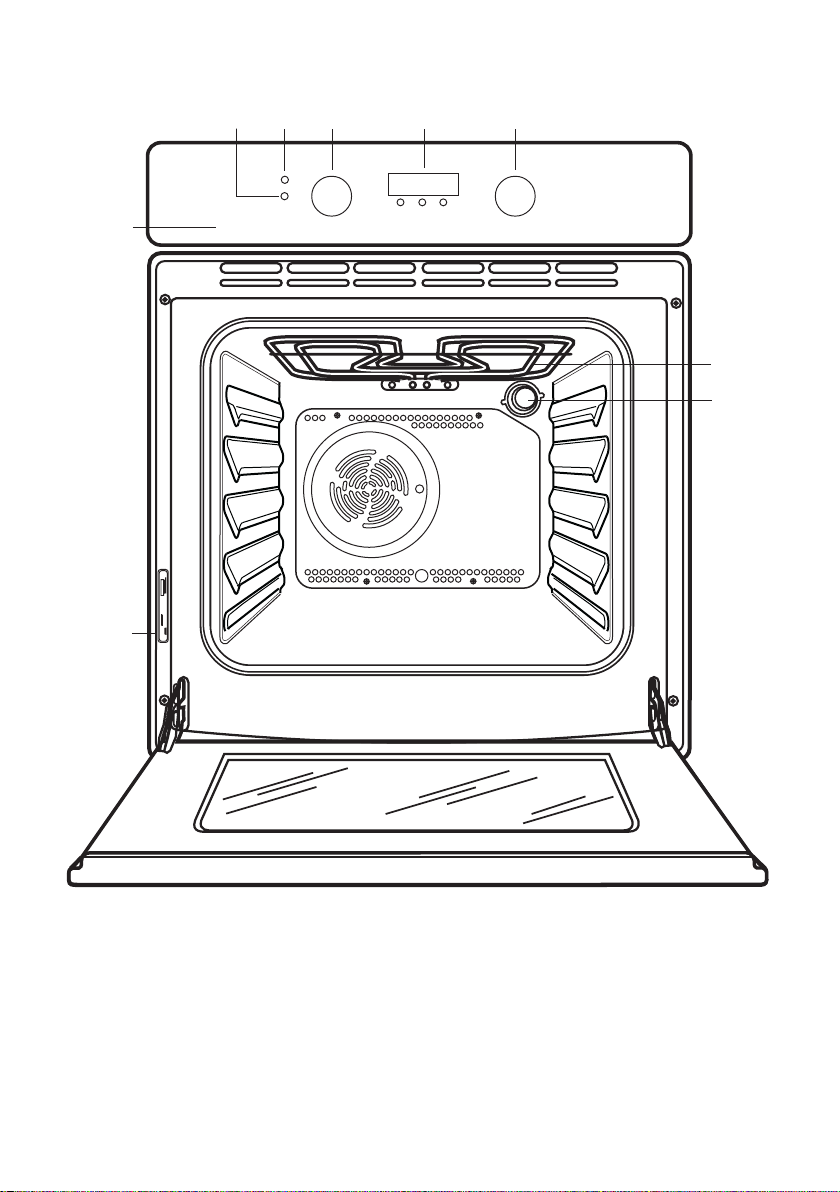
Description of the appliance
423
5
6
1
7
8
9
1. Control panel
2. Oven Function control knob
3. Oven Thermostat control knob
4. Overall control light
5. Oven thermostat control light
6. Electronic programmer
7. Grill
8. Oven lamp
9. Rating plate
23
Electric oven
50
MAX
100
150
200
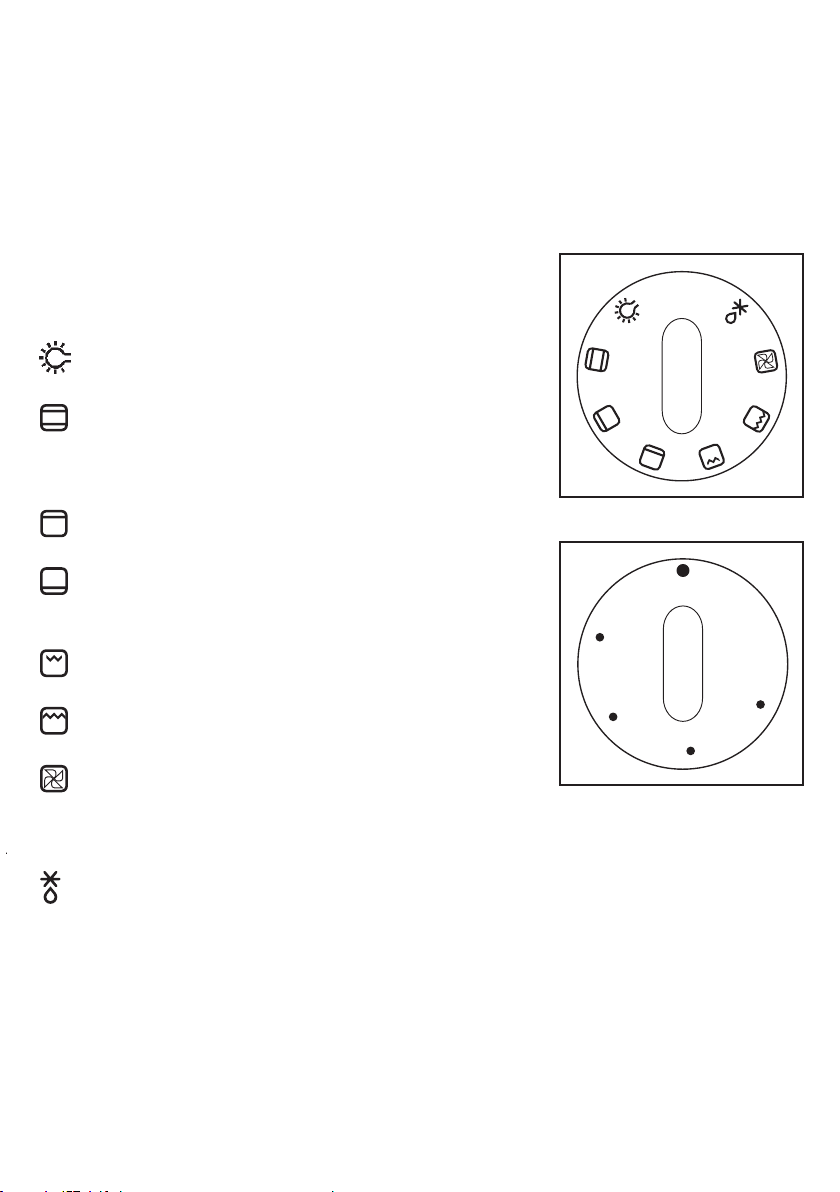
Oven Function (Fig. 2) and
Thermostat (Fig. 3) control
knobs
They enable to select the most appropriate
type of heating for the different cooking
requirements by appropriately connecting
the heating elements and adjusting
temperature to the required level.
Oven Light - The oven light will be on
without any cooking function
Conventional cooking - The heat
comes from both the top and bottom
element, ensuring even heating
inside the oven.
Top heating element - The heat
comes from the top of the oven only.
Bottom heating element - The heat
comes from the bottom of the oven
only.
Inner grill element only - can be used
for grilling small quantities.
Double Grill - The full grill element
will be on.
Fan cooking - This allows you to roast
or roast and bake simoultaneously
using any shelf, without flavour
transference.
0
Fig. 2
Fig. 3
Defrost Setting - This setting is
intended to assist in thawing of frozen
food.
24

Oven thermostat control
light
This light goes off when the oven heats up
to the temperature set and comes on again
every time the thermostat cuts in to stabilize
temperature.
Operating control light
It indicates that one or more of the heating
elements are turned on.
Safety thermostat
In order to avoid excessive overheating due
to incorrect use of the appliance or else to a
faulty component, the oven is equipped with
a safety thermostat which cuts off the power
supply if necessary. Operation is restored
automatically when the oven temperature
decreases to normal values. Therefore, if the
thermostat cuts in because you have not
been using the appliance correctly, the oven
can be used again simply by waiting for the
appliance to cool down. If, instead, the
thermostat cuts in because of a faulty
component, you should call the Service
Department.
25
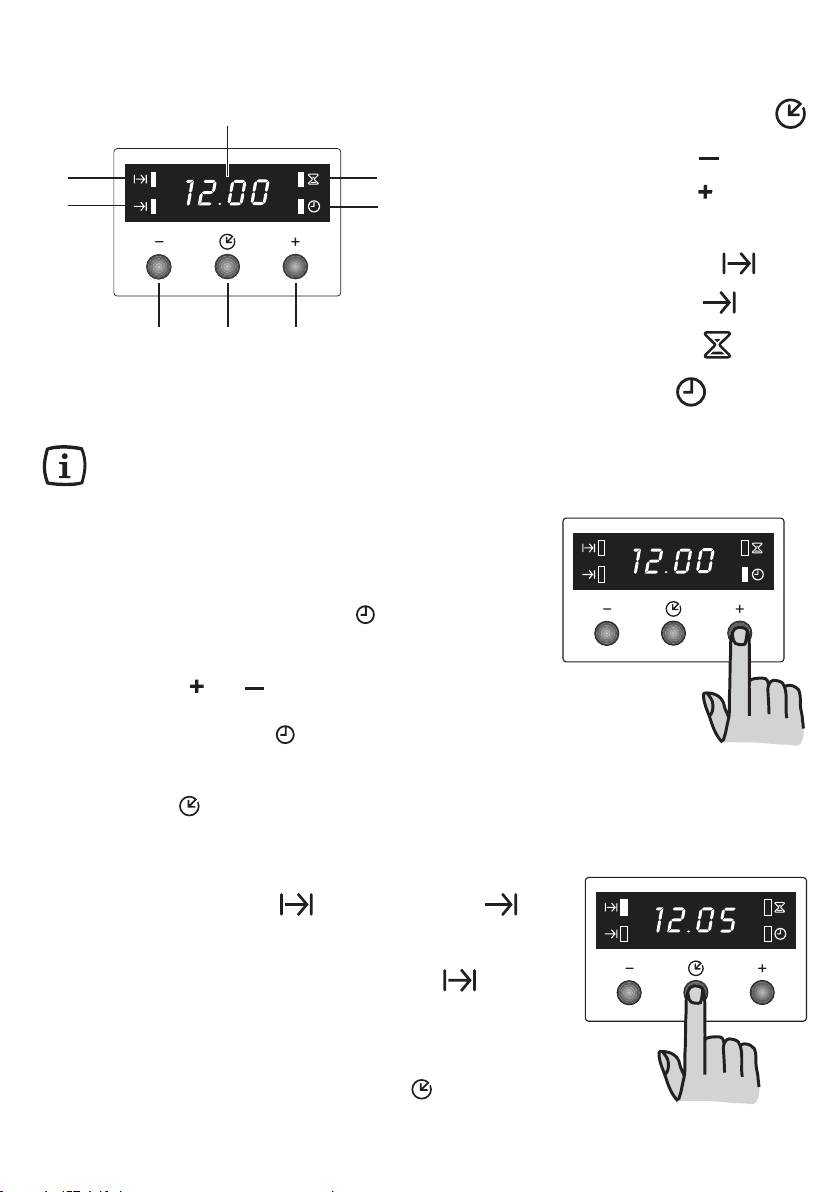
Electronic programmer
4
5
6
23
The oven will work only if the time of day has
been set. Moreover, the oven can also be operated
without any programme.
1
1. Push button for selecting a function
2. Decreasing control button “ ”
7
3. Increasing control button “ ”
8
4. Display
5. “Cooking Duration” pilot lamp
6. “End of cooking” pilot lamp
7. “Minute minder” pilot lamp
8. “Time of day” pilot lamp
Setting the time of day
When the power supply is switched on, or after a power
failure, the “Time of day” pilot lamp will flash on the
display.
To set the correct time of day:
1. press button “ ” or “ ”.
2. After the setting is carried out, wait for 5 seconds: the
“Time of day” pilot lamp will go out and the display
will show the set time. The appliance is ready for use.
To reset the correct time of day:
1. press button repeatedly to select the “Time of day”
function. The relevant pilot lamp will start flashing. Then
proceed as described above.
The time of day may be reset only if no automatic
function (cook duration or end of cooking )
has been set.
“Cooking Duration” function
Thanks to this function, the oven will automatically switch
off at the end of a programmed cooking duration time.
Place food in the oven, select a cooking function and
adjust the cooking temperature. Press button repeatedly
to select the “Cooking Duration” function. The relevant pilot
26
 Loading...