

Page 1
Page 2
Hereby, Yealink Network Technology CO., LTD. declares that this phone is in conformity
with the essential requirements and other relevant provisions of the CE, FCC.
Copyright © 2013 YEALINK NETWORK TECHNOLOGY CO., LTD.
Copyright © 2013 Yealink Network Technology CO., LTD. All rights reserved. No parts of this
publication may be reproduced or transmitted in any form or by any means, electronic or
mechanical, photocopying, recording, or otherwise, for any purpose, without the express written
permission of Yealink Network Technology CO., LTD. Under the law, reproducing includes
translating into another language or format.
When this publication is made available on media, Yealink Network Technology CO., LTD. gives
its consent to downloading and printing copies of the content provided in this file only for private
use and not for redistribution. No parts of this publication may be subject to alteration,
modification or commercial use. Yealink Network Technology CO., LTD. will not be liable for any
damages arising from use of an illegally modified or altered publication.
THE SPECIFICATIONS AND INFORMATION REGARDING THE PRODUCTS IN THIS GUIDE ARE
SUBJECT TO CHANGE WITHOUT NOTICE. ALL STATEMENTS, INFORMATION, AND
RECOMMENDATIONS IN THIS GUIDE ARE BELIEVED TO BE ACCURATE BUT ARE PRESENTED
WITHOUT WARRANTY OF ANY KIND, EXPRESS OR IMPLIED. USERS MUST TAKE FULL
RESPONSIBILITY FOR THEIR APPLICATION OF PRODUCTS.
YEALINK NETWORK TECHNOLOGY CO., LTD. MAKES NO WARRANTY OF ANY KIND WITH
REGARD TO THIS GUIDE, INCLUDING, BUT NOT LIMITED TO, THE IMPLIED WARRANTIES OF
MERCHANTABILITY AND FITNESS FOR A PARTICULAR PURPOSE. Yealink Network Technology CO.,
LTD. shall not be liable for errors contained herein nor for incidental or consequential damages
in connection with the furnishing, performance, or use of this guide.
This device is marked with the CE mark in compliance with EC Directives 2006/95/EC and 2004/108/EC.
This device is compliant with Part 15 of the FCC Rules. Operation is subject to the following two conditions:
1. This device may not cause harmful interference, and
2. This device must accept any interference received, including interference that may cause undesired
operation.
Page 3
Note: This device is tested and complies with the limits for a Class B digital device, pursuant to Part 15 of the
To avoid the potential effects on the environment and human health as a result of the
presence of hazardous substances in electrical and electronic equipment, end users of
electrical and electronic equipment should understand the meaning of the crossed-out
wheeled bin symbol. Do not dispose of WEEE as unsorted municipal waste and have to
collect such WEEE separately.
FCC Rules. These limits are designed to provide reasonable protection against harmful interference in a
residential installation. This equipment generates, uses, and can radiate radio frequency energy and, if not
installed and used in accordance with the instructions, may cause harmful interference to radio
communications. However, there is no guarantee that interference will not occur in a particular installation. If
this equipment does cause harmful interference to radio or television reception, which can be determined
by turning the equipment off and on, the user is encouraged to try to correct the interference by one or more
of the following measures:
1. Reorient or relocate the receiving antenna.
2. Increase the separation between the equipment and receiver.
3. Connect the equipment into an outlet on a circuit different from that to which the receiver is connected.
4. Consult the dealer or an experience radio/TV technician for help.
Page 4

Page 5

About This Guide
Thank you for choosing the Yealink EXP40 expansion module. The EXP40 is designed to
improve the power and the flexibility of the advanced Yealink SIP-T46G IP phones. It
features 20 physical keys, each with a dual-color LED. You can add 20 additional keys
via page switches, bringing the number of keys up to 40. Up to six expansion modules
can be daisy-chained to a single T46G IP phone. The Yealink EXP40 is ideal for
receptionists, administrative assistants, call center agents, power-users, and executives
who need to monitor and manage a large volume of calls on a regular basis.
This guide provides everything you need to quickly set up and use the EXP40 expansion
module. Be sure to read the Packaging Contents in this guide before you set up and use
your EXP40 expansion module.
The topics provided in this guide include:
Chapter 1 Getting Started
Chapter 2 Configuration
v
Page 6

Yealink EXP40 User Guide
vi
Page 7

Table of Contents
About This Guide ...................................................................... v
In This Guide ......................................................................................................................... v
Table of Contents ..................................................................... vii
Getting Started ......................................................................... 1
Packaging Contents ............................................................................................................. 1
Physical Features.................................................................................................................. 2
Installation ............................................................................................................................. 3
Configuration ............................................................................ 5
Conference ........................................................................................................................... 6
Forward ................................................................................................................................. 7
Transfer .................................................................................................................................. 8
Hold ....................................................................................................................................... 9
DND...................................................................................................................................... 10
Call Return ........................................................................................................................... 10
SMS ...................................................................................................................................... 11
Directed Pickup .................................................................................................................. 12
Group Pickup ...................................................................................................................... 13
Call Park .............................................................................................................................. 14
DTMF .................................................................................................................................... 15
Voice Mail ........................................................................................................................... 16
Speed Dial .......................................................................................................................... 17
Intercom .............................................................................................................................. 18
Line ....................................................................................................................................... 19
BLF ........................................................................................................................................ 20
URL ....................................................................................................................................... 21
Group Listening .................................................................................................................. 22
Record.................................................................................................................................. 23
URL Record .......................................................................................................................... 24
XML Browser ....................................................................................................................... 25
Hot Desking ........................................................................................................................ 26
Prefix .................................................................................................................................... 27
Local Group ........................................................................................................................ 28
XML Group .......................................................................................................................... 29
LDAP ..................................................................................................................................... 30
Multicast Paging ................................................................................................................. 31
ACD ...................................................................................................................................... 32
Zero Touch ........................................................................................................................... 33
Keypad Lock ....................................................................................................................... 34
Directory .............................................................................................................................. 35
Troubleshooting ...................................................................... 37
vii
Page 8

Page 9
Getting Started
This chapter provides basic installation instructions and information for obtaining the
best performance with the EXP40 expansion module. The topics include:
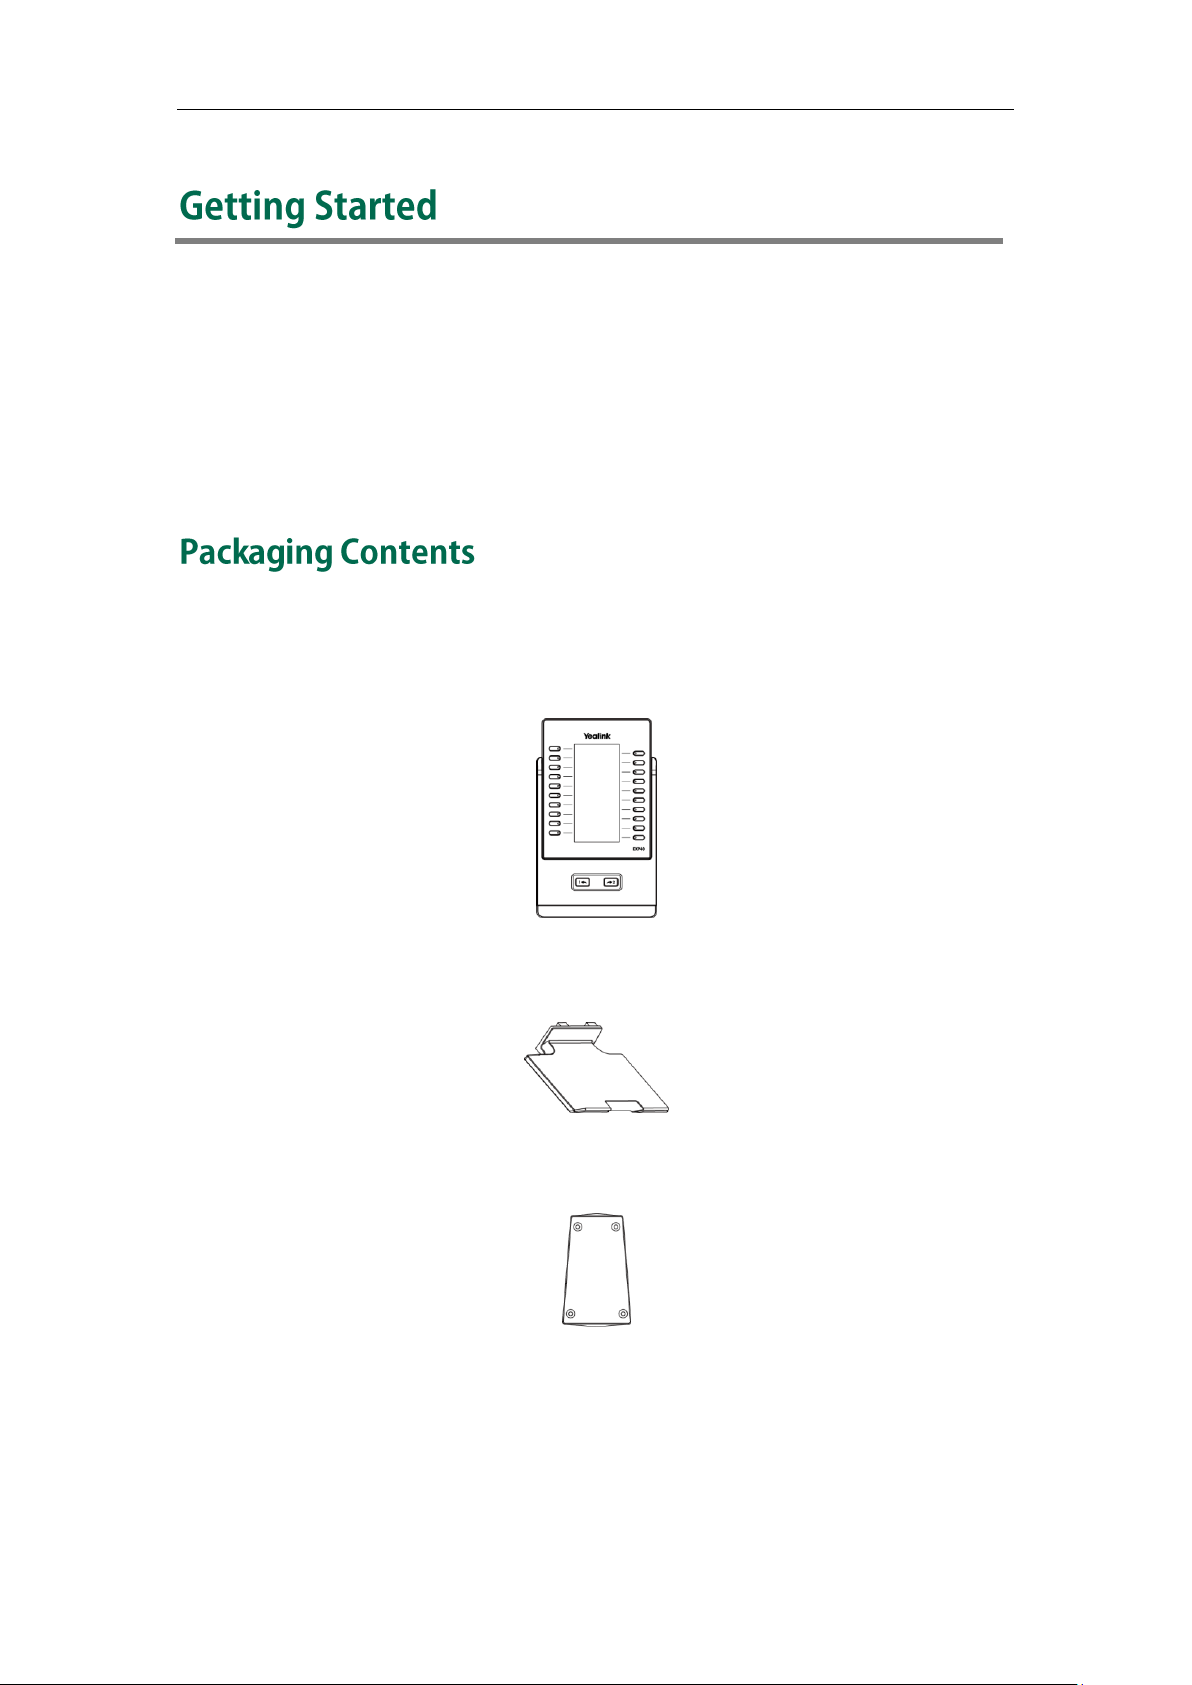
Packaging Contents
Physical Features
Installation
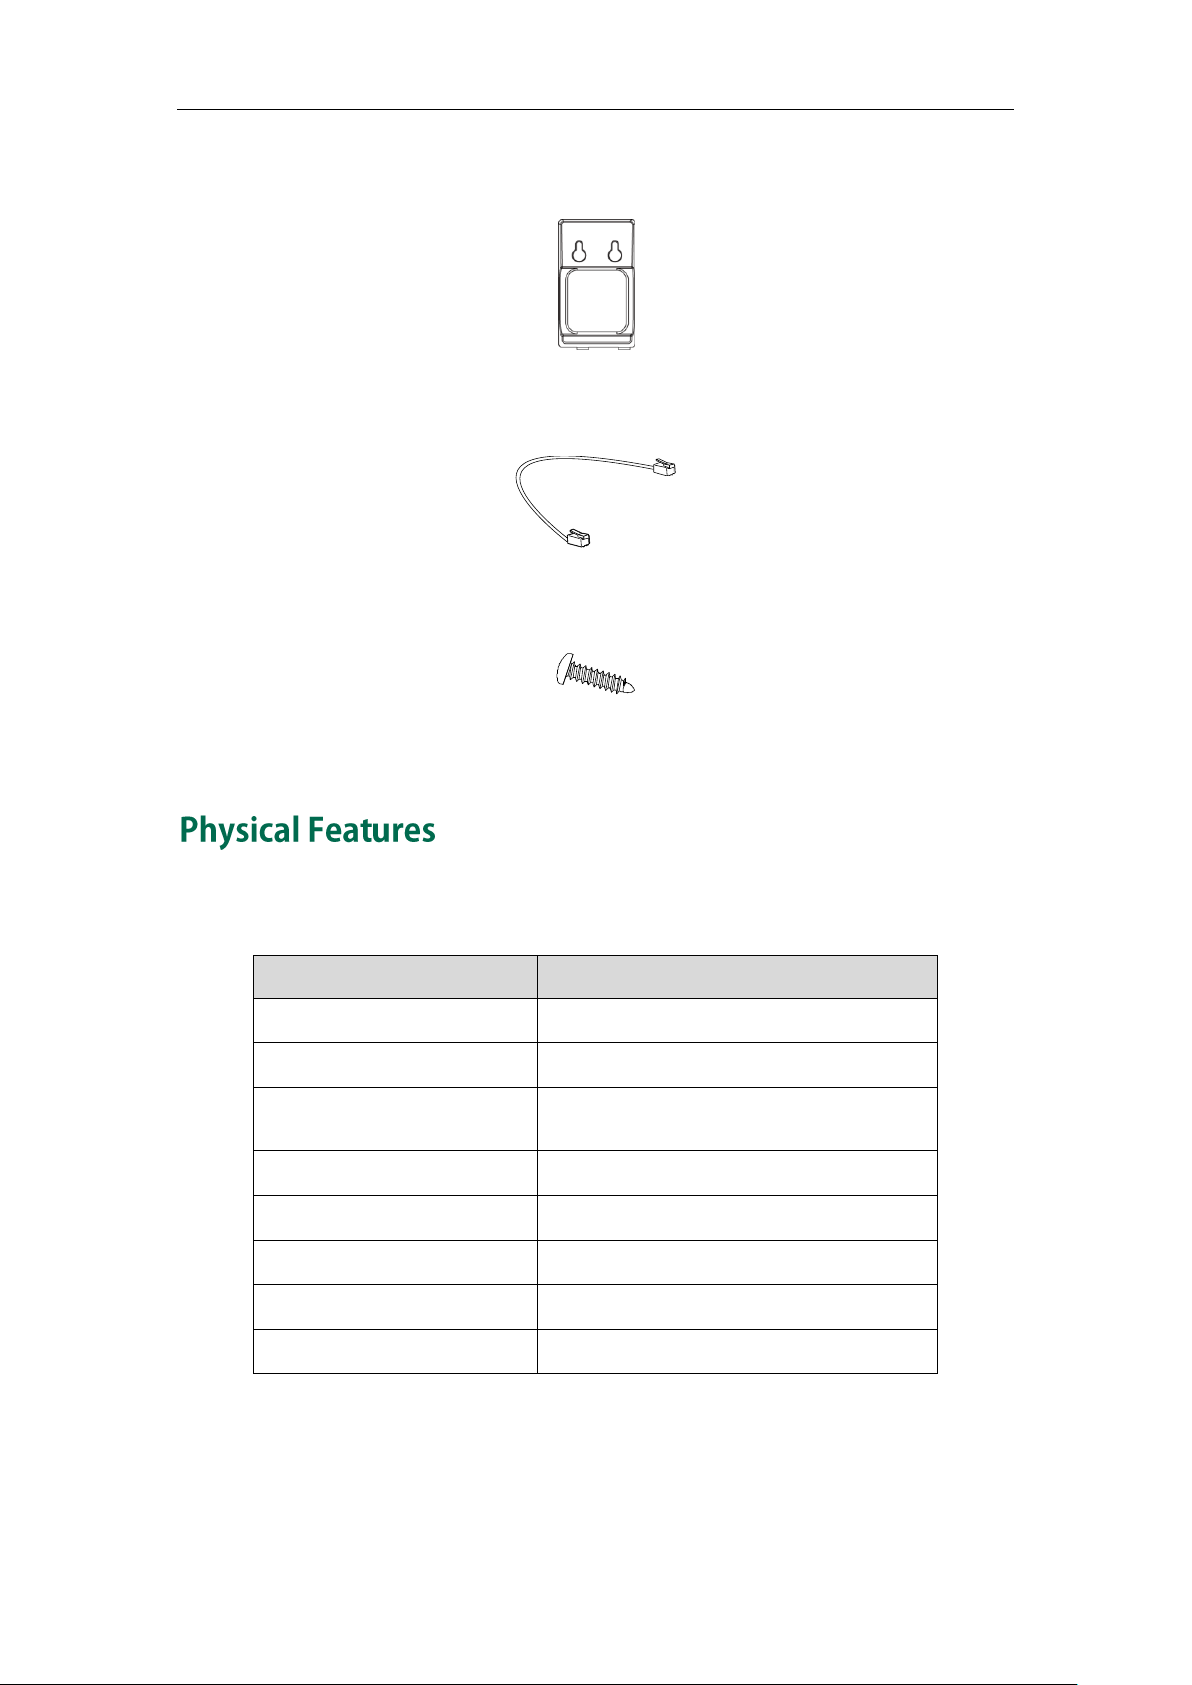
The following items are included in your package:
Expansion Module
Stand
Connecting Sheet
1
Page 10
Yealink EXP40 User Guide
Item
Description
LCD
320 x 160 pixel
Hard keys
20
LEDs
20
Each key with a dual-color LED
EXT In port
RJ12 (6P6C)
EXT Out port
RJ12 (6P6C)
Power interface
5V/1.2A
Foot stand
√
Wall Mount (Optional)
√
Wall Mount Bracket(Optional)
Connecting Cord
Screw
Check the list before installation. If you find anything missing, contact your reseller.
The main physical features of the EXP40 expansion module are described in the
following table:
2
Page 11
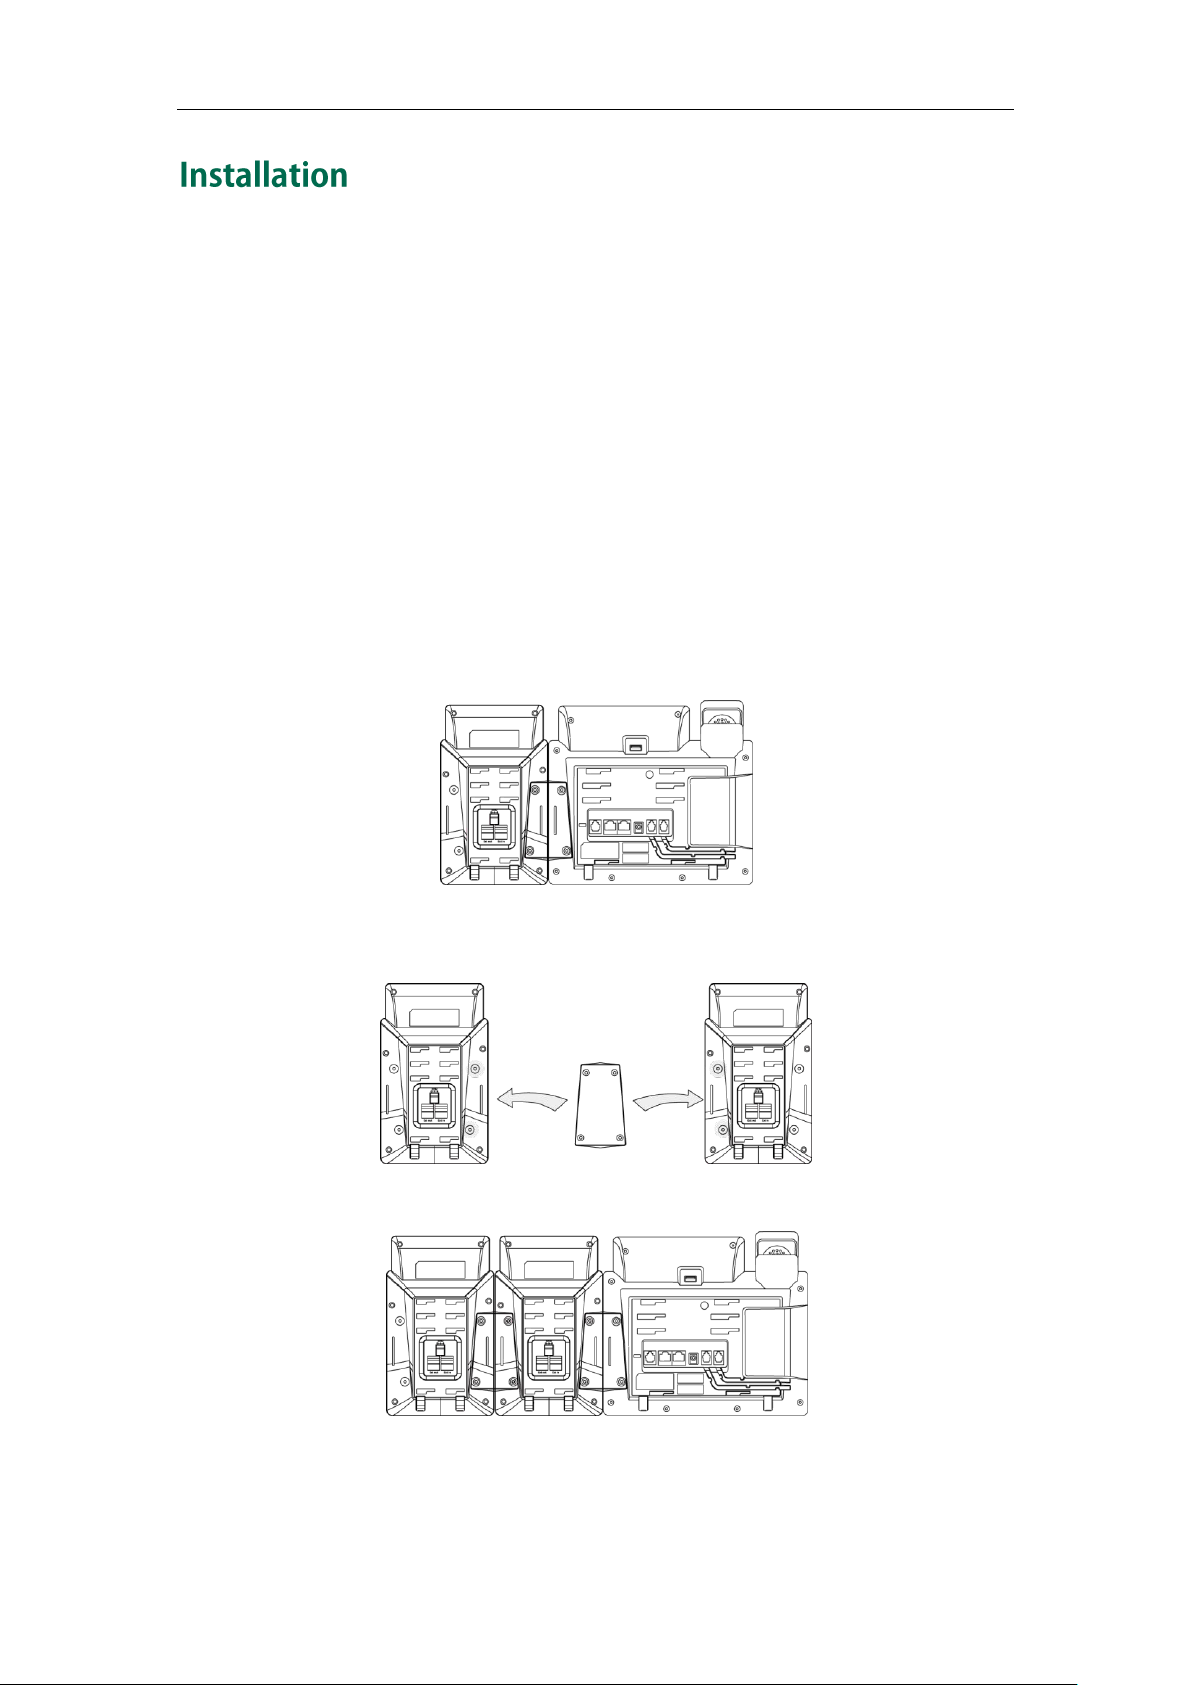
Getting Started
The EXP40 expansion module applies to SIP-T46G IP phone. To easily connect the EXP40
to the phone, please unplug the phone stand from the T46G IP phone.
To unplug the stand from the T46G IP phone:
1. Unplug the power adapter and Ethernet cable from the IP phone.
2. Unplug the handset attached to the IP phone.
3. Turn the IP phone over and lay it on a non-slip, flat surface.
4. Unplug the stand from the IP phone.
To connect the
EXP40 expansion module:
1. Turn over the phone and the expansion module, and lay them on a flat, non-slip
surface.
2. Connect the EXP40 expansion module and the IP phone using the supplied
connecting sheet and screws.
If you want to connect two or more expansion modules, connect two expansion
modules as below
:
Connecting two expansion modules on a single phone is shown as below
:
3
Page 12
Yealink EXP40 User Guide
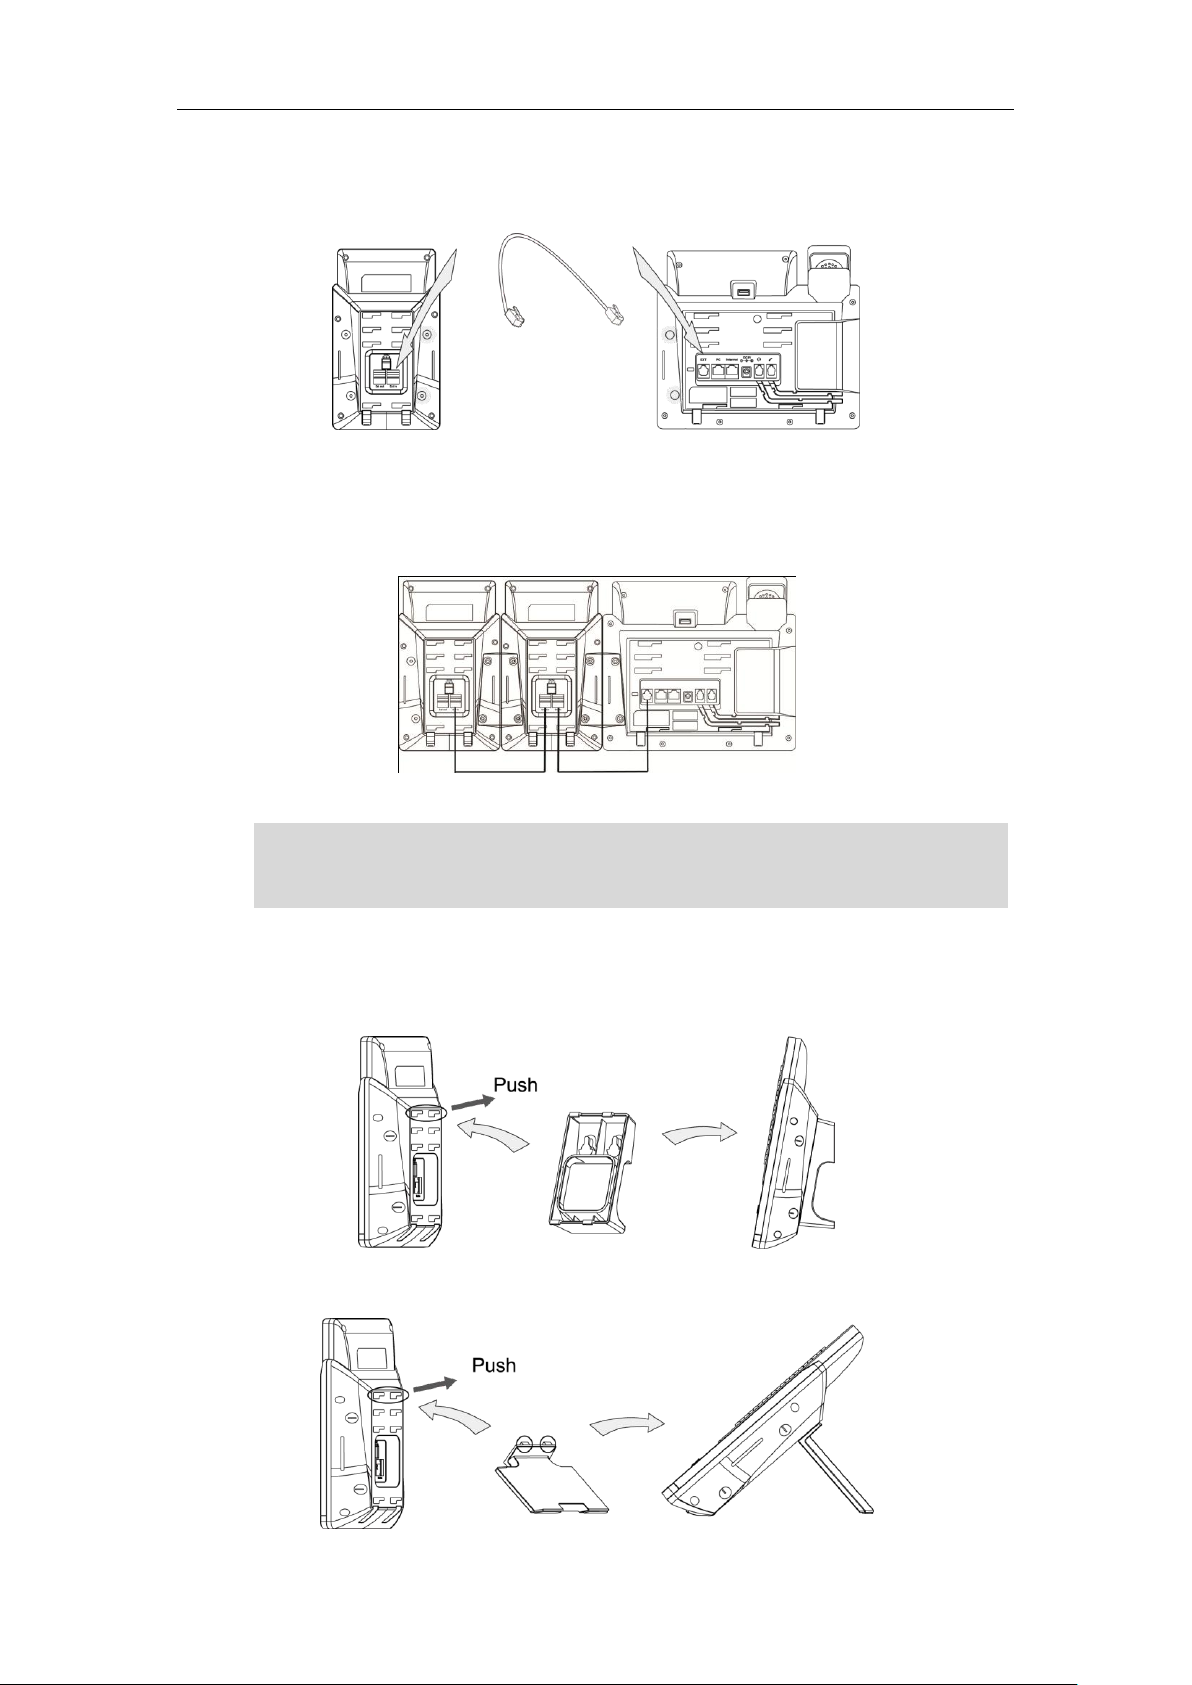
Up to six expansion modules can be connected to the T46G IP phone. If you use more
than two expansion modules on a single phone, you need to connect an additional
power adapter to any one of the expansion modules.
3. Connect the Ext jack of the IP phone and the Ext in jack of the expansion module
using one supplied cord.
If you connect two expansion modules, connect the Ext out jack of the previous
expansion module and the Ext in jack of the second expansion module using
another supplied cord.
Note
To attach the stand of the expansion module:
a) Wall mount method (Optional)
b) Desk mount method
4
Page 13

Configuration
The EXP40 expansion module supports 40 DSS keys (Ext keys). You can access
additional 20 keys via page switches. Each key can be assigned a feature via phone
user interface or web user interface. Long press the desired key, the phone will enter
into the setting interface of this key.
To log in the web user interface, you should obtain the IP address of the IP phone in
advance. Press the OK key when the phone is idle, and the phone will display the IP
address and some other information. Enter the IP address (e.g., http://192.168.0.10 or
192.168.0.10) in the address bar of web browser on your PC. The default user name and
password are both admin (case-sensitive).
This chapter provides you with instructions of assigning a feature to a DSS key via web
user interface. The topics include:
Conference
Forward
Transfer
Hold
DND
Call Return
SMS
Directed Pickup
Group Pickup
Call Park
DTMF
Voice Mail
Speed Dial
Intercom
Line
BLF
URL
Group Listening
Record
URL Record
XML Browser
5
Page 14

Yealink EXP40 User Guide
Quick access features like intercom and voice mail should be configured on your SIP
server in advance to make sure they will work on your phone. Contact your system
administrator for more information.
If more than one expansion module is connected, select the desired expansion module
from the pull-down list of Expansion Key.
Feature codes may vary between different servers.
Hot Desking
Prefix
Local Group
XML Group
LDAP
Multicast Paging
ACD
Zero Touch
Keypad Lock
Directory
Note
You can configure a DSS key as the conference key. When you are in a call, you can
press the conference key to invite a third party to join a conference.
To configure a DSS key as the conference key:
1. Click on DSSKey->Ext Key.
2. In the desired DSS key field, select Conference from the pull-down list of Type.
3. Enter the phone number or extension of the destination party in the Value field or
leave it blank.
If a phone number is configured, you can dial out the number by pressing the
conference key when the phone is idle or during a call.
4. Enter the desired value in the Label field or leave it blank.
6
Page 15

Configuration
If you leave this field blank, the LCD screen will display the default label
“Conference”.
5. Click Confirm to accept the change.
You can configure a DSS key as the forward key. When the phone is idle, you can press
the forward key to enter into the setting interface of the call forward feature. When the
phone receives an incoming call, you can press the forward key to forward the incoming
call to the pre-defined number (if configured).
To configure a DSS key as the forward key:
1. Click on DSSKey->Ext Key.
2. In the desired DSS key field, select Forward from the pull-down list of Type.
3. Enter the destination number you want to forward the incoming calls to in the Value
field or leave it blank.
4. Enter the desired value in the Label field or leave it blank.
7
Page 16

Yealink EXP40 User Guide
If you leave this field blank, the LCD screen will display the default label “Forward”.
5. Click Confirm to accept the change.
You can configure a DSS key as the transfer key. Then you can perform a Blind,
Semi-Attend or Attended Transfer by pressing the transfer key during a call.
To configure a DSS key as the transfer key:
1. Click on DSSKey->Ext Key.
2. In the desired DSS key field, select Transfer from the pull-down list of Type.
3. Enter the phone number you want to transfer the call to in the Value field or leave it
blank.
4. Enter the desired value in the Label field or leave it blank.
8
Page 17

Configuration
If you leave this field blank, the LCD screen will display the default label “Transfer”.
5. Click Confirm to accept the change.
You can configure a DSS key as the hold key. You can hold a call or retrieve a held call
by pressing the hold key.
To configure a DSS key as the hold key:
1. Click on DSSKey->Ext Key.
2. In the desired DSS key field, select Hold from the pull-down list of Type.
3. Enter the desired value in the Label field or leave it blank.
If you leave this field blank, the LCD screen will display the default label “Hold”.
4. Click Confirm to accept the change.
9
Page 18

Yealink EXP40 User Guide
You can configure a DSS key as the DND key. If the DND key mode is configured to
“phone”, you can activate the DND mode by pressing the DND key when the phone is
idle. Press the DND key again to deactivate the DND mode. If the DND key mode is
configured to “custom”, press the DND key when the phone is idle, the phone enters into
the DND setting interface.
To configure a DSS key as the DND key:
1. Click on DSSKey->Ext Key.
2. In the desired DSS key field, select DND from the pull-down list of Type.
3. Enter the desired value in the Label field or leave it blank.
If you leave this field blank, the LCD screen will display the default label “DND”.
4. Click Confirm to accept the change.
You can configure a DSS key as the call return key. Then you can place a call back to the
caller of the last incoming call by pressing the call return key when the phone is idle.
To configure a DSS key as the call return key:
1. Click on DSSKey->Ext Key.
2. In the desired DSS key field, select Call Return from the pull-down list of Type.
3. Enter the desired value in the Label field or leave it blank.
10
Page 19

Configuration
If you leave this field blank, the LCD screen will display the default label “Call
Return”.
4. Click Confirm to accept the change.
You can configure a DSS key as the SMS key. Then you can access the text message
interface more quickly and easily by pressing the SMS key.
To configure a DSS key as the SMS key:
1. Click on DSSKey->Ext Key.
2. In the desired DSS key field, select SMS from the pull-down list of Type.
3. Enter the desired value in the Label field or leave it blank.
11
Page 20

Yealink EXP40 User Guide
If you leave this field blank, the LCD screen will display the default label “SMS”.
4. Click Confirm to accept the change.
You can configure a DSS key as the directed pickup key. If you press the directed pickup
key when the specified phone number receives an incoming call, the call is answered
on your phone.
To configure a DSS key as the directed pickup key:
1. Click on DSSKey->Ext Key.
2. In the desired DSS key field, select Directed Pickup from the pull-down list of Type.
3. Enter the directed call pickup code followed by the specific extension you want to
pick up calls from in the Value field.
4. Enter the desired value in the Label field or leave it blank.
If you leave this field blank, the LCD screen will display the default label “Pick Up”.
12
Page 21

5. Select the desired line to apply this key from the pull-down list of Line.
6. Click Confirm to accept the change.
Configuration
Group pickup allows you to pick up incoming calls within a pre-defined group of phone
numbers.
You can configure a DSS key as the group pickup key. When any number within the
group receives an incoming call, you can press the group pickup key to pick up the
incoming call. If the numbers within the group receive multiple incoming calls, the first
incoming call will be picked up.
To configure a DSS key as the group pickup key:
1. Click on DSSKey->Ext Key.
2. In the desired DSS key field, select Group Pickup from the pull-down list of Type.
3. Enter the group call pickup code in the Value field.
4. Enter the desired value in the Label field or leave it blank.
If you leave this field blank, the LCD screen will display the default label “Group
Pick Up”.
13
Page 22

Yealink EXP40 User Guide
5. Select the desired line to apply this key from the pull-down list of Line.
6. Click Confirm to accept the change.
The call park feature allows you to park a call at a special extension and then retrieve it
on any other phone in the system.
You can configure a DSS key as the call park key. Then you can park a call at an
extension by pressing the call park key. The current call is placed on hold and can be
retrieved on another IP phone.
To configure a DSS key as the call park key:
1. Click on DSSKey->Ext Key.
2. In the desired DSS key field, select Call Park from the pull-down list of Type.
3. Enter the call park feature code in the Value field.
4. Enter the desired value in the Label field or leave it blank.
If you leave this field blank, the LCD screen will display the default label “Call
Park”.
14
Page 23

5. Select the desired line to apply this key from the pull-down list of Line.
6. Click Confirm to accept the change.
Configuration
You can configure a DSS key as the DTMF key. If you press the DTMF key during an
active call, the phone will send the pre-defined DTMF digits.
To configure a DSS key as the DTMF key:
1. Click on DSSKey->Ext Key.
2. In the desired DSS key field, select DTMF from the pull-down list of Type.
3. Enter the desired DTMF digits in the Value field.
4. Enter the desired value in the Label field or leave it blank.
15
Page 24

Yealink EXP40 User Guide
If you leave this field blank, the LCD screen will display the default label “DTMF”.
5. Click Confirm to accept the change.
You can configure a DSS key as the voice mail key. Then you can press the voice mail
key when the phone is idle to dial out the pre-defined voice mail access code, and
follow the voice prompt to listen to the voice mails.
To configure a DSS key as the voice mail key:
1. Click on DSSKey->Ext Key.
2. In the desired DSS key field, select Voice Mail from the pull-down list of Type.
3. Enter the voice mail access code in the Value field.
4. Enter the desired value in the Label field or leave it blank.
If you leave this field blank, the LCD screen will display the default label “Voice
Mail”.
16
Page 25

5. Select the desired line to apply this key from the pull-down list of Line.
6. Click Confirm to accept the change.
Configuration
You can configure a DSS key as the speed dial key. Then you can quickly dial out the
pre-defined number using the specified line by pressing the speed dial key.
To configure a DSS key as the speed dial key:
1. Click on DSSKey->Ext Key.
2. In the desired DSS key field, select Speed Dial from the pull-down list of Type.
3. Enter the desired number you want to dial out directly in the Value field.
4. Enter the desired value in the Label field or leave it blank.
If you leave this field blank, the LCD screen will display the number specified in the
Value field.
17
Page 26

Yealink EXP40 User Guide
5. Select the desired line to apply this key from the pull-down list of Line.
6. Click Confirm to accept the change.
You can configure a DSS key as the intercom key. This is especially helpful in an office
environment as you can connect to the operator or the secretary more quickly by
pressing the intercom key.
To configure a DSS key as the intercom key:
1. Click on DSSKey->Ext Key.
2. In the desired DSS key field, select Intercom from the pull-down list of Type.
3. Enter the remote extension number in the Value field.
4. Enter the desired value in the Label field or leave it blank.
If you leave this field blank, the LCD screen will display the default label
“Intercom”.
18
Page 27

5. Select the desired line to apply this key from the pull-down list of Line.
6. Click Confirm to accept the change.
Configuration
You can configure a DSS key as the line key. It performs the same as a hard line key. You
can press this key to accept the incoming calls, place active calls on hold or resume a
held call.
To configure a DSS key as the line key:
1. Click on DSSKey->Ext Key.
2. In the desired DSS key field, select Line from the pull-down list of Type.
19
Page 28

Yealink EXP40 User Guide
3. Select the desired line to apply this key from the pull-down list of Line.
4. Click Confirm to accept the change.
Busy Lamp Field (BLF) allows you to monitor a user for status changes. You can configure
a DSS key as the BLF key, which allows you to monitor the status (idle, ringing or busy) of
the pre-defined phone user. You can also pick up the incoming call of the monitored user
directly by pressing the BLF key.
To configure a DSS key as the BLF key:
1. Click on DSSKey->Ext Key.
2. In the desired DSS key field, select BLF from the pull-down list of Type.
3. Enter the phone number you want to monitor in the Value field.
4. Enter the desired value in the Label field or leave it blank.
If you leave this field blank, the LCD screen will display the value specified in the
Value field.
5. Select the desired line to apply to this key from the pull-down list of Line.
20
Page 29

6. Enter the directed call pickup code in the Extension field.
7. Click Confirm to accept the change.
Configuration
You can configure a DSS key as the URL key. If you press the URL key, the phone will send
HTTP requests to a web server.
To configure a DSS key as the URL key:
1. Click on DSSKey->Ext Key.
2. In the desired DSS key field, select URL from the pull-down list of Type.
3. Enter the URL of the web server you want to access in the Value field.
4. Enter the desired value in the Label field or leave it blank.
21
Page 30

Yealink EXP40 User Guide
If you leave this field blank, the LCD screen will display the default label “URL”.
5. Click Confirm to accept the change.
You can configure a DSS key as the group listening key. Then you can activate the
Speakerphone mode and Handset/Headset mode at the same time by pressing the
group listening key. It is suitable for the group conversation which has more than one
person at one side. You are able to speak and listen using the handset/headset;
meanwhile the others nearby can only listen using the speaker. You can get back to the
previous mode by pressing the group listening key again.
To configure a DSS key as the group listening key:
1. Click on DSSKey->Ext Key.
2. In the desired DSS key field, select Group Listen from the pull-down list of Type.
3. Enter the desired value in the Label field or leave it blank.
22
Page 31

Configuration
If you leave this field blank, the LCD screen will display the default label “Group
Listening”.
4. Click Confirm to accept the change.
Call recording allows users to record calls. Normally, there are 2 main methods to
trigger a recording on a certain server. We call them record and URL record. Record is
for the phone to send the server a SIP INFO message containing a specific header. URL
record is for the phone to send an HTTP URL to the server. The server processes these
messages and decides to start or stop a recording.
You can configure a DSS key as the record key. Then you can record calls using the
record method by pressing the record key.
To configure a DSS key as the record key:
1. Click on DSSKey->Ext Key.
2. In the desired DSS key field, select Record from the pull-down list of Type.
3. Enter the desired value in the Label field or leave it blank.
23
Page 32

Yealink EXP40 User Guide
If you leave this field blank, the LCD screen will display the default label “Record”
4. Click Confirm to accept the change.
You can configure a DSS key as the URL record key. Then you can record calls using the
URL record method by pressing the call record key.
To configure a DSS key as the URL record key:
1. Click on DSSKey->Ext Key.
2. In the desired DSS key field, select URL Record from the pull-down list of Type.
3. Enter the URL in the Value field.
4. Enter the desired value in the Label field or leave it blank.
24
Page 33

Configuration
If you leave this field blank, the LCD screen will display the default label “URL
Record”.
5. Click Confirm to accept the change.
XML browser is a simple browser feature, which is based on xml language and
http/https service. Users can use tools such as PHP, JavaScript, etc., accordance with the
established syntax, to generate server-side features dynamically to meet the needs of
the user xml file, and then download the xml file to a SIP phone by http/https, so as to
realize a simple browser feature. Using XML browser, users can achieve the
personalized features, such as weather information, stock information, date of inquiry,
access to address book, configuration of the terminal parameters and so on.
To configure a DSS key as the XML browser key:
1. Click on DSSKey->Ext Key.
2. In the desired DSS key field, select XML Browser from the pull-down list of Type.
3. Enter the URL you want to set as the XML Browser in the Value field.
4. Enter the desired value in the Label field or leave it blank.
25
Page 34

Yealink EXP40 User Guide
If you leave this field blank, the LCD screen will display the default label “XML
Browser”.
5. Click Confirm to accept the change.
Hot Desking is regularly used in places where not all the employees are in the office at
the same time, or not in the office for a very long time, which means actual personal
offices would be often vacant, consuming valuable space and resources.
Hot Desking is a phone feature that allows users to login or logout an IP phone. You can
configure a DSS key as the hot desking key. Press the hot desking key to delete all
accounts on the IP phone, and then register your account on line 1.
To configure a DSS key as the hot desking key:
1. Click on DSSKey->Ext Key.
2. In the desired DSS key field, select Hot Desking from the pull-down list of Type.
3. Enter the desired value in the Label field or leave it blank.
26
Page 35

Configuration
If you leave this field blank, the LCD screen will display the default label “Hot
Desking”.
4. Click Confirm to accept the change.
You can configure a DSS key as the prefix key. If you press the prefix key when the
phone is idle, the phone enters into the dialing interface and displays the prefix number
which you specified. You can enter other digits and then dial out.
To configure a DSS key as the prefix key:
1. Click on DSSKey->Ext Key.
2. In the desired DSS key field, select Prefix from the pull-down list of Type.
3. Enter the prefix number you want to add before the entered number in the Value
field.
4. Enter the desired value in the Label field or leave it blank.
27
Page 36

Yealink EXP40 User Guide
If you leave this field blank, the LCD screen will display “Prefix: „the value specified
in the Value field‟ ” (e.g., Prefix: 0592).
5. Click Confirm to accept the change.
You can configure a DSS key as the local group key. Then you can press the local group
key to access the pre-defined contact group in the local directory quickly.
To configure a DSS key as the local group key:
1. Click on DSSKey->Ext Key.
2. In the desired DSS key field, select Local Group from the pull-down list of Type.
3. Enter the desired value in the Label field or leave it blank.
If you leave this field blank, the LCD screen will display the selected group name.
28
Page 37

4. Select the desired contact group name from the pull-down list of Line.
5. Click Confirm to accept the change.
Configuration
You can configure a DSS key as the XML group key. If you press the XML phonebook key
when the phone is idle, the phone will automatically download the corresponding
phone book from the server and display the entries of the phone book on the LCD
screen. To use this key feature, you need to configure remote phonebook on the phone
in advance.
To configure a DSS key as the XML group key:
1. Click on DSSKey->Ext Key.
2. In the desired DSS key field, select XML Group from the pull-down list of Type.
3. Enter the desired value in the Label field or leave it blank.
If you leave this field blank, the LCD screen will display the selected XML group
name.
29
Page 38

Yealink EXP40 User Guide
4. Select the desired XML group name from the pull-down list of Line.
5. Click Confirm to accept the change.
LDAP (Lightweight Directory Access Protocol) is an application protocol for accessing
and maintaining information services of the distributed directory over an IP network. The
IP phone can be configured to interface with a corporate directory server that supports
LDAP (Microsoft‟s Active Directory is included).
You can configure a DSS key as the LDAP key. If you press the LDAP key when the phone
is idle, the IP phone will download and display the LDAP entries on the LCD screen.
To configure a DSS key as the LDAP key:
1. Click on DSSKey->Ext Key.
2. In the desired DSS key field, select LDAP from the pull-down list of Type.
3. Enter the desired value in the Label field or leave it blank.
30
Page 39

Configuration
If you leave this field blank, the LCD screen will display the default label “LDAP”.
4. Click Confirm to accept the change.
You can use multicast paging to quickly and easily announce time sensitive
announcements to people within the multicast group. You can configure a multicast
paging key on the phone, which allows you to send a Real Time Transport Protocol (RTP)
stream to the pre-configured multicast address(es) without involving SIP signaling.
To configure a DSS key as the multicast paging key:
1. Click on DSSKey->Ext Key.
2. In the desired DSS key field, select Paging from the pull-down list of Type.
3. Enter the multicast IP address and port number in the Value field.
The valid multicast IP addresses range from 224.0.0.0 to 239.255.255.255.
4. Enter the desired value in the Label field or leave it blank.
31
Page 40

Yealink EXP40 User Guide
If you leave this field blank, the LCD screen will display “the value specified in the
Value field” (e.g., 224.5.6.20:10008).
5. Click Confirm to accept the change.
ACD feature is often used in offices for customer service, such as call center. The ACD
system handles large volumes of incoming calls from callers who have no need to talk
to a specific person but who require assistance from any of multiple persons at the
earliest opportunity. The ACD feature on the IP phone allows the ACD system to
distribute calls from large volumes of incoming calls to the registered IP phone users.
To use the ACD feature, you should configure a DSS key as the ACD key in advance. You
can press the ACD key to log in the ACD system.
To configure a DSS key as the ACD key:
1. Click on DSSKey->Ext Key.
2. In the desired DSS key field, select ACD from the pull-down list of Type.
3. Enter the desired value in the Label field.
32
Page 41

If you leave this field blank, the LCD screen will display the default label “ACD”.
4. Click Confirm to accept the change.
Configuration
You can configure a DSS key as the zero touch key. Then you can configure auto
provision and network parameters quickly by pressing the zero touch key when the
phone is idle.
To configure a DSS key as the zero touch key:
1. Click on DSSKey->Ext Key.
2. In the desired DSS key field, select Zero Touch from the pull-down list of Type.
3. Enter the desired value in the Label field or leave it blank.
33
Page 42

Yealink EXP40 User Guide
If you leave this field blank, the LCD screen will display the default label “Zero
Touch”.
4. Click Confirm to accept the change.
You can configure a DSS key as the keypad lock key. Then you can press the keypad
lock key to immediately lock the keypad of your phone instead of long pressing the
pound key.
To configure a DSS key as the keypad lock key:
1. Click on DSSKey->Ext Key.
2. In the desired DSS key field, select Keyboard Lock from the pull-down list of Type.
3. Enter the desired value in the Label field or leave it blank.
34
Page 43

Configuration
If you leave this field blank, the LCD screen will display the default label
“KeyGuard”.
4. Click Confirm to accept the change.
You can configure a DSS key as the directory key. You can press the directory key to
quick access the local directory, call history, LDAP and remote phone book.
To configure a DSS key as the favorites key:
1. Click on DSSKey->Ext Key.
2. In the desired DSS key field, select Directory from the pull-down list of Type.
3. Enter the desired value in the Label field or leave it blank.
35
Page 44

Yealink EXP40 User Guide
If you leave this field blank, the LCD screen will display the default label
“Directories”.
4. Click Confirm to accept the change.
36
Page 45

Troubleshooting
This chapter provides general troubleshooting information to help you solve the
problems you might encounter when using your EXP40.
If you require additional information or assistance with your EXP40, contact your system
administrator.
Why does the EXP40 LCD screen prompts "Loading"?
Ensure that the Ext in/out jacks of the EXP40 are properly plugged using the supplied
connecting cord. For more information, refer to Installation on page 3.
Why is the EXP40 LCD screen blank?
Ensure that at least one EXP40 is properly plugged into a functional AC outlet if you
connect more than two expansion modules.
Ensure that the contrast of the LCD screen is in a comfortable level. For more
information about the contrast, refer to
Yealink SIP-T46G User Guide
.
37
 Loading...