

Page 1

Page 2

SPECIAL MESSAGE SECTION
This product utilizes batteries or an external power supply (adapter). DO
NOT connect this product to any power supply or adapter other than
one described in the manual, on the name plate, or specifically recommended by Yamaha.
This product should be used only with the components supplied or; a
cart, rack, or stand that is recommended by Yamaha. If a cart, etc., is
used, please observe all safety markings and instructions that accompany the accessory product.
SPECIFICATIONS SUBJECT TO CHANGE:
The information contained in this manual is believed to be correct at the
time of printing. However, Yamaha reserves the right to change or
modify any of the specifications without notice or obligation to update
existing units.
This product, either alone or in combination with an amplifier and headphones or speaker/s, may be capable of producing sound levels that
could cause permanent hearing loss. DO NOT operate for long periods
of time at a high volume level or at a level that is uncomfortable. If you
experience any hearing loss or ringing in the ears, you should consult
an audiologist.
IMPORTANT: The louder the sound, the shorter the time period before
damage occurs.
NOTICE:
Service charges incurred due to a lack of knowledge relating to how a
function or effect works (when the unit is operating as designed) are not
covered by the manufacturer’s warranty, and are therefore the owners
responsibility. Please study this manual carefully and consult your
dealer before requesting service.
ENVIRONMENTAL ISSUES:
Yamaha strives to produce products that are both user safe and environmentally friendly. We sincerely believe that our products and the
production methods used to produce them, meet these goals. In keeping with both the letter and the spirit of the law, we want you to be
aware of the following:
Battery Notice:
This product MAY contain a small non-rechargeable battery which (if
applicable) is soldered in place. The average life span of this type of
battery is approximately five years. When replacement becomes necessary, contact a qualified service representative to perform the replacement.
This product may also use “household” type batteries. Some of these
may be rechargeable. Make sure that the battery being charged is a
rechargeable type and that the charger is intended for the battery
being charged.
When installing batteries, do not mix batteries with new, or with batteries of a different type. Batteries MUST be installed correctly. Mismatches or incorrect installation may result in overheating and battery
case rupture.
Warning:
Do not attempt to disassemble, or incinerate any battery. Keep all
batteries away from children. Dispose of used batteries promptly and
as regulated by the laws in your area. Note: Check with any retailer of
household type batteries in your area for battery disposal information.
Disposal Notice:
Should this product become damaged beyond repair, or for some
reason its useful life is considered to be at an end, please observe all
local, state, and federal regulations that relate to the disposal of products that contain lead, batteries, plastics, etc. If your dealer is unable
to assist you, please contact Yamaha directly.
NAME PLATE LOCA TION:
The name plate is located on the bottom of the product. The model
number, serial number, power requirements, etc., are located on this
plate. You should record the model number, serial number, and the
date of purchase in the spaces provided below and retain this manual
as a permanent record of your purchase.
Model
Serial No.
Purchase Date
92-BP
PLEASE KEEP THIS MANUAL
FCC INFORMATION (U.S.A.)
IMPORTANT NOTICE: DO NOT MODIFY THIS UNIT!
This product, when installed as indicated in the instructions contained in
this manual, meets FCC requirements. Modifications not expressly approved by Yamaha may void your authority, granted by the FCC, to use
the product.
IMPORTANT:
When connecting this product to accessories and/or another product use
only high quality shielded cables. Cable/s supplied with this product
MUST be used. Follow all installation instructions. Failure to follow instructions could void your FCC authorization to use this product in the
USA.
NOTE:
This product has been tested and found to comply with the requirements
listed in FCC Regulations, Part 15 for Class “B” digital devices. Compliance with these requirements provides a reasonable level of assurance
that your use of this product in a residential environment will not result in
harmful interference with other electronic devices. This equipment generates/uses radio frequencies and, if not installed and used according to
• This applies only to products distributed by Yamaha Corporation of America.
the instructions found in the users manual, may cause interference
harmful to the operation of other electronic devices. Compliance with
FCC regulations does not guarantee that interference will not occur in
all installations. If this product is found to be the source of interference,
which can be determined by turning the unit “OFF” and “ON”, please try
to eliminate the problem by using one of the following measures:
• Relocate either this product or the device that is being affected by the
interference.
• Utilize power outlets that are on different branch (circuit breaker or
fuse) circuits or install AC line filter/s.
• In the case of radio or TV interference, relocate/reorient the antenna.
If the antenna lead-in is 300 ohm ribbon lead, change the lead-in to
co-axial type cable.
If these corrective measures do not produce satisfactory results, please
contact the local retailer authorized to distribute this type of product. If
you can not locate the appropriate retailer, please contact Yamaha
Corporation of America, Electronic Service Division, 6600
Orangethorpe Ave, Buena Park, CA90620
Page 3

PRECAUTIONS
PLEASE READ CAREFULLY BEFORE PROCEEDING
* Please keep these precautions in a safe place for future reference.
WARNING
Always follow the basic precautions listed below to avoid the possibility of serious injury or even death from electrical shock,
short-circuiting, damages, fire or other hazards. These precautions include, but are not limited to, the following:
• Do not open the instrument or attempt to disassemble the internal parts
or modify them in any way. The instrument contains no user-serviceable
parts. If it should appear to be malfunctioning, discontinue use immediately and have it inspected by qualified Yamaha service personnel.
• Do not expose the instrument to rain, use it near water or in damp or
wet conditions, or place containers on it containing liquids which might
spill into any openings.
• If the AC adaptor cord or plug becomes frayed or damaged, or if there is
a sudden loss of sound during use of the instrument, or if any unusual
smells or smoke should appear to be caused by it, immediately turn off
the power switch, disconnect the adaptor plug from the outlet, and
have the instrument inspected by qualified Yamaha service personnel.
• Use the specified adaptor (PA-6 or an equivalent recommended by
Yamaha) only. Using the wrong adaptor can result in damage to the
instrument or overheating.
• Before cleaning the instrument, always remove the electric plug from
the outlet. Never insert or remove an electric plug with wet hands.
• Check the electric plug periodically and remove any dirt or dust which
may have accumulated on it.
CAUTION
Always follow the basic precautions listed below to avoid the possibility of physical injury to you or others, or damage to the
instrument or other property. These precautions include, but are not limited to, the following:
• Do not place the AC adaptor cord near heat sources such as heaters or
radiators, and do not excessively bend or otherwise damage the cord,
place heavy objects on it, or place it in a position where anyone could
walk on, trip over, or roll anything over it.
• When removing the electric plug from the instrument or an outlet, always hold the plug itself and not the cord.
• Do not connect the instrument to an electrical outlet using a multipleconnector. Doing so can result in lower sound quality, or possibly cause
overheating in the outlet.
• Unplug the AC power adaptor when not using the instrument, or during
electrical storms.
• Always make sure all batteries are inserted in conformity with the +/–
polarity markings. Failure to do so might result in overheating, fire, or
battery fluid leakage.
• Always replace all batteries at the same time. Do not use new batteries
together with old ones. Also, do not mix battery types, such as alkaline
batteries with manganese batteries, or batteries from different makers,
or different types of batteries from the same maker, since this can
cause overheating, fire, or battery fluid leakage.
• Do not dispose of batteries in fire.
• Do not attempt to recharge batteries that are not intended to be charged.
• If the instrument is not to be in use for a long time, remove the batteries
from it, in order to prevent possible fluid leakage from the battery.
• Keep batteries away from children.
• Before connecting the instrument to other electronic components, turn
off the power for all components. Before turning the power on or off for
all components, set all volume levels to minimum.
• Do not expose the instrument to excessive dust or vibrations, or extreme cold or heat (such as in direct sunlight, near a heater, or in a car
during the day) to prevent the possibility of panel disfiguration or damage to the internal components.
• Do not use the instrument near other electrical products such as televisions, radios, or speakers, since this might cause interference which can
affect proper operation of the other products.
• Do not place the instrument in an unstable position where it might accidentally fall over.
• Before moving the instrument, remove all connected adaptor and other
cables.
• When cleaning the instrument, use a soft, dry cloth. Do not use paint
thinners, solvents, cleaning fluids, or chemical-impregnated wiping cloths.
Also, do not place vinyl or plastic objects on the instrument, since this
might discolor the panel or keyboard.
• Do not rest your weight on, or place heavy objects on the instrument,
and do not use excessive force on the buttons, switches or connectors.
• Use only the stand specified for the instrument. When attaching the
stand, use the provided screws only. Failure to do so could cause damage to the internal components or result in the instrument falling over.
• Do not operate the instrument for a long period of time at a high or
uncomfortable volume level, since this can cause permanent hearing
loss. If you experience any hearing loss or ringing in the ears, consult a
physician.
■ SAVING USER DATA
• Always save data to a floppy disk frequently, in order to help prevent
the loss of important data due to a malfunction or user operating error.
Yamaha cannot be held responsible for damage caused by improper use or
modifications to the instrument, or data that is lost or destroyed.
Always turn the power off when the instrument is not in use.
Make sure to discard used batteries according to local regulations.
(4)
1
Page 4

Congratulations!
Piano
3
4
FREEZE
You are the proud owner of a fine electronic keyboard. The Yamaha PSR-730/630 Por taTone
combines the most advanced tone generation technology with state-of-the-art digital electronics
and features to give y ou stunning sound quality with maximum musical enjo yment. A large g raphic
display and easy-to-use interf ace also greatly enhance the operability of this advanced instrument.
In order to make the most of your P ortaT one’s f eatures and extensive perf ormance potential, we
urge you to read the manual thoroughly while trying out the various f eatures described. Keep the
manual in a safe place for later reference.
●The LCD displays as illustrated in this owner’ s manual are for instructional purposes only , and may appear some what
different from those on your instrument. The displa ys from the PSR-730 are used for the instructions and descriptions
in this manual.
Important Features
PSR-730
T ouch-sensitive 61-key ke yboard for a wide
range of dynamic musical expression (page 115).
individualize your arrangement of any style of
music (page 35).
The Groove & Dynamics function lets you
A variety of voices, 215 panel voices (200
panel voices for PSR-630), 12 drum kits and 480
XG voices, with the maximum polyphony of 64
voices (32 voices for PSR-630).
V oice set feature automaticaly selects the
appropriate voice parameter settings f or the panel
voices (page 116).
Advanced auto-accompaniment technology gives y ou 100 fully-orchestrated accompaniment “styles” to back up what you play on the
keyboard (page 22).
Virtual Arranger feature lets you add chord
progressions to any of the auto-accompaniment
styles for more musical, refined accompaniment
(page 29).
Large multi-function LCD display panel
makes it easy to select and edit parameters.
The functional layout of the track buttons
below the panel display makes oper ation easy.
Registration Memory saves your favorite
panel settings for instant recall when needed
(page 57).
Minus-one and Repeat functions are ideal
for learning new songs and polishing your keyboard technique (page 79).
Digital effects (reverb, chorus, DSP and
harmony) add depth and ambiance to your sound
(page 42).
One Touch Setting feature automatically
selects appropriate voice, effect, and other settings for the selected accompaniment style — all
you hav e to do is select a style and play (page 40).
2
PSR-730
The Multi Effect function lets you combine
two digital effects (page 48).
Page 5

PSR-730
15 16
With the Digital Equalizer you can fine
tune the sound of y our performance on five different frequency bands (page 51).
User Song recording feature makes it easy
to record and playback f our melody tracks with an
accompaniment track (page 83).
A total of sixteen tracks can be recorded
with the Multi recording function, including keyboard, harmony and accompaniment (page 88).
Create original accompaniment styles with
the User Style feature (you can also establish
your o wn rules for changing pitch based on chord
changes (page 98).
Multi Pads record and pla y short rhythmic
and melodic sequences that can be used to add
impact and variety to your performances (page
106).
The floppy disk drive plays XG disks and
lets you easily manage User Song, User Style,
User Pad and Registration data (page 64).
A range of MIDI functions for expanded
musical enjoyment (XG f ormat compatible), and a
TO HOST terminal for easy connection to a personal computer (page 121)
MIDI templates for easy MIDI settings
(page 129).
GM System Level 1
“GM System Level 1” is an addition to the MIDI
standard which ensures that any GM-compatible music
data can be accurately played by any GM-compatible
tone generator, regardless of manufacturer. The GM
mark is affixed to all software and hardw are products that
support the “GM System Level 1”.
PSR-730/630 supports GM System Level 1.
◆ Packing List
Please check that these items are packed with your PSR-730/630.
• PSR-730/630
XG
XG is a new MIDI format created by Yamaha which
significantly improves and expands upon the “GM System Level 1” standard by providing a greater variety of
high-quality voices plus considerably enhanced effect
operation while being fully compatible with GM.
PSR-730/630 supports the XG format.
• Music Stand (page 7)
• Sample Disk
• Owner’s manual
3
Page 6

Contents
Panel Controls 6
The Music Stand ........................................................7
Basic Display Operation 8
The Display Icons............................................................8
The Menus .....................................................................10
Shortcuts .................................................................11
Setting Up 12
Power Supply.................................................................12
Using An Optional AC Power Adaptor.........................12
Using Batteries ............................................................12
Connections ..................................................................13
PHONES Jack.............................................................13
SUSTAIN Pedal Jack...................................................13
FOOT VOLUME Jack ..................................................13
AUX OUT R and L/L+R Jacks .....................................13
MIDI IN/OUT and TO HOST Connectors ....................13
The Demonstration 14
Digital Effects 42
Reverb ...........................................................................43
Selecting a Reverb Type..............................................43
Reverb Return Level....................................................43
Chorus ...........................................................................44
Selecting a Chorus Type .............................................44
Chorus Return Level ...................................................44
DSP ...........................................................................45
Select the DSP Type ...................................................45
DSP Return Level........................................................46
Harmony.........................................................................47
Selecting a Harmony Type ..........................................47
Adjusting the Harmony Volume ...................................48
Multi Effect (PSR-730) ...................................................48
How Multi Effect Works ...............................................48
Applying Multi Effect (PSR-730) ..................................49
Setting Parts for Effect 1/2 ..........................................49
Select the Effect Type for Effect 1/2.............................50
Adjust the Dry/Wet Settings for Effect 1/2 ...................50
The Digital Equalizer (PSR-730) ...................................51
Using the Digital Equalizer (PSR-730) .........................51
Selecting a Digital EQ Type. ........................................52
Setting the Gain (User Setting) ...................................53
Playing the PSR-730/630 16
A Word About the “R1”, “R2”, and “L” Voices .............16
Selecting & Playing R1 Voices .....................................17
Keyboard Percussion ................................................ 19
The Dual Voice Mode.....................................................19
The Split Voice Mode.....................................................20
Changing the SPLIT VOICE Split Point .......................21
Auto Accompaniment 22
What is Auto Accompaniment? ...................................22
Using Auto Accompaniment ........................................22
Changing Tempo ...................................................... 26
The Beat Indicator....................................................26
Accompaniment Sections..........................................27
Accompaniment Track Muting ..................................28
The Synchro Stop Function ....................................... 28
Using Virtual Arranger ..................................................29
Accompaniment V olume Control .................................29
Changing the Accompaniment Split Point.................. 30
Interaction Between the AUTO ACCOMPANIMENT
and SPLIT VOICE Split Points.............................. 31
The Auto Accompaniment Fingering Modes..............31
The Stop Accompaniment Function ...........................35
Groove and Dynamics (PSR-730) ................................35
Applying Groove & Dynamics......................................36
Arranging the Groove & Dynamics Effect
(User Settings).......................................................36
One Touch Setting .........................................................40
The Pitch Bend Wheel 54
Setting the Pitch Bend Range ......................................54
The Modulation Wheel (PSR-730) 55
Changing the Modulation Wheel Function .................55
Transpose 56
Setting T ransposition....................................................56
Registration Memory 57
Registering the Panel Settings ....................................57
Naming the Registration Banks ...................................58
Recall the Registered Panel Settings ..........................60
The Accompanient Freeze Function ...........................60
The Multi Pads 61
Selecting a MULTI PAD Set...........................................61
Playing the MULTI PADs ...............................................62
Turning the CHORD MATCH Function On/Off ............63
Disk Operations 64
Floppy Disk Handling Precautions.............................64
User Song Data...........................................................65
User Style/User Pad/Registration Memory Data .........65
Data that Can be Saved or Loaded with the
PSR-730/630 ........................................................65
4
Page 7

Using Commercially Available Music Collections
(Sold Separately)...................................................66
The Sample Disk ...........................................................66
Format ...........................................................................67
Save ...........................................................................68
Load ...........................................................................70
Disk Copy.......................................................................72
Song Copy .....................................................................73
Delete File ......................................................................75
Song Playback 76
Song Playback Procedure............................................76
Song Volume Control...................................................78
Play from a Specified Measure ...................................78
Minus-one Practice .......................................................79
Repeat Play....................................................................80
Song Repeat ..................................................................81
Next Song ......................................................................82
Song Recording 83
Quick Recording Procedure.........................................84
Rehearsal Mode .......................................................86
Multi Recording Procedure ..........................................88
About the Recording with the Digital Effects Applied . 90
Punch In/Punch Out ....................................................92
Quantize ......................................................................93
Naming User Songs ....................................................94
Clearing Song Data .....................................................94
Song Edit.....................................................................96
Overall Functions 114
Touch Sensitivity........................................................115
Pitch Bend Range .....................................................115
Modulation Wheel......................................................115
Master Tuning............................................................ 115
Scale Tuning.............................................................. 115
Song Transpose.........................................................116
Metronome ................................................................116
Split Voice Split Point.................................................116
Accompaniment Split Point .......................................116
Fingering Mode .........................................................116
Voice Set ...................................................................116
Pedal .........................................................................117
MIDI Functions 119
What’s MIDI?................................................................119
MIDI Terminal/TO HOST Terminal ......................... 121
What You Can Do with MIDI........................................121
Connecting to a Personal Computer
(TO HOST Terminal/HOST SELECT Switch)....................122
Connect using the PSR-730/630 MIDI terminals ......122
Connect using the TO HOST terminal.......................124
The PSR-730/630 MIDI Functions ..............................125
Transmit Channel & Transmit Track ...........................125
Receive Channel & Receive Mode...........................126
Local Control .............................................................127
Clock .........................................................................128
Initial Data Send ........................................................128
MIDI Template ........................................................... 129
Style Recording 98
Style Recording Procedure ..........................................98
Rehearsal Mode .....................................................101
Drum Cancel .............................................................103
Quantize ....................................................................103
Naming Styles ...........................................................104
Clearing User Style Data...........................................105
Multi Pad Recording 106
Multi Pad Recording Procedure.................................106
Naming Pads.............................................................109
Clearing User Pad Data ............................................109
Revoicing 110
Revoicing the R1, R2, and L Voices ........................... 110
Revoicing a Style.........................................................112
Appendix 130
PSR-730/630 Display MENU/SUB MENU Structure ..130
Voice List .....................................................................133
Maximum Polyphony .................................................133
Drum Kit List................................................................140
Style List ......................................................................142
About Digital Effects (Reverb/Chorus/DSP) .............143
When DSP type Is Selected as a System Effect ....... 143
When DSP type Is Selected as a Insertion Effect .....144
Harmony Type List ......................................................147
Refining User Styles with Style File Format .............148
Style File (Auto Accompaniment) Format..................148
About the Source Chord Type ................................... 150
Troubleshooting .......................................................... 151
Data Backup & Initialization .......................................152
Data Backup..............................................................152
Data Initialization .......................................................152
MIDI Data Format.........................................................153
MIDI Implementation Chart ........................................168
Specifications..............................................................171
Index.............................................................................172
5
Page 8

Panel Controls
PSR-730
PITCH BEND MODULATION
q w
PHONES
PSR-630
1
2
AUTO ACCOMPANIMENT
STYLE
001 ~ 011
012 ~ 019
020 ~ 022
023 ~ 030
031 ~ 034
035 ~ 041
STAND BY
ON
MASTER
VOLUME
MAX
MIN
DEMO
3
SYNC STOP START
4
5
6
8BEAT
16BEAT
6/8 BALLAD
DANCE
DISCO
ROCK
RESET
TEMPO
TRANSPOSE
ACMP / SONG
VOLUME
ACCOMPANIMENT
ON / OFF
INTRO
042 ~ 047
048 ~ 051
052 ~ 060
061 ~ 065
066 ~ 070
071 ~ 081
DIGITAL MULTI EFFECT
DIGITAL EQ MULTI EFFECT
REVERB HARMONY
CHORUS
VARIATION
RHYTHM&BLUES
ROCK&ROLL
COUNTRY&WESTERN
TRADITIONAL JAZZ
CONTEMPORARY JAZZ
LATIN
DSP
MAIN / AUTO FILL
0
8
RECORD
082 ~ 083
CARIBBEAN
BALLROOM LATIN
084 ~ 087
BALLROOM STANDARD
088 ~ 091
MARCH
092 ~ 095
WALTZ
096 ~ 100
SUB MENU
MENU
MENU
9
BA
BA
GROOVE&DYNAMICS
START / STOP
ENDING
7
MAX
MIN
PANEL VOICE
001 ~ 019
020 ~ 031
032 ~ 054
055 ~ 061
062 ~ 081
DISK
116
001
MULTI PAD
STYLE
DISK
000
TRANSPOSE
SONG
REGIST MEMORY
MULTI
DIGITAL EQ
EFFECT
MIDI
12345678910111213141516
DIGITAL EFFECT
OVERALL
RHYTHM
2
ACCOMPANIMENT TRACK
REVOICE
BANK
MEMORY
082 ~ 096
PIANO
097 ~ 108
CHROMATIC
109 ~ 128
PERCUSSION
129 ~ 137
ORGAN
138 ~ 153
ACCORDION
154 ~ 168
GUITAR
AB
ONE TOUCH
100
TEMPO
REPEAT
213
ACMP/SONG
REGISTRATION MULTI PAD
VOLUME
VARIATION
REVERB HARMONYCHORUS DSP SYNC STOP
!
2
REGISTRATION MEMORY
BASS
SOLO STRINGS
ENSEMBLE
SOLO BRASS
BRASS ENSEMBLE
REED
nd Pianop1 Gra8Beat Po
001
SETTING
MEASURE
FREEZE
4
MEMORY
FINGERING mM
SONG TRACKLR2 R1
@
BEAT
1234
dim
MELODY3MELODY2MELODY1MELODY
4
169 ~ 176
177 ~ 194
195 ~ 215
216 ~ 227
001
VOICE
119
6
513
GROOVE & DYNAMICS
7
augsus
4
001001001001001001001001001001001001001001001001
ACMP VOICEVOICEVOICERHYTHM1BASS CHORD 1CHORD 2PAD PHRASE1PHRASE
L
R1R2
DUALSPLIT
FREEZE
SYNTH LEAD
SYNTH PAD
DRUM KITS
161 2 3 4 5 6 7 8 9 10 11 12 13 14 15 16
VOICE
STYLE
SONG
ONE TOUCH SETTING
228 ~ 266
267 ~ 286
287 ~ 322
323 ~ 351
352 ~ 393
#
VOICE
STYLE
SONG
XG VOICE
PIPE
)
F1
C1
e
CLICK
36 37 39 41 4238 40 43 45 46 50 51 5244 47 48 49 53 55 5754 5856 6259 60 61 69 7063 716564 66 67 7268 73 7574 76 77 78 79 808381 82
E1
D1
T S R 1 1 2 32 3 L H L HRS
G1 A1
B1 C2 D2 E2
F2
G2 A2 B2 C3 D3 E3 F3 G3 A3 B3 C4 D4 E4 F4 G4 A4 B4 C5 D5 E5 F5 G5 A5 B5
M
M
C
L
H
1
R
1
C
R
HLHLHLHL
2
2
r
394 ~ 405
406 ~ 439
440 ~ 471
472 ~ 484
485 ~ 492
STRINGS
ENSEMBLE
BRASS
REED
PIPE
PIANO
CHROMATIC
PERCUSSION
ORGAN
GUITAR
BASS 493 ~ 528 SYNTH LEAD
&
KEYBOARD
SPLIT VOICE DUAL VOICE
*
$
STOP
12341234
529 ~ 557
SYNTH PAD
558 ~ 613
SYNTH EFFECTS
ETHNIC
614 ~ 634
PERCUSSIVE
635 ~ 657
SOUND EFFECTS
658 ~ 665
666 ~ 707 SFX
PSR-730
%
123
456
789
^
–
/ NO
0
+
/ YES
MULTI PAD
(
HLSLHLMO
84 85 86 8887 89 90 91 93 9492 95
PITCH BEND
q
PHONES
e
PSR-730/630
1
2
AUTO ACCOMPANIMENT
STYLE
001 ~ 011
012 ~ 019
020 ~ 022
023 ~ 030
031 ~ 034
035 ~ 041
STAND BY
ON
MASTER
VOLUME
MAX
MIN
DEMO
3
SYNC STOP START
8BEAT
16BEAT
6/8 BALLAD
DANCE
DISCO
ROCK
4
5
6
RESET
TEMPO
TRANSPOSE
ACMP / SONG
VOLUME
ACCOMPANIMENT
ON / OFF
INTRO
042 ~ 047
048 ~ 051
052 ~ 060
061 ~ 065
066 ~ 070
071 ~ 081
7
RHYTHM&BLUES
ROCK&ROLL
COUNTRY&WESTERN
TRADITIONAL JAZZ
CONTEMPORARY JAZZ
LATIN
0
DIGITAL EFFECT
REVERB HARMONY
CHORUS
DSP
8
RECORD
VARIATION
MAIN / AUTO FILL
082 ~ 083
CARIBBEAN
BALLROOM LATIN
084 ~ 087
BALLROOM STANDARD
088 ~ 091
MARCH
092 ~ 095
WALTZ
096 ~ 100
SUB MENU
MENU
9
START / STOP
ENDING
BA
BA
REGISTRATION MEMORY
PANEL VOICE
PIANO
001 ~ 018
CHROMATIC
019 ~ 030
PERCUSSION
ORGAN
031 ~ 051
052 ~ 057
ACCORDION
058 ~ 073
GUITAR
MENU
DISK
001
MULTI PAD
STYLE
SONG
REGIST MEMORY
MIDI
12345678910111213141516
DIGITAL EFFECT
OVERALL
REVOICE
116
100
TEMPO
DISK
000
ACMP/SONG
TRANSPOSE
VOLUME
REVERB HARMONYCHORUS DSP SYNC STOP
RHYTHM
2
ACCOMPANIMENT TRACK
MEMORY
AB
REPEAT
213
REGISTRATION MULTI PAD
VARIATION
!
074 ~ 088
089 ~ 100
101 ~ 118
119 ~ 126
127 ~ 140
141 ~ 155
ONE TOUCH
2
SETTING
4
FREEZE
MEMORY
@
BASS
SOLO STRINGS
ENSEMBLE
SOLO BRASS
BRASS ENSEMBLE
REED
001
MEASURE
156 ~ 163
164 ~ 181
182 ~ 200
201 ~ 212
nd Pianop1 Gra8Beat Po
001
BEAT
1234
VOICE
119
6
dim
513
7
augsus
4
FINGERING mM
ACMP VOICEVOICEVOICERHYTHM1BASS CHORD 1CHORD 2PAD PHRASE1PHRASE
MELODY3MELODY2MELODY1MELODY
4
L
SONG TRACKLR2 R1
DUALSPLIT
001001001001001001001001001001001001001001001001
R1R2
FREEZE
PIPE
SYNTH LEAD
SYNTH PAD
DRUM KITS
161 2 3 4 5 6 7 8 9 10 11 12 13 14 15 16
VOICE
STYLE
SONG
ONE TOUCH SETTING
XG VOICE
213 ~ 251
PIANO
CHROMATIC
252 ~ 271
PERCUSSION
ORGAN
272 ~ 307
308 ~ 336
GUITAR
337 ~ 378
BASS 478 ~ 513 SYNTH LEAD
VOICE
STYLE
SONG
STOP
#
379 ~ 390
391 ~ 424
425 ~ 456
457 ~ 469
470 ~ 477
&
KEYBOARD
SPLIT VOICE DUAL VOICE
*
12341234
)
C1
CLICK
T S R 1 1 2 32 3 L H L HRS
36 37 39 41 4238 40 43 45 46 50 51 5244 47 48 49 53 55 5754 5856 6259 60 61 69 7063 716564 66 67 7268 73 7574 76 77 78 79 808381 82
F1
E1
D1
G1 A1
B1 C2 D2 E2
F2
G2 A2 B2 C3 D3 E3 F3 G3 A3 B3 C4 D4 E4 F4 G4 A4 B4 C5 D5 E5 F5 G5 A5 B5
M
M
C
L
H
1
R
1
C
R
HLHLHLHL
2
2
r
STRINGS
ENSEMBLE
BRASS
REED
PIPE
%
^
SYNTH EFFECTS
543 ~ 598
ETHNIC
599 ~ 619
PERCUSSIVE
620 ~ 642
SOUND EFFECTS
643 ~ 650
651 ~ 692 SFX
PSR-630
123
456
789
–
/ NO
0
+
/ YES
SYNTH PAD
514 ~ 542
MULTI PAD
(
HLSLHLMO
84 85 86 8887 89 90 91 93 9492 95
6
MAC PC1 PC2 MIDI
MIDI
IN
OUT SUSTAINTO HOSTFOOT VOL
AUX OUT
RL / L
+
R
DC IN 10-12V
tyuiopQ
Page 9

Top Panel Controls
■
q STAND BY/ON Switch ......................... page 14
w MASTER VOLUME Control..................page 14
e DEMO Button.......................................page 14
Panel Controls
GROOVE & DYNAMICS Button
!4
(PSR-730) ......................................... page 36
!5 NUMBER Buttons ................................ page 10
!6 + and – Buttons.................................... page 10
!7 Data Dial ..............................................page 10
r TEMPO Buttons ...................................page 26
t TRANSPOSE Buttons..........................page 56
y ACCOMPANIMENT/SONG VOLUME
Buttons..........................................pages 29,78
u AUTO ACCOMPANIMENT SECTION
• AUTO ACCOMPANIMENT
ON/OFF Button .................................page 23
• SYNC STOP Button..........................page 28
• SYNC START Button ........................page 24
C6
96
• INTRO Button ................................... page 24
• MAIN/AUTO FILL A & B Buttons.......page 24
• ENDING Button.................................page 25
!8 KEYBOARD SECTION
• DUAL VOICE Button ......................... page 19
• SPLIT VOICE Button......................... page 20
!9 MULTI PAD SECTION
• STOP Button.....................................page 62
• 1, 2, 3, 4 Buttons............................... page 62
@0 Keyboard..............................................page 18
@1 PITCH BEND Wheel ............................page 54
@2 MODULATION Wheel (PSR-730) ........ page 55
@3 PHONES Jack......................................page 13
@4 Disk Drive.............................................page 64
i RECORD Button .................... pagse 84,99,106
Rear Panel Controls
o START/STOP Button................pages 15,23,25
!0
DIGITAL MULTI EFFECT SECTION (PSR-730)
DIGITAL EFFECT SECTION (PSR-630)
• DIGITAL EQ Button (PSR-730).........page 51
• REVERB Button ................................page 43
• CHORUS Button ...............................page 44
• DSP Button .......................................page 45
• VARIATION Button ............................ page 46
• MULTI EFFECT Button (PSR-730) ...page 49
• HARMONY Button ............................page 47
■
@5 FOOT V OL Jack...................................page 13
@6 TO HOST Connector..........................page 121
@7 HOST SELECT Switch ......................page 122
@8 MIDI IN and OUT Connectors............page 121
@9 SUSTAIN Jack......................................page 13
#0 AUX OUT R, L/L+R Jacks ....................page 13
#1 DC IN 10-12V Jack ..............................page 12
!1 DISPLAY & RELATED CONTROLS
• DISPLAY............................................. page 8
• MENU Buttons .................................. page 10
• SUB MENU Buttons..........................page 10
• VOICE Button....................................page 10
C6
96
• STYLE Button ...................................page 10
• SONG Button ....................................page 10
• REVOICE Button.............................page 110
• TRACK Buttons......... pages 19,20,28,86,111
◆ The Music Stand
!2 REGISTRATION MEMORY SECTION
• BANK [+], [ –] Buttons (PSR-730) .....page 58
• MEMORY Button...............................page 58
• 1, 2, 3, 4 Buttons............................... page 58
• FREEZE Button ................................ page 60
!3 ONE TOUCH SETTING Button ............page 41
The PSR-730/630 is supplied with a music
stand that can be attached to the instrument
by inserting it into the slot at the rear of the
control panel.
7
Page 10

Basic Display Operation
001
The PSR-730/630 LCD panel is a large multi-function type that simultaneously displays and
provides access to a number of important parameters. Basic operation of the displa y as well
as the MENU and SUB MENU buttons, and the meaning of the icons which appear in the
display, are summarized briefly below.
The Display Icons
001
DISK
Style/Song Number
The style number or song number is displayed here when in the Song/Style Mode.
Disk
Appears when a floppy disk song is selected
(page 76).
Voice Number (R1 Voice)
The currently selected R1 voice number (page 17) appears here.
XG
Appears when one of the PSR-730/
630’s XG voices is selected (page
16).
XG
Appears when XG voices are used in a
floppy disk song.
nd Pianop1 Gra8Beat Po
AB
REPEAT
REGISTRATION MULTI PAD
VARIATION
DISK
MULTI
EFFECT
116
100
TEMPO
000
TRANSPOSE
REVERB HARMONYCHORUS DSP SYNC STOP
ACMP/SONG
VOLUME
001
STYLE
SONG
DIGITAL EQ
12345678910111213141516
ONE TOUCH
SETTING
213
4
MEMORY
FREEZE
001
MEASURE
1234
FINGERING mM
dim
BEAT
6
7
119
513
augsus
4
001
VOICE
GROOVE & DYNAMICS
001001001001001001001001001001001001001001001001
BASS CHORD 1CHORD 2PAD PHRASE1PHRASE
RHYTHM
1
2
ACCOMPANIMENT TRACK
12345678
RHYTHM
1
BASS CHORD 1CHORD 2PAD PHRASE1PHRASE
RHYTHM
2
910111213
213213252201471
MELODY
2
1
4
3
MELODY
MELODY
MELODY
8
ACMP
MELODY
2
1
SONG TRACK
2
4
3
L
L
R1R2
DUALSPLIT
R2 R1
ACMP VOICEVOICEVOICERHYTHM
MELODY
MELODY
MELODY
ACCOMP ANIMENT TRA CKS
347324407324322340219219
These icons display the on/off status and volume/velocity settings
for each of the 8 accompaniment tracks. They are also used to
specify tracks when using the REV OICE function (page 110). When
2
doing Multi recording/playback of songs, the on/off status and
volume settings are shown for tracks 1-8 (page 89).
MELODY TRACKS 1 … 4, ACCOMPANIMENT TRACK
In Song Quick Record mode, the recording track is indicated(page
86). When doing Multi recording/playback of songs, the on/off
status and volume settings are shown for tracks 9-13 (page 89).
Page 11

Basic Display Operation
116
0
100
AB
ONE TOUCH
SETTING
213
FREEZE
4
1
1234
TEMPO
Shows the current tempo of accompaniment/song playback (page 26).
TRANSPOSE
The current transpose value (page 56).
ACMP/SONG VOLUME
In Song/Style Mode (page 11), the accompaniment or song volume is displa yed
(pagse 29,78).
REPEAT
Indicates the “A” and “B” repeat points
when programming a repeat section, and
whether REPEA T PLA Y is on or off (page
80).
ONE TOUCH SETTING
Appears when the ONE TOUCH SETTING feature is engaged (page 41).
REGISTRATION 1 … 4
(Registration Memory)
Indicates the currently selected REGISTRATION MEMORY or ONE TOUCH
SETTING number (page 57).
FREEZE
Appears when the REGISTRATION
MEMORY “FREEZE” function is on (page
60).
MEASURE
Indicates the current measure number
during song recording and playback (page
78).
BEA T
Flashes at the current tempo and indicates the current beat during accompaniment and song playback. (page 26)
MULTI PAD 1 … 4
Indicates the currently playing MUL TI P AD
numbers (page 62).
VARIATION
mM
DIGITAL EQ (PSR-730)
Appears when the DIGIT AL EQU ALIZER is
turned on (page 51).
MULTI EFFECT (PSR-730)
Appears when the MUL TI EFFECT is turned
on (page 49).
REVERB
Appears when the PSR-730/630 REVERB
effect is turned on (page 43).
CHORUS
Appears when the CHORUS eff ect is turned
on (page 44).
DSP
Appears when the DSP effect is turned on
(page 45).
DSP VARIATION
Appears when the DSP VARIA TION effect
is turned on (page 46).
HARMONY
Appears when the HARMONY effect is
turned on (page 47).
SYNC STOP
Appears when AUTO ACCOMPANIMENT
SYNC STOP function is engaged (page
28).
FINGERING
Shows the currently selected fingering
mode (page 32).
CHORD
Displays the current chord name during
7
AUTO ACCOMPANIMENT playback or
SONG recording/playback (page 25).
GROOVE & DYNAMICS
Appears when the GROO VE & DYNAMICS
function is engaged (page 36).
(PSR-730)
Keyboard Settings (VOICE R1/VOICE R2/VOICE L)
14 15 16
L
DUALSPLIT
001048064
VOICEVOICEVOICE
R1R2
These icons indicate the on/off status and volume settings for the L, R2, and
R1 voices when the DUAL VOICE and/or SPLIT VOICE functions are used
(pages 19,20). They are also used to specify trac ks when using the REVOICE
function (page 110).
During Multi recording/playback of songs, the y indicate the on/off status,
volume/velocity and voice settings for tracks 14-16 (page 86).
9
Page 12

Basic Display Operation
The Menus
MENU
Main Menu Selection (VOICE/STYLE/SONG Buttons)
Y ou can select one of the three main VOICE/STYLE/SONG menus by pressing the appropriate
button to the right of the display. The menu icon
selected.
Selecting Other Menus (MENU [▲], [▼] Buttons)
You can select one of the seven “DISK” “MULTI PAD” “REGIST MEMORY” “MIDI” “DIGITAL
EFFECT” “OVERALL” “GROO VE & DYNAMICS” menus on the left of the display by pressing
the [▲], [▼] MENU buttons at the lower left. The menu icon
you have selected.
will move to indicate the menu you have
will move to indicate the menu
SUB MENU
MENU
MENU
MULTI PAD
REGIST MEMORY
DIGITAL EFFECT
OVERALL
GROOVE&DYNAMICS
AB
DISK
MIDI
001
STYLE
DIGITAL EQ
116
100
TEMPO
DISK
000
ACMP/SONG
TRANSPOSE
SONG
MULTI
EFFECT
12345678910111213141516
RHYTHM
2
ACCOMPANIMENT TRA CK
VOLUME
REVERB HARMONYCHORUS DSP SYNC STOP
ONE TOUCH
SETTING
REPEAT
213
FREEZE
4
MEMORY
REGISTRATION MULTI PAD
VARIATION
MELODY
2
001
MEASURE
FINGERING mM
MELODY
2
1
SONG TRACK
MELODY
nd Pianop1 Gra8Beat Po
3
BEAT
1234
119
6
dim
513
7
augsus
ACMP VOICEVOICEVOICERHYTHM1BASS CHORD 1CHORD 2PAD PHRASE1PHRASE
MELODY
4
4
L
L
001
VOICE
GROOVE & DYNAMICS
001001001001001001001001001001001001001001001001
R1R2
DUALSPLIT
R2 R1
SUB MENU Selection (SUB MENU [▲], [▼] Buttons)
You can select one of the sub menus within the selected menu by pressing the [▲], [▼] SUB
MENU buttons at the upper left of the display. At the top of the display, the MENU/SUB MENU
you selected will displayed on the left and the current setting or v alue f or that item on the right.
123
Number Buttons [1]-[0], [+] (YES), [–] (NO) Buttons
456
The number buttons [1] – [0], [+],[–], are used to change
settings (values). Pressing the [+] button increases the dis-
789
played value by 1. Pressing the [–] button decreases it by 1.
Pressing and holding either button causes a continuous in-
–
/ NO
0
+
/ YES
crease or decrease. Pressing the [+] (YES) or [–] (NO) buttons
also switches betw een on and off settings. For items that have
initial default v alues , pressing the [+] and [–] buttons together
at the same time will return the setting to the initial value.
Dial
Like the number buttons [1]-[0], [+],[–], the
dial is used to change settings and values.
Rotating it to the right (clockwise) increases
the value, while rotating it to the left (counterclockwise) decreases it. The dial can also be
used to toggle on/off settings.
• When the value displayed is a number like a style number, pressing and holding either the [+] or [–] button will cause the number to
continue to the lowest value after the highest is reached or vice-
m
versa (...99
100m1m2..., ...2m1m100m99...). If the number displayed is a value like a transpose value, it will stop changing when
the maximum or minimum value is reached.
VOICE
STYLE
SONG
VOICE
STYLE
SONG
10
Page 13

Basic Display Operation
There are two modes in the PSR-730/630: Style Mode and Song Mode , and normally one of them is selected. Pressing
the STYLE button selects Style Mode , lighting the STYLE icon, while pressing the Song button selects Song Mode and
lights the SONG icon, displaying the current mode.
STYLE
Style Mode * Pressing the START/STOP button will start accompaniment playback.
Currently selected
style name and style
number
Accompaniment
volume
001
STYLE
SONG
DIGITAL EQ
12345678910111213141516
1
116
DISK
000
TRANSPOSE
MULTI
EFFECT
BASS CHORD 1CHORD 2PAD PHRASE1PHRASE
RHYTHM
2
ACCOMP ANIMENT TRA CK
Information for accompaniment tracks 1-8
SONG
Song Mode * Pressing the START/STOP button will start song playback.
Currently selected
song name and song
number
Song volume
001
STYLE
SONG
DIGITAL EQ
12345678910111213141516
1
116
DISK
000
TRANSPOSE
MULTI
EFFECT
BASS CHORD 1CHORD 2PAD PHRASE1PHRASE
RHYTHM
2
ACCOMP ANIMENT TRA CK
Information for song tracks 1-16
AB
ONE TOUCH
100
TEMPO
REVERB HARMONYCHORUS DSP SYNC STOP
100
TEMPO
REVERB HARMONYCHORUS DSP SYNC STOP
ACMP/SONG
VOLUME
ACMP/SONG
VOLUME
REPEAT
VARIATION
AB
REPEAT
VARIATION
SETTING
213
FREEZE
4
MEMORY
REGISTRATION MULTI PAD
MELODY
2
ONE TOUCH
SETTING
213
FREEZE
4
MEMORY
REGISTRATION MULTI PAD
MELODY
2
001
MEASURE
FINGERING mM
MELODY
2
1
SONG TRACK
001
MEASURE
FINGERING mM
MELODY
2
1
SONG TRACK
MELODY
MELODY
nd Pianop1 Gra8Beat Po
3
nd Pianorid GraLondon B
3
BEAT
1234
119
6
dim
513
7
augsus
ACMP VOICEVOICEVOICERHYTHM
MELODY
4
BEAT
1234
119
6
dim
513
7
augsus
ACMP VOICEVOICEVOICERHYTHM
MELODY
4
4
GROOVE & DYNAMICS
L
L
GROOVE & DYNAMICS
4
L
L
001
VOICE
001109084888888888888888362324407339337355219219
R1R2
DUALSPLIT
R2 R1
001
VOICE
213213213213213252219471442468434259391337213213
R1R2
DUALSPLIT
R2 R1
• When in Song Mode, AUTO ACCOMPANIMENT ON/OFF , SYNC START,
SYNC STOP and other buttons connected with accompaniment will not
function.
Shortcuts
To make operation as easy and as efficient as possible, the PSR-730/630 features a number of
“shortcuts” which allow you to jump directly to certain functions without having to use the MENU
and SUB MENU buttons. All of these shortcuts work in the same way: press and hold a panel
button for a few seconds to go to the related function. For example, if you press and hold the
[REVERB] button for a few seconds , y ou will go directly to the REVERB type selection function.
The shorcuts will also be described where appropriate throughout this manual.
11
Page 14

Setting Up
This section contains information about setting up your PSR-730/630 and preparing to play.
Be sure to go through this section carefully before using your PSR-730/630.
Power Supply
• Never interrupt the power
supply (e.g. remove the
Although the PSR-730/630 will run either from an optional AC adaptor or
batteries, Y amaha recommends use of the more environmentally safe A C adaptor.
Follow the instructions below according to the power source you intend to use .
■ Using An Optional AC Power Adaptor
batteries or unplug the
AC adaptor) during any
PSR-730/630 record operation! Doing so can result in a loss of data.
z Plug an optional Yamaha PA-6 Power Adaptor into a wall AC outlet.
x Then plug the DC output cable from the PA-6 into the DC IN 10-12V jack on
the rear panel of the PSR-730/630. The internal batteries are automatically
disconnected when an AC Power Adaptor is used.
DC IN 10-12V
PA-6
When turning the power OFF, simply reverse the procedure.
■ Using Batteries
For battery operation the PSR-730/630 requires six 1.5V SUM-1, “D” size, R20 or equivalent batteries.
When the batteries need to be replaced “Lo Battery!!” may appear on top of the
display, the volume ma y be reduced, the sound may be distorted, and other problems
may occur. When this happens, turn the power off and replace the batteries.
Replace the batteries as follows:
z Open the battery compartment cover located on the instrument’ s bottom panel.
x Insert the six new batteries, being careful to follow the polarity markings on
the inside of the compartment.
c Replace the compartment cover, making sure that it locks firmly in place.
• Use ONLY a Yamaha PA-6 AC
Power Adaptor (or other
adaptor specifically recommended by Yamaha) to power
your instrument from the AC
mains. The use of other adaptors may result in irreparable
damage to both the adaptor
and the PSR-730/630.
• Unplug the AC Power Adaptor when not using the PSR730/630, or during electrical
storms.
• When the batteries run
down, replace them with a
complete set of six new
batteries. NEVER mix old
and new batteries.
• Do not use different kinds
of batteries (e.g. alkaline
and manganese) at the
same time.
• If the instrument is not to
be in use for a long time,
remove the batteries from
it, in order to prevent possible fluid leakage from
the battery.
• Plugging or unplugging
the AC power adaptor
while the batteries are installed will reset the PSR730/630 to the defaults.
◆ Important Notes on Battery Use
• Since the PSR-730 and PSR-630 consume a considerable
amount of power , Yamaha recommends the use of an A C power
adaptor rather than batteries. The batteries should be considered an auxiliary power source for data backup.
• The floppy disk drive, in pa rticular, uses a large amount of
power, so it is impor tant to always use an AC power ada ptor
when performing disk-intensive operations such as song recording/playback or data load/save. If you attempt to use
battery power for these operations and the batteries do fail, you
will lose not only the data you’re recording or sa ving, b ut also
12
other data in internal memory including user styles, user pads,
registration memory, etc.
• Taking the above precautions into consideration, always use an
AC power adaptor when using the PSR-630/730 for an important performance or when creating important data.
• When using batteries and the “Lo Battery!!” war ning initially
appears on the display, the v olume will drop a little but you will
be able to use the instrument for a while longer. When the “Lo
Battery!!” warning begins to appear every few seconds, replace the batteries as soon as possible.
Page 15

Connections
■ PHONES Jack
■ SUSTAIN Pedal Jack
SUSTAIN
■ FOOT VOLUME Jack
FOOT VOL
A standard pair of stereo headphones can be
plugged in here for private pr actice or late-night
playing. The internal stereo speaker system is
automatically shut off when a pair of headphones is plugged into the PHONES jack.
Do not listen with the headphones at high volume for long periods of time. Doing so may
cause hearing loss.
The sustain function causes the sound from a
depressed key to continue, even after the key is
released. Plug an optional Yamaha FC4 or FC5
footswitch into the sustain jack and use it to
switch sustain on and off. The footswitch connected to this jack can also be set to replicate the
functions of some panel buttons, doing things
like starting and stopping accompaniment (page
117).
Connecting an optional Y amaha FC7 foot controller lets you use your foot to change the
volume as you play the PSR-730/630 (expression function). The foot controller connected to
this jack can also be set to replicate the functions
of the main volume controls, such as accompaniment or song volume (page 117).
Setting Up
• Be sure that you do not
press the footswitch while
turning the power on. If
you do, the ON/OFF status of the footswitch will
be reversed.
• When the sustain or
sostenuto pedal functions are being used
(page 117), some
voices may sound continuously or have a long
decay after the notes
have been released
while the pedal is held.
■ AUX OUT R and L/L+R Jacks
• • • • • • • • • • • • • • • • • •
AUX OUT
L/L+R
R
Stereo
System
■ MIDI IN/OUT and TO HOST Connectors
See page 121.
The rear-panel AUX OUT R and L/L+R jacks
deliver the output of the PSR-730/630 for connection to a keyboard amplifier, stereo sound
system, a mixing console, or tape recorder. If
you will be connecting the PSR-730/630 to a
monaural sound system, use only the L/L+R
jack. When a plug is inserted into the L/L+R jack
only, the left- and right-channel signals ar e combined and delivered via the L/L+R jack so you
don’t lose any of the PSR-730/630 sound. (Use
phone plugs).
• Connecting PSR730/630 to external
equipment only after
turning off power for
all devices. To prevent damage to the
speakers, set the
volume of the external devices at the
minimum setting before connecting
them. Failure to observe these cautions
may result in electric shock or equipment damage.
13
Page 16

The Demonstration
Once you’ve set up your PSR-730/630, try listening to the pre-progr ammed demonstration
songs. A total of 15 demo songs are provided.
Switch ON
1
Turn the power ON by pressing the [STAND BY/ON] switch.
STAND BY
ON
• Even when the switch is in
the “STAND BY” position,
electricity is still flowing to
the instrument at the minimum level. When you are
not using the PSR-730/630
for a long time, make sure
you unplug the AC power
adoptor from the wall AC
outlet, and/or remove the
batteries from the instrument.
Set an Initial Volume Level
2
Turn the [MASTER V OLUME] control up (c lockwise) about a quarter-turn
from its minimum position. You can re-adjust the [MASTER VOLUME]
control for the most comfortable overall volume level after playbac k begins.
MASTER
VOLUME
MAX
Press the [DEMO] Button
3
MIN
Press the [DEMO] button to start demo playback. The PSR-730/630 SONG
menu will automatically be selected and the number and name of the first demo
song will appear on the top line of the display. The demo will begin playing
automatically. The demo songs will play in sequence, and the sequence will
repeat until stopped.
• If you play the PSR-730/630
with the volume at its maximum level when the batteries
are used, the life of the batteries will be shorter.
• You can either have all the
demo songs played continuously, or have only one song
play (page 77).
DEMO
14
tTrumpet
Page 17

Skip to the Beginning Of a Different Demo Song
4
While the demonstration is playing you can select any of the demo songs by
using the [–] and [+] buttons. Playback will skip to the beginning of the selected
song.
123
456
The Demonstration
Stop When Done
5
dR&B
789
/ NO
–
0
+
/ YES
Press the [DEMO] button or the [ST ART/ST OP] button to stop demo playback.
DEMO
START / STOP
• Stopping demo song
playback, then starting it again by pressing the [START/
STOP] button will
cause demo song
playback to automatically stop at the end
of that song.
• If the [DEMO] button
is pressed in Style
Mode (page 11), the
instrument will automatically switch to
Song Mode (page 11).
15
Page 18

Playing the PSR-730/630
The PSR-730/630 actually includes two voice sets: the “panel” voices and percussion kits,
and the XG voices. The panel voices include 215 “pitched” voices (200 “pitched” voices for
PSR-630) and 12 drum kits, while the XG voice set includes 480 voices .
When an XG voice is selected, an XG icon
of the display.
Panel Voices Voice numbers 1-215 Voice numbers 1-200
Drum Kits Voice numbers 216-227 Voice numbers 201-212
XG Voices Voice numbers 228-707 Voice numbers 213-692
Choose a voice you like, and try it out!
• Refer to the panel voice list or XG voice list when selecting voices (page 133).
• See page 3 for information about XG.
is displayed under the v oice number at the top
PSR-730 PSR-630
A Word About the “R1”, “R2”, and “L” Voices
The PSR-730/630 allows up to three voices to be selected at the same time: “R1”
(Right-hand 1), “R2”, (Right-hand 2) and “L” (Left-hand). The “R1” voice is the basic
voice of the PSR-730/630 and it’s used when you’re playing a single voice over the
entire range of the keyboard as with an acoustic piano. Y ou can also have two voices
play together at the same time (R1 voice and R2 voice) or play dif ferent voices with
the right and left hands (R1 voice and L voice) (pages 19, 20). The numbers of the
currently selected R1, R2, and L voices are all shown at the lower right of on the
display panel. Normally, the R1 voice n umber is also shown at the upper right of the
display panel.
001109084
L
VOICEVOICEVOICE
R1R2
DUALSPLIT
● Playing with a Single Voice
● Playing with Two Voices
The R1 (Right-hand 1), the R2 (Right-hand 2) and the L
(Left hand) voices are shown.
L
R1 Voice
(Dual Voice Mode m page 19).
L
R1 Voice + R2 Voice
VOICEVOICEVOICE
R1R2
DUALSPLIT
VOICEVOICEVOICE
R1R2
DUALSPLIT
●
Playing Separate Voices with the Right and Left Hands (Split V oice Mode m page 20)
L Voice
L Voice
(Split Voice Mode + Dual Voice Mode)
R1 Voice
R1 Voice + R2 Voice
16
L
L
VOICEVOICEVOICE
R1R2
DUALSPLIT
VOICEVOICEVOICE
R1R2
DUALSPLIT
Page 19

Playing the PSR-730/630
Selecting & Playing R1 Voices
Select the VOICE Menu
1
Press the [V OICE] button so that the triangular indicator appears in the display next
to “VOICE” to the right of the display . The number and name of the cur rently selected
“R1” voice appears on the top right of the display panel when the VOICE menu is
selected.
nd Pianop1 Gra
001
VOICE
Select a Panel Voice
2
The PSR-730/630 voices can be selected by using the [–] and [+] buttons, the
number buttons, the data dial, or the [VOICE] button.
● The [–] and [+] Buttons
When the VOICE menu is selected these b uttons step up or down through the PSR730/630’s voices. Press either button briefly to step to the next voice in the
corresponding direction, or hold the button to scroll rapidly through the voices in
the corresponding direction.
ghtPianop1 Bri
002
VOICE
789
/ NO
–
VOICE
0
+
/ YES
● The Number Buttons
The number buttons can be used to directly enter the number of the desired voice,
thereby immediately selecting that voice without having to step through a number
of other voices. T o select v oice number 109, for example, press the [1], [0], and [9]
number buttons in sequence.
ingsp1 Str
* The above illustration shows the display of the PSR-730.
109
123
456
789
/ NO 0+ / YES
–
17
Page 20

Playing the PSR-730/630
One- or two-digit voice numbers can be entered without leading zeros. To select
voice number “23”, for example , simply press the [2] button and then the [3] button.
The bars below the voice number on the display will f lash for a few seconds, and
then disappear when the selected voice number has been recognized by the PSR730/630.
123
ophonep1 Xyl
023
* The above illustration shows the display of
the PSR-730.
456
789
/ NO
–
0
+
/ YES
One- or two-digit voice numbers can also be enter ed with leading zeroes: e.g. “23”
can be entered as “023” by pressing the [0], [2], and [3] buttons. In this case the
specified voice number will be immediately recognized by the PSR-730/630.
● The Data Dial
Simply rotate the dial clockwise to increment the voice number, or counterclockwise to decrement the voice number.
● The [VOICE] Button
Pressing the [VOICE] button increments the voice number. Press briefly to
increment by one, or hold for continuous incrementing.
VOICE
Play & Adjust Volume
3
You can now play the selected voice on the PSR-730/630 keyboard. Use the
[MASTER VOLUME] control to adjust the overall volume level.
If the Voice Set function (page 116) is turned “on”, whenever a panel voice is
selected appropriate “R2” and “L” voices (i.e. DUAL VOICE and SPLIT VOICE
modes) as well as digital effects, etc., will be automatically selected at the same time.
MASTER
VOLUME
MIN
MAX
• When a XG voice is
selected the XG icon
will appear below the
voice number.
• Refer to page 133 for
a complete list of the
panel and XG voices.
18
Page 21

Playing the PSR-730/630
◆Keyboard Percussion
When one of the 12 panel DRUM KIT voices are selected you can pla y different
drums and percussion instruments on the keyboard. The drums and percussion
instruments played by the various keys are marked by symbols below the keys.
.Kit1p1 Std
* The above illustration shows the display of the PSR-730.
● The Drum Kits
PSR-730 PSR-630 Kit Name
216 201 Standard Kit1
217 202 Standard Kit2
218 203 Room Kit
219 204 Rock Kit
220 205 Electronic Kit
221 206 Analog Kit
216
PSR-730 PSR-630 Kit Name
222 207 Dance Kit
223 208 Jazz Kit
224 209 Brush Kit
225 210 Classic Kit
226 211 SFX Kit 1
227 212 SFX Kit 2
VOICE
• The HARMONY effect
(page 47) cannot be
turned on while a
drum kit is selected
for the “R1” voice, and
will automatically be
turned off if a drum kit
is selected while
HARMONY is on.
• The TRANSPOSE parameter (page 56) has
no effect on the drum
kit voices.
• See page 140 for a
complete listing of the
keyboard percussion
drum instrument assignments.
The Dual Voice Mode
When the DU AL V OICE mode is engaged you can play two voices (the R1 and R2
voices) simultaneously across the entire keyboard.
The DUAL VOICE mode is turned on and off by pressing the [DUAL VOICE]
button. When the DU AL VOICE mode is tur ned on both R1 and R2 icons in the display
will light. Press the [DUAL V OICE] button a second time to turn the DU AL VOICE
mode off: the R2 icon in the display will go out leaving only the R1 icon lit.
001109084
L
VOICEVOICEVOICE
R1R2
DUALSPLIT
In the Syle mode, the R2 TRA CK button below the display (second from the right)
can also be used to turn the R2 voice on or off as required.
001109084
L
L
VOICEVOICEVOICE
R1R2
DUALSPLIT
R2 R1
DUAL VOICE
• The R1/R2 voice settings (voice parameters) can be changed
as required by using
the REVOICE function,
described on page
110.
• The R1 voice cannot
be turned off.
• The DUAL VOICE
mode can be used at
the same time as the
SPLIT VOICE mode,
described below. In
this case the L voice is
played on the left-hand
section of the keyboard while both the
R1 and R2 voices are
played on the righthand section of the
keyboard. See the
“The Split Voice Mode”
section, below, for
more information.
1614 15 16
19
Page 22

Playing the PSR-730/630
The Split Voice Mode
The SPLIT V OICE mode lets you play different voices with the left and right hands.
The “split point” forms a boundary on the keyboard with the R voice playing on the
right side, and the L voice on the left.
The SPLIT VOICE mode is engaged by pressing the [SPLIT VOICE] button.
When turned on, the L icon in the display will light in addition to the R1 or R1 and R2
icons. Press the [SPLIT VOICE] button a second time to disengage the SPLIT VOICE
mode: the L icon will go out leaving only the R voice.
Split Point
• The L voice settings
(voice parameters)
can be changed as
required by using the
REVOICE function,
described on page
110.
• The split point can be
changed as required
as described below.
001109084
L
VOICEVOICEVOICE
R1R2
DUALSPLIT
SPLIT VOICE
In the Syle mode, the L TRACK button belo w the display (third from the right) can
also be used to turn the L voice on or off as required.
001109084
L
L
VOICEVOICEVOICE
R1R2
DUALSPLIT
R2 R1
1614 15 16
20
Page 23

Playing the PSR-730/630
Changing the SPLIT VOICE Split Point
The SPLIT VOICE split point can be set to any key on the PSR-730/630 keyboard
to match your individual playing requirements.
Select the SPLIT VOICE Split Point Function
1
Use the MENU [▲] and [▼] buttons to the left of the display to move the triangular
indicator next to “OVERALL” on the left side of the display.
MENU
DIGITAL EFFECT
GROOVE&DYNAMICS
MIDI
OVERALL
Then use the SUB MENU [▲] and [▼] buttons to select the “Split Point” function
from within the OVERALL menu . The MIDI note number (see the bottom of the
keyboard) corresponding to the current split point will appear to the right of “Split
Point” on the top line of the display.
[ B2 ]nt: 59SplitPoi
Set As Required
2
Simply press the key you want to assign as the split point. The key number of the
key you press will appear to the right of “SplitPoint” on the top line of the display . Y ou
can also use the [–] and [+] buttons, number buttons, or data dial to enter the split point
key number . The lo west key on the keyboar d (C1) is key number “36”, middle C (C3)
is “60”, and the highest key (C5) is 96. The split point can be set at any key number
from 0 through 127, allowing the split point to be set outside the range of the PSR-730/
630 keyboard for MIDI applications.
123
456
789
/ NO
0
+
–
/ YES
• The split point key becomes the highest
key in the left-hand
section of the keyboard.
• The default split point
(54 for PSR-730 and
59 for PSR-630) can
be instantly recalled
by pressing the [–]
and [+] buttons at the
same time.
• For the relationship
between the SPLIT
VOICE split point and
the AUTO ACCOMPANIMENT split
point, see page 31.
• When setting the split
point, that is, the sub
menu “SplitPoint” is
shown on the display,
pressing the key on
the keyboard doesn’t
either produce notes
or detect chords in the
accompaniment section, but only designates the split point.
21
Page 24

Auto Accompaniment
The PSR-730/630 has 100 different accompaniment “styles” from every musical type that can
be used to provide fully-orchestrated or rhythm-only accompaniment. Just select one of the
many styles available and play along.
What is Auto Accompaniment?
With the Auto Accompaniment feature, all you have to do is play the chords in your
song and the accompaniment style that matches your music will automatically play
along following the same chord progression. Using Auto Accompaniment, even a
solo performer can enjoy playing with an entire band or orchestra backing them up.
● When Auto Accompaniment is turned on...
The specified left-hand section of the keyboard becomes the “Auto Accompaniment” section, and chords played in this section are automatically detected
and used as a basis for fully automatic accompaniment with the selected style.
AUTO ACCOMPANIMENT
split point (54)
• The default setting for
the Auto Accompaniment split point is [54]
(the Auto Accompaniment sections extends to the left of key
[54]). To change the
Auto Accompaniment
split point, see page
30.
“auto accompaniment”
section
Using Auto Accompaniment
Select a Style
1
Press the [STYLE] button to select the STYLE menu (the triangular indicator will
appear next to “STYLE” to the right of the display). The number and name of the
currently selected style will appear on the top left of the display, and the
icon will light, indicating that the PSR-730/630 is in Style Mode.
nd Pianop1 Gra8Beat Po
ACMP/SONG
VOLUME
AB
REPEAT
VARIATION
001
STYLE
SONG
DIGITAL EQ
12345678910111213141516
1
116
100
TEMPO
DISK
000
TRANSPOSE
MULTI
REVERB HARMONYCHORUS DSP SYNC STOP
EFFECT
BASS CHORD 1CHORD 2PAD PHRASE1PHRASE
RHYTHM
2
ACCOMP ANIMENT TRA CK
ONE TOUCH
SETTING
213
4
REGISTRATION MULTI PAD
2
FREEZE
MEMORY
MELODY
001
MEASURE
FINGERING mM
MELODY
2
1
SONG TRACK
MELODY
3
BEAT
1234
6
dim
7
ACMP VOICEVOICEVOICERHYTHM
MELODY
4
119
513
augsus
4
GROOVE & DYNAMICS
L
L
001
VOICE
001109084888888888888888362324407339337355219219
R1R2
DUALSPLIT
R2 R1
VOICE
STYLE
SONG
STYLE
VOICE
STYLE
SONG
22
Page 25

Auto Accompaniment
Find the style you want by referring to the style list (page 142), then pressing the [1]–
[0] number buttons, enter the 1-3 digits of its style number.
Example: Select style number “24” (Dance Pop 2)
Press number buttons [2], [4] in sequence.
p2Dance Po
024
Y ou can also change style numbers using the [+], [–] buttons or the Data Dial. Also you
can increment the style number by pressing the [STYLE] button. Press briefly to
increment by one, or hold for continuous incrementing.
123
456
789
/ NO
0
+
–
/ YES
• Just like the voice
numbers, when selecting 1 or 2 digit
style numbers, if you
add [0] at the beginning and enter a 3
digit number, it will be
immediately recognized. For example, to
select style number
“95” (Polka) press
buttons [0], [9], [5] in
sequence.
789
–
/ NO
Turn AUTO ACCOMPANIMENT On
2
0
+ / YES
STYLE
Press the AUTO ACCOMPANIMENT [ON/OFF] so that its indicator lights.
ACCOMPANIMENT
ON / OFF
Start the Accompaniment
3
There are several ways to start the accompaniment:
• If AUTO ACCOMPA-
NIMENT is off (not lit),
only rhythm (drums
and percussion) accompaniment will be
produced.
• For information about
the accompaniment
tracks, see page 28.
● Straight start
Press the [START/STOP] button. The rhythm will begin playing immediately
without bass and chord accompaniment. The currently selected MAIN [A] or [B]
section will play.
START / STOP
SYNC STOP START
AUTO ACCOMPANIMENT
INTRO
MAIN / AUTO FILL
• It is possible to select
the MAIN A or B section prior to a straight
start — refer to “7.
BA
ENDING
BA
Select the MAIN A
and B Sections as
Required,” below.
23
Page 26

Auto Accompaniment
● Start with an introduction followed by the MAIN A section
Press the [INTRO] b utton so that its indicator lights, press the MAIN/A UTO
FILL [A] button (not necessary if its indicator is already flashing), then press
[ST ART/STOP].
SYNC STOP START
MENT
INTRO
MAIN / AUTO FILL
BA
BA
ENDING
● Start with an introduction followed by the MAIN B section
Press the [INTRO] b utton so that its indicator lights, press the MAIN/A UTO
FILL [B] button (not necessary if its indicator is already flashing), then press
[ST ART/STOP].
SYNC STOP START
MENT
INTRO
MAIN / AUTO FILL
BA
BA
ENDING
● Synchronized start
Any of the above start types can be synchronized to the first note or c hord
played on the left-hand section of the keyboard (i.e. keys to the left of and
including the split-point key — normally 54) by first pressing the [SYNC
START] button.
SYNC STOP START
MENT
INTRO
MAIN / AUTO FILL
BA
BA
ENDING
START / STOP
START / STOP
• If you press the [SYNC
START] button while the
accompaniment is playing,
the accompaniment will
stop and the synchro start
mode will be engaged.
• The [INTRO] button can be
used to select the INTRO
section even while the accompaniment is playing.
• The accompaniment split
point can be changed via
the “Accompaniment Split
Point” function in the
OVERALL menu — see
page 30.
Pressing the [SYNC START] button alone causes a straight start to occur
when the first note or chord is played. Press the [SYNC START] b utton and
then the appropriate [INTRO] and [MAIN/AUTO FILL] buttons for a
synchronized introduction start. The BEAT indicator will flash at the current
tempo when a synchronized start mode has been selected. The synchro start
mode can be disengaged prior to actually starting the accompaniment by
pressing the [SYNC START] button a second time.
SYNC STOP START
IMENT
INTRO
24
MAIN / AUTO FILL
• When the AUTO ACCOMPANIMENT split point and
SPLIT VOICE split point are
set at different keys, the L
voice can be played between the AUTO ACCOMPANIMENT split point and
SPLIT VOICE split point
when the AUTO ACCOMPANIMENT function is on.
BA
ENDING
BA
• When the AUTO ACCOMPANIMENT split point and
SPLIT VOICE split point are
set to the same key, the L
voice can be played anywhere to the left of the
AUTO ACCOMPANIMENT
split point and SPLIT
VOICE split point while
AUTO ACCOMPANIMENT
is not playing.
Page 27

Play the Melody with the Accompaniment
4
As soon as you play any chord that the PSR-730/630 can “recognize” on the lefthand section of the keyboard, the PSR-730/630 will automatically begin to play the
chord along with the selected rhythm and an appropriate bass line. The name of the
current chord will appear on the display.
1234
MULTI PAD
119
6
dim
FINGERING mM 7augsus
513
GROOVE & DYNAMICS
4
VOICE
The chord will be recognized according to the rules set in the Fingering Mode.
• For the method for entering chords, see page 32 “A uto Accompaniment Fingering Modes. ”
The Auto Accompaniment will continue playing even if the left hand releases the
keys. As you press each chord in the song, you can play the melody along with the
accompaniment.
Auto Accompaniment
• When the Fingering Mode
is set for “Single Finger,”
“Fingered 1,” “Fingered 2,”
or “Multi-Finger,” playing a
chord in the auto accompaniment section while
the rhythm is stopped will
cause Bass + Chord to be
played (for all styles).
However, when the Auto
Accompaniment split point
and the Split Voice split
point are the same key,
playing a chord in the accompaniment section with
the rhythm stopped will
cause Bass + L voice to
be played.
Changing Accompaniment Sections
5
You can vary the song by pressing [INTRO], MAIN/AUTO FILL [A]/[B] or
[ENDING] buttons and changing to a different accompaniment section (page 27).
Try pressing the different buttons and see what happens.
INTRO
Stop the Accompaniment
6
MAIN / AUTO FILL
BA
BA
ENDING
Press the [START/STOP] button to stop the accompaniment.
START / STOP
If you want to stop after playing the ending, press the [ENDING] button.
The accompaniment will stop after playing the ending .
ENDING
• The ending will begin
playing immediately when
you press the ENDING
button while the accompaniment is playing the first
beat of the measure.
The ending will begin
playing from the next
measure when you press
the button while the accompaniment is playing
the second or larger numbered beat.
• If you press the INTRO
button while the ending is
playing, the intro section
will begin playing after the
ending is finished.
• If you press a MAIN/
AUTO FILL (A,B) button
while the ending is playing, fill-in accompaniment
will immediately start playing, continuing with the
main section.
• If you press the SYNC
START while an accompaniment is playing, the
accompaniment will stop
and the PSR-730/630 will
enter Synchronized Start
standby status.
25
Page 28

Auto Accompaniment
◆ Changing Tempo
You can change the tempo for accompaniment or song playback.
When you select a different style while the accompaniment is not playing, the
“default” tempo for that style is also selected, and the tempo is displayed immediately
above “TEMPO” in the display in quarter-note beats per minute. If the accompaniment
is playing, the same tempo is maintained even if you select a different style.
You can change the tempo to any value between 32 and 280 beats per minute,
however, b y using the TEMPO [▼] and [▲] buttons. Press either button brief ly to
decrement or increment the tempo value by one, or hold the button for continuous
decrementing or incrementing.
TEMPO
001
116
TEMPO
100
116Tempo:
AB
REPEAT
ONE TOUCH
SETTING
When either of the TEMPO buttons is pressed the current tempo value will a ppear
on the top line of the display for a few seconds — during this time the [–] and [+]
buttons, number buttons, or data dial can also be used to set the tempo. The default
tempo for the selected style can be recalled at any time by pressing both the TEMPO
[▼] and [▲] buttons simultaneously (or by pressing the [–] and [+] buttons simulta-
neously while the tempo value is showing on the top line of the display).
◆ The Beat Indicator
When Auto Accompaniment or song playback is started, the four dots of the BEA T
indicator provide a visual indication of the selected tempo as shown below.
4/4 time 3/4 time
1st beat
2nd beat
3rd beat
4th beat
26
Page 29

◆ Accompaniment Sections
There are 8 types of Auto Accompaniment sections that allow you to vary the
arrangement of the accompaniment to match the song you are playing. They are:
Intro, Main A and B, Fill-in (AA, AB, BA, BB) and Ending. By switching between
them while playing you can put together a single song.
INTRO
MAIN / AUTO FILL
BA
BA
● INTRO Section
This is the beginning of the song. When the intro finishes playing, accompaniment shifts to the main section.
● MAIN Section
There are two variations that can play in the main section of the song: A and
B. The Auto Accompaniment will automatically play following along with the
chords that you play.
● FILL-IN Section
Fill-in livens up pauses in the song. W henever you press the MAIN/AUT O
FILL [A] or [B] button during accompaniment, the PSR-730/630 will generate
an appropriate “fill-in” (one of four types: AA, AB, BA, and BB) which will
smoothly connect the current section to the selected section — even if it is the
same section.
ENDING
Auto Accompaniment
• The MAIN A section is
automatically selected
whenever the PSR-730/
630 power is initially
turned on.
• The indicator of the destination section (MAIN A
or B) will flash while the
corresponding fill-in is
playing. During this time
you can change the destination section by pressing the appropriate
MAIN/AUTO FILL [A] or
[B] button.
• You can use the intro
section even in the
middle of the song by
pressing the INTRO button during the song.
• If the MAIN/AUTO FILL
A/B button is pressed after the final half beat
(eighth note) of the measure, fill-in will begin from
the next measure.
• You can begin the accompaniment by using
the ending instead of the
intro section.
● ENDING Section
This is the ending portion of the song. When the ending is finished, Auto
Accompaniment will stop.
27
Page 30

Auto Accompaniment
◆ Accompaniment T rack Muting
The PSR-730/630 has eight accompaniment tracks — RHYTHM 1, RHYTHM 2,
BASS, CHORD 1, CHORD 2, PAD, PHRASE 1, and PHRASE 2 — that you can
control to modify the “orchestration” and therefore the overall sound of the accompaniment. When a style is selected the icons corresponding to the tracks which contain
data for any section of that style will light.
Individual accompaniment tracks can be turned OFF (muted) or ON by pressing the
TRACK buttons corresponding to the target tracks. The track icon will disappear
when a track is muted. By turning the tracks OFF and ON in different combinations,
you can create various arrangements from a single accompaniment style.
12345678
RHYTHM
1
1 2 3 4 5 6 7 8
BASS CHORD 1CHORD 2PAD PHRASE1PHRASE
RHYTHM
2
ACCOMP ANIMENT TRA CK
347324407324322340219219
2
• Individual track voices, volume, and
other parameters
can be changed by
using the REVOICE
function — page
112.
● What’s in the Tracks
RHYTHM 1 & 2 These are the main rhythm tracks. The RHYTHM
tracks produce the drum and percussion sounds.
BASS The BASS track always plays a bass line, but the
voice will change to fit the selected style … acoustic
bass, synth bass, tuba, etc.
CHORD 1 & 2 These tracks provide the rhythmic chordal accom-
paniment required by each style. You’ll find guitar,
piano, and other chordal instruments here.
P AD This track plays long chords where necessary , using
sustained instruments such as strings, organ, choir.
PHRASE 1 & 2 This is where the musical embellishments reside.
The PHRASE tracks are used for punchy brass
stabs, arpeggiated chords, and other extras that
make the accompaniment more interesting.
◆ The Synchro Stop Function
When the Synchro Stop function is engaged, accompaniment playback will stop
completely when all keys in the auto-accompaniment section of the keyboard are
released. Accompaniment playback will start again as soon as a chord is play ed.
The BEAT indicators in the display will flash while the accompaneiment is
stopped.
The Synchro Stop function is engaged by pressing the [SYNC STOP] button
so that the SYNC STOP icon in the display appears. Press the [SYNC STOP]
button again so that the icon disappears to turn the Synchro Stop function off.
SYNC STOP START
AUTO ACCOMPANIMENT
28
ONE TOUCH
SETTING
FREEZE
MEMORY
SYNC STOP
nd Pianop1 Gra
001
MEASURE
FINGERING mM 7augsus
BEAT
1234
MULTI PAD
6
dim
119
513
GROOVE & DYNAMICS
4
• The Synchro Stop
function can not be
turned on when the
FULL KEYBOARD
AUTO ACCOMPANIMENT fingering mode
is selected. The Synchro Stop function will
be automatically
turned off if the FULL
KEYBOARD fingering
mode is selected while
the Synchro Stop function is on.
001
VOICE
Page 31

Auto Accompaniment
STYLE
Using Virtual Arranger
When the Virtual Ar ranger function is turned on while Auto Accompaniment is
active, simply pressing chords in the auto accompaniment section causes the Auto
Accompaniment to automatically play slightly different chord variations, which
creates a livelier and more melodic accompaniment. Turning the Virtual Arranger
function off returns to normal Auto Accompaniment.
Press the [STYLE] button to select the STYLE menu. The triangular indicator will
appear next to “STYLE” to the right of the display, and the PSR-730/630 will enter
Style Mode (the
STYLE
When Style Mode is selected with the Style Menu (the
on/off setting of the Virtual Arranger can be changed with the Sub Menu. Select the
“V.Arranger” sub menu using the SUB MENU [▼], [▲] keys. The cur rent on/off
status will be shown at the top right of the display.
icon will light).
STYLE
STYLE
icon is lit), the
• Simultaneously pressing the [SYNC STOP]
and [SYNC START]
buttons causes the
Virtual Arranger to
switch between off
and on. The current
on/off status will be
shown at the top right
of the display. (The
on/off display will return to its original condition after a few seconds.)
SUB MENU
er: OffV.Arrang
Change the on/off status using the [+], [–] buttons or the Da ta Dial.
Accompaniment Volume Control
The volume of the accompaniment in relation to the keyboar d can be adjusted for
the best overall balance by using the ACMP/SONG VOLUME [▼] and [▲] b uttons.
When either button is pressed the current accompaniment volume setting will appear
on the top line of the display for a few seconds.
The accompaniment volume range is from “0” (no sound) to “127” (maximum
volume). The default setting is “100”. Press the ACMP/SONG VOLUME [▼] button
to decrease the volume or the [▲] button to increase the volume. Press the button
briefly to single step, or hold to continuously decrement or increment.
• While the accompaniment volume setting
appears on the top
line of the display the
[–] and [+] buttons,
number buttons, or
Data Dial can also be
used to set the accompaniment volume.
ACMP / SONG
VOLUME
001
STYLE
116
TEMPO
000
TRANSPOSE
100
ACMP/SONG
VOLUME
me: 100AcmpVolu
AB
REPEAT
ONE TOUCH
SETTING
29
Page 32

Auto Accompaniment
Changing the Accompaniment Split Point
The AUTO ACCOMPANIMENT split point (the boundary point between the
melody section and accompaniment section) can be set to any key on the PSR-730/630
keyboard to match your individual playing requirements.
Select the Accompaniment Split Point Function
1
Use the MENU [▲] and [▼] buttons to the left of the display to move the triangular
indicator next to “OVERALL” on the left side of the display.
MENU
DIGITAL EFFECT
GROOVE&DYNAMICS
MIDI
OVERALL
Then use the SUB MENU [▲] and [▼] buttons to select the “ AcmpSplit” function
from within the OVERALL menu . The MIDI note number corresponding to the
current split point will appear to the right of “AcmpSplit” on the top line of the displa y.
[F#2 ]t: 54AcmpSpli
Set As Required
2
Simply press the key you want to assign as the split point. The key number of the
key you press will appear to the right of “ AcmpSplit” on the top line of the display . Y ou
can also use the [–] and [+] buttons, number buttons, or Data Dial to enter the split point
key number. T he split point can be set at any key number from 0 through 127.
123
456
789
/ NO
0
+
–
/ YES
• The split point key becomes the highest
key in the Auto Accompaniment section
of the keyboard.
• When setting the split
point, that is, the sub
menu “AcmpSplit” is
shown on the display,
pressing the key on
the keyboard doesn’t
either produce notes
or detect chords in the
accompaniment section, but only designates the split point.
30
Page 33

Auto Accompaniment
◆Interaction Between the AUTO ACCOMPANIMENT and
SPLIT VOICE Split Points
The SPLIT V OICE split point (page 21) and A UTO ACCOMP ANIMENT split point
can be independently specified, with the following limitations. The SPLIT VOICE
split point cannot be set at a lower key than the AUT O A CCOMP ANIMENT split point
(if you attempt to do this the A UT O A CCOMPANIMENT split point will be set to the
same key as the SPLIT VOICE split point). Conversely, the AUTO ACCOMPANIMENT split point cannot be set at a higher key than the SPLIT VOICE split point (if
you attempt to do this the SPLIT VOICE split point will be set to the same key as the
AUTO ACCOMPANIMENT split point).
AUTO ACCOMPANIMENT
split point
Accompaniment
AUTO ACCOMPANIMENT split point/
Accompaniment/
L Voice
SPLIT VOICE
split point
L Voice
SPLIT VOICE split point
R Voice
R Voice
The Auto Accompaniment Fingering Modes
The PSR-730/630 A UT O ACCOMPANIMENT feature has fi ve dif ferent fingering
modes which can be selected as follows.
Select the Fingering Mode Function
1
Use the MENU [▲] and [▼] buttons to the left of the display to mov e the triangular
indicator next to “OVERALL ” on the left side of the display.
MENU
MIDI
DIGITAL EFFECT
OVERALL
GROOVE&DYNAMICS
• You can jump directly
to the “FingerMode”
function by pressing
and holding the AUTO
ACCOMPANIMENT
[ON/OFF] button for a
few seconds.
31
Page 34

Auto Accompaniment
CDE FGABCDEF
CE FAB CE F
#b #bb #b #
Then use the SUB MENU [▲] and [▼] buttons to select the “FingerMode” function
from within the OVERALL menu. The ab breviated name of the current finger ing
mode will appear to the right of “FingerMode” on the top line of the display.
Select the Required Fingering Mode
2
Use the [–] and [+] buttons or Data Dial to select the desired fingering mode:
● Single (Single Finger)
● Fingered 1
● Fingered 2
● Full Key
● Multi (Multi-finger)
(Full Keyboard)
• The default Fingering
Mode is “Multi”.
tide: MulFingerMo
● The SINGLE FINGER Mode
glede: SinFingerMo
Single-finger accompaniment makes it simple to produce beautifull y orchestrated
accompaniment using major, seventh, minor and minor-seventh chords by pressing
a minimum number of keys on the AUTO ACCOMPANIMENT section of the
keyboard. T he abbreviated chord fingerings described below are used:
C
■ For a major chord, press the root key only.
Cm
C
Cm
7
7
■ For a minor chord, simultaneously press the root key
and a black key to its left.
■ For a seventh chord, simultaneously press the root
key and a white key to its left.
■ For a minor-seventh chord , simultaneously press the
root key and both a white and black key to its left.
Root Key Diagram
Auto Accompaniment
Split Point [54]
Accompaniment
Section
32
Page 35

Auto Accompaniment
● The FINGERED 1 Mode
gered 1de: FinFingerMo
The Fingered 1 mode lets you finger your own chords on the AUTO ACCOMP ANIMENT section of the keyboard (i.e. all keys to the left of and including the splitpoint key — normally 54) while the PSR-730/630 supplies appropriately orchestrated rhythm, bass, and chord accompaniment in the selected style.
The FINGERED 1 mode recognizes the following chords:
Chord Name/[Abbreviation] Normal Voicing
Major [M] 1 - 3 - 5
Add ninth [(9)] 1 - 2 - 3 - 5
Sixth [6] 1 - (3) - 5 - 6
Sixth ninth [6(9)] 1 - 2 - 3 - (5) - 6
Major seventh [M7] 1 - 3 - (5) - 7 or
Major seventh ninth [M7(9)] 1 - 2 - 3 - (5) - 7
Major seventh add sharp eleventh [M7(#11)] 1 - (2) - 3 - #4 - 5 - 7 or
Flatted fifth [(b5)] 1 - 3 - b5
Major seventh flatted fifth [M7b5] 1 - 3 - b5 - 7
Suspended fourth [sus4] 1 - 4 - 5
Augmented [aug] 1 - 3 - #5
Major seventh augmented [M7aug] 1 - (3) - #5 - 7
Minor [m] 1 - b3 - 5
Minor add ninth [m(9)] 1 - 2 - b3 - 5
Minor sixth [m6] 1 - b3 - 5 - 6
Minor seventh [m7] 1 - b3 - (5) - b7
Minor seventh ninth [m7(9)] 1 - 2 - b3 - (5) - b7
Minor seventh eleventh [m7(11)] 1 - (2) - b3 - 4 - 5 - (b7)
Minor major seventh [mM7] 1 - b 3 - (5) - 7
Minor major seventh ninth [mM7(9)] 1 - 2 - b3 - (5) - 7
Minor seventh flatted fifth [m7b5] 1 - b3 - b5 - b7
Minor major seventh flatted fifth [mM7b5] 1 - b3 - b5 - 7
Diminished [dim] 1 - b3 - b5
Diminished seventh [dim7] 1 - b3 - b5 - 6
Seventh [7] 1 - 3 - (5) - b7 or
Seventh flatted ninth [7(b9)] 1 - b2 - 3 - (5) - b7
Seventh add flatted thirteenth [7(b13)] 1 - 3 - 5 - b6 - b7
Seventh ninth [7(9)] 1 - 2 - 3 - (5) - b7
Seventh add sharp eleventh [7(#11)] 1 - (2) - 3 - #4 - 5 - b7 or
Seventh add thirteenth [7(13)] 1 - 3 - (5) - 6 - b7
Seventh sharp ninth [7(#9)] 1 - #2 - 3 - (5) - b7
Seventh flatted fifth [7b5] 1 - 3 - b5 - b7
Seventh augmented [7aug] 1 - 3 - #5 - b7
Seventh suspended fourth [7sus4] 1 - 4 - (5) - b7
One plus two plus five [1+2+5] 1 - 2 - 5
1 - (3) - 5 - 7
1 - 2 - 3 - #4 - (5) - 7
1 - (3) - 5 - b7
1 - 2 - 3 - #4 - (5) - b7
Chord (C) Display
CC
C(9) C(9)
C6 C6
C6(9) C6(9)
CM7 CM7
CM7(9) CM7(9)
CM7(#11) CM7(#11)
C(b5) C(b5)
CM7b5 CM7(b5)
Csus4 Csus4
Caug Caug
CM7aug CM7aug
Cm Cm
Cm(9) Cm(9)
Cm6 Cm6
Cm7 Cm7
Cm7(9) Cm7(9)
Cm7(11) Cm7(11)
CmM7 CmM7
CmM7(9) CmM7(9)
Cm7b5 Cm7(b5)
CmM7b5 CmM7(b5)
Cdim Cdim
Cdim7 Cdim7
C7 C7
C7(b9) C7(b9)
C7(b13) C7(b13)
C7(9) C7(9)
C7(#11) C7(#11)
C7(13) C7(13)
C7(#9) C7(#9)
C7b5C7b5
C7aug C7aug
C7sus4 C7sus4
C1+2+5 C
• Notes in parentheses
can be omitted.
• If you play any three
adjacent keys (including black keys), the
chord sound will be
canceled and only the
rhythm instruments
will continue playing
(CHORD CANCEL
function).
• Playing a single key
or two same root keys
in the adjacent octaves produces accompaniment based
only on the root.
• A perfect fifth (1 + 5)
produces accompaniment based only on
the root and fifth
which can be used
with both major and
minor chords.
• The chord fingerings
listed are all in “root”
position, but other inversions can be used
— with the following
exceptions:
b
5, 6, m6,
m7, m7
sus4, aug, dim7,
b
5, 6(9), m7(11),
7
1+2+5.
• Inversion of the 7sus4
chord is not recognized if the 5th is
omitted.
• The AUTO ACCOMPANIMENT will sometimes not change
when related chords
are played in sequence (e.g. some
minor chords followed
by the minor seventh).
• Two-note fingerings
will produce a chord
based on the previously played chord.
33
Page 36

Auto Accompaniment
Example for “C” chords
(9)
C
C
(9)
C
6
C
6
CM
7
CM
(9)
7
CM
7
(#11)
(b5)
C
CM
b5
7
Csus
CmM
(9)
C
7
( )
4
7
Caug
CmM
7
( )
#11)
(
C
7
( )
( )
(9)
( )
CM aug
7
( )
b5
Cm
7
(13)
C
7
( )
Cm
CmM
(#9)
C
7
( )
b5
7
( )
Cm
Cdim
b5
C
7
( )
(9)
Cm
6
Cdim
C aug
7
( )
7
● The FINGERED 2 Mode
gered 2de: FinFingerMo
This is essentially the same as the FINGERED 1 mode, described above, except
that the FINGERED 2 mode additionally allows you to specify the lowest note
of each chord — simply, the lowest note played in the AUTO ACCOMPANIMENT section of the keyboard is used as the accompaniment bass note. This
means you can specify “on-bass” chords in which the main bass note for the
chord is not the root of the chord. For a C major chord, for example, you could
use E (the third) or G (the fifth) as the bass note rather than C.
( )
Cm
7
C
7
C sus
7
(9)
Cm
7
( )
( )
4
( )
C
C
(b9)
7
1+2+5
( )
( )
Cm
C
7
(11)
7
( )
(b13)
( )
C C on E C on G
● The FULL KEYBOARD Mode (Full Key)
l Keyde: FulFingerMo
When the FULL KEYBOARD Mode is selected, the PSR-730/630 will automatically create appropriate accompaniment while you play just about anything
using both hands, anywhere on the keyboar d. You do not have to worry about
specifying the accompaniment chords. The name of the detected chord will
appear in the display.
• When the FULL KEYBOARD mode is selected, the split point setting (see page 30) for the
auto accompaniment will
be ignored.
• Chord detection occurs
at approximately 8th-note
intervals. Extremely short
chords — less than an
8th note in length — may
not be detected.
34
Page 37

● The MULTI-FINGER Mode (Multi)
tide: MulFingerMo
This is the default accompaniment mode. The MULTI-FINGER mode automatically detects SINGLE FINGER or FINGERED 1 chord fingerings, so you
can use either type of fingering without having to switch fingering modes.
◆ The Stop Accompaniment Function
While the SINGLE FINGER, FINGERED 1, FINGERED 2, or MULTI-FINGER mode is selected chords played in the AUTO ACCOMPNIMENT section of
the keyboard are also detected and played by the PSR-730/630 Auto Accompaniment system when the accompaniment is stopped (except when the FULL KEYBOARD mode is engaged). In this case the bass note and chord voices are selected
automatically .
Auto Accompaniment
• If you want to play minor,
seventh or minor seventh
chords using the SINGLE
FINGER operation in the
MULTI-FINGER Mode, always press the closest
white/black key(s) to the
root of the chord.
• When the AUTO ACCOMPANIMENT split
point and SPLIT
VOICE split point are
set to the same key,
the L voice and the
automatically selected
bass note will sound.
Groove and Dynamics (PSR-730)
The PSR-730 Groove & Dynamics function lets you temporarily change the
timing, velocity and gate time of notes during playback of any of the preset
accompaniment styles (style numbers 1-100).
● Groove .......... Lets you play the music with some swing or put a little groove
in the beat by making subtle shifts in the timing (clock) of the
accompaniment.
● Dynamics...... Changes the impression of the accompaniment by varying the
velocity of the notes in relation to the timing.
The Groove & Dynamics function is composed of the four items belo w . When you
choose an accompaniment style, the most appropriate template or value for each
item will be automatically set.
• Beat Groove Template (Automatically selected from 49 types)
• Measure Groove Template (Automatically selected from 25 types)
• Dynamics Template (Automatically selected from 17 types)
• Dynamics Rate (Automatically set within a range of 0-100%)
• Expand Rate (Automatically set within a range of 0-400%)
• Boost Rate (Automatically set within a range of 0-400%)
35
Page 38

Auto Accompaniment
■ Applying Groove & Dynamics
When you press the [GROO VE & D YNAMICS] button, the GR OO VE & DYNAMICS icon will light, and the Groove & Dynamics effect will be applied to the
accompaniment.
nd Pianop1 Gra
001
VOICE
GROOVE & DYNAMICS
■ Arranging the Gr oove & Dynamics Effect (User Settings)
You can arrange any of the Groove & Dynamics settings (Beat Groove Template ,
Measure Groove Template, Dynamics Templa te, Dynamics Rate, Expand Rate or
Boost Rate) that have been preset for each accompaniment style, and apply any kind
of effect you want.
Use the MENU [s] and [t] buttons to the left of the display to move the triangular
indicator next to “GROOVE & DYNAMICS” on the left side of the display.
MENU
DIGITAL EFFECT
GROOVE&DYNAMICS
MIDI
OVERALL
● Select the Beat Groove Template
Use the SUB MENU [s] and [t] buttons to select the “BeatGroove” function from
within the GROOVE & DYNAMICS men u. The name of the currently selected
Beat Groove Template will appear on the right of the top line of the display.
SUB MENU
ve: ThruBeatGroo
Referring to the “Beat Groove Template List” below, use the [+], [–] buttons or the
Data Dial to select one of the 49 template types.
36
Page 39

Auto Accompaniment
Beat Groove Template List
The templates in this list shift the timing of the accompaniments by beats.
These templates add lifelike eff ect to your accompaniments b y conv erting a specific beat to
another and slightly shifting the converted beat.
Name: Indicates each template name.
No.1"Thru” (No.1) adds no effect as its name implies.
Targeted Beat: Beats to be converted.
8 = Eighth note
12 = Eighth note triplet
16 = 16th note
24 = 16th note triplet
Converted Beat: Converted results.
For example , selecting one of the templates, 12-17 (16 as T argeted Beat and 8 as Conv erted
Beat), indicates ever y 16th note will be con ver ted to eighth notes.
Swing: Delays the timing of the converted beat. There are six types: A
(Min.), B, C, D, E (Max.) and off (no effect).
No.
Name
1 Thru 8 off off
2 8_off_A 8 off A
3 8_off_B 8 off B
4 8_off_C 8 off C
5 8_off_D 8 off D
6 8_off_E 8 off E
7 16_off_A 16 off A
8 16_off_B 16 off B
9 16_off_C 16 off C
10 16_off_D 16 off D
11 16_off_E 16 off E
12 16_16to8_off 16 8 off
13 16_16to8_A 16 8 A
14 16_16to8_B 16 8 B
15 16_16to8_C 16 8 C
16 16_16to8_D 16 8 D
17 16_16to8_E 16 8 E
18 16_16to12_off 16 12 off
19 12_12to8_off 12 8 off
20 12_12to8_A 12 8 A
21 12_12to8_B 12 8 B
22 12_12to8_C 12 8 C
23 12_12to8_D 12 8 D
24 12_12to8_E 12 8 E
25 12_12to16A_off 12 16A off
Targeted Converted Swing
Beat Beat
No.
Name
26 12_12to16A_A 12 16A A
27 12_12to16A_B 12 16A B
28 12_12to16A_C 12 16A C
29 12_12to16A_D 12 16A D
30 12_12to16A_E 12 16A E
31 12_12to16B_off 12 16B off
32 12_12to16B_A 12 16B A
33 12_12to16B_B 12 16B B
34 12_12to16B_C 12 16B C
35 12_12to16B_D 12 16B D
36 12_12to16B_E 12 16B E
37 24_24to8_off 24 8 off
38 24_24to8_A 24 8 A
39 24_24to8_B 24 8 B
40 24_24to8_C 24 8 C
41 24_24to8_D 24 8 D
42 24_24to8_E 24 8 E
43 24_24to16_off 24 16 off
44 24_24to16_A 24 16 A
45 24_24to16_B 24 16 B
46 24_24to16_C 24 16 C
47 24_24to16_D 24 16 D
48 24_24to16_E 24 16 E
49 24_24to12_off 24 12 off
Targeted Converted Swing
Beat Beat
● Select the Measure Groove Template
Use the SUB MENU [s] and [t] buttons to select the “MeasGroove” function
from within the GROOVE & DYNAMICS menu. The name of the currently
selected Measure Groove Template will appear on the right of the top line of the
display.
Referring to the “Measure Groove Template List” below, use the [+], [–] buttons
or the Data Dial to select one of the 25 template types.
ve: ThruMeasGroo
37
Page 40

Auto Accompaniment
Measure Groove Template List
The templates in this list shift the timing of the accompaniments by measures. These
templates add lifelike effect to your accompaniments by hastening or delaying the timing of
the first beat of every measure.
Name: Indicates each template name and content.
No.1"Thru” (No.1) adds no effect as its name implies.
“Push” in the template names indicates those templates hasten the timing.
“Heavy” indicates the templates delay the timing. The suffixes “A”, “B” and
“C” indicate min., med. and max., respectively.
Time Signature: Indicates the appropriate time signatures for you to use.
Be sure to match the time signature here to your song.
No. Name Time Signature
1 Thru 2 2_PushA 2
3 2_PushB 2
4 2_PushC 2
5 2_HeavyA 2
6 2_HeavyB 2
7 2_HeavyC 2
8 3_PushA 3
9 3_PushB 3
No. Name Time Signature
10 3_PushC 3
11 3_HeavyA 3
12 3_HeavyB 3
13 3_HeavyC 3
14 4_PushA 4
15 4_PushB 4
16 4_PushC 4
17 4_HeavyA 4
No. Name Time Signature
18 4_HeavyB 4
19 4_HeavyC 4
20 5_PushA 5
21 5_PushB 5
22 5_PushC 5
23 5_HeavyA 5
24 5_HeavyB 5
25 5_HeavyC 5
● Select the Dynamics Template
Use the SUB MENU [s] and [t] buttons to select the “Dynamics” function from
within the GROOVE & DYNAMICS men u. The name of the currently selected
Dynamics Template will appear on the right of the top line of the display.
: ThruDynamics
Referring to the “Dynamics Template List” below, use the [+], [–] buttons or the
Data Dial to select one of the 17 template types.
Dynamics T emplate List
The templates in this list strengthen or weaken the notes on a specific timing. The stress
degree can be determined by changing the Dynamics Rate.
Name: Indicates each template name.
No.1"Thru” (No.1) adds no effect as its name implies.
The templates from No.7 to No.17 are prog rammed to put an emphasis on a specific timing.
38
Page 41

No. Name
1 Thru
2 8beat_on
3 8beat_off
4 16beat_on
5 16beat_off
6 2nd Beat_Off
7 Dance
8 Disco
9 Techno
10 Fusion
11 Reggae
12 BossaNova
13 Tango
14 Rhumba Bass
15 Rhumba Chord
16 Latin
17 Samba
Auto Accompaniment
● Set the Dynamics Rate
The Dynamics Rate sets the amount of the Dynamics template applied to the PSR730/630 within the range, 0-100%.
Use the SUB MENU [s] and [t] buttons to select the “DynamcsRate” function
from within the GROO VE & DYN AMICS menu. The currently set Dynamics Rate
value will appear on the right of the top line of the display.
ate:100%DynamcsR
Use the [1]–[0] number buttons, the [+], [–] buttons or the Data Dial to set the
Dynamics Rate value within a range of 0-100%.
● Set the Expand Rate
The Expand Rate widens or narrows the dynamic range of the Accompaniment
within the range, 0-100 (original)-400%.
Use the SUB MENU [s] and [t] buttons to select the “ExpandRate” function
from within the GROOVE & DYNAMICS menu. The currently set Expand Rate
value will appear on the right of the top line of the display.
te: 100%ExpandRa
Use the [1]–[0] number buttons, the [+], [–] buttons or the Data Dial to set the
Expand Rate value within a range of 0-400%.
• Though Expand Rate
can be adjusted by a
rate of 1 in 100, the
rate actually applied
will be rounded down
to nearest 10. For example, the rates 1
through 9 result in 0,
no effect. The rates
29 and 53 result in 20
and 50, respectively.
When using the Registration Memory function, the result rate
will be memorized.
39
Page 42

Auto Accompaniment
● Set the Boost Rate
The Boost Rate strengthens or weakens the Accompaniment by offsetting the velocity
value of the Style data, within the range, 0-100 (original)-400%.
Use the SUB MENU [s] and [t] buttons to select the “BoostRate” function from
within the GROOVE & DYNAMICS menu. The currently set Boost Rate value will
appear on the right of the top line of the display.
e: 100%BoostRat
Use the [1]–[0] number buttons, the [+], [–] buttons or the Data Dial to set the Boost
Rate value within a range of 0-400%.
One Touch Setting
• You can jump directly
to the “BeatGroove”
sub menu of the
GROOVE & DYNAMICS menu (Beat
Groove Template selection screen) by
pressing and holding
the GROOVE & DYNAMICS button for a
few seconds.
• User settings will be
lost when another accompaniment style is
selected. To be able
to recall your original
settings anytime, save
them using the Registration Memory function (page 57).
• Though Boost Rate
can be adjusted by a
rate of 1 in 100, the
rate actually applied
will be rounded down
to nearest 10. For example, the rates 1
through 9 result in 0,
no effect. The rates
29 and 53 result in 20
and 50, respectively.
When using the Registration Memory function, the result rate
will be memorized.
The PSR-730/630’s 100 internal styles eac h have four recommended “panel setups”
that can be instantly selected via the [ONE TOUCH SETTING] and REGISTRATION MEMORY [1] … [4] buttons. The One T ouch Setting feature automatically sets
the following parameters:
● One Touch Setting Parameter List
• R1 Voice
(Voice number, volume, octave, pan, reverb depth,
chorus depth, DSP depth)
• Dual Voice ON/OFF
• R2 Voice
(Voice number, volume, octave, pan, reverb depth,
chorus depth, DSP depth)
• Split Voice ON/OFF
• L Voice
(Voice number, volume, octave, pan, reverb depth,
chorus depth, DSP depth)
• Split Point: Split Voice=54
: Auto Accompaniment=54
• Auto Accompaniment=ON
• Main A/B section
• Accompaniment T rack=ON
• Synchro start=ON
• Accompaniment volume=100
• Harmony ON/OFF, type, volume
• Reverb ON/OFF
• Chorus ON/OFF
• DSP ON/OFF, type, variation ON/OFF
• Multi Pad Set number
• Chord Match ON/OFF=Default (Multi Pad1…4)
40
Page 43

Auto Accompaniment
Select a Style
1
Select the STYLE menu and select an accompaniment style as described on page
22.
Press the [ONE TOUCH SETTING] Button
2
Press the [ONE TOUCH SETTING] button. The ONE T OUCH SETTING and
REGIST [1] icons will appear in the display, and the One Touch Setting type 1 panel
settings will be recalled. At the same, Auto Accompaniment will automatically be
turned on if it was off, and the Sync Start mode will be engaged.
ONE TOUCH SETTING
Select a ONE TOUCH SETTING Type, as Required
3
AB
REPEAT
213
REGISTRATION MEMORY
ONE TOUCH
SETTING
FREEZE
4
If you want to select a different REGISTRATION MEMOR Y, use the REGISTRATION MEMORY buttons to select the desir ed ONE TOUCH SETTING type. The
corresponding number will appear in the display, and all setting will change according
to the recalled data.
REGISTRATION MEMORY
1234
Turn ONE TOUCH SETTING Off When Done
4
AB
REPEAT
213
REGISTRATION MEMORY
ONE TOUCH
SETTING
FREEZE
4
Press the [ONE TOUCH SETTING] button again and the ONE TOUCH SET-
TING icon in the display will disappear and the One Touch Setting feature will turn
off.
• If the style is changed
when One Touch Setting is on, the panel
settings appropriate to
the selected style that
have the same One
Touch Setting number
will immediately be
set.
• You can also try
changing the established One Touch
Setting data, making
your own original settings. To be able to
recall your original
settings anytime, save
them using the Registration Memory function (page 57).
• If you press ONE
TOUCH SETTING
buttons [1]–[4] when a
user style is selected,
the voice data won’t
be changed, but the
style data will change
to the user style settings (values).
41
Page 44

Digital Effects
With the digital effects built into the PSR-730/630 you can add ambiance and depth to your
music in a variety of ways—such as adding re verb that mak es y ou sound like you are pla ying
in a concert hall or adding harmony notes for a full, rich sound
With the PSR-730, you can take adv antage of even more sophisticated features lik e the Multi
Effect function that lets apply several effects together or the Digital Equalizer that lets you
adjust volume for each of 5 frequency bands.
Digital Effects
REVERB Button Y ou can create a reverb effect that makes you sound lik e
REVERB
you are playing in places like a concer t hall, or live in a
club.
CHORUS Button You can add a chorus effect that makes your playing
CHORUS
sound as though multiple parts were being played together at the same time.
DSP Button In addition to the reverb and chorus types, the effects
DSP
usually used to a specific part, such as the distortion and
tremolo, can be selected.
VARIATION
PSR-730
MULTI-EFFECT Button Y ou can apply re verb , chorus or DSP effects to particular
MULTI EFFECT
PSR-730
parts, or combine them together.
DIGITAL EQ Button You can apply volume adjustments to the output of the
DIGITAL EQ
PSR-730, to five different frequency bands, enhancing
the impression your music gives.
HARMONY Button You can add a variety of harmony notes to the R1 voice,
HARMONY
• For details about using Digital Effects (Reverb, Chorus, DSP, Multi-Effect, Digital Equalizer) see page 143.
42
or to your playing in the right-hand section, as well as
adding an tremolo or other effect.
Page 45
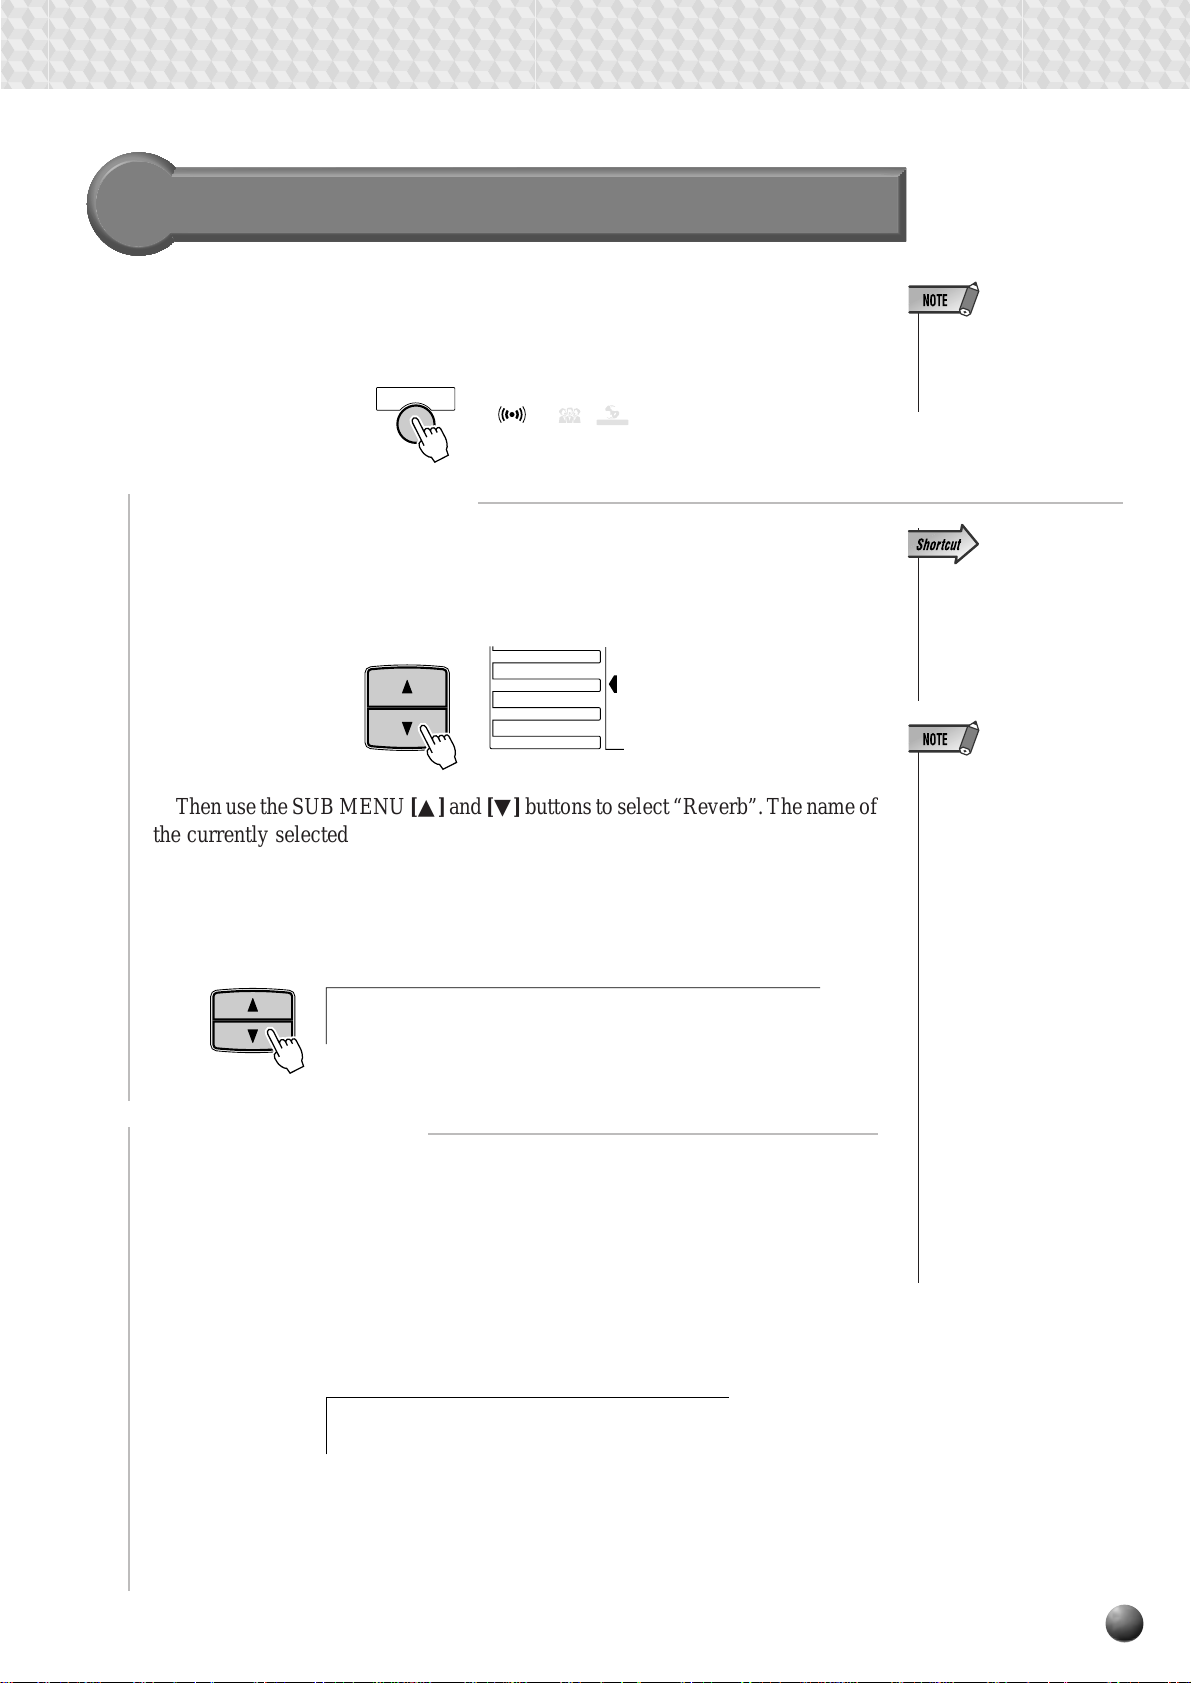
Reverb
If you press the [REVERB] button, the REVERB icon will light up, and the
Reverb effect will be turned on. After setting the Reverb type, the effect will be
applied to the R1 voice from the keyboard.
REVERB
REVERB CHORUS D SP
■ Selecting a Reverb Type
Select one of the 13 Reverb types.
Use the MENU [▲] and [▼] buttons to move the triangular indicator in the
display next to “DIGITAL EFFECT”.
MENU
DIGITAL EFFECT
GROOVE&DYNAMICS
Then use the SUB MENU [▲] and [▼] buttons to select “Reverb”. The name of
the currently selected Reverb type will appear on the right of the top line of the
display.
Referring to the Reverb Type List on page 145, use the [–] and [+] buttons, [1]–[0]
number buttons, or Data Dial to select the desired Reverb effect from 1-13.
SUB MENU
■ Reverb Return Level
The Rev.Return (Reverb Return Level) parameter sets the amount of reverb
effect returned from the reverb eff ect stage, thus making it possible to adjust the
degree of reverb eff ect applied to the overall sound.
Use the MENU [▲] and [▼] buttons to move the triangular indicator in the
display next to “DIGITAL EFFECT”, then use the SUB MENU [▲] and [ ▼]
buttons to select “Rev.Return”. The currently set return level will be displayed on
the right of the top line of the display.
VARIATION
MIDI
OVERALL
8 RooReverb: m 4
Digital Effects
• The REVERB ON/OFF
status will be set automatically according to the
selected R1 panel voice.
• You can also jump directly
to the DIGITAL EFFECT
REVERB TYPE function
by pressing and holding
the [REVERB] button for a
few seconds.
• When you select a different Style, the appropriate
Reverb type will be selected accordingly. Some
of the Styles contain Reverb types which cannot
be selected on the PSR730/630. In this case “XG
Reverb” will be displayed
when you select the SUB
MENU Reverb of the
DIGITAL EFFECT.
• If you don’t want to apply
the Reverb effect to Styles
or Songs, select “13:
OFF” from the Reverb
types, or set the Reverb
Return Level to [0]. In either case no Reverb will
be applied to the entire
system. If you use the
Revoice function, you can
set the Reverb Depth for
each track of the Style independently (see page
110).
Use the [–] and [+] buttons, the [1]–[0] number buttons, or Data Dial to set the
desired reverb return level (the curr ent return level value appears to the right of
“Rev .Return” on the display). The range is from “0” to “127”. The higher the v alue
the greater the return level.
rn: 64Rev.Retu
43
Page 46

Digital Effects
Chorus
If you press the [CHORUS] button, the CHORUS icon will light up, and
the Chorus effect will be turned on. After setting the Chorus type, the effect
will be applied to the R1 voice from the keyboard.
■ Selecting a Chorus Type
CHORUS
REVERB CHORUS DSP
VARIATION
• The CHORUS ON/OFF status
will be set automatically according to the selected R1 panel
voice.
Select one of the 10 Chorus types.
Use the MENU [▲] and [▼] buttons to move the triangular indicator in the
display next to “DIGITAL EFFECT”.
MENU
DIGITAL EFFECT
GROOVE&DYNAMICS
MIDI
OVERALL
Then use the SUB MENU [▲] and [▼] buttons to select “Chorus”. The
name of the currently selected Chorus type will appear on the right of the top
line of the display.
Referring to the Chorus T ype List on page 145, use the [–] and [+] buttons, the
[1]–[0] number buttons, or Data Dial to select the desired Chorus effect from
1-10.
SUB MENU
1 ChoChorus: rus 1
• You can also jump directly to the
DIGITAL EFFECT Chorus function by pressing and holding the
[CHORUS] button for a few seconds.
• When you select a different
Style, the appropriate Chorus
type will be selected accordingly.
Some of the Styles contain Chorus types which cannot be selected on the PSR-730/630. In
this case “XG Chorus” will be
displayed when you select the
SUB MENU Chorus of the DIGITAL EFFECT.
• If you don’t want to apply the
Chorus effect to Styles or Songs,
select “10: OFF” from the Chorus
types, or set the Chorus Return
Level to [0]. In either case no
Chorus will be applied to the entire system. If you use the
Revoice function, you can set
the Chorus Depth for each track
of the Style independently (see
page 110).
■ Chorus Return Level
The Cho.Return (Chorus Return Level) parameter sets the amount of
chorus effect returned from the chorus effect stage, thus making it possible to
adjust the degree of chorus effect applied to the overall sound.
Use the MENU [▲] and [▼] buttons to move the triangular indicator in the
display next to “DIGIT AL EFFECT”, then use the SUB MENU [▲] and [▼]
buttons to select “Cho.Return”.
Use the [–] and [+] buttons, the [1]–[0] number buttons, or Data Dial to set
the desired chorus return level (the current return level value appears to the
right of “Cho.Return” on the display). The range is from “0” to “127”. The
higher the value the greater the return level.
44
rn: 64Cho.Retu
Page 47

DSP
If you press the [DSP] button, the DSP icon will light up, and the DSP effect will
be turned on. After setting the DSP type, the effect will be applied when you play the
R1, R2 and L voice from the keyboard.
DSP
Digital Effects
VARIATION
REVERB CHORUS DSP
VARIATION
■ Select the DSP Type
The PSR-730/630 features an extensive range of 46 DSP (Digital Signal Processor)
effects. There are tw o types of digital effects, system effects and insertion ef fects. The
illustration below will give you an idea of how DSP effects work, centering on the
mixer.
Insertion Effect System Effect
RETURNSEND
(Depth)
Amp
• The DSP effect and
variation settings may
change according to
the selected R1 panel
voice.
• You can also jump directly to the DIGITAL
EFFECT DSP function by pressing and
holding the [DSP] button for a few seconds.
● System Effect:
Applies to all of the parts input to the mixer. You can set the DSP Depth and DSP
Return Level. The System Effect includes Reverb and Chorus types.
● Insertion Effect:
Applies only to a designated part before inputting the signal to the mixer . You can
effectively use the digital effects by applying the effect to the specific part. With
the Insertion Effect, you can only designate the DSP Depth. The Insertion Effect
includes Distortion and Tremolo.
(See page 143, “About Digital Effects” and the Type List)
Mixer
Speaker
• DSP Depth cannot be
modified for some Insertion effects. In this
case the display
shows “- - -”, indicating that it’s not accessible.
45
Page 48

Digital Effects
Use the MENU [▲] and [▼] buttons to move the triangular indicator in the display
next to “DIGITAL EFFECT”.
Then use the SUB MENU [▲] and [▼] buttons to select “DSP”. After a f ew seconds
the name of the currently selected DSP effect will appear on the right of the top line
of the display.
SUB MENU
Referring to the DSP Type List on page 145, use the [–] and [+] buttons, the [1]–
[0] number buttons, or Data Dial to select the desired DSP effect from 1-46
For each DSP type, there is a variation. Pressing the DSP V ARIATION button will
cause the VARIATION icon to displa y, and the variation type will be applied.
10 StaDSP: ge 2
DSP
VARIATION
REVERB CHORUS DSP
VARIATION
■ DSP Return Le vel
The DSP Return (DSP Return Level) parameter sets the amount of DSP effect
returned from the DSP effect stage, thus making it possible to adjust the degree of DSP
effect applied to the overall sound.
Use the MENU [▲] and [▼] buttons to move the triangular indicator in the display
next to “DIGIT AL EFFECT”, then use the SUB MENU [▲] and [▼] buttons to select
“DSP Return” (the current return level v alue appears to the right of “DSP Return” on
the display).
rn: 64DSP Retu
• If DSP Insertion Effect
is selected (page
145), you won’t be
able to set the DSP
Return Level. In this
case, “- - -” will be
shown on the display.
• When the Voice Set
function is ON (page
116), selecting the
panel voice for the R1
voice will reset the
DSP Return level to
64 (fixed at 64).
Use the [–] and [+] buttons, the [1]–[0]number buttons, or Data Dial to set the
desired DSP return level. The range is from “0” to “127”. T he higher the value the
greater the return level.
46
Page 49

Harmony
If you press the [HARMONY] button, the HARMONY icon will light up, and
the Harmony effect will be turned on. After setting the Harmony type, it will be
applied to the R1 voice.
HARMONY
VARIATION
CHORUS DSP
The Harmonies except for the types 6, 7 and 9 are applied to the R1 voice
according to the chords detected in the Accompaniment section.
HARMONY
Digital Effects
• Harmony can not be
turned on when a drum kit
is selected for the R1
voice.
• Harmony can not be
turned on when the Full
Keyboard Auto accompaniment fingering mode is
selected even if Auto Accompaniment is on. Harmony will be automatically
turned off if the Full Keyboard fingering mode is
selected while the Harmony effect is on.
• If a drum kit voice is selected for R1 when Harmony is turned on, Harmony will be automatically
be turned off.
■ Selecting a Harmony Type
Select one of the 16 Harmony types. There are various harmony effects,
depending on the Harmony type, with some adding a number of higher notes to the
note of the pressed key, and some adding a number of lower notes.
Use the MENU [▲] and [▼] buttons to move the triangular indica tor in the
display next to “DIGITAL EFFECT”.
MENU
DIGITAL EFFECT
GROOVE&DYNAMICS
Then use the SUB MENU [▲] and [▼] buttons to select “Harmony”. The name
of the currently selected Harmony type will appear on the right of the top line of
the display.
SUB MENU
MIDI
OVERALL
• You can also jump directly
to the DIGITAL EFFECT
HARMONY TYPE function
by pressing and holding
the [HARMONY] button
for a few seconds.
• When the Voice Set function is ON (see page 116),
the HARMONY type may
change according to the
selected R1 panel voice.
Referring to the Harmony Type List on page 147, use the [–] and [+] buttons, the
[1]–[0] number buttons, or Data Dial to select the desired Harmony effect from 1-
16.
1 DueHarmony: t
47
Page 50

Digital Effects
■ Adjusting the Harmony Volume
The volume of the harmony sound in relation to the ke yboard sound can be adjusted
for Harmony types 1 through 16 as follows:
Use the MENU [▲] and [▼] buttons to move the triangular indicator in the display
next to “DIGIT AL EFFECT”, then use the SUB MENU [▲] and [▼] buttons to select
“Harm.V ol”. The current harmony volume setting will appear to the right of “Harm.V ol”
on the display.
Use the [–] and [+] buttons, the [1]–[0] number buttons, or Data Dial to adjust the
harmony volume as required. The range is from “0” to “127”.
• When the Voice Set
function is ON (see
page 116), the Harmony Volume may
change according to
the selected R1 panel
voice.
• Changing the volume
of the harmony sound
: 127Harm.Vol
may not produce audible effect for some
R1 voices (ex. organ
sounds) when you select Harmony types 1
through 6.
Multi Effect (PSR-730)
Multi Effect allows you to apply three types of eff ects (reverb, chorus and DSP) more
powerfully and effectivel y.
■ How Multi Effect Works
With Multi Effect, you can combine 2 ef fects (Effect 1/2) and apply them to the output
from the keyboard (R1/R2/L parts).
There are 2 ways to combine the effects; in series or in parallel.
Example 1) Applying Effects 1 and 2 to separate parts (parallel)
Part
Right1
Effect1 In
Part
Left
Effect2 In Effect2
Effect1
Dist. Hard
Effect1
Effect 2
Rotary SP.4
• By adding Multi-Effect
to Reverb, Chorus
and DSP, the PSR730 can have up to 5
system effects.
• Since Multi-Effect is
installed closer to the
tone generator than
Reverb, Chorus or
DSP, it can function
as an insertion effect.
See page 143, “About
Digital Effects.”
Example 2) Applying Effects 1 and 2 to a single part (series)
Part
Right1
Effect1 In
Effect1
Effect2 In Effect2
Effect1
Auto Pan
Effect1
Effect 2
Auto Wah
48
Page 51

Applying Multi Effect (PSR-730)
Pressing the [MUL TI EFFECT] button will cause the Multi Effect icon to light on the
display. After making part settings for Effect 1/2 and type settings, the Multi Effect
will be applied.
MULTI EFFECT
MULTI
DIGITAL EQ
EFFECT
■ Setting Parts for Effect 1/2
Digital Effects
• The MULTI EFFECT
ON/OFF status will be
set automatically according to the selected R1 panel voice.
• Some of the song files
may contain Multi Effect settings. When
you play back such
songs, Multi Effect
button on the panel
will automatically be
turned off.
Select a part each for Effect 1 and Effect 2
● Effect 1 ...... Select Right 1 (R1 part), Right 2 (R2 part), Left (L part) .
● Effect 2 ...... Right 1 (R1 part), Right 2 (R2 part), Left (L part) or Eff ect 1
(Effect 1 in series).
Use the MENU [▲] and [▼] buttons to mov e the triangular indicator in the display
next to “DIGITAL EFFECT”.
MENU
DIGITAL EFFECT
GROOVE&DYNAMICS
MIDI
OVERALL
Then use the SUB MENU [▲] and [▼] buttons to select “Effect1 In” or “Effect2
In”. The name of the currently selected part will appear on the right of the top line of
the display.
Use the [–] and [+] buttons or Data Dial to select the part you want to apply the ef fect
to.
In; RigEffect1 ht 1
• You can jump directly
to the “Effect1 IN” sub
menu of the DIGITAL
EFFECTS menu by
pressing and holding
the MULTI-EFFECT
button for a few seconds.
• The Effect 1/2 part
settings may automatically change according to the selected R1 panel voice.
• “- - -” may appear on
the display if you play
back the songs containing Multi Effect
settings.
In; LefEffect2 t
49
Page 52

Digital Effects
■ Select the Effect Type for Effect 1/2
Select one of the 42 effect types for Effect 1 and Effect 2
Use the MENU [▼] and [▲] buttons to move the triangular indicator in the display
next to “DIGITAL EFFECT”. The icon for “DIGITAL EFFECT” will light.
Then use the SUB MENU [▼] and [▲] buttons to select “Effect1” or “Ef fect2”. The
name of the currently selected type will appear on the right of the top line of the
display.
Referring to the Multi-Effect T ype List on page 146, use the [–] and [+] buttons, [1]–
[0] number buttons, or Data Dial to select the desired effect type.
01 HalEffect1: l 1
18 FlaEffect2: nger 1
• The Effect 1/2 type
settings may automatically change when a
panel voice is selected
for R1.
• “** XG Ins Eff” may appear on the display if
you play back the
songs containing Multi
Effect settings.
■ Adjust the Dry/Wet Settings for Effect 1/2
Set the Dry/Wet settings for Effect 1 and Effect 2
Dry refers to an original sound that has no effects applied to it, while Wet means that
effects are applied to a sound. Dry/Wet is a setting value that regulates the level of
effects that are applied.
● Dry/Wet [0]............Only dry sound is output.
● Dry/Wet [64] .........Output with the same amount of the dry/wet sounds.
● Dry/Wet [127].......Only wet sound is output.
Use the MENU [▼] and [▲] buttons to move the triangular indicator in the display
next to “DIGITAL EFFECT”. The icon for “DIGITAL EFFECT” will light.
Then use the SUB MENU [▼] and [▲] buttons to select “Eff1 Dry/Wet” or “Eff2
Dry/W et”. The currently set Dry/Wet value will appear on the right of the top line of
the display.
Use the [–] and [+] buttons, the [1]–[0] number buttons, or Data Dial to select the
Dry/Wet value within a range of 0-127.
• The dry/wet settings
cannot be done for
some of the Effect 1/2
types. In that case, “-
- -” will be displayed.
• The Dry/Wet settings
for Effect 1/2 may automatically change
when a panel voice is
selected for R1.
Wet: 64Eff1Dry/
Wet: 48Eff2Dry/
50
Page 53

The Digital Equalizer (PSR-730)
Usually an equalizer is used to correct the sound output from amps or speakers to
match the special character of the room. The sound is divided into se v eral fr equency
bands, then by raising or lowering the level for eac h band, the corr ection is made.
Adjusting the sound you play according to the genre—classical music more refined,
pops music more crisp, and rock music more dynamic—can also serve to draw out the
special characteristics of the music and make your performance more enjoyable.
The PSR-730 possesses a high grade 5 band digital equalizer function. With this
function, a final effect—tone control—can be added to the output of your instrument.
Example) 04 (Bright)
+12
0
+7 -2 0 +2 +7
-12
LowGain
LowMidGain MidGain HighMidGain HighGain
Digital Effects
Frequency Bands (5 bands)
LowGain 80 Hz
LowMidGain 500 Hz
MidGain 1.0 kHz
HighMidGain 4.0 kHz
HighGain 8.0 kHz
The digital equalizer adjusts the gain (amplitude change) in each of the 5 frequency
bands within a range of -12 to 0 to +12 decibels [dB]. T ry listening to each of the fi ve
preset equalizer settings and compare them.
Using the Digital Equalizer (PSR-730)
If you press the [DIGITAL EQ] button, the DIGITAL EQ icon will light up, and
the Digital EQ effect will be turned on. After setting the Digital EQ type, the equalizer
effect will be applied to the overall output of the PSR-730.
• The range of each frequency band can be
changed by transmitting the system exclusive message from an
external MIDI device
to the PSR-730/630
(see page 156).
DIGITAL EQ
DIGITAL EQ
MULTI
EFFECT
51
Page 54

Digital Effects
■ Selecting a Digital EQ Type.
Select one of the 5 Digital EQ types.
Use the MENU [▼] and [▲] buttons to move the triangular indicator in the display
next to “DIGITAL EFFECT”.
MENU
DIGITAL EFFECT
GROOVE&DYNAMICS
MIDI
OVERALL
Then use the SUB MENU [▼] and [▲] buttons to select “EQ T ype”. The name of
the currently selected Digital EQ type will appear on the right of the top line of the
display.
Referring to the Equalizer Type List below, use the [–] and [+] buttons, the [1]–[5]
number buttons, or Data Dial to select the desired equalizer type.
SUB MENU
04 BriEQ Type: ght
● Equalizer Type List
• You can jump directly
to the “Digital EQ” sub
menu of the DIGITAL
EFFECTS menu by
pressing and holding
the DIGITAL EQ button for a few seconds.
01 Standard
+12
0
-12
02 Disco
+12
0
-12
03 Mild
+12
0
-12
04 Bright
+12
0
-12
+3 0 -1 0 +5
LowGain
+7 -2 -1 +2 +7
LowGain
+2 +2 -2 -5 0
LowGain
+7 -2 0 +2 +7
LowGain
LowMidGain MidGain HighMidGain HighGain
LowMidGain MidGain HighMidGain HighGain
LowMidGain MidGain HighMidGain HighGain
LowMidGain MidGain HighMidGain HighGain
05 Lo Fi
+12
0
-12
-12
LowGain
-3 +10 -2
LowMidGain MidGain HighMidGain HighGain
52
-10
Page 55

■ Setting the Gain (User Setting)
Y ou can change the settings for any of the 5 preset equalizer types, adjusting the output
to meet your own needs.
Select the equalizer type you wish to use as a base for your settings, then use the
SUB MENU [▼] and [▲] buttons to select “LowGain”.The current Lo wGain value for
the type you selected will be shown on the right of the upper line of the display.
+ 4LowGain:
Use the [–] and [+] buttons, the [1]–[0] number buttons, or Data Dial to set the
LowGain amplitude change within a range of -12 to 0 to +12 decibels [dB].
Switch to each of the other bands: “LowMidGain,” “MidGain,” “HighMidGain,”
and “HighGain”, and set them in the same way as the “LowGain.”
Digital Effects
After finishing the gain settings, use the SUB MENU [▼] and [▲] buttons to select
“EQ Type”. “** User” will appear on the right of the top line of the display.
** UseEQ Type: r
53
Page 56

The Pitch Bend Wheel
Use the PSR-730/630 pitch bend wheel to bend notes up (roll the wheel away from you) or
down (roll the wheel toward you) while playing the keyboard. The pitch bend wheel is selfcentering and will automatically return to nor nal pitch when released.
PITCH BEND
Setting the Pitch Bend Range
The maximum pitch bend range can be set via the PITCH BEND RANGE function
in the OVERALL function group. Use the MENU [▼] and [▲] buttons to move the
triangular indicator in the display next to “OVERALL”.
MENU
DIGITAL EFFECT
GROOVE&DYNAMICS
Then use the SUB MENU [▼] and [▲] buttons to select “PB Range”. The current
pitch bend range setting will appear to the right of the function name on the top line
of the display. Use the [–] and [+] buttons, the [1]–[0] number buttons, or Data Dial
to set the pitch bend range from “01” to “12” as required. Each increment corresponds
to one semitone.
: 2PB Range
MIDI
OVERALL
• When the Voice Set
function is ON (page
116), the Pitch Bend
Range will be
changed according to
the selected R1 panel
voice.
• The default pitch bend
range can be instantly
recalled by pressing
the [+] and [–] buttons
simultaneously.
54
Page 57

The Modulation Wheel (PSR-730)
The Modulation function applies a vibrato effect to notes played on the keyboard (R1, R2, L
voices). Rolling the MODULATION wheel all the way towards yourself minimizes the depth
of the effect, while rotating it away from yourself increases it.
MODULATION
• In order to avoid acci-
MAX
MIN
dentally applying
modulation when you
don’t intend to, set the
depth at its minimum
setting.
• You can also assign
other functions to the
MODULATION Wheel
(see below).
Changing the Modulation Wheel Function
It’s possible to change the effect that is applied when you rotate the MODULA-
TION Wheel. You can select from 3 types: modulation, brightness or resonance
● Modulation...........Applies vibrato effects to the voices from the keyboard.
● Brightness ...........Adjusts the brightness of the R1 voice played on the keyboard.
Increasing the depth makes the sound brighter , while decreasing it makes it softer.
● Resonance...........Adds resonance to the R1 voices played on the keyboard.
Use the MENU [▼] and [▲] buttons to mov e the triangular indicator in the display
next to “OVERALL”.
Then use the SUB MENU [▼] and [▲] buttons to select “ModWheel”. The ef fect
currently set for the modulation wheel will appear to the right of the top line of the
display.
: ModulationModWheel
Referring to the information above, use the [–] and [+] buttons or the Data Dial to
select one of the 3 effects.
55
Page 58

Transpose
This functions allow the overall pitch of the PSR-730/630 to be transposed up or down by a
maximum of one octave in semitone increments.
Setting Transposition
Use the TRANSPOSE [▼] and [▲] buttons to set the desired degree of transposi-
tion. Press either button briefly to decrement or increment by one, or hold for
continuous decrementing or incrementing. The current transpose value will appear on
the top line of the display for a few seconds whenever one of the TRANSPOSE b uttons
is pressed — during this time the [–] and [+] buttons, number buttons, or data dial can
also be used to set the transpose value (the transpose value also appears continuously
above “TRANSPOSE” in the display).
ACMP/SONG
VOLUME
e: 0Transpos
AB
REPEAT
ONE TOUCH
SETTING
TRANSPOSE
001
STYLE
116
TEMPO
000
TRANSPOSE
100
The transpose range is from –12 to +12. Each step corresponds to one semitone,
allowing a maximum upward or downw ard transposition of 1-octave. A setting of “0”
produces the normal pitch.
• The Transpose func-
• Press the TRANS-
• The new TRANS-
• When the Transpose
tion cannot be applied
when a drum kit is the
selected voice (page
19).
▼
POSE [
buttons simultaneously to instantly
reset the transpose
value to “0”.
POSE value will take
effect from the next
key played.
value is shown at the
top of the display, you
can use the [1]–[0]
number keys, the
[+],[–] buttons or the
Data Dial to change it.
] and [▲]
56
Page 59

Registration Memory
The PSR-730/630 Registration Memory feature can be used to memorize 128 complete
control-panel setups (32 banks, 4 setups each) that you can recall whenever needed.
• The PSR-730/630’s initial Registration Memory [1]–[4] settings (when it shipped from the
factory) are the same panel settings as when the power switch is first turned on.
Registering the Panel Settings
Set Up the Controls as Required
1
Make the desired control settings. The following settings ar e memorized by the
Registration Memory function:
● Data Stored By the Registration Memory
VOICE PARAMETERS
• R1 Voice (Voice number,
volume, octave, pan, reverb
depth, chorus depth, DSP
depth)
• Dual Voice ON/OFF
• R2 Voice (Voice number,
volume, octave, pan, reverb
depth, chorus depth, DSP
depth)
• Split Voice ON/OFF
• L Voice (Voice number,
volume, octave, pan, reverb
depth, chorus depth, DSP
depth)
• Pedal 1 function
• Pedal 2 function
Select a Registration Bank (if necessary)
2
• Split Point (Split Voice)
• Touch Sensitivity
• Reverb ON/OFF
• Chorus ON/OFF
• DSP ON/OFF, variation
ON/OFF
• DSP type
• Multi Effect (ON/OFF,
Effect 1/2: part, type, dry/
wet)
• Harmony ON/OFF, type,
volume
• Pitch bend range
• Modulation wheel
function
• Scale Tuning
ACCOMPANIMENT PARAMETERS
• Auto Accompaniment ON/OFF
• Fingering mode
• Tempo
• Split point
(Auto Accompaniment)
• Accompaniment volume
• Track data (Track ON/OFF,
voice, volume, pan, reverb
depth, chorus depth)
• Accompaniment section (Main
A/B)
• Multi Pad Set number
• Chord Match ON/OFF (Multi
Pad1…4)
• Transpose
• Reverb type
• Chorus type
• Groove & Dynamics (ON/
OFF, templates, rates)
• Style number (Style
names [page 104] for the
user styles)
Use the MENU [▲] and [▼] buttons to move the triangular indicator next to
“REGIST MEMORY “ in the menu list to the left of the display — the currently
selected registration bank number and name will appear on the top line of the display.
Then use the [–] and [+] buttons, [1]–[0] number buttons, or Data Dial to select the
desired bank (1 through 32).
• Press and hold the
REGISTRATION
MEMORY [MEMORY]
button for a few seconds to go directly to
the REGIST
MEMORY display.
ist1 RegBank 01:
57
Page 60

Registration Memory
On the PSR-730, there are BANK [▼] and [▲] buttons. Pressing these buttons will
directly bring up the registration bank sub menu (example: Bank 1) of the “Regist
Memory”, main menu item, and all you have to do is add the correct number.
BANK
MEMORY
REGISTRATION MEMORY
1
Register the Settings
3
While holding the [MEMORY] button, press one of the REGISTRATION
MEMOR Y buttons — [1] through [4]. The corresponding REGISTRA TION MEMOR Y
number will appear below “REGISTRATION” in the display.
MEMORY
REGISTRATION MEMORY
1234
ist1 RegBank 01:
AB
REPEAT
ONE TOUCH
SETTING
213
REGISTRATION MEMORY
FREEZE
4
• Any data that was
previously recorded in
the Registration
Memory location you
selected will be
erased and replaced
by the new settings.
• The Registration
Memory contents will
be retained even after
turning the power off.
See page 152 for the
details.
Naming the Registration Banks
You can give your own names (up to 8 char acters) to the registration banks where
you have stored settings.
After recalling the registration settings you wish to name, use the MENU [▲] and
[▼] buttons to move the triangular indicator next to “REGIST MEMOR Y“ in the menu
list to the left of the display.
Then use the SUB MENU [▲] and [▼] buttons to select “Reg Naming”. The current
name will appear on the top right of the display.
Reg Nami
58
-
ist1ng: Reg
Page 61

Registration Memory
Referring to the information below, use the [1]– [0] number buttons, the [+], [–]
buttons or the Data Dial to enter the name.
[+] .................. Select letter (cursor moves right)
[–].................. Select letter (cursor moves left)
Dial ............... Change Character
[1]–[0]........... ”Jump” entry
[Character List]
• When entering letters with the Dial
0 1 2 3 4 5 6 7 8 9
B C D E F G H I J K L M N O P Q R S T U V
A
W
X Y Z - –
• When doing “jump” entry with the [1]–[0] number buttons
[1].......... 1
[2].......... 2
[3].......... 3
[4].......... 4
[5].......... 5
[6].......... 6
[7].......... 7
[8].......... 8
[9].......... 9
[0].......... 0
A B C
D E F
G H I
J K L
M N O
P Q R
S T U
V W X
Y Z @
- –
• Lower case letters
can’t be entered with
the naming function.
Reg Nami
The same method can be used to give y our own names to user songs (page 94), user
pads (page 109), or user styles (page 104).
E 01ng: LIV
-
59
Page 62
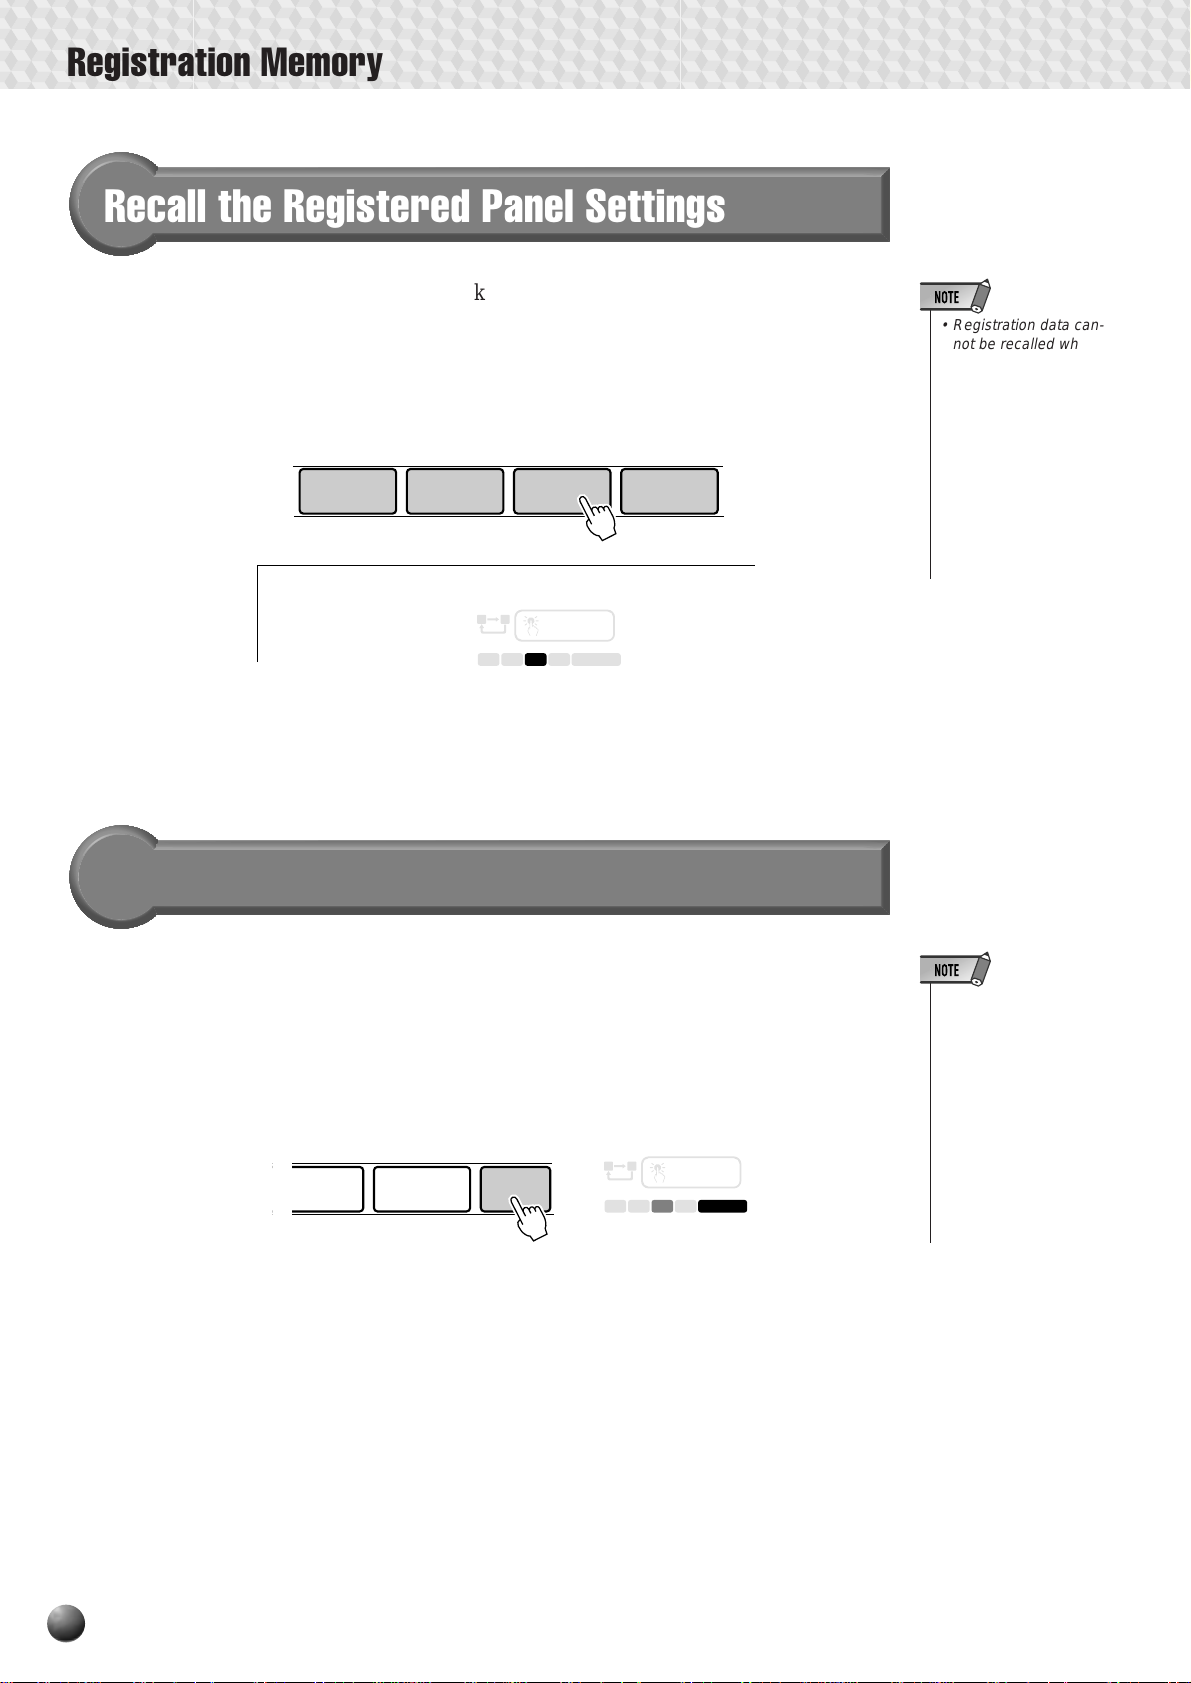
Registration Memory
Recall the Registered Panel Settings
Simply select the appropriate bank as described above, then press the desired
REGISTRA TION MEMOR Y button at any time to recall the memorized settings. T he
corresponding Registration Memory number will appear above “REGISTRATION”
in the display, and the appropriate setting changes will appear in the display.
REGISTRATION MEMORY
1234
AB
REPEAT
ONE TOUCH
SETTING
213
REGISTRATION MEMORY
FREEZE
4
• Registration data cannot be recalled when
the One Touch Setting function is on.
• When power is turned
on, or the bank is
changed, all of the
numbers in the REGISTRATION
MEMORY section of
the display will be
blank.
ist3 RegBank 03:
The Accompanient Freeze Function
When the FREEZE function is engaged, the accompaniment parameters listed
above will not be changed when a REGISTRATION MEMORY is recalled. This
allows you to recall different REGISTRATION MEMORY settings w hile using A uto
Accompaniment, without suddenly disturbing the flow of the accompaniment. The
FREEZE function is turned on and off by pressing the [FREEZE] button. The
“FREEZE” icon appears in the display when it is turned on.
MORY
34
FREEZE
AB
REPEAT
213
REGISTRATION MEMORY
ONE TOUCH
SETTING
FREEZE
4
• FREEZE remains on
even if a different registration bank is selected.
• The Freeze function
will automatically be
turned on when one
of the following
modes, Song, Record
or Style Revoice, is
engaged.
60
Page 63

The Multi Pads
The PSR-730/630 MUL TI P ADS can be used to play a n umber of short pre-recorded rhythmic
and melodic sequences that can be used to add impact and variety to your keyboard
performances. You can also record your own MUL TI P AD phrases as described in “MUL TI P AD
Recording” on page 106.
Some pad phrases simply play back as prog rammed, while others are “chord match” types
which, if the CHORD MATCH function is turned on, are automatically transposed to match
chords played using the PSR-730/630 Auto Accompaniment feature.
Selecting a MULTI PAD Set
The PSR-730/630 has 36 multi pad sets, each containing a complete set of 4 MUL TI
P AD phrases — 144 phrases in all. Before using the MUL TI PADS, select the MUL TI
PAD set containing the phrases you want to use as follows:
Select the Multi Pad Function
1
To select a multi pad set first use the MENU [▲] and [▼] buttons to select the
MULTI PAD function so that the triangular indicator in the display appears next to
“MULTI PAD” to the left of the display.
SUB MENU
MENU
Select a Multi Pad Set Number
2
If necessary use the SUB MENU [▲] and [▼] buttons so that the name of the
currently selected MULTI PAD set appear s on the display (see list on page 62), then
use the [–] and [+], number buttons, or data dial to select the MUL TI P AD set you want
to use.
MENU
DISK
MULTI PAD
REGIST MEMORY
MIDI
DIGITAL EFFECT
OVERALL
GROOVE&DYNAMICS
fare1 FanBank 01:
• Press and hold the
MULTI PAD [STOP]
button for a few seconds to go directly to
the MULTI PAD SET
display.
61
Page 64

The Multi Pads
Playing the MULTI PADs
Simply tap any of the MULTI PADs at an y time to play back the corresponding
phrase at the currently set tempo. MUL TI PAD playback begins as soon as the button
is pressed. You can even play two, three, or four MUL TI P ADs a t the same time. Also,
you can create “retriggered sample” effects by repeatedly pressing a pad before its
contents are completely played back.
• Pressing the pad during its playback will
stop playing and begin playing from the
top again.
STOP
1234
BEAT
1234
MULTI PAD
MULTI PAD
The MUL TI P AD voices are indepedent from the voices you hav e currently selected
for keyboard performance. Y ou could, for example , play piano on the keyboard while
a MULTI PAD plays a brass chord stab.
When the CHORD MATCH function (page 63) for a pad is turned on, the
corresponding phrase will be automatically transposed to match chords played using
the PSR-730/630 Auto-accompaniment feature.
MULTI PAD playback can be terminated by pressing the MULTI PAD [STOP]
button.
STOP
1234
● The Multi Pad Sets
Chord Match
Set Pad 1 Pad 2 Pad 3 Pad 4
1 Fanfare1 OOO –
2 Fanfare2 OOO –
3 Brassy1 OOOO
4 Brassy2 OOOO
5 Synth Brass OOOO
6 Guitar Play1 OOOO
7 Guitar Play2 OOOO
8 Guitar Play3 OOOO
9 Guitar Play4 OOOO
10 Techno Synth1 OOOO
11 Techno Synth2 OOOO
12 Arpeggio OOOO
13 Crystal OOOO
14 Twinkle OOOO
15 Magical OOOO
16 Piano Sequence OOOO
17 Banjo Sequence OOOO
18 Gothic OOOO
Set Pad 1 Pad 2 Pad 3 Pad 4
19 Classic OOOO
20 Jingle OOOO
21 Horror SE ––––
22 Racing SE ––––
23 Stormy SE ––––
24 Water SE ––––
25 Animal SE ––––
26 Haha SE ––––
27Rock Kit ––––
28 Techno Kit ––––
29 Analog Kit ––––
30 Tom Flam ––––
31 Latin Percusion1 ––––
32 Latin Percussion2 ––––
33 Timbales ––––
34 Analog Sequence ––––
35 Conga Sequence ––––
36 Techno Sequence ––––
MULTI PAD
Chord Match
62
Page 65

Turning the CHORD MATCH Function On/Off
The CHORD MATCH function can be individually turned on or off for eac h of the
MULTI PADs, as described below.
Select the MULTI PAD Function
1
Use the MENU [▲] and [▼] buttons to select the MULTI PAD function so tha t the
triangular indicator in the display appears next to “MULTI PAD” to the left of the
display.
SUB MENU
MENU
MENU
DISK
MULTI PAD
REGIST MEMORY
MIDI
DIGITAL EFFECT
OVERALL
GROOVE&DYNAMICS
The Multi Pads
• The chord match
function has no effect
with pads that contain
percussion phrases.
Select a CHORD MATCH Function
2
Use the SUB MENU [▲] and [▼] buttons to select “P1ChdMatch”, “P2ChdMatch”,
“P3ChdMatch”, or “P4ChdMatch”, depending on the pad for which you want to turn
the CHORD MATCH function on or off.
ch: OnP1ChdMat
Turn the CHORD MATCH Function On or Off
3
Use the [–] and [+] buttons or data dial to turn the CHORD MATCH function for
the selected pad “on” or “off” as required.
123
456
789
–
/ NO
0
+
/ YES
• The chord match on/
off status depends on
the selected Multi
Pad.
• The CHORD MATCH
ON/OFF setting is restored to its original
status whenever a
preset MULTI PAD
set is selected.
• When the CHORD
MATCH ON/OFF status of a user MULTI
PAD (see page 107)
set is changed, the
new status is recorded with the
MULTI PAD data.
63
Page 66

Disk Operations
There is a disk drive installed in the PSR-730/630. By inserting a floppy disk into it, y ou can
do many things: record and pla ybac k user songs, sa ve and load user styles (page 98), user
pads (page 106), or registration memory data (page 57).
You can save an y number of user styles and registration data on floppy disks, make song
libraries or find many other ways to make playing the PSR-730/630 more efficient.
There is a sample disk packed with the PSR-730/630. It contains 20 XG songs and 8 style
files. To play back the songs see page 76. To load the styles see page 70.
◆ Floppy Disk Handling Precautions
Floppy disks are an inexpensive, convenient, and reliable way to
store your music data. They are not indestructable, however, and
should be handled with care. Observe the following points to
ensure the long-term safety of your disks and data.
Type of Disk
• Use the 3.5-inch 2DD or 2HD floppy disks with the PSR-730/
630.
Taking Care of Your Floppy Disks
• Never attempt to eject a disk during a read or write operation (i.e.
while the disk drive is operating). Doing so can damage both the
disk and the drive.
• Never turn the power ON or OFF while a disk is in the drive.
Always eject the disk before turning the power OFF.
• To eject a floppy disk from the disk drive press the eject button
slowly as far as it will go. Then when the disk is fully ejected,
remove it by hand. The disk may not be ejected properly if the
eject button is pressed too quickly or if it is not pressed in far
enough (the eject button may become stuck halfway with the
disk extending from the slot by only a few millimeters). If this is
the case, do not attempt to pull out the partially ejected disk.
Doing so may damage the disk drive mechanism and/or the
floppy disk. To remove a partially ejected disk, try pressing the
eject button once again or push the disk back into the slot, then
repeat the eject procedure carefully.
This lamp is always on when the
power is on, regardless of Disk
operation.
• Do not insert anything but floppy disks into the disk drive. Other
objects can damage the disk drive or floppy disk.
• Never open the disk shutter by hand or touch the internal surface
of the disk. Dirt, dust, or grease on the disk’s magnetic surface
can cause data errors.
• Never leave disks near a speaker, TV, or other device that emits
a strong magnetic field. Strong magnetic fields can partially
erase the data on the disk.
• Do not store disks in places exposed to direct sunlight or other
sources of heat. The acceptable storage temperature range is
approximately 4° to 53° C (39° to 127° F).
• Do not store disks in areas subject to extreme dryness or
humidity. The acceptable relative humidity range is approximately 8 to 90%.
• Do not store disks in areas contaminated with dust, sand, smoke,
etc.
• Do not place heavy objects such as books on top of a disk.
• Avoid getting floppy disks wet, particularly with oily or sticky
fluids. A disk that has been wet with water should be allowed to
dry naturally before use. Disks contaminated by other fluids can
cause damage to the disk drive and should be discarded.
• Be sure to apply the disk label at the proper position. When
changing the label never cover the old label with a new label;
always remove the old label first.
Head Cleaning
• With extended use the read/write head of the disk drive will pick
up dust and other particles that will eventually cause data errors.
If this occurs, clean the head with a 3.5 inch head cleaning disk
available from most computer supply stores.
Data Backup
• For maximum data security we strongly recommended that you
keep two copies of important data on separate floppy disks.
These disks should ideally be stored in separate locations. This
gives you a backup if one disk is lost or damaged.
Protecting Your Data (Write Protect Tab)
• To prevent accidental erasure of important data, slide the disk’s
write-protect tab to the “protect” position (tab open). If you
attempt to modify the disk when the write-protect tab is set to ON
position, “Disk Write Protected!!” will appear on the display
indicating that the operation is not possible.
Write protect tab ON
(locked-write protected)
Write protect tab OFF
(unlocked- write enabled)
64
Page 67
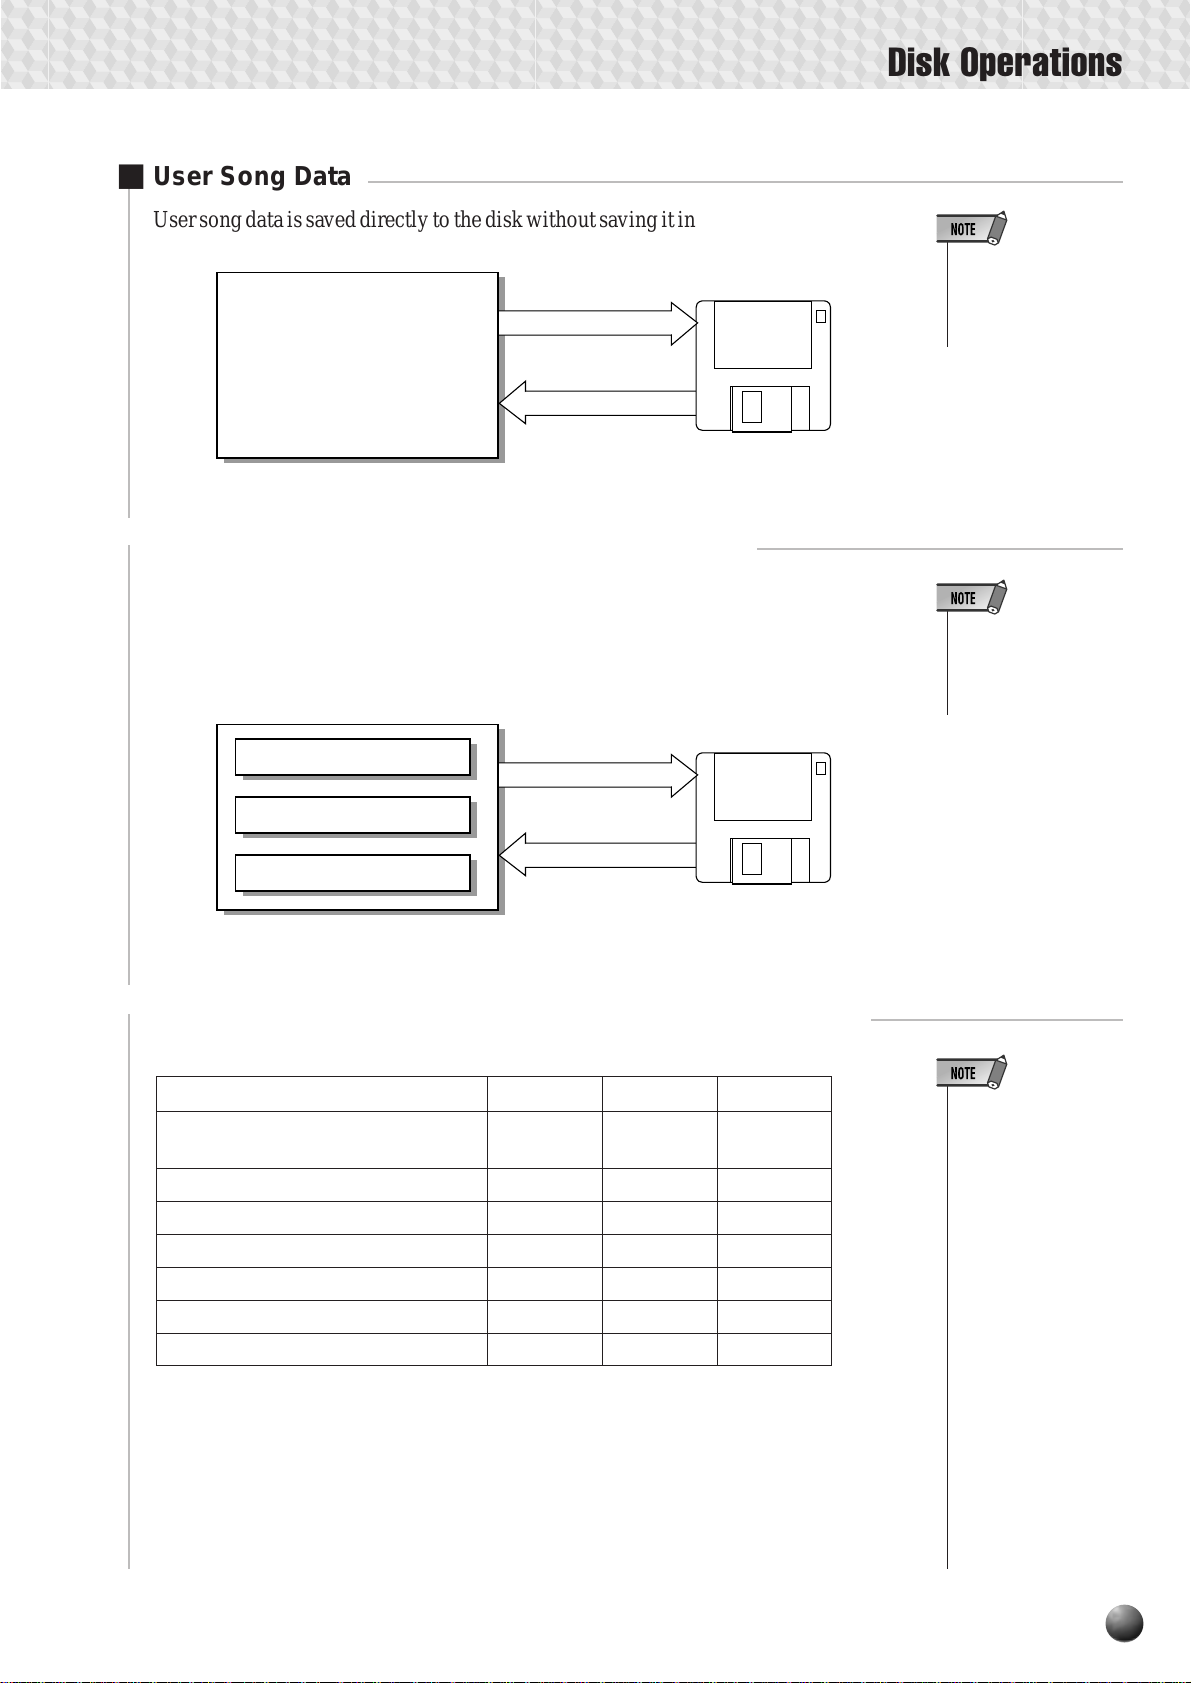
■ User Song Data
User song data is saved directly to the disk without saving it in the PSR-730/630 itself.
User Song
Record
(Direct save)
Playback
(Direct read)
Floppy
Disk
Maximum of 60 files can
be saved.
■ User Style/User Pad/Registration Memory Data
The PSR-730/630 has User Style, User Pad and Registration Memory functions
installed. The data recorded with these functions can also be saved individually or
gathered together to floppy disks and also the data (files) saved on disks can be loaded
individually or gathered together into the PSR-730/630.
Disk Operations
• It may not be possible
to record the full 60
files to a disk, depending on the legnth
of the recorded files.
• The maximum number of files may vary
according to the type
and volume of the
saved files (page 68).
User Style
Floppy
Disk
User Pad
Save
Save or load individually
or gathered together
Load
Registration Memory
Up to 43 “All” type files (page 68)
can be recorded on a 2HD disk.
Up to 21 “All” type files can be
recorded on a 2DD disk.
■ Data that Can be Saved or Loaded with the PSR-730/630
Data Type Extension Save Load
User Style (101-104) .USR OO
[Style File Format]
User Pad (bank 37-40) .USR OO
Registration Memory (bank 01-32) .USR OO
User Style + Registration Memory .USR OO
User Pad + Registration Memory .USR OO
User Style + User Pad .USR OO
User Song .MID — —
• When saving data,
use a floppy disk formatted on the PSR730/630.
• The three letters after
the file name (after
the period) are called
the extension. The extension shows the
type of file.
• Since the user songs
are directly recorded
to the disk as you play
during recording and
read from the disk
during playback, the
Save/Load functions
are not available. The
Disk Copy, Song
Copy and Delete File
operations related to
the user songs can be
executed.
65
Page 68

REPEAT
ONE T
SET
REGISTRATION
TEMPO
TRANSPOSE ME
AB
213
4
DISK
STYLE
ACMP/SONG
VOLUME
100
116
000
G PSR-730X
001
SONG
Disk Operations
■ Using Commercially Available Music Collections
(Sold Separately)
The PSR-730/630 can playback commercially available XG/GM music collection or
YAMAHA DOC collection (Disk Orchestra Collection) disk files. It can also load
styles collected on YAMAHA style file disks.
The PSR-730/630 can handle music disks (floppy disks) that bear the following
marks:
You can playback song files collected on these disks using the voices defined
in the GM standard.
You can playback songs using the XG format, an extension of the GM standard
that allows for much higher sound quality.
You can playback song files collected on these disks using the voices defined
in Yamaha’s DOC format.
You can load and play with the style files collected on these disks.
• With song data software that includes lyrics, you can view the
lyrics in the display
during playback. Consult your Yamaha
dealer for information
on song data that is
compatible with the
Lyrics Display function of the PSR-730/
630.
The Sample Disk
Try playing some of the songs on the included Sample Disk.
Insert the Sample Disk into the Disk Drive .
1
Once the disk is inserted, the menu icon on the display will automatically switch to
the song menu, and the currently selected song name and song number will appear at
the upper left of the display. The PSR-730/630 will switch into Song Mode. The
SONG icon will light along with the DISK (floppy disk) icon and the XG icon.
Start and Stop the Song
2
Press the [ST ART/STOP] button, and playback of the Sample Disk song will beg in.
START / STOP
For details, see page 76 “Song Playback.”
66
Page 69

Format
Setting up commercially availab le floppy disks (3.5 inch, 2HD/2DD
type) for use with the PSR-730/630 is called formatting
Follow the steps belo w to format a disk.
Insert the Disk into the Disk Drive
1
Insert a commercially available 3.5 inc h floppy disk (unformatted) into
the disk drive, with the shutter on the disk towards the drive, and with the
label side facing upward.
The “DISK” menu will be automatically selected, and the Sub Menu
item “Format Disk? NO/YES” will appear on the top line of the display.
NO/YESisk?Format D
Disk Operations
• After formatting, the capacity of a
2HD disk will be 1 Mbyte, and of
a 2DD disk will be 720 Kbyte.
• If you insert an unformatted disk
with the write protect tab in the
ON position into the drive, “Format Disk? NO/YES” will appear,
but when you try to format it,
“Disk Write Protected!!” will be
displayed. Eject the disk, move
the protect tab to the OFF position, and reinsert it in the drive.
• The “DISK” menu won’t be selected automatically when you insert the formatted disk. If you
want to format the formatted disk
to record from scratch, first insert
the disk you want to format, then
press the Menu button, next
press the Sub Menu button to
show the “Format Disk? YES” on
the display.
Press the [+] (YES) Button
2
When the [+] button is pressed, “Execute? NO/YES” will appear on the
display.
NO/YESisk?Execute?
Start Formatting
3
Press the [+] (YES) button and disk formatting will begin. Once started,
formatting cannot be canceled. During formatting, the display will read “Now
Formatting... xx%.”
.. 20%atting.Now Form
When formatting is finished, the display will return to the one which was
selected before inserting the disk.
If you don’t want to format, press the [–] (NO) button befor e the step 3 or
simply eject the disk. The display will return to the one which was selected
before inserting the disk.
• If data is already saved on the
disk, be careful not to format it. If
you format the disk, all the previously recorded data will be deleted.
• While formatting is in progress
(while “Now Formatting” is displayed) , never eject the disk or
turn off the power to the PSR730/630.
• If a disk that cannot be read by
the PSR-730/630 is inserted into
the disk drive, it will be treated
the same as an unformatted
floppy disk. Take care not to
erase important data by accidentally formatting a disk.
• If you want to reformat a disk
that already has been formatted
for the PSR-730/630, insert the
disk in the drive, select the “Format Disk? YES” item from the
sub menu of the “DISK” menu,
then proceed as for a normal format.
• If you insert the formatted disk
and you press the [-] (NO) button
or eject the disk in the step 2, the
display will return to the “Format
Disk?”.
67
Page 70
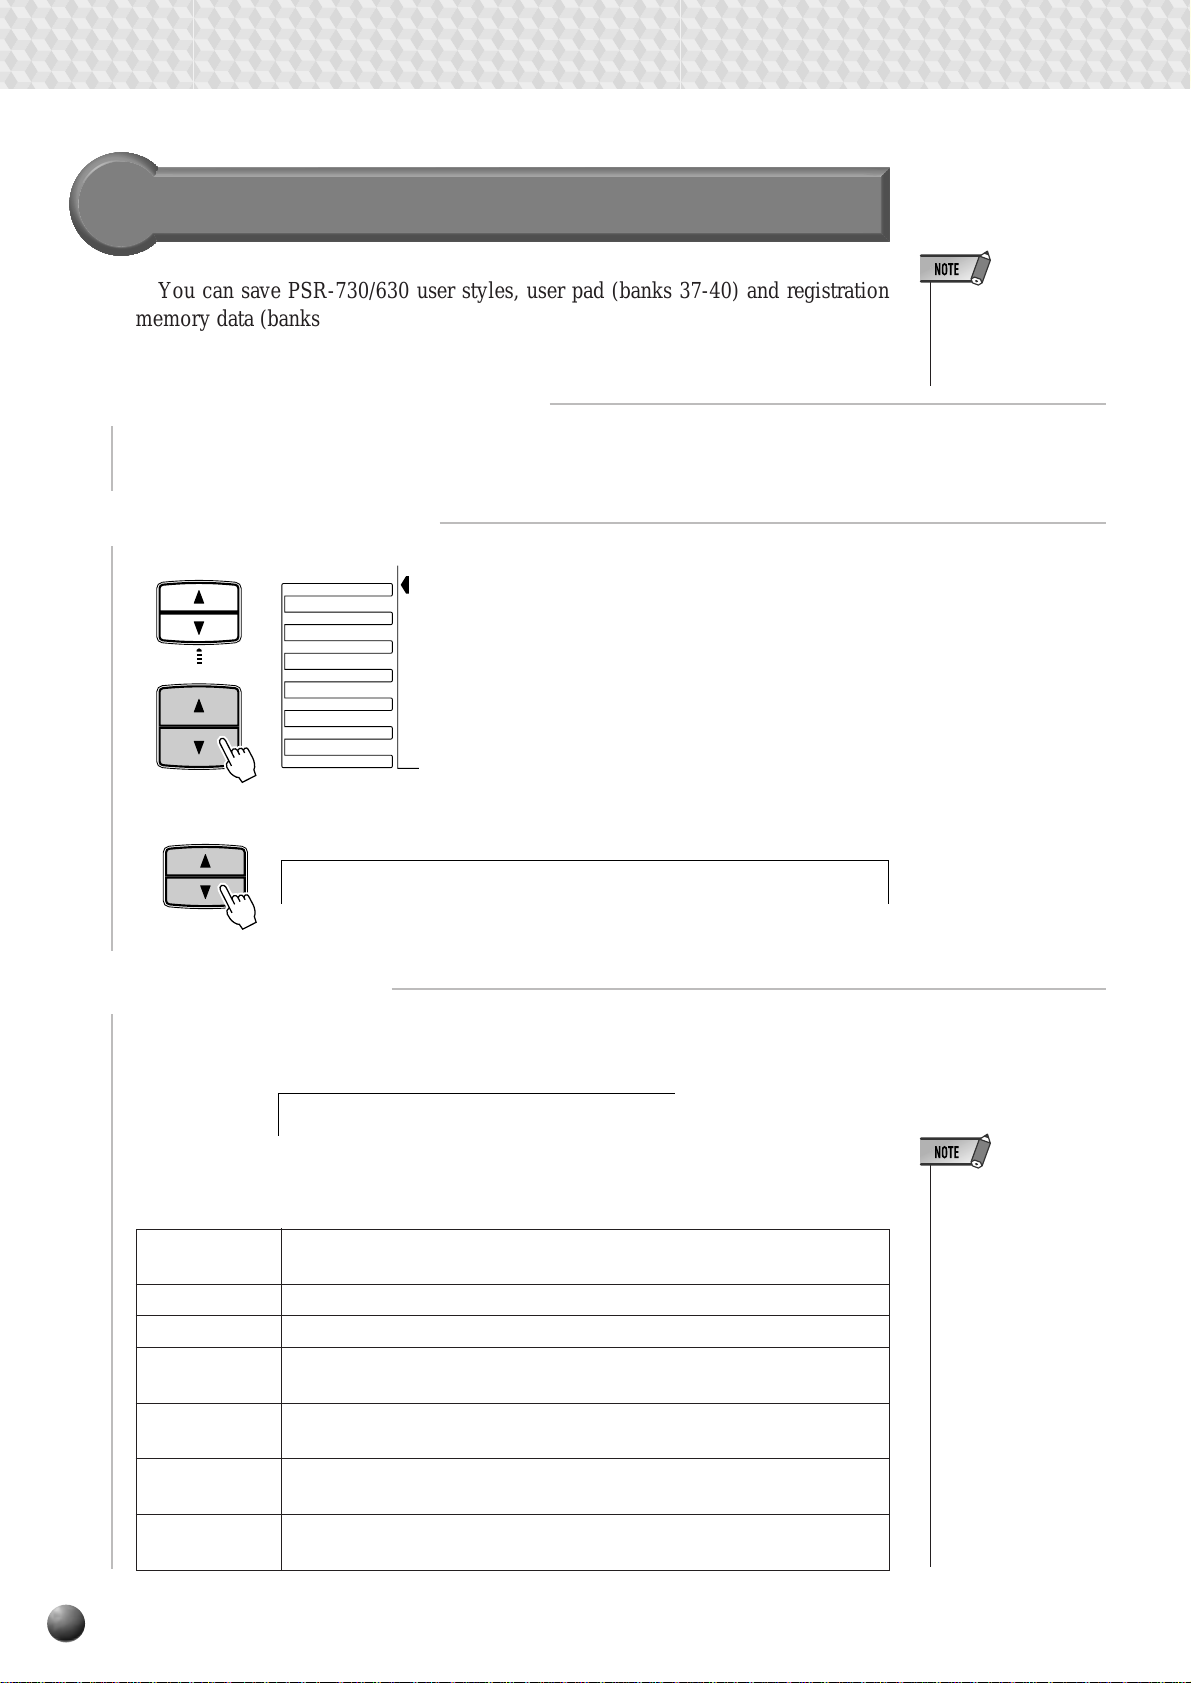
Disk Operations
Save
You can save PSR-730/630 user styles, user pad (banks 37-40) and registration
memory data (banks 01-32) on floppy disks.
Insert a Formatted Floppy Disk.
1
If a disk has not been already inserted in the drive, insert a formatted floppy disk.
Select a Save Function
2
SUB MENU
MENU
SUB MENU
MENU
DISK
MULTI PAD
REGIST MEMORY
MIDI
DIGITAL EFFECT
OVERALL
GROOVE&DYNAMICS
Use the MENU [▲] and [▼] buttons to select
the Disk function so that the triangular indicator
in the display appears next to “DISK” to the left
of the display.
Use the SUB MENU [▲] and [▼] buttons so
that “Sav e To Disk? YES” appears on the display.
• After formatting, the
capacity of a 2HD
disk will be 1 Mbyte,
and of a 2DD disk will
be 720 Kbyte.
YESDisk?Save To
Select the File Type
3
Press the [+] (YES) button, and the file type select screen “File Type: All” will
appear on the display.
e: AllFile Typ
Use the [–] and [+] buttons or the Data Dial to select the file type for the data you
want to save. Refer to the file type list below:
All Save all User Style (101-104), User Pad (bank 37-40), and Registration
Memory (bank 01-32) data into one single file.
Style Save all User Style (101-104) data gathered together into one single file .
Pad
Regist Save all Registration Memory (bank 01-32) data gathered together into
Style + Reg. Save all User Style (101-104) and Registration Memory (bank 01-32)
Pad + Regist Save all User Pad (bank 37-40), and Registration Memory (bank 01-32)
Style + Pad Save all User Style (101-104) and User Pad (bank 37-40) data gathered
Save all User Pad (bank 37-40) data gathered together into one single file.
one single file.
data gathered together into one single file.
data gathered together into one single file.
together into one single file.
• If the DISK menu is
selected when there
is no floppy disk inserted into the disk
drive, “- - -” will be
displayed at the top of
the display, and disk
operations won’t be
possible.
• Although all User
Style (101-104), User
Pad (bank 37-40),
and Registration
Memory (bank 01-32)
data can be saved
gathered into one
single file, the data
can be recalled individually when loaded
back into the PSR730/630.
68
Page 71

Save File Confirmation
4
Use the SUB MENU [▼] button so that “Save File....” appear s on the display,
showing the new file the data will be saved to.
0001.USRe: UF–0Save Fil
To overwrite the data already saved to an existing file, use the [–] and [+] buttons
or the Data Dial to select the file you want to overwrite .
If Necessary Change the File Name
5
Use the SUB MENU [▼] button so that “Rename:.....” appears on the display, and
you can change the name of the file (the 8 characters before the extension).
-001.USR LIVERename:
Disk Operations
• Even if you chose a
file where data is already saved because
you want to overwrite
the data, renaming
the file will cause the
new data to be saved
in a different file, and
the old data won’t be
overwritten.
• While data is being
saved (“Now Saving”
is displayed), never
eject the floppy disk
or turn off power to
the PSR-730/630.
Execute the File Save
6
Use the SUB MENU [▼] button so that “Execute: NO/YES” appears on the display .
NO/YESisk?Execute?
Press the [+] (YES) button and the save operation will be gin. While it is in progress,
“Now Saving...” will appear at the top of the display.
-001.USRng...ENow Savi
When the save operation is finished , the sub menu will return to “Save To Disk?
YES.”
• If you press the SUB
• If there isn’t enough
• If a write error occurs
s
MENU [
sub menu display will
return to “Save To
Disk? YES.”
space on the disk,
“Disk Full” will be displayed, and you won’t
be able to save any
data. You can delete
unneeded files on the
disk (page 75), or exchange the disk for a
new one and repeat
the save operation.
during a save operation, “Disk Error” will
be displayed. If the error reoccurs after repeating the save operation, there could
be something wrong
with the disk. Insert a
different disk in the
drive and repeat the
save operation.
] button the
69
Page 72

Disk Operations
Load
After saving User Style (101-104), User Pad (bank 37-40), and Registration
Memory (bank 01-32) data onto a floppy disk, you can reload them into the PSR-730/
630.
You can also load style data from the included Sample Disk or commercially
available Yamaha Style File disks.
Insert the Floppy Disk into the Disk Drive.
1
Insert the floppy disk that has the data you want to load into the floppy disk drive.
Select a Load Function
2
Use the MENU [▲] and [▼] buttons to select the Disk function so that the triangular
indicator in the display appears next to “DISK” to the left of the display.
Use the SUB MENU [▲] and [▼] buttons so that “Load To Disk? YES” appears
on the display.
SUB MENU
• If the DISK menu is
selected when there
is no floppy disk inserted into the disk
drive, “- - -” will be
displayed at the top of
the display, and disk
operations won’t be
YESm Disk?Load Fro
possible.
Select the File to Load
3
Press the [+] (YES) button, and “Load File..... ” file select scr een will appear on the
display .
0001.USRe: UF–0Load Fil
Use the [–] and [+] buttons or the Data Dial to select the file to load.
Select the File Type (Data Type) to Load
4
Press the SUB MENU [▼] button and the sub menu “File Type:....” will be
displayed.
e: AllFile Typ
Use the [–] and [+] buttons or the Data Dial to select the file type (data type) to load.
The file types that you can load at this point will depend on the types of files that
were originally saved to this file.
File types that were saved File types that can be loaded
All All, Style, Pad, Regist
Style Style
Pad Pad
Regist Regist
Style+Reg. Style, Regist, Style+Reg.
Pad+Regist Pad, Regist, Pad+Regist
Style+Pad Style, Pad , Style+Pad
• If the disk contains no
file, the display shows
“File Not Found!!” indicating that the Load
function is not possible.
70
Page 73

Select the Data to Be Loaded If Necessary
5
If the file type selected in step 4 was “Style,” “Pad,” or “Regist,” press the SUB
MENU [▼] button so that the sub menu “Source:....” (load data selection screen) is
displayed.
le 1 AllSource:
By setting the “source” and “destination,” the data can be individually loaded (or
loaded as a group).
Style ....... A single Style can be extracted from the f ile 4 Styles saved together on the
disk and loaded into one of the PSR-730/630 User Style 101-104.
Pad ......... A single bank can be extracted fr om the file 4 banks sav ed together on the
disk and loaded into one of the PSR-730/630 User Pad banks 37-40.
Regist .... A single bank can be extracted from the f ile 32 banks saved together on the
disk and loaded into one of the PSR-730/630 Registration banks 1-32.
Disk Operations
• When the selected file
type is “All,” “Style +
Reg,” “Pad + Regist,”
“Style + Pad,” step 5
is not necessary. Proceed from step 6.
File Type Source Destination
Style Style 1-4, All Style 1-4 (User Style 101-104)
Pad Pad bank 1-4, All Pad bank 1-4 (User Pad 37-40)
Regist Regist bank 1-32 All Reg. bank 1-32
● Source Selection
Use the [–] and [+] buttons or the Data Dial to select the load source.
If “All” is selected, all the data will be loaded.
le 2 StySource:
● Select the Destination
Press the SUB MENU [▼] button so that “Destination:.... ” appears on the display.
le 4ion:StyDestinat
Use the [–] and [+] buttons, [1]–[0] number buttons, or the Data Dial to select the
destination for the data.
Press the SUB MENU [▼] button so that “Execute NO/YES” (load execution
screen) appears on the display.
71
Page 74

Disk Operations
Execute the Load Operation
6
NO/YESisk?Execute?
Press the [+] (YES) button, and the load operation will start. Once started, the
operation can’t be canceled.
As the file is loading, “Now Loading” will appear on the top line of the display.
-001.USRing...ENow Load
When the load operation is finished, the display will return to the “Load From Disk?
YES” sub menu.
If you aren’t going to load, press the [–] (NO) button instead of the [+] (YES) button,
or eject the disk. The display will return back to the previous “Load From Disk? YES”.
• When data is loaded
from a floppy disk to
the PSR-730/630, the
data already in the
memory of the instrument will be replaced
by the data on the disk.
Save important data
into a disk file before
doing the load operation.
• While data is loading
(“Now Loading” is displayed), never eject
the floppy disk or turn
the power off.
• “Not Enough Memory!!”
may appear on the display, if a problem occurs that prevents the
data from being loaded
(the capacity of the
PSR-730/630 [RAM] is
exceeded, something
is wrong with the
floppy disk, or the data
from the disk is corrupted, etc.).
Disk Copy
Y ou can copy the entire da ta saved on a floppy disk onto another one using the disk
copy feature. It’s a good idea to use disk copy to create backup disks of your important
data.
Insert the Disk to Copy From (Source Disk) into the Disk
1
Drive
Insert the disk that you want to copy from (source disk) into the disk drive.
Select a Disk Copy Function
2
Use the MENU [▲] and [▼] buttons to select the Disk function so that the triangular
indicator in the display appears next to “DISK” to the left of the display.
Use the SUB MENU [▲] and [▼] buttons so that “Disk Copy? YES” appears on
the display.
SUB MENU
nd PiYESy? GraDisk Cop
• If the DISK menu is
selected when there
is no floppy disk inserted into the disk
drive, “- - -” will be
displayed at the top of
the display, and disk
operations won’t be
possible.
72
Page 75

Press the [+] (YES) Button
3
Make sure that the disk you wish to copy from (source disk) is inserted in the disk
drive, then press the [+] (YES) button. “Now Reading” will appear on the display.
nd PiYESing...Now Read
The contents of the disk will be copied to the PSR-730/630, and when reading is
finished, “Insert Copy Disk” will be displayed.
kd PiYESopy DisInsert C
Insert the Destination Disk into the Floppy Drive
4
Insert the destination disk for the copy operation into the disk drive. “Now
Copying” will appear on the display.
nd PiYESing...Now Copy
Data will be copied from the PSR-730/630 to the destination disk, and when
copying is finished, the display will return to the “Disk Copy? YES”.
If the quantity of data is large, it may be necessary for the data to be copied in parts.
In such a case, “Insert Source Disk” will appear again on the display.
iskPiYESource DInsert S
Eject the copy (destination) disk and insert the source disk. Follo w the messages on
the display and repeat to change the disks. The number of times you repeat the disk
changes depend on the size of the data to be copied. Once all the data has been copied,
the display will return to the “Disk Copy? YES” .
Disk Operations
• While data is copying
(“Now Copying” or
“Now Reading” is displayed), never eject
the floppy disk or turn
the power off.
• If you want to cancel
the Disk Copy function in this step, press
the [–] (NO) button to
cancel the operation,
returning to “Disk
Copy? YES” display.
• The disk type of both
source disk and destination disk must be
the same (2DD or
2HD). If the source
disk is 2HD type, use
2HD blank disk for the
destination. If you insert a wrong type,
“Disk Media Type Error!!” will be shown on
the display.
• If you insert a wrong
disk, different from the
source or destination
disk, during the disk
copy operation, “Disk
Type Error!!” will be
shown on the display.
Song Copy
The songs recorded on a floppy disk can be copied in file units to another location
on the same disk.
Insert the Floppy Disk into the Disk Drive
1
Insert the disk with the songs you want to copy into the disk drive.
73
Page 76

Disk Operations
Select a Song Copy Function
2
Use the MENU [▲] and [▼] buttons to select the Disk function so that the triangular
indicator in the display appears next to “DISK” to the left of the display.
Use the SUB MENU [▲] and [▼] buttons so that “Song Copy? YES” appears on
the display.
SUB MENU
Select the (Source) Song File to Be Copied
3
Press the [+] (YES) button, and the file select screen “File Name:.....” will appear
on the display.
• If the DISK menu is
selected when there
is no floppy disk inserted into the disk
drive, “- - -” will be
displayed at the top of
the display, and disk
nd PiYESy? GraSong Cop
operations won’t be
possible.
_001e: SONGFile Nam
Use the [–] and [+] buttons or the Data Dial to select the song file you wish to copy .
Confirm the Name of the (Destination) Song File to Copy
4
Use the SUB MENU [▼] button so that “Copy File....” appears on the display,
showing the name that will be given to the new song file being made.
_002e: SONGCopy Fil
T o overwr ite an already recorded song, use the [–] and [+] buttons or the Data Dial
to select the file you want to overwrite.
Use the SUB MENU [▼] button so that “Rename:.....” a ppears on the display, and
you can change the name of the file (8 characters before the extension).
_002YES COPYRename:
Execute the Copy Operation
5
After changing the file name, or when you don’t w ant to change the name, use the
SUB MENU [▼] button so that “Execute: NO/YES” appears on the display.
NO/YESisk?Execute?
Press the [+] (YES) button and the save operation will begin. While it is in progress,
“Now Copying...” will appear at the top of the display.
• When the floppy
disk’s write-protect
tab is set to ON (see
page 64) or the disk is
a “purposely copyprotected” disk, the
display shows “Disk
Write Protected!!” indicating that the Song
Copy function is not
possible.
• While the song is
copying (“Now Copying” is displayed),
never eject the floppy
disk or turn the power
off.
When the copy operation is finished, the sub menu will return to “Song Copy?
YES.”
74
Page 77

Delete File
You can delete saved data (User Songs, User Styles, User Pads, or Reg istration
Memory) from the floppy disk in file units.
Insert the Floppy Disk into the Disk Drive
1
Insert the disk with the files you want to delete into the disk drive.
Select a Delete File Function
2
Use the MENU [▲] and [▼] buttons to select the Disk function so that the triangular
indicator in the display appears next to “DISK” to the left of the display.
Use the SUB MENU [▲] and [▼] buttons so that “Delete File? YES” appears on
the display.
SUB MENU
nd PiYESile?Delete F
Disk Operations
• If the DISK menu is
selected when there
is no floppy disk inserted into the disk
drive, “- - -” will be
displayed at the top of
the display, and disk
operations won’t be
possible.
Select the File to Be Deleted
3
Press the [+] (YES) button, and the file select screen “File Name:.....” will appear
on the display.
0001.USRe: UF_0File Nam
Use the [–] and [+] buttons or the Data Dial to select the file you wish to delete.
Execute the Delete Operation
4
Press the SUB MENU [▼] button so that “Execute: NO/YES” appears on the
display.
NO/YESisk?Execute?
Press the [+] (YES) button and the delete operation will begin. While it is in
progress, “Now Deleting...” will appear at the top of the display.
• When the floppy disk’s
write-protect tab is set
to ON (see page 64) or
the disk is a “purposely
copy-protected” disk,
the display shows
“Disk Write Protected!!” indicating that
the Delete File function
is not possible.
• While the file is being
deleted (“Now Deleting” is displayed),
never eject the floppy
disk or turn the power
off.
When the delete operation is finished, the sub menu will return to “Delete File?
YES.”
_002ting...Now Dele
75
Page 78

Song Playback
REPEAT
ONE T
SET
REGISTRATION
TEMPO
TRANSPOSE ME
AB
213
4
DISK
STYLE
ACMP/SONG
VOLUME
100
116
000
G PSR-730X
001
SONG
You can playback a wonderful variety of songs on the PSR-730/630, including the preset
demo songs, the songs on the included Sample Disk, the User Songs you record on a floppy
disk and the songs on commercially available XG/GM song collection disks. Except for the
preset demo songs, a floppy disk must be inserted in the disk drive to playback a song.
Song Playback Procedure
Select the Song Menu
1
Press the [SONG] button to select the SONG menu (the triangular indicator will
appear next to “SONG” to the right of the display). The name and number of the
currently selected song will appear on the left of the top line of the display, and the
SONG
PSR-730/630 will switch to Song Mode, lighting the
icon on the display.
tTrumpet
001
STYLE
SONG
ACMP/SONG
VOLUME
AB
REPEAT
116
100
TEMPO
DISK
000
TRANSPOSE MEMORY
213
REGISTRATION
ONE TOUCH
SETTING
4
FREEZE
SONG
SONG
• Entering the Song
Mode automatically
selects the following
settings: Auto Accompaniment Off, Synchro Start Off, Synchro Stop Off, and
Registration Memory
Freeze On. These
settings cannot be altered in Song Mode.
When playing back a song recorded on a floppy disk, insert the disk into the disk
driv e.
Inserting the disk will cause the PSR-730/630 to automatically change to the
“SONG” menu, and the name and number of the currently selected song will appear
on the left of the top line of the display . The PSR-730/630 will switch to Song Mode,
SONG
lighting the
Enter the Song Number
2
icon on the display , and the
(floppy disk icon) will be shown.
DISK
Use the [–] and [+] buttons, [1]–[0] number buttons, or the Data Dial to select the
song to be played back. The SONG button can also be pushed to increment the song
number, and holding it down will cause the number to increment continuously.
123
dAlways
002
STYLE
SONG
ACMP/SONG
VOLUME
AB
REPEAT
REGISTRATION
213
116
100
TEMPO
DISK
000
TRANSPOSE MEMORY
ONE TOUCH
SETTING
4
FREEZE
456
789
• Inserting the disk containing no song data
won’t automatically
select the “SONG”
menu.
76
/ NO
–
0
+
/ YES
Page 79
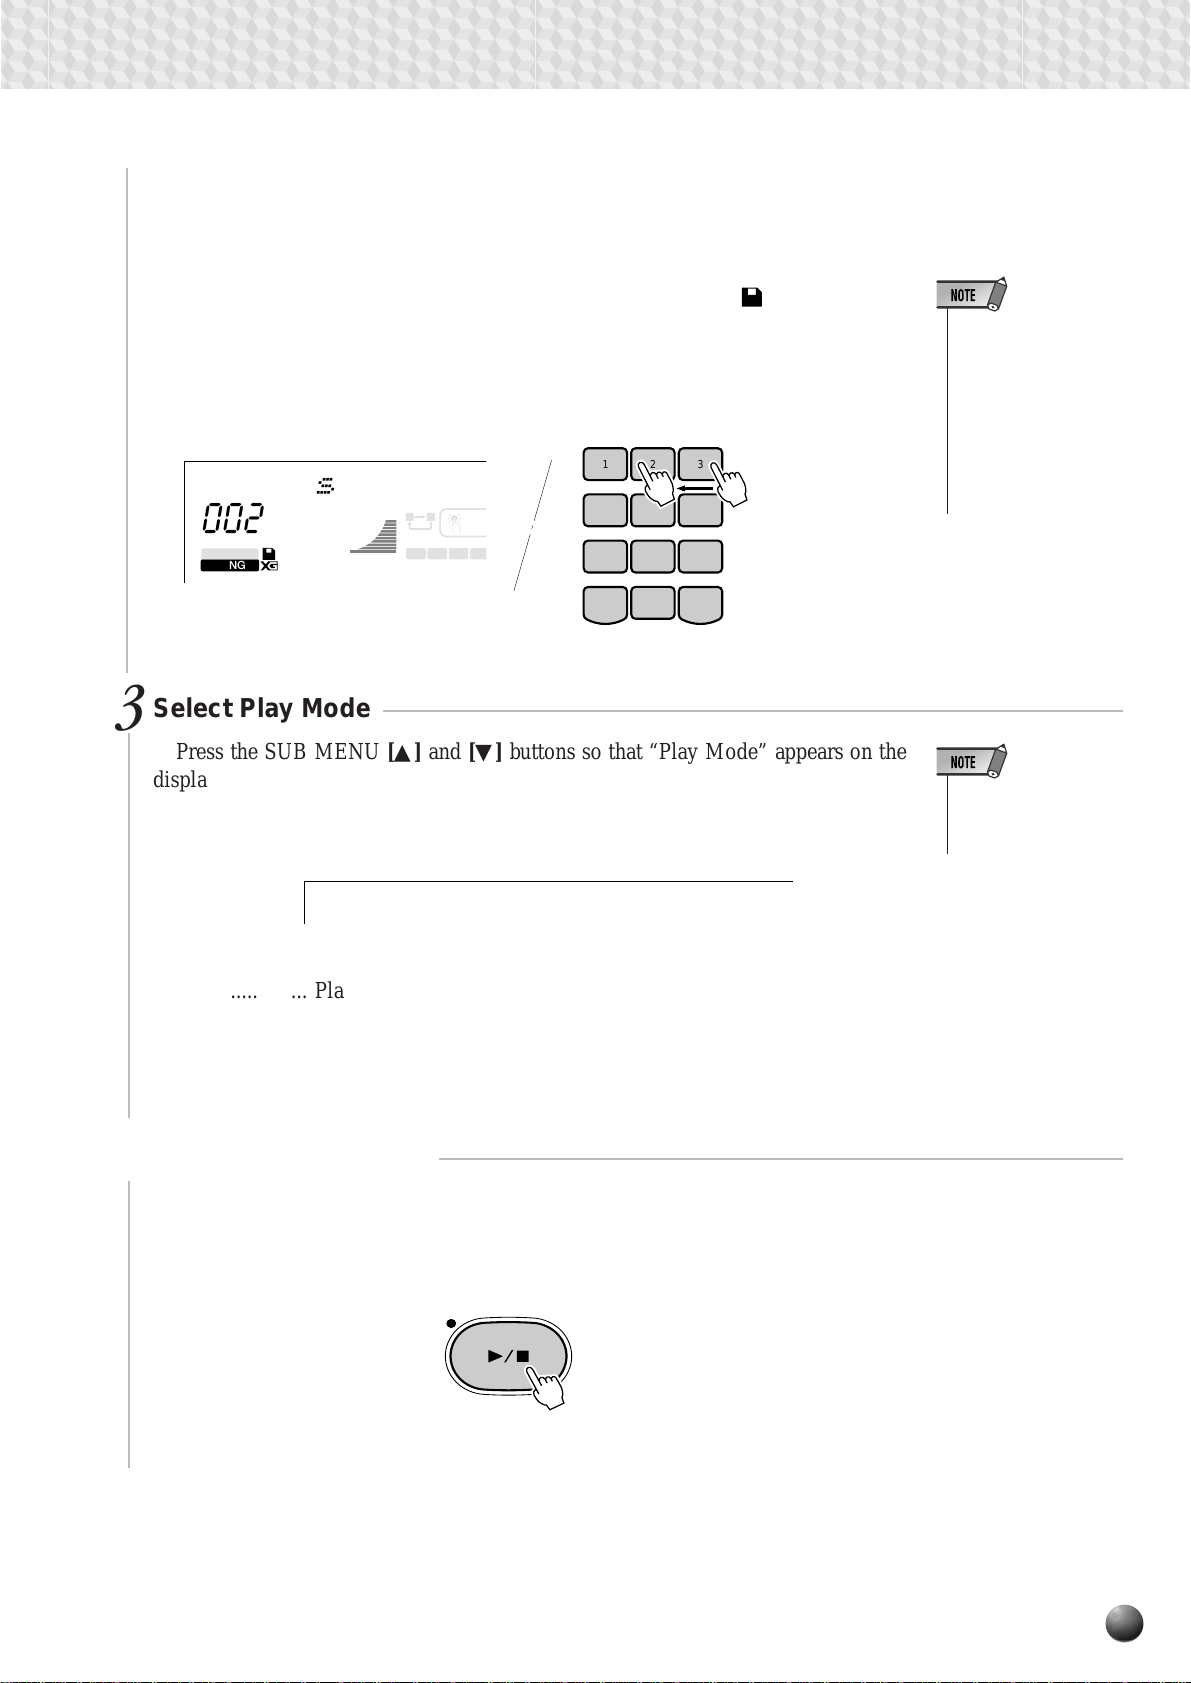
The songs will be displayed in sequence, as follows:
Demo Song (001) m Disk Song (001) m Demo Song (001)....
● Selecting a Disk Song Quickly
When selecting a Demo Song, hold the [3] button down until the
enter the Disk Song number using the [1]–[0] number buttons.
Example) Selecting Disk Song number 2
Press [3] and hold until the DISK icon lights
Press [2]
123
dAlways
002
STYLE
SONG
ACMP/SONG
VOLUME
AB
REPEAT
REGISTRATION
213
116
100
TEMPO
DISK
000
TRANSPOSE MEMORY
ONE TOUCH
SETTING
4
FREEZE
456
789
/ NO
0
–
+
/ YES
icon lights, then
DISK
Song Playback
• Song data of a certain
commercially available song disk may
use the voices which
are not built in the
PSR-730/630. In this
case nothing will be
shown on the voice
number display of the
appropriate track.
Select Play Mode
3
Press the SUB MENU [▲] and [▼] buttons so that “Play Mode” appears on the
display. On the r ight of the top line of the display, the current play mode will be
displayed. Use the [–] and [+] buttons, or the Data Dial to select the play mode for
playback.
glee: SinPlay Mod
Single............... Play through the selected song, then stop.
All...................... Continue playback through all the songs on the floppy disk. If there
is no floppy disk inserted in the drive, this setting will be ignored.
Start/Stop the Song
4
Press the [ST AR T/STOP] b utton, and start playback of the song. T o stop playback
part way through the song, press the [START/STOP] button one more time.
• Selecting “All” here
cancels the Next song
setting (see page 82).
START / STOP
77
Page 80

Song Playback
■ Song Volume Contr ol
The volume of song playback can be adjusted for the best balance in relation to notes
from the keyboard. While in Song Mode (the
SONG VOLUME [▲] and [▼] buttons. When either button is pressed the current song
volume setting will appear on the top line of the display for a few seconds. The song
volume is also shown on the display when in the Song Mode (the
SONG
icon is lit) press the ACMP/
SONG
icon is lit).
ACMP/SONG
VOLUME
me 100SongVolu
AB
REPEAT
213
REGISTRATION
ONE TOUCH
SETTING
4
FREEZE
ACMP / SONG
VOLUME
001
STYLE
SONG
116
100
TEMPO
DISK
000
TRANSPOSE MEMORY
Press the ACMP/SONG VOLUME [▲] or [▼] buttons to button to decrease or
increase the volume within a range of 0-127. Press briefly to single step, or hold for
continuous decrementing/incrementing.
■ Play from a Specified Measure
Press the [SONG] button to select the SONG menu (the triangular indicator will
appear next to “SONG” to the right of the display). Use the SUB MENU [▲] and [▼]
buttons to select the “Measure” parameter in the display . The current measure number
will appear to the right of “Measure” on the top line of the display (the current measure
number is also continuously displayed next to “MEASURE” in the display).
• While the song volume setting appears
on the top line of the
display the [–] and [+]
buttons, number buttons, or data dial can
also be used to set
the song volume.
• You can move the
measure number for
playback back and
forth even during the
song playback.
001Measure:
ACMP/SONG
VOLUME
AB
REPEAT
001
STYLE
SONG
116
100
TEMPO
DISK
000
TRANSPOSE MEMORY
Use the [–] and [+] buttons, [1]–[0] number buttons, or the Data Dial to specify the
measure from which to begin playback, then press the [ST ART/STOP] b utton to start
from that measure.
009Measure:
001
STYLE
SONG
ACMP/SONG
VOLUME
AB
REPEAT
116
100
TEMPO
DISK
000
TRANSPOSE MEMORY
213
REGISTRATION
ONE TOUCH
SETTING
FREEZE
4
213
REGISTRATION
009
MEASURE
ONE TOUCH
SETTING
FREEZE
4
001
MEASURE
123
456
789
/ NO 0 + / YES
–
78
Page 81

Minus-one Practice
You can turn-off (mute) any of the parts of a song while it is playing, then practice
playing that part yourself along with the other tracks of the song. This is called Minusone playback.
Choose any one of the demo or sample disk songs, press one of the TRACK b uttons
1-16 below the display , muting the part you want to play, and then tr y playing yourself.
Selecting the Song for Minus-one Playback
1
To select the song, see (page 76).
Select the track for Minus-one playback
2
Press one of the TRACK b uttons below the display , and its number 1 – 16 will
disappear from the display. The track you selected will go OFF and the part will be
muted.
Song Playback
12345678910111213141516
RHYTHM
1
2
Select the R1 Voice
3
BASS CHORD 1CHORD 2PAD PHRASE1PHRASE
ACCOMP ANIMENT TRA CK
MELODY
MELODY
MELODY
2
1
2
SONG TRACK
ACMP VOICEVOICEVOICERHYTHM
MELODY
4
3
L
DUALSPLIT
R2 R1
L
When you are going to play in place of the muted part, set the voice for the part you
1
muted (listed under the TRACK Number
– 16) as the R1 voice.
To select the R1 voice, see page (page 17).
START/STOP Minus-one Playback
4
Just like starting regular song playback, press the [START/STOP] button to start
and stop Minus-one playback. You can play the muted part yourself.
213213213213213252219471442468434259391337213213
R1R2
161 2 3 4 5 6 7 8 9 10 11 12 13 14 15 16
START / STOP
Pressing one of the TRA CK buttons corresponding to the muted parts during song
playback turns on that track/part again.
79
Page 82

Song Playback
Repeat Play
This function allows you to specify any section of a Demo or Sample disk song for
continuous repeat playback.
Select the A-B Repeat Parameter
1
While the SONG menu is selected, but no recording is in progress, use the SUB
MENU [▲] and [▼] buttons to select the “ A-B Repeat” parameter in the display . T he
MAIN/AUTO FILL [A] and [B] button indica tors will flash.
Start Playback
2
MAIN / AUTO FILL
atA-B Repe
BA
BA
Press the [START/STOP] button to start song playback.
START / STOP
Specify the Repeat “A” and “B” Points
3
While the song is playing, press the MAIN/A UTO FILL [A] button at the beginning
of the section to be repeated (the [A] button indicator will light continuously , and the
“A” repea t icon will appear in the display), then press the MAIN/AUTO FILL [B]
button at the end of the section to be repeated (the [B] button indicator will light
continuously, and the “B” repea t icon will appear in the display). Repeat pla yback will
begin automatically from the A point as soon as the B point has been specified, and
will continue until either the MAIN/AUT O FILL [A] button is pressed again to cancel
the repeat function, or until song playback is stopped.
MAIN / AUTO FILL
MAIN / AUTO FILL
BA
BA
BA
BA
AB
REPEAT
213
REGISTRATION MEMORY
AB
REPEAT
213
REGISTRATION MEMORY
ONE TOUCH
SETTING
FREEZE
4
ONE TOUCH
SETTING
FREEZE
4
• If only the “A” repeat
point is specified, repeat playback will occur between the “A”
point and the end of
the song.
• If the MAIN/AUTO
FILL [B] button is
pressed during repeat
playback, the previously specified “B”
point will be cancelled
and a new “B” point
can be specified as
required.
• Repeat playback will
continue even if a different menu is selected during repeat
playback.
• Repeat playback will
be cancelled if a different SONG number
selected or the record
mode is engaged.
80
Page 83

Song Repeat
The Song Repeat feature is handy when you want to repeat playback of a particular
song.
Select a Song Number
1
To select the song, see (page 76).
Turn on the Song Repeat
2
After making sure that the “SONG” menu is selected, use the SUB MENU [▲] and
[▼] buttons so that “SongRepeat” appears on the display. The current SongRepeat
setting will be shown on the top line of the display.
Song Playback
at: OffSongRepe
Use the [–] and [+] buttons or the Data Dial to set the on/of f state to the Song Repea t
function.
at: OnSongRepe
Start Playback
3
Playback will begin as soon as the [START/STOP] button is pressed. Until you
press the [START/STOP] button once again, Song Repeat playback will continue.
START / STOP
• If the Song Repeat
feature is ON, the
song will replay repeatedly regardless of
whether the play
mode is set for Single
or All.
• Doing any of the following operations will
automatically cause
the song repeat function to turn off.
• Changing the song
number.
• Specifying the Next
Song function (page
82).
• Setting the Play
Mode to “All” (page
77).
81
Page 84

Song Playback
Next Song
The Next Song feature is handy when the next song you want to play isn’t the one
with the next song number.
Select the first song you want to play
1
To select the song , see (page 76).
Select the next song
2
After making sure that the “SONG” menu is selected, use the SUB MENU [▲] and
[▼] buttons so that “NextSong” appears on the display . The current NextSong setting
will be shown on the top line of the display.
• When “All” is selected
in the Play mode (see
page 77), setting the
Next song will auto-
mpet:01 TruNextSong
matically change the
Play mode from “All”
to “Single”
82
Use the [–] and [+] buttons, [1]–[0] number buttons, or the Data Dial to select the
next song.
iano:04 E.PNextSong
Start Playback
3
Playback will begin as soon as the [ST ART/STOP] button is pr essed. When the first
song is finished, playback will continue with the next song.
If the [ST ART/STOP] b utton is pressed once again, or when the next song finishes,
playback will automatically stop.
START / STOP
• If the Song Repeat
feature is ON, the
next song will play after the first song regardless of whether
the play mode is set
for Single or All.
• While the selected
next song is playing,
the song to play after
it finishes can be selected in the same
way using the Next
Song function.
• If the first song and
the next song are the
same, the Next Song
feature won’t work.
• Doing any of the following operations will
automatically cause
the song repeat function to turn off.
• Changing the song
number.
• Turning on the Song
Repeat function
(page 81).
• Setting the Play
Mode to “All” (page
77).
Page 85

Song Recording
You can record your own music performance on a floppy disk as a user song.
• User Songs are recorded on floppy disks. They can’t be recorded unless a floppy disk is inserted into the disk drive.
• The Shortcut functions are not available when one of the Record modes is engaged.
● Quick Recording
You can easily record four tracks from the PSR-730/630 keyboard together with on
track of Auto Accompaniment.
12345678910111213141516
BASS CHORD 1CHORD 2PAD PHRASE1PHRASE
RHYTHM
1
2
MELODY
2
MELODY
MELODY
2
1
ACMP VOICEVOICEVOICERHYTHM
MELODY
4
3
L R1R2
001109084204064133124001442468434259391337213213
DUALSPLIT
• The quick recording
method is different
from the multi recording method but for
both of them, the recorded data is recorded on tracks 1–
16.
● Multi Recording
In Multi Recording, the different parts of the some are di vided among tracks 1–16,
with keyboard playing on tracks 1–5, harmony notes on tracks 6–8, and auto
accompaniment (RHYTHM1-PHRASE2) on tracks 9–16. This lets you fine tune
the recording settings for each track, then carefully edit.
12345678910111213141516
MELODY
MELODY
MELODY
BASS CHORD 1CHORD 2PAD PHRASE1PHRASE
RHYTHM
1
2
MELODY
2
1
2
ACMP VOICEVOICEVOICERHYTHM
4
3
L R1R2
213213213213213252216471442468434259391337213001
DUALSPLIT
After finishing your recording of a user song, you can play it back in the same way
as one of the preset demo songs.
The data you can record in user songs using Quick Recording or Multi Recording are
as follows:
The accompaniment tracks record the following and data:
• Accompaniment style number*
• Accompaniment track changes*
(8 tracks: track on/off, voice number, volume, pan,
reverb depth, chorus depth)
• Section changes and their timing
• Chord changes and their timing.
• Accompaniment volume
• Reverb type.
• Chorus type.
• Tempo and time signature*
The keyboard (R1/R2/L) tracks record the following and data:
• Note on/off (key press and release)
• Velocity (strength of key press)
• R1/R2/L voice number, volume, octa ve*, pan, rev erb
depth, chorus depth, DSP depth.
• Reverb on/off and type
• Chorus on/off and type
• DSP (including variation) on/off and type
The maximum amount of song memory is 65,000 notes for 2DD disks and 130,000 notes for 2HD disks.
* Recorded only at the beginning of a song; changes cannot be made during recording.
• Multi effect on/off, type and settings (PSR-730)
• Harmony on/off, type
• Sustain pedal on/off
• Pitch bend, pitch bend range.
• Tempo
• Being able to record
note on/off and velocity
means being able to
record forte or piano,
crescendo or diminuendo, and other subtle
elements of expression
from the keyboard as
you play them.
• Note ON (key press),
note OFF (key release),
and velocity (strength of
key press) are MIDI
data events (playing
information)(page 119).
• Be careful to avoid the
song data loss that will
occur during recording
if the power is turned
off, the AC adaptor is
unplugged from the outlet, or the batteries lose
power.
83
Page 86

Song Recording
Quick Recording Procedure
With quick recording, you can use 5 tracks for recording each song.
● ACMP track....................... Used to record auto accompaniment notes (such
as chord change and section change data).
● MELODY 1–4 track ......... Used to record keyboard melody notes.
Insert Floppy Disk and Change to Record Mode
1
Insert the floppy disk you will use to record the user song into the floppy disk
drive.
Press the [RECORD] button to engage the Record Ready Mode. The [RECORD]
button indicator will light, and the SONG, STYLE, and MULTI PAD [1] … [4]
icons will flash, indicating that you must select one of the corresponding record
modes.
and Piano
001
FINGERING
11 12 13 14 15 16
MELODY
2
BEAT
1234
MULTI PAD
6
dim
mM
7augsus4
MELODY
4
3
119
513
ACMP VO IC EVOICEVOICE
The
RECORD
SONG
icon will be lit on the display indicating that the Song mode is
engaged and the User song number will be shown above the icon.
GROOVE & DYNAMICS
L
001
VOICE
213213213213213252
R1R2
DUALSPLIT
STYLE
SONG
nd Pianop1 Gra8Beat Po
001
DISK
SONG
84
Page 87

Select the SONG Record Mode
2
Press the [SONG] button to select the SONG record mode. The SONG menu
icon will light.
The beat indicator dots will flash at the currently set tempo, indicating that
the record ready (Synchro Start) mode is engaged.
The track bars for MELOD Y 1–4 and ACMP tracks will flash at the bottom
of the display (Record Ready Mode).
• In Song Record Ready Mode,
the track numbers (9-13) for
corresponding to tracks where
data is already recorded will
light.
• If the [RECORD] button is
pressed, the lowest-numbered
user song which does not contain any recorded data will automatically be selected.
• The following panel setting
changes will occur when the
record ready mode is engaged:
• The measure number will be re-
set to “1”.
• If the Metronome function is on
(page 116), the metronome will
sound at the current tempo.
• The Registration Memory Freeze
function will be turned on (it
cannot be turned off while the
record mode is engaged).
• The SYNCHRO STOP function
wil be turned off.
If Necessary, Select a User Song Number
3
When you want to change the user song number selected in step two, use the
[–] and [+] buttons, [1]–[0] number buttons, or Data Dial to change it as
required.
Select the Track to be Recorded
4
● When recording a melody track.
Use the TRACK buttons to select a MELODY 1–4 track to record.
For example, if you press the track button below the MELODY 1 track, the
MELOD Y 1 track bar will stop flashing , and the track bars for the other tracks
will go out. This shows that you have selected the MELODY 1 track as the
track for recording.
85
Page 88

Song Recording
78910111213141516
001109084213213252201471442468
MELODY
2
1
2
SONG TRACK
4
3
L
L
R1R2
DUALSPLIT
R2 R1
169 10 11 12 13 14 15 167 8
ACMP VOICEVOICEVOICEPHRASE1PHRASE
MELODY
MELODY
MELODY
● Recording the ACMP track
If you press the TRACK b utton belo w the ACMP track, the ACMP track bar will
light and the ACMP track will be selected as the recording track. (If you do this
when AUTO ACCOMPANIMENT is off, AUTO ACCOMPANIMENT will
automatically be turned on.)
78910111213141516
ACMP VOICEVOICEVOICEPHRASE1PHRASE
MELODY
MELODY
MELODY
MELODY
2
1
2
SONG TRACK
4
3
L
L
001109084213213252201471442468
R1R2
DUALSPLIT
R2 R1
169 10 11 12 13 14 15 167 8
• If you start recording
without selecting a specific track while the
panel AUTO ACCOMPANIMENT button is
ON, the MELODY 1 and
ACMP tracks will automatically be selected for
recording.
• The ACMP track and
one MELODY track can
be recorded together at
the same time.
• If the ACMP track is
turned off, AUTO ACCOMPANIMENT on the
panel will also be turned
off.
• If AUTO ACCOMPANIMENT is turned on, the
ACMP track will be automatically selected for recording.
• AUTO ACCOMPANIMENT cannot be turned
on or off during recording.
Record
5
Recording will begin as soon as you play a note on the keyboard or press the
[START/STOP] button, and the BEAT indicator dots will begin to indicate the
current beat as in the Auto Accompaniment mode. The MEASURE parameter will
also show the current measure number during recording.
START / STOP
009
BEATMEASURE
1234
MULTI PAD
◆ Rehearsal Mode
If the SYNC START button is pressed while in Record Ready Mode, it will be
canceled (the beat indicator dots will go out) and the PSR-730/630 will enter
Rehearsal Mode. In this mode, you can try playing your song before actually
recording it. Pressing the SYNC ST AR T button will return to Record Ready Mode.
SYNC STOP START
IMENT
86
Page 89

Song Recording
• Before actually starting to record you can try playing the
PSR-730/630 the way it is set up by using the “Rehearsal
Mode”: press the [SYNC START] button to temporarily disengage the record ready mode, rehearse as necessary, then
press the [SYNC START] button again to return to the record
ready mode.
• Whenever you record using a SONG, any previously recorded material in the same track will be erased.
• If the SONG memory becomes full while recording, “Disk
FULL!!” will appear on the display and recording will stop (the
“Rehearsal Mode” will be engaged).
Stop Recording
6
• Recording is carried out in 1-measure increments. If you stop
recording in the middle of a measure, rests will automatically
be recorded until the end of that measure.
• If you start recording by pressing the [START/STOP] button,
nothing will be recording on a MELODY track until you begin
playing on the keyboard. Only rhythm accompaniment will be
recorded on the ACCOMPANIMENT track until you play a
chord in the auto accompaniment section of the keyboard.
• During recording you can use the TRACK buttons to turn
playback of previously-recorded MELODY tracks or the ACCOMPANIMENT track on or off as required.
Stop recording by pressing the [ST ART/STOP] button. If y ou press the [ENDING]
button while recording the A CCOMP ANIMENT track, recording will stop automatically after the ending section has finished. When recording is stopped the MEASURE
number on the display will return to “1” and the record-ready mode will be engaged.
START / STOP
Record Additional Tracks as Required
7
ENDING
By repeating steps 4 through 6, above, you can select and record additional tracks
as required.
● Recording from the Middle of the Song
It is possible to initiate recording from the middle of the song. If you want to change
the latter half of the song (track), select the Measure number from which you want
to record and start recording. When the AUTO ACCOMPANIMENT is on, this
method is not available for the quick recording procedure.
• You can also press
the [SYNC START]
button to stop recording and return to the
record ready mode.
• While the record
ready mode is engaged you can press
the [VOICE] button to
go to the VOICE
menu and change the
R1 voice as required.
The R2 voice, however, cannot be
changed (If the Voice
Set function is on —
page 116 — the R2
voice will automatically be changed
when an R1 panel
voice is selected).
The record-ready
mode must be disengaged in order to
change the R2 voice
and other settings.
• You can rerecord a
part of an already recorded track if desired, using the Punch
In/Punch Out feature
(page 92)
Exit From the Record Mode
8
When you’re finished recording a song, press the [RECORD] button so that its
indicator goes out, to exit from the record mode. The recorded user song can now be
played back in the same way as the demonstration songs.
RECORD
• You can edit the data
recorded in user
songs (page 96).
• You can edit the recorded accompaniment data recorded
on accompaniment
tracks (page 96).
87
Page 90

Song Recording
Multi Recording Procedure
With Multi Recording, you can record up to 16 tracks for a single song.
The default settings for the tracks are as follows:
Track 1 ............... For recording keyboard playing (R1 part).
Track 2 ............... For recording keyboard playing (R2 part).
Track 3 ............... For recording keyboard playing (L part).
Tracks 4,5 ......... For recording keyboard playing (R1 part).
Tracks 6–8 ........ For recording harmony notes (Harmony type 7–16).
Tracks 9–16...... For recording Auto Accompaniment notes (RHYTHM 1–
PHRASE 2)
Engage the Song Record Mode and Select the User Song
1
In the same way as steps 1–3 for Quick Recording, engage the Song Recording
Mode and select the user song number.
• Even though three tracks,
track 1, 4 and 5, are prepared for R1 part as the
default, the R1 part performance cannot be recorded to the multiple
tracks at the same time. In
such cases, the last track
you select is designated
for the R1 part recording.
• When you insert an commercially available song
disk and try to record and
overwrite one of the song
files which is not writeprotected, “Convert NO/
YES” will appear and the
recording will not be initiated. If you select “YES”
to execute recording,
“Don’t remove the disk”
appears and the PSR730/630 starts converting
the selected song’s format
to the PortaTone’s. After
completing the conversion, Record-ready mode
is engaged to indicate recording becomes possible.
88
Select the Record Method
2
Use the SUB MENU [▲] and [▼] buttons so that “Quick Record” or “Multi
Record” (record method selection screen) appears on the display.
cordMulti Re
Use the [–] and [+] buttons or the Data Dial to select Multi Record as the record
method.
Select the Track and Part to Record
3
Select the track and the part to be recorded on that track.. Default parts are
already set for recording, but you can change them as needed.
Use the SUB MENU [▲] and [▼] buttons so that “Part Select” (record part
selection screen) appears on the display.
ect:VoiPart Sel ce R1
• If you begin recording
without selecting the
record method, Quick
Record Mode will automatically be selected.
Page 91

Press the TRACK button to select one of the tracks 1–16 for recording. For
example, if you press the Track button below the track 1, the track 1 bar will light,
showing that the track 1 is selected for recording. If you press the same TRA CK button
once again, the track bar will go out and that track will not be recorded.
Song Recording
123456789101112131415 16
213213213213213252216471442468434259391337213001
BASS CHORD 1CHORD 2PAD PHRASE1PHRASE
RHYTHM
1
2
ACCOMP ANIMENT TRA CK
MELODY
2
1
2
SONG TRACK
ACMP VOICEVOICEVOICERHYTHM
4
3
L
L
R1R2
DUALSPLIT
R2 R1
161 2 3 4 5 6 7 8 9 10 11 12 13 14 15 16
MELODY
MELODY
MELODY
At this time, the part to be recorded for that track will be shown at the top of the
display. As needed, use the [–] and [+] buttons or the Data Dial to change the part.
Track Default Part Other Parts that Can Be Set
1 R1 R2, L
2 R2 R1,L
3 L R1, R2
4 R1 R2, L
5 R1 R2, L
6 Harmony 1 R1, R2, L
7 Harmony 2 R1, R2, L
8 Harmony 3 R1, R2, L
9 ACMP 1ch (RHYTHM2) R1, R2, L
10 ACMP 2ch (RHYTHM1) —
11 ACMP 3ch (BASS) R1, R2, L
12 ACMP 4ch (CHORD1) R1, R2, L
13 ACMP 5ch (CHORD2) R1, R2, L
14 ACMP 6ch (PAD) R1, R2, L
15 ACMP 7ch (PHRASE1) R1, R2, L
16 ACMP 8ch (PHRASE2) R1, R2, L
When recording accompaniment tracks (9–16), first turn Auto Accompaniment on
and then press the TRACK buttons n umbered 9–16 to select 9–16 tracks for recording.
Pressing any of the TRACK buttons under the tracks will let you select any tracks
(such as RHYTHM 1 track and BASS track only) for recording.
789101112131415 16
MELODY
ACCOMPANIMENT
ON / OFF
2
1
MELODY
MELODY
MELODY
3
2
SONG TRACK
• If the part selected for
a track is the same
one as that being recorded, that track
cannot be set for recording at the same
time. Only one track
213213213213213252216471442468
ACMP VOICEVOICEVOICEPHRASE1PHRASE
4
L
L
R1R2
DUALSPLIT
R2 R1
can be selected, with
the last chosen having priority.
• Auto Accompaniment
cannot be turned on
or off once recording
has started.
167 8 9 10 11 12 13 14 15 16
89
Page 92

Song Recording
The harmony notes (type 7–16) can be recorded to the tracks 6–8. To record
harmony notes, first turn Harmony on and then press the TRACK buttons numbered
6–8 to select 6–8 tracks for recording.
HARMONY
ACCOMPANIMENT
ON / OFF
Start/Stop Recording
4
123456789101112131415 16
MELODY
MELODY
MELODY
BASS CHORD 1CHORD 2PAD PHRASE1PHRASE
RHYTHM
1
2
ACCOMP ANIMENT TRA CK
MELODY
1
2
3
2
SONG TRACK
Record the track(s) in the same way as steps 5-7 for Quick Recording.
Since the recorded accompaniment data is recorded on each accompaniment
track, it can be edited using the Song Edit function (page 97).
213213213213213252216471442468434259391337213001
ACMP VOICEVOICEVOICERHYTHM
4
L
L
R1R2
DUALSPLIT
R2 R1
161 2 3 4 5 6 7 8 9 10 11 12 13 14 15 16
• You can also use Rehearsal Mode to practice before recording
when doing Multi Recording.
■ About the Recording with the Digital Effects Applied
Only one type of each of the Digital Effects, Reverb, Chor us, DSP and Multi Effect
(PSR-730) can be set at one time. Be aware of the following facts, especially when
recording a song with different effects applied to the different trac ks.
Reverb type and Chorus type effects can be set and recorded independently for
A
each of the 16 tracks. However, only the latest settings made (one each) will be
effective if several effects are used in a song (the latest setting priority).
[EX.] While the panel REVERB button is turned on:
1. Select the Hall 1 (Reverb) f or the Accompaniment trac k, and record the Accompaniment track for ten measures from the beginning.
2. Start recording the keyboard (R1) track with the Hall 1 (Re verb) selected from the
beginning and then change the effect type to Room 1 (Reverb) respectively from
the fifth measure through the end.
When you play back the song recorded as above, the first four measures will be
played back with the Hall 1 applied to both the Accompaniment track and
keyboard (R1) track, and the remaining six measures, from fifth through the end,
with the Room 1 applied to both tracks. The effect types set for the Accompaniment track are replaced with the latest settings. Only the Depth for each track
remains the same.
90
Page 93

DSP type effects can be set and recorded for R1/R2/L part(s) when used as System
B
effect and for R1 part when used as Insertion effect. They can’ t be recorded for the
track used as the Accompaniment and/or Harmon y part. During playback, only the
latest setting will be effective if se v eral types are used for the tracks in a song (the
latest setting priority).
[EX.]
1. Turn on the panel DSP button, and start recording on the track 1 with the Distortion
(DSP type: No.42 Dist.Hard) selected for ten measures from the beginning.
2. Turn off the panel DSP button, and start recording on the track 2 without any eff ect
from the beginning. Then turn on the panel DSP button again at the fifth measure ,
and continue recording to the end with the Rotary Speaker (DSP type: No .28 Rotary
SP.1) selected.
When you play back the song recorded with the above condition, the first four
measures will be played back with the Distortion applied only to track 1, and the
remaining six measures, from the fifth through the end, with the Rotary Speaker
applied only to track 2. The DSP type set for track 1 is replaced by the one set for
the track 2.
Song Recording
(PSR-730)
C
Multi effects can be set and recorded for R1/R2/L part(s). They can’ t be recorded
for the track used as the Accompaniment and/or Har mony part. During playback,
only the latest setting will be effective if several types are used for the tracks in a
song (the latest setting priority).
[EX.] Two Multi Effect types set in series for R1
1. Multi Effect is turned on and 10 measures are recorded for R1 on track 1.
2. Recording is started for R1 on track 2 with Multi eff ect off, and then it is turned on
at the fifth measure.
When you play back the song recorded with the above conditions, the first four
measures will be played back with the Multi Effect applied only to track 1, and the
remaining six measures, from the fifth through the end, with Multi Effect applied
only to track 2.
91
Page 94

Song Recording
The data recorded on tracks for keyboard playing (R1/R2/L) can be re-recorded in
parts with the Punch In/Punch Out feature.
● Before re-recording
● After Re-recording
In the Record Ready Mode (page 88) for the track you will re-record or in the
1
Rehearsal Mode, use the SUB MENU [▲] and [▼] buttons so that “Punch In:Off”
appears on the display.
Punch In/Punch Out
12345678
Recording start
(Punch In)
12345678
Previously
played data
Newly played data
Recording stop
(Punch Out)
Previously played
data
• Punch In/Punch Out
recording is available
only when Multi
record mode is engaged. When in the
Quick record-ready
mode, “Punch In: - - -”
or “Punch Out: - - -”
appears on the display and Punch In/
Punch Out recording
is not accessible.
• If you select the
tracks set as the Accompaniment or Harmony, “Punch In: - - -”
or “Punch Out: - - -”
appears on the display and Punch In/
Punch Out recording
is not accessible.
: 3Punch In
Use the [–] and [+] buttons, [1]–[0] number buttons, or the Data Dial to enter the
measure number for using the Punch In feature.
Use the SUB MENU [▼] button so that “Punch Out:Off” appears on the display.
2
t: 5Punch Ou
Use the [–] and [+] buttons, [1]–[0] number buttons, or the Data Dial to enter the
measure number for using the Punch Out feature.
Start and Stop Recording
3
Start recording as usual. Even though you start playing from the beginning, only the
data played within the Punch In/Punch Out range will be re-recorded.
• You can use Punch
In/Punch Out to rerecord multiple tracks
at the same time.
• Punch In/Punch Out
cannot be used for
songs that have no
data recorded in
them. “Punch In: - - -”
will be shown on the
display.
• The Punch Out measure number cannot
be set lower than the
Punch In measure
number.
92
Page 95

Quantize
With the Quantize feature, the timing of data recorded in a user songs can be
adjusted.
In the Record Ready Mode for the track you want to quantize (page 88) or in the
1
Rehearsal Mode, use the SUB MENU [▲] and [▼] buttons so that “Quantize: YES”
appears on the display.
YES?Quantize
Press the [+] YES button and “Quantize” will be displayed, with the value at the
2
upper right of the display.
2: 32Quantize
Song Recording
• Quantize setting is
available only when
Multi record-ready
mode is engaged.
When in the Quick
record-ready mode,
“Quantize? - - -” appears on the display
and Quantize setting
is not accessible.
Use the [–] and [+] buttons, or the Data Dial to select the Quantize value (4, 6, 8,
12, 16, 24, 32).
Set the Quantize value to correspond to the smallest notes in the track you are
working with. For example , if the data was recorded with quarter notes and eighth
notes, use 1/8 for the quantize value. If the quantize function is applied in this case
with the value set to 1/4, the eighth notes would be mo ved on top of the quarter notes.
Quantize Value Note
4 Quarter note
6 Quarter note triplet
8 Eighth note
12 Eighth note triplet
16 Sixteenth note
24 Sixteenth note triplet
32 Thirty-second note
After making the setting in step 2, use the SUB MENU [▼] button so that “Execute?
3
One measure of 8th notes before quantization
After quantization
No/Yes” appears on the display.
Pressing the [+] YES button to execute the quantize function.
Press the [–] (NO) button, and the quantize function won’t e xecute. The display will
return to “Quantize?”.
When Quantize is finished, the display will return to “Quantize? YES”
4
NO/YES: 1/3Execute?
93
Page 96

Song Recording
You can give your own name (8 characters or less) to user songs.
In the Record Ready Mode (pages 84, 88) for the song you want to name, or in the
Rehearsal Mode, use the SUB MENU [▲] and [▼] buttons so that “Song Name”
appears on the display. The current name for the song will be displayed at the upper
right of the display.
Naming User Songs
SONSongName
_
G_001
The method of setting the characters is the same as for Registration Naming (page
58).
LESSongName
SON01
_
Clearing Song Data
You can clear unneeded song data in two different ways: Clearing Selected Tr acks
or Clearing an Entire Song. In either Quick Record or Multi Record Mode, this
operation is done in Record Ready Mode or in Rehearsal Mode.
● Clearing Selected Tracks
While the Song record ready or rehearsal mode is engaged use the SUB MENU [▲]
and [▼] buttons to select the “Track Clear?” function. The track bars for tracks which
contain data will flash, showing that those tracks can be cleared.
YESear?Track Cl
● Quick Record
123456789101112131415 16
BASS CHORD 1CHORD 2PAD PHRASE1PHRASE
RHYTHM
1
2
MELODY
2
MELODY
MELODY
2
1
ACMP VOICEVOICEVOICERHYTHM
MELODY
4
3
● Multi Record
123456789101112131415 16
BASS CHORD 1CHORD 2PAD PHRASE1PHRASE
RHYTHM
1
2
MELODY
2
MELODY
MELODY
2
1
ACMP VOICEVOICEVOICERHYTHM
MELODY
4
3
L
L
213213213219213252016001442468434259391337213001
R1R2
DUALSPLIT
213213213213213252216471442468434259391337213001
R1R2
DUALSPLIT
• When in Quick
Record Mode, Clear
Selected Track will
clear data as follows:
• If the ACMP track is
cleared, data that
would be in tracks 916 in the Multi Record
mode will be cleared
at the same time.
• If Melody tracks that
were recorded with
Dual Voice are
cleared, tracks recorded with Multi
Record Mode R1/R2
parts will be cleared at
the same time.
• The tracks recorded
by Quick recording
can be cleared using
the Multi recording
Track Clear function,
and vice versa.
• Demo song tracks
cannot be cleared.
94
Page 97

Use the TRACK buttons to select the track you want to clear. The track bar for the
track you selected will light steadily and the track bars for the other tracks will be
turned off.
● Quick Record
123456789101112131415 16
BASS CHORD 1CHORD 2PAD PHRASE1PHRASE
RHYTHM
1
2
ACCOMP ANIMENT TRA CK
MELODY
MELODY
MELODY
2
1
2
SONG TRACK
ACMP VOICEVOICEVOICERHYTHM
MELODY
4
3
L
● Multi Record
123456789101112131415 16
BASS CHORD 1CHORD 2PAD PHRASE1PHRASE
RHYTHM
1
2
ACCOMP ANIMENT TRA CK
MELODY
MELODY
MELODY
2
1
2
SONG TRACK
ACMP VOICEVOICEVOICERHYTHM
MELODY
4
3
L
L
L
213213213219213252016001442468434259391337213001
R1R2
DUALSPLIT
R2 R1
213213213213213252216471442468434259391337213001
R1R2
DUALSPLIT
R2 R1
161 2 3 4 5 6 7 8 9 10 11 12 13 14 15 16
Song Recording
161 2 3 4 5 6 7 8 9 10 11 12 13 14 15 16
Once the desired track has been selected, “Are You Sure?” will appear on the
display.
NO/YESSure?Are You
Press the [+] (YES) button to actually clear the currently selected track.
While the track is being cleared, “Now Deleting” will appear in the top of the
display.
NO/YESting...Now Dele
When track clear is finished, the display will return to “Track Clear?”
If you press the [–] (NO) button, track clear will not be executed and the displa y will
return to “Track Clear?”
• While the track is
being cleared, (“Now
Deleting” is displayed) never eject
the floppy disk or
turn off the power to
the PSR-730/630.
95
Page 98

Song Recording
● Clearing an Entire Song
Use the song selection sub menu (pages 85, 88) to be sure that you have selected the
song that you want to clear.
While the SONG record-ready or rehearsal mode (page 87) is engaged use the SUB
MENU [▲] and [▼] buttons to select the “Song Clear? YES” function.
Press the [+] (YES) button and “ Are You Sure? NO/YES” will appear on the display.
Press the [+] (YES) button a second time to actually clear the currently selected user
song.
NO/YESar?Song Cle
• While the track is
being cleared, (“Now
Deleting” is displayed) never eject
NO/YESSure?Are You
the floppy disk or
turn off power to the
PSR-730/630.
While the song is being cleared, “Now Deleting” will appear at the top of the
display.
When the operation is finished, the display will show “Song Clear? - - -”
Press [–] (NO) if you want to abort the clear operation. The display will return to
“Song Clear? YES”
Song Edit
The data in user songs can be edited in a way similar to using the Revoice function
for Voices and Styles (page 110). The edited data can be written into the user song data.
While the SONG record-ready or rehearsal mode (page 87) is engaged use the SUB
1
MENU [▲] and [▼] buttons to select the “Song Edit? YES” function.
NO/YESt?Song Edi
• Demo Songs cannot
be cleared.
When the [+] YES button is pressed, the track bar will flash under the lowest
2
numbered track that has data in it. This shows that this is the track that is selected
for editing. On the top line of the display, the curr ent voice parameter and value for
the track will be displayed.
123456789101112131415 16
BASS CHORD 1CHORD 2PAD PHRASE1PHRASE
RHYTHM
1
2
96
nd Piano1 GraVoice:00
213213213213213252216471442468434259391337213001
MELODY
MELODY
MELODY
MELODY
2
1
2
ACMP VOICEVOICEVOICERHYTHM
4
3
L
R1R2
DUALSPLIT
Page 99

Press the TRACK button to select the track you will edit. The track bar for the
3
selected track will light.
Song Recording
123456789101112131415 16
MELODY
MELODY
MELODY
BASS CHORD 1CHORD 2PAD PHRASE1PHRASE
RHYTHM
1
2
ACCOMP ANIMENT TRA CK
Use the SUB MENU [▼] button so that the voice parameter you wish to chang e
4
MELODY
2
1
2
SONG TRACK
ACMP VOICEVOICEVOICERHYTHM
4
3
L
L
213213213213213252216471442468434259391337213001
R1R2
DUALSPLIT
R2 R1
161 2 3 4 5 6 7 8 9 10 11 12 13 14 15 16
appears on the display . The parameter and value will appear at the top of the display .
nd Piano1 GraVoice:00
nd Piano 127Volume:
0 Pan;
nd Pianopth: 0ReverbDe
nd Pianopth: 0ChorusDe
nd Piano: 26DSPDepth
nd Piano 0Octave:
In the same way as for the revoice function (page 111), use the [–] and [+] buttons,
[1]–[0] number buttons, or the Data Dial to change the setting.
• When in Quick
Record Mode, if both
R1 and R2 voices are
recorded on one
track, only the R1
voice can be edited.
• When in Quick
Record Mode, you
cannot edit the ACMP
track.
• If a track with no data
is selected, [- - -] will
appear at the top of
the display and you
won’t be able to edit.
• Each parameter can
be recorded for one
track (one each for a
track). The parameter
changes done in the
middle of the song will
be lost.
See page 110 for information about each value.
Repeat steps 3–4 as needed.
5
When editing is finished, press the SUB MENU [▲] button so that “Disk Save?
6
YES” is shown on the display. Press the [+] YES button and the song data will be
replaced.
Exit the Record Mode and try playing the song.
7
NO/YESe?Disk Sav
97
Page 100

Style Recording
The PSR-730/630 lets you record up to three original “user styles” which can be used f or autoaccompaniment in the same way as the preset styles . The user styles are recorded as style
numbers 101, 102, 103, and 104, and each style can be recorded with the full complement
of 8 tracks (RHYTHM 1, RHYTHM 2, BASS, CHORD 1, CHORD 2, PAD, PHRASE 1,
PHRASE 2) and 5 sections (INTRO, MAIN A, MAIN B, ENDING, FILL).
• Material recorded on the STYLE tracks will be retained even after turning the power
off. See page 152 for the details.
• The recorded data will be lost if the power is turned off, the AC adaptor is unplugged,
or the batteries fail during recording.
• The REGISTRATION MEMORY cannot be recalled during style recording.
• The Shortcut functions are not available when one of the Record modes is engaged.
● The STYLE tracks record the following operations and data:
• Note on/off.
• Velocity.
• Voice number (drum kit n umber).*
• Pitch bend.
Only one event of the item marked with * can be recorded for each track of the sections.
Style Recording Procedure
Select a Style To Begin With
1
Select the style from one of the 100 presets that is closest to the type of style
you want to create. You will use this style as a starting point for the user style you
will create.
Example 1) When you want to create a user style with 8
beats in 4/4 time, select style number 001 “8 Beat Pop.”
p18Beat Po
001
Example 2) When you w ant to create a user style with 3/4 waltz
time, select user style 099 “Vien. Waltz.”
ltzVien. Wa
• Up to approximately
1,980 notes for a section
(totally ca. 5,940 notes)
can be recorded in the
PSR-730/630 STYLE
tracks.
• If none of the preset styles
is appropriate, select one
that has the same time signature and number of measures as the one you want
to create, then use the “All
Clear” function (page 105)
to clear all preset data before entering your own.
• If you select a blank user
style to begin with (101 …
104), the style will be in 4/4
time and all sections except
FILL will be 2 measures
long. FILL will be 1 measure long.
099
98
 Loading...